
arlindsay1992's 1987 4Runner Build Up Thread
 Jul 27, 2016 | 07:51 AM
#141
Thread Starter
Registered User
iTrader: (8)
Joined: May 2011
Posts: 1,517
Likes: 354
From: Southeast Virginia
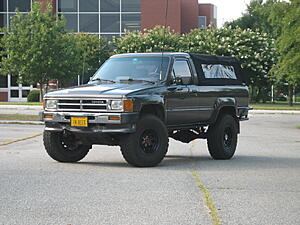
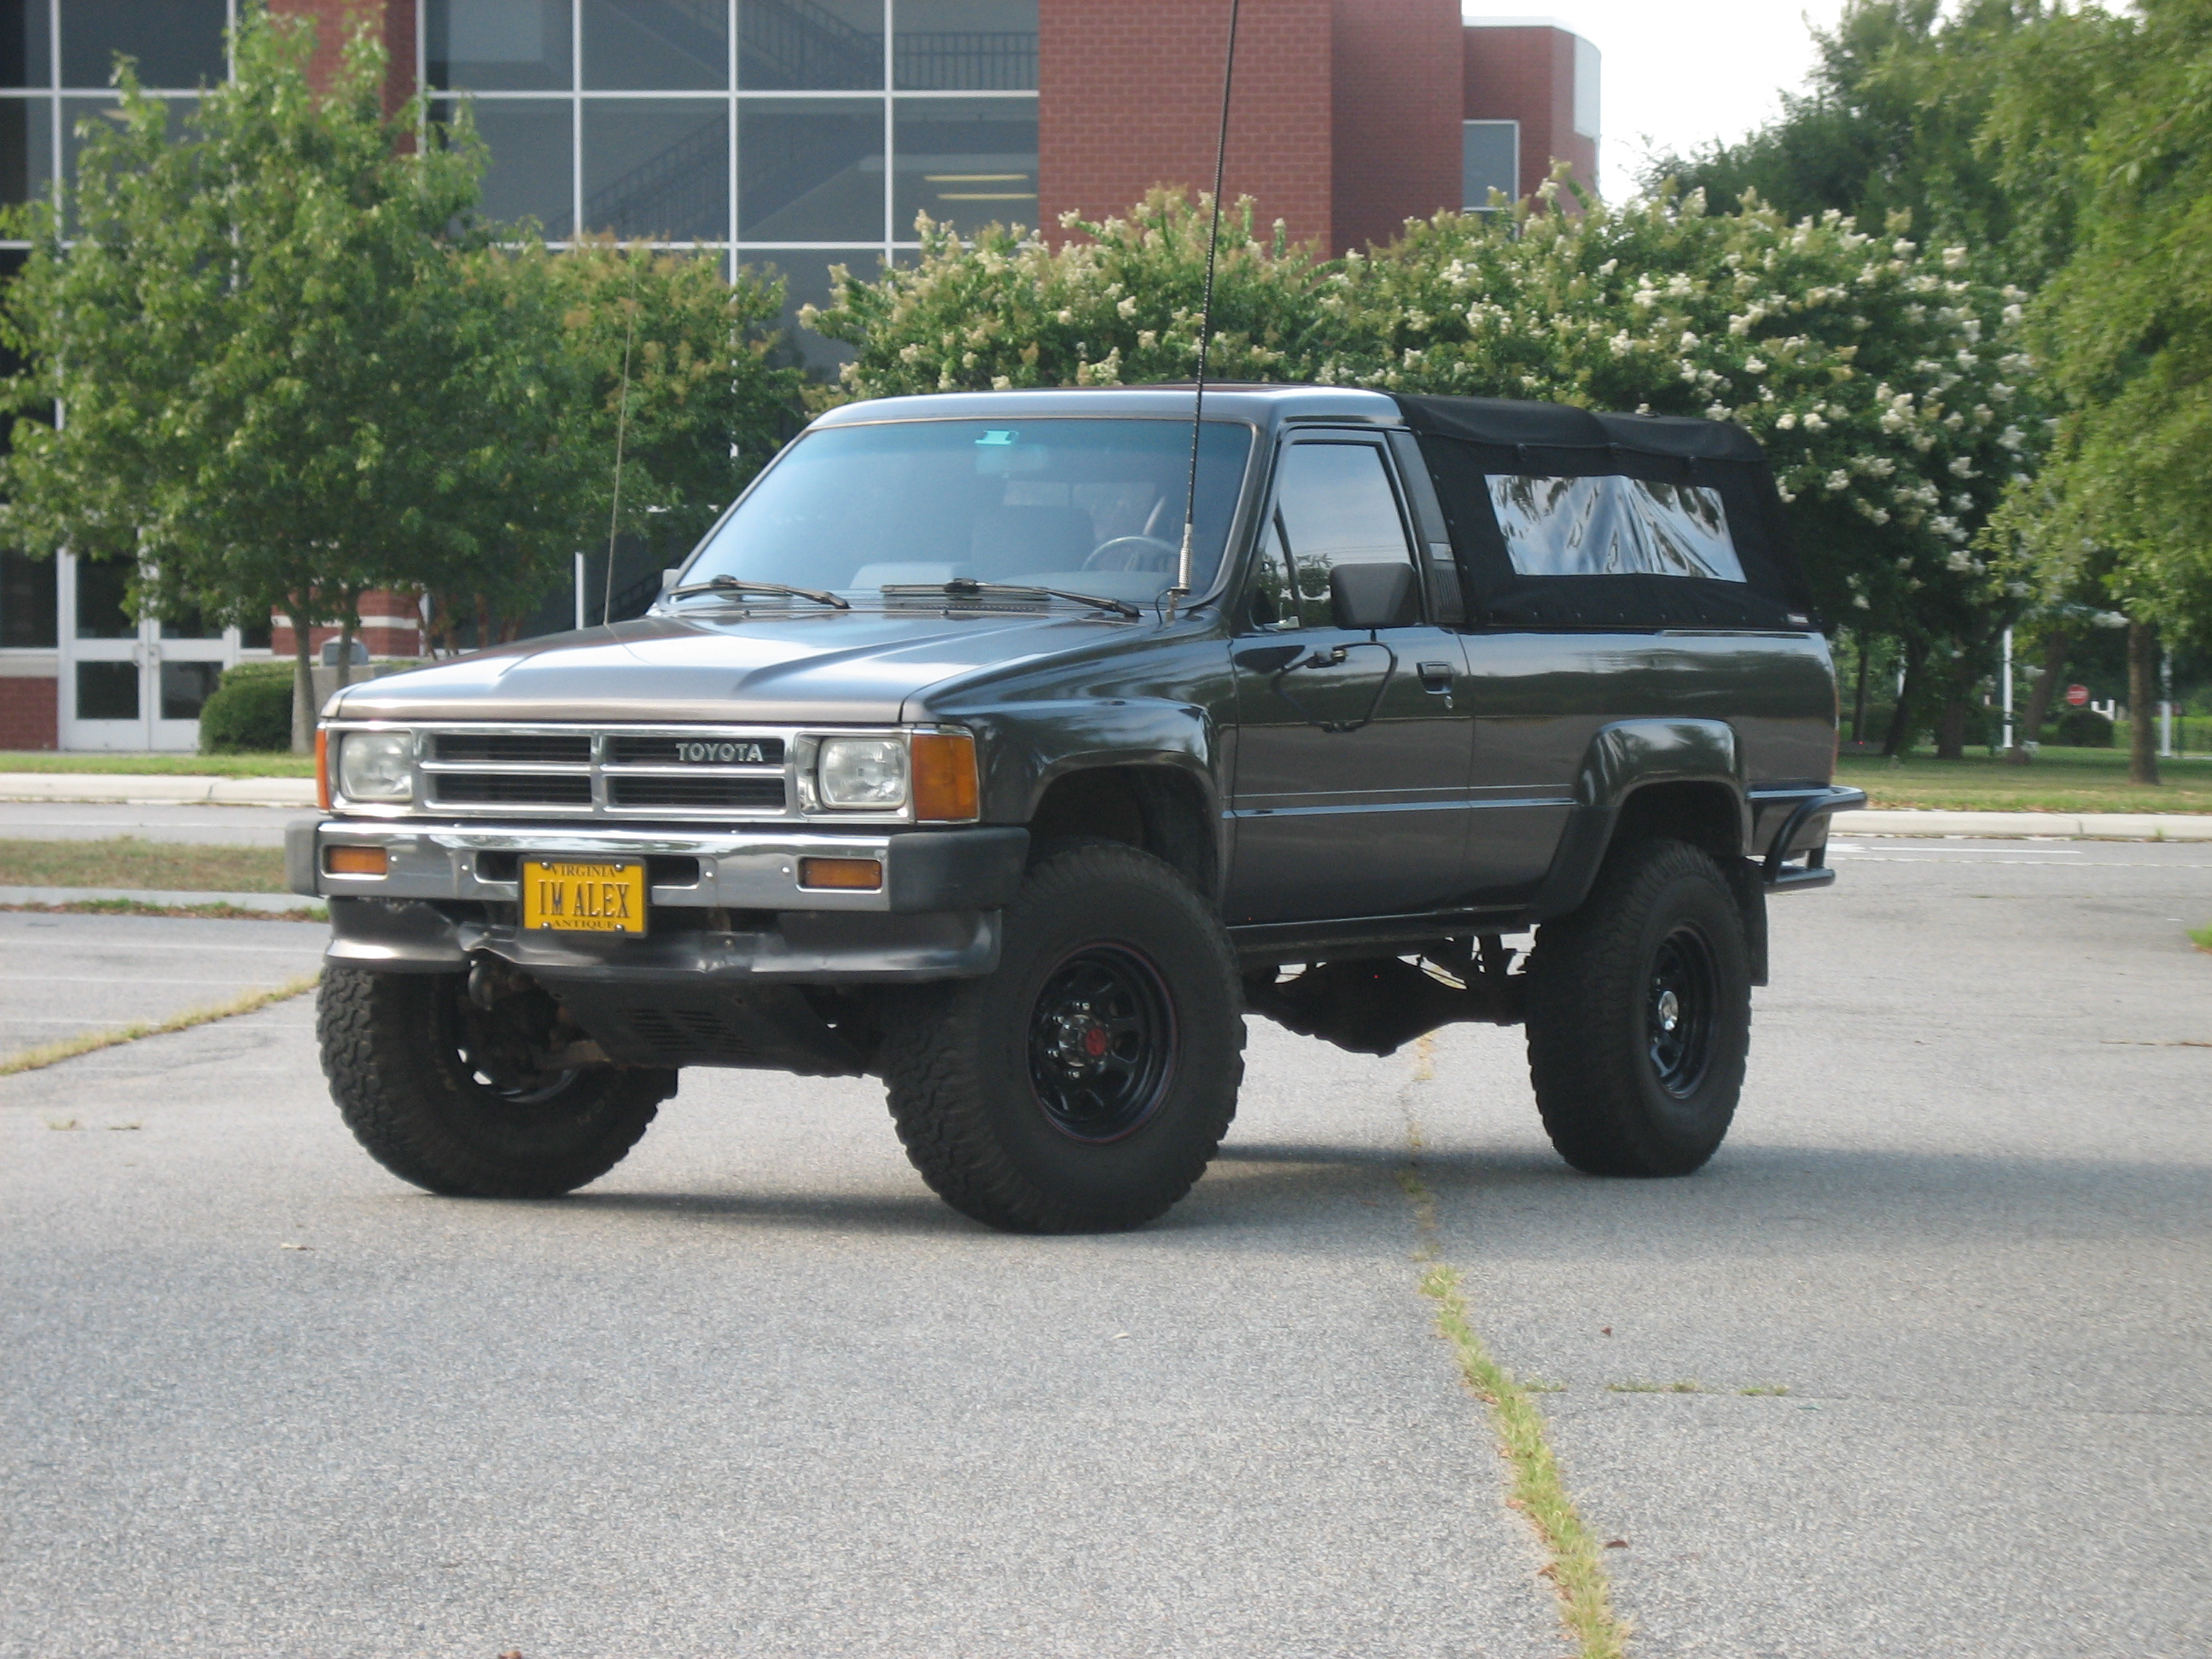
Haven't posted pictures of the truck actually fully assembled. Washed it for the third time since it was painted and actually took some nice pictures. Since the last pictures the mirrors are installed and the front end is all put together. I need to detail the interior and get some pictures of that too.
 Aug 4, 2016 | 08:17 AM
#144

Registered User
Joined: Jan 2015
Posts: 652
Likes: 0
From: Hendersonville NC
Know what you mean. I have a ceiling fan, a side door open and a box fan blowing in and it still is over bearing.
At night my garage floor condensates and gets slick.
Nothing like body filler dust on a wet floor. Hard to get off
At night my garage floor condensates and gets slick.
Nothing like body filler dust on a wet floor. Hard to get off
Aug 4, 2016 | 06:24 PM
#145
Registered User
Joined: Nov 2014
Posts: 119
Likes: 0
From: Jackson, MS
I recall in your last video you said that the floor mats you have are Tacoma floor mats. I've been looking for some myself that fit well; do you remember what generation of Tacoma those mats are from?
Aug 5, 2016 | 01:06 PM
#148
Thread Starter
Registered User
iTrader: (8)
Joined: May 2011
Posts: 1,517
Likes: 354
From: Southeast Virginia
Winch bumper and winch, sliders, solid axle swap, 4.71 gears, and lockers. I feel like I've done so much to the truck but when I list what I still want to do it seems like I've done almost nothing.
Aug 7, 2016 | 07:20 AM
#150
Thread Starter
Registered User
iTrader: (8)
Joined: May 2011
Posts: 1,517
Likes: 354
From: Southeast Virginia
Looked through my folder of receipts and couldn't find it. I could have sworn I saw it in there years ago but I guess not. I've had them as long as the truck so they're either for a first or second gen Tacoma.
Sep 7, 2016 | 04:50 PM
#152
Thread Starter
Registered User
iTrader: (8)
Joined: May 2011
Posts: 1,517
Likes: 354
From: Southeast Virginia
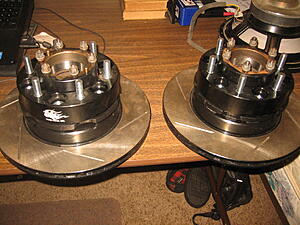
Not much of an update but I did bolt my TG wheel spacers up to my SFA hubs. Still slowly collecting parts for the SAS. Still need a spring hanger, shackles, and high-steer. Then it's time to get cutting.
 Sep 7, 2016 | 05:05 PM
#153

Are you planning to run the spacers to match the ifs rear (once you do the front axle swap)? If so, you should look into doing the ifs hub swap. I did that on my on mine a couple months ago and am using the bigger ifs v6 calipers (all pistons are big, vs 2 big 2 small). Noticed a big difference in stopping power, but then again i did dual diaphram booster swap with newer 4runner master cylinder and proportioning valve to feed the bigger calipers.
Whose solid axle bracket are you planning on running? Ive got one on a trail rig i bought for parts. It drove straight down the road no issues, but is definitely home made. Has a 2" receiver built into it which is sweet for recovery/winch mounting. If your interested ill make you a killer deal for it. May have shackles as well.
Whose solid axle bracket are you planning on running? Ive got one on a trail rig i bought for parts. It drove straight down the road no issues, but is definitely home made. Has a 2" receiver built into it which is sweet for recovery/winch mounting. If your interested ill make you a killer deal for it. May have shackles as well.
Sep 7, 2016 | 05:45 PM
#154
Thread Starter
Registered User
iTrader: (8)
Joined: May 2011
Posts: 1,517
Likes: 354
From: Southeast Virginia
I'm going to use the V6 IFS calipers also with rotors for an FJ60. So they are vented but fit the older hubs. I don't really like the IFS hub swap because you need to drill out the threads on the knuckle and turn down the hubs. Having a slip on rotor isn't a huge selling point for me.
I'd like to run the Low Range Off Road front spring hanger since it's low profile. It also has slotted holes that line up with the tow hook holes in the frame to help with positioning. Probably going to get their greaseable stock replacement SFA shackles as well. Most aftermarket shackles are a bad design in that they can't actually be tightened down because they'll pinch the bushings. This leads to looseness and the shackle plate holes getting ovaled out. If you look at the factory rear shackles there's a shoulder so that you can fully tighten the nut without the spring bushings getting pinched. LROR and DavezOffroad are the only two manufacturers I've found that address this issue.
I'd like to run the Low Range Off Road front spring hanger since it's low profile. It also has slotted holes that line up with the tow hook holes in the frame to help with positioning. Probably going to get their greaseable stock replacement SFA shackles as well. Most aftermarket shackles are a bad design in that they can't actually be tightened down because they'll pinch the bushings. This leads to looseness and the shackle plate holes getting ovaled out. If you look at the factory rear shackles there's a shoulder so that you can fully tighten the nut without the spring bushings getting pinched. LROR and DavezOffroad are the only two manufacturers I've found that address this issue.
Sep 8, 2016 | 02:01 PM
#156
Thread Starter
Registered User
iTrader: (8)
Joined: May 2011
Posts: 1,517
Likes: 354
From: Southeast Virginia
Rears up front and as little lift as possible. Hoping to keep it level with the OME CS-009R springs in the rear so about 2 inches overall. I know with high steer that might not be possible and I might need to bring the rear up another inch or two. Hopefully not, though. I guess we'll see.
Sep 9, 2016 | 01:34 PM
#157
I just got caught up on your thread and you have done a great job bringing this truck back up. As far as you tore it down and got it to where it is, you will have prevented a lot of future problems. You will still appreciate the work you got into even a few years from now. Great Job!!!
Sep 9, 2016 | 02:02 PM
#158
Registered User
Joined: Jun 2010
Posts: 1,448
Likes: 100
From: Virginia
I pulled the Husky Liners from my son's 1st gen Tacoma before it was sold. I'll try them in the '89 this evening and take pictures. It never occurred to me that they might fit.
Feb 21, 2017 | 01:29 PM
#159
Thread Starter
Registered User
iTrader: (8)
Joined: May 2011
Posts: 1,517
Likes: 354
From: Southeast Virginia
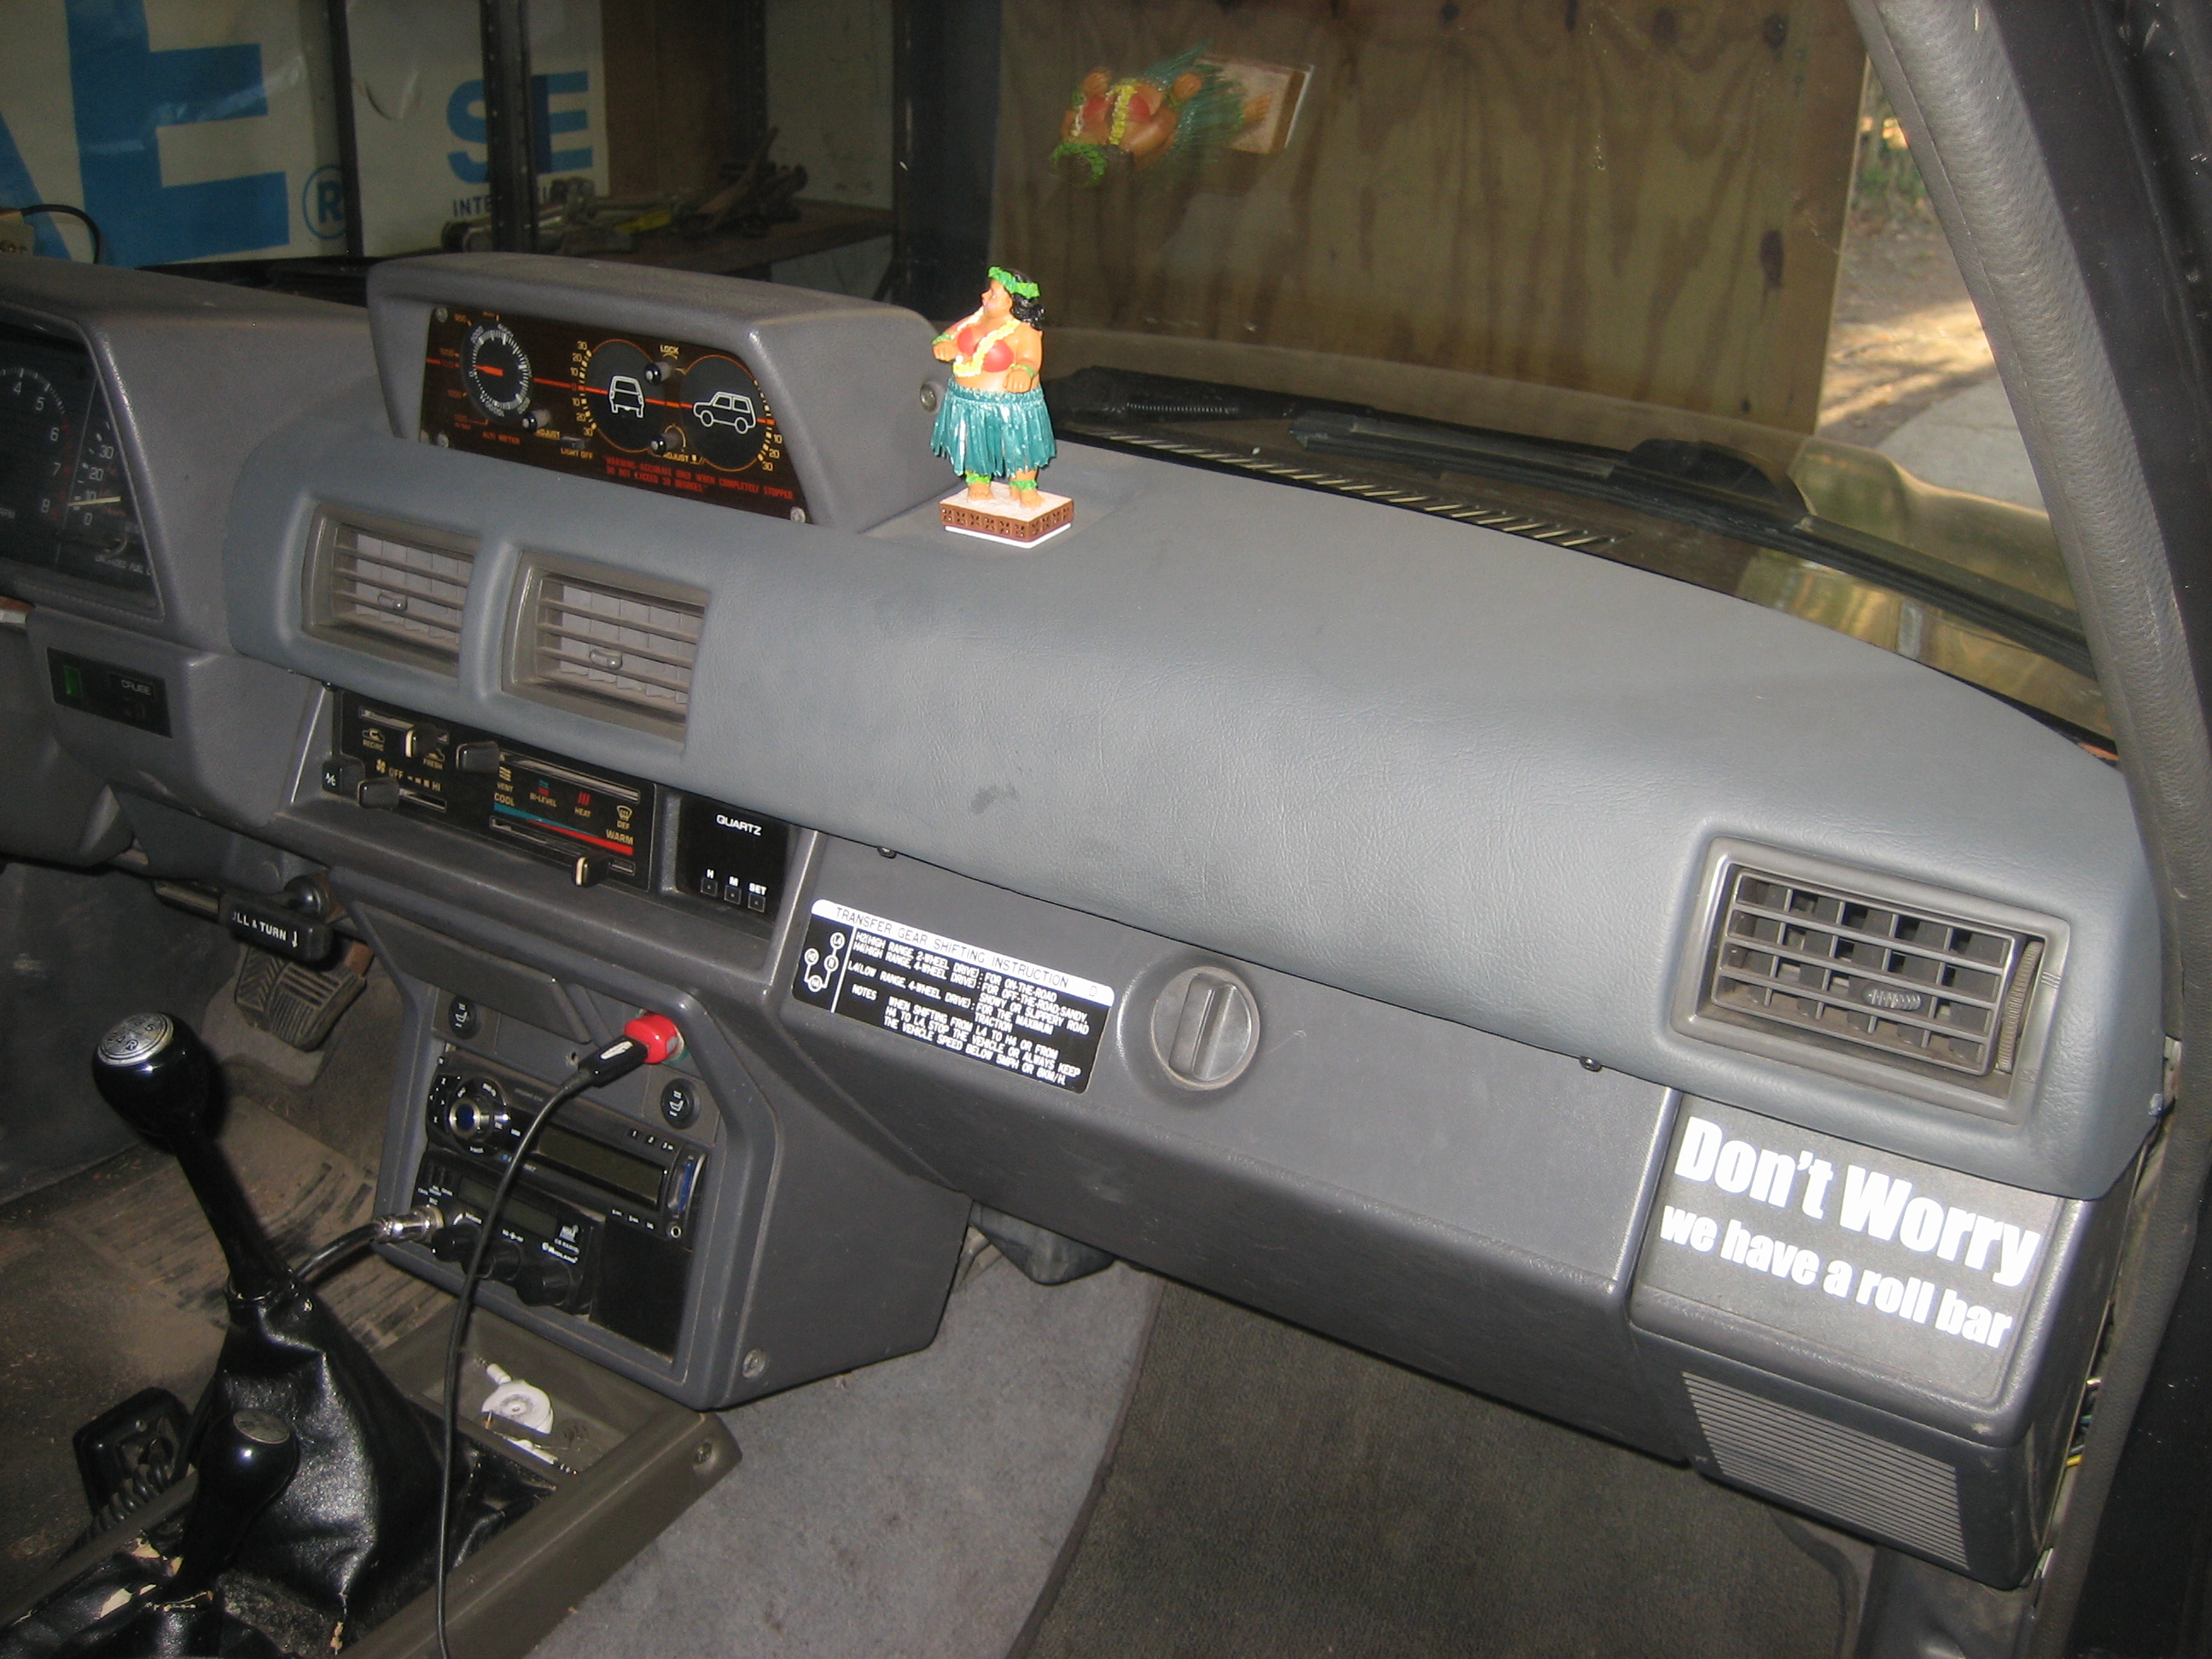
A while back I got one of those plastic dashcaps. Not a new dashpad, a dashcap. If you've been on the fence about fitment I'll try to give my opinion. They fit really well and unless you look closely you won't know it's there. The most obvious sign is right around the vents. The dashcap has a finite thickness which makes it so the vents cannot be removed through the holes in the dashcap. No big deal unless one breaks or you want to remove the far right one to install/remove the screw that holds the dash pad to the dash structure. My solution was to not glue the dashcap on like directed, but to screw it on. I installed the screws along the bottom and way off to the right so they don't show. Also, having an inclinometer helps here. The dashcap gets sandwiched between the inclinometer bracket and the dashpad. With no inclinometer there's a larger span between where the cap gets fastened. The last thing to worry about is color match. I got one unpainted. The color I went with was Duplicolor Vinyl&Fabric Charcoal Gray, HVP111. The match isn't perfect, it's a bit lighter than the rest of the dash, but it's pretty good. The flash makes it seem worse than it is. Overall I'm quite pleased. It looks way better now than it did with the cracked original dashpad.

 Feb 21, 2017 | 03:00 PM
#160
Registered User
Joined: Jan 2015
Posts: 652
Likes: 0
From: Hendersonville NC
Looks good, but those screws would drive me nuts.
im considering getting one of those caps, but i can get my local advance to mix a vinyl paint to match my interior.
as for attaching it, screws would suit my fancy better but i would have to have them hidden.
im considering getting one of those caps, but i can get my local advance to mix a vinyl paint to match my interior.
as for attaching it, screws would suit my fancy better but i would have to have them hidden.


