
Redeth's Overland Trailer Build
 Jan 5, 2016 | 04:50 PM
#61
Thread Starter
Registered User
Joined: Apr 2012
Posts: 2,817
Likes: 2
From: Los Angeles CA
 Jan 14, 2016 | 06:48 PM
#62
Thread Starter
Registered User
Joined: Apr 2012
Posts: 2,817
Likes: 2
From: Los Angeles CA
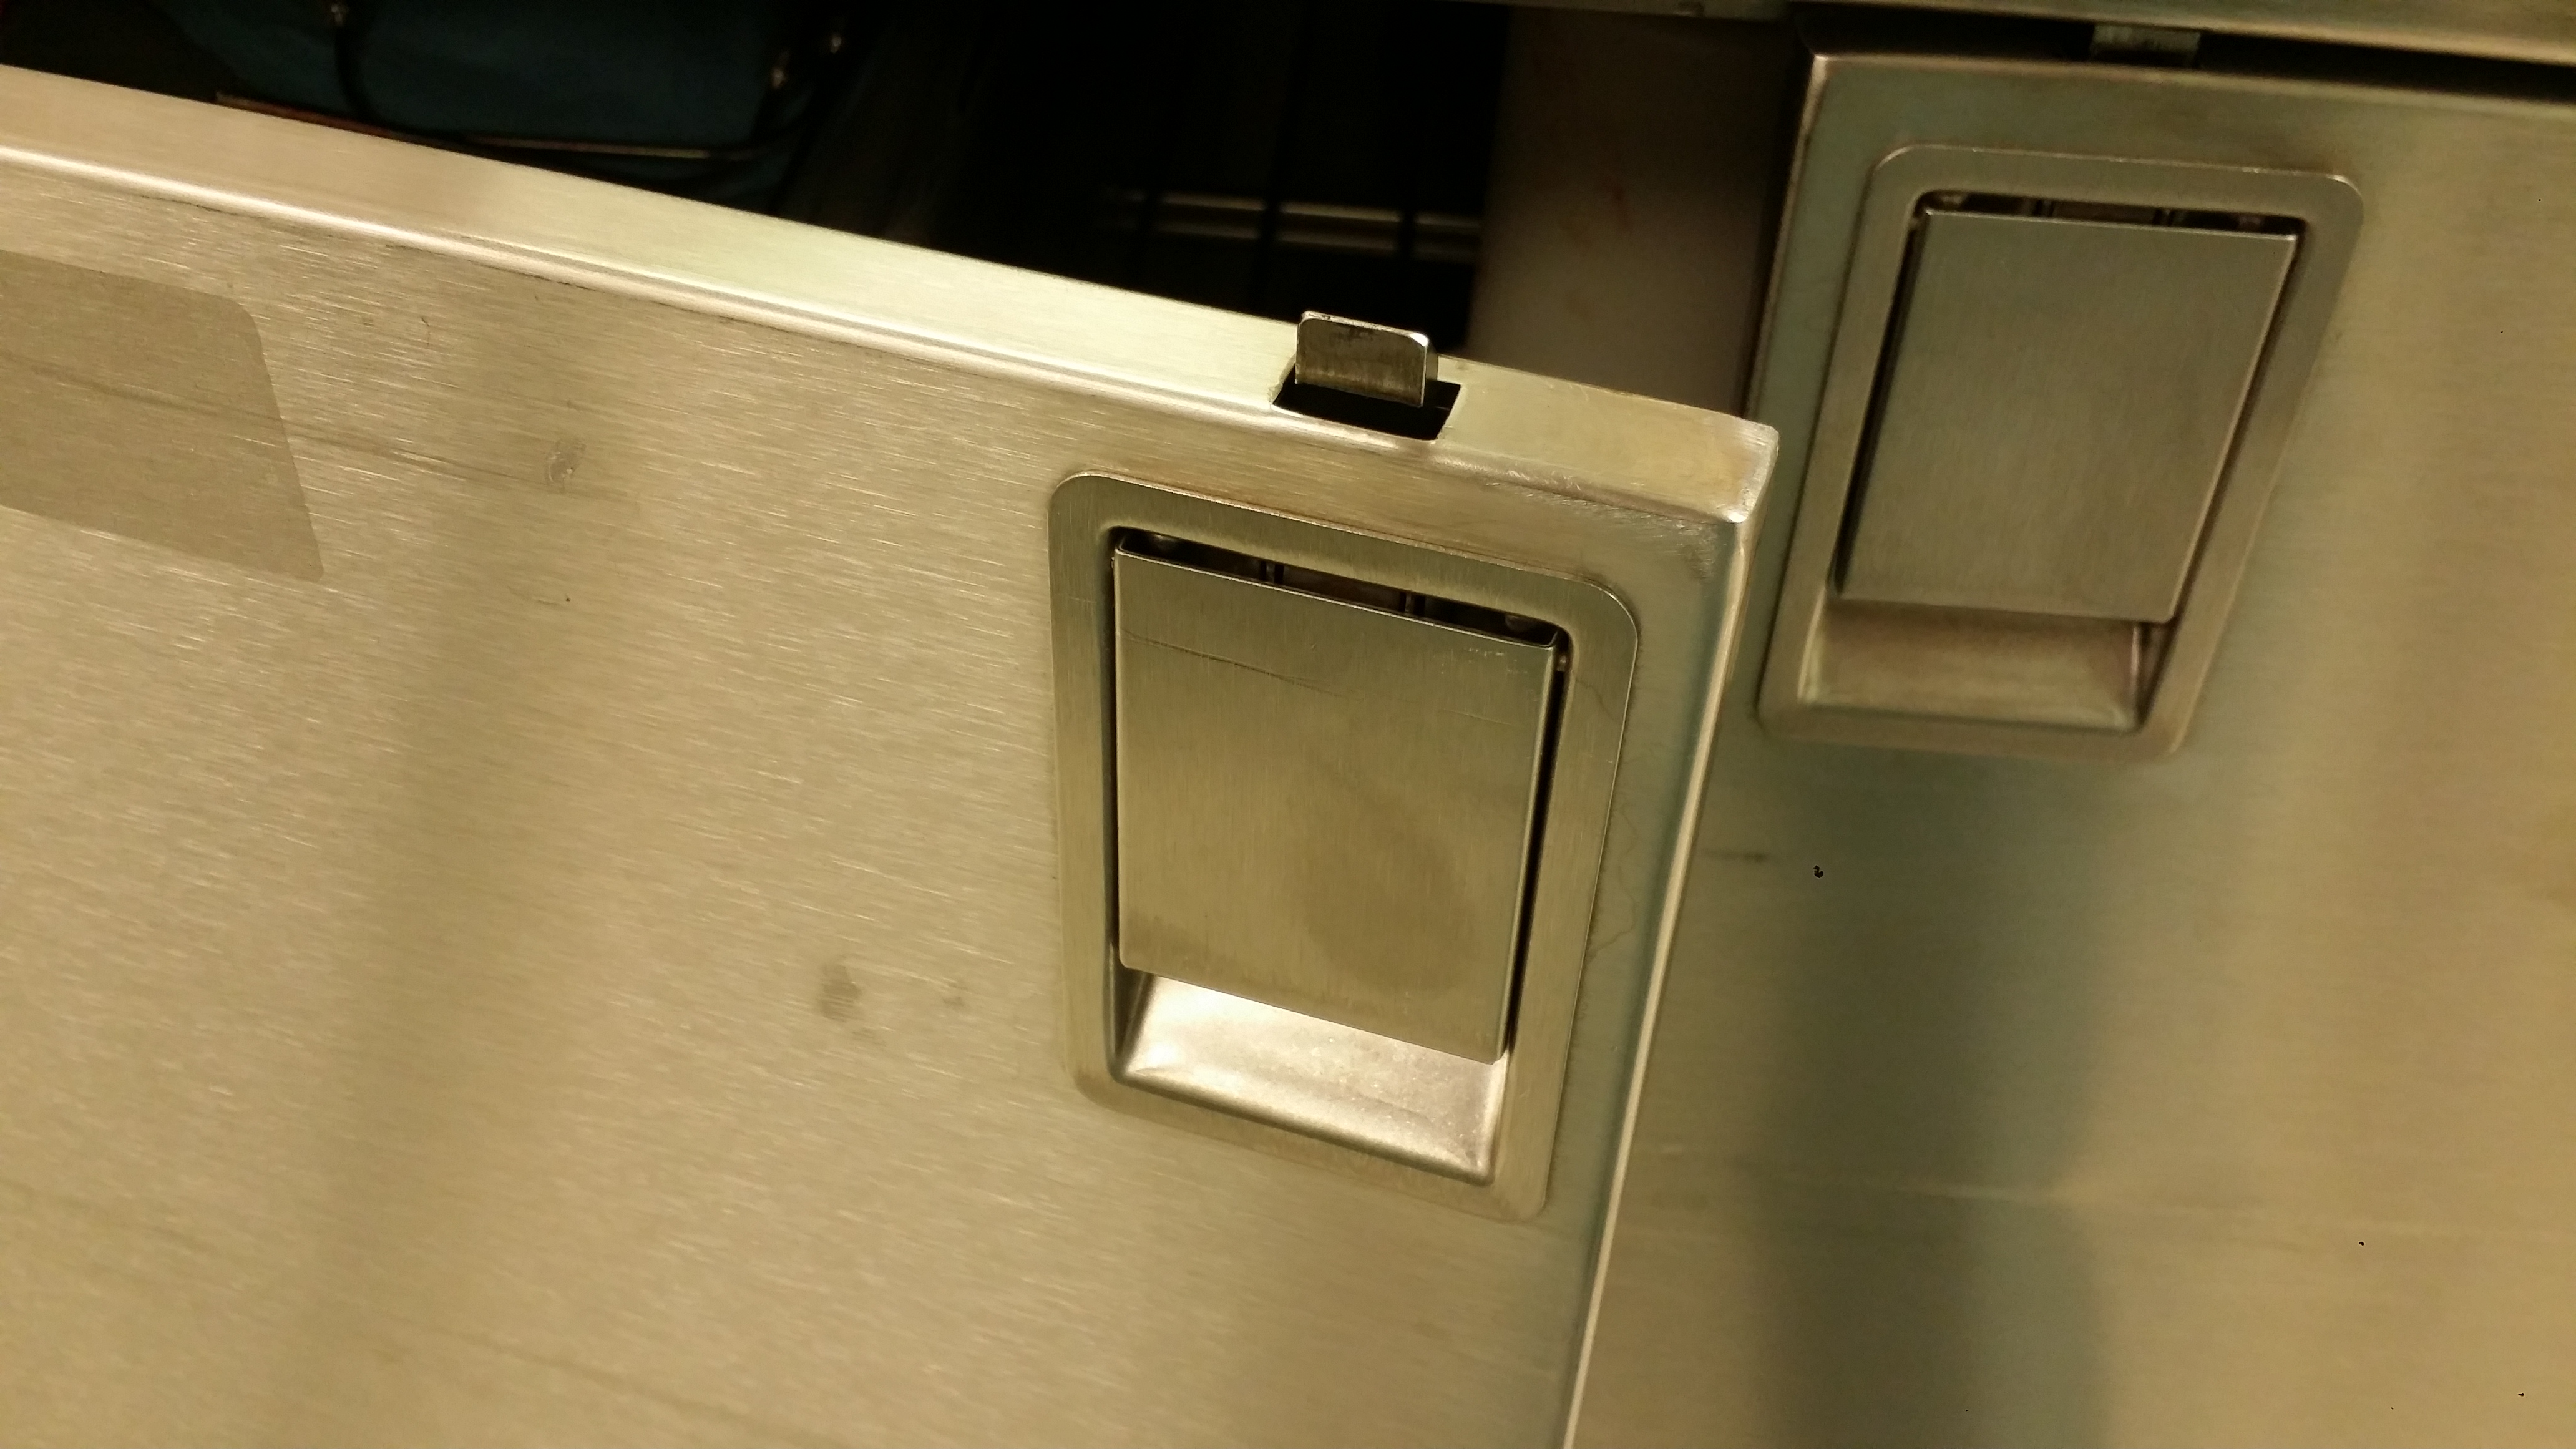
Just a quick little update. I ordered these trailer compartment door latches on sunday from Ebay from seller "DiscountTrailerSupply". and they finally arrived today.
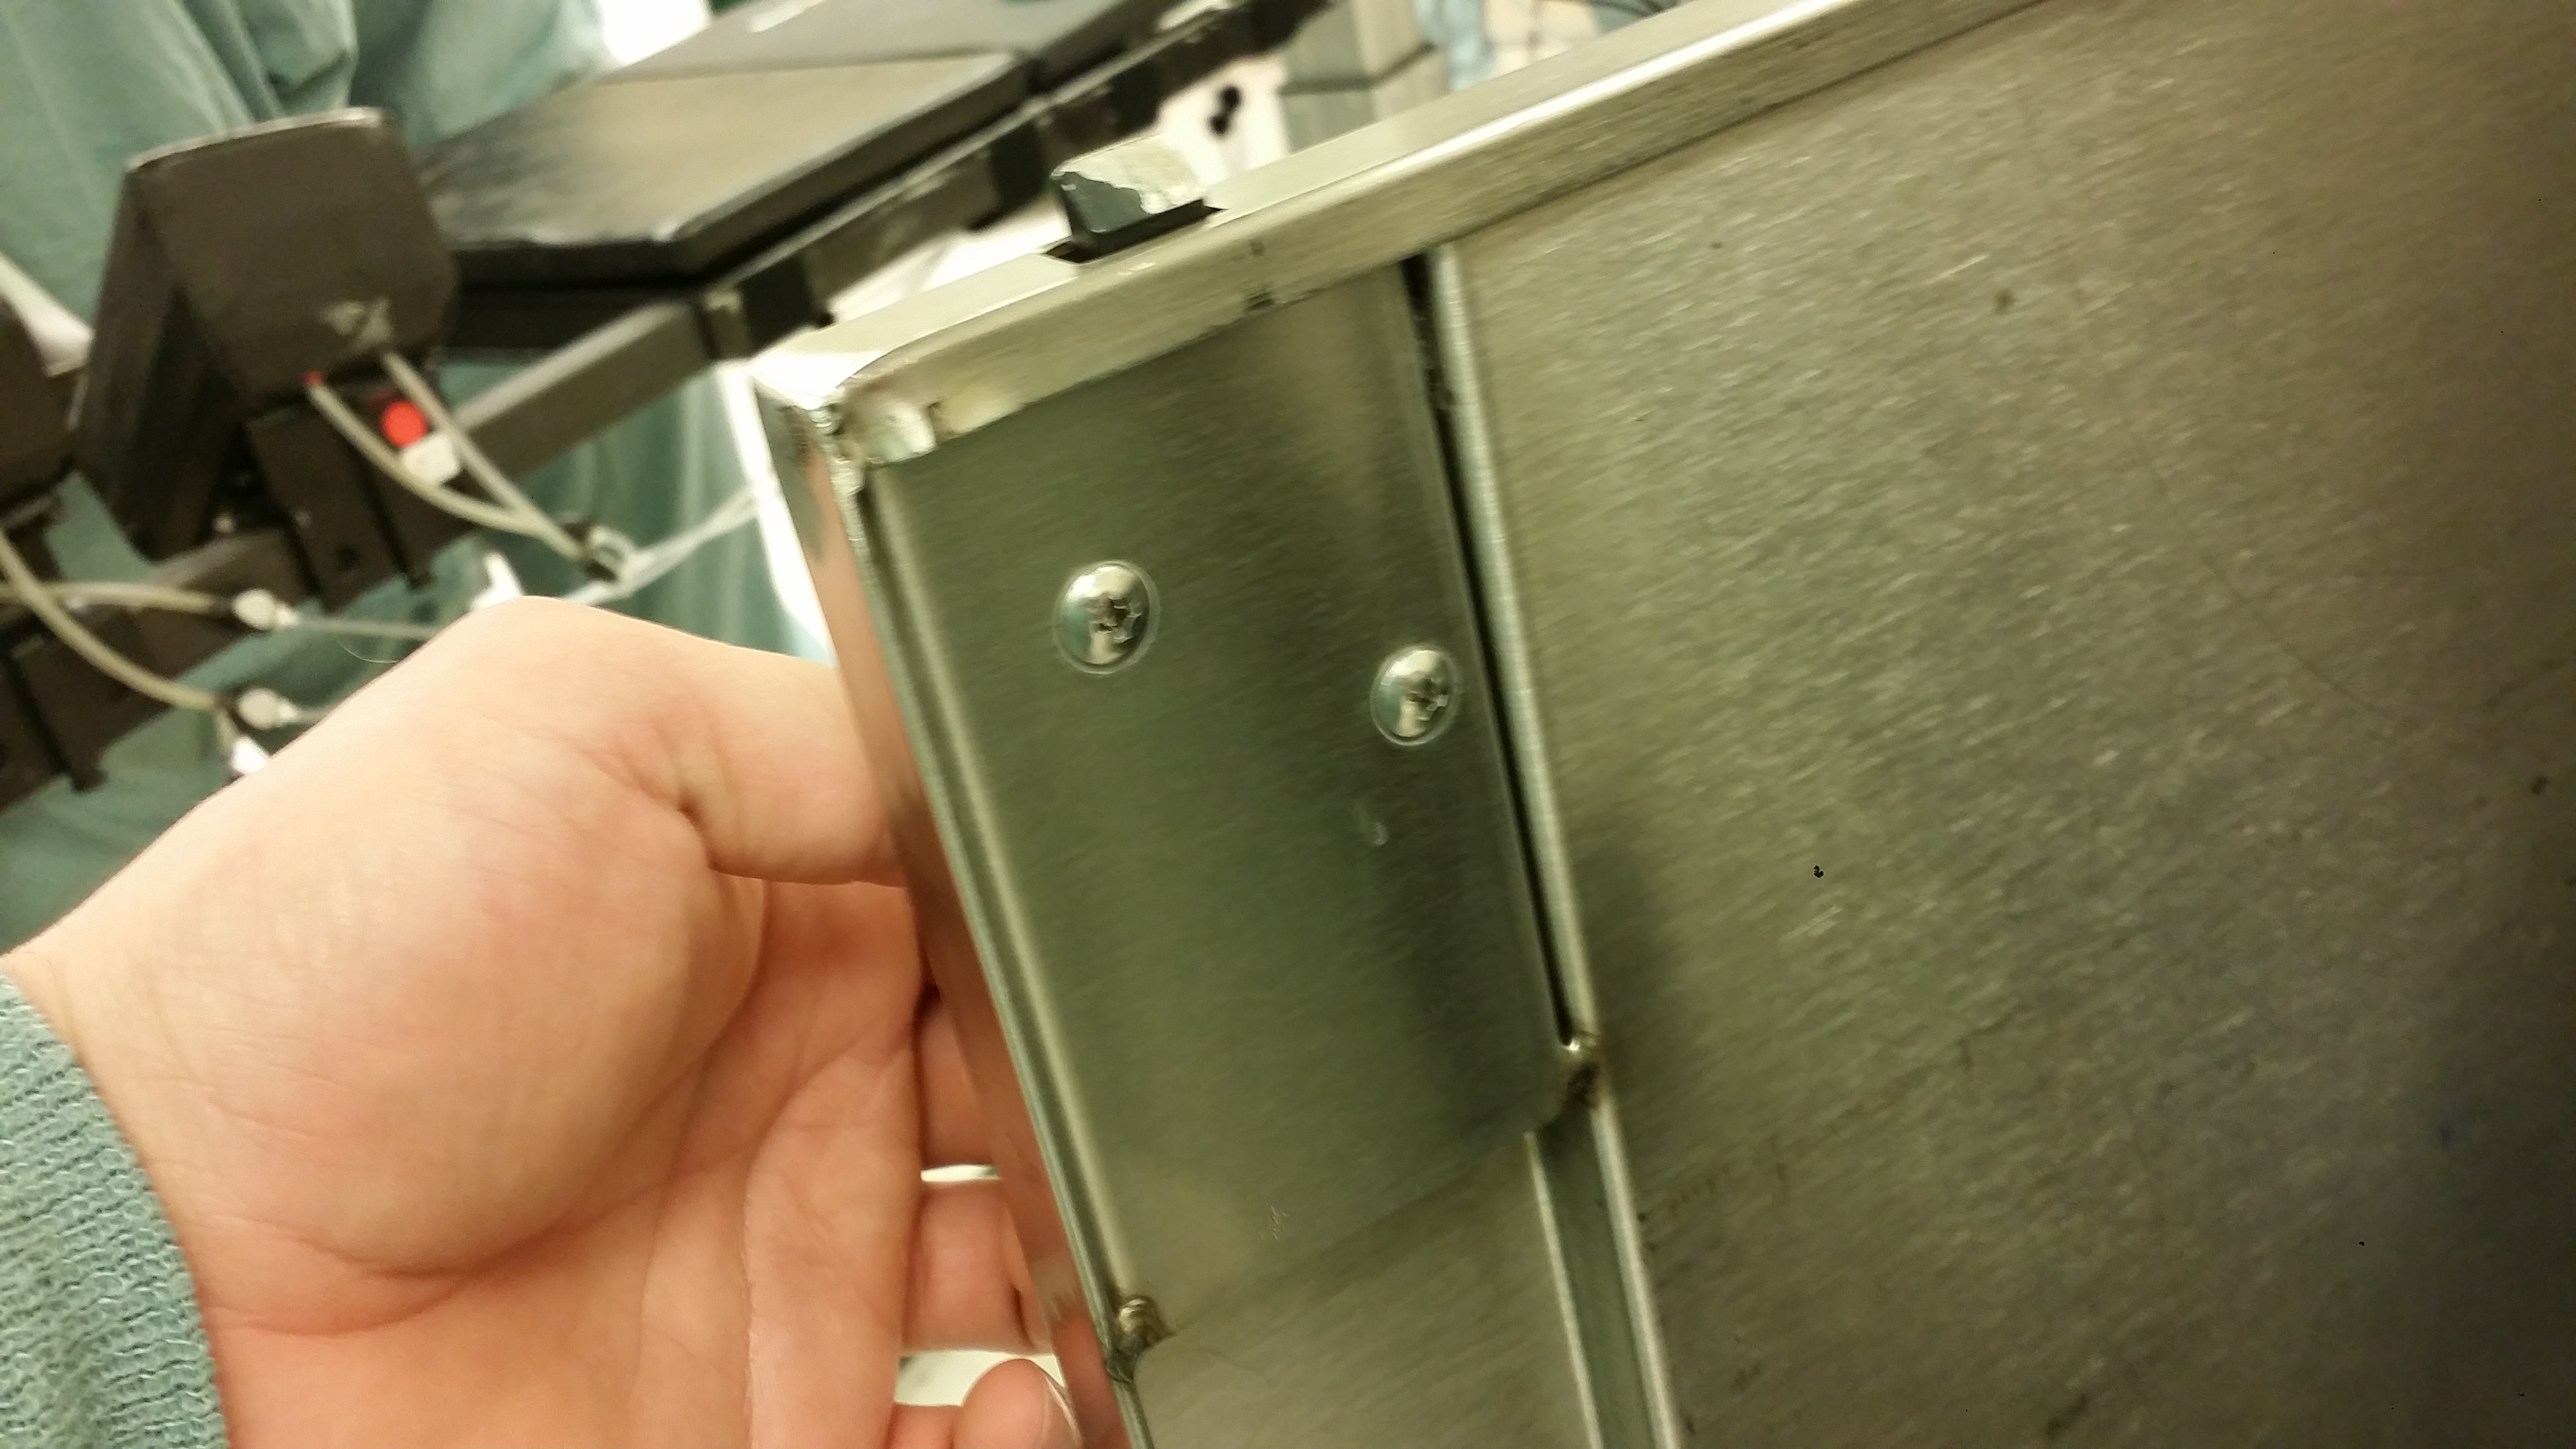
I liked this particular one because it was a steel finish. it wasn't stainless. This means I have more freedom to mount this where i want it whether it is Weld/Rivot/Screw/ or Bolt on
All i gotta say is that they feel really beefy. I was afraid they would be cheap but i was wrong they are anything but cheap. I like the fact they were the paddle style latch too. the "T-Handle" type just seem like they would come out whenever they want and i didn't want them getting snagged on anything on the trailer so this seemed more practical for me.
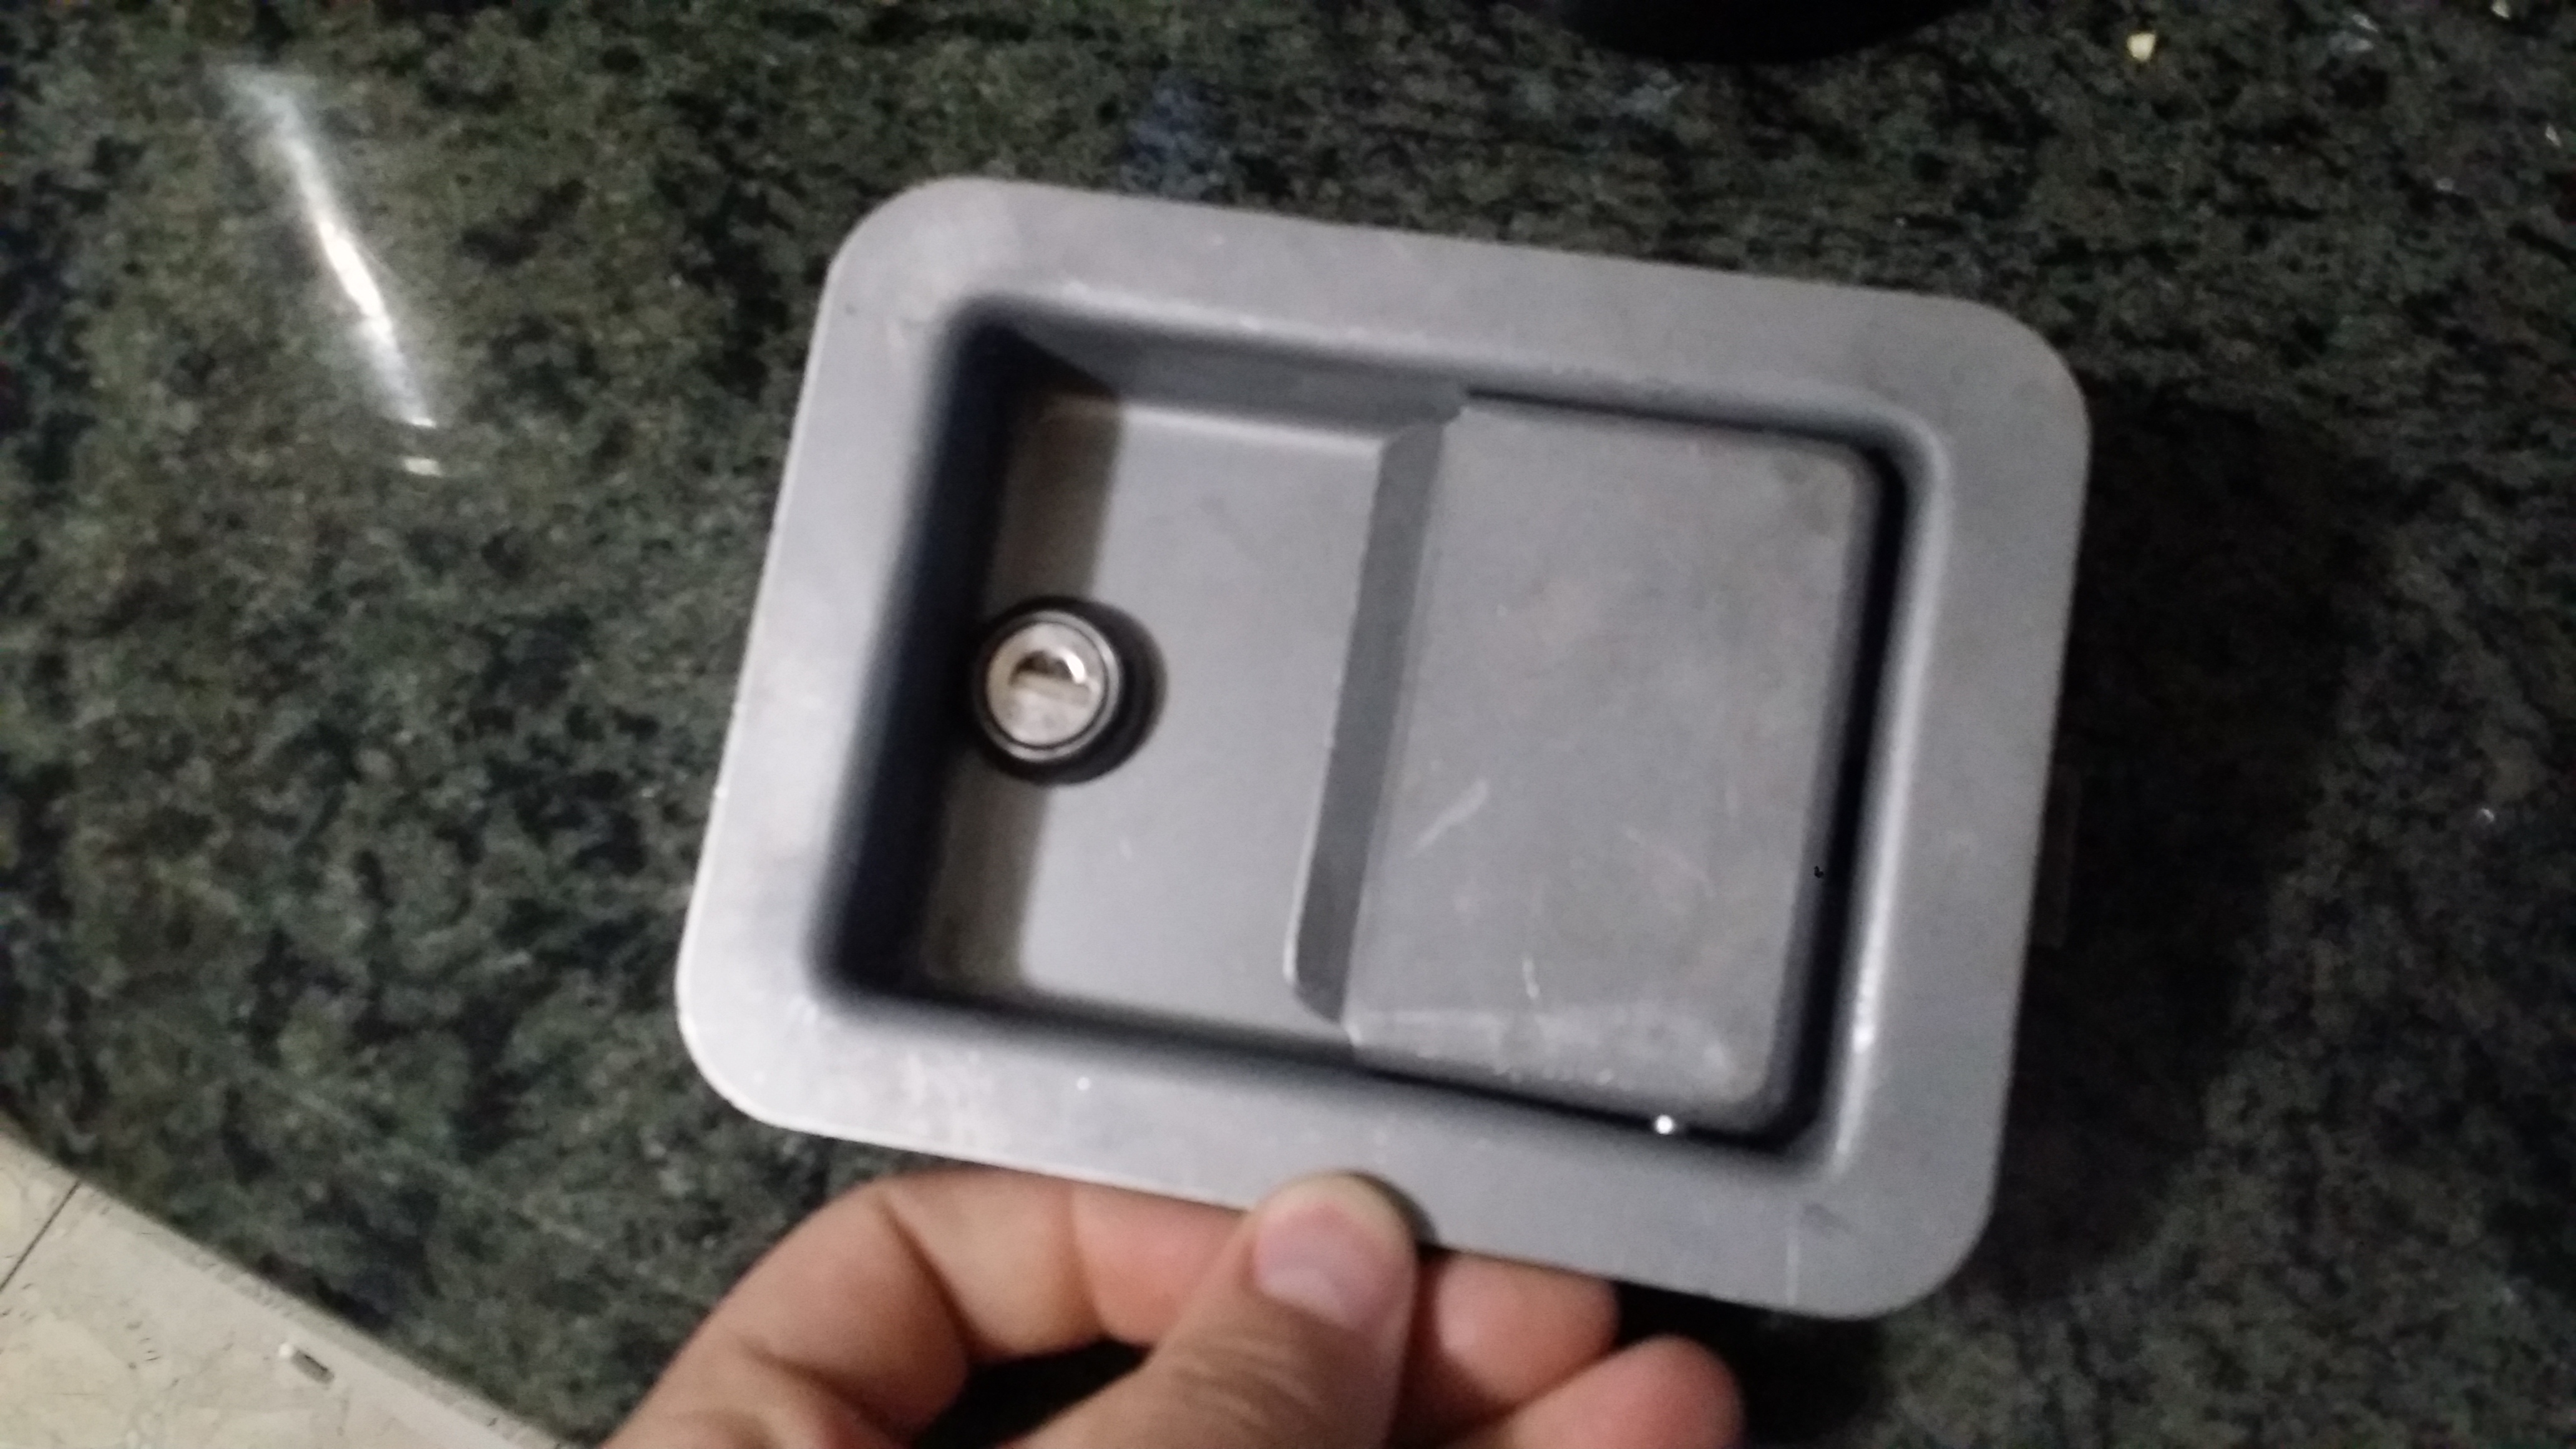
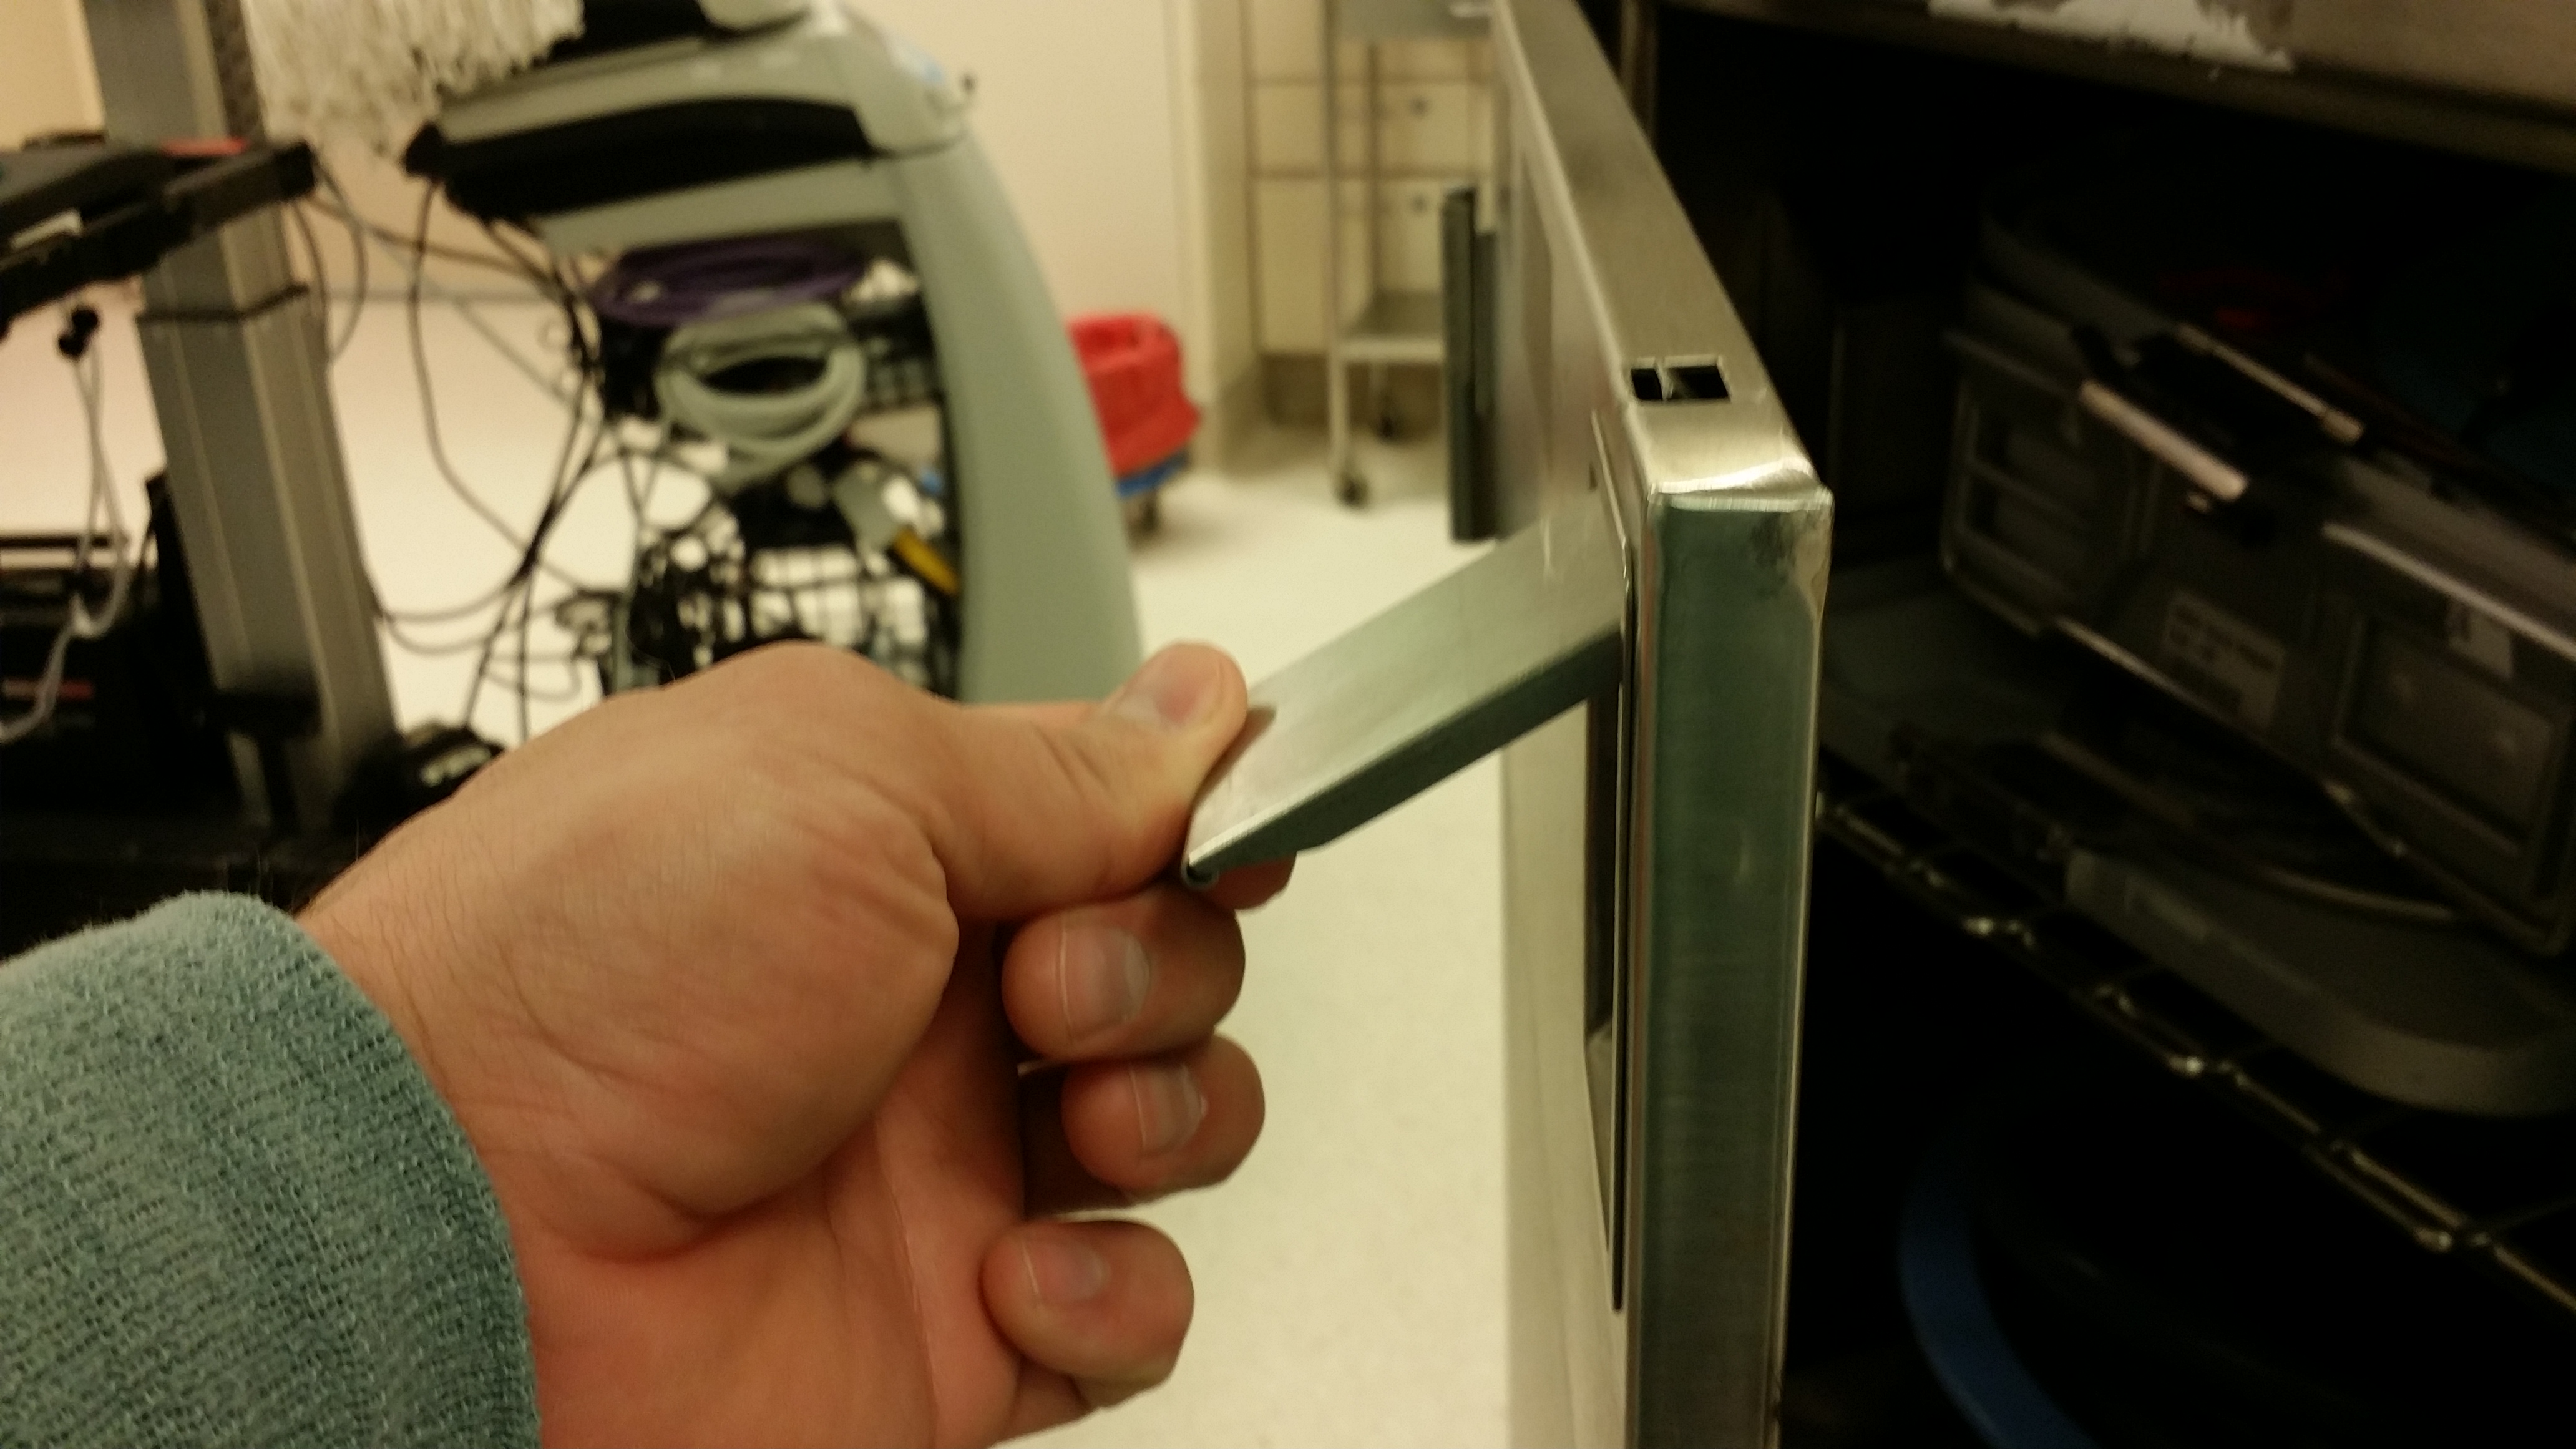
The part that holds the door in the locked position when closed looks like it is cast steel.
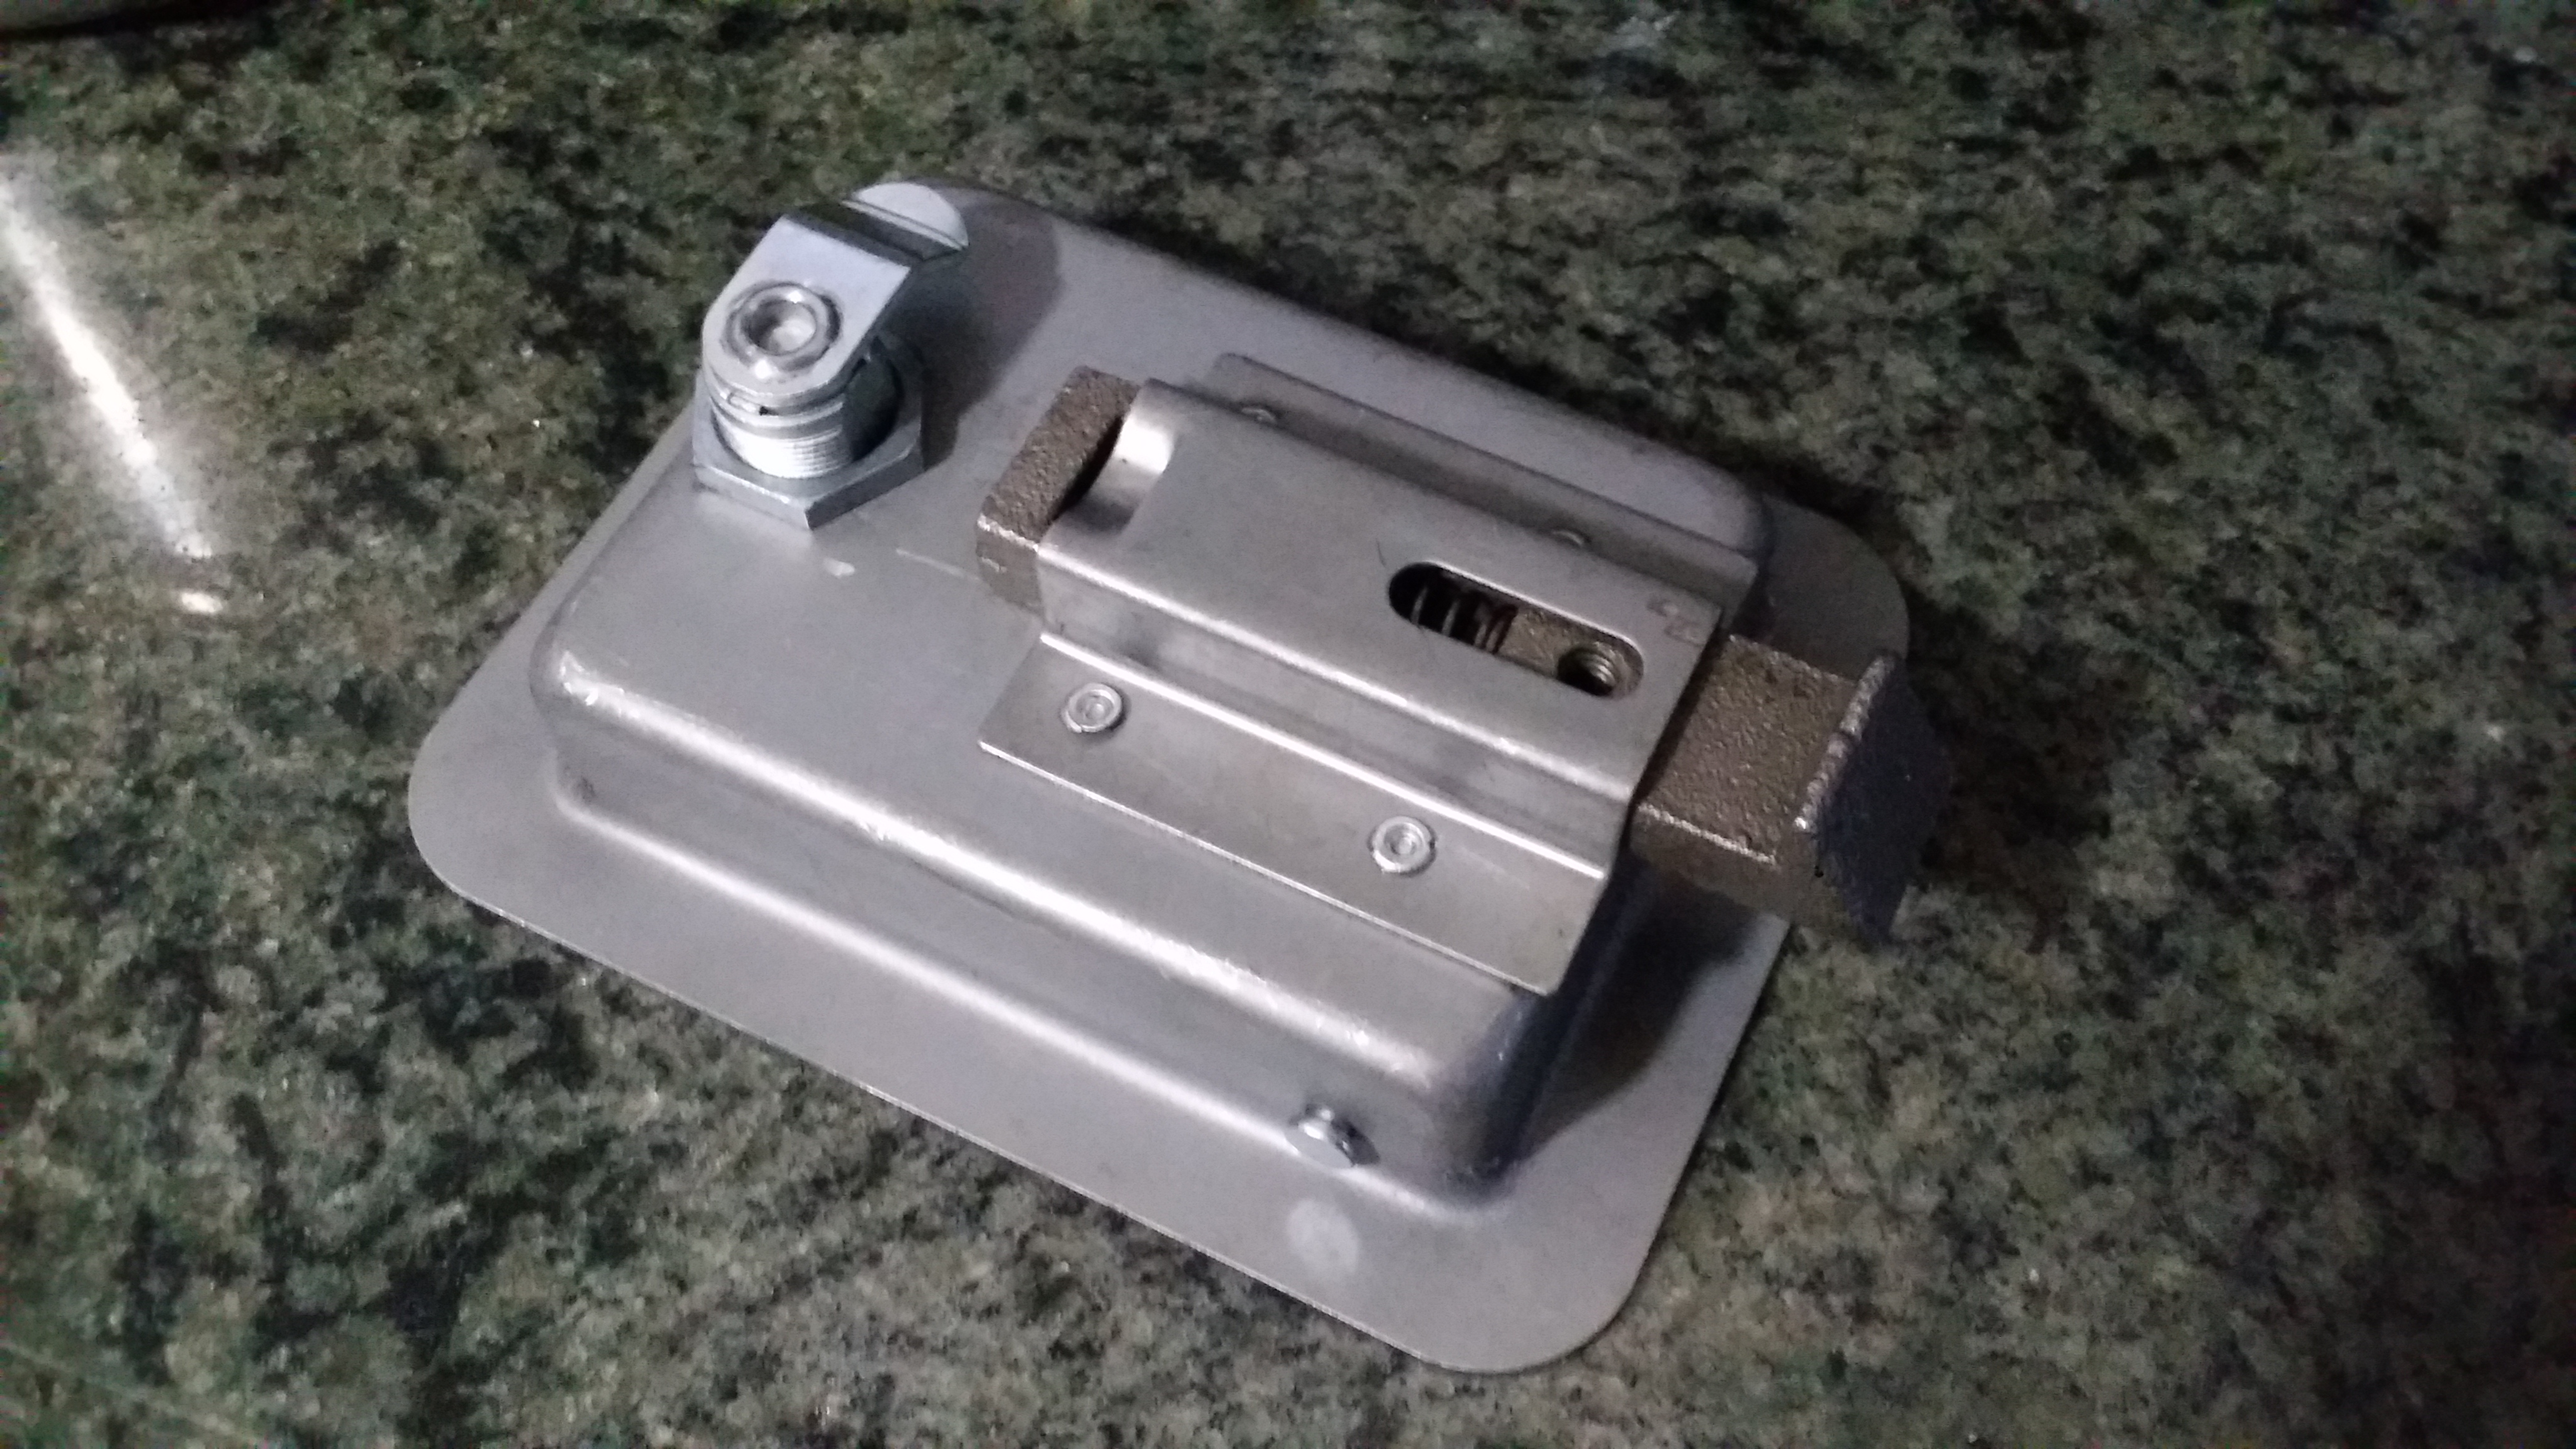
Here is that paddle part in action
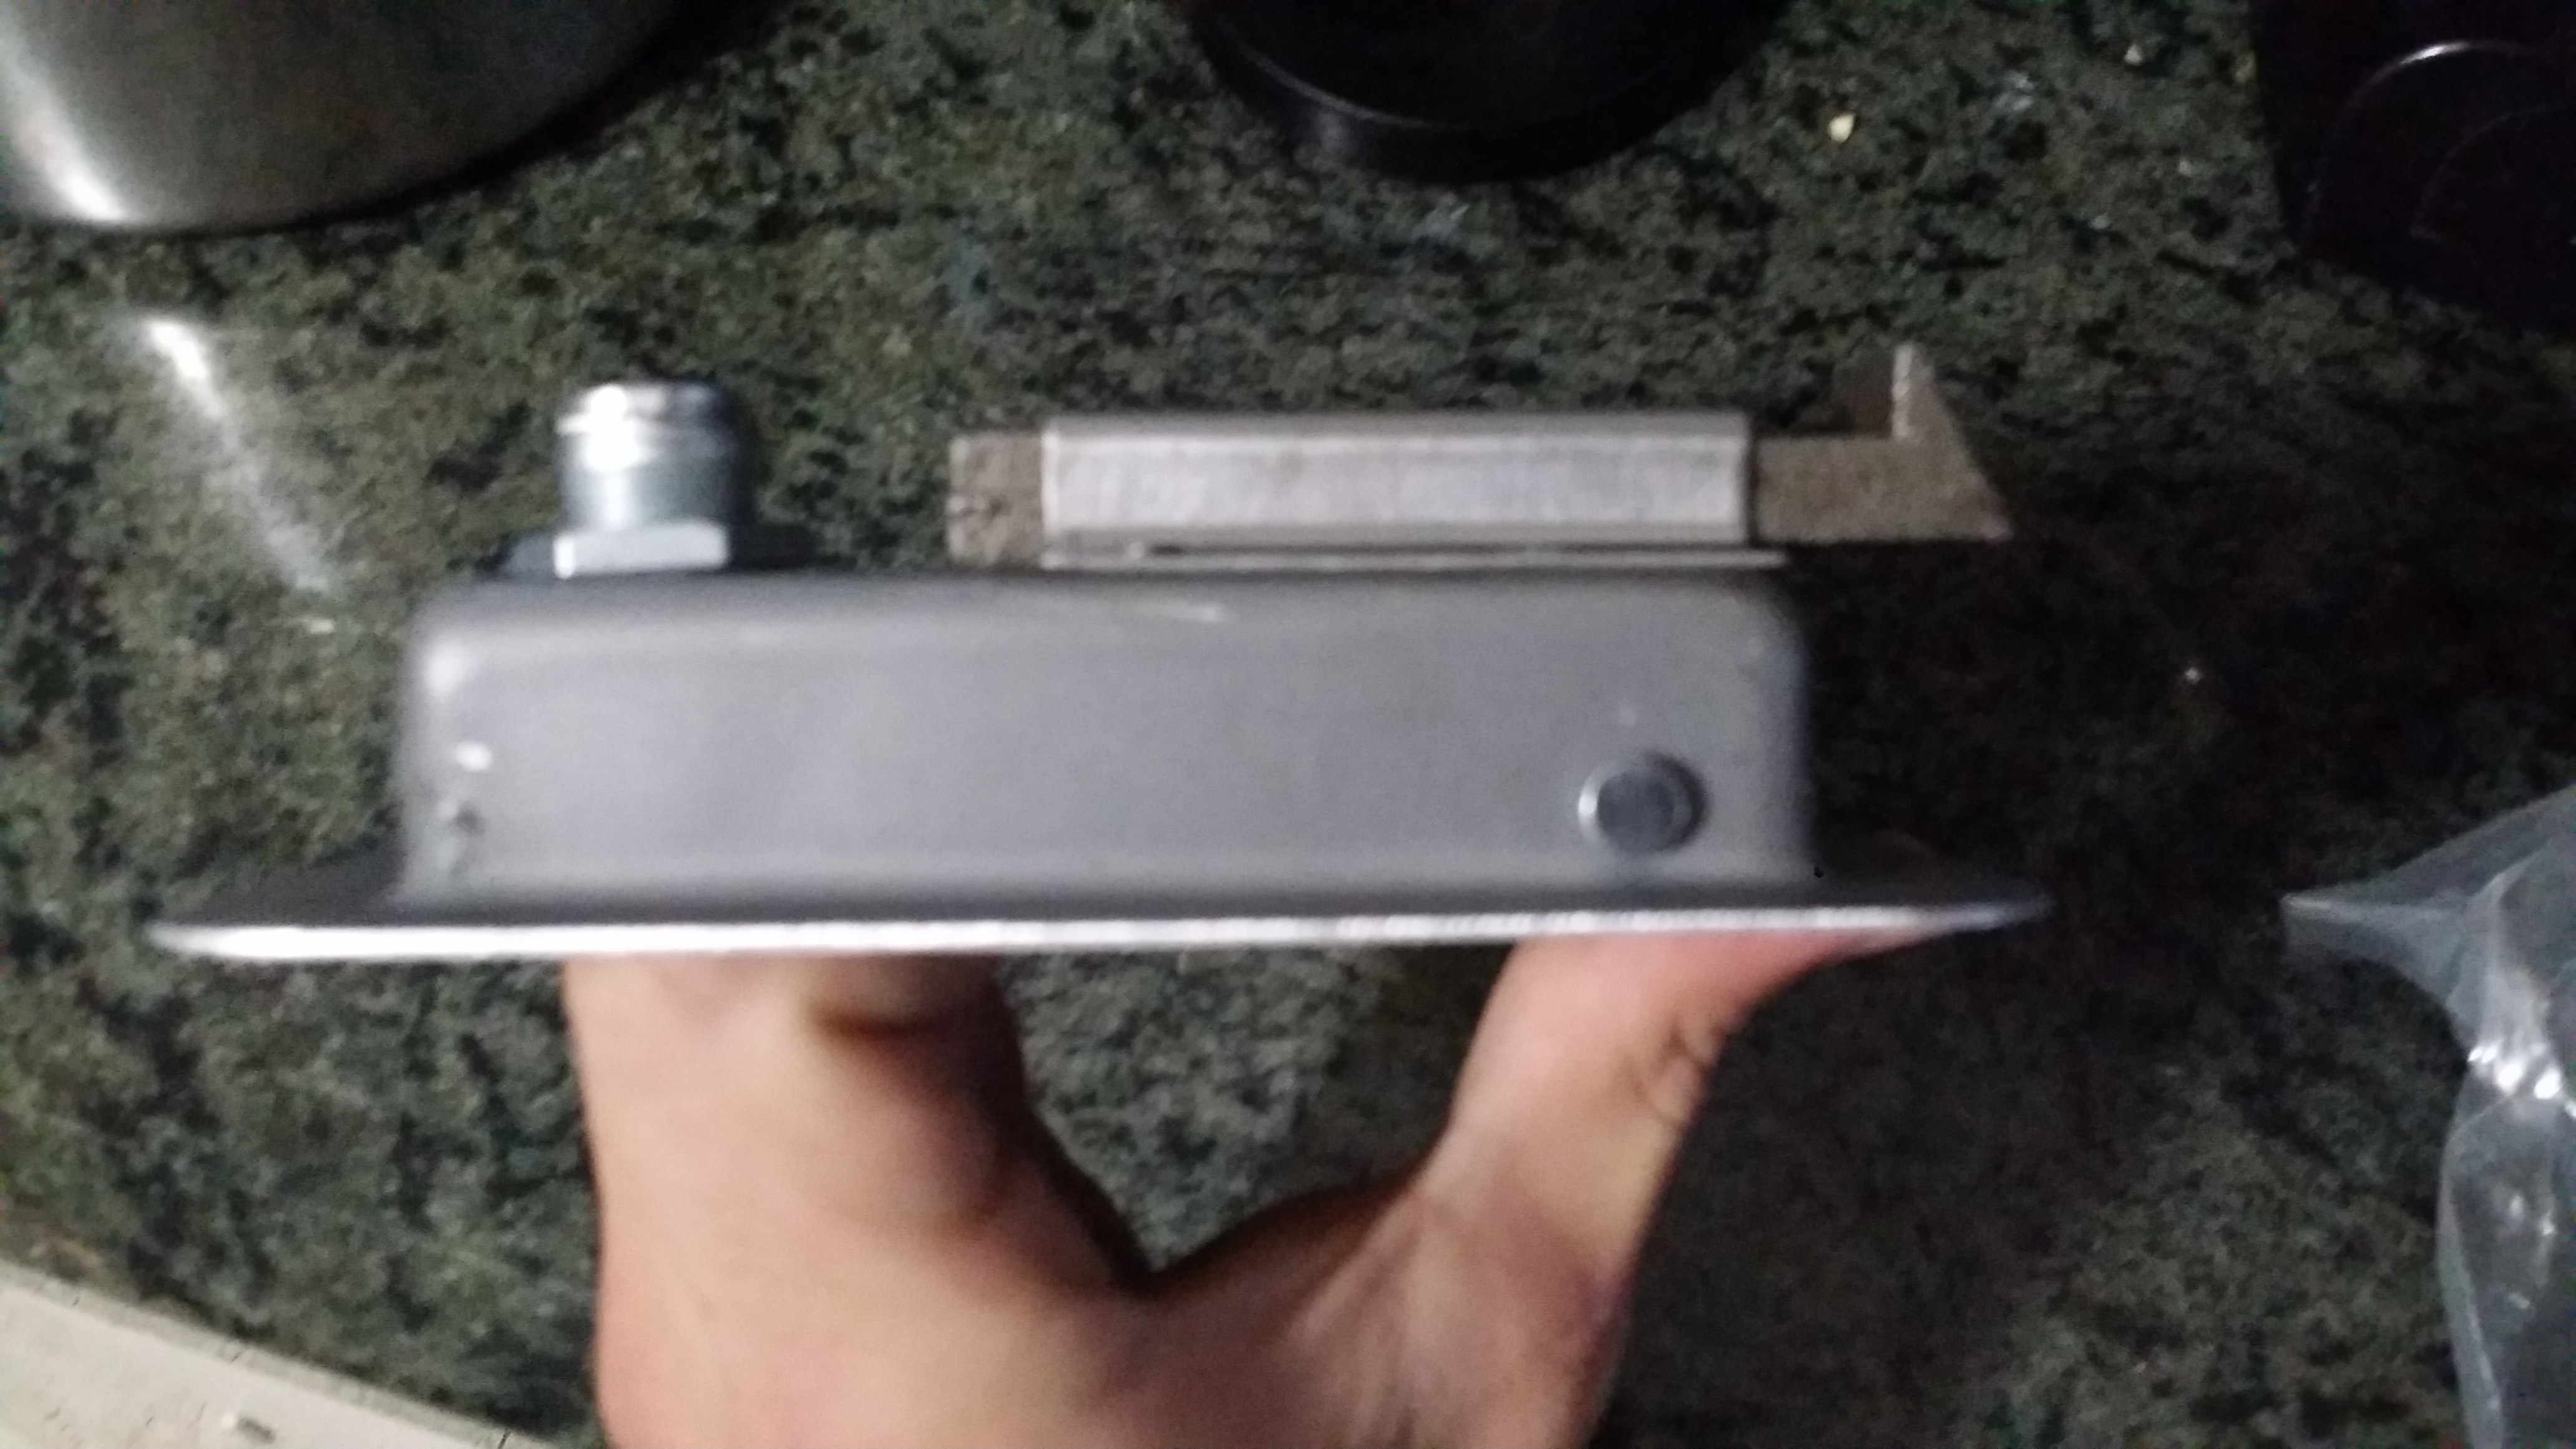
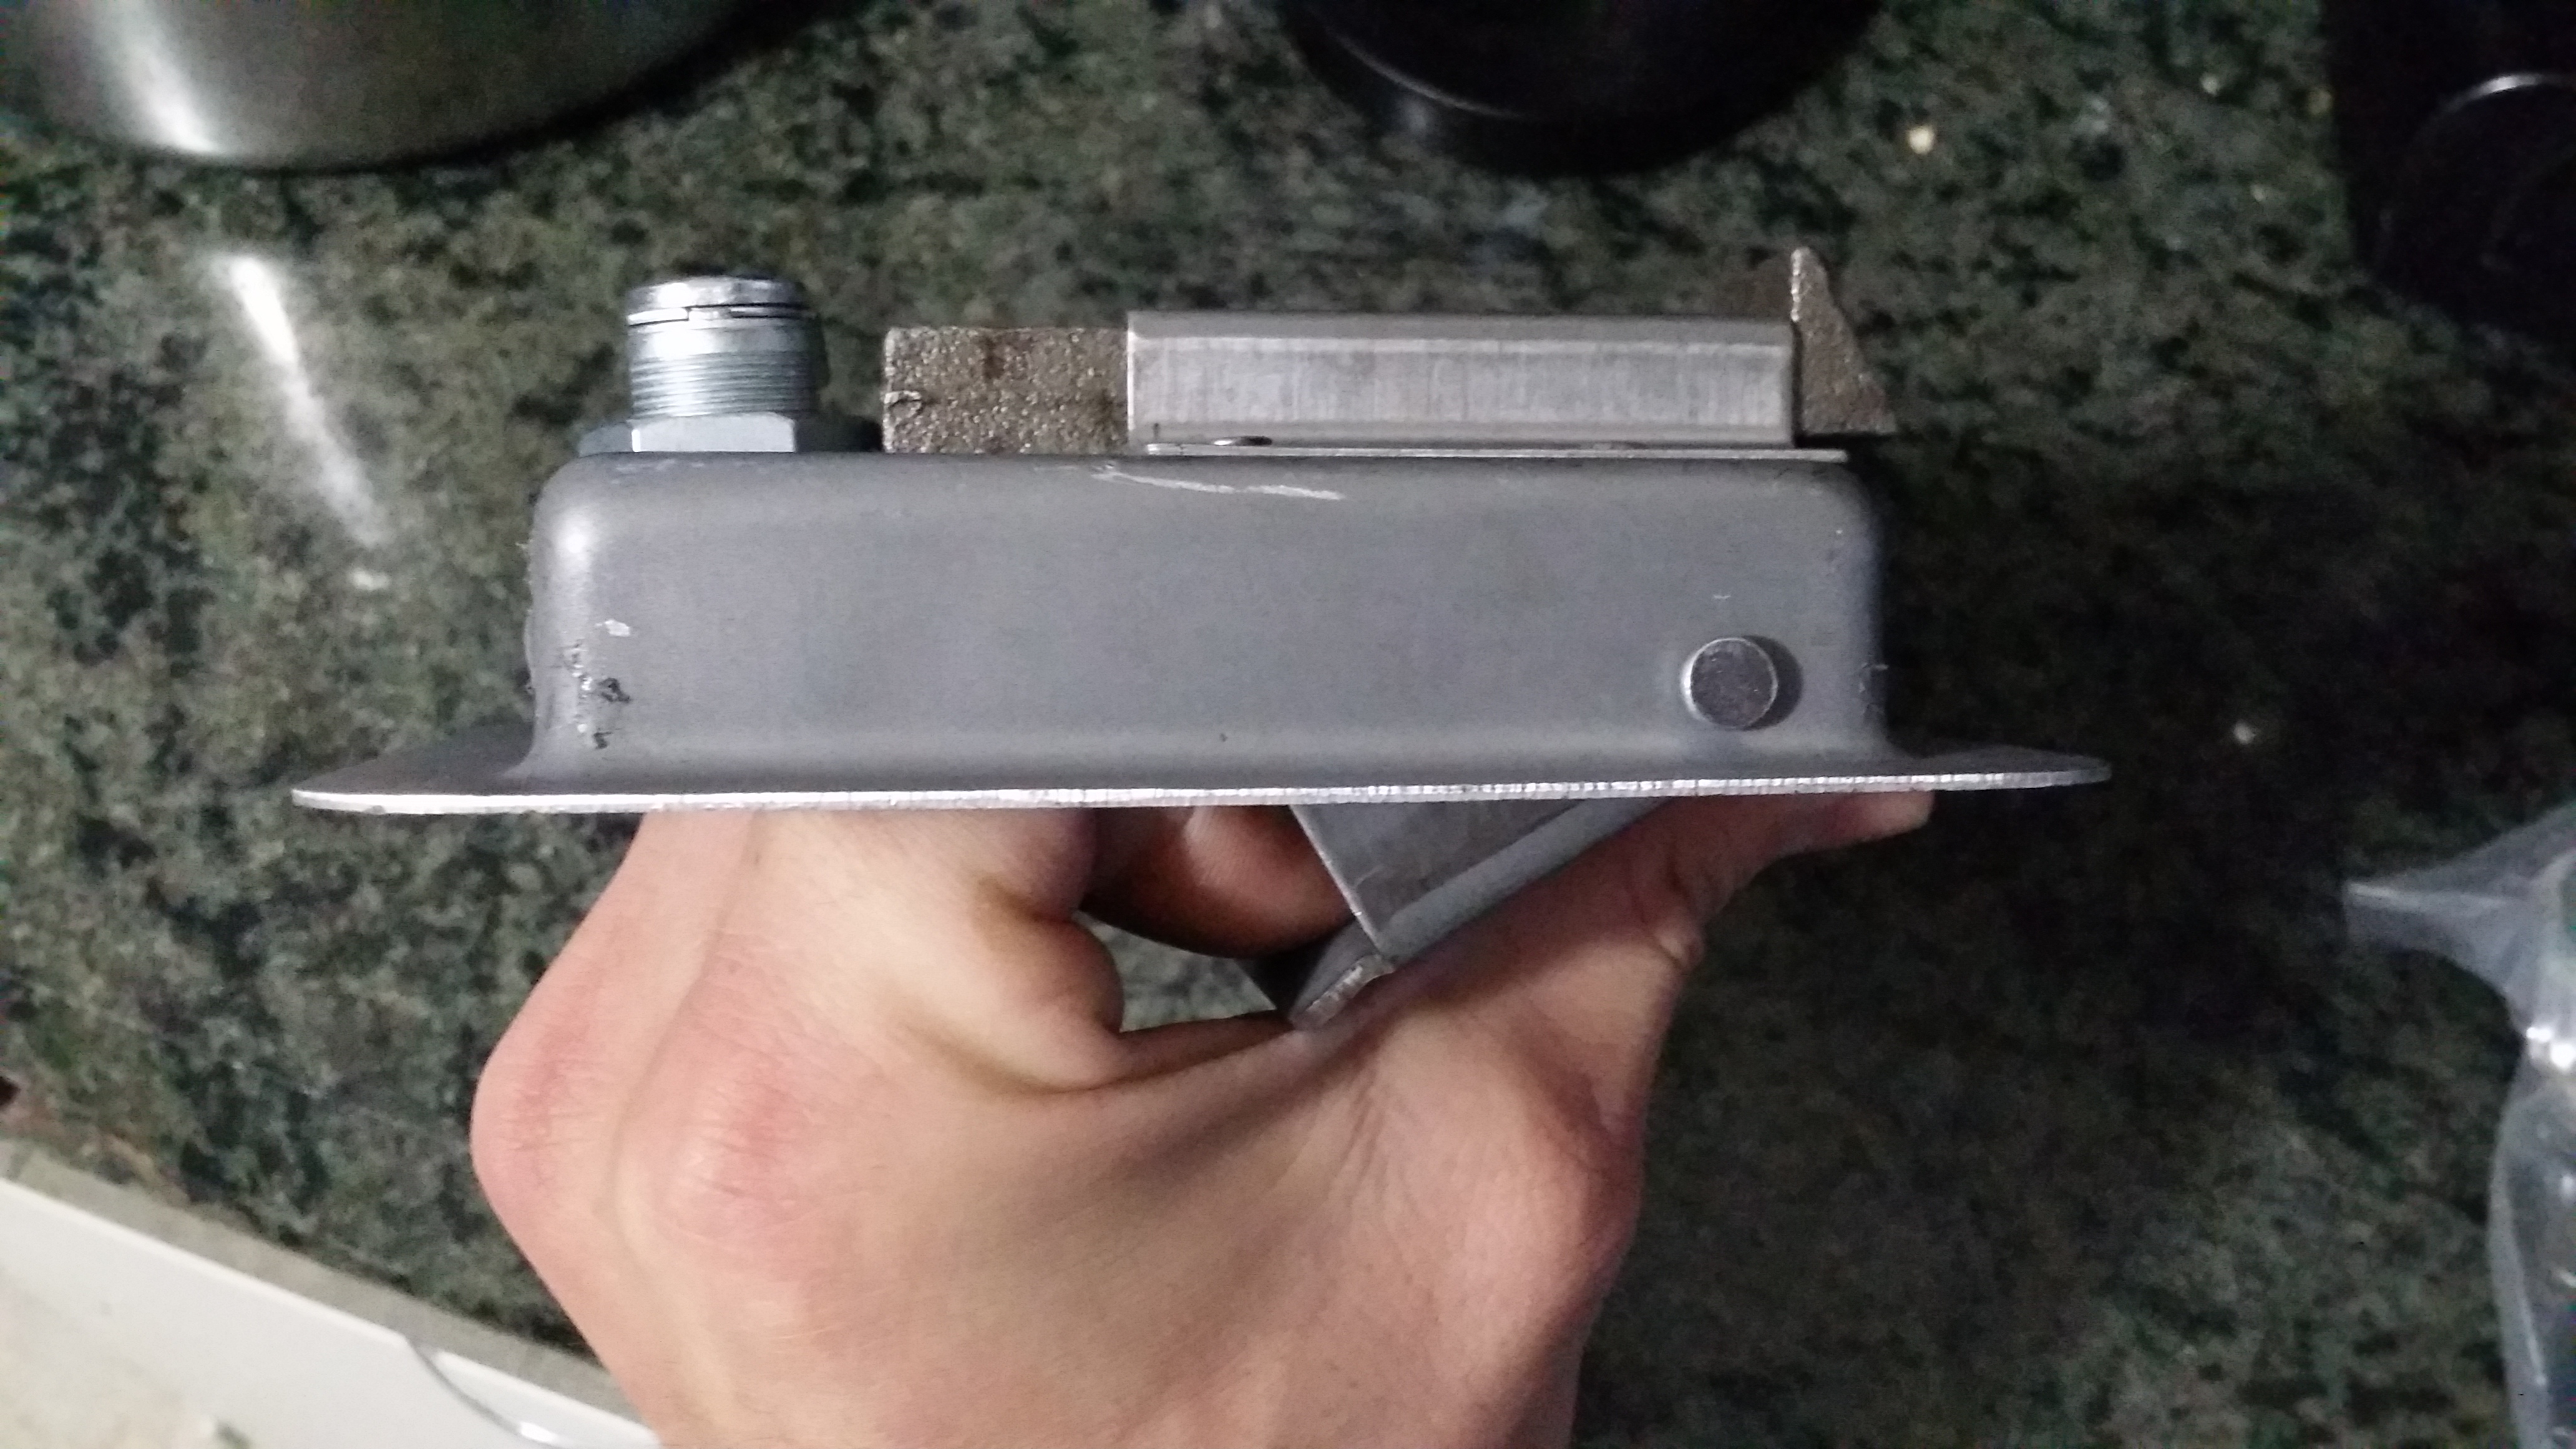
The overall dimensions are: 4-1/4" x 5-1/2" x 1-5/8" deep
Fits into 3-3/8" x 4-5/8" hole.
I bought 5 of these. 2 for the front compartment (1 for each side: the heated shower and tent heater side) and on the opposite side i will have the fuse boxes, batteries, solar stuff and inverter. Then 1 for the front door of the large compartment which will be the door for the Fridge freezer, And the 4th and 5th ones are going to be used for the large wide rear door and ill have one on each of the sides.
Each is $12.99 with 5.99 s&h. But if you buy more you can have each additional one added on the same package for $1 more on shipping rather then paying $6 each to ship each one individually. I saved a few bucks.
If you're curious on looking into buying something like this here is the website where you can find it.
http://www.ebay.com/itm/Trailer-Truc...VIwRNnW1DR-FkQ
And if you want a smaller version i would probably go with this one
http://www.ebay.com/itm/Trailer-Truc...GmDqEWqSHxhUrw
Both are really neat products.
My only complaint about the one i bought is the lock. They are pretty cheap locks. And i definitely plan on swapping the locks on all 5 of them out to make sure stuff is secure inside of the trailer.
I liked this particular one because it was a steel finish. it wasn't stainless. This means I have more freedom to mount this where i want it whether it is Weld/Rivot/Screw/ or Bolt on
All i gotta say is that they feel really beefy. I was afraid they would be cheap but i was wrong they are anything but cheap. I like the fact they were the paddle style latch too. the "T-Handle" type just seem like they would come out whenever they want and i didn't want them getting snagged on anything on the trailer so this seemed more practical for me.

The part that holds the door in the locked position when closed looks like it is cast steel.

Here is that paddle part in action


The overall dimensions are: 4-1/4" x 5-1/2" x 1-5/8" deep
Fits into 3-3/8" x 4-5/8" hole.
I bought 5 of these. 2 for the front compartment (1 for each side: the heated shower and tent heater side) and on the opposite side i will have the fuse boxes, batteries, solar stuff and inverter. Then 1 for the front door of the large compartment which will be the door for the Fridge freezer, And the 4th and 5th ones are going to be used for the large wide rear door and ill have one on each of the sides.
Each is $12.99 with 5.99 s&h. But if you buy more you can have each additional one added on the same package for $1 more on shipping rather then paying $6 each to ship each one individually. I saved a few bucks.
If you're curious on looking into buying something like this here is the website where you can find it.
http://www.ebay.com/itm/Trailer-Truc...VIwRNnW1DR-FkQ
And if you want a smaller version i would probably go with this one
http://www.ebay.com/itm/Trailer-Truc...GmDqEWqSHxhUrw
Both are really neat products.
My only complaint about the one i bought is the lock. They are pretty cheap locks. And i definitely plan on swapping the locks on all 5 of them out to make sure stuff is secure inside of the trailer.
Last edited by Redeth005; Jan 14, 2016 at 06:55 PM.
Jan 14, 2016 | 07:07 PM
#63
Thread Starter
Registered User
Joined: Apr 2012
Posts: 2,817
Likes: 2
From: Los Angeles CA
I am hoping to get to work on the front compartment this weekend. Hopefully I'll be able to finish it completely by Sunday and have the larger compartment floor started as well. The larger compartment will take a bit longer since I want to build a slide out type of drawer for the fridge/freezer cooler using old skateboard bearings. To do that I'll have to start with the floor part then weld on the walls and roof of it together.
Jan 19, 2016 | 05:09 PM
#64
Thread Starter
Registered User
Joined: Apr 2012
Posts: 2,817
Likes: 2
From: Los Angeles CA
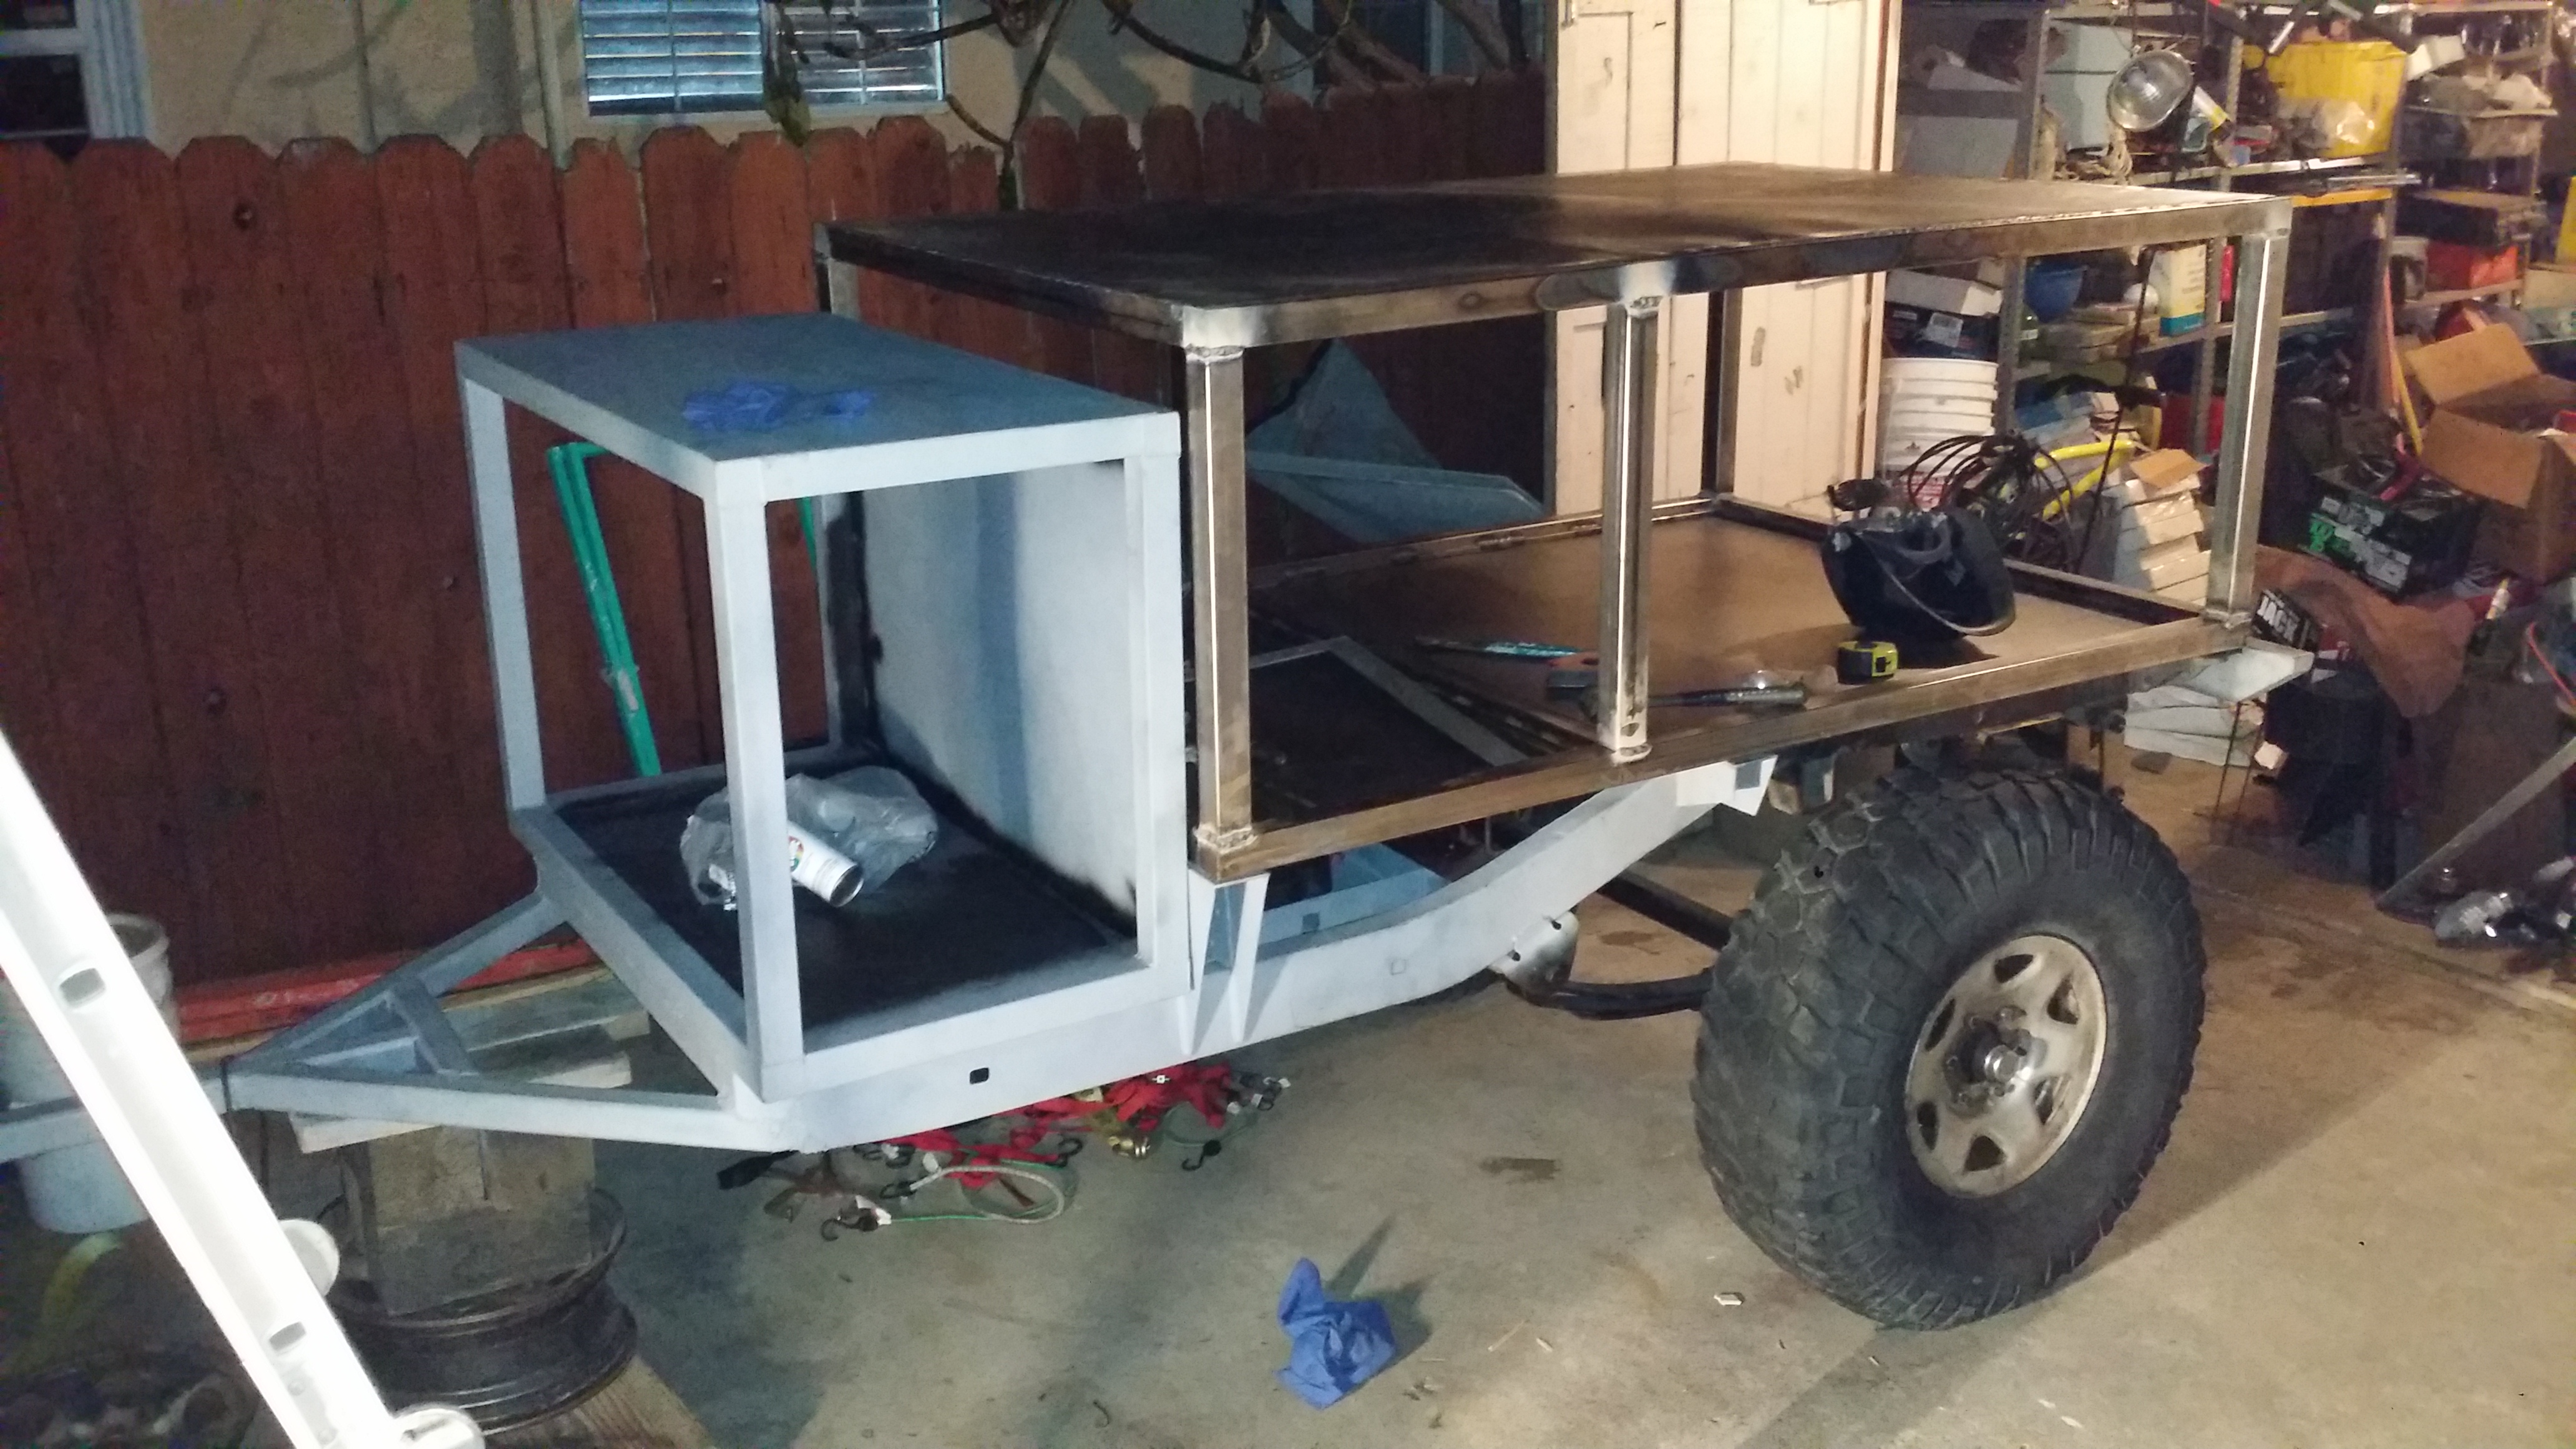
Picked up some tires for the trailer this past friday. 35/12.5/r15 BF Goodrich KM2's. Bought off of "Infamous_Ride" on Instagram.
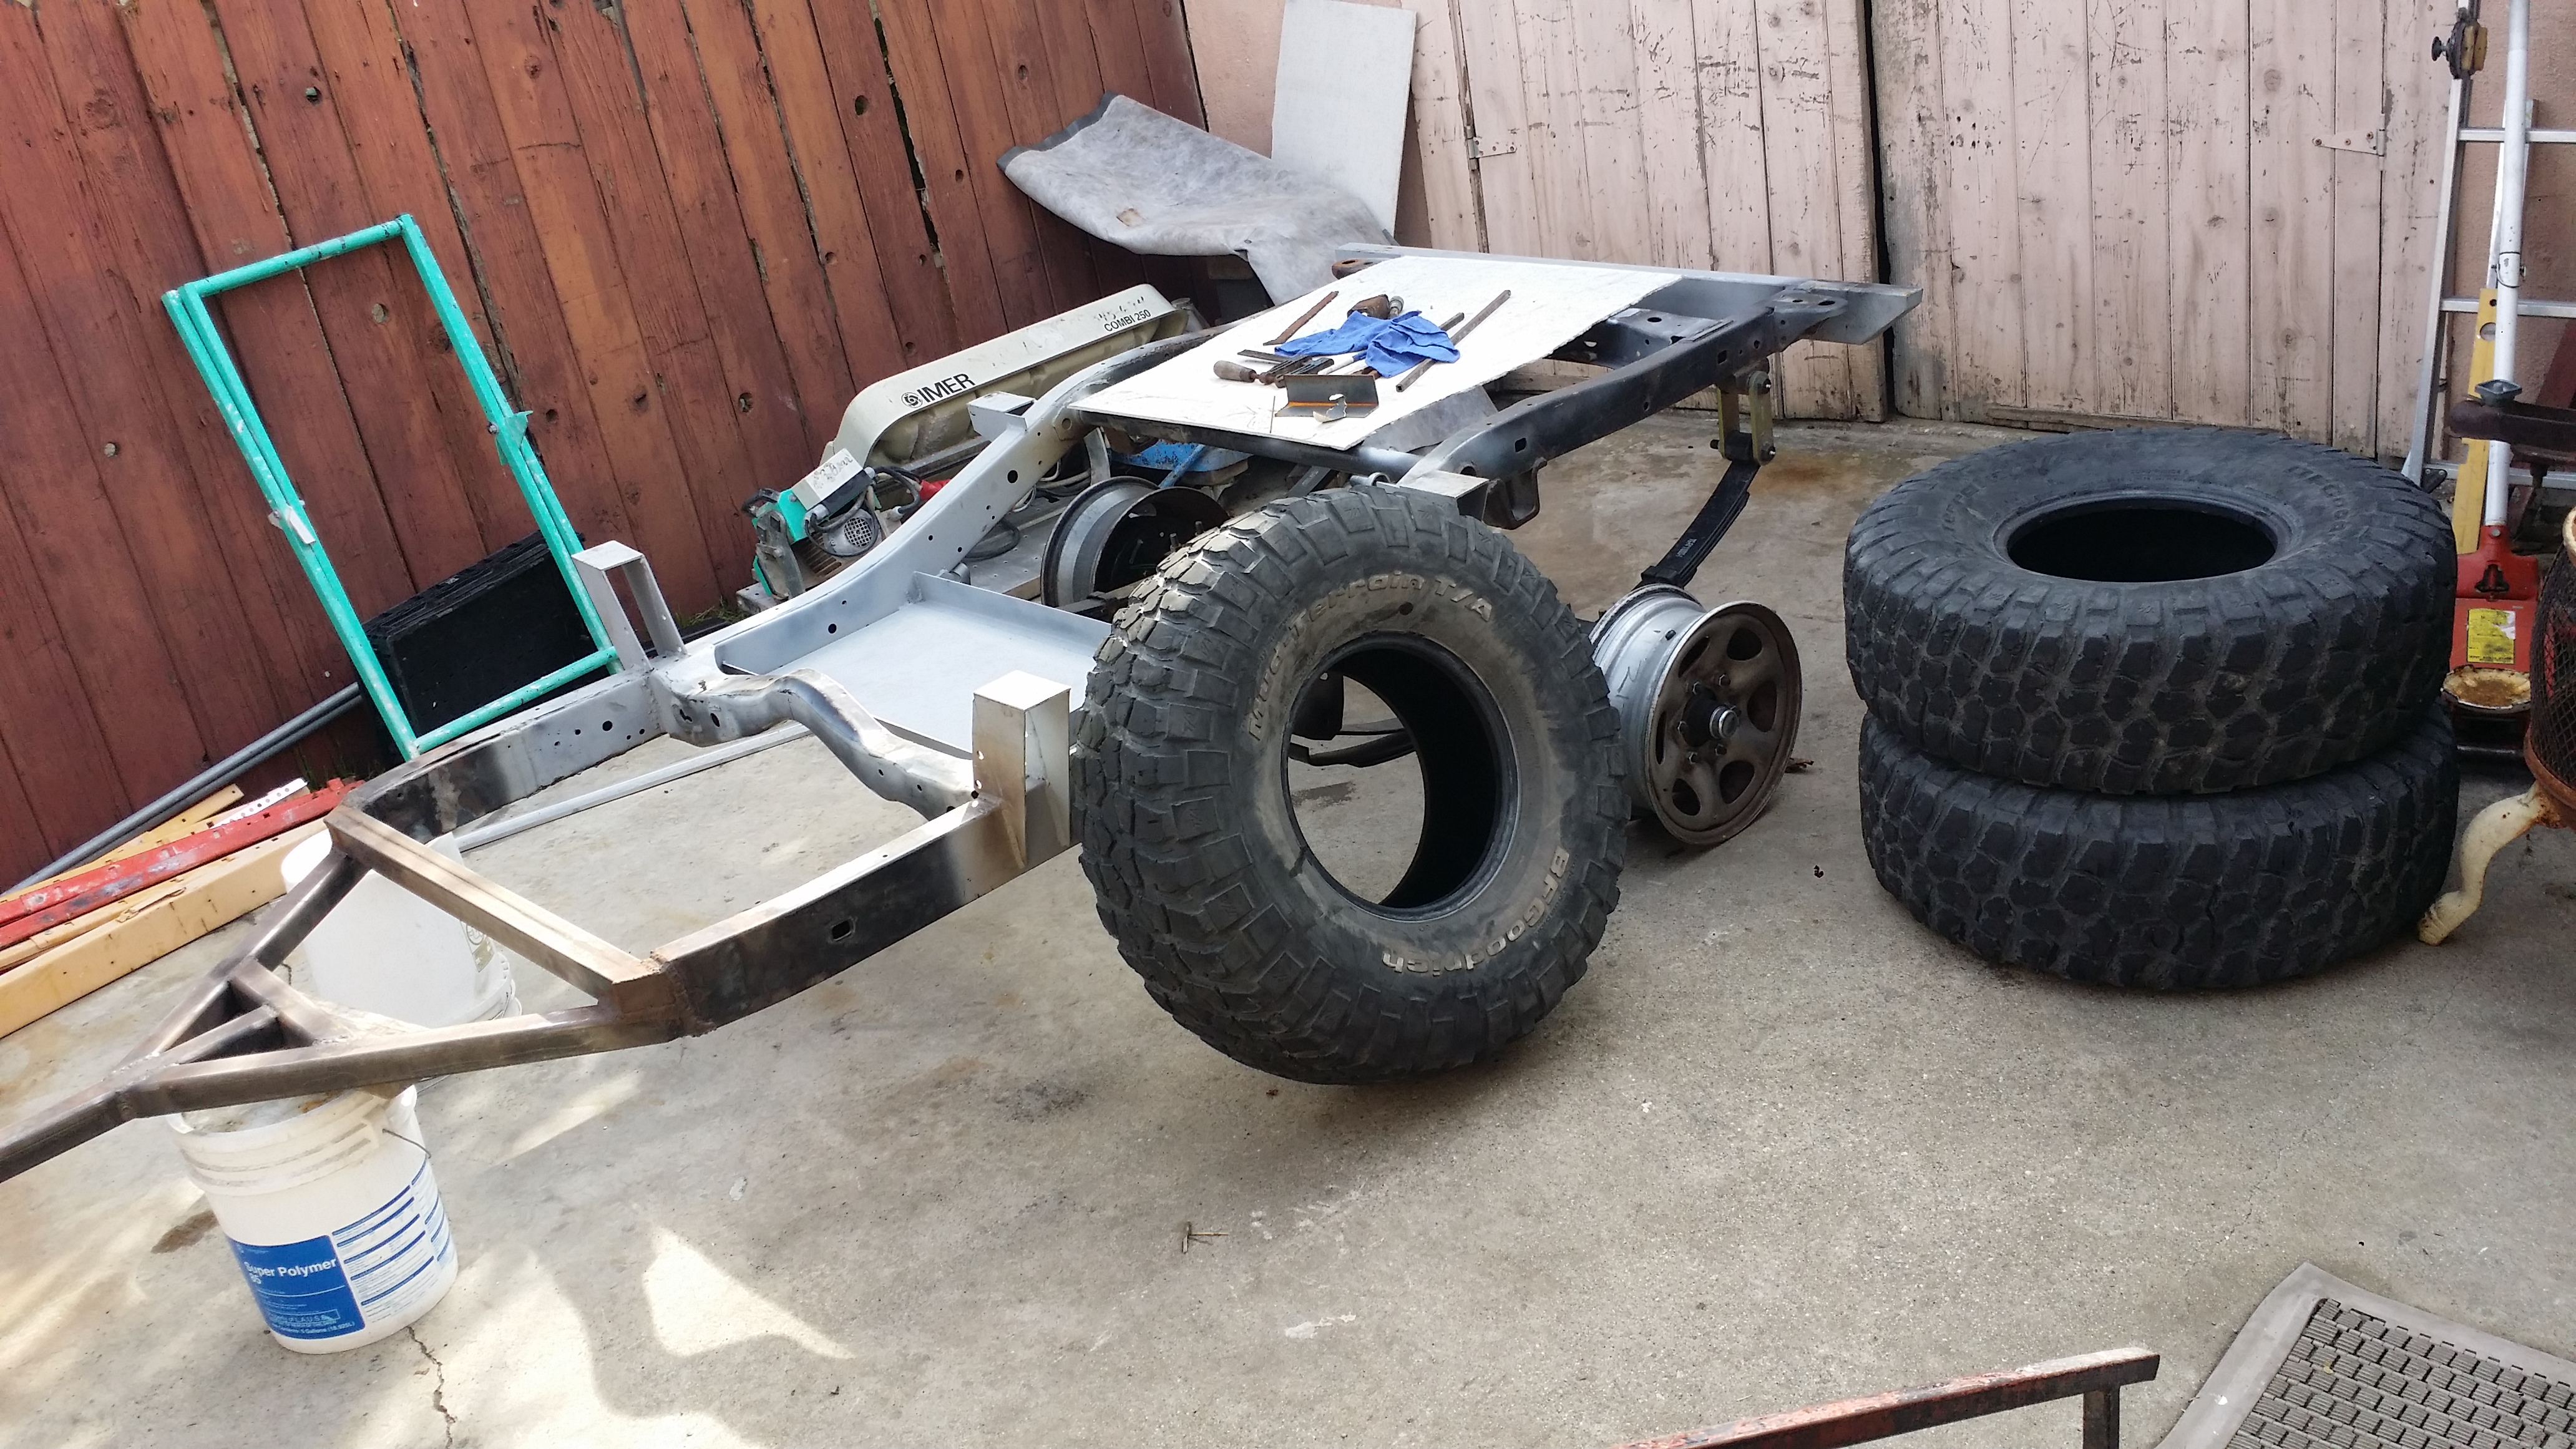
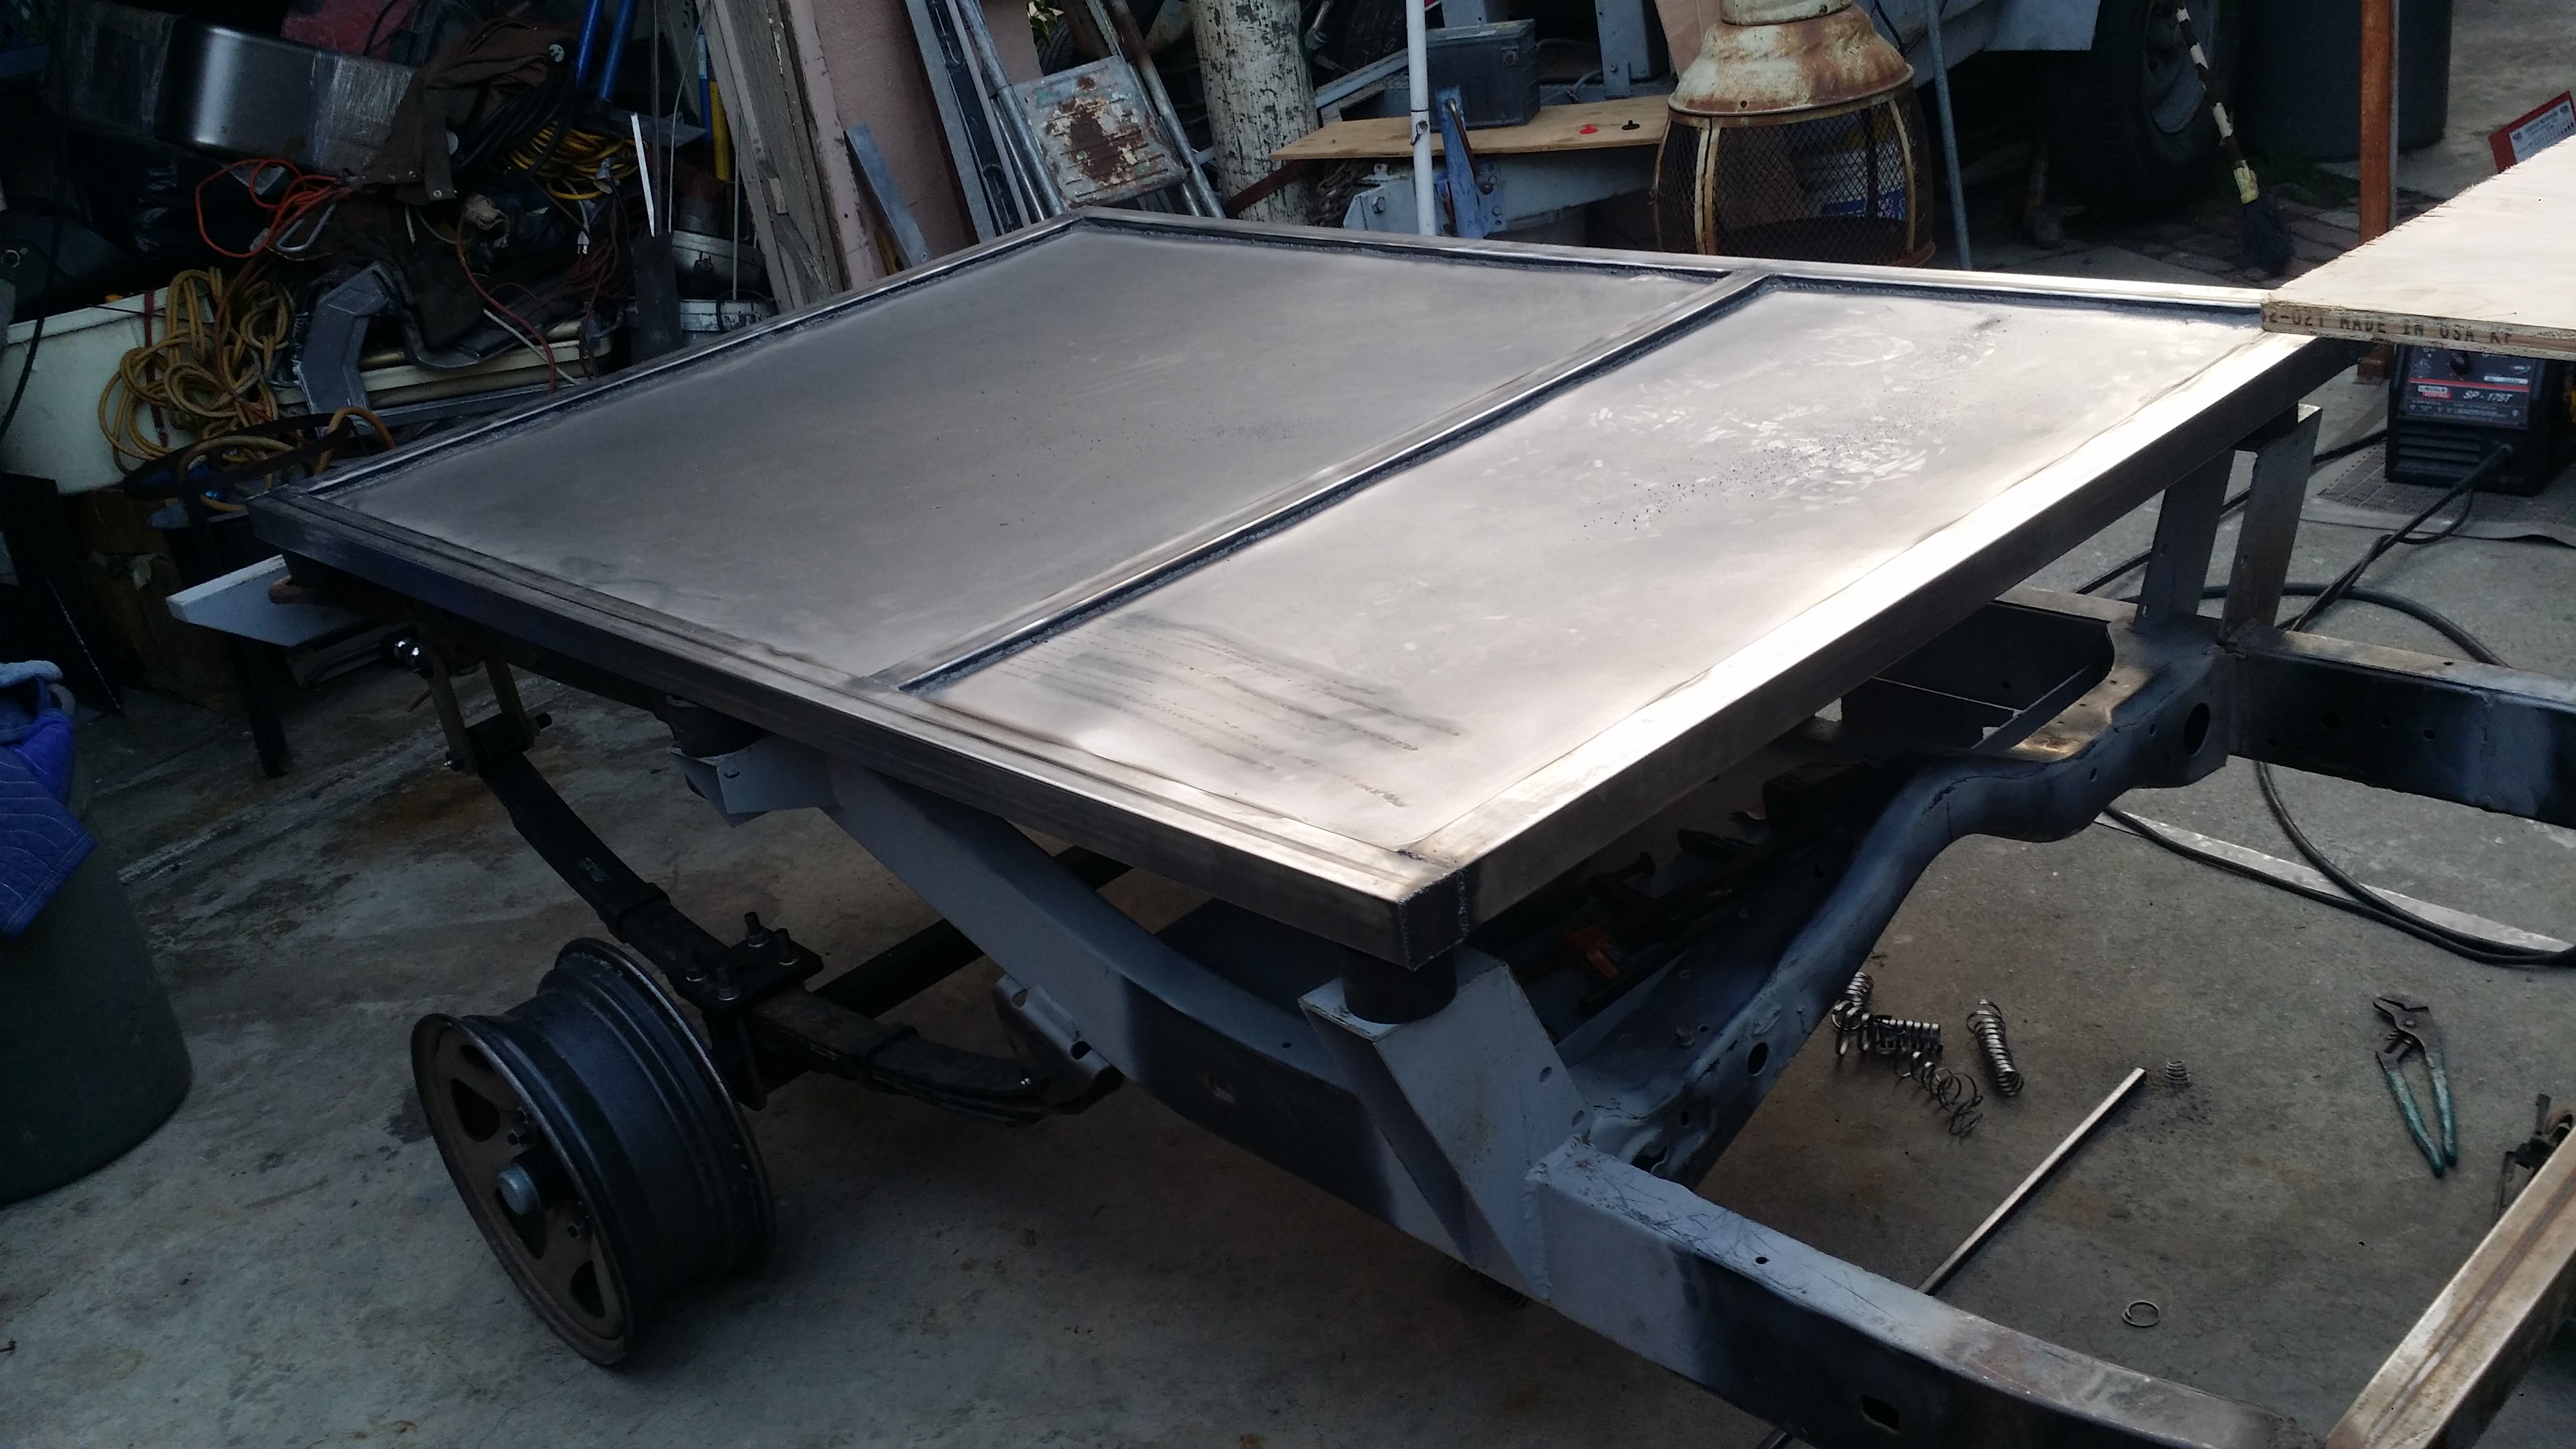
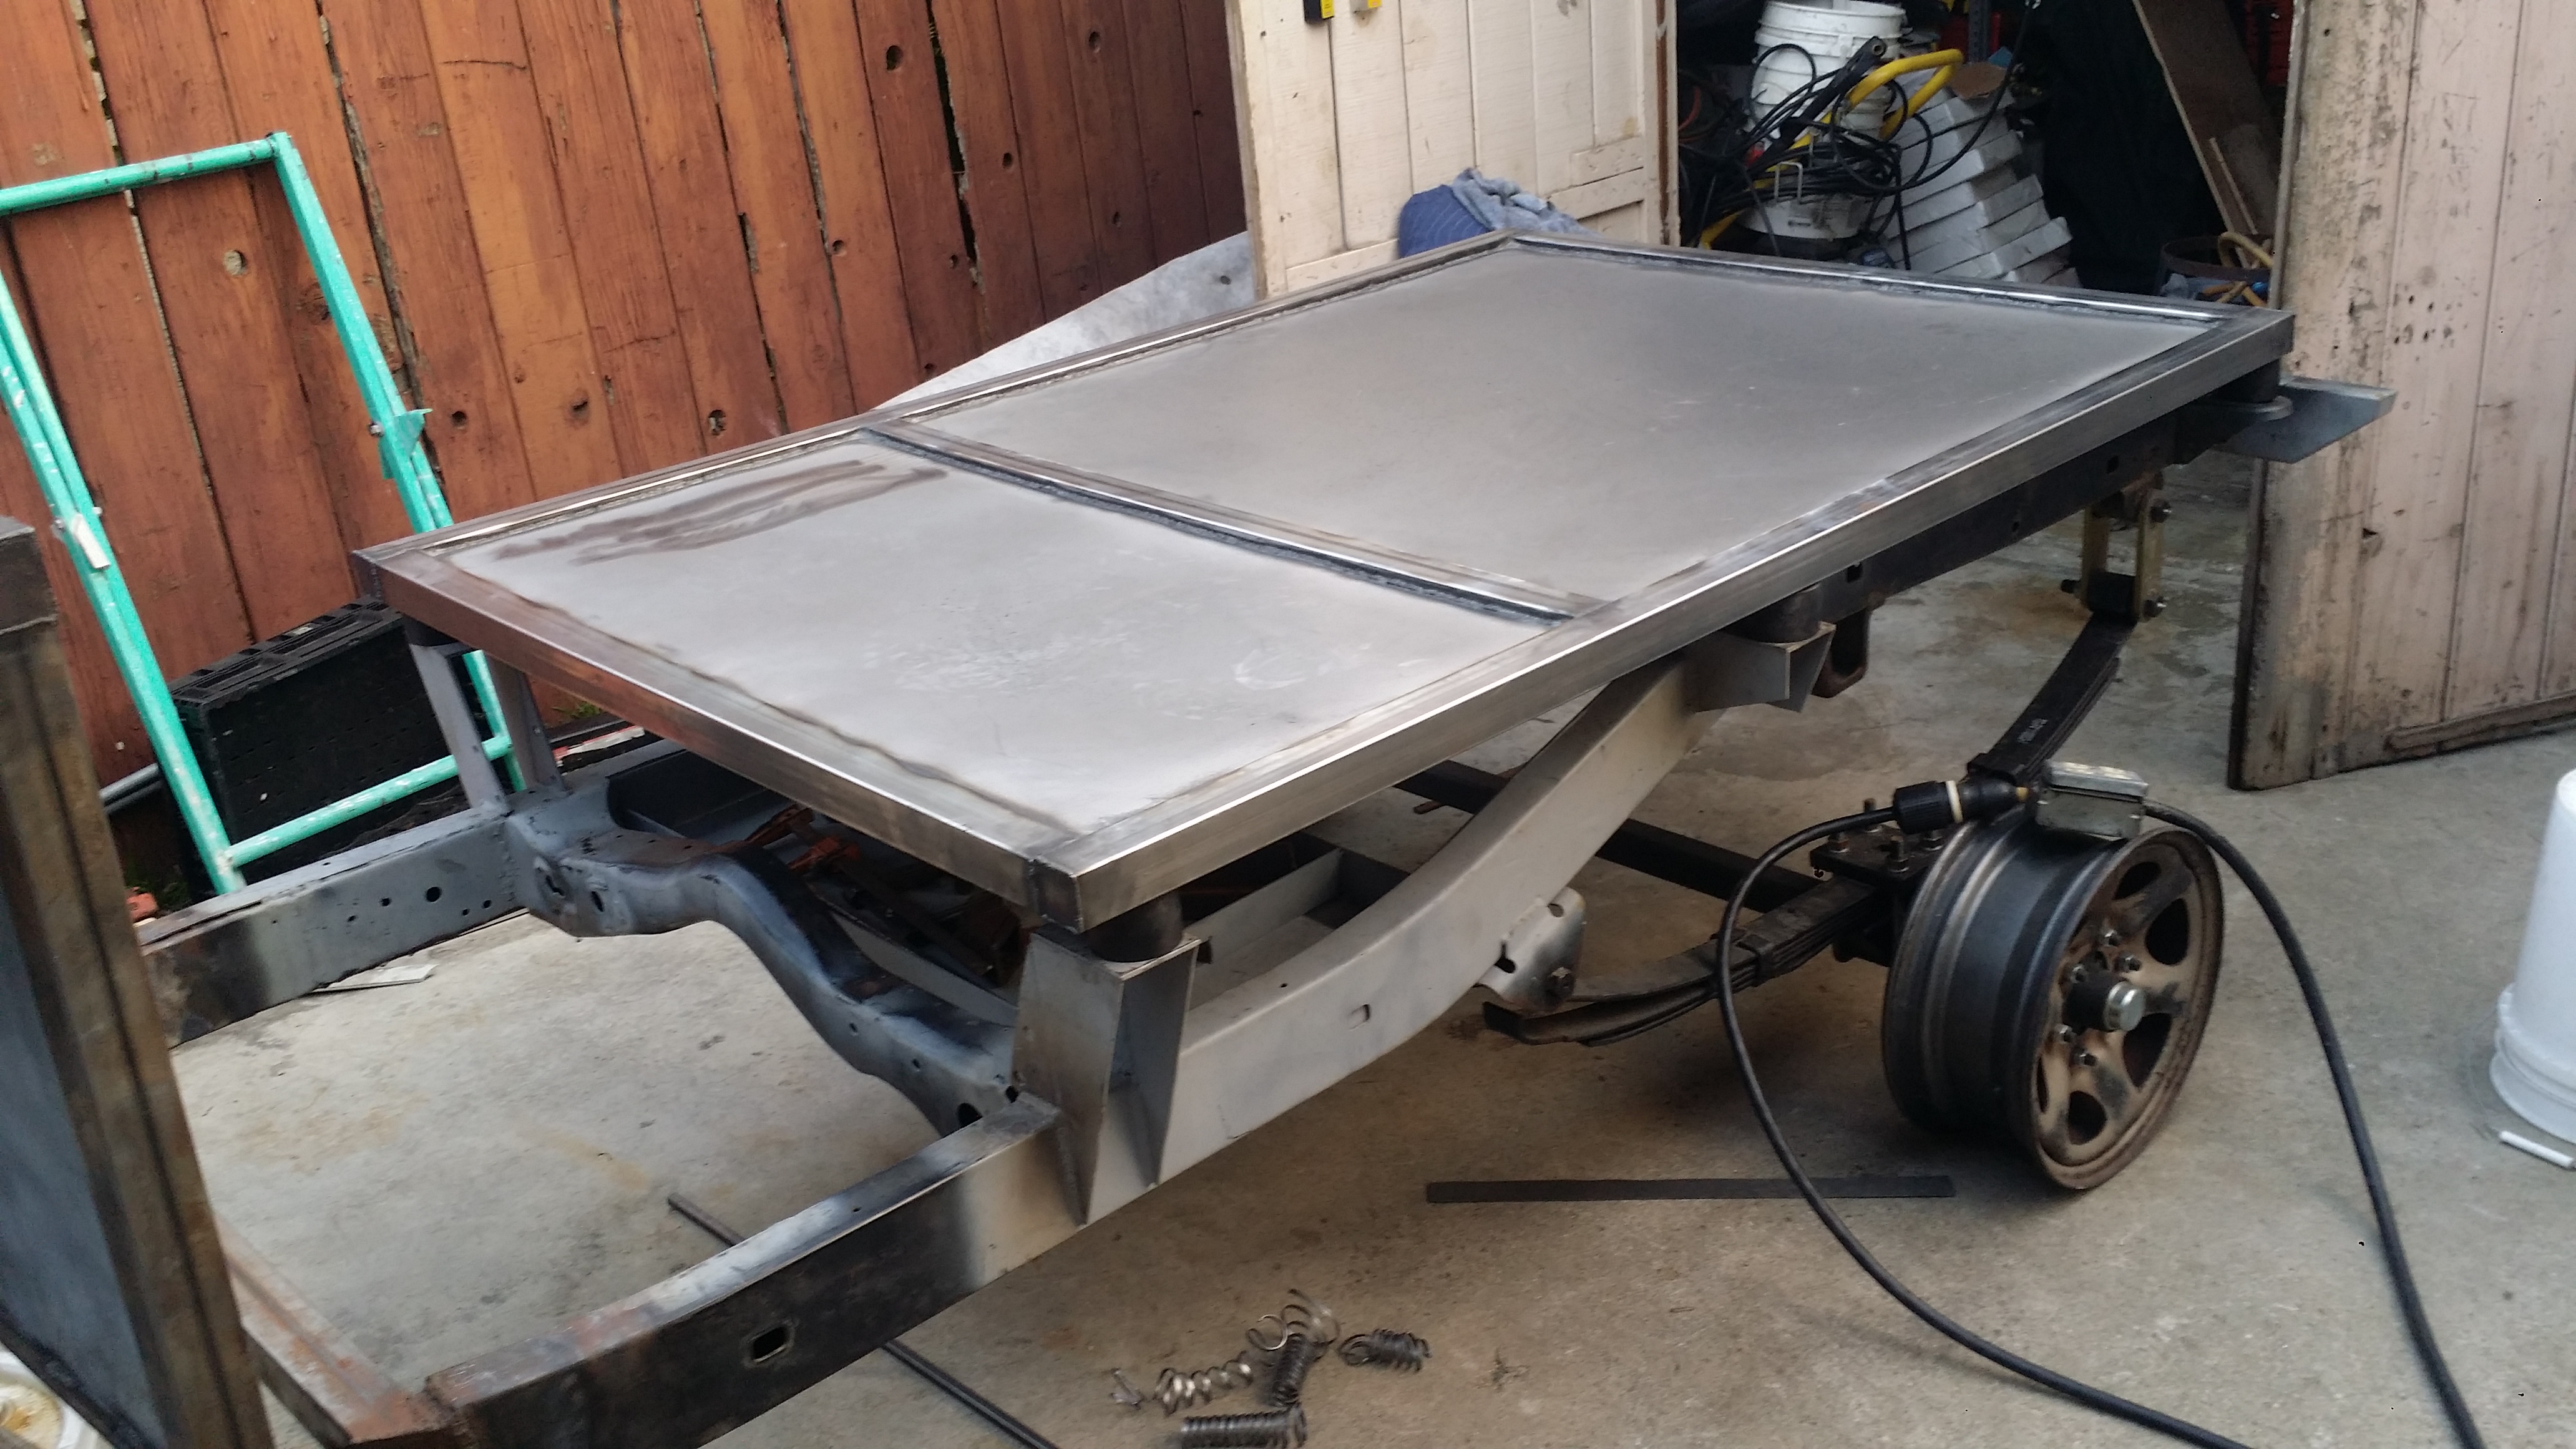
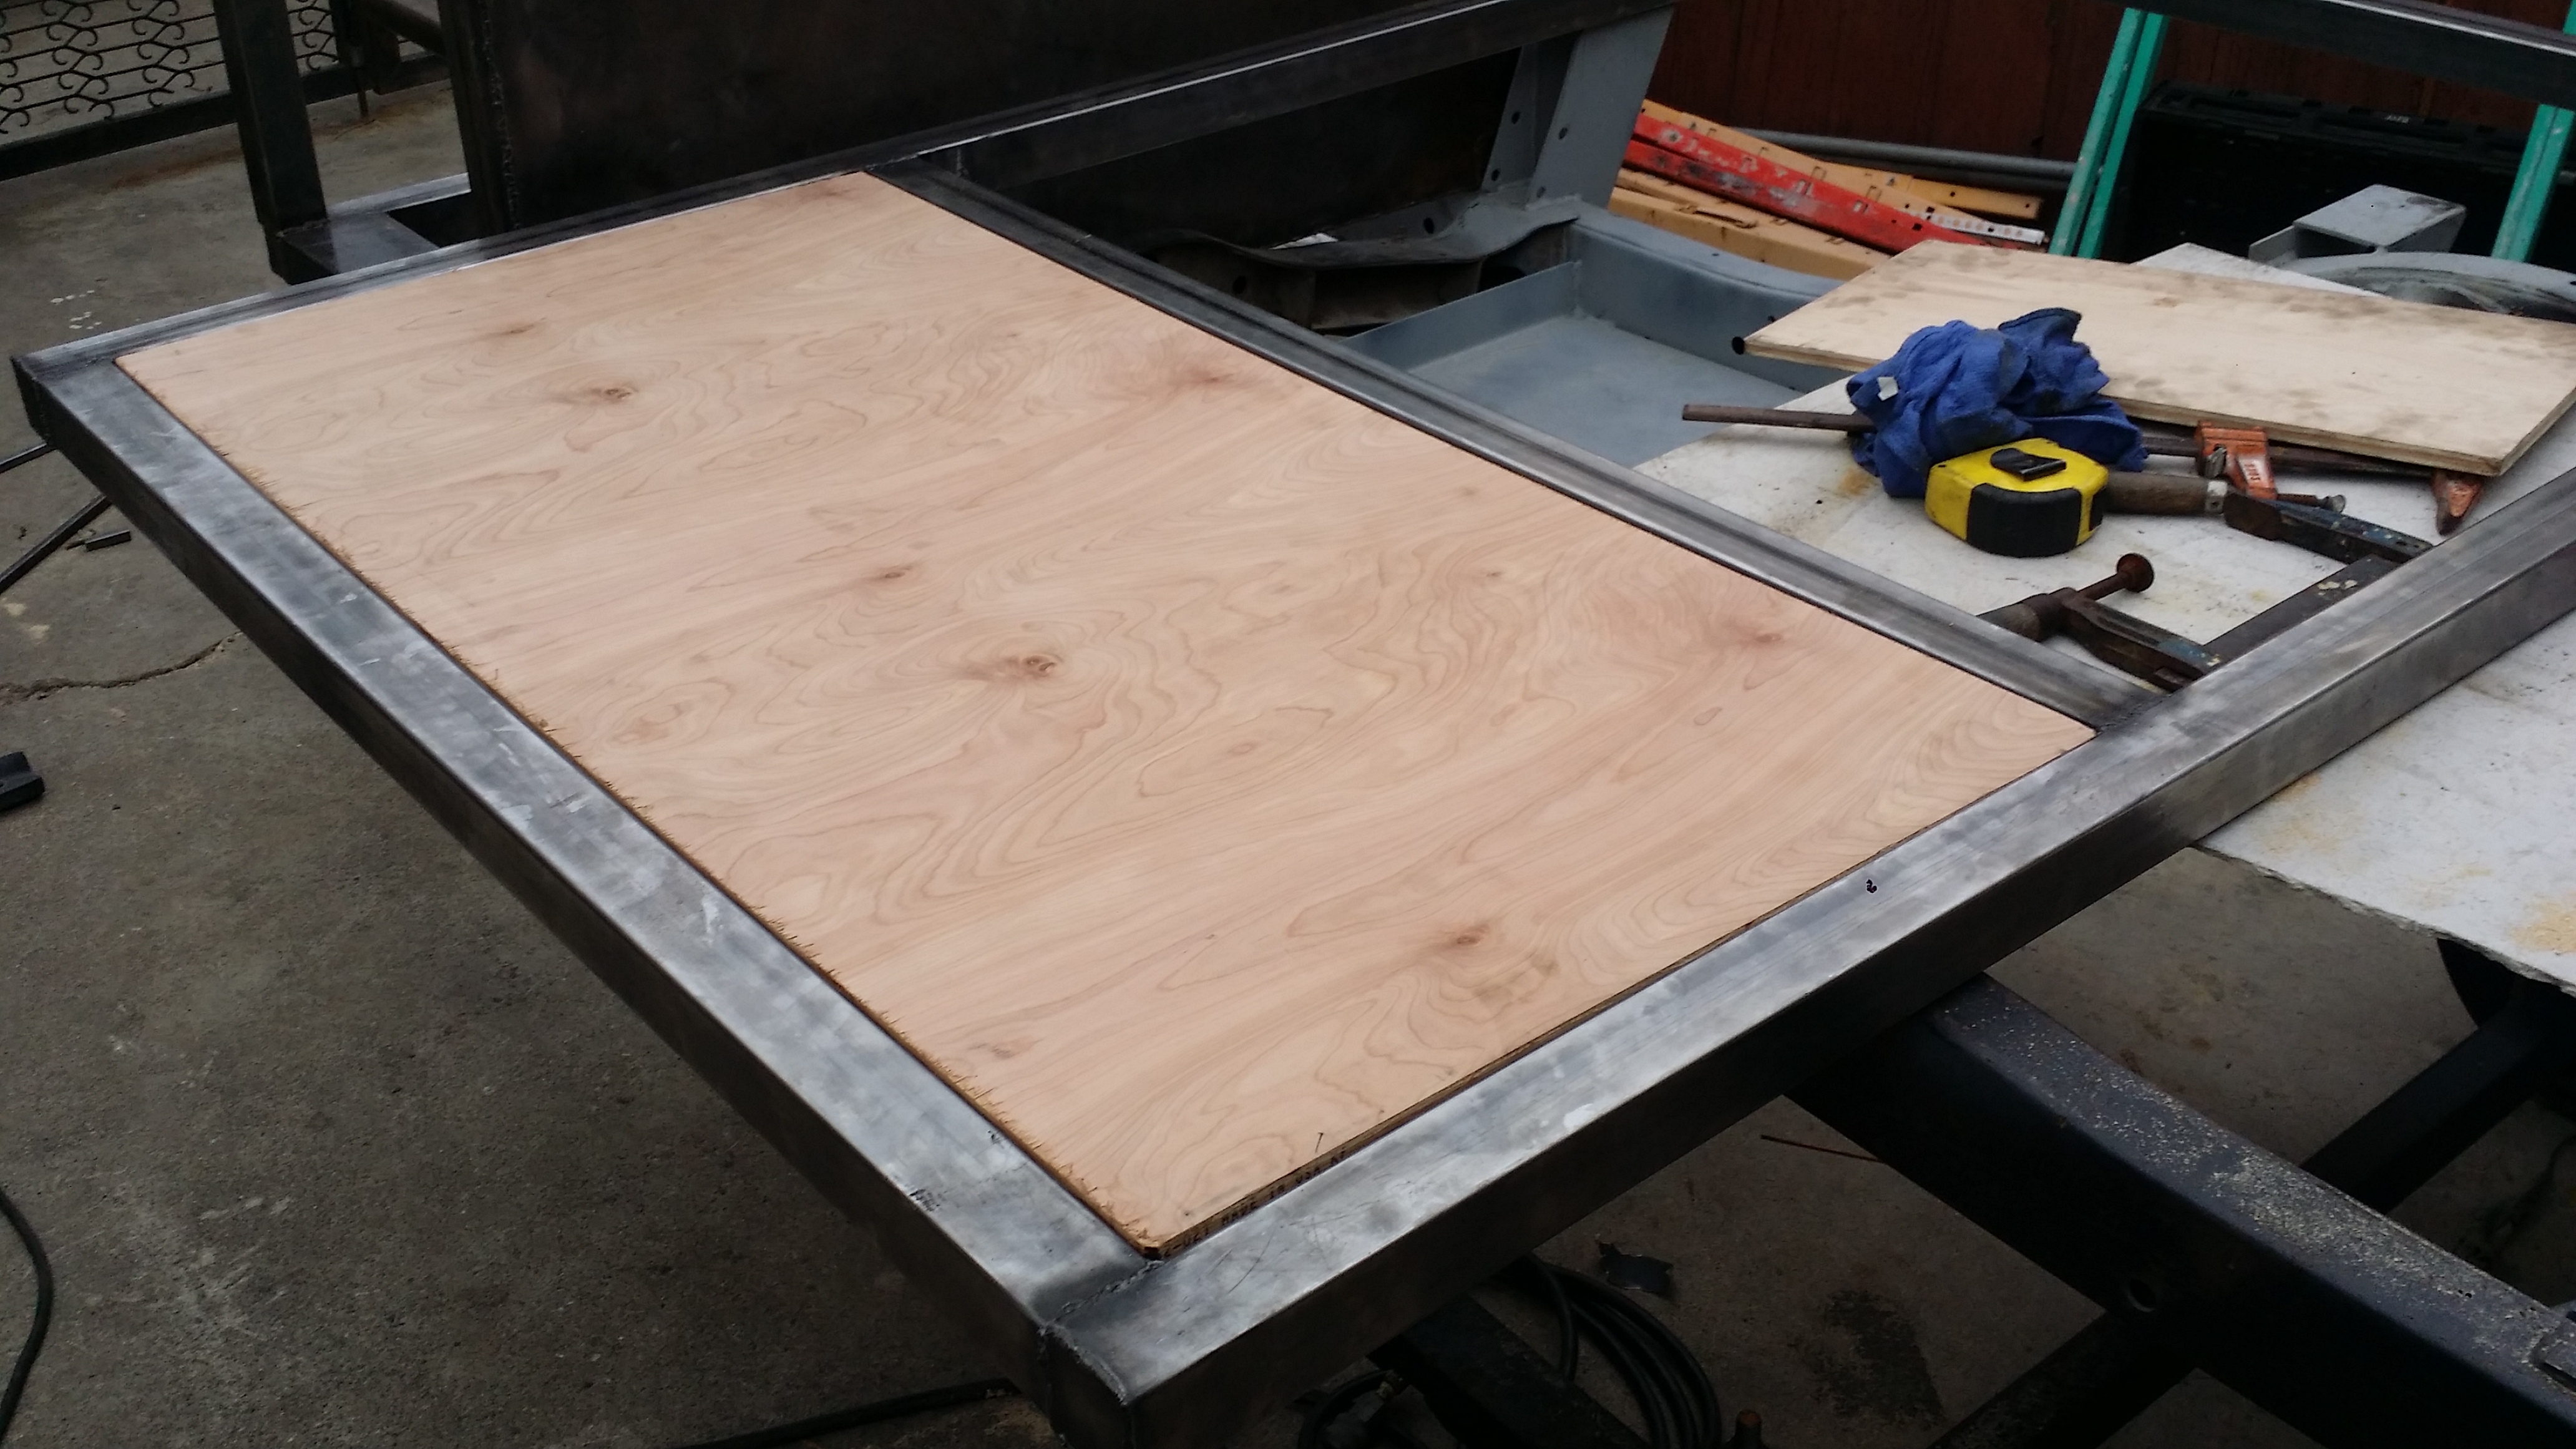
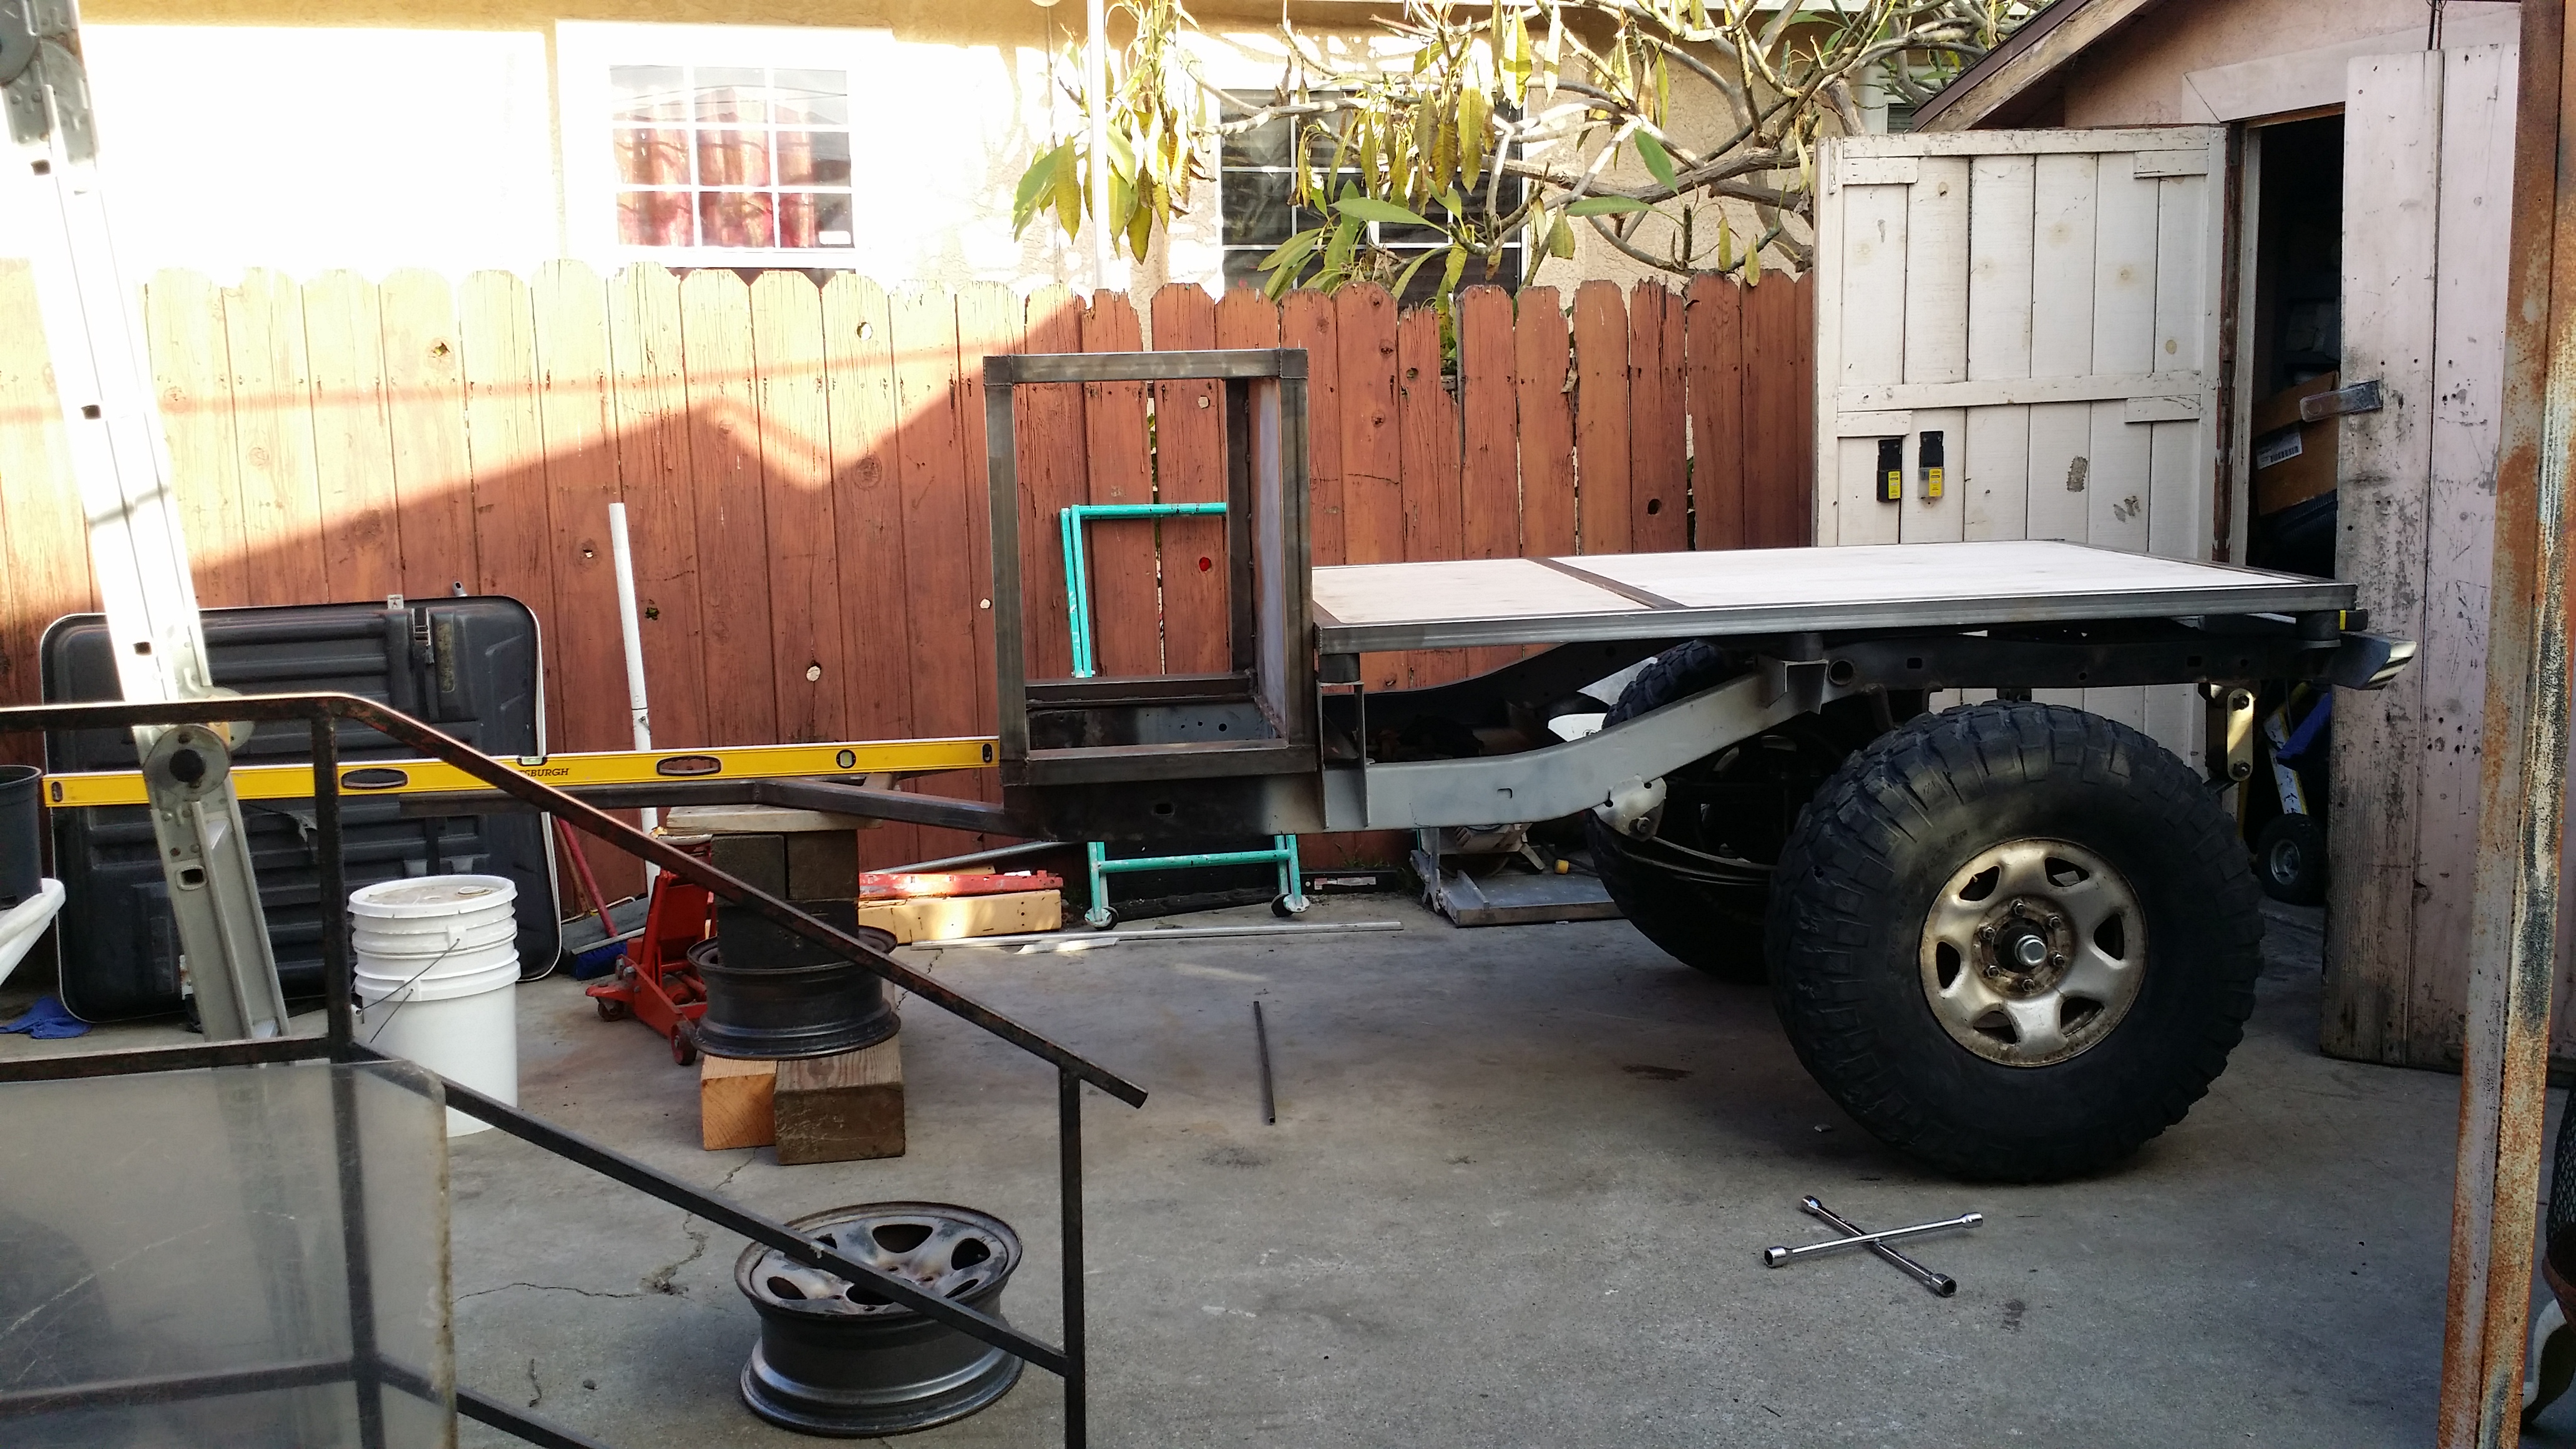
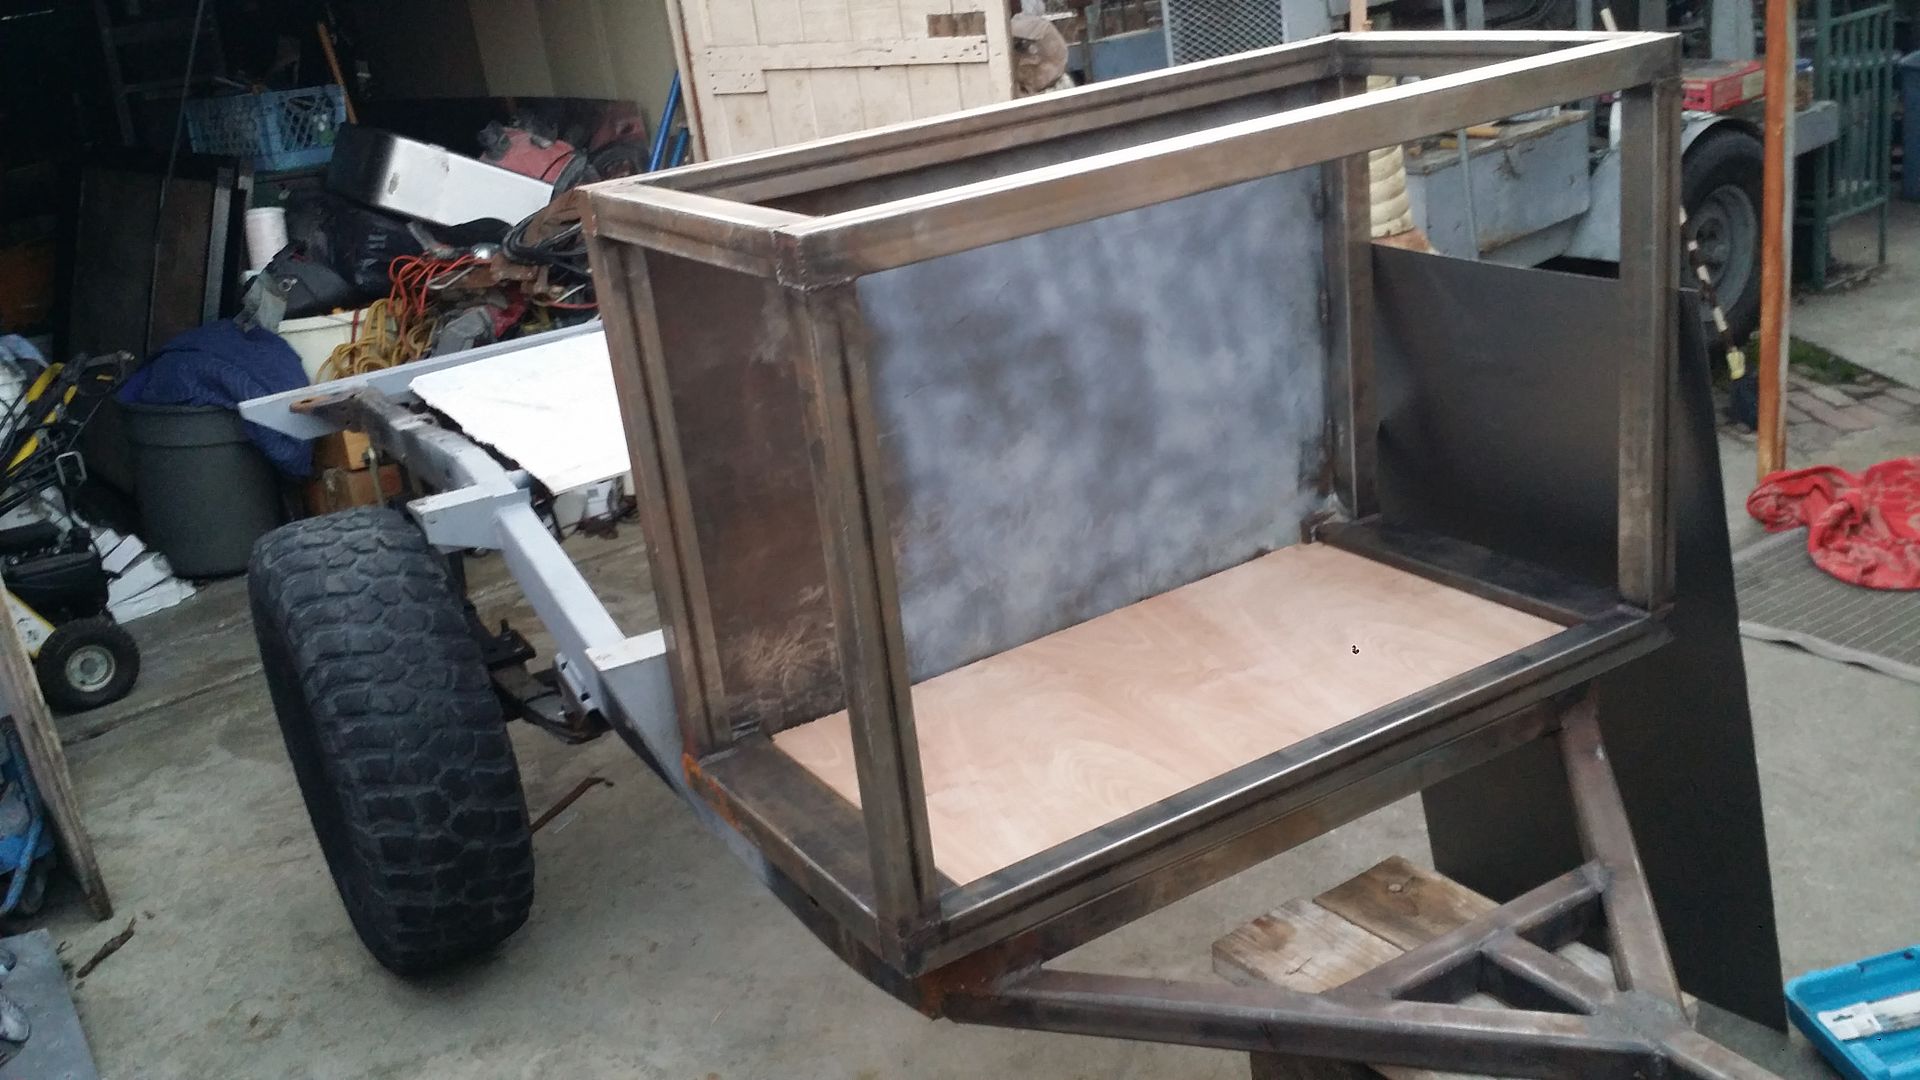
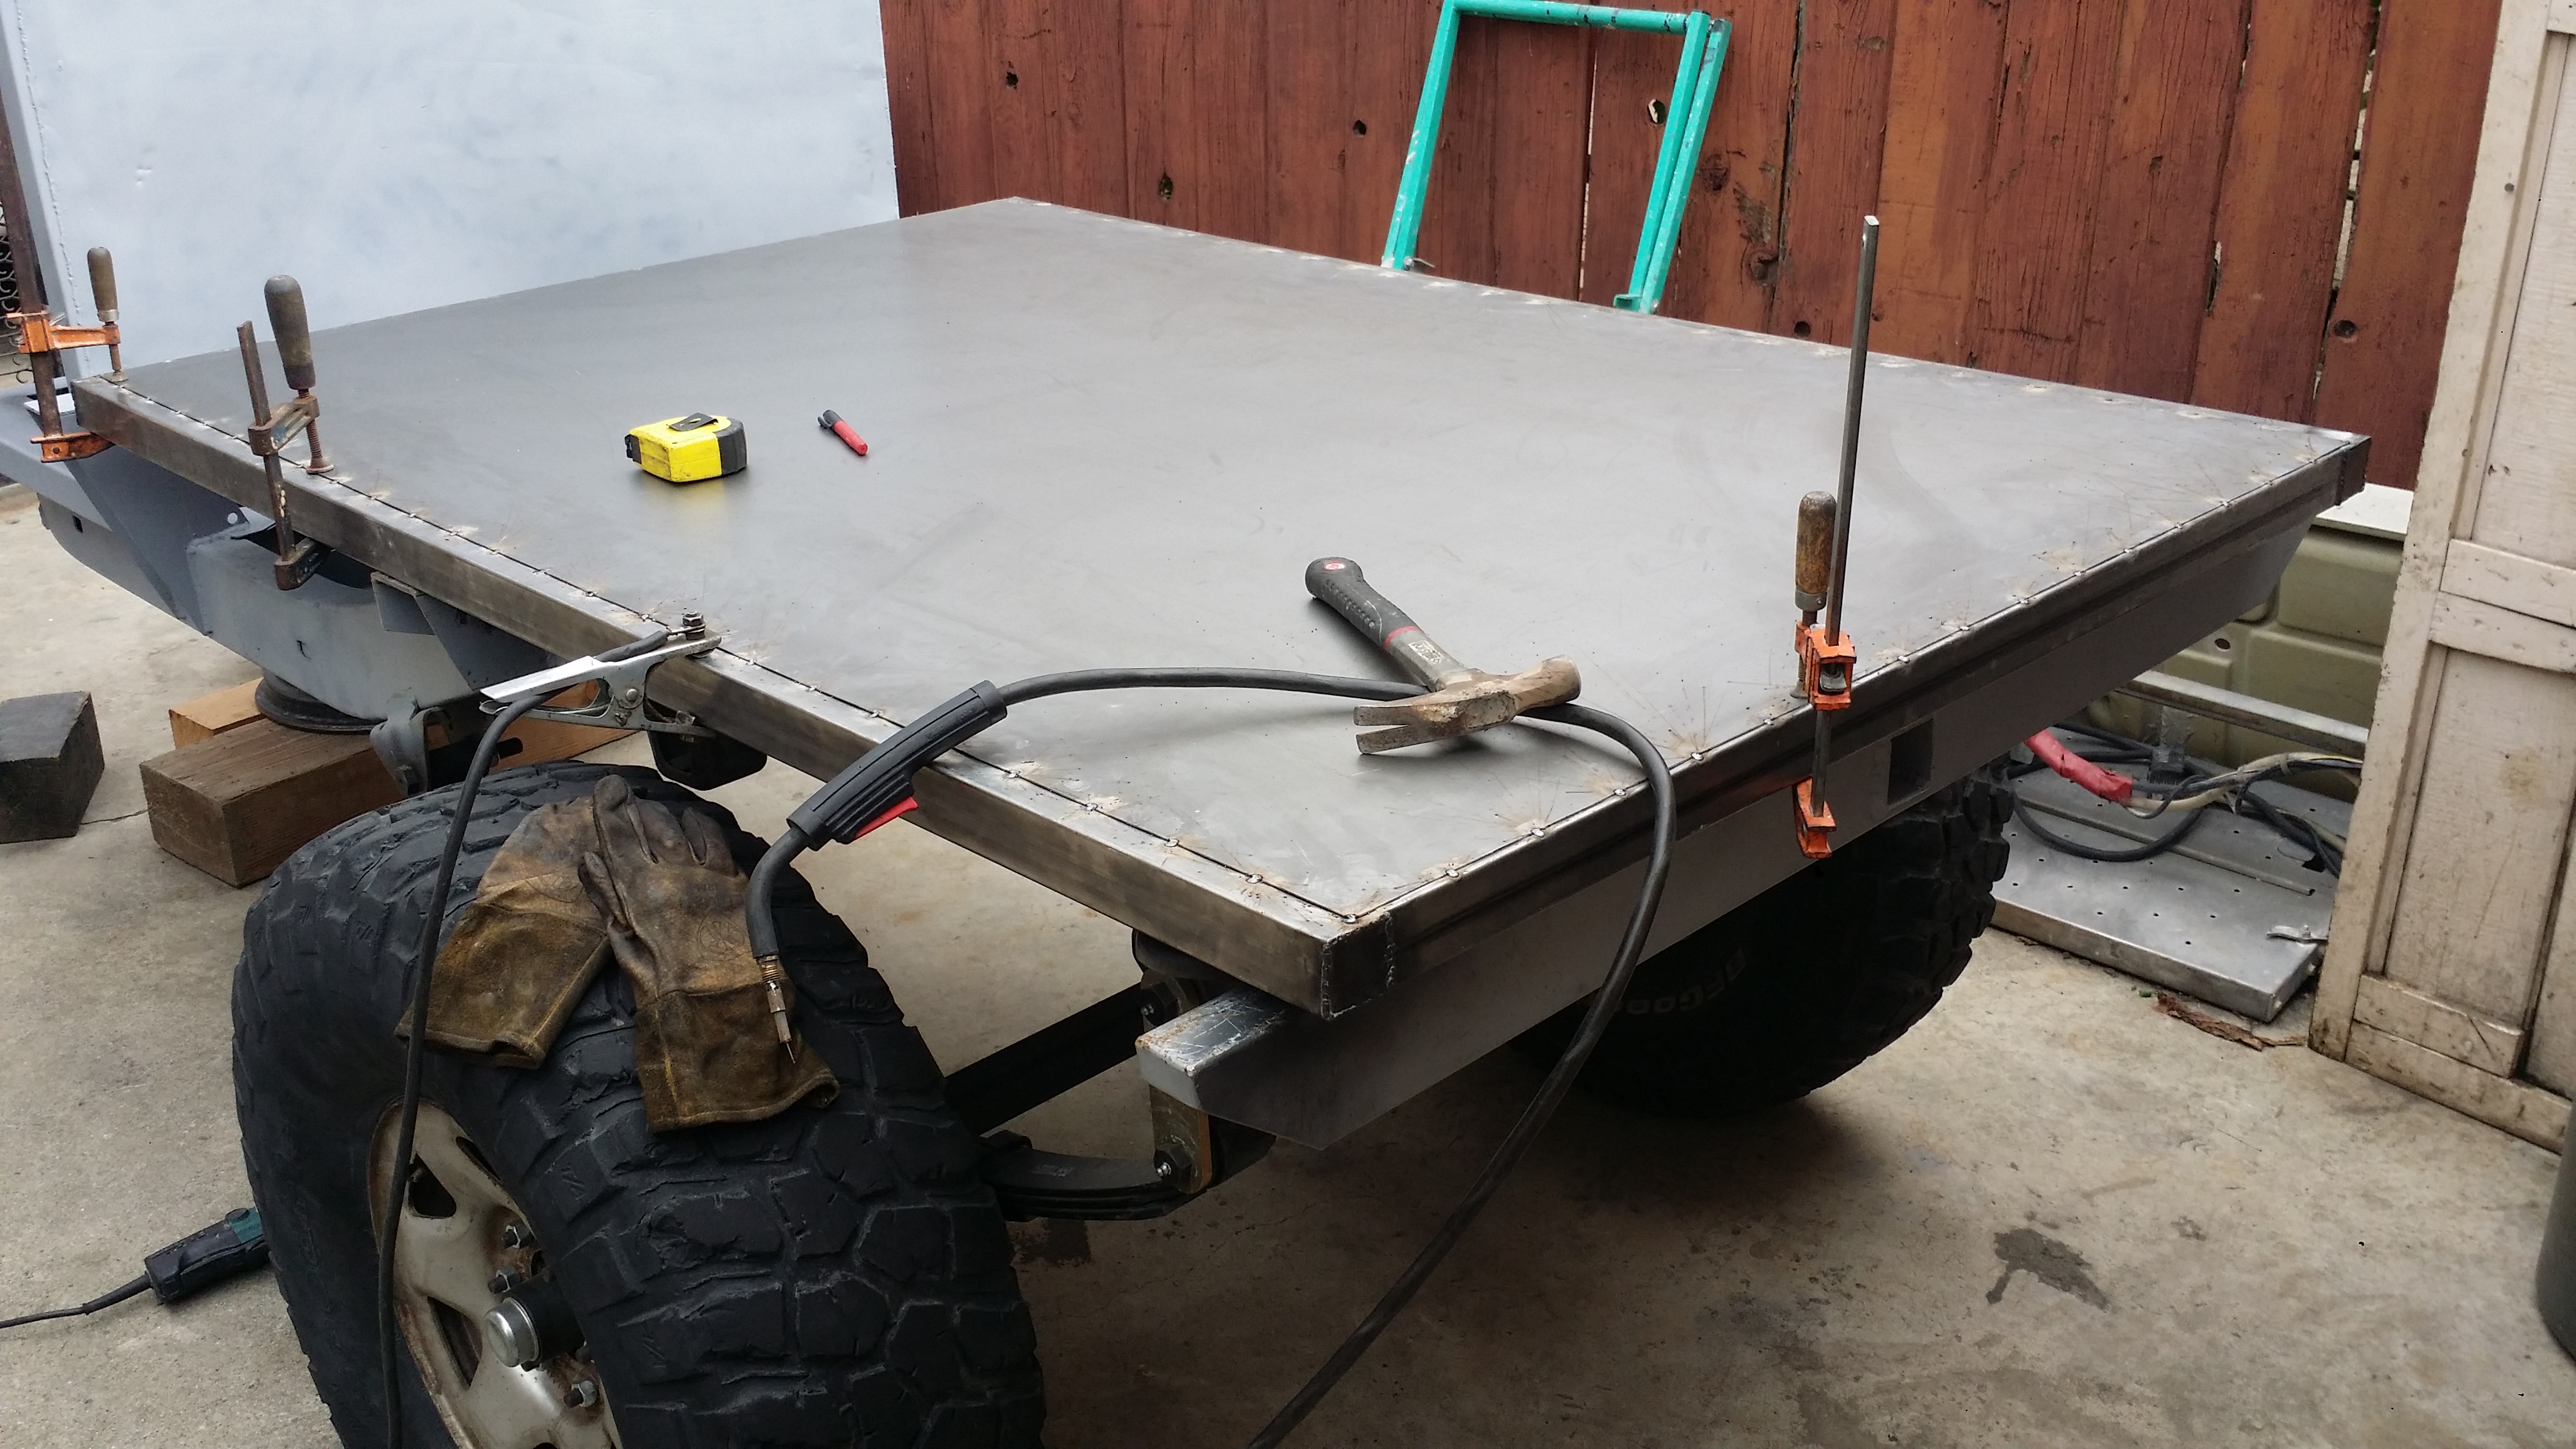
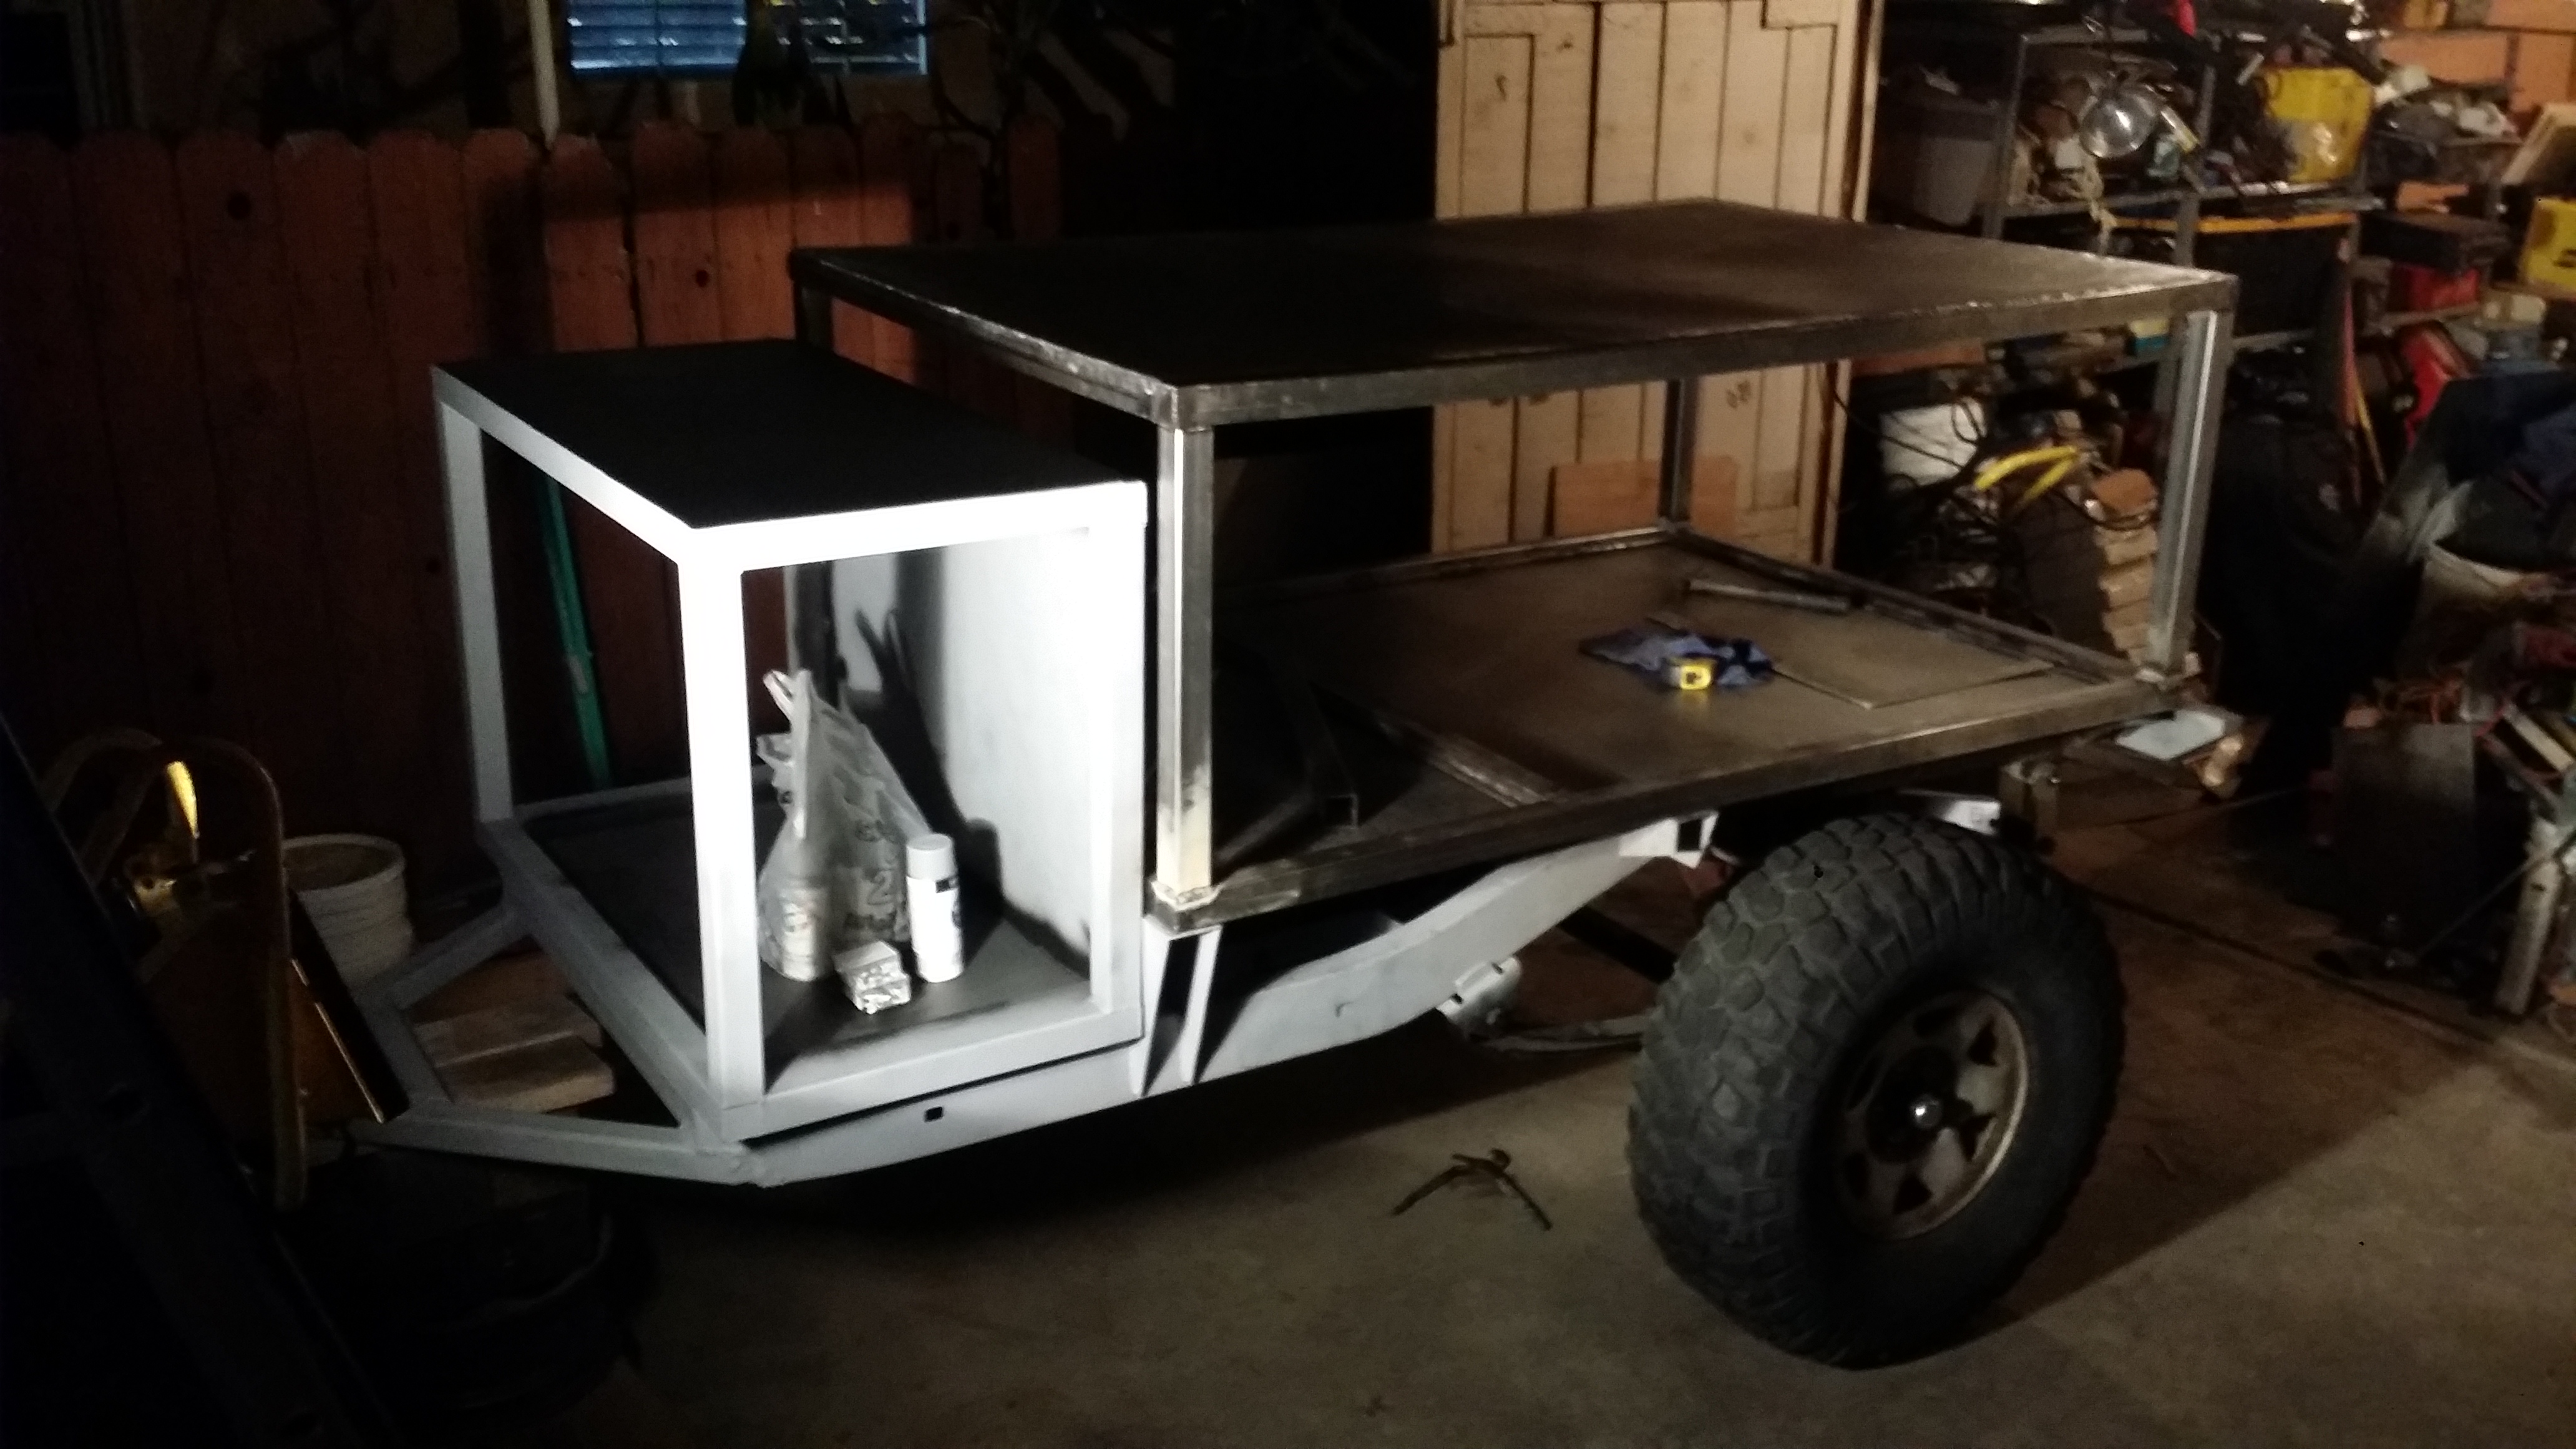
Then over this past weekend I got started on working on the large trailer compartment floor. I started off by welding on these 1/2"x1/2" square tube along the inner walls of the 2x2 frame. The depth was made deep enough so it would fit 1/2" birchwood pieces flush with the top surface. you'll see what i mean in a bit...
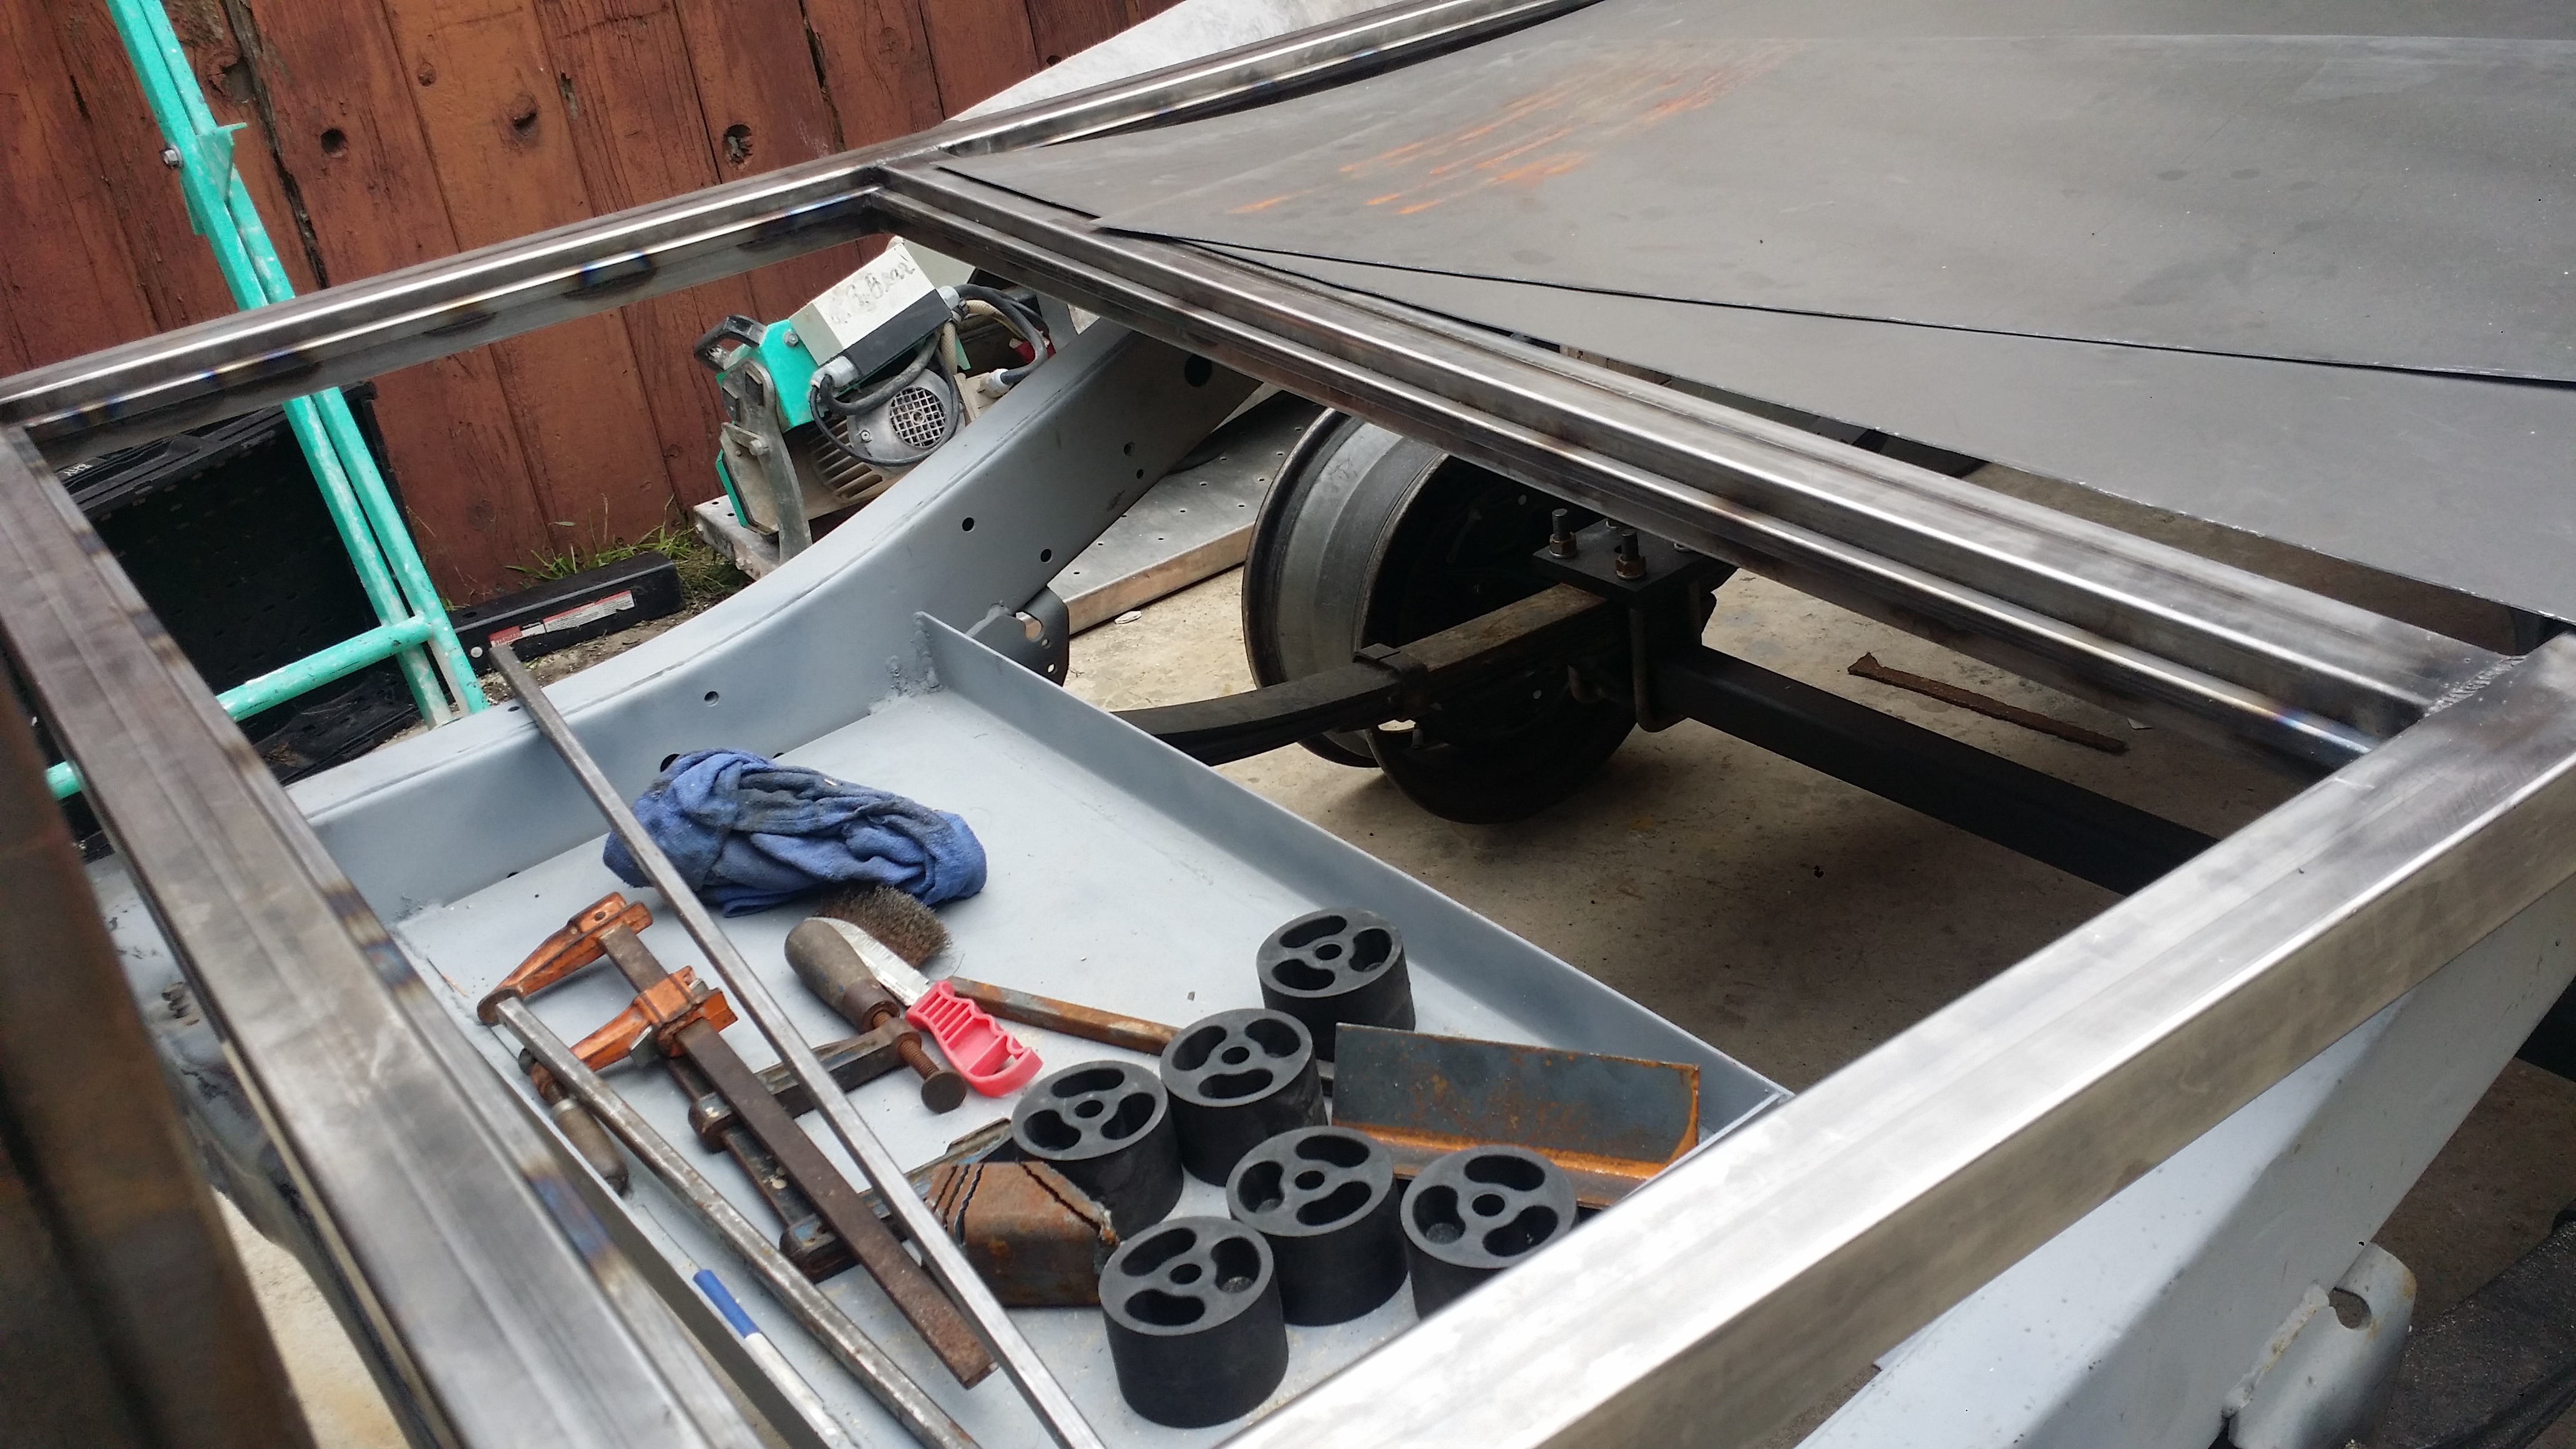
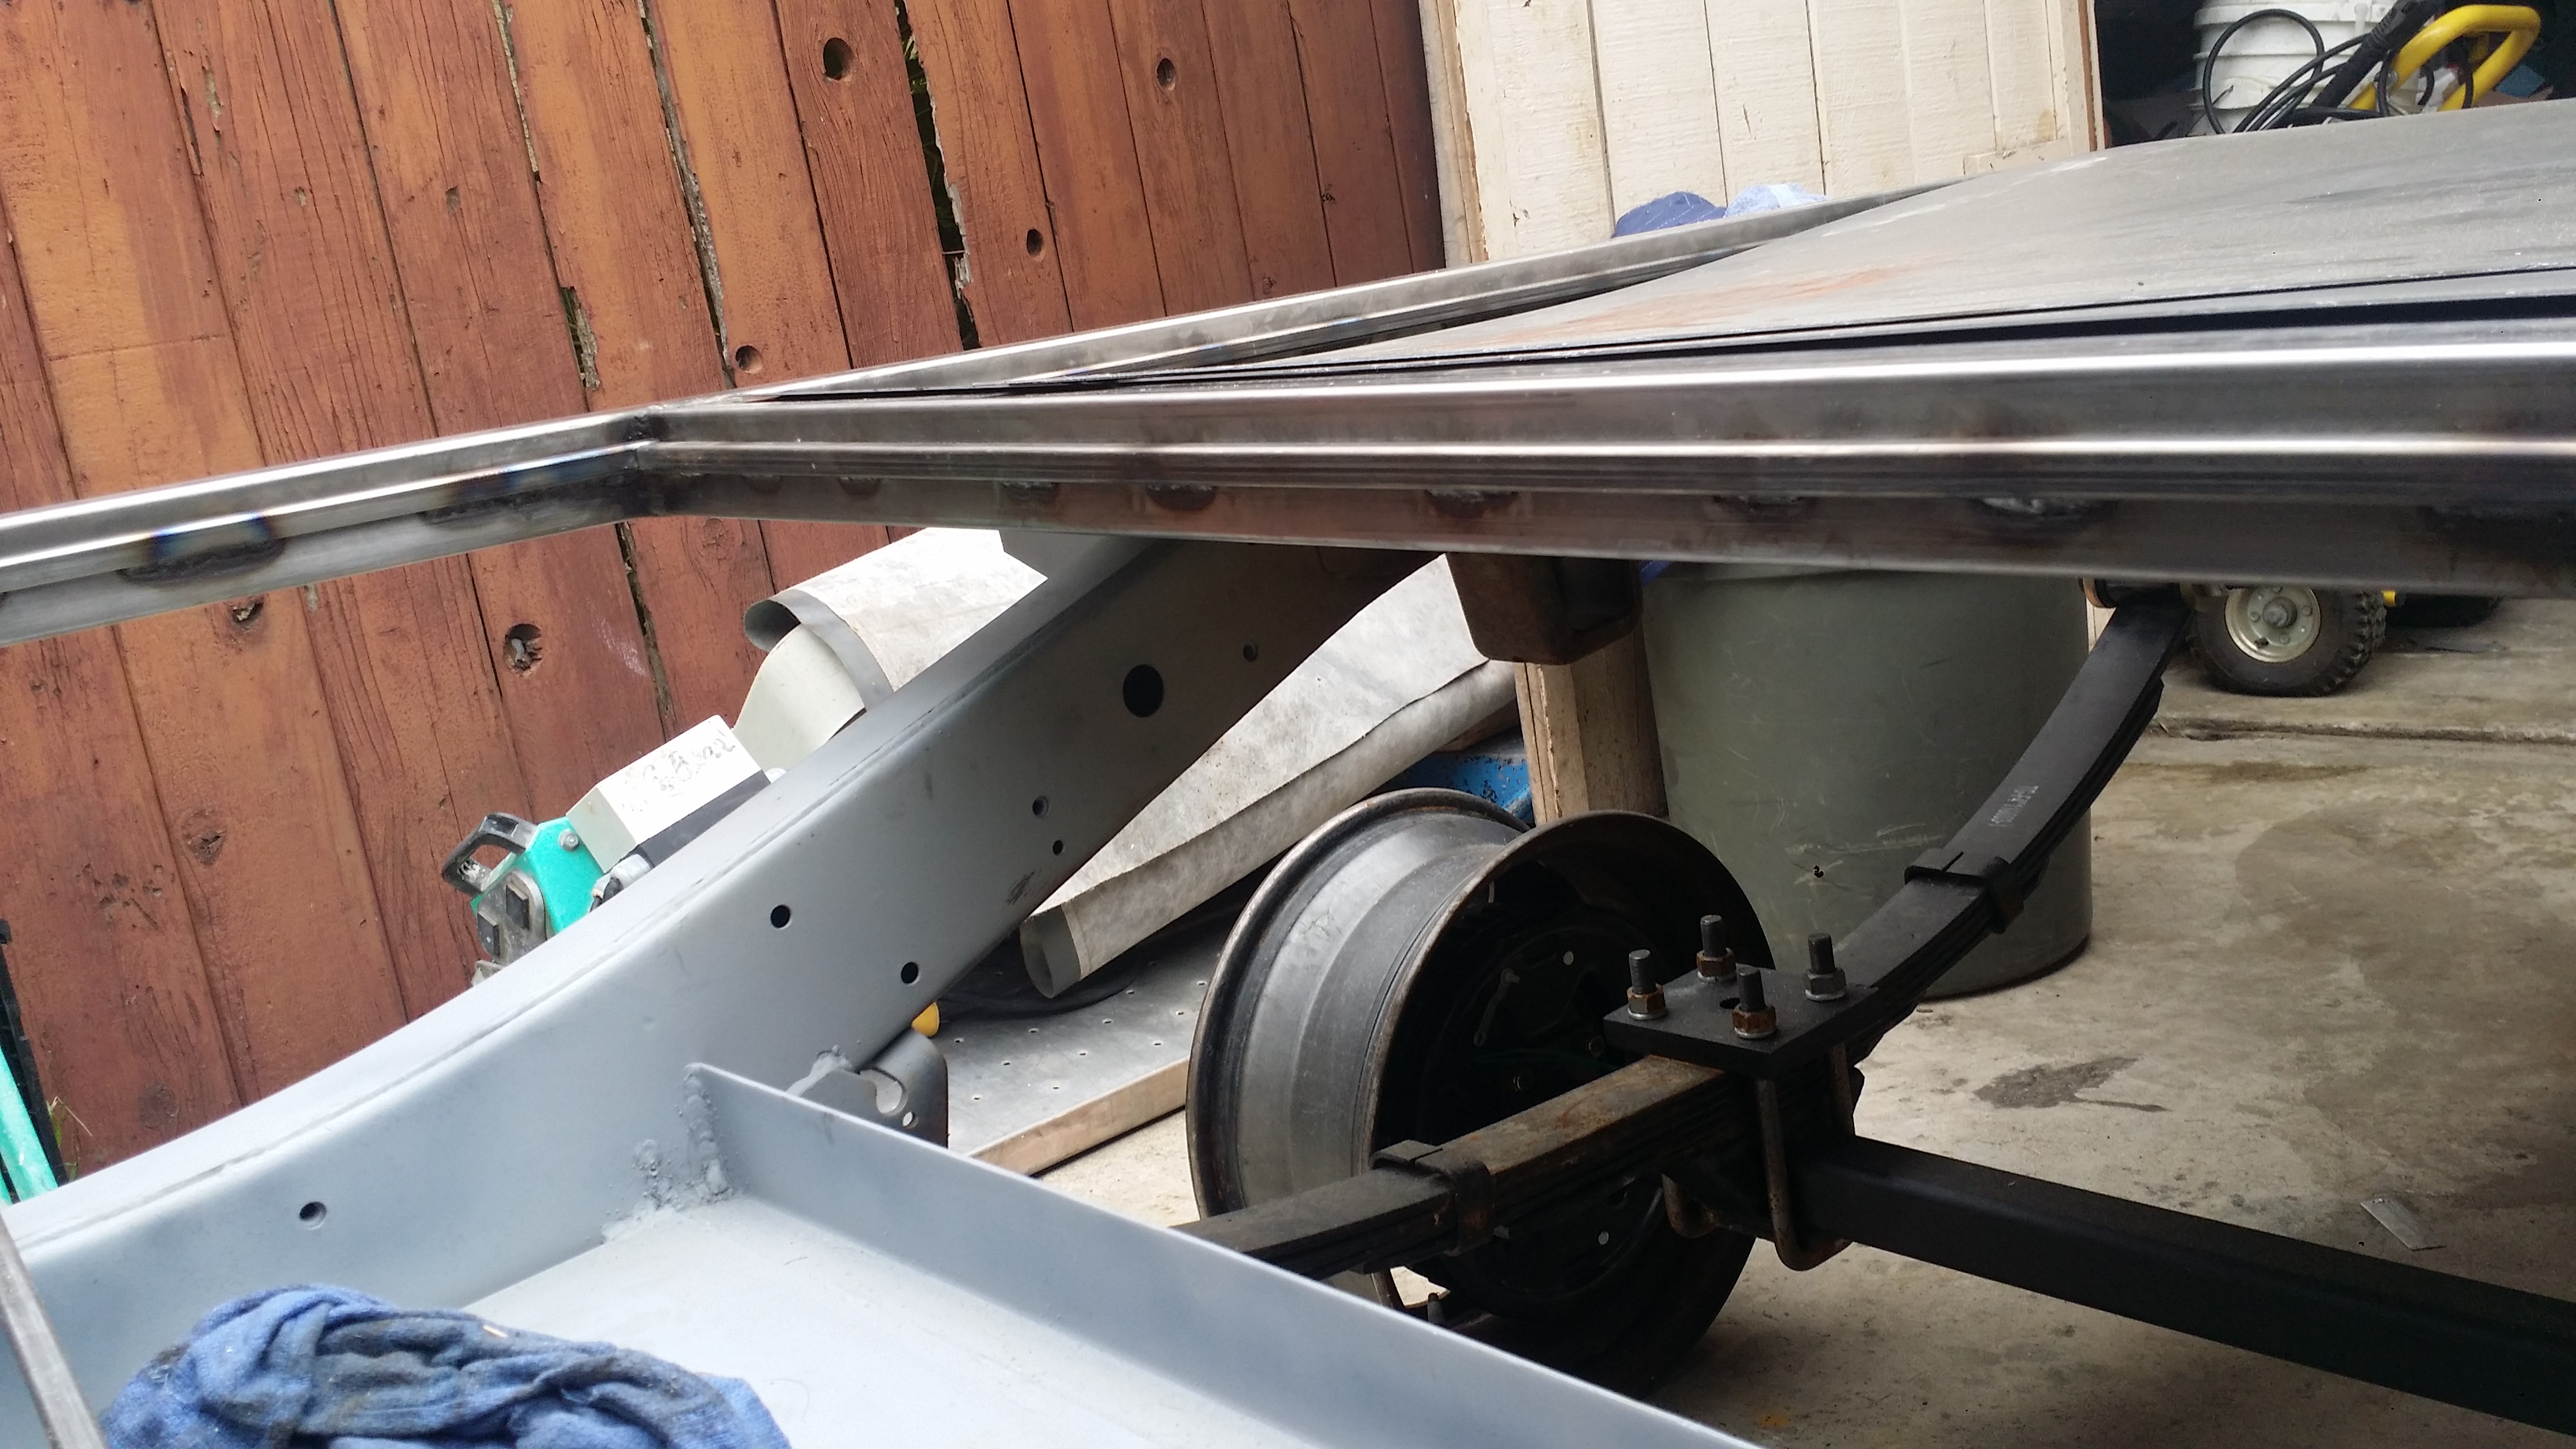
Then i cut the 16guage sheet metal that i bought a few weeks ago to size to fit on top of those 1/2" square tubes. and tack welded it all the way around to keep the sheet metal from bending.
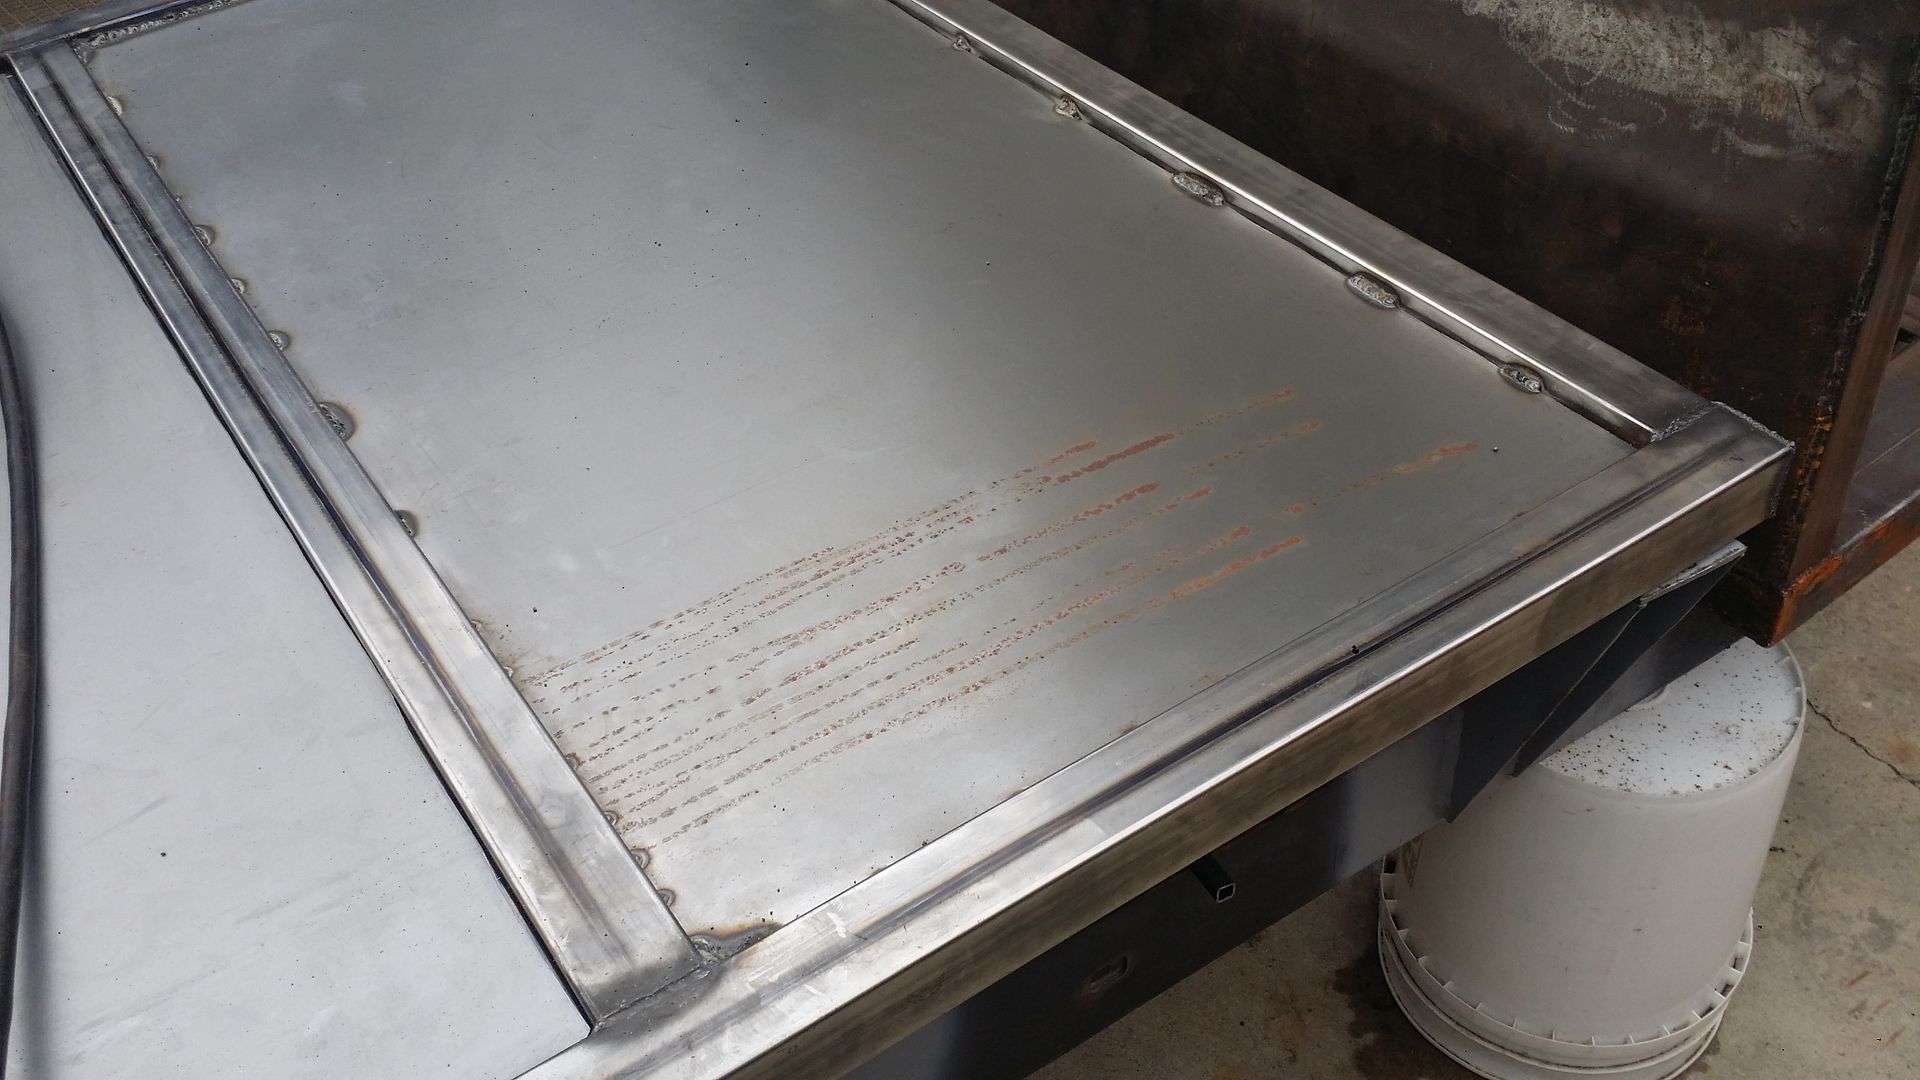
then fully welded it all the way around. Doing this will keep water from entering through the bottom of the trailer during river crossings if i ever have to cross a river that would reach that high lol
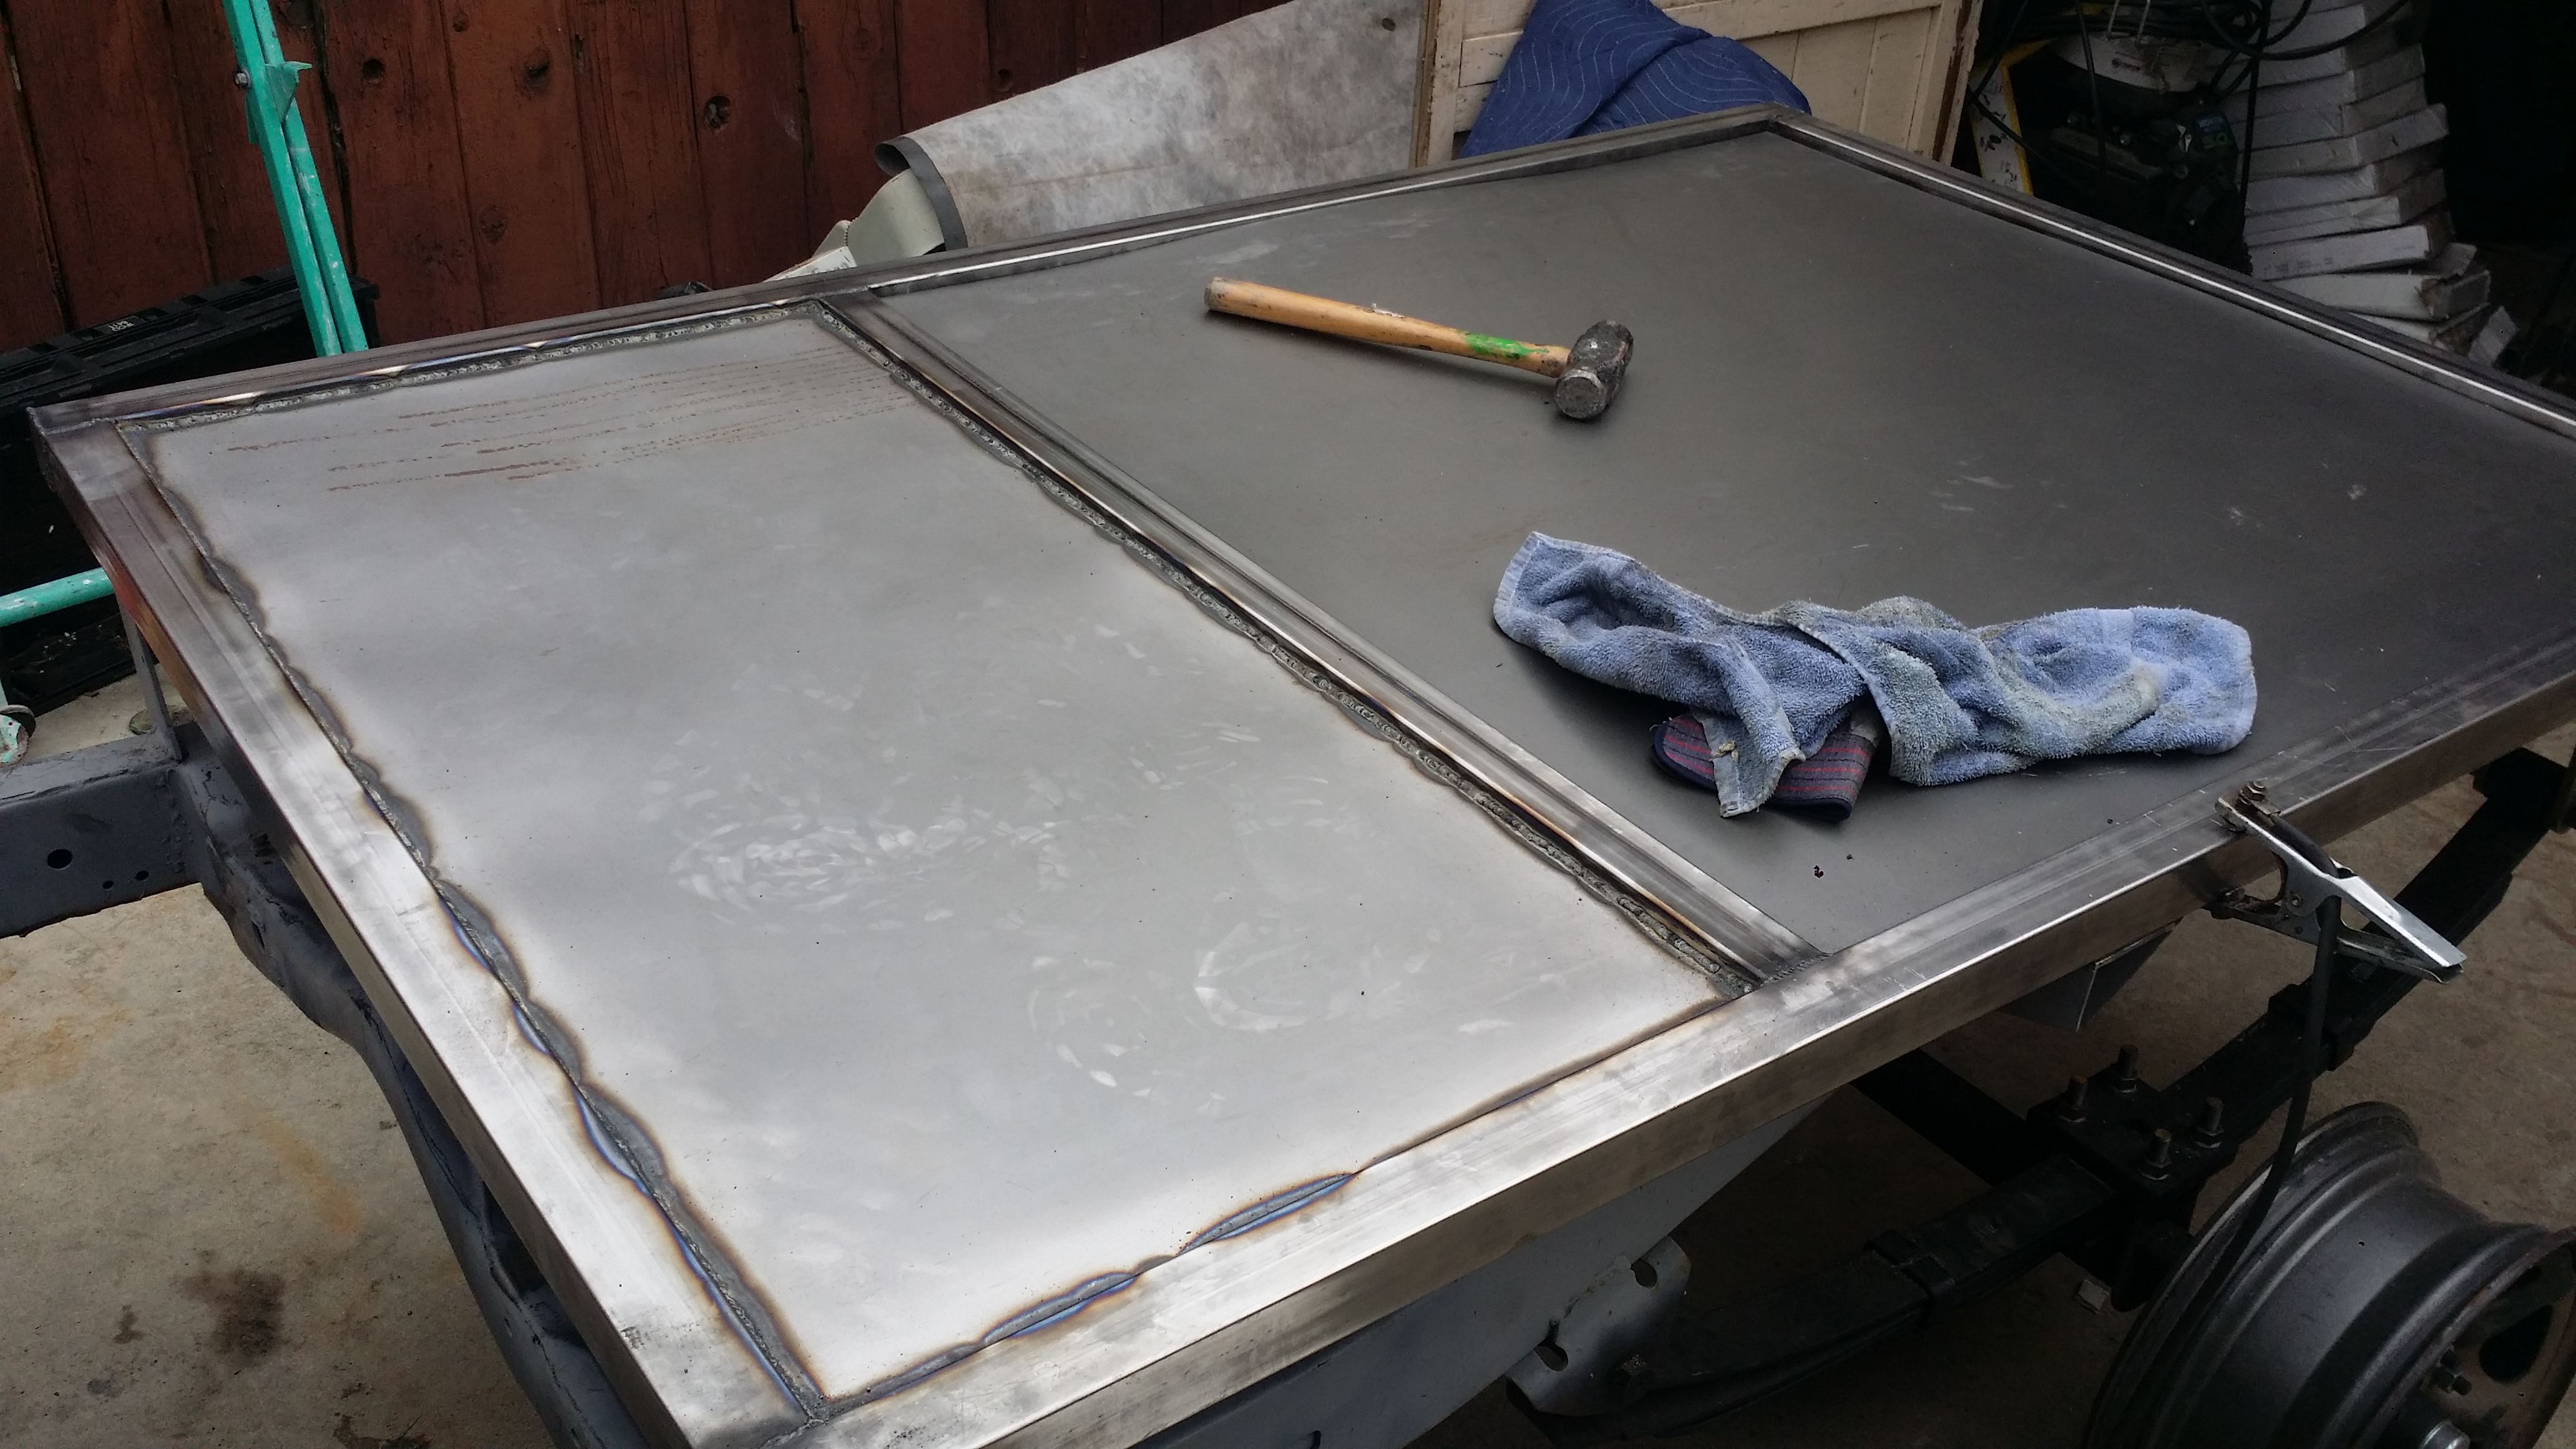
Here are both sides done already
Then i called GooseGear to ask them what thickness of flooring i should use for my trailer floor to make their job easier for when the time comes for them to build me my custom fitted drawers in the rear of the trailer. They told me to use 1/2" birch wood so i went to home depot to buy one. They said it would be easier to work with that than any other wood since they make all their products using high quality birchwood.
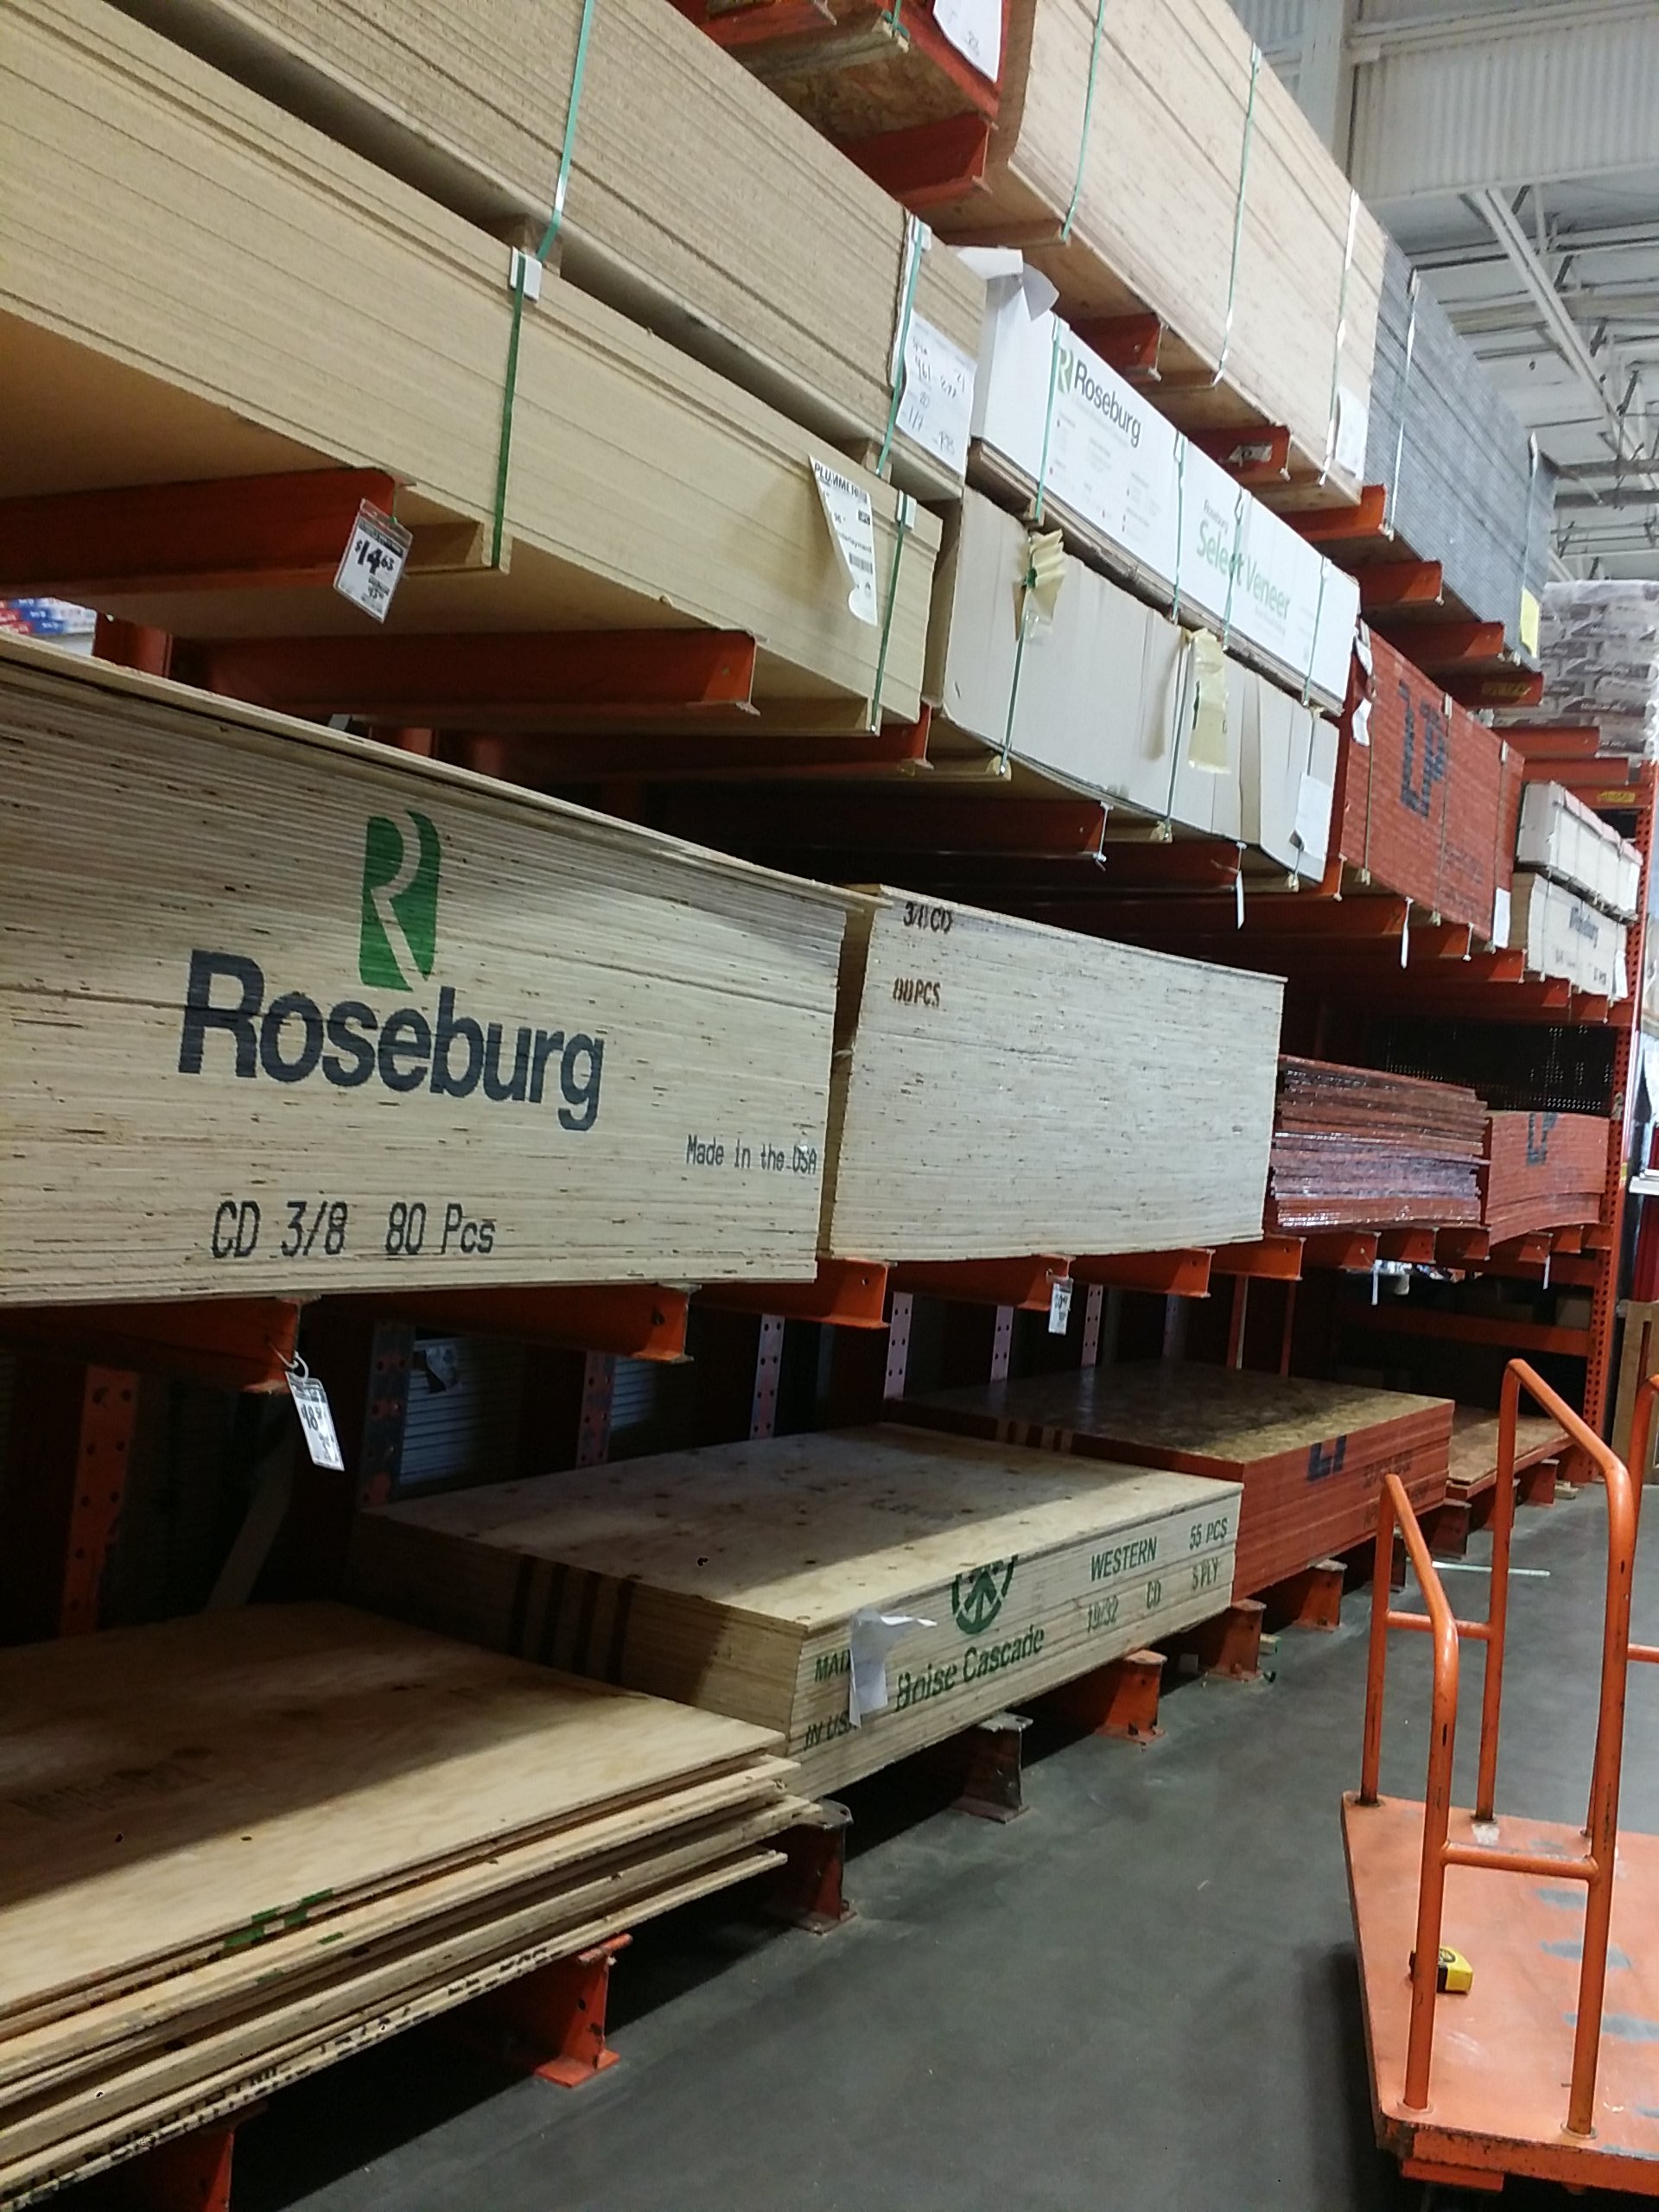
Bam! all cut to size flush with the upper part of the 2x2" square tube.
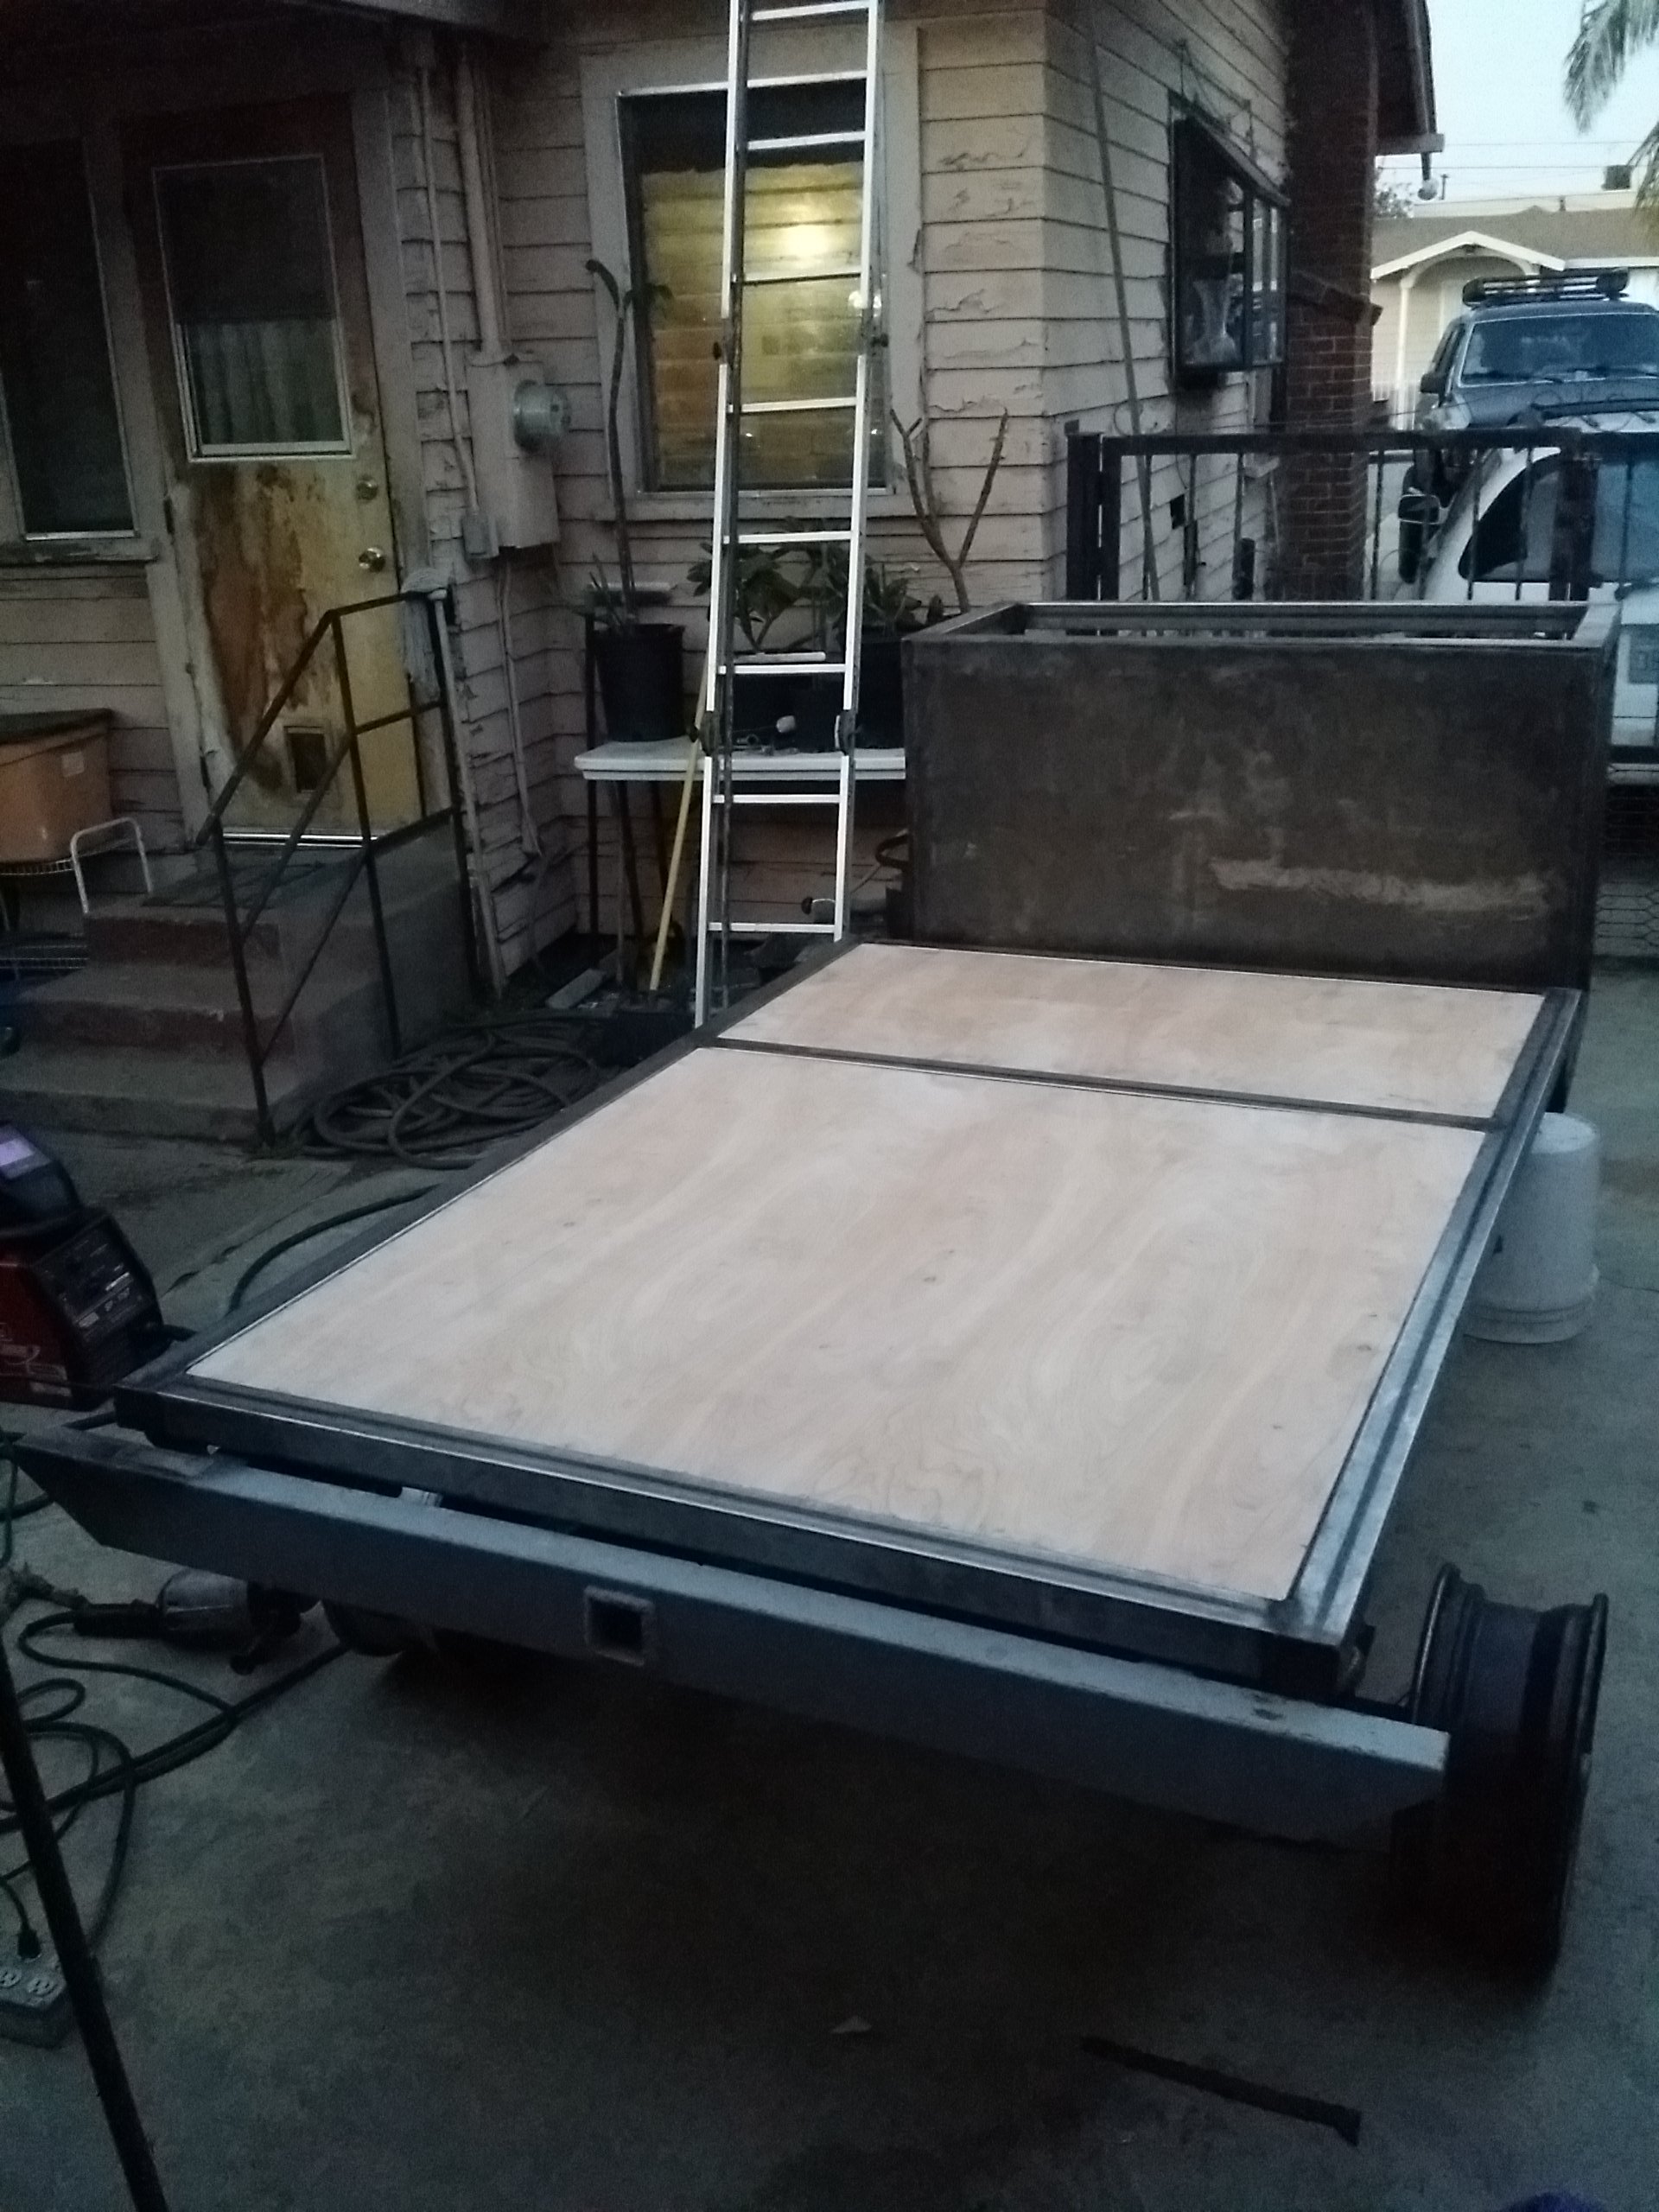
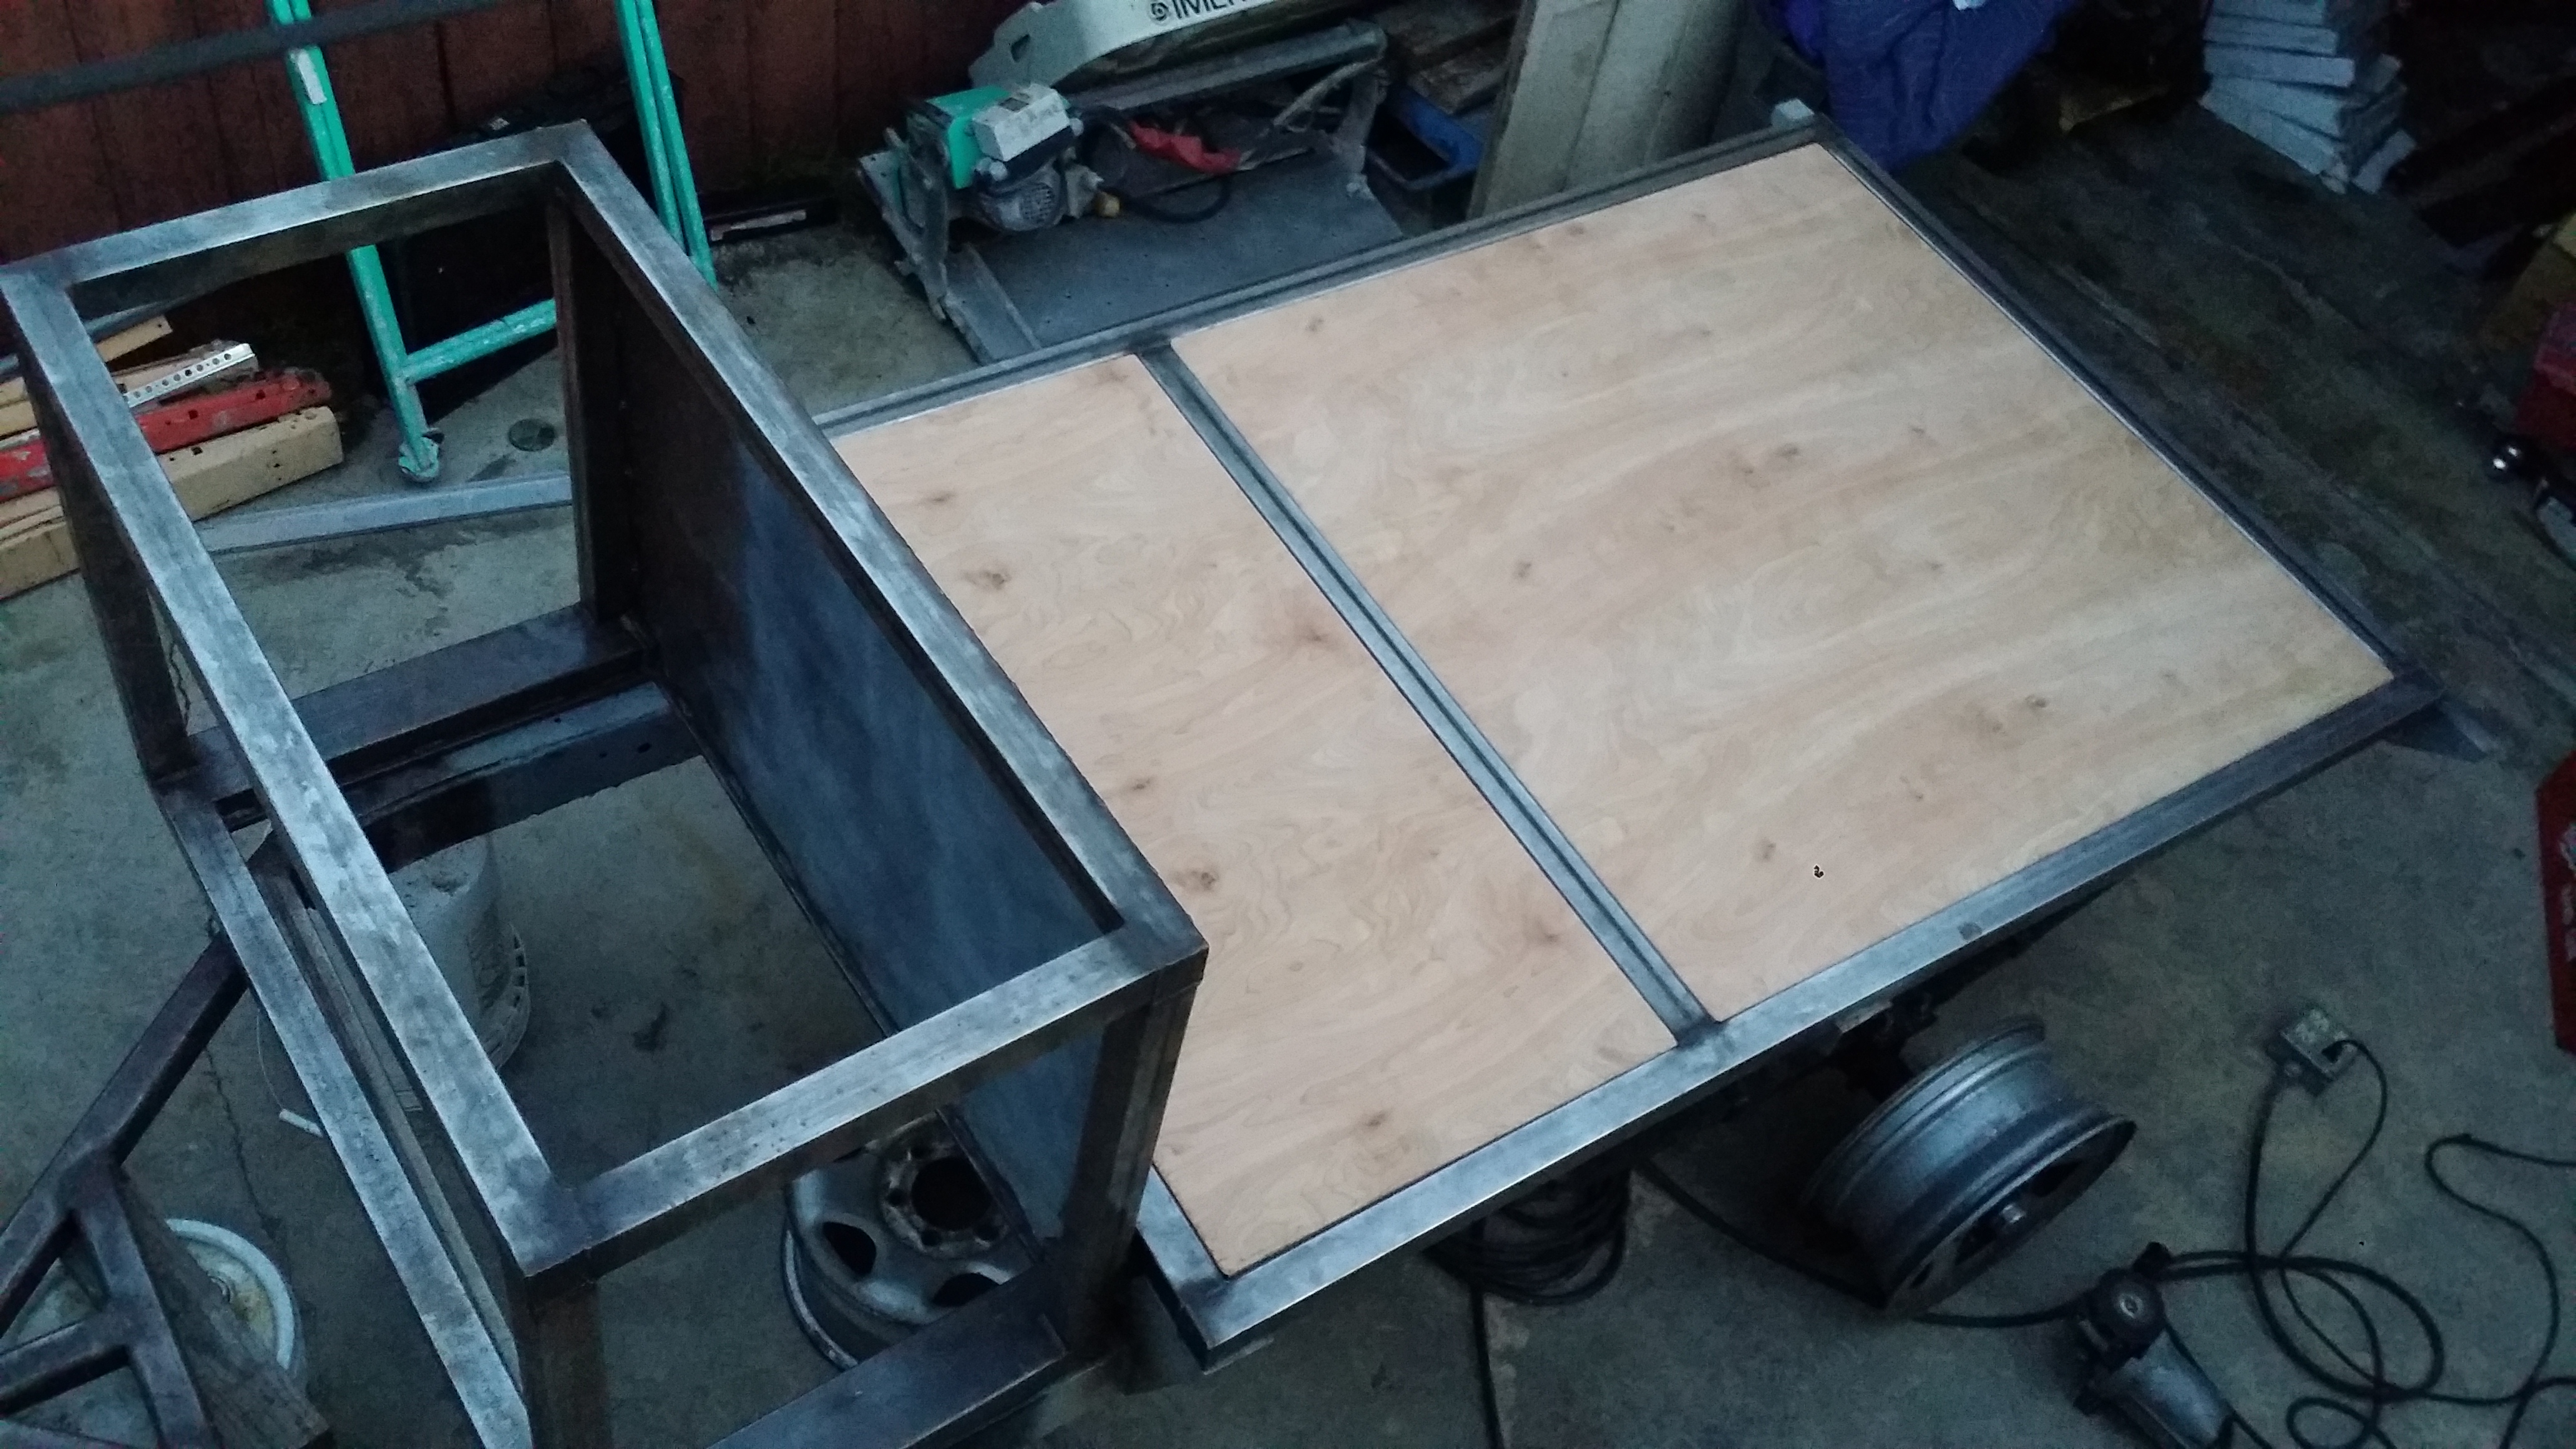
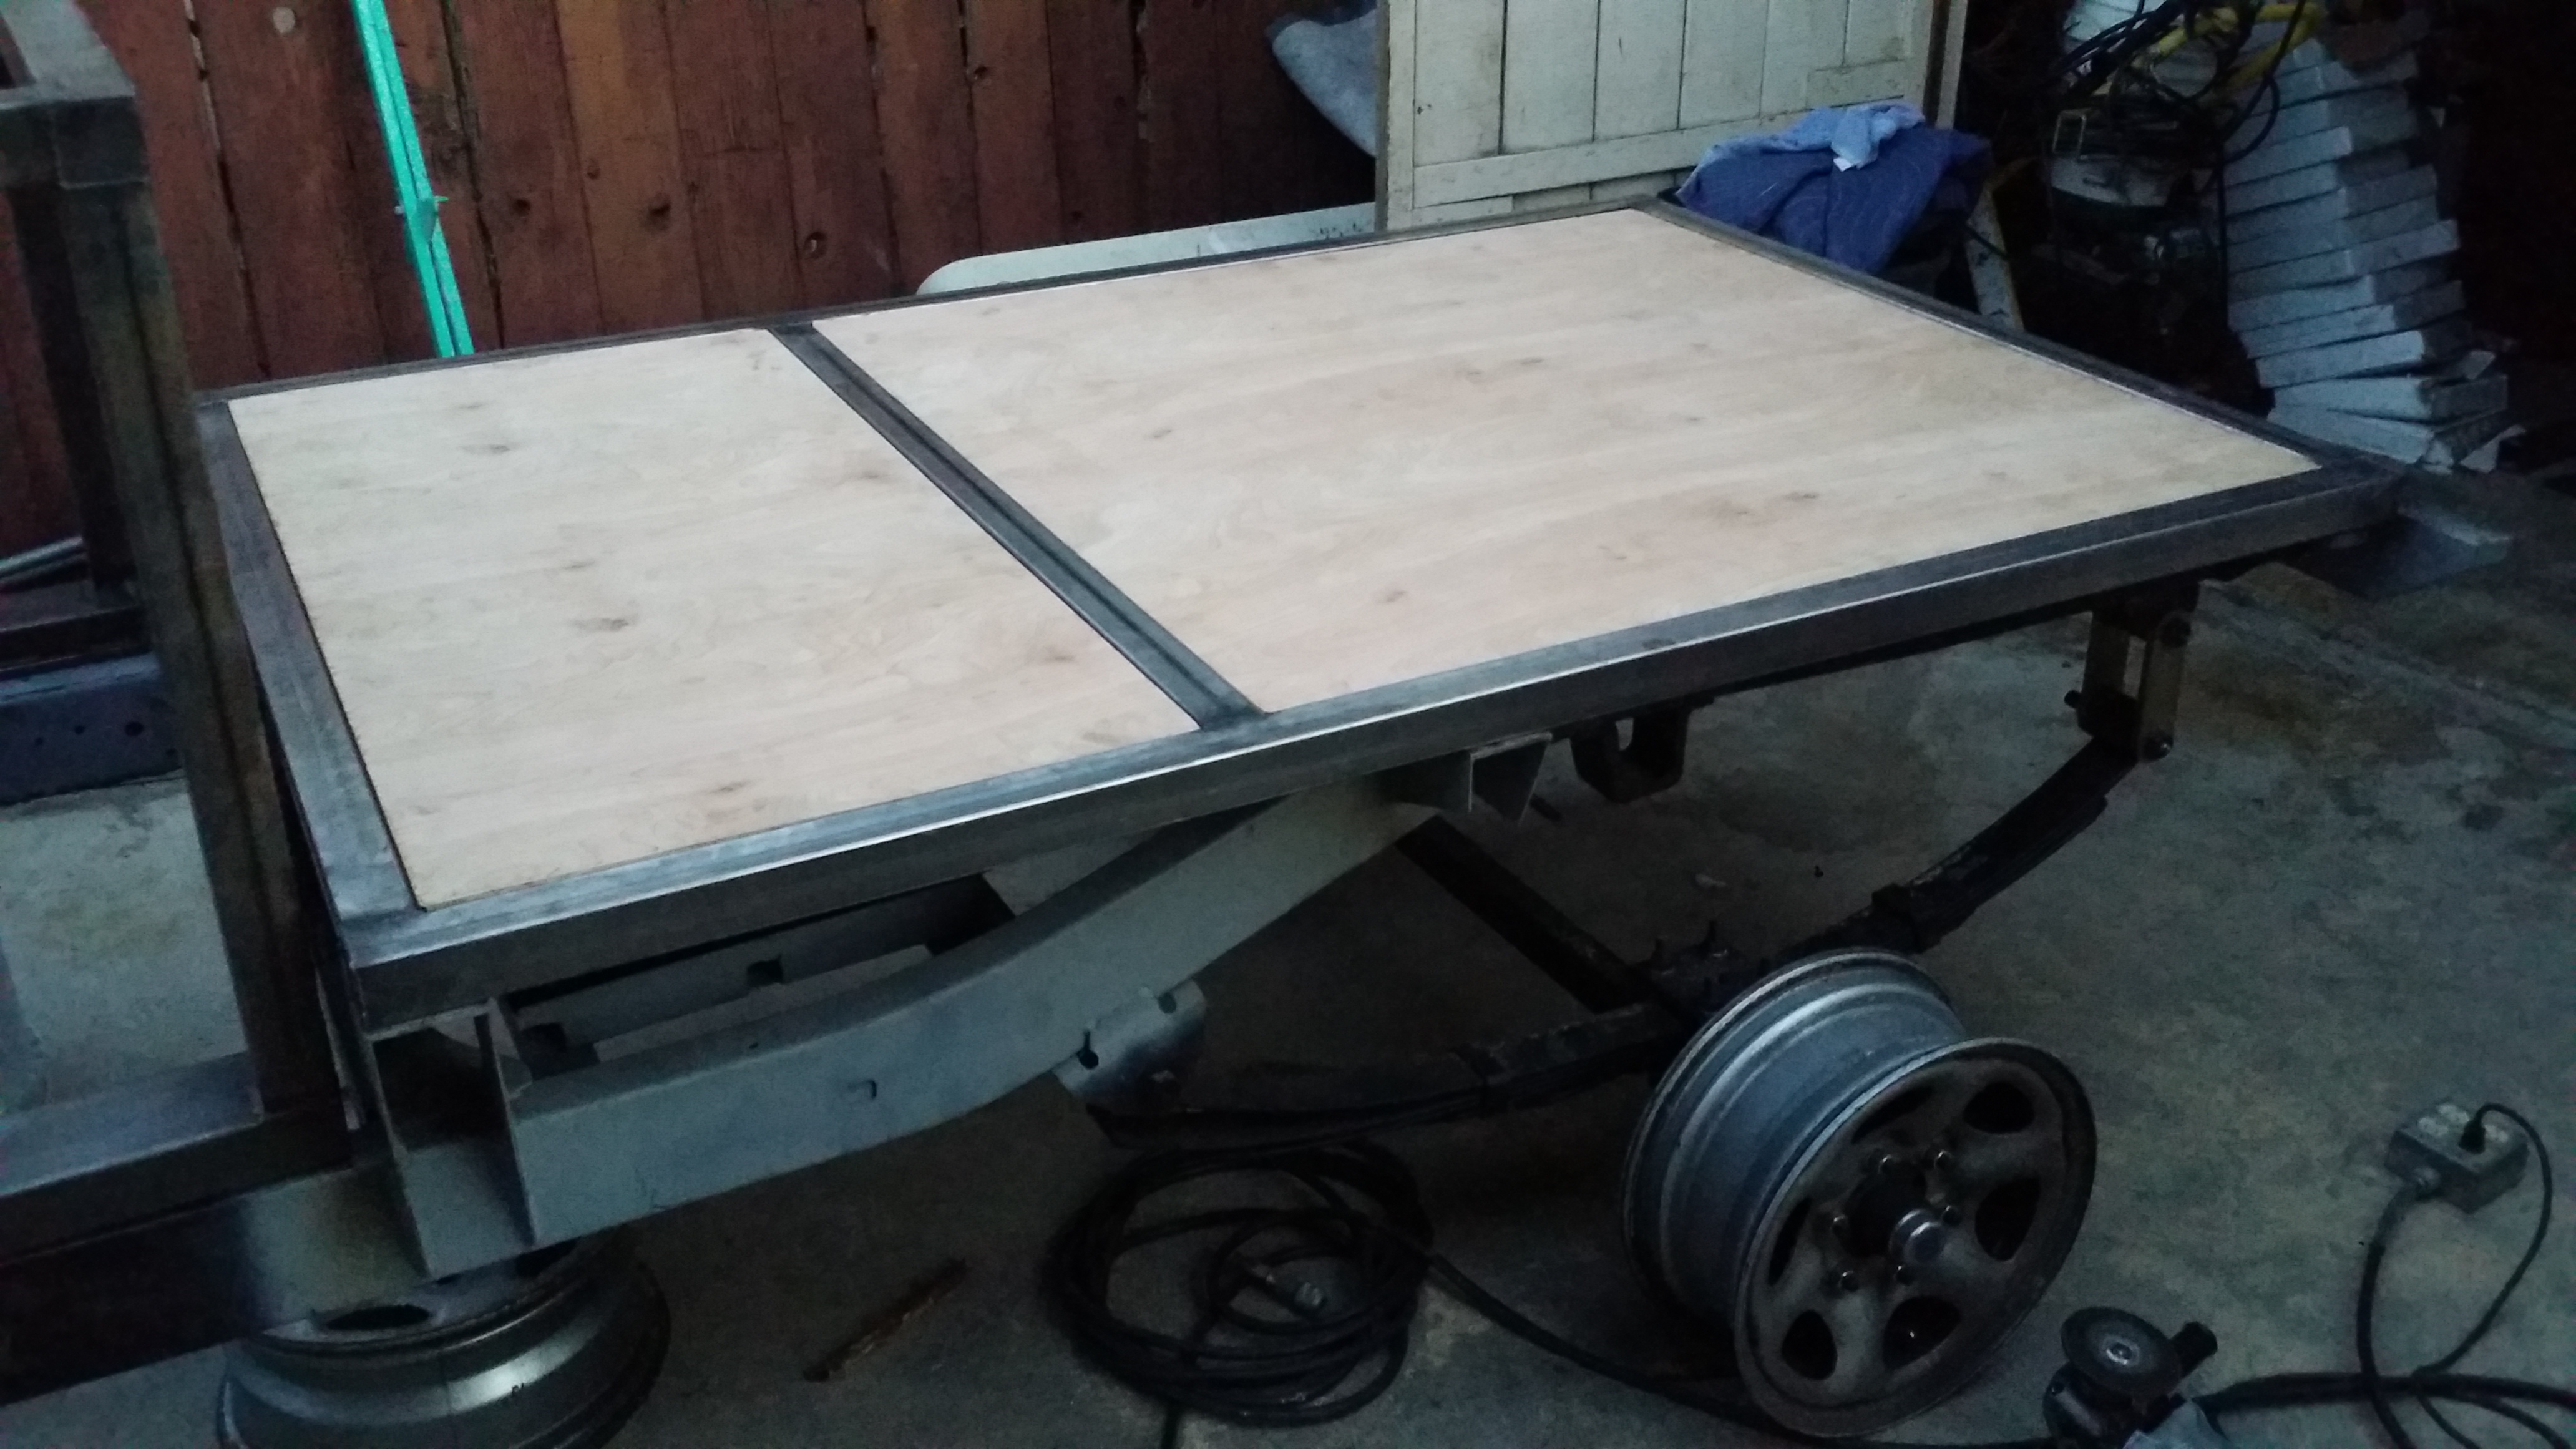
This was before i did the sheet metal floor but still looks really nice.
What i plan to do next to further ensure that it is going to be water proof from the bottom side is add silicone along the inner welds where the sheet metal meets the tube. after that i can go ahead and build the walls up with the precut 2x2 tubing i have and the roof of the trailer. I still have a long way to go but this flooring was some major progress in this build. it was also very time consuming to do a continuous weld throughout the whole thing.
That is all for now. I cant wait to get some more progress in.

Then over this past weekend I got started on working on the large trailer compartment floor. I started off by welding on these 1/2"x1/2" square tube along the inner walls of the 2x2 frame. The depth was made deep enough so it would fit 1/2" birchwood pieces flush with the top surface. you'll see what i mean in a bit...


Then i cut the 16guage sheet metal that i bought a few weeks ago to size to fit on top of those 1/2" square tubes. and tack welded it all the way around to keep the sheet metal from bending.

then fully welded it all the way around. Doing this will keep water from entering through the bottom of the trailer during river crossings if i ever have to cross a river that would reach that high lol

Here are both sides done already


Then i called GooseGear to ask them what thickness of flooring i should use for my trailer floor to make their job easier for when the time comes for them to build me my custom fitted drawers in the rear of the trailer. They told me to use 1/2" birch wood so i went to home depot to buy one. They said it would be easier to work with that than any other wood since they make all their products using high quality birchwood.

Bam! all cut to size flush with the upper part of the 2x2" square tube.


This was before i did the sheet metal floor but still looks really nice.

What i plan to do next to further ensure that it is going to be water proof from the bottom side is add silicone along the inner welds where the sheet metal meets the tube. after that i can go ahead and build the walls up with the precut 2x2 tubing i have and the roof of the trailer. I still have a long way to go but this flooring was some major progress in this build. it was also very time consuming to do a continuous weld throughout the whole thing.
That is all for now. I cant wait to get some more progress in.
Last edited by Redeth005; Jan 19, 2016 at 05:12 PM.
Jan 23, 2016 | 07:43 AM
#66
Thread Starter
Registered User
Joined: Apr 2012
Posts: 2,817
Likes: 2
From: Los Angeles CA
Jan 23, 2016 | 05:23 PM
#67
Thread Starter
Registered User
Joined: Apr 2012
Posts: 2,817
Likes: 2
From: Los Angeles CA
So at the hospital i work in i realized our case carts that carry all our surgical instruments into the operating rooms have similar door latches to the ones i bought. Here are just some nice reference pix i took for myself to look back on.
Then i went to instagram user "Ish_mrqz" to get some help mounting these 35" BF goodrich KM2 tires onto the temporary rims and talk about trucks and this trailer project.
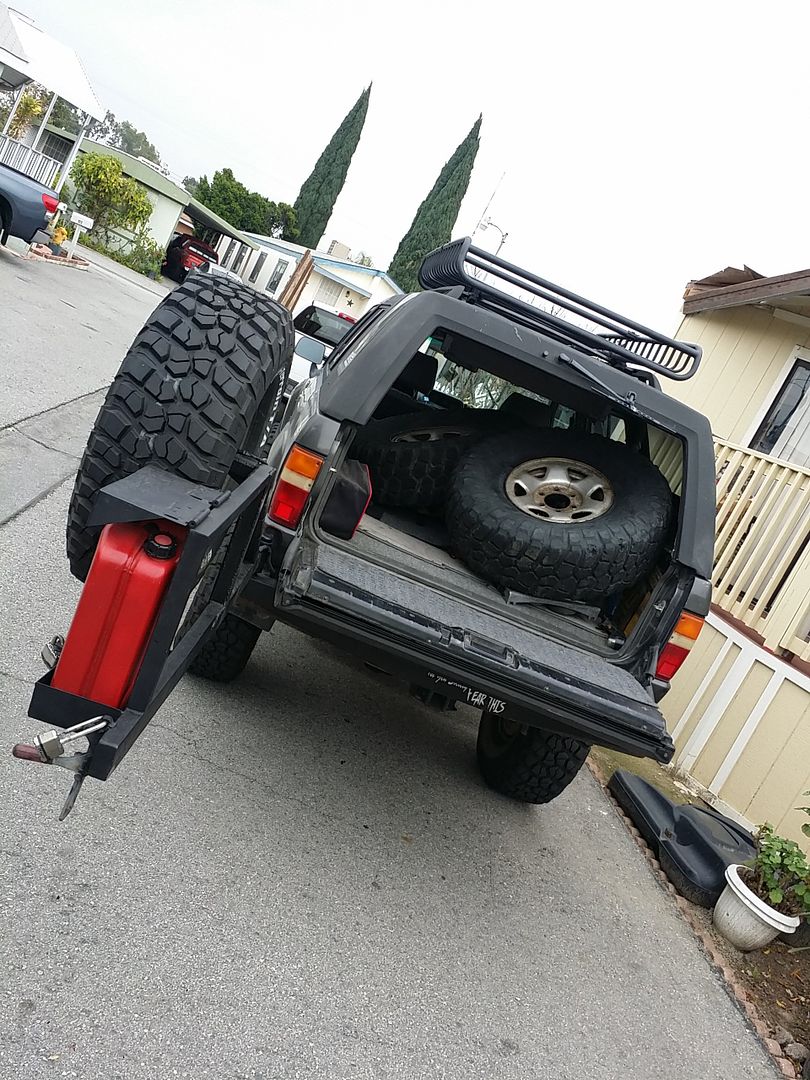
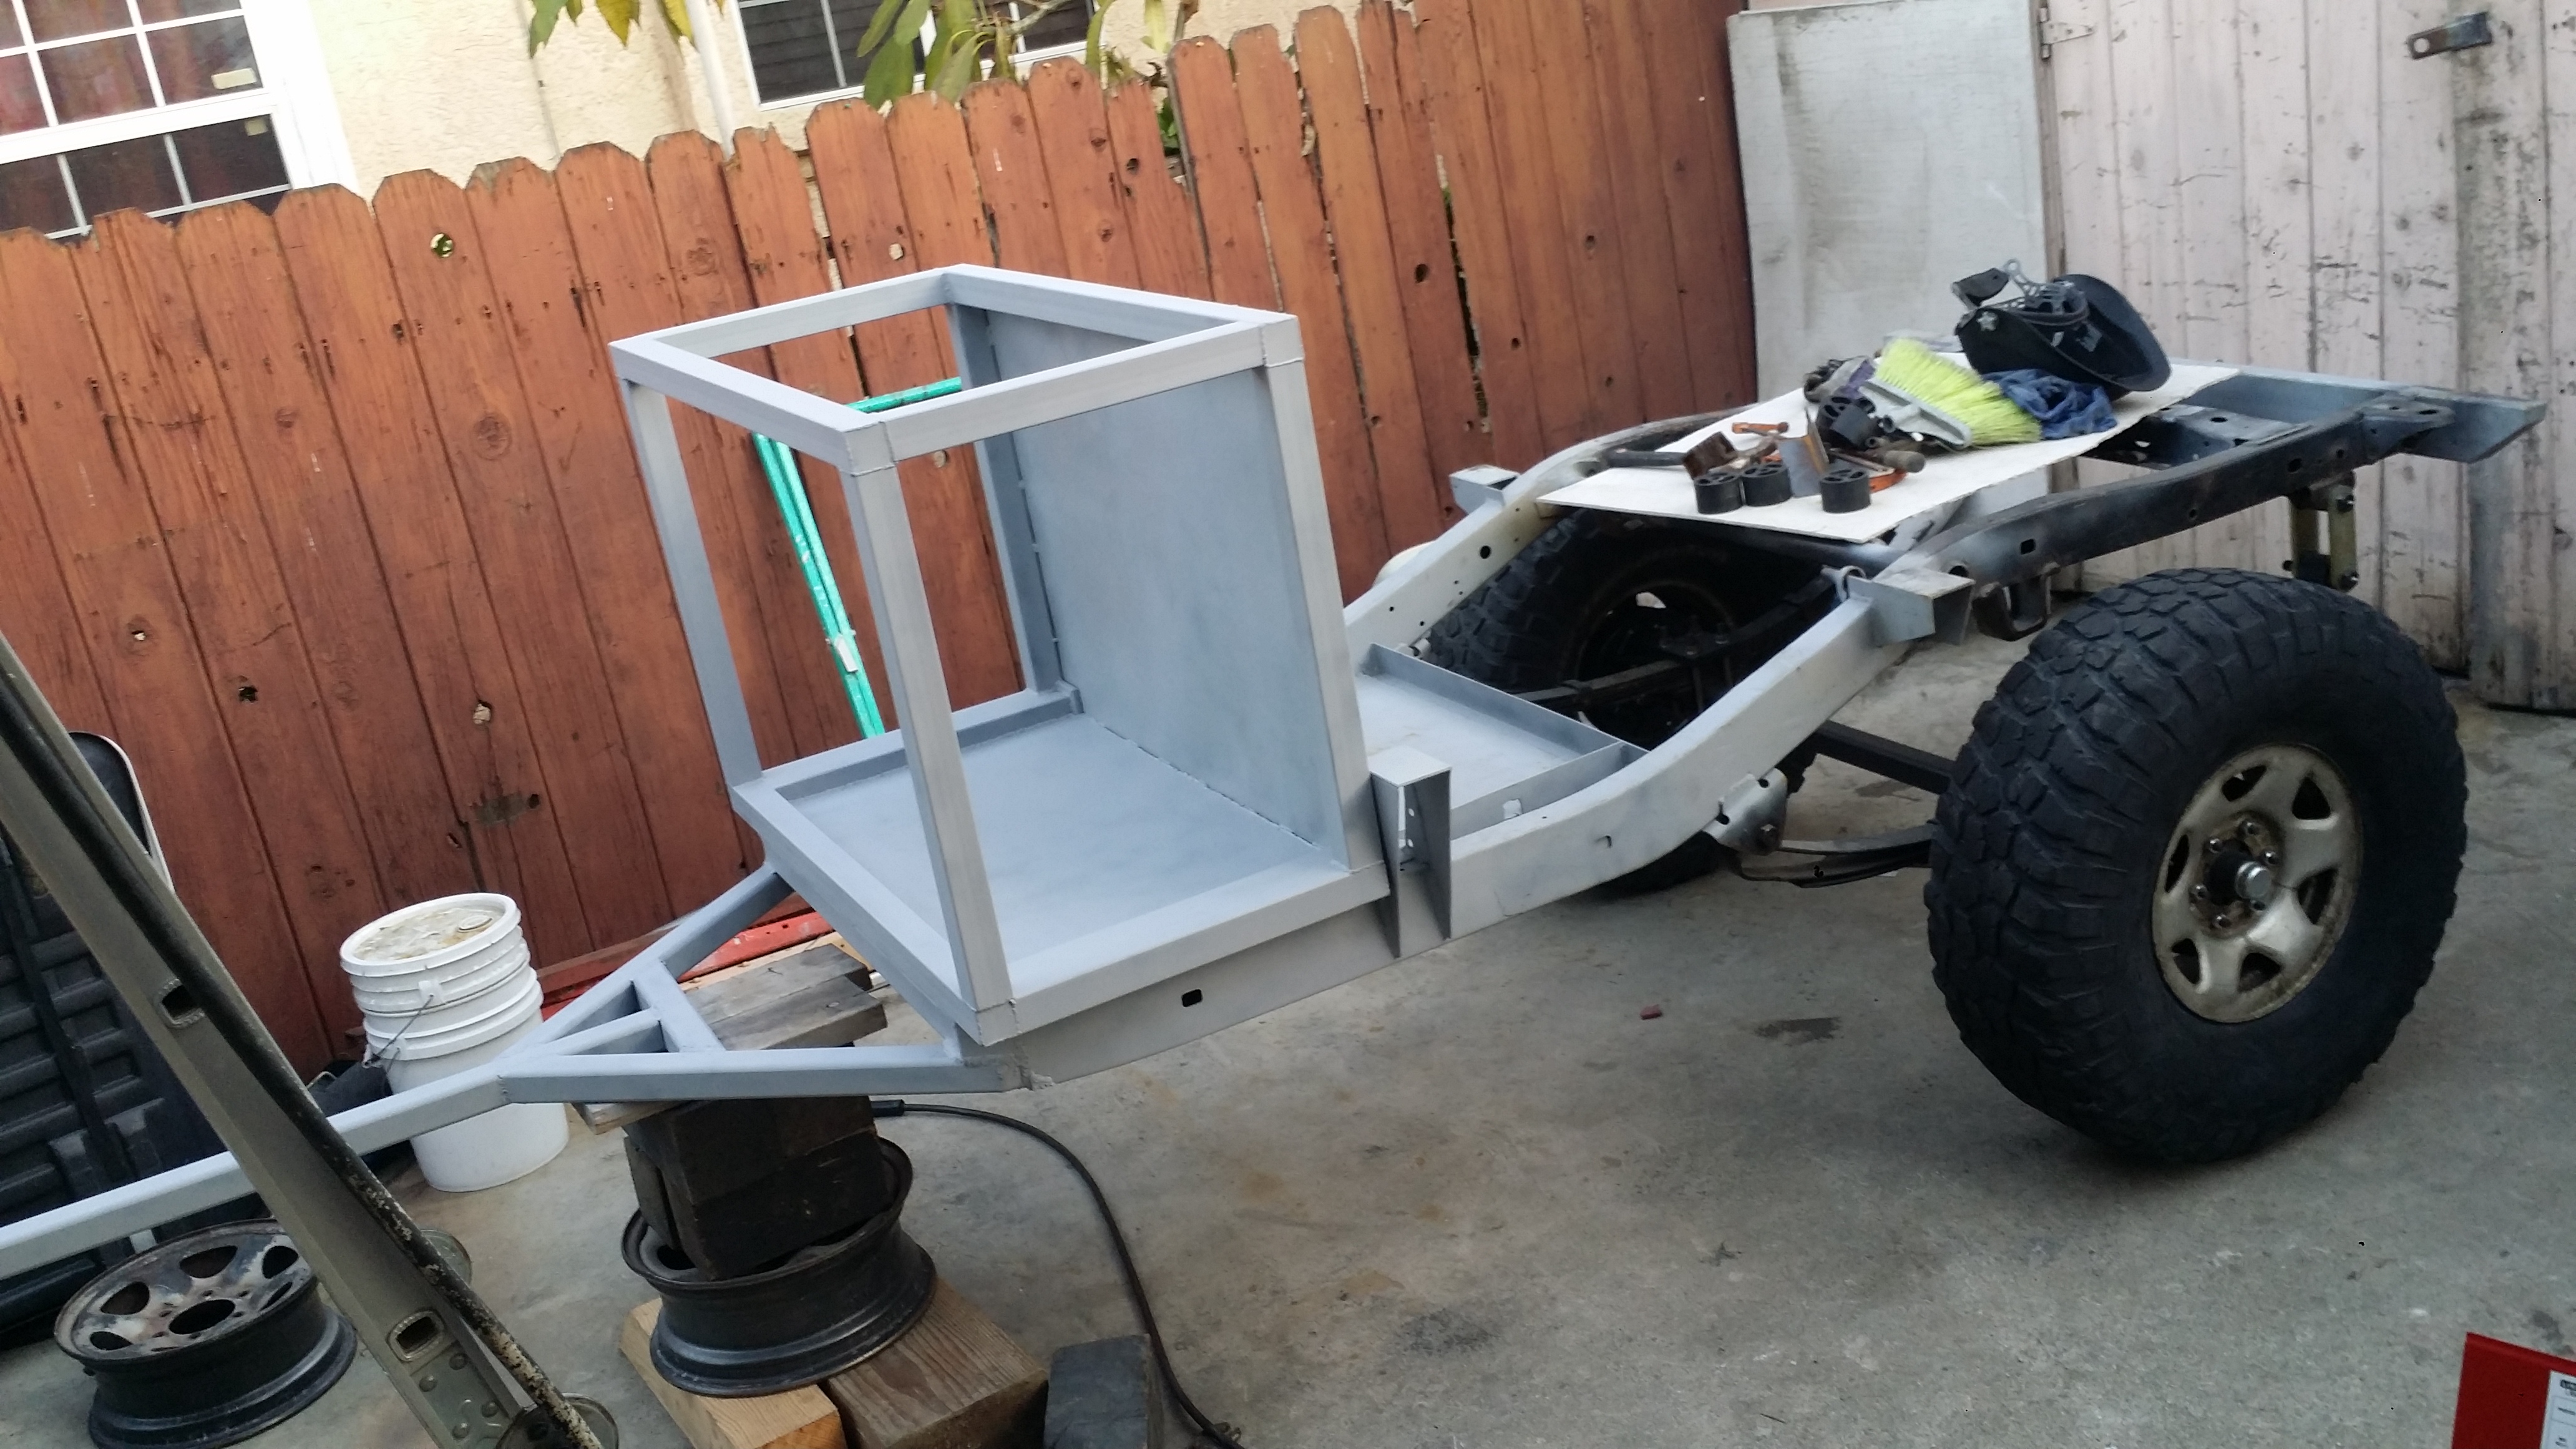
After getting the truck level in the front with the back here is how it looks. Those tires really lifted the trailer a lot! Now it's starting to look beefy! And now I can work on the trailer without being hunched over all the time. I think these KM2's make this project look a lot more serious now.
Looking mean!
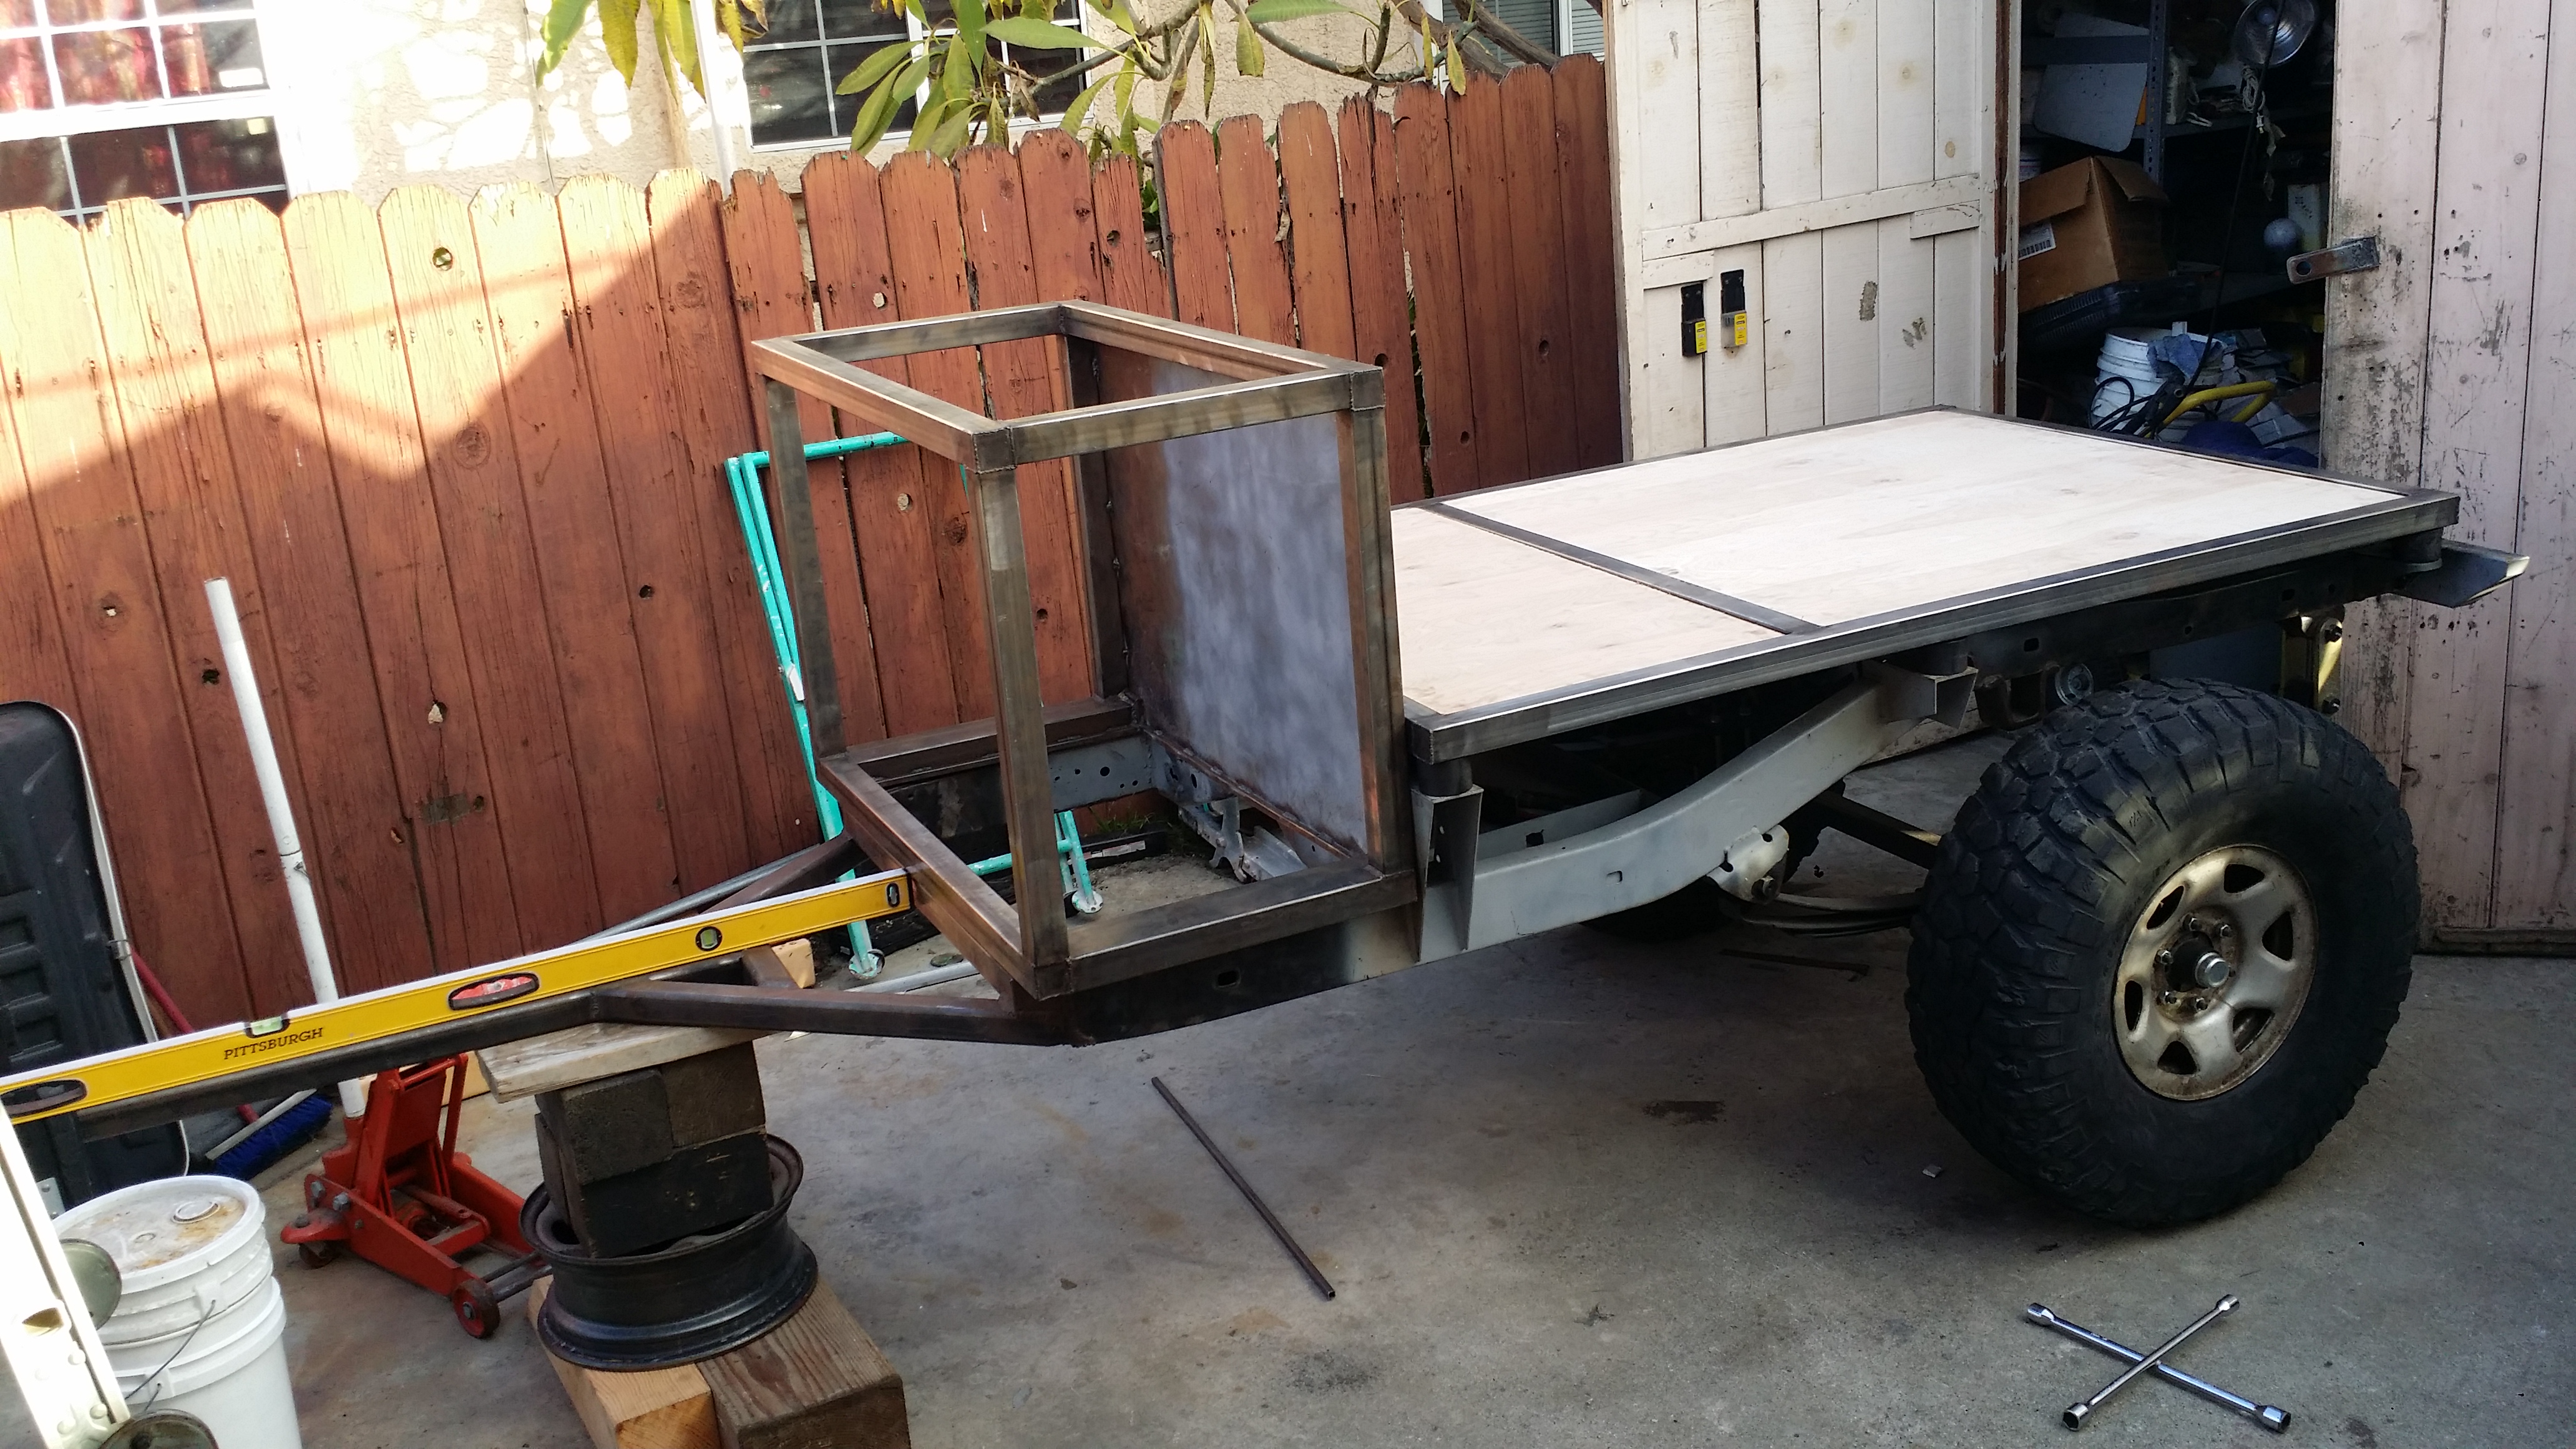
Test fitment of the "Jeep Style" trailer fenders I bought on Ebay a few months ago. I am definitely going to have to trim them from the bottom a bit. But for the most part I'm liking the way they are going to look on it; especially after I fab up some small rock sliders for it. They measure 36" at the base of the fender, 21" at the top of the fender, 19" height, and 10" wide. Once I buy the same 15�8" steel procomp rims that I have on the truck these tires will sit perfectly centered with the fender.
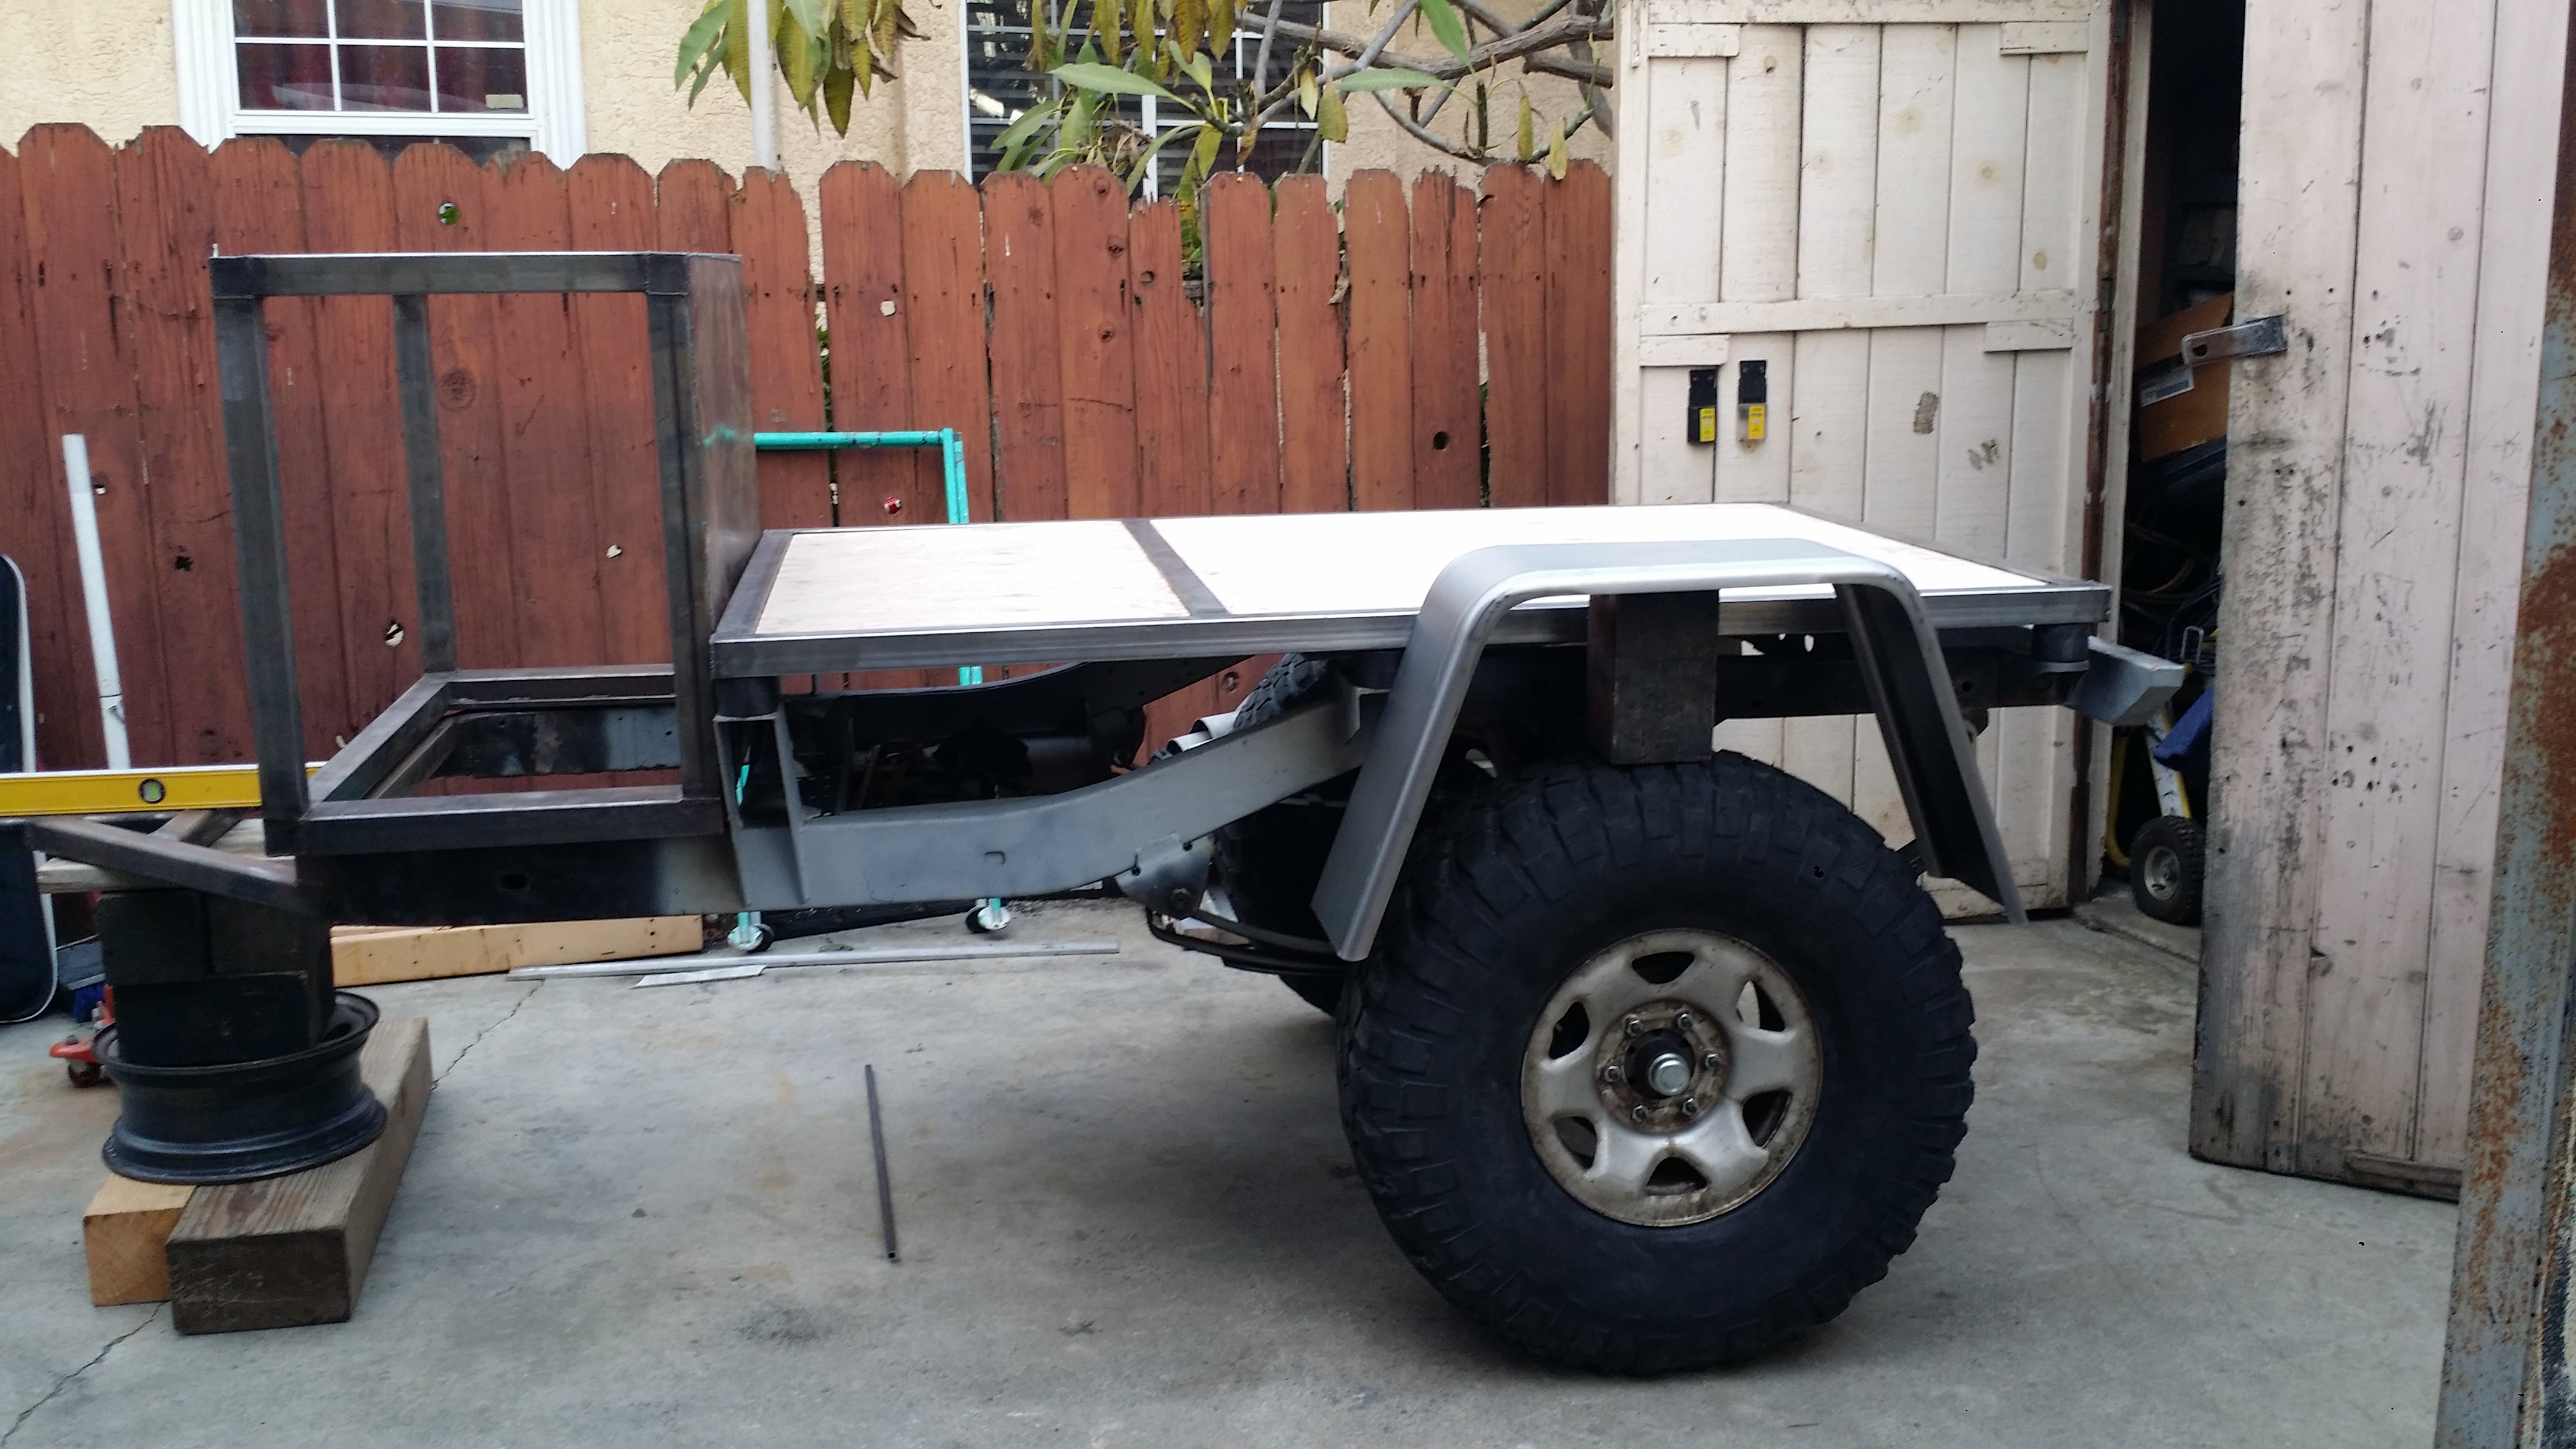
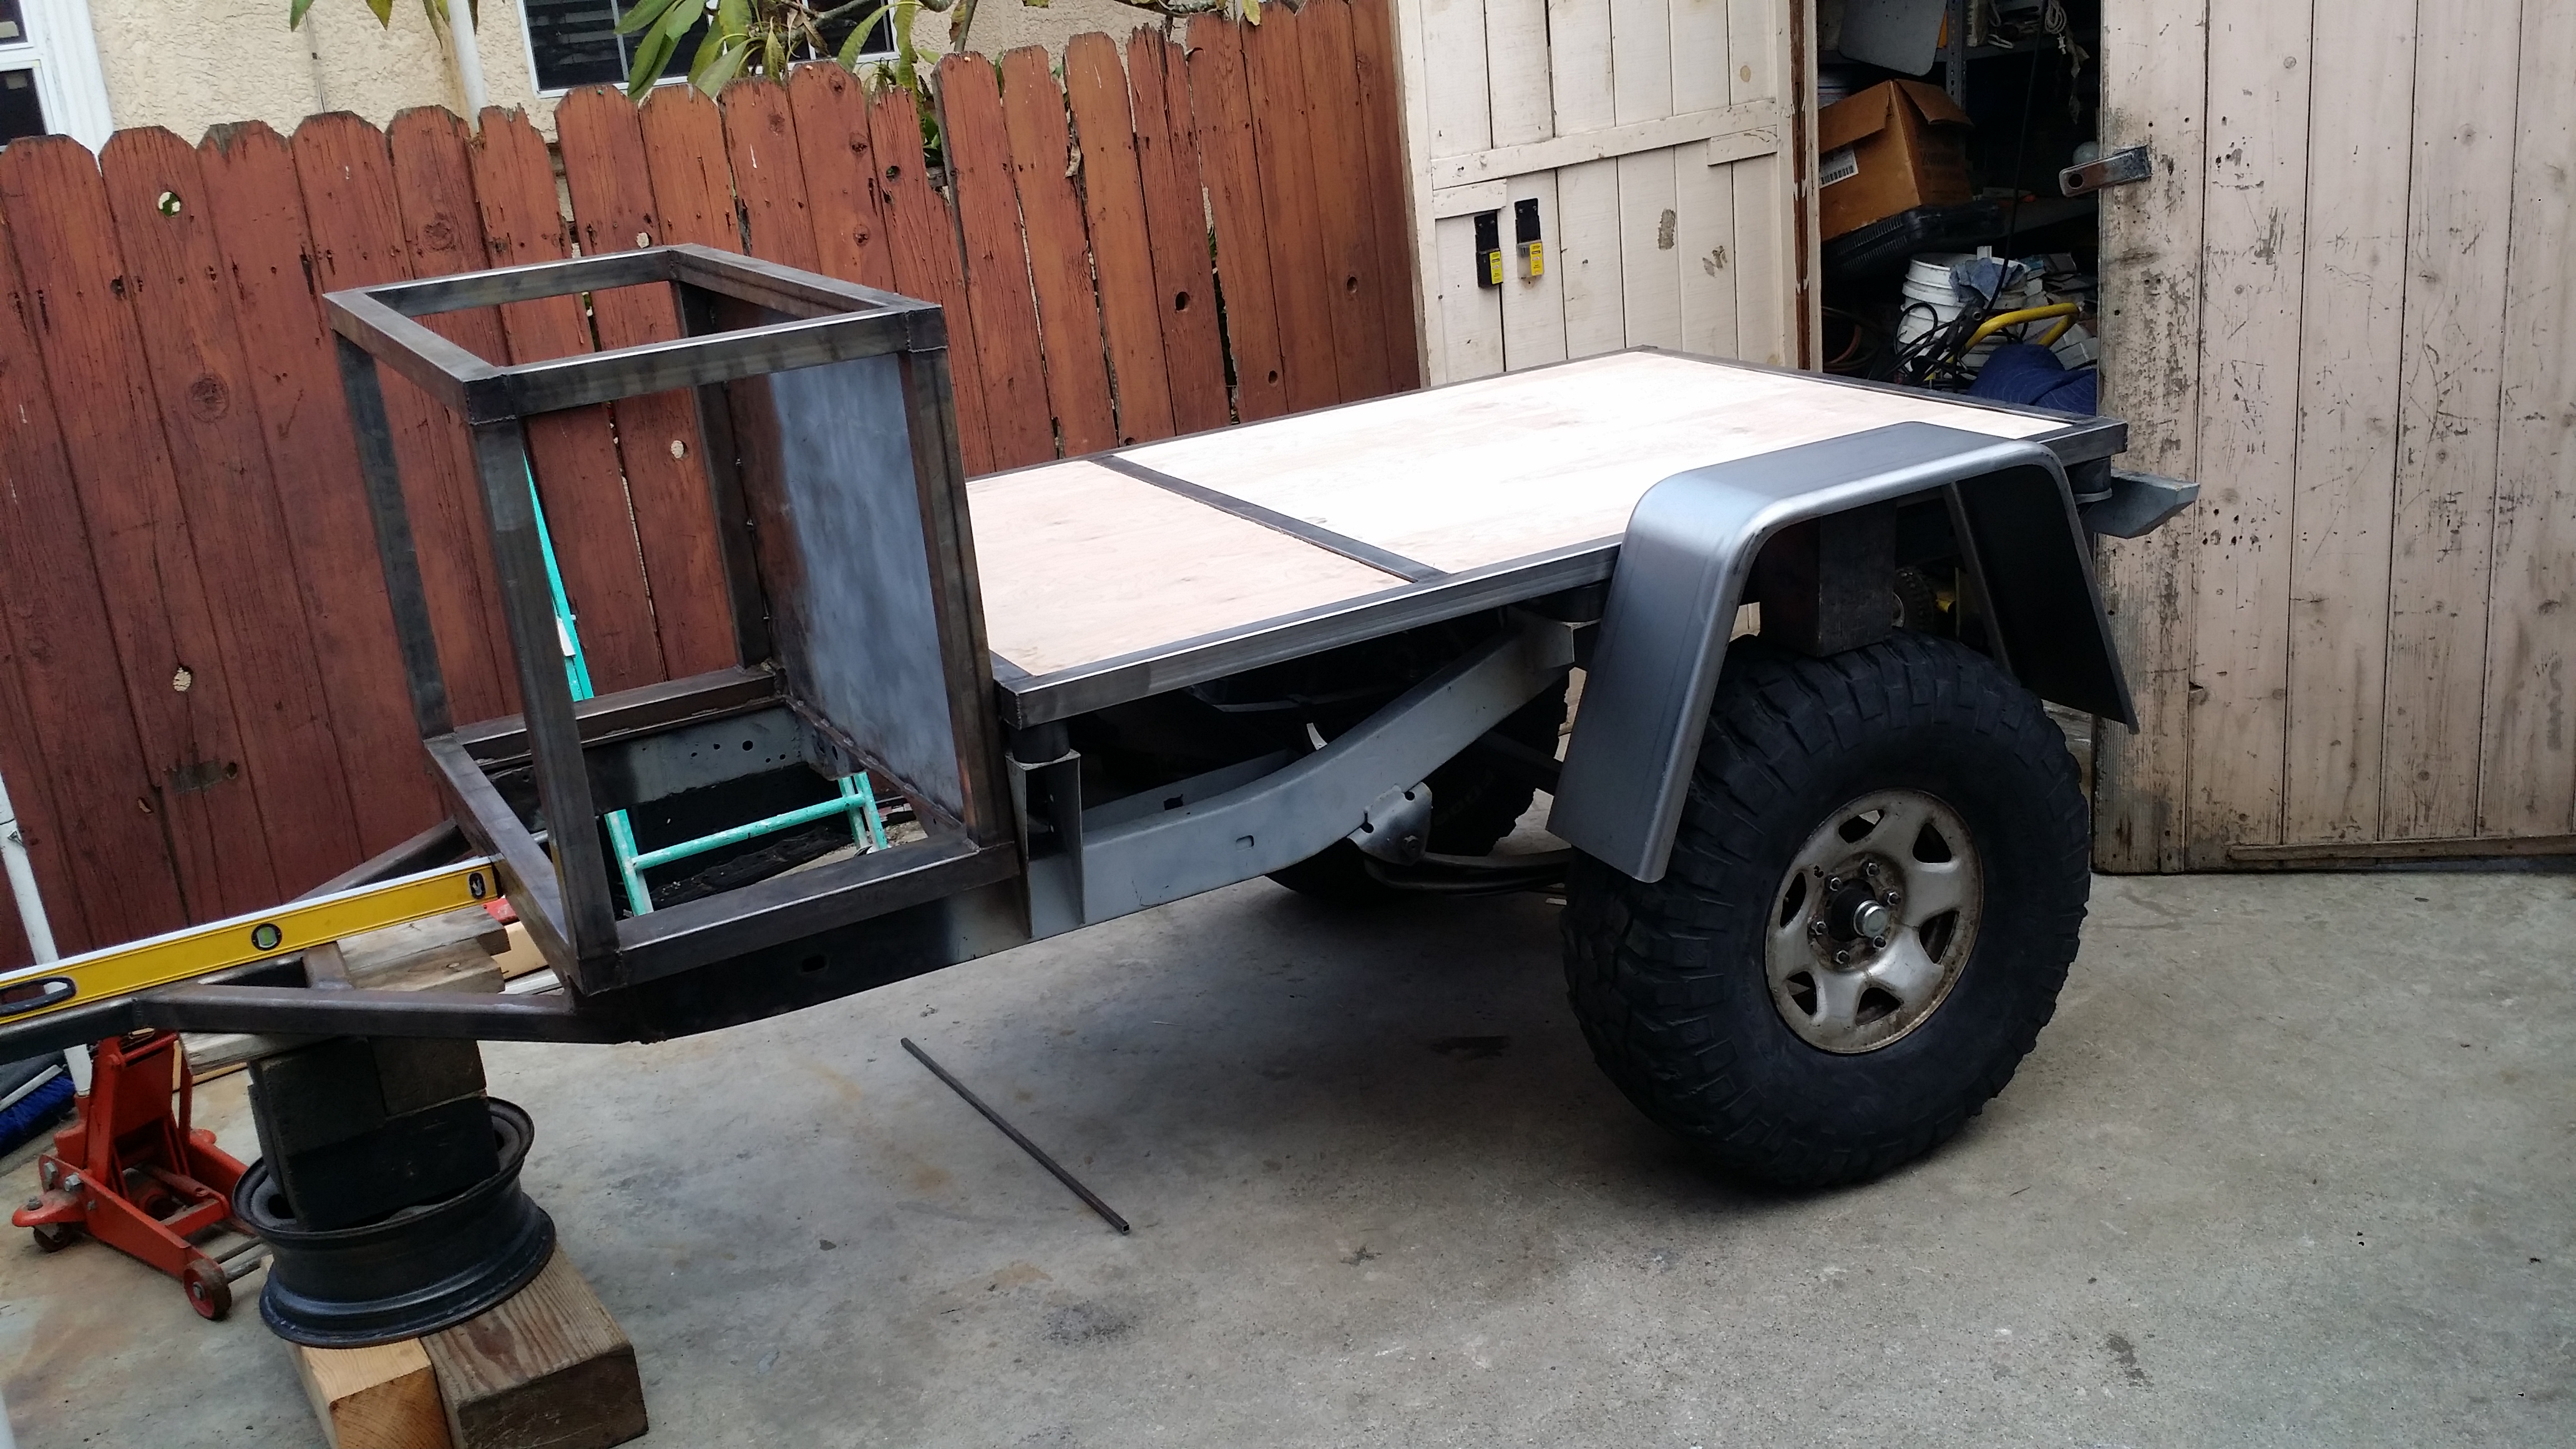
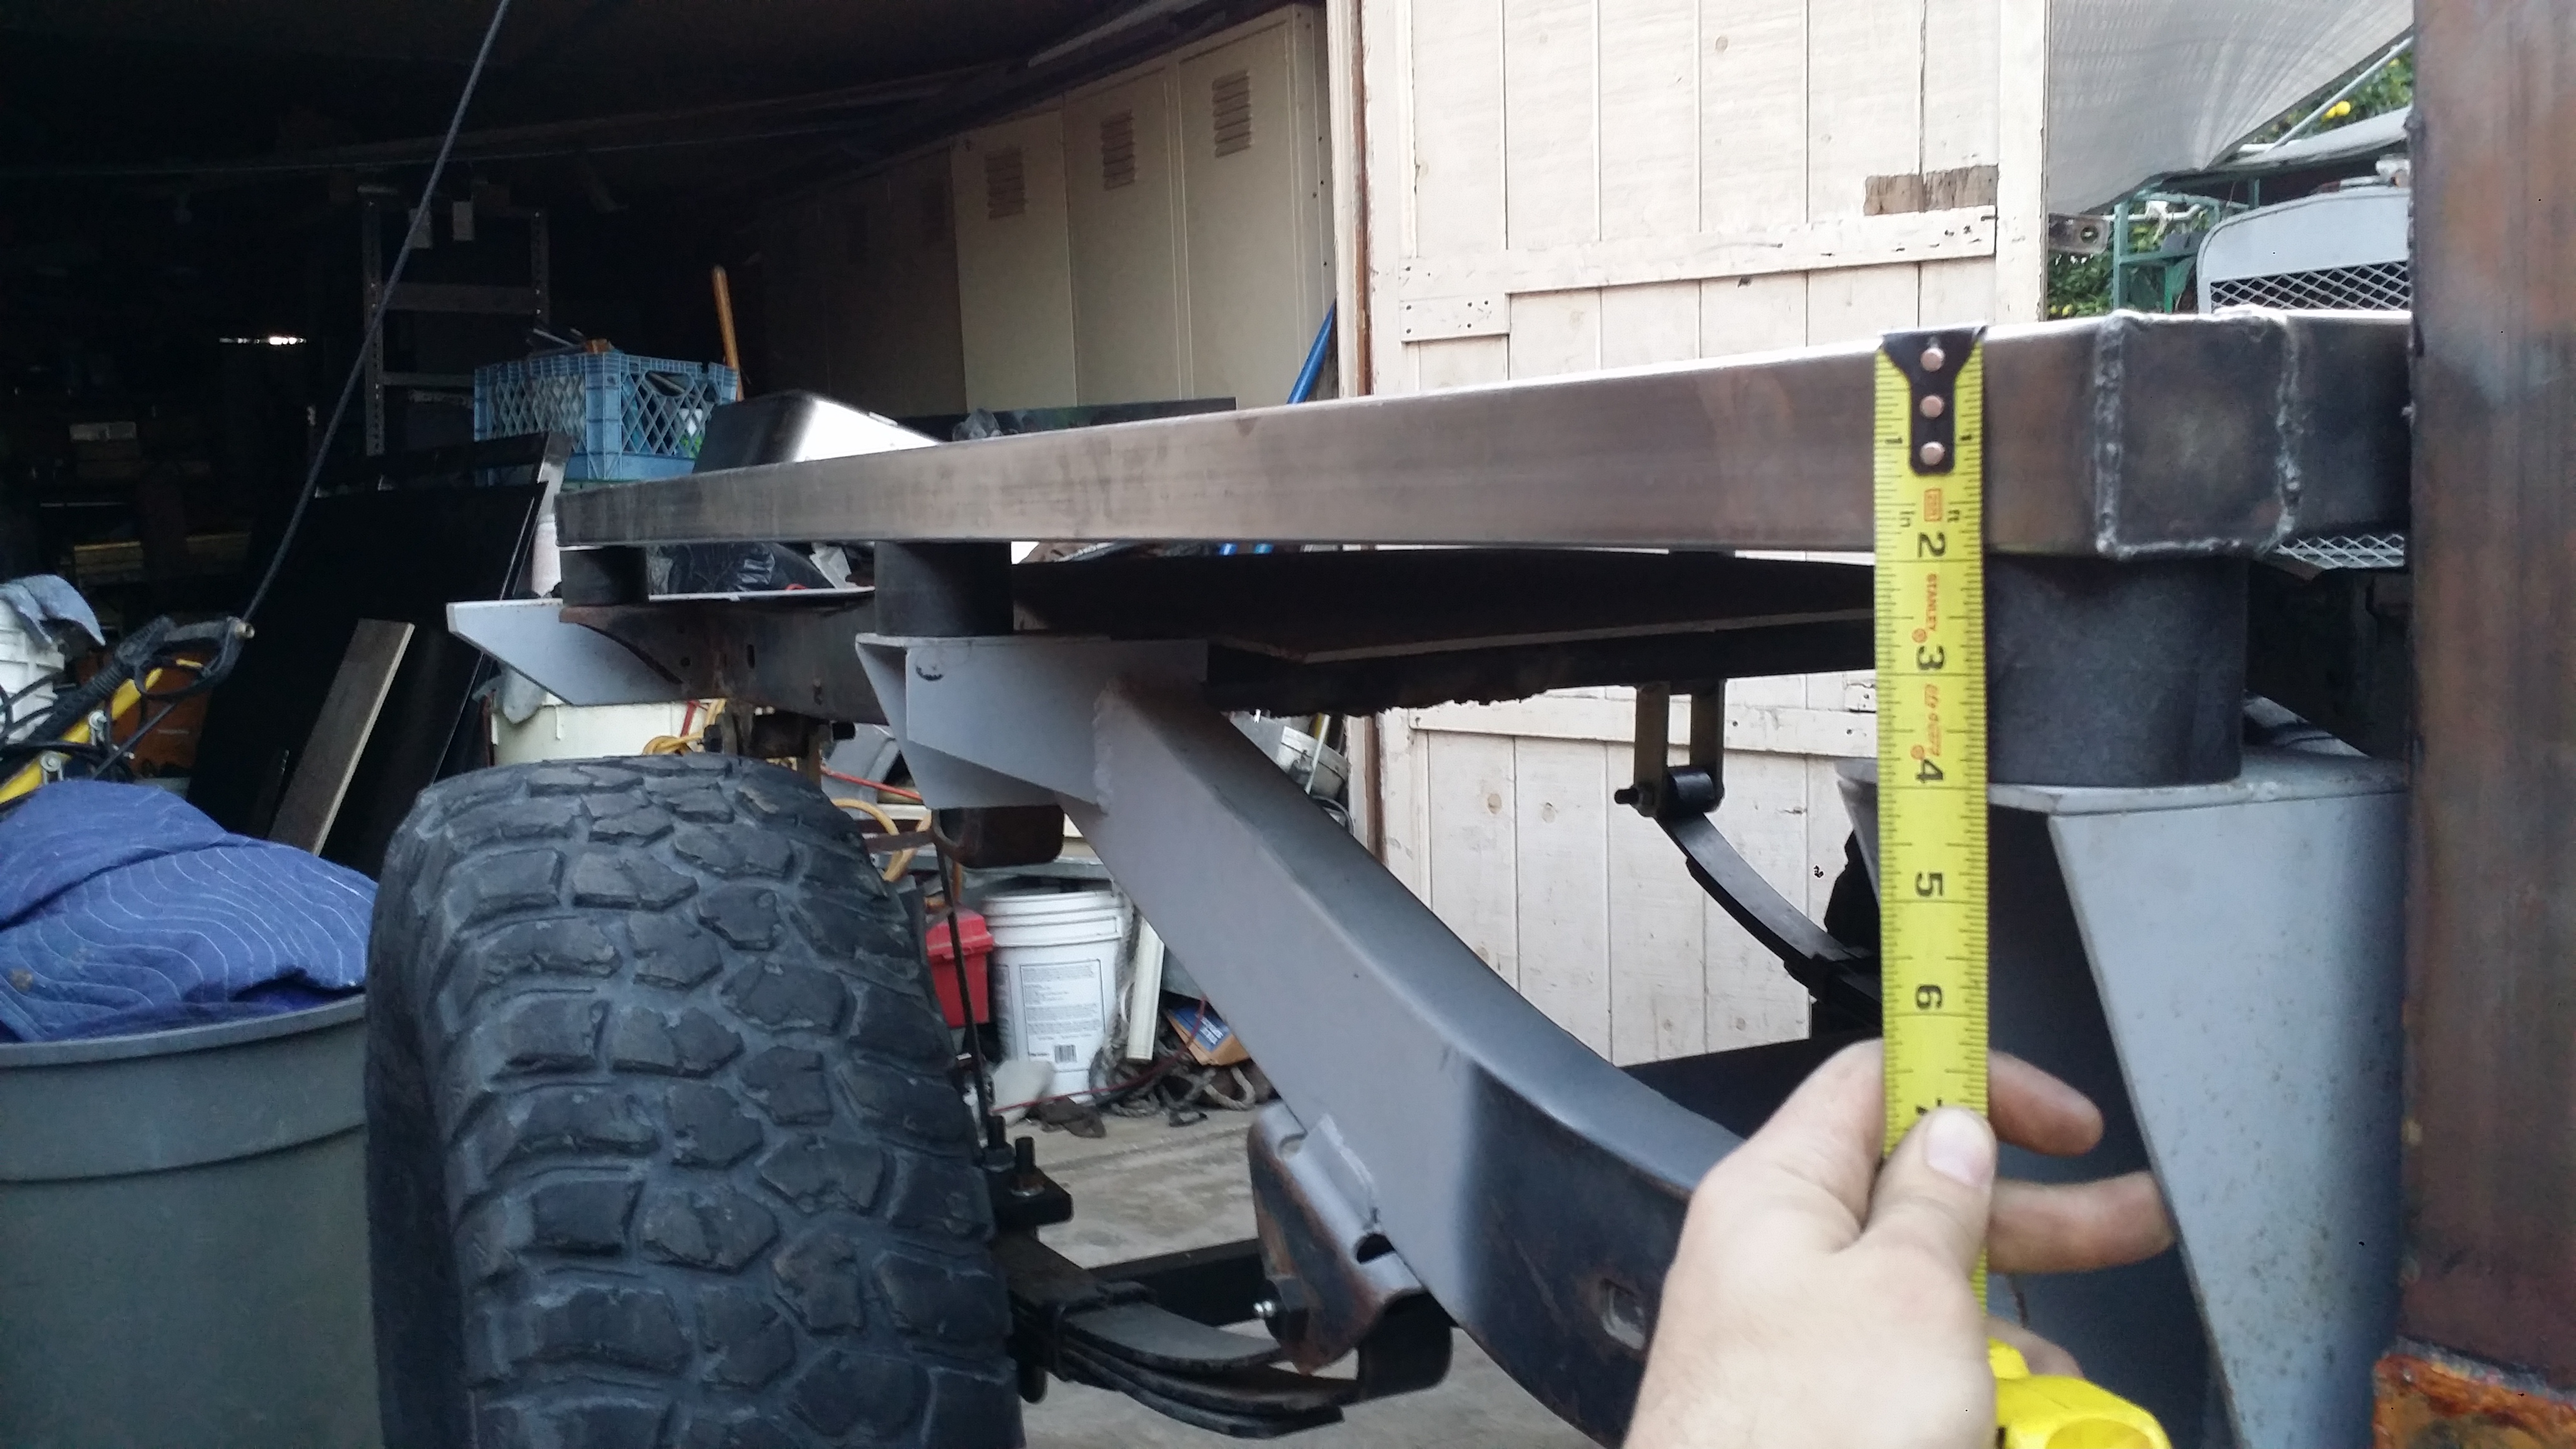
With the 2" spacers. Im going to have to find some strong bolts to hold up the main compartment when its loaded up with fridge/freezer, roof top tent and camping gear. I am not going to build this compartment to be removable but i am going to use the body lift to raise the main compartment because it sits too close to the tire. and i fear that when flexed out the tire will rub. So these 2" spacers are going to give me the extra clearance i need for the tire to move up some. Once i find the bolts to secure it in place im going to weld them onto the body towers that i made so they can not be removed.
I also went ahead and began to cut the flooring for the front compartment. the 0.5" wood is all cut out to size and then i traced the wood onto the remaining sheet metal from the first piece i used for the large compartment. and cut it to size. I'm really hoping it doesn't rain tonight/tomorrow so i can weld up the floor to the smaller compartment and possibly to roof as well. I would really like to see this compartment permanently welded onto the frame by tomorrow. but we will see if i have sufficient time to complete all the tasks i want to do tomorrow.
---------------------------------------------------------------------------------------
The trailer project is really starting to come together. All i know is that It's gonna be tall! Once i'm done with the main compartment. It's going to be 64" tall. Plus 3 more inches to make a roof rack above the main compartment so I can mount the Mt. Rainier roof top tent that i want. AND another 15.5" of the closed roof top tent. In total it's gonna sit somewhere between 80-83" tall. It's gonna be huge when all closed up. Imagine how awesome it'll look once the large roof top tent is open! Im sure where ever i decide to camp out will be considered home base for my wheeling groups lol!


Then i went to instagram user "Ish_mrqz" to get some help mounting these 35" BF goodrich KM2 tires onto the temporary rims and talk about trucks and this trailer project.

After getting the truck level in the front with the back here is how it looks. Those tires really lifted the trailer a lot! Now it's starting to look beefy! And now I can work on the trailer without being hunched over all the time. I think these KM2's make this project look a lot more serious now.

Looking mean!

Test fitment of the "Jeep Style" trailer fenders I bought on Ebay a few months ago. I am definitely going to have to trim them from the bottom a bit. But for the most part I'm liking the way they are going to look on it; especially after I fab up some small rock sliders for it. They measure 36" at the base of the fender, 21" at the top of the fender, 19" height, and 10" wide. Once I buy the same 15�8" steel procomp rims that I have on the truck these tires will sit perfectly centered with the fender.


With the 2" spacers. Im going to have to find some strong bolts to hold up the main compartment when its loaded up with fridge/freezer, roof top tent and camping gear. I am not going to build this compartment to be removable but i am going to use the body lift to raise the main compartment because it sits too close to the tire. and i fear that when flexed out the tire will rub. So these 2" spacers are going to give me the extra clearance i need for the tire to move up some. Once i find the bolts to secure it in place im going to weld them onto the body towers that i made so they can not be removed.

I also went ahead and began to cut the flooring for the front compartment. the 0.5" wood is all cut out to size and then i traced the wood onto the remaining sheet metal from the first piece i used for the large compartment. and cut it to size. I'm really hoping it doesn't rain tonight/tomorrow so i can weld up the floor to the smaller compartment and possibly to roof as well. I would really like to see this compartment permanently welded onto the frame by tomorrow. but we will see if i have sufficient time to complete all the tasks i want to do tomorrow.

---------------------------------------------------------------------------------------
The trailer project is really starting to come together. All i know is that It's gonna be tall! Once i'm done with the main compartment. It's going to be 64" tall. Plus 3 more inches to make a roof rack above the main compartment so I can mount the Mt. Rainier roof top tent that i want. AND another 15.5" of the closed roof top tent. In total it's gonna sit somewhere between 80-83" tall. It's gonna be huge when all closed up. Imagine how awesome it'll look once the large roof top tent is open! Im sure where ever i decide to camp out will be considered home base for my wheeling groups lol!
Last edited by Redeth005; Jan 23, 2016 at 05:31 PM.
Jan 24, 2016 | 06:05 PM
#68
Thread Starter
Registered User
Joined: Apr 2012
Posts: 2,817
Likes: 2
From: Los Angeles CA
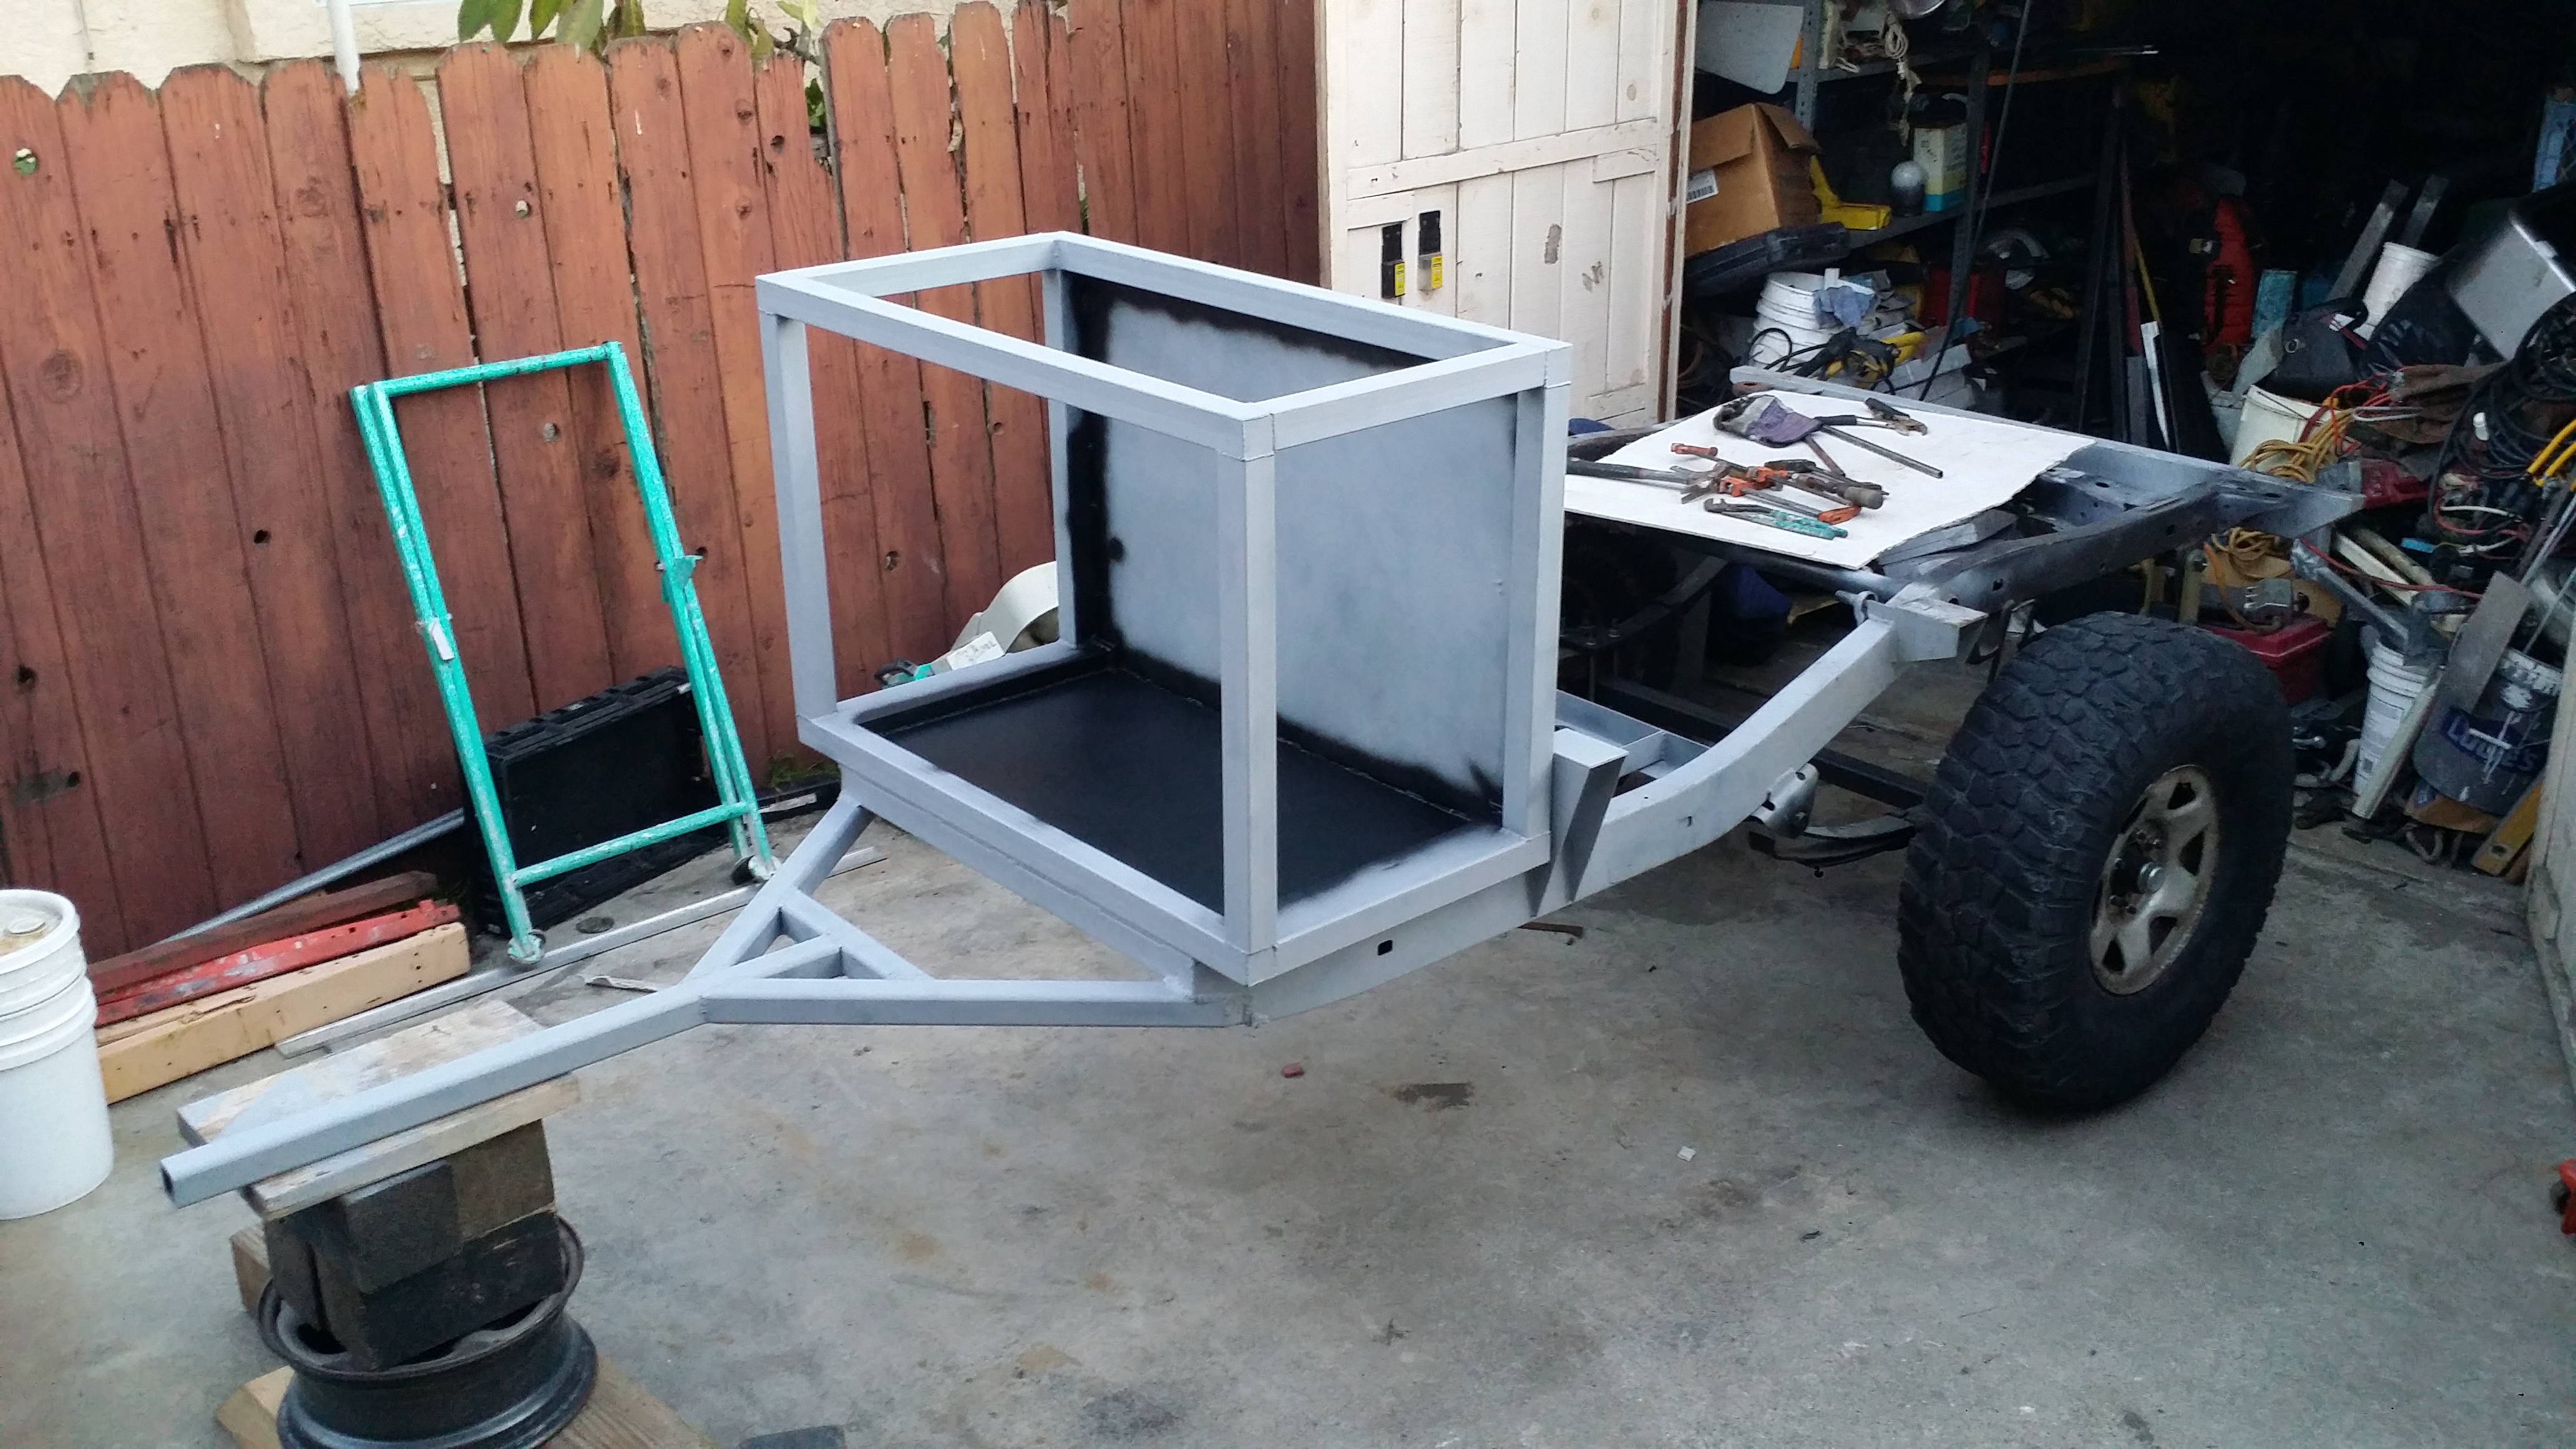
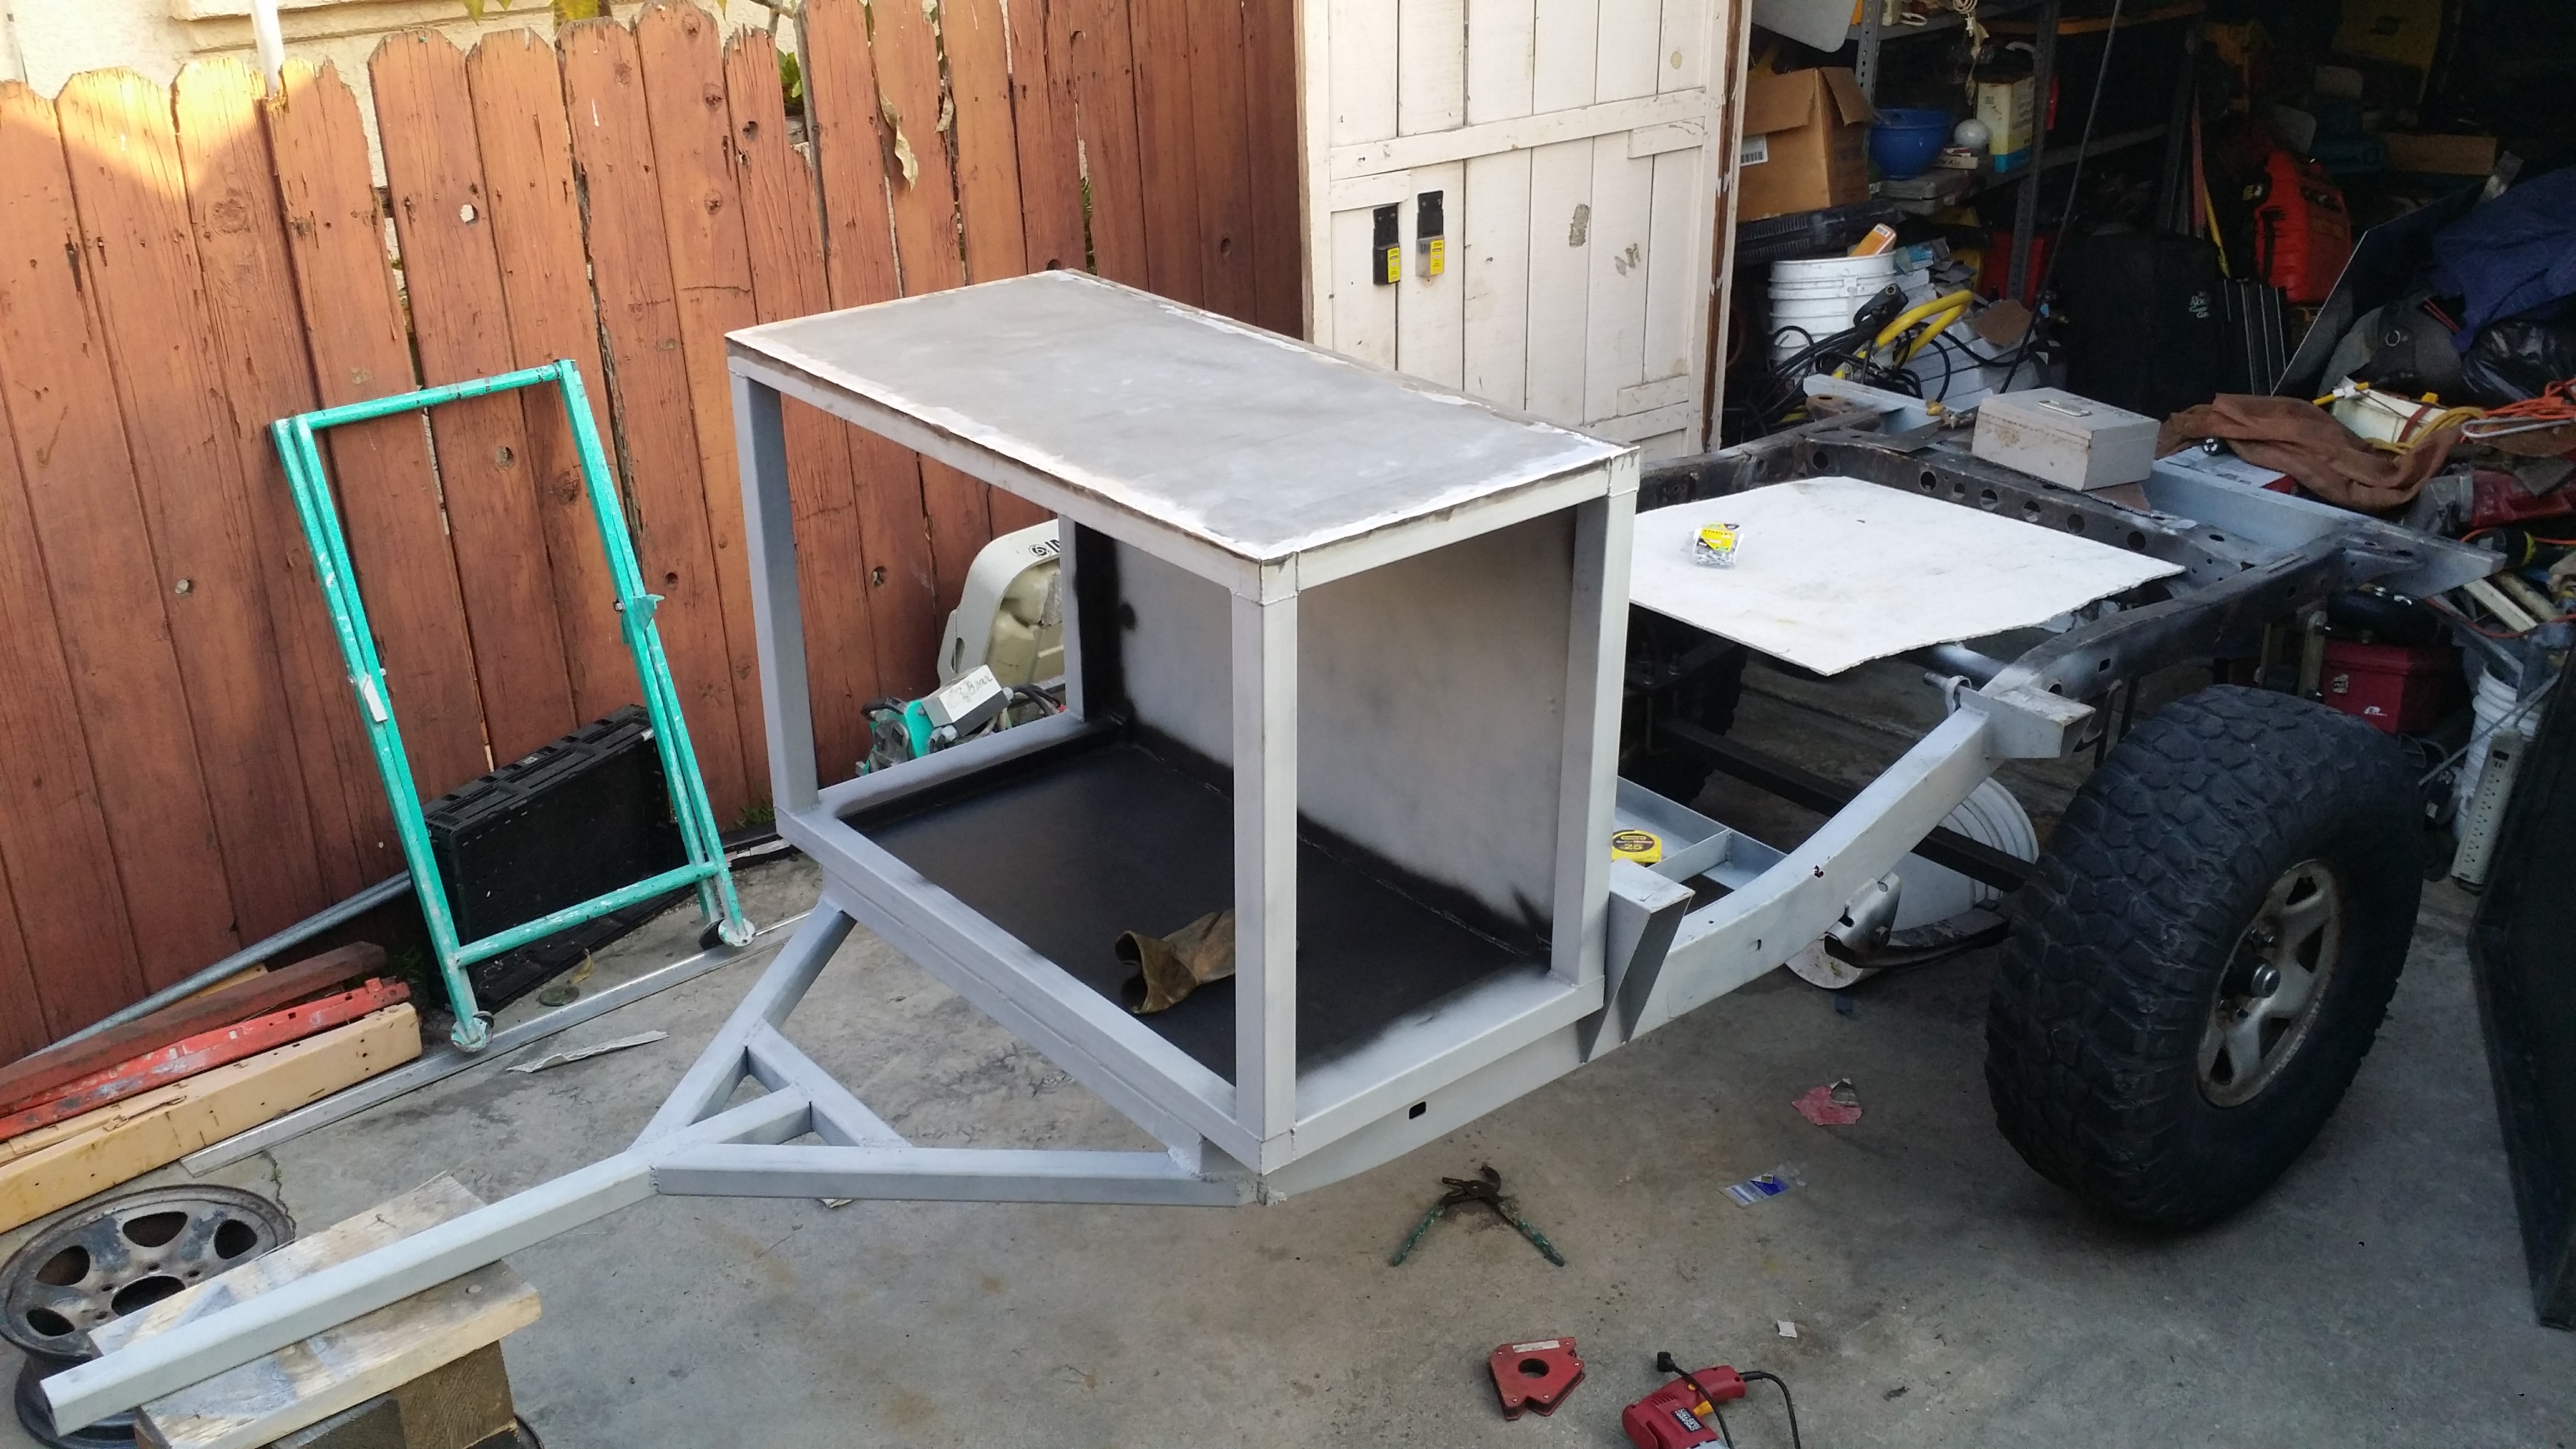
Got the front storage compartment floor welded on and permanently welded onto the trailer frame now. Lately even with having the trailer covered, I've been having trouble keeping oxidation away so I went ahead and primed the whole front half of the frame to keep the surface rust off as well as the entire front compartment.
I had about half a can of matte black left over from my previous project so i also painted all of the inside floor and got all the welds really good to add extra protection for the mean time.
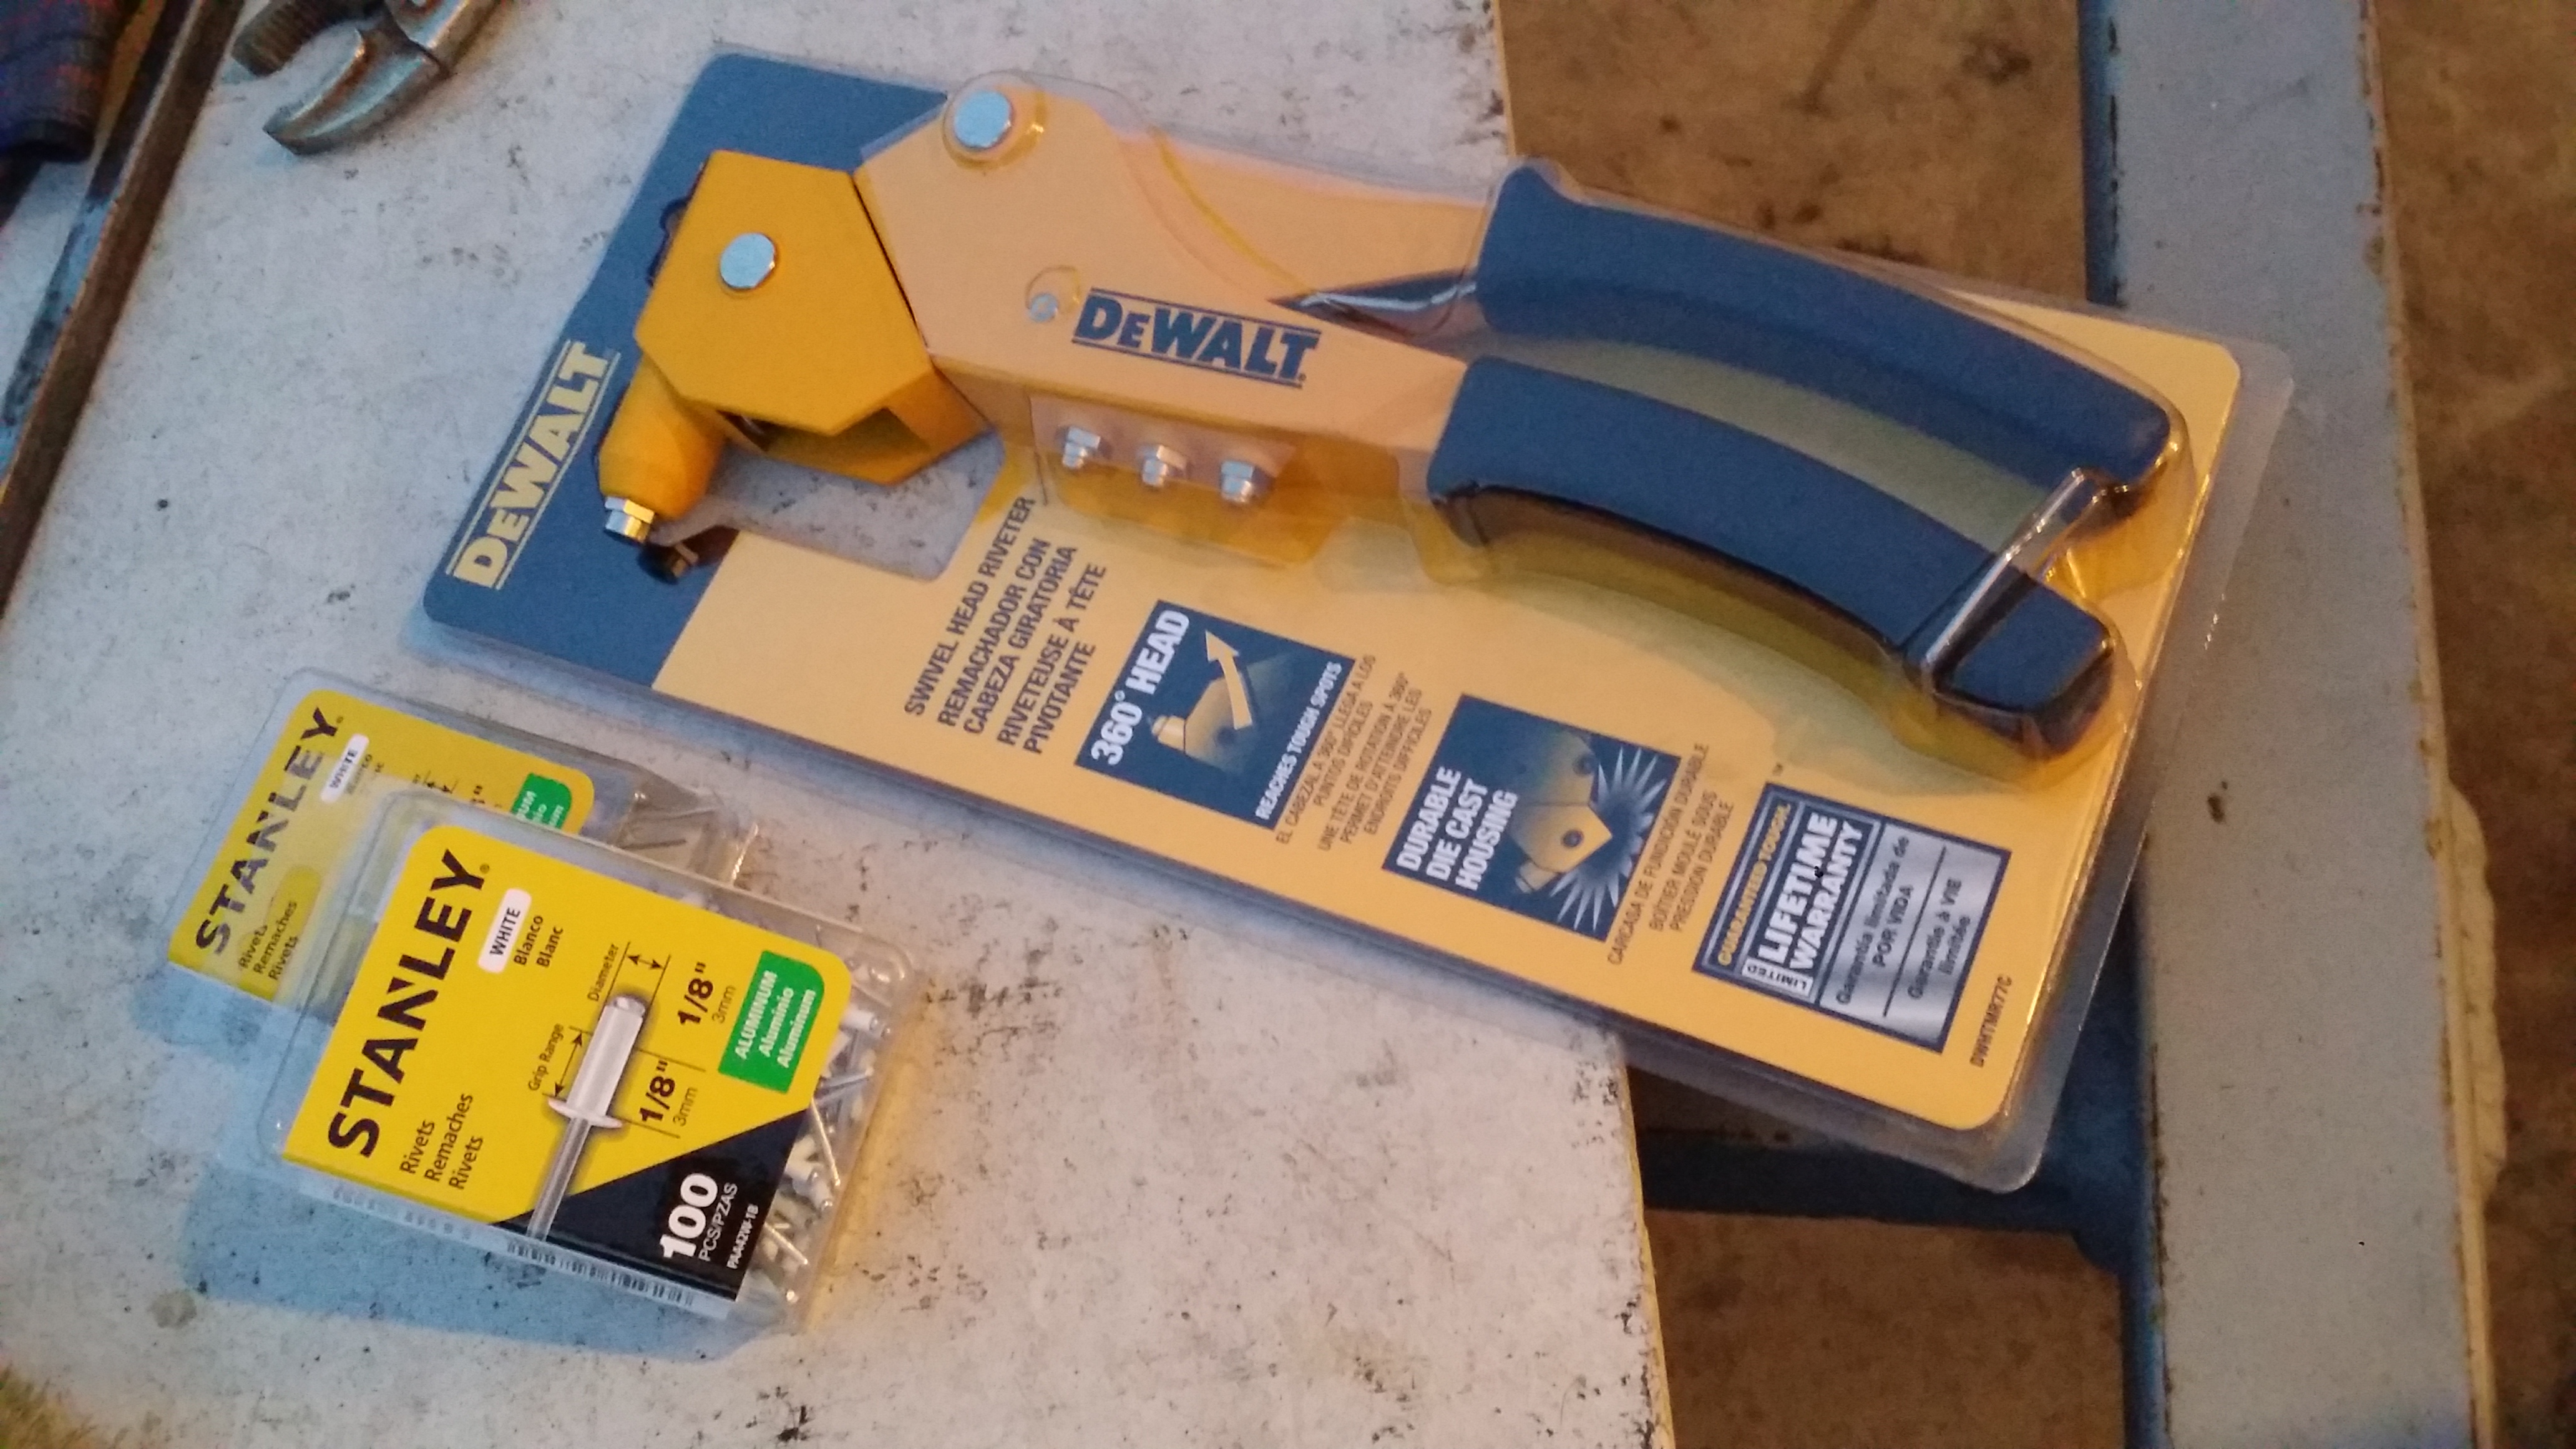
Bought this pop rivet gun with 1/8" rivets at home depot this morning as well These are going to be used to mount the aluminum side walls onto the steel storage compartments. This particular gun is really cool because the head swivels so you can change your angle in those hard to reach places.
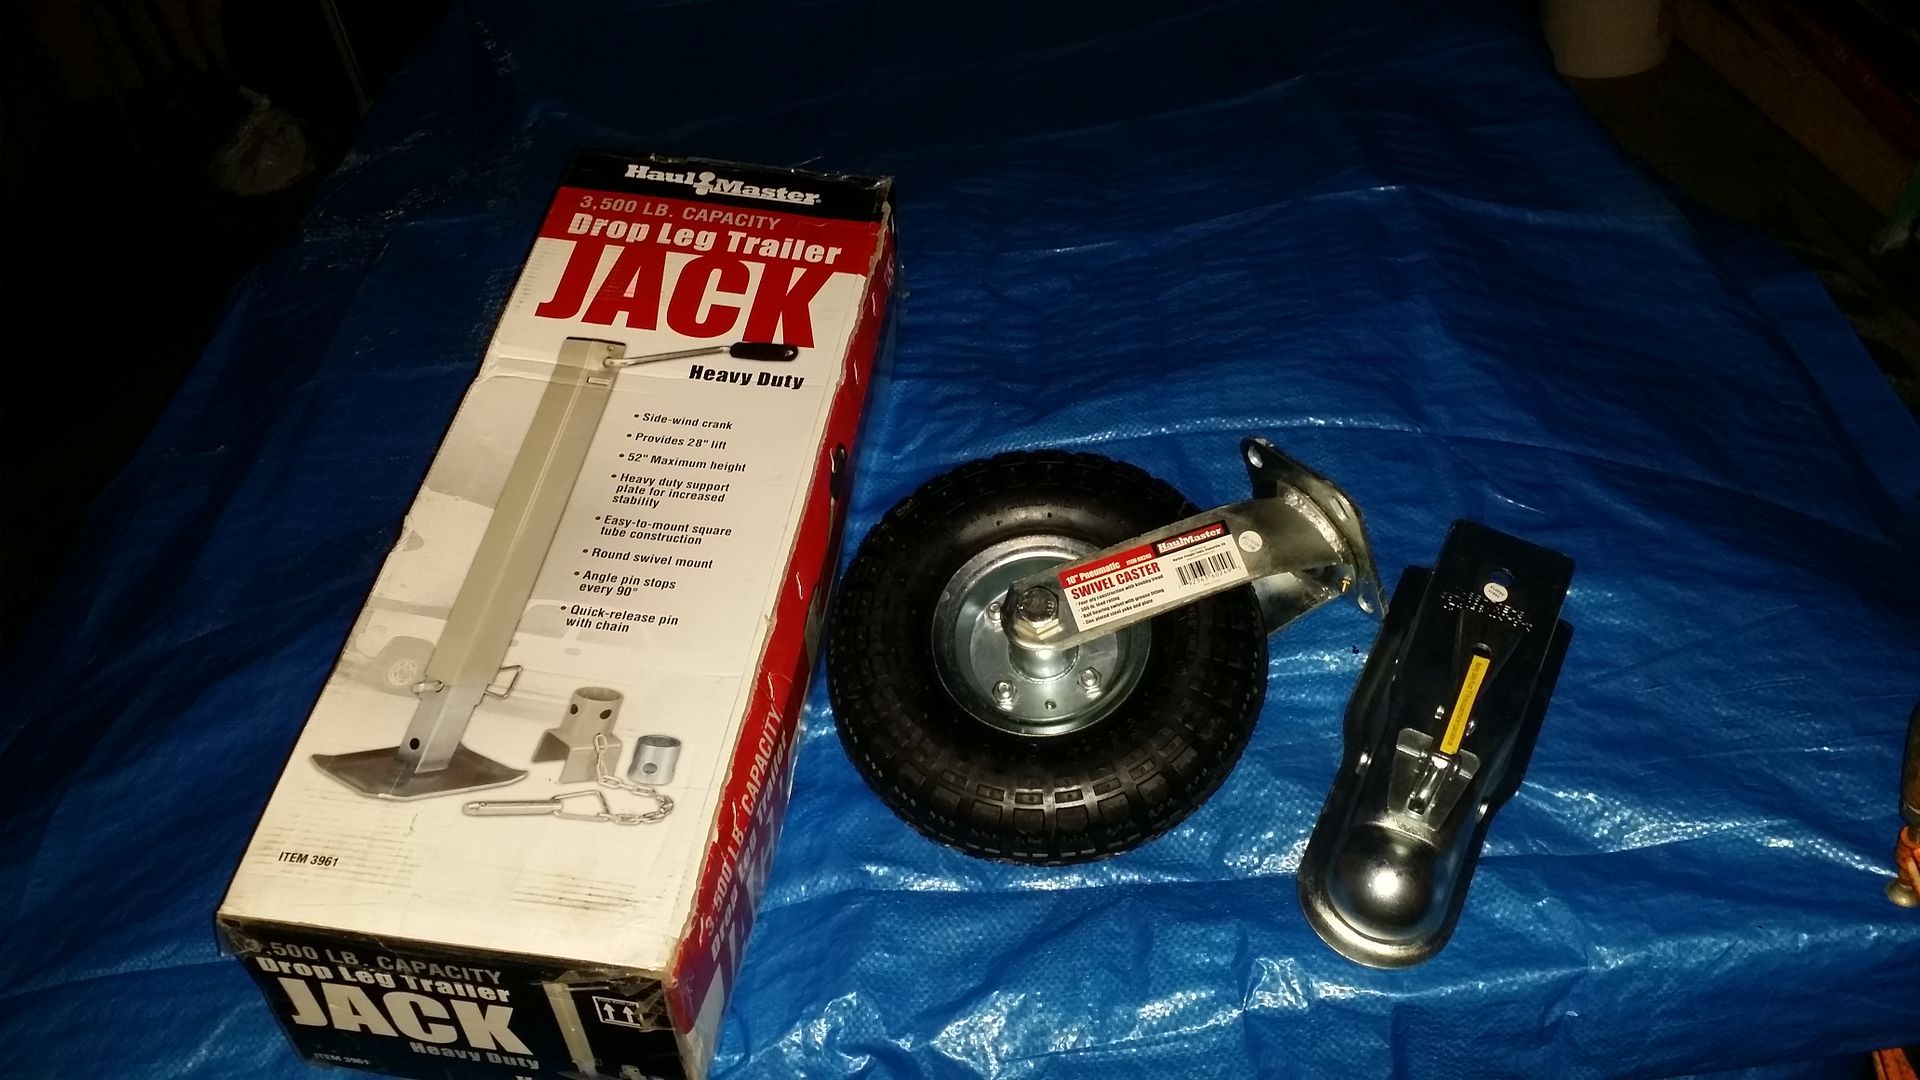
Also this morning i bought this trailer jack for the tongue. I was thinking about somehow mounting this tire to the bottom of the jack. But still debating on keeping it or taking it back to get something built better. Any suggestions? My tongue is 24" tall so i need something to clear that height and preferably with a rubber tire not plastic. And soon ill be adding this trailer hitch just temporarily until i get the trailer inspection done (whenever that time comes). After i get the trailer registered with the DMV i would really like to get myself something similar to the Max Coupler.

Last edited by Redeth005; Jan 24, 2016 at 06:07 PM.
Jan 25, 2016 | 05:31 PM
#69
Thread Starter
Registered User
Joined: Apr 2012
Posts: 2,817
Likes: 2
From: Los Angeles CA
Wooo! i see progress for this weekend. I just came home from buying a 4'x10' 16guage aluminum sheet metal for the walls of this trailer. I cant wait to start working on it some more. Ive had such good momentum on this project lately i would hate to stop now. lol
Jan 26, 2016 | 07:37 AM
#70


for the hitch and tongue jack:
i recommend a pintle hitch to allow for increased articulation, or maybe a bolt-on hitch so you can have a smooth 2" ball hitch for highway, and pintle for off-road.
and for the jack: your idea of using the swivel wheel is excellent. the larger wheel won't sink into the ground as much. if you're worried about moving it around, it should be fine. if your trailer is balanced enough, tongue weight shouldn't be too much (you should be able to lift it by yourself)
rule of thumb: tongue weight = 10% of total trailer weight (ie- if the trailer is 1500#, tongue weight should be close to 150#)
but you probably already knew that
Jan 31, 2016 | 04:05 PM
#71
Thread Starter
Registered User
Joined: Apr 2012
Posts: 2,817
Likes: 2
From: Los Angeles CA
for the hitch and tongue jack:
i recommend a pintle hitch to allow for increased articulation, or maybe a bolt-on hitch so you can have a smooth 2" ball hitch for highway, and pintle for off-road.
and for the jack: your idea of using the swivel wheel is excellent. the larger wheel won't sink into the ground as much. if you're worried about moving it around, it should be fine. if your trailer is balanced enough, tongue weight shouldn't be too much (you should be able to lift it by yourself)
rule of thumb: tongue weight = 10% of total trailer weight (ie- if the trailer is 1500#, tongue weight should be close to 150#)
but you probably already knew that
i recommend a pintle hitch to allow for increased articulation, or maybe a bolt-on hitch so you can have a smooth 2" ball hitch for highway, and pintle for off-road.
and for the jack: your idea of using the swivel wheel is excellent. the larger wheel won't sink into the ground as much. if you're worried about moving it around, it should be fine. if your trailer is balanced enough, tongue weight shouldn't be too much (you should be able to lift it by yourself)
rule of thumb: tongue weight = 10% of total trailer weight (ie- if the trailer is 1500#, tongue weight should be close to 150#)
but you probably already knew that
Jan 31, 2016 | 04:48 PM
#72
Thread Starter
Registered User
Joined: Apr 2012
Posts: 2,817
Likes: 2
From: Los Angeles CA
Alright guys i have some updates for you all.
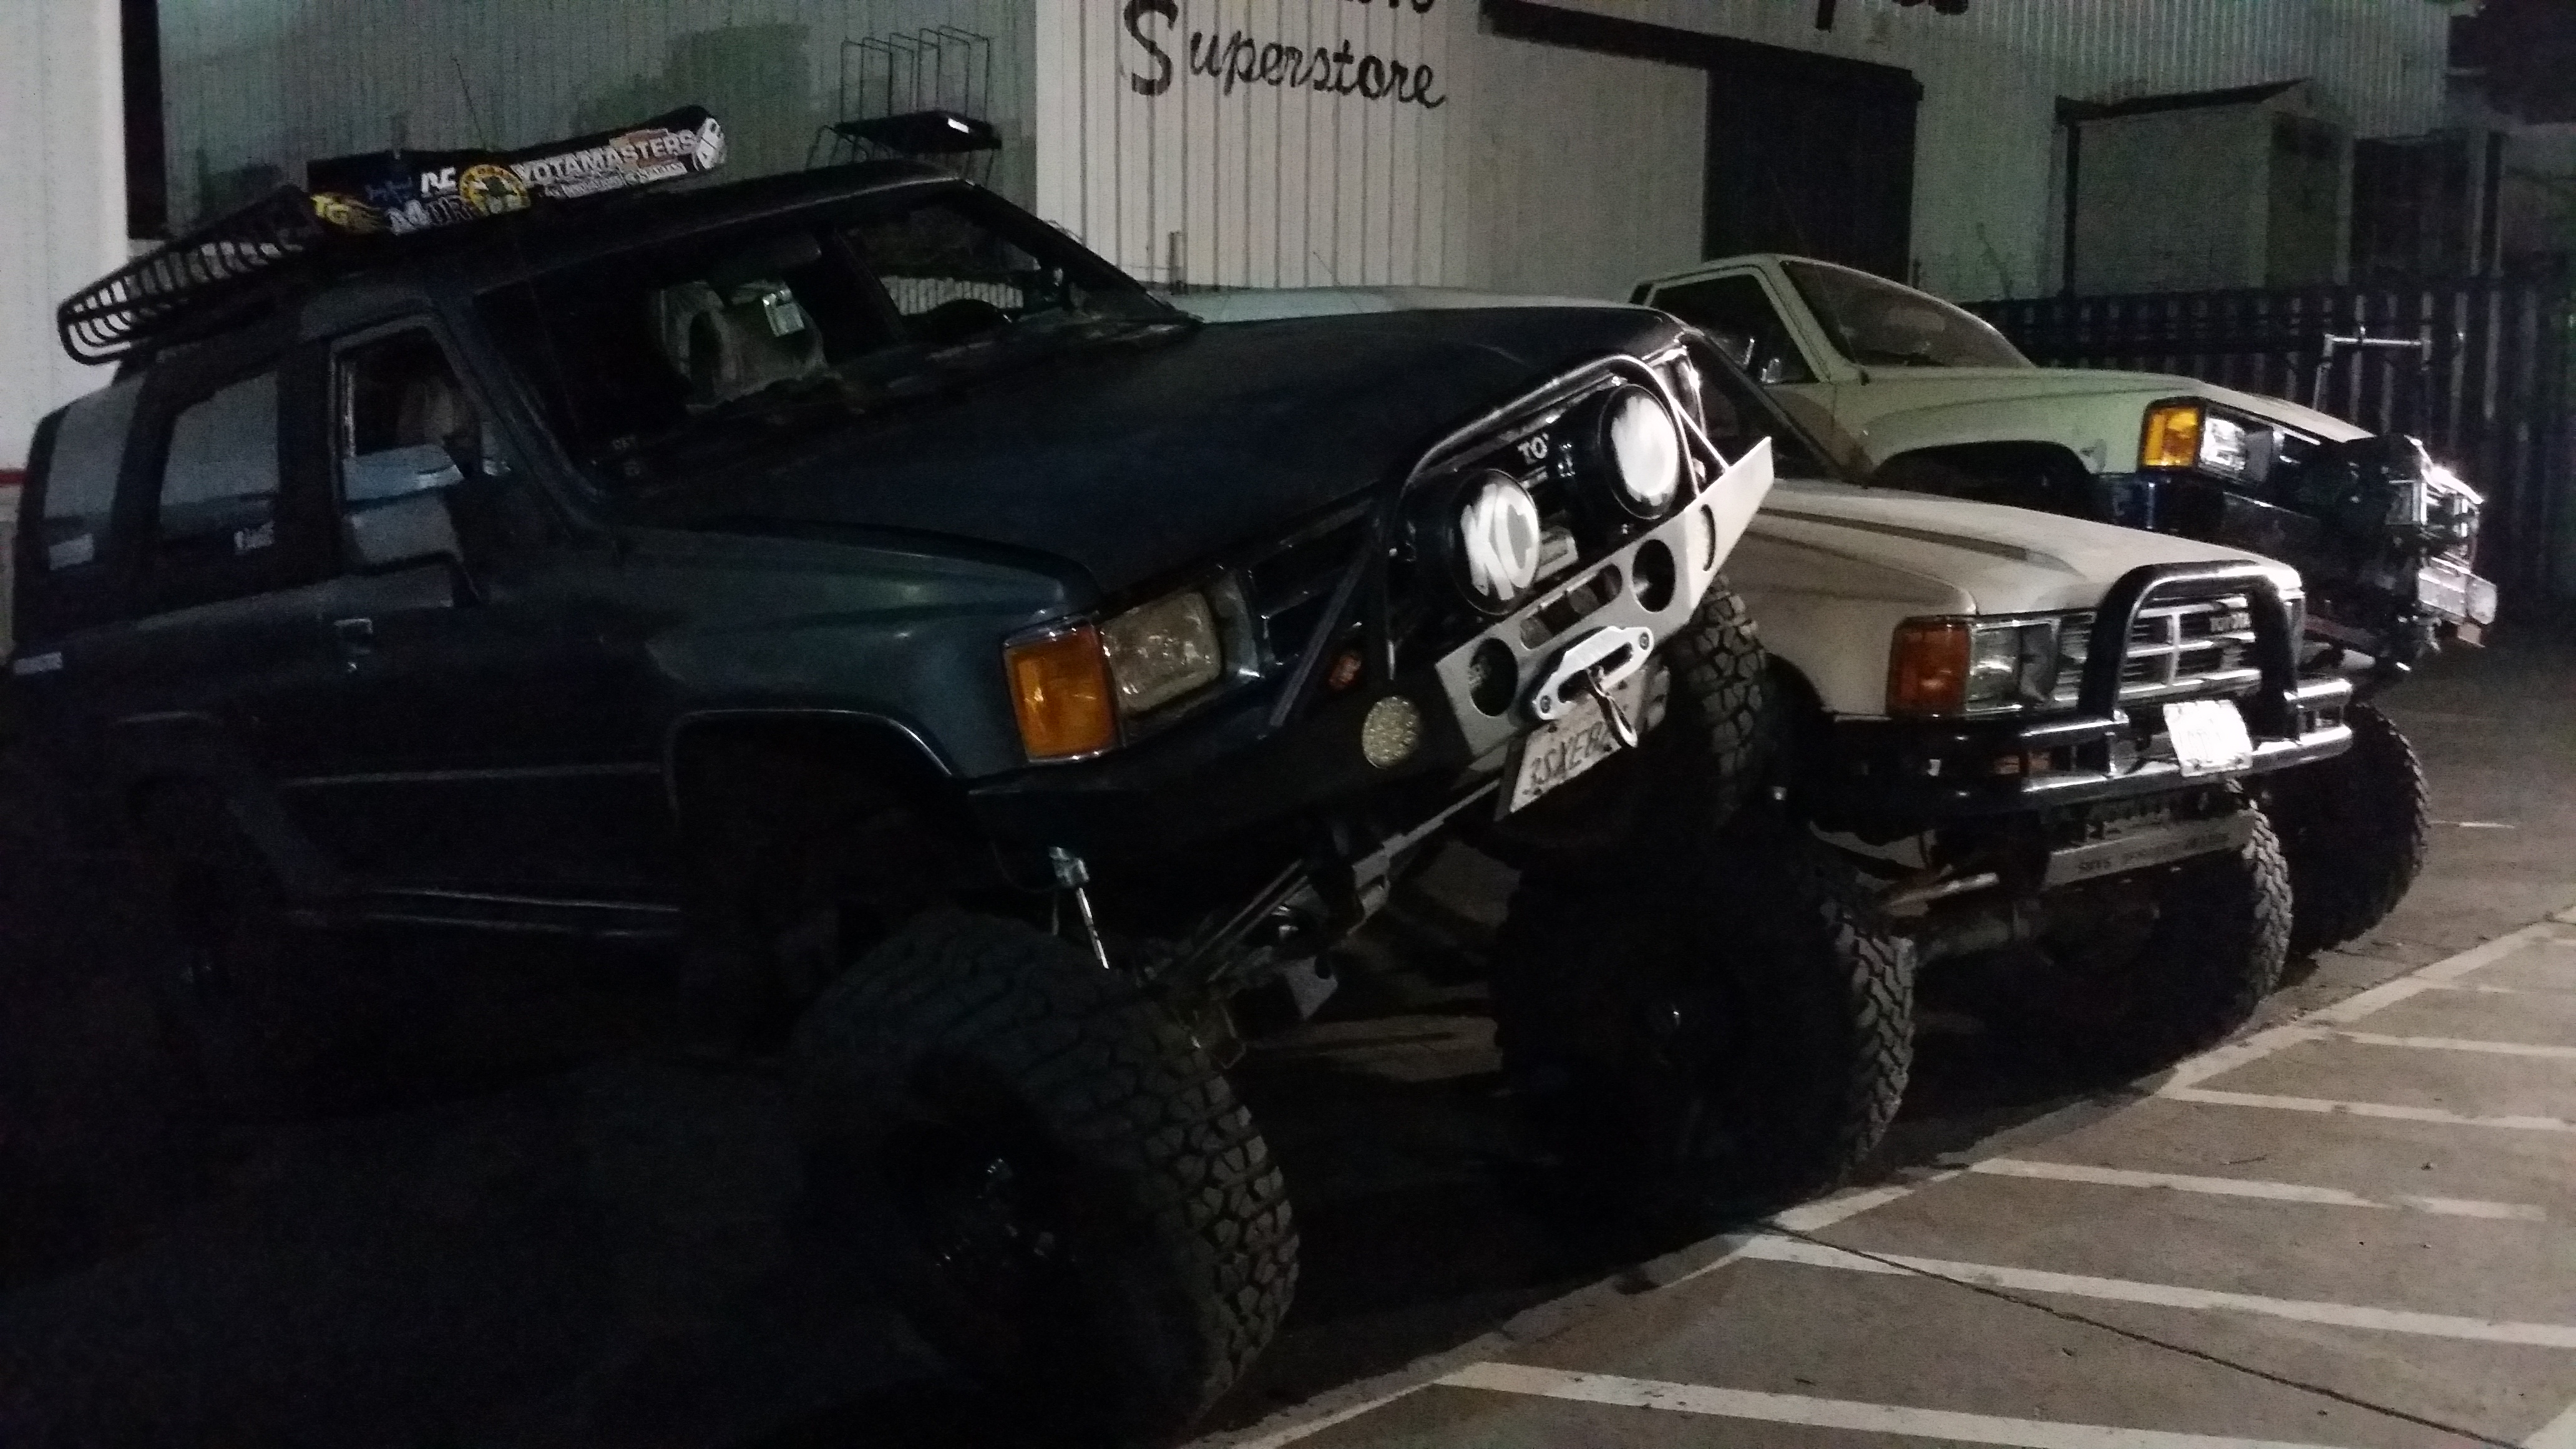
First off let me show off my tow vehicle.
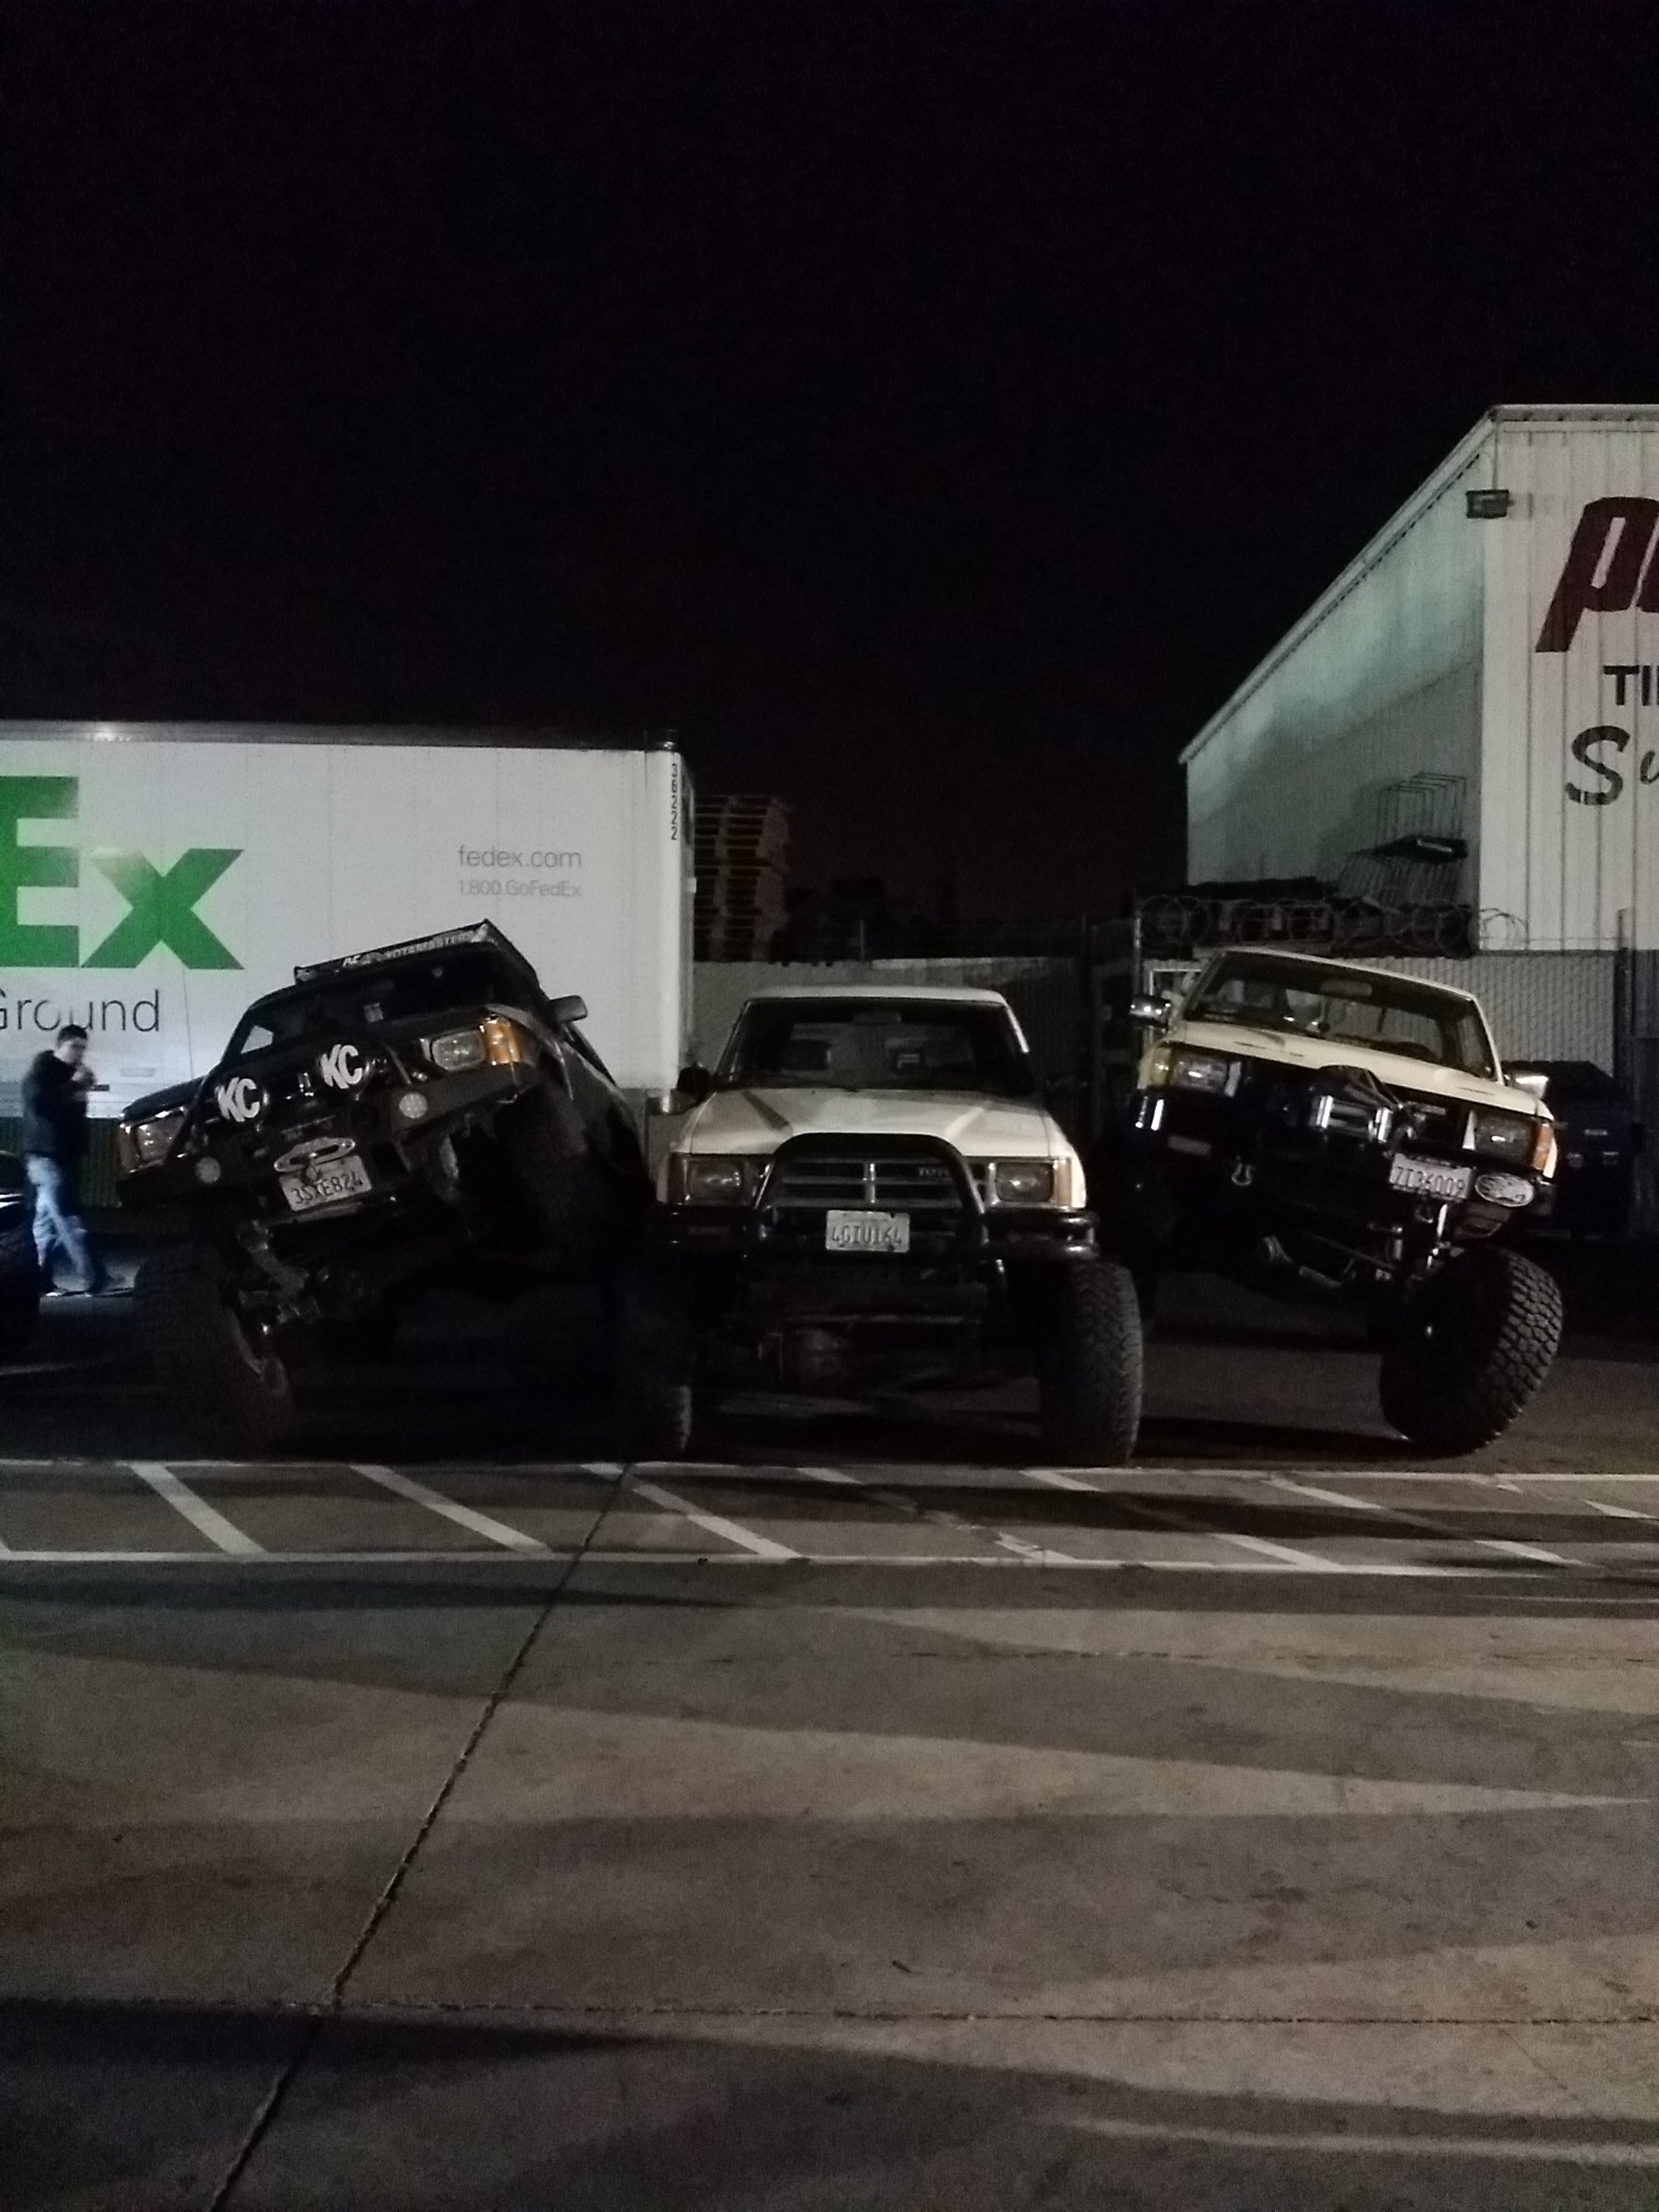
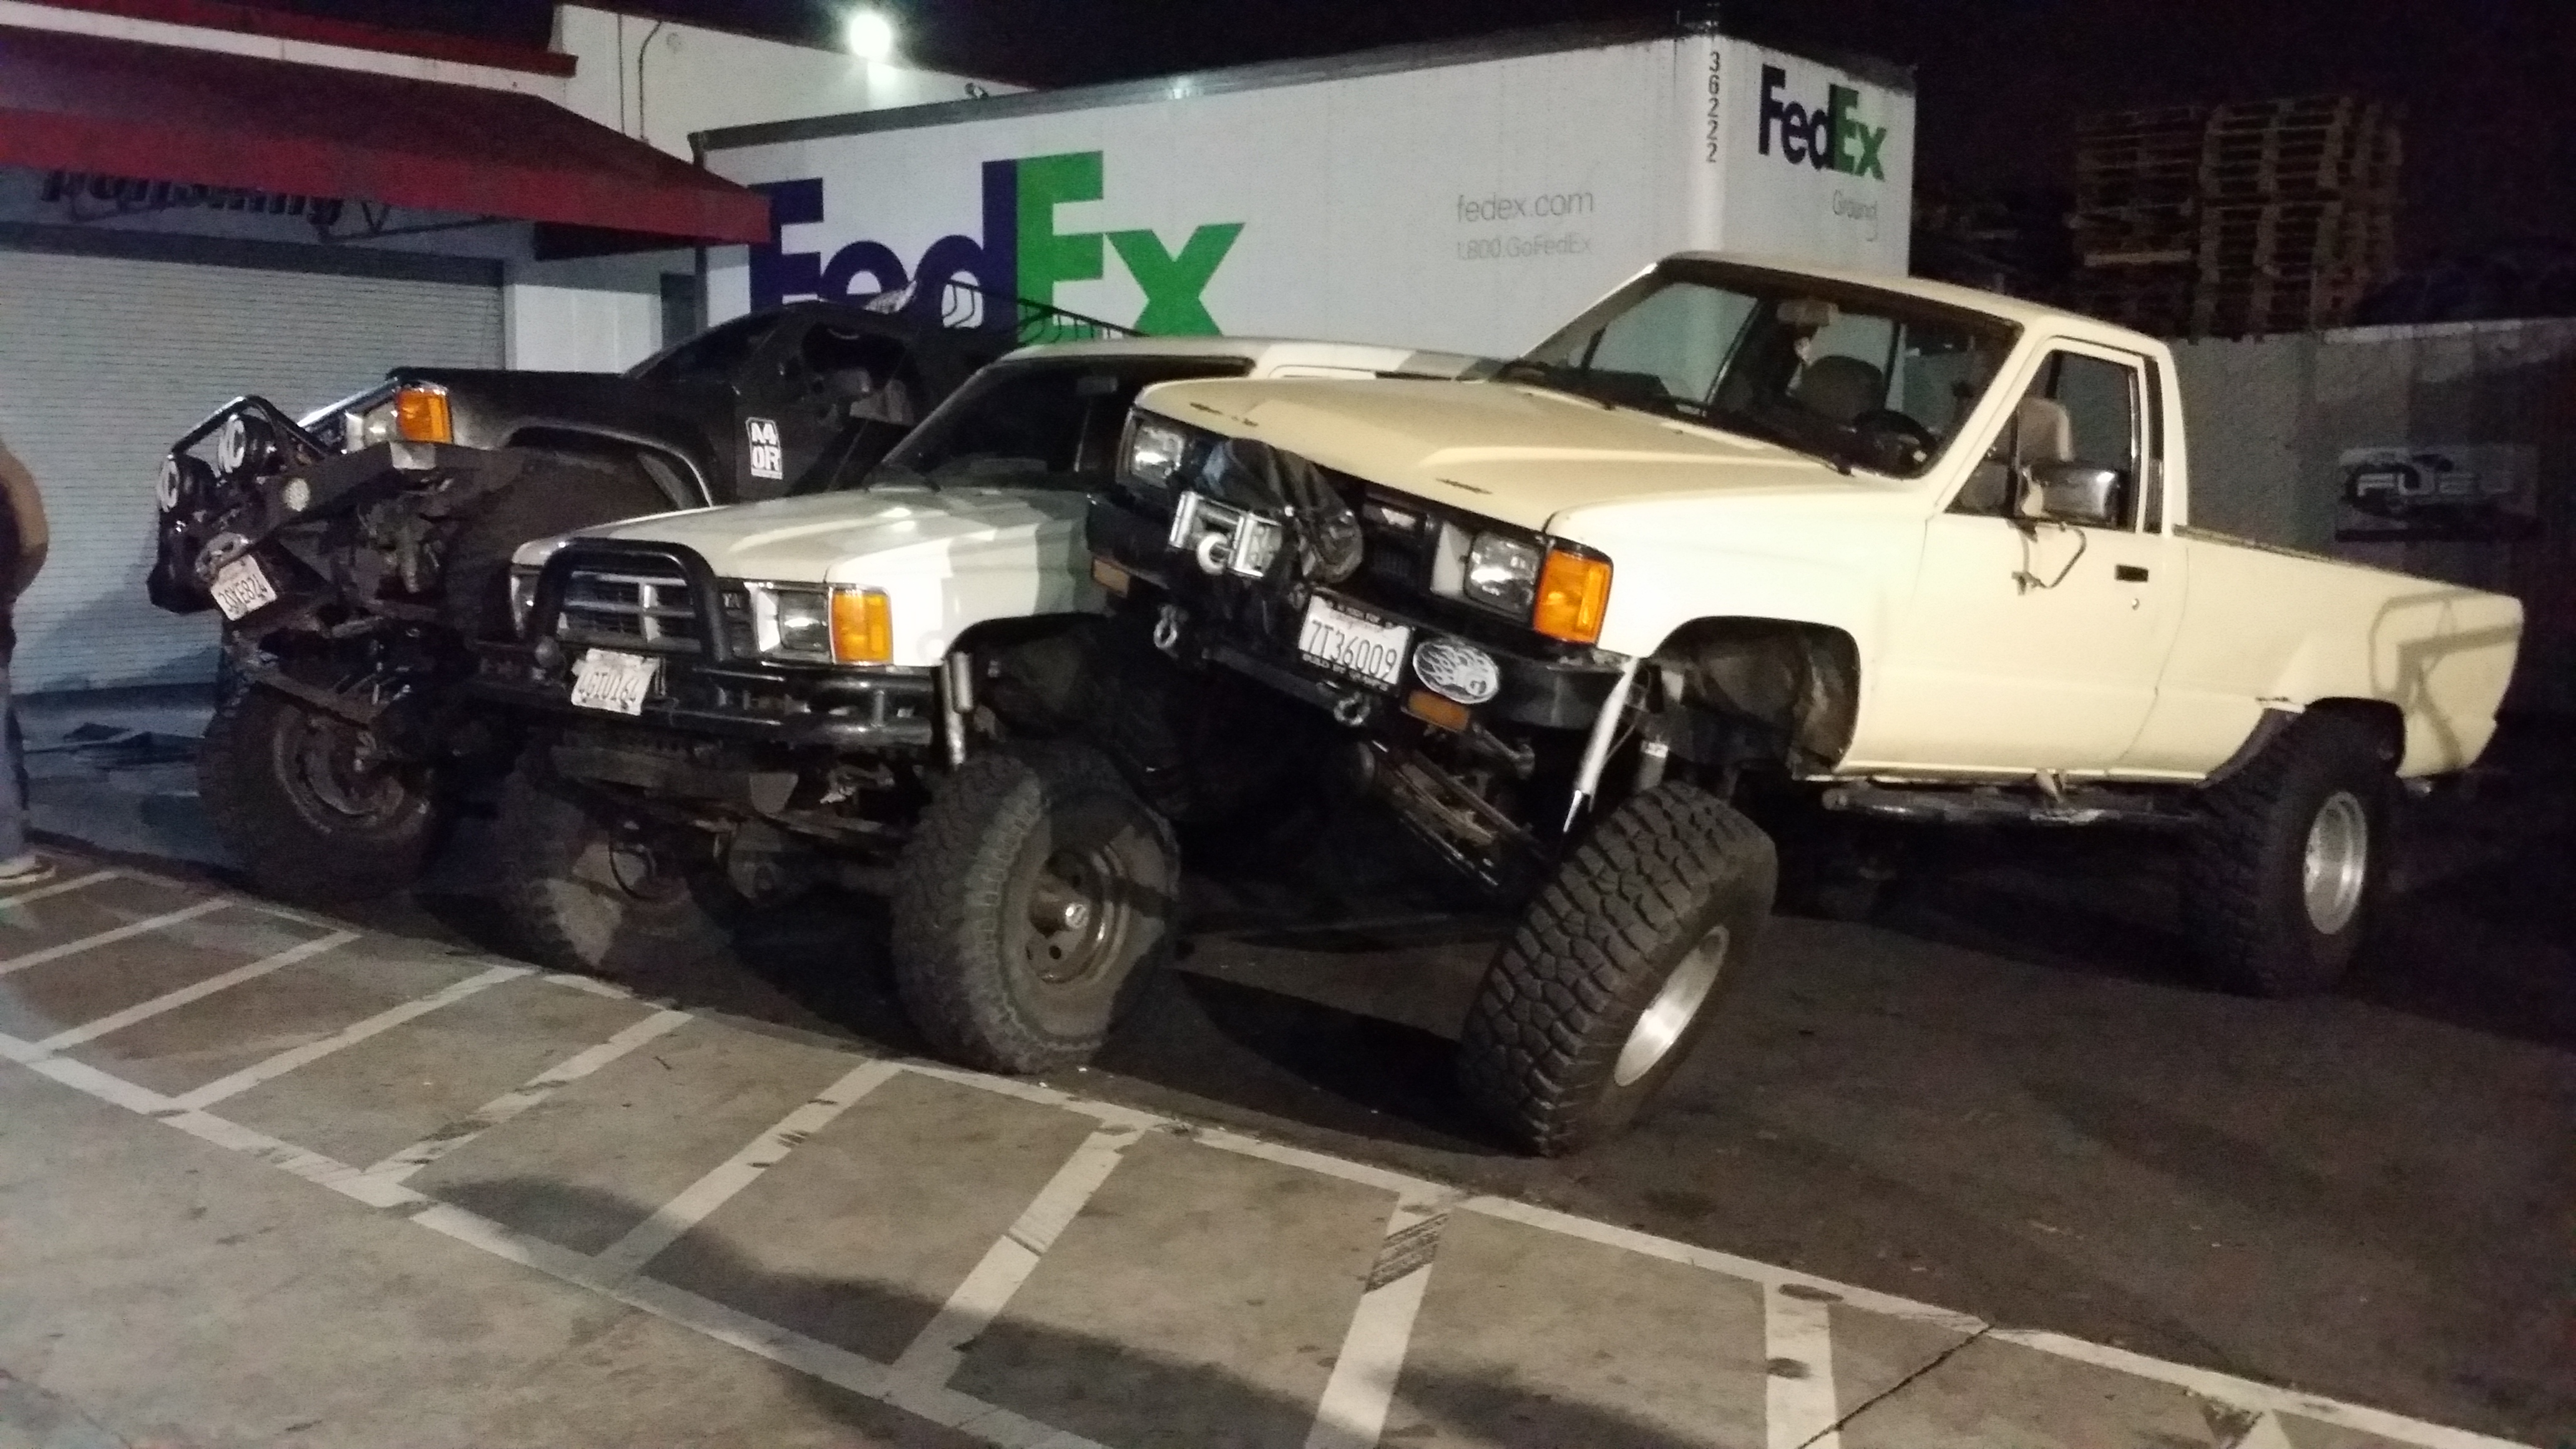
Every month a few of my buddies host a local "Jeep meet" but they welcome all vehicles. Usually a couple of our toyota friends and me come crash the party and show the Jeepers how the Toyota guys do it. We always get attention from the people attending these meets when we do crazy stuff like this. After all, we do have rock crawlers why not show off their capabilities! lol
My truck is the grey 4Runner to the left.
--------------------------------------------------------------------------------------
Back to the trailer build lol
Had fun tack welding this 63"�48" sheet metal every 3" for the trailer roof. Followed by welding up the entire perimeter of the outside to make it leak proof!
After I finished the roof of the rear compartment i did the front compartment
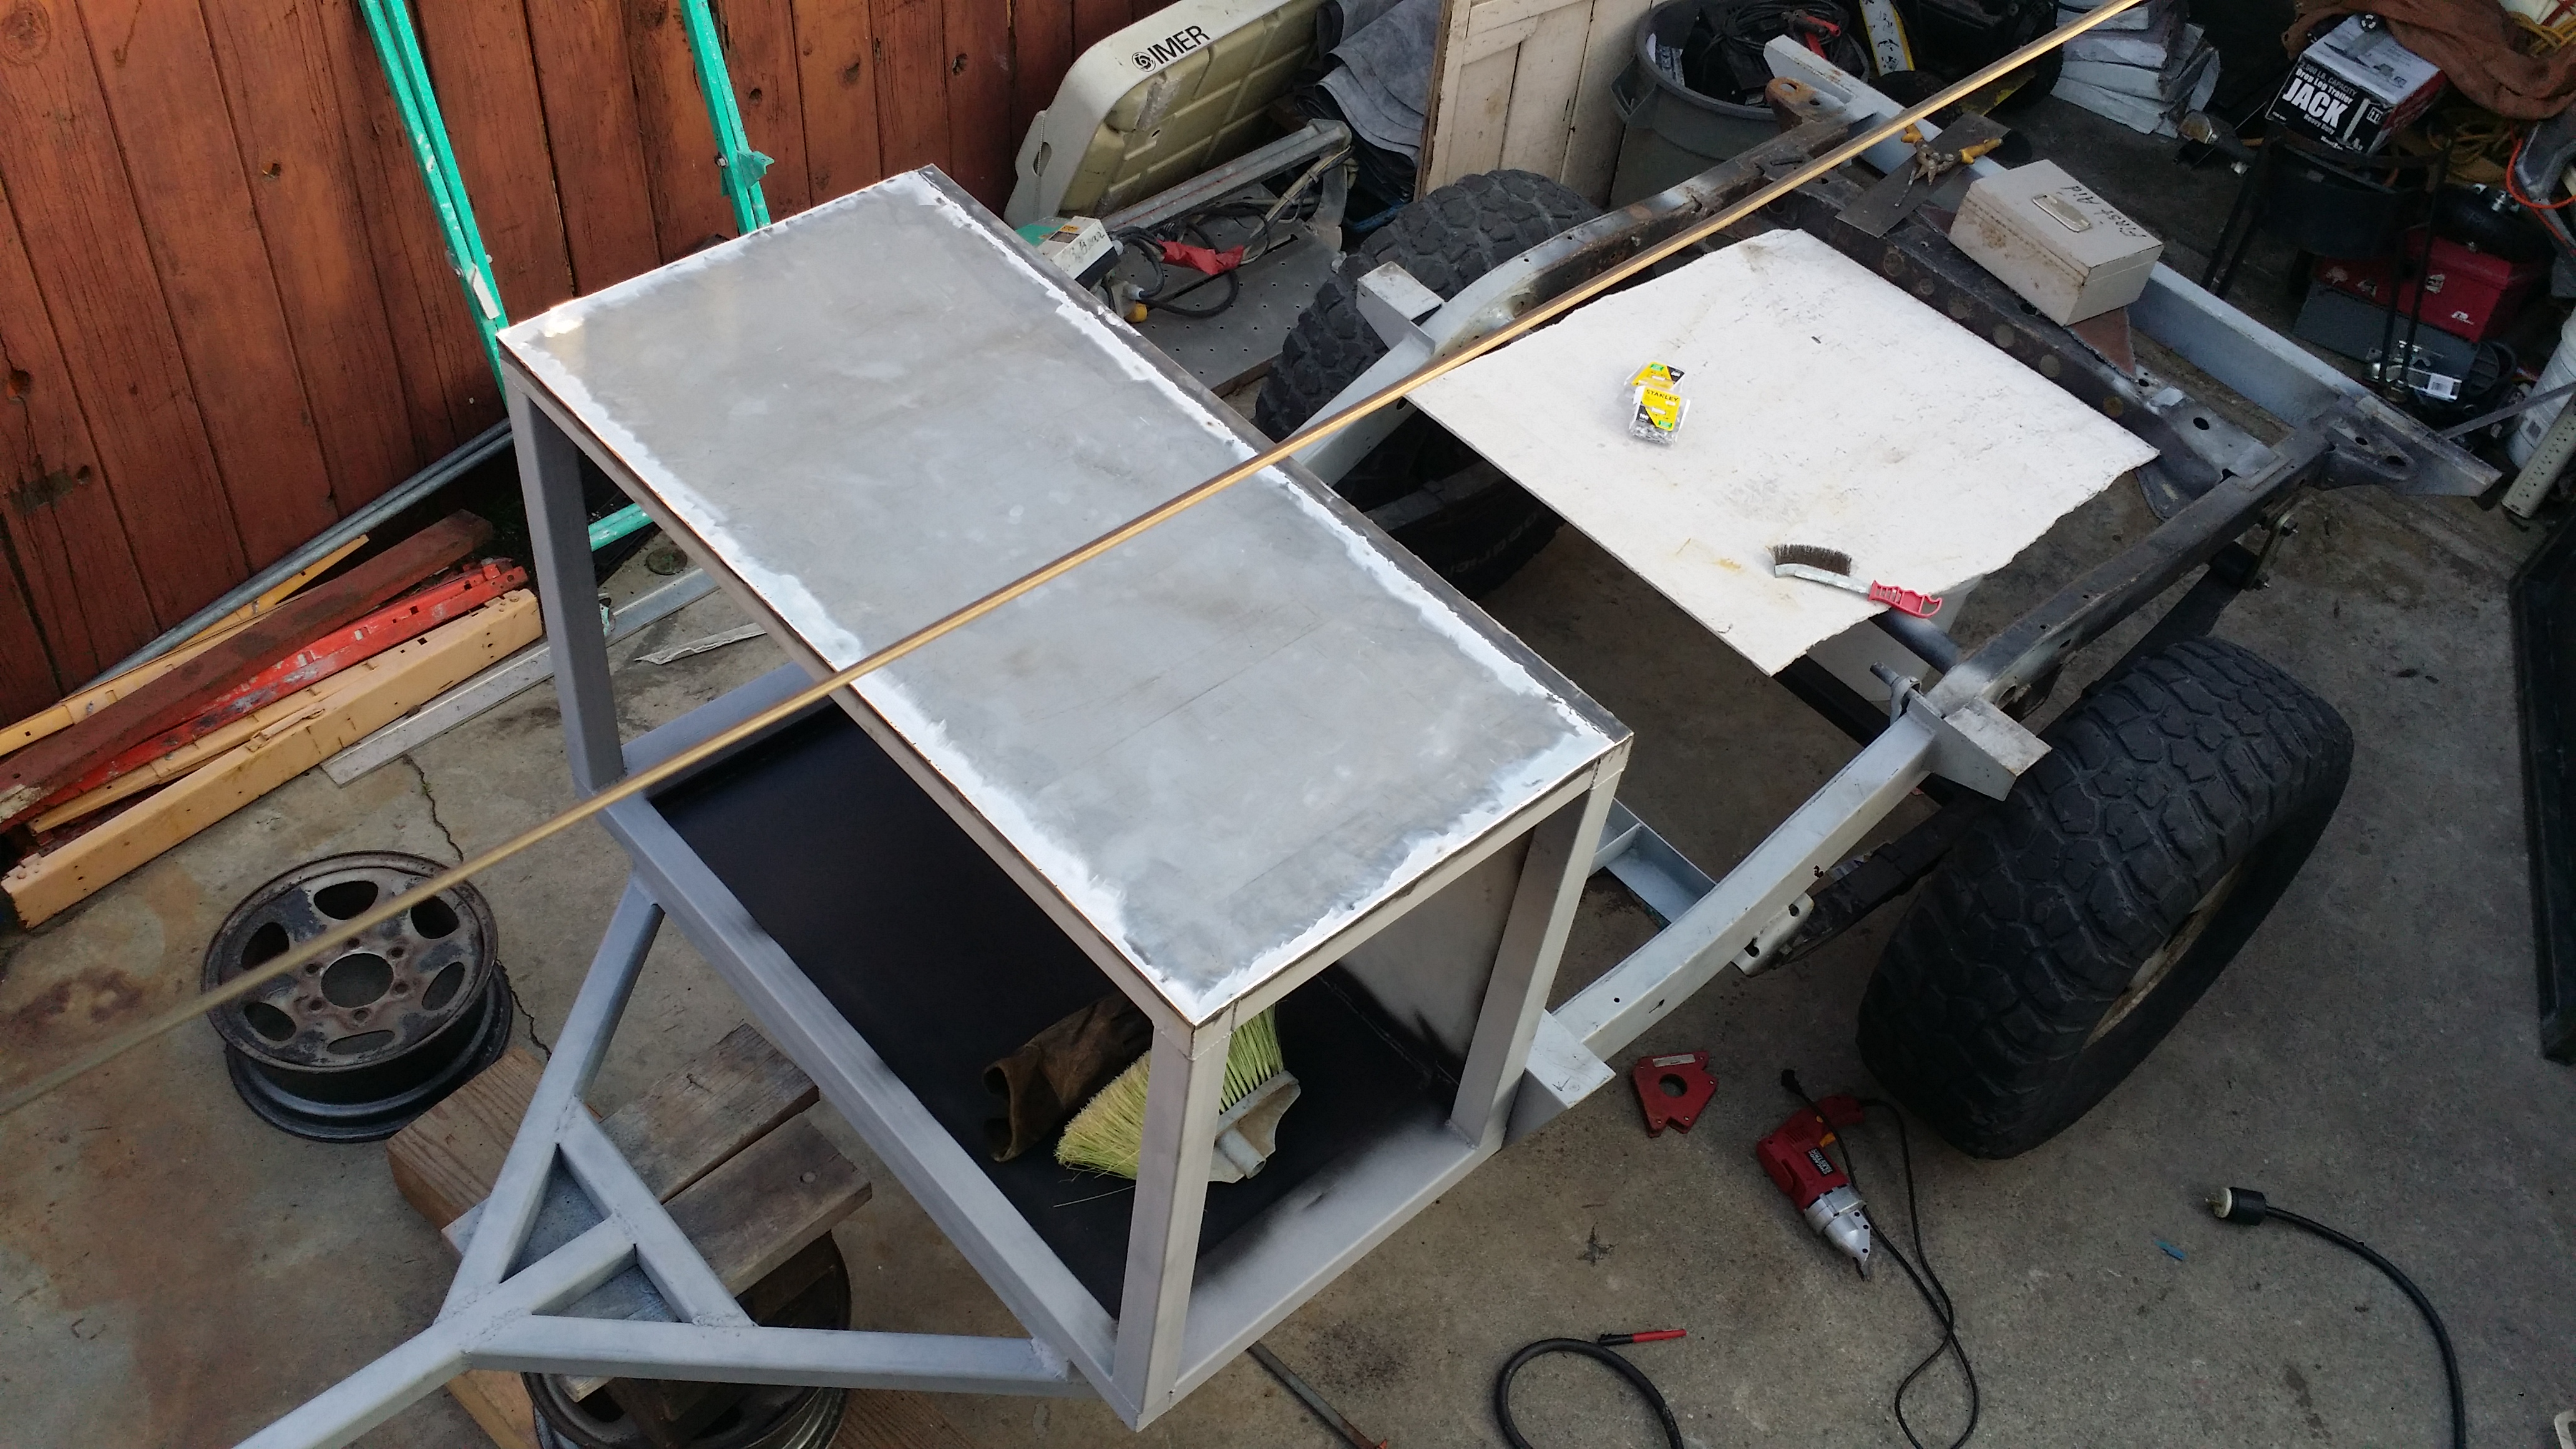
Nice clean job. Im proud of this one. It was welded on pretty solid and didnt warp at all.
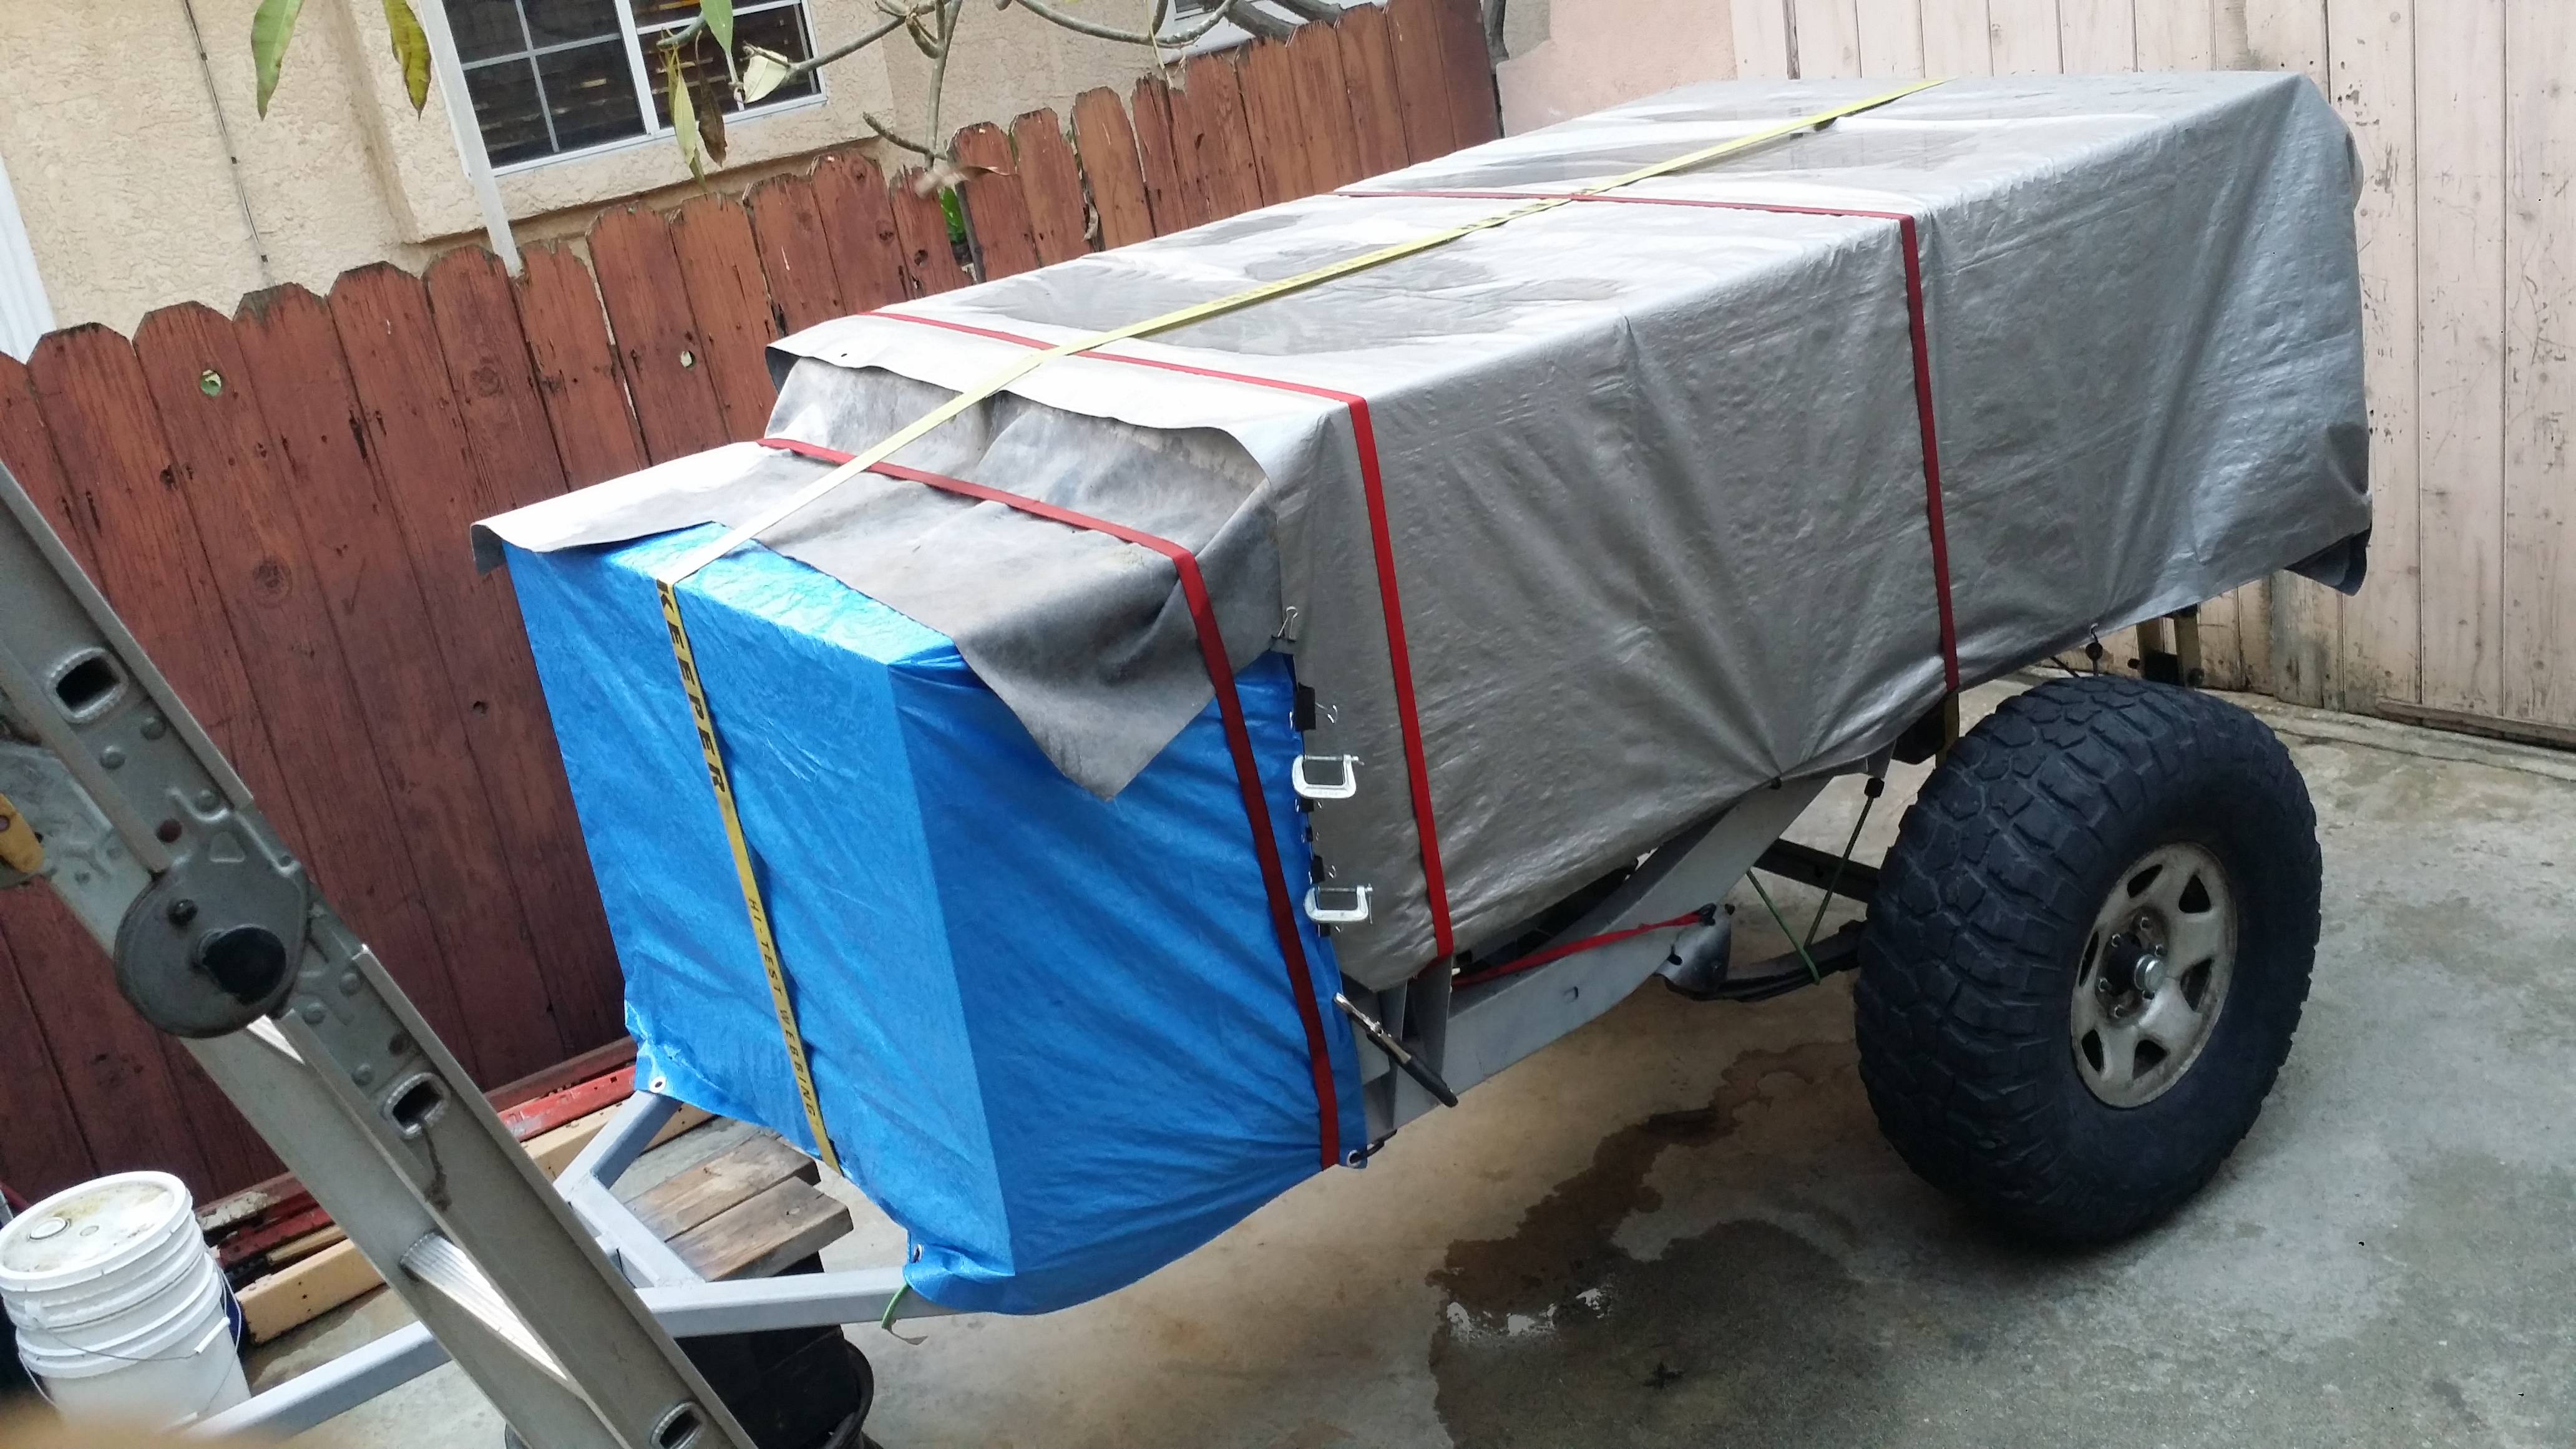
That night i primed the entire front compartment. and then began squaring off the wall tubing that will hold up the roof. I got the tubes made out to 90 degree angles then did the final welds on them. After i tried to center out the roof i found that my roof apparently warped about 0.5" toward the middle. Here in the pic you can see that there is a slight bow at the center of the roof. Unfortunately this project had to be put on hold until my dad and i get time to work on it together so we can heat up the metal and bend it back to make it straight again. I thought tack welding it all the way around before beginning the full welds would prevent it from warping but i was wrong. I'd forgotten how sheet metal can cause warpage if not welded correctly and on a sheet of this size i should have known better to weld every other side 2 to 3 inches until i finally got the entire thing done with. i learned the hard way. Now i gotta fix it. I know it wont be too bad once i straighten it out. I'm just happy the floor of the large compartment is completely square so i at least have something to work with to make sure the top is bent enough to make parallel with the floor.
I was supposed to fix the warped metal today by heating up the metal with the acetylene torch and adding pressure at the center to straighten it out. but like most of the country we were hit with a storm. Im just happy it wont be lasting very long. but for the mean time i had to cover up the whole rear compartment because it is bare metal and now i cant store it in the garage because i have the wall tubes welded in permanently. So for now on its going to be kept outside covered up with these tarps and hope it doesnt get too oxidized.
First off let me show off my tow vehicle.
Every month a few of my buddies host a local "Jeep meet" but they welcome all vehicles. Usually a couple of our toyota friends and me come crash the party and show the Jeepers how the Toyota guys do it. We always get attention from the people attending these meets when we do crazy stuff like this. After all, we do have rock crawlers why not show off their capabilities! lol
My truck is the grey 4Runner to the left.


--------------------------------------------------------------------------------------
Back to the trailer build lol
Had fun tack welding this 63"�48" sheet metal every 3" for the trailer roof. Followed by welding up the entire perimeter of the outside to make it leak proof!

After I finished the roof of the rear compartment i did the front compartment

Nice clean job. Im proud of this one. It was welded on pretty solid and didnt warp at all.

That night i primed the entire front compartment. and then began squaring off the wall tubing that will hold up the roof. I got the tubes made out to 90 degree angles then did the final welds on them. After i tried to center out the roof i found that my roof apparently warped about 0.5" toward the middle. Here in the pic you can see that there is a slight bow at the center of the roof. Unfortunately this project had to be put on hold until my dad and i get time to work on it together so we can heat up the metal and bend it back to make it straight again. I thought tack welding it all the way around before beginning the full welds would prevent it from warping but i was wrong. I'd forgotten how sheet metal can cause warpage if not welded correctly and on a sheet of this size i should have known better to weld every other side 2 to 3 inches until i finally got the entire thing done with. i learned the hard way. Now i gotta fix it. I know it wont be too bad once i straighten it out. I'm just happy the floor of the large compartment is completely square so i at least have something to work with to make sure the top is bent enough to make parallel with the floor.

I was supposed to fix the warped metal today by heating up the metal with the acetylene torch and adding pressure at the center to straighten it out. but like most of the country we were hit with a storm. Im just happy it wont be lasting very long. but for the mean time i had to cover up the whole rear compartment because it is bare metal and now i cant store it in the garage because i have the wall tubes welded in permanently. So for now on its going to be kept outside covered up with these tarps and hope it doesnt get too oxidized.

Last edited by Redeth005; Jan 31, 2016 at 06:56 PM.
Jan 31, 2016 | 06:50 PM
#73
Thread Starter
Registered User
Joined: Apr 2012
Posts: 2,817
Likes: 2
From: Los Angeles CA
Since i couldn't get anything done today i went ahead and began researching trailer lights.
Originally i was set on buying either the 2"x6" oval lights or the 4" circle lights. in Red, Amber, and clear for backing up. But considering the size of those lights i figured it was going to take up a lot of space if i were to use 3 lights on each side of the rear. i wanted to keep the tail light assembly simple with less wiring to worry about.
I have had great luck with SuperBrightLEDs.com in the past. They make great products. And i was happy to find these awesome Jeep style Trailer lights. And best of all they wont take up as much space as if i was to use the 2"x6" or 4" LED lights. This trailer light assembly measures 5.75" x 2.88" x 6.75". It is a pretty good size for what i want. and can use a plate welded to the frame then mount these babies onto them.
I bought 2 of these. with shipping the total came out to $100.74
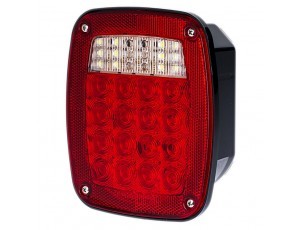
I like the fact that they have the clean LED light on the bottom that is meant for license plate lighting on either side of the trailer.
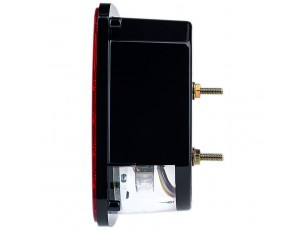
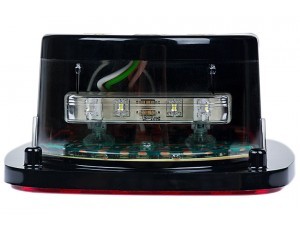
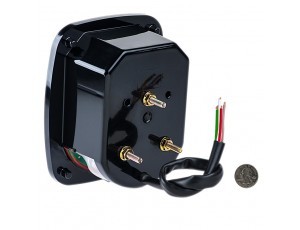
Mounting surface
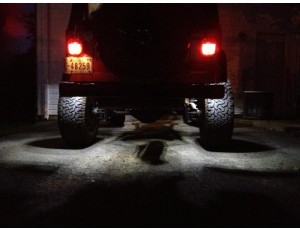
Here you can see how the bottom LEDs light up the bottom side for the licence plate.

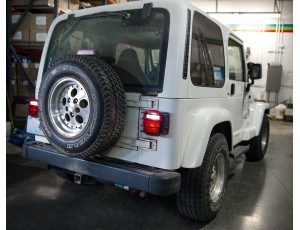
Here's a better idea of how big they are on real rigs
I feel that these lights will do just fine. They only cost $44.95 each. And i have had excellent experiences with their lights in the past so i know i will be off pretty well with using them on the trailer. Plus on the bright side if i ever break one i can always buy another one from their site. Here is a link to this product.
https://www.superbrightleds.com/more...ight/828/2055/
The best part about these lights is that they are all LEDs so there is no need to replace any bulbs or anything like that.
---------------------------------------------------------------------------------------
I also ordered some Trail-Gear running lights.
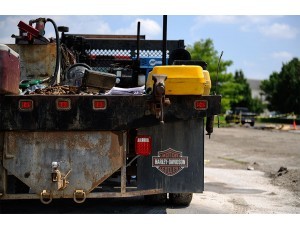
These only ran me $7.72 each. They are 100% water proof and only measure 2 1/2" x 1" I have personally tested these lights out on my truck and i use them as turn signals/hazard lights. But I have seen many people use these as the side lights or running lights on their trucks.
I ordered 4 of these. with shipping they came out to $44.82
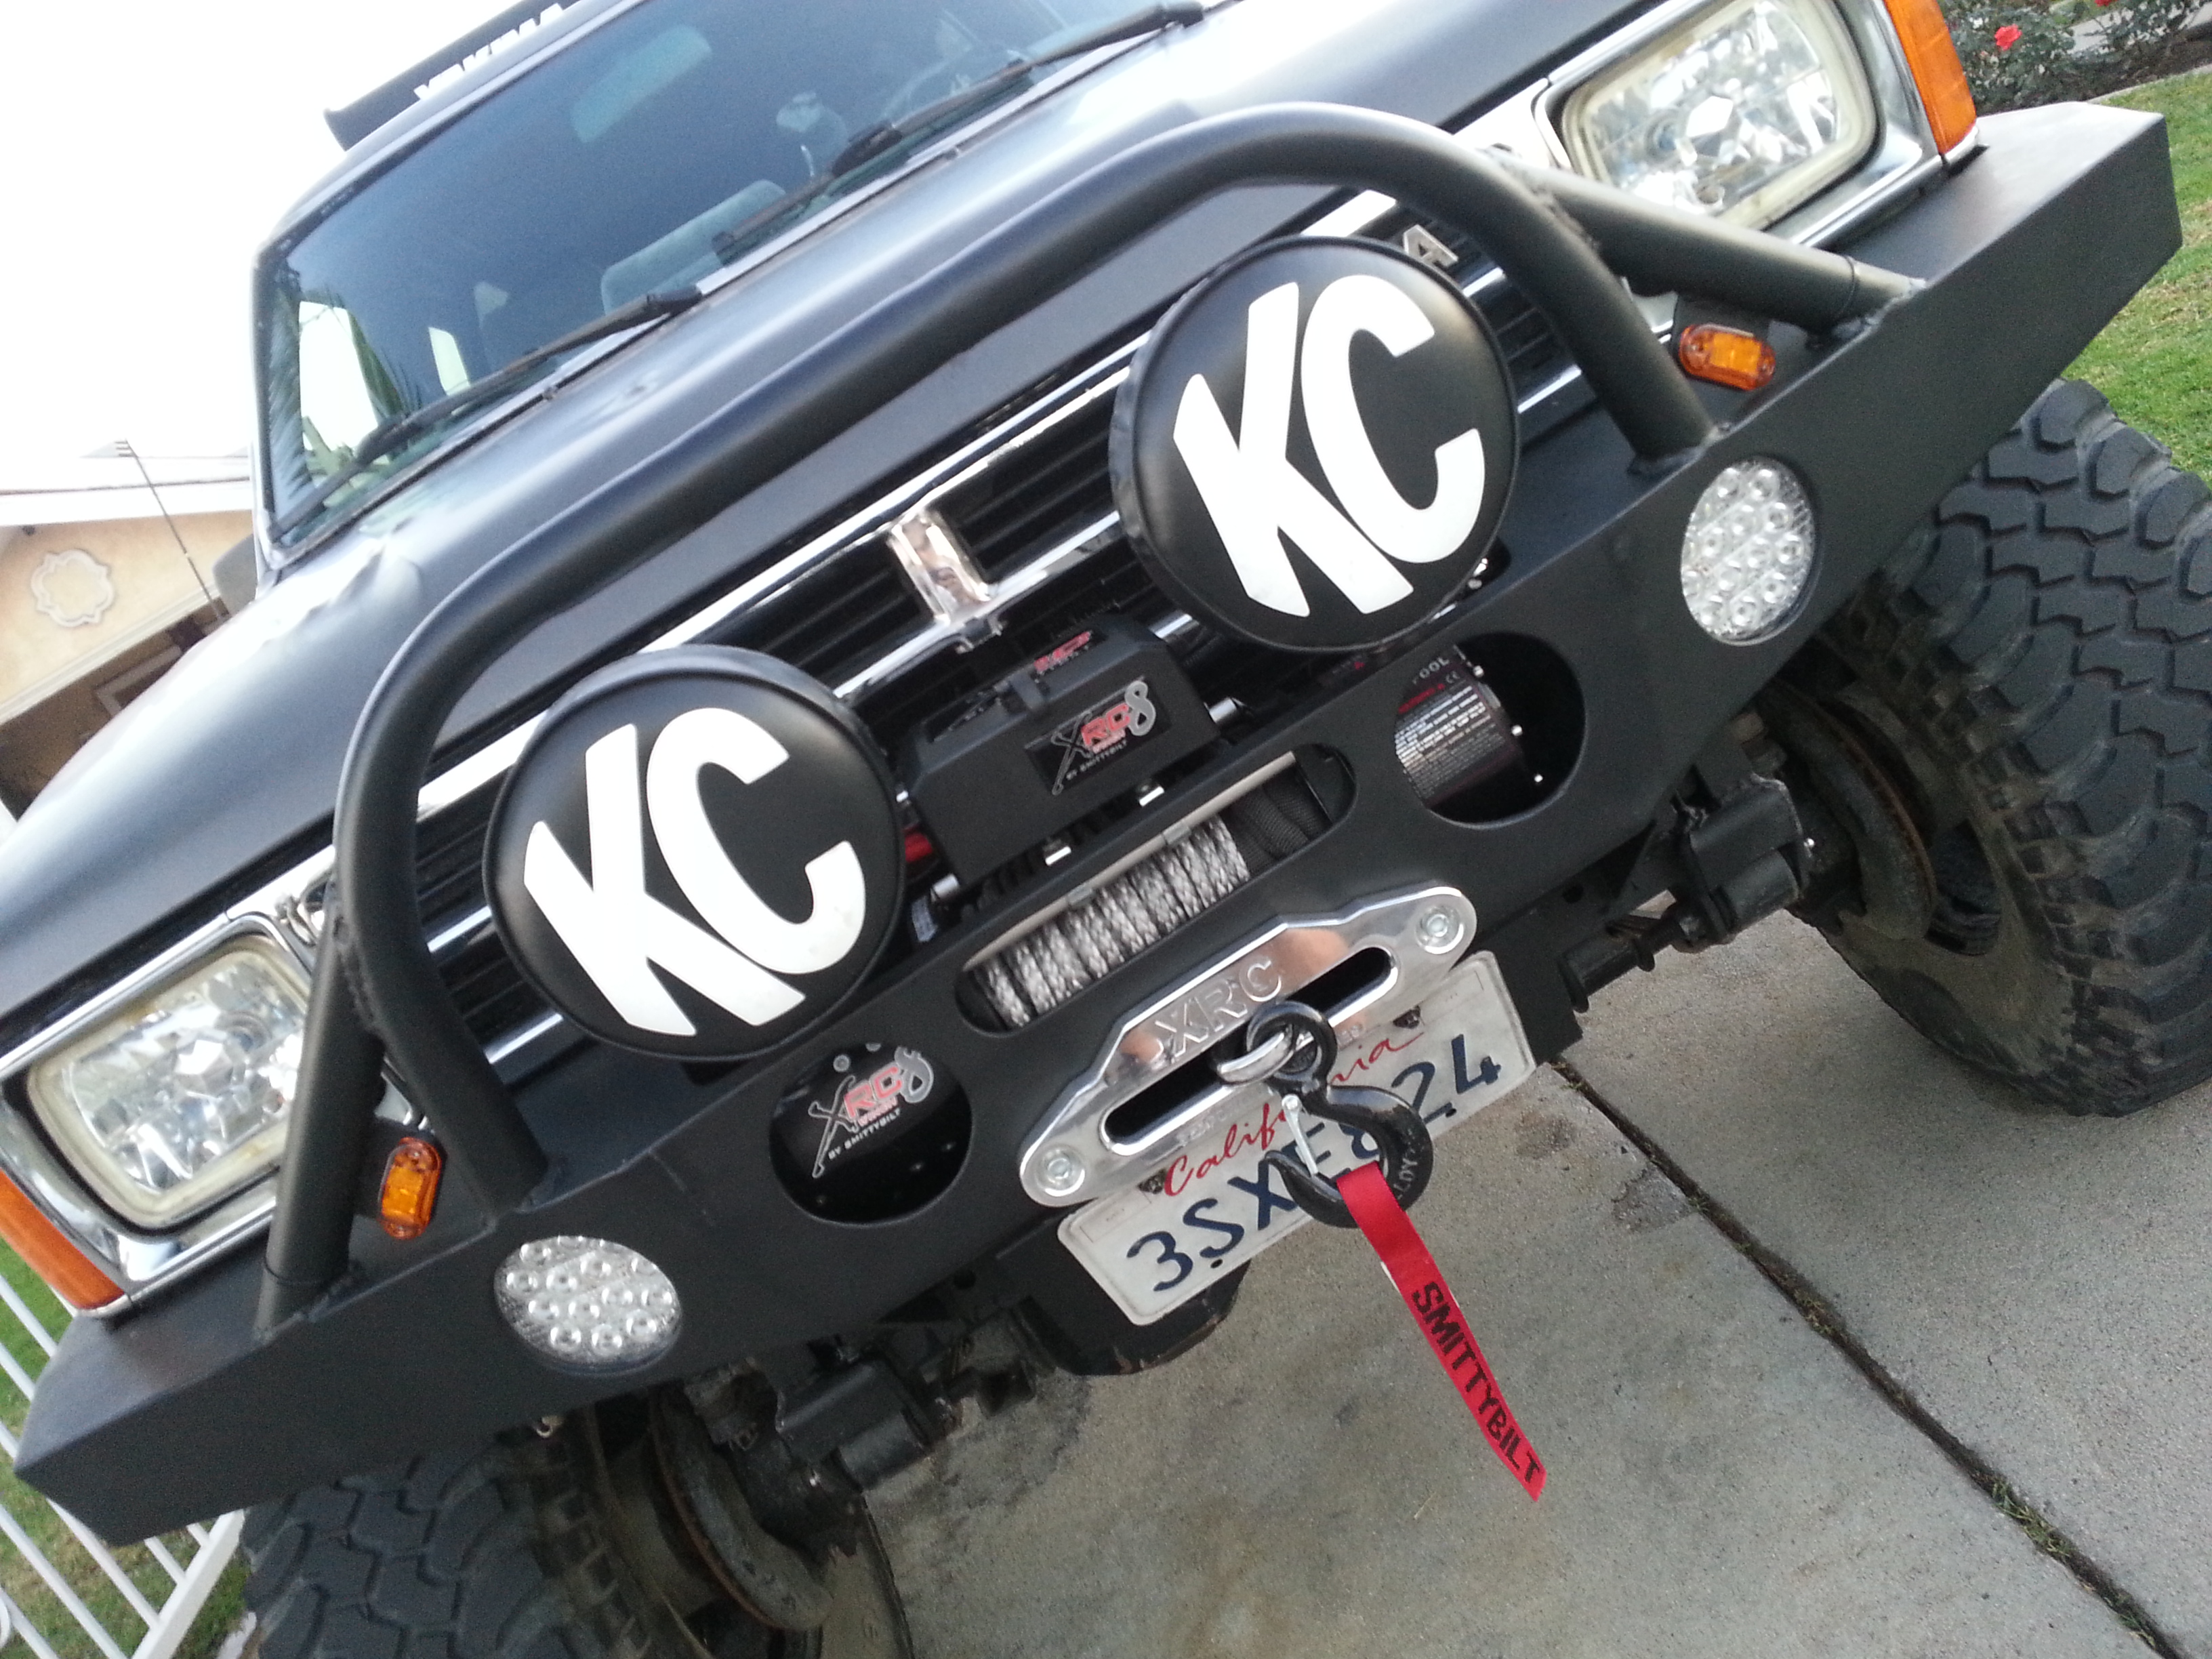
Here are pix of the lights from when i made my 4Runner's front bumper.
They are plenty bright to use as running lights.
Finished product on the truck

****************************
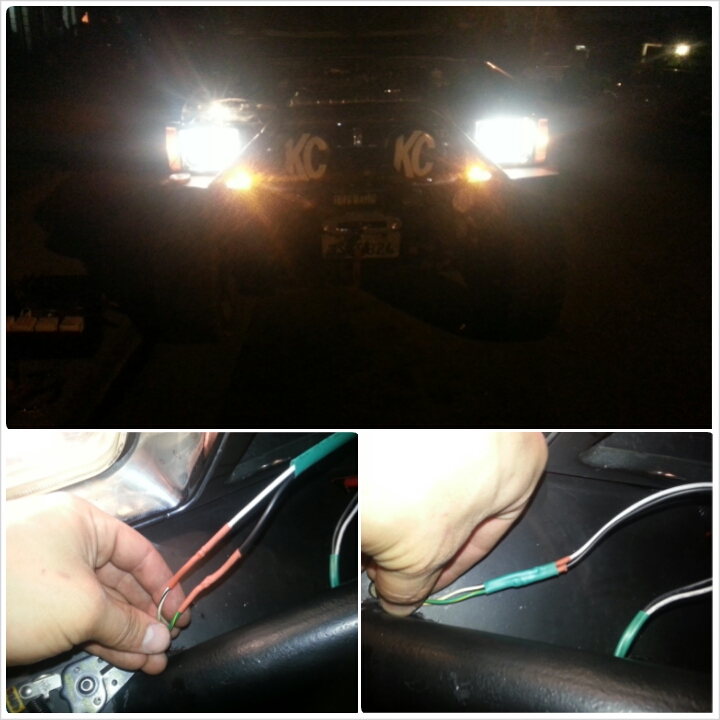
I havent decided which direction to go with for exterior lighting yet but I want to buy some exterior LED lights to light up the campsite. Still debating on buying my buddie's "All4Offroad" rock lights. Here is an example of how much they light up.
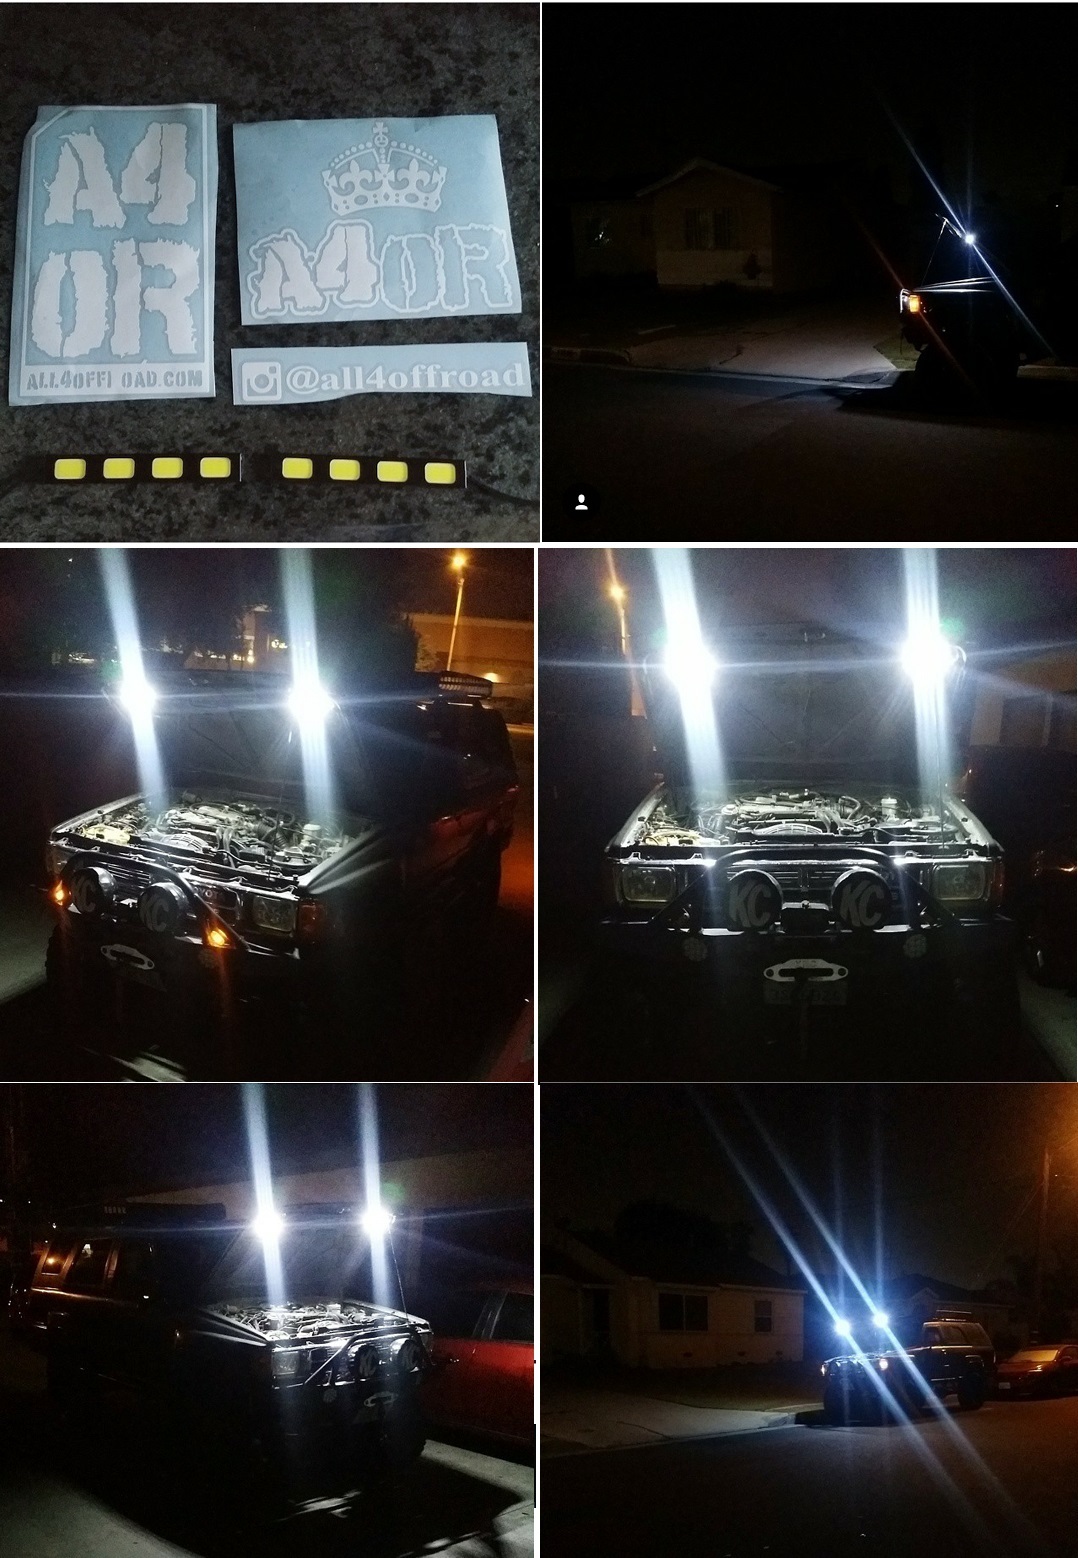
He has a great product but I'm still debating on buying these or just going with Larger LED lights to really light up the campsite and light up a little further out because i know there are coyotes and other things that lurk out in the wild and i know i want something that will light up more then just the immediate camp ground. My girl and i were in a situation once where we saw tons of glowing eyes in the distant bushes when we were helping out with a friends late night truck repair. and once i saw the eyes i told my friend Mark (AKA chefyota4x4 on yotatech and instagram) to flip on his 360 degree roof lighting and when he did that everything that was out there scurried off. All i saw was the bushes moving as they ran off. im sure it was a family of coyotes. So i may just get these Rock lights to light up the interior of the trailer compartments and have one on something like an extension cord to route into the CVT roof top tent that i plan to run. Then i can use the larger LED's to light up around the trailer when needed with on and off switches.
Originally i was set on buying either the 2"x6" oval lights or the 4" circle lights. in Red, Amber, and clear for backing up. But considering the size of those lights i figured it was going to take up a lot of space if i were to use 3 lights on each side of the rear. i wanted to keep the tail light assembly simple with less wiring to worry about.
I have had great luck with SuperBrightLEDs.com in the past. They make great products. And i was happy to find these awesome Jeep style Trailer lights. And best of all they wont take up as much space as if i was to use the 2"x6" or 4" LED lights. This trailer light assembly measures 5.75" x 2.88" x 6.75". It is a pretty good size for what i want. and can use a plate welded to the frame then mount these babies onto them.
I bought 2 of these. with shipping the total came out to $100.74

I like the fact that they have the clean LED light on the bottom that is meant for license plate lighting on either side of the trailer.


Mounting surface

Here you can see how the bottom LEDs light up the bottom side for the licence plate.

Here's a better idea of how big they are on real rigs


I feel that these lights will do just fine. They only cost $44.95 each. And i have had excellent experiences with their lights in the past so i know i will be off pretty well with using them on the trailer. Plus on the bright side if i ever break one i can always buy another one from their site. Here is a link to this product.
https://www.superbrightleds.com/more...ight/828/2055/
The best part about these lights is that they are all LEDs so there is no need to replace any bulbs or anything like that.
---------------------------------------------------------------------------------------
I also ordered some Trail-Gear running lights.

These only ran me $7.72 each. They are 100% water proof and only measure 2 1/2" x 1" I have personally tested these lights out on my truck and i use them as turn signals/hazard lights. But I have seen many people use these as the side lights or running lights on their trucks.
I ordered 4 of these. with shipping they came out to $44.82
Here are pix of the lights from when i made my 4Runner's front bumper.

They are plenty bright to use as running lights.

Finished product on the truck


****************************
I havent decided which direction to go with for exterior lighting yet but I want to buy some exterior LED lights to light up the campsite. Still debating on buying my buddie's "All4Offroad" rock lights. Here is an example of how much they light up.

He has a great product but I'm still debating on buying these or just going with Larger LED lights to really light up the campsite and light up a little further out because i know there are coyotes and other things that lurk out in the wild and i know i want something that will light up more then just the immediate camp ground. My girl and i were in a situation once where we saw tons of glowing eyes in the distant bushes when we were helping out with a friends late night truck repair. and once i saw the eyes i told my friend Mark (AKA chefyota4x4 on yotatech and instagram) to flip on his 360 degree roof lighting and when he did that everything that was out there scurried off. All i saw was the bushes moving as they ran off. im sure it was a family of coyotes. So i may just get these Rock lights to light up the interior of the trailer compartments and have one on something like an extension cord to route into the CVT roof top tent that i plan to run. Then i can use the larger LED's to light up around the trailer when needed with on and off switches.
Last edited by Redeth005; Jan 31, 2016 at 07:04 PM.
Jan 31, 2016 | 06:50 PM
#74
Thread Starter
Registered User
Joined: Apr 2012
Posts: 2,817
Likes: 2
From: Los Angeles CA
Once i get these compartments made i'll finally be able to get around to installing the fun meticulous stuff
I still have a large to-do list:
1)Weld on some Tie downs onto the tray that holds the water tank. This way i can strap it down and keep it secured onto the tray.
2) Weld gussets onto the rear bumper tow hitch receiver to hold it onto the rear crossmember.
3) figure out a way to use the 2" body lift or just weld on 2" tube so i can permanently mount/weld that rear compartment box in place.
4) Make all the doors using the latches i bought.
5) Weld on the flanges that will be holding up the aluminum walls which will be riveted into place then paint all the steel tube and sheet metal. Then cut the aluminum to size and actually install the aluminum walls. then seal the joints with silicone inside and outside.
6) Also get around to installing the Propex HS2000 heater, heated shower set up, then order the Engel combi fridge/freezer that i want so i can get everything installed.
Once i have everything in place i'll be able to have a better idea of what my Amperage usage is going to be. I still need to and find a solar panel and fab up a mount to mount it up on top of the front compartment box. Urgh! So much more research i need to do for solar power i wish i had a solar guru to help me out with that one. I want to find out how many deep cell batteries i need so i can choose which brand battery and how many i need so i can fabricate a box or some sort of a battery tray onto the rear of the trailer to hold multiple batteries. I figure the batteries will add weight to the rear side to keep the trailer balanced because right now there is a lot more weight in the front of the trailer then there is supposed to be. I was actually thinking about taking the stock tire carrier off of my 4runner since i do not use it anymore and install it onto this trailer and just fabricate a battery holder that can easily be lifted up and down using that stock tire carrier. Not sure if I'm in over my head but it sounds like a good idea because if i decide on getting deep cycle acid batteries instead of the deep cycle optima batteries that i usually use i know i will need to do maintenance on the batteries. And being able to drop the battery tray by using that pulley will be convenient. and it will still keep the batteries up high enough under the trailer from getting hit/damaged.
Last edited by Redeth005; Jan 31, 2016 at 07:12 PM.
 Feb 5, 2016 | 10:22 AM
#76
Thread Starter
Registered User
Joined: Apr 2012
Posts: 2,817
Likes: 2
From: Los Angeles CA
Today my Dad and I heat up the side rails of the roof to the rear box with an acetylene torch then smacked it all back into place with a 2�4 and sledge hammer. We then confirmed it was straight with a long right angle level. It looks great. That was a nice save considering the droop or bow it had in the last pix I had posted thanks to my mistake.
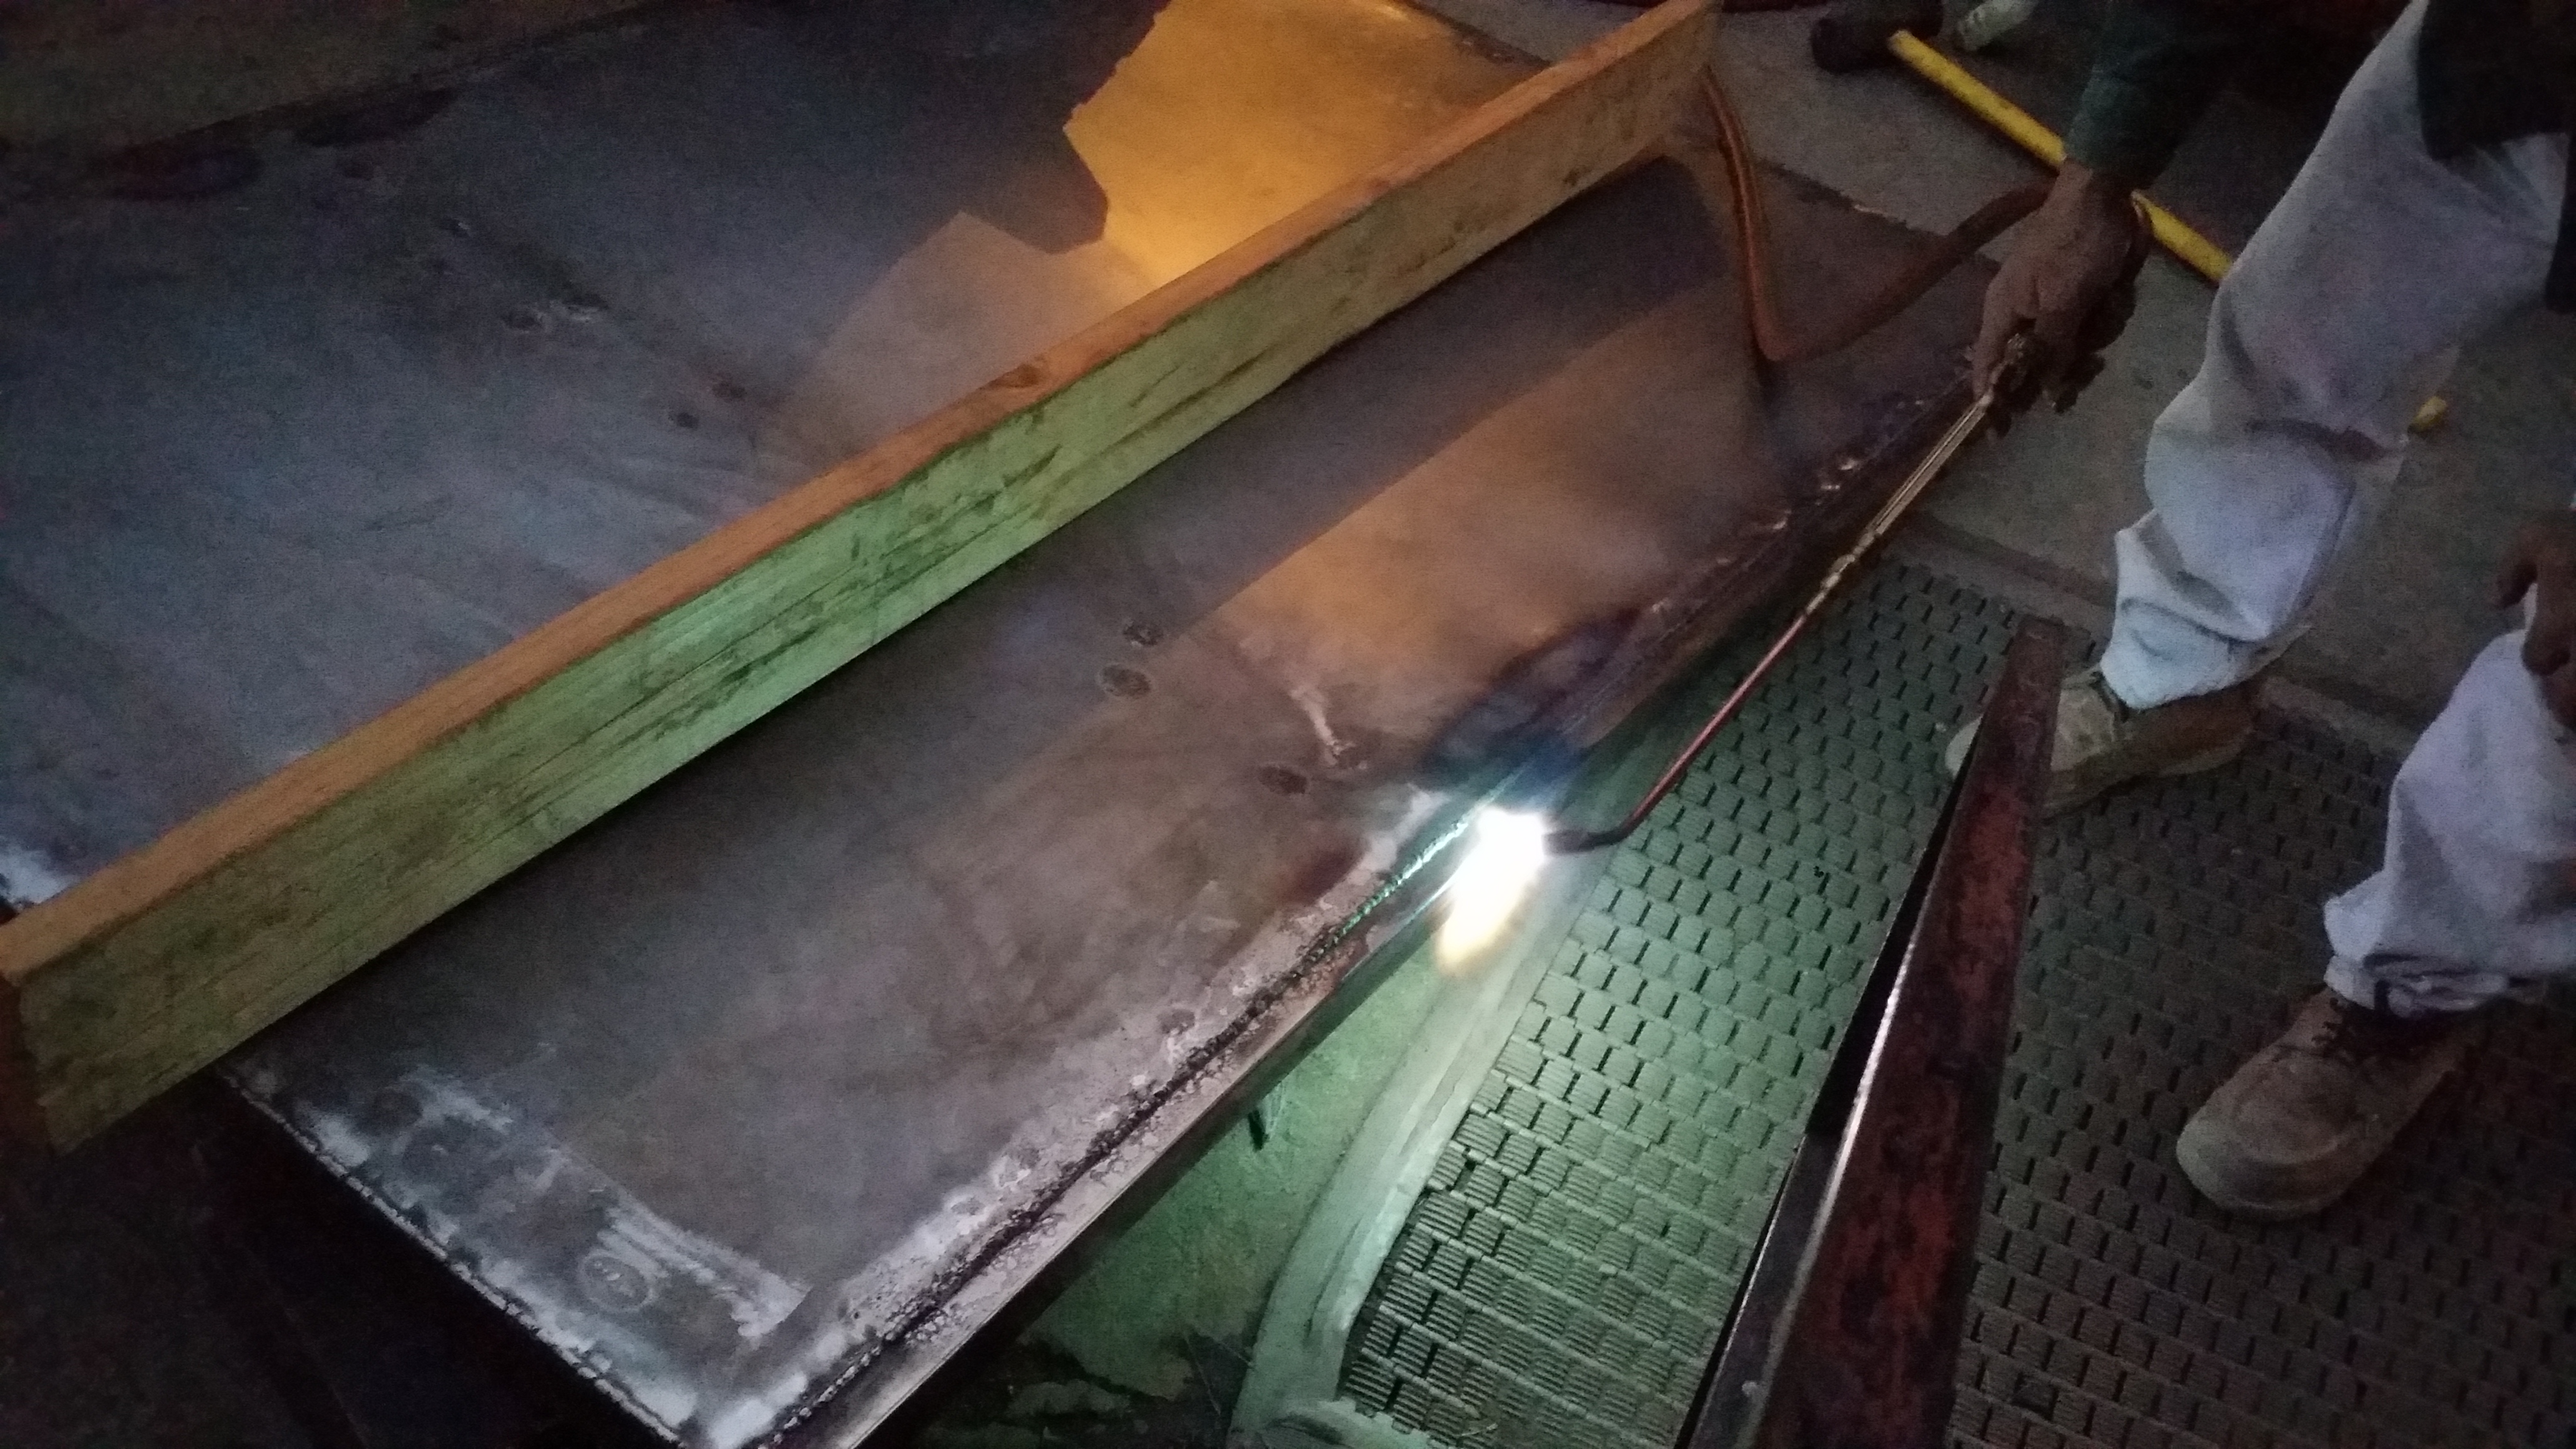
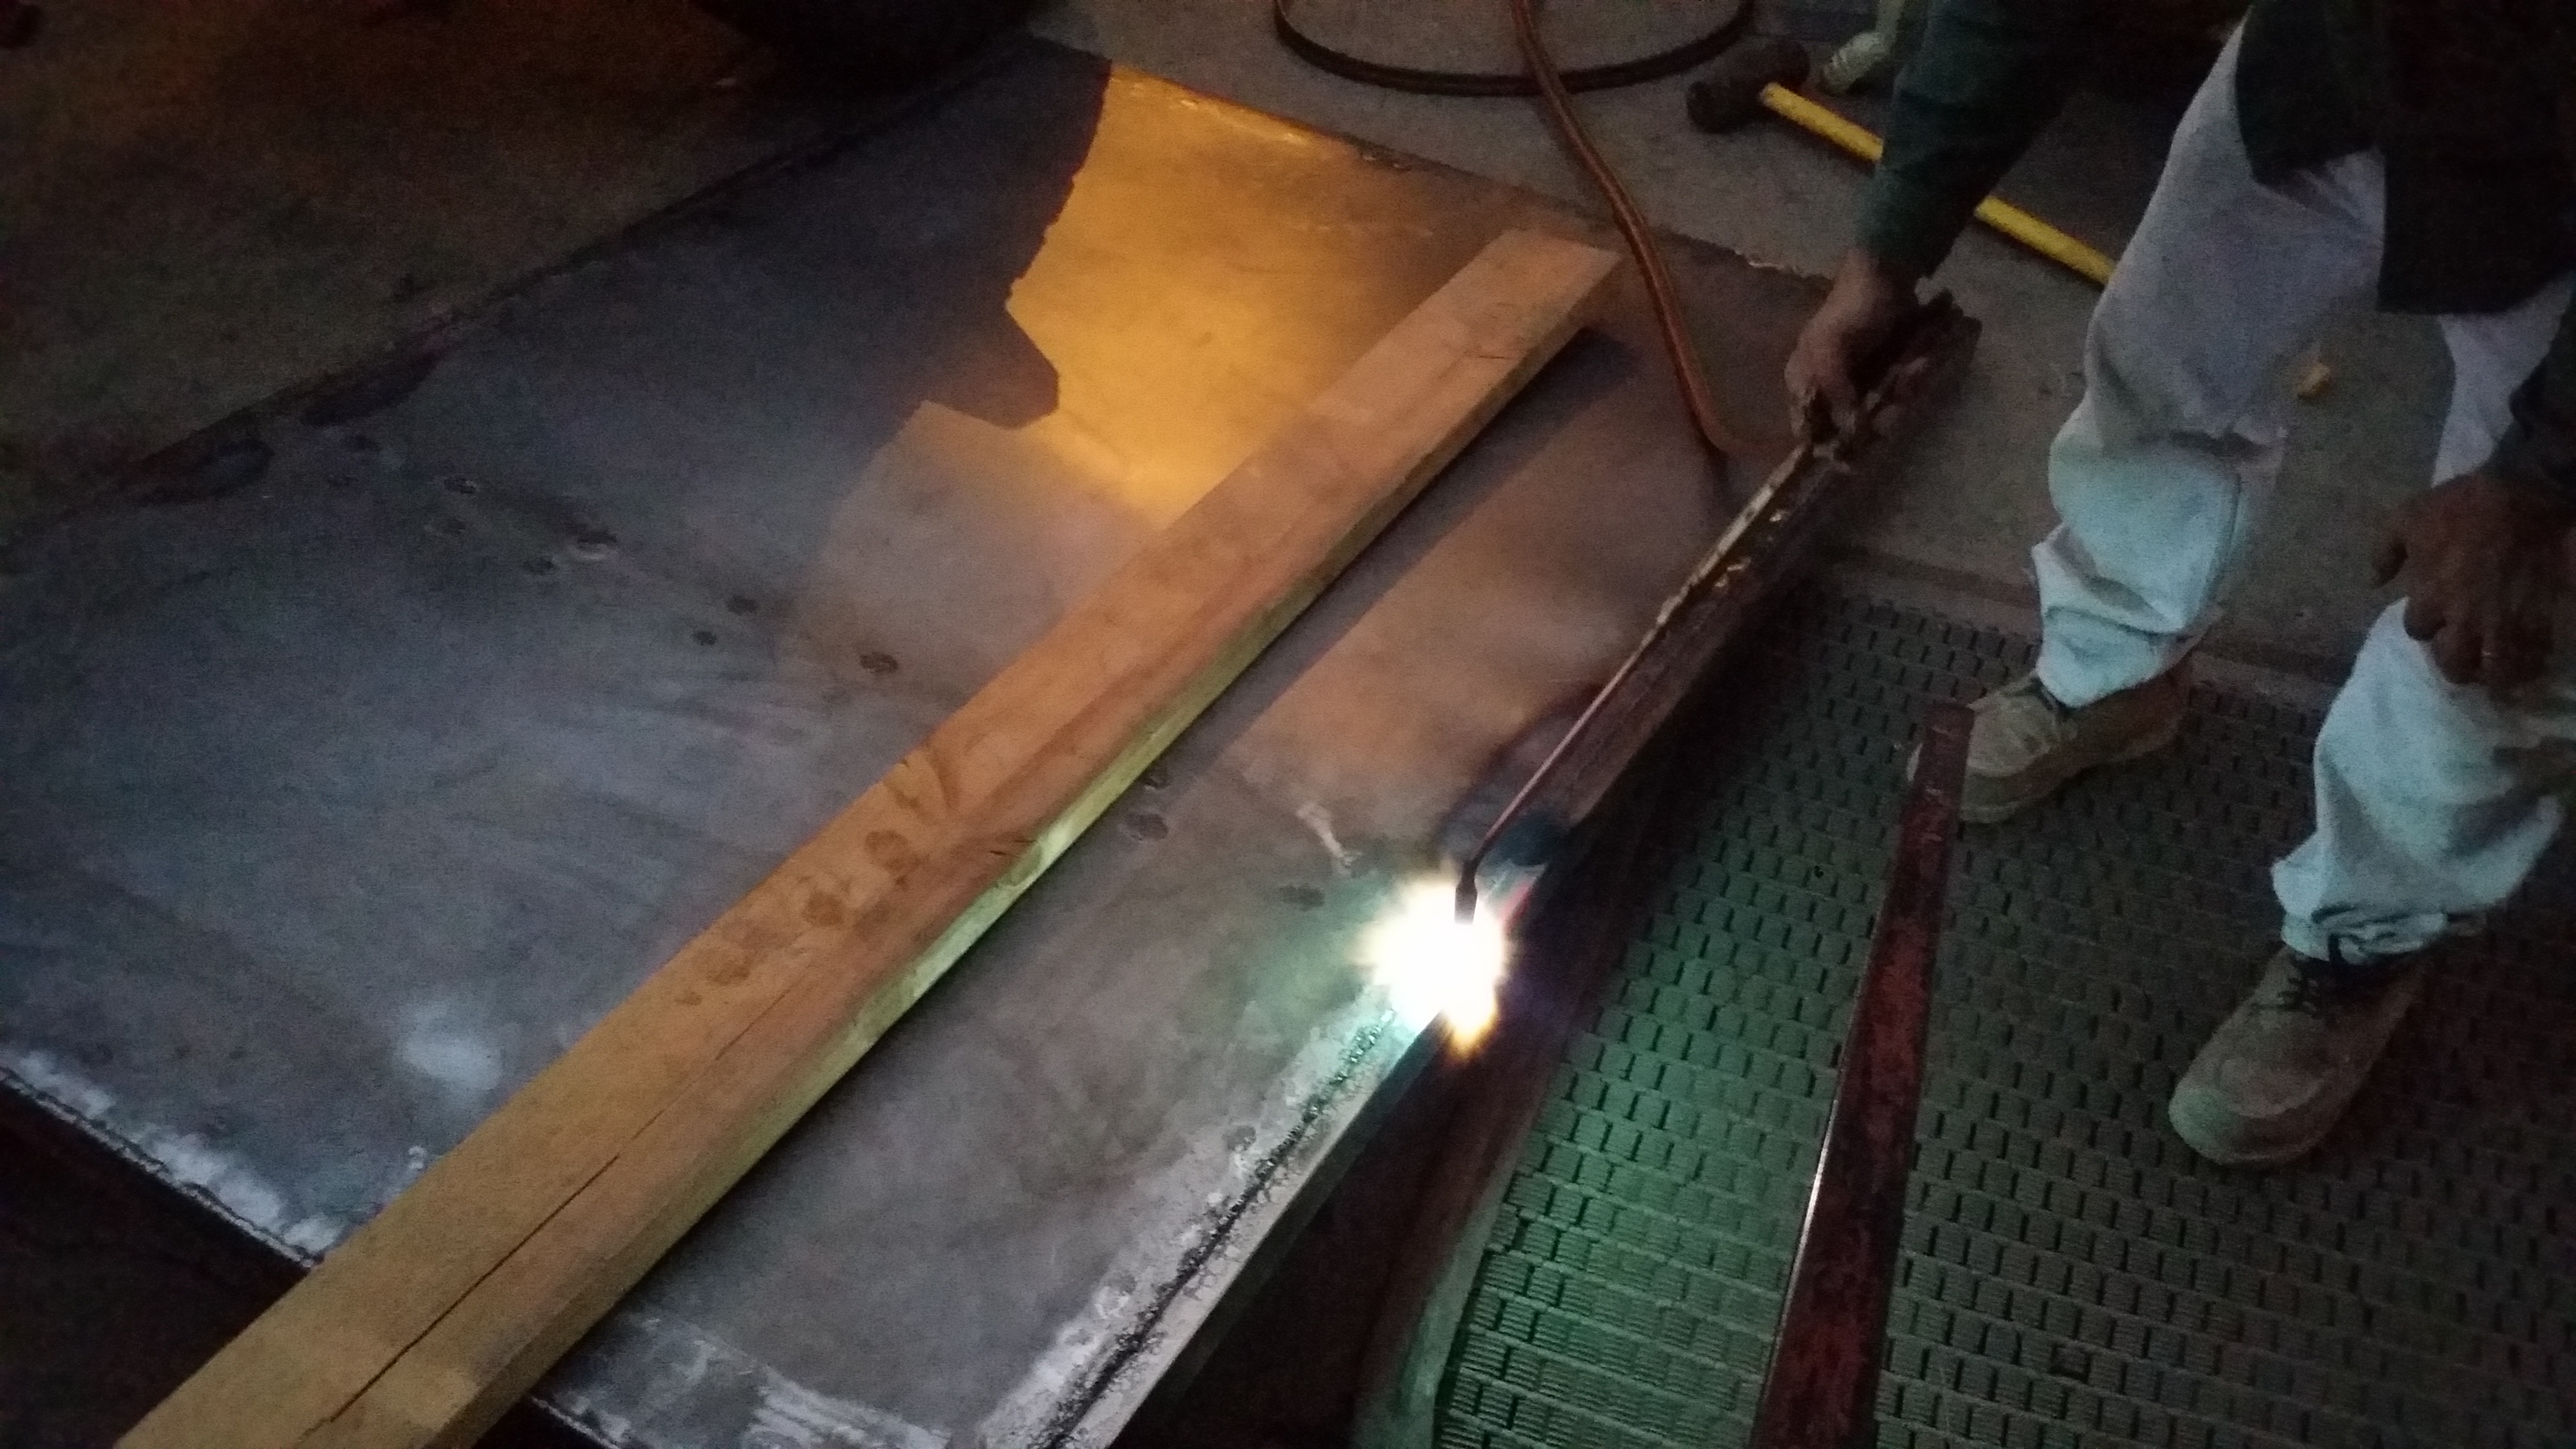
You can see the droop not there anymore. I already welded half of the roof into place. I'll continue the welds on Saturday. At least now it's solid and most importantly fixed!


You can see the droop not there anymore. I already welded half of the roof into place. I'll continue the welds on Saturday. At least now it's solid and most importantly fixed!
 Feb 5, 2016 | 05:57 PM
#77
Thread Starter
Registered User
Joined: Apr 2012
Posts: 2,817
Likes: 2
From: Los Angeles CA
My SuperBrightLEDs trailer lights came in today. And as usual they did not disappoint. The quality in this thing looks great. I'm very satisfied. 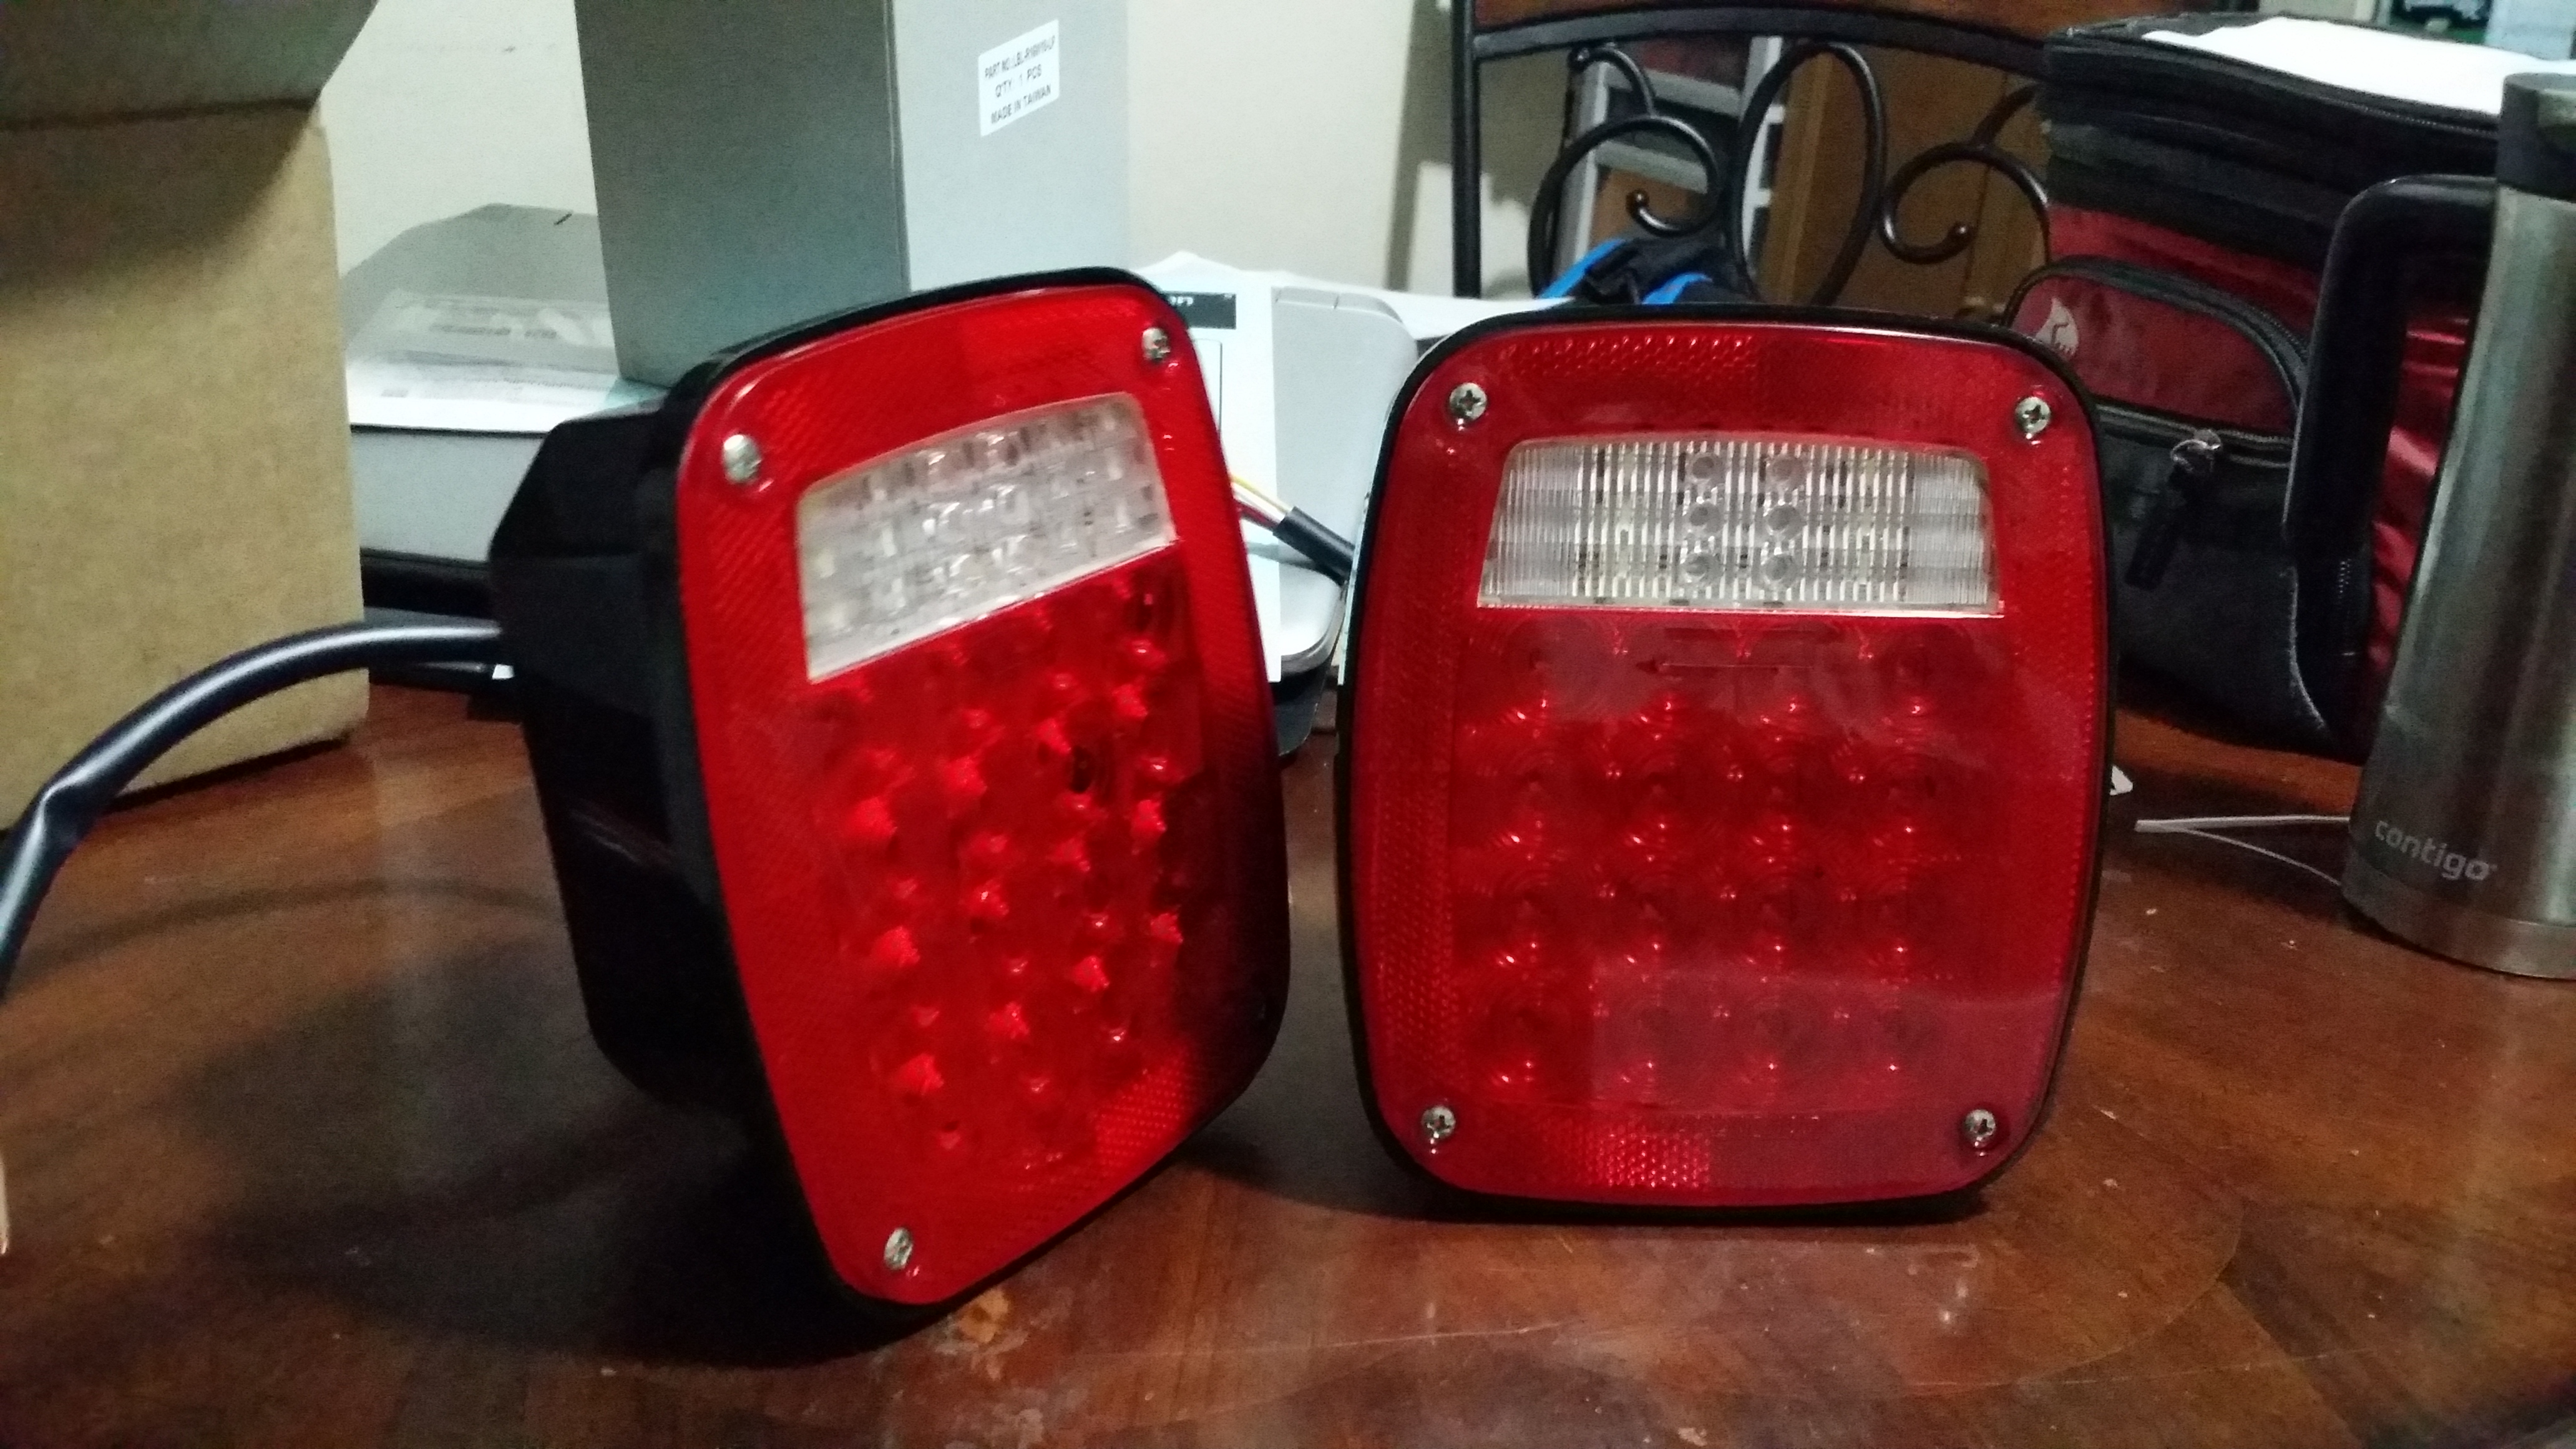
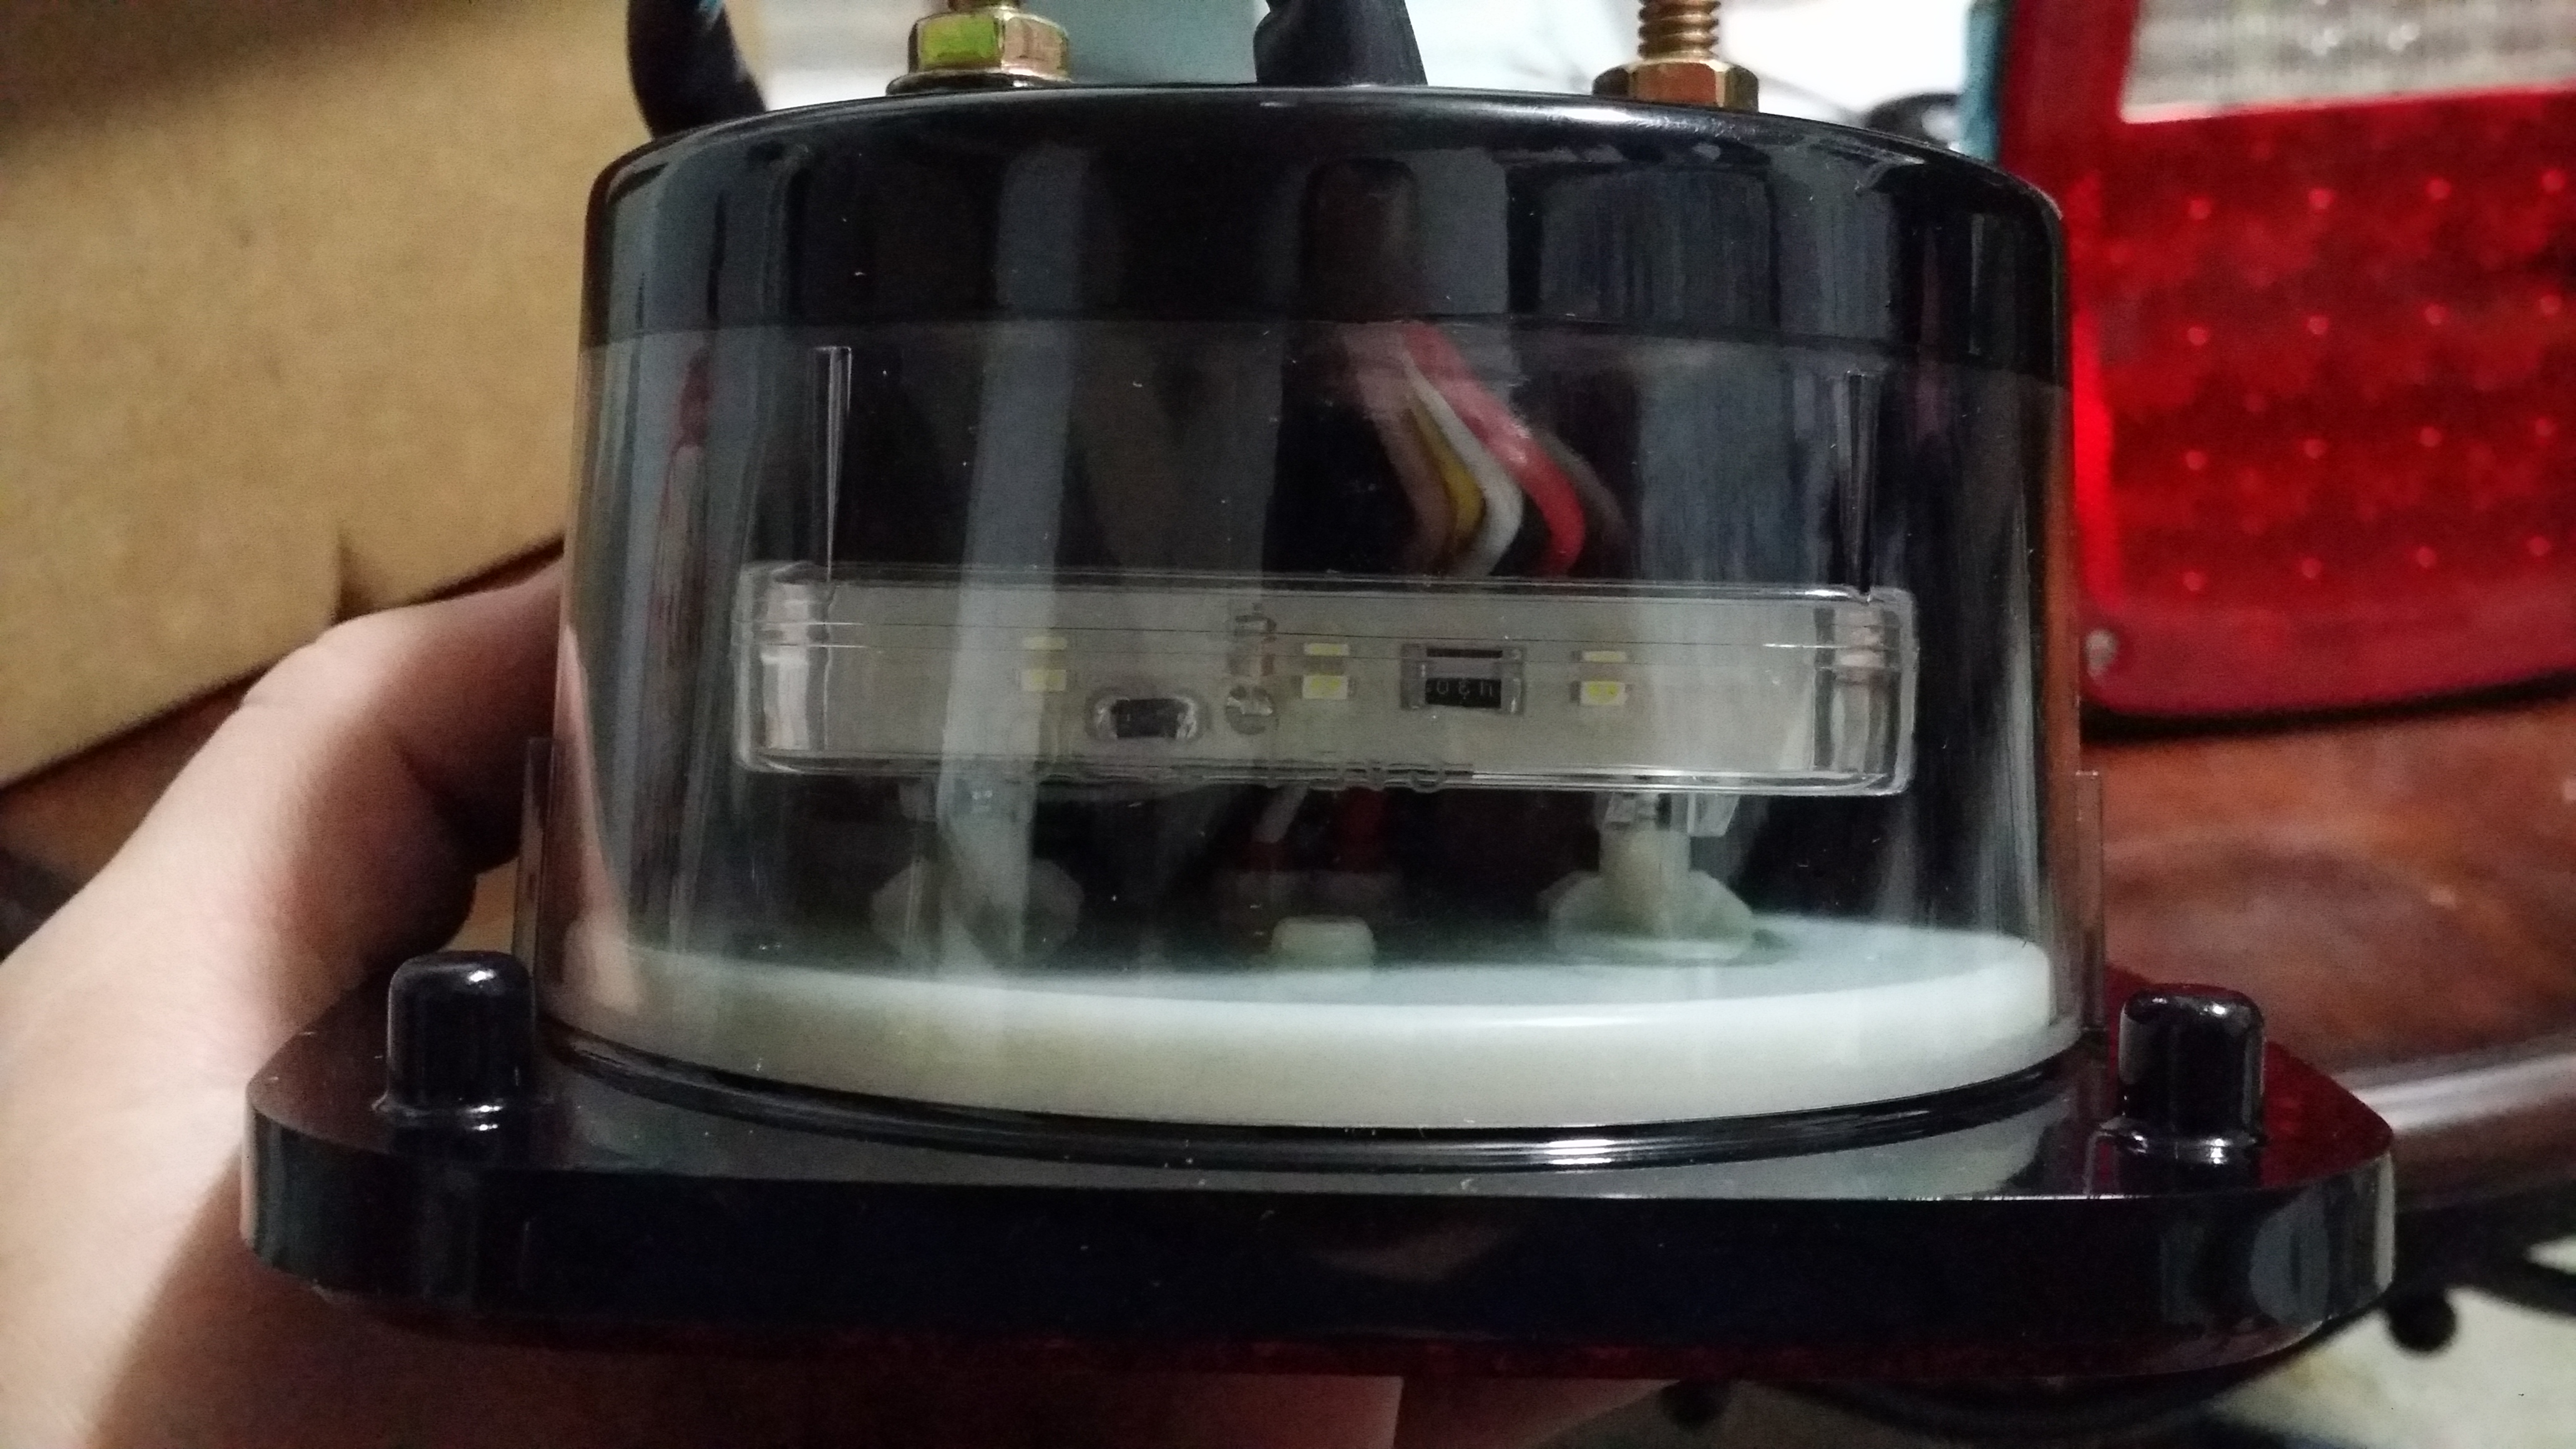
Close up of the 3 leds on the bottom side for license plate illumination.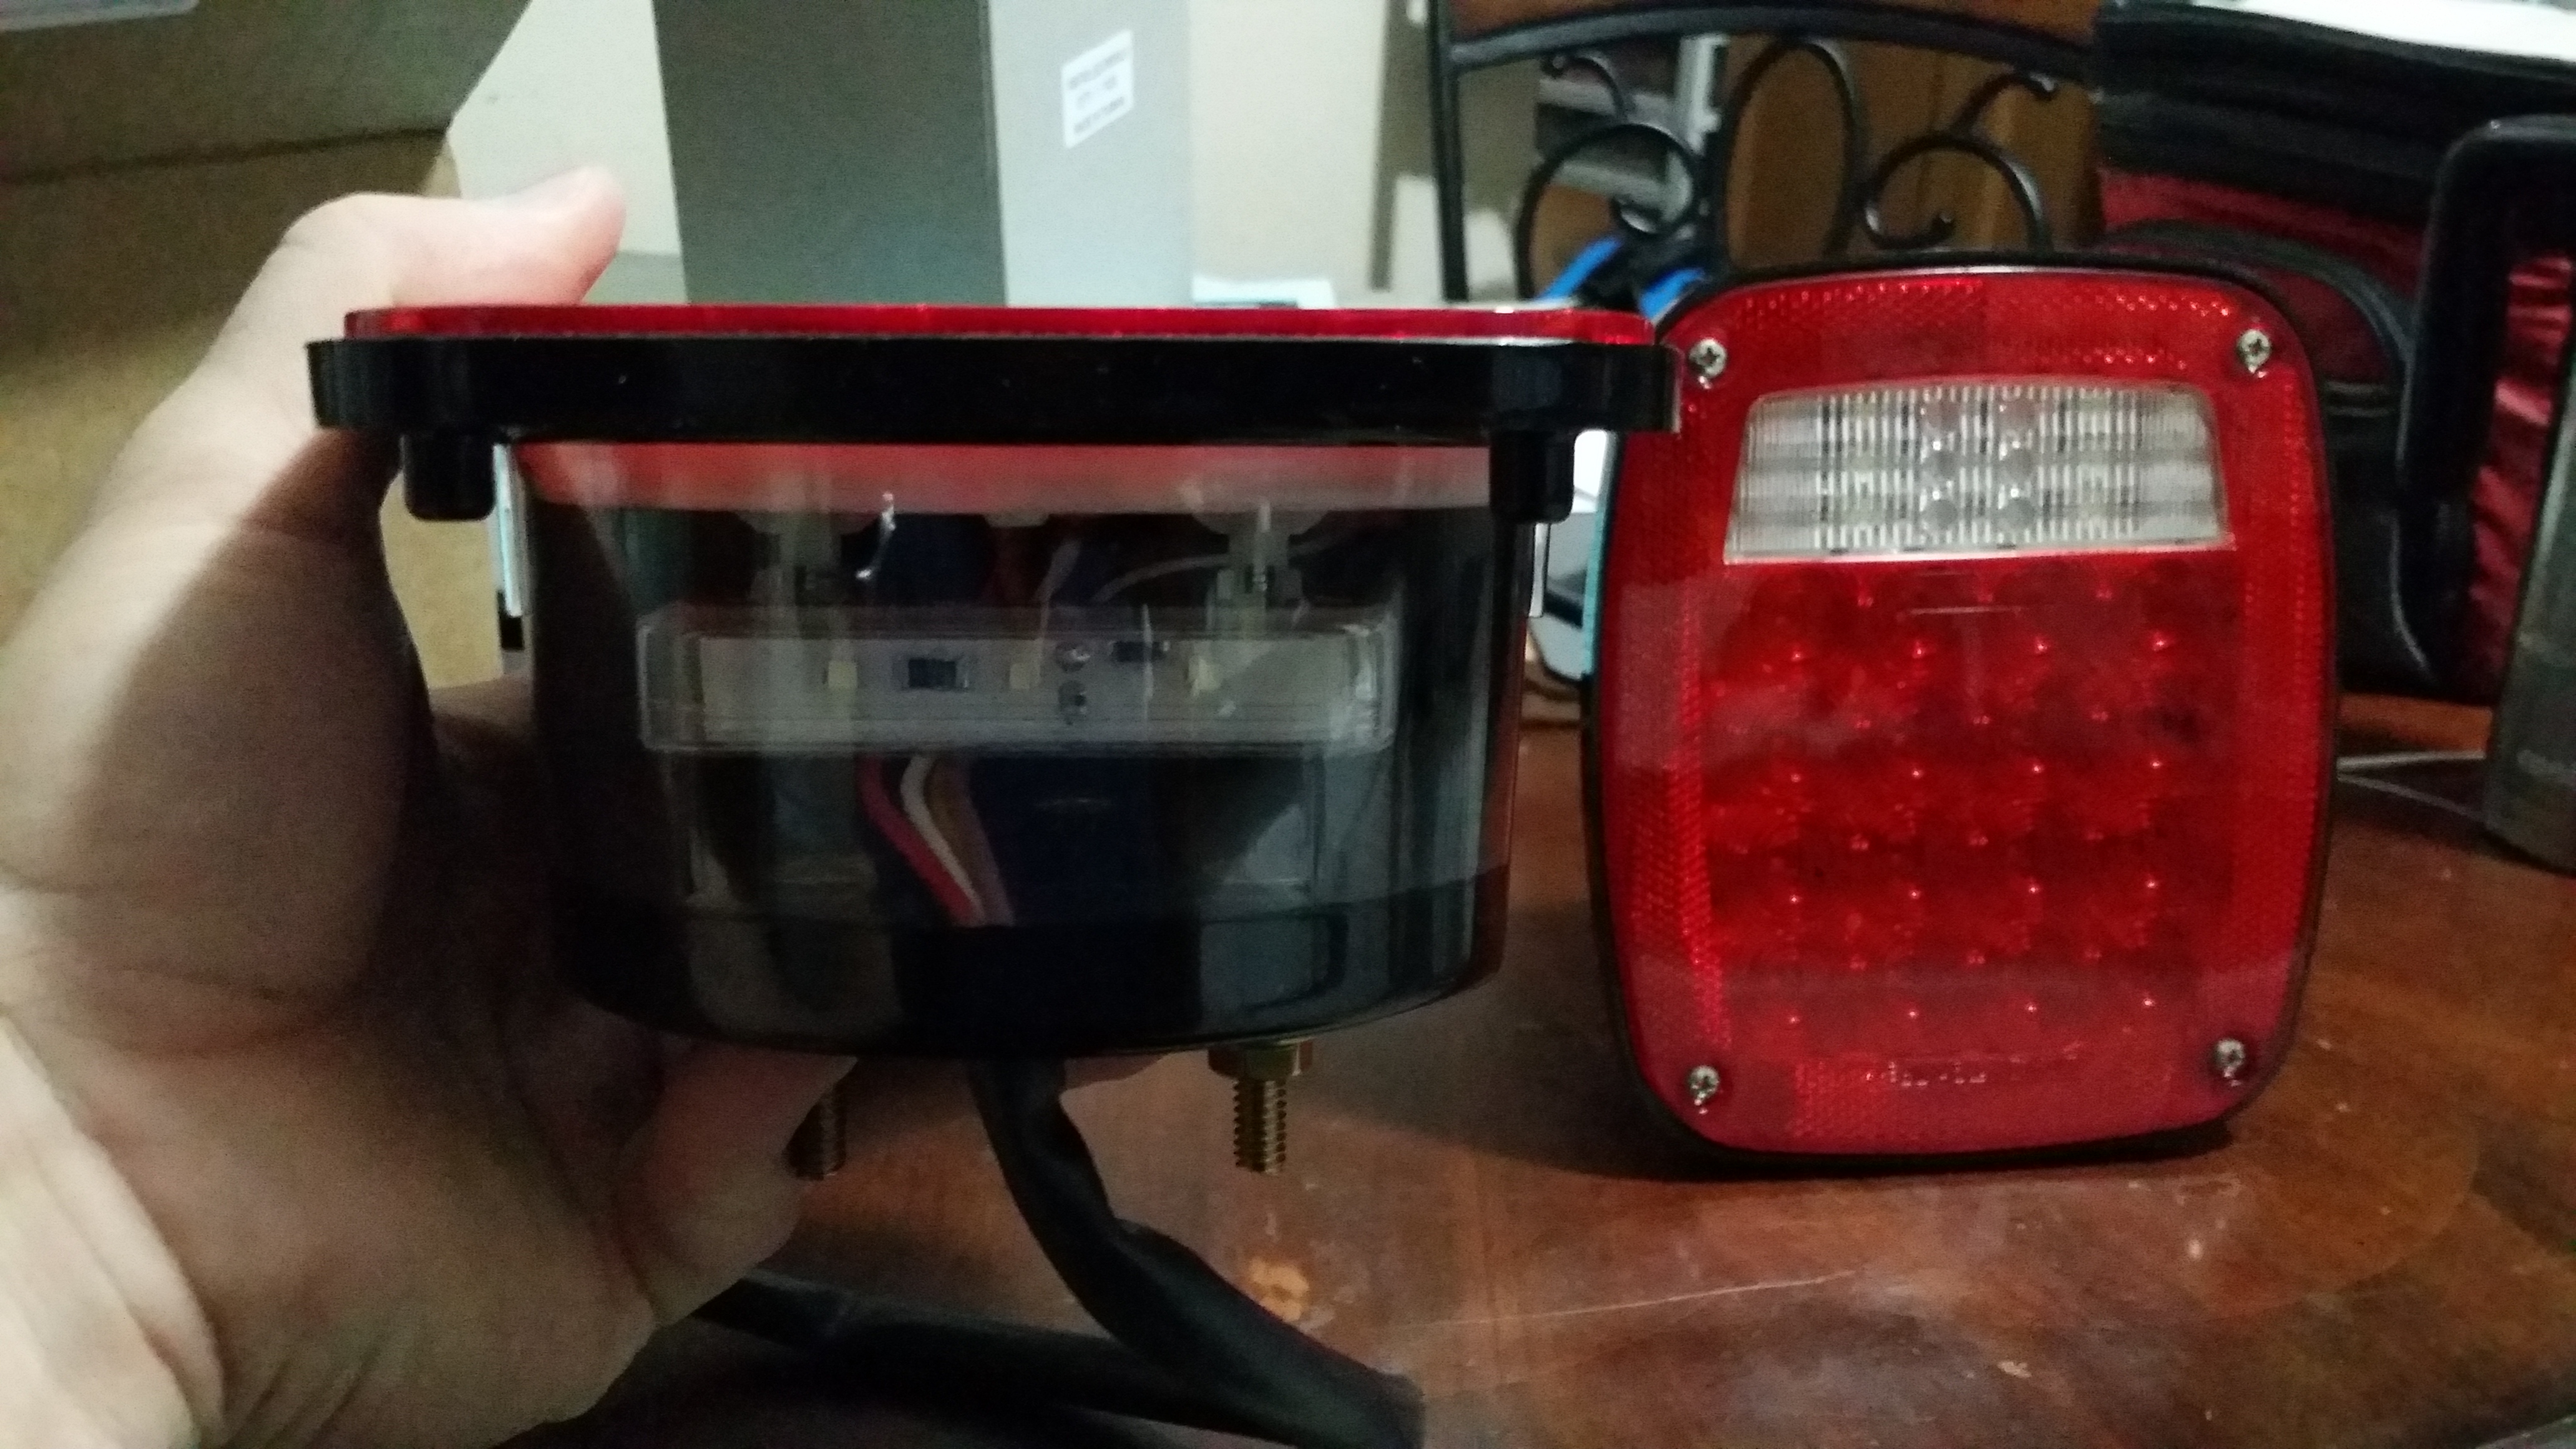
3 screw mounting surface on the rear side.

Nice thick wires! So much easier to work with for me vs tiny thin wires that some other companies make. Wire code for the trailer lights is included on the box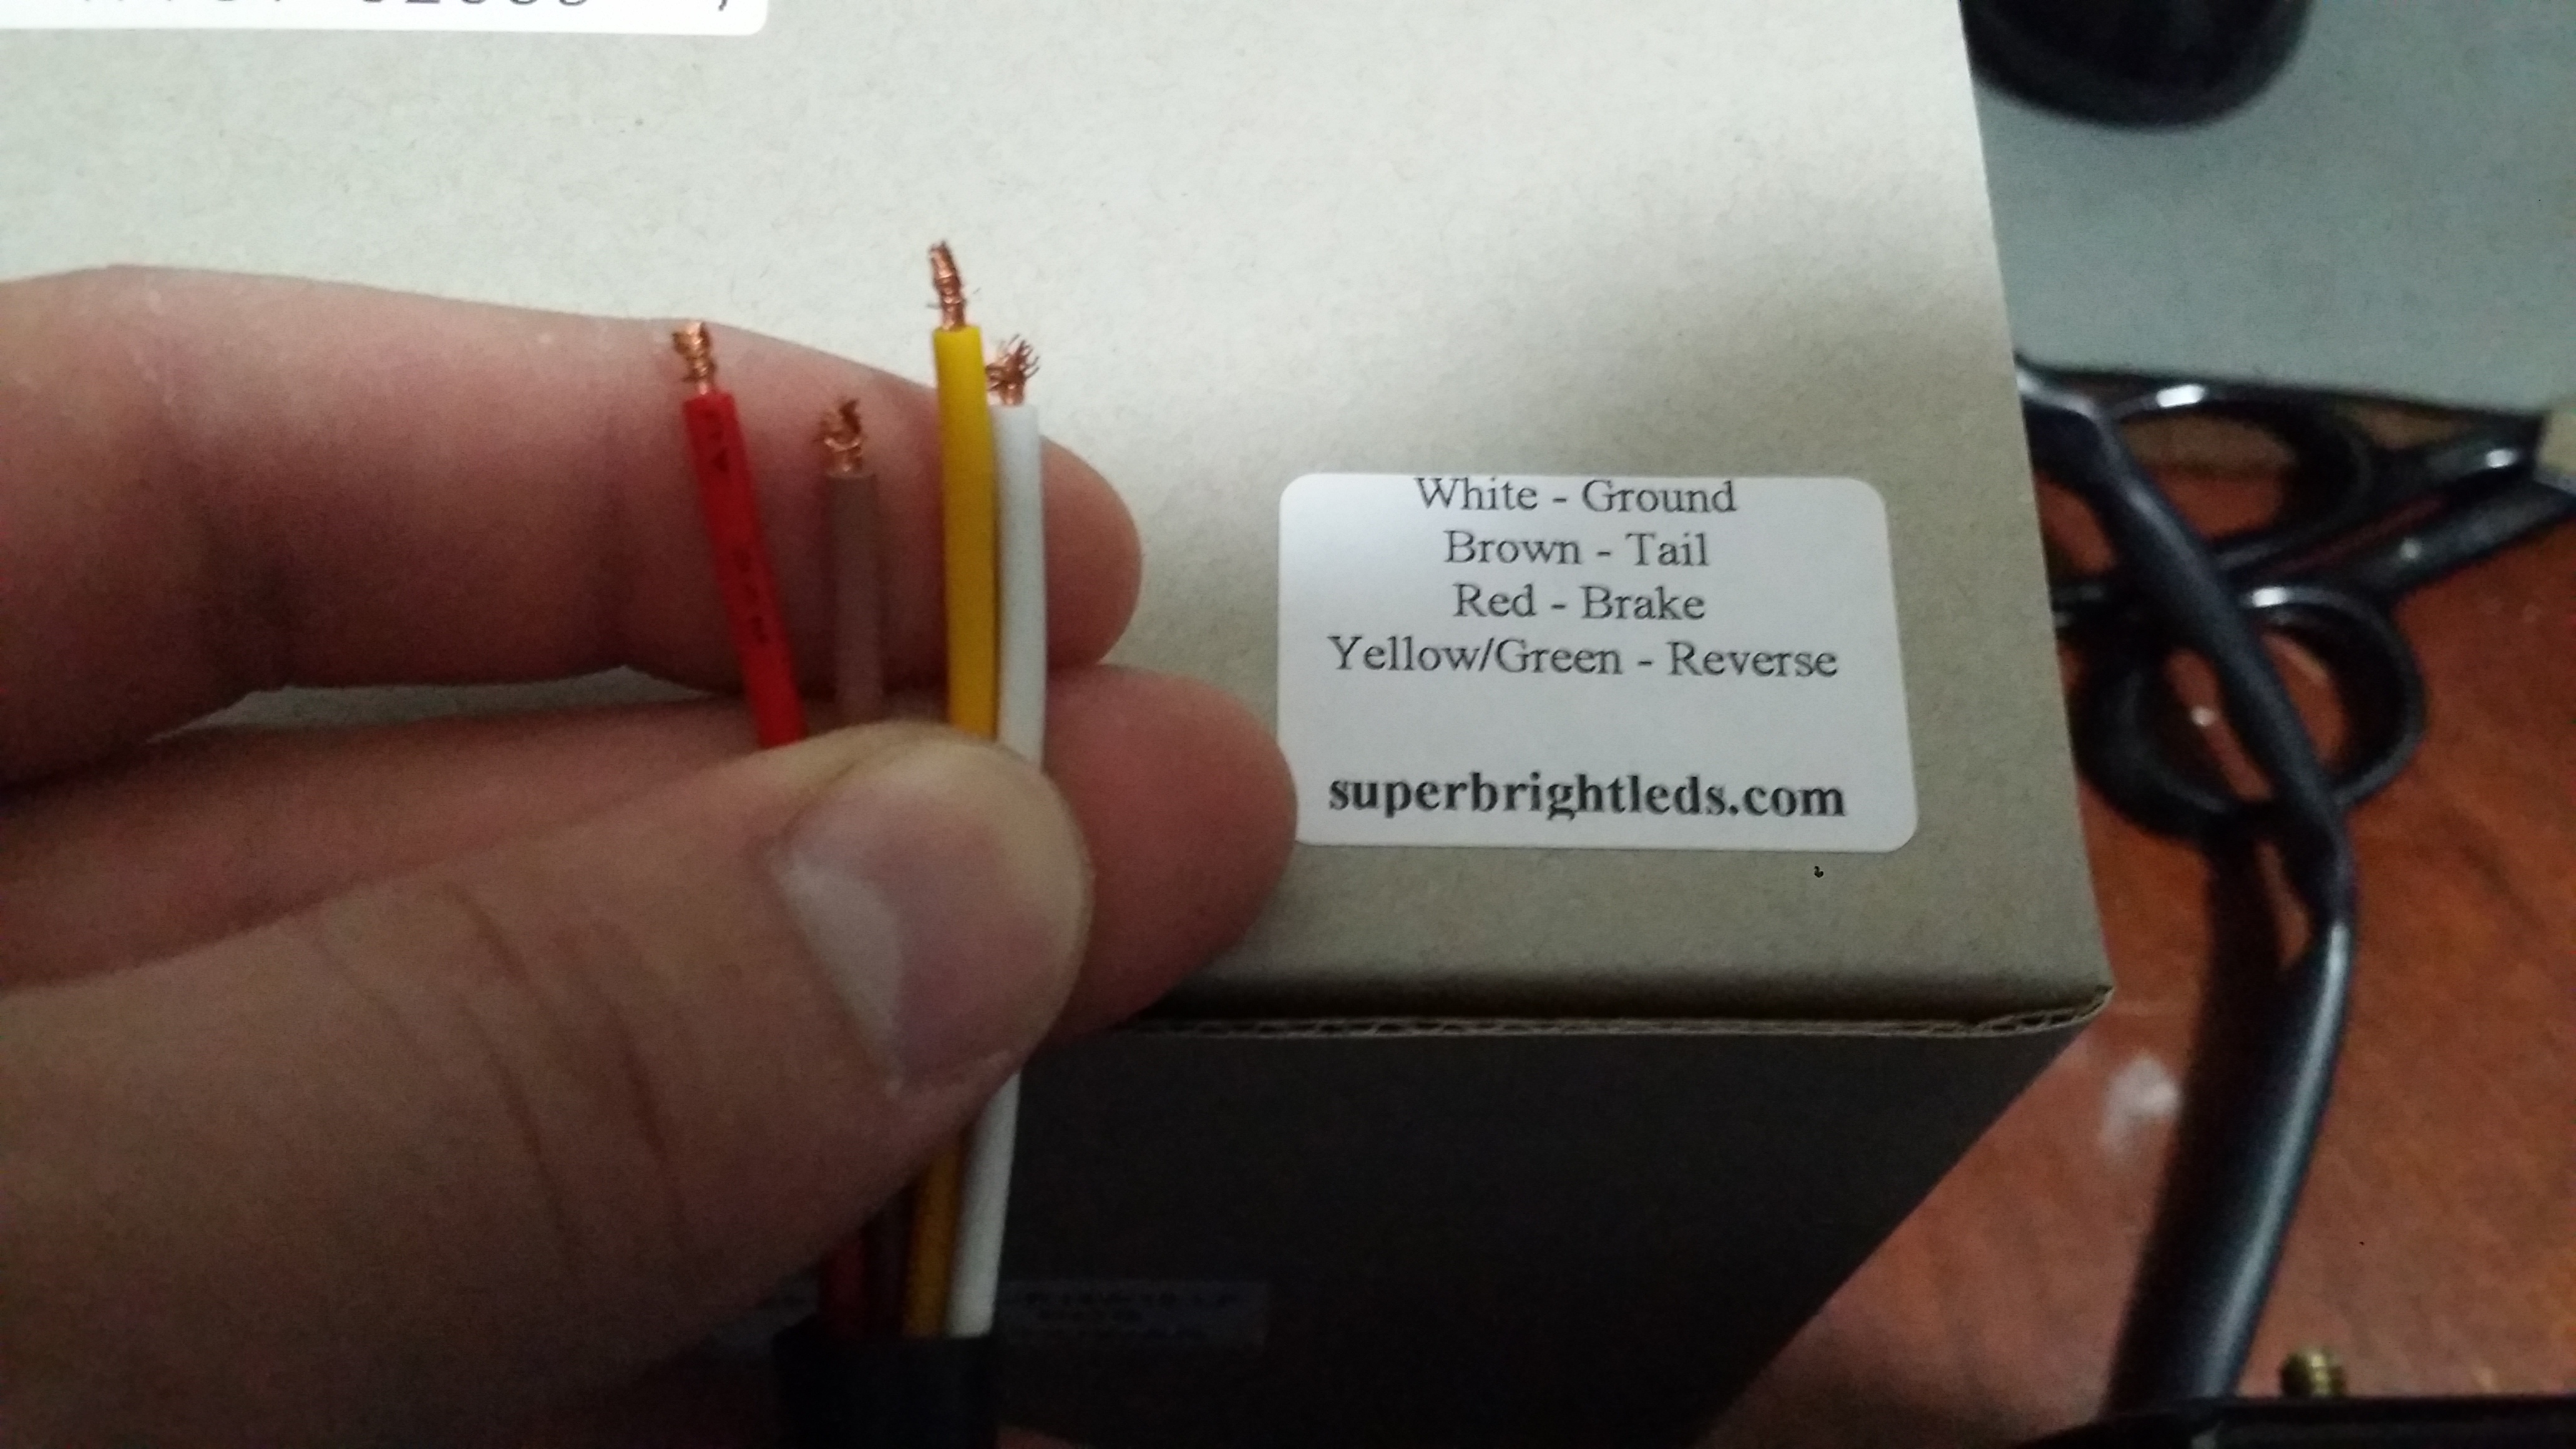

Close up of the 3 leds on the bottom side for license plate illumination.


3 screw mounting surface on the rear side.

Nice thick wires! So much easier to work with for me vs tiny thin wires that some other companies make. Wire code for the trailer lights is included on the box
 Feb 28, 2016 | 07:51 PM
#78
Thread Starter
Registered User
Joined: Apr 2012
Posts: 2,817
Likes: 2
From: Los Angeles CA
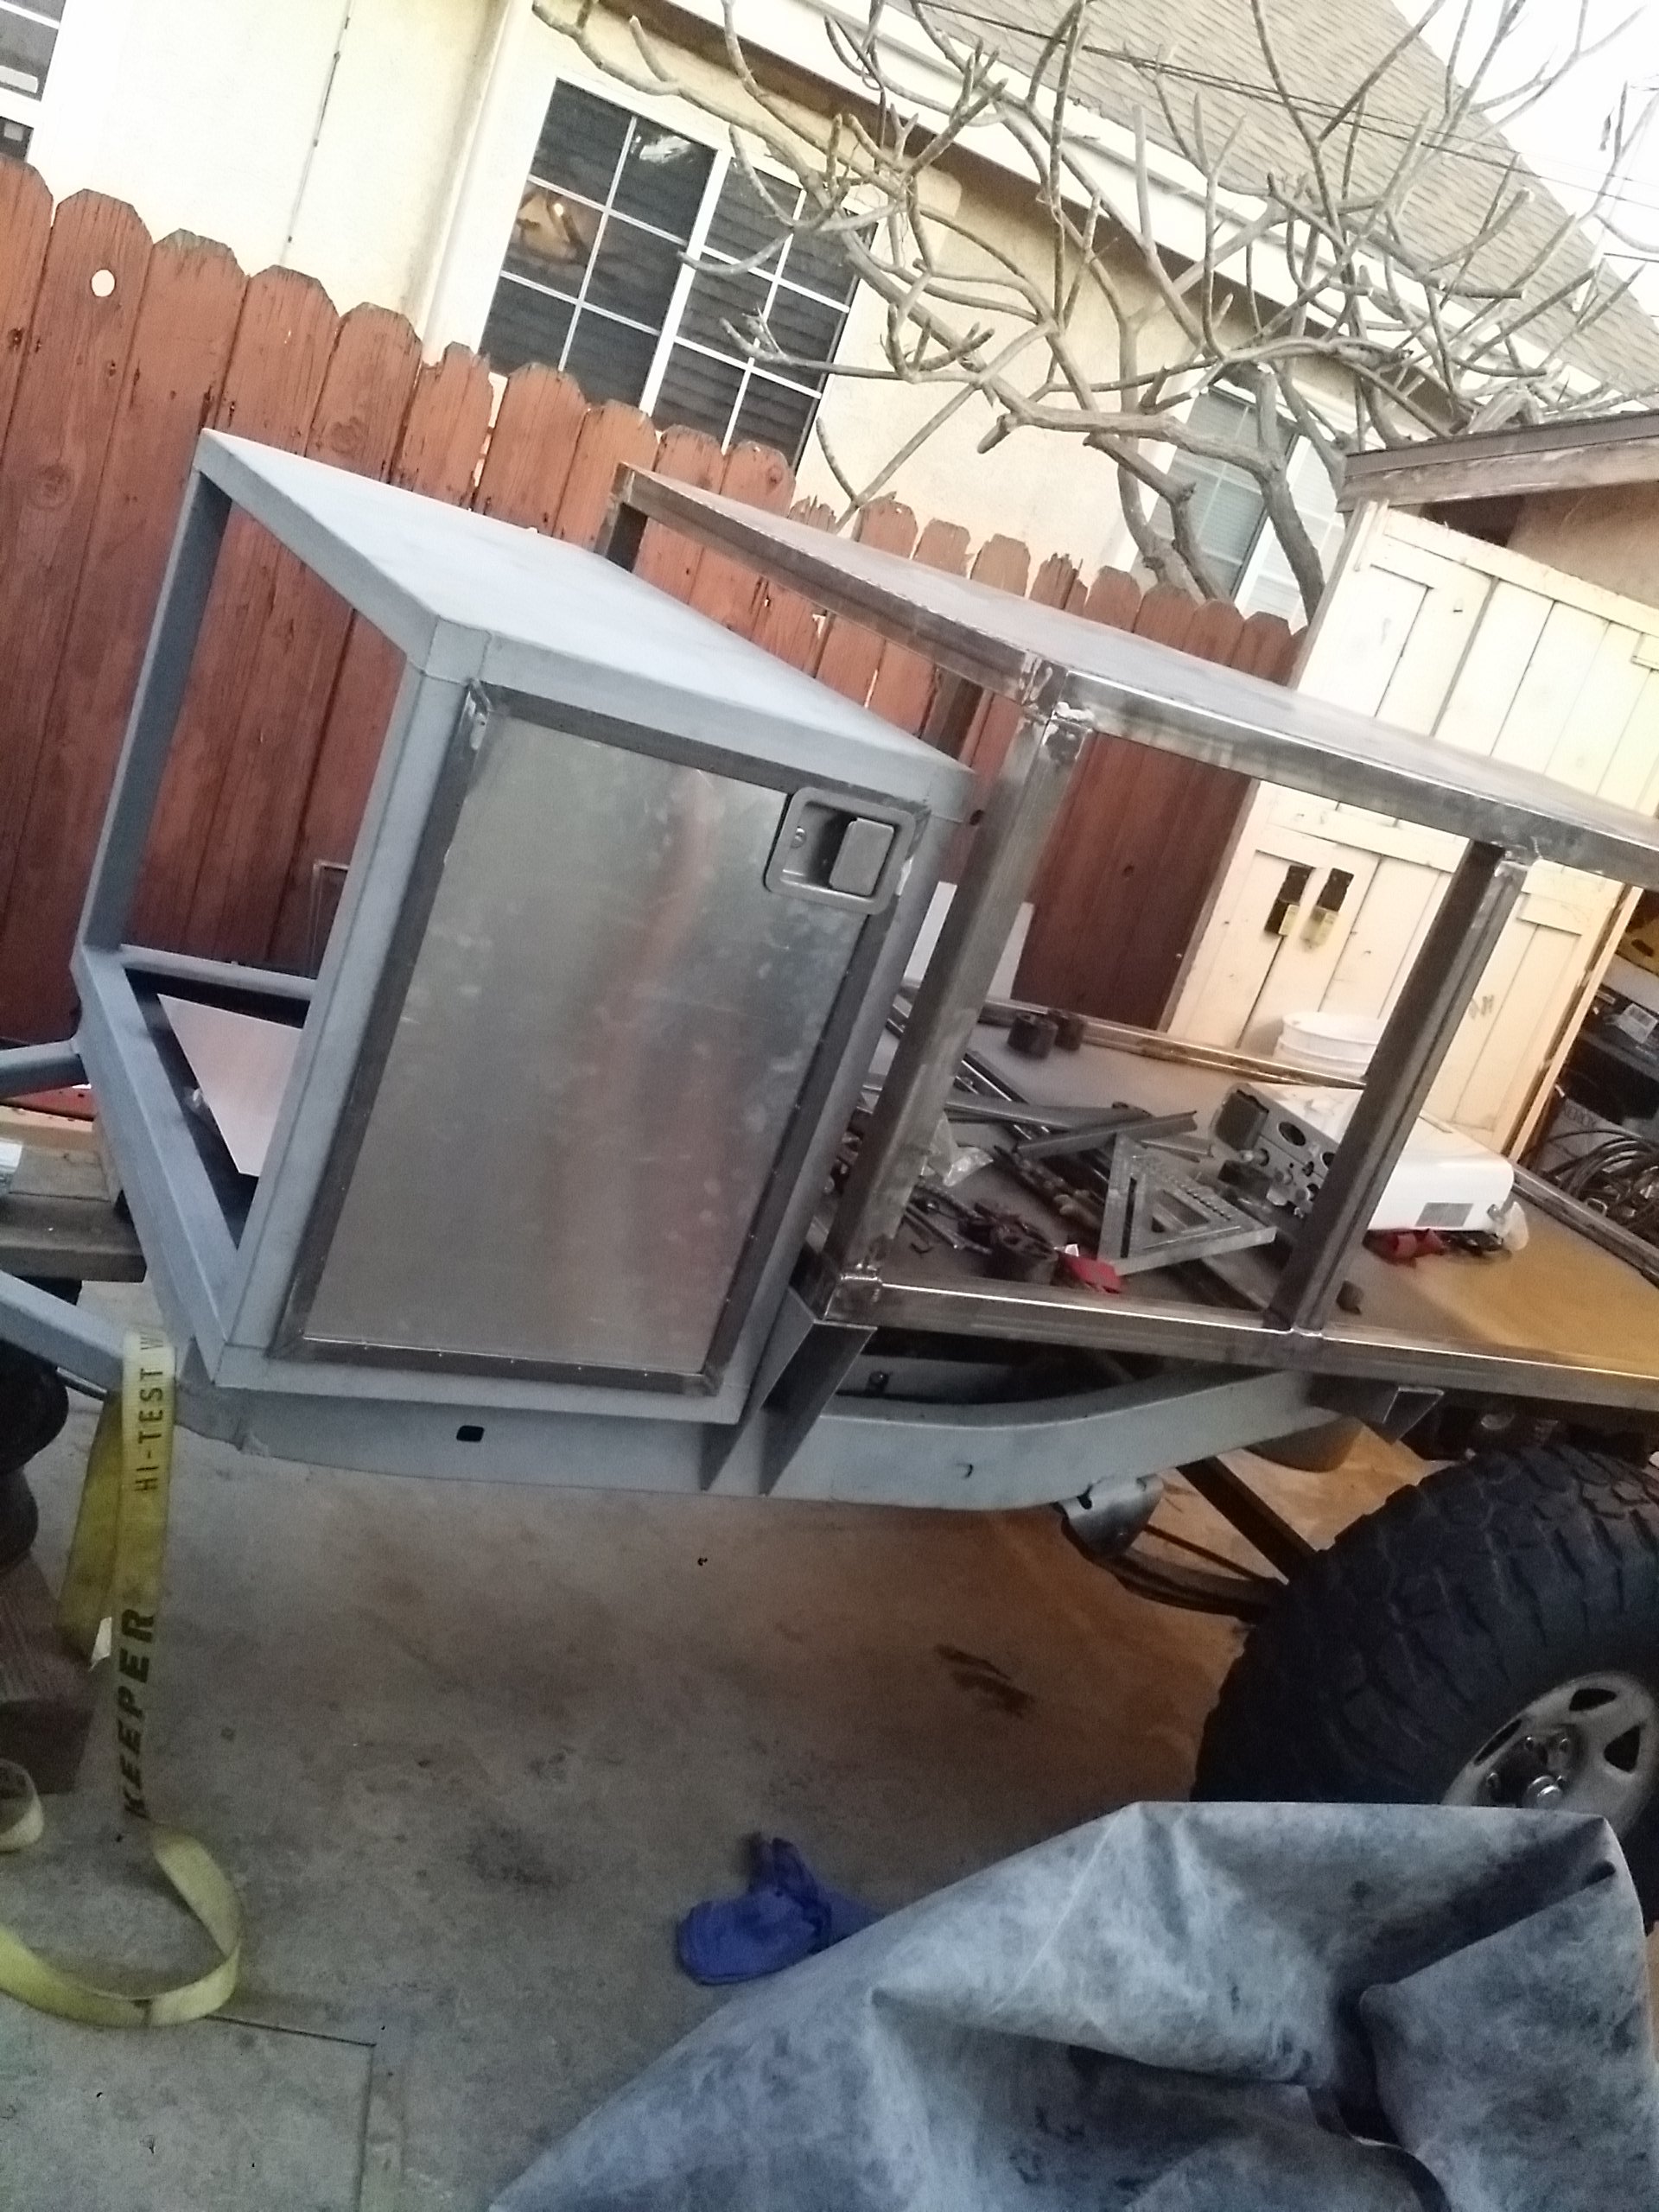
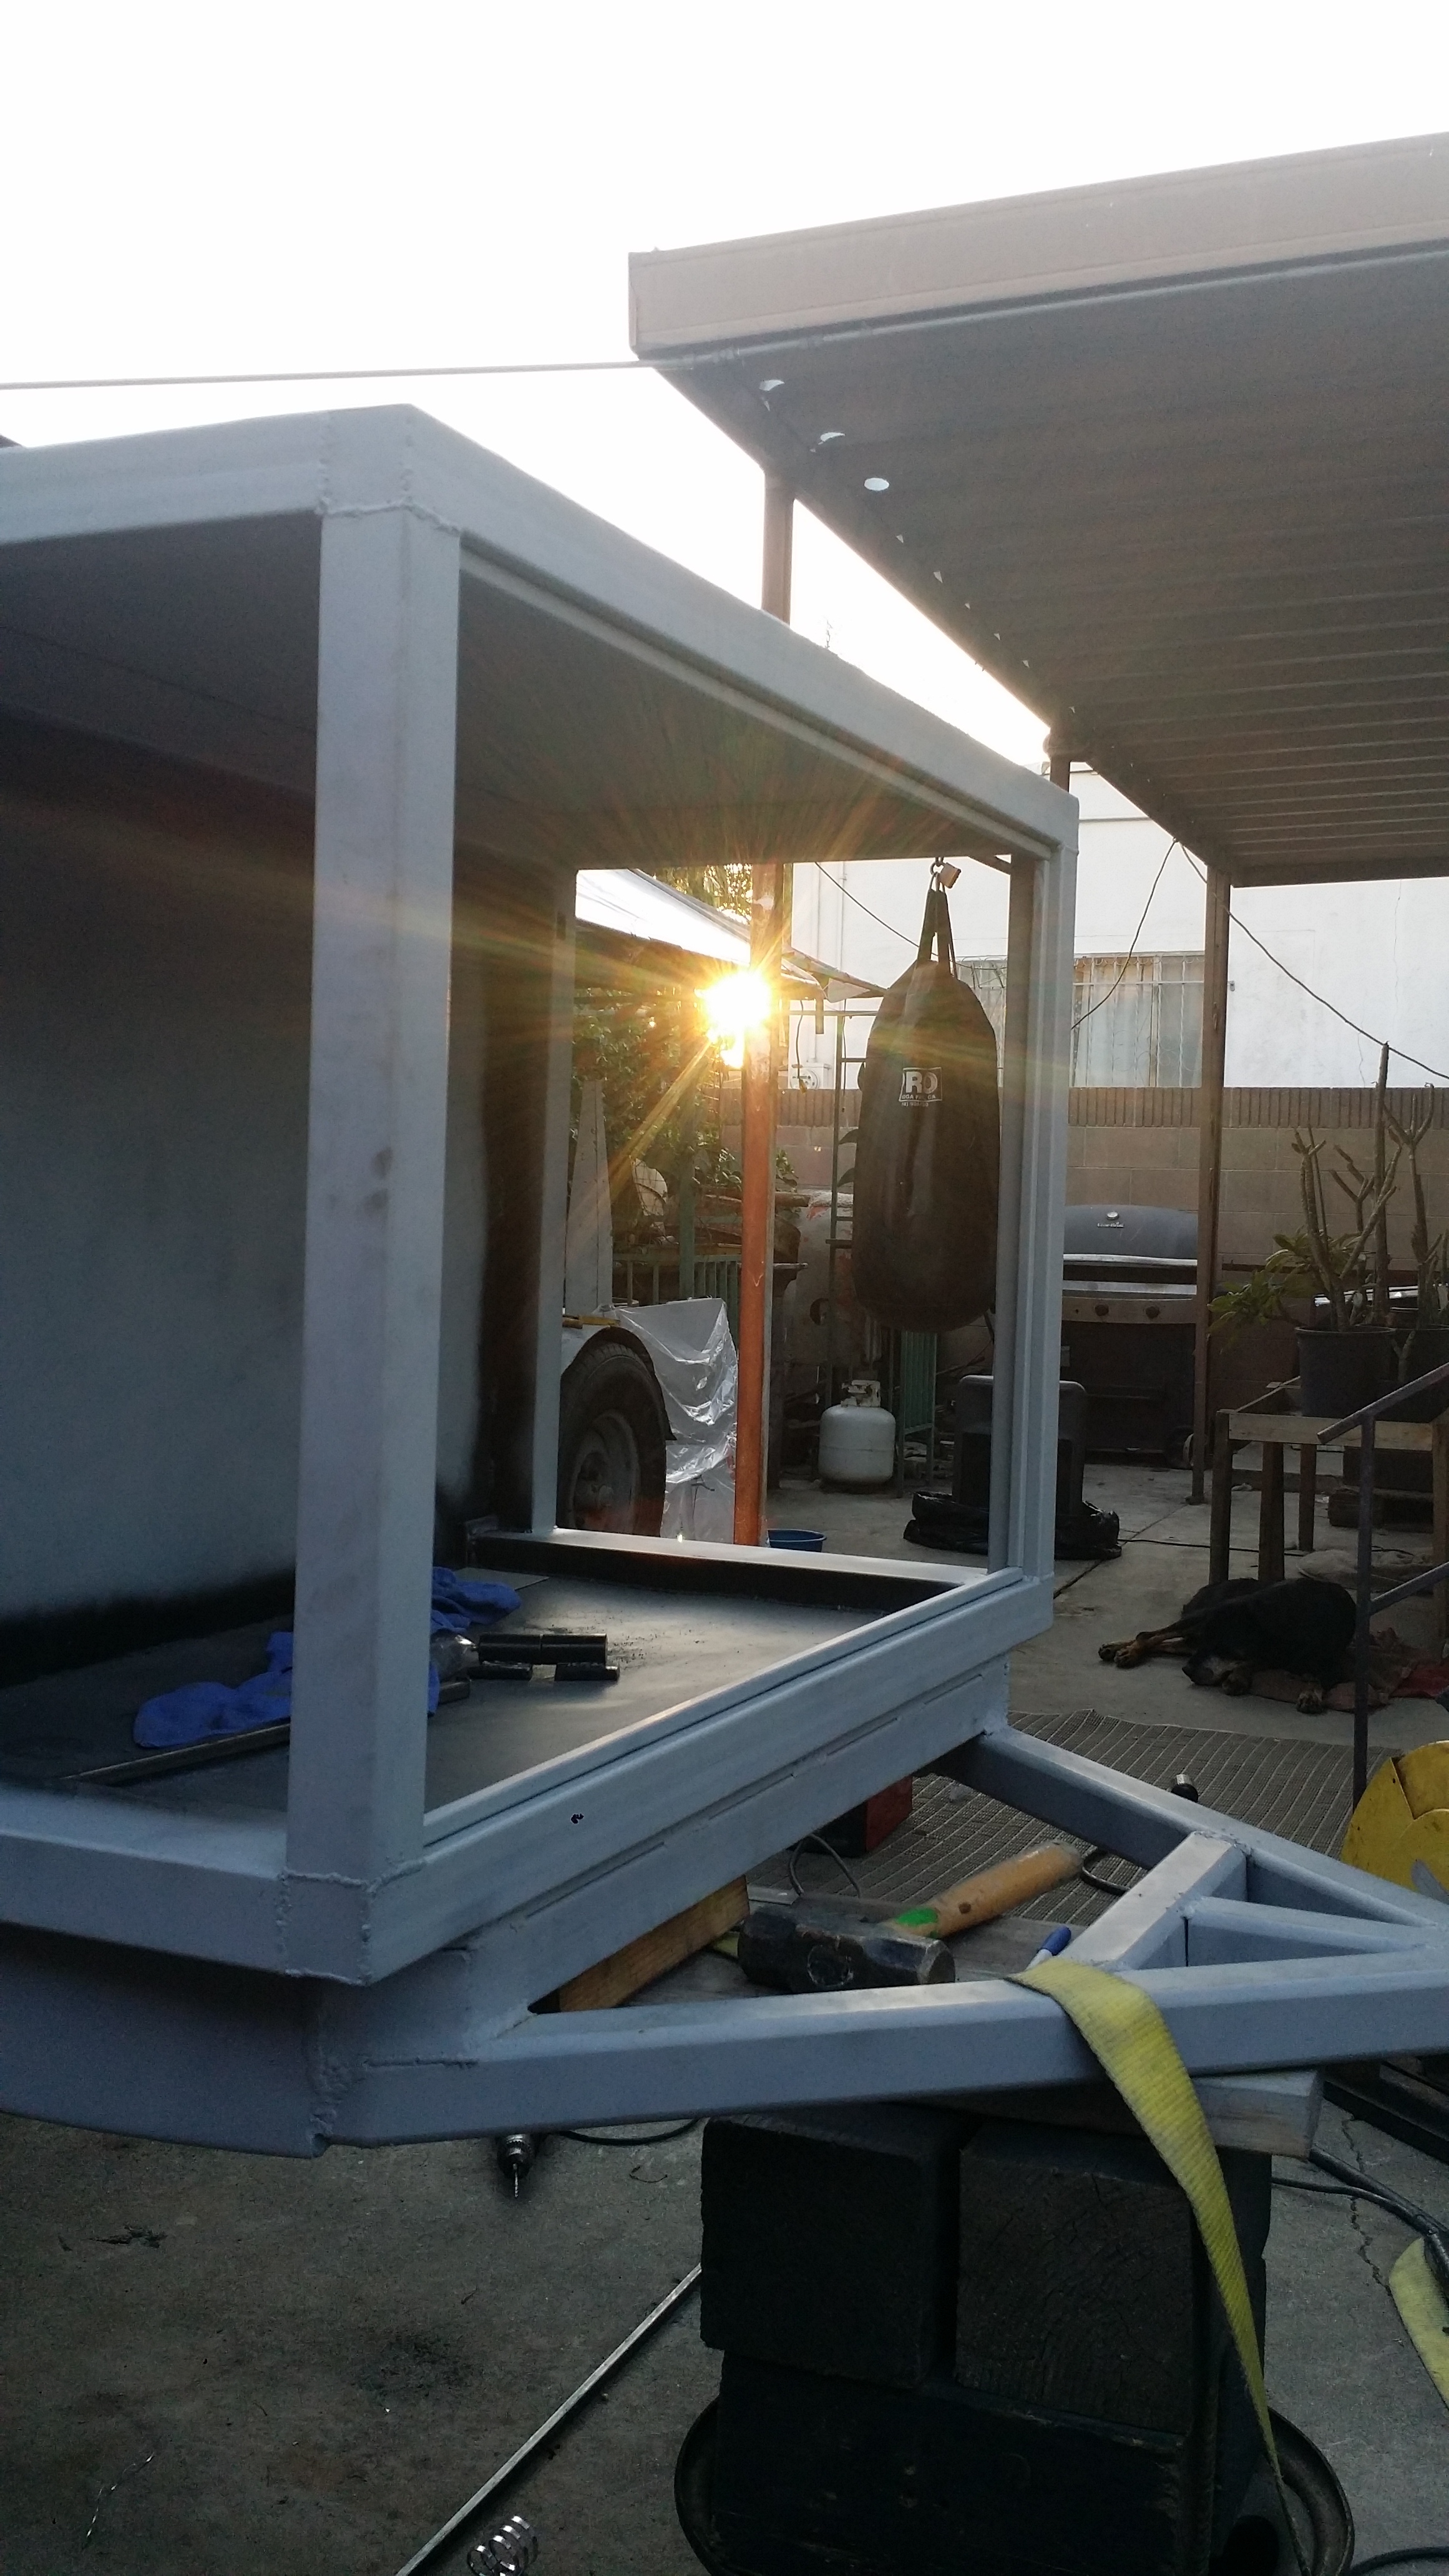
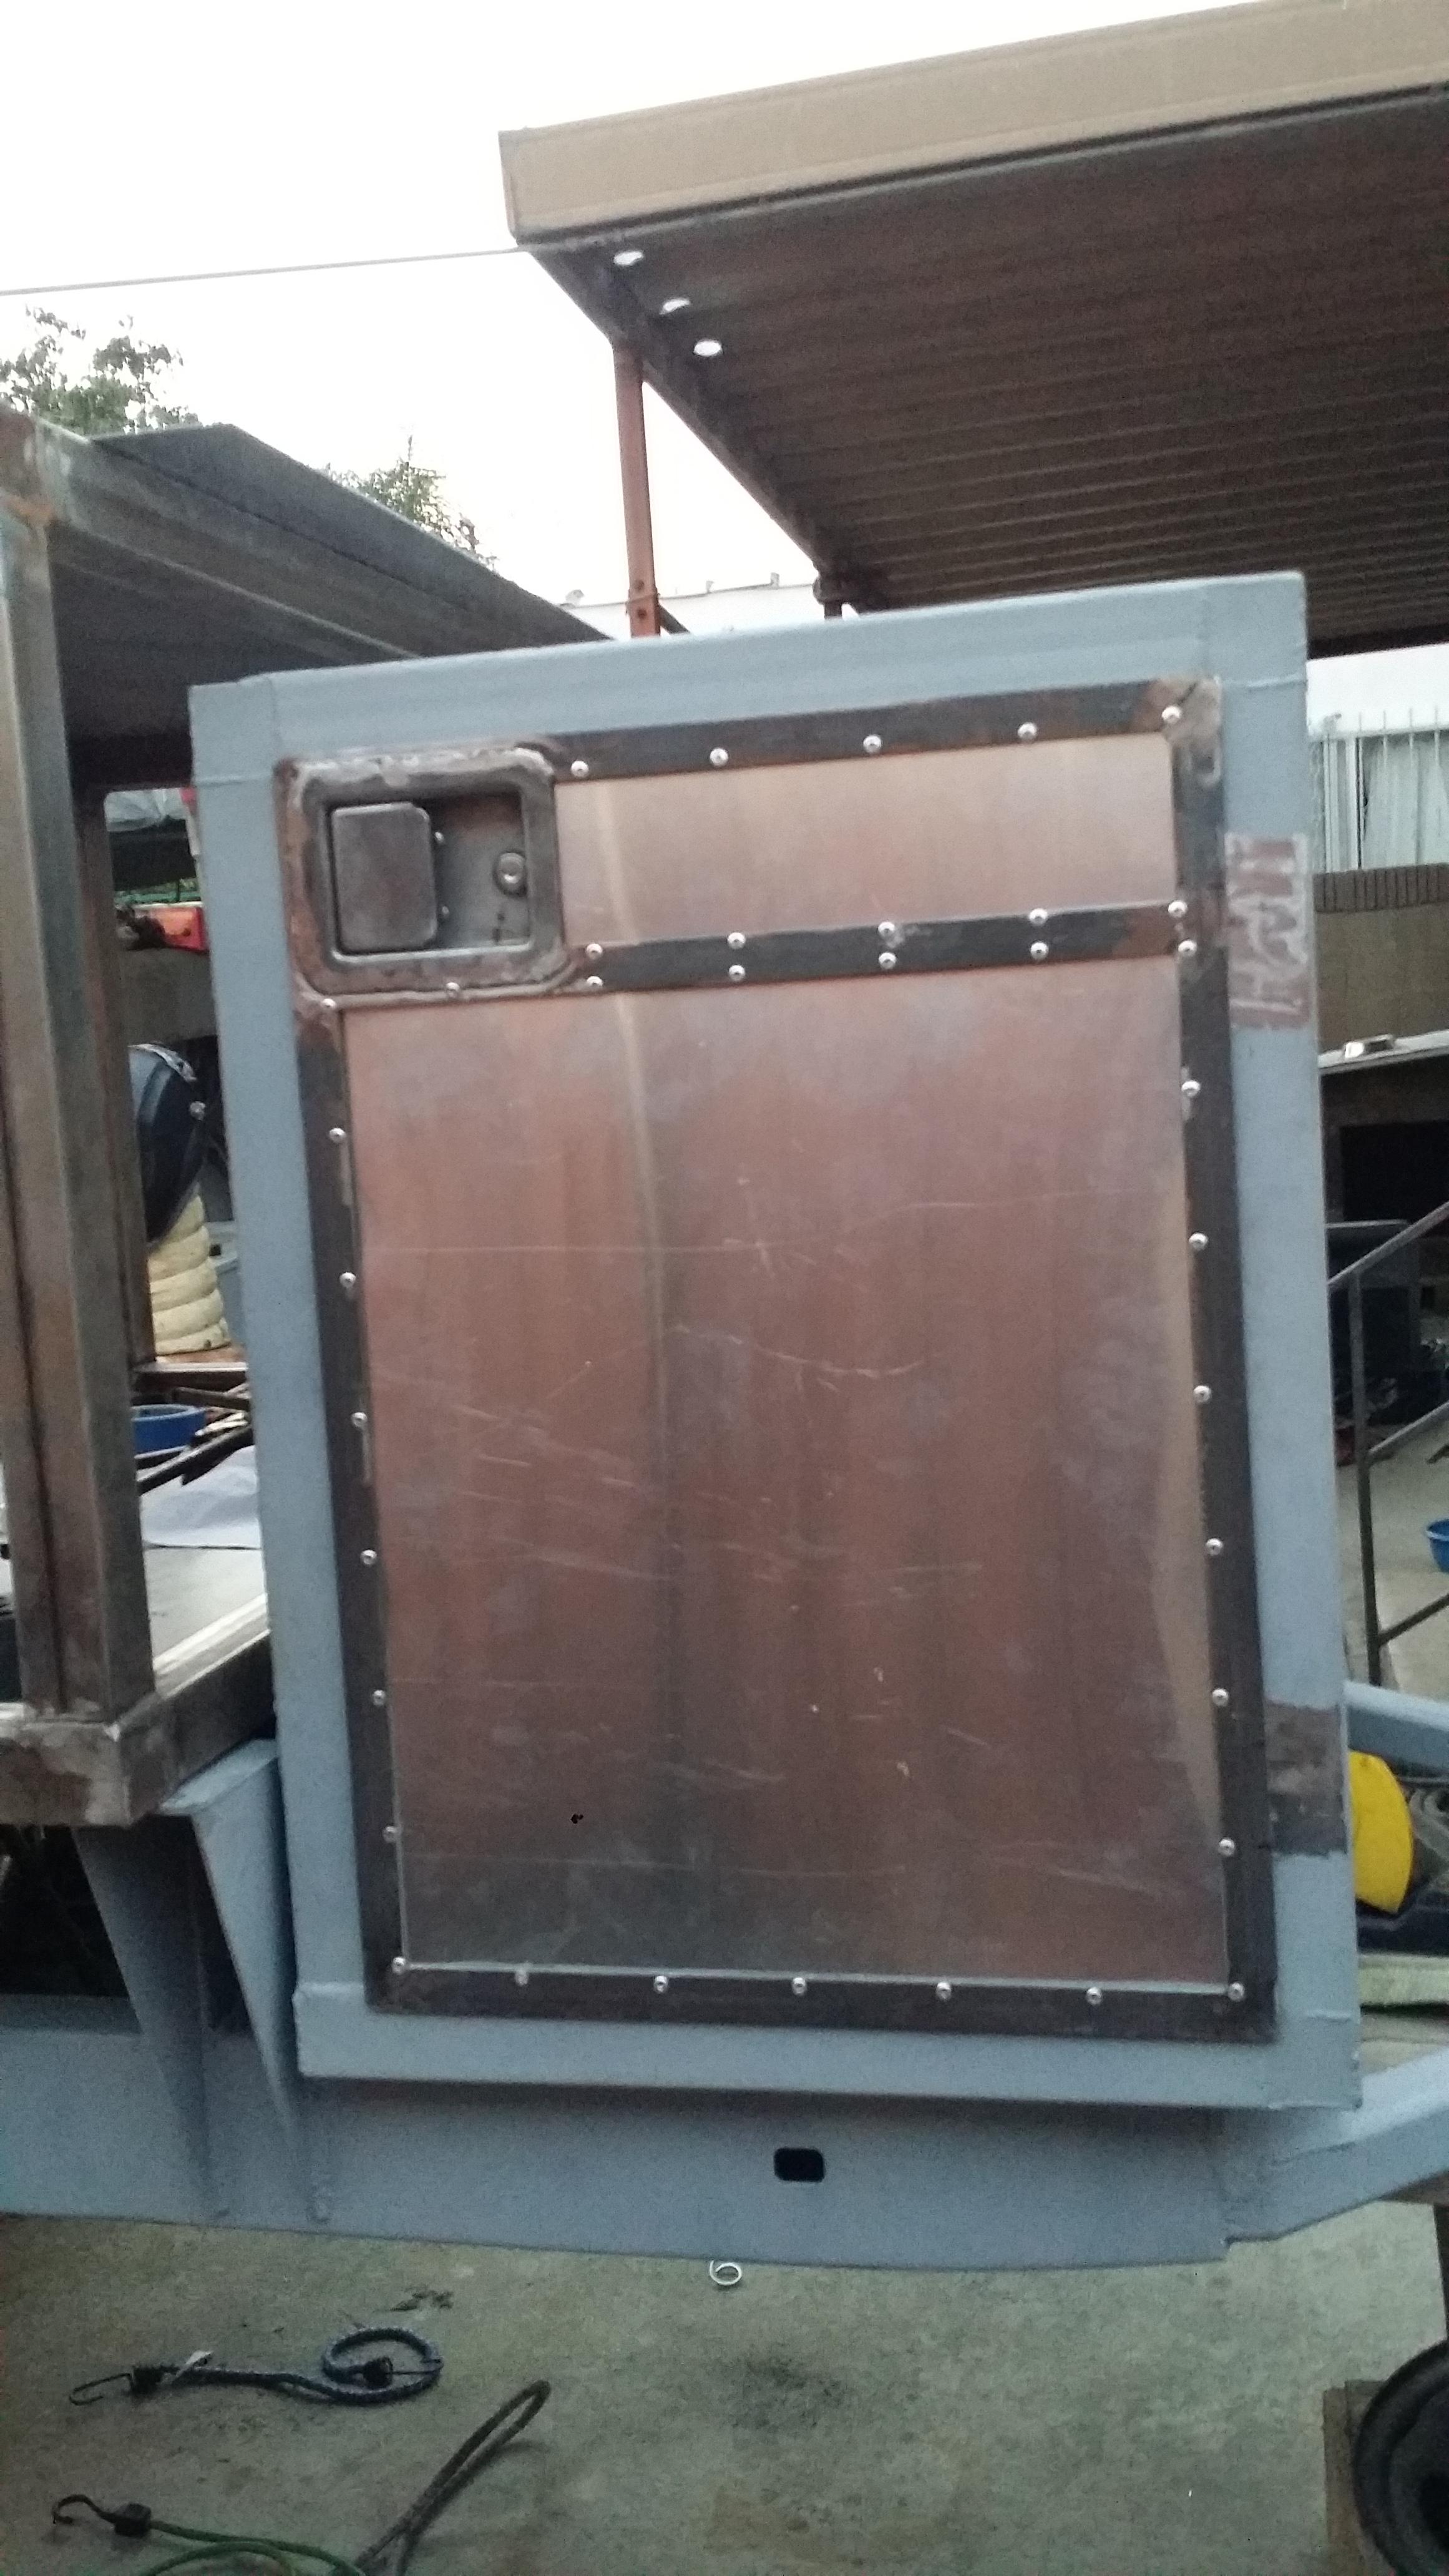
I got a ton of stuff accomplished this weekend. i started off by making the frames to the doors. I actually didnt do that portion since my sense of math and angles arent the best. So my dad did those for me. once that was done i went ahead and cut out the 16 gauge aluminum sheet metal to size to use for the walls of the door.
Here's a test fitment of the door with the latch on the real compartment.
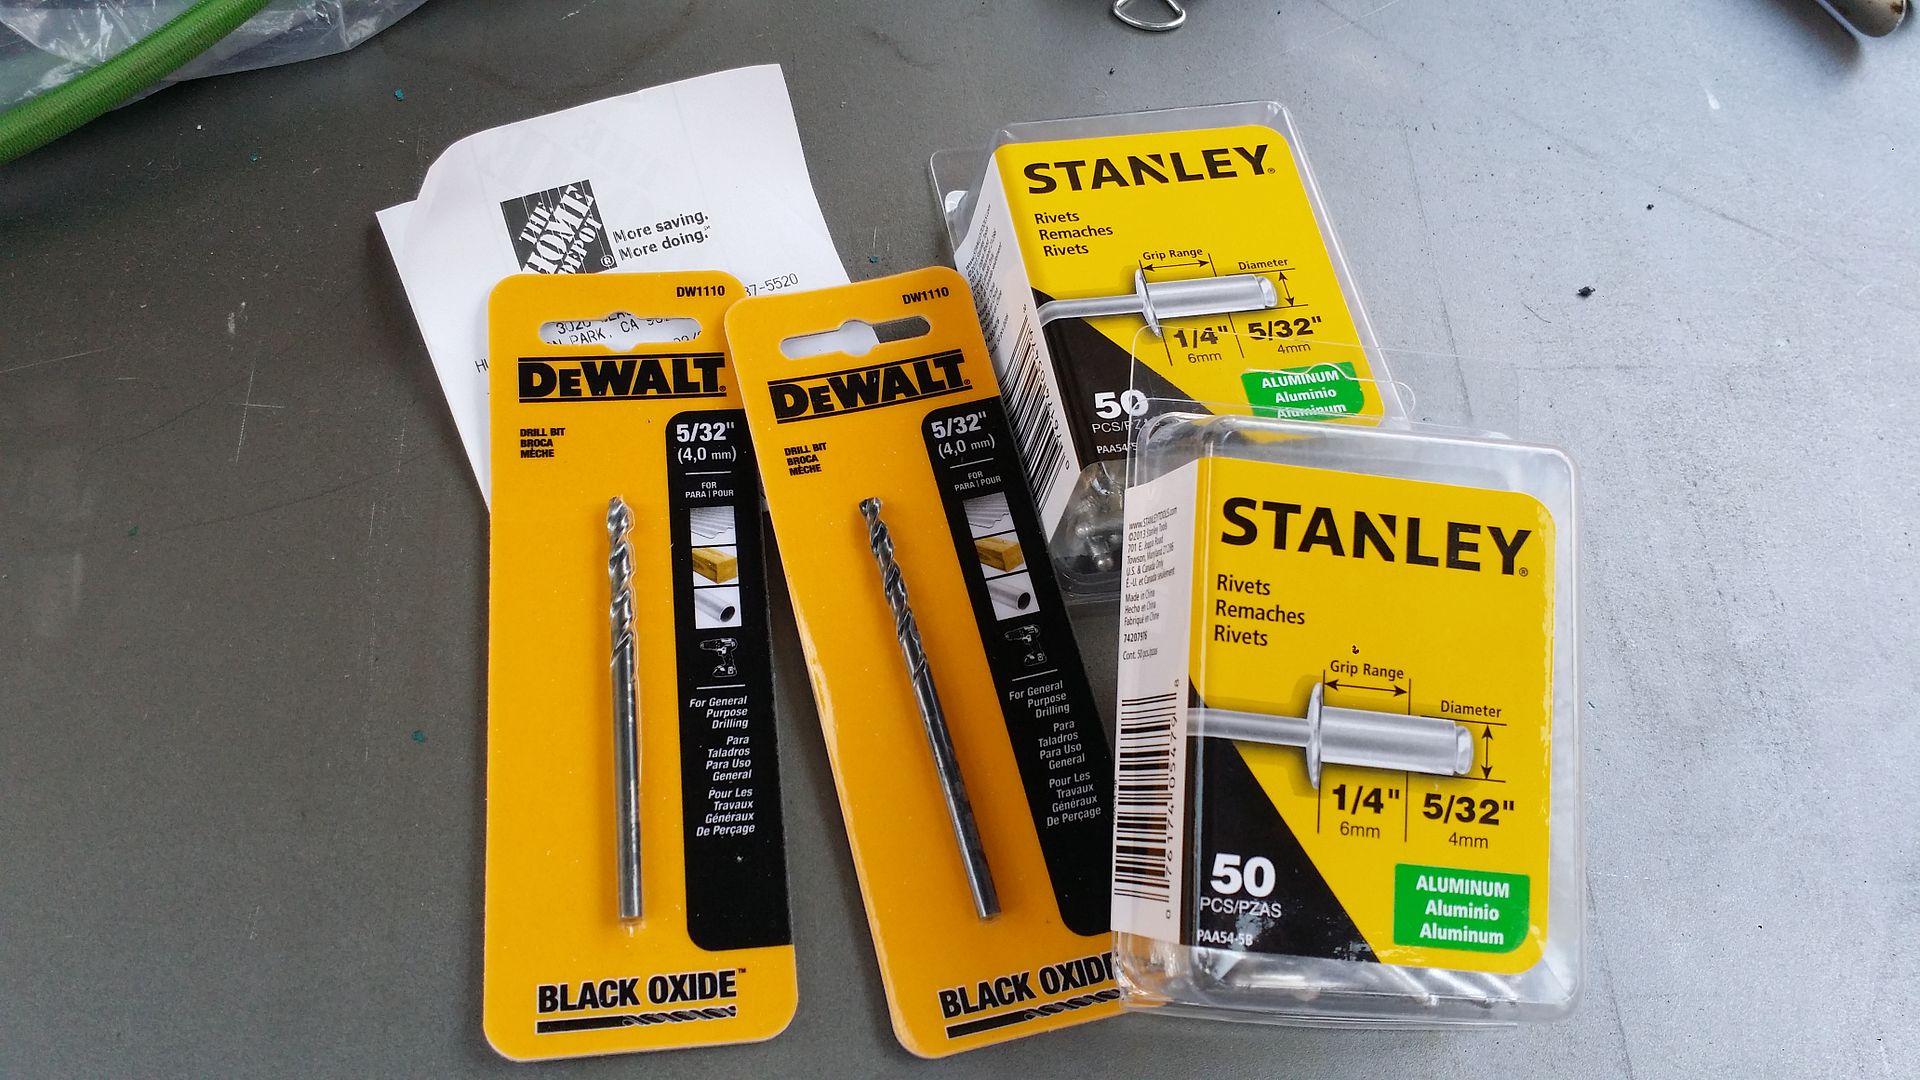
The original rivets i bought weren't thick enough so i had to buy new ones. These can rivet up to 1/4" thick. If you have never used Pop-Rivets before just know you need to drill the hole before you can use them. Drill through both surfaces, insert the pop rivet, then use the rivet gun to clamp them together.
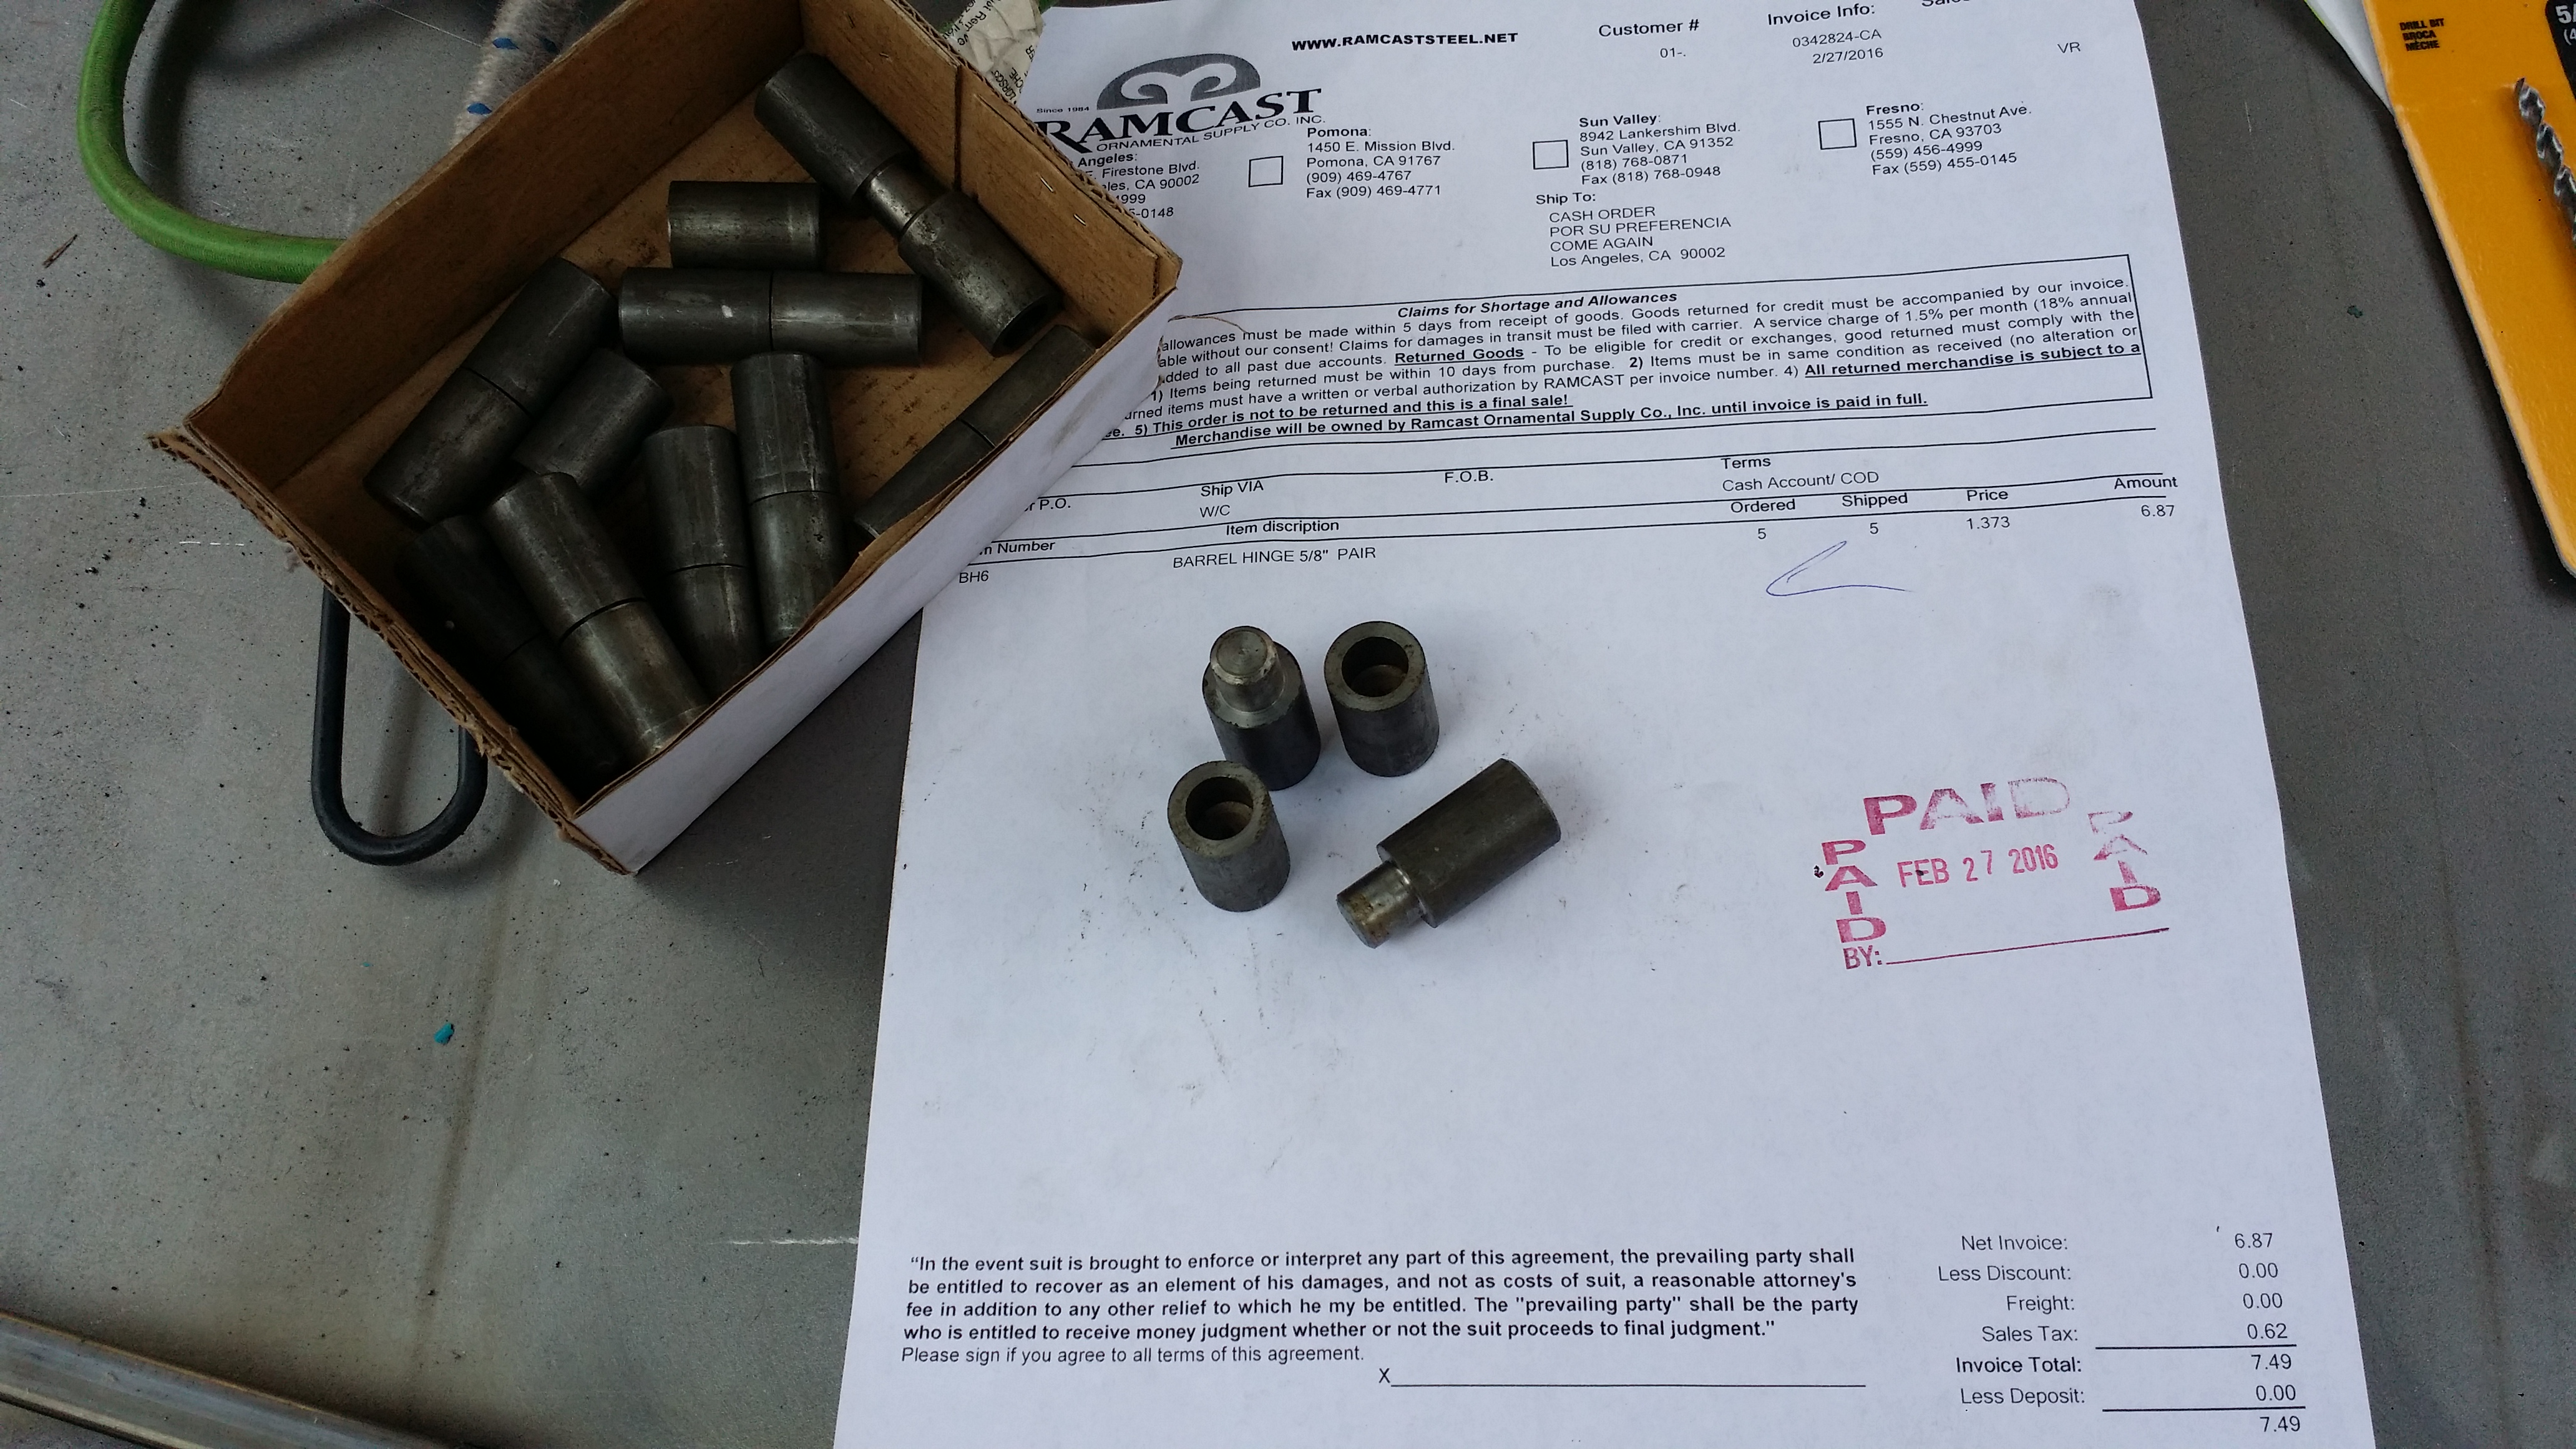
I also went ahead and bought 5/8"s barrel hinges. the other set of hinges just seemed way too large for what it would be holding. So this smaller size is alot better for this application.
Door 1 wall secured in place.
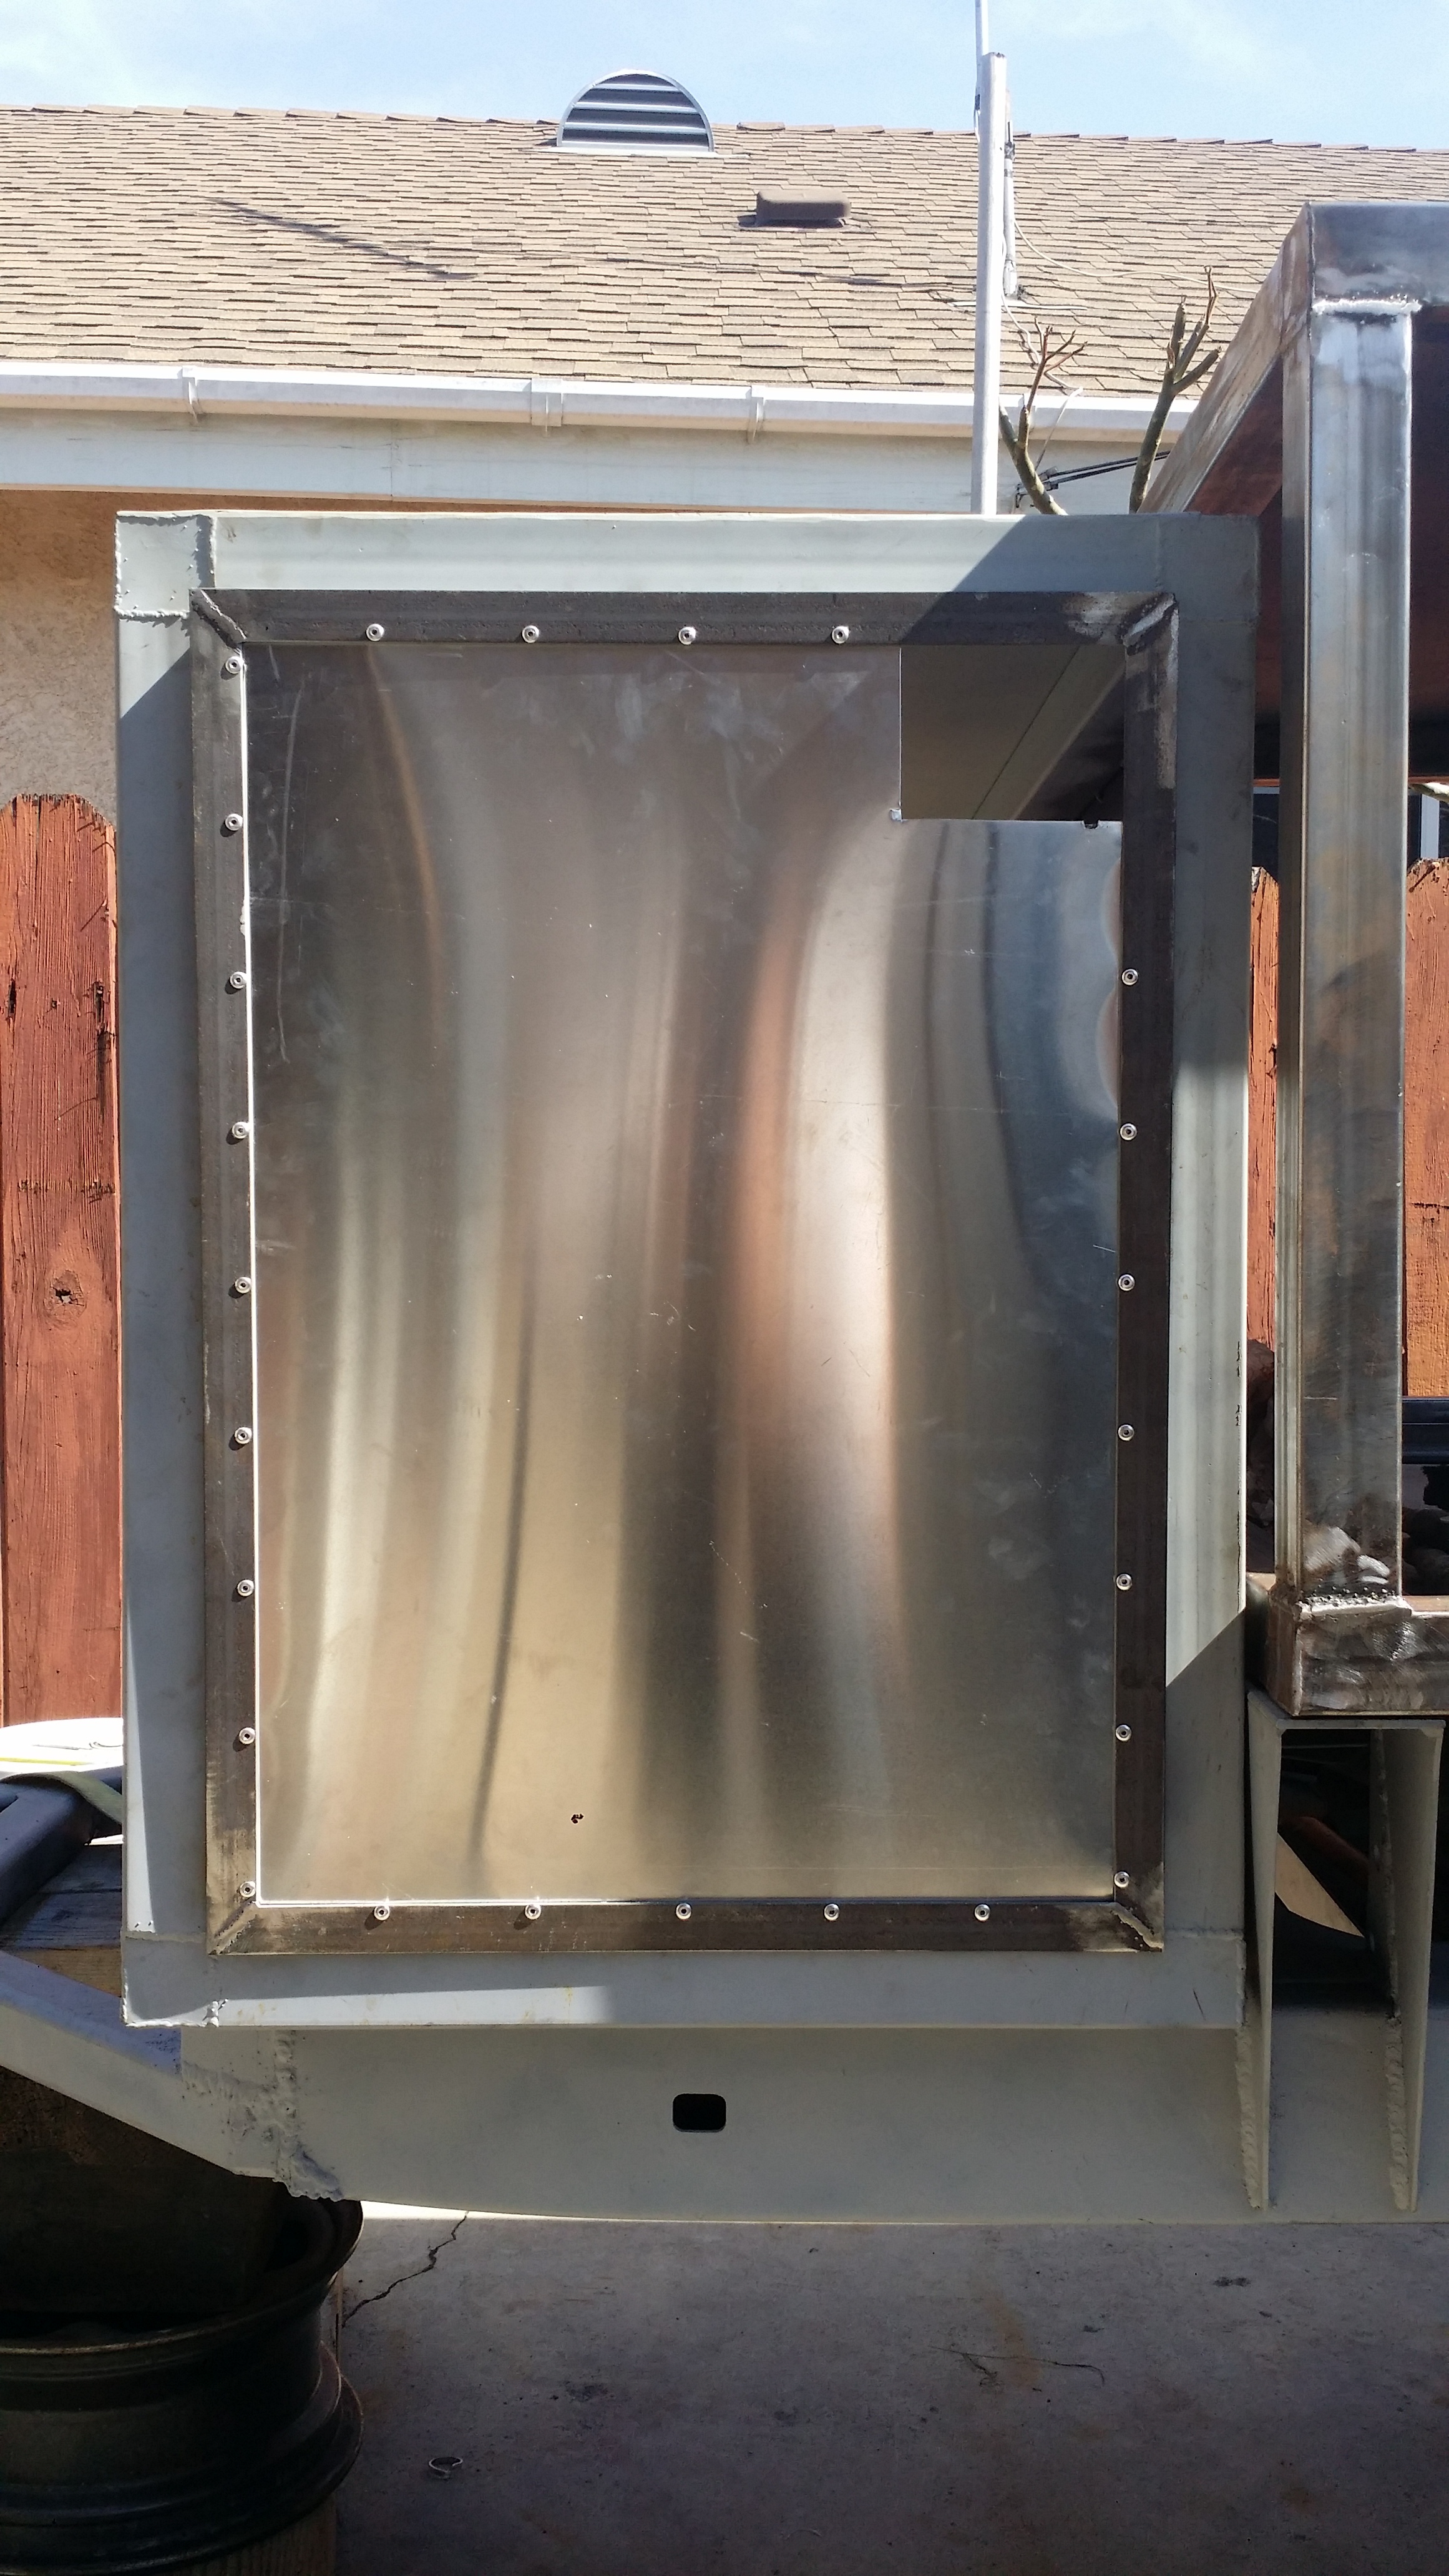
As i said before the latches i bought are weldable so i welded them in to place
Here is the inside view of that driver side door to the trailer pretty much done; minus the hinges. This is the door that is going to hold my heated shower. I think i will end up putting a pin to maintain the door open when the shower is in use. Keeping the door open will allow the shower fumes to vent outside of the trailer while in use. Not to mention keep the propane fueled flame outside of the trailer rather then having it inside.
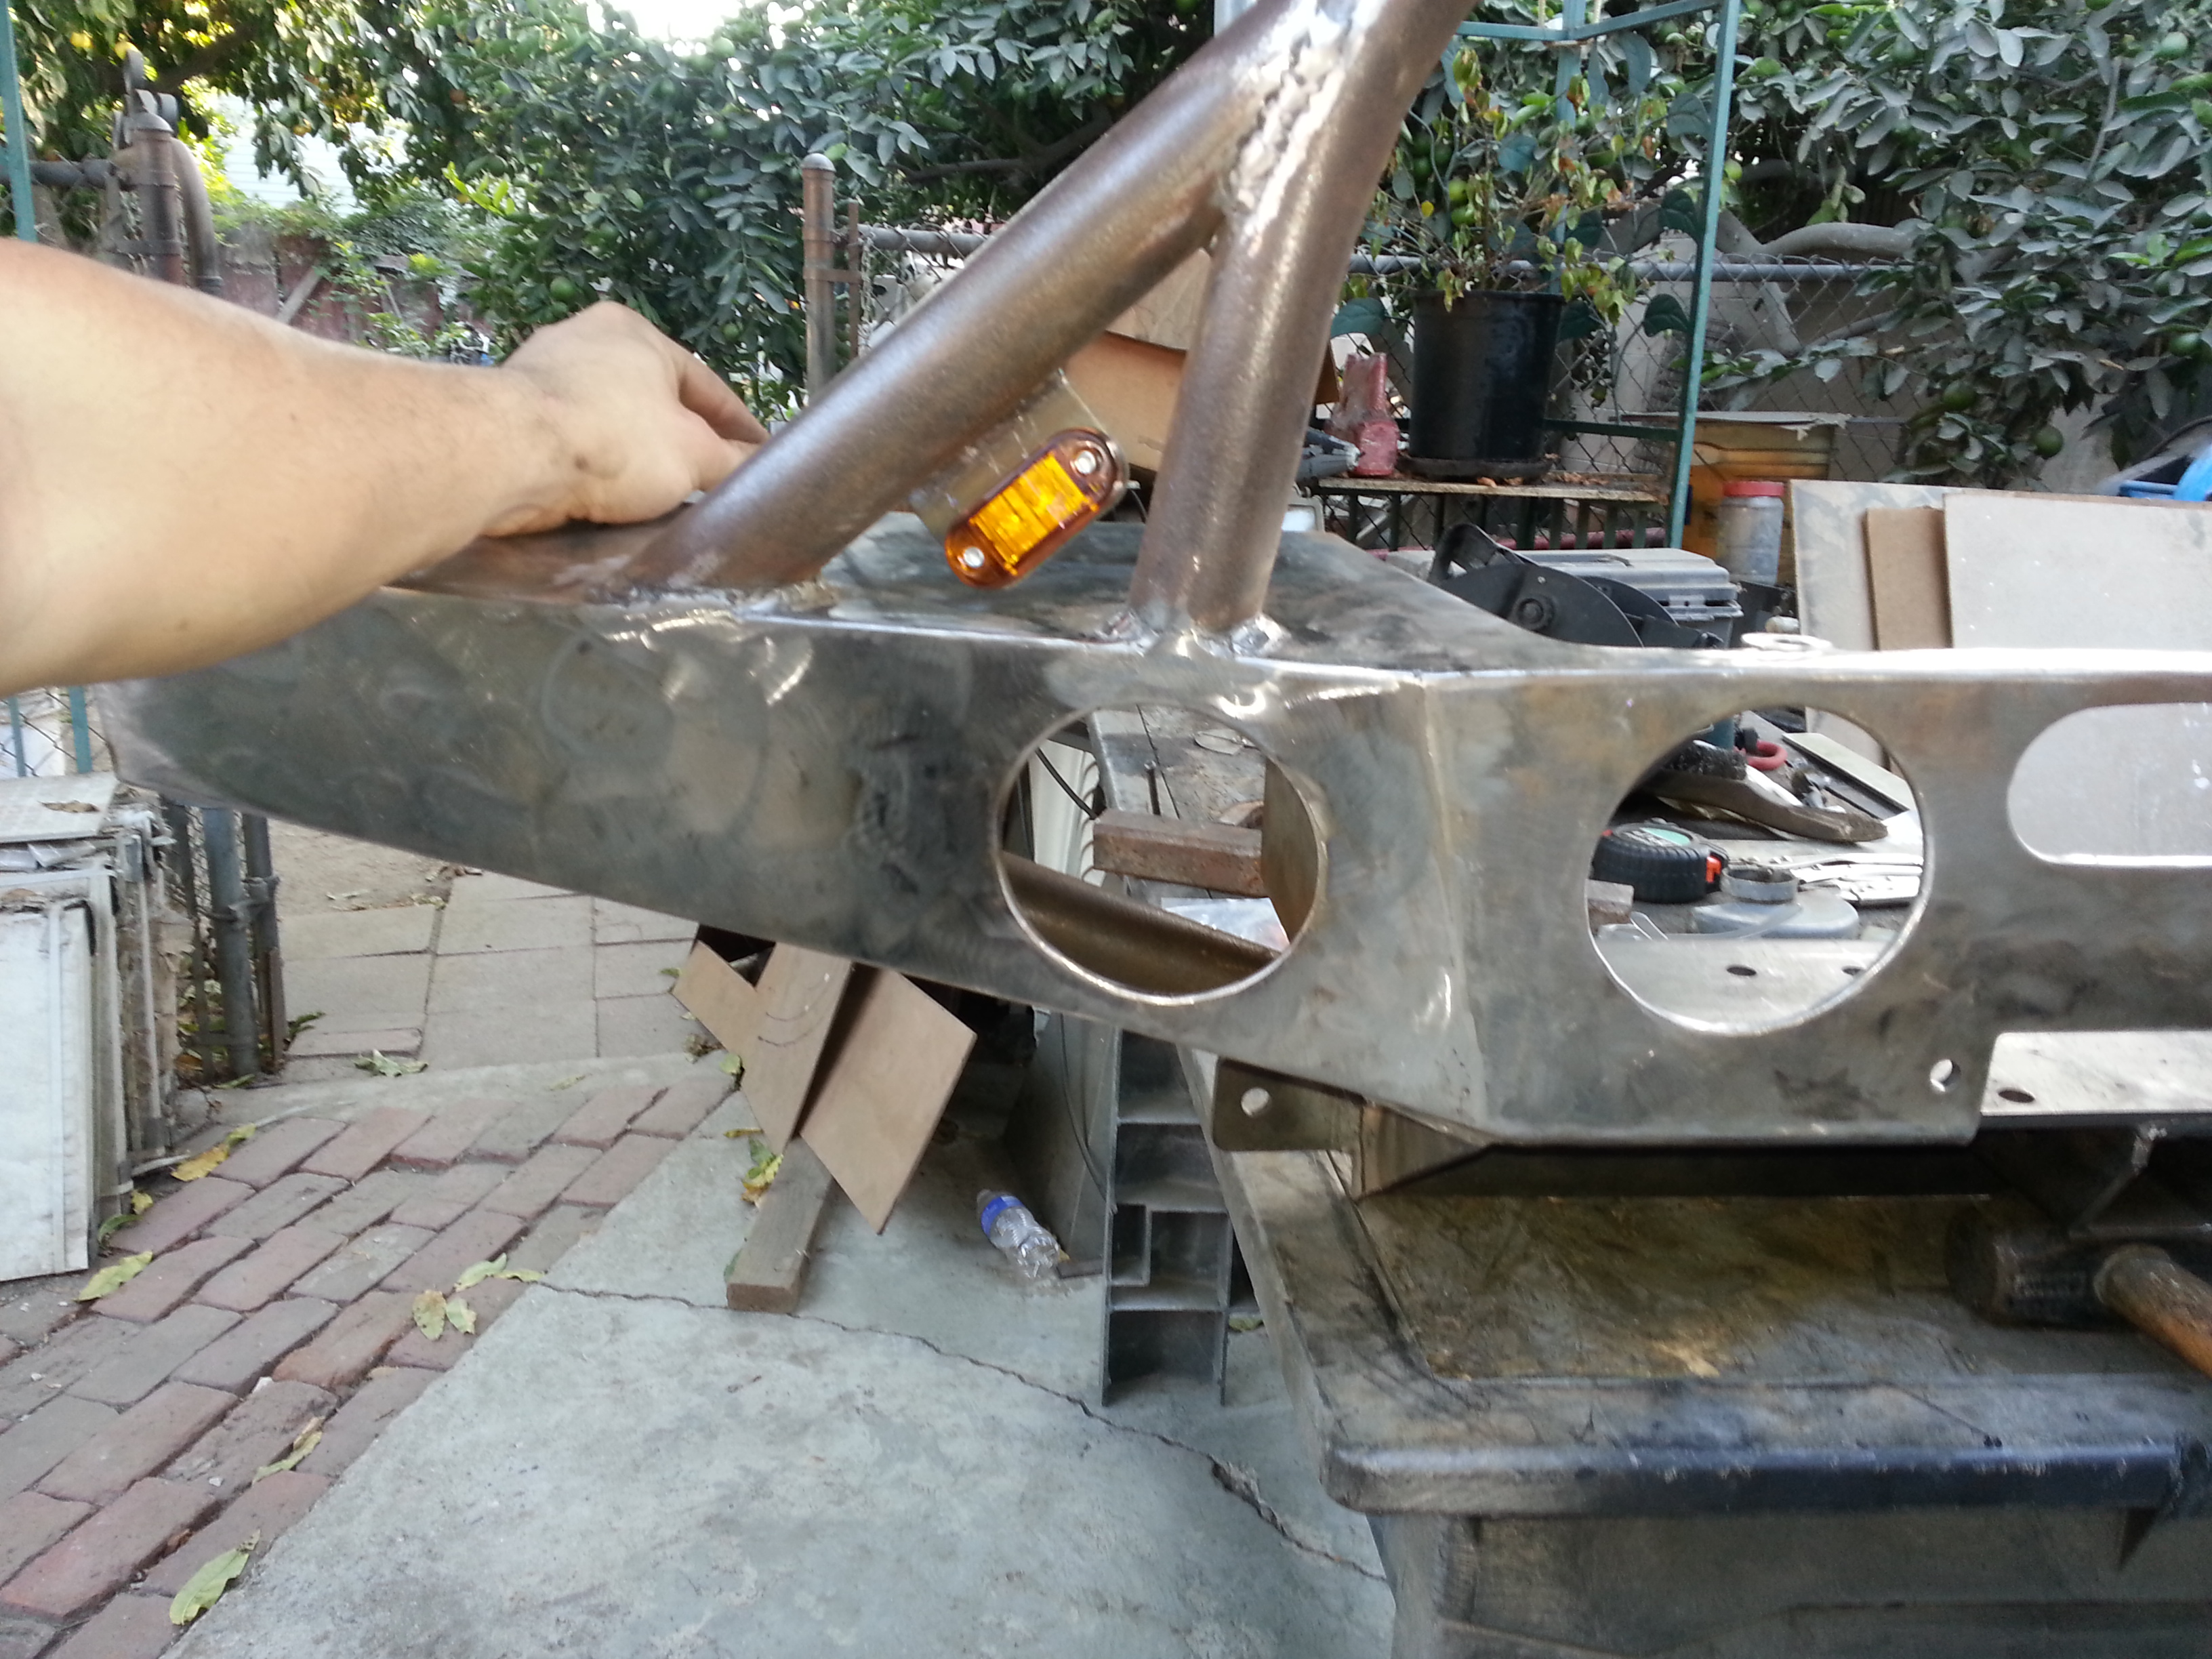
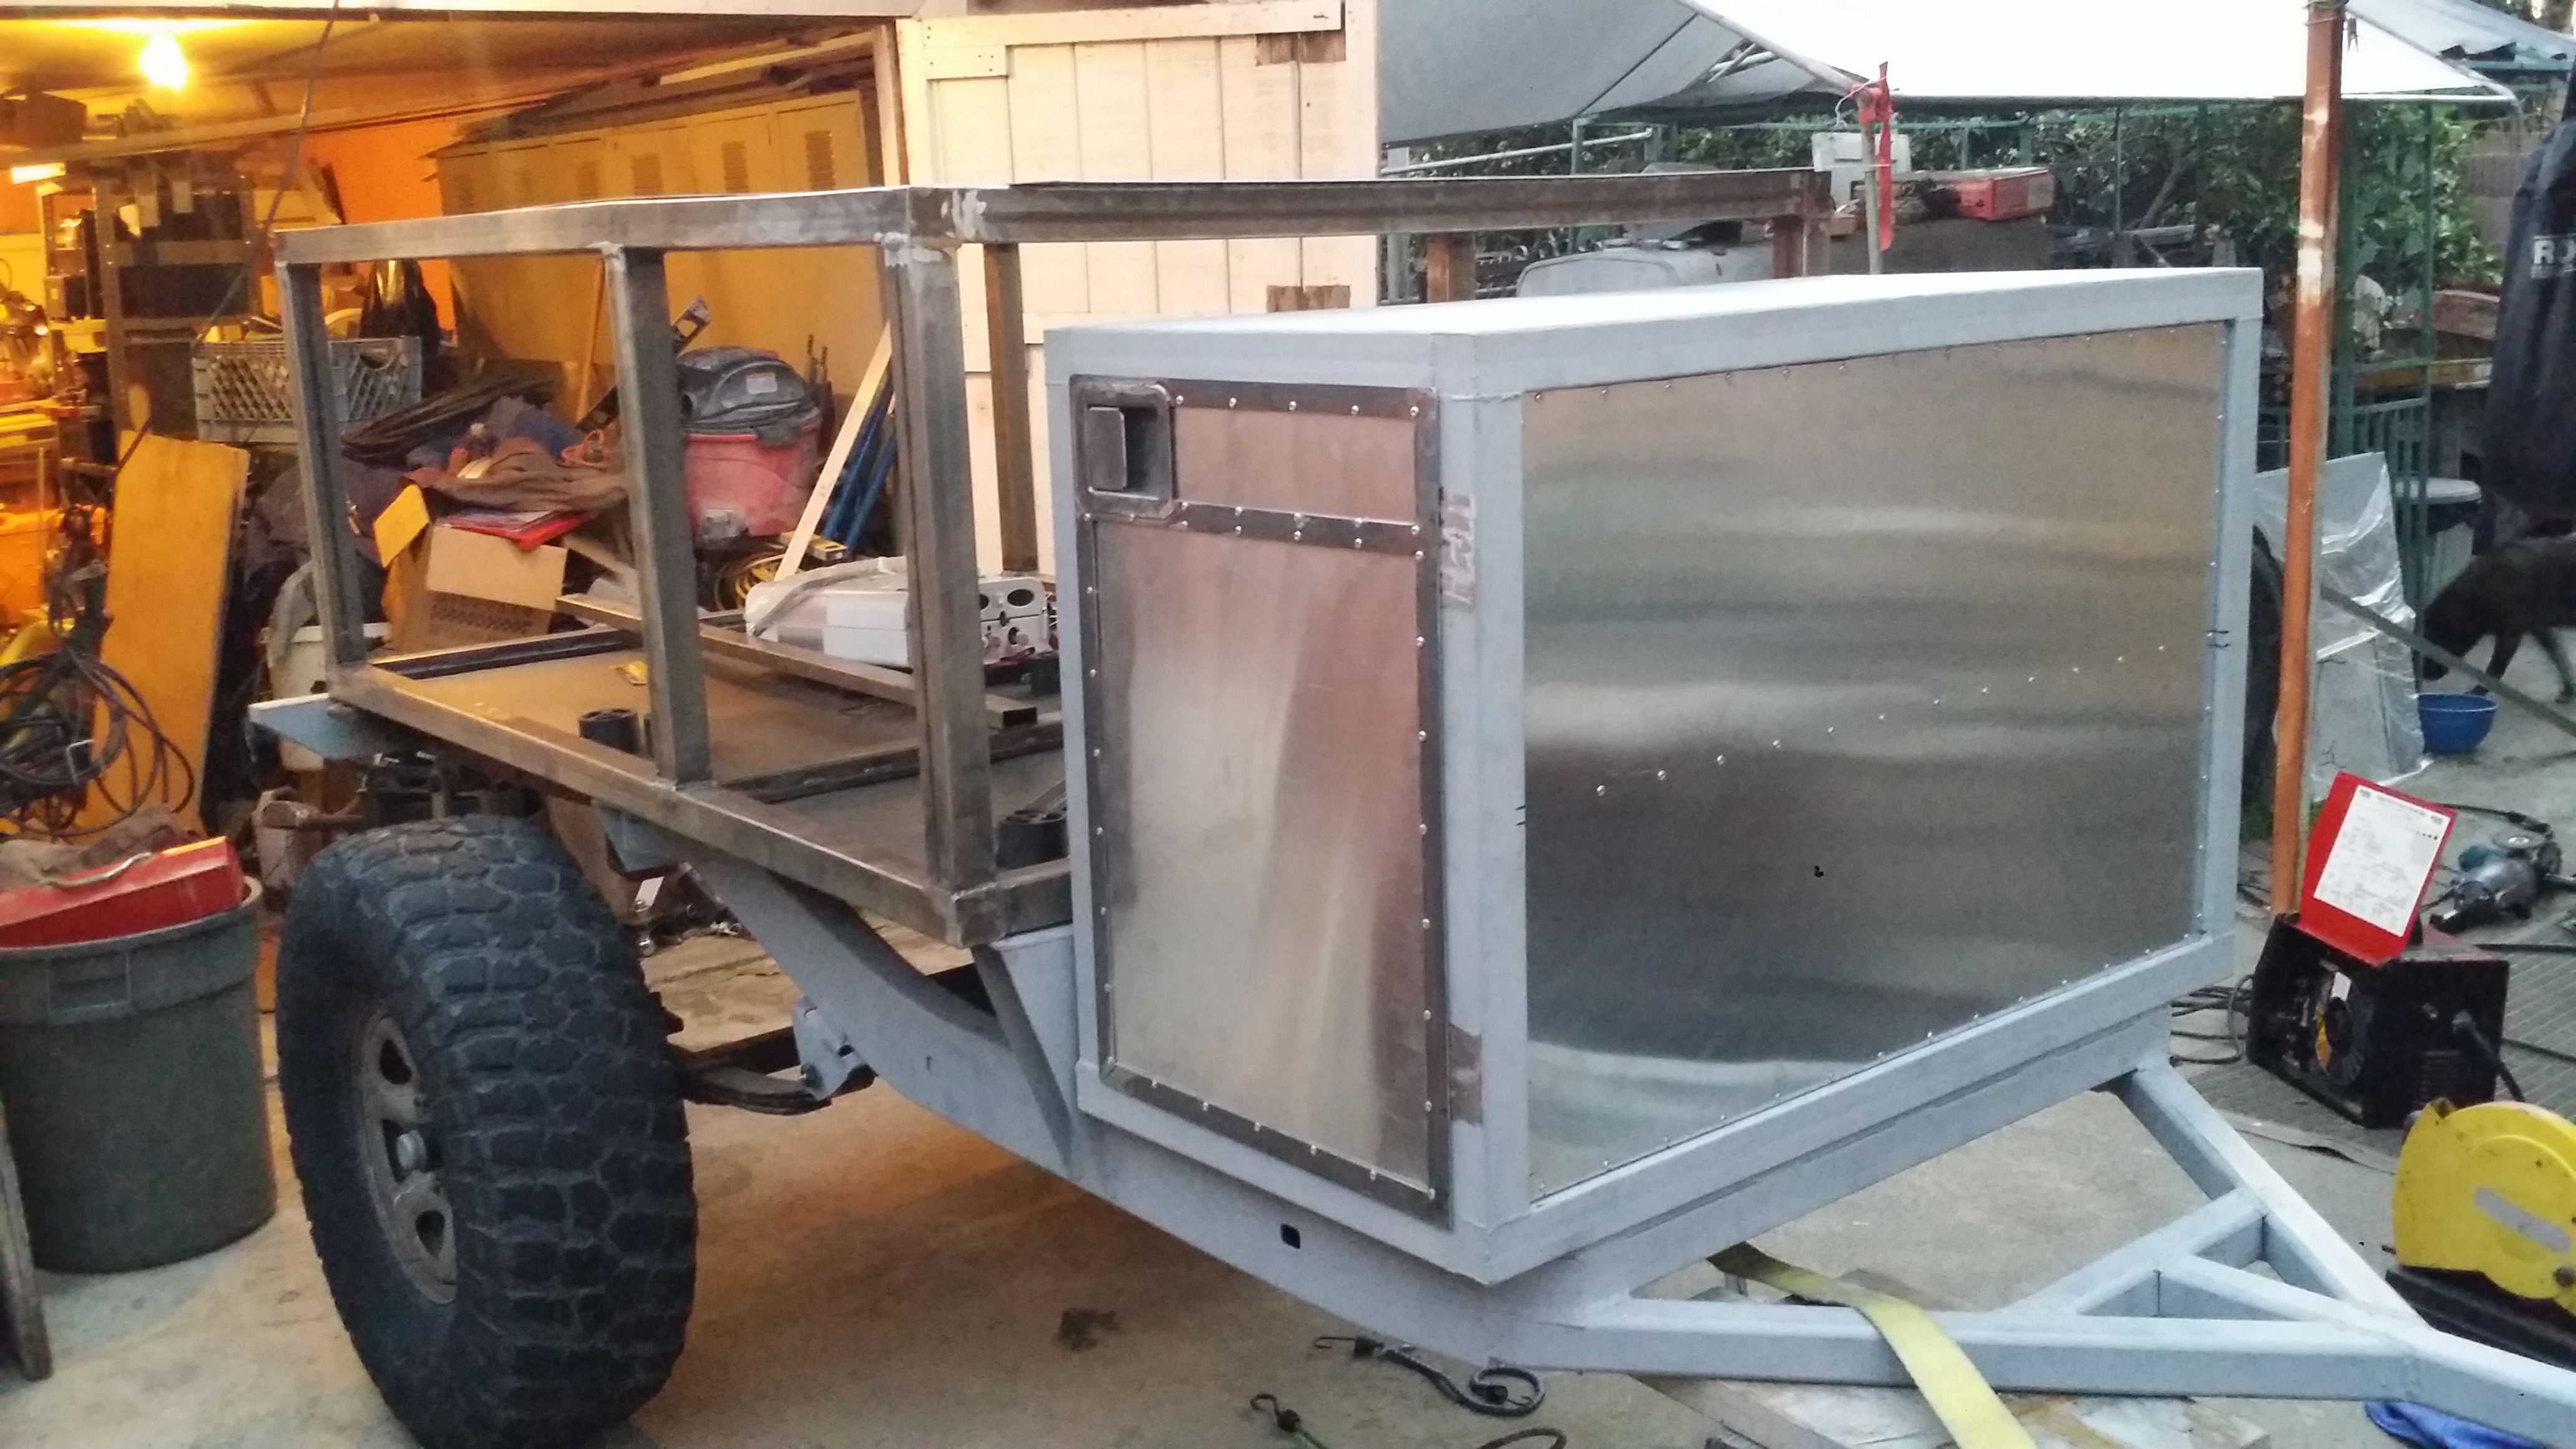
Next up i wanted to make the front face for the front compartment. Here i had already welded the 0.5"x0.5" 16guage square tube all around the inner lip. and it was welded into place a little less than 1/2" recessed inward.
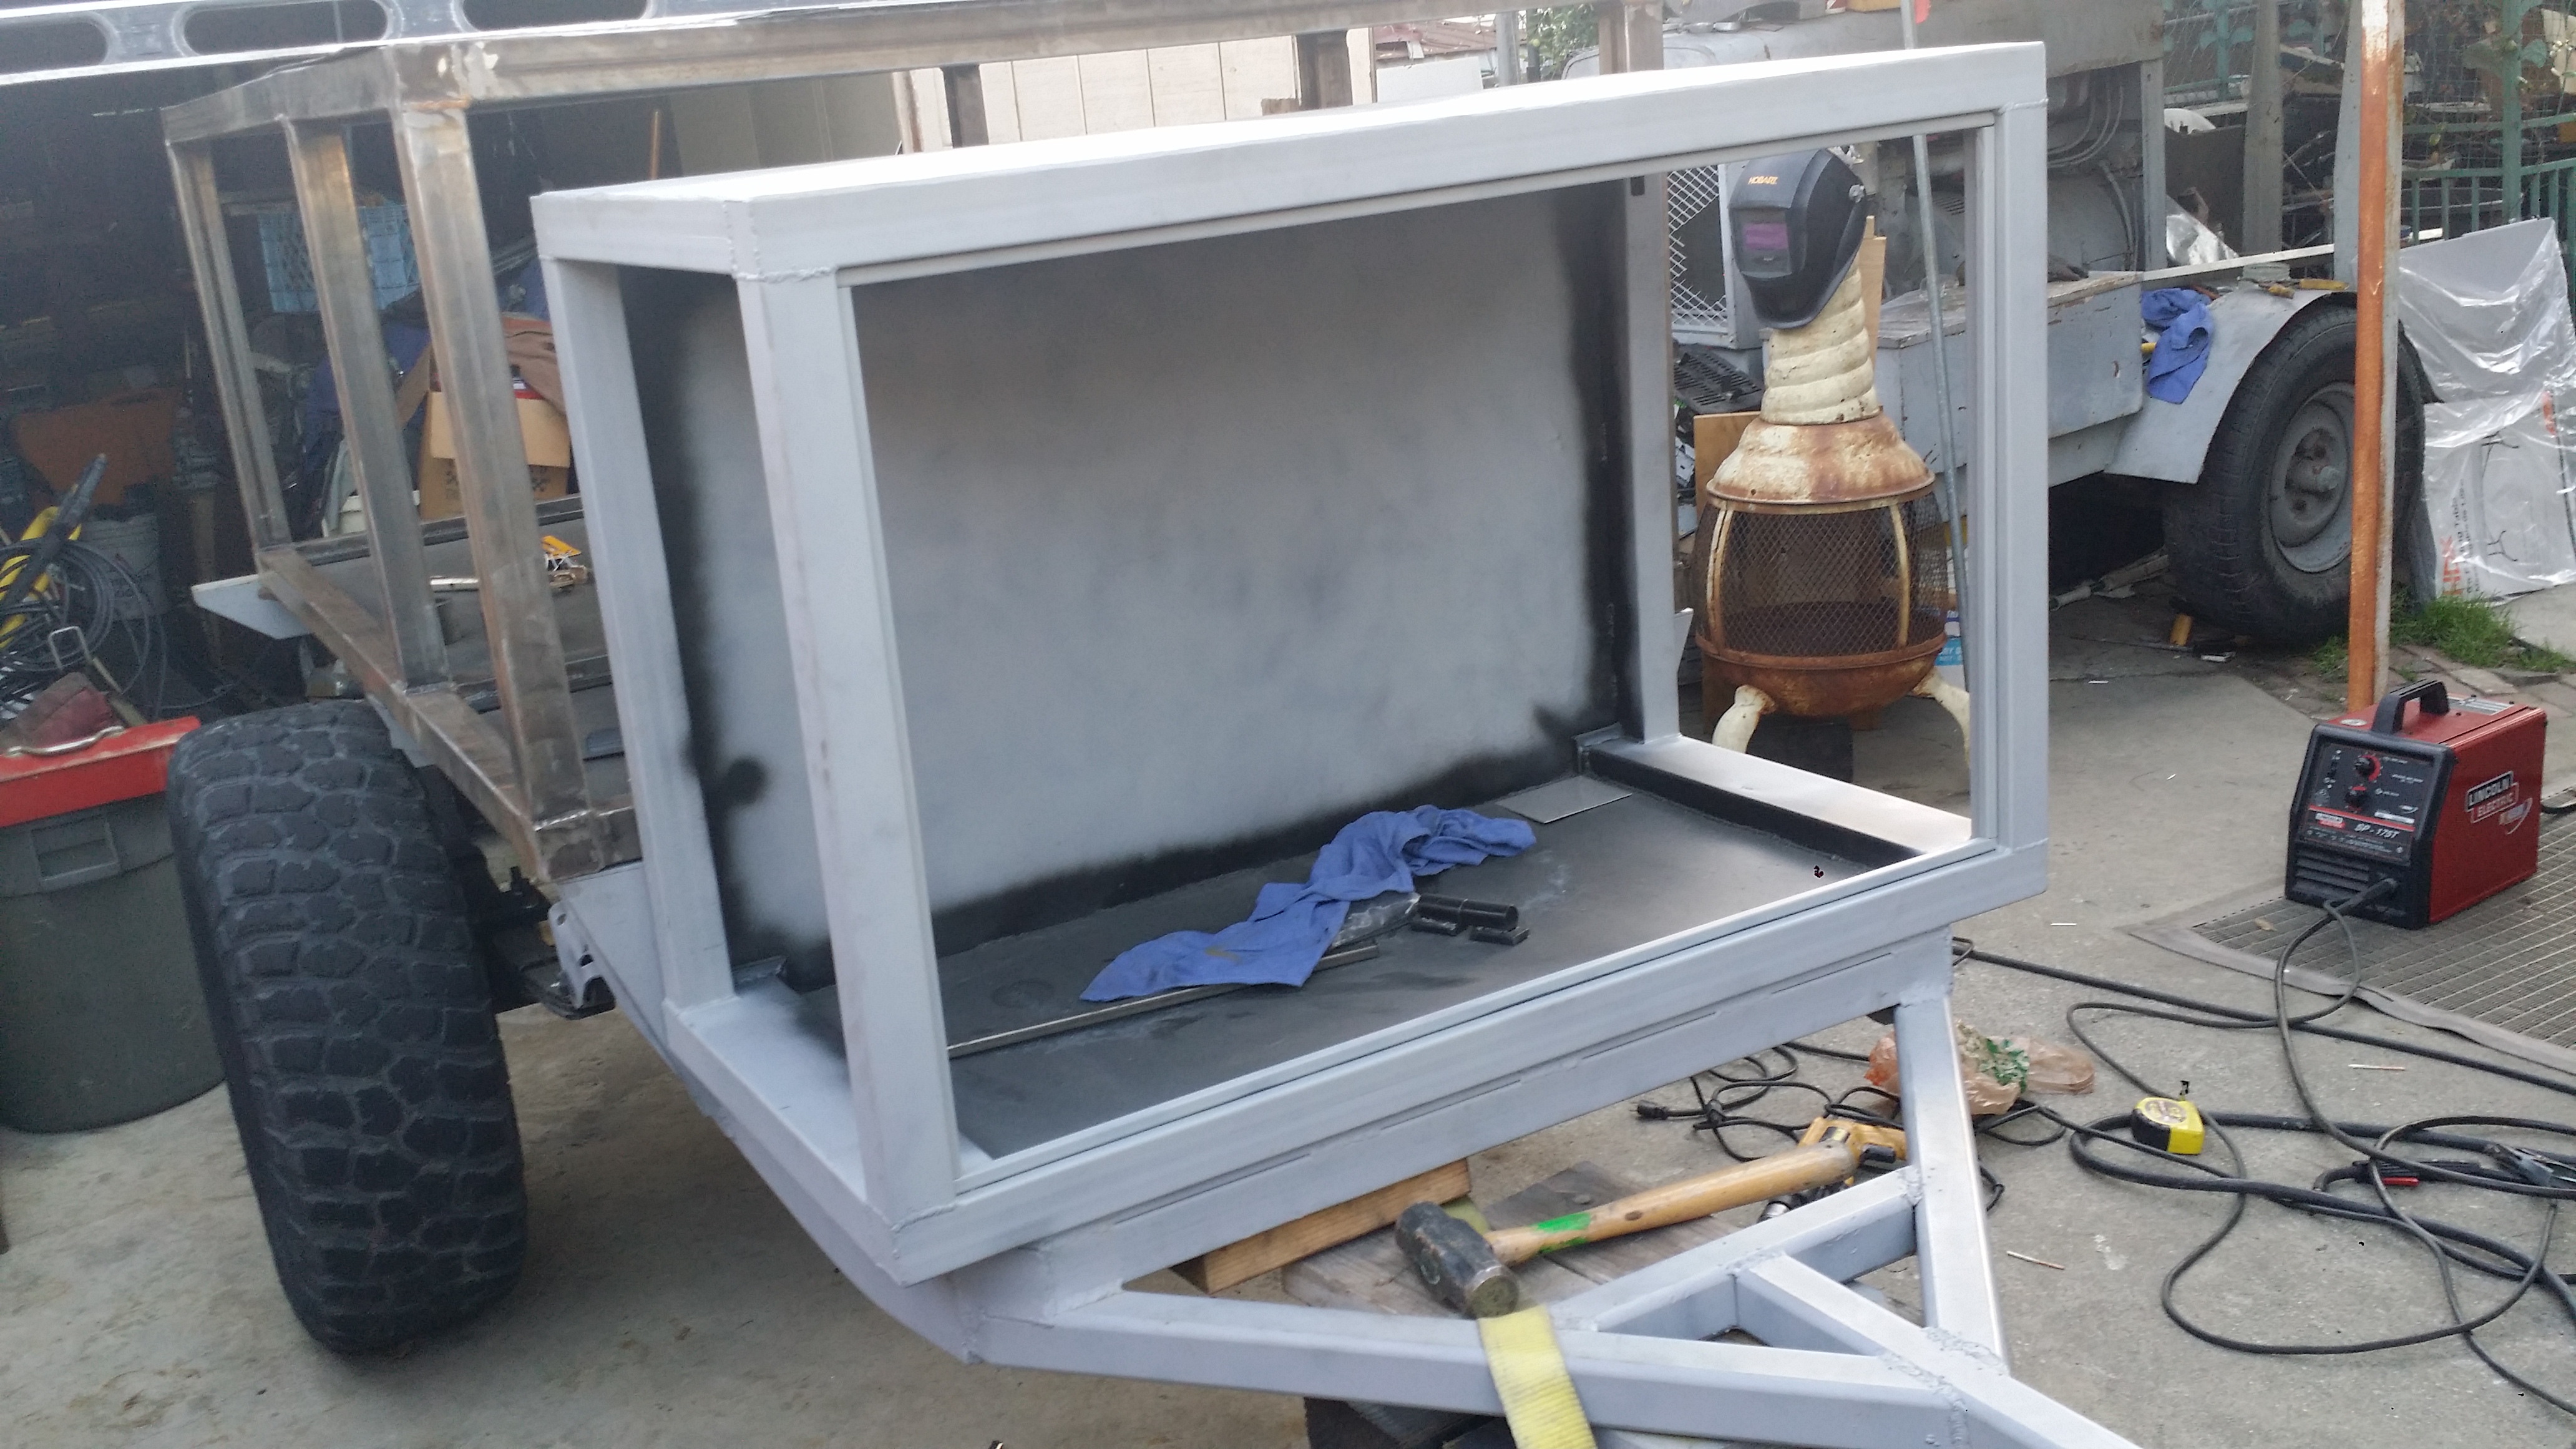
Heres a better pic of that...
I had planned to just use the outer tube to hold the aluminum sheet metal in place but i thought having a center tube added in the middle would add extra support and keep it from vibrating as much which in turn would reduce noise when on the go

BAM! all riveted in to place. I put pop rivets every 3" in case you are wondering. And I gotta say that was a lot easier than I expected it to be. Rivet guns are very easy to use. And i think i did a really good job for my first time using them. All i really had to do was watch a few quick YouTube videos of how to work the pop rivet gun and that was it.

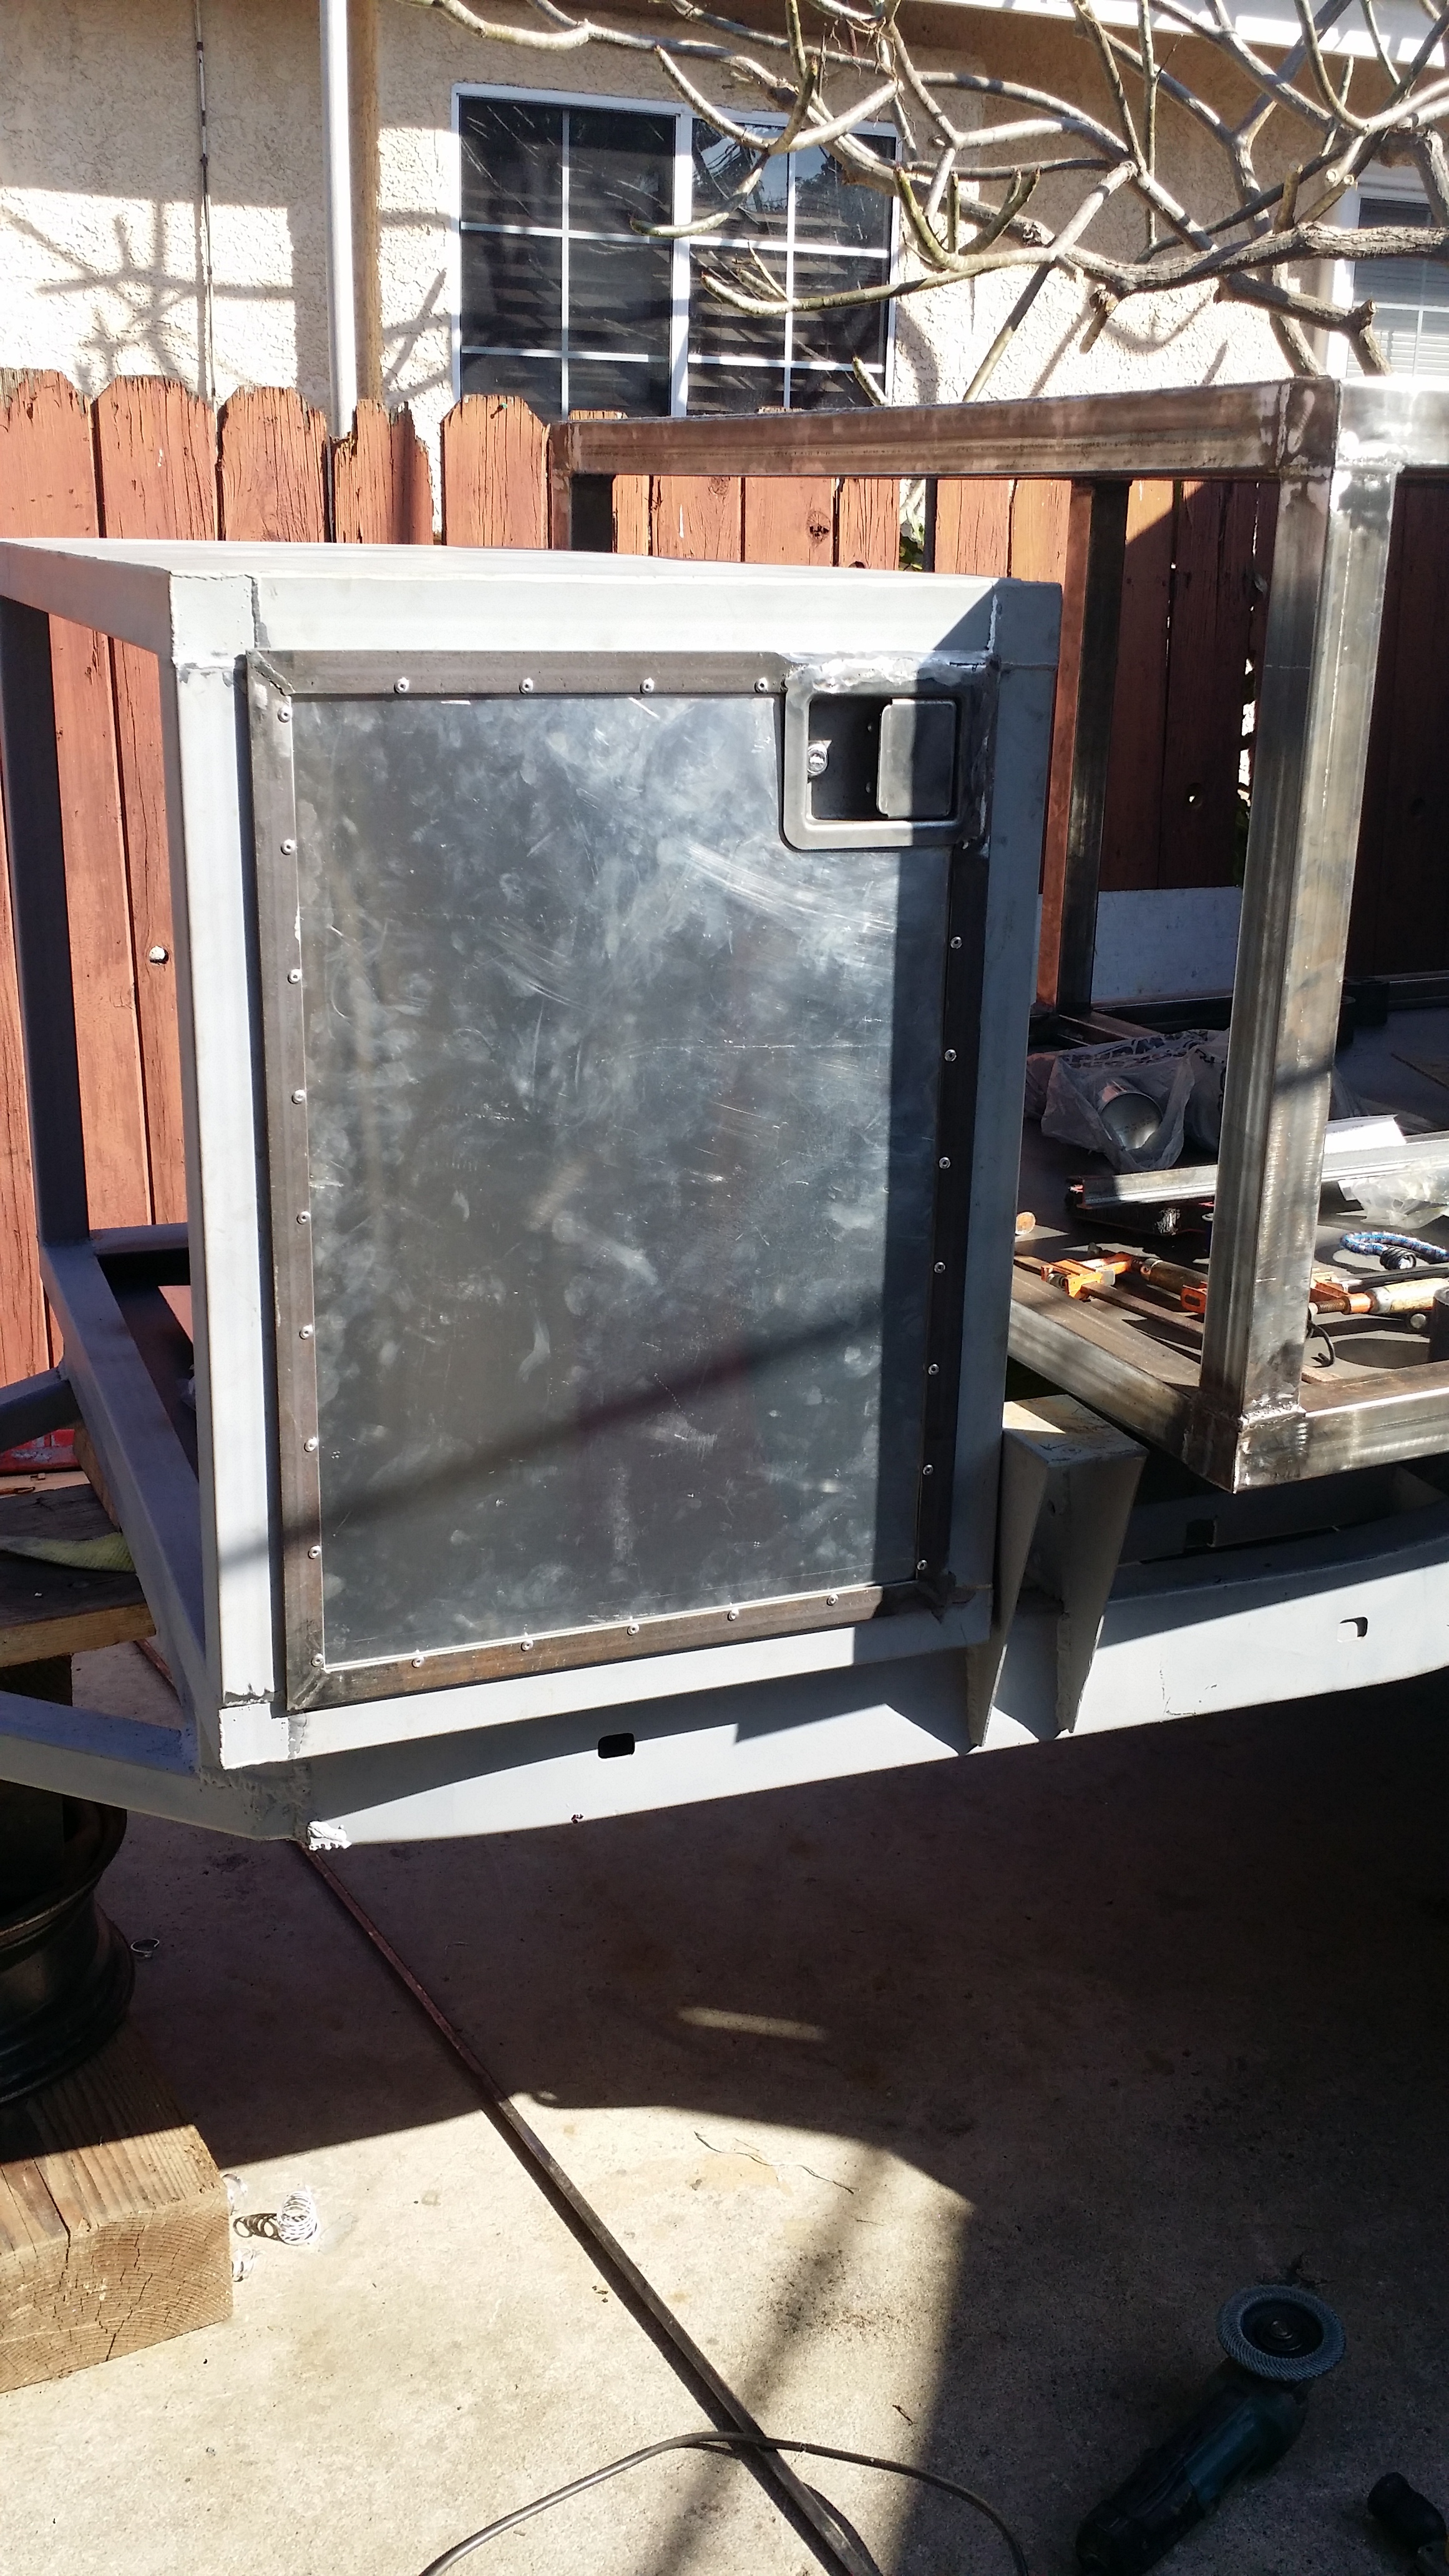
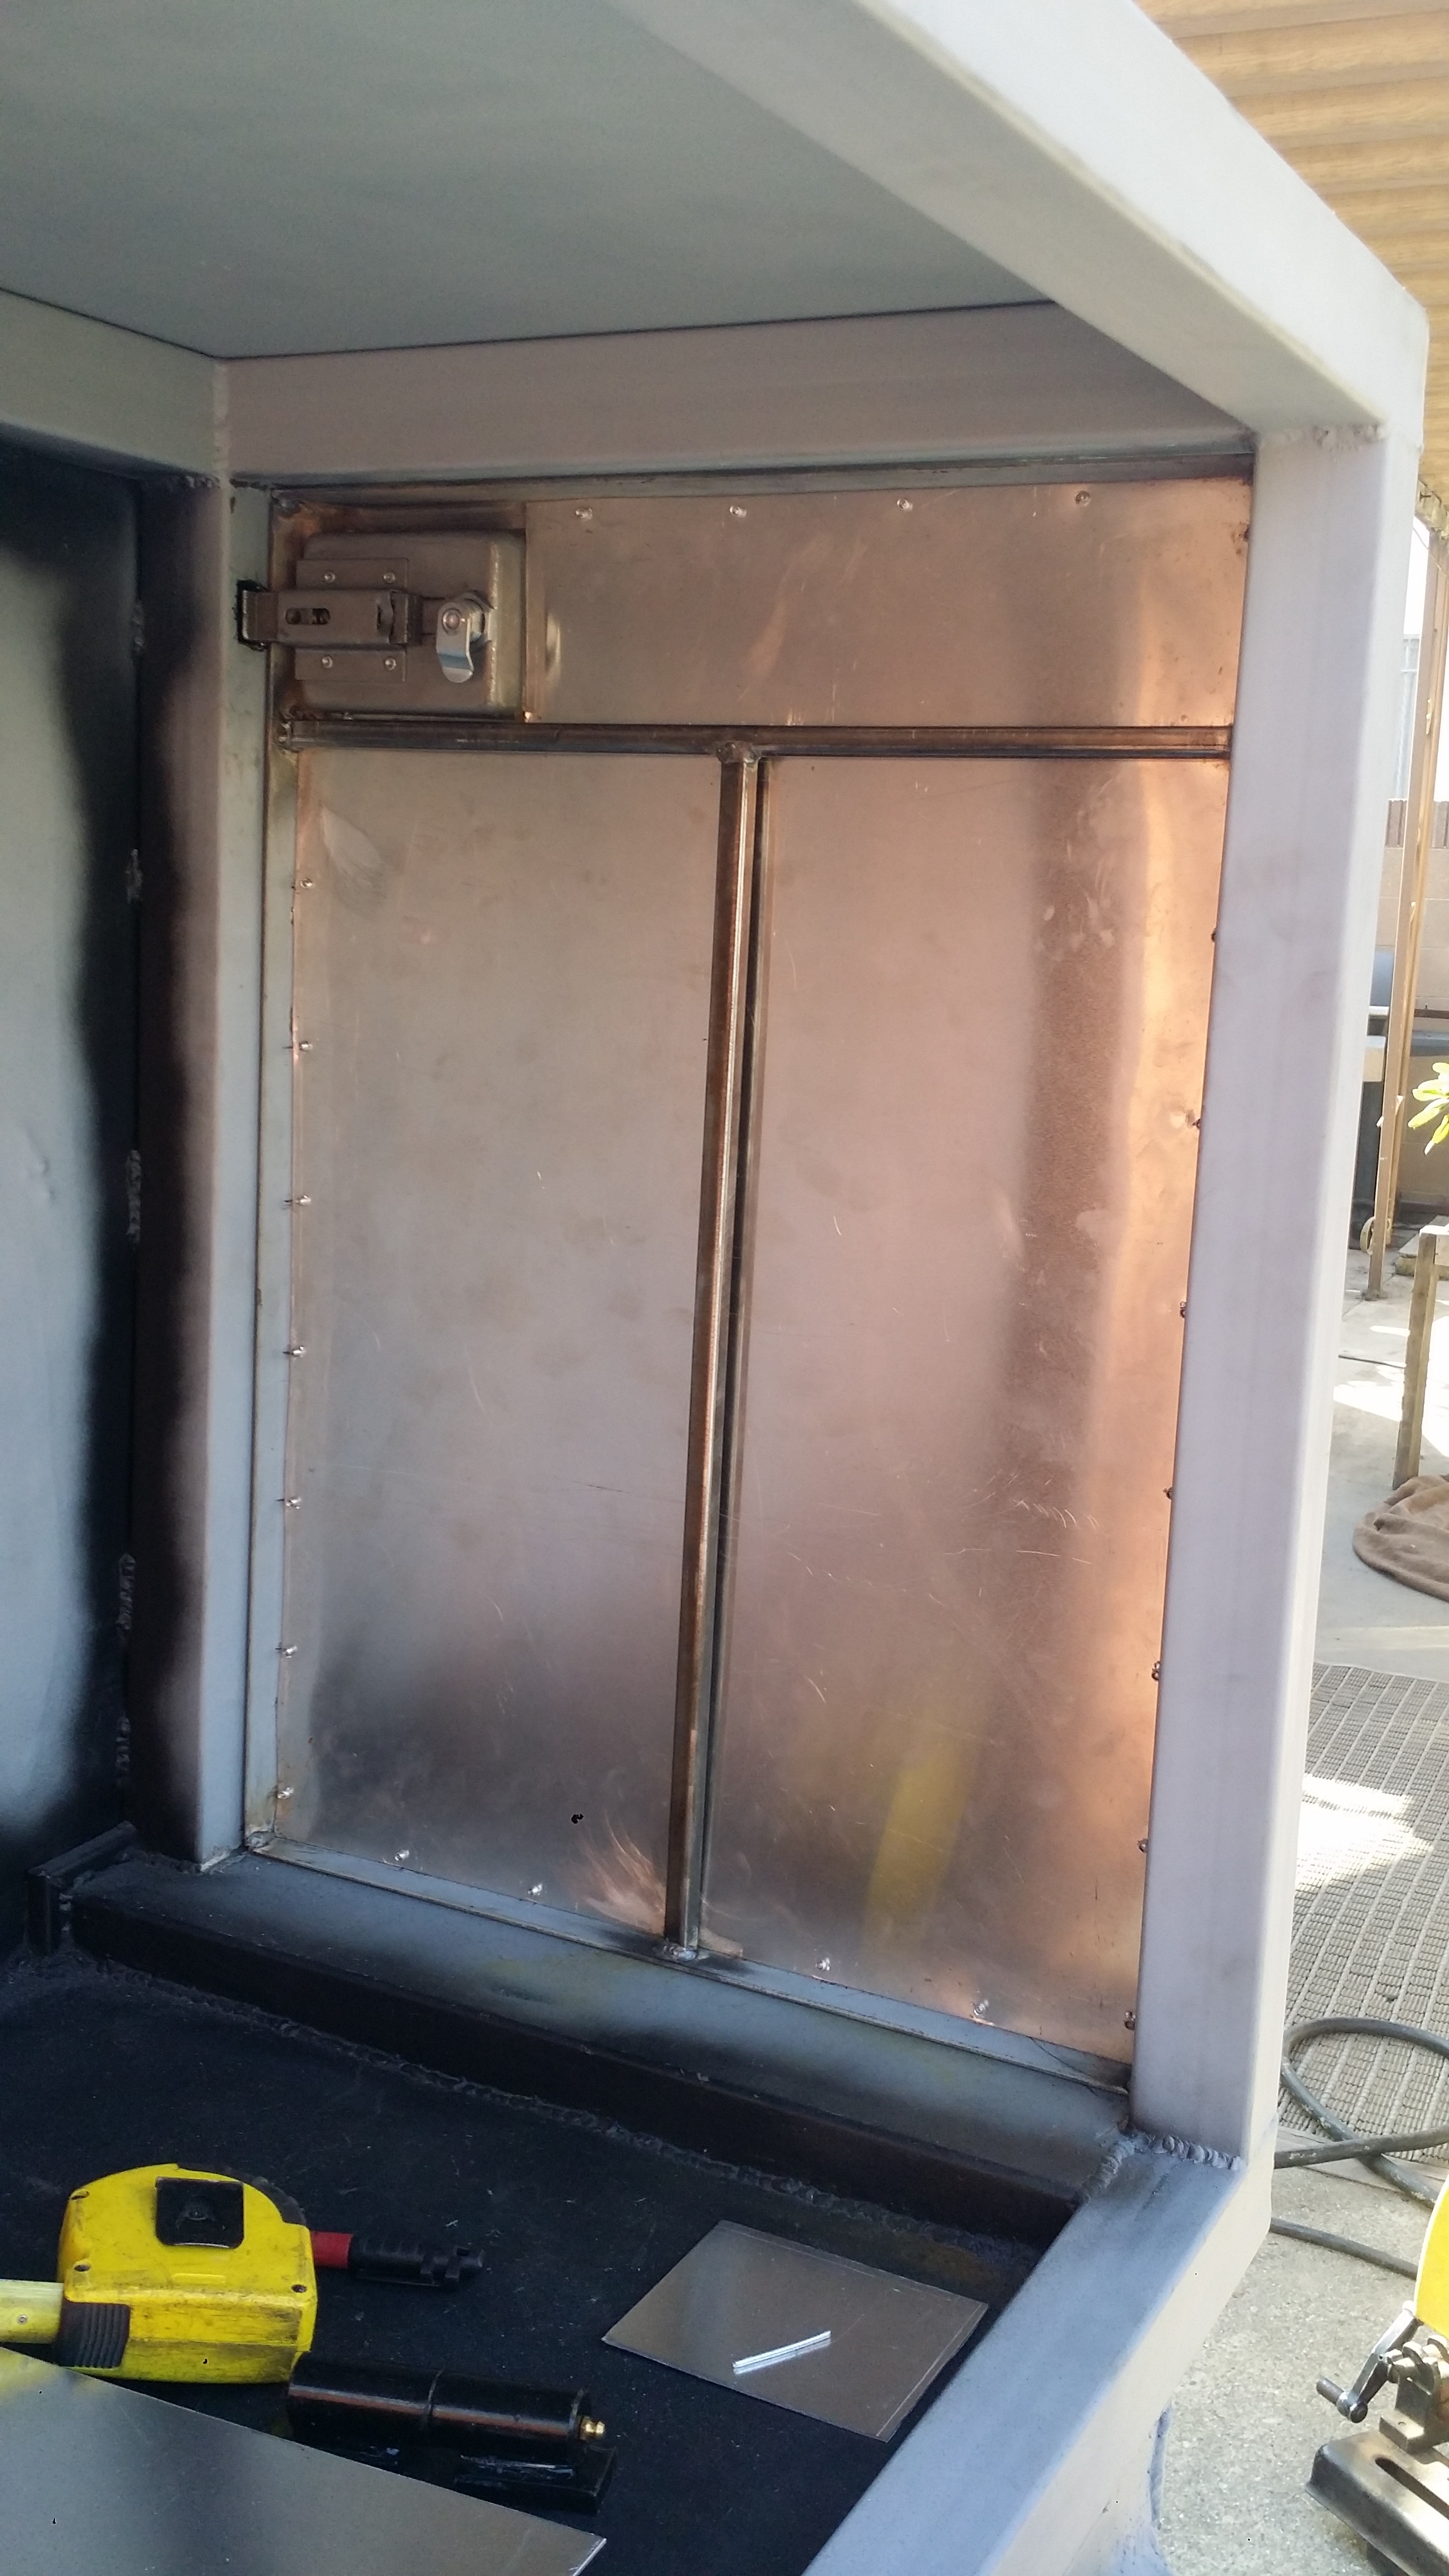
Then today i worked on making the 2nd door. Yes i know this door is different then the other one. You will later see why i made it like this once i get everything that will be installed on this side.
By the way this side of this compartment will house all the electrical stuff including battery bank for the solar energy system that I plan to run, breakers, relays, wires, electrical switches that will control the outdoor lighting etc etc...
I did get around to welding on the hinges but i havent taken any pictures of that yet because it got dark quick. But the front compartment is almost complete. I still gotta reprime everything again. and i would like to add a center brace for the rear wall of that front compartment the way i did to the front side. but it is pretty much done.
If i dont end up going to the Tierra Del Sol 54th Annual Dessert Safari next weekend i will probably start working on the rear compartment or get around to installing all the heated shower stuff.
Anyway until next time!
Here's a test fitment of the door with the latch on the real compartment.

The original rivets i bought weren't thick enough so i had to buy new ones. These can rivet up to 1/4" thick. If you have never used Pop-Rivets before just know you need to drill the hole before you can use them. Drill through both surfaces, insert the pop rivet, then use the rivet gun to clamp them together.

I also went ahead and bought 5/8"s barrel hinges. the other set of hinges just seemed way too large for what it would be holding. So this smaller size is alot better for this application.

Door 1 wall secured in place.

As i said before the latches i bought are weldable so i welded them in to place

Here is the inside view of that driver side door to the trailer pretty much done; minus the hinges. This is the door that is going to hold my heated shower. I think i will end up putting a pin to maintain the door open when the shower is in use. Keeping the door open will allow the shower fumes to vent outside of the trailer while in use. Not to mention keep the propane fueled flame outside of the trailer rather then having it inside.

Next up i wanted to make the front face for the front compartment. Here i had already welded the 0.5"x0.5" 16guage square tube all around the inner lip. and it was welded into place a little less than 1/2" recessed inward.

Heres a better pic of that...

I had planned to just use the outer tube to hold the aluminum sheet metal in place but i thought having a center tube added in the middle would add extra support and keep it from vibrating as much which in turn would reduce noise when on the go

BAM! all riveted in to place. I put pop rivets every 3" in case you are wondering. And I gotta say that was a lot easier than I expected it to be. Rivet guns are very easy to use. And i think i did a really good job for my first time using them. All i really had to do was watch a few quick YouTube videos of how to work the pop rivet gun and that was it.

Then today i worked on making the 2nd door. Yes i know this door is different then the other one. You will later see why i made it like this once i get everything that will be installed on this side.

By the way this side of this compartment will house all the electrical stuff including battery bank for the solar energy system that I plan to run, breakers, relays, wires, electrical switches that will control the outdoor lighting etc etc...

I did get around to welding on the hinges but i havent taken any pictures of that yet because it got dark quick. But the front compartment is almost complete. I still gotta reprime everything again. and i would like to add a center brace for the rear wall of that front compartment the way i did to the front side. but it is pretty much done.
If i dont end up going to the Tierra Del Sol 54th Annual Dessert Safari next weekend i will probably start working on the rear compartment or get around to installing all the heated shower stuff.
Anyway until next time!
Last edited by Redeth005; Feb 28, 2016 at 07:59 PM.
Apr 17, 2016 | 08:51 PM
#79
Thread Starter
Registered User
Joined: Apr 2012
Posts: 2,817
Likes: 2
From: Los Angeles CA
Finally after over a month of putting the trailer project on hold i'm back at it again. I busted my driver side birfield on my 89 4runner during this past year's Tierra Del Sol offroad event in March. Spent alot of time and money repairing, upgrading, rebuilding the knuckles/seals and beefing up the front axle with Marlin Crawler knuckle gussets.
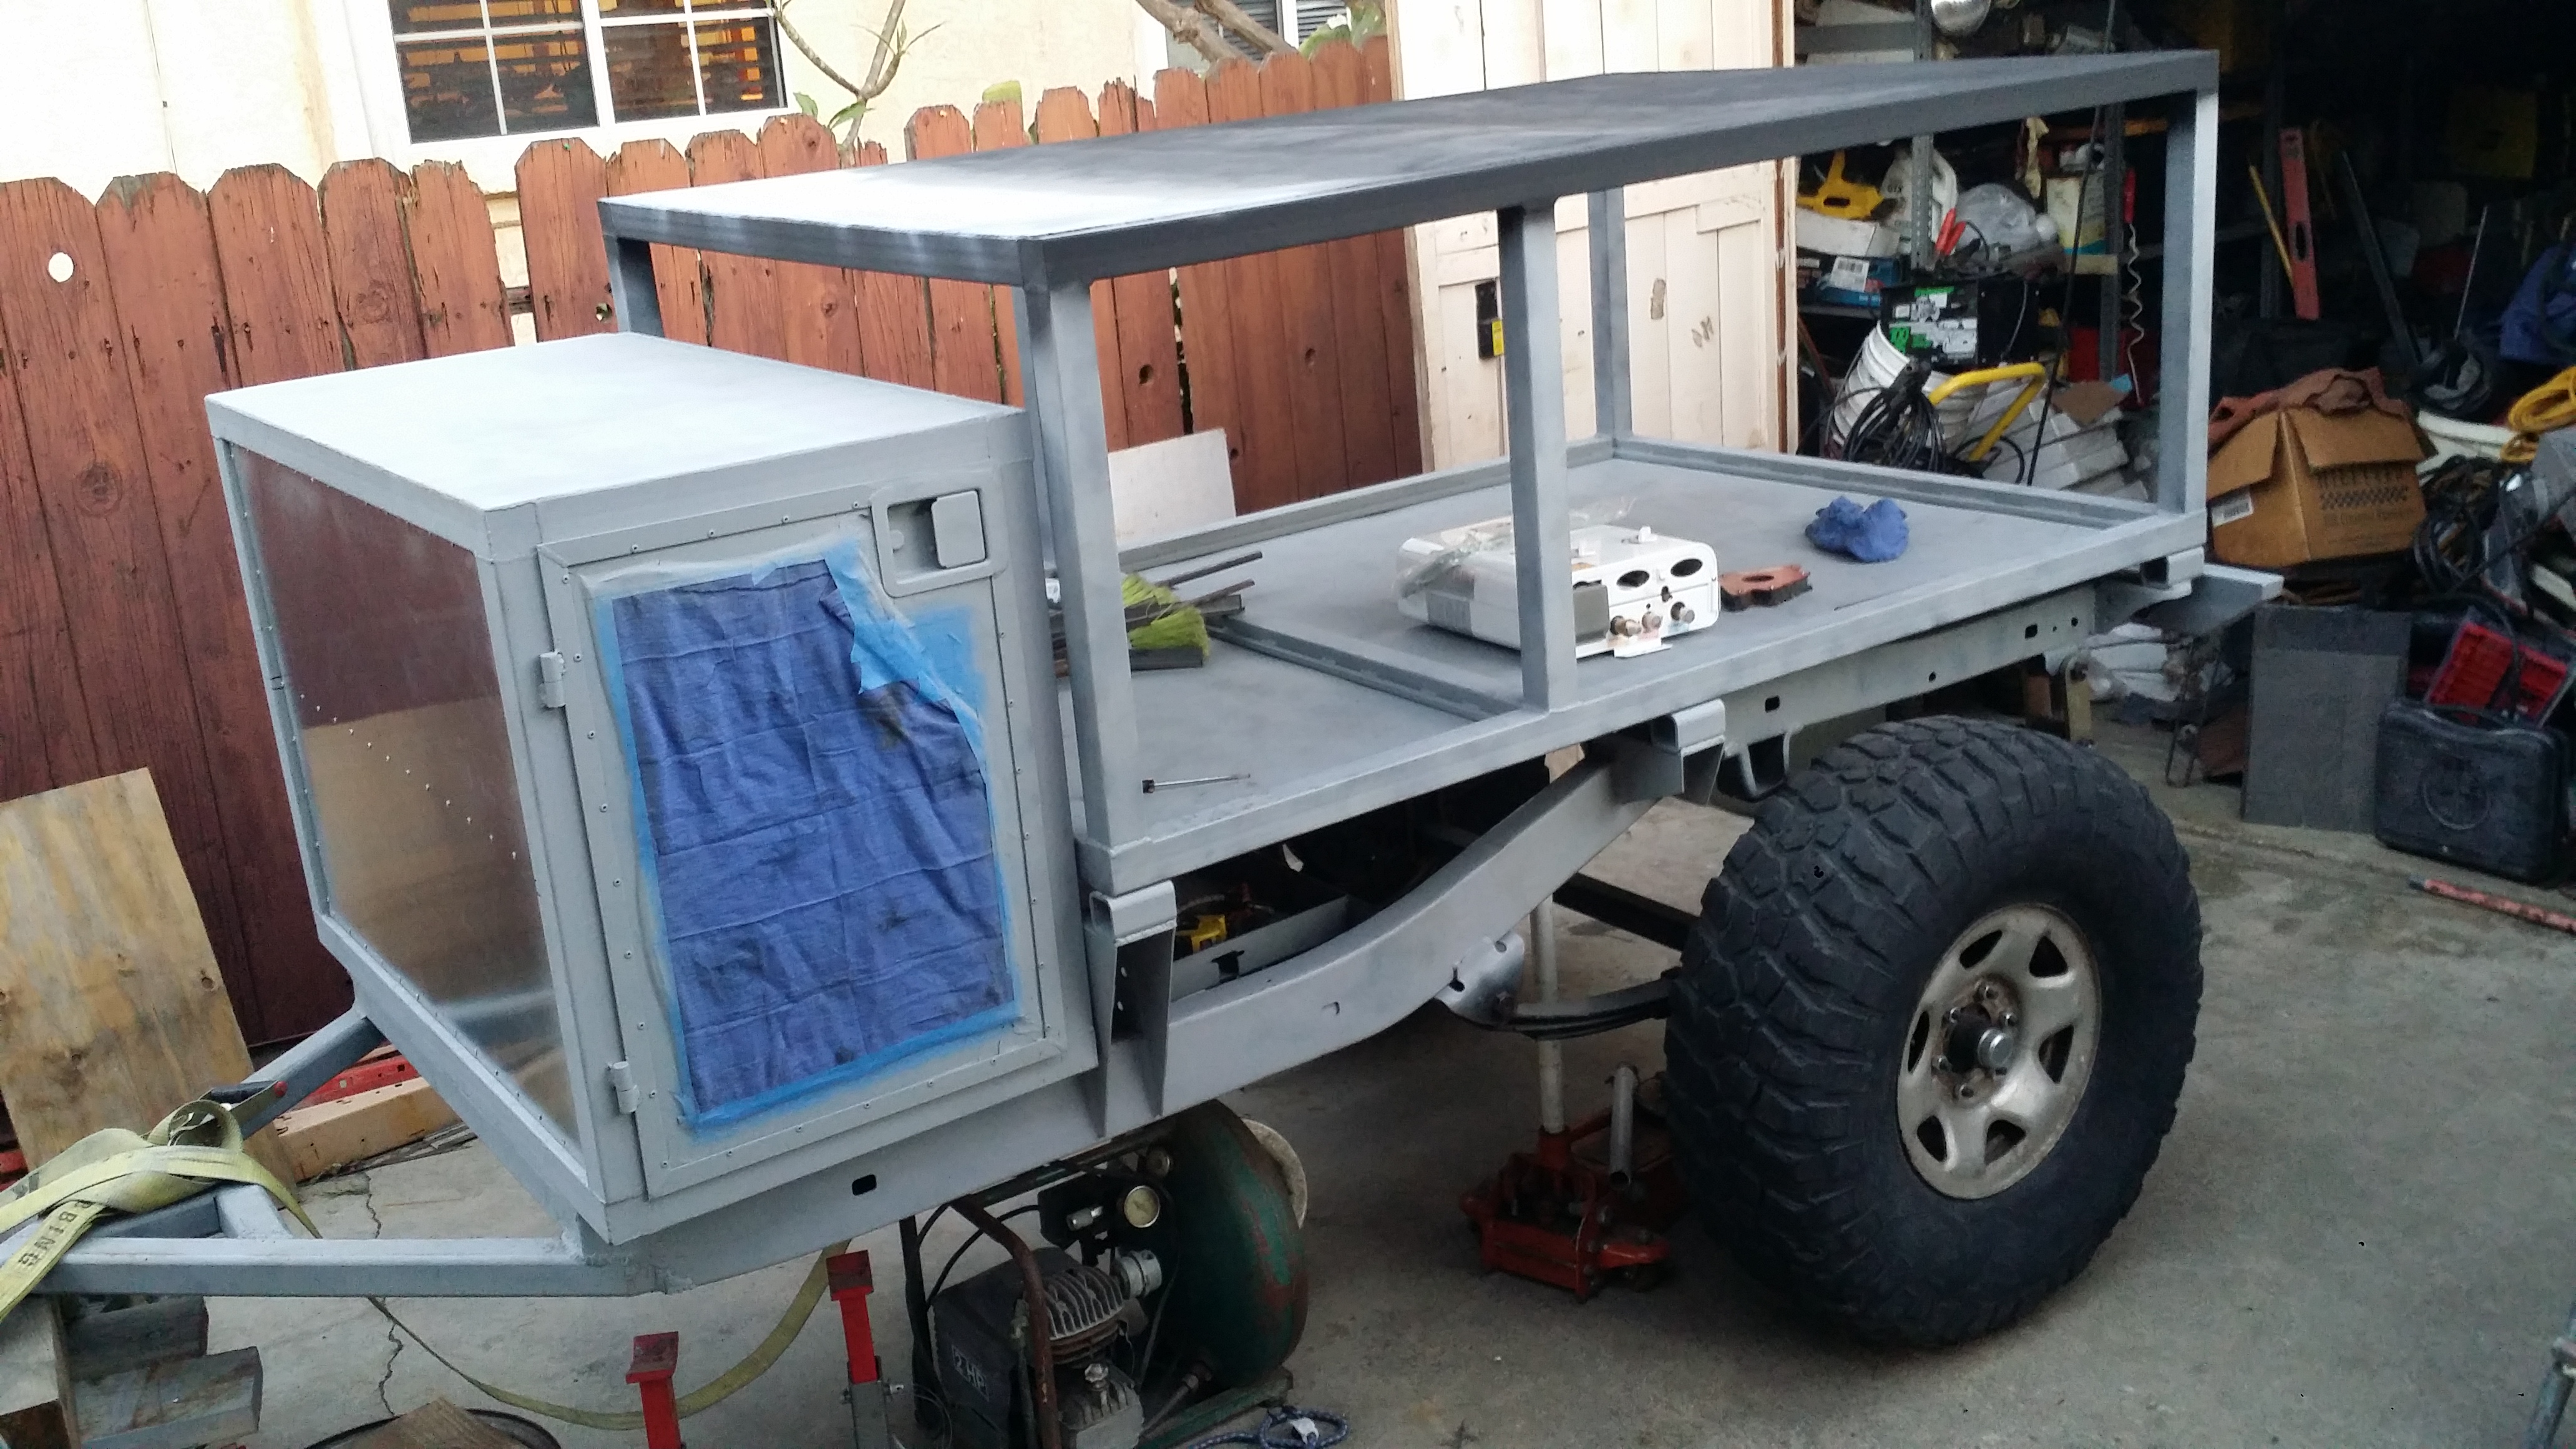
Anyway now that the tow vehicle is put together again i started back up on the trailer.
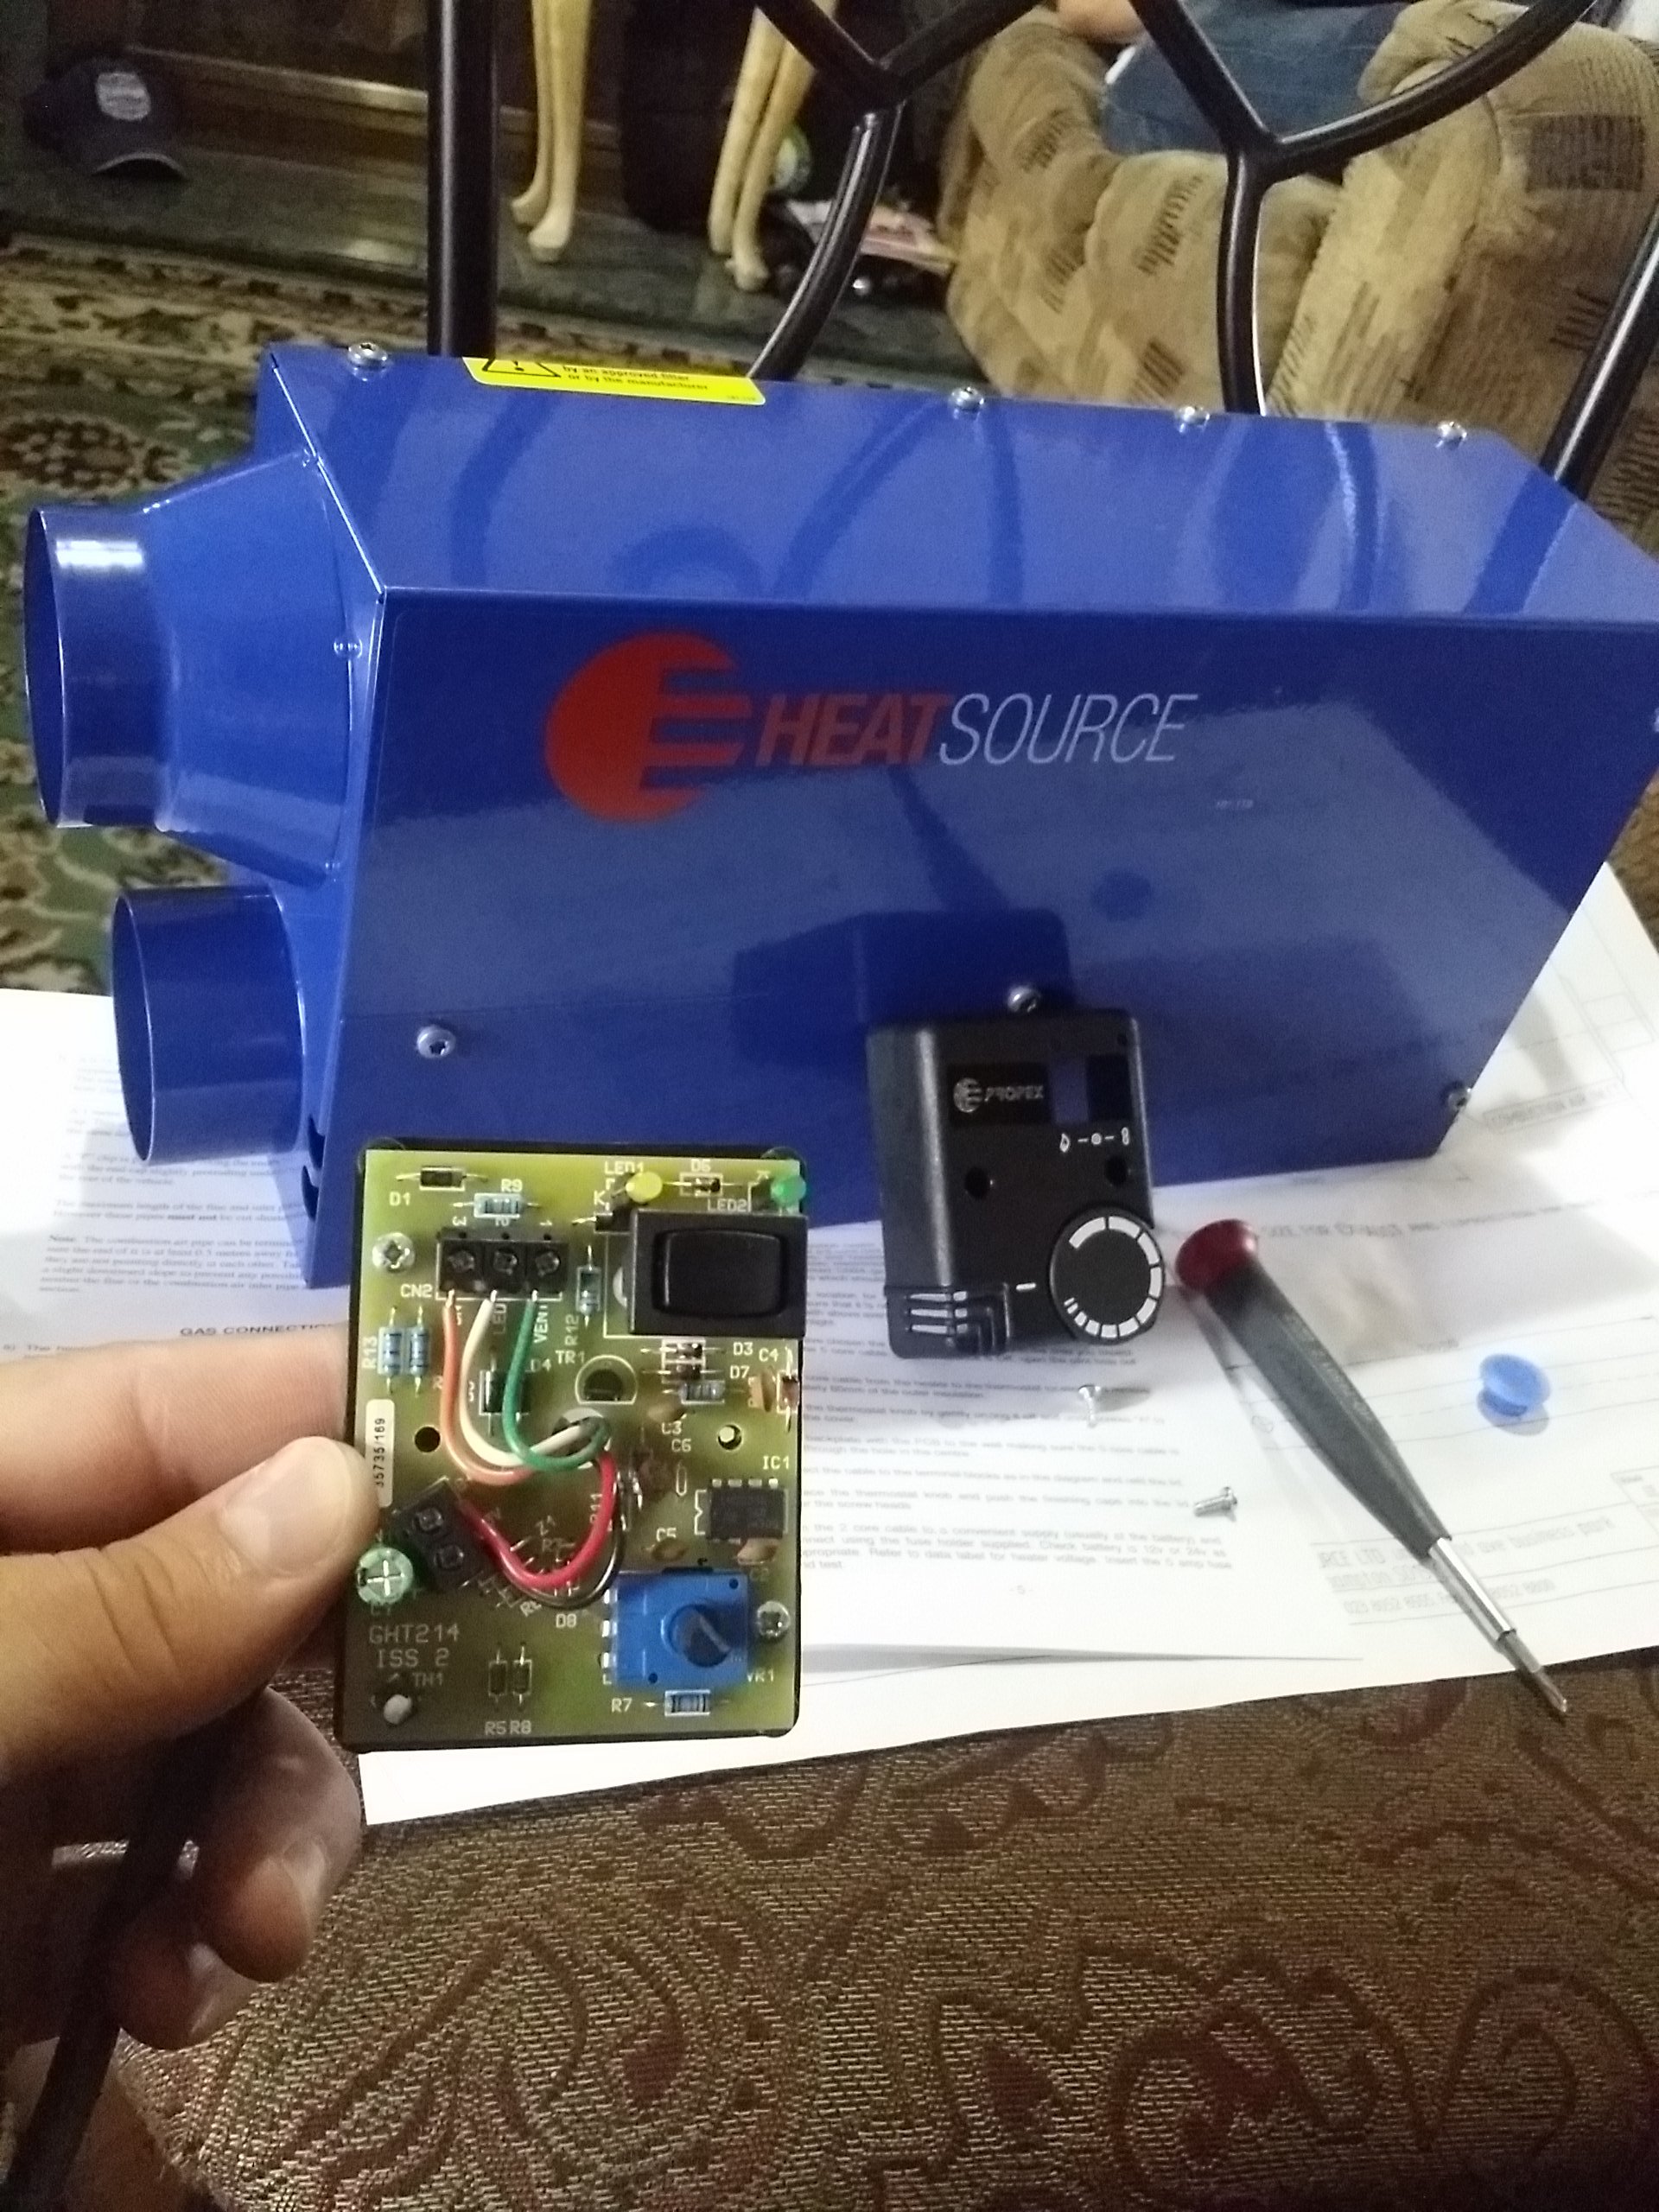
During the week i wired up a thermostat for the on board forced air Propex HS2000 heater. I'll have do some research on how to work with propane gas lines. Apparently a portion of this is going to have to be hard line.
Then today i ground down the entire rear compartment and primered the whole thing inside and out. Although i had the trailer covered with tarps and all the moisture from the recent Ill Nino rain storms had gotten into the trailer and caused it to get alot of surface rust. So rather than dealing with that again i ground it all down with a wire wheel and made sure to get it all primed.
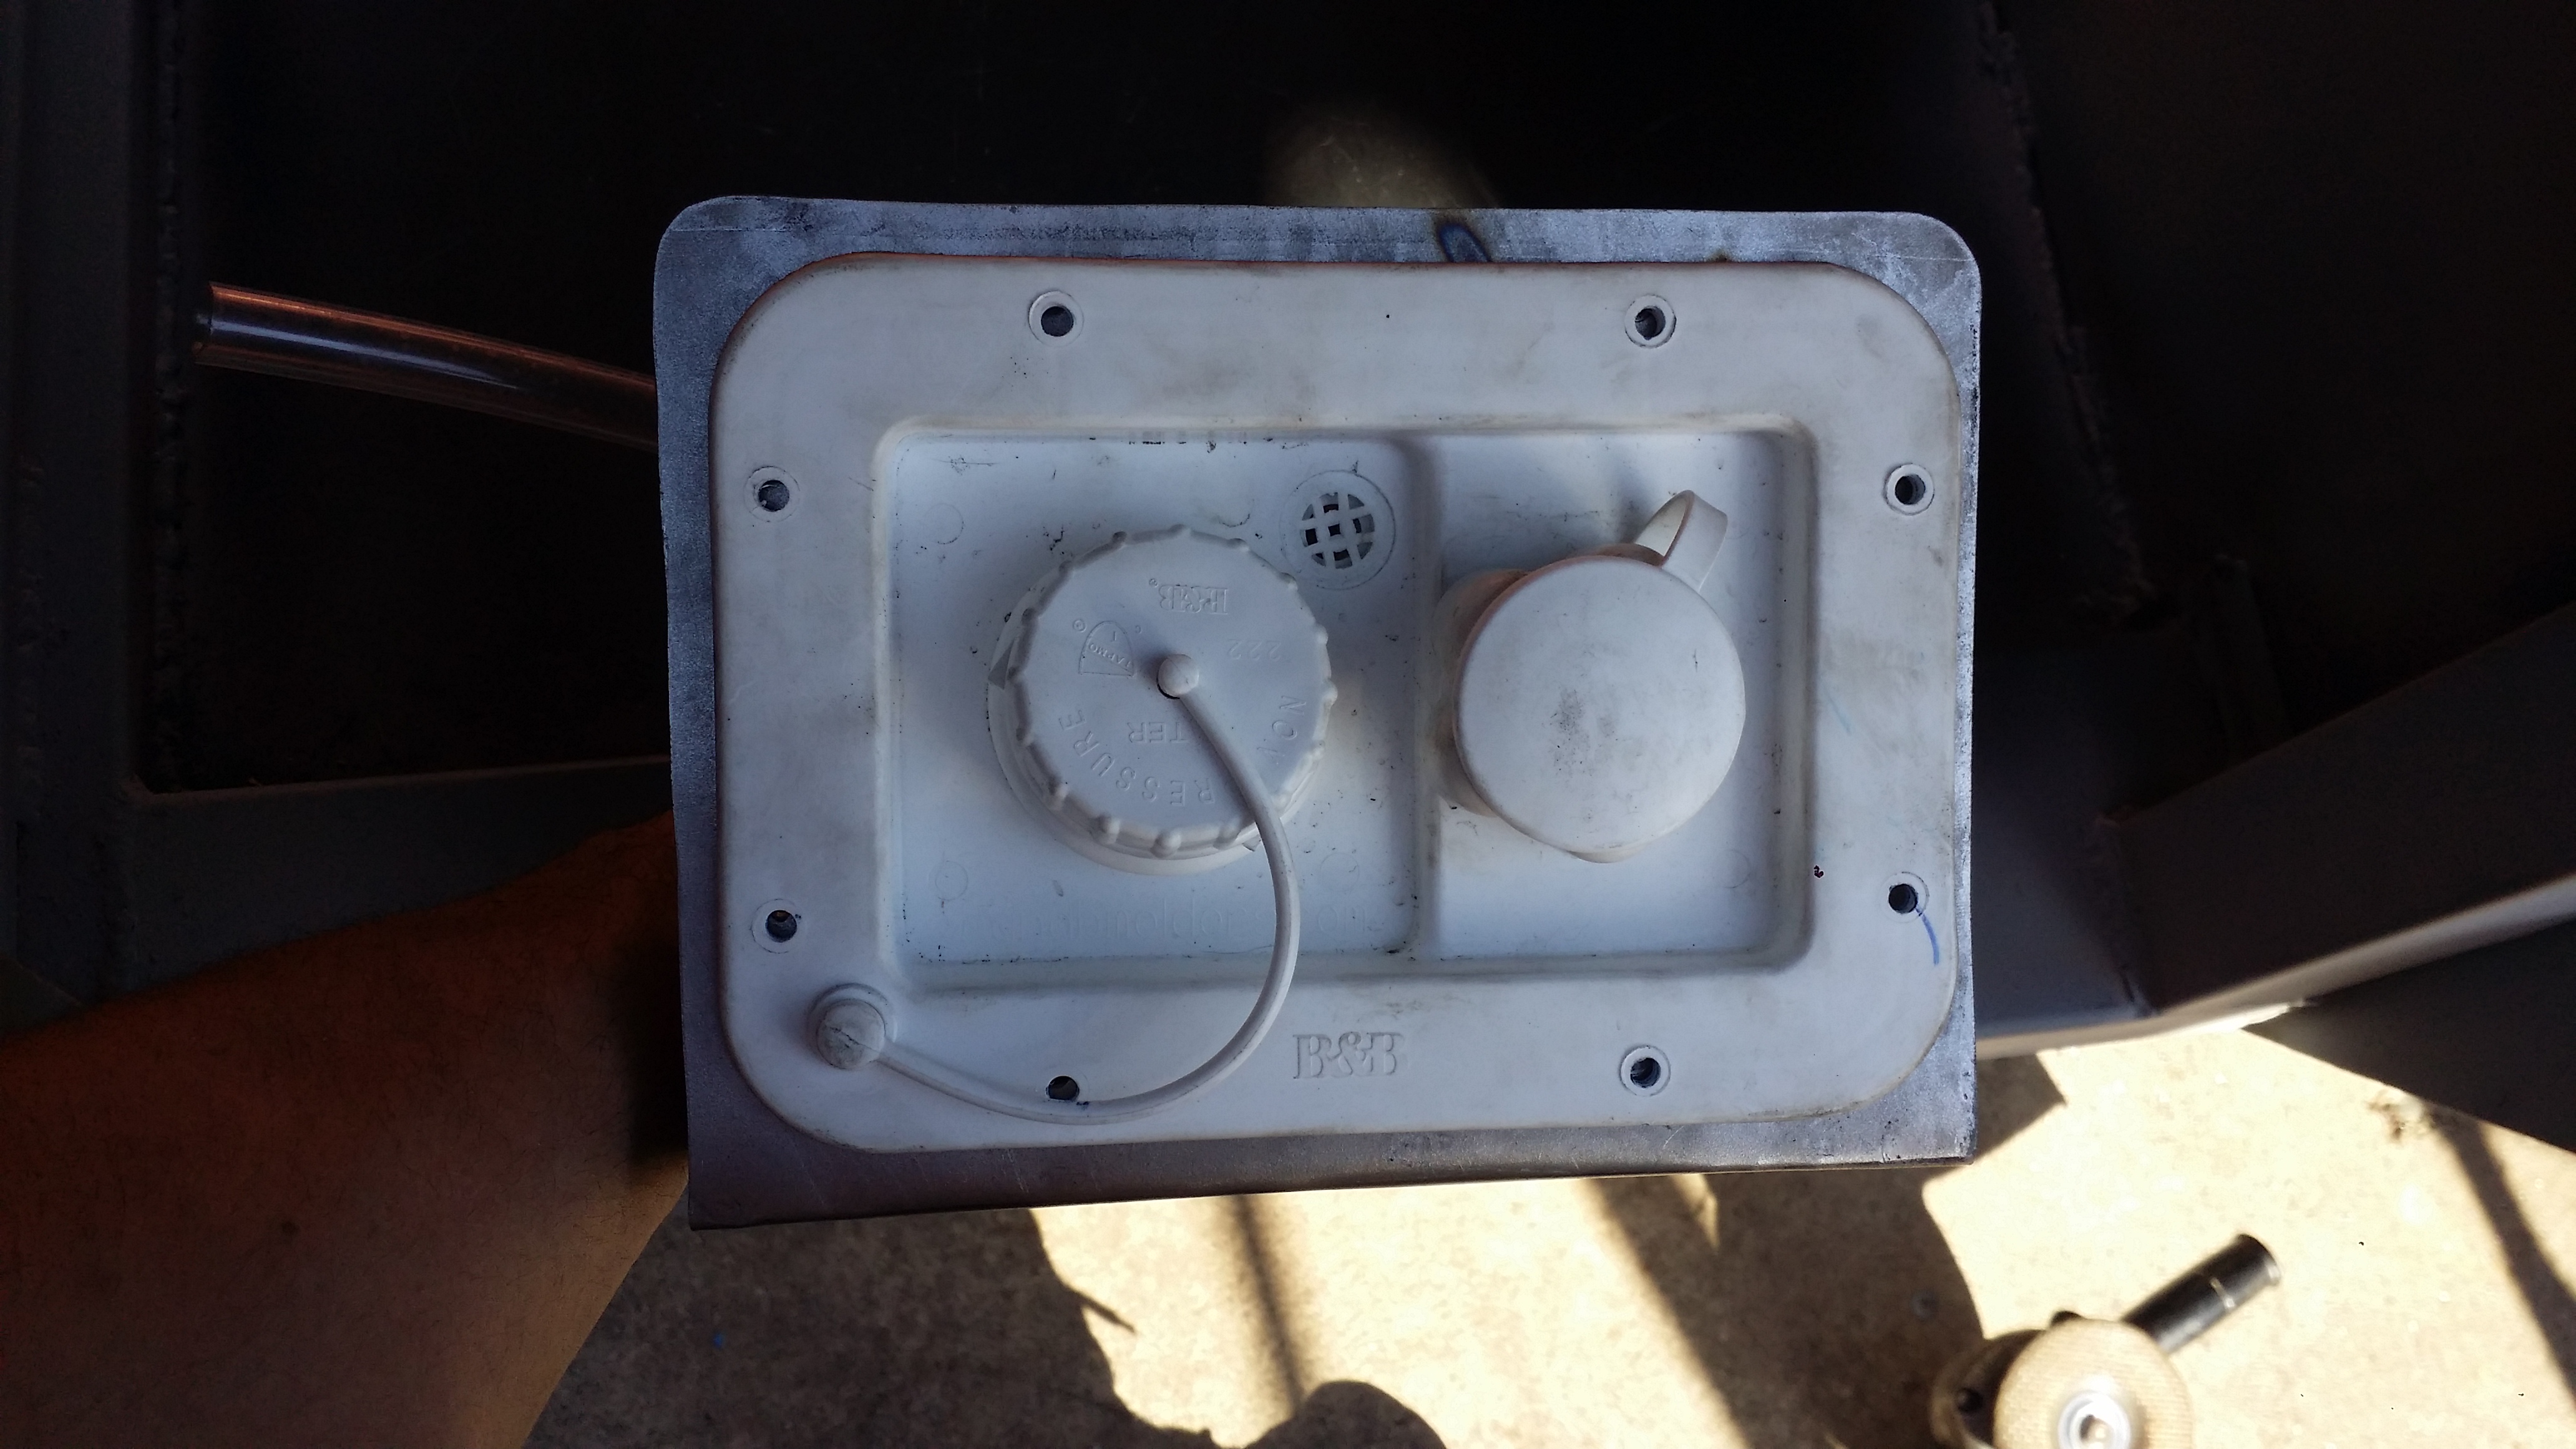
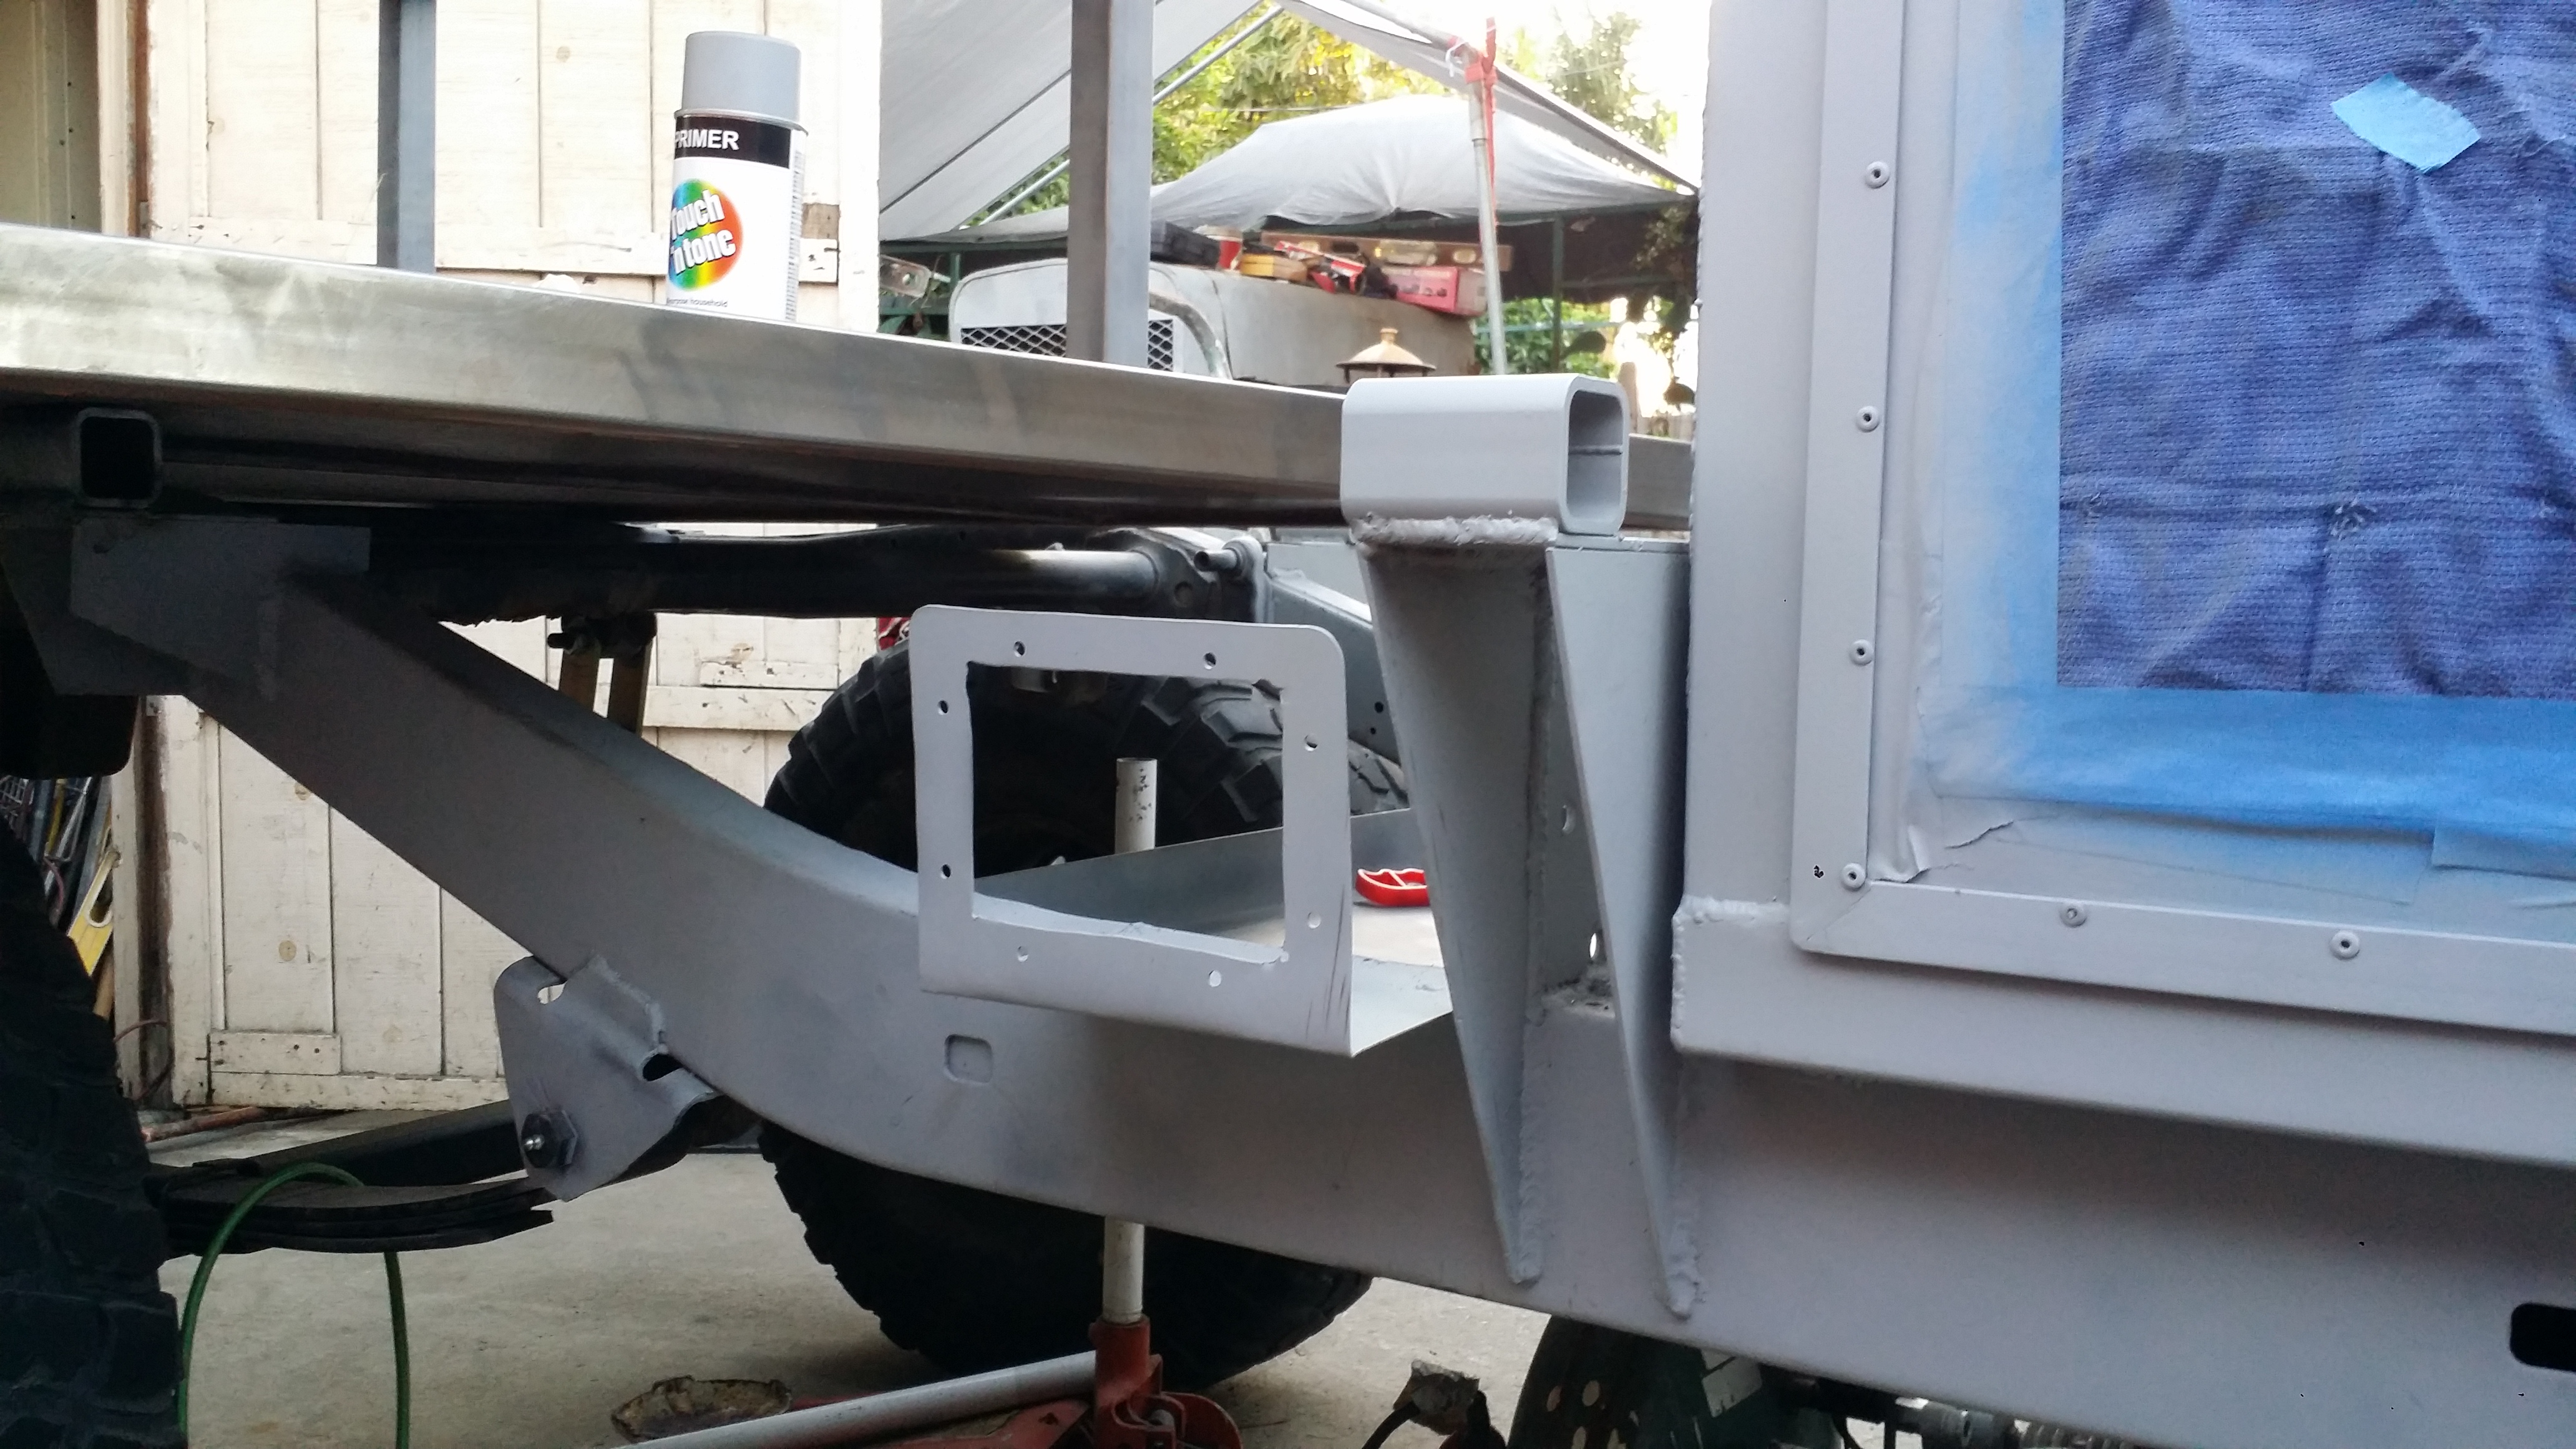
Another thing i wanted to do was get started on the on board heated water system. this is the water hose refill and air breather.
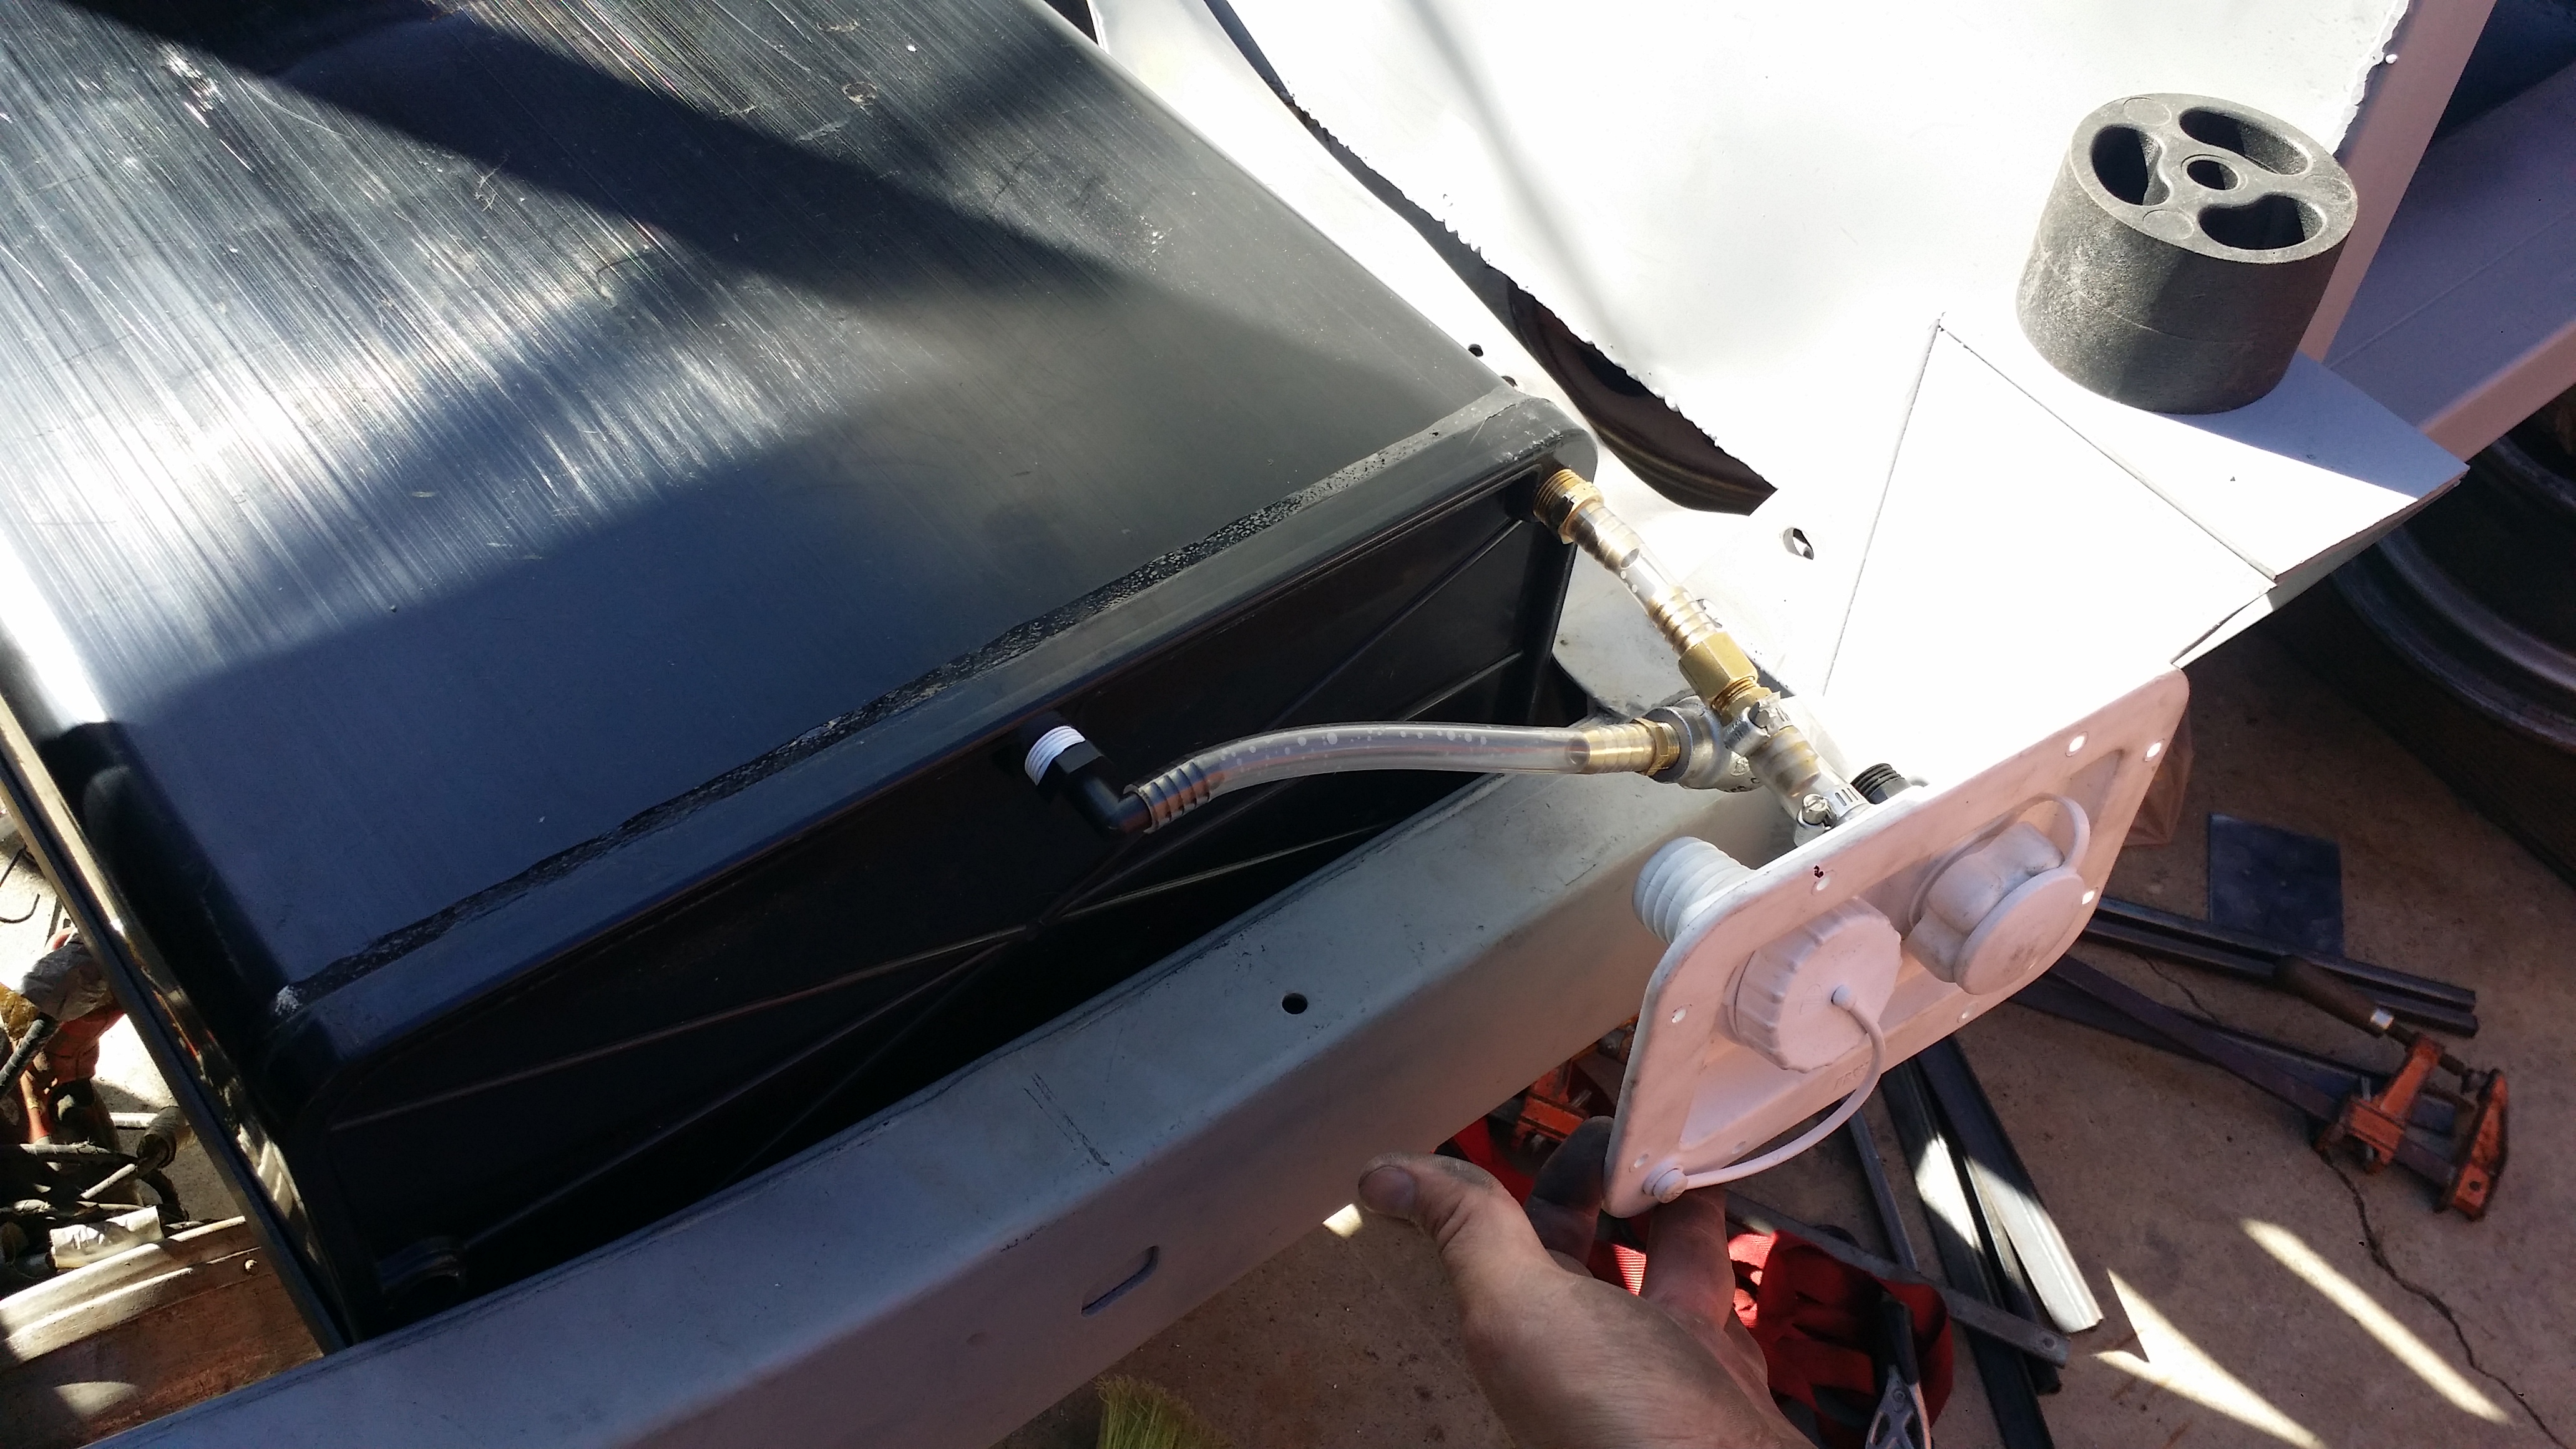
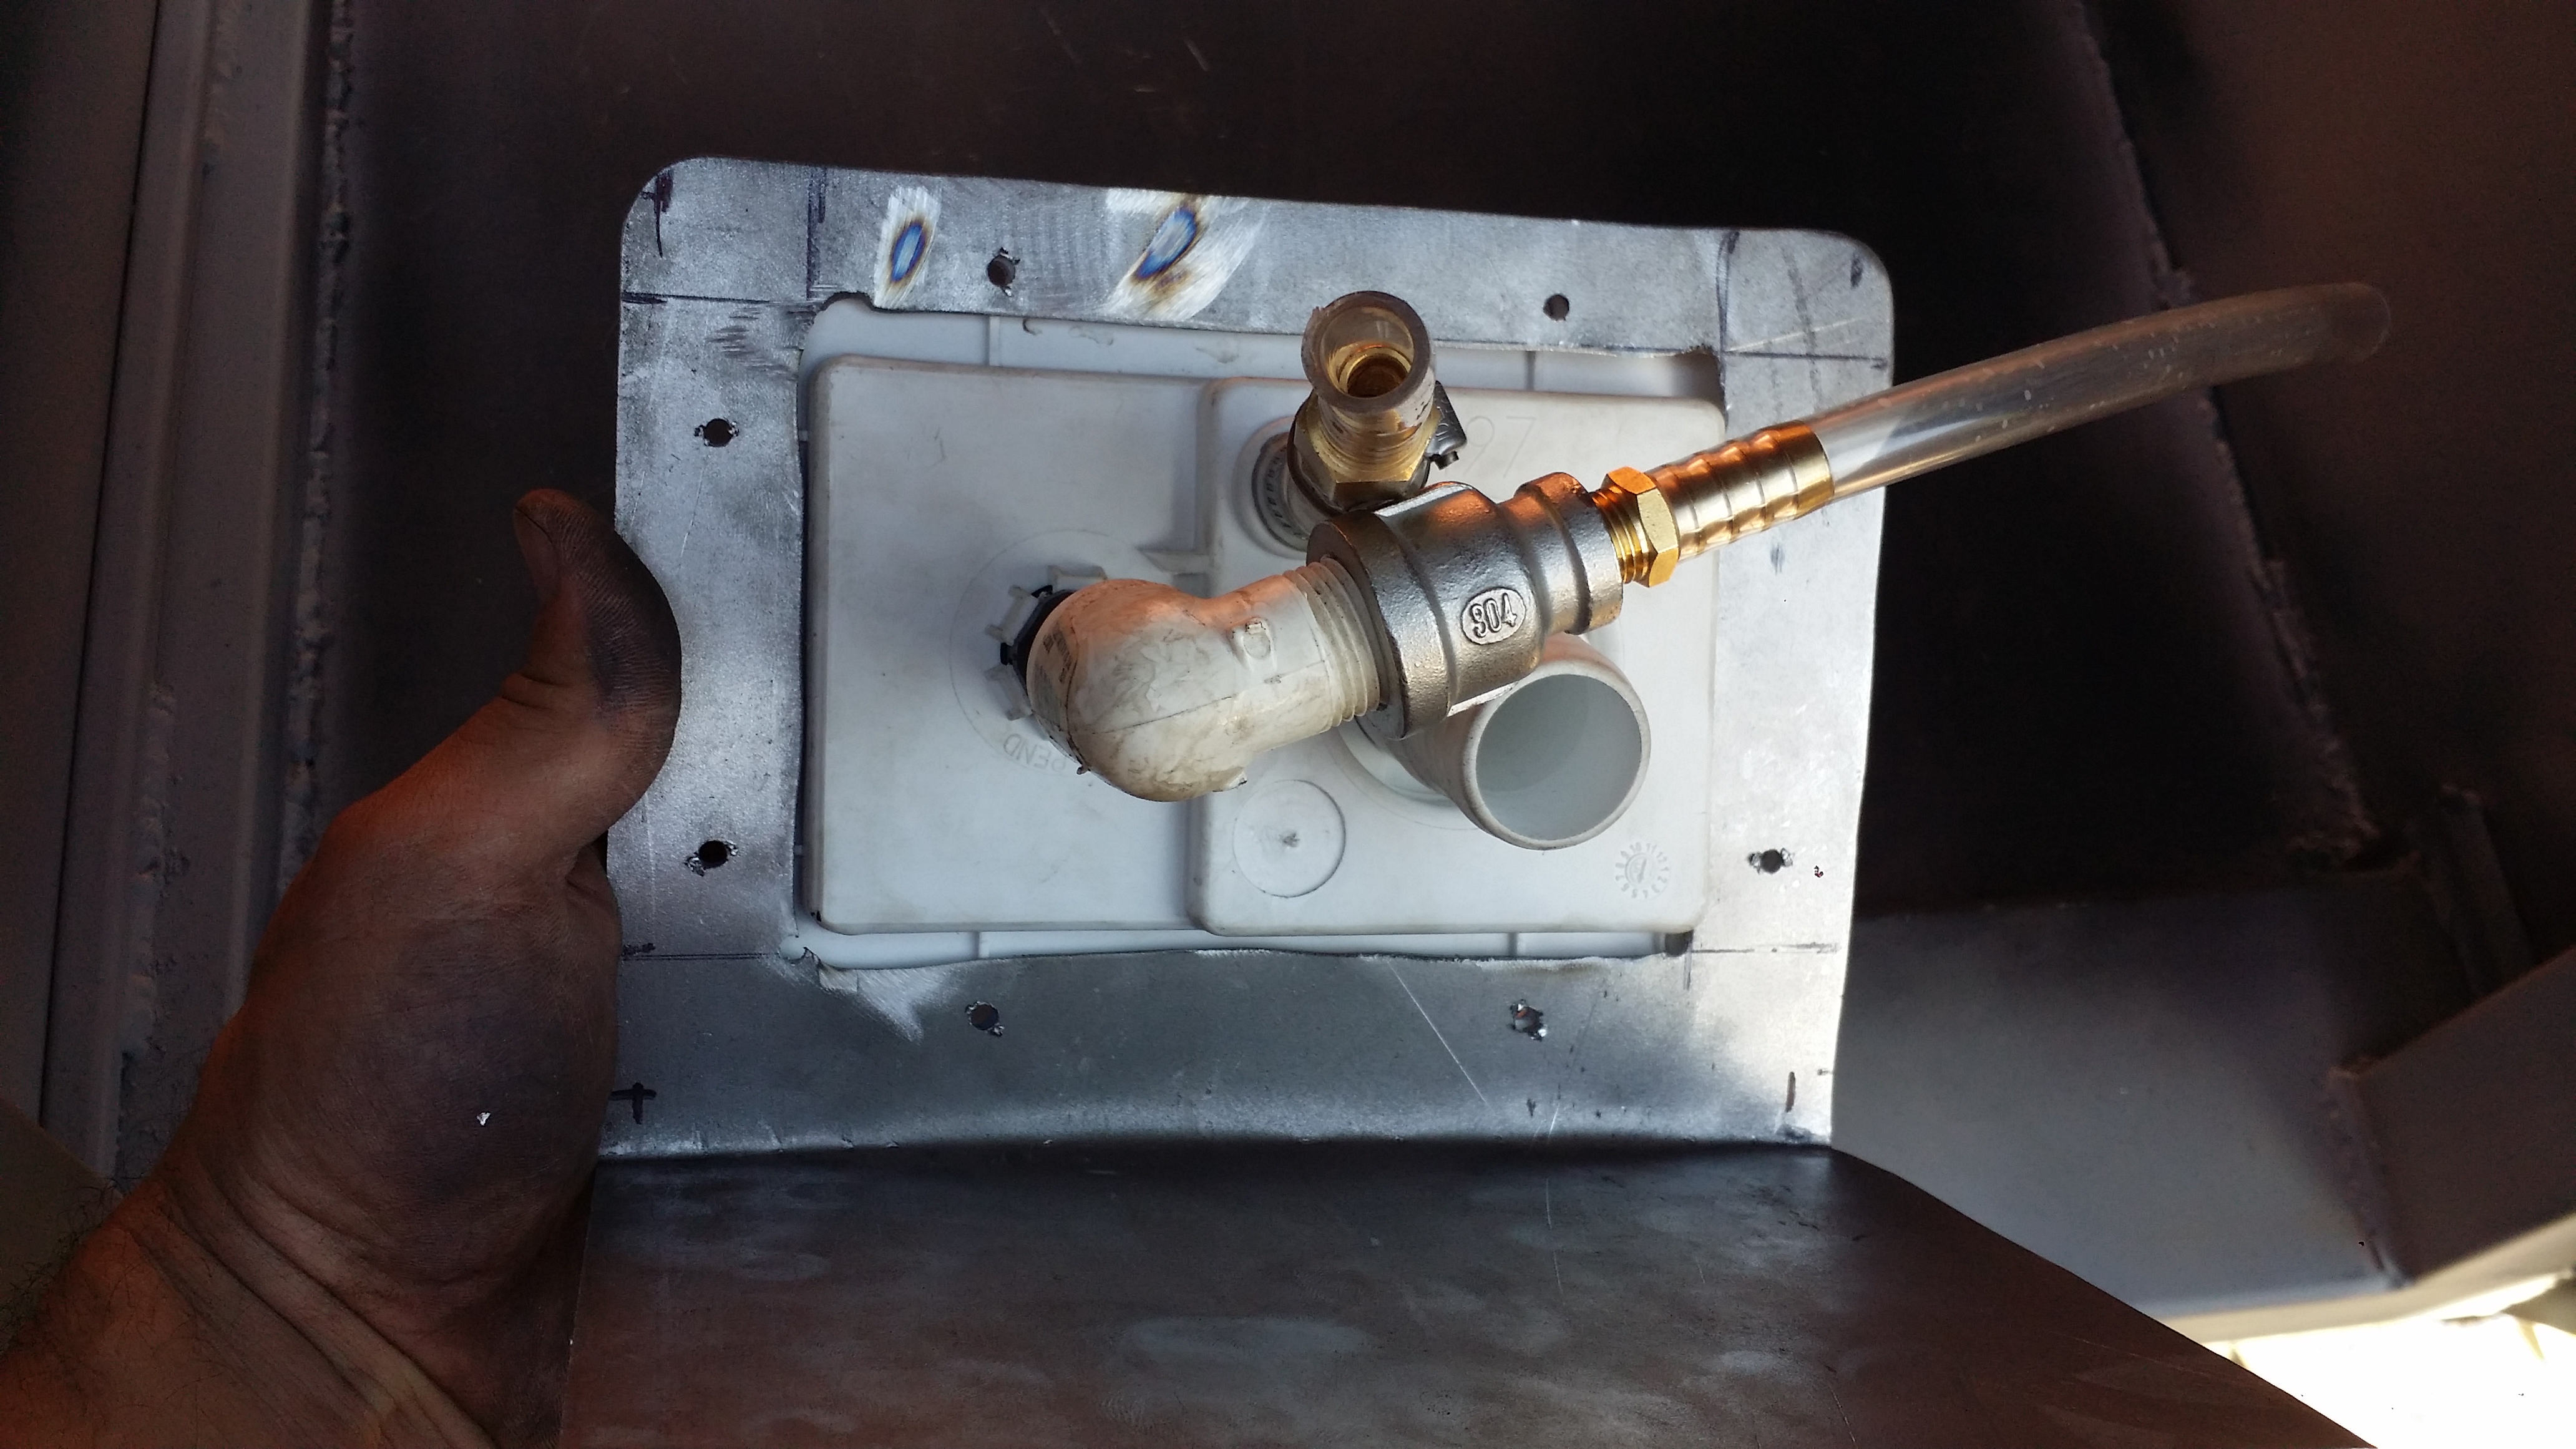
I had to figure out a way to mount this thing in place. So i used some spare 16 gauge sheet metal and bent it into a right angle then cut out a hole in the center so i could weld it to the trailer chassis and mount the plastic refill piece.
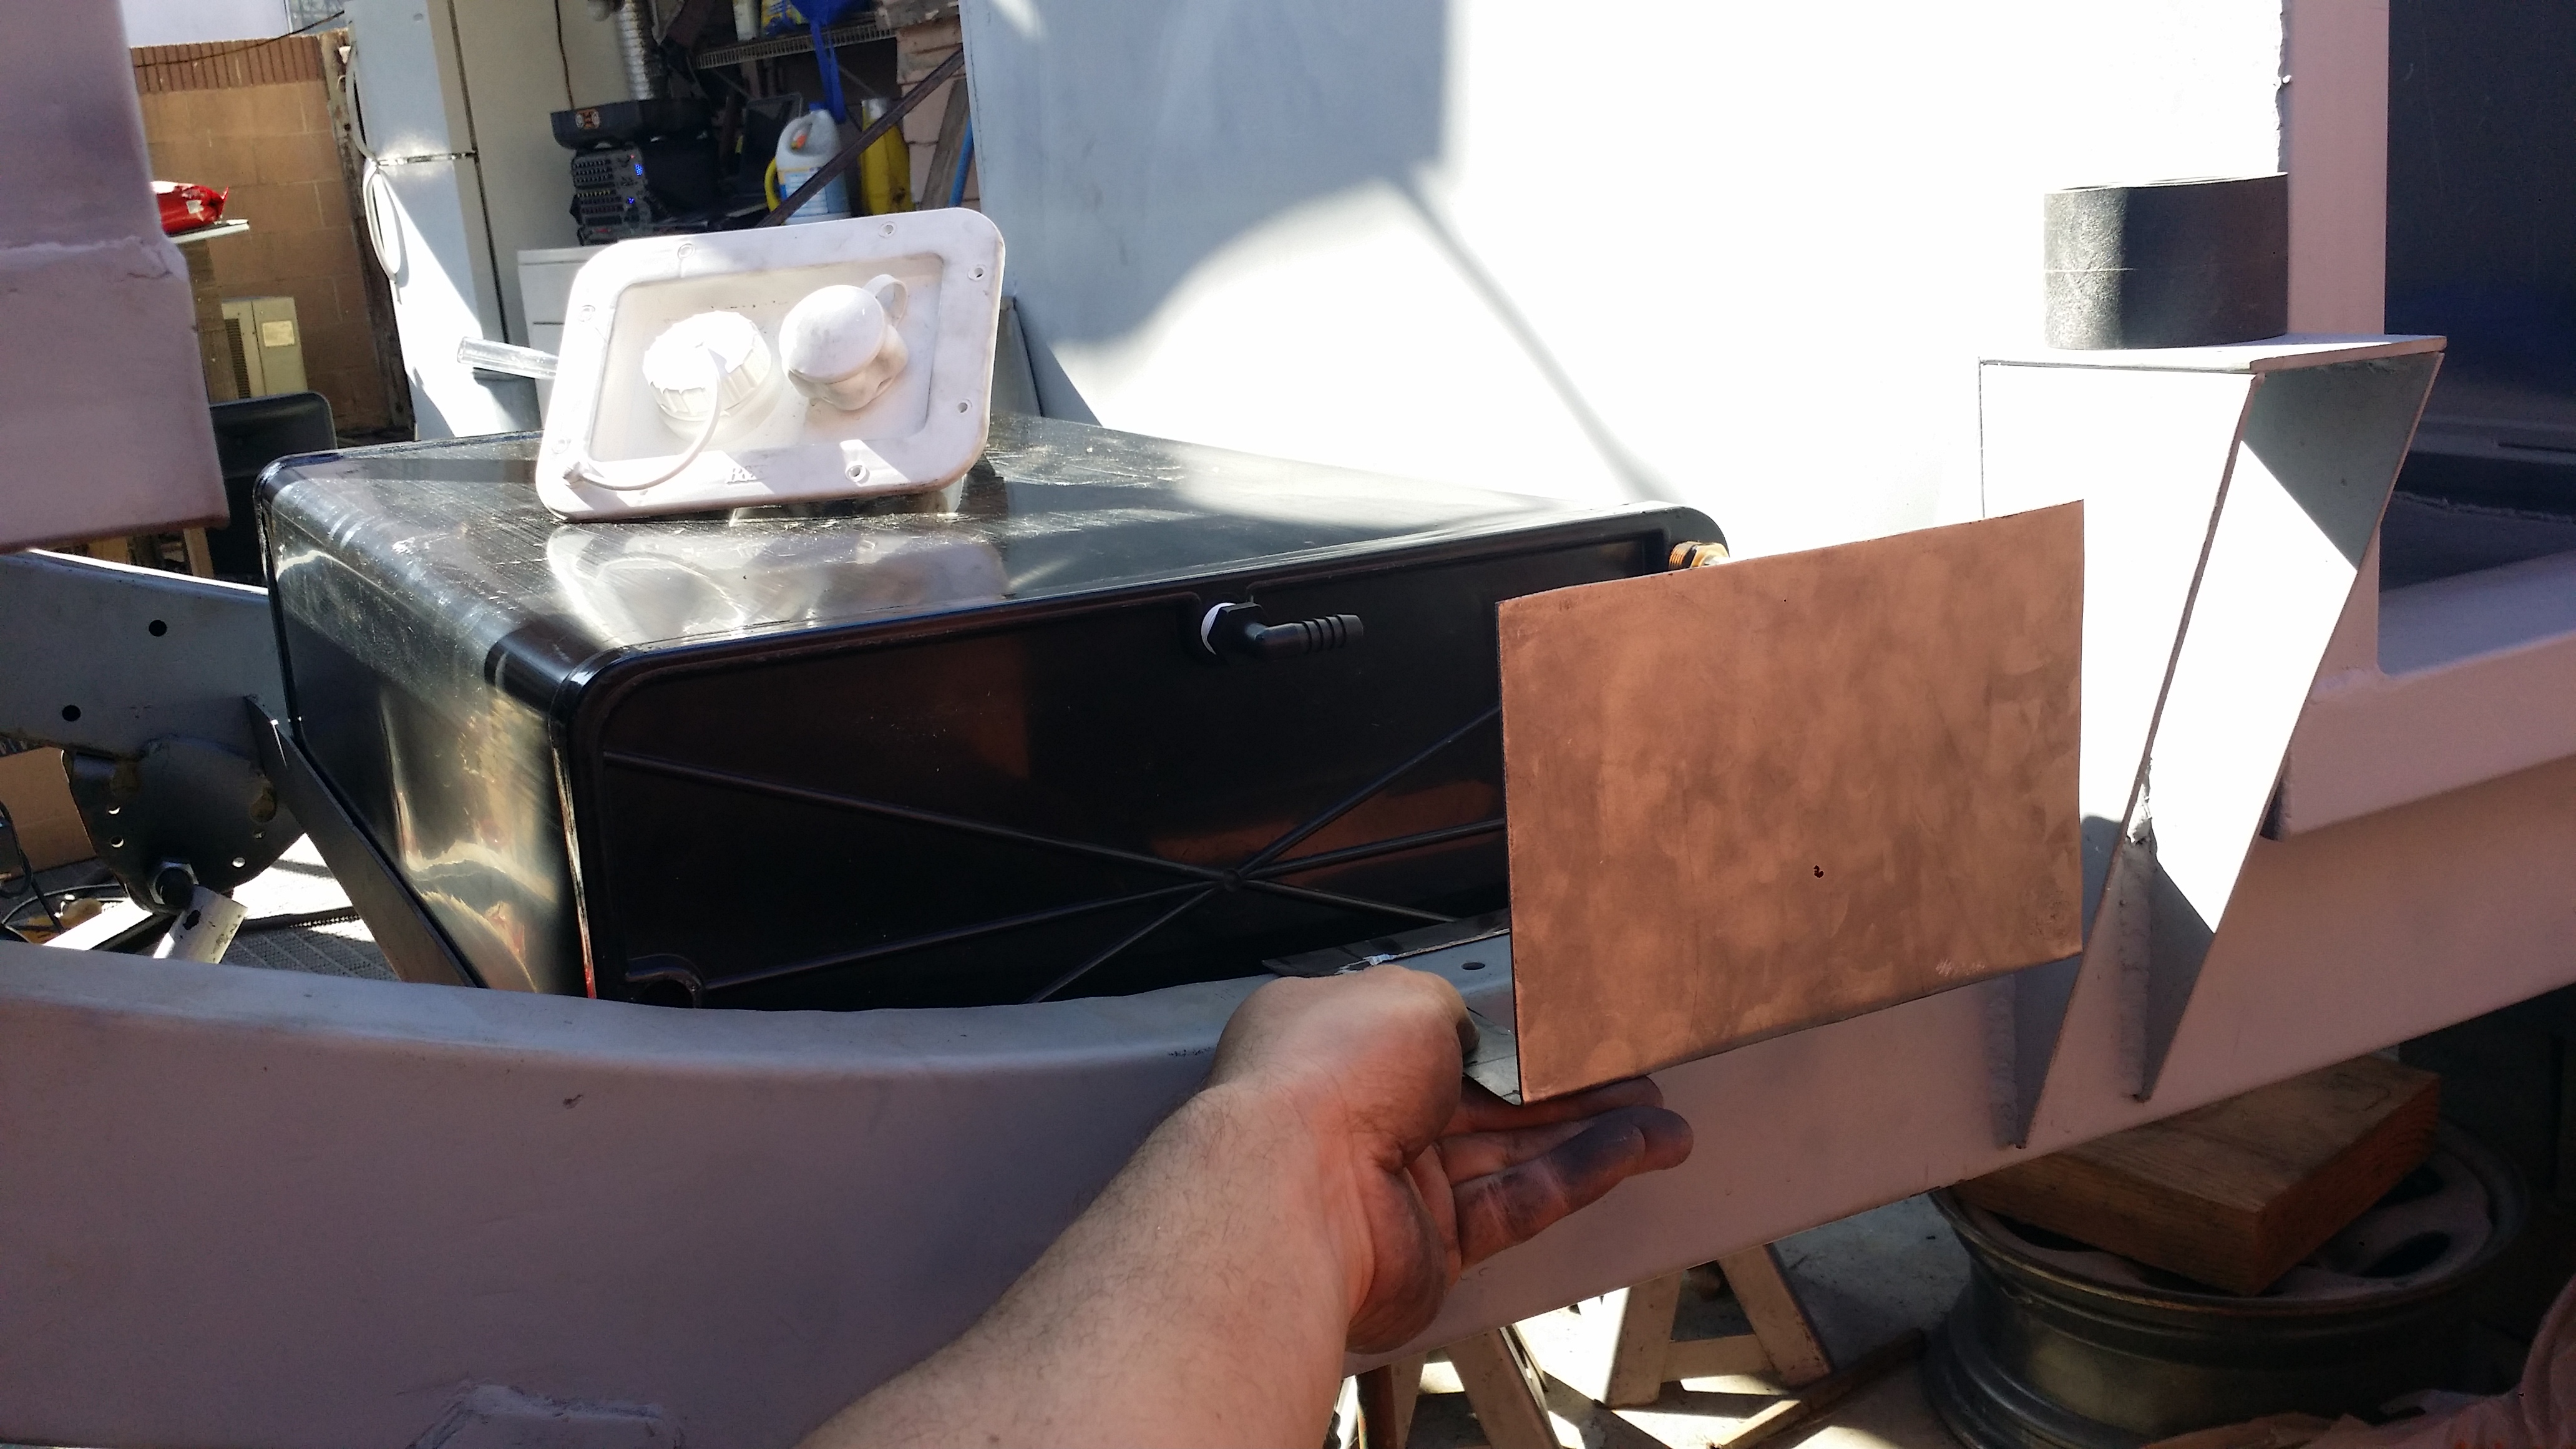
not the cleanest cut out but the inner cuts wont be visible when the metal is painted and the plastic part is mounted covering it up.

the rear view
Also welded on 2" spacers instead of using the plastic 2"body lift pieces that i posted from my neighbors donation.
Originally i wanted to make the rear compartment removable. but i learned that the plastic spacers would not work out because the bolts that would need to be used to hold it in place would be mounted in bad spots. So i resorted to these metal spacers instead. This way i can just weld the entire rear compartment into place and not have to worry about it anymore.
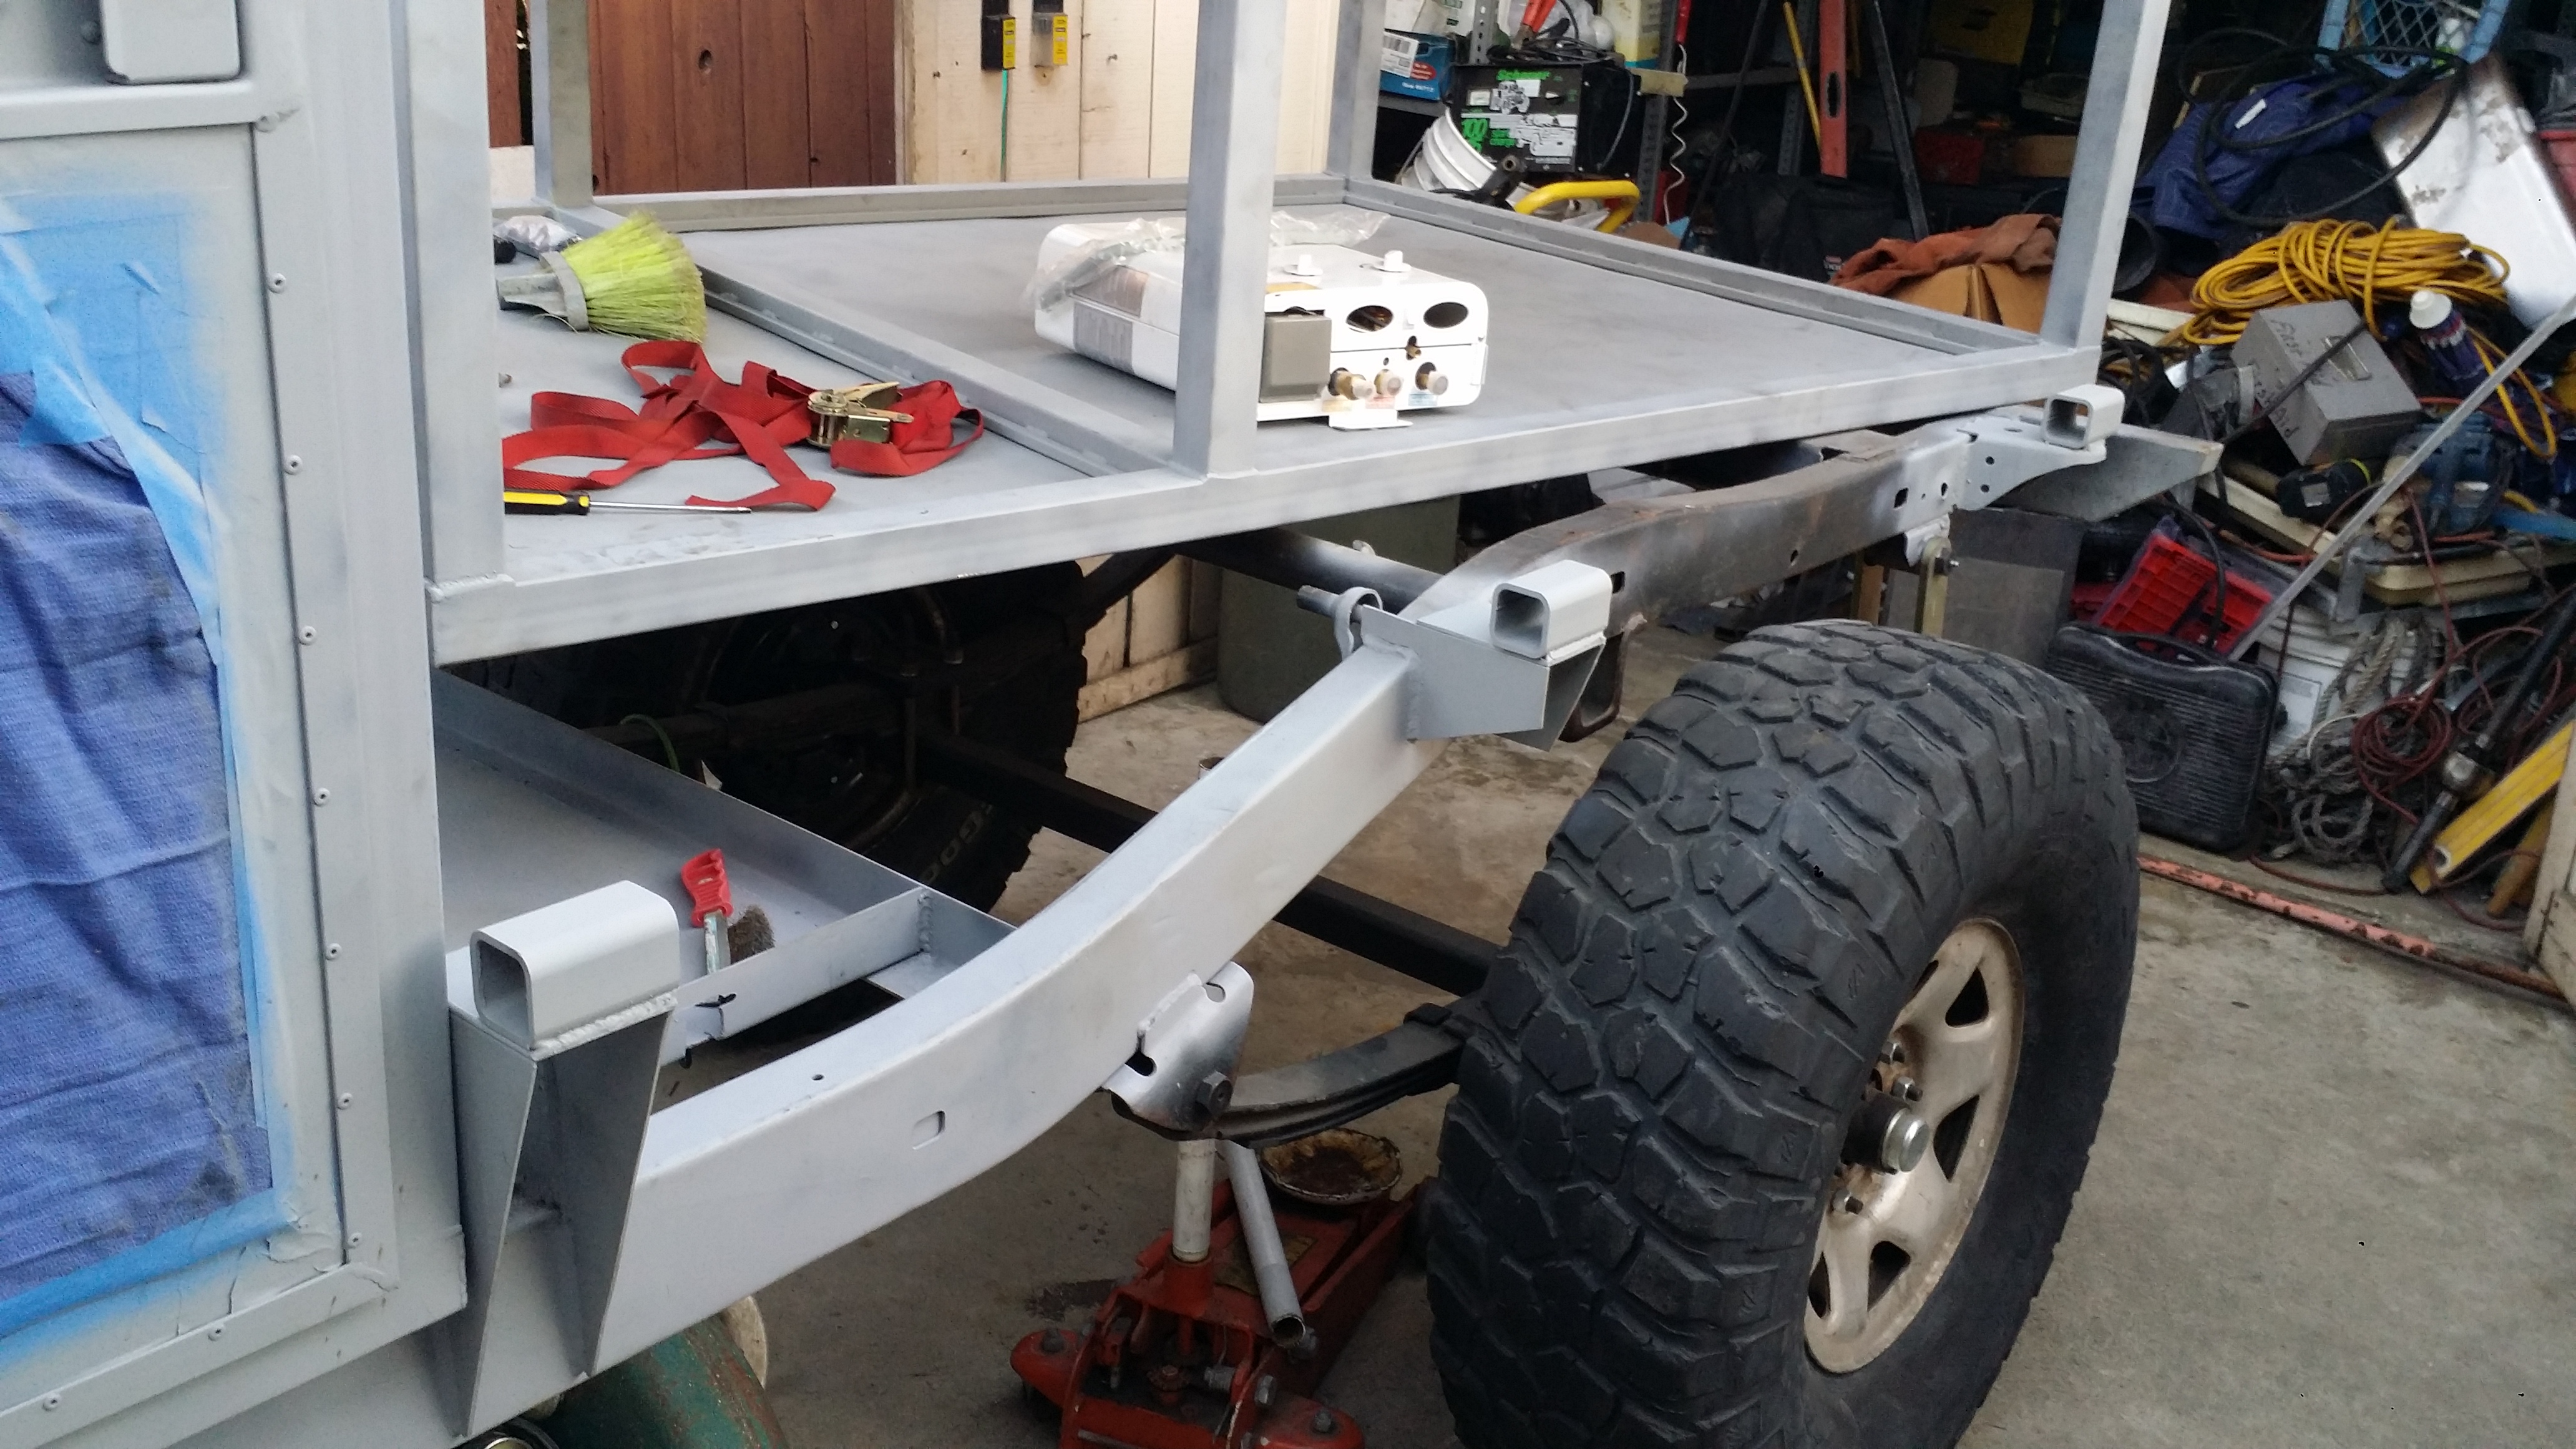
I suppose the spacers could also work as some tie down points as well. This is where that white plastic water refill area will be. Yes i know it is just out there and vulnerable right now, but i do plan to add some rock sliders all around this thing and those will protect this for sure.
Done for the day. Didnt seem like i did much but i baked in the sun for 8 hours doing all this crap lol

Maybe next week i can get that water tank and rear compartment permanently mounted in place. and get started on getting the heated shower stuff mounted in the front compartment as well. We'll see how much i can get accomplished. Hopefully i don't have anymore hick-ups on this build that take up too much of my time
Anyway now that the tow vehicle is put together again i started back up on the trailer.
During the week i wired up a thermostat for the on board forced air Propex HS2000 heater. I'll have do some research on how to work with propane gas lines. Apparently a portion of this is going to have to be hard line.

Then today i ground down the entire rear compartment and primered the whole thing inside and out. Although i had the trailer covered with tarps and all the moisture from the recent Ill Nino rain storms had gotten into the trailer and caused it to get alot of surface rust. So rather than dealing with that again i ground it all down with a wire wheel and made sure to get it all primed.
Another thing i wanted to do was get started on the on board heated water system. this is the water hose refill and air breather.

I had to figure out a way to mount this thing in place. So i used some spare 16 gauge sheet metal and bent it into a right angle then cut out a hole in the center so i could weld it to the trailer chassis and mount the plastic refill piece.

not the cleanest cut out but the inner cuts wont be visible when the metal is painted and the plastic part is mounted covering it up.


the rear view

Also welded on 2" spacers instead of using the plastic 2"body lift pieces that i posted from my neighbors donation.
Originally i wanted to make the rear compartment removable. but i learned that the plastic spacers would not work out because the bolts that would need to be used to hold it in place would be mounted in bad spots. So i resorted to these metal spacers instead. This way i can just weld the entire rear compartment into place and not have to worry about it anymore.

I suppose the spacers could also work as some tie down points as well. This is where that white plastic water refill area will be. Yes i know it is just out there and vulnerable right now, but i do plan to add some rock sliders all around this thing and those will protect this for sure.

Done for the day. Didnt seem like i did much but i baked in the sun for 8 hours doing all this crap lol


Maybe next week i can get that water tank and rear compartment permanently mounted in place. and get started on getting the heated shower stuff mounted in the front compartment as well. We'll see how much i can get accomplished. Hopefully i don't have anymore hick-ups on this build that take up too much of my time
Last edited by Redeth005; Apr 17, 2016 at 08:58 PM.


