
Redeth's Overland Trailer Build
 Nov 11, 2015 | 06:37 PM
#41
Thread Starter
Registered User
Joined: Apr 2012
Posts: 2,817
Likes: 2
From: Los Angeles CA
 Nov 11, 2015 | 07:53 PM
#42
Thread Starter
Registered User
Joined: Apr 2012
Posts: 2,817
Likes: 2
From: Los Angeles CA
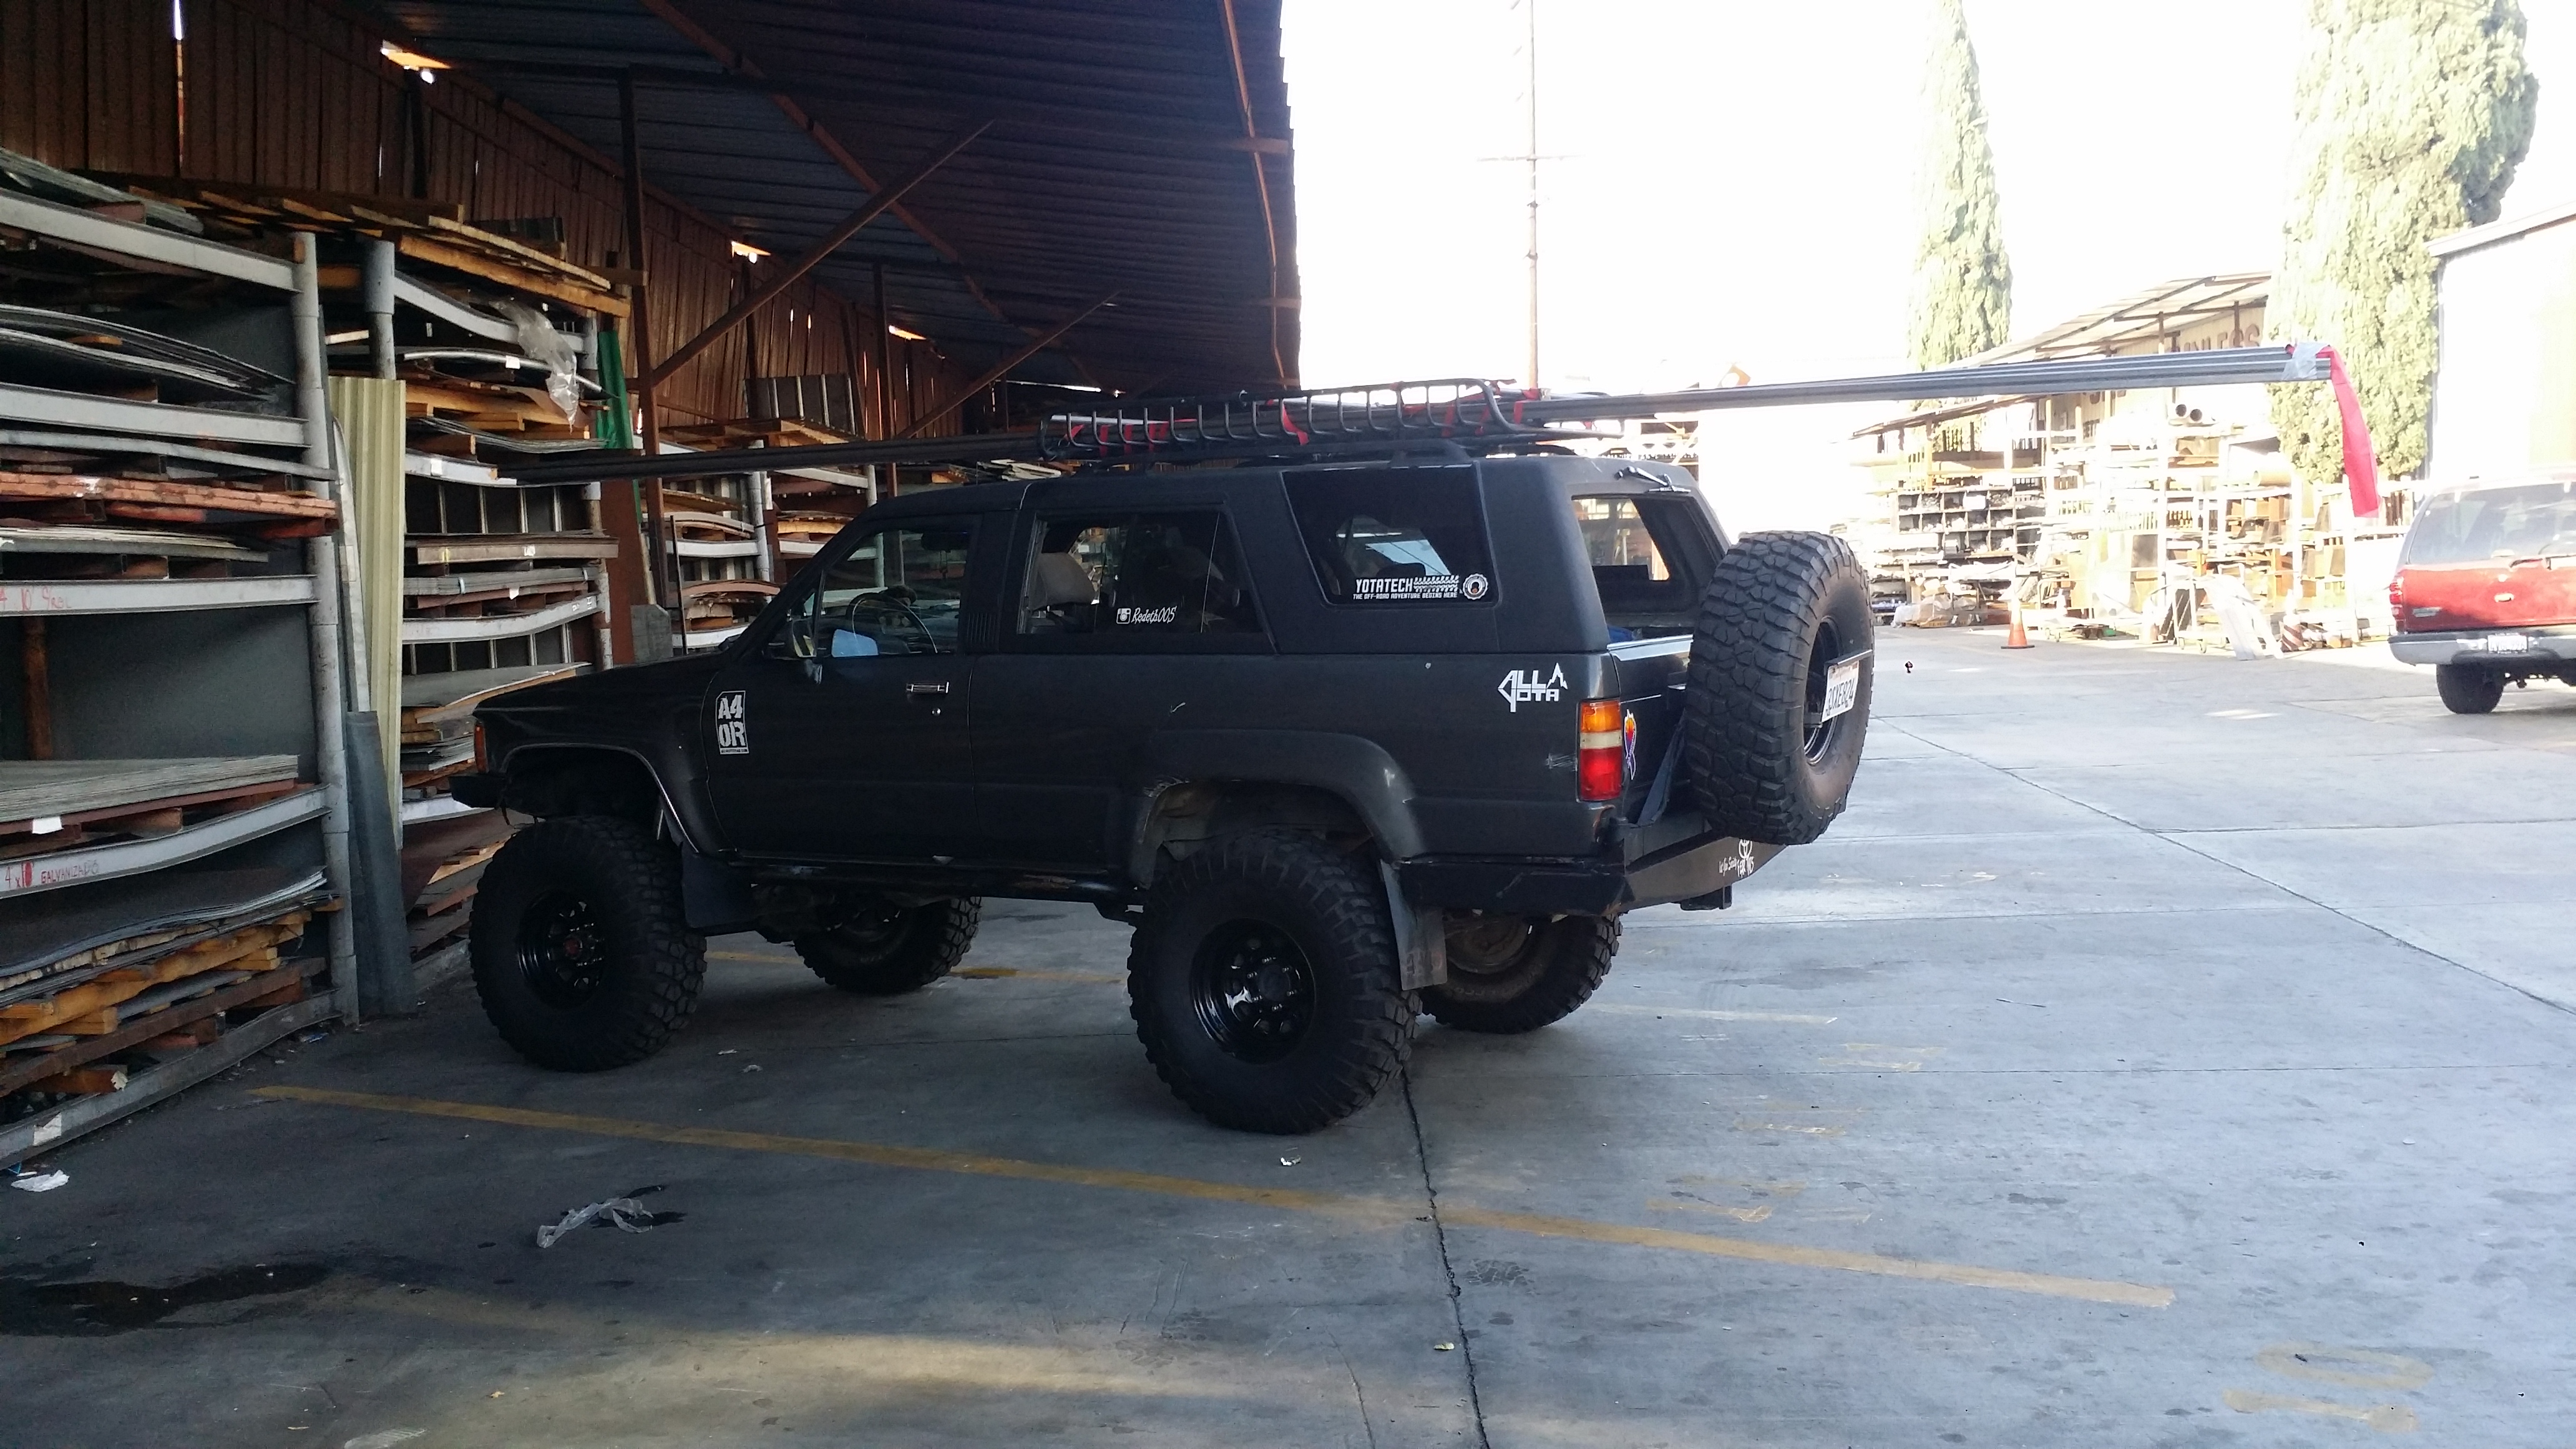
Dropped by the local steel shop (BOBCO METAL in the city of Vernon CA) about 2 weeks ago. I bought 3 sticks of 2"x2" 16 gauge square tube and returned a few days later for a 4th stick.
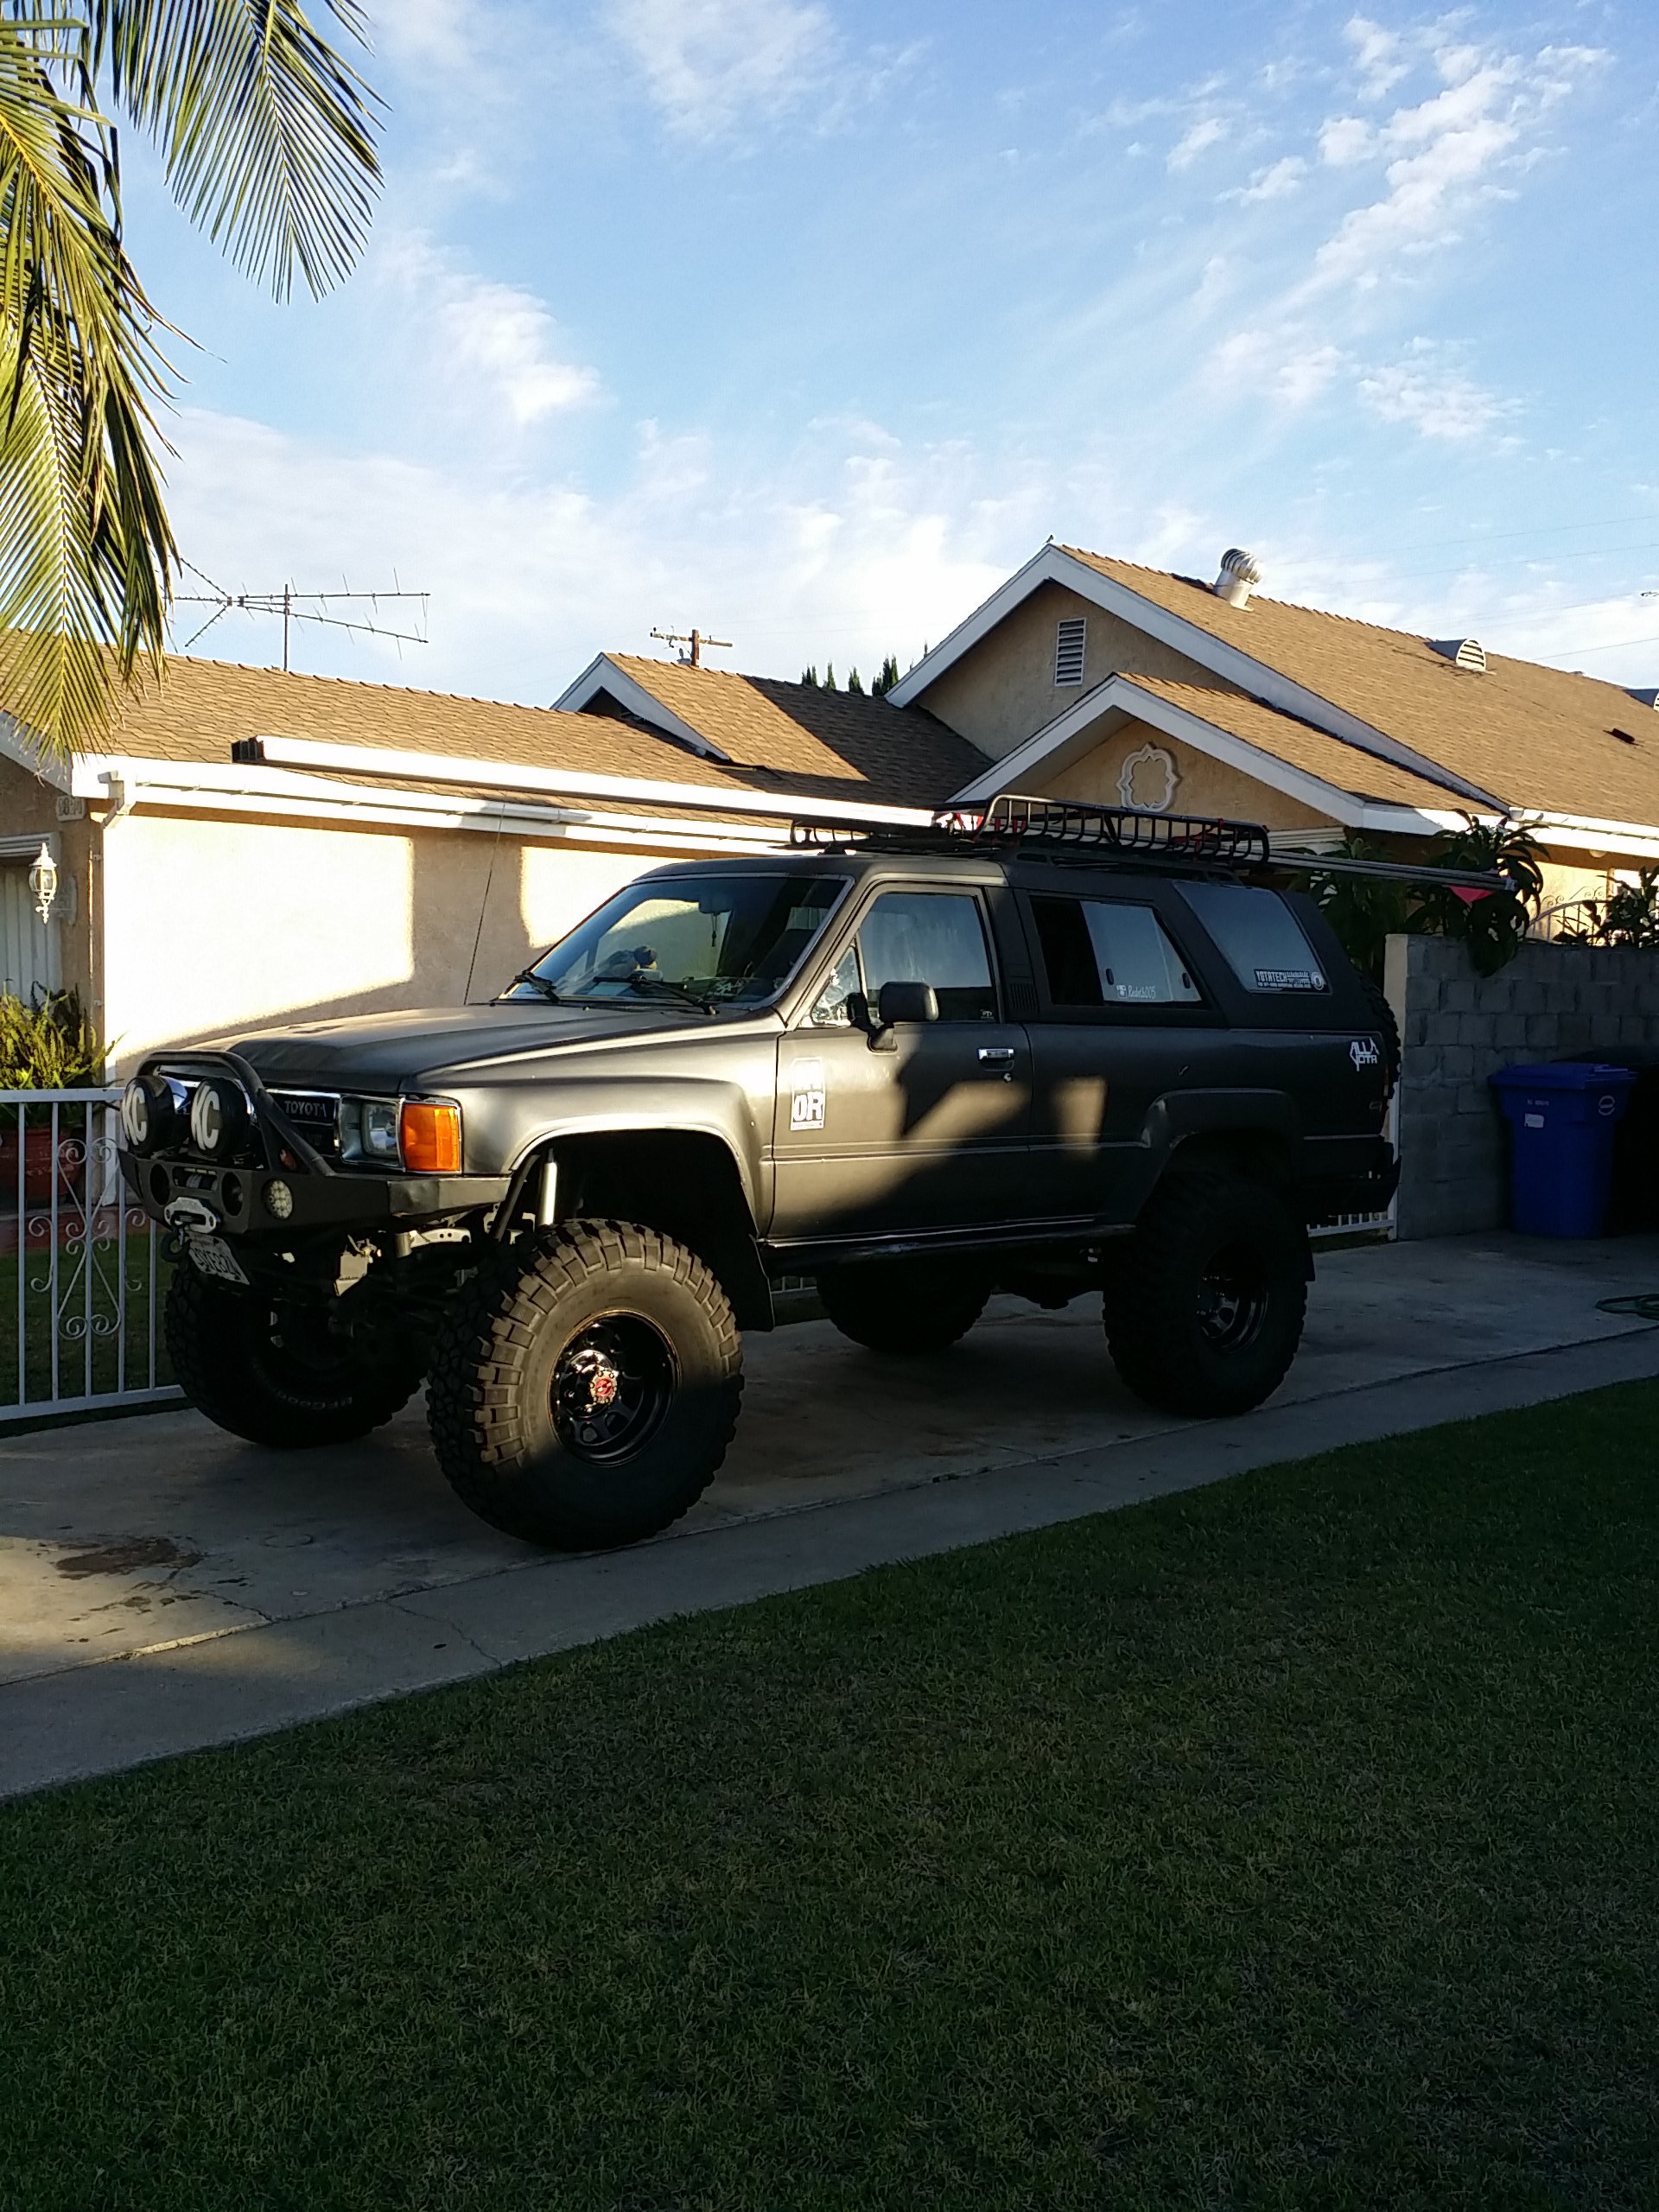
Woooo view from inside the truck driving home. Those 22ft tubes really move alot even while strapped down. that was scary but not nearly as scary as driving with the 4runner chassis on my roof haha!

Home
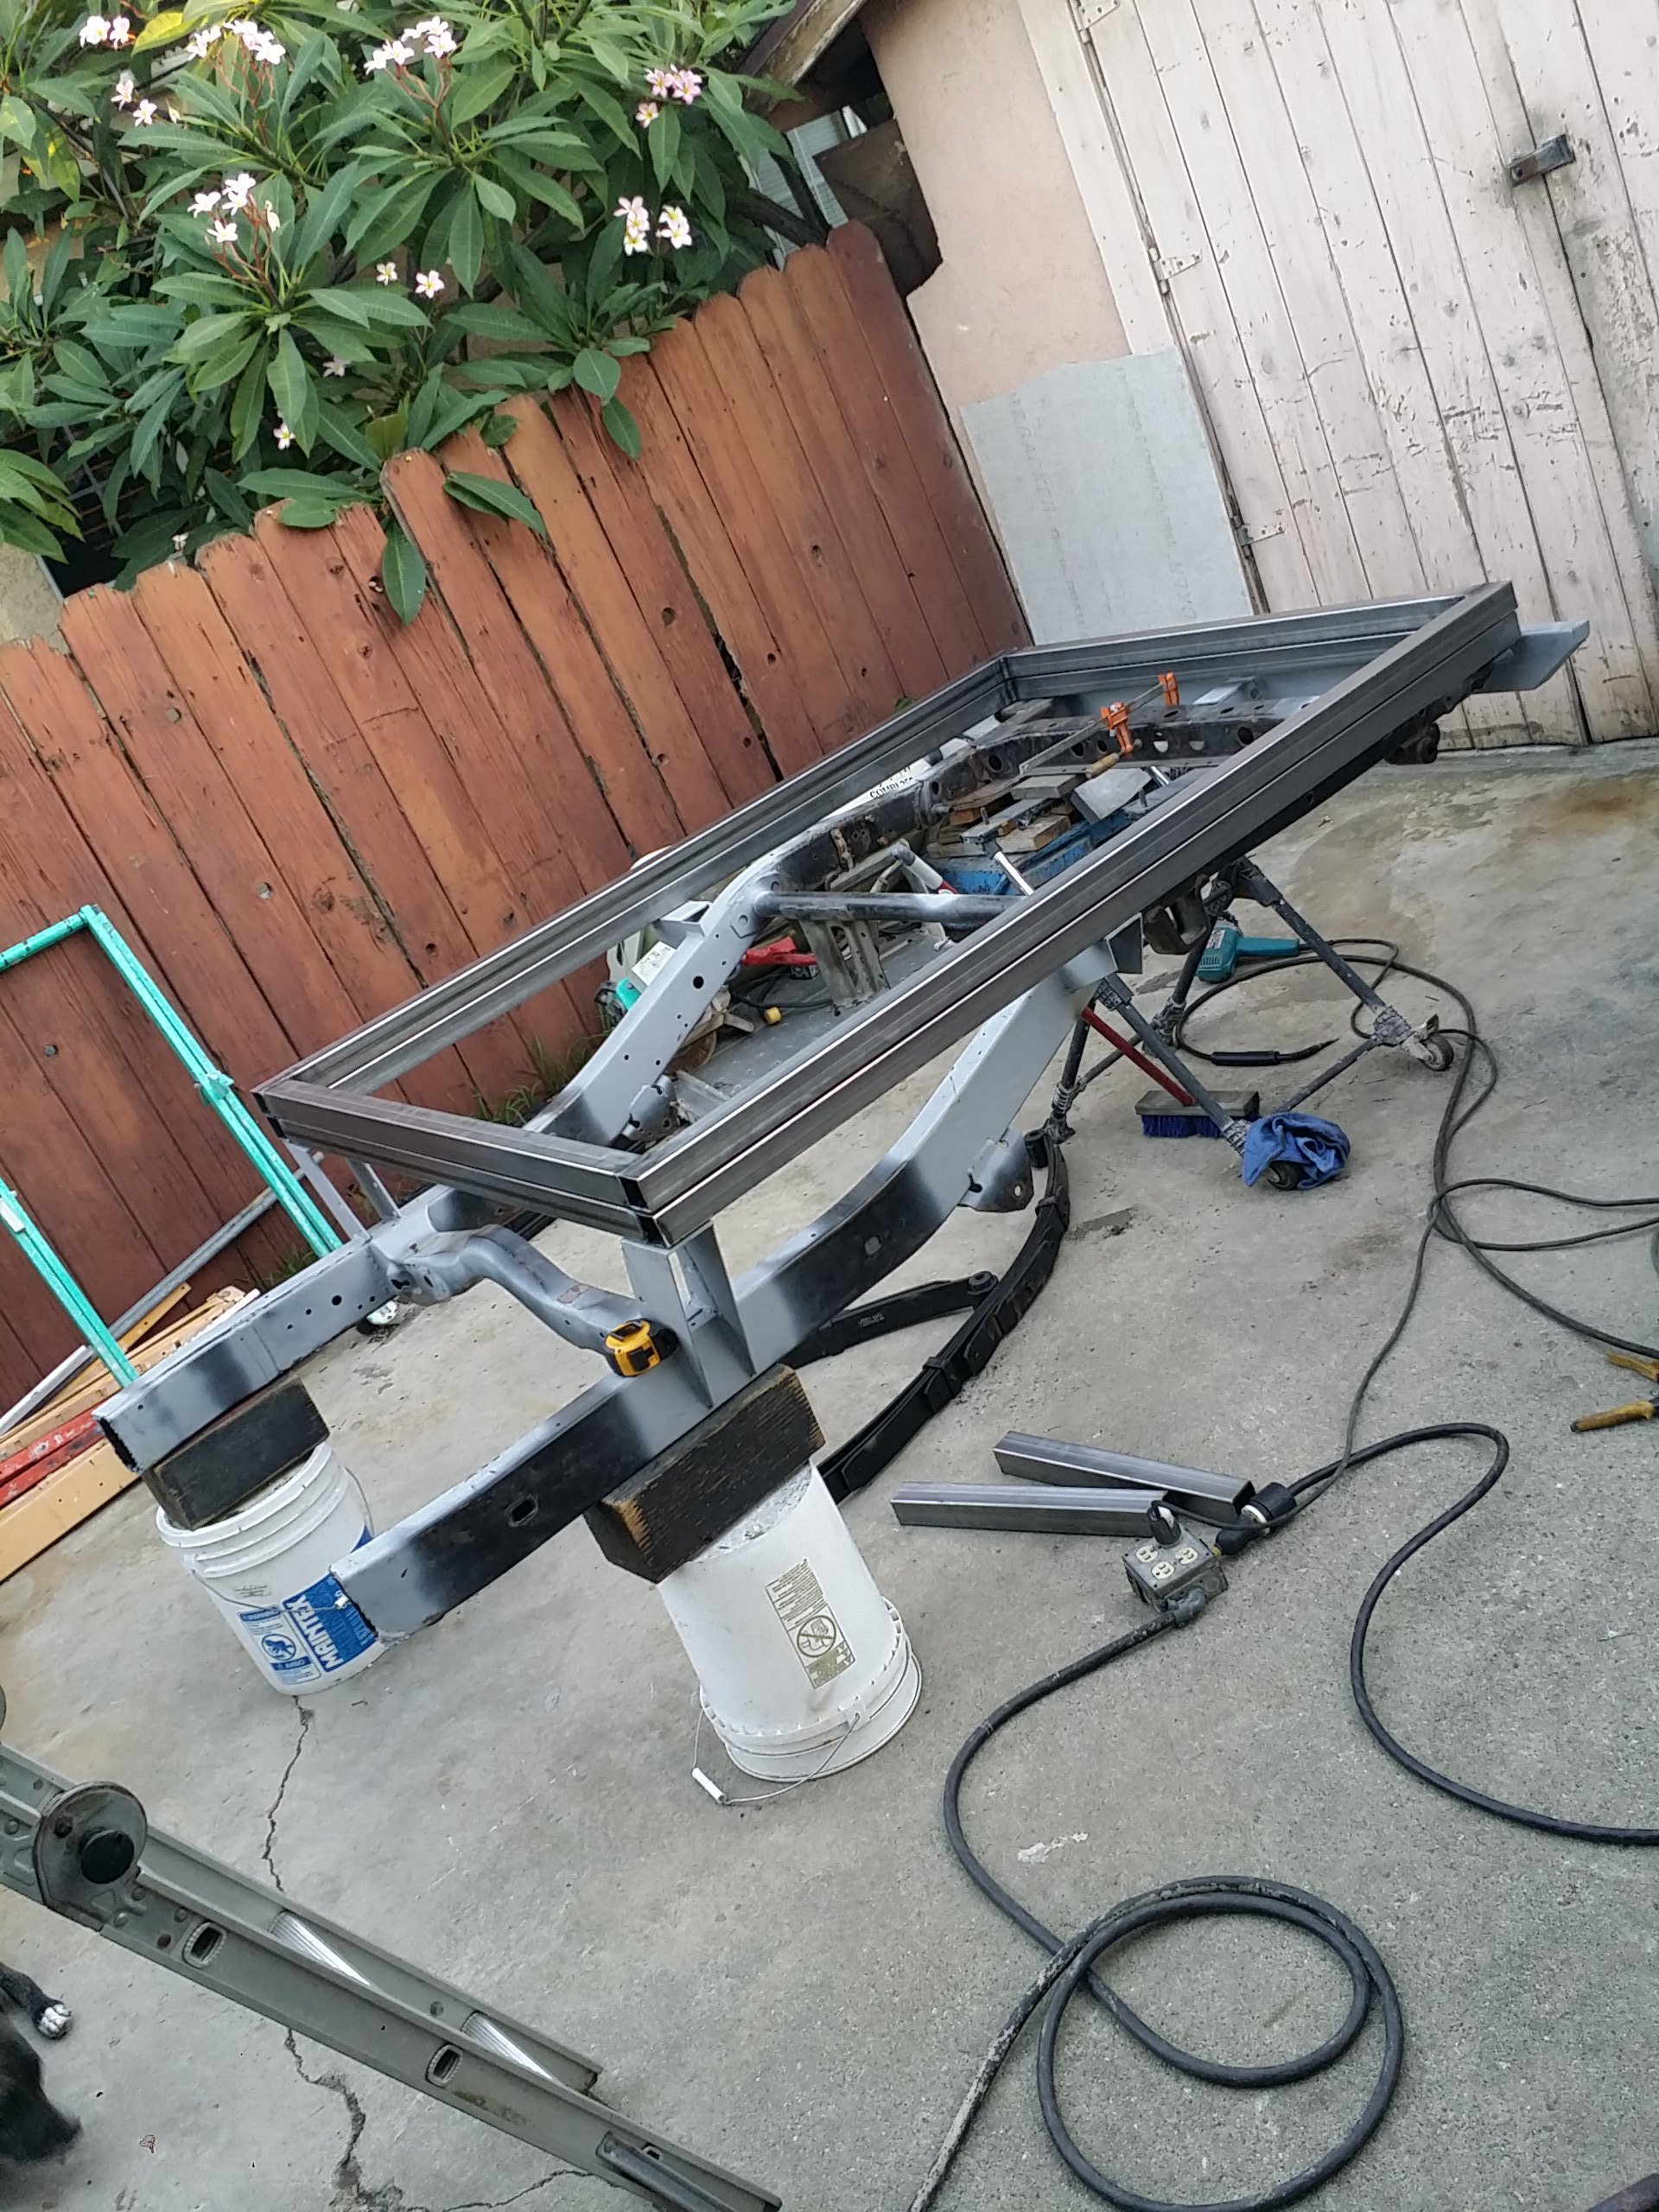
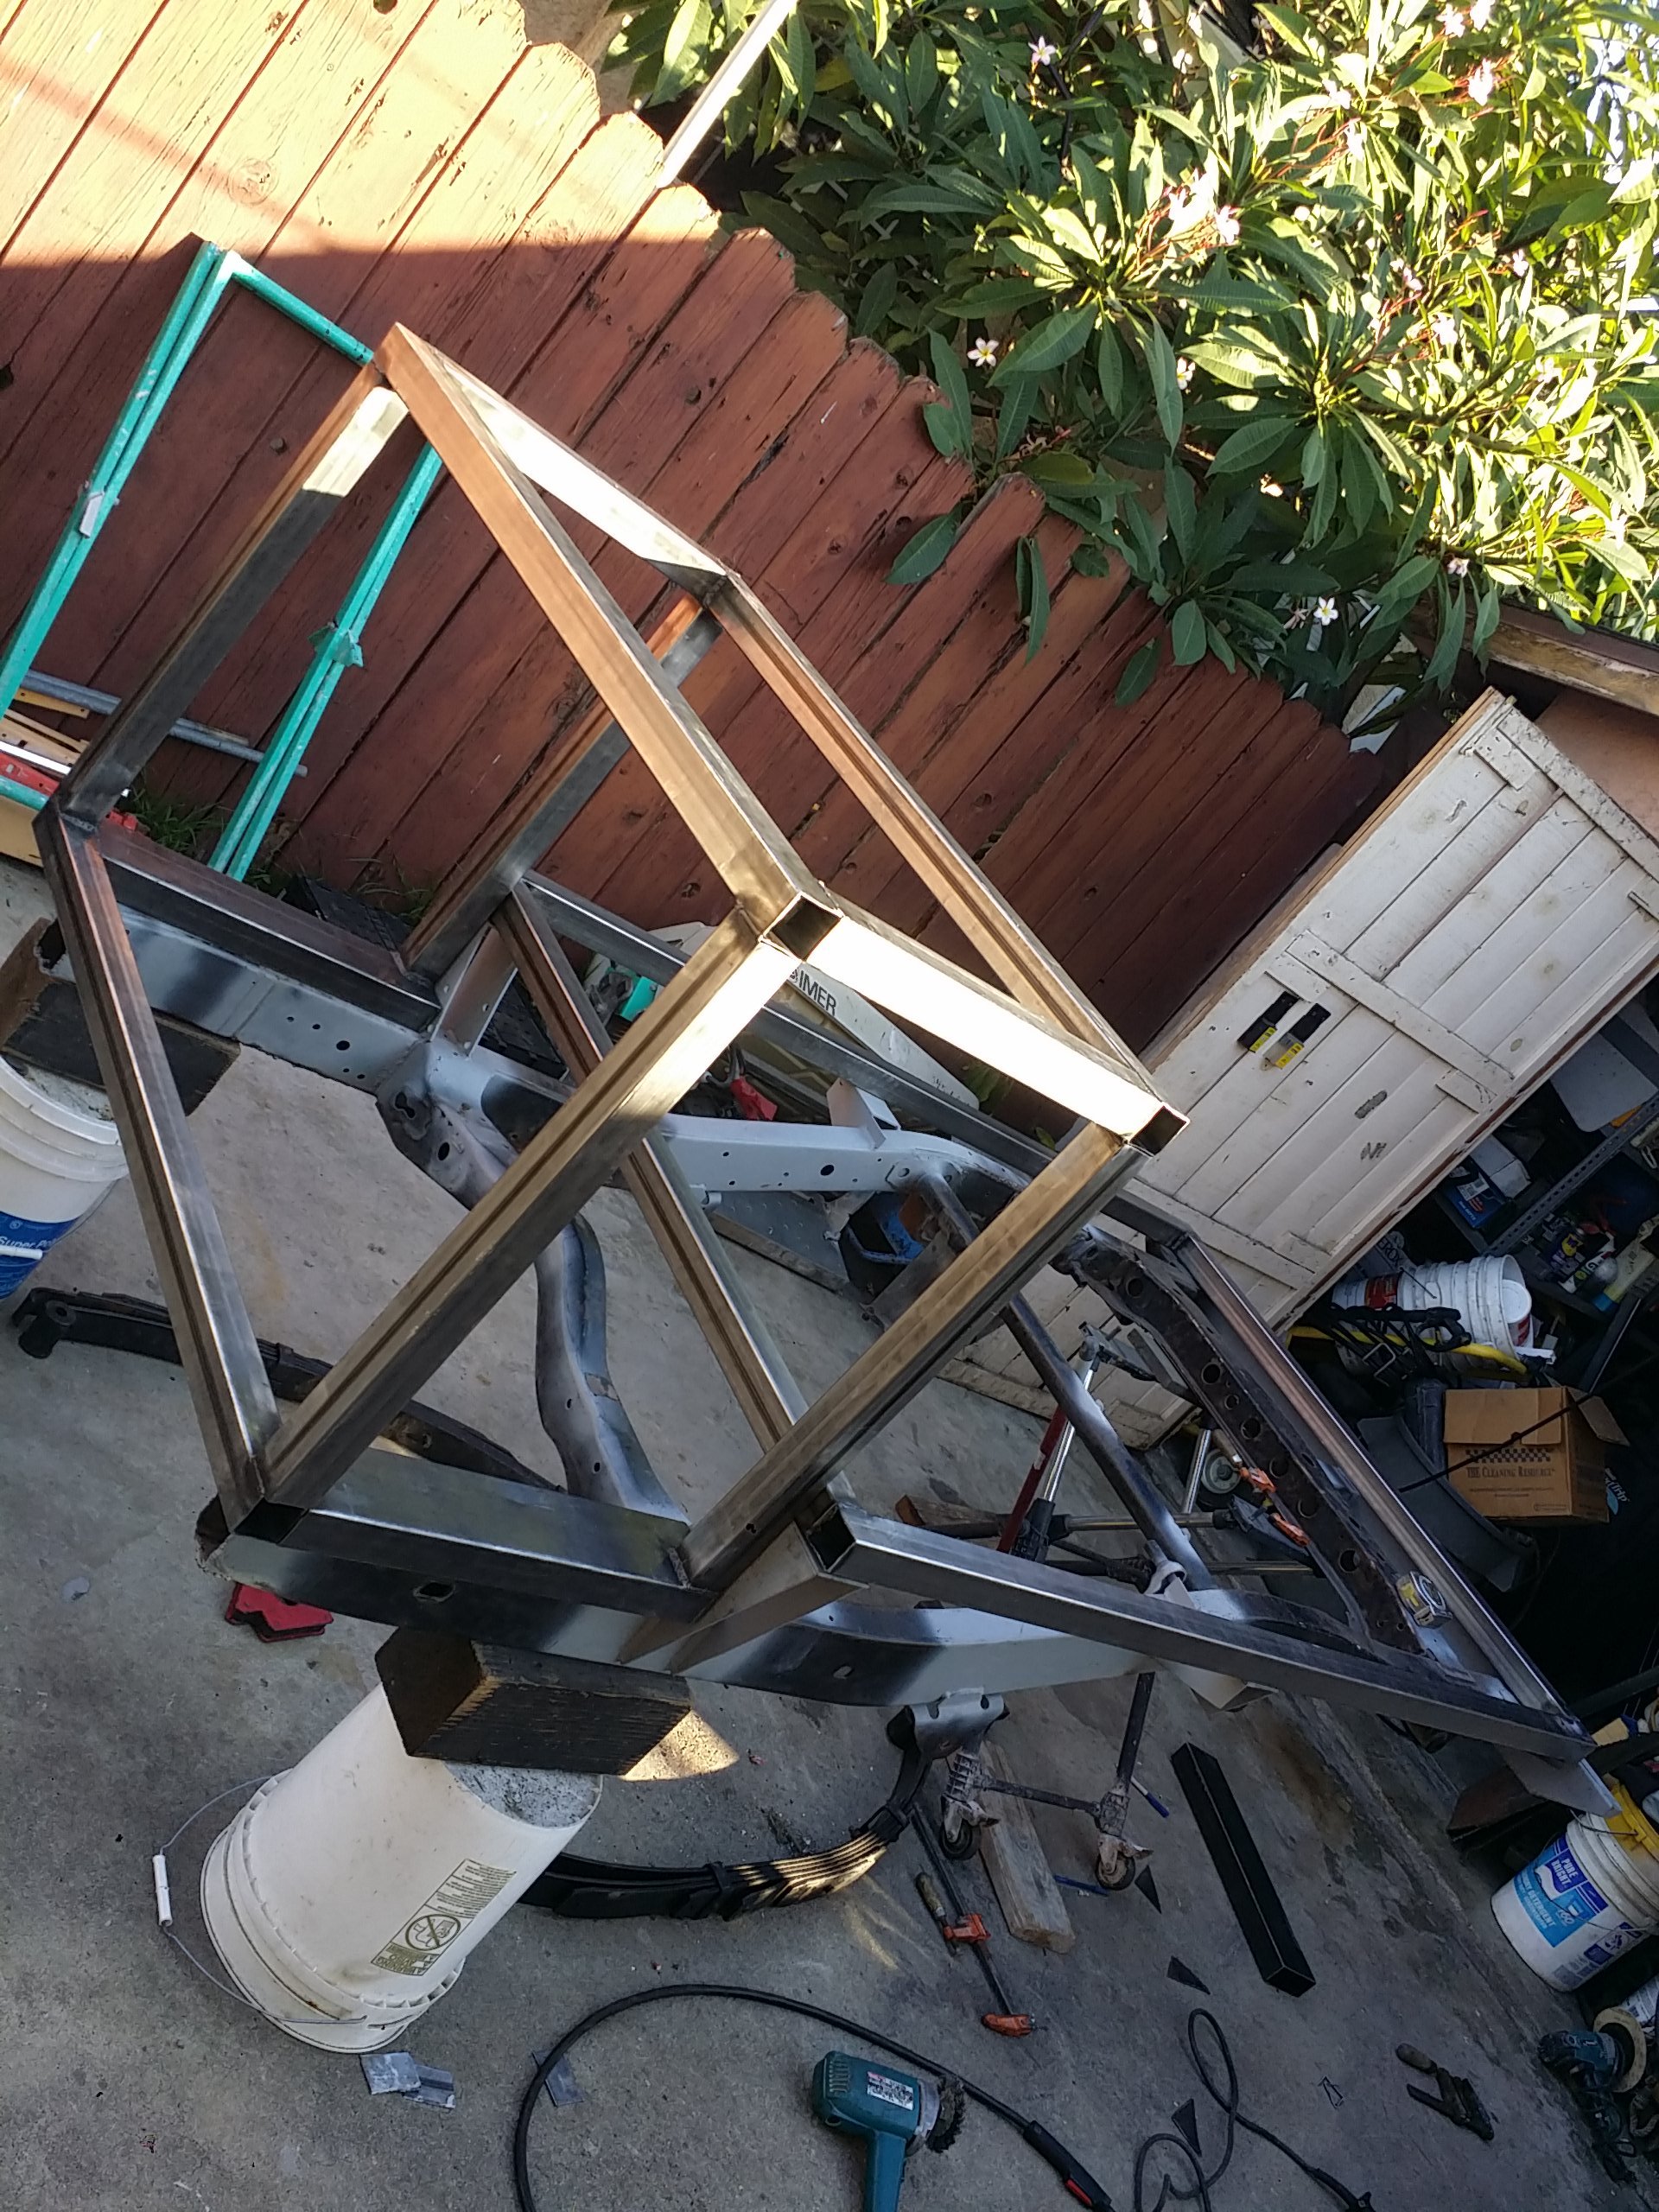
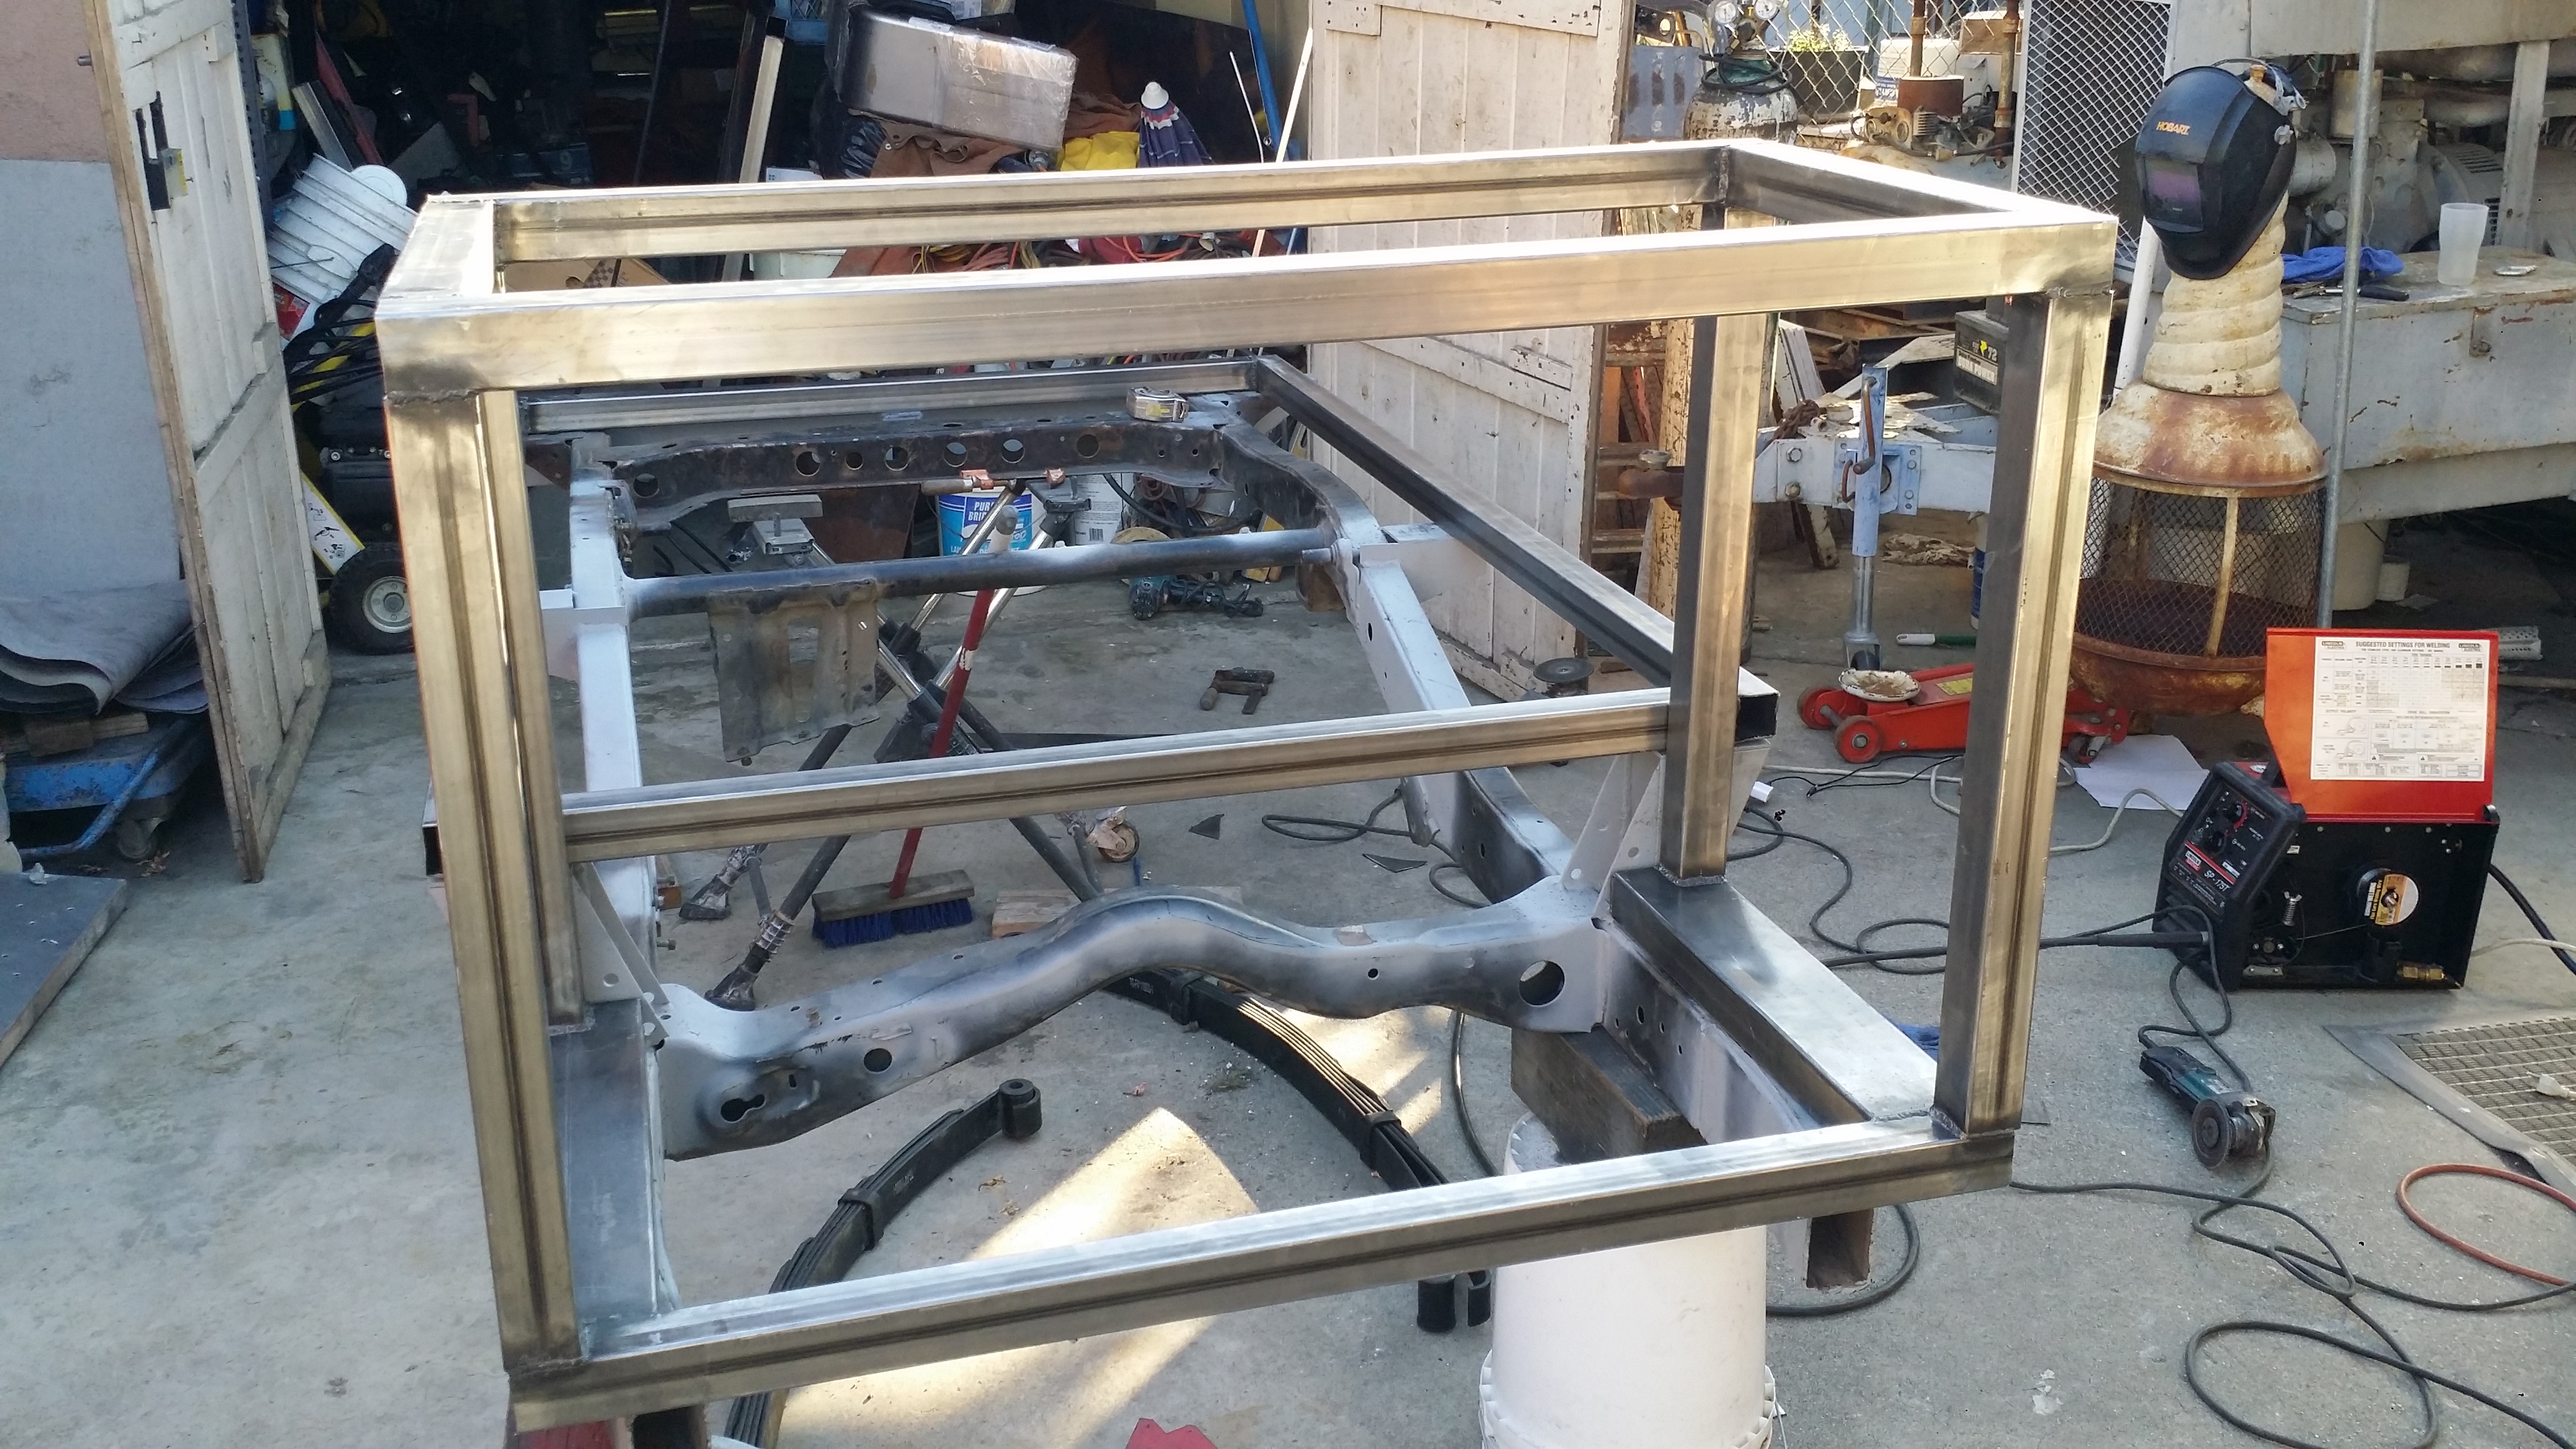
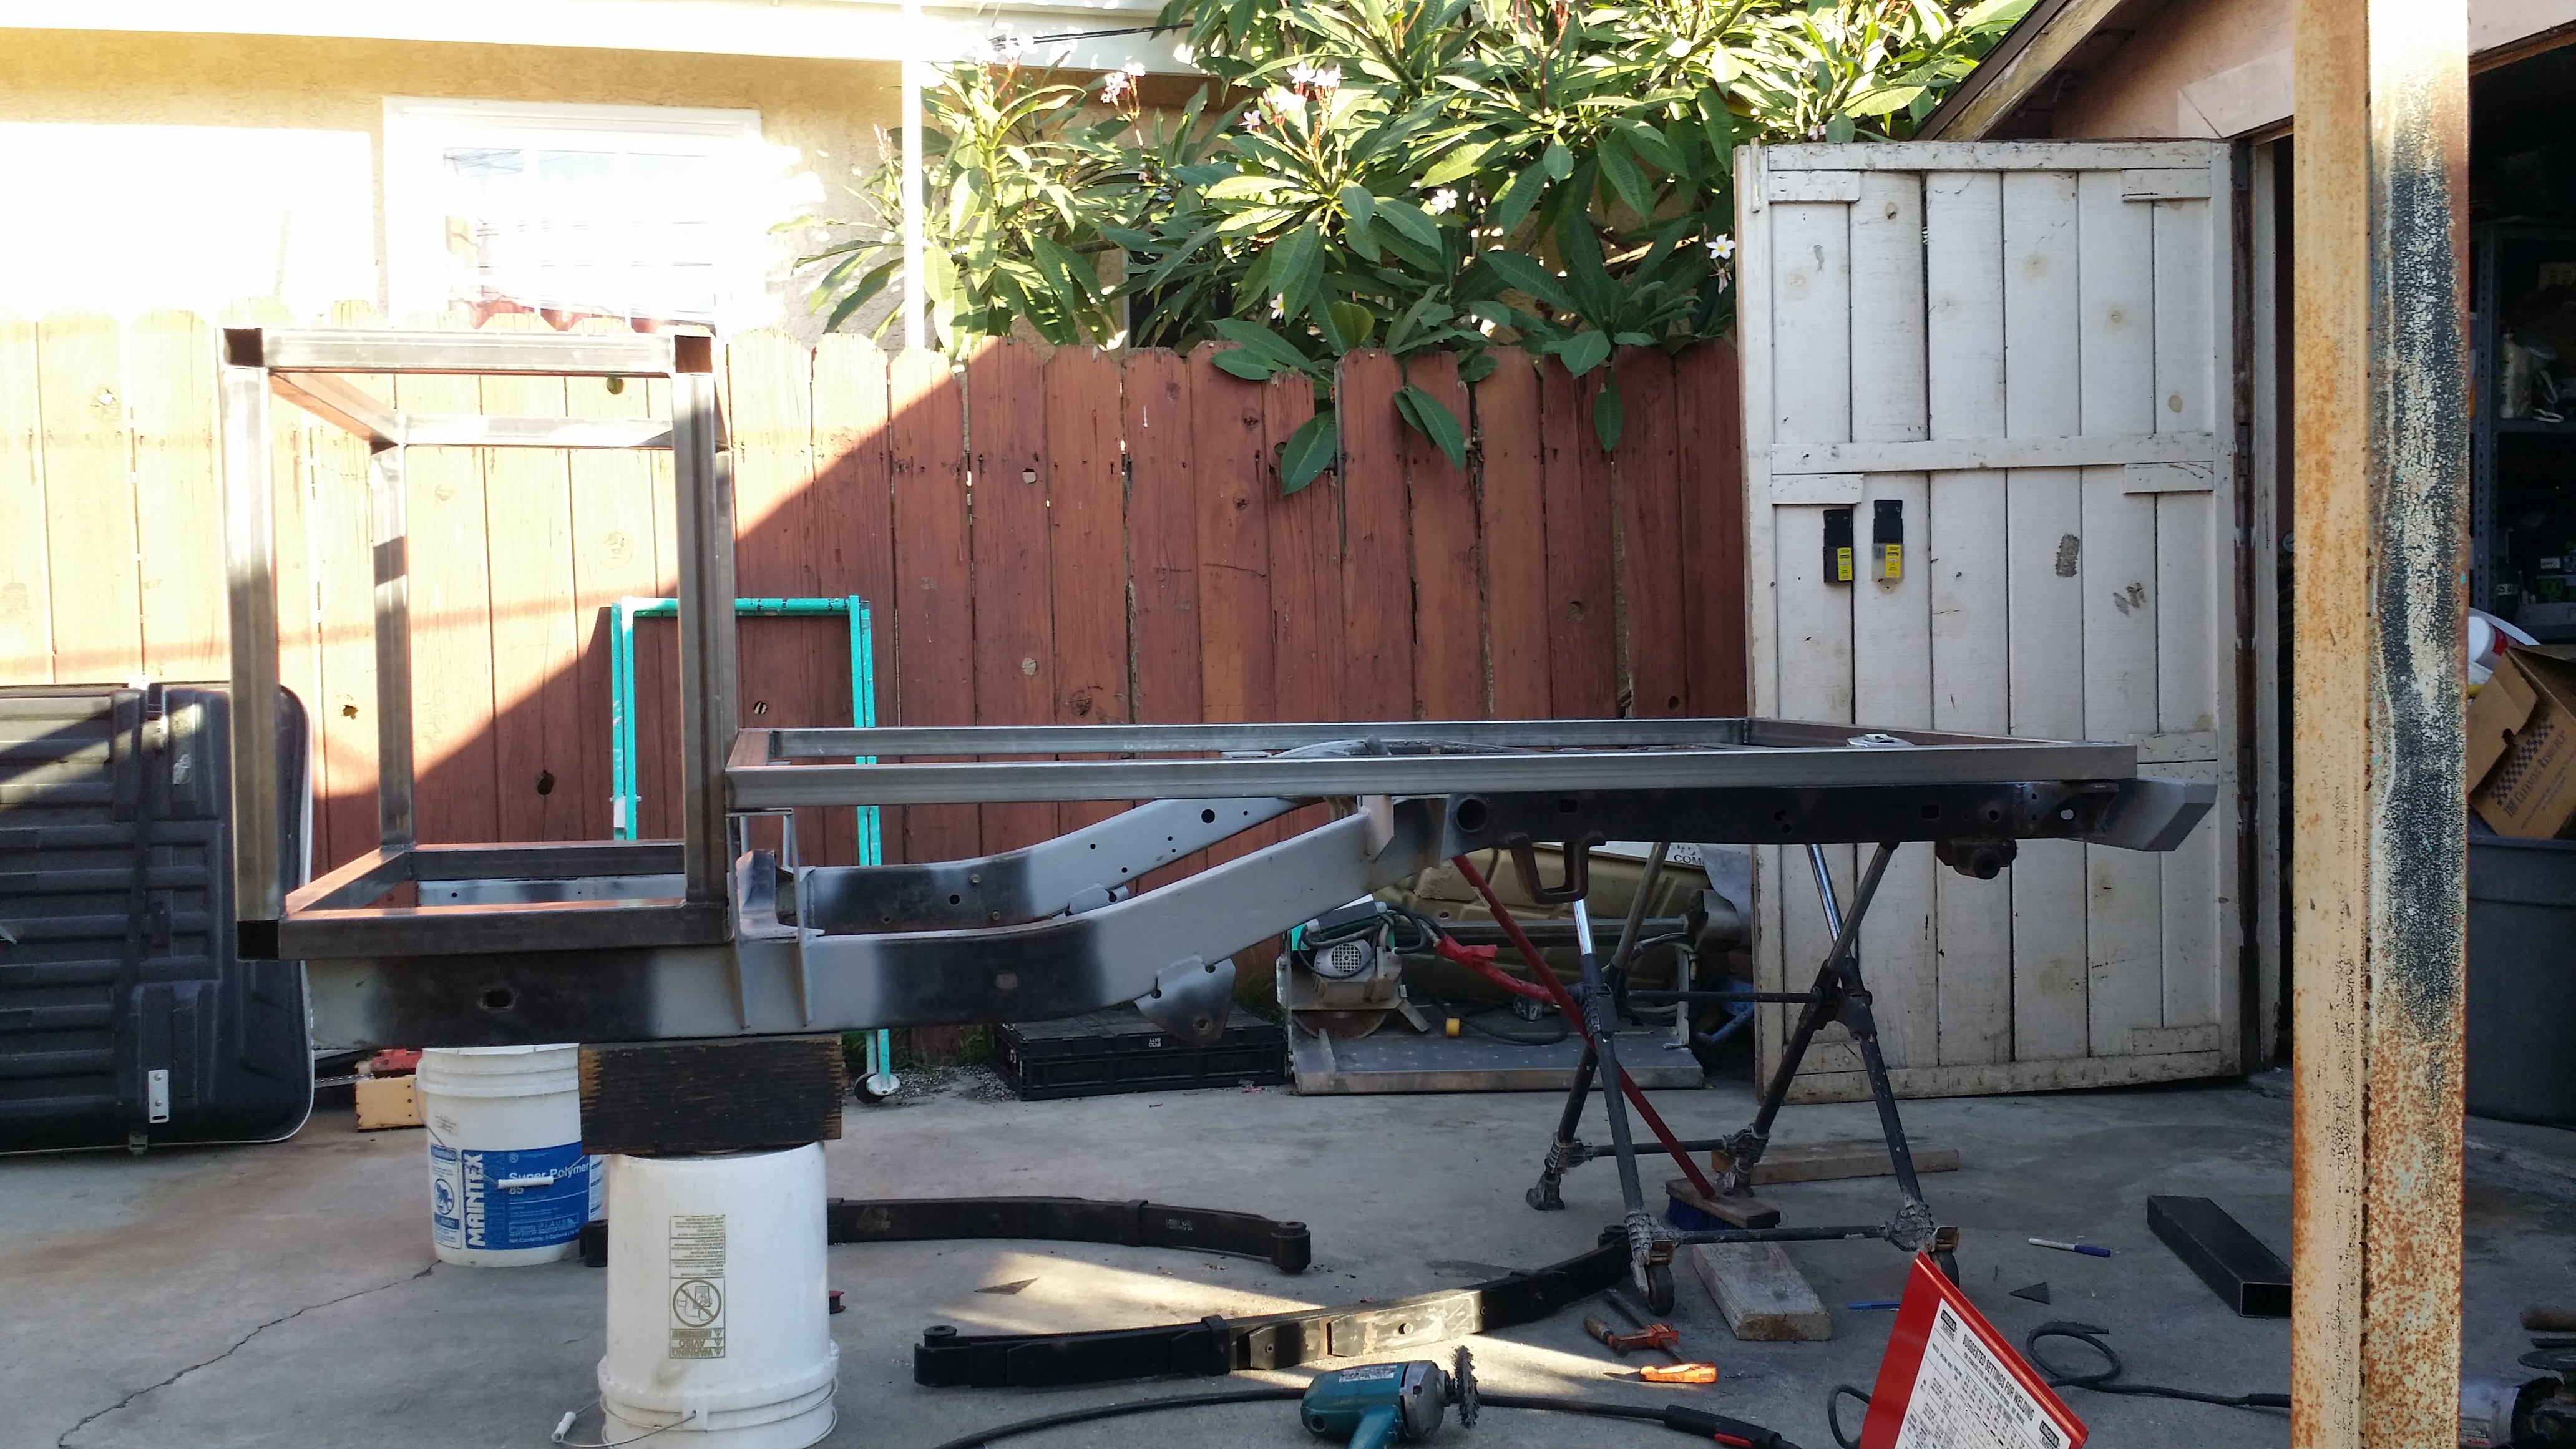
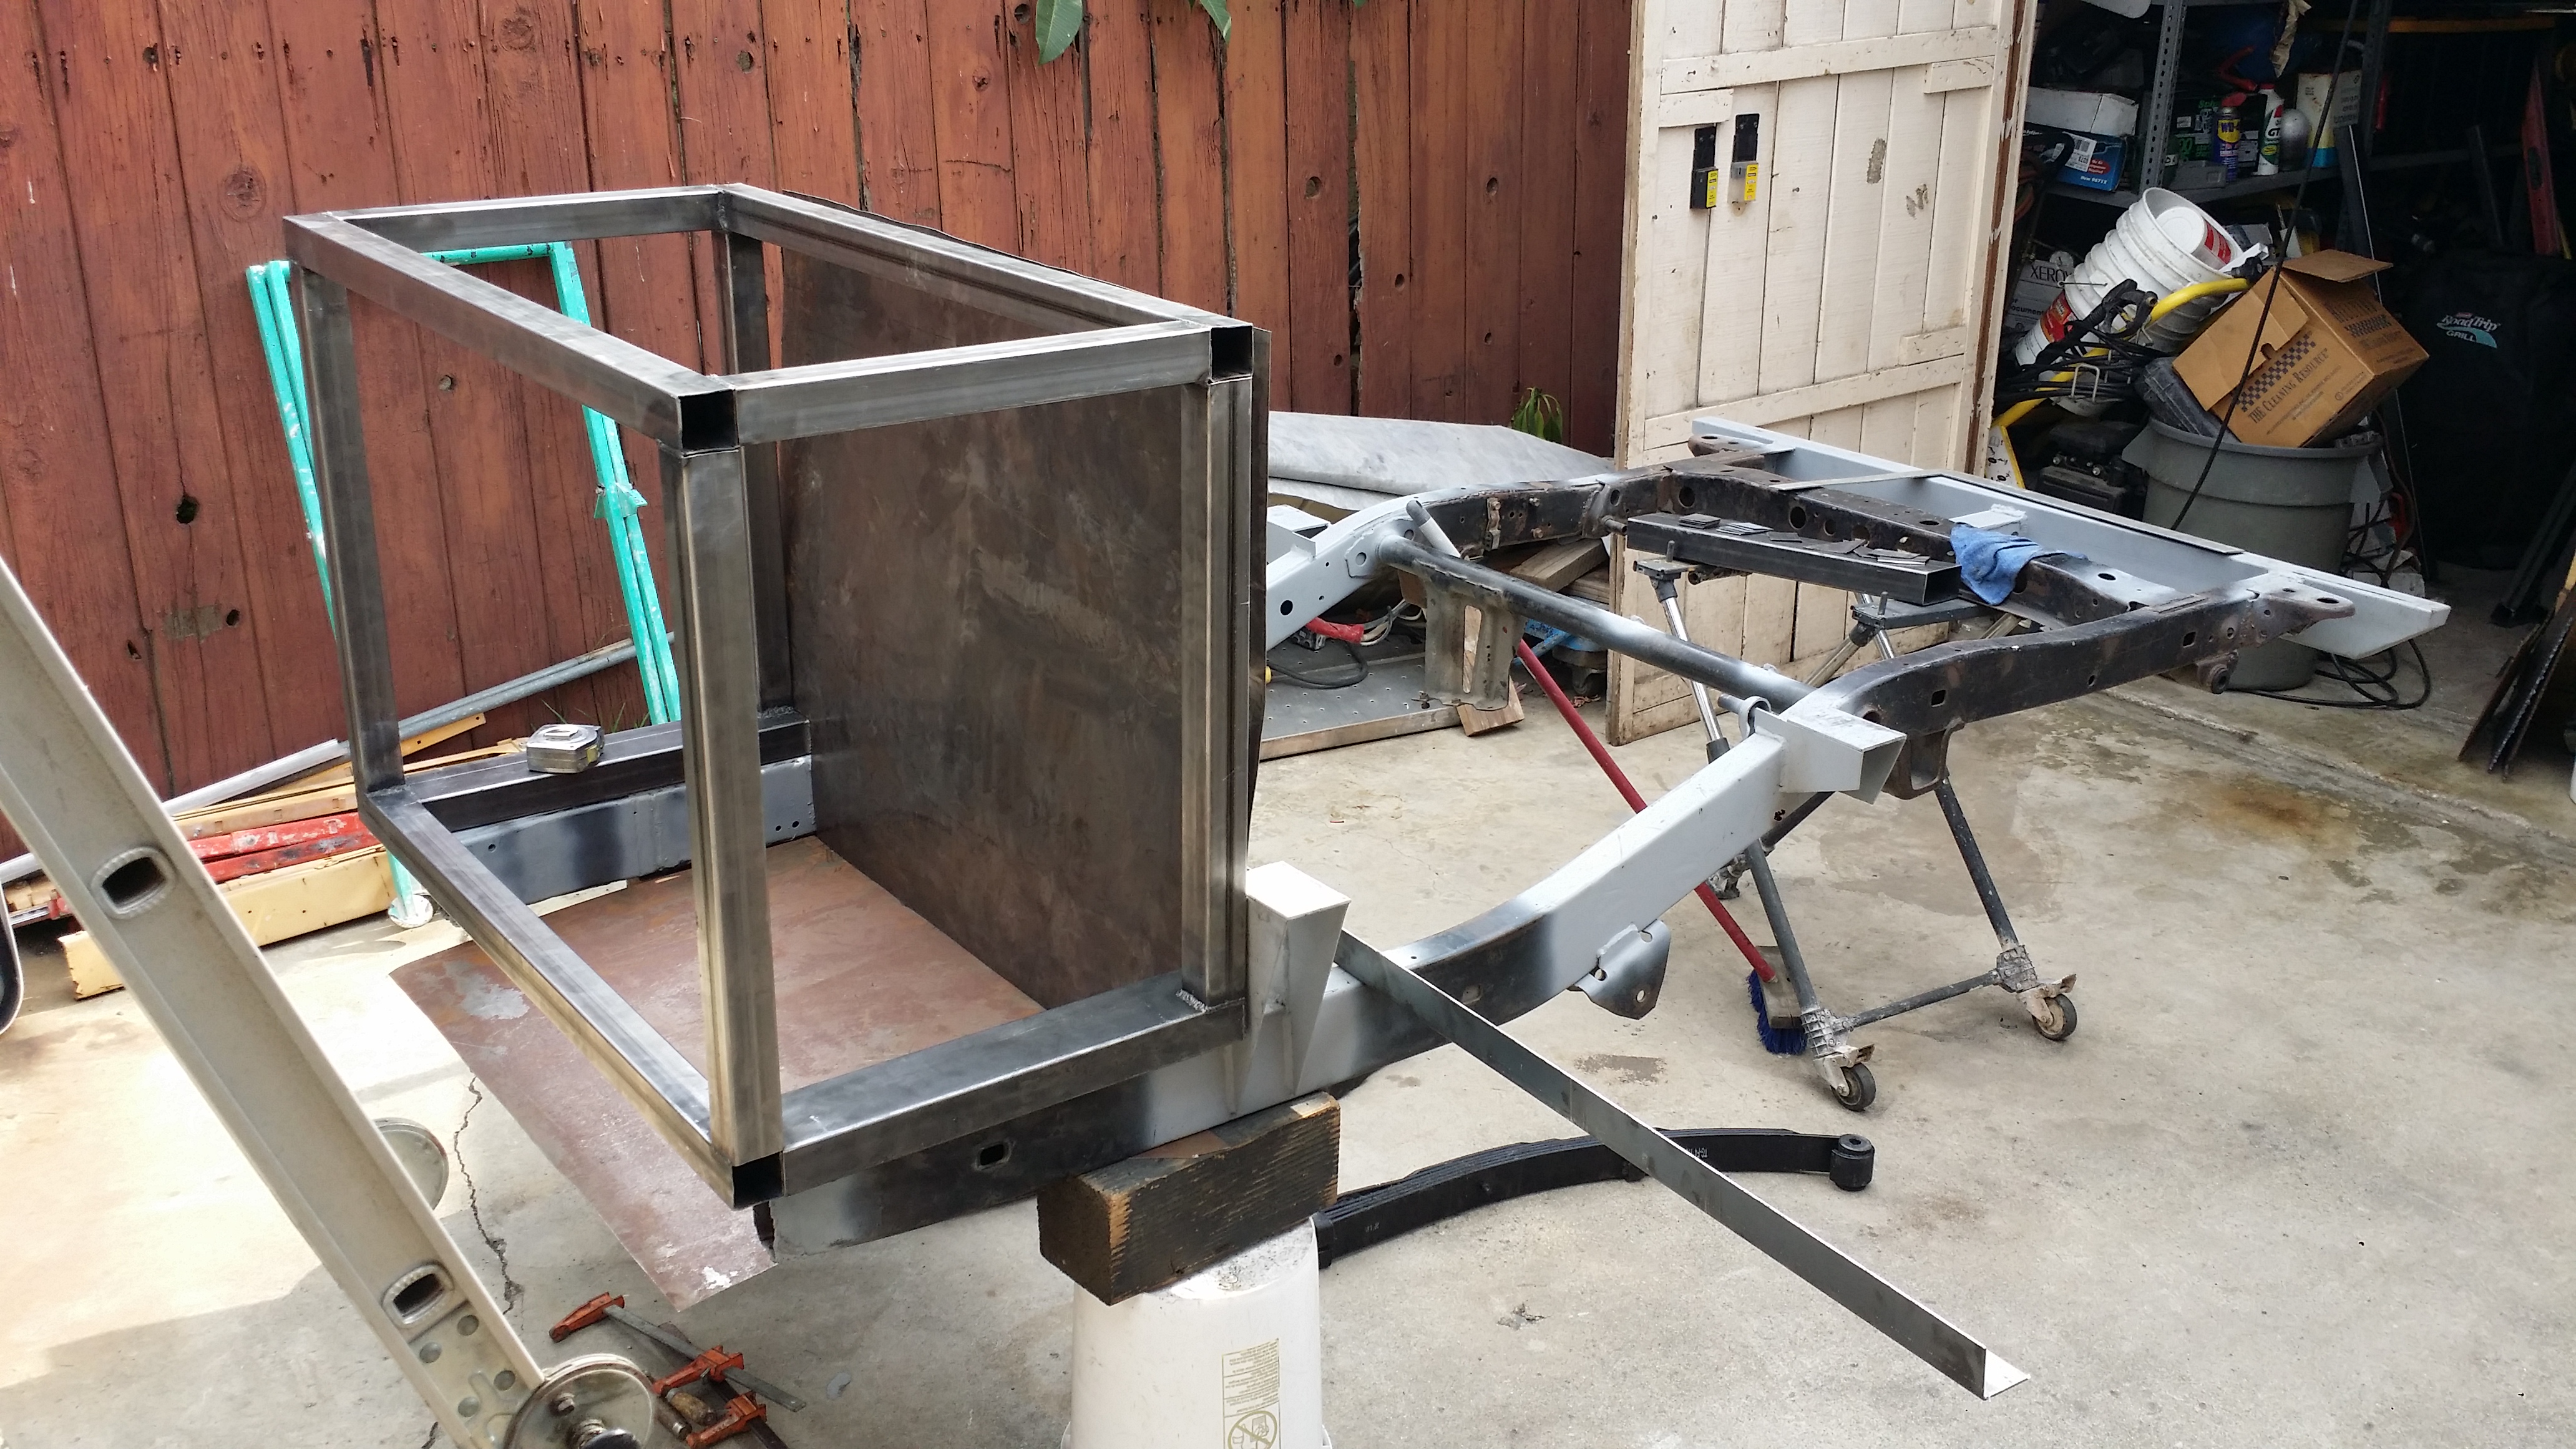
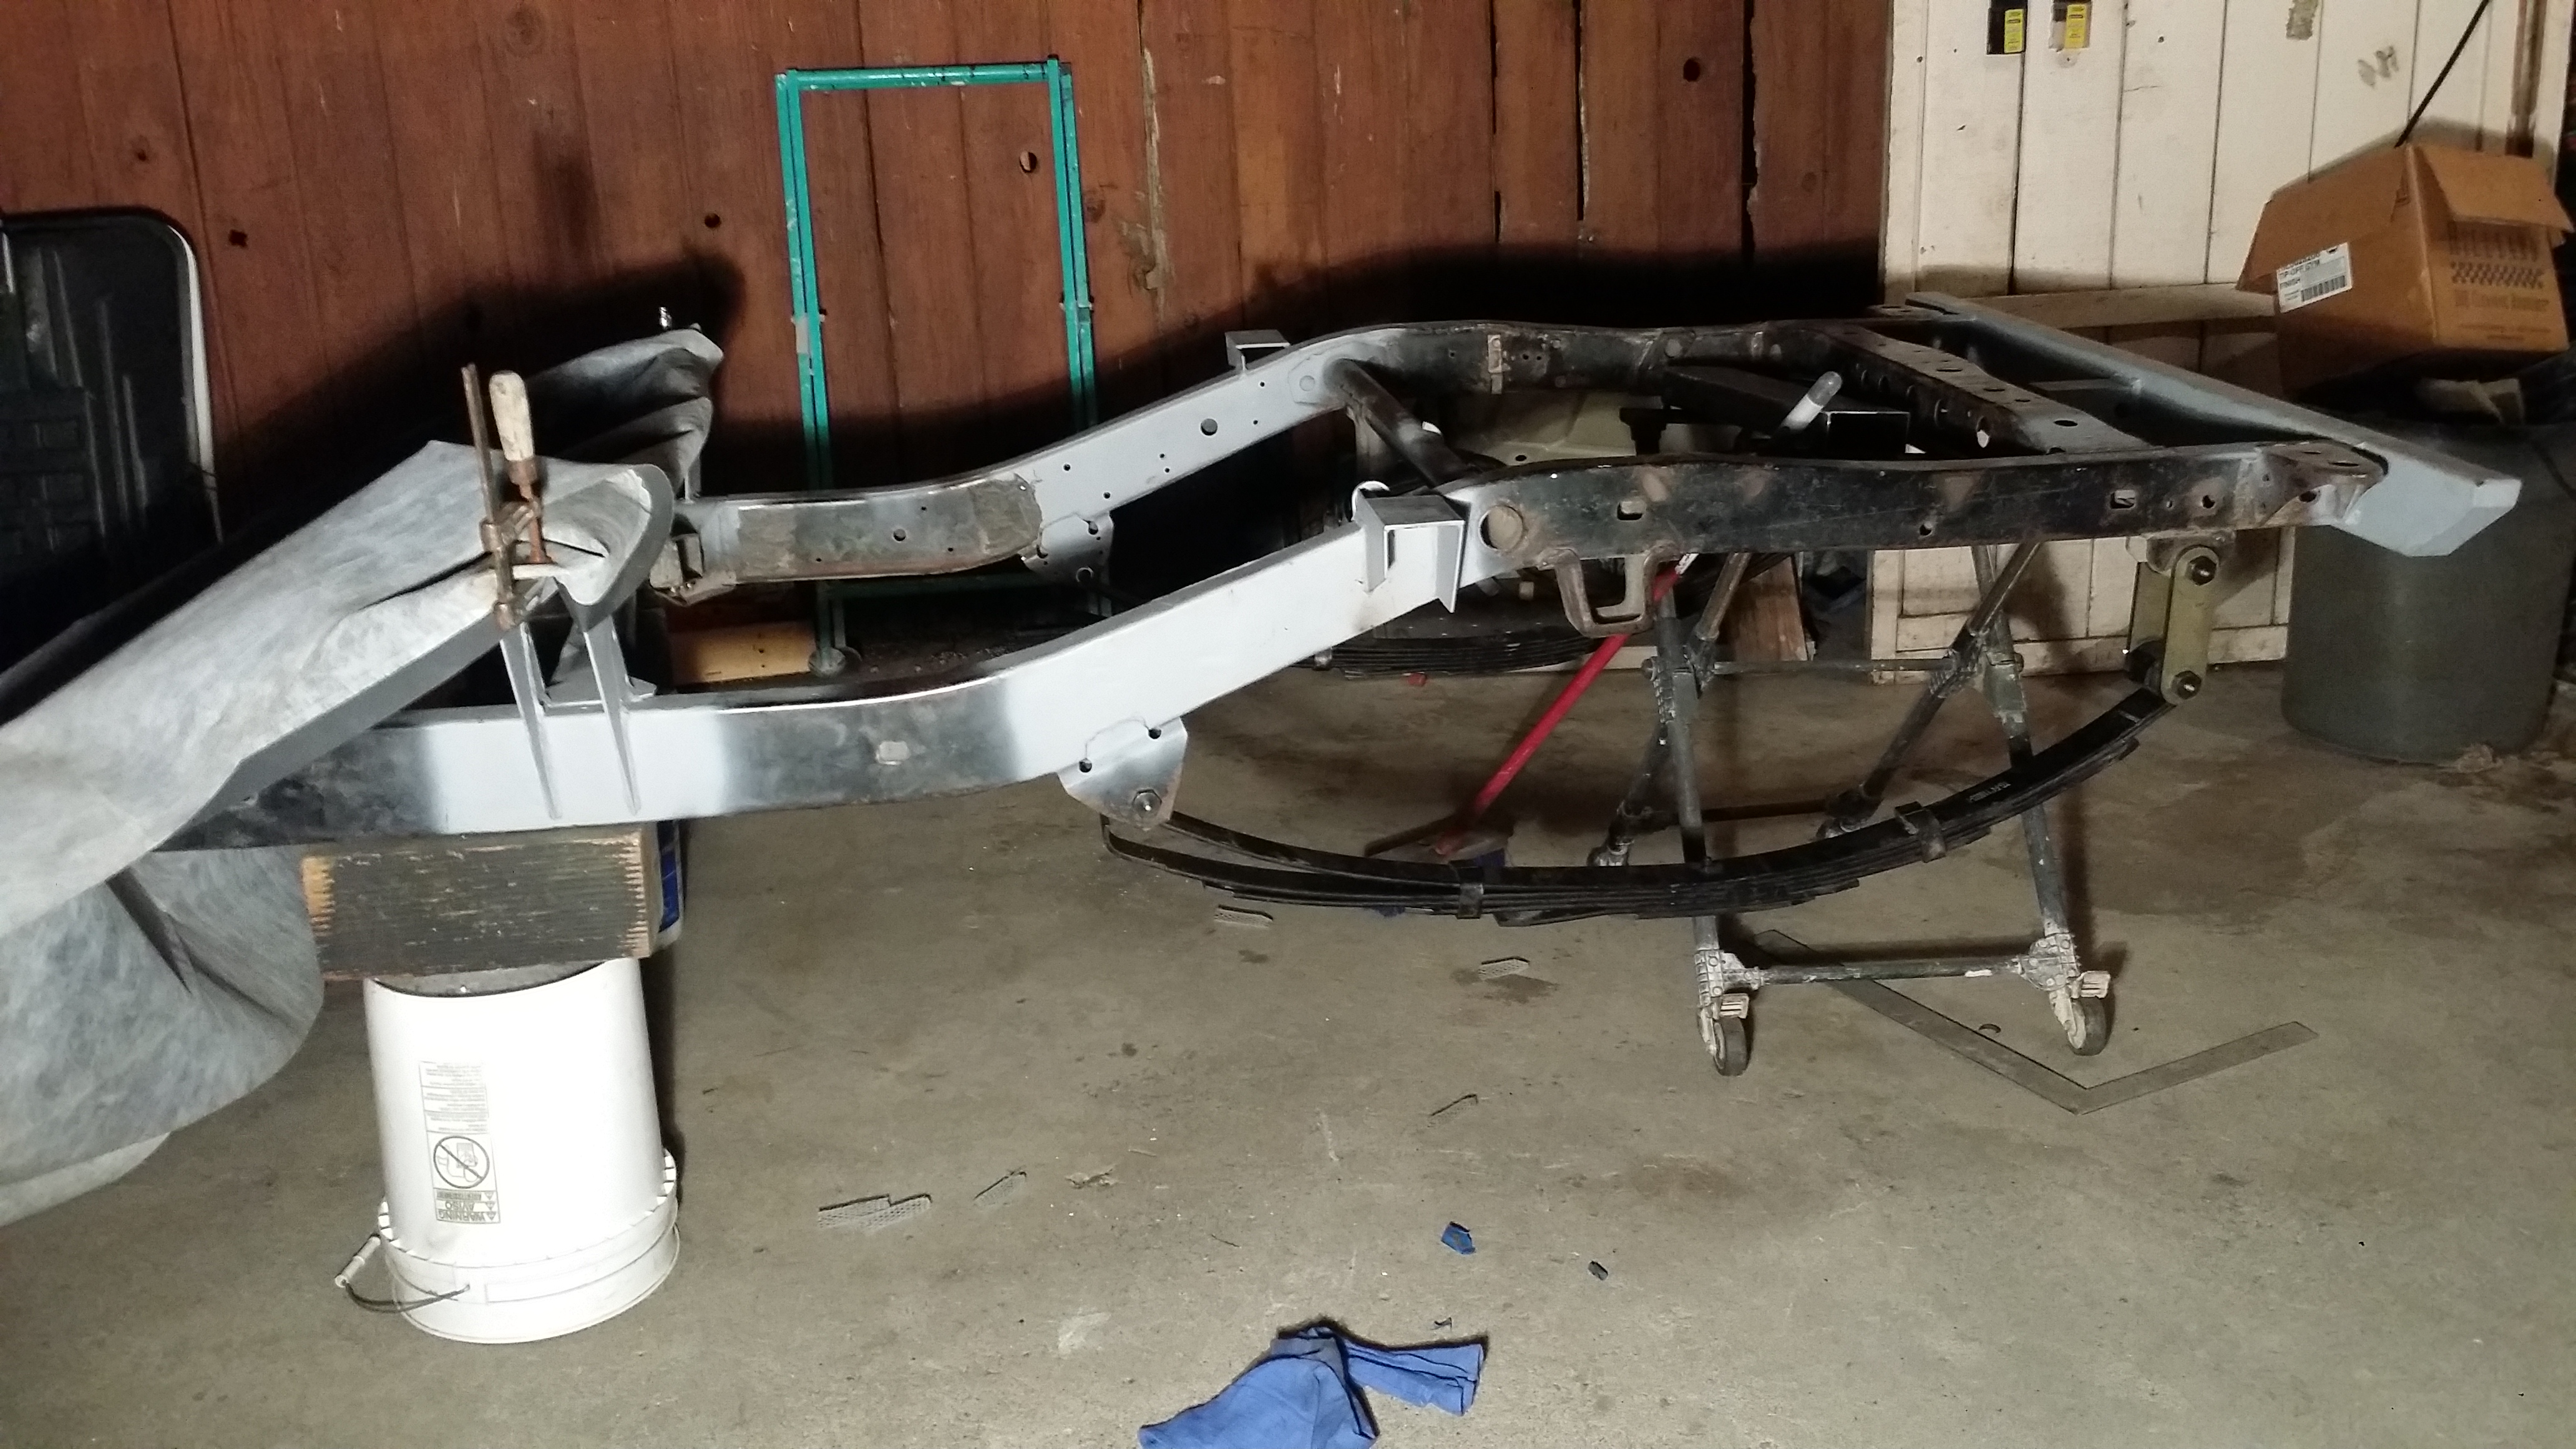
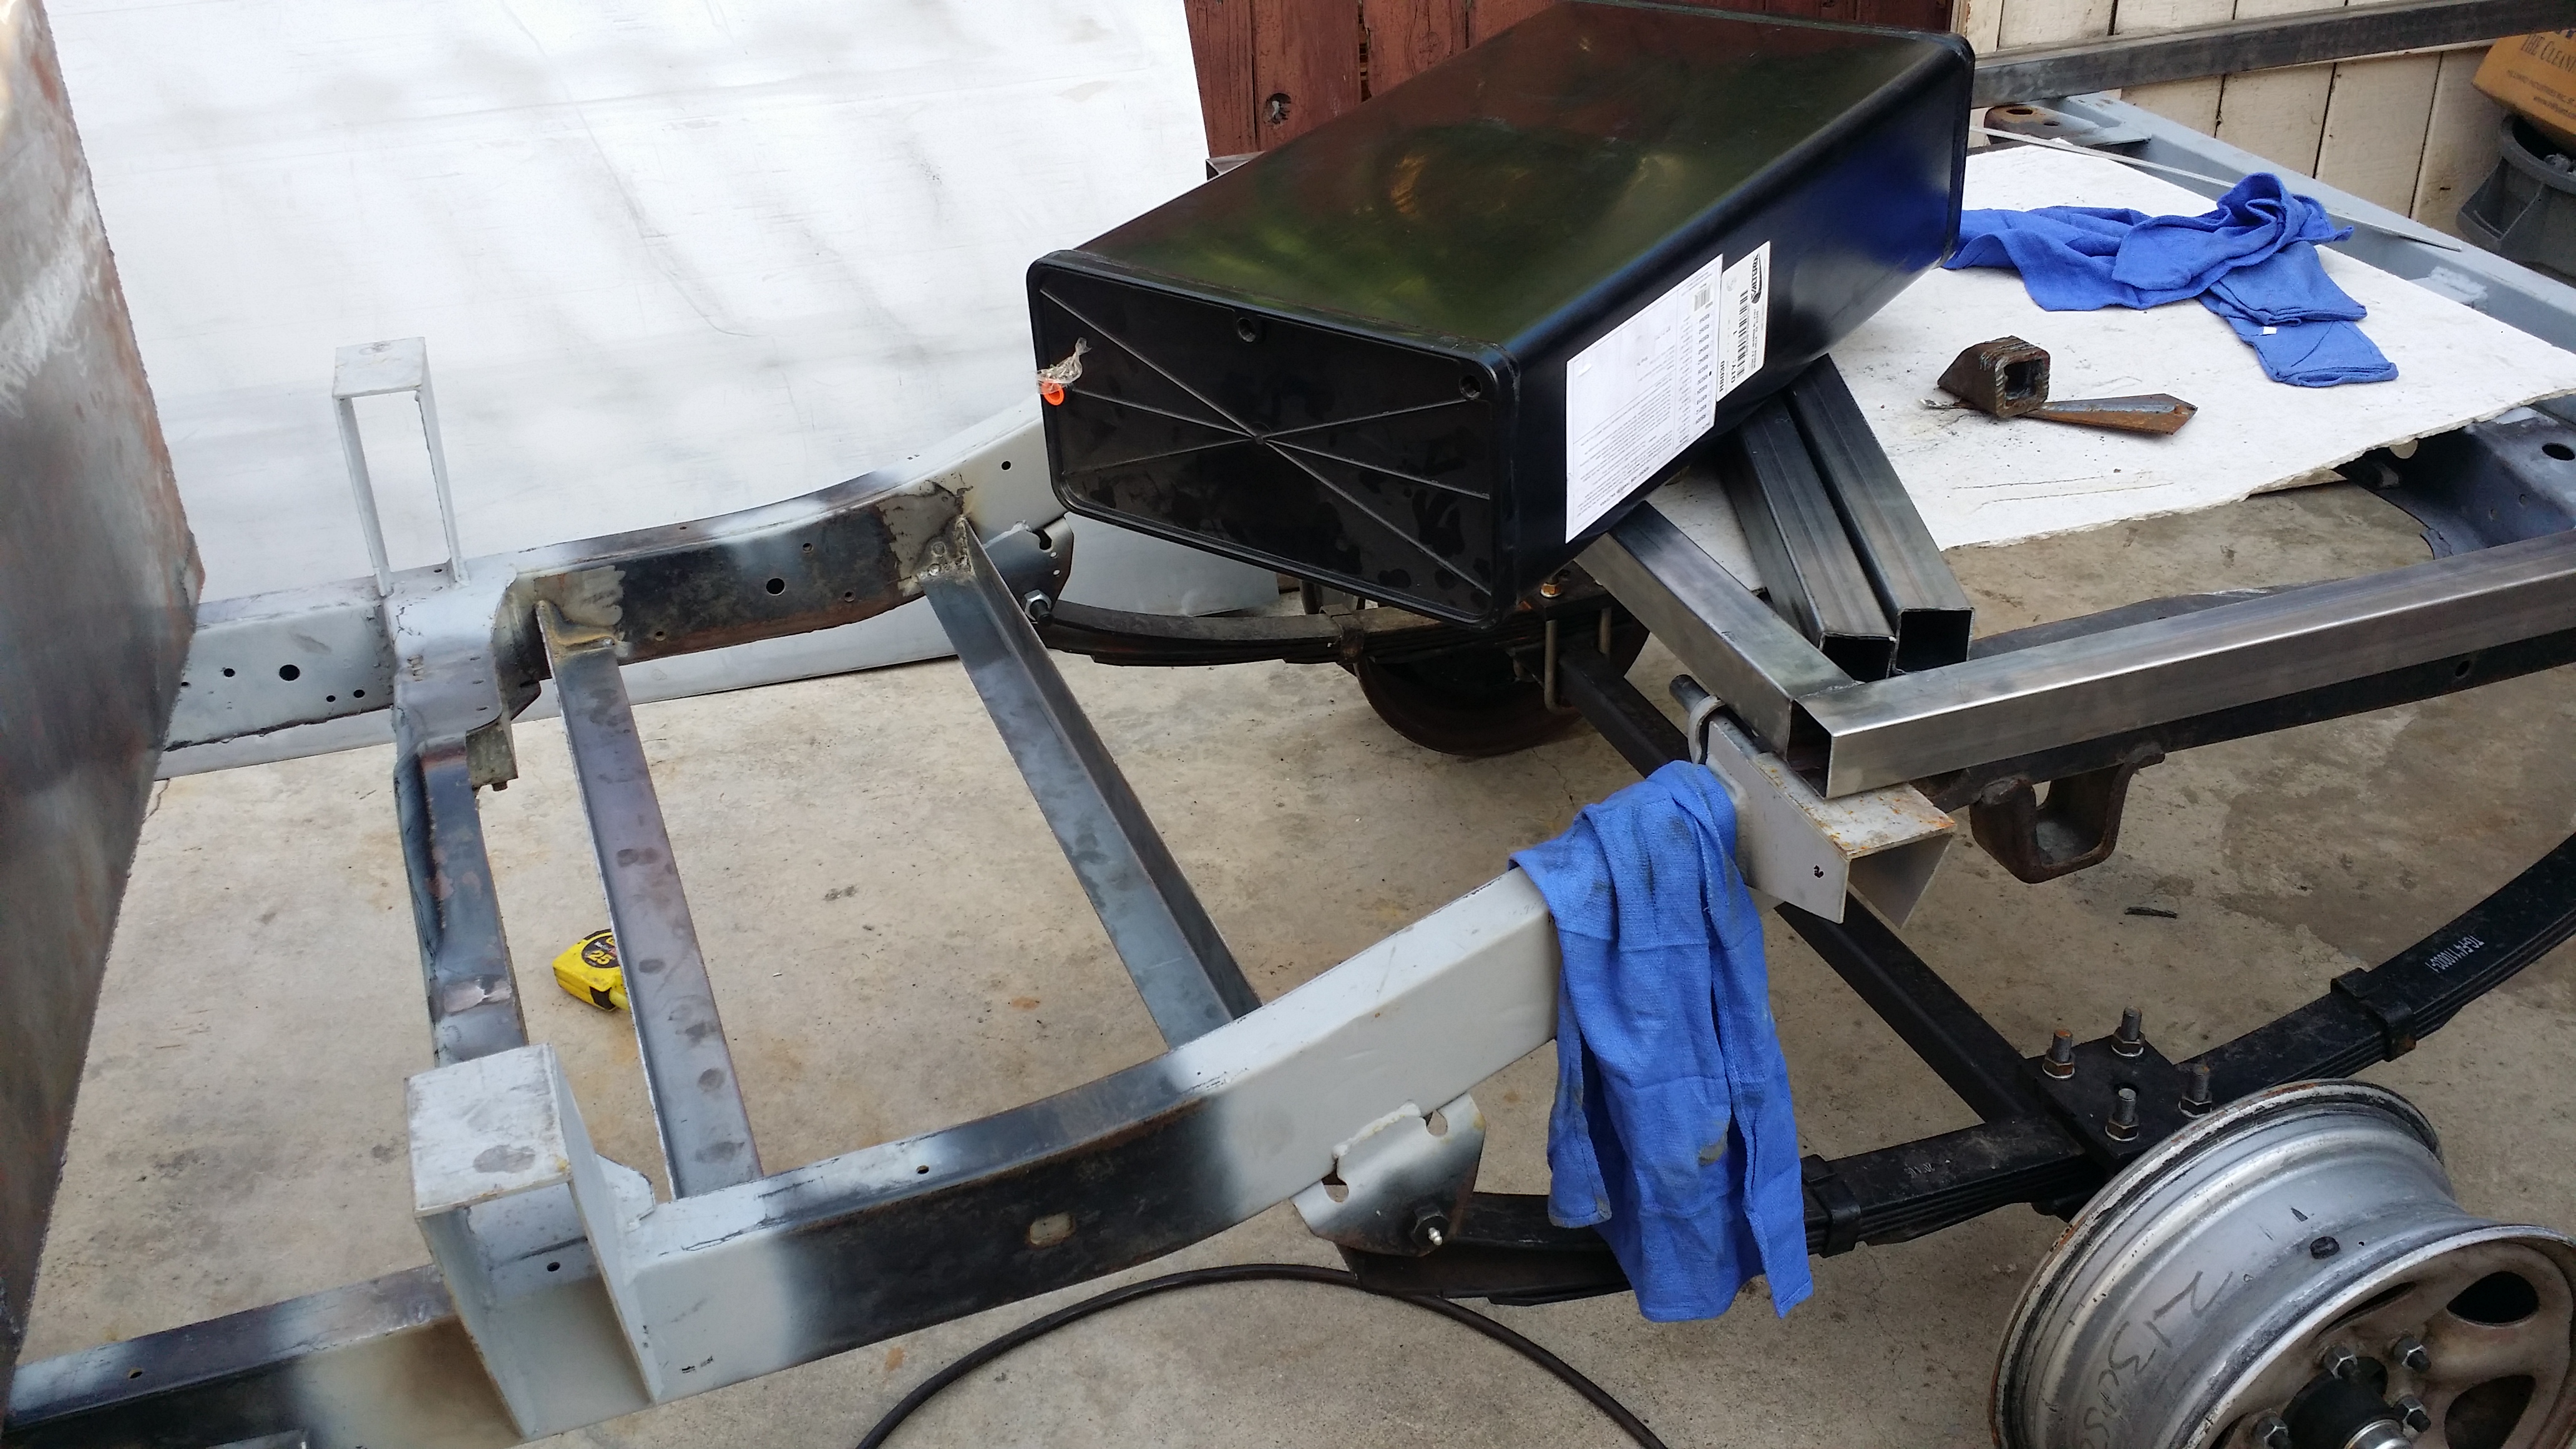
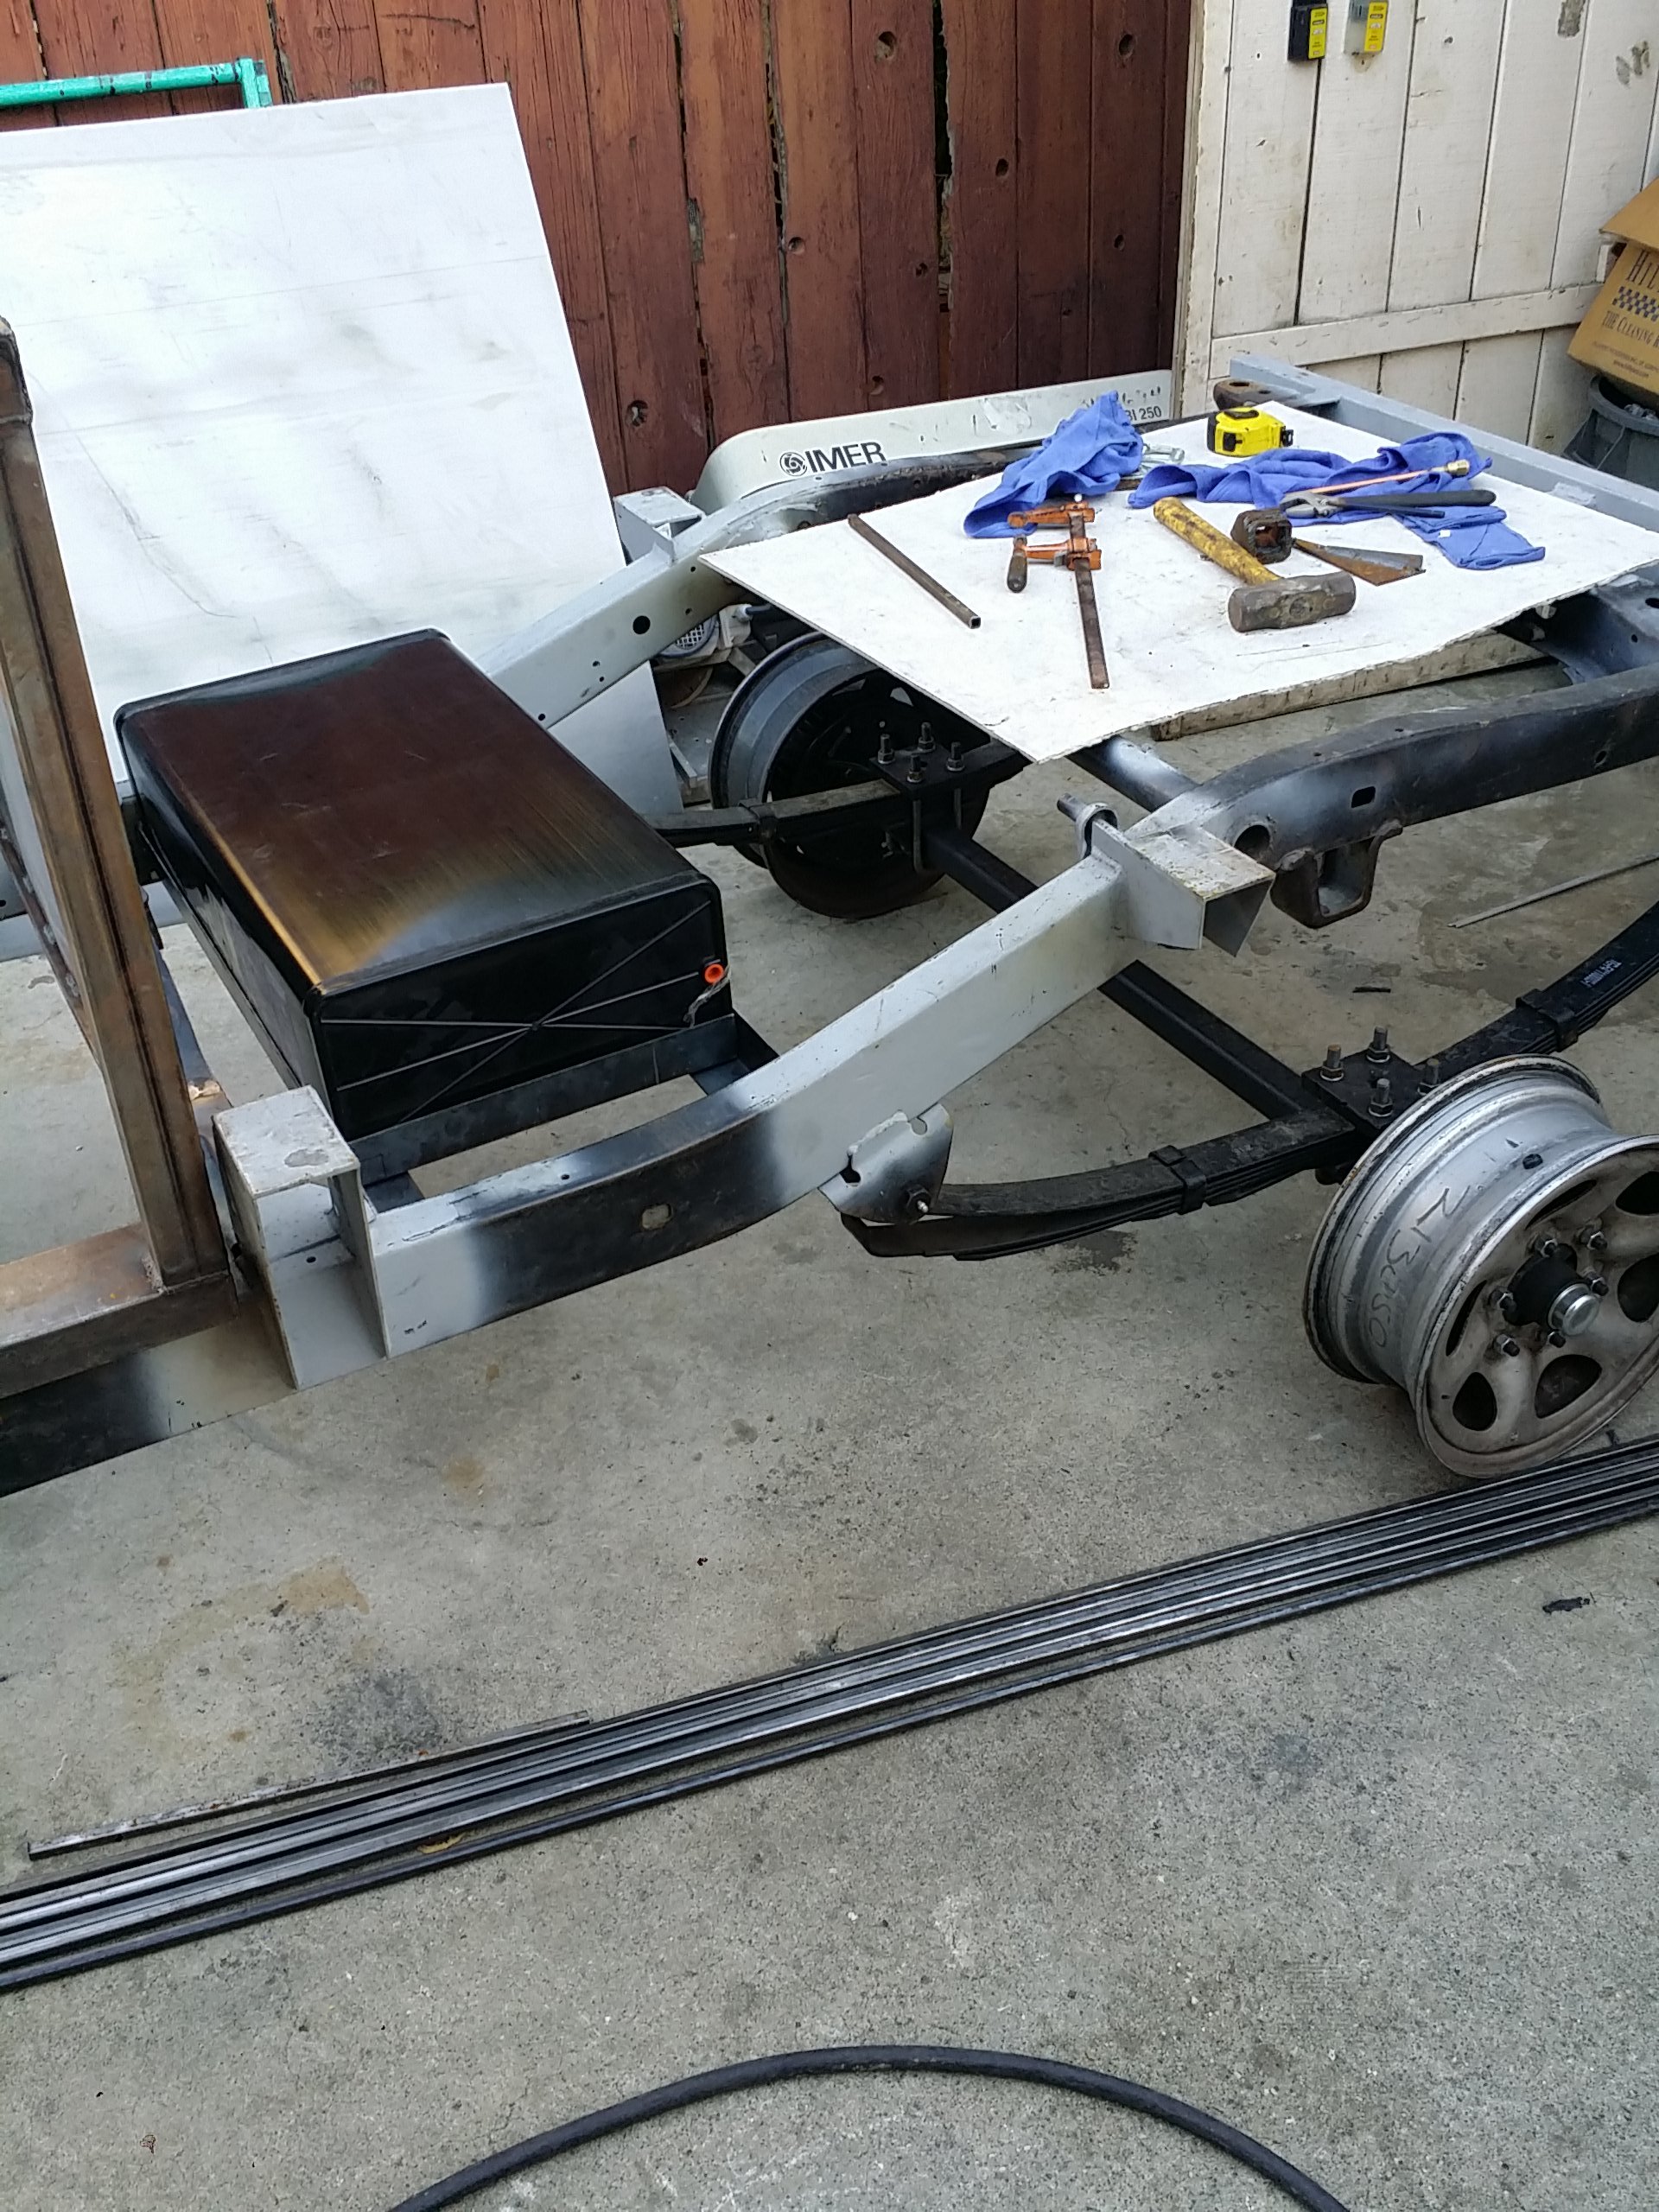
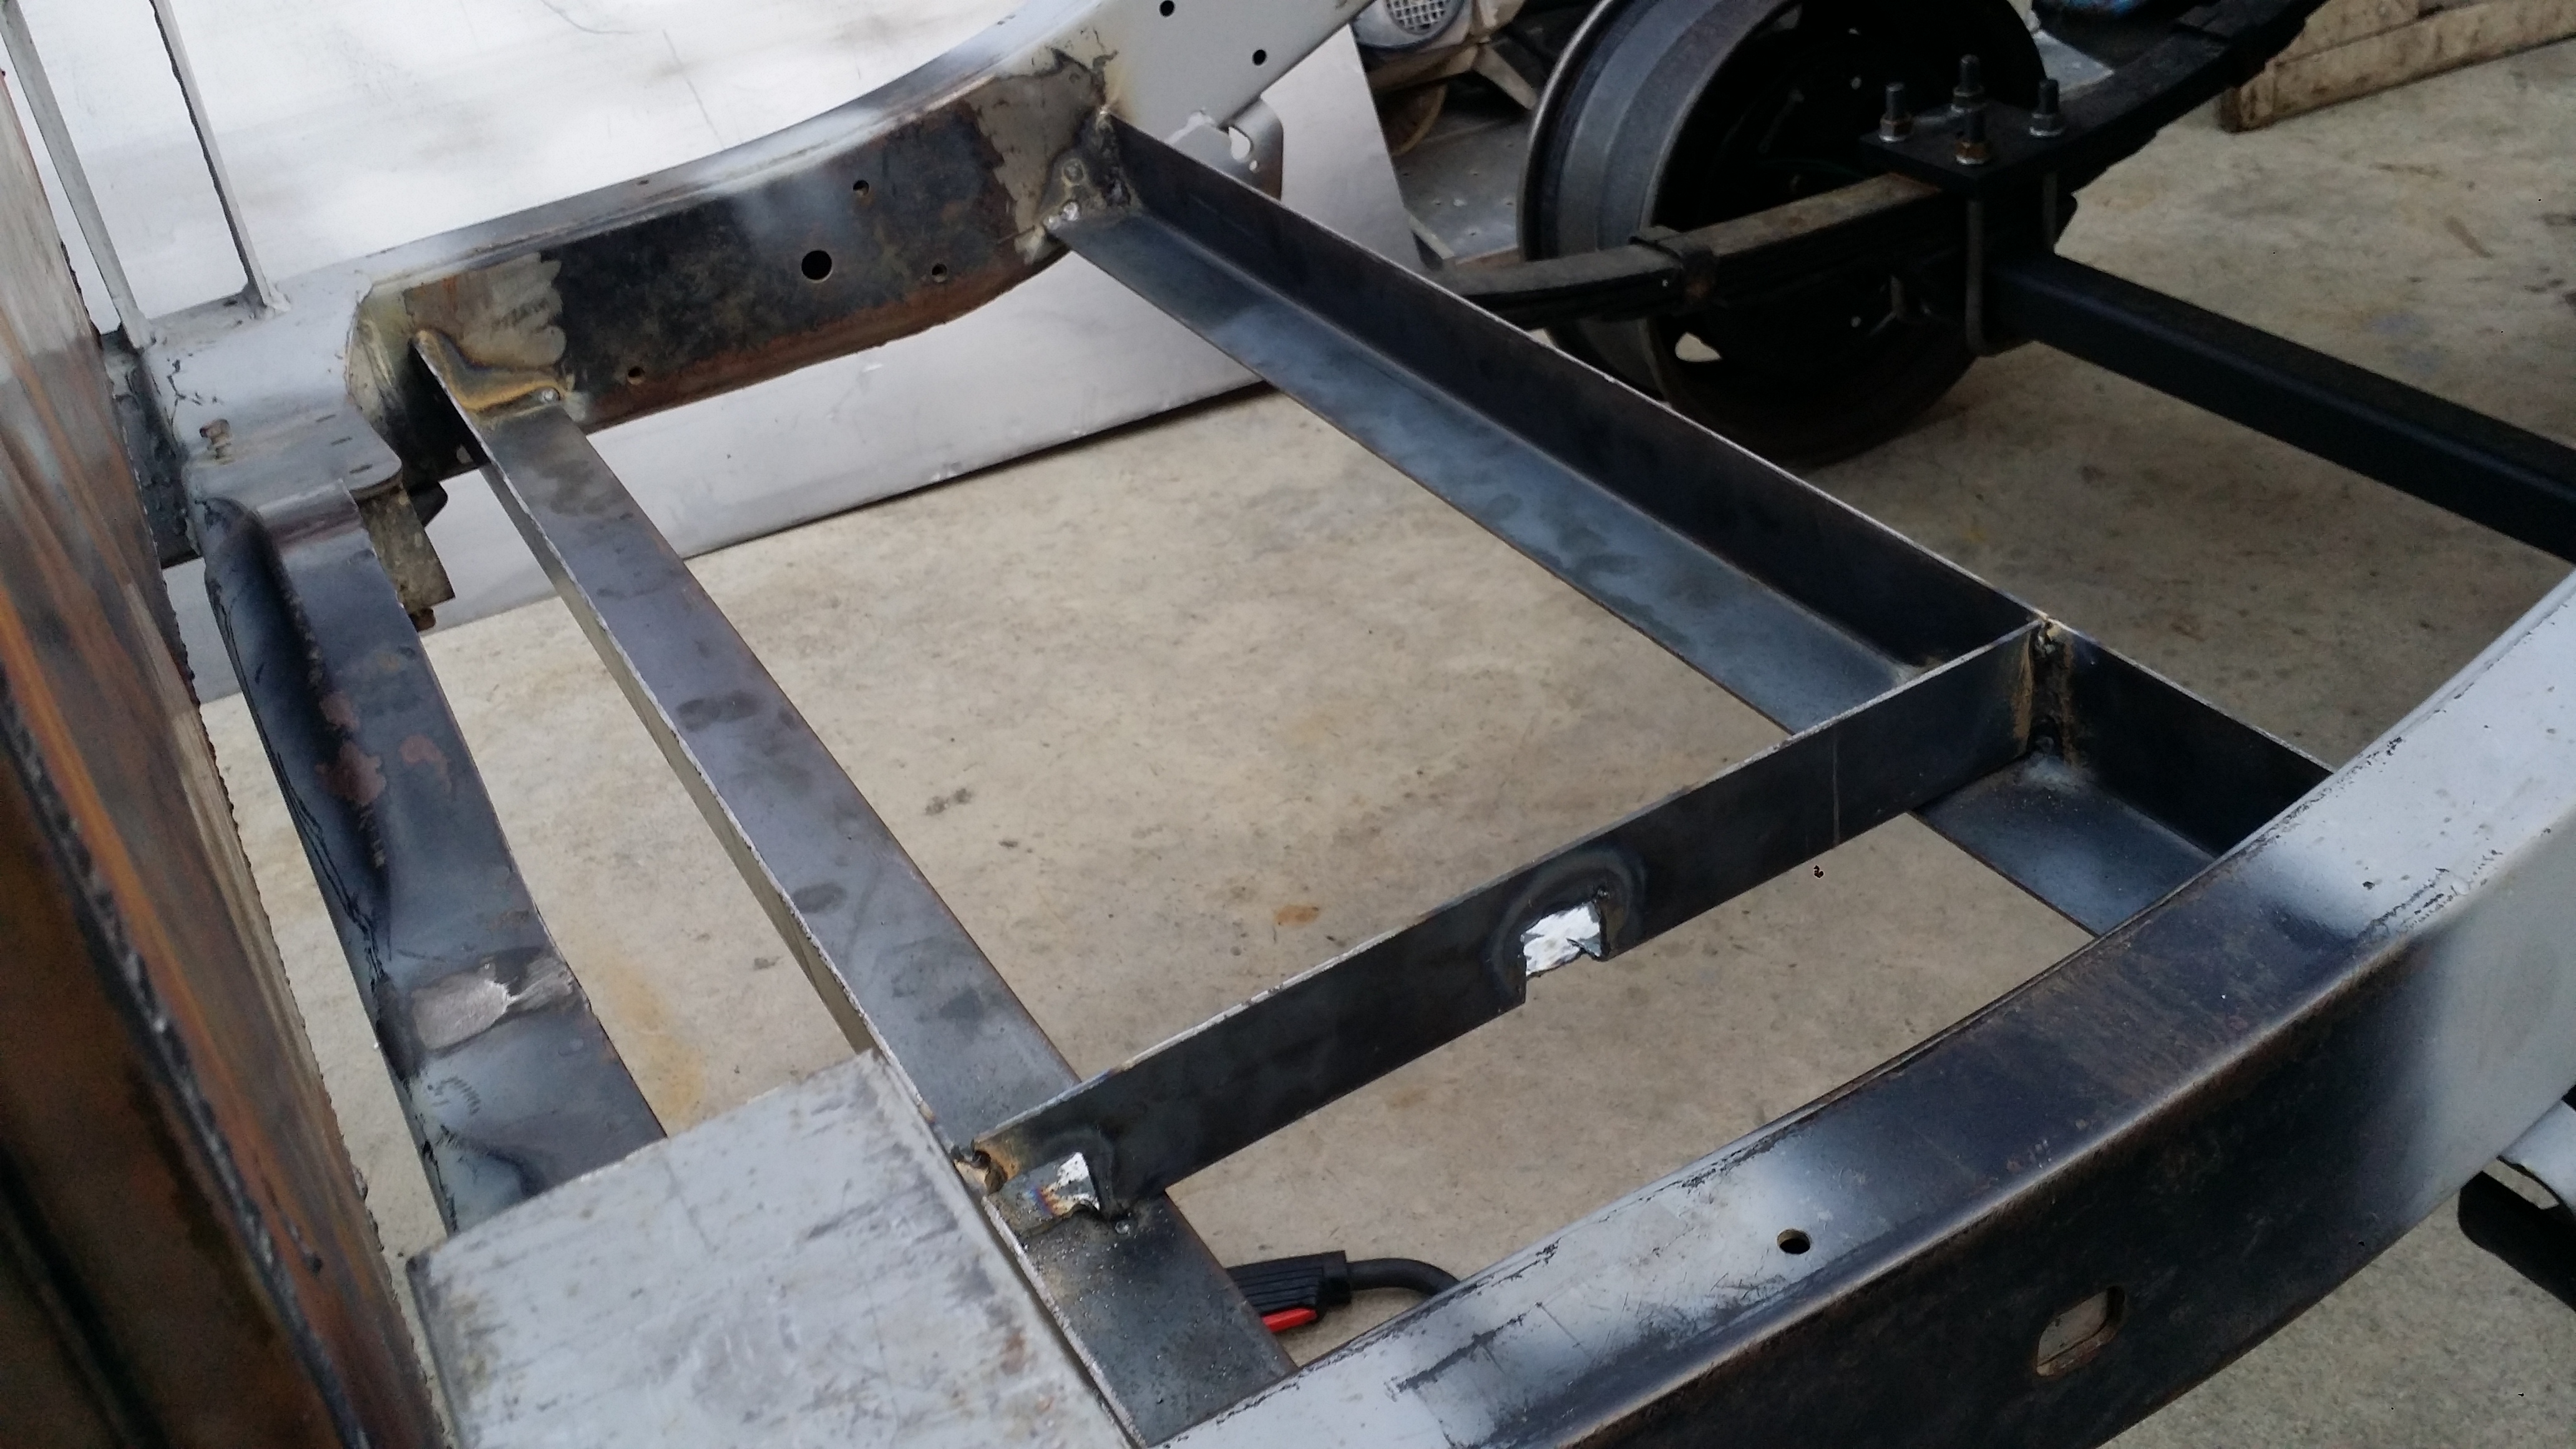
Got the tube all cut out to size for the Large compartment box. I just had enough for all the L�W�H pieces. I thought I would have enough for the small box uo front too but I guess I was wrong. I had to go back to the steel shop for some more steel for the smaller compartment up in front.
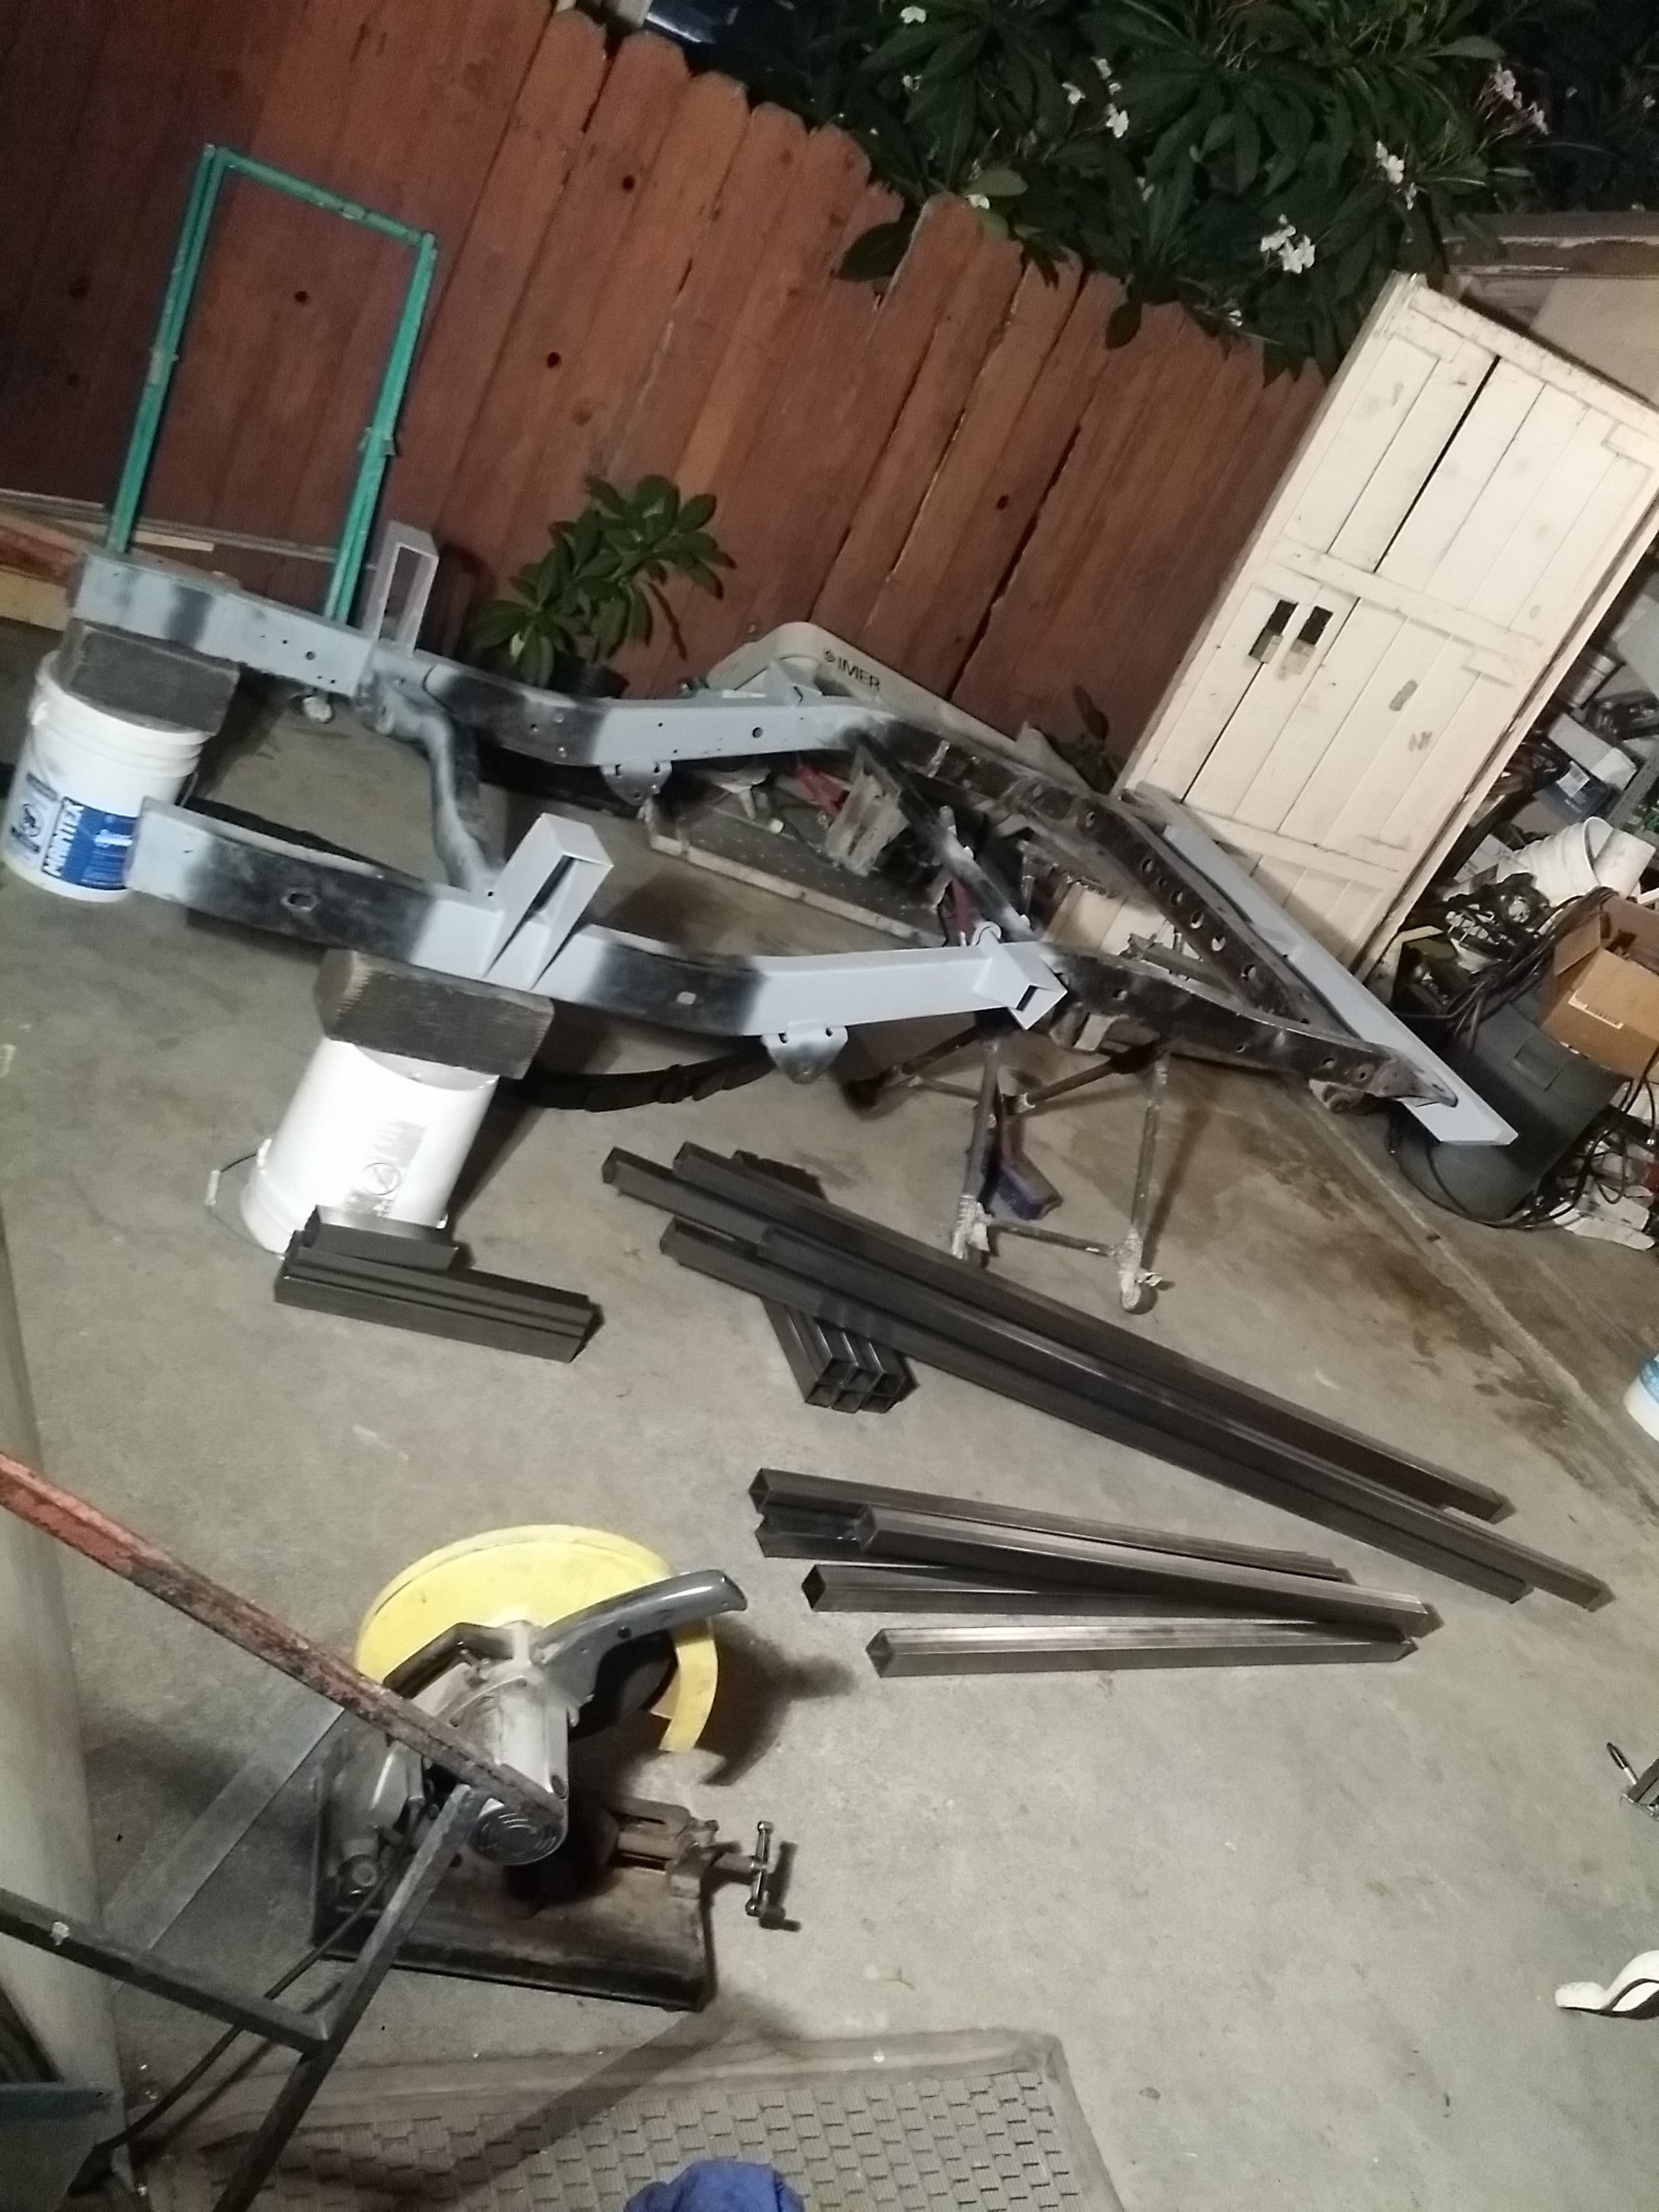
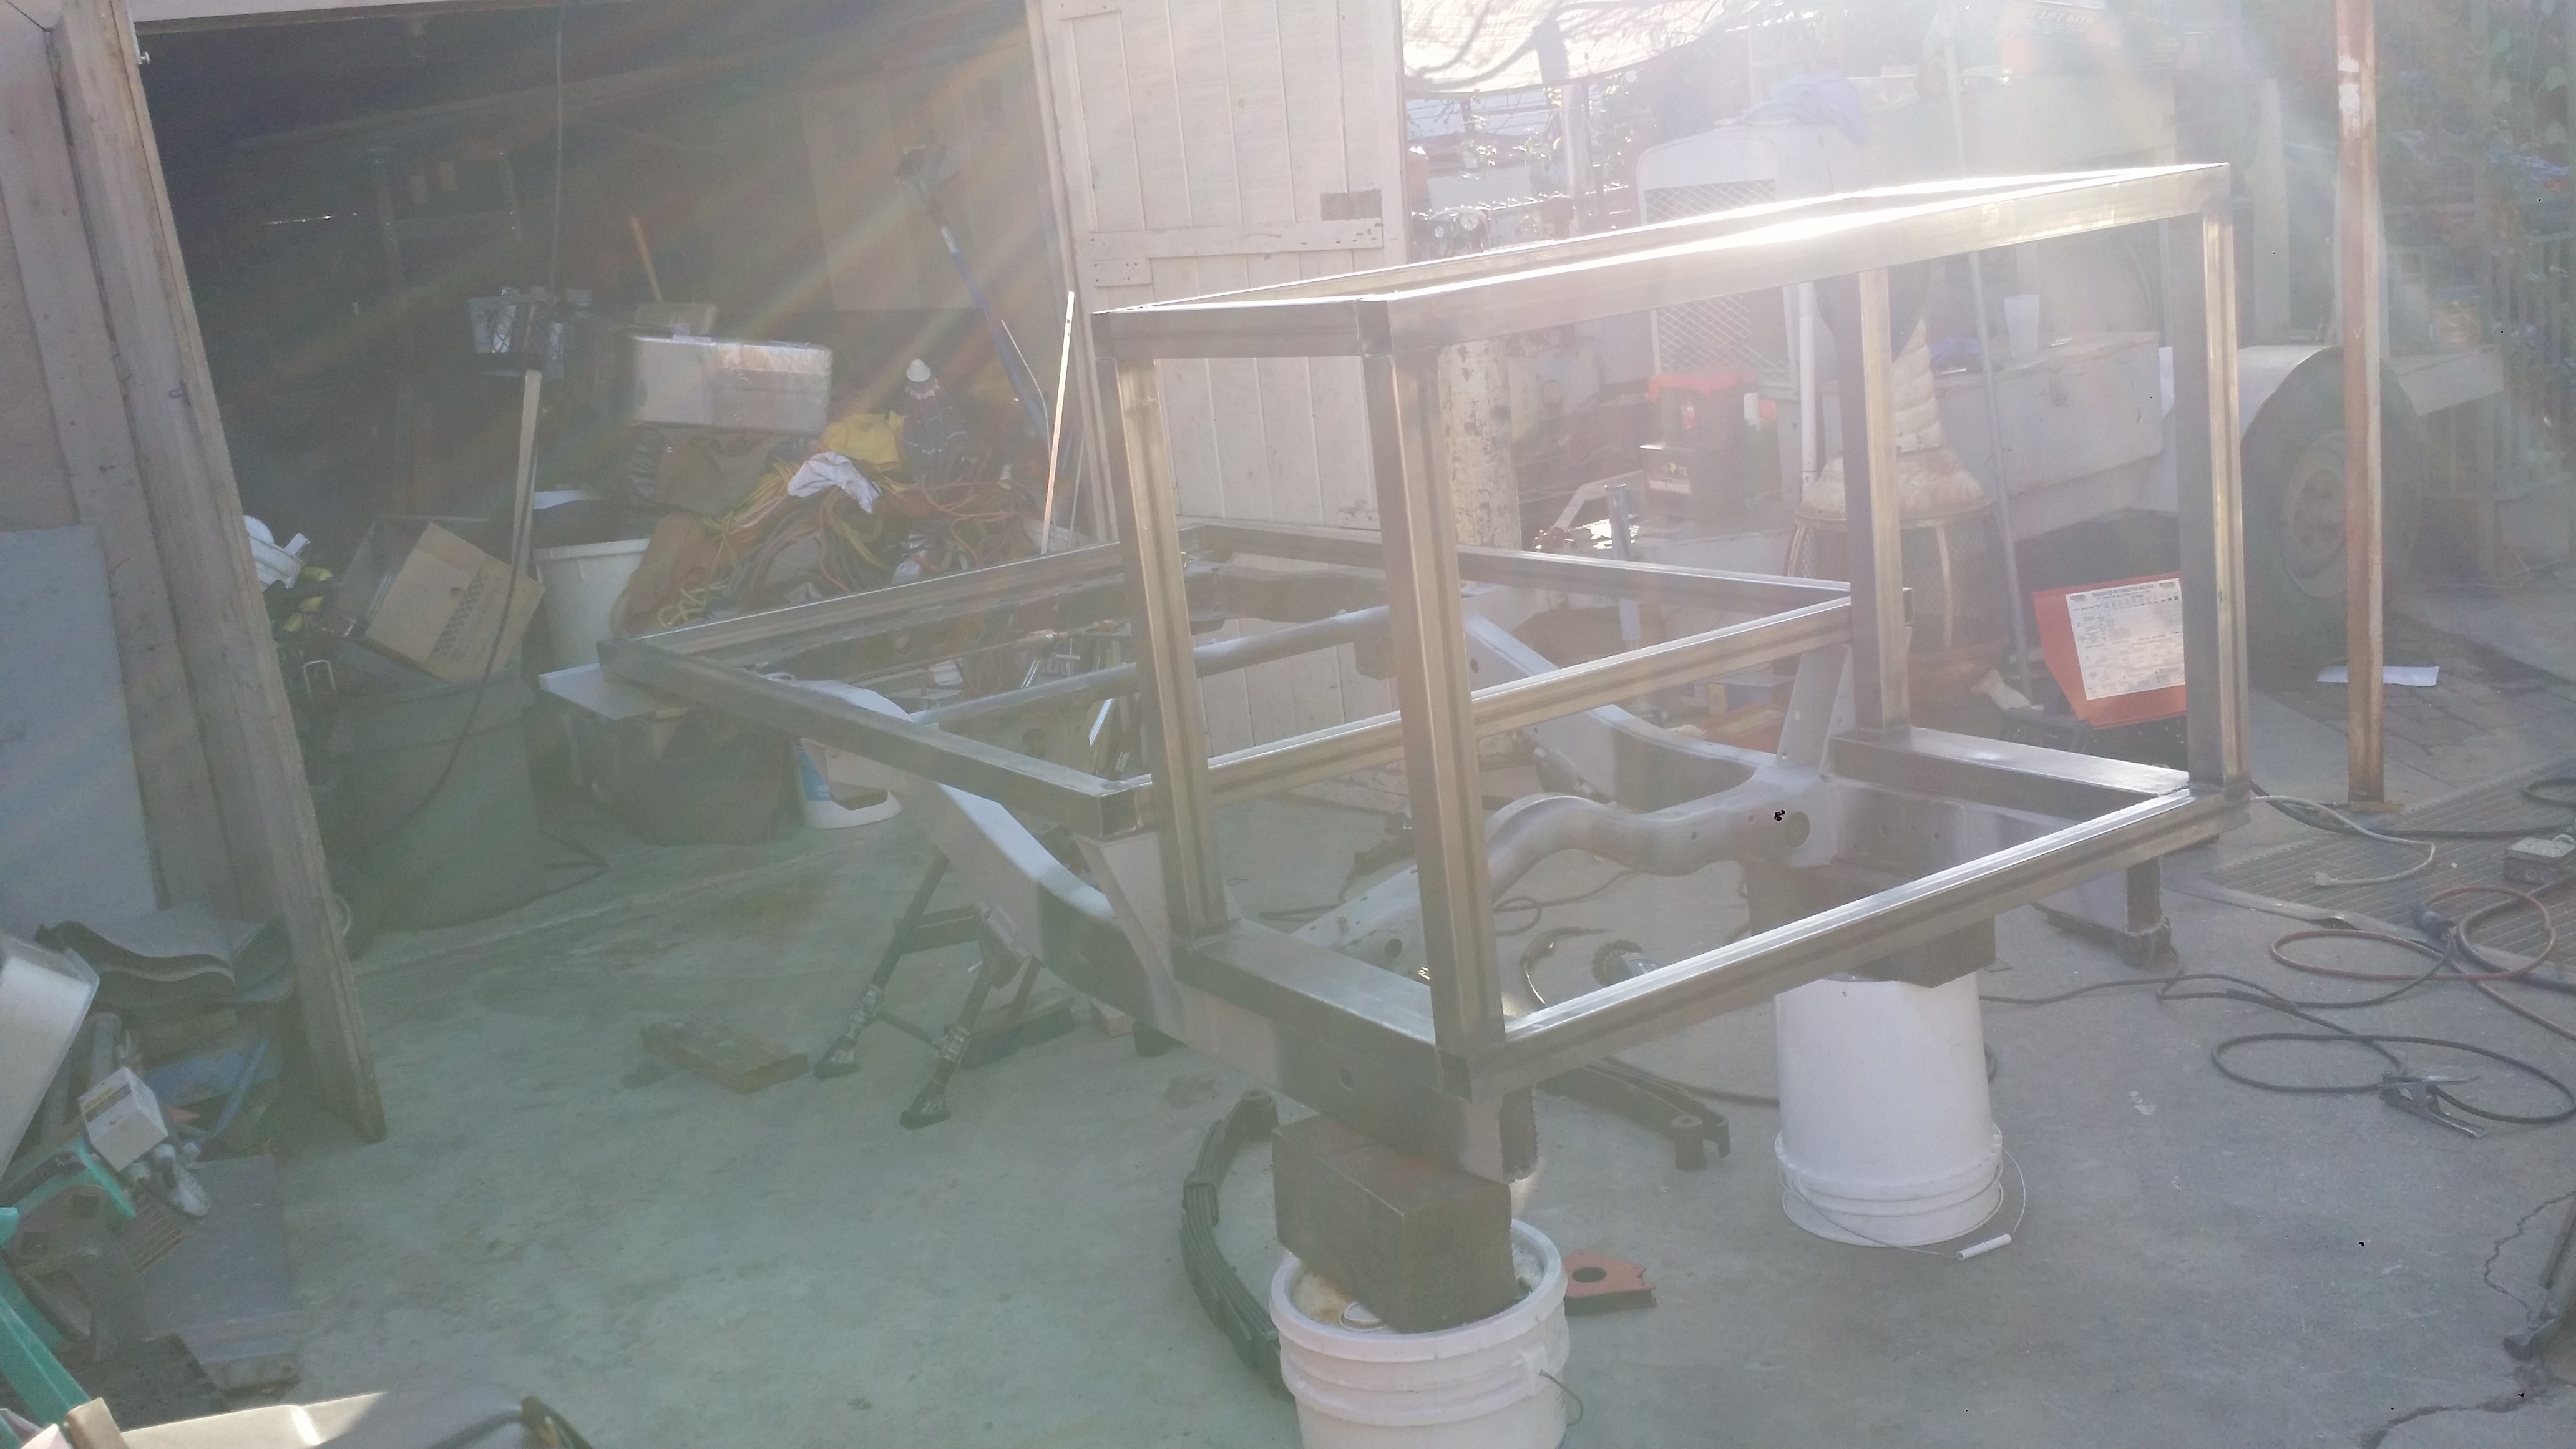
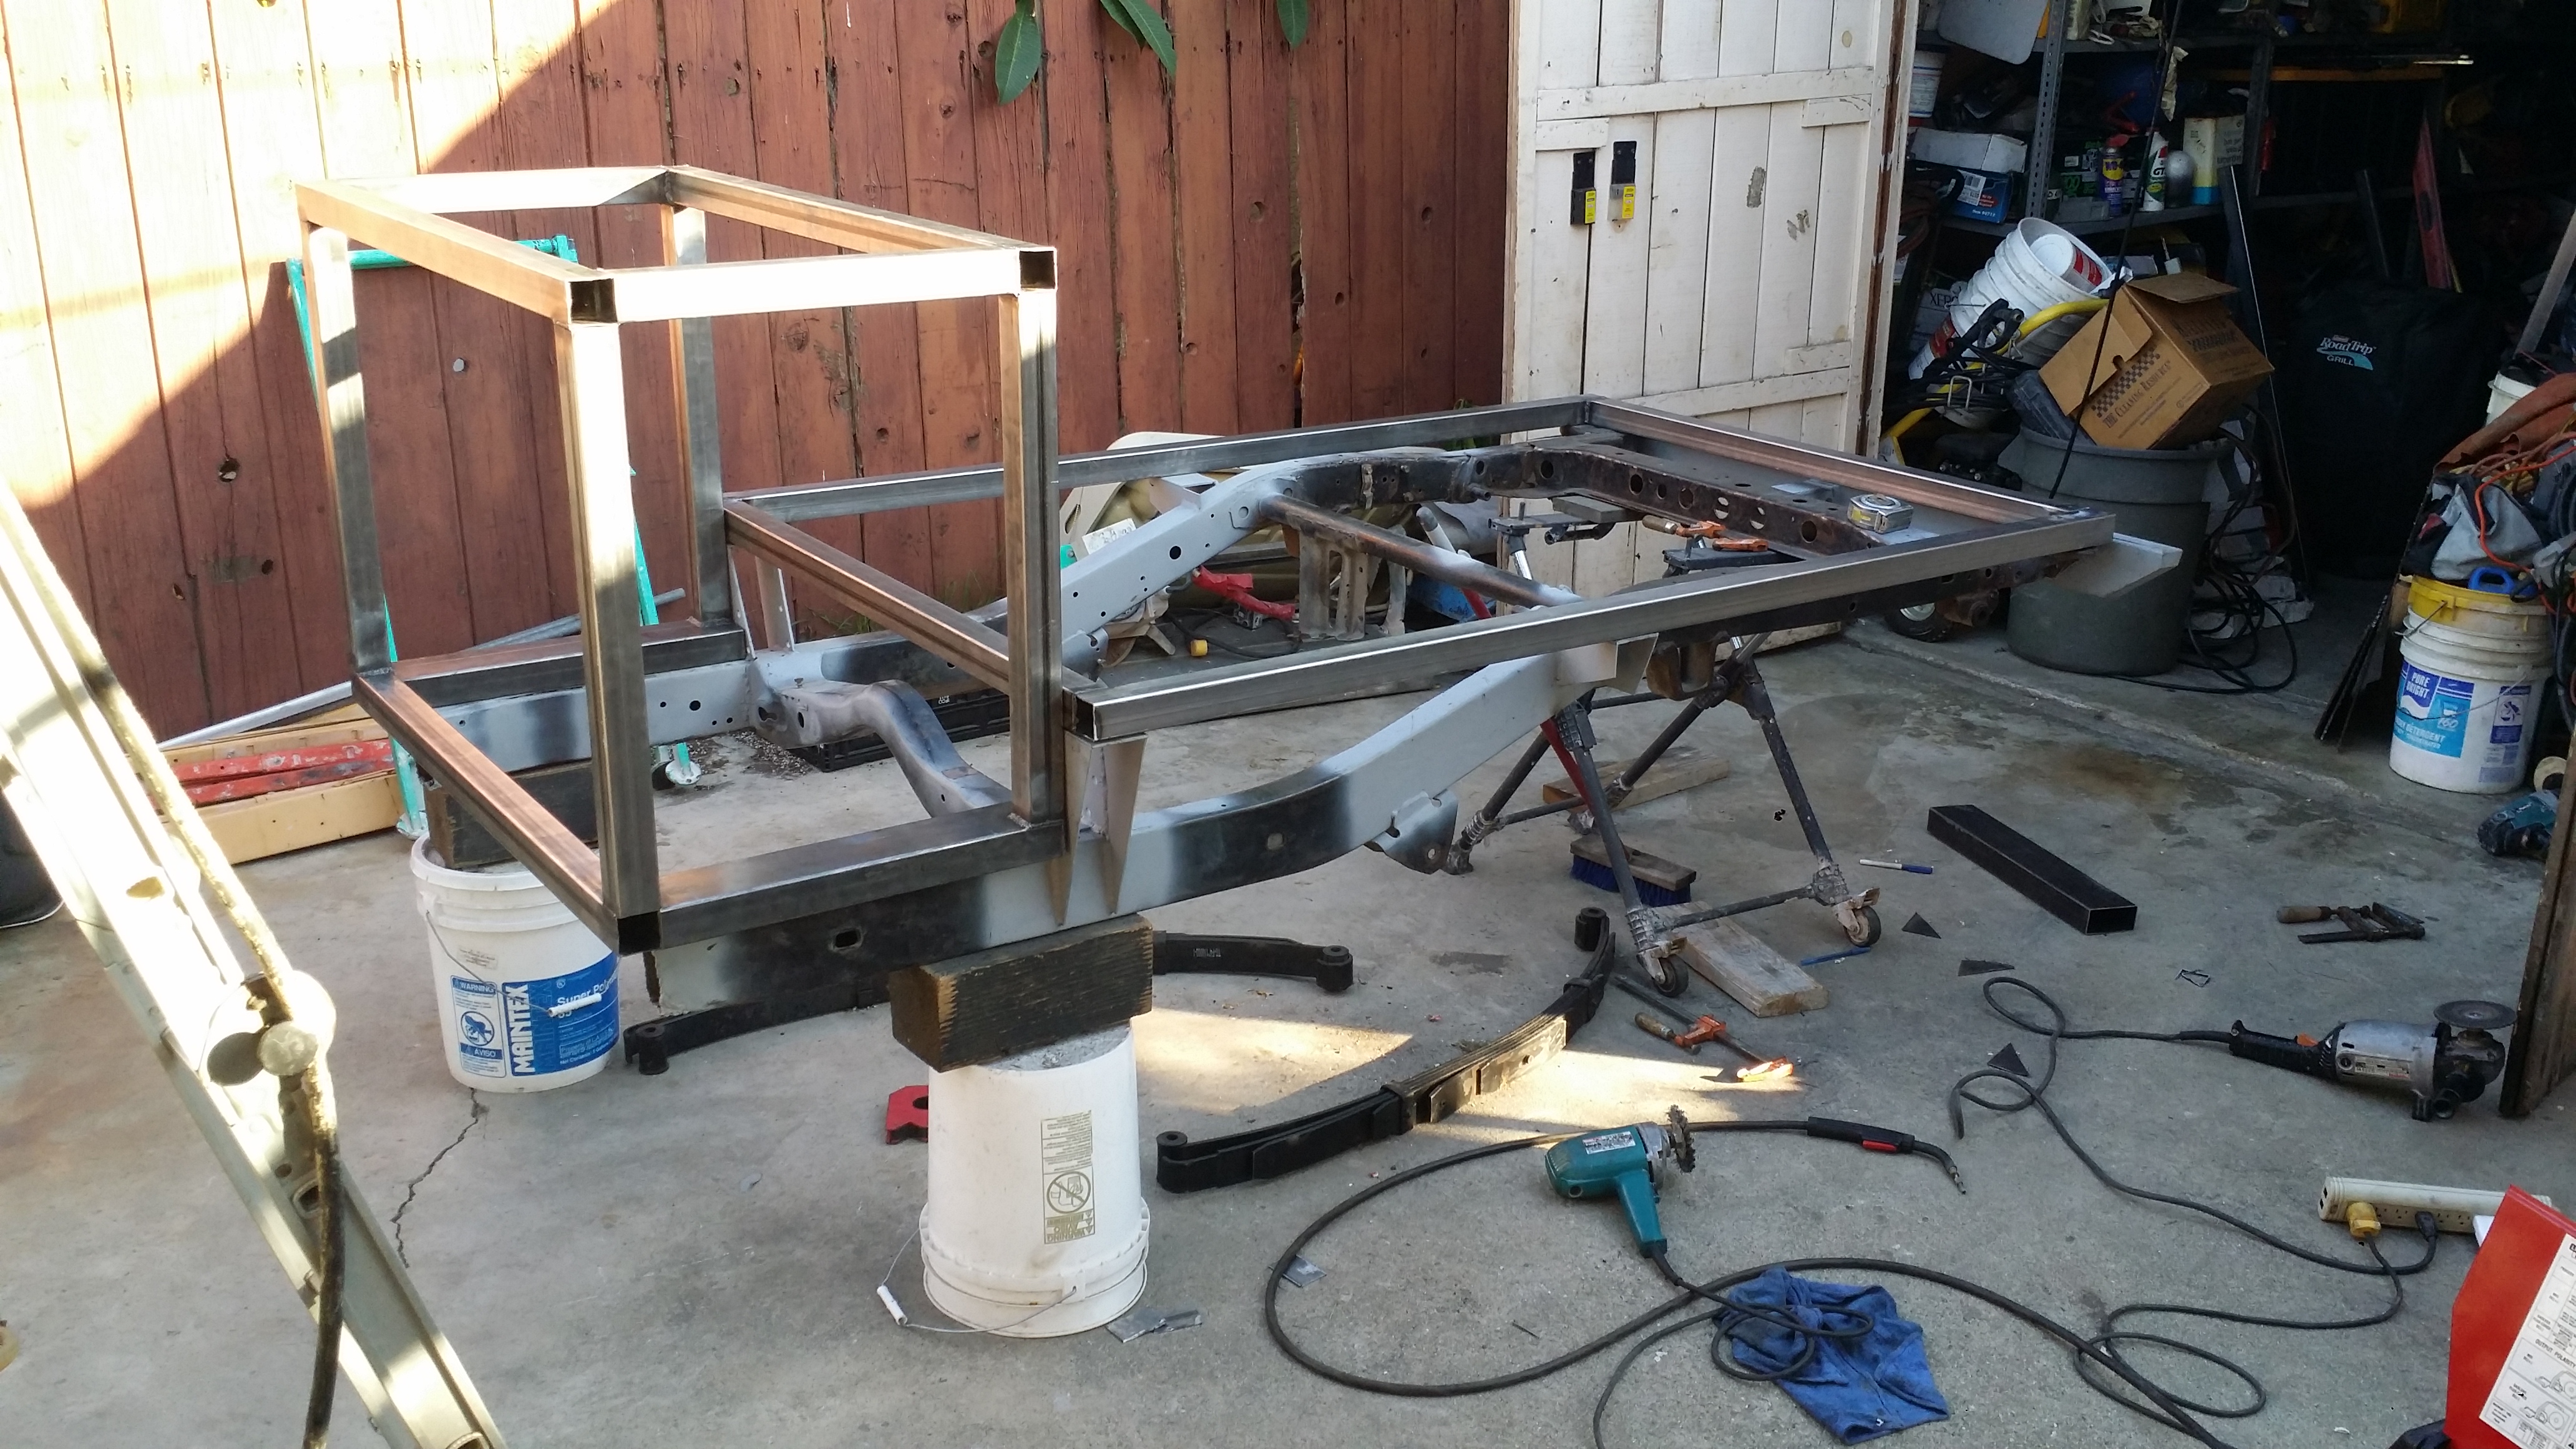
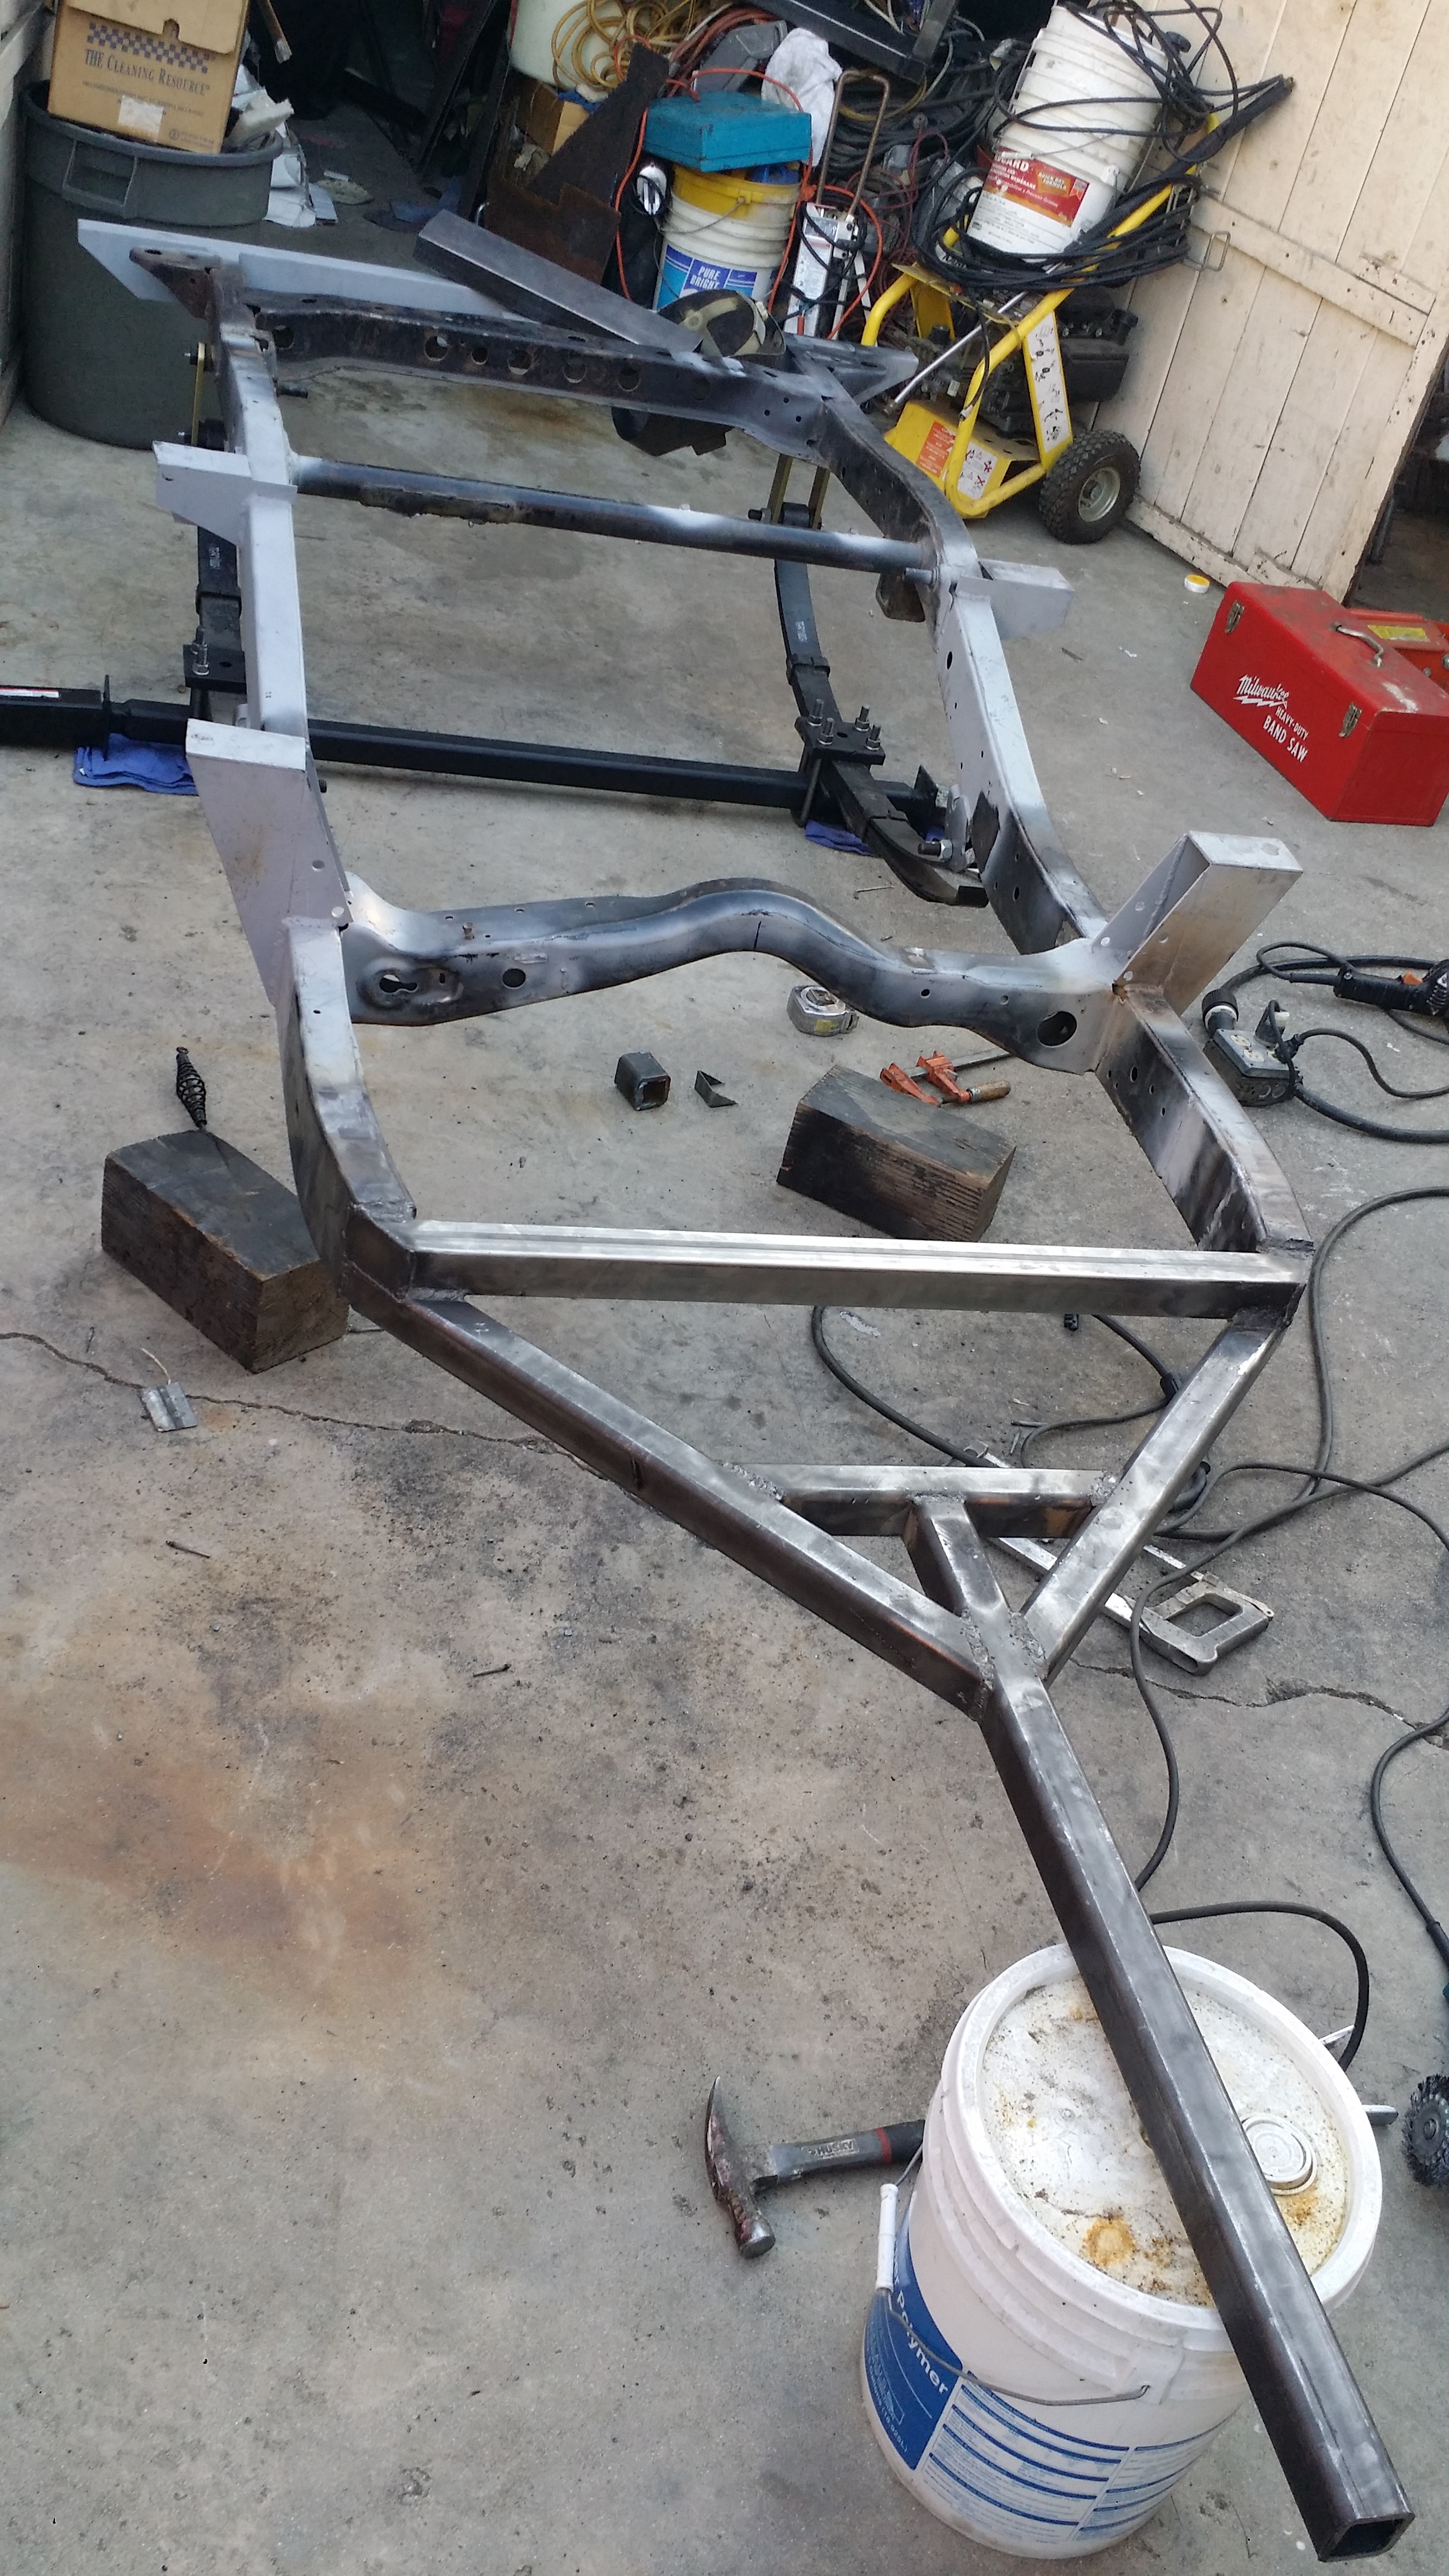
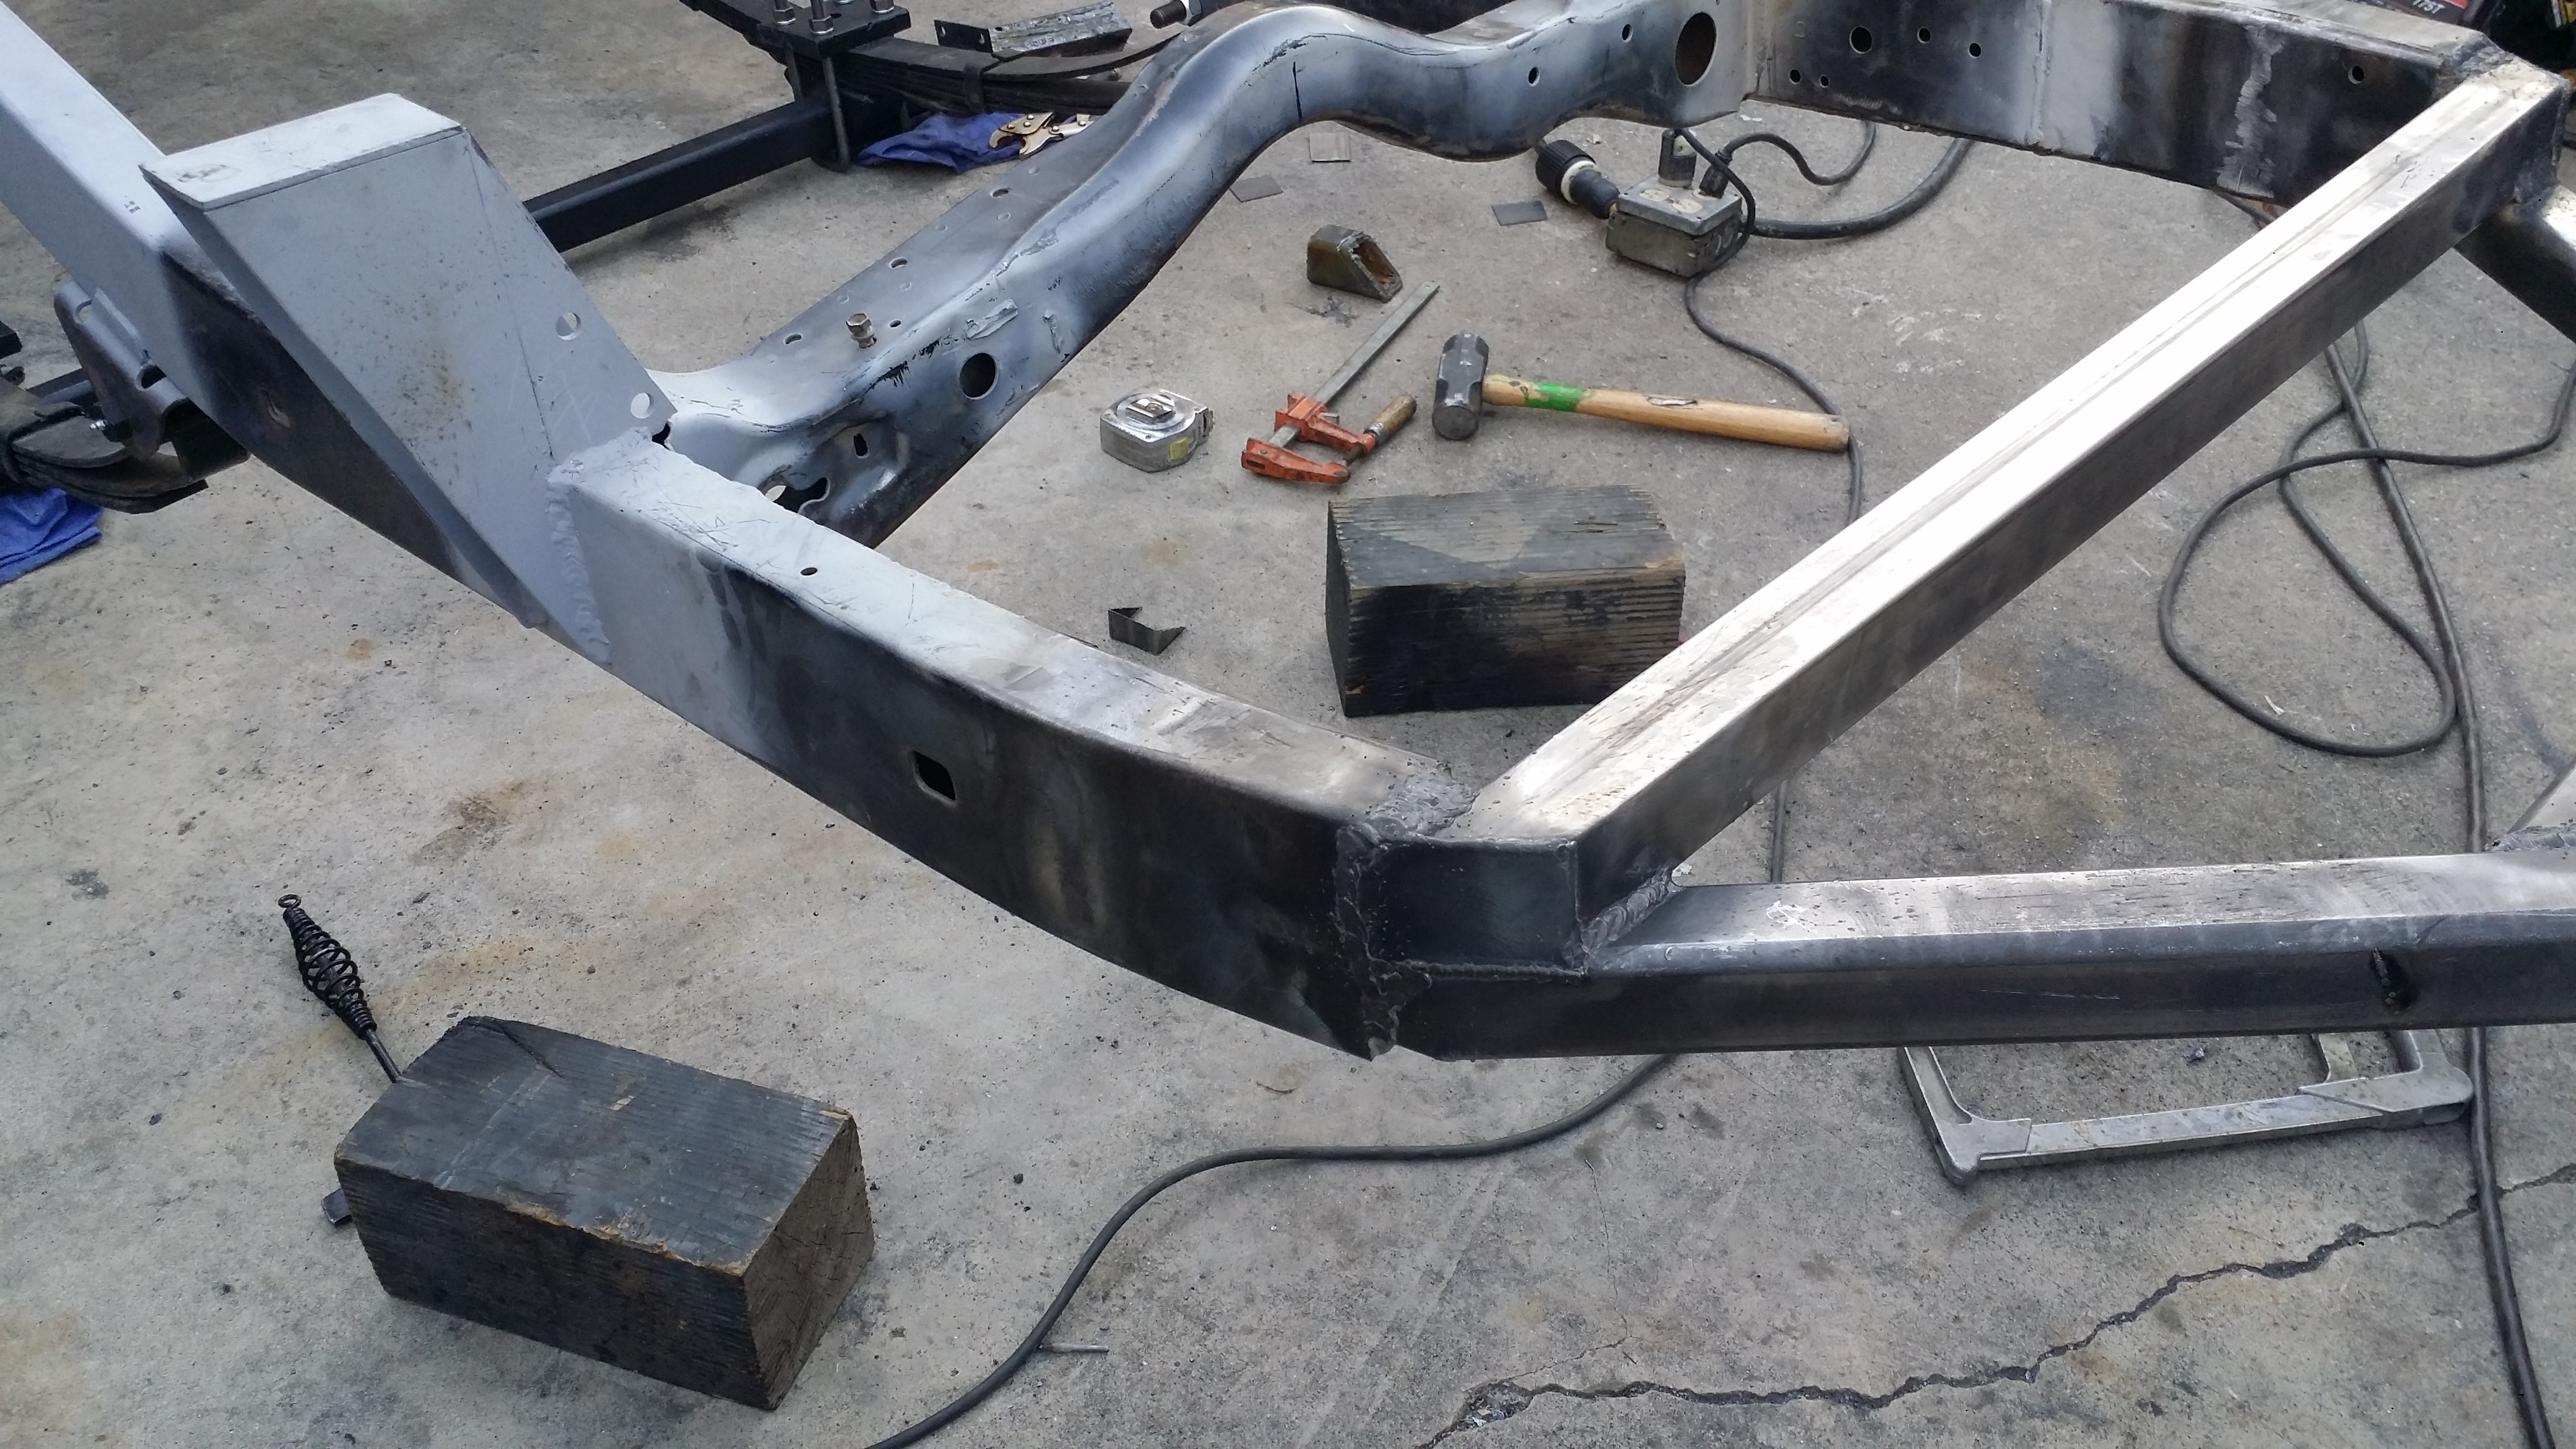
So far this is what i have built with the steel. Made the top and bottom frame to the large trailer compartment this past saturday with the help from my girl Faby. I still gotta cap the ends of those long tube but for now this is how the large compartment will sit. My time has been very limited lately and havent had much progress other then buying parts but this is a good firm foundation for the trailer build. The 4th tube i bought will be cut up soon to make the smaller front box that will house my heated shower, forced air propane heater, and some of the electrical stuff.
---------------------------------------------------------------------------------------
Updates for today:
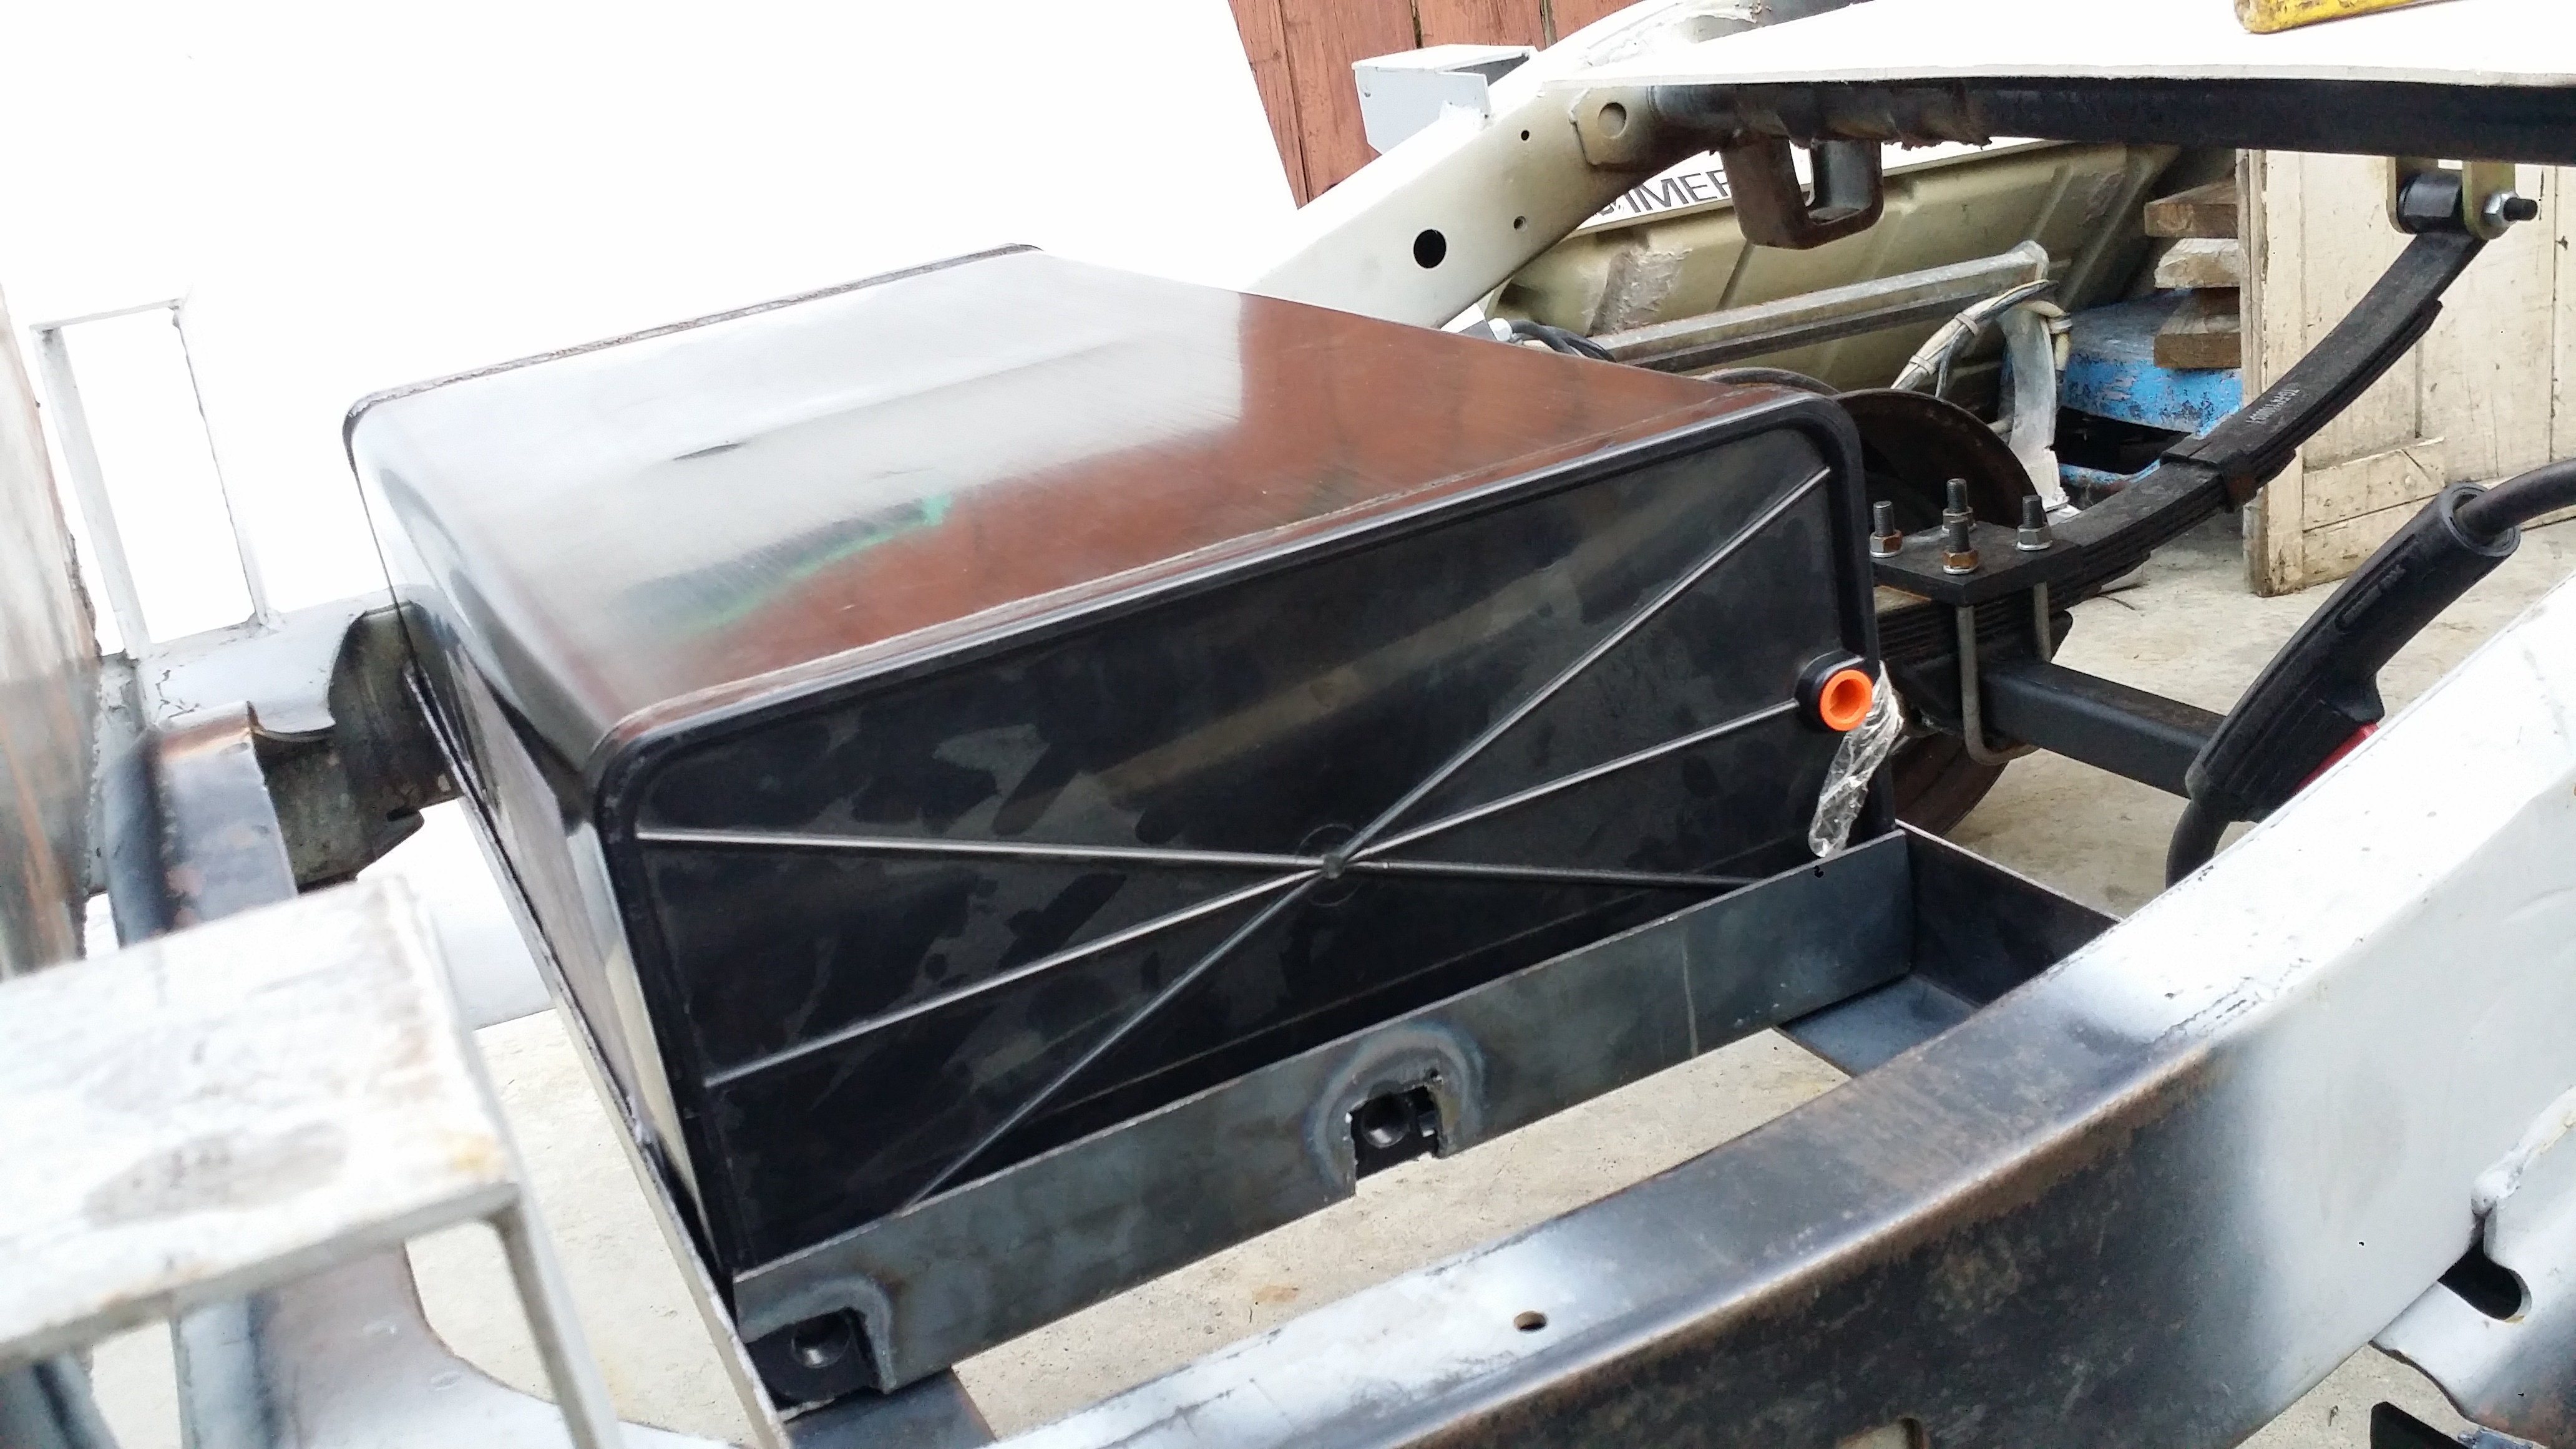
Look what just came to my door all the way from Great Britain! About damn time too! This is my super compact propane forced air heater system. This works off of 12v and propane. I believe with a minimal power draw of 1.6 - 2amps
It is pretty pricey. I bought it on an impulse buy lol. It costs 569.95 British Pounds(GBP) which is equivalent to 868.06 US Dollars. ----- oh man! that thing is definitely going to be one of the best things I have on the trailer. Especially during winter time or cold desert nights. This and my heated shower are gonna be awesome. Best part about this heater is that I can route this into the CVT Rooftop tent through the sides where the joints fold and then pull it out when it's time to put the tent away.
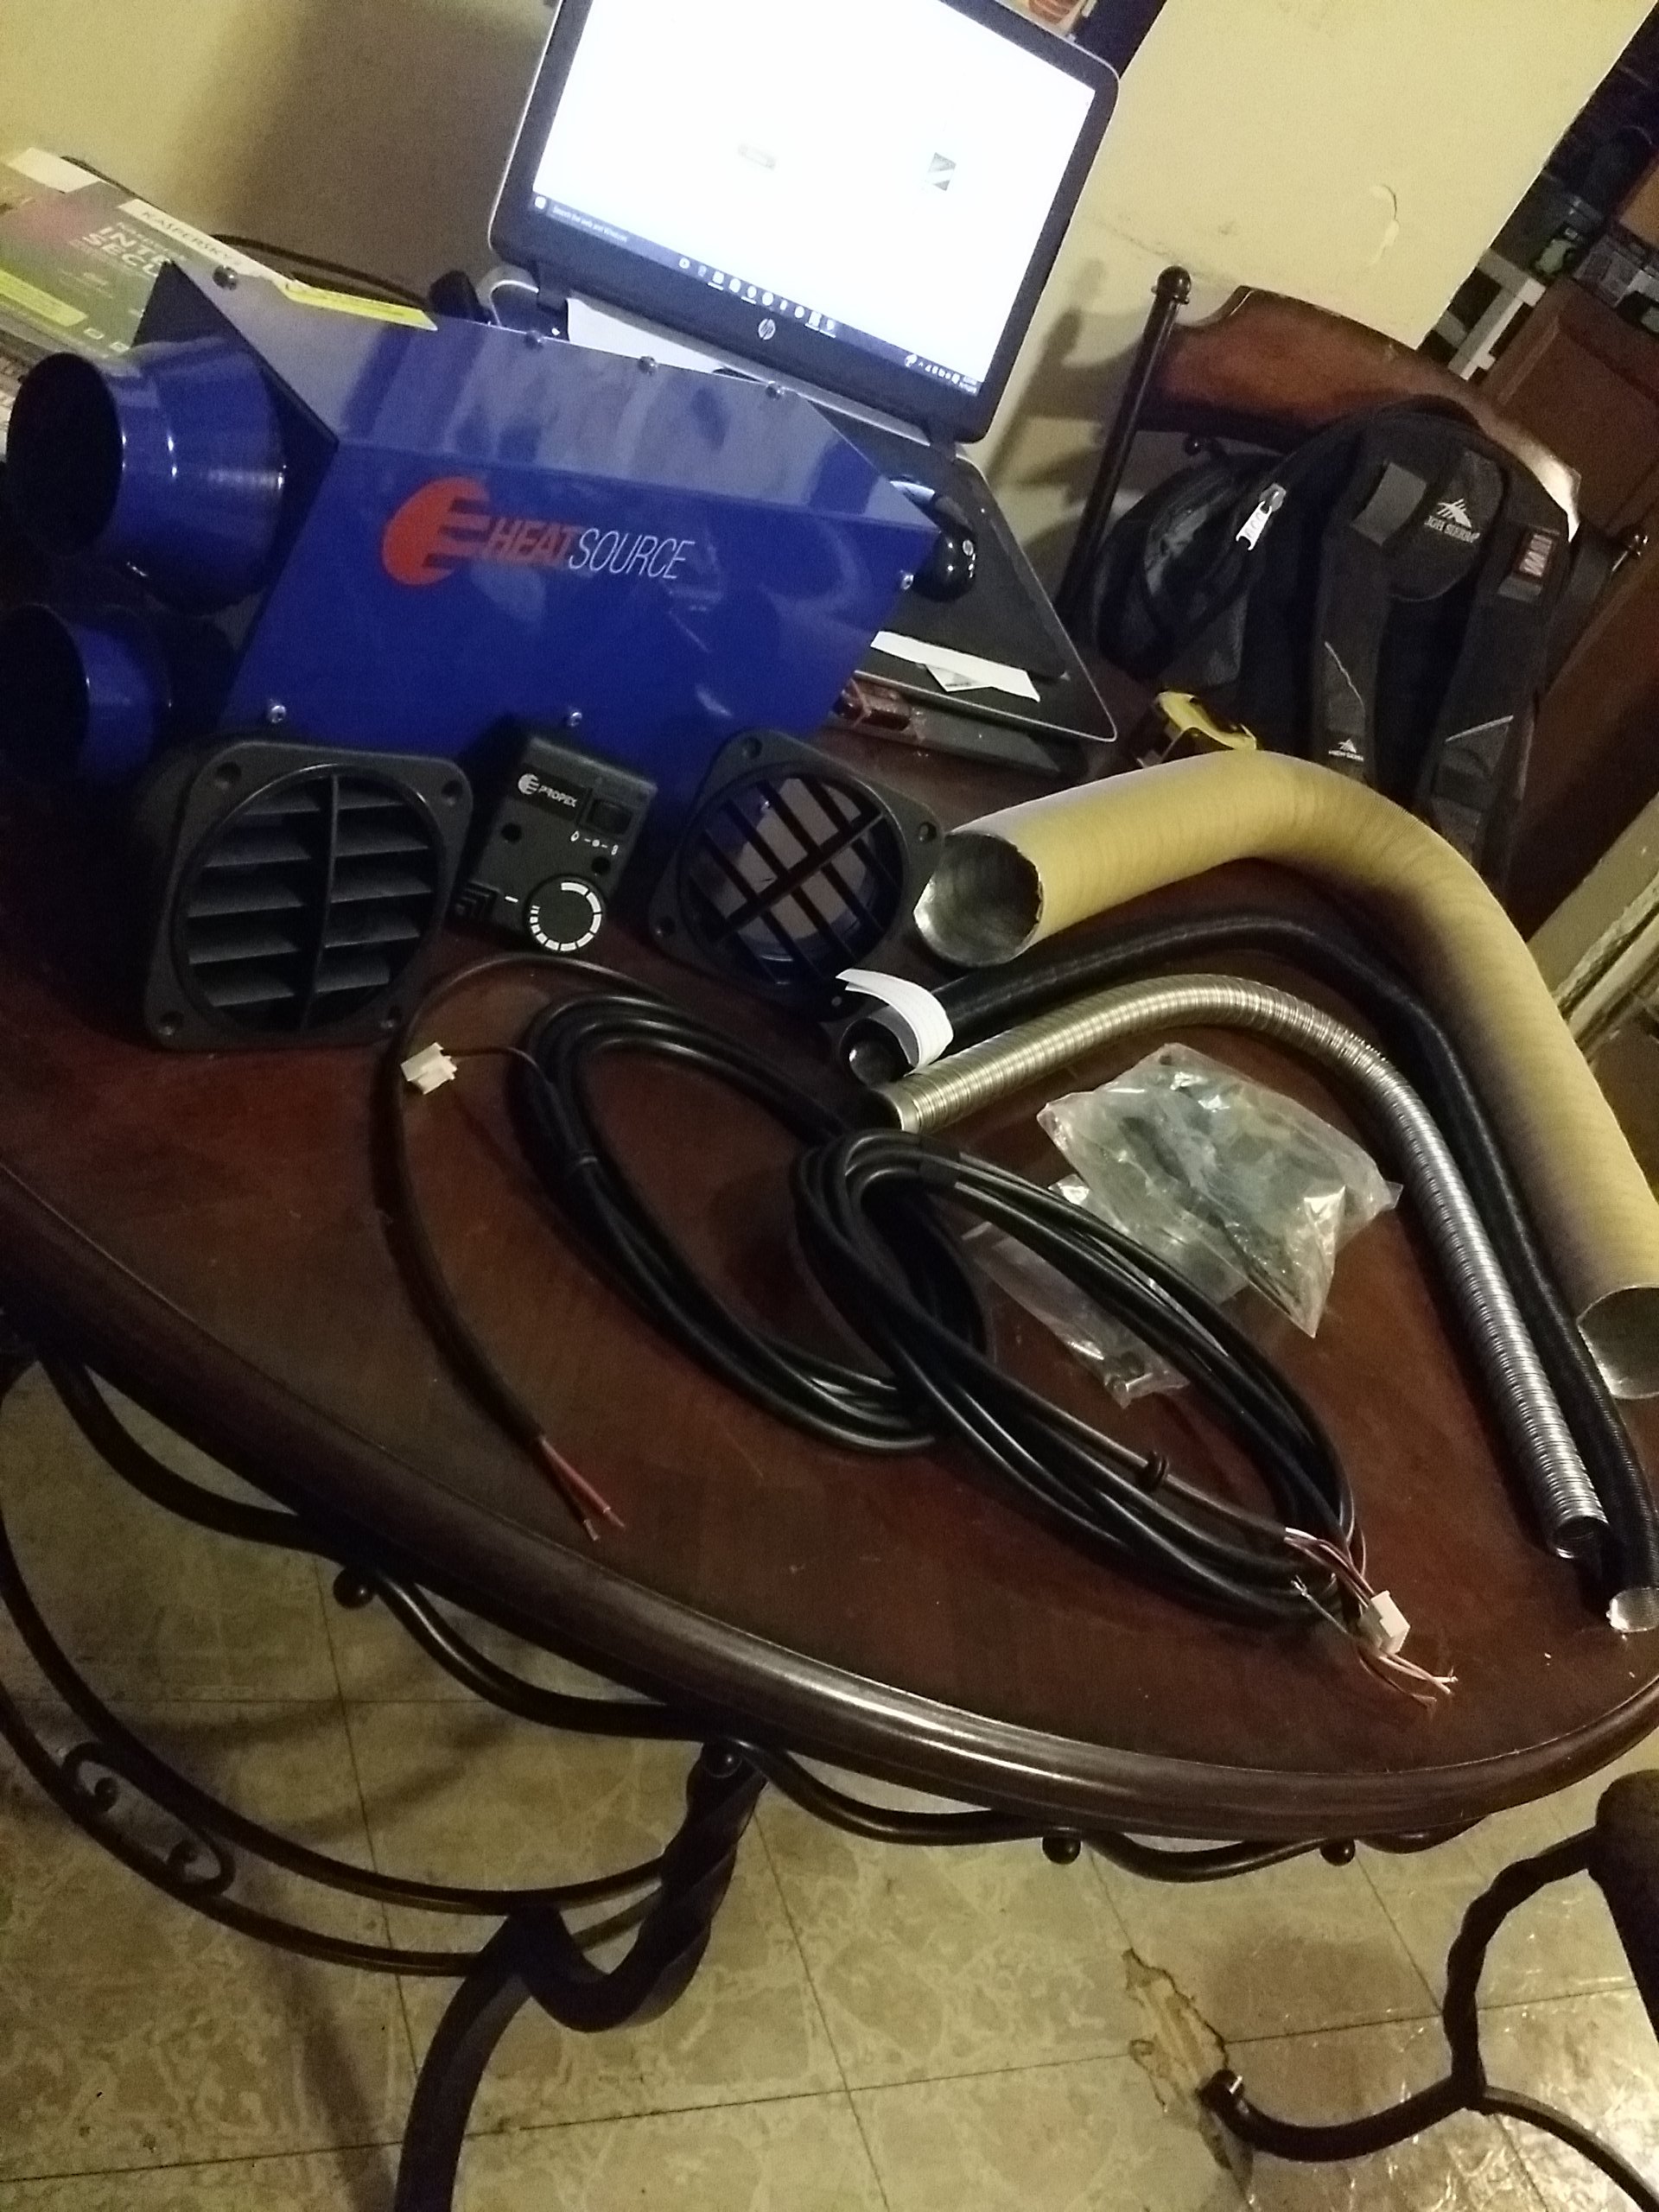
I bought it off of Ebay; user "VWheritage"
Price is GBP 449.95; Approximately US $679.87 and shipping was GBP 120.00 (approx. US $181.32)
In total i spent 569.95 British Pounds(GBP) which is equivalent to 868.06 US Dollars.
Here is the link to where i bought it.
http://www.ebay.com/itm/T4-Propex-He...UAAOSw3ydV3b~I
By the way Shipping was extremely quick. i got it in about 1 week!
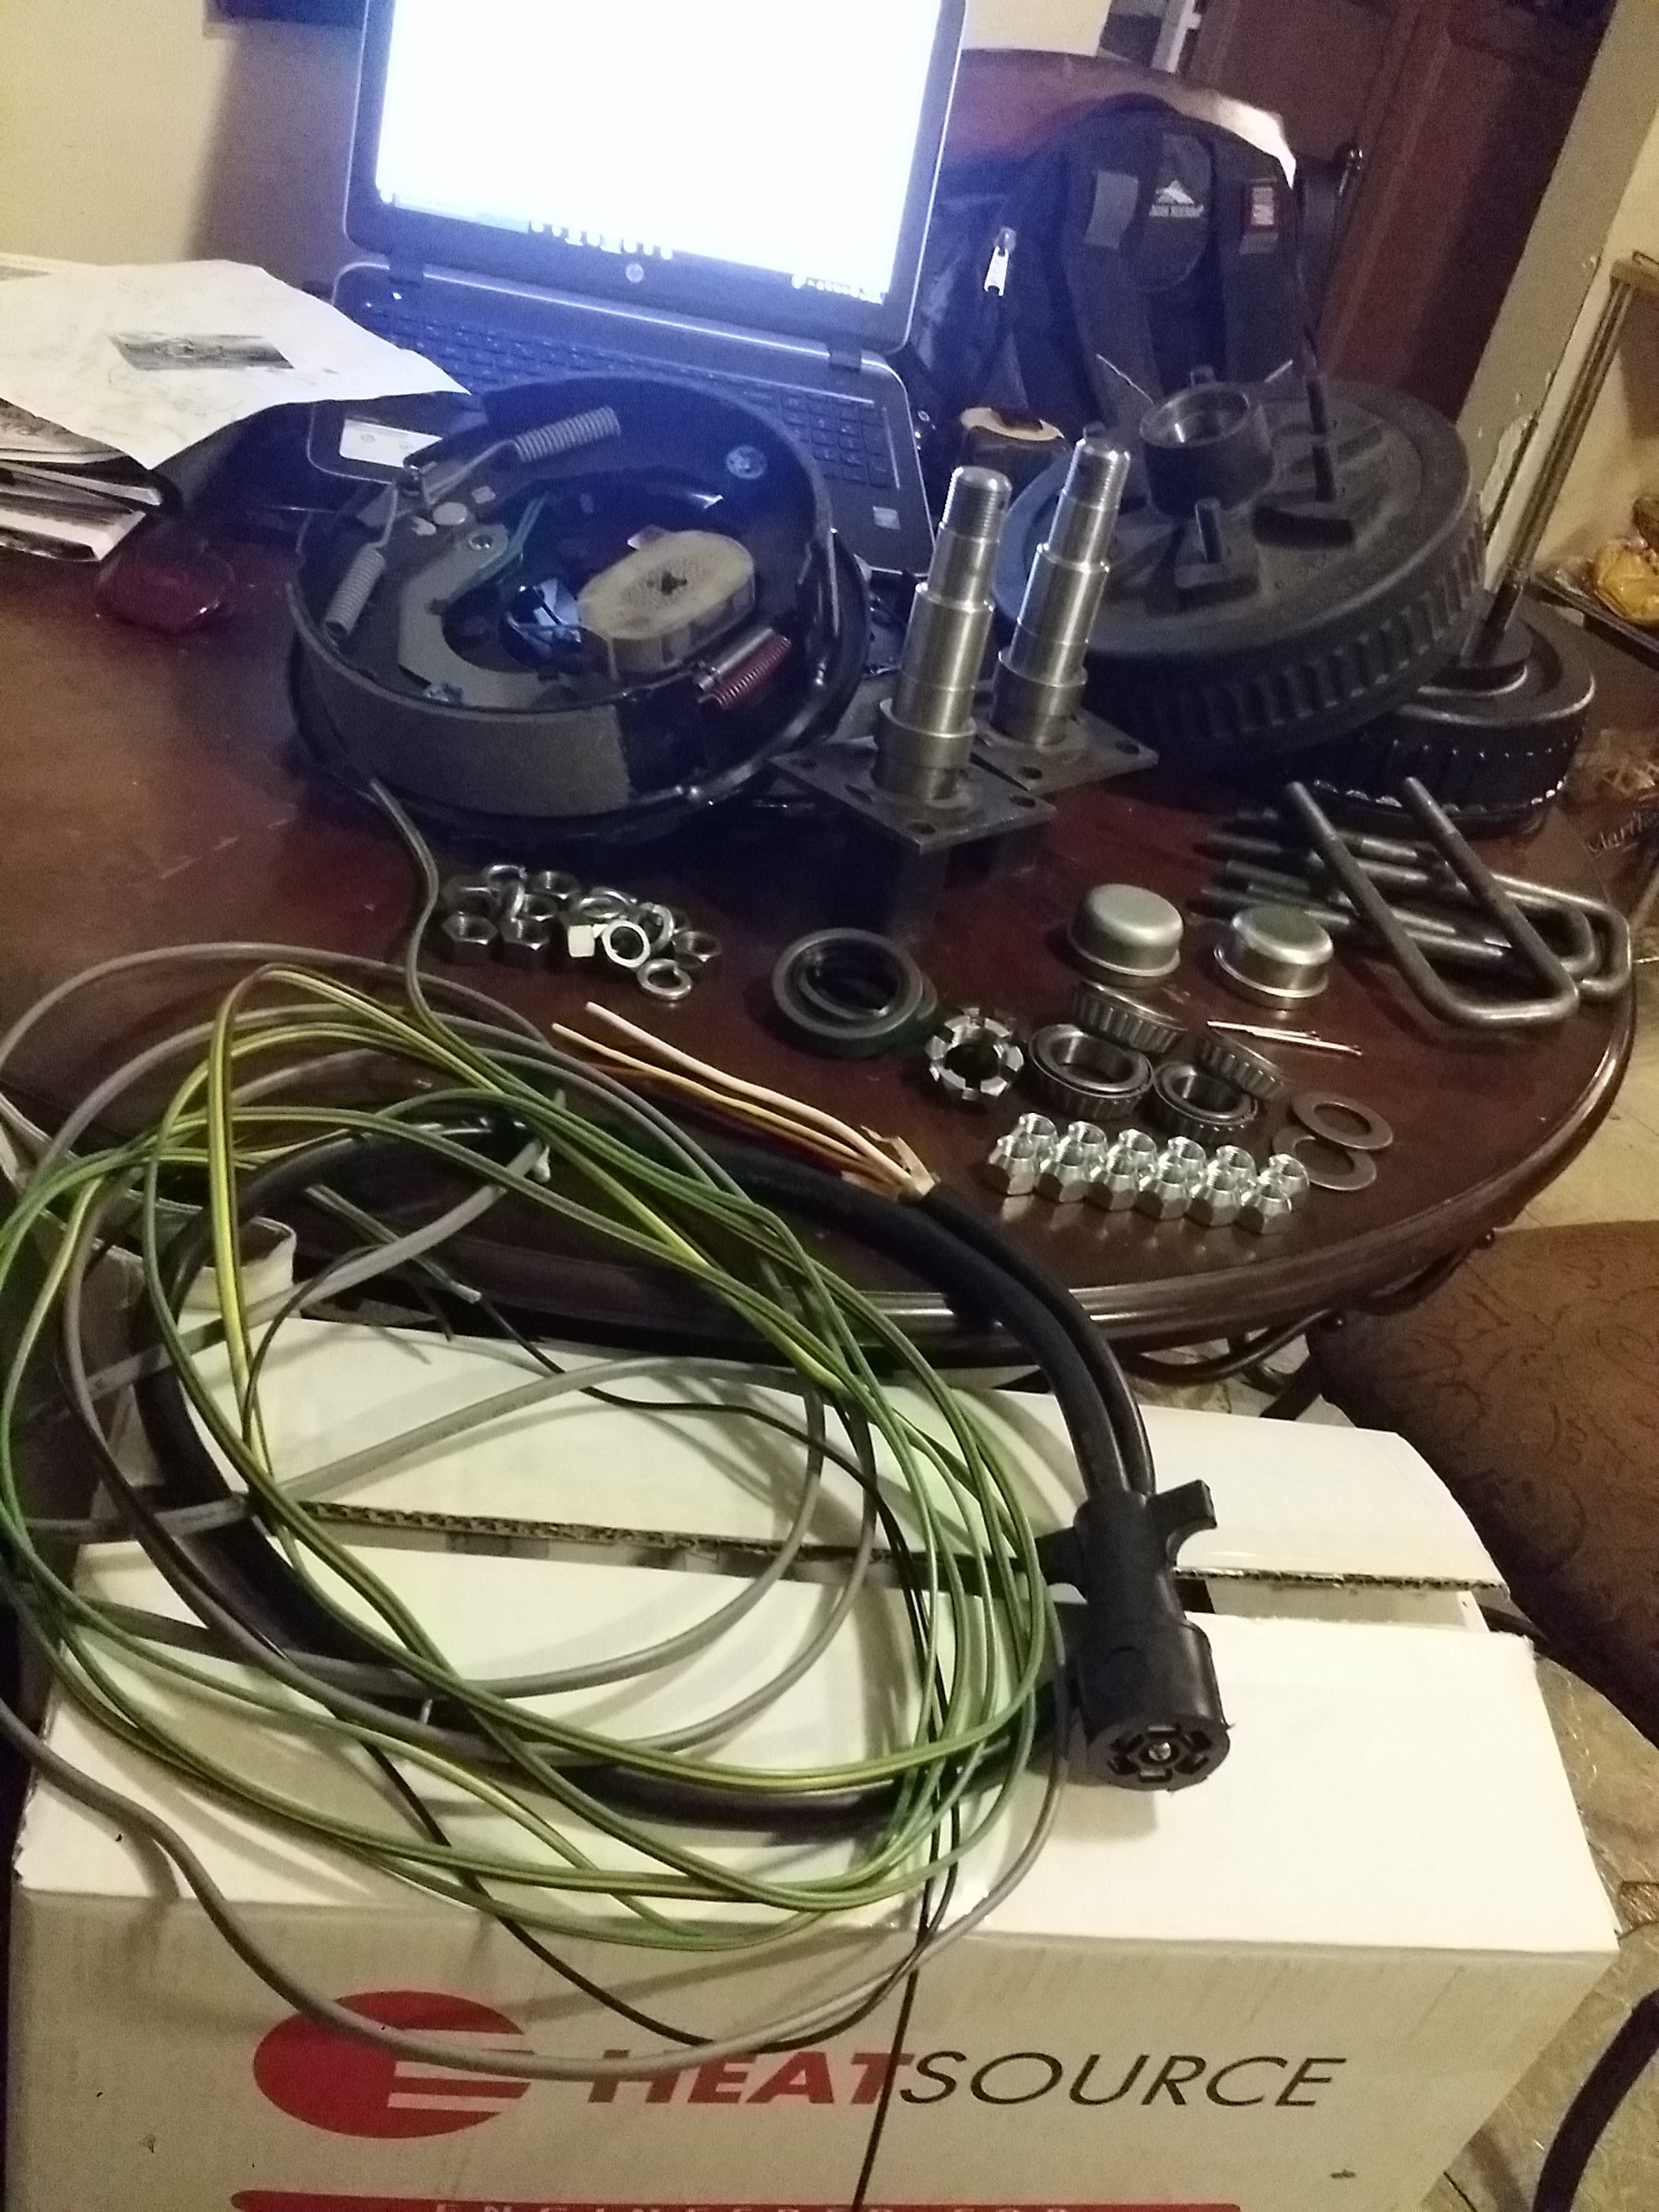
And also today i went to my local trailer store "Marksman Trailer Supply" in Santa Fe Springs CA and bought all the stuff needed to build my own custom trailer axle.
This is the last of the things I have coming in the mail. After this all I gotta do is cut my 1/4" thick 2"�2" square tube to size to make my trailer axle 58" wide(hub face to hub face) so I can match the wheel base of my Toyota 4Runner that I'll be towing it with. These are all "Dexter" trailer parts brand and the axle will be rated at 3500 pounds towing capacity. Yes! Those are electric brakes. It's much safer and it won't eat my truck brakes so easily if i have assistance from the trailer. This wiring kit is for a 7 pole trailer harness. All I'll need to get for the lighting to work is some heavy duty tail lights, turn signals, running lights for the side, plus rock lights I will only run LED lighting on this build for absolute minimal power draw off the solar battery bank I plan to run on this. All of this will come eventually with some time. But it will definitely happen. I can't wait to get to work. I plan to buy the lights off of my instagram buddy's page "@All4OffRoad" he will hook me up with a discount price when the time comes to buy.
All these parts were bought for $421.29 - This was at a small discount charge because they made me wait a good while because they only had one 6x5.5 pattern brake drum in stock so they had to get the other one for me while i waited. On the plus side i got to meet a lot of cool people/ other customers at the shop and i got a personal tour of the back area where they build their in house trailers. I gotta say that is one awesome place. They took the time to explain to me how to run the wires, to my brakes, running lights, turn signals, and tail lights. plus how to properly build the DIY axle that i was buying. We had a lot of time to kill while waiting lol i learned a lot from them and i think it was definitely worth the wait. I got a lot of knowledge off of them and a discount. Double win!

Woooo view from inside the truck driving home. Those 22ft tubes really move alot even while strapped down. that was scary but not nearly as scary as driving with the 4runner chassis on my roof haha!

Home

Got the tube all cut out to size for the Large compartment box. I just had enough for all the L�W�H pieces. I thought I would have enough for the small box uo front too but I guess I was wrong. I had to go back to the steel shop for some more steel for the smaller compartment up in front.

So far this is what i have built with the steel. Made the top and bottom frame to the large trailer compartment this past saturday with the help from my girl Faby. I still gotta cap the ends of those long tube but for now this is how the large compartment will sit. My time has been very limited lately and havent had much progress other then buying parts but this is a good firm foundation for the trailer build. The 4th tube i bought will be cut up soon to make the smaller front box that will house my heated shower, forced air propane heater, and some of the electrical stuff.

---------------------------------------------------------------------------------------
Updates for today:
Look what just came to my door all the way from Great Britain! About damn time too! This is my super compact propane forced air heater system. This works off of 12v and propane. I believe with a minimal power draw of 1.6 - 2amps
It is pretty pricey. I bought it on an impulse buy lol. It costs 569.95 British Pounds(GBP) which is equivalent to 868.06 US Dollars. ----- oh man! that thing is definitely going to be one of the best things I have on the trailer. Especially during winter time or cold desert nights. This and my heated shower are gonna be awesome. Best part about this heater is that I can route this into the CVT Rooftop tent through the sides where the joints fold and then pull it out when it's time to put the tent away.

I bought it off of Ebay; user "VWheritage"
Price is GBP 449.95; Approximately US $679.87 and shipping was GBP 120.00 (approx. US $181.32)
In total i spent 569.95 British Pounds(GBP) which is equivalent to 868.06 US Dollars.
Here is the link to where i bought it.
http://www.ebay.com/itm/T4-Propex-He...UAAOSw3ydV3b~I
By the way Shipping was extremely quick. i got it in about 1 week!
And also today i went to my local trailer store "Marksman Trailer Supply" in Santa Fe Springs CA and bought all the stuff needed to build my own custom trailer axle.
This is the last of the things I have coming in the mail. After this all I gotta do is cut my 1/4" thick 2"�2" square tube to size to make my trailer axle 58" wide(hub face to hub face) so I can match the wheel base of my Toyota 4Runner that I'll be towing it with. These are all "Dexter" trailer parts brand and the axle will be rated at 3500 pounds towing capacity. Yes! Those are electric brakes. It's much safer and it won't eat my truck brakes so easily if i have assistance from the trailer. This wiring kit is for a 7 pole trailer harness. All I'll need to get for the lighting to work is some heavy duty tail lights, turn signals, running lights for the side, plus rock lights I will only run LED lighting on this build for absolute minimal power draw off the solar battery bank I plan to run on this. All of this will come eventually with some time. But it will definitely happen. I can't wait to get to work. I plan to buy the lights off of my instagram buddy's page "@All4OffRoad" he will hook me up with a discount price when the time comes to buy.
All these parts were bought for $421.29 - This was at a small discount charge because they made me wait a good while because they only had one 6x5.5 pattern brake drum in stock so they had to get the other one for me while i waited. On the plus side i got to meet a lot of cool people/ other customers at the shop and i got a personal tour of the back area where they build their in house trailers. I gotta say that is one awesome place. They took the time to explain to me how to run the wires, to my brakes, running lights, turn signals, and tail lights. plus how to properly build the DIY axle that i was buying. We had a lot of time to kill while waiting lol i learned a lot from them and i think it was definitely worth the wait. I got a lot of knowledge off of them and a discount. Double win!

Last edited by Redeth005; Nov 11, 2015 at 07:59 PM.
Nov 12, 2015 | 01:04 PM
#43
Nice update, making some good progress! I think I will add electric brakes to my axels ( someday when I start working on it again, lol) at least the axels I bought have the flanges so I can bolt them on later. Nice work on the frame work for the main box! One suggestion, if you cut the end of the square tubing at 45� then you won't have to go back and weld a plate over the end to box in the ends. That's what I did on mine, awesome work though!
Last edited by rustED; Nov 12, 2015 at 01:07 PM.
Nov 12, 2015 | 04:21 PM
#44
Thread Starter
Registered User
Joined: Apr 2012
Posts: 2,817
Likes: 2
From: Los Angeles CA
Nice update, making some good progress! I think I will add electric brakes to my axels ( someday when I start working on it again, lol) at least the axels I bought have the flanges so I can bolt them on later. Nice work on the frame work for the main box! One suggestion, if you cut the end of the square tubing at 45� then you won't have to go back and weld a plate over the end to box in the ends. That's what I did on mine, awesome work though!
Luckily now that I have the shower, water tank, and heater stuff now I can build the front storage box without worrying about measurements not being enough and such. I'll be able to make it more accurate now. I think the hardest part for me is going to be making my own doors I still don't understand how to make them. All I know is that I'll be buying great able bullet hinges from ebay. But that's about it. I need to do more research.
Nov 14, 2015 | 04:40 PM
#45
Thread Starter
Registered User
Joined: Apr 2012
Posts: 2,817
Likes: 2
From: Los Angeles CA
Cut up the 4th tube today and used some of the scrap pieces I had laying around to create the front storage box. It is coming out good. I think the hardest part is going to be creating the doors on both sides. I gotta do some more research on how to do this. But here are the progress pix from today's hard work.
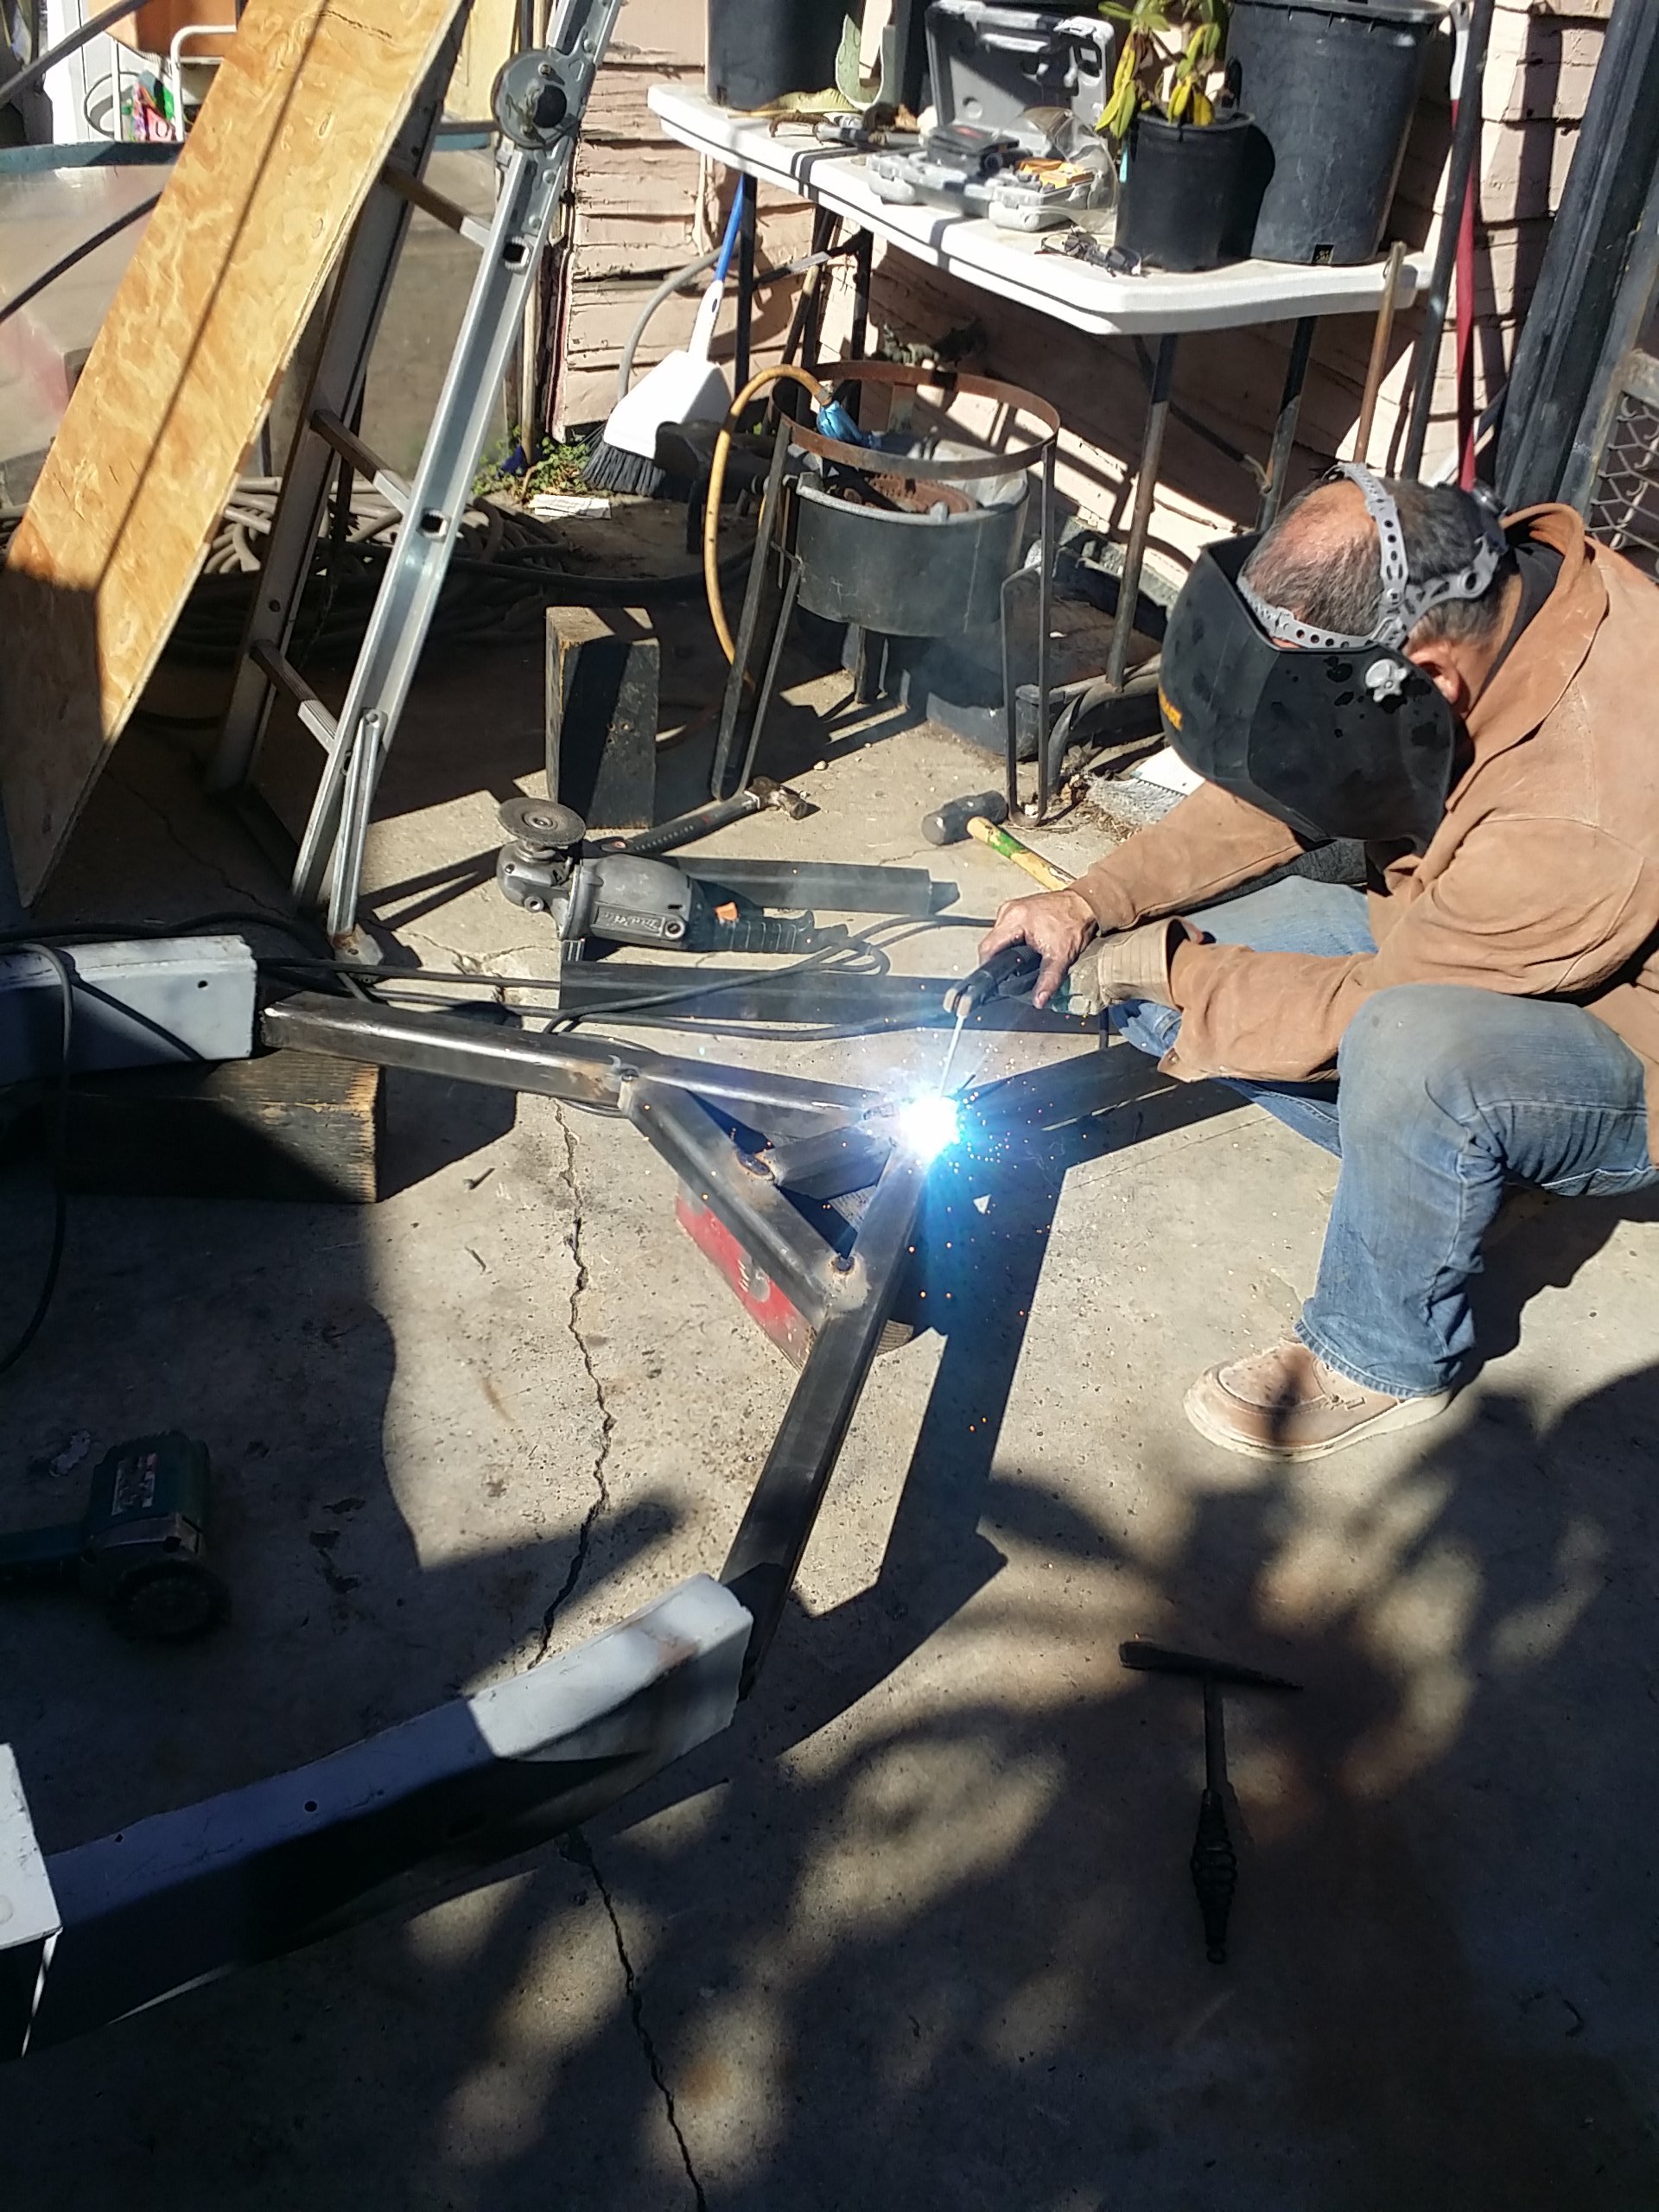
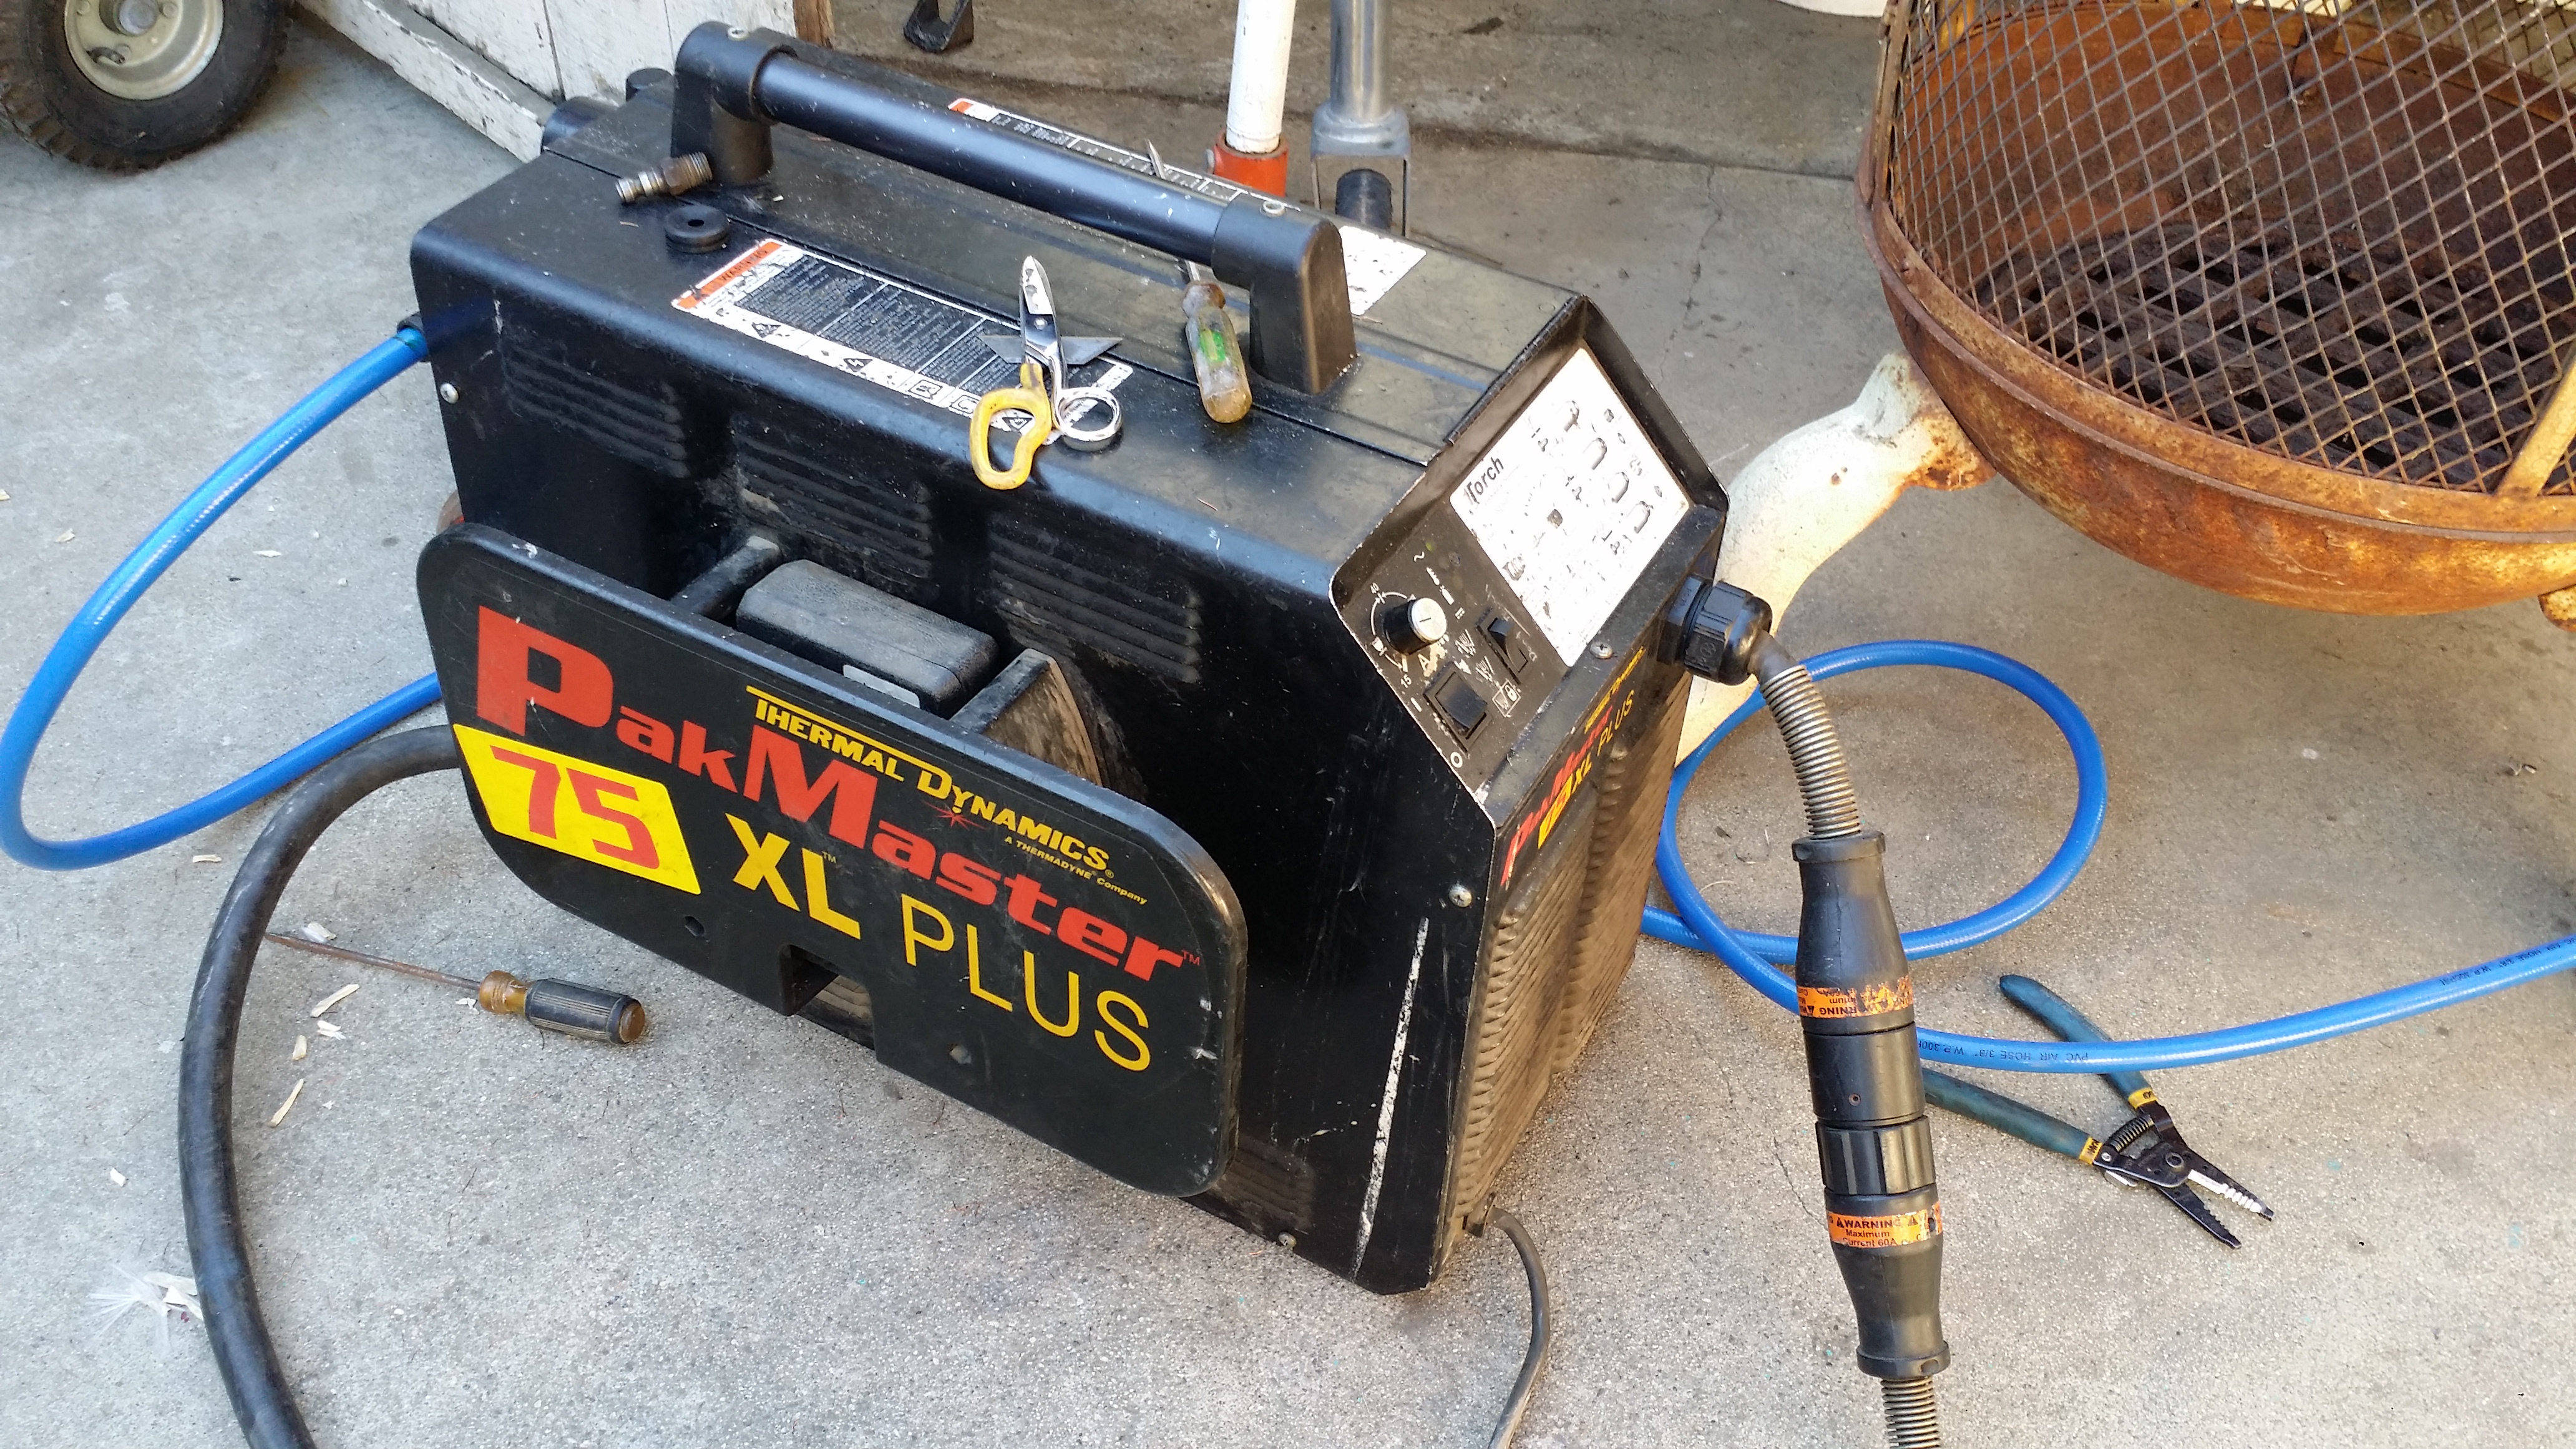
By the way I've learned to hate working with flux core welding wire. I hate it so much. Too much splatter, it doesn't seem to weld as clean as when I weld with the regular wire with co2. Unfortunately for me I don't have much of a choice right now because it has been pretty windy where I live so using gas is definitely out of the picture. I'm forced to use the flux core wire.

By the way I've learned to hate working with flux core welding wire. I hate it so much. Too much splatter, it doesn't seem to weld as clean as when I weld with the regular wire with co2. Unfortunately for me I don't have much of a choice right now because it has been pretty windy where I live so using gas is definitely out of the picture. I'm forced to use the flux core wire.


 Nov 15, 2015 | 08:54 AM
#47
Thread Starter
Registered User
Joined: Apr 2012
Posts: 2,817
Likes: 2
From: Los Angeles CA
Probably not. I bought a cheapie Harbor Freight Flux core wheel. I didn't know there was good or bad ones. I thought what made welds good was always gas. So same thing with these too? Darn I bought 2 wheels. Maybe I'll return the 2nd one for some sander wheels or something and buy a decent flux core wheel from the local Praxair weld lung supply store. It would probably be better quality like you say. Thanks
Nov 15, 2015 | 02:21 PM
#48
Thread Starter
Registered User
Joined: Apr 2012
Posts: 2,817
Likes: 2
From: Los Angeles CA
i had a short amount of time to work on the trailer today before it started to drizzle outside forcing me to stop work.
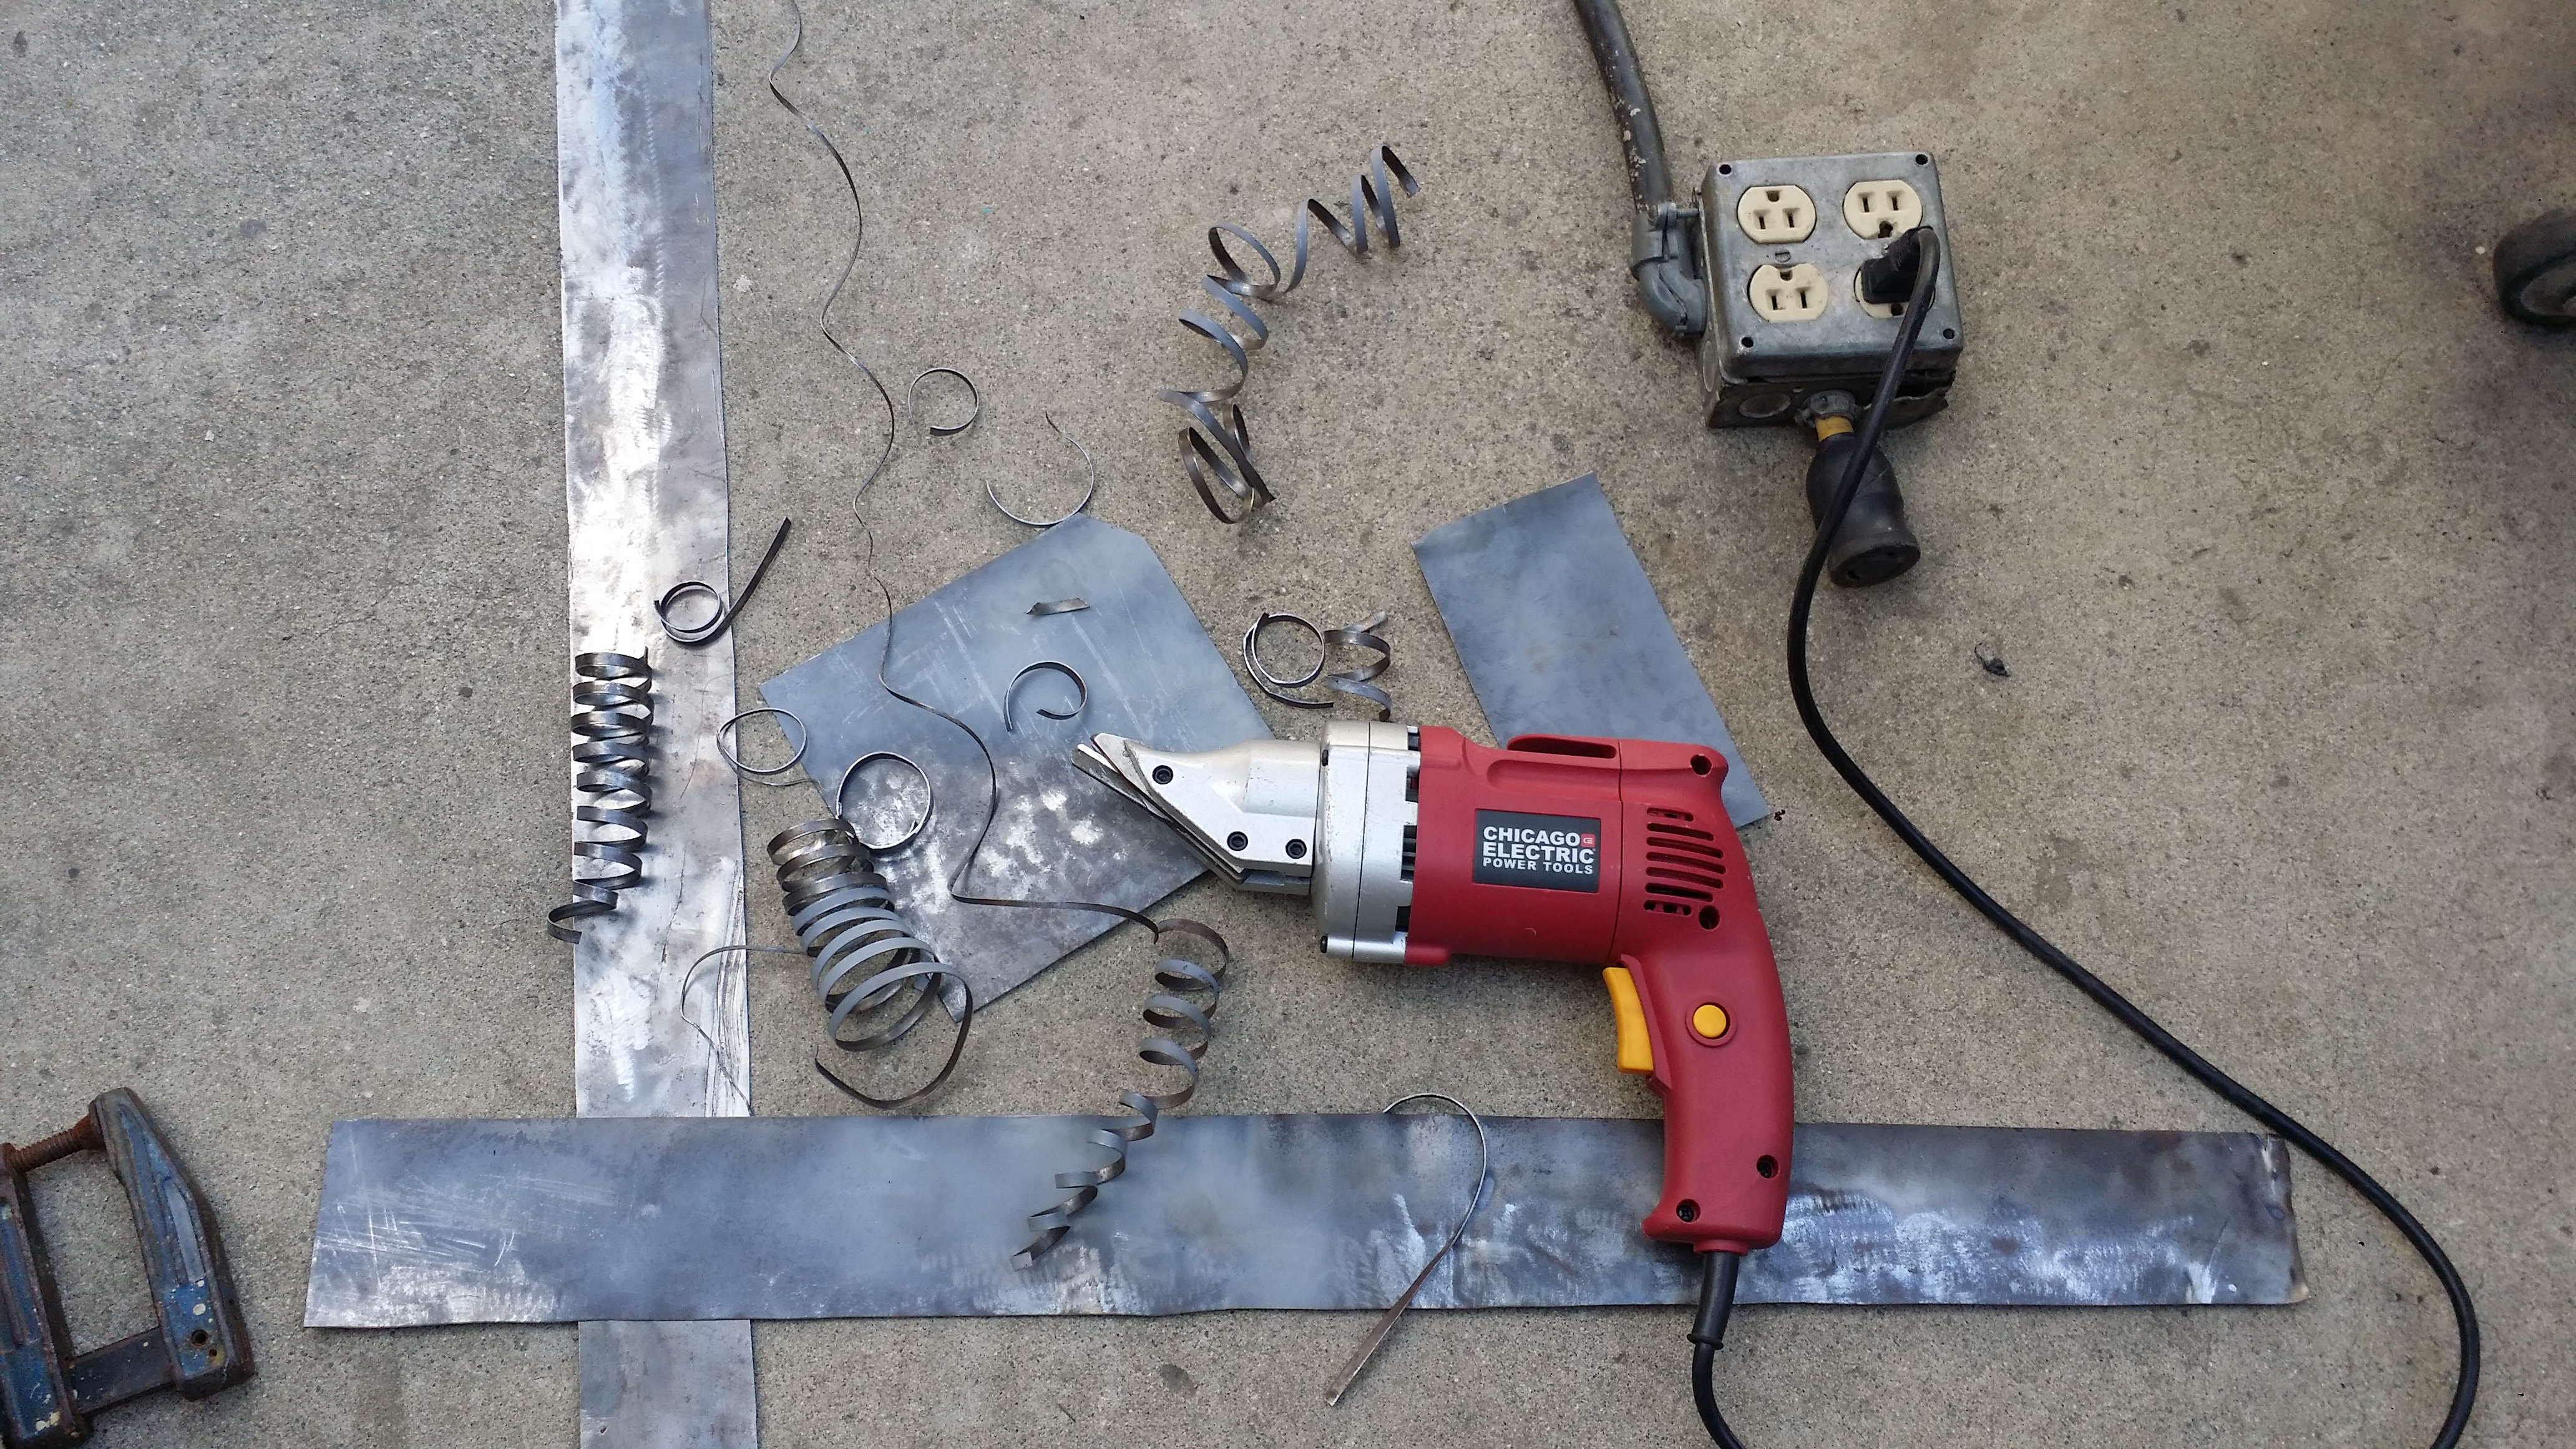
My dad saw me struggling with cutting the sheet metal so he pulled out this pretty awesome cutter that made cutting a breeze! its a cheapie harbor freight brand but it works great.
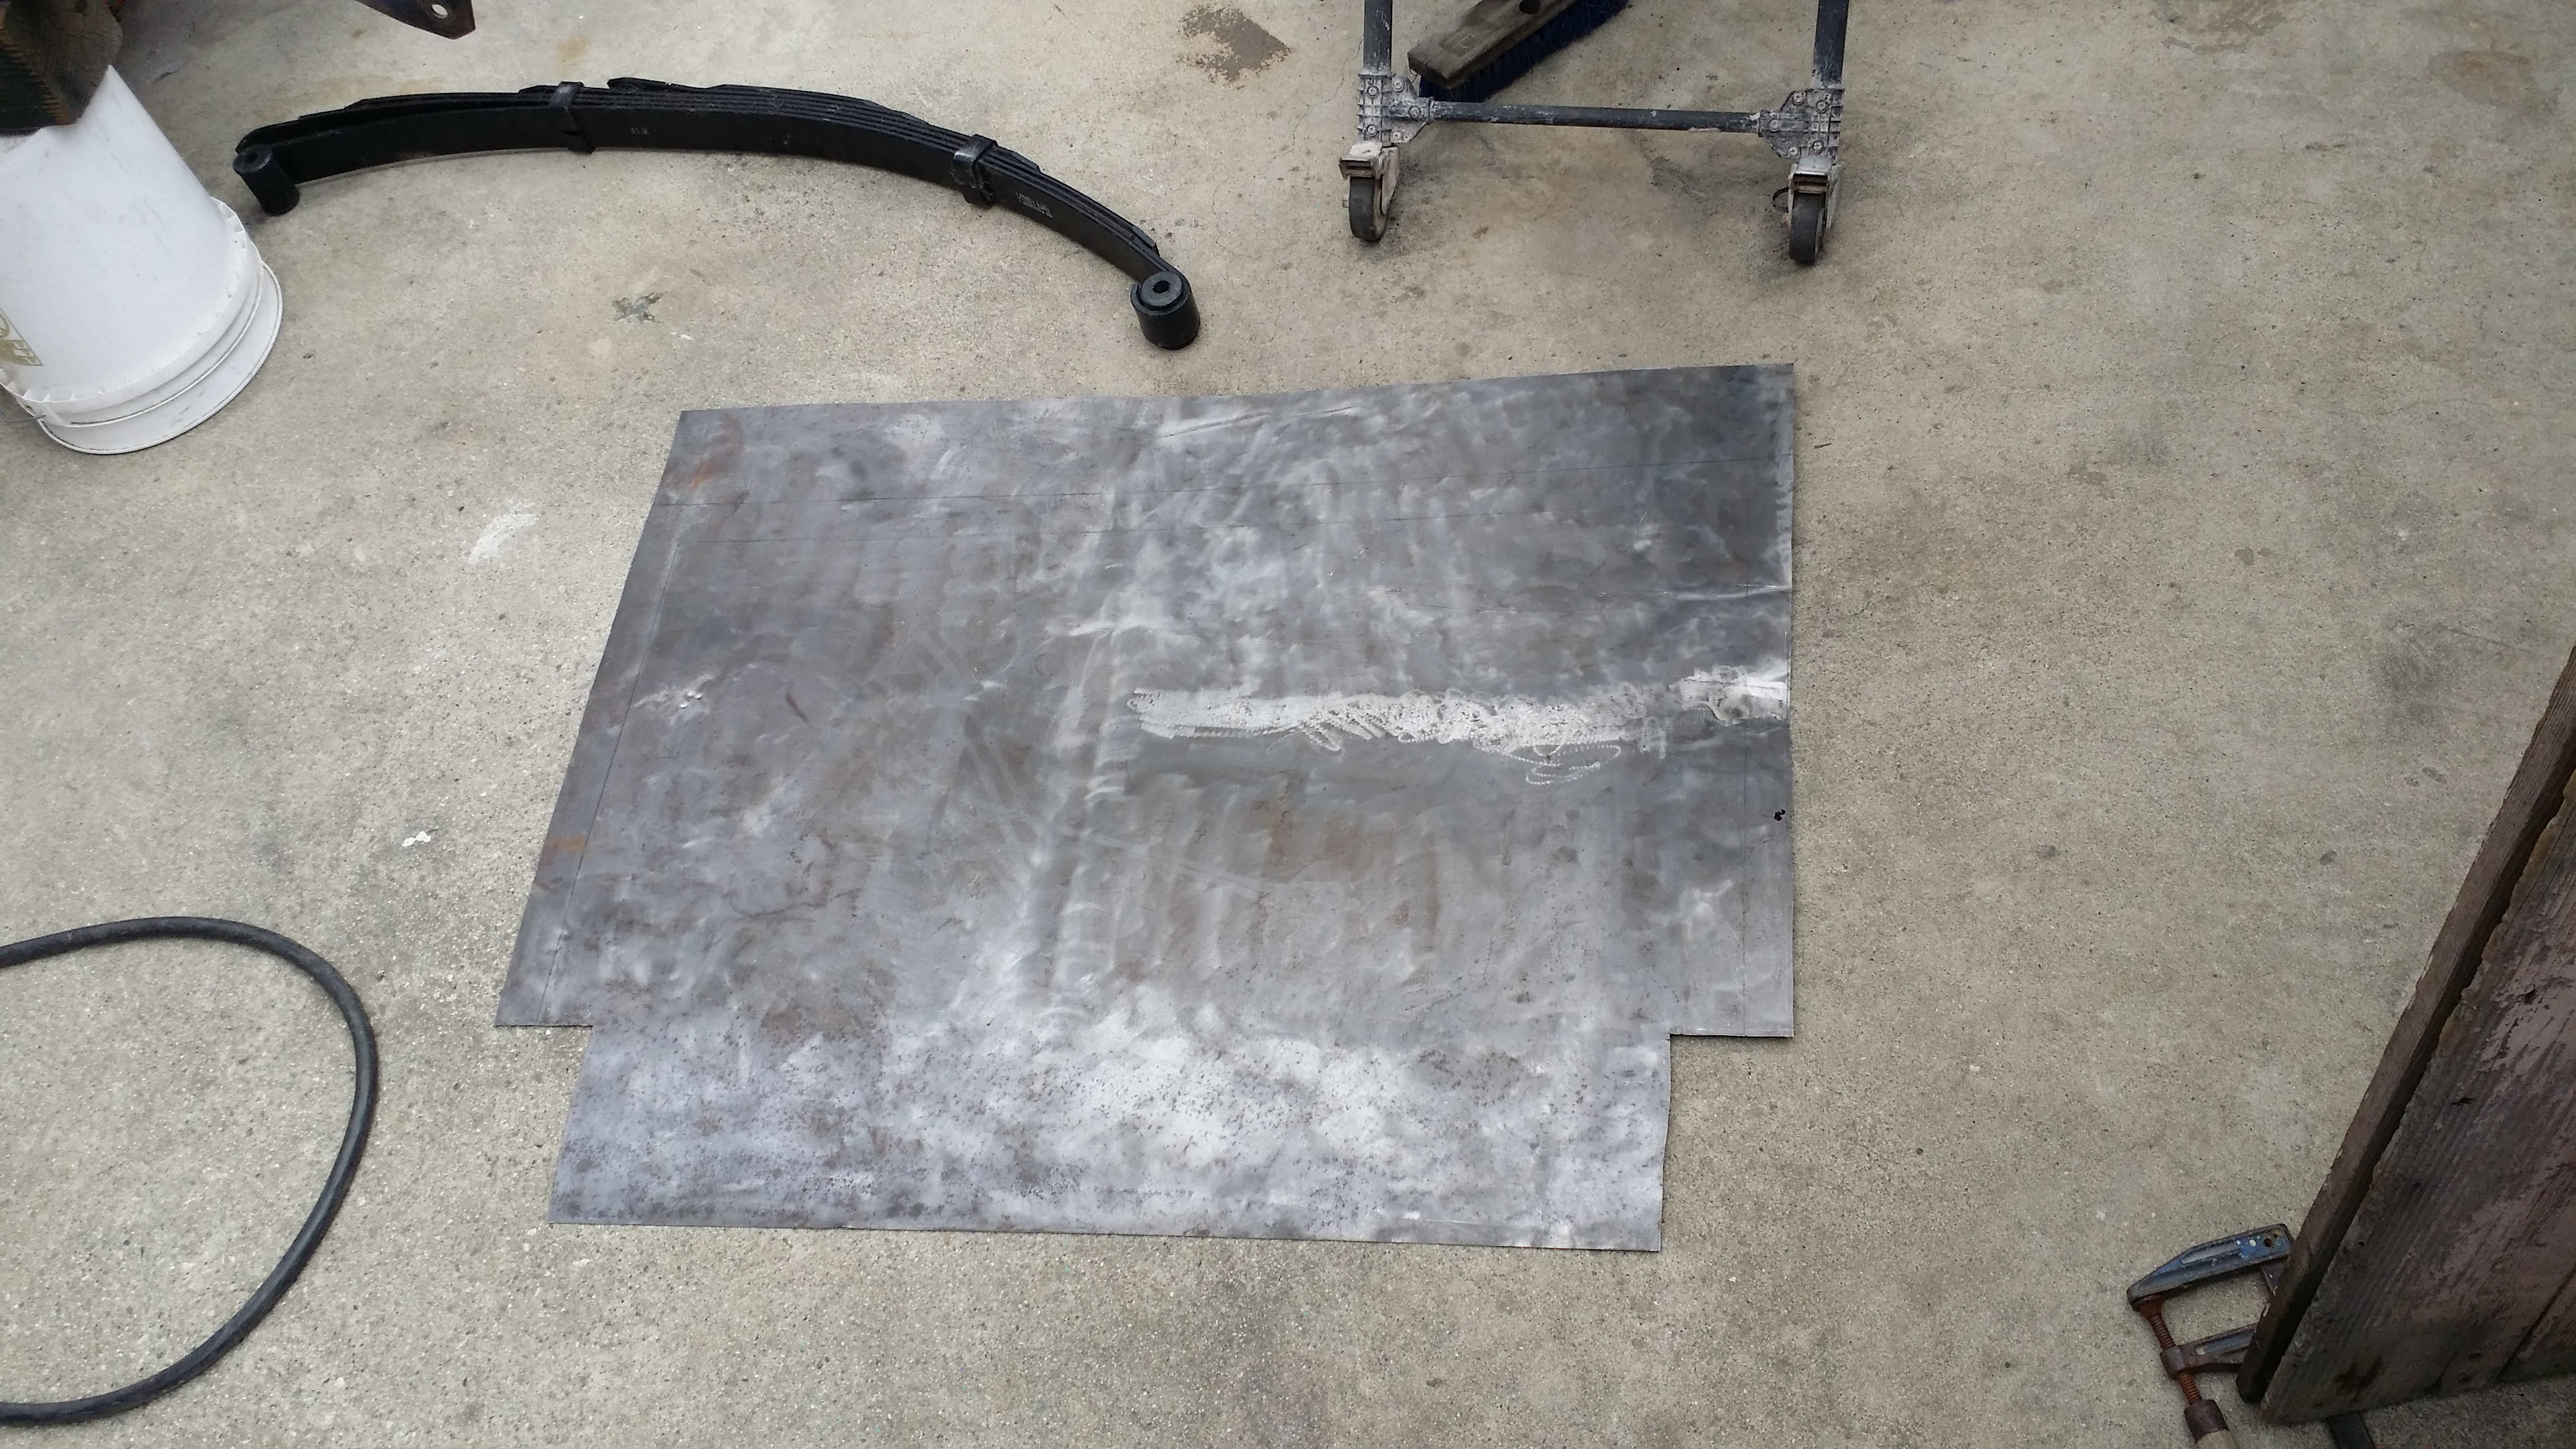
here is the shape i cut the large square to. Those notches on the bottom will fit in between the two frame rails and cover the back side of the front storage box.
See.
Here is another piece of sheet metal that i had laying around but unfortunately it is about 1" too short so i'll be using this for the bottom of the water tank holder instead but you get the idea of what I'm going for here.
I also cut out the two 90 degree angle pieces that will be used for the sides of securing the water tank in place. But i didnt get a chance to finish it because the rain drops started falling quick so i had to get all the steel and welding supplies into the garage before everything got wet. So no pix of that yet.
My dad saw me struggling with cutting the sheet metal so he pulled out this pretty awesome cutter that made cutting a breeze! its a cheapie harbor freight brand but it works great.

here is the shape i cut the large square to. Those notches on the bottom will fit in between the two frame rails and cover the back side of the front storage box.

See.

Here is another piece of sheet metal that i had laying around but unfortunately it is about 1" too short so i'll be using this for the bottom of the water tank holder instead but you get the idea of what I'm going for here.

I also cut out the two 90 degree angle pieces that will be used for the sides of securing the water tank in place. But i didnt get a chance to finish it because the rain drops started falling quick so i had to get all the steel and welding supplies into the garage before everything got wet. So no pix of that yet.
Nov 16, 2015 | 06:41 PM
#49
Probably not. I bought a cheapie Harbor Freight Flux core wheel. I didn't know there was good or bad ones. I thought what made welds good was always gas. So same thing with these too? Darn I bought 2 wheels. Maybe I'll return the 2nd one for some sander wheels or something and buy a decent flux core wheel from the local Praxair weld lung supply store. It would probably be better quality like you say. Thanks
Nov 16, 2015 | 07:44 PM
#50
Thread Starter
Registered User
Joined: Apr 2012
Posts: 2,817
Likes: 2
From: Los Angeles CA
 I havent had much experience with flux core before.
Nov 18, 2015 | 07:16 PM
I havent had much experience with flux core before.
Nov 18, 2015 | 07:16 PM
#51
Thread Starter
Registered User
Joined: Apr 2012
Posts: 2,817
Likes: 2
From: Los Angeles CA
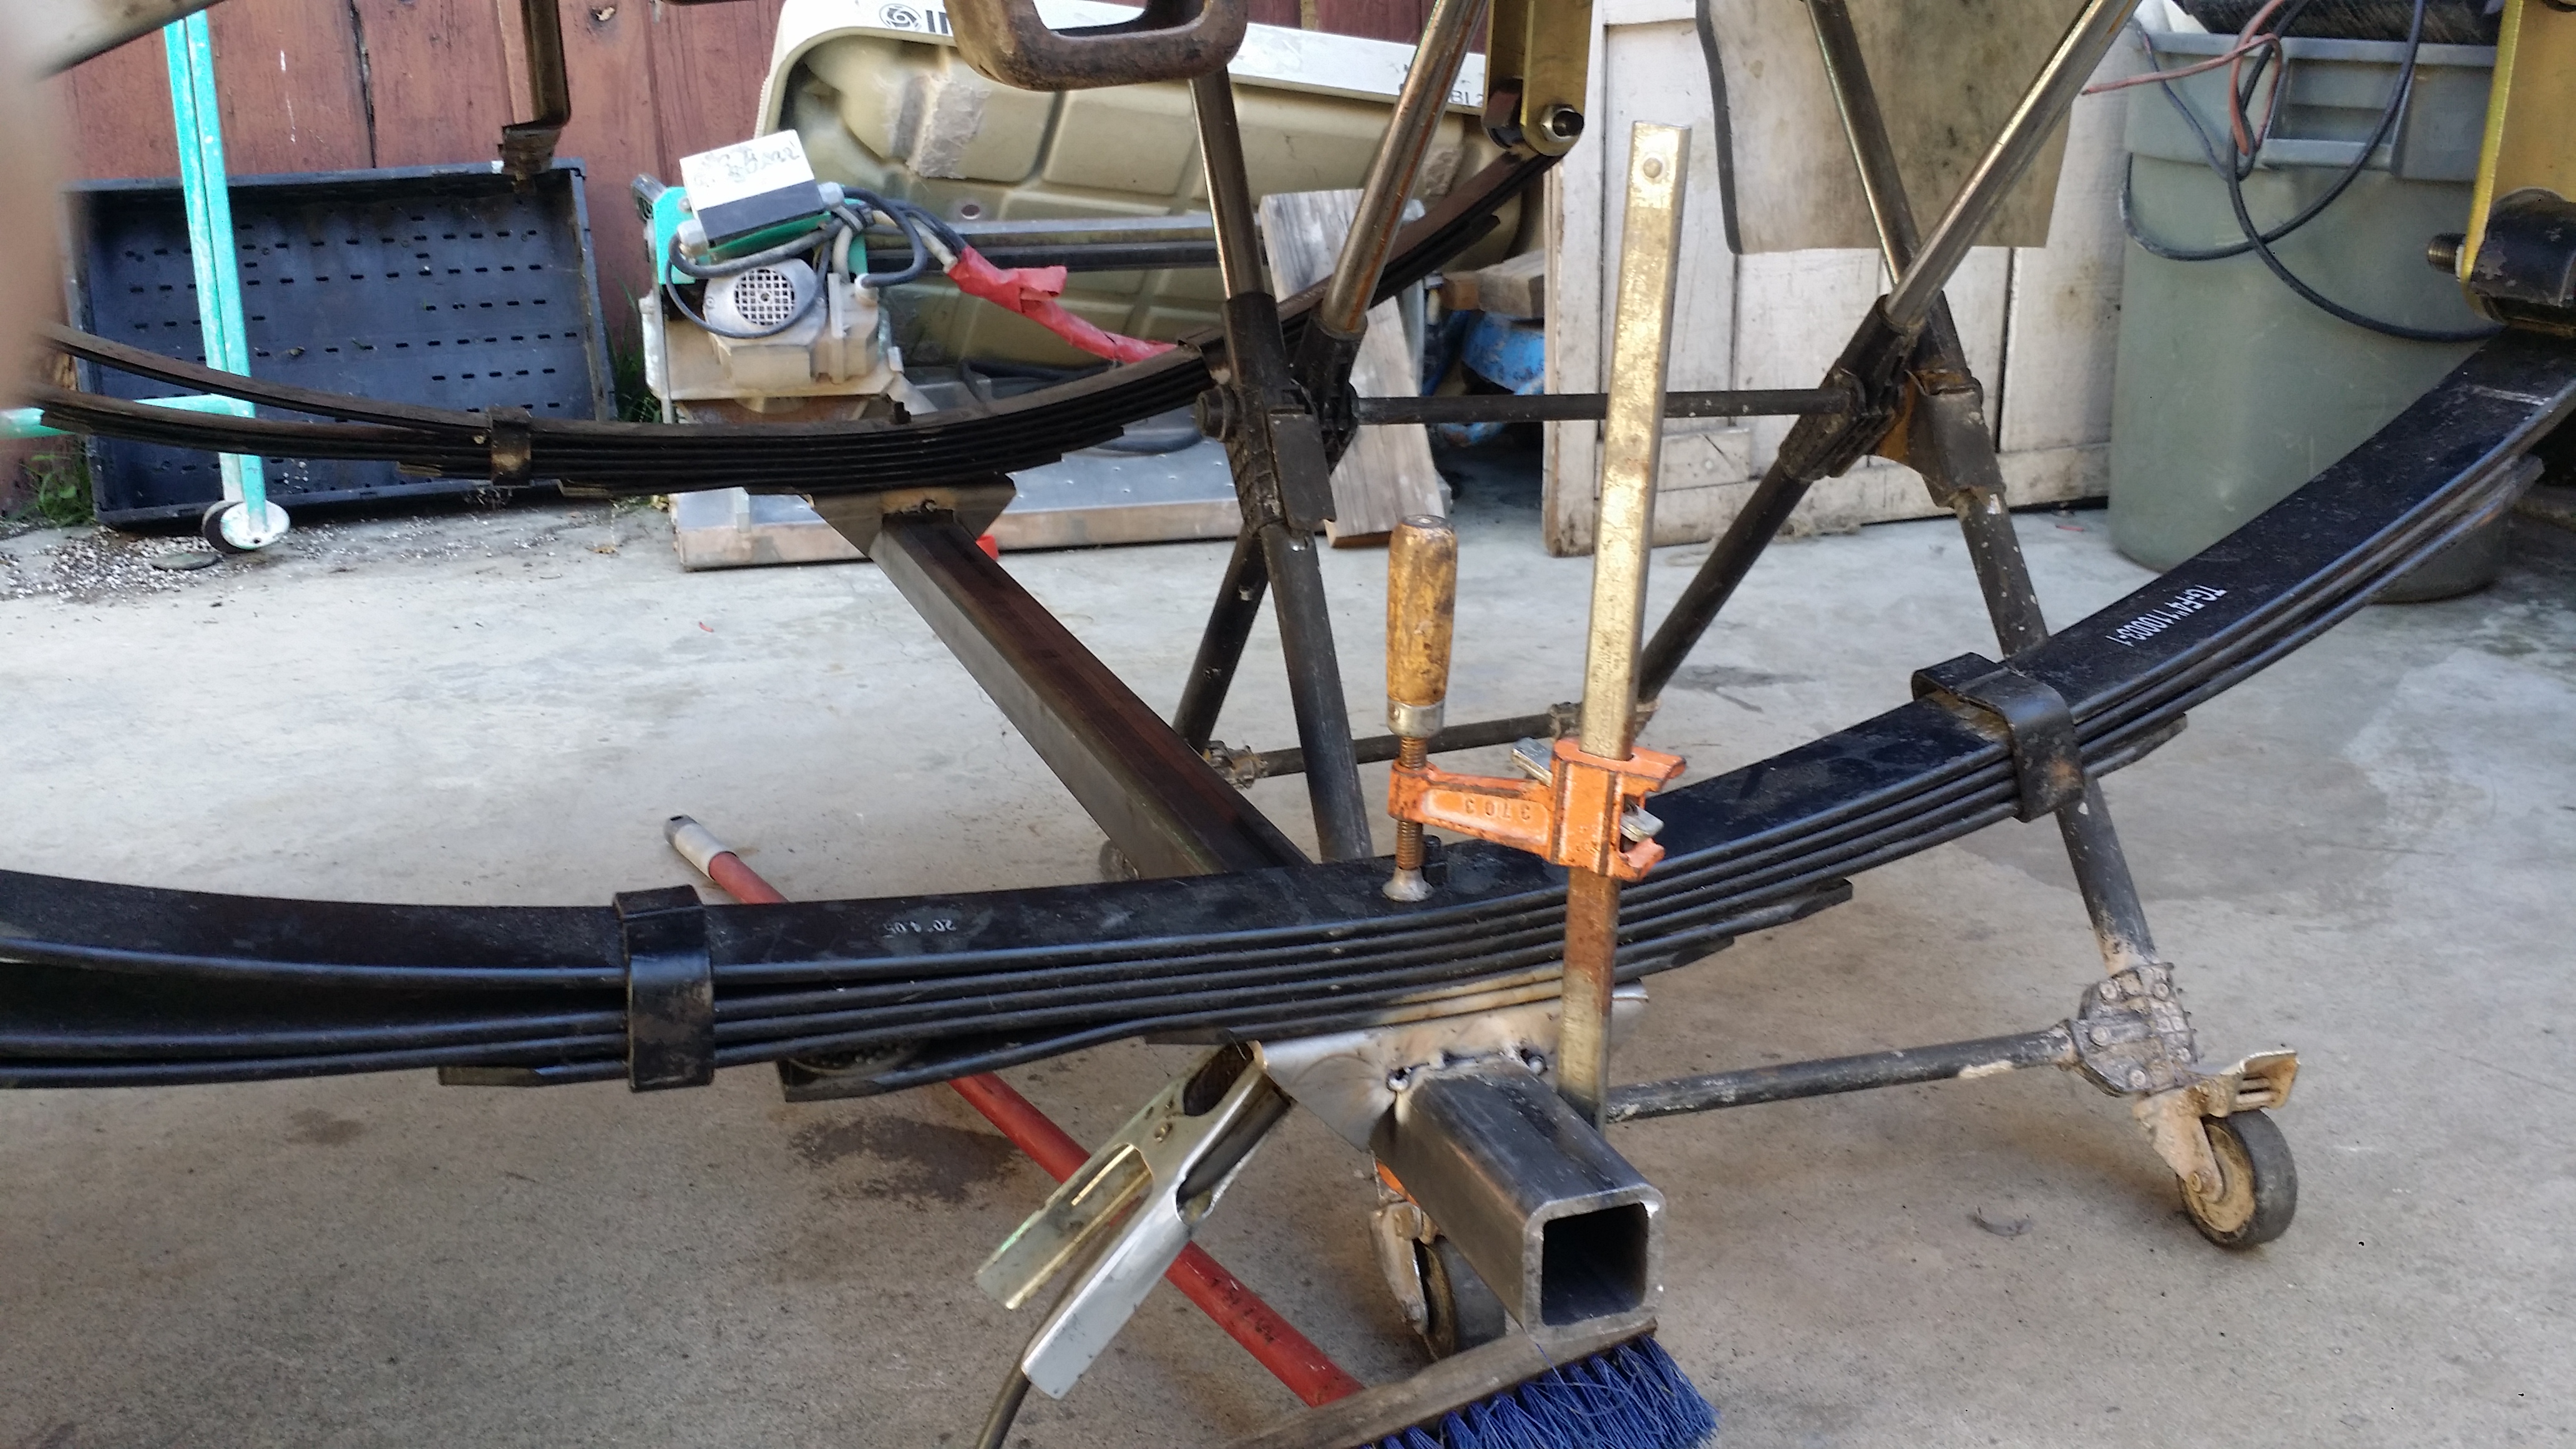
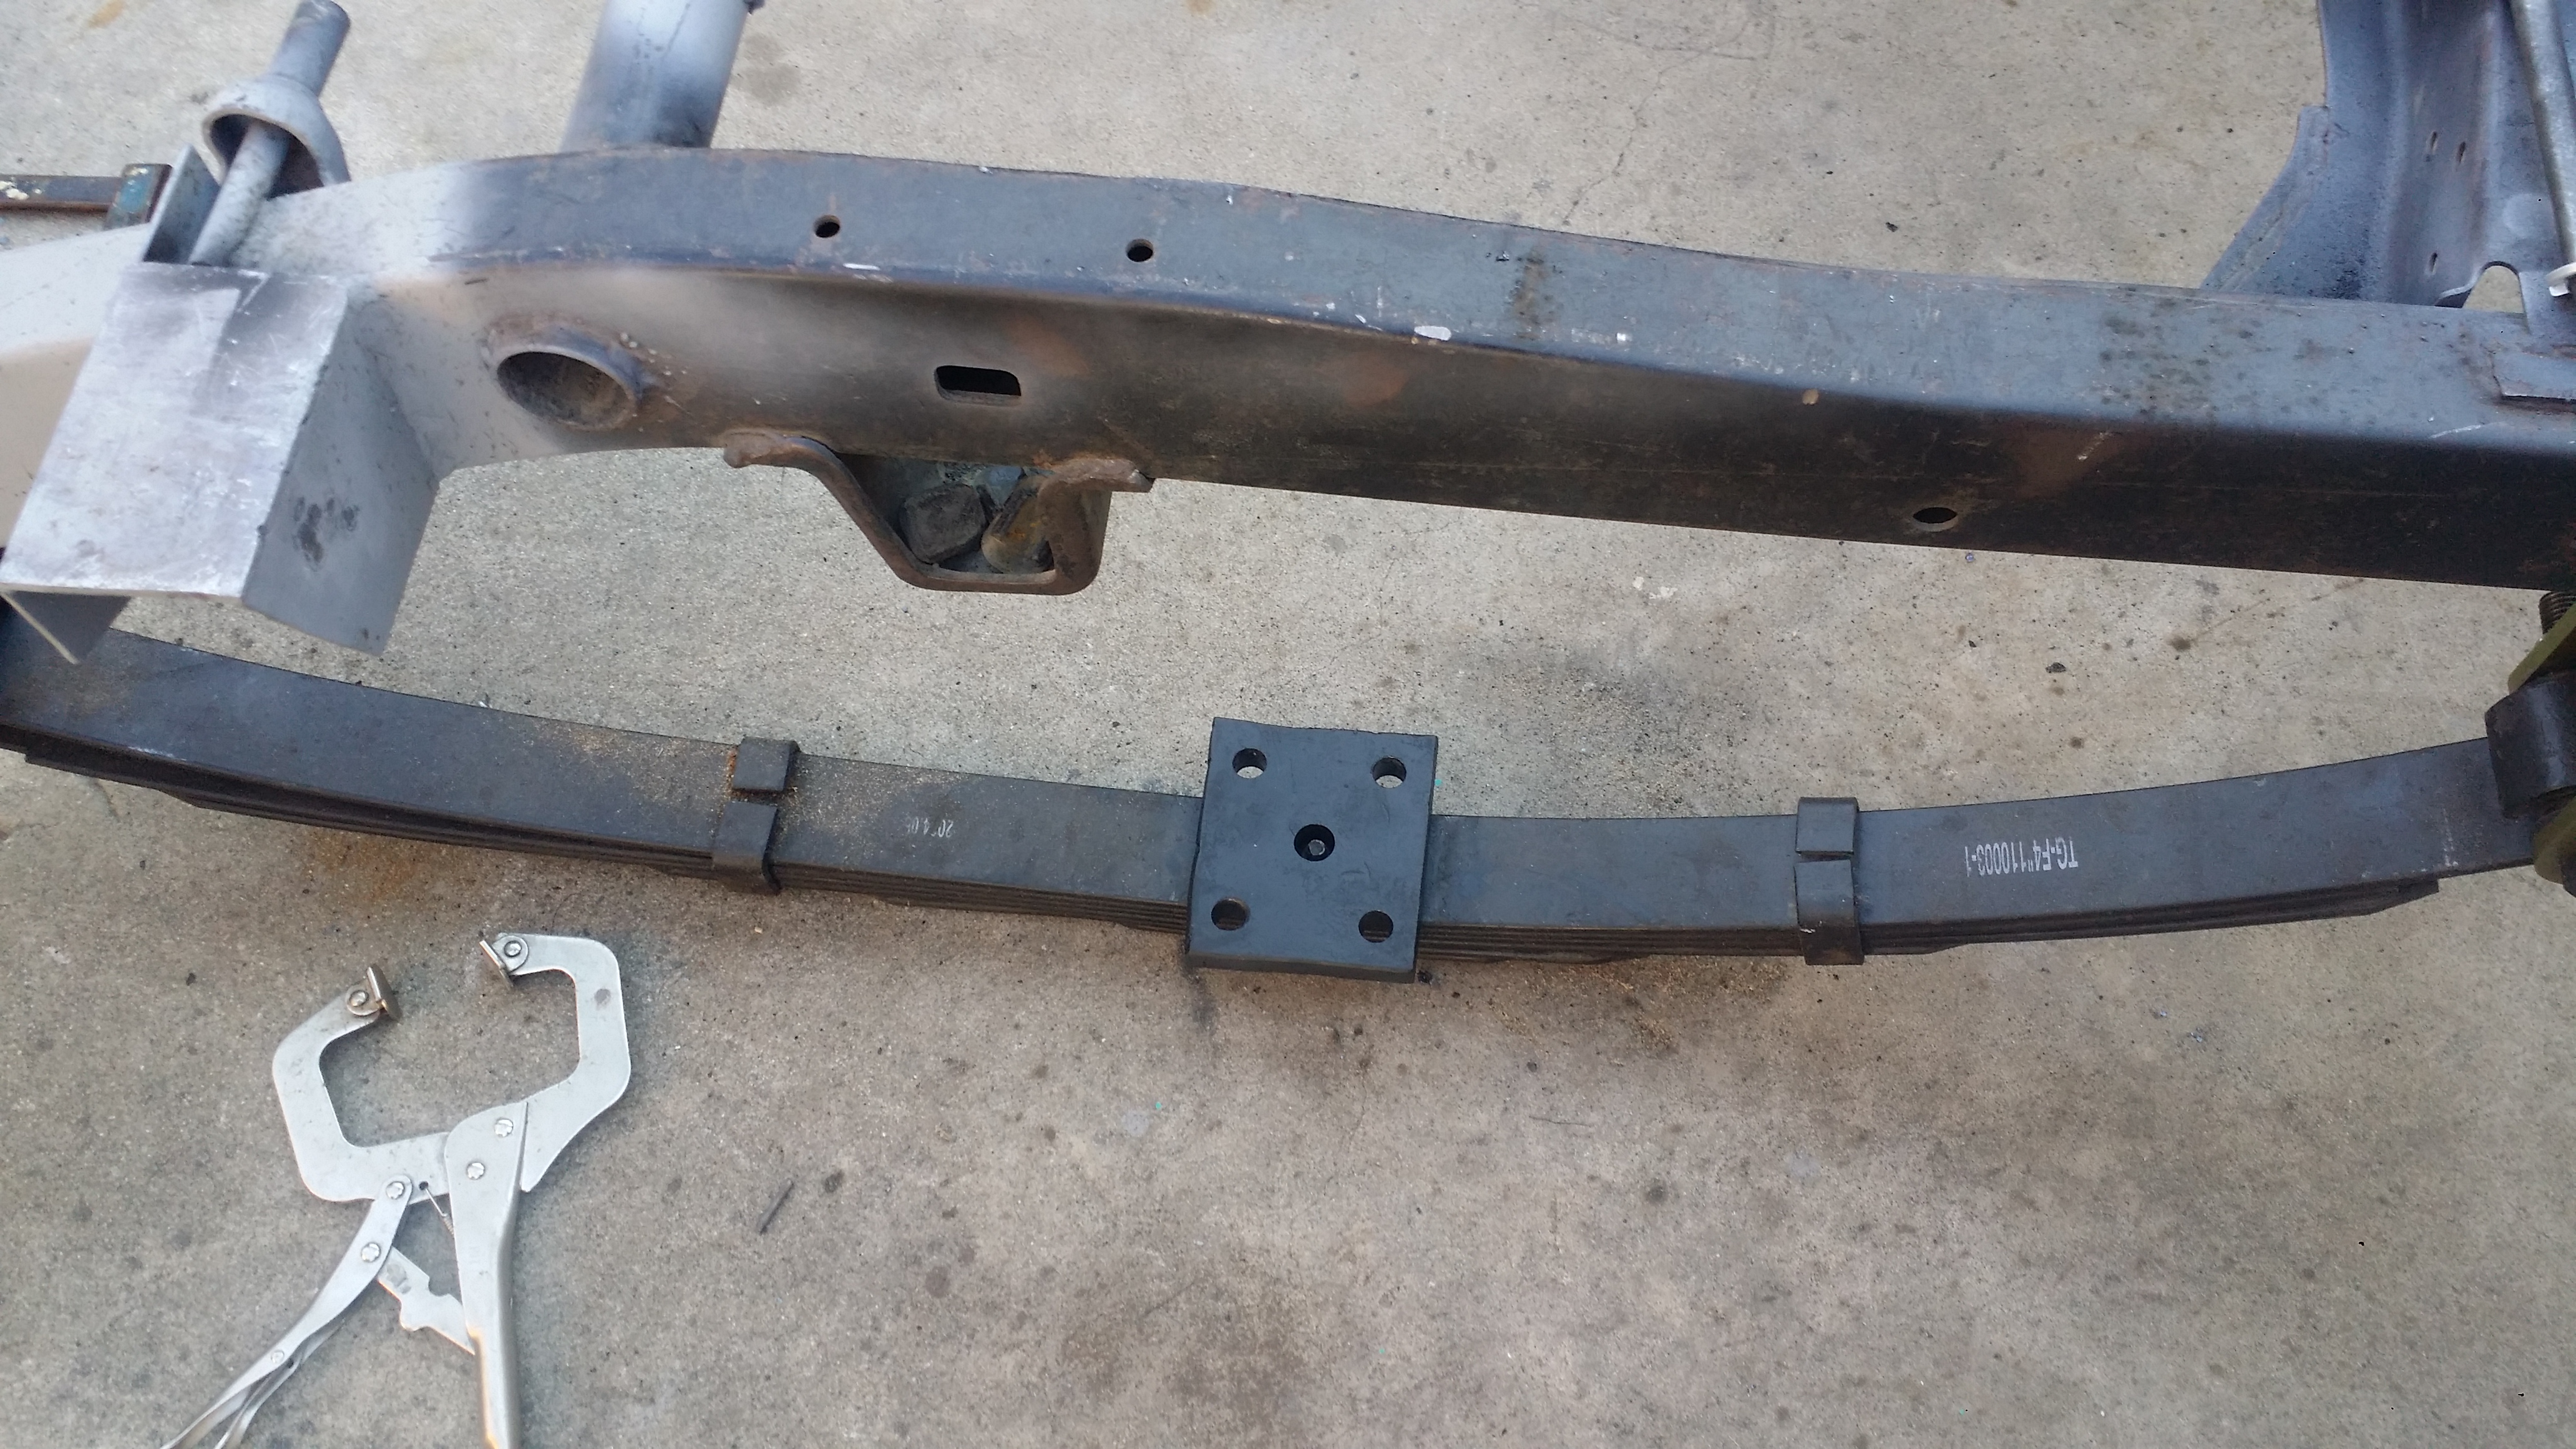
Nice to see AllPro-Offroad.com came through for me and sold me 6 of these greaseable leaf spring bolts.
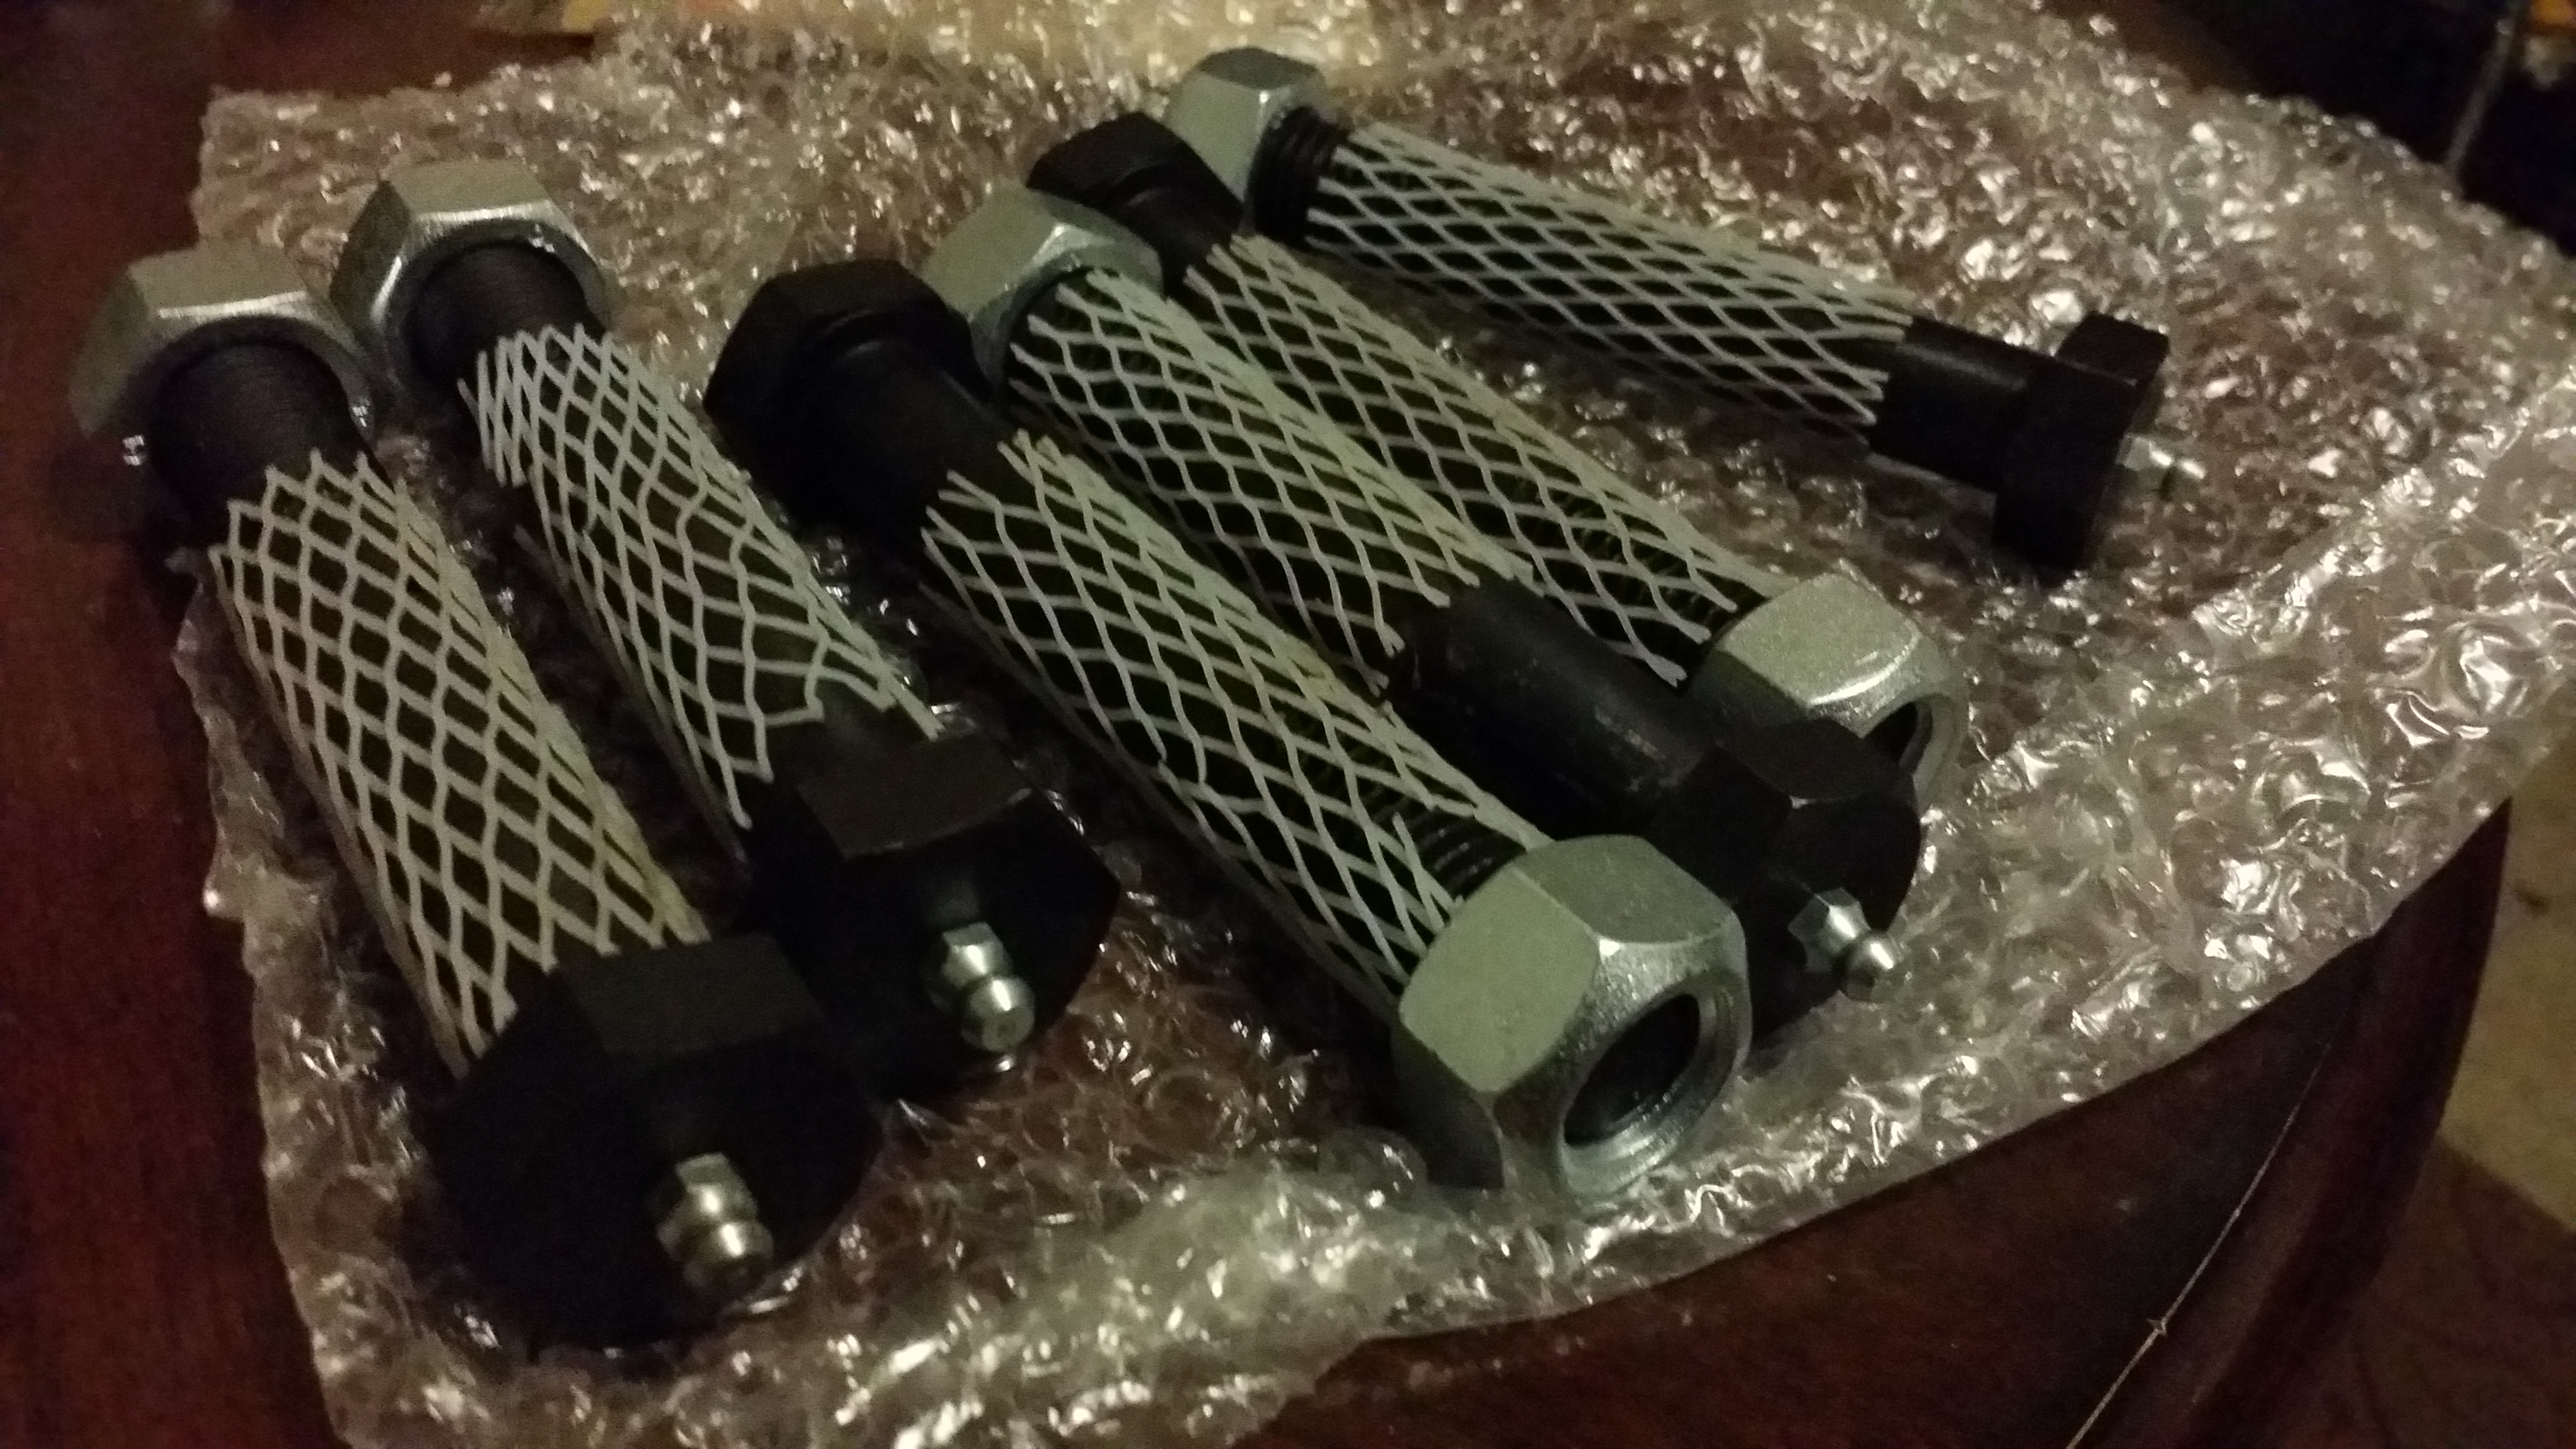
I was finally able to install the donated Trail-Gear 4" lift leaf springs with my 4Runner's old 4" shackles. I'm sure they'll settle down some once the trailer is sitting on it's own weight.
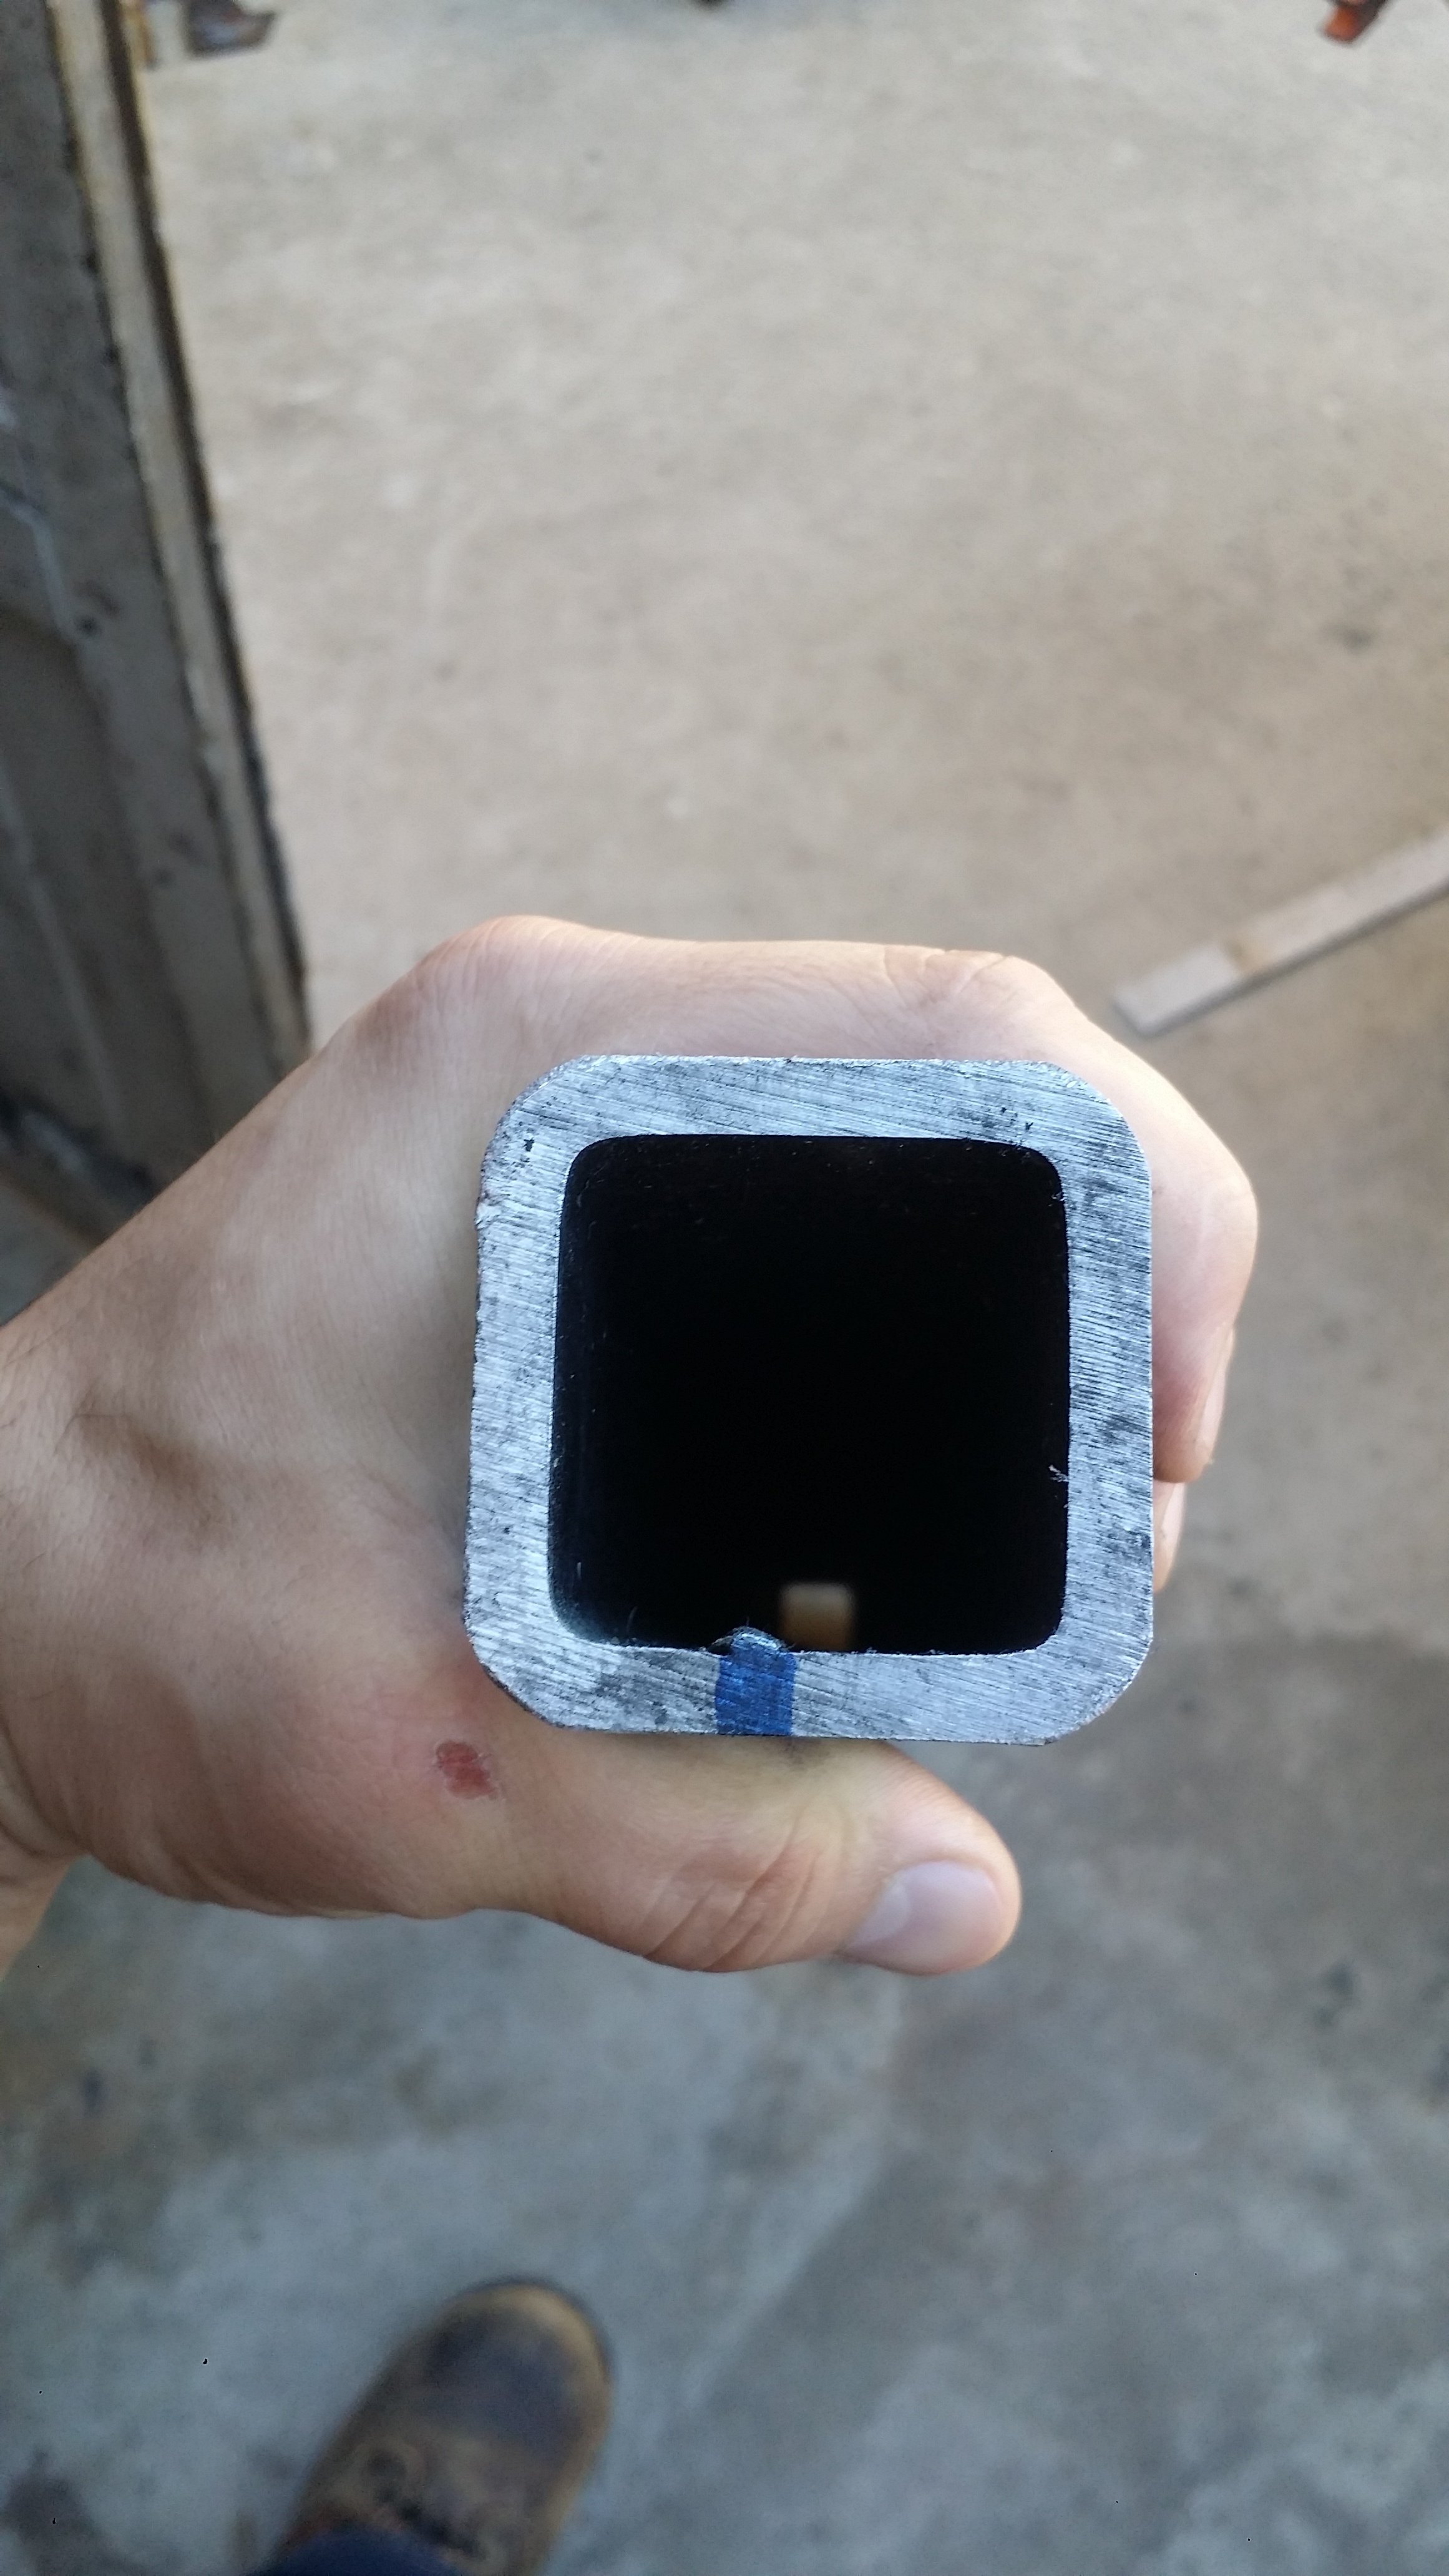
Also, today after work i dropped by the steel shop and bought a 2"x2" 1/4" thick stick of 20ft steel tube so i could build the trailer axle. But i only need 48-50" worth of that 20ft tube for the axle lol I didn't plan on buying a full length piece but the shop doesn't sell cut pieces of 1/4" tube so i figured i could still build the front tongue of the trailer with the remaining amount of that stick. why not right? I'll just stack 2 pieces of that 2x2 tube and turn it into a 4x2 and then make the hitch connector with a piece of the 2x2 as well. It definitely wont go to waste and 1/4" thick will be nice to use for the frame. so it all works out in the end.
It got dark too fast outside so i didn't get around to welding up the axle yet. I'll probably knock that job out of the way on saturday.
thats all for now.
Last edited by Redeth005; Nov 18, 2015 at 07:18 PM.
Nov 21, 2015 | 08:12 PM
#52
Thread Starter
Registered User
Joined: Apr 2012
Posts: 2,817
Likes: 2
From: Los Angeles CA
Time to build the trailer axle!
I took a ton of pix because i couldn't find any info on how to build a trailer axle and it made research hard for me. So i took a bunch of pix to help others out in case they are in the same boat i was in.
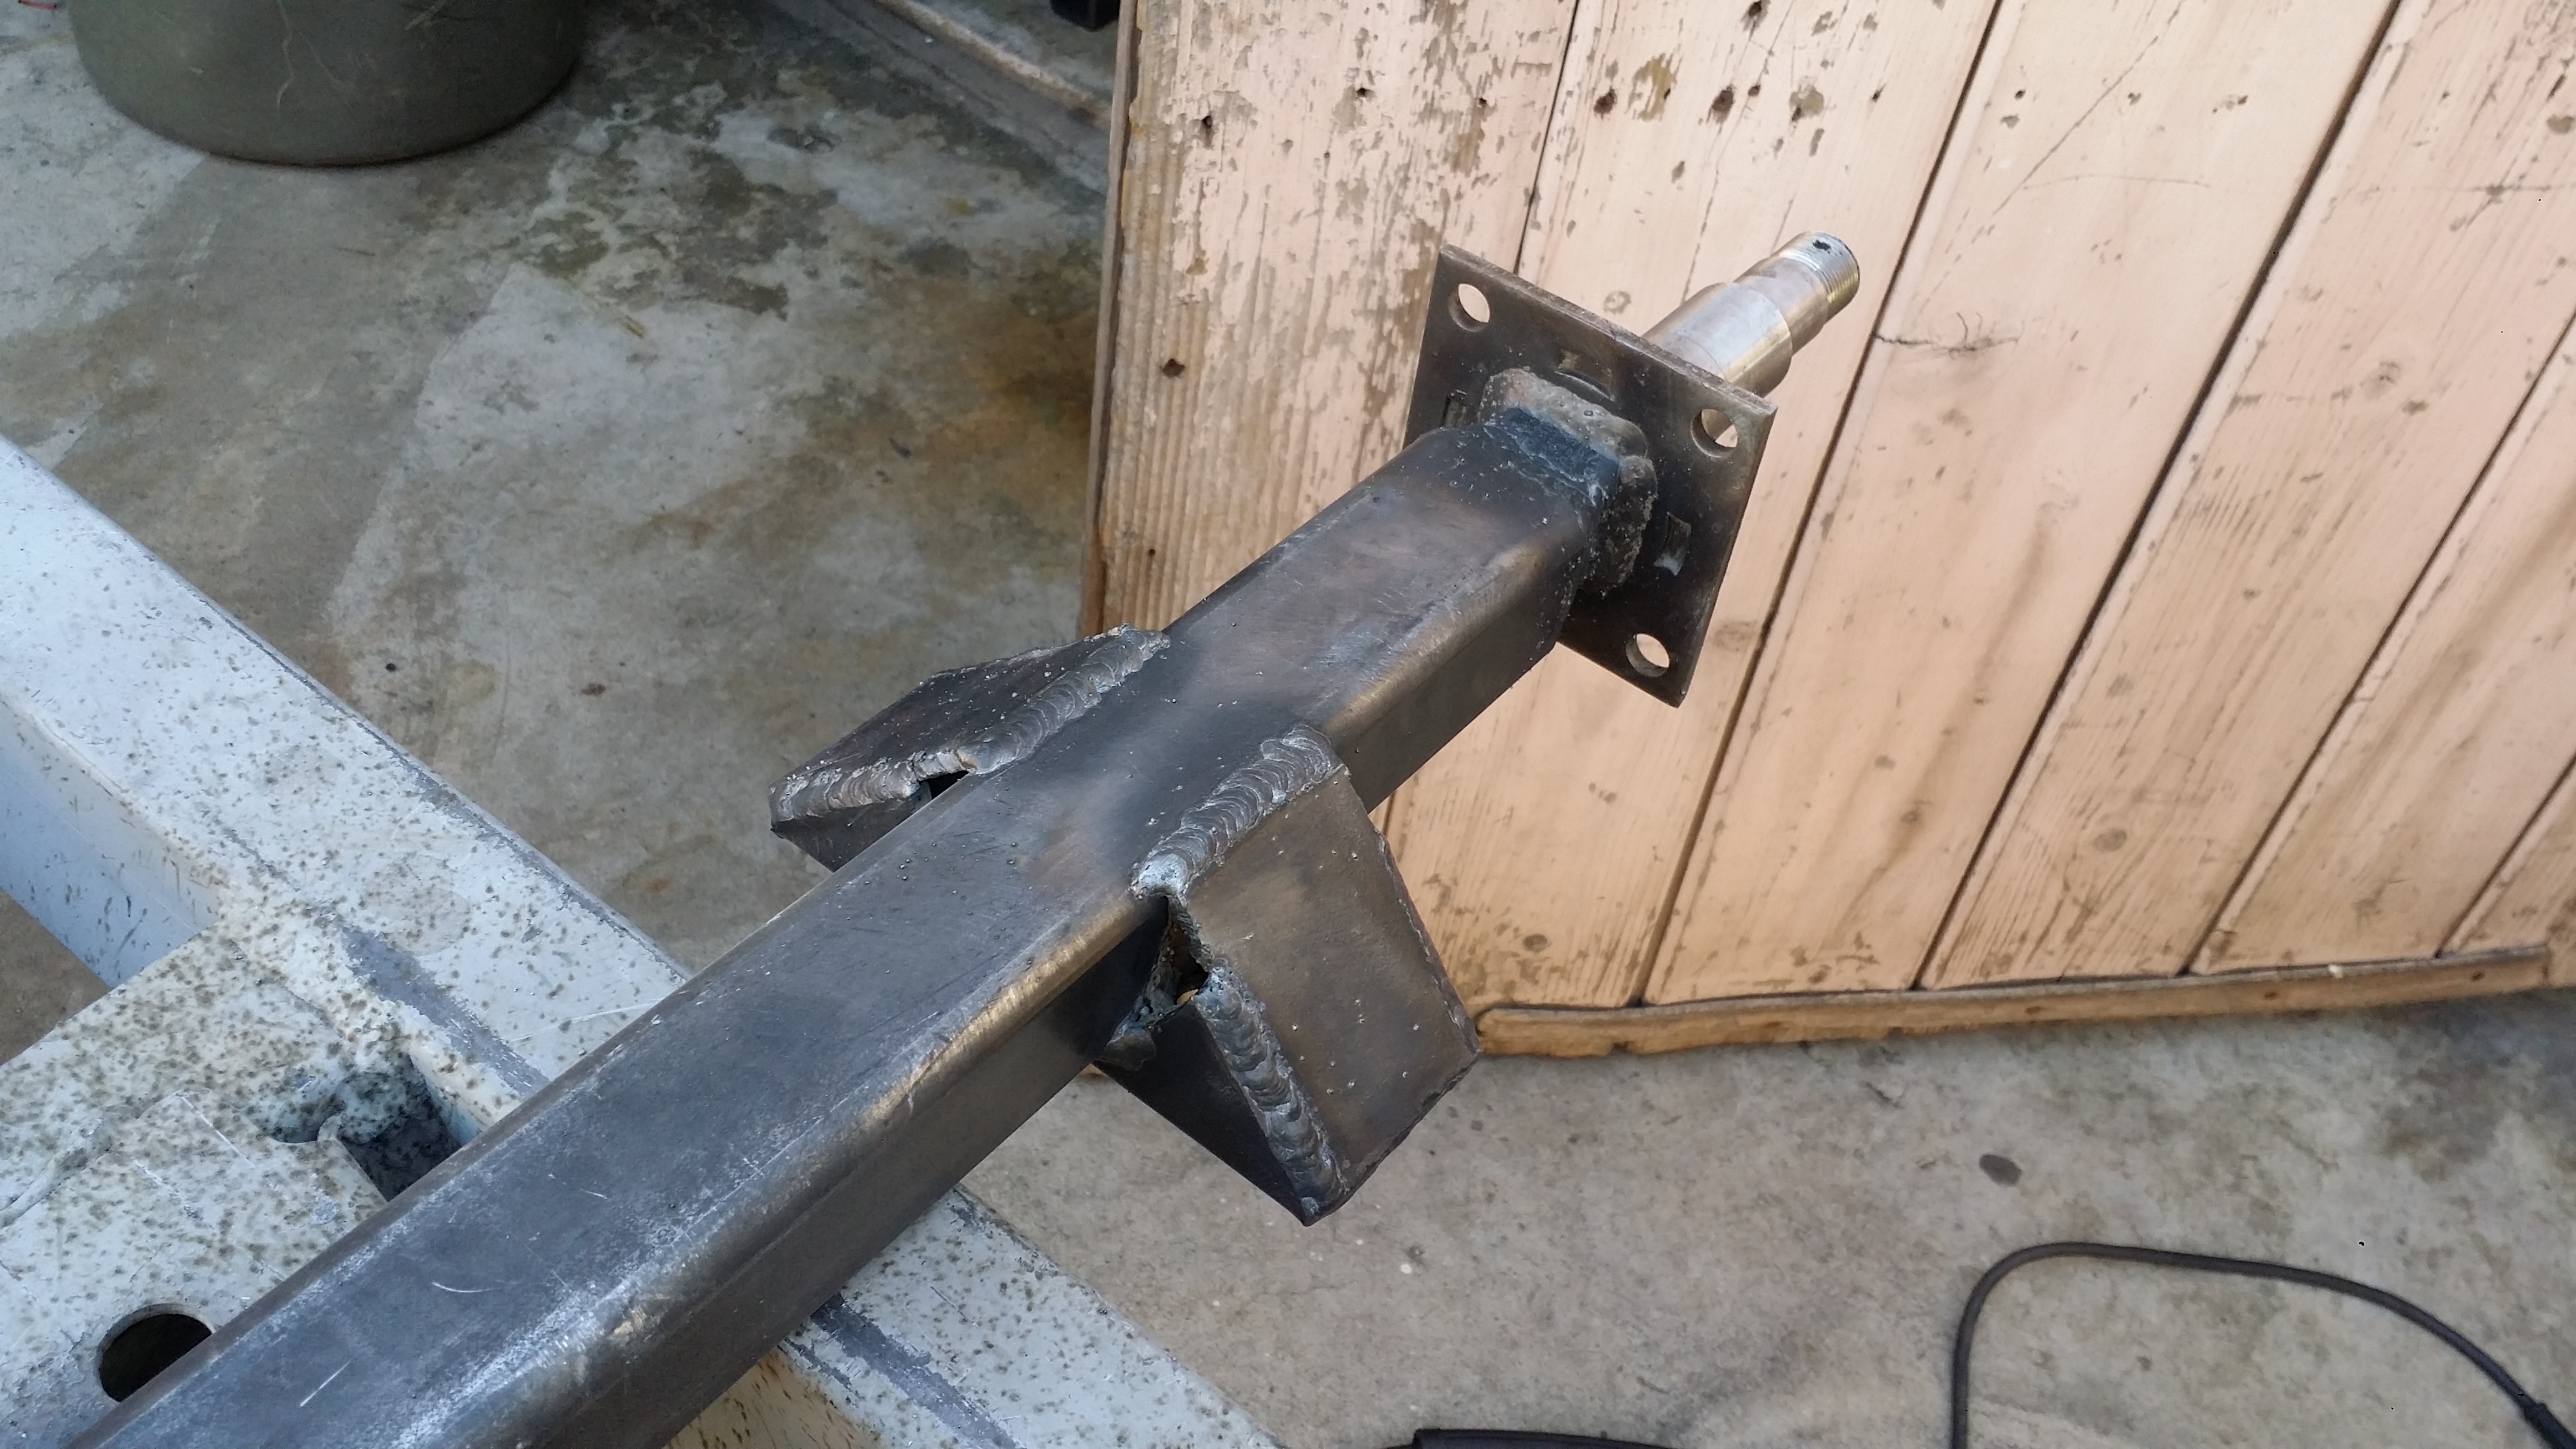
First i had to mark the inner weld on the inside of that 1/4" 2x2" tube that ill be using for the axle. The spindles won't fit inside until i cut out this piece on on the spindle side.
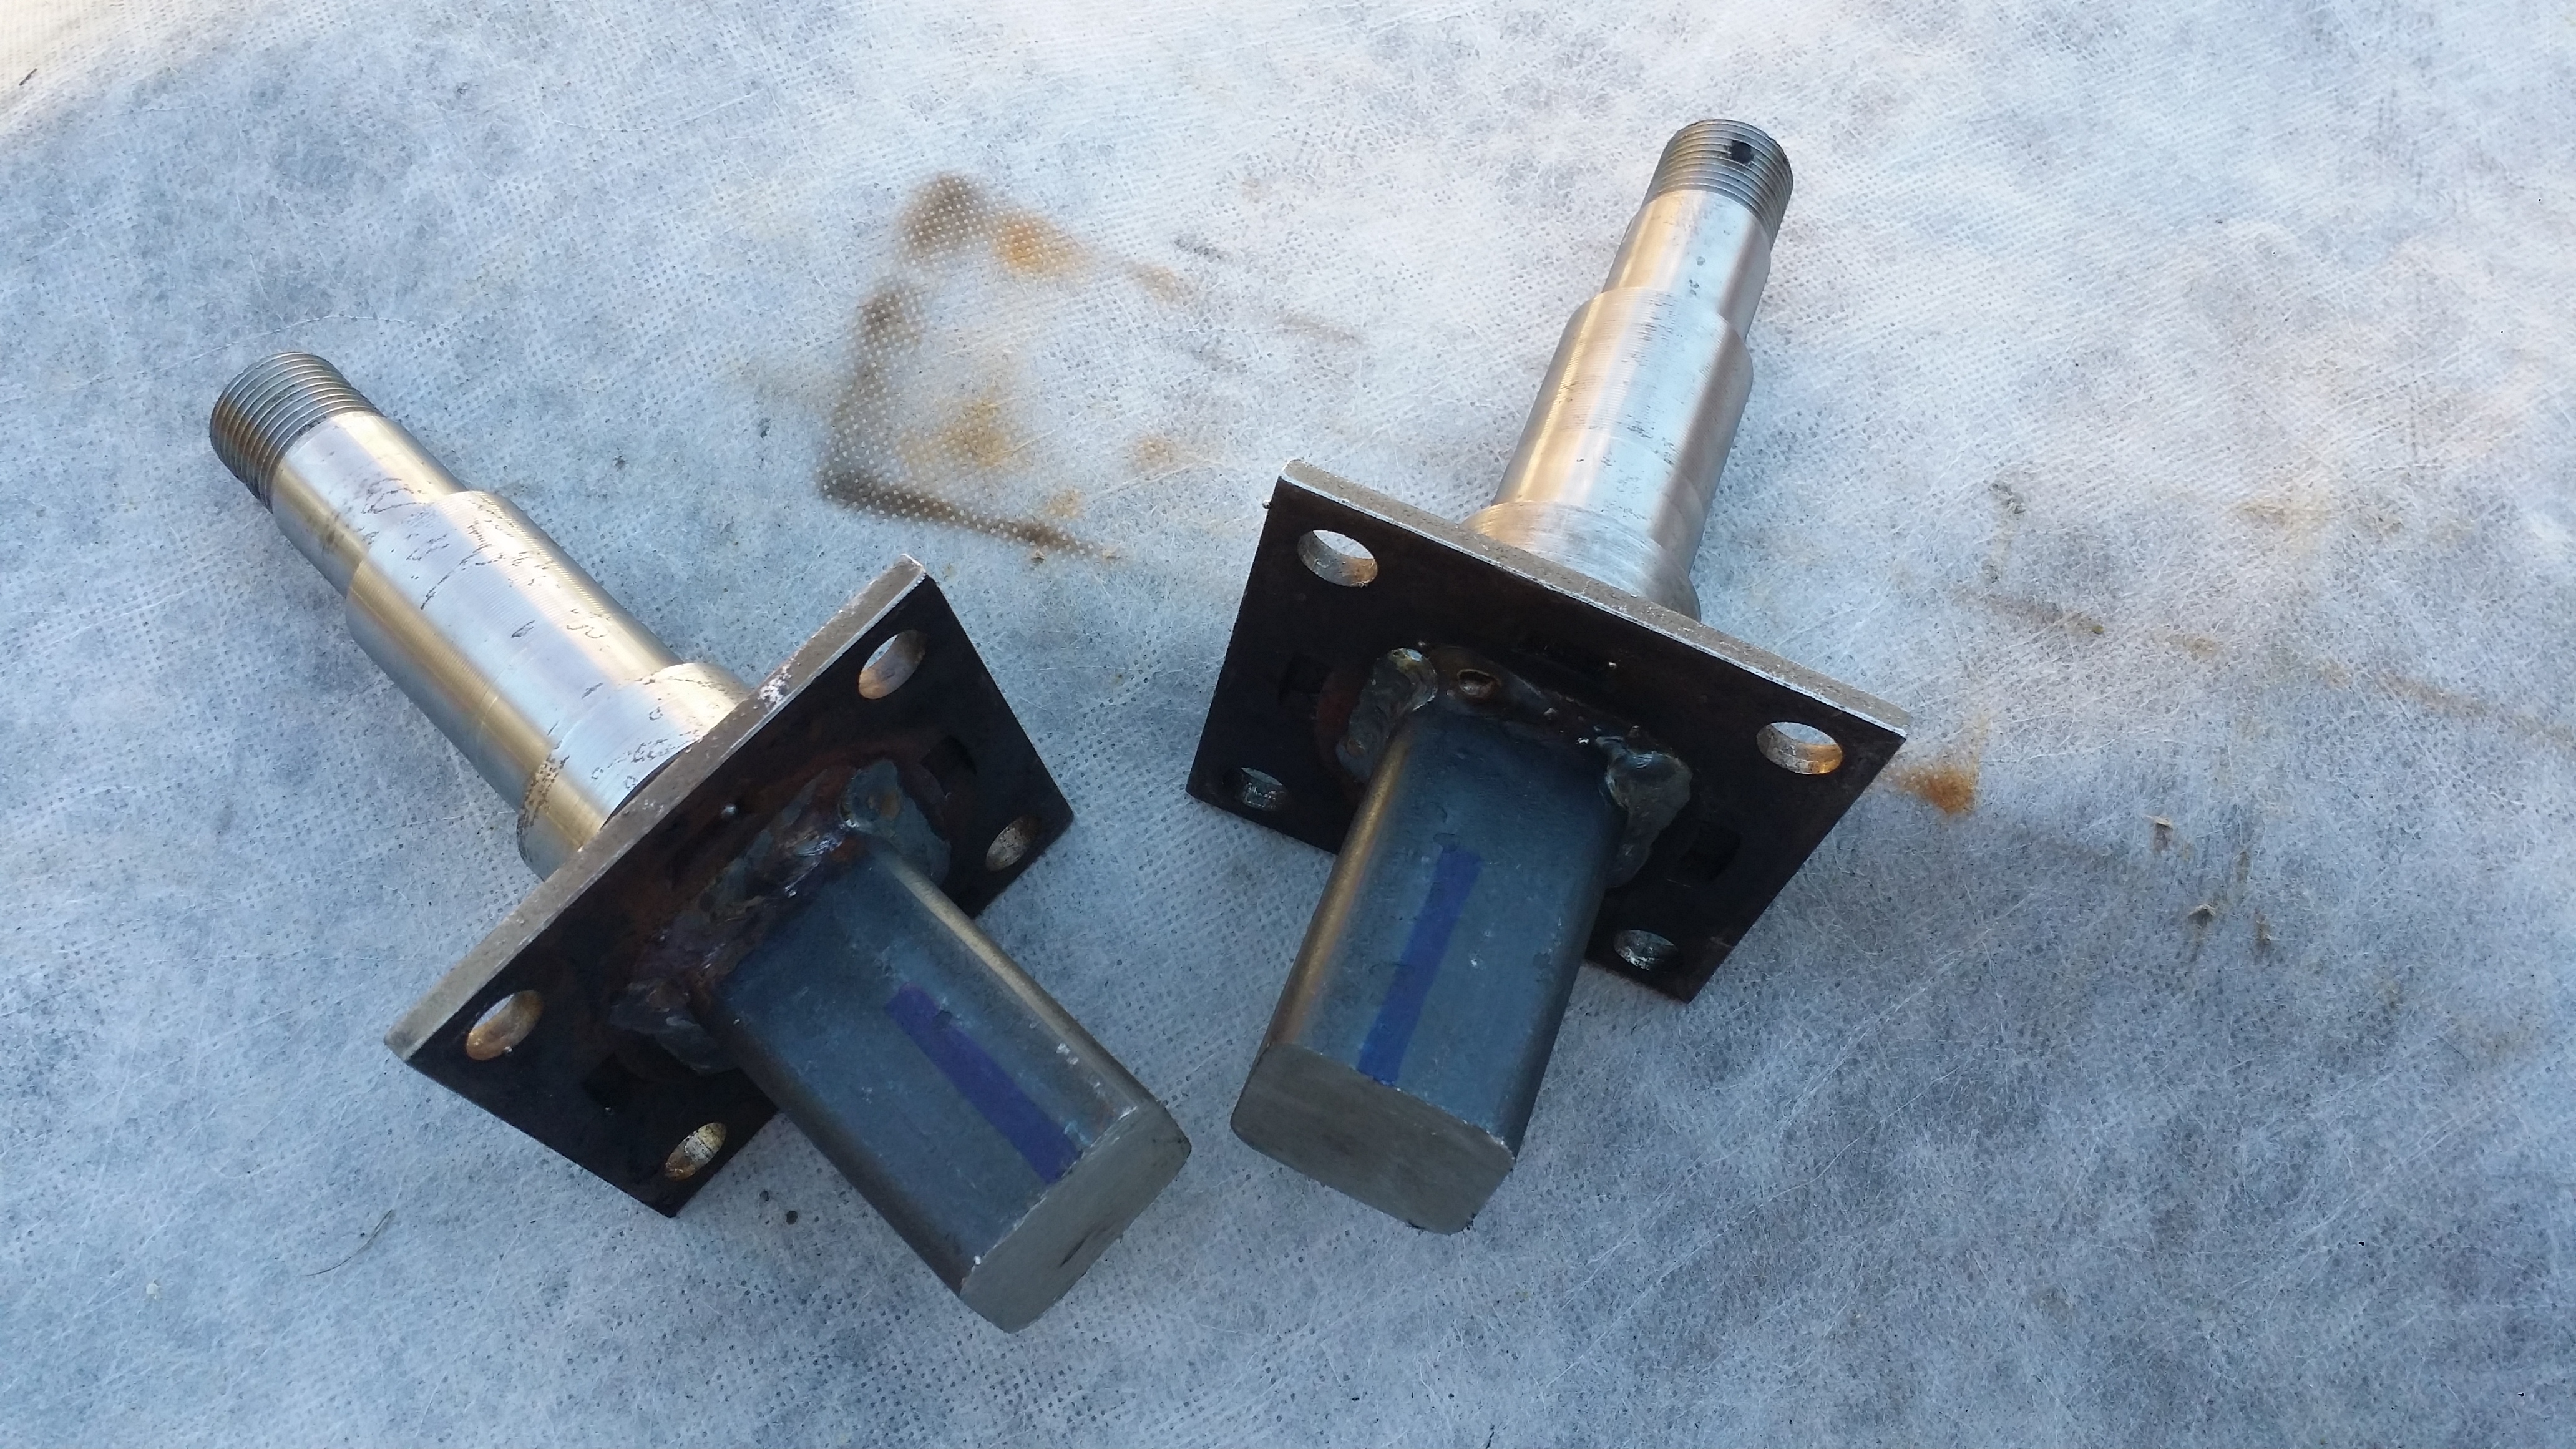
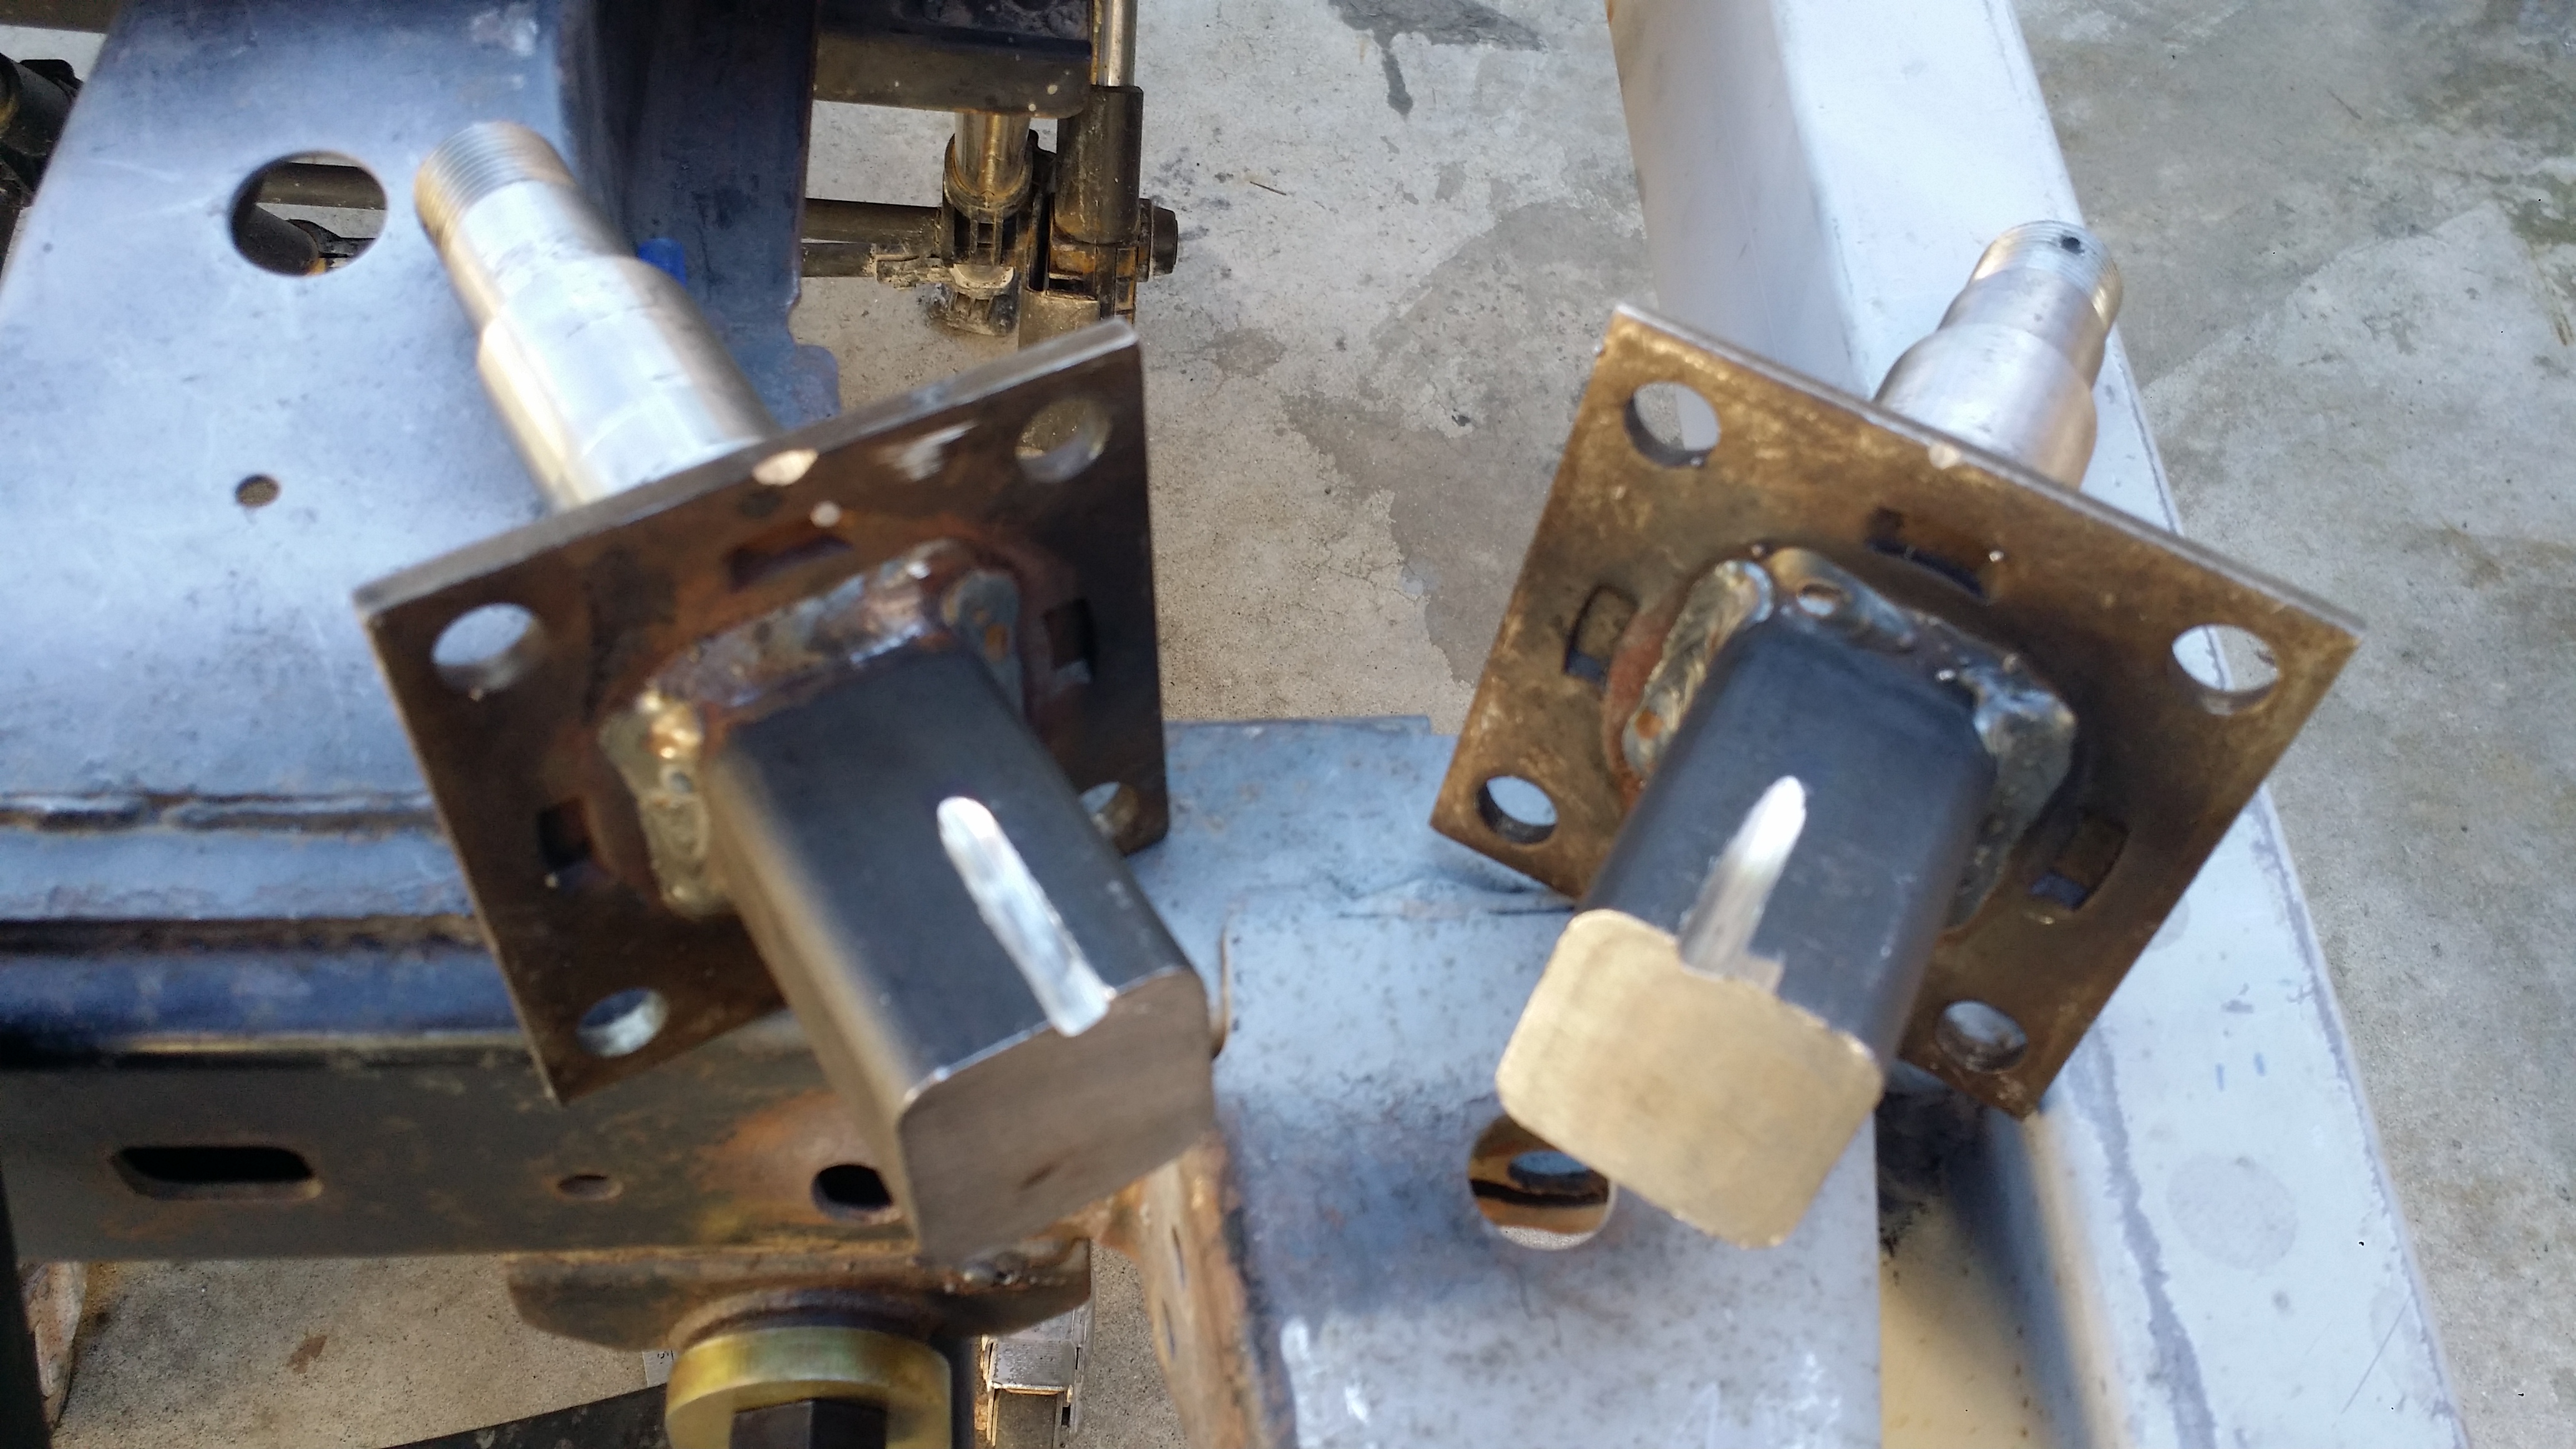
Now i can fit the spindles into place and properly measure how wide my axle will be.
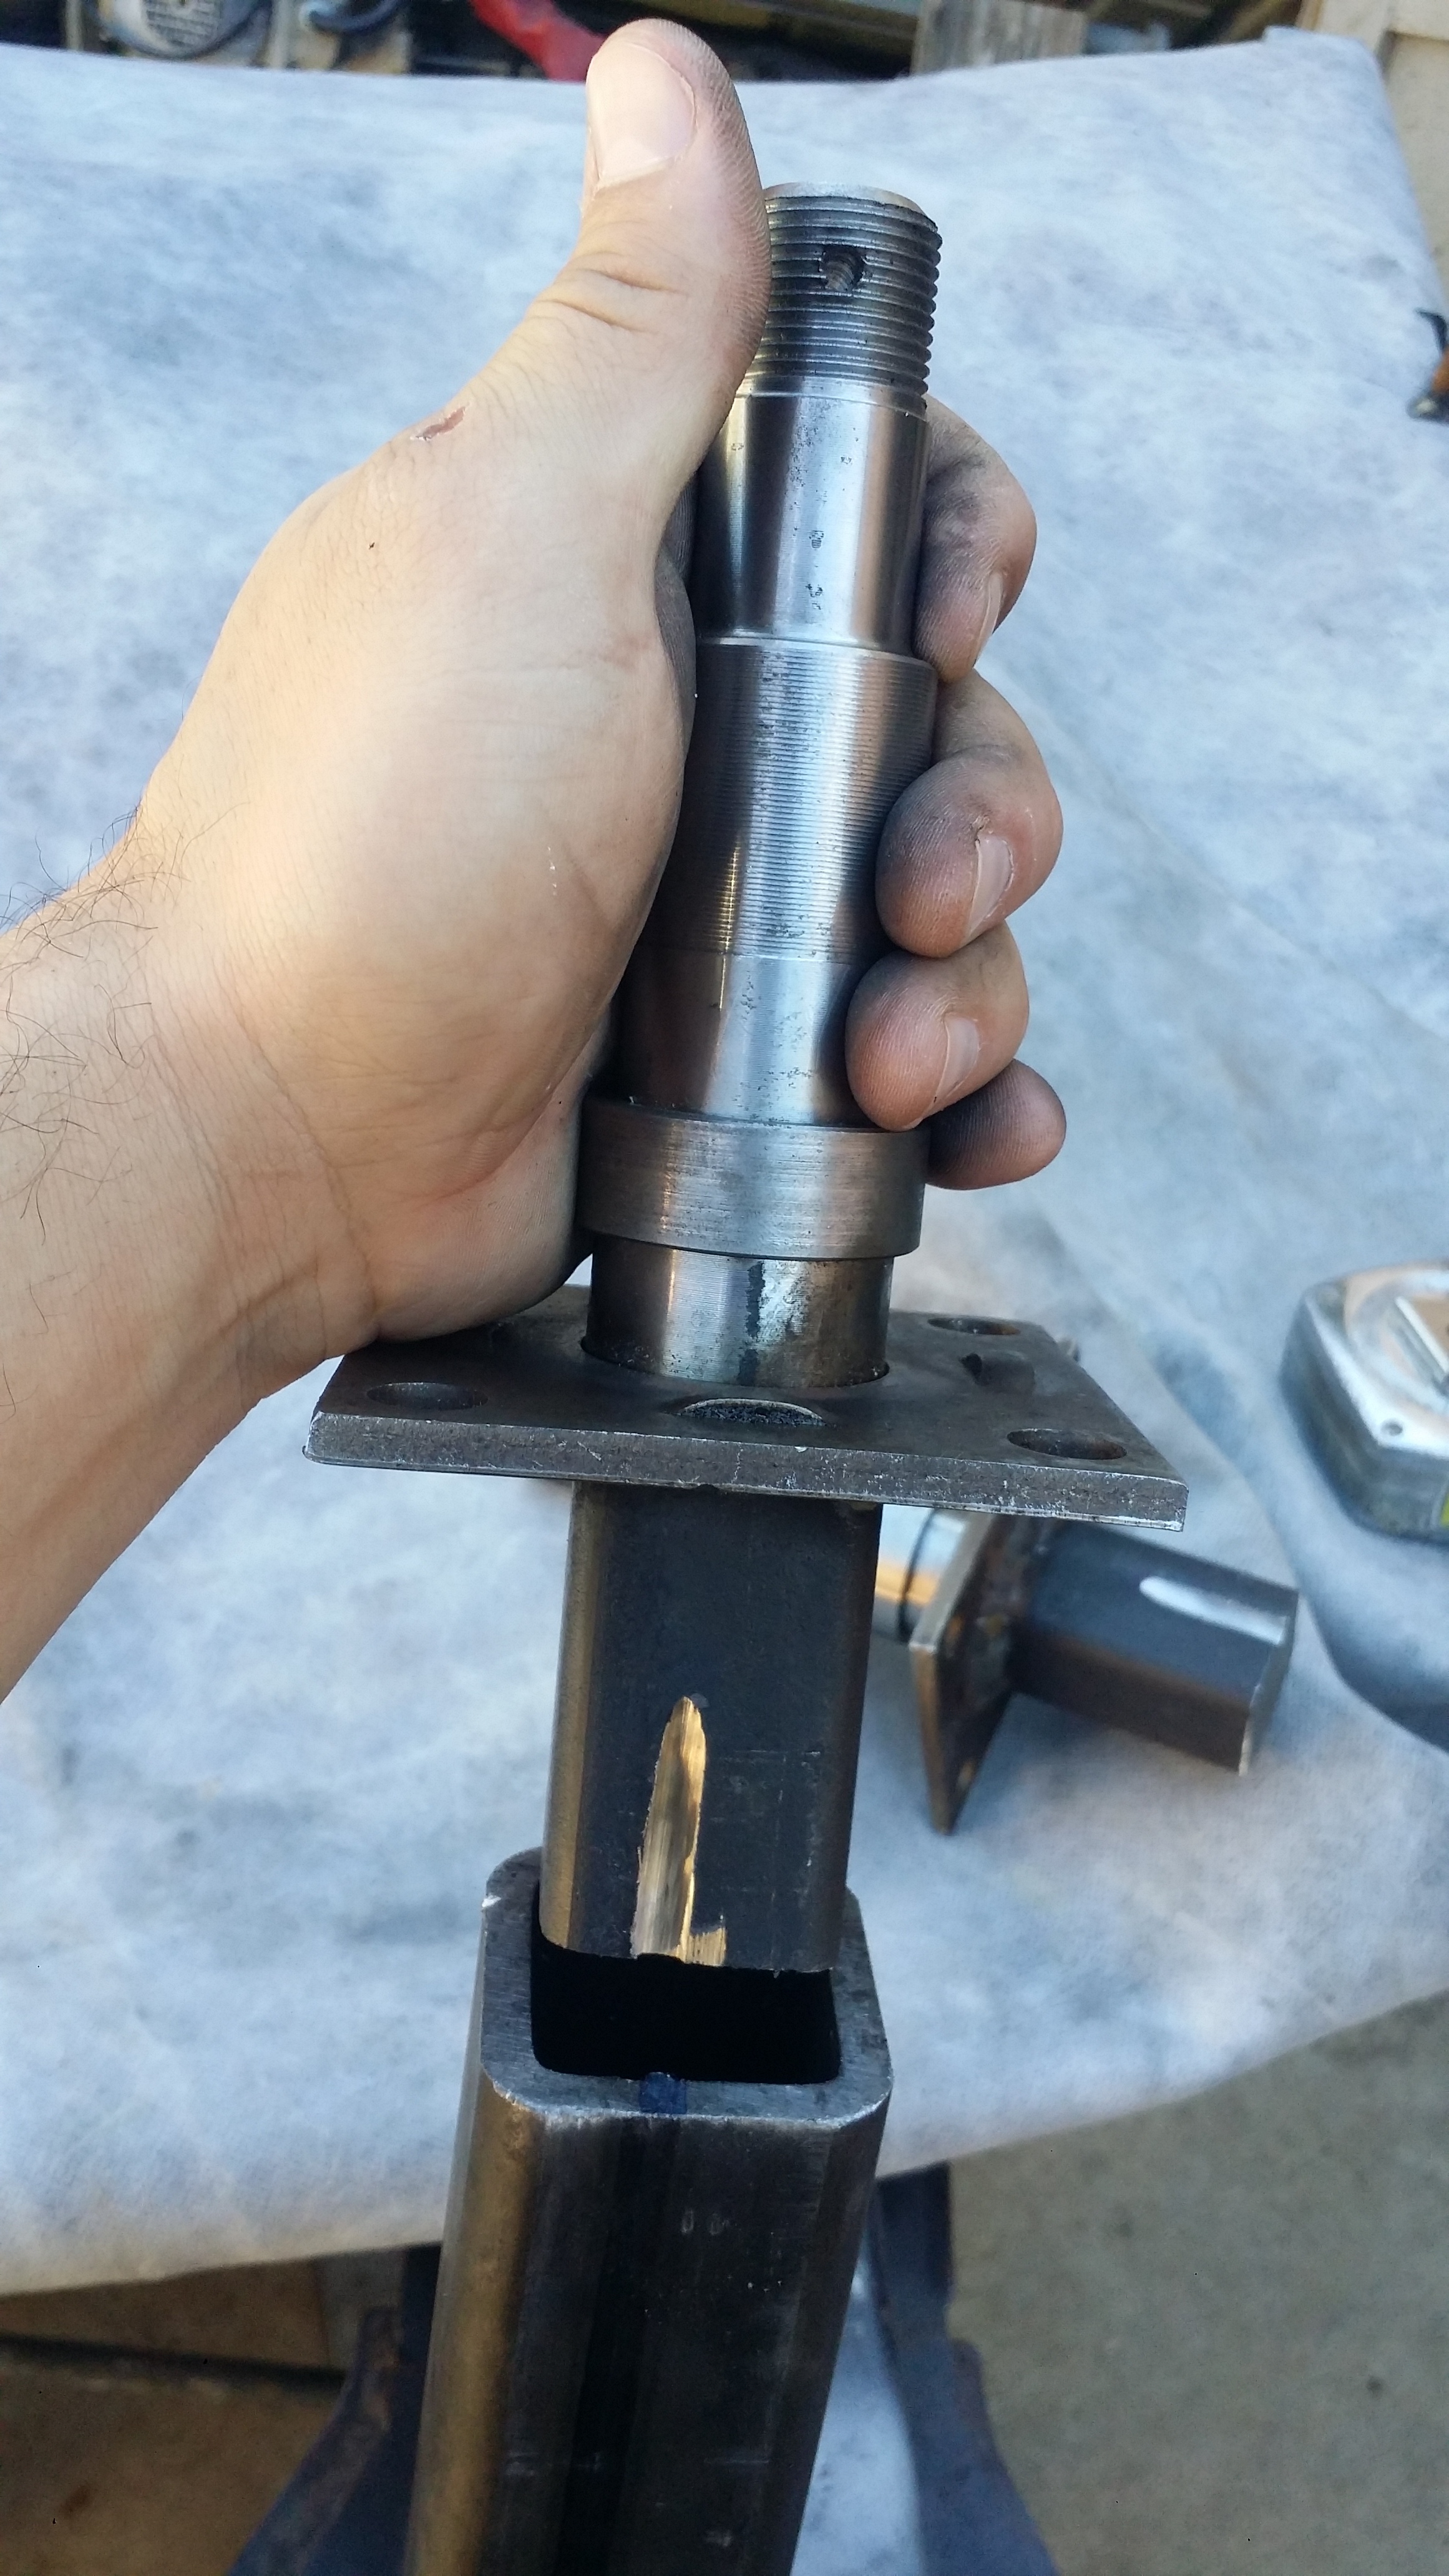
Perfect fit
The guy at my local trailer shop told me to leave 1" of that solid steel spindle shaft exposed so this was me double checking that i was at the correct distance.
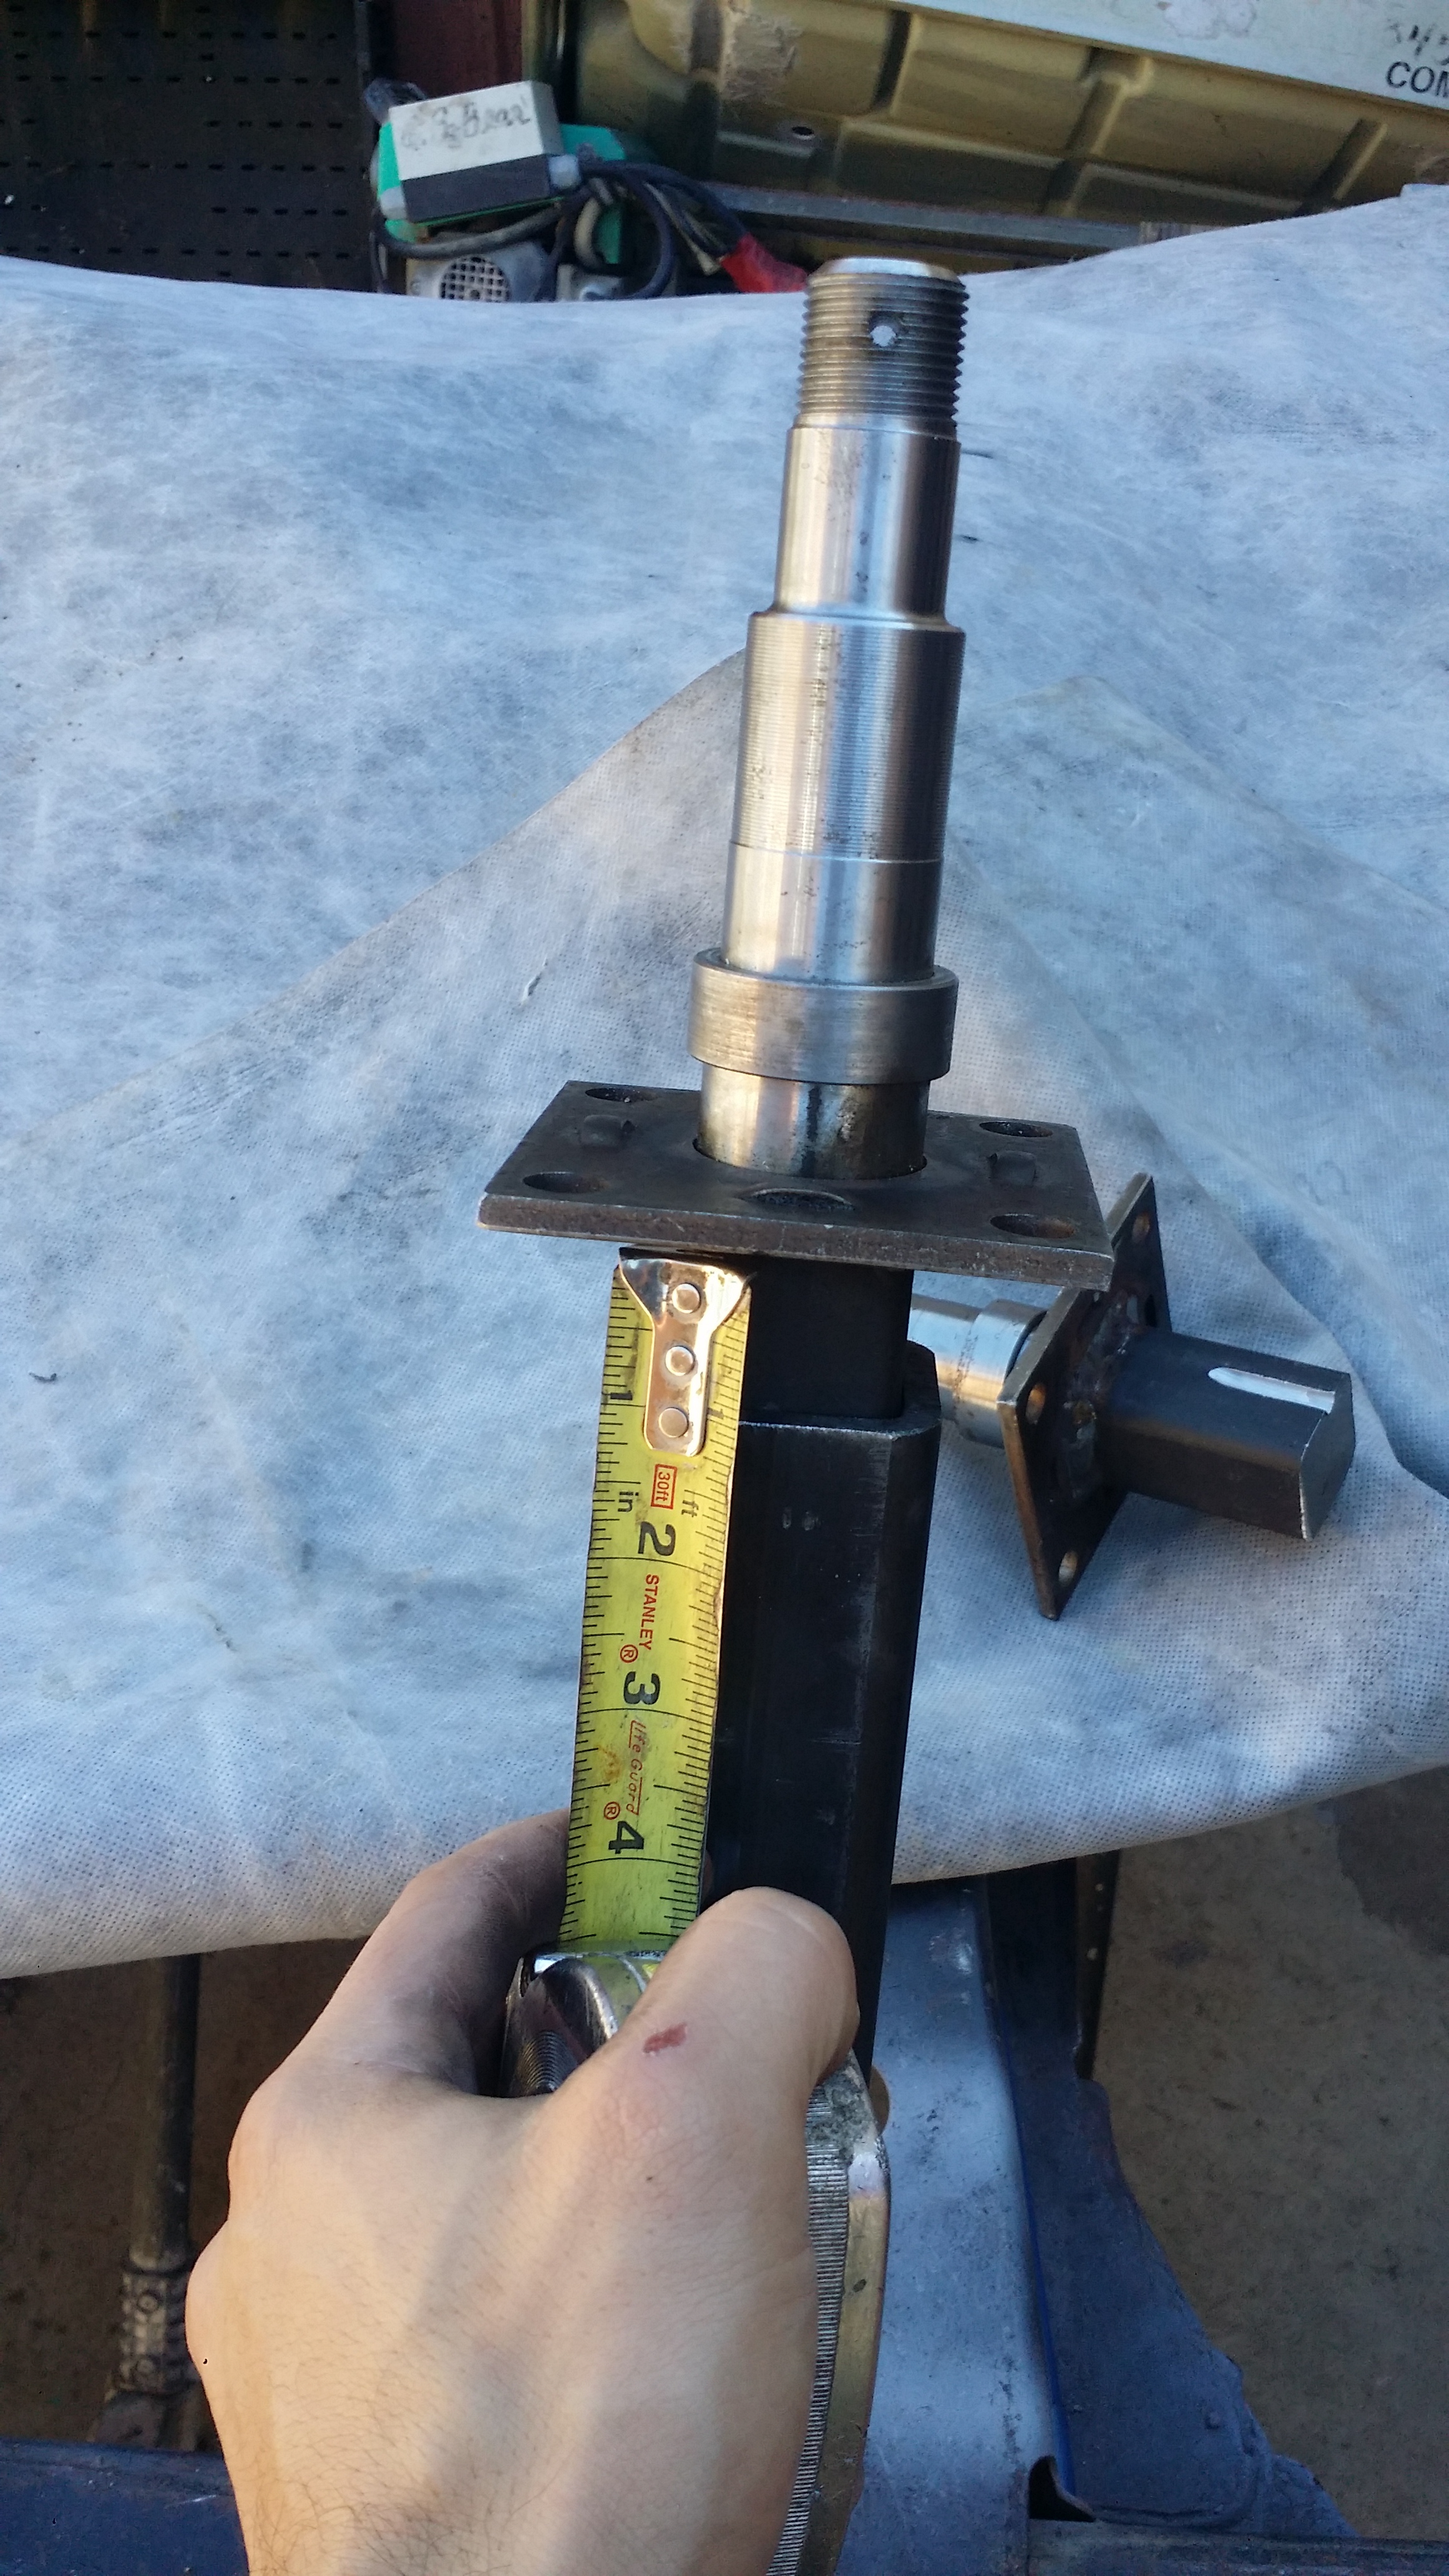
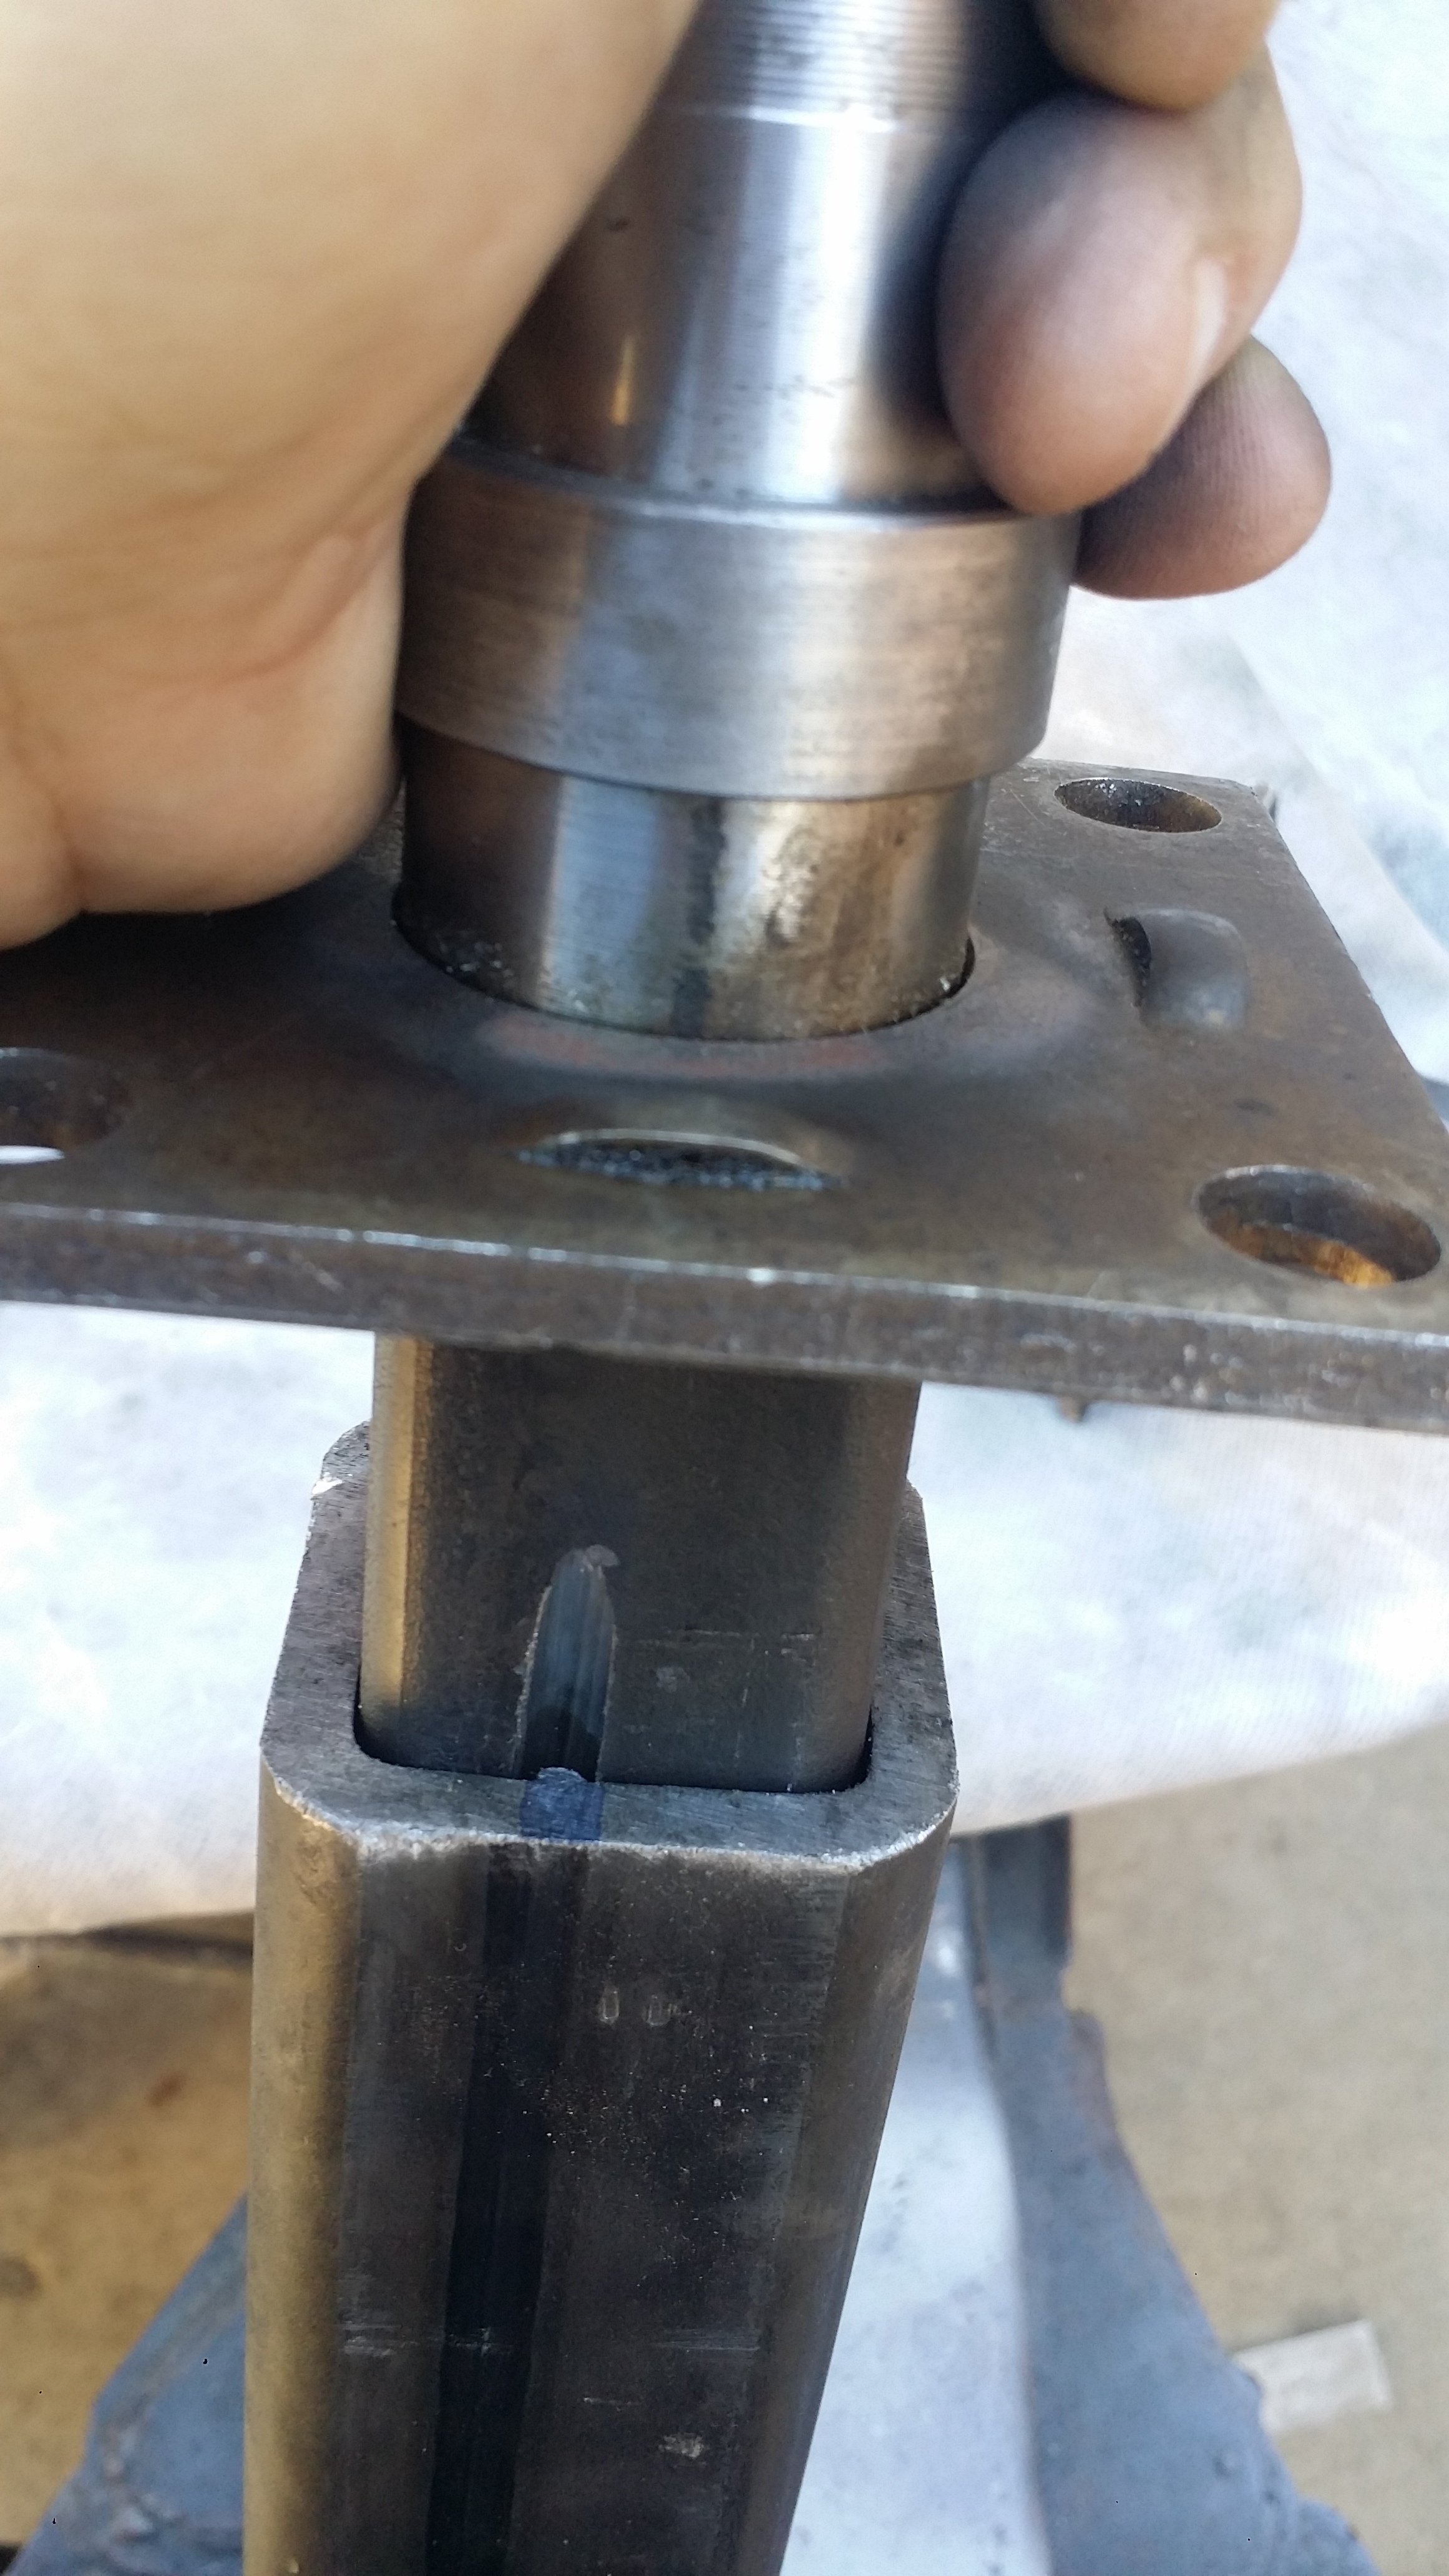
Covered up the spindle threading with a junk piece of tube that i was practicing on a long long long time ago lol I covered the threading to make sure no weld splatter sticks to where i don't want it at.
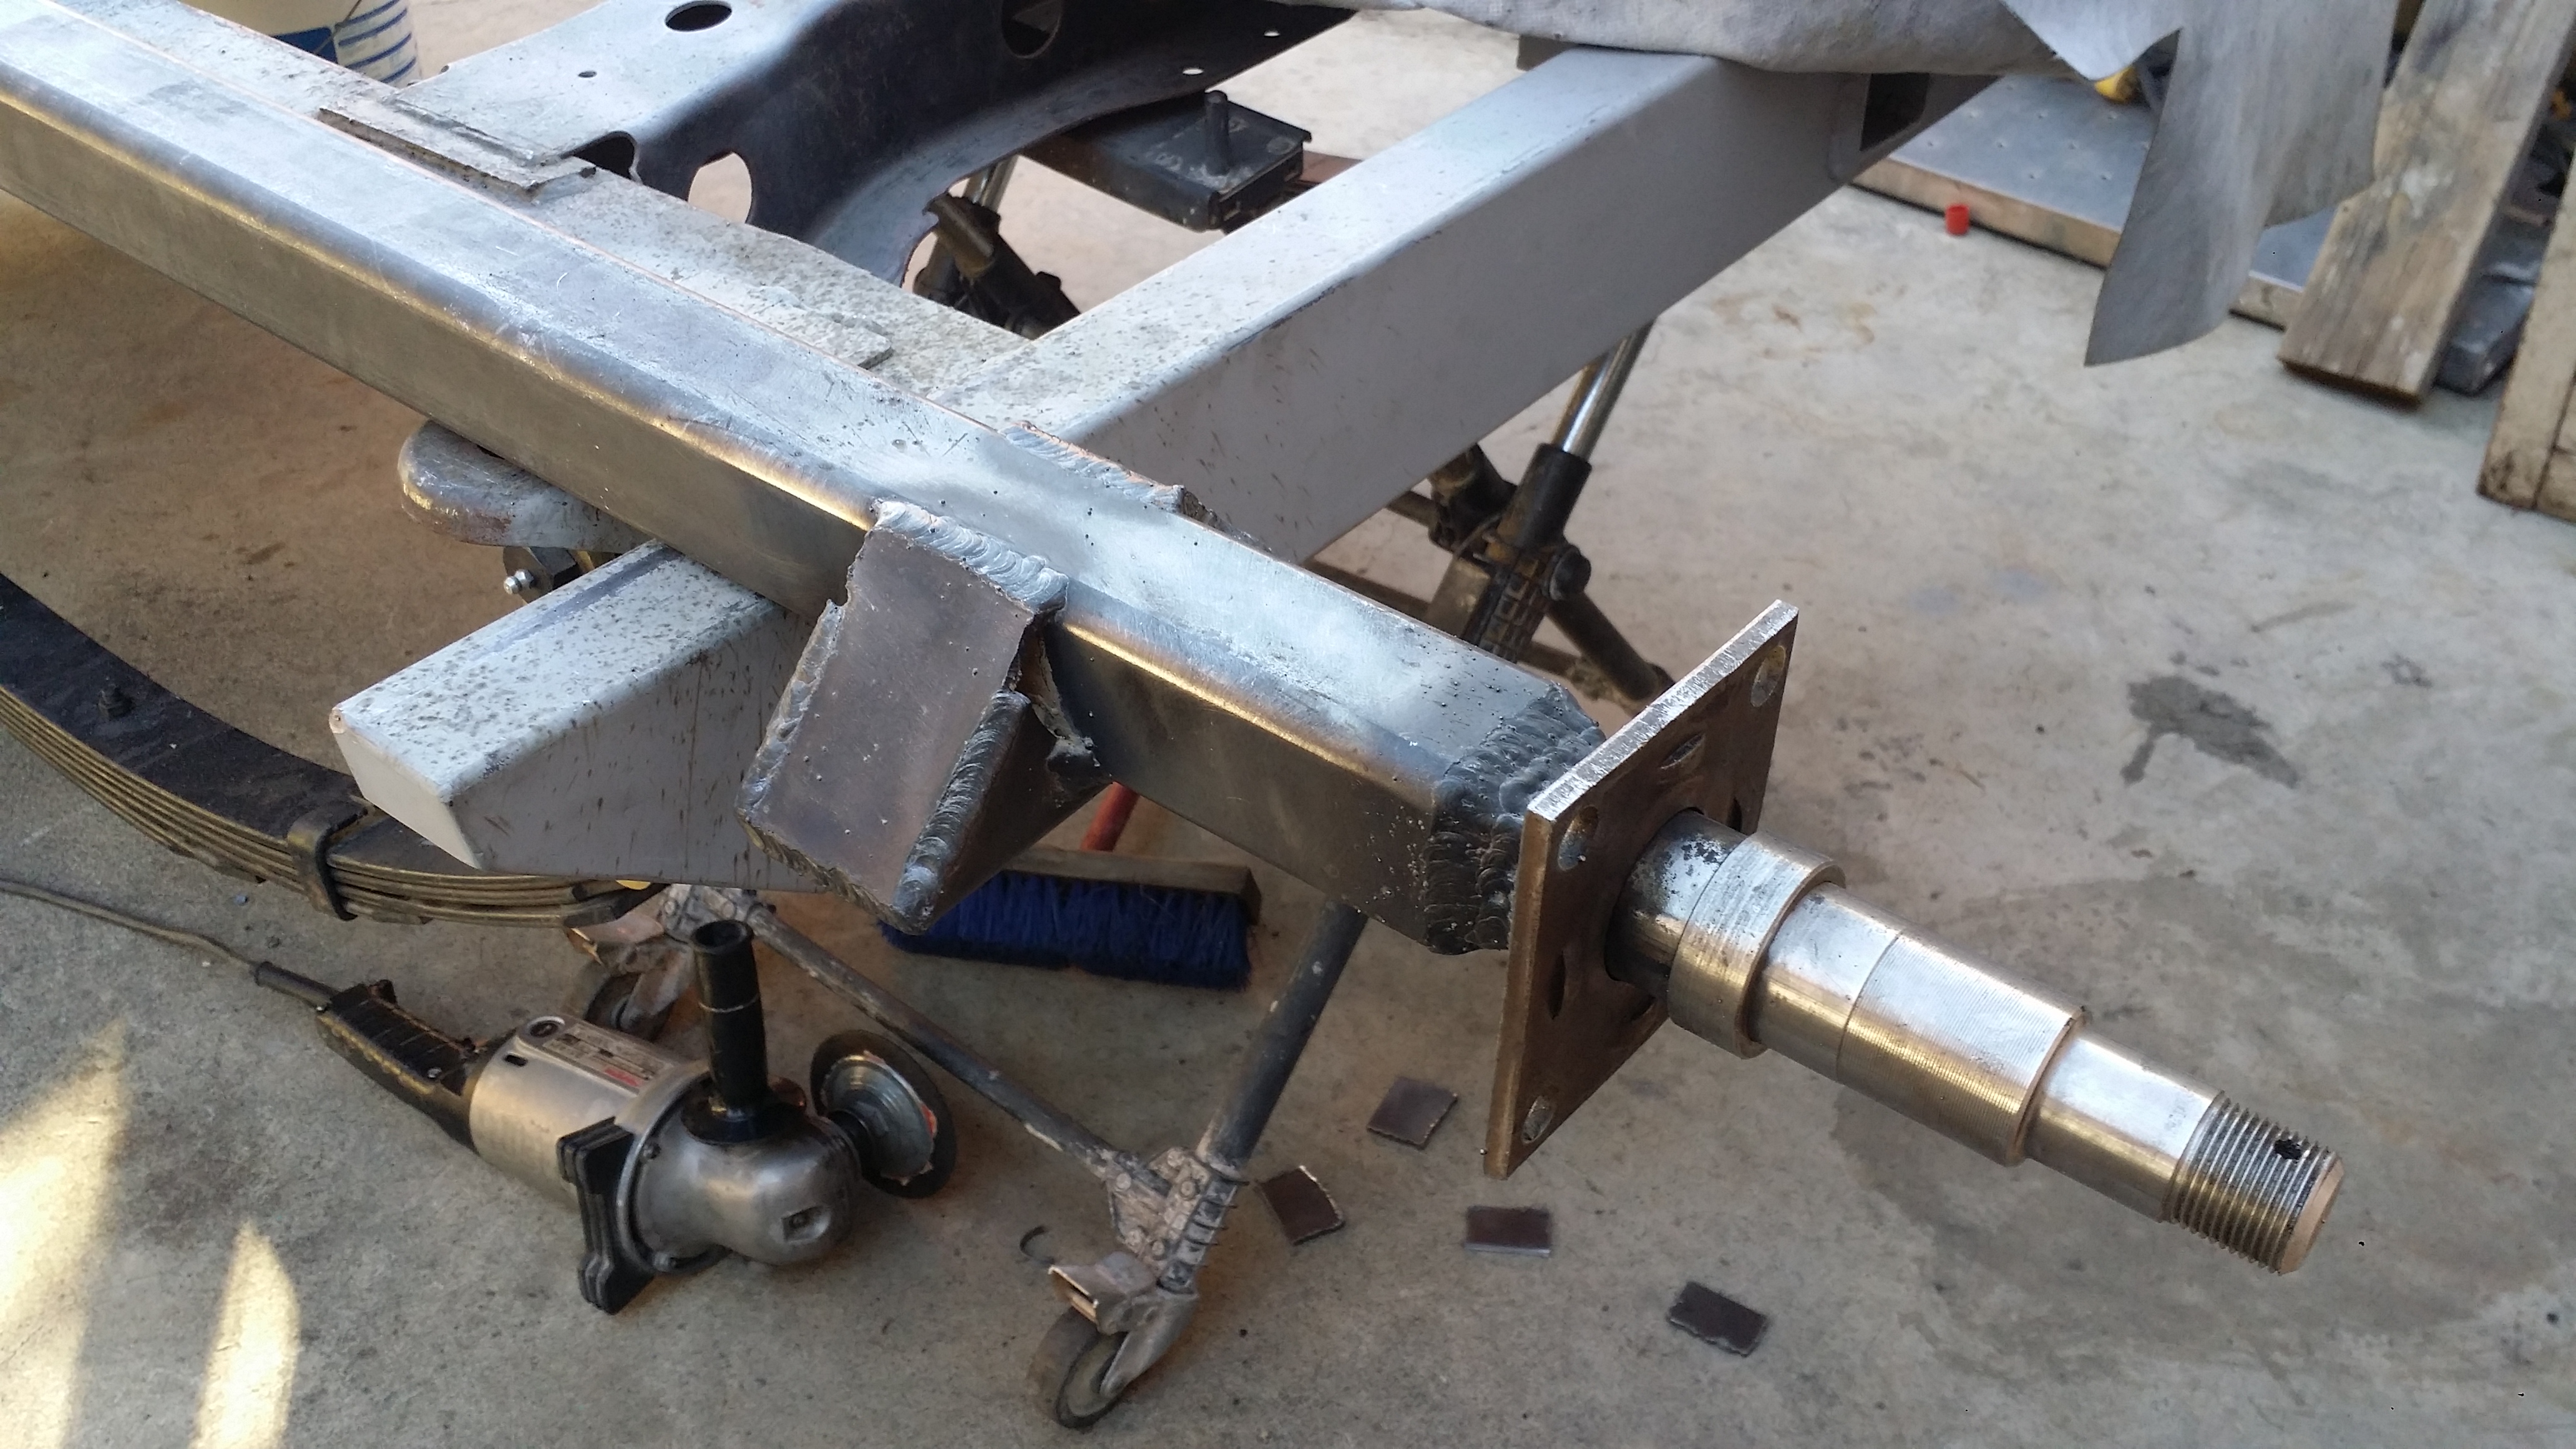
Next i used my 2 spare triple slotted AllPro-Offroad spring perches from when i did the Solid Axle Swap on my 4runner. I had 2 left over so it worked out for me in using them for this axle. If you have ever built your own axle or plan to build your own axle and decide to use Truck leaf springs like i am doing you will find out that the spring perches that you find on trailer part stores are more narrow due to the thinner leaf springs. (or at least the ones at my local store were about 1" too thin.) So Since i am using regular width 4Runner springs these work out the best. But of course they had to be modified for a square tube axle because these are made for the stock toyota axle. So here they are already notched to 2"
I tacked the spring perches in place and made sure they were even on both sides. Then i held them in place on to the leaf springs to make sure i got them in the correct location. Once i threw on a few more tacks i was ready to permanently weld them into place.
I think im getting a little better at using this cheap harbor freight flux core wire. I hate it so much! they cause so much splatter and the welds never come out as nice as when i use gas with regular wire. but i dont have much of a choice right now so i had to deal with it.

I added plates to the bottom side for reinforcement because the spring perches were only welded pretty much on one of the 4 sides of the square tube. So this helped a lot.
Practice Fitment
Primed
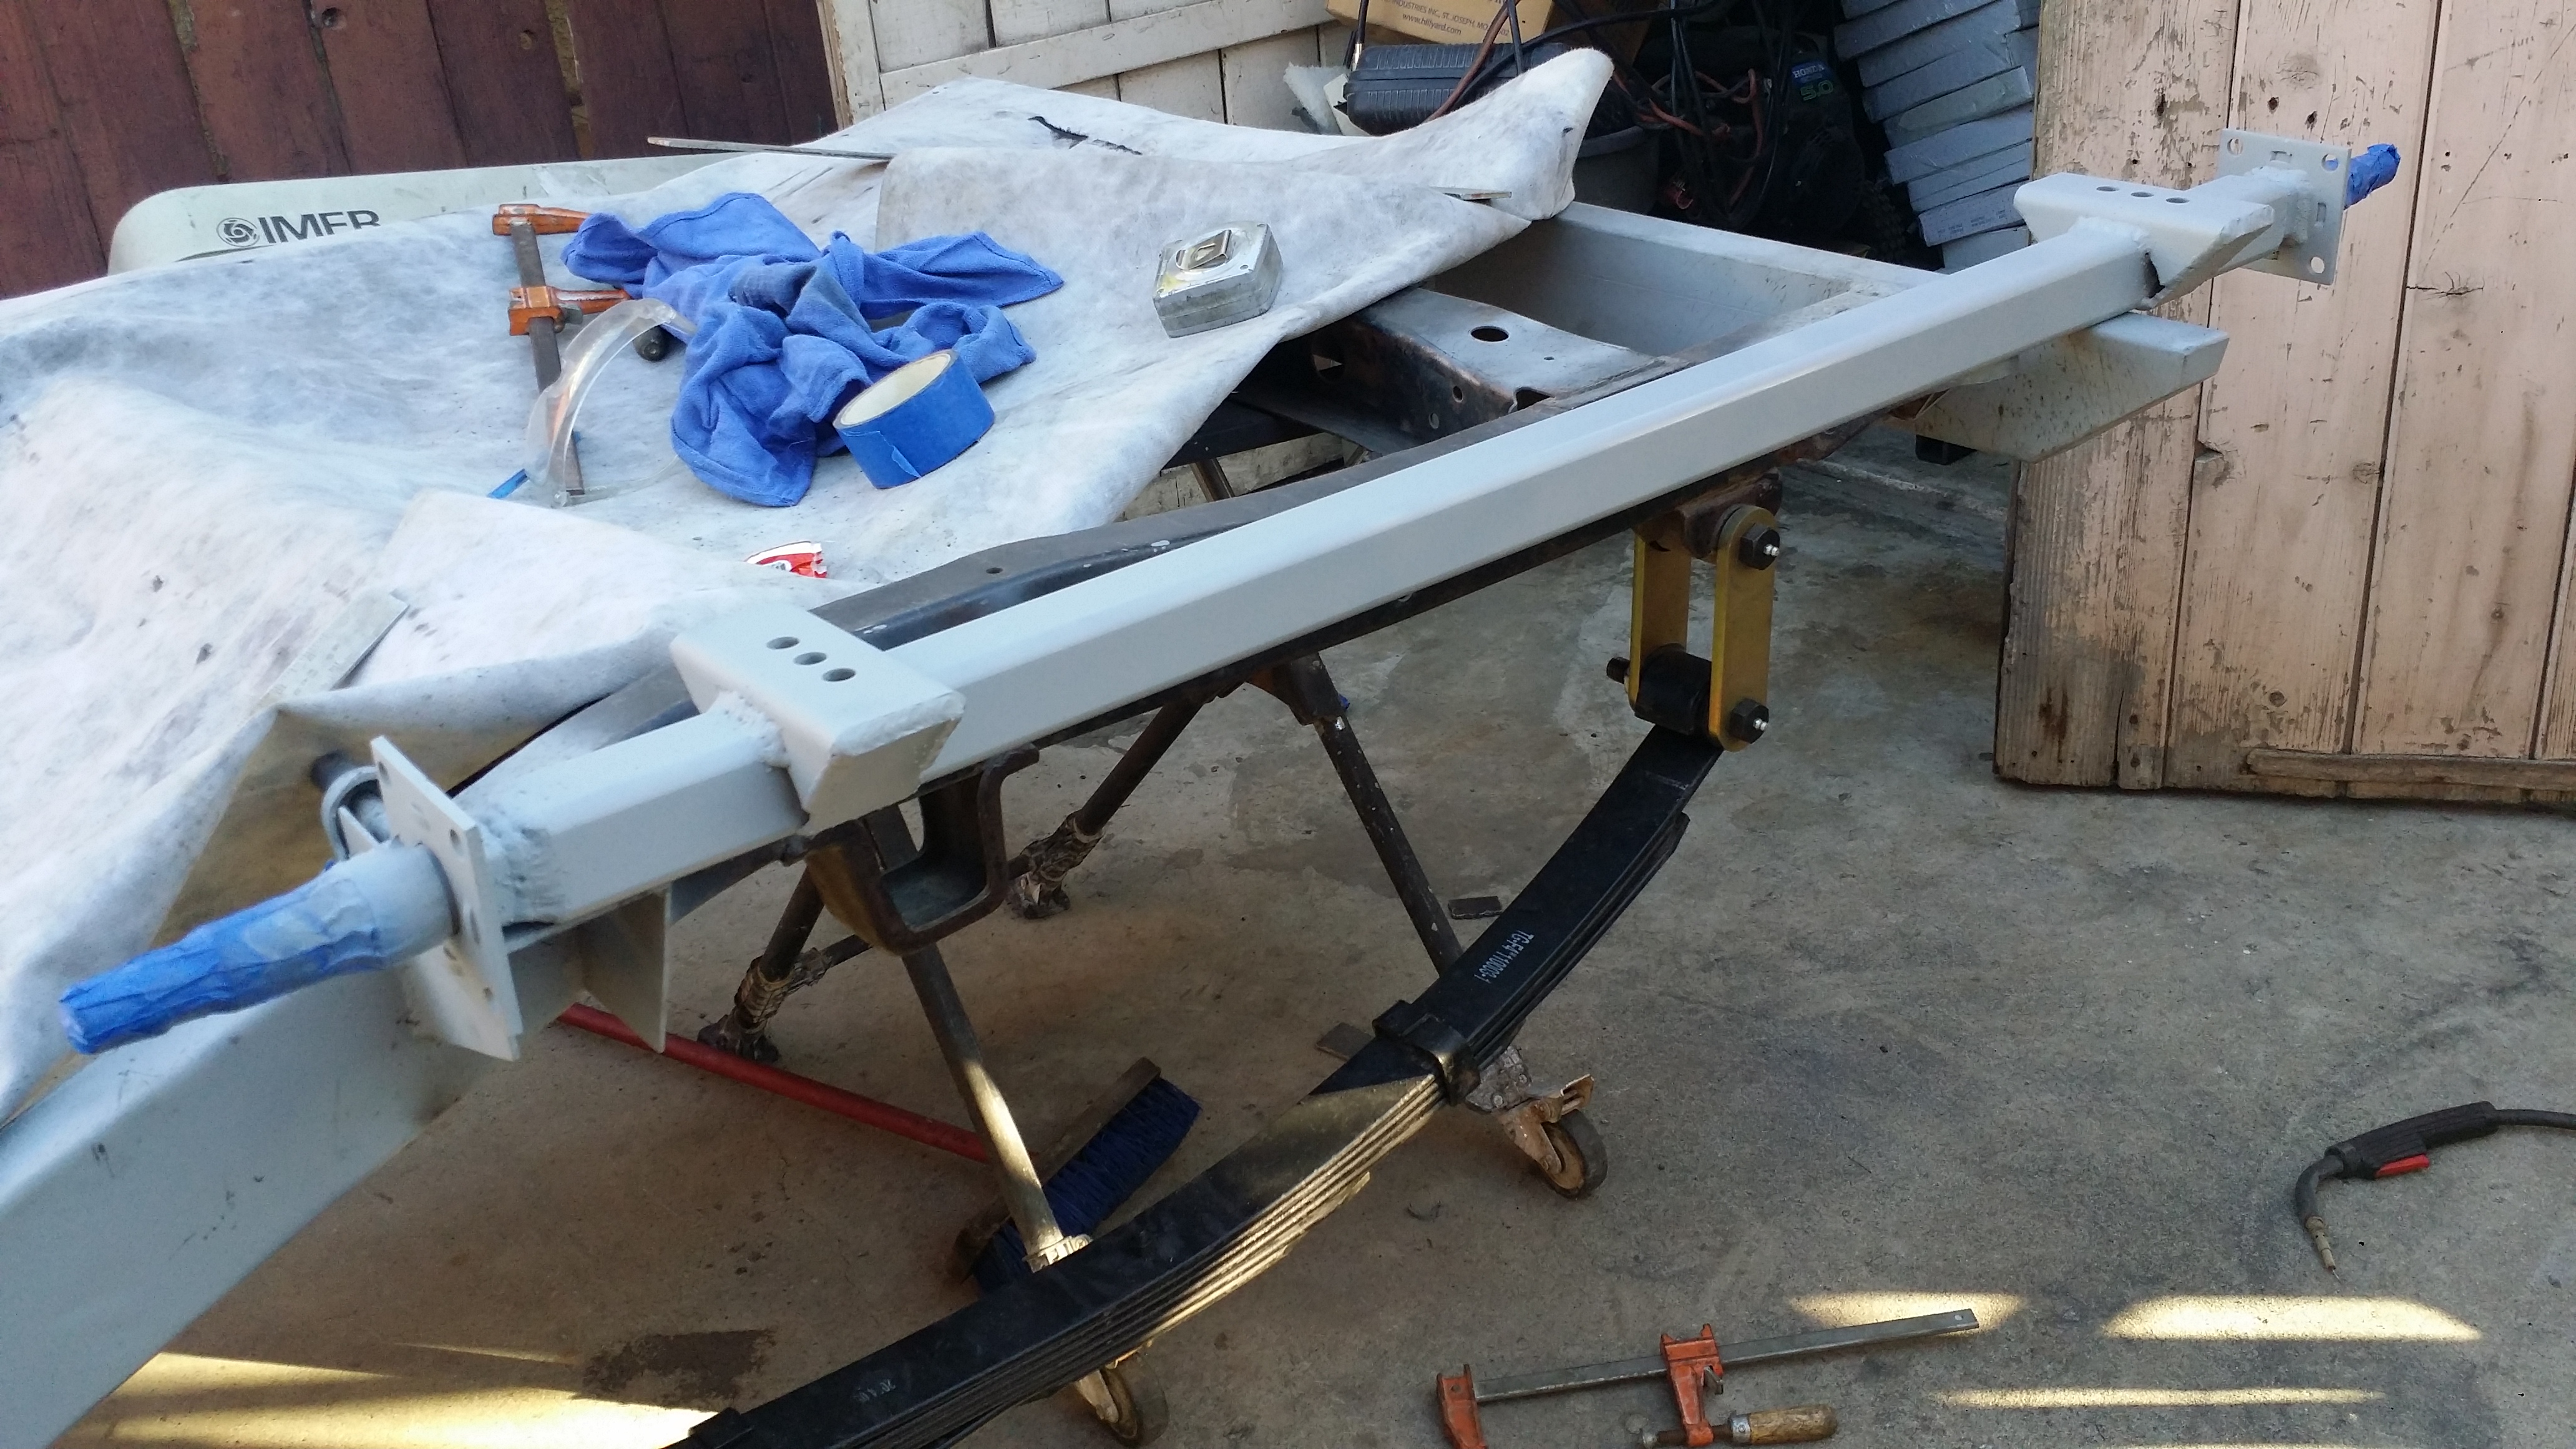
Nice matte black finish. It still needs the 2nd coat. I'll do it tomorrow.

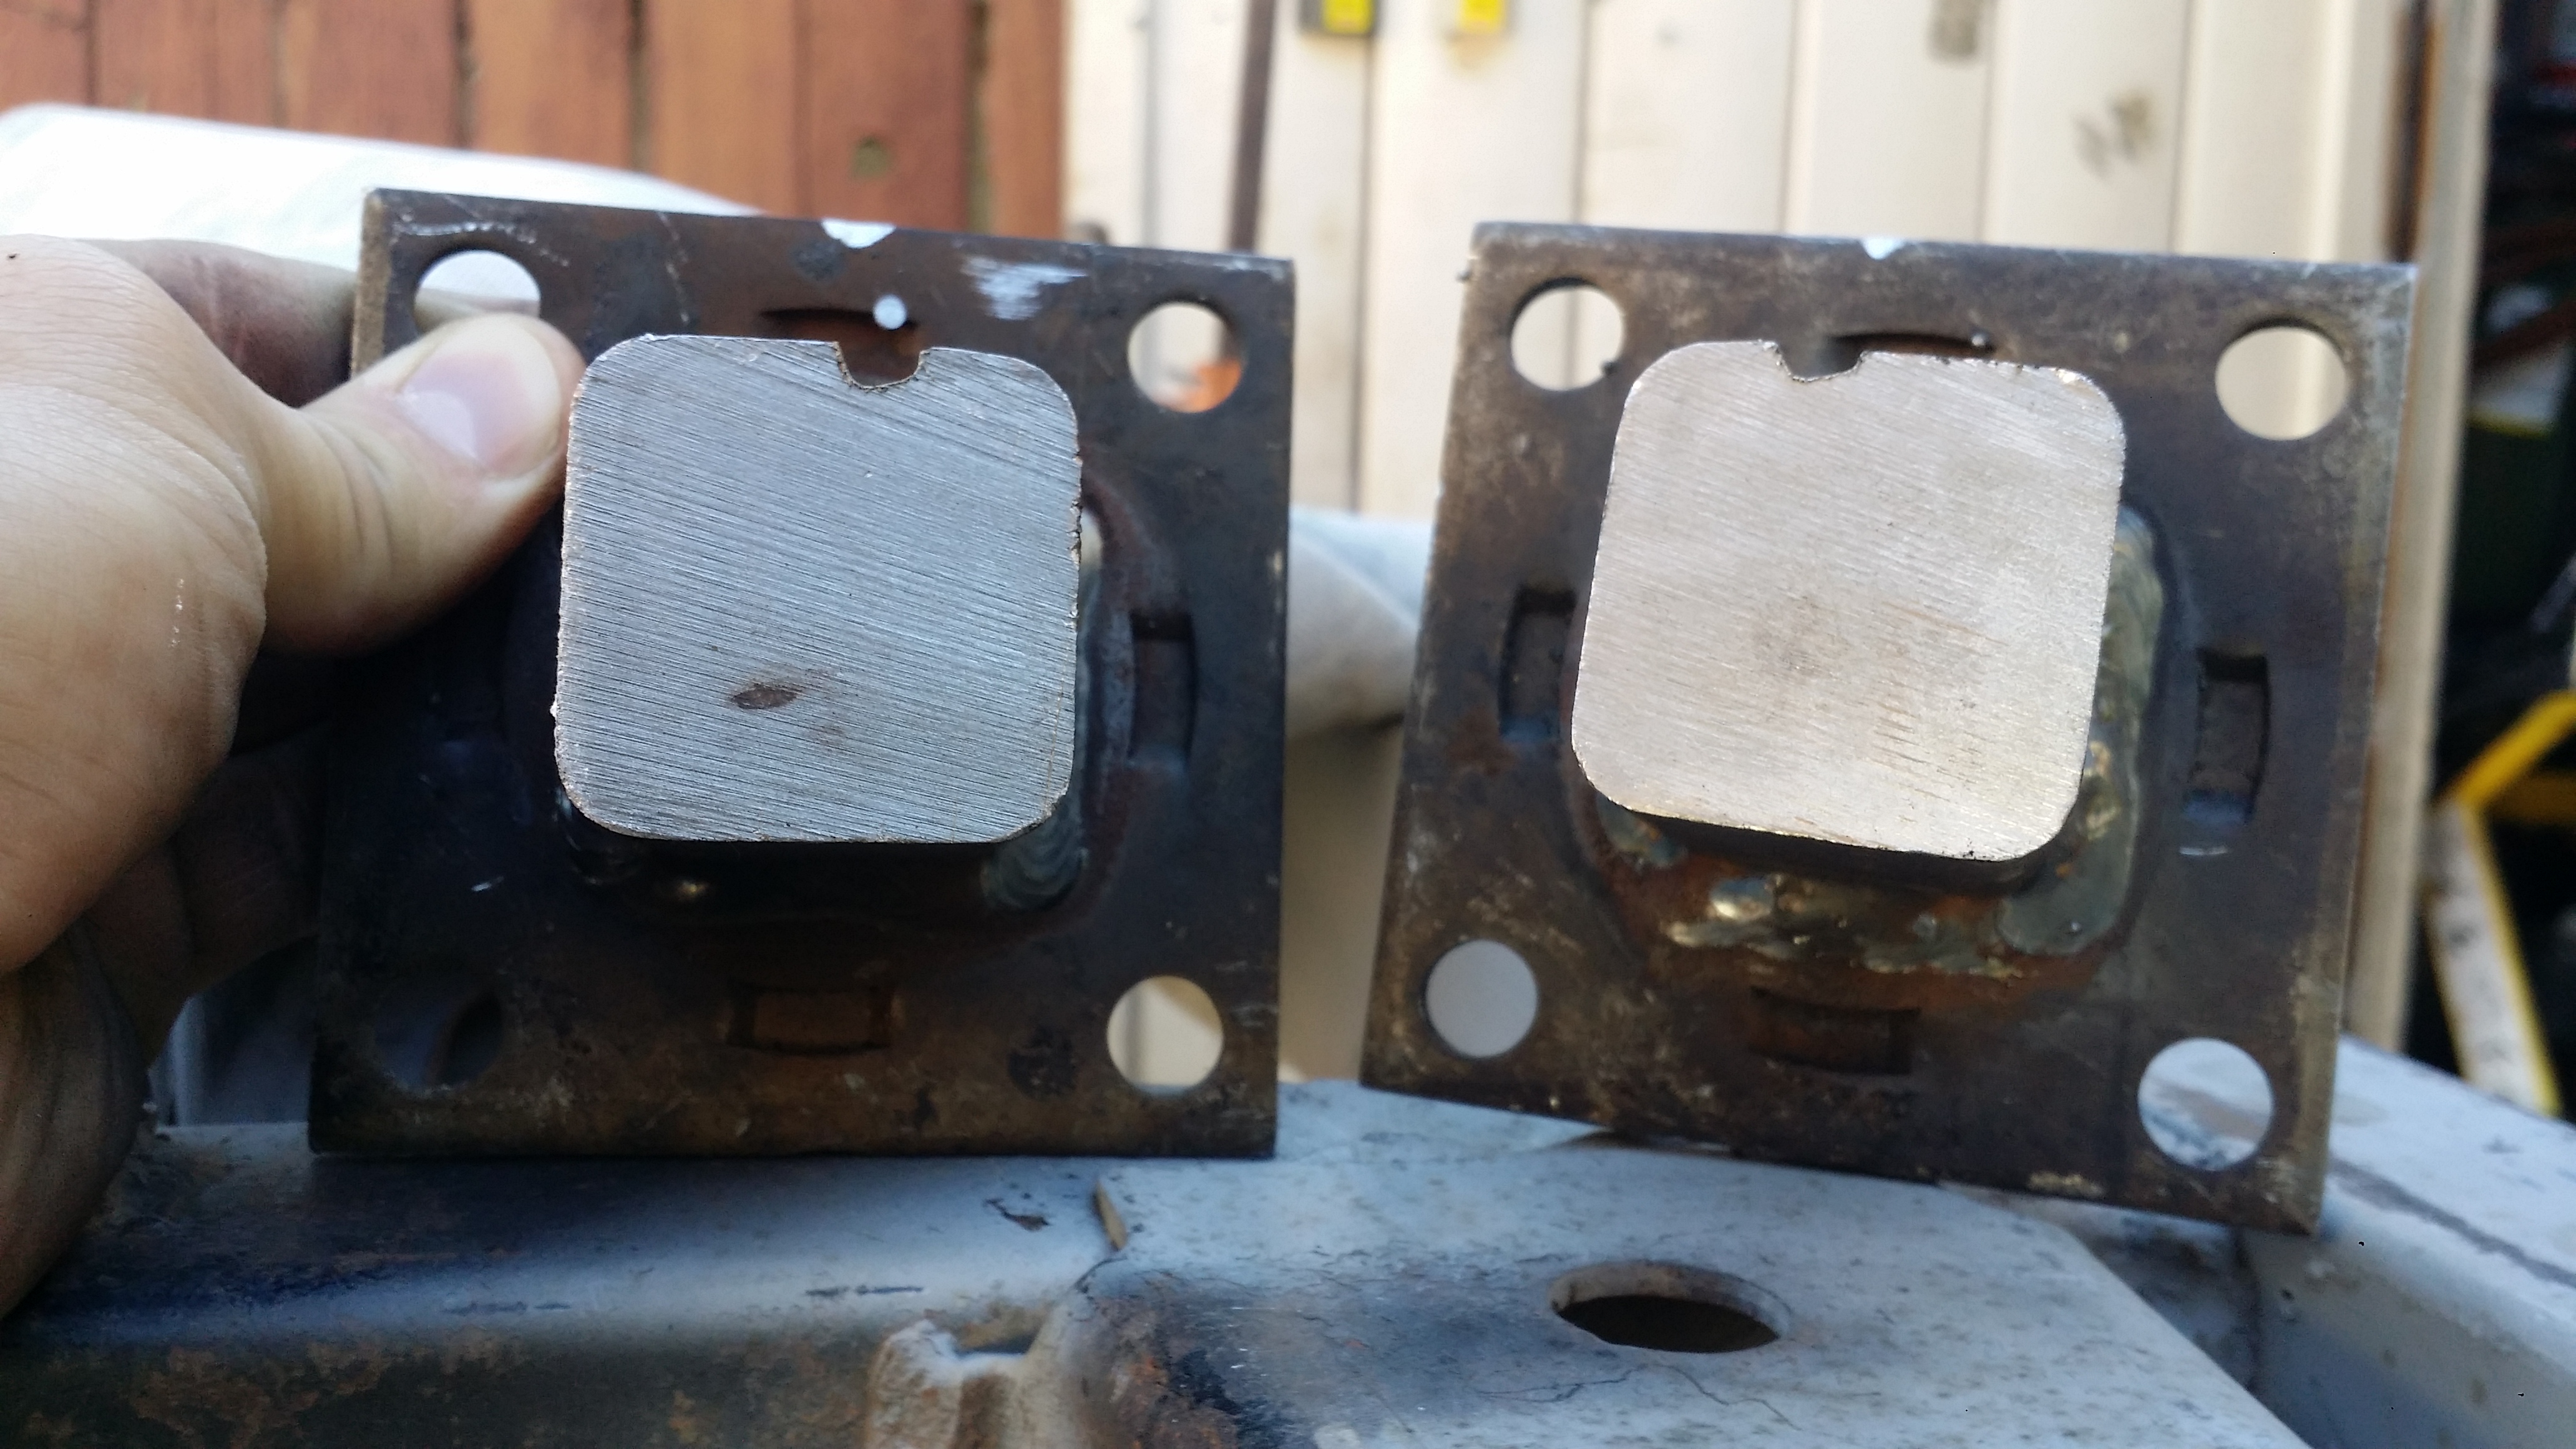
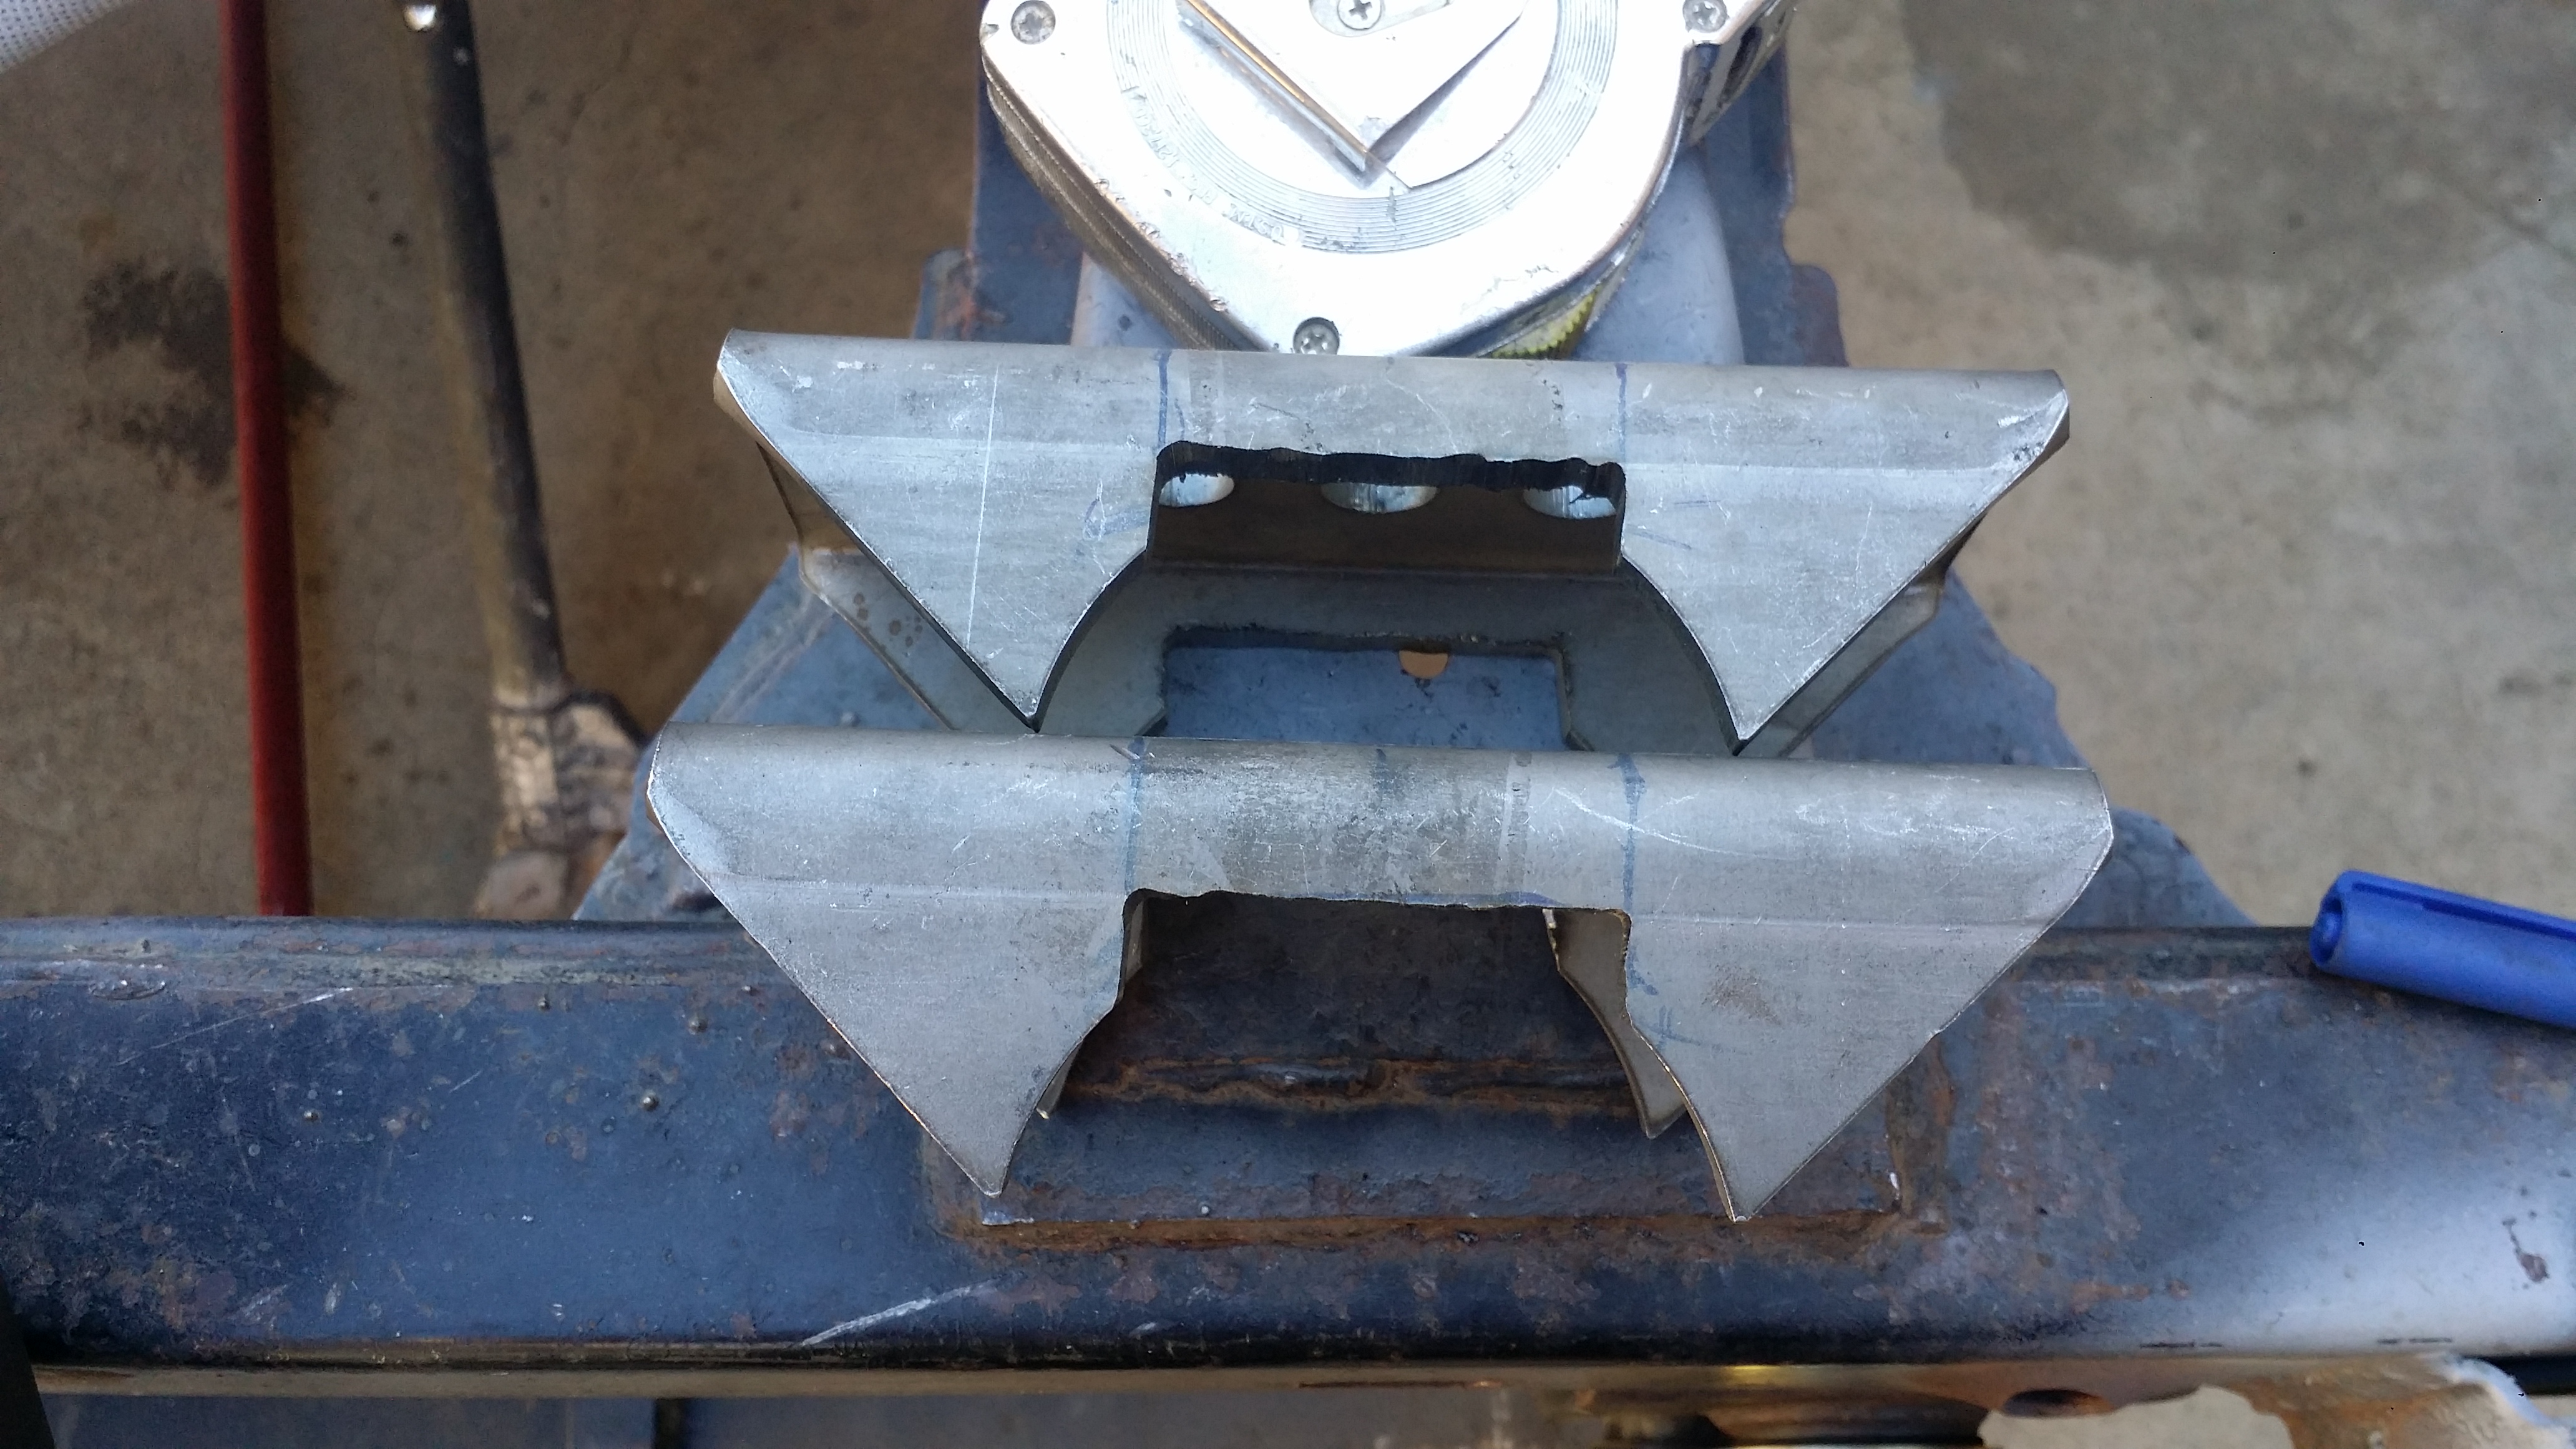
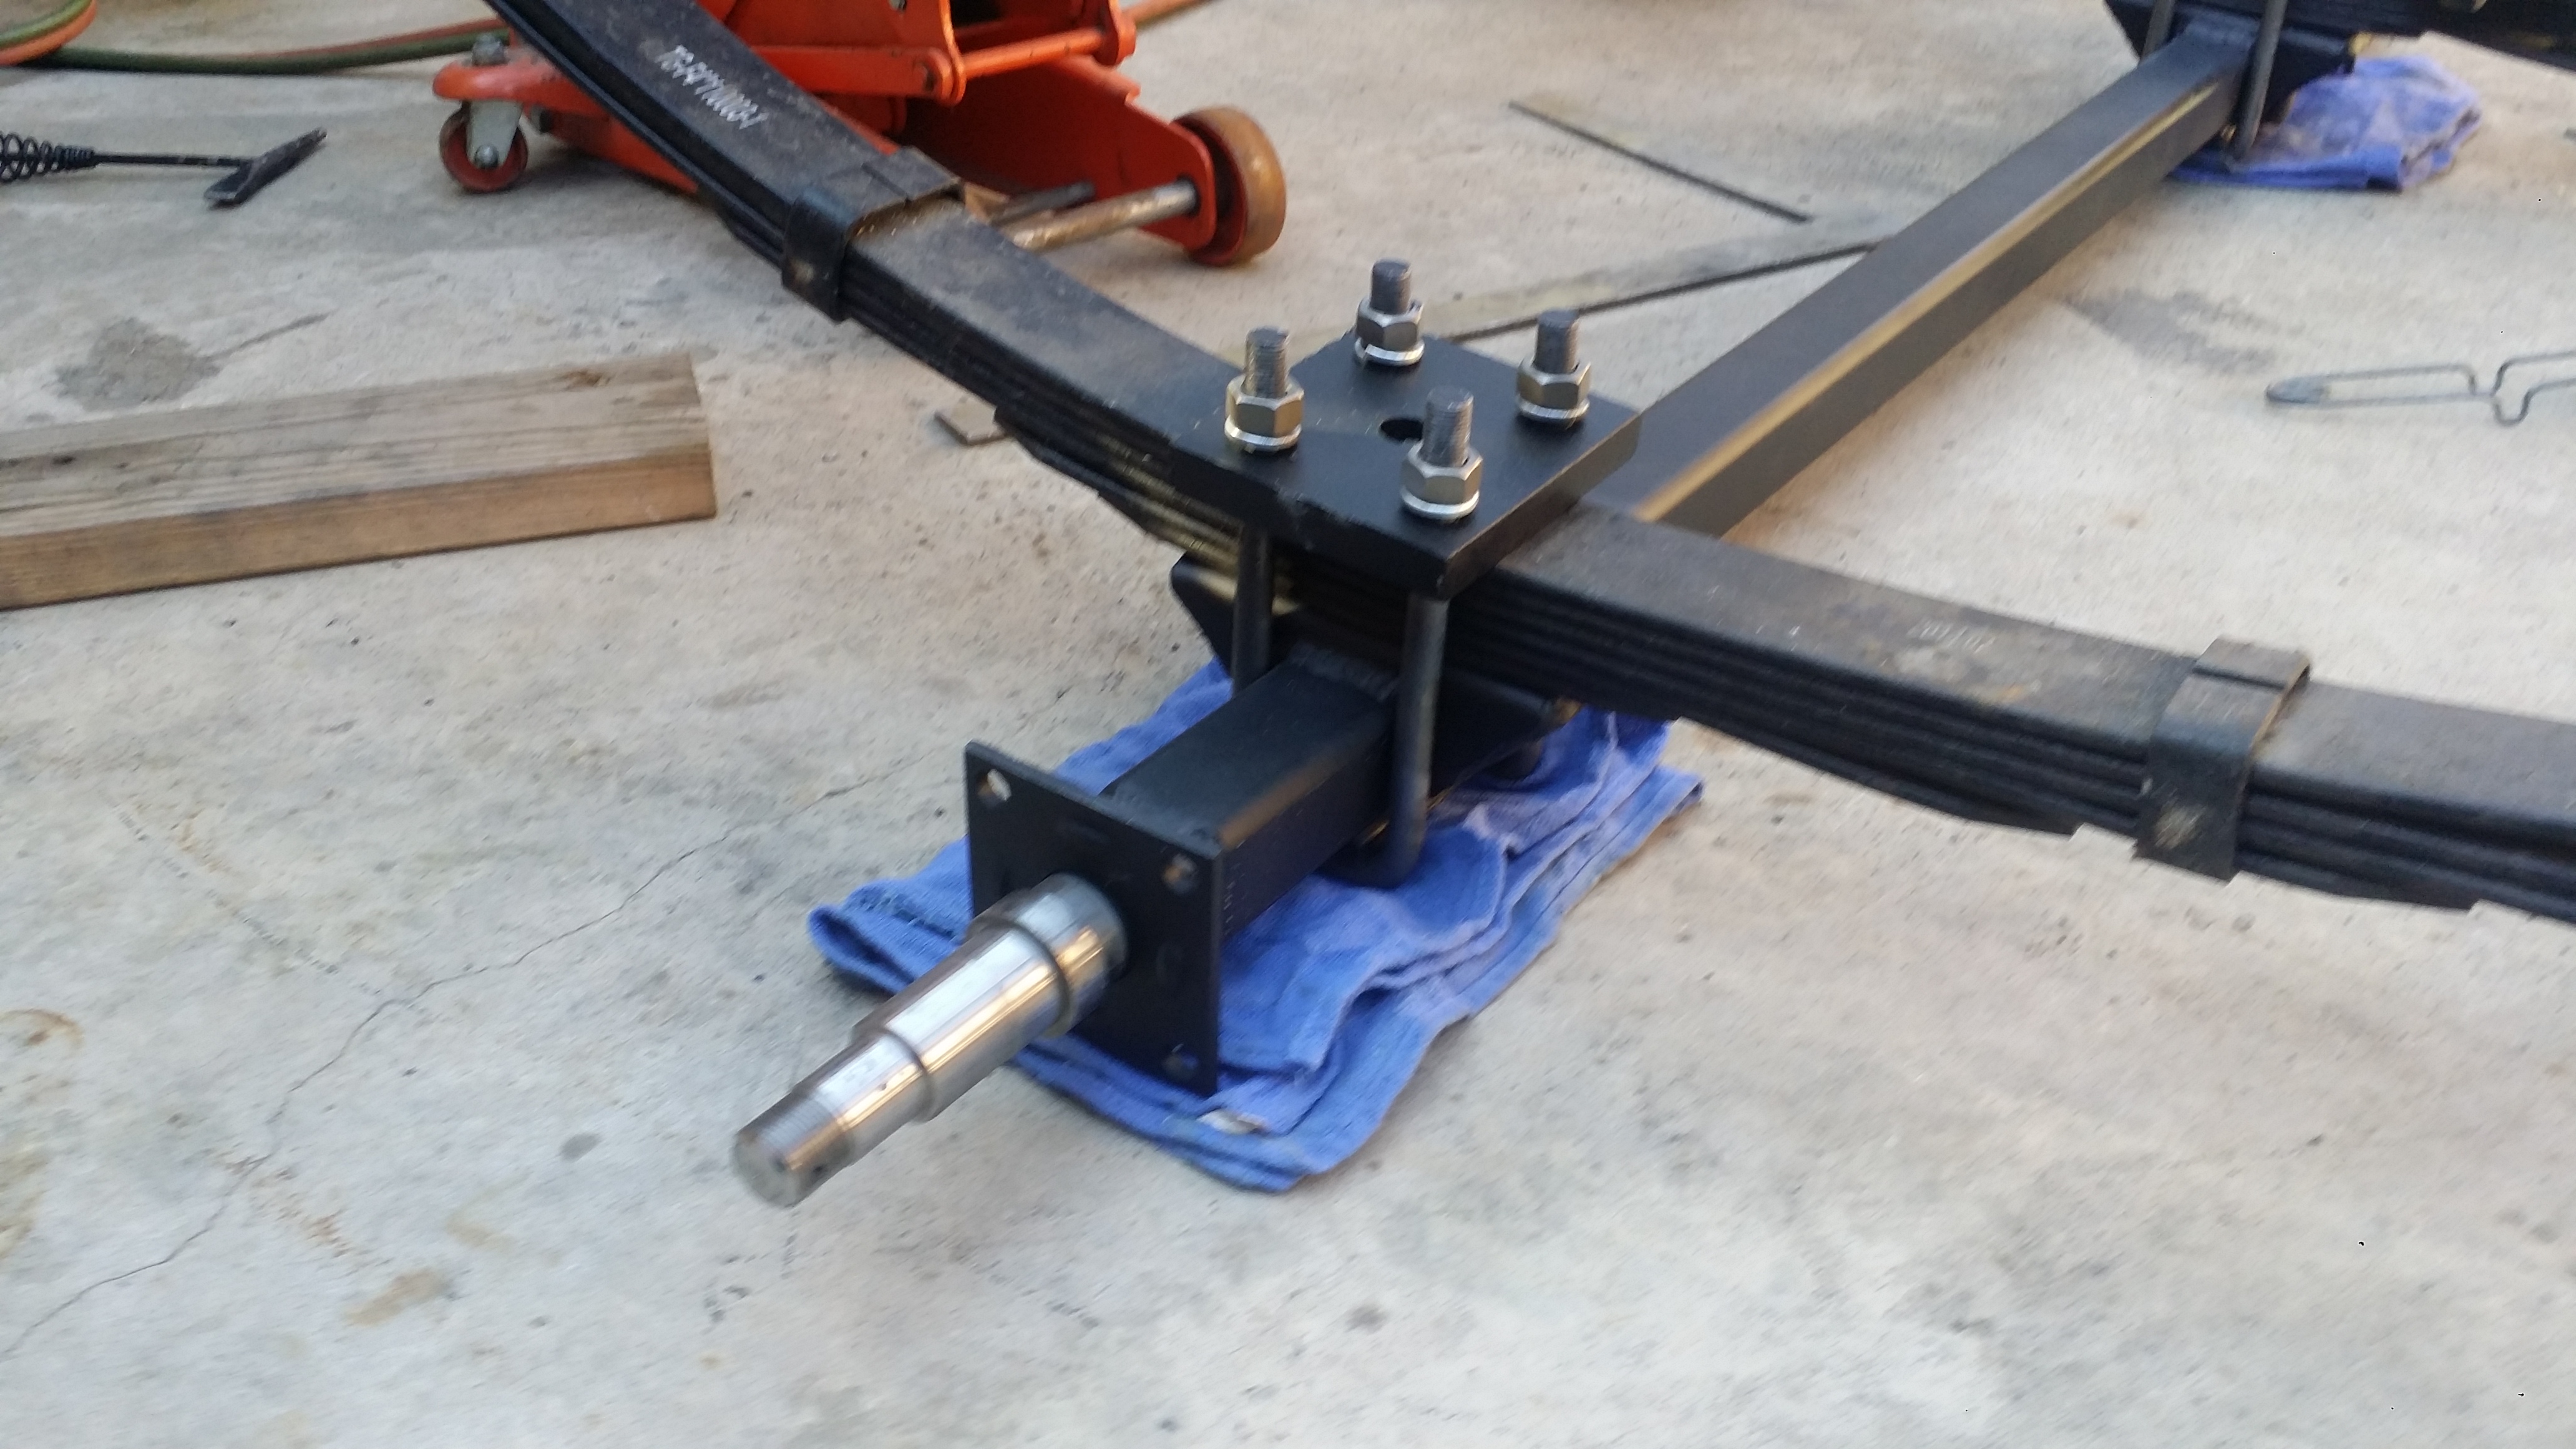
One of the issues i ran into by choosing to use truck leaf springs paired with a 2" tube trailer axle is that i cant use a trailer u-bolt plate or the truck u-bolt plate. sooooo i have to make my own.
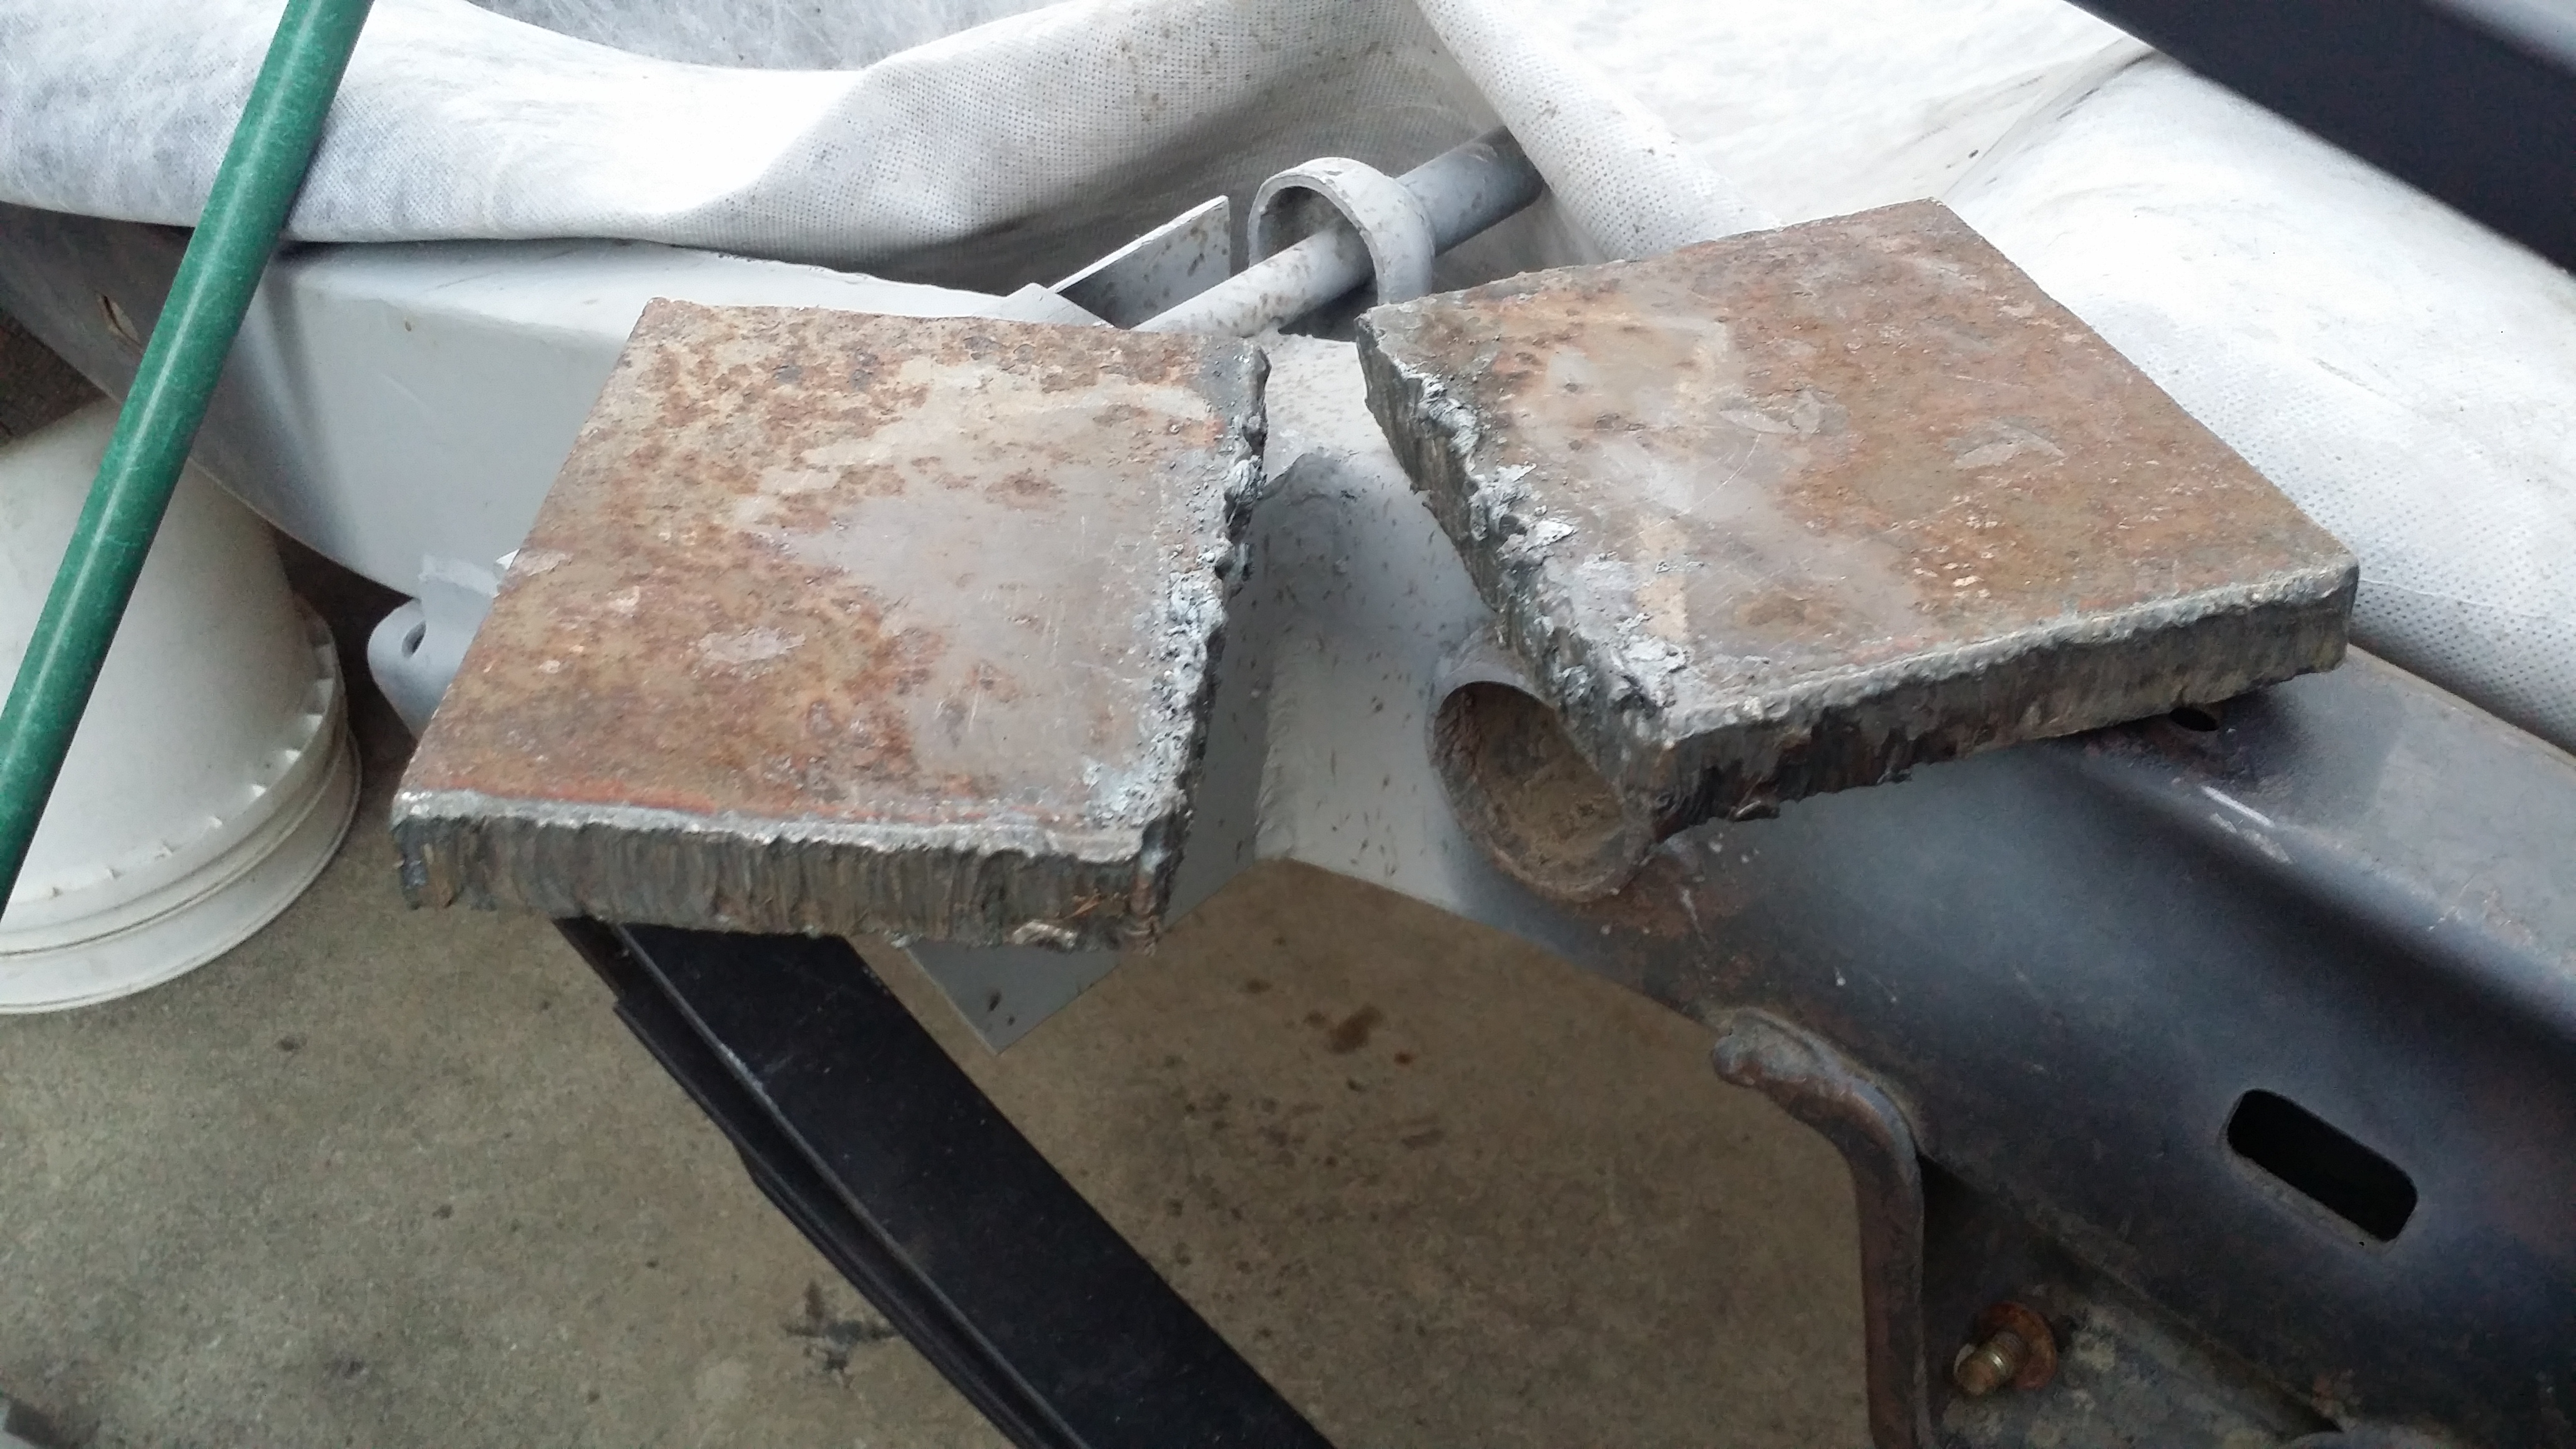
I didn't want to use 1/4" steel and i didn't have 0.5" scrap metal so i went digging in the back yard and found this chunk of steel beam. Cut it with the acetylene torch to 4&3/8" x 5".
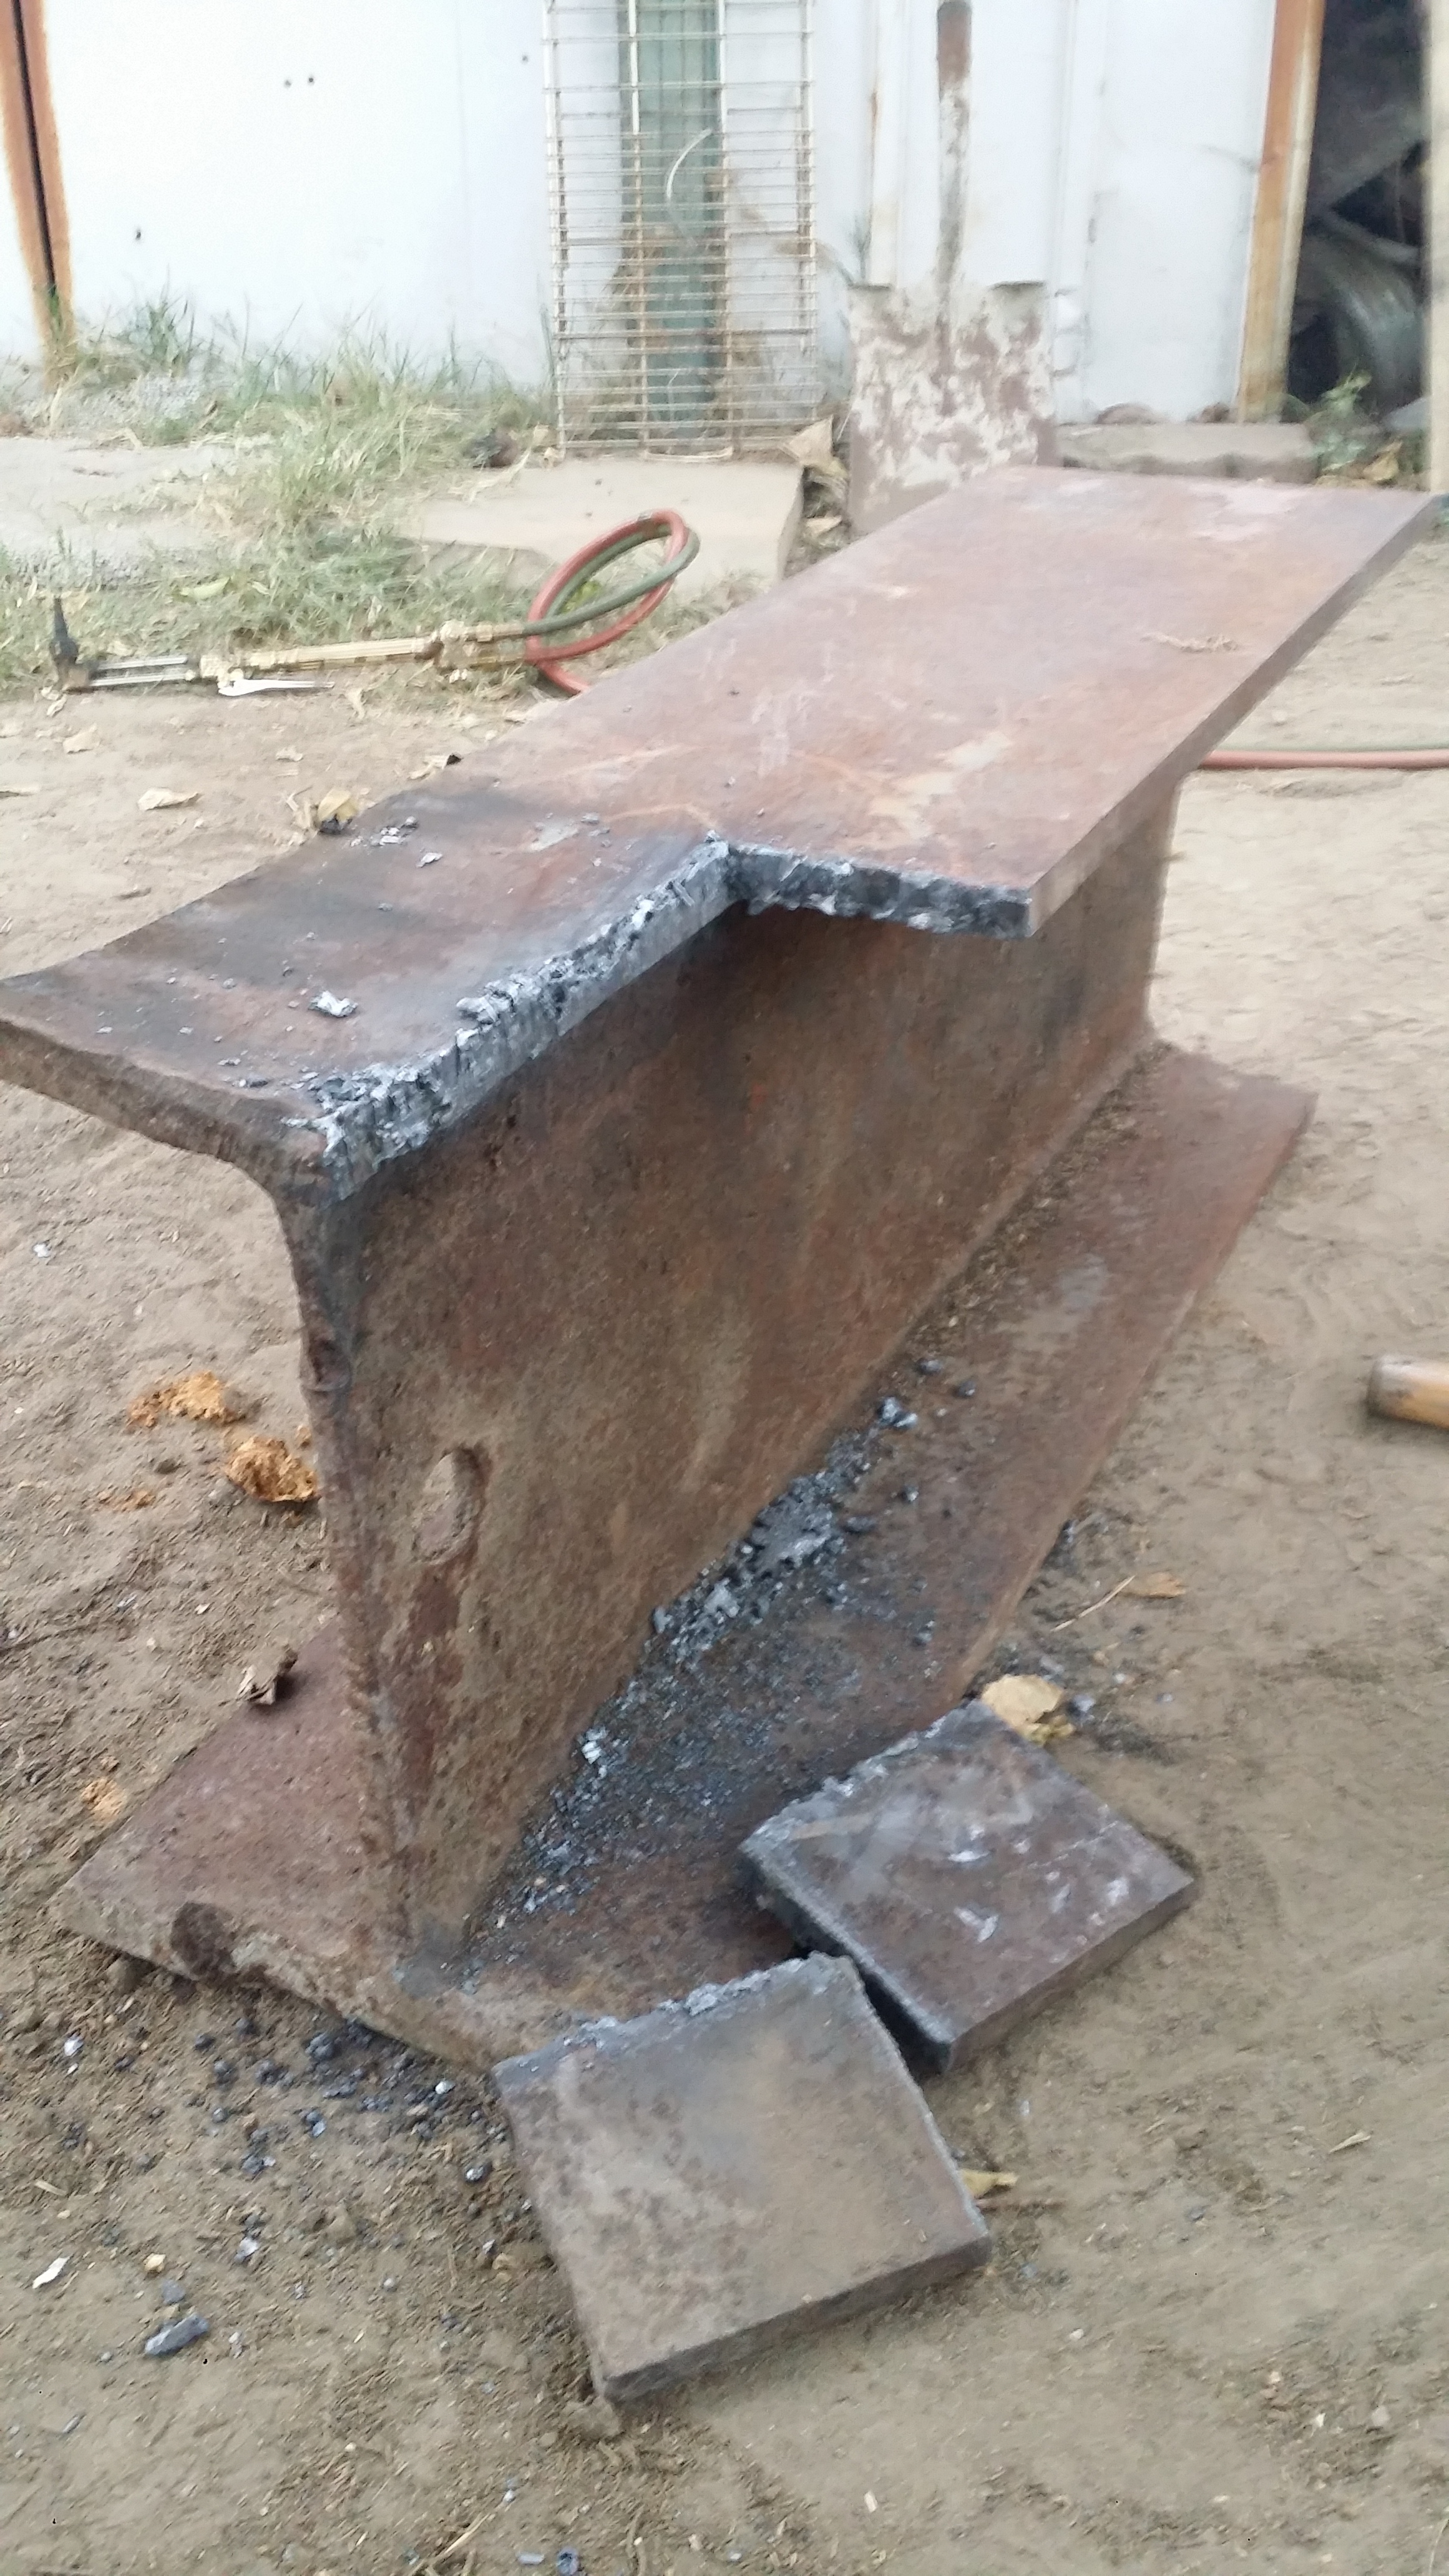
Just gotta grind it down, clean up the rust, and drill the 4 u-bolt holes and center pin hole on each plate then i can finally secure the axle to the leaf springs.
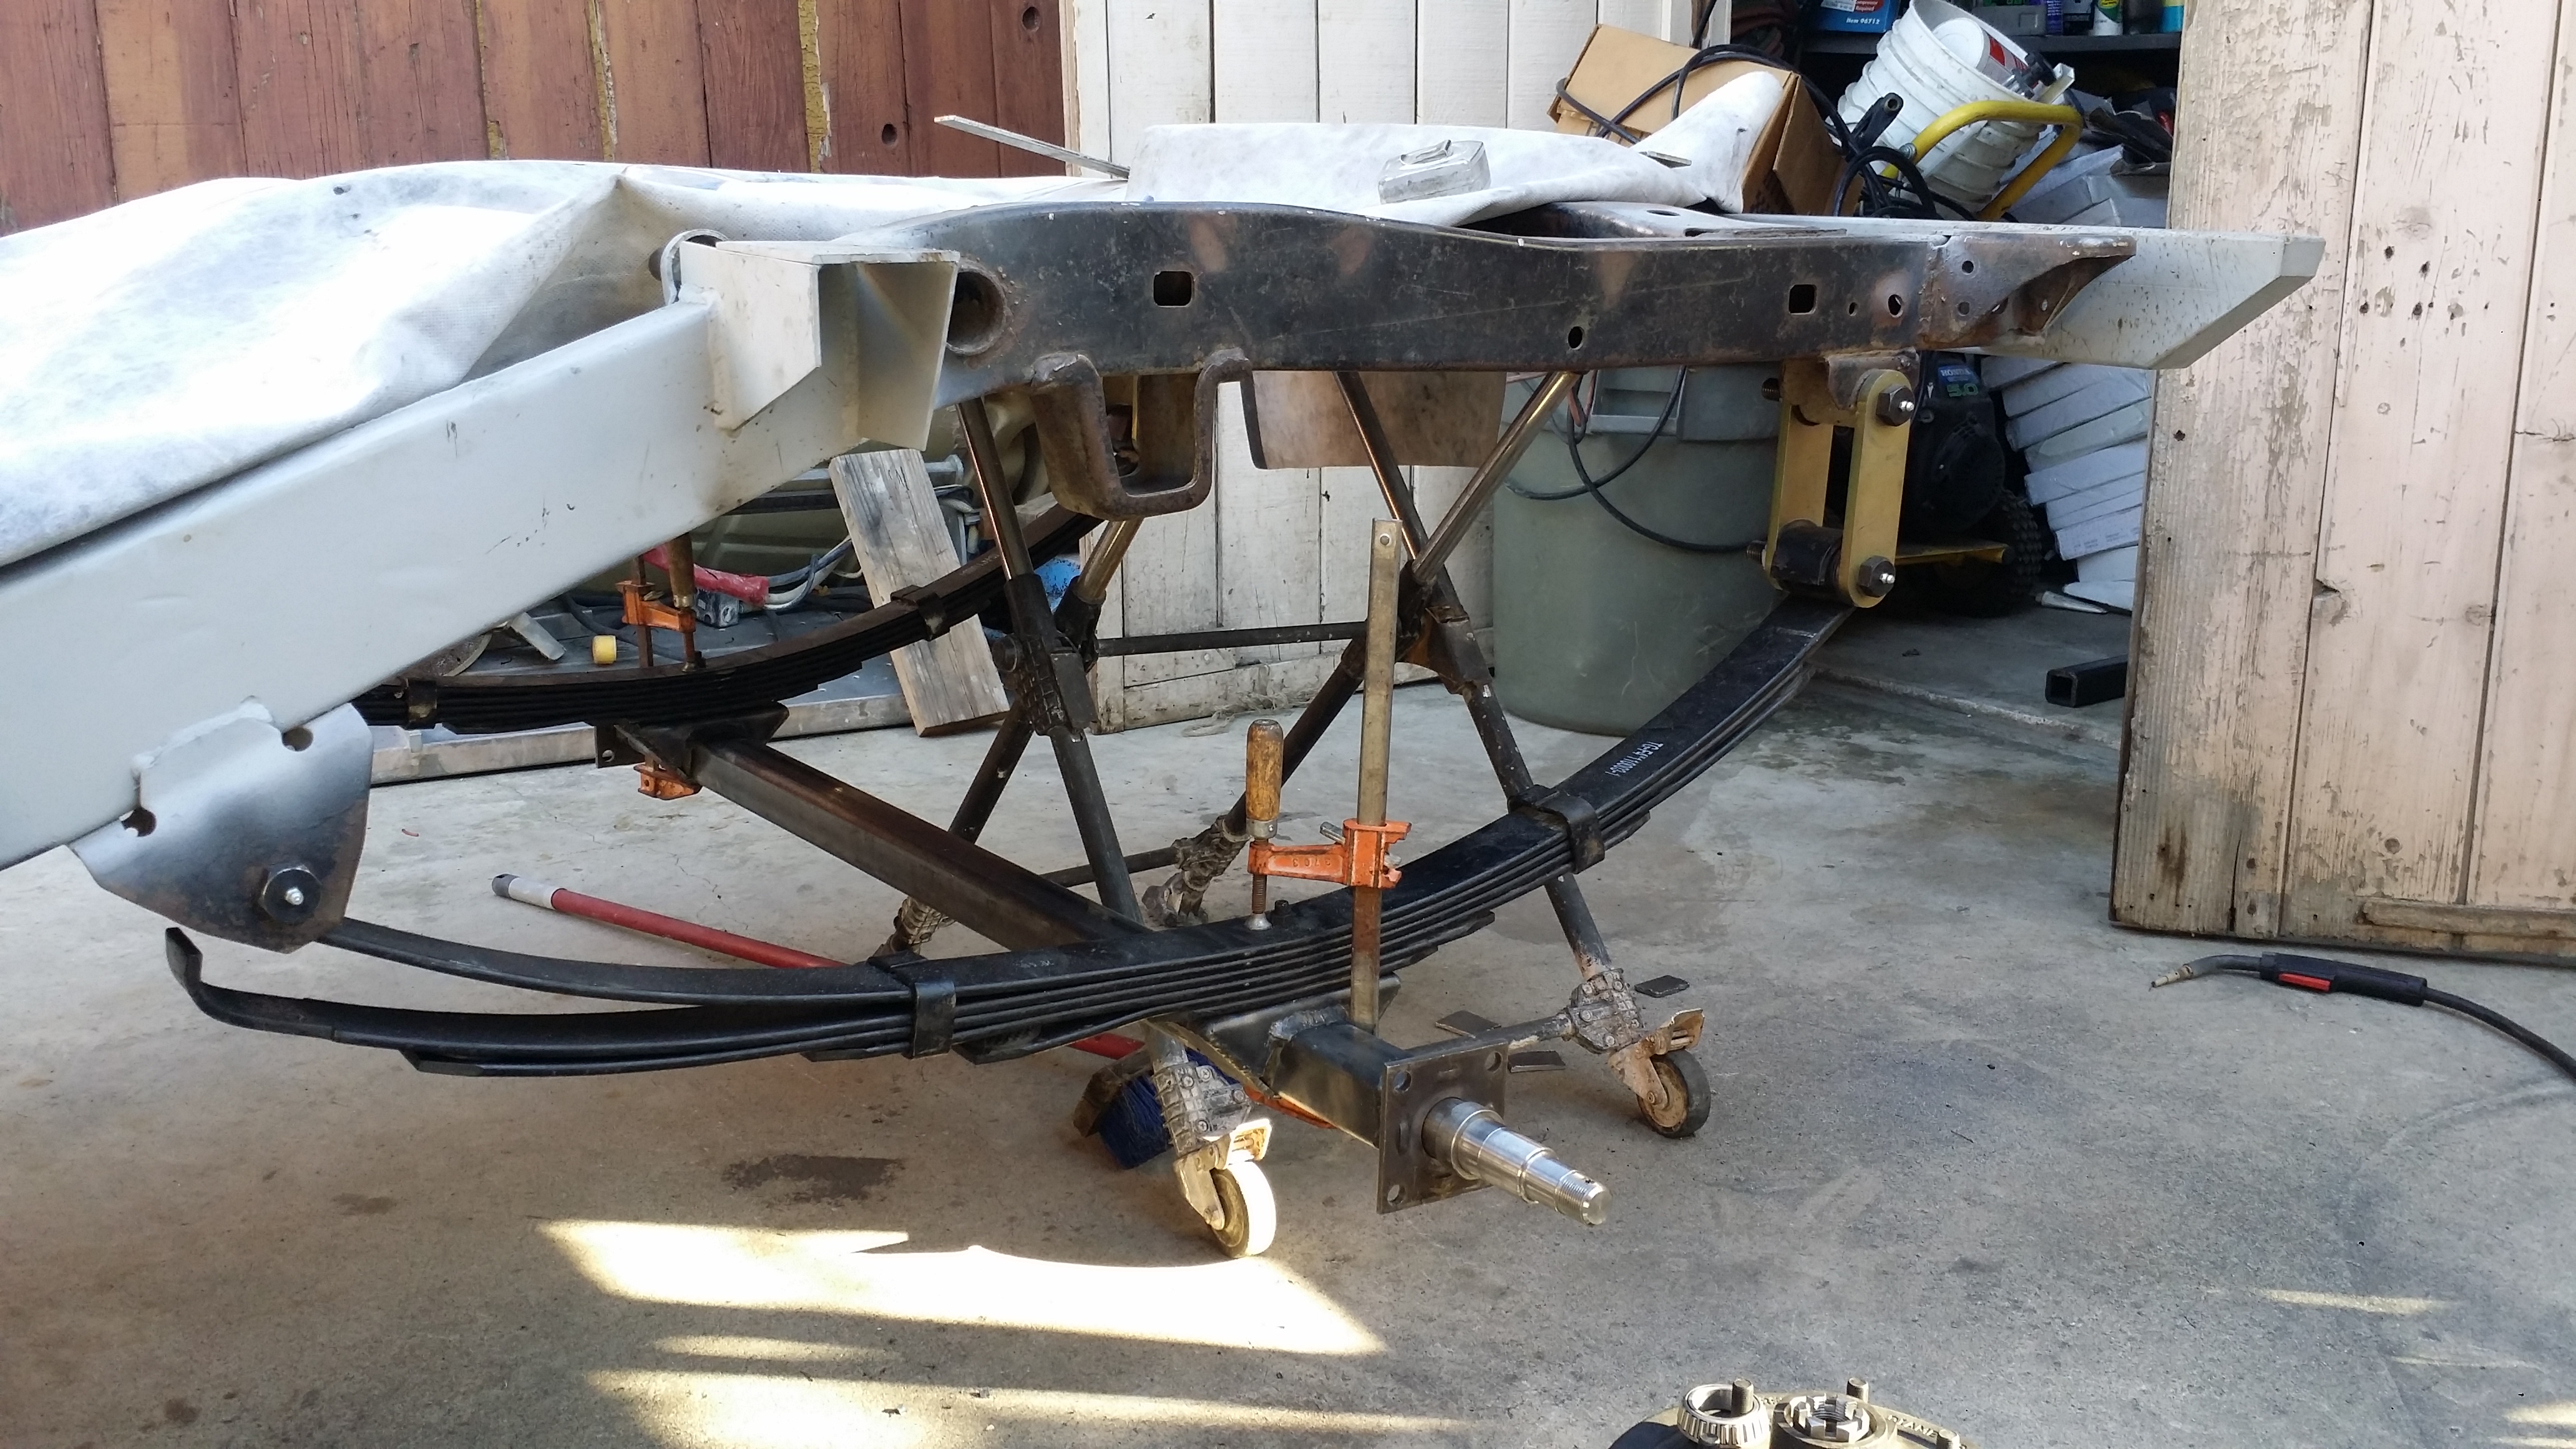
Making this axle took forever to get just right but I took my time to get it right the first time around. Once put together with electric brakes and rest of the hub assembly the axle will be 59" hub face to hub face. My stock 4Runner axles are 58.5" wide so it works out fine.
I'll probably get it all pieced together by tomorrow and i'll upload a few more pix. Enjoy!
I took a ton of pix because i couldn't find any info on how to build a trailer axle and it made research hard for me. So i took a bunch of pix to help others out in case they are in the same boat i was in.
First i had to mark the inner weld on the inside of that 1/4" 2x2" tube that ill be using for the axle. The spindles won't fit inside until i cut out this piece on on the spindle side.


Now i can fit the spindles into place and properly measure how wide my axle will be.

Perfect fit

The guy at my local trailer shop told me to leave 1" of that solid steel spindle shaft exposed so this was me double checking that i was at the correct distance.

Covered up the spindle threading with a junk piece of tube that i was practicing on a long long long time ago lol I covered the threading to make sure no weld splatter sticks to where i don't want it at.

Next i used my 2 spare triple slotted AllPro-Offroad spring perches from when i did the Solid Axle Swap on my 4runner. I had 2 left over so it worked out for me in using them for this axle. If you have ever built your own axle or plan to build your own axle and decide to use Truck leaf springs like i am doing you will find out that the spring perches that you find on trailer part stores are more narrow due to the thinner leaf springs. (or at least the ones at my local store were about 1" too thin.) So Since i am using regular width 4Runner springs these work out the best. But of course they had to be modified for a square tube axle because these are made for the stock toyota axle. So here they are already notched to 2"

I tacked the spring perches in place and made sure they were even on both sides. Then i held them in place on to the leaf springs to make sure i got them in the correct location. Once i threw on a few more tacks i was ready to permanently weld them into place.

I think im getting a little better at using this cheap harbor freight flux core wire. I hate it so much! they cause so much splatter and the welds never come out as nice as when i use gas with regular wire. but i dont have much of a choice right now so i had to deal with it.

I added plates to the bottom side for reinforcement because the spring perches were only welded pretty much on one of the 4 sides of the square tube. So this helped a lot.


Practice Fitment

Primed

Nice matte black finish. It still needs the 2nd coat. I'll do it tomorrow.

One of the issues i ran into by choosing to use truck leaf springs paired with a 2" tube trailer axle is that i cant use a trailer u-bolt plate or the truck u-bolt plate. sooooo i have to make my own.
I didn't want to use 1/4" steel and i didn't have 0.5" scrap metal so i went digging in the back yard and found this chunk of steel beam. Cut it with the acetylene torch to 4&3/8" x 5".

Just gotta grind it down, clean up the rust, and drill the 4 u-bolt holes and center pin hole on each plate then i can finally secure the axle to the leaf springs.

Making this axle took forever to get just right but I took my time to get it right the first time around. Once put together with electric brakes and rest of the hub assembly the axle will be 59" hub face to hub face. My stock 4Runner axles are 58.5" wide so it works out fine.
I'll probably get it all pieced together by tomorrow and i'll upload a few more pix. Enjoy!
Last edited by Redeth005; Nov 21, 2015 at 08:28 PM.
Nov 28, 2015 | 11:33 AM
#54
Thread Starter
Registered User
Joined: Apr 2012
Posts: 2,817
Likes: 2
From: Los Angeles CA
Now that thanksgiving is over i can add more to the build. Here is the continuation of what AllPro-Offroad and Trail-Gear call a "U-Bolt Flip kit" only difference is mine had to be custom made due to using Toyota leaf springs in pair with the trailer 2" thick axle. Enjoy
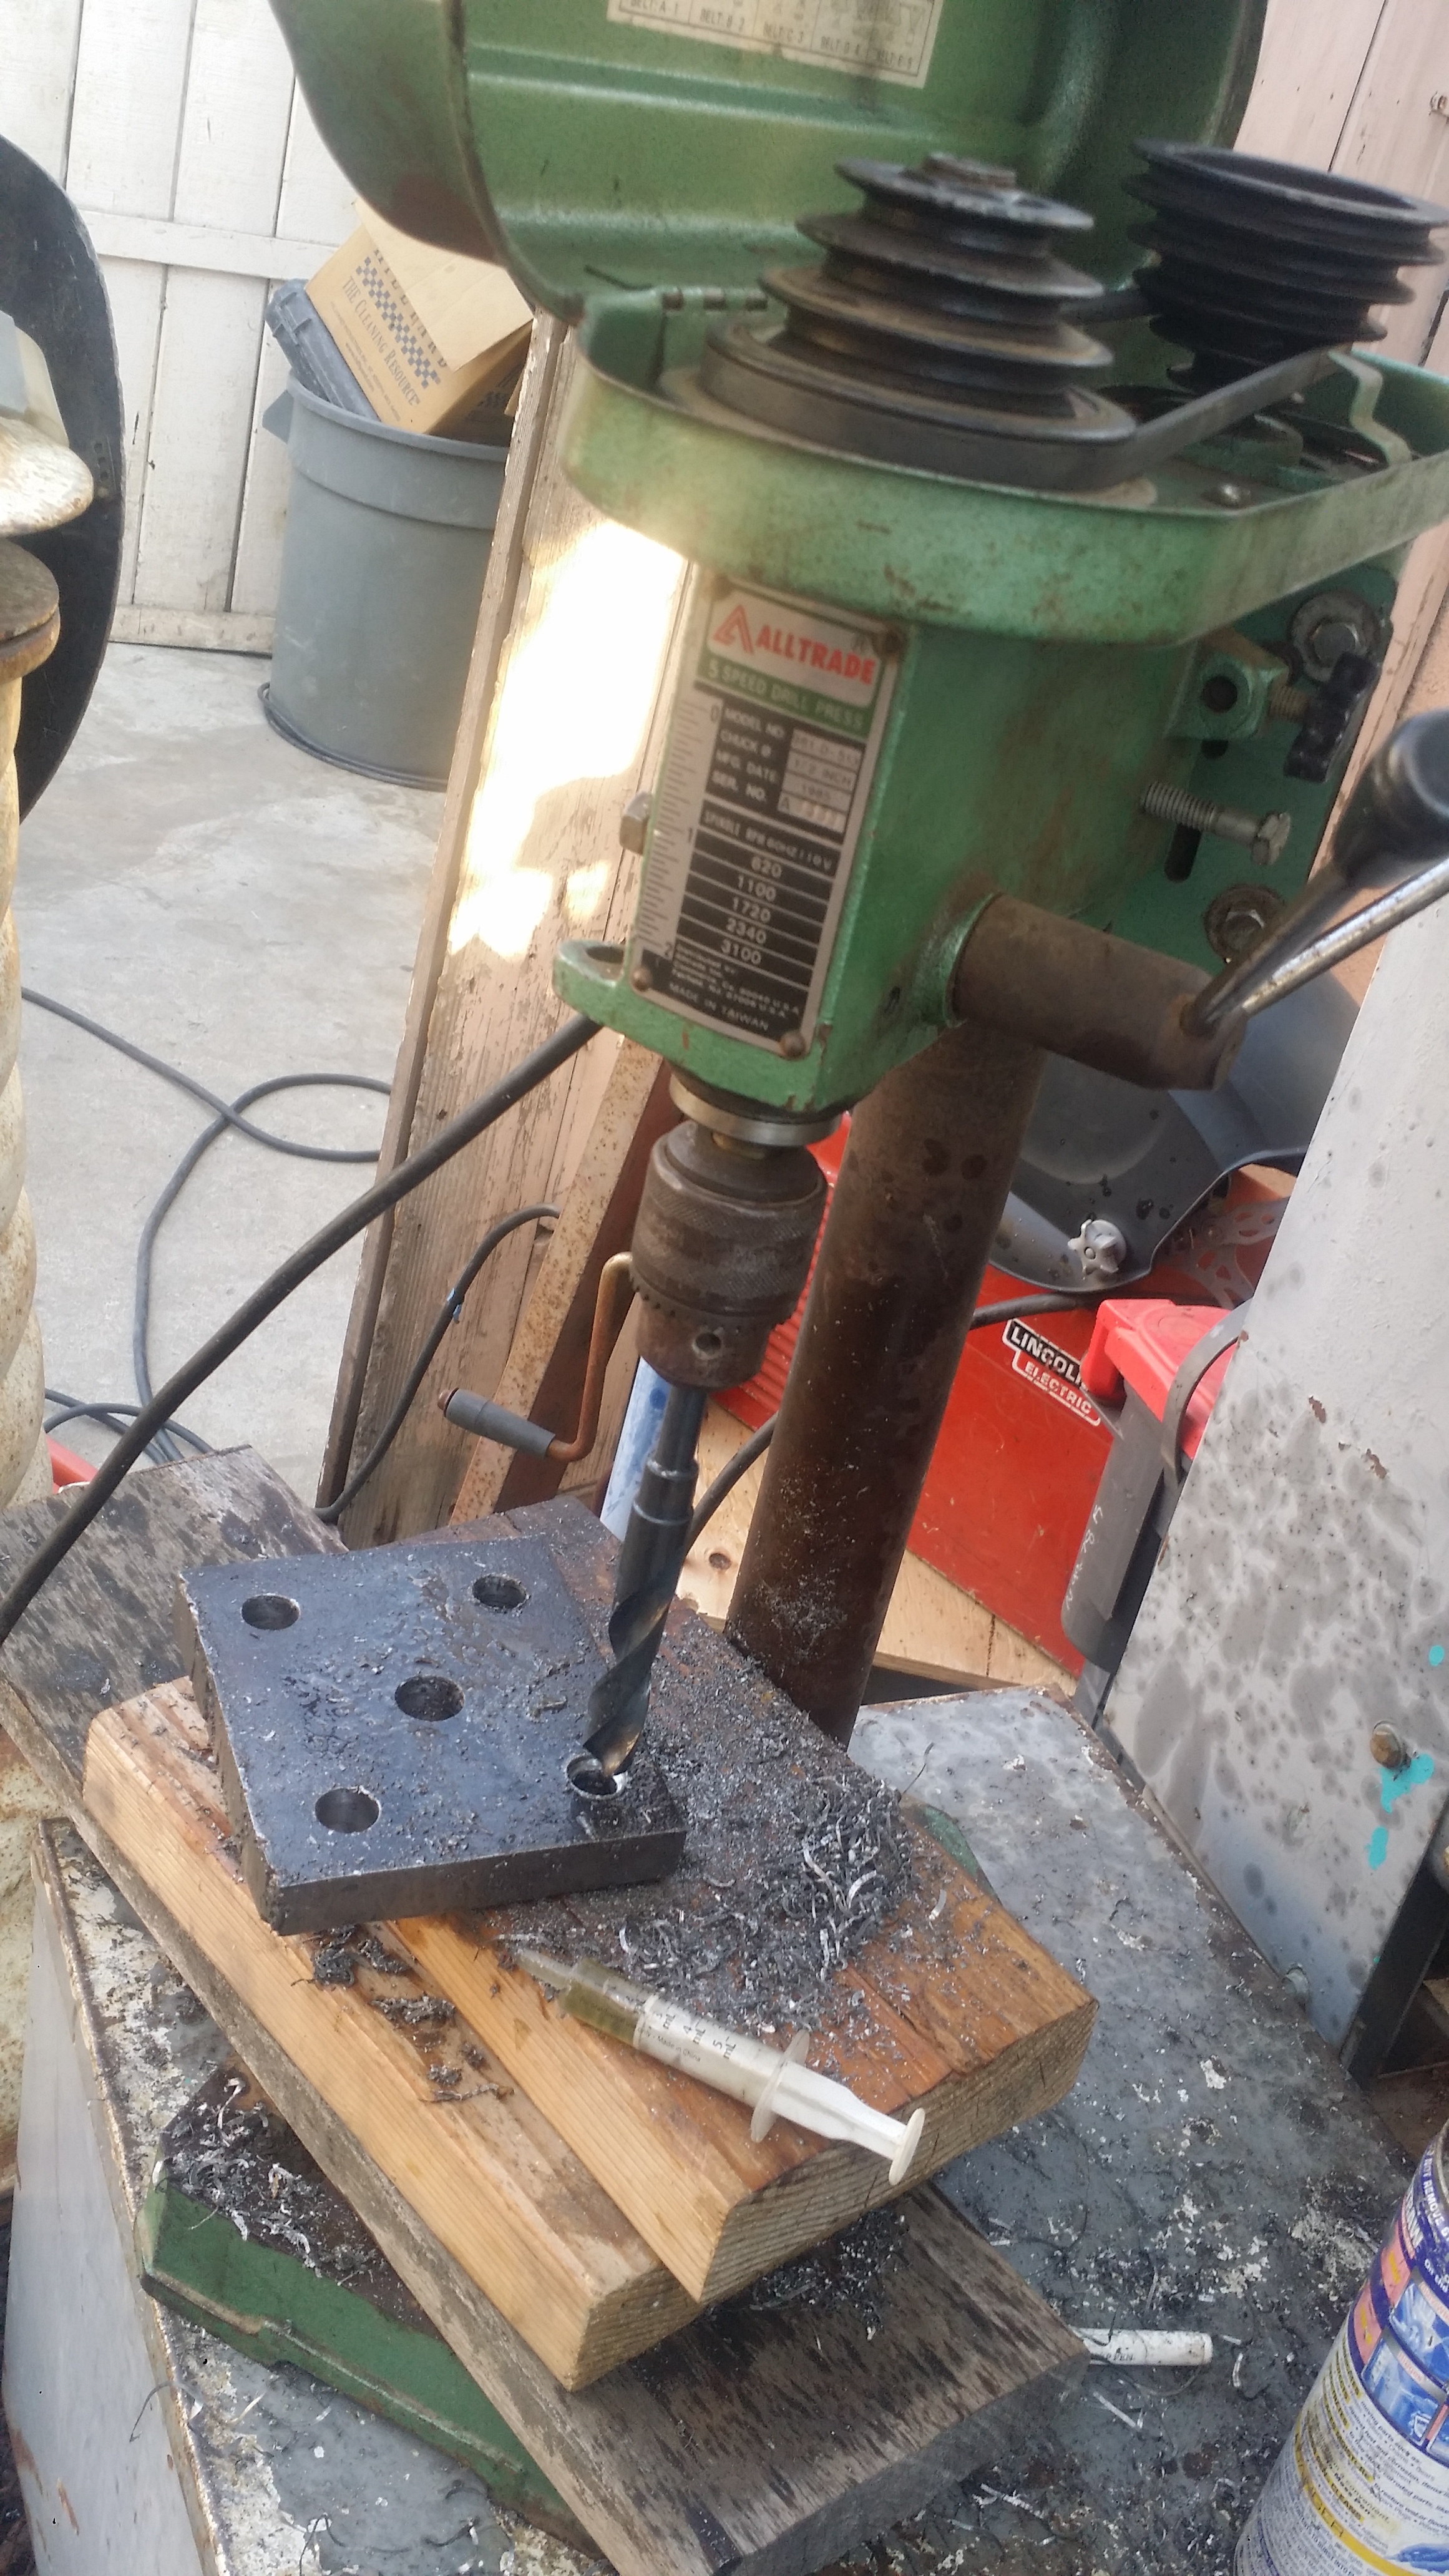
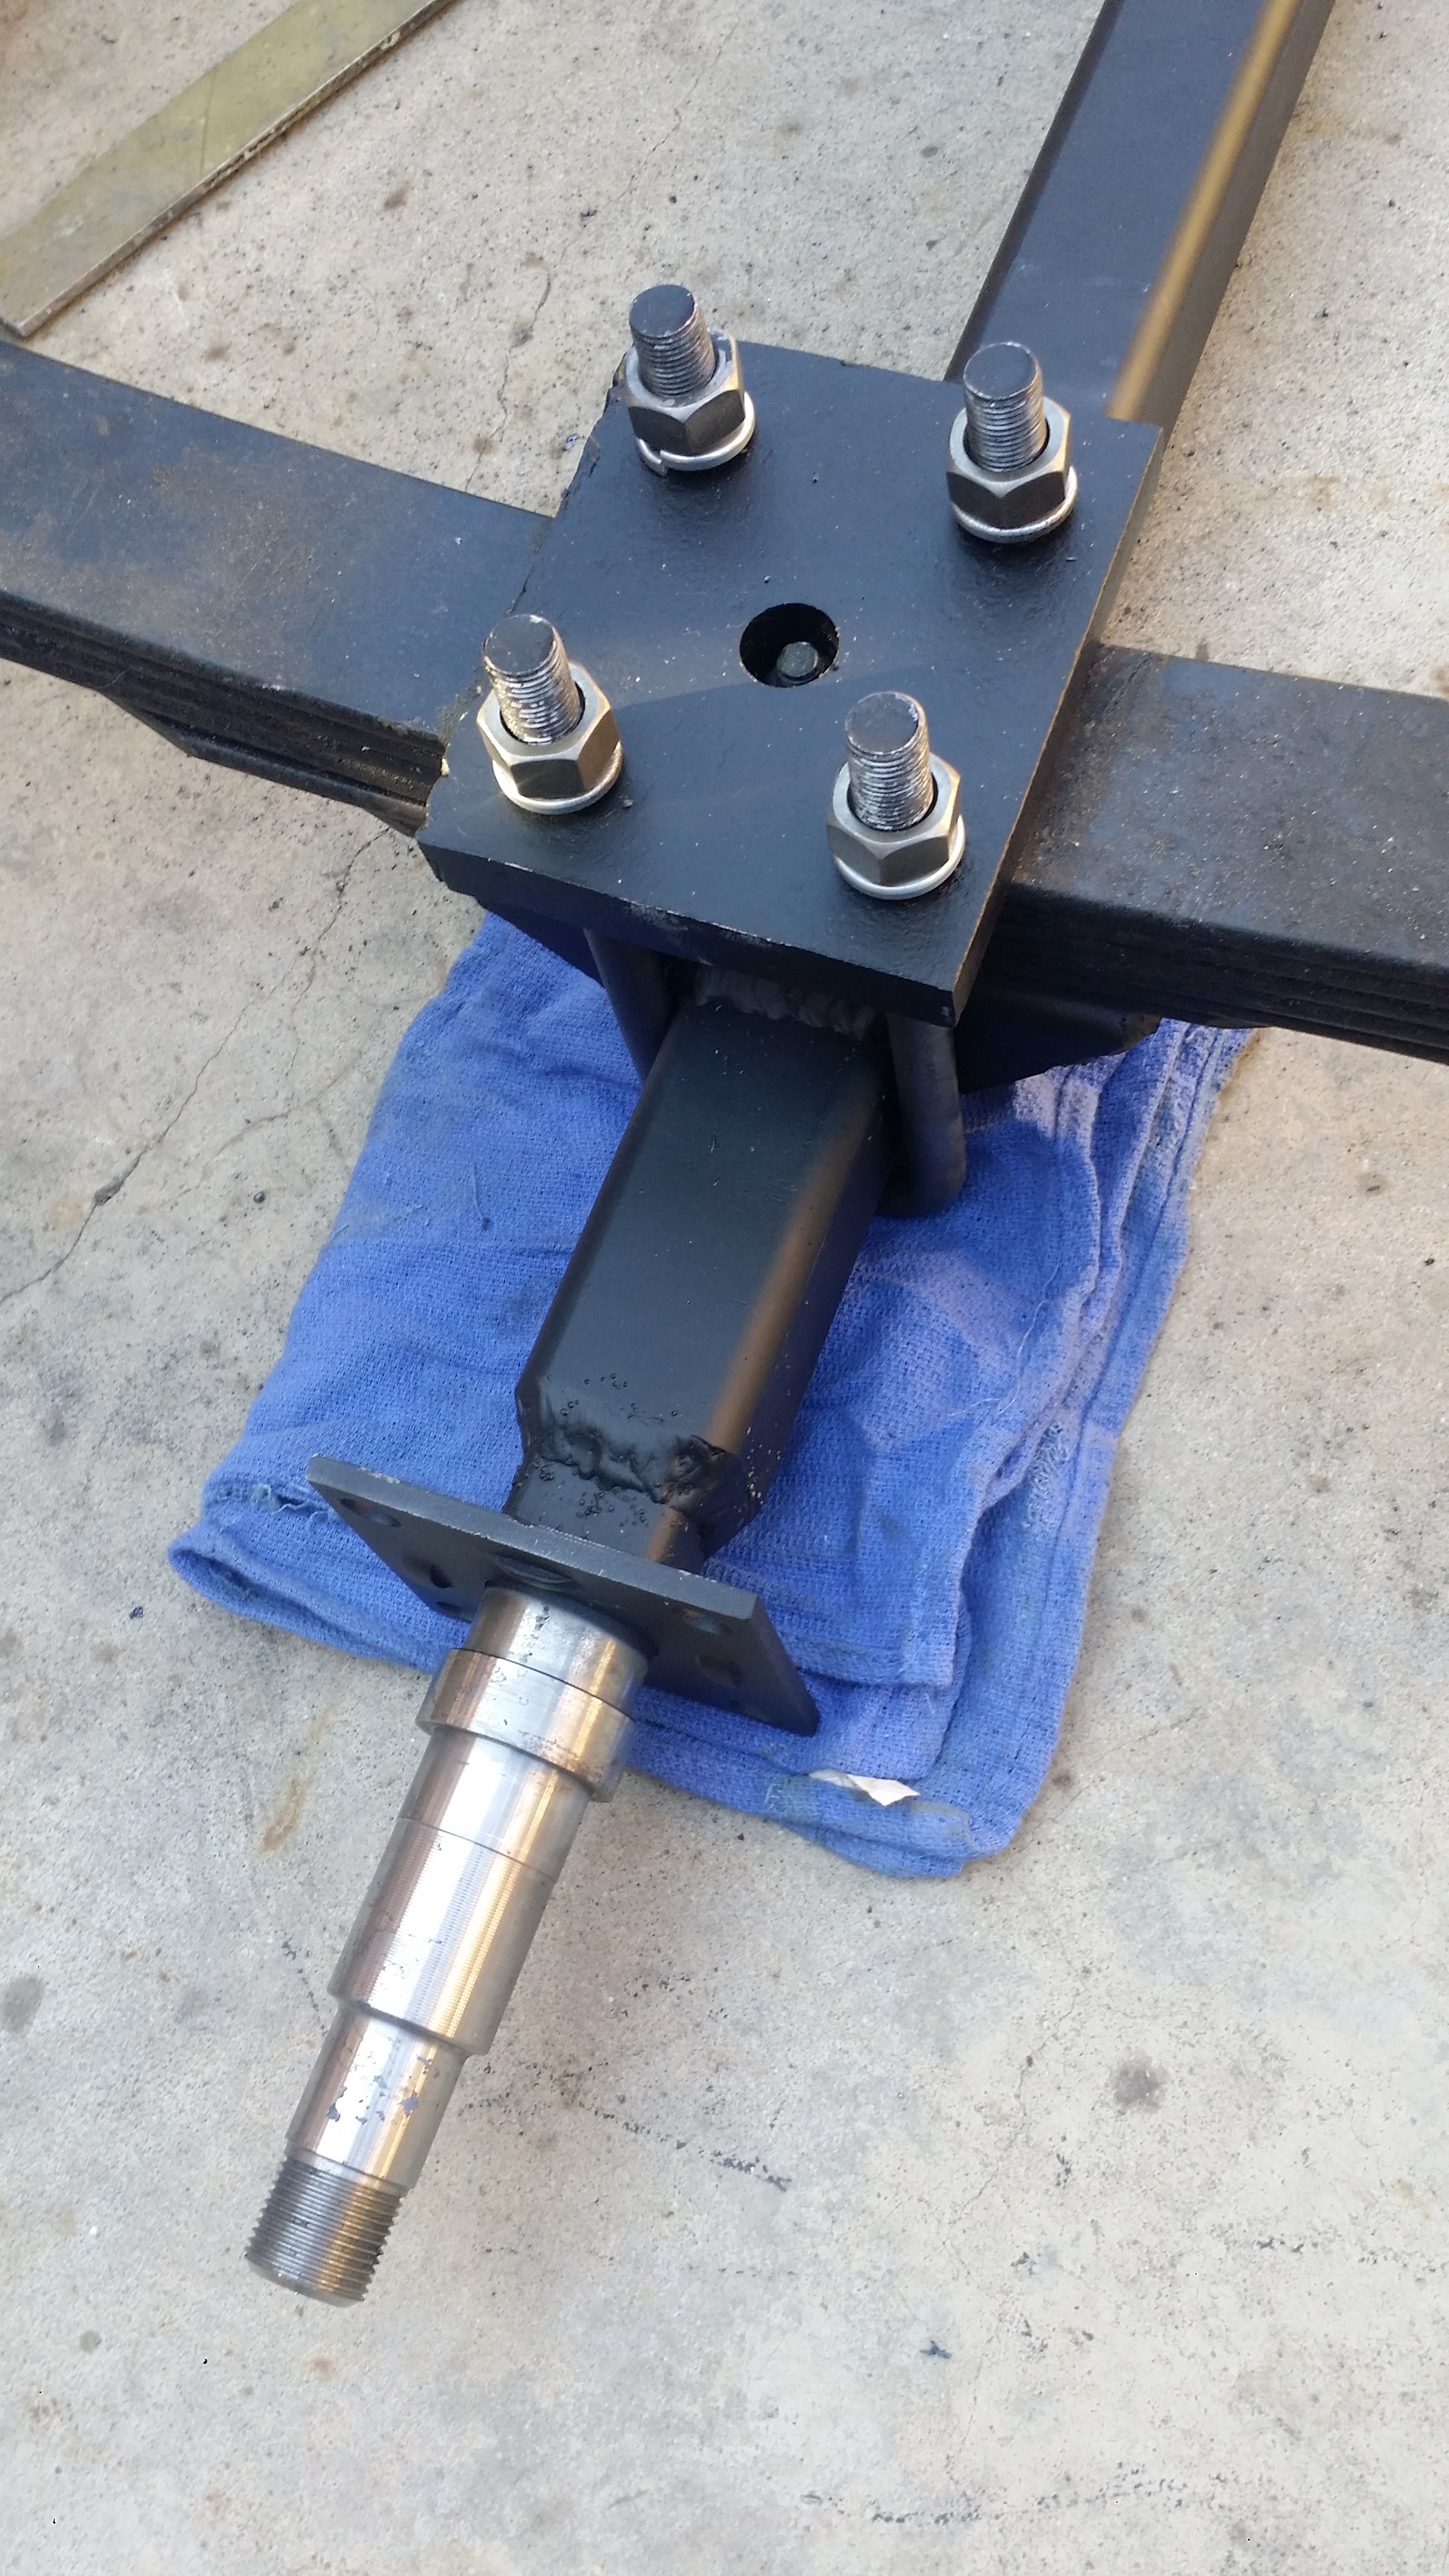
Drilled out the ubolt holes to 5/8" and the center pin hole to i believe 3/4". Yes that is a syringe. No needle but it works great for adding oil when drilling out the holes for lubrication.
Not the prettiest of creations but i don't work in a machine shop and i gotta do with what I've got.
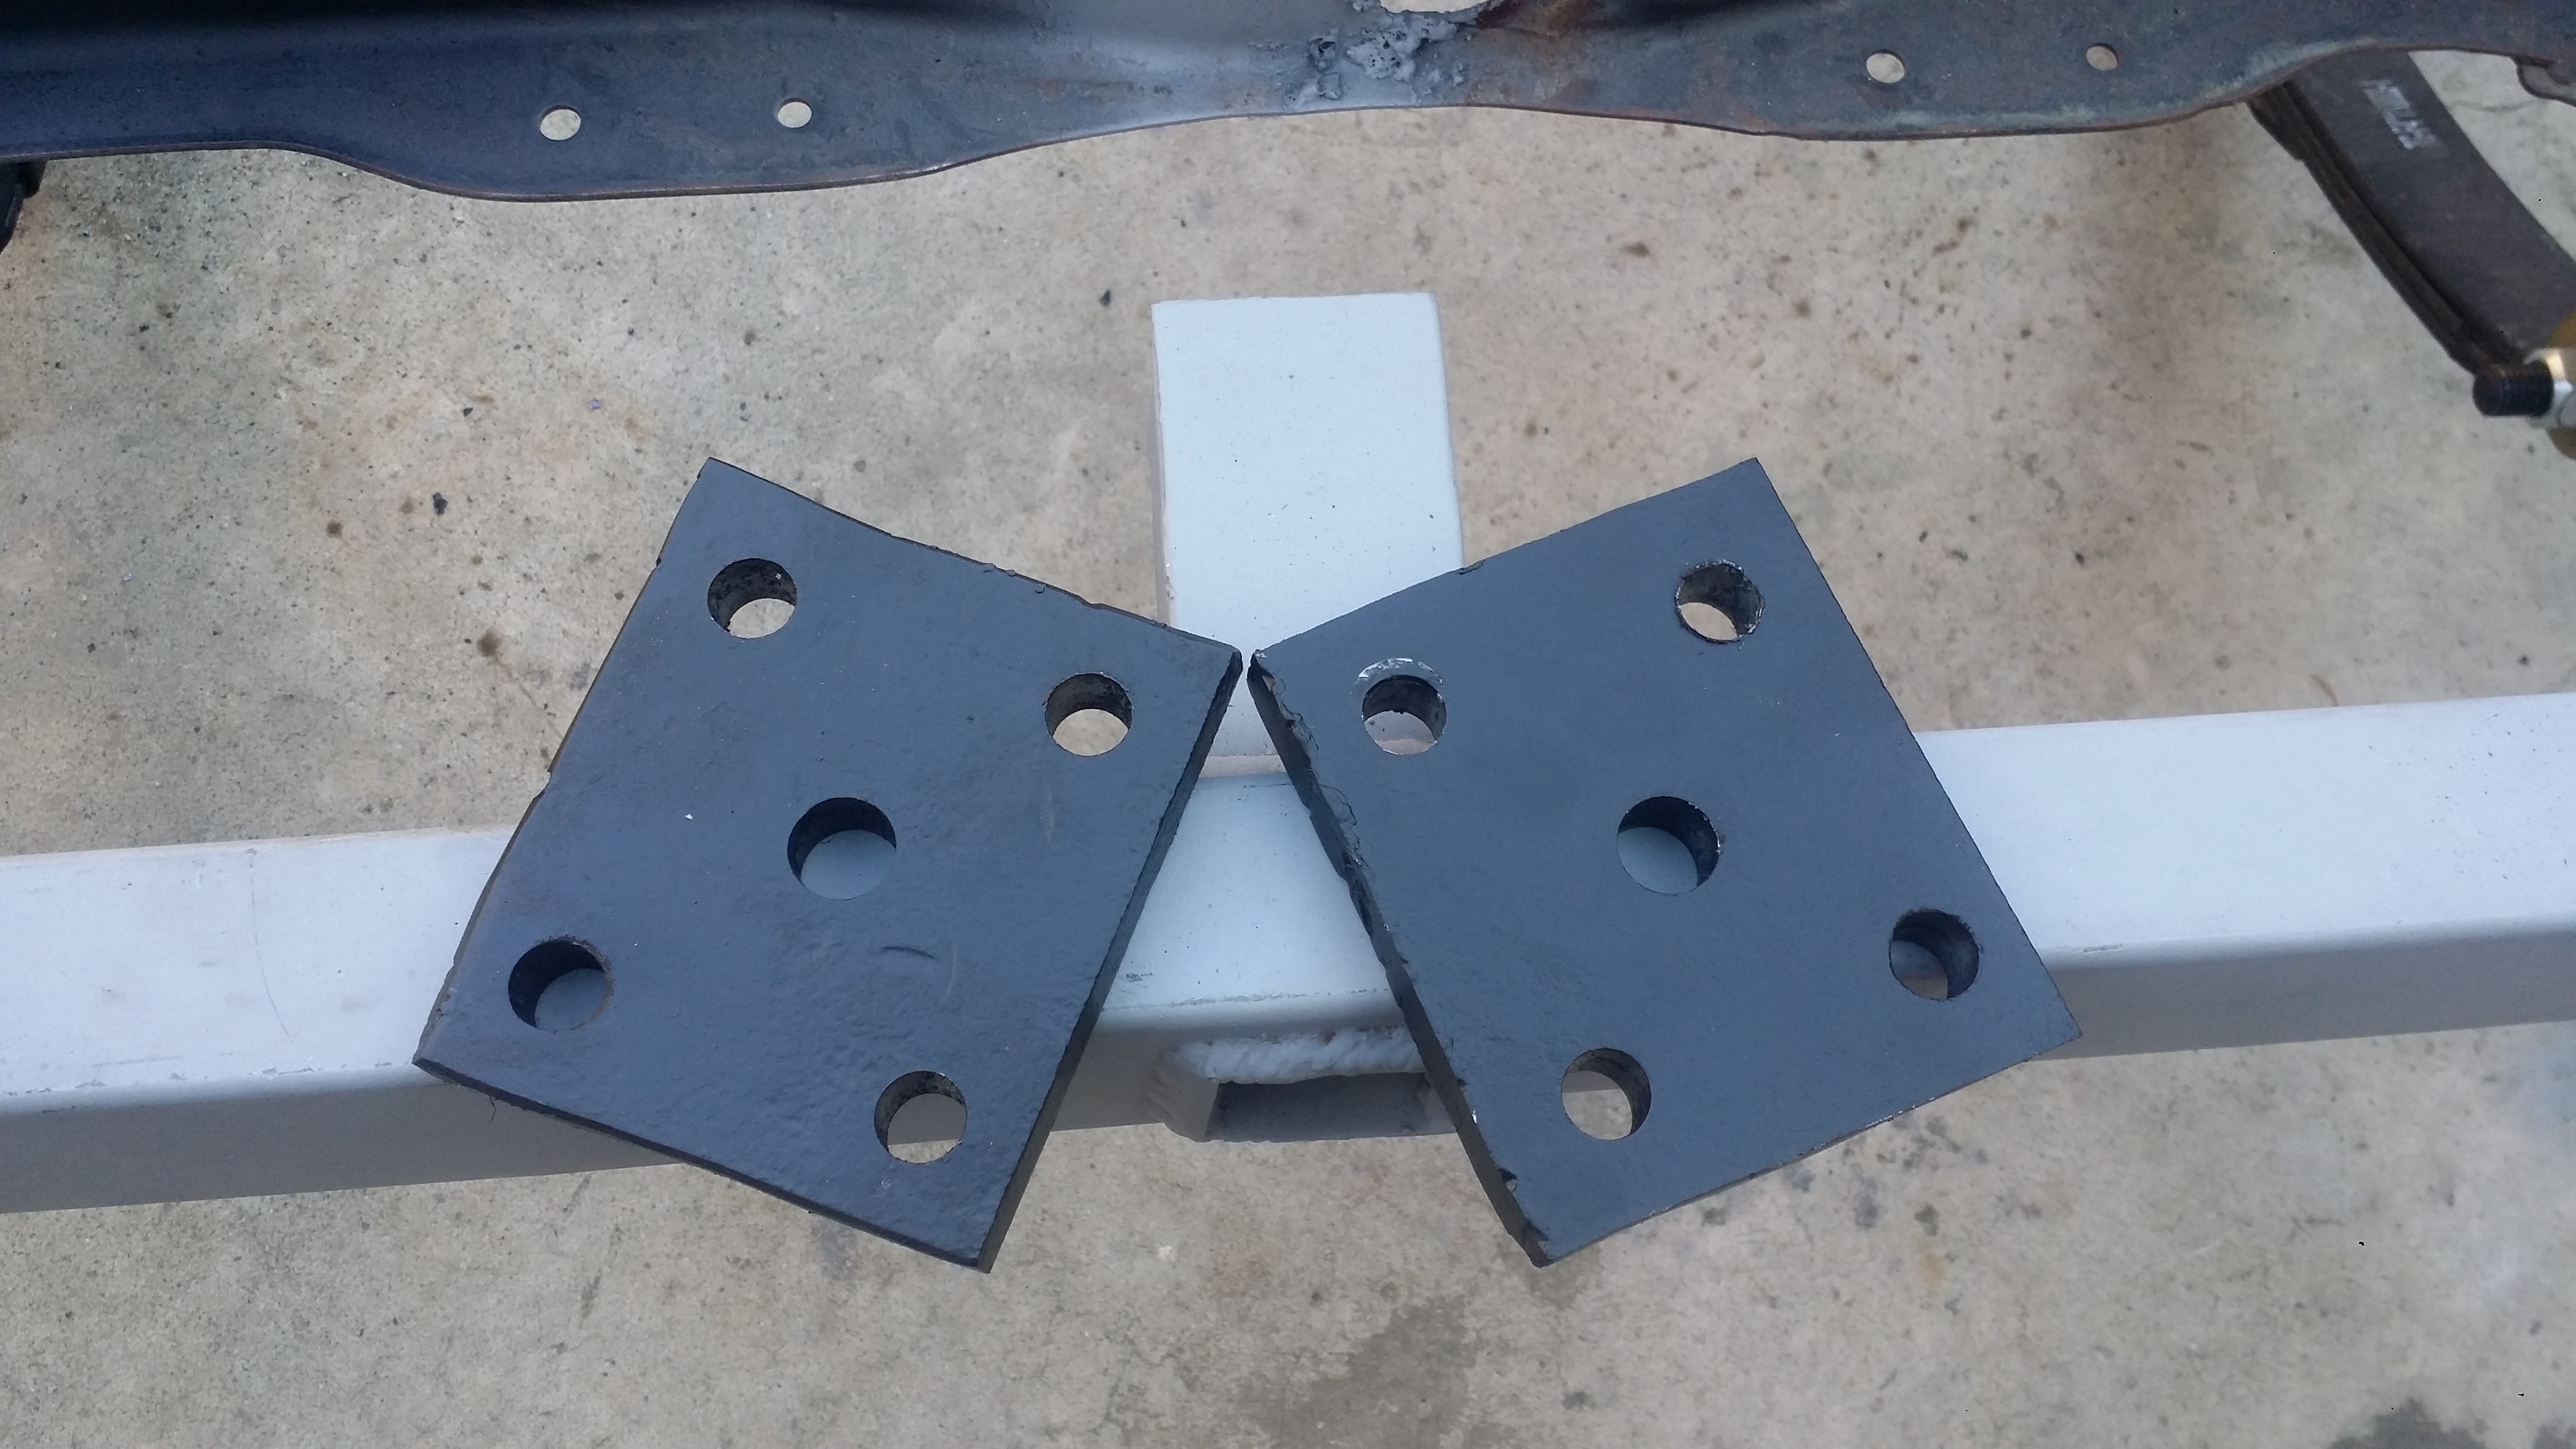
center pin fits fine. and has enough wiggle room in case i need to move it a little forward or back
Looks pretty solid to me.
A little more view from the top side. Yes i know the nuts aren't tightened. i haven't tightened them yet.
I will continue the axle build as soon as i go buy the nuts and lock washers that hold the brake components on to the axle. Apparently the shop forgot to include those and they are too far away for me to get them. It'd probably cost less to buy at my local nut and bolt store then all the gas i'd spend going to pick up the 8 nuts and washers they owe me. oh well. I'll post pix once i get that situated with.
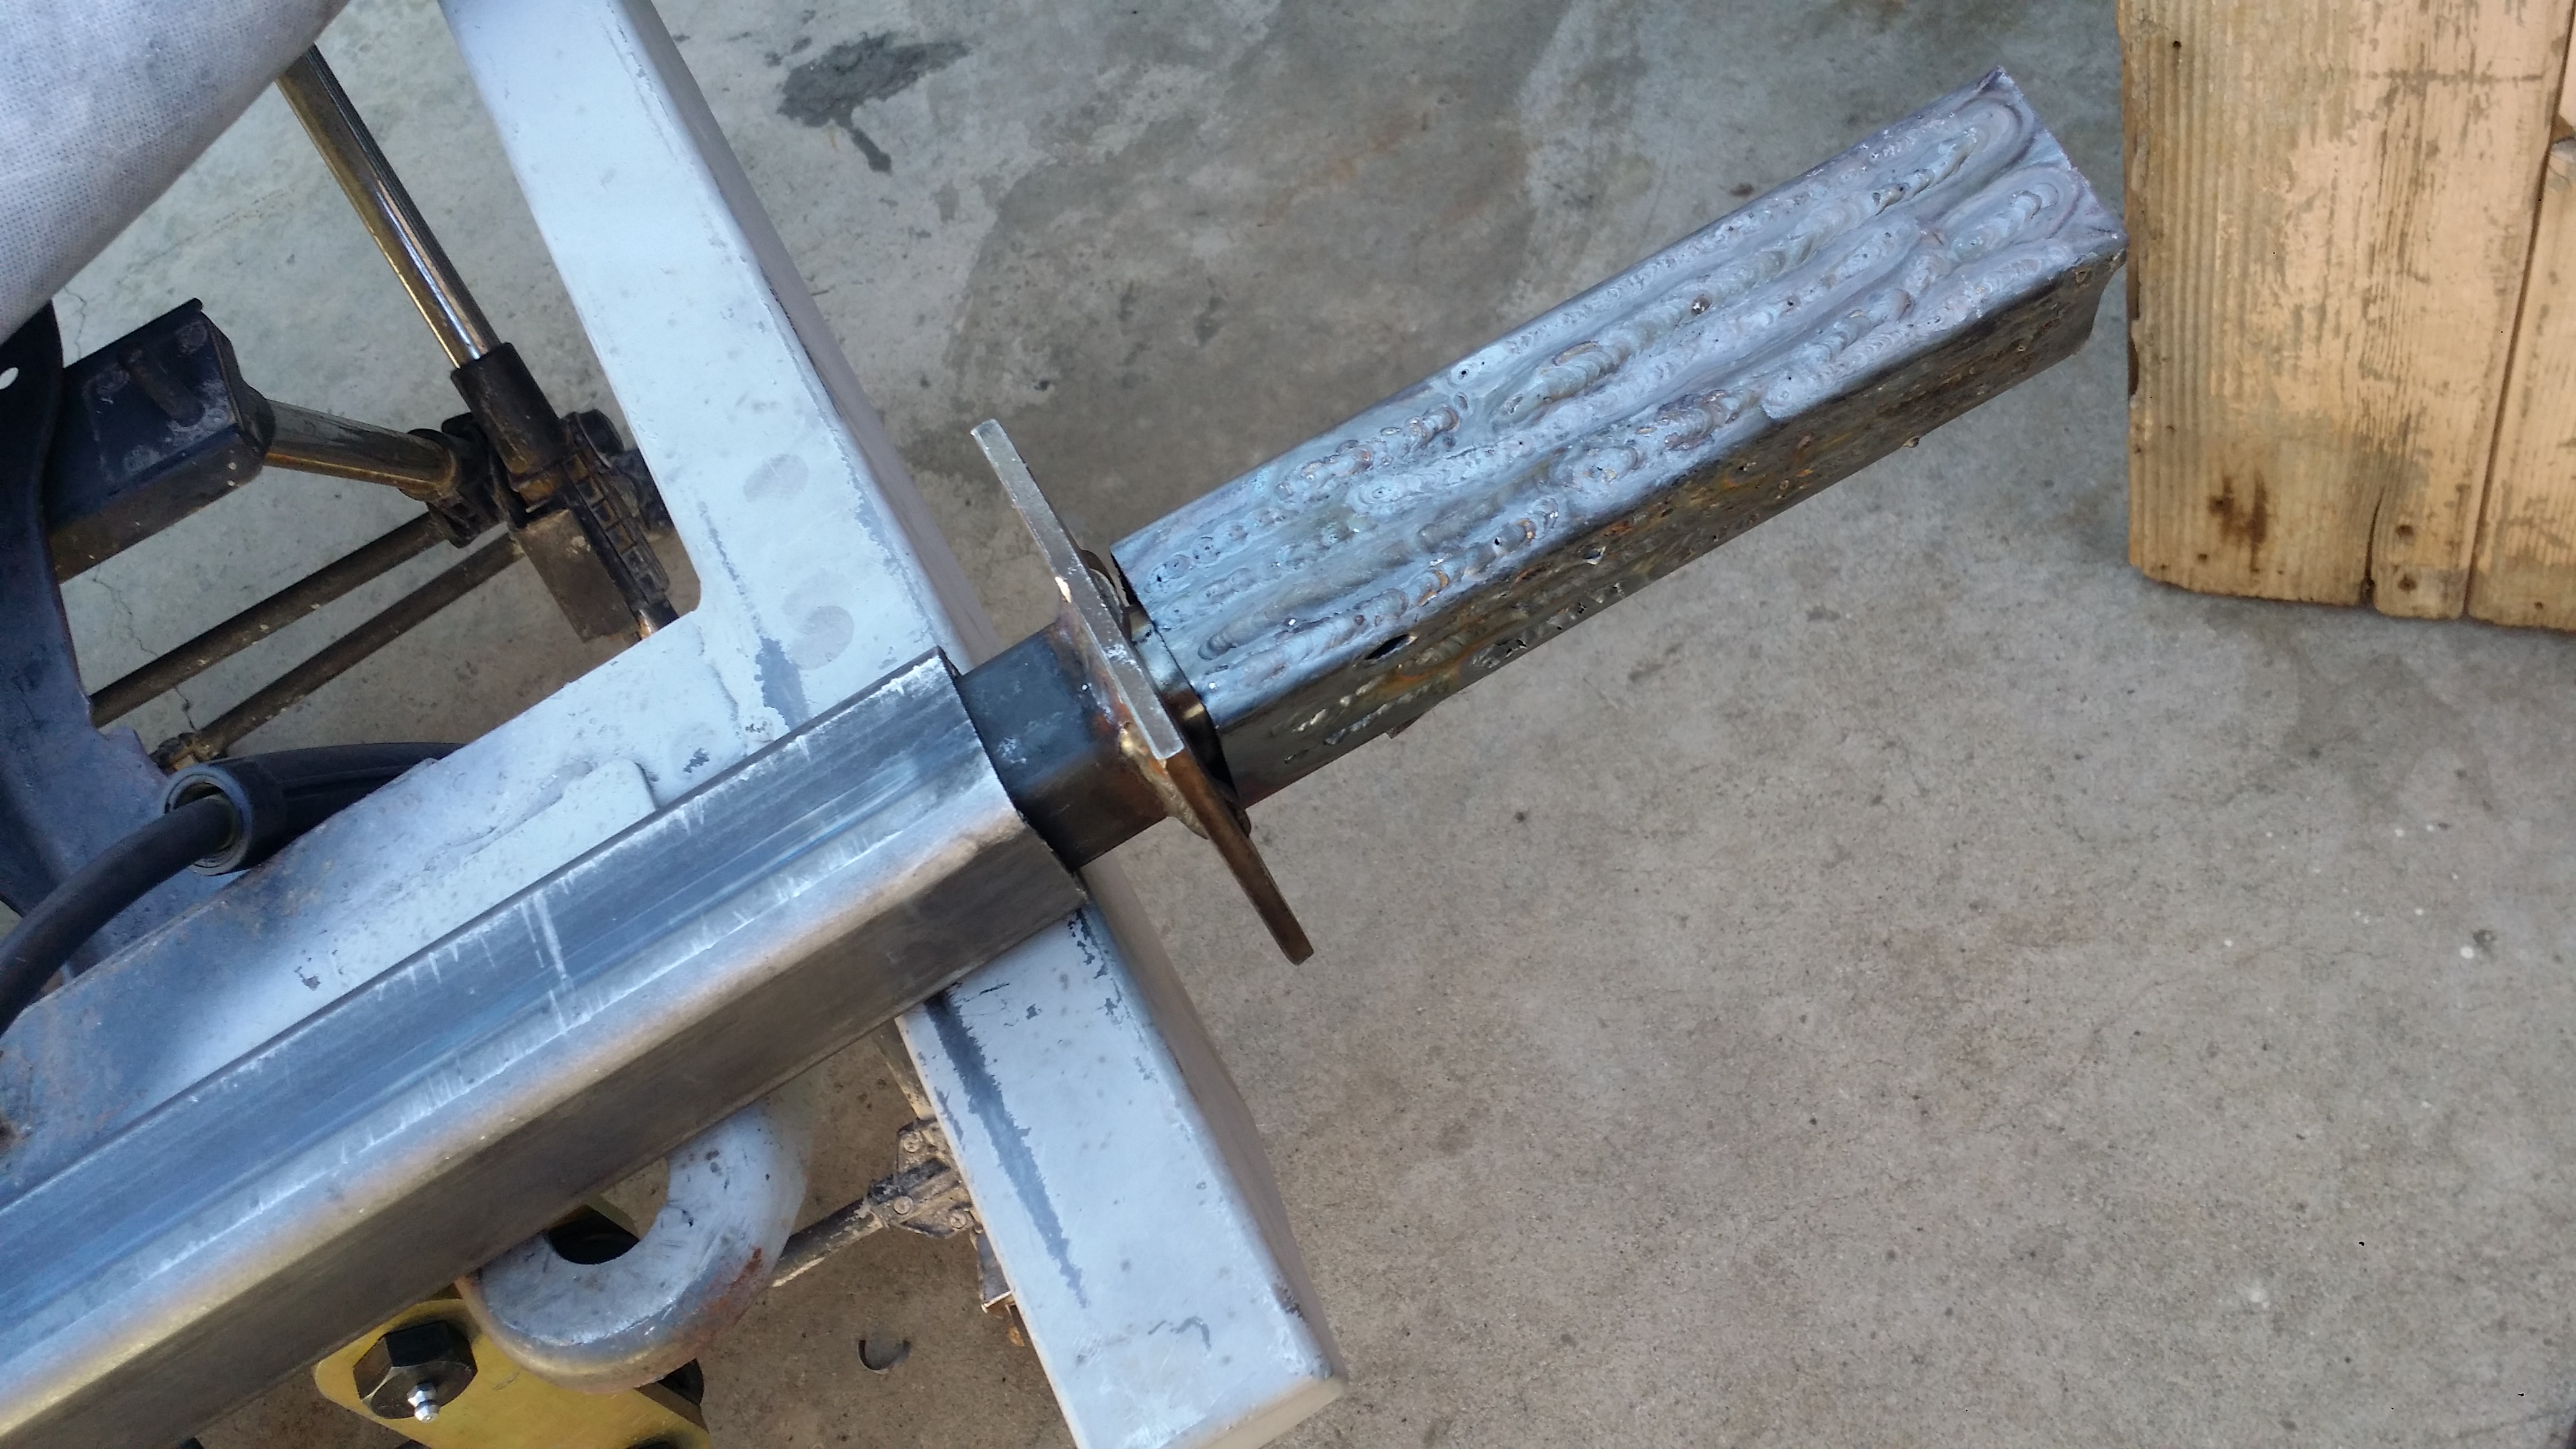
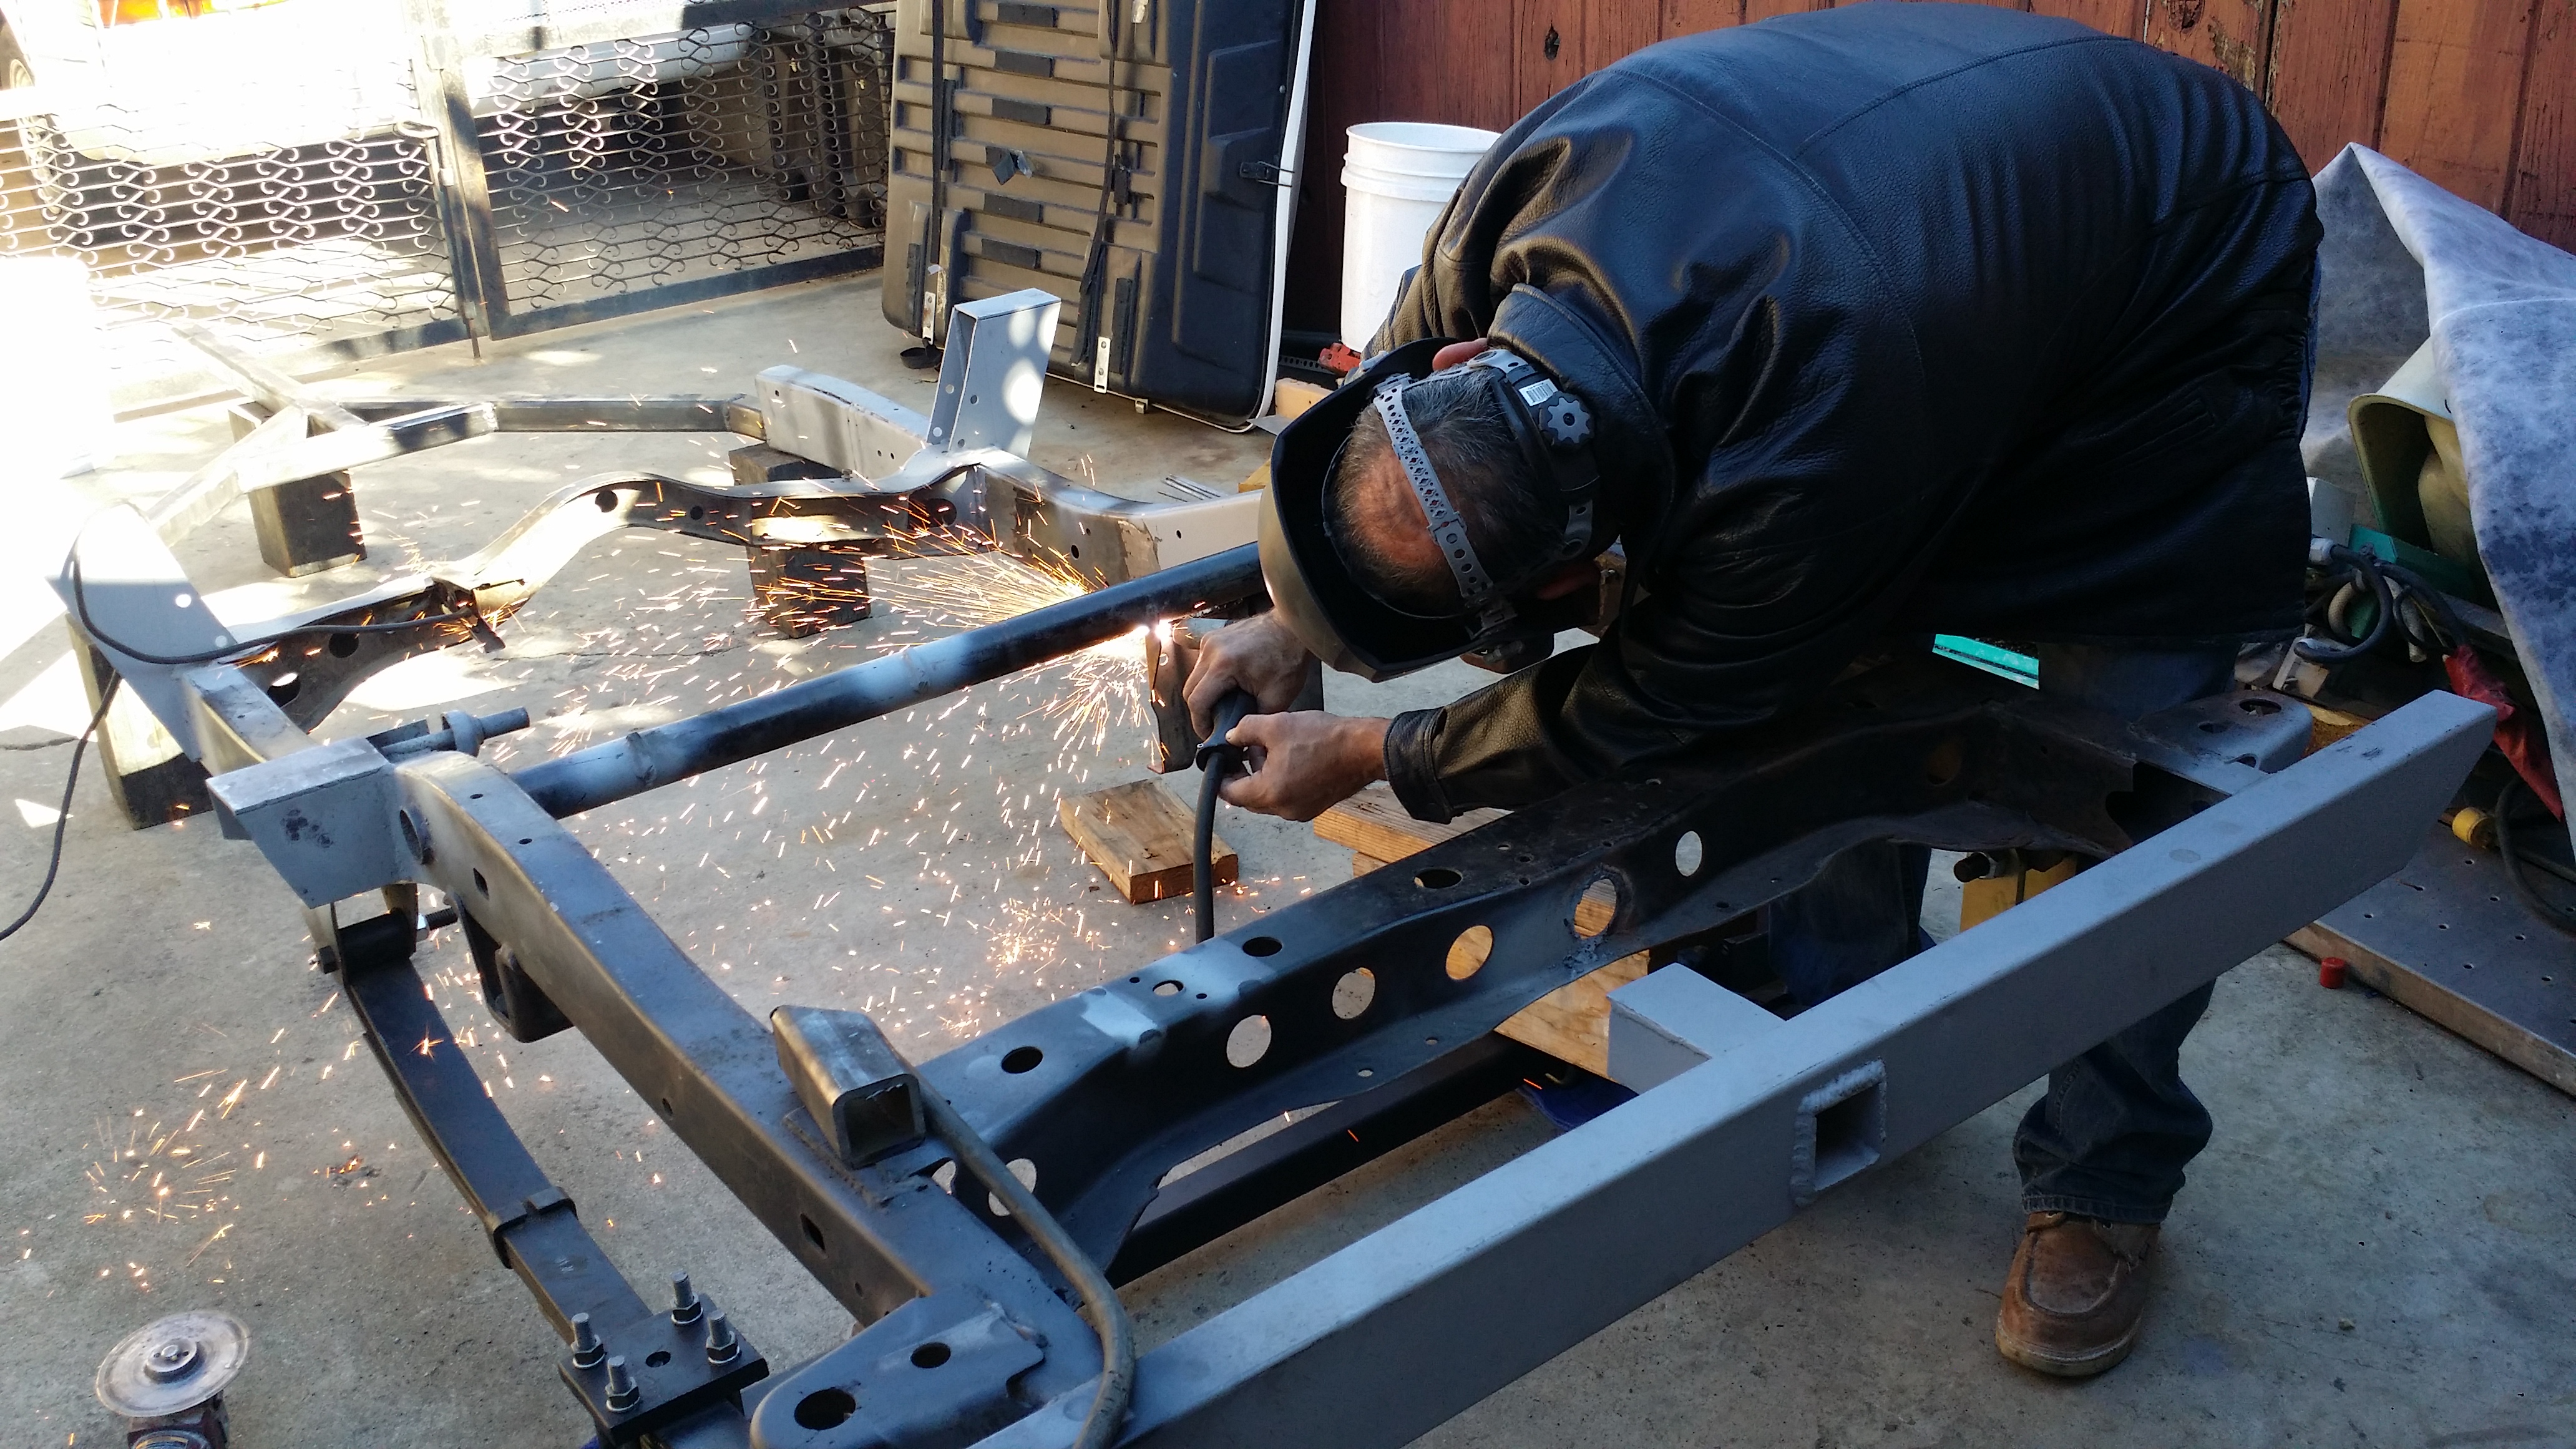
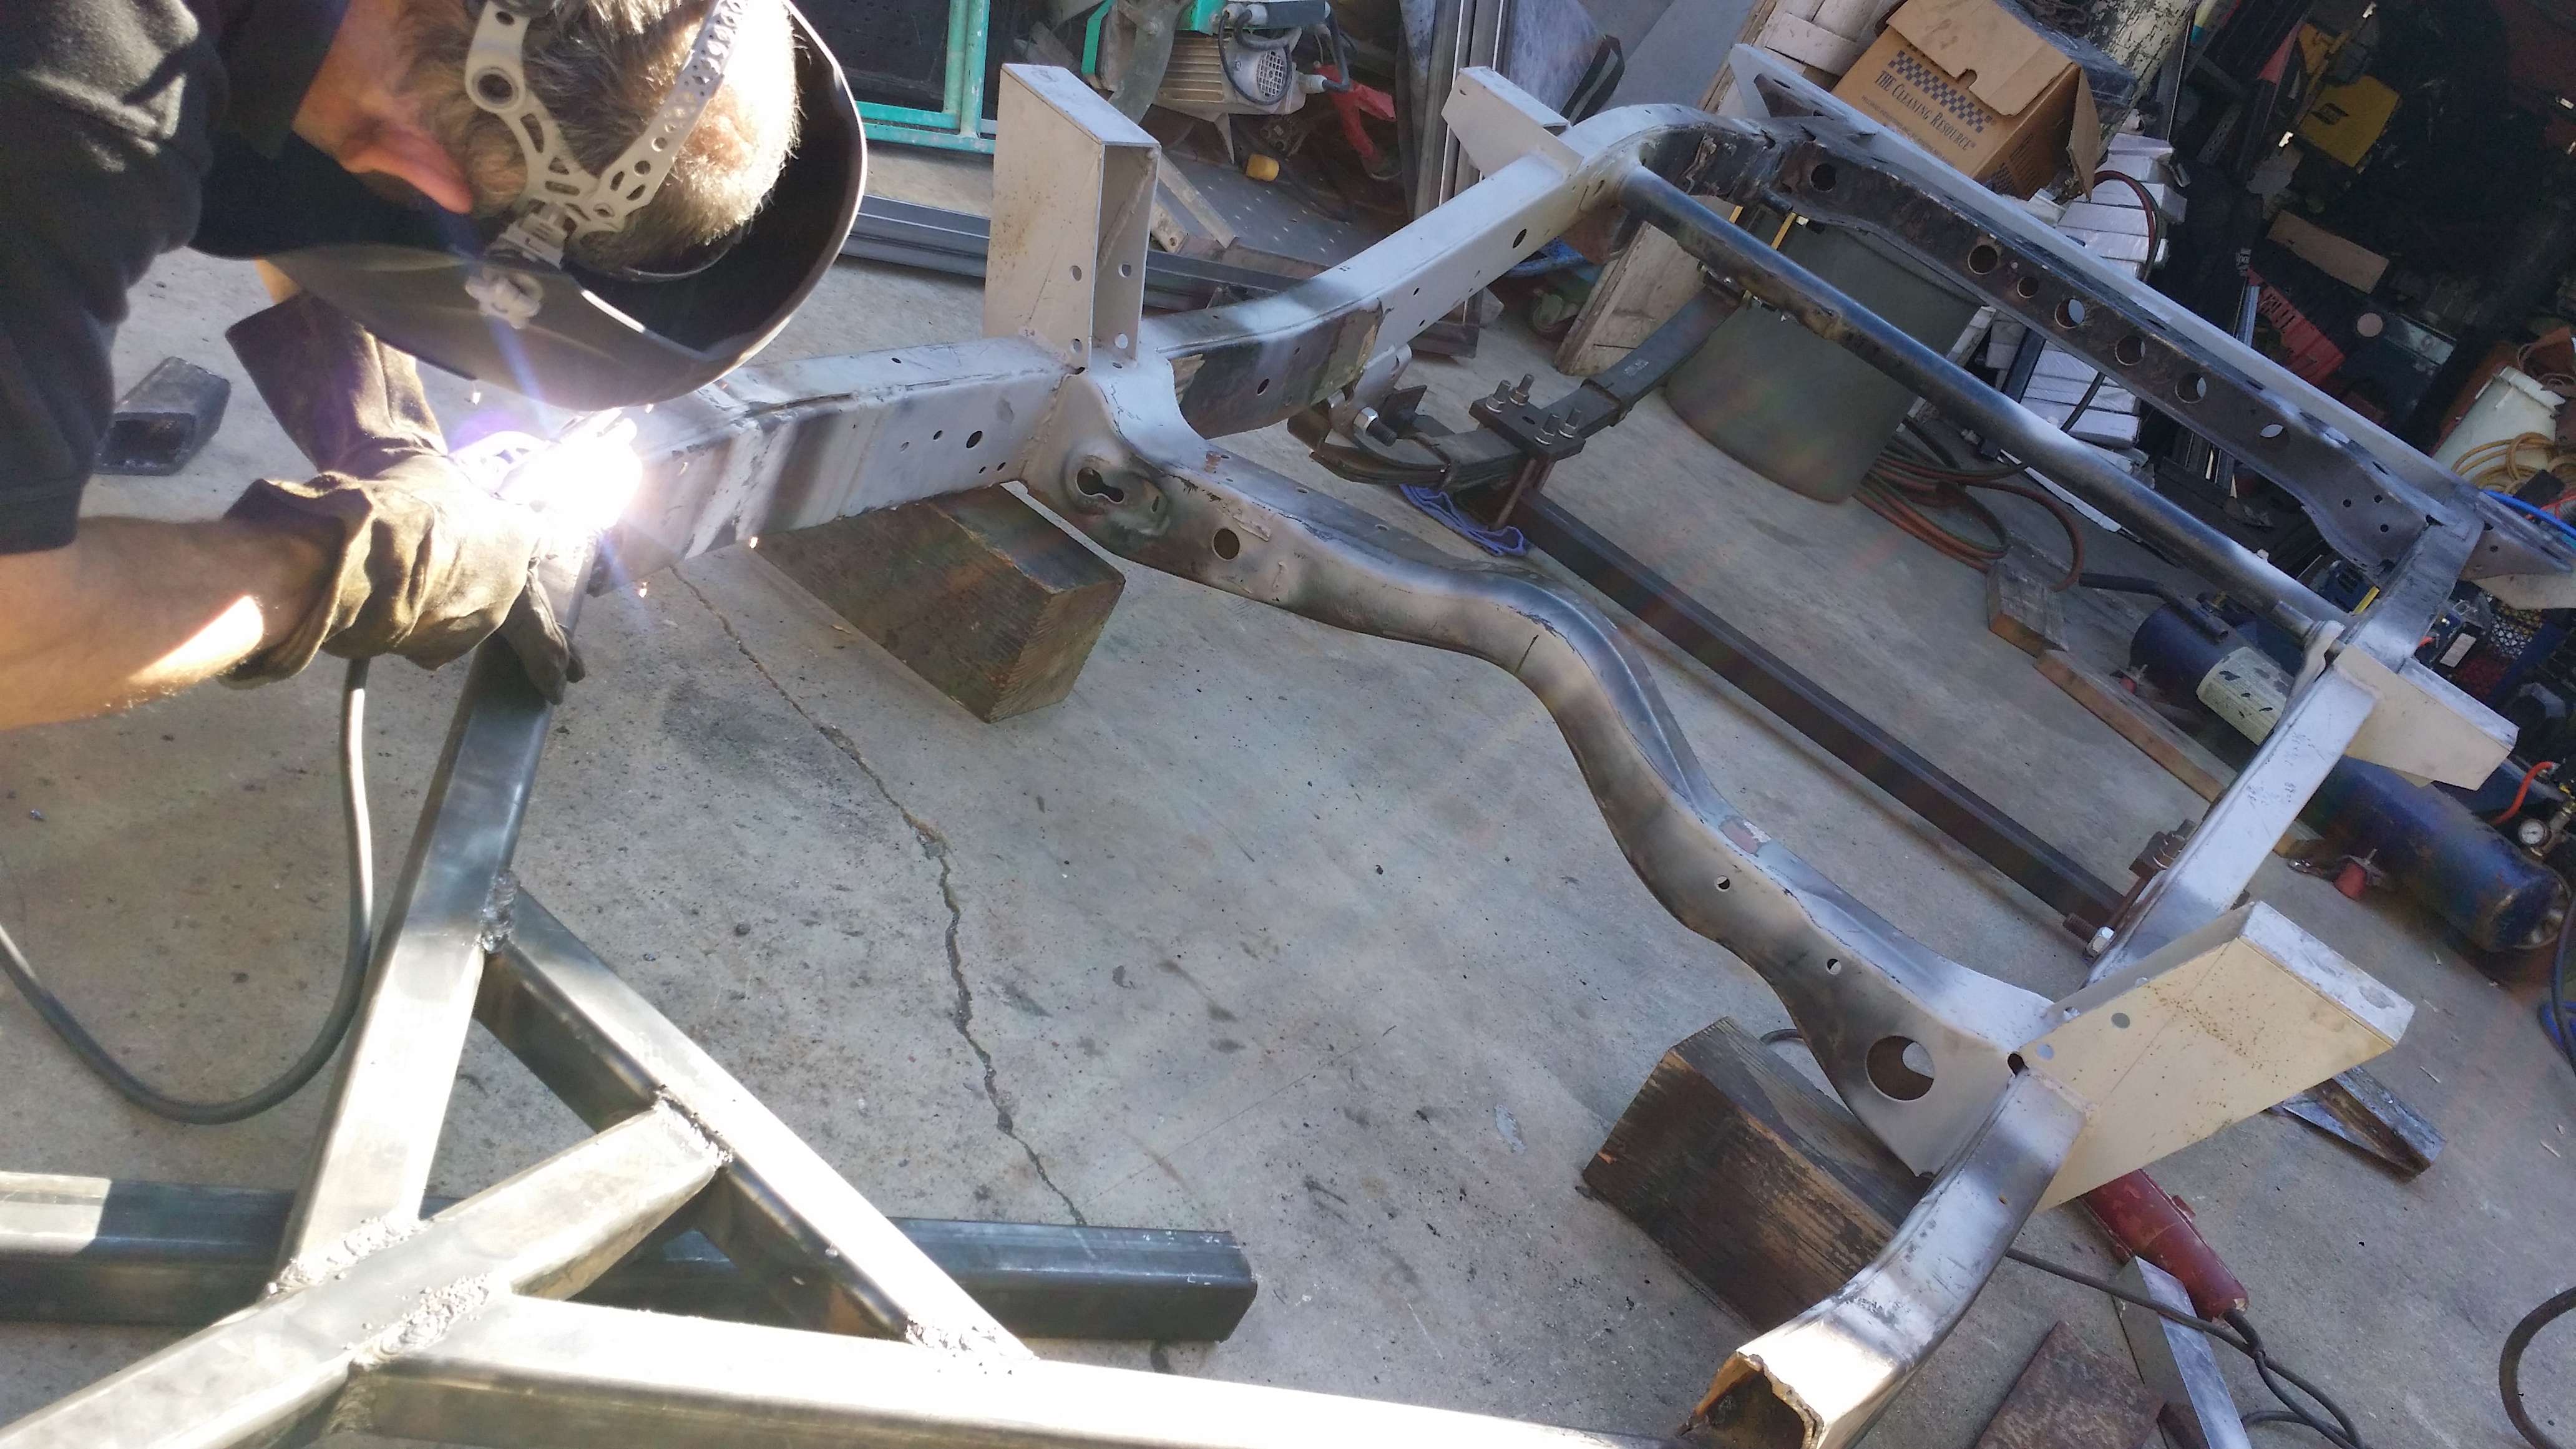
Here's my dad working his magic with the mathematical angles and other stuff. He trust me and my welds but we both felt it would be best if he were to create my trailer tongue and weld it in place properly since he has so much more experience then me. Plus I wanted him to stick weld these since his machine gets extremely deep penetration into the metal.
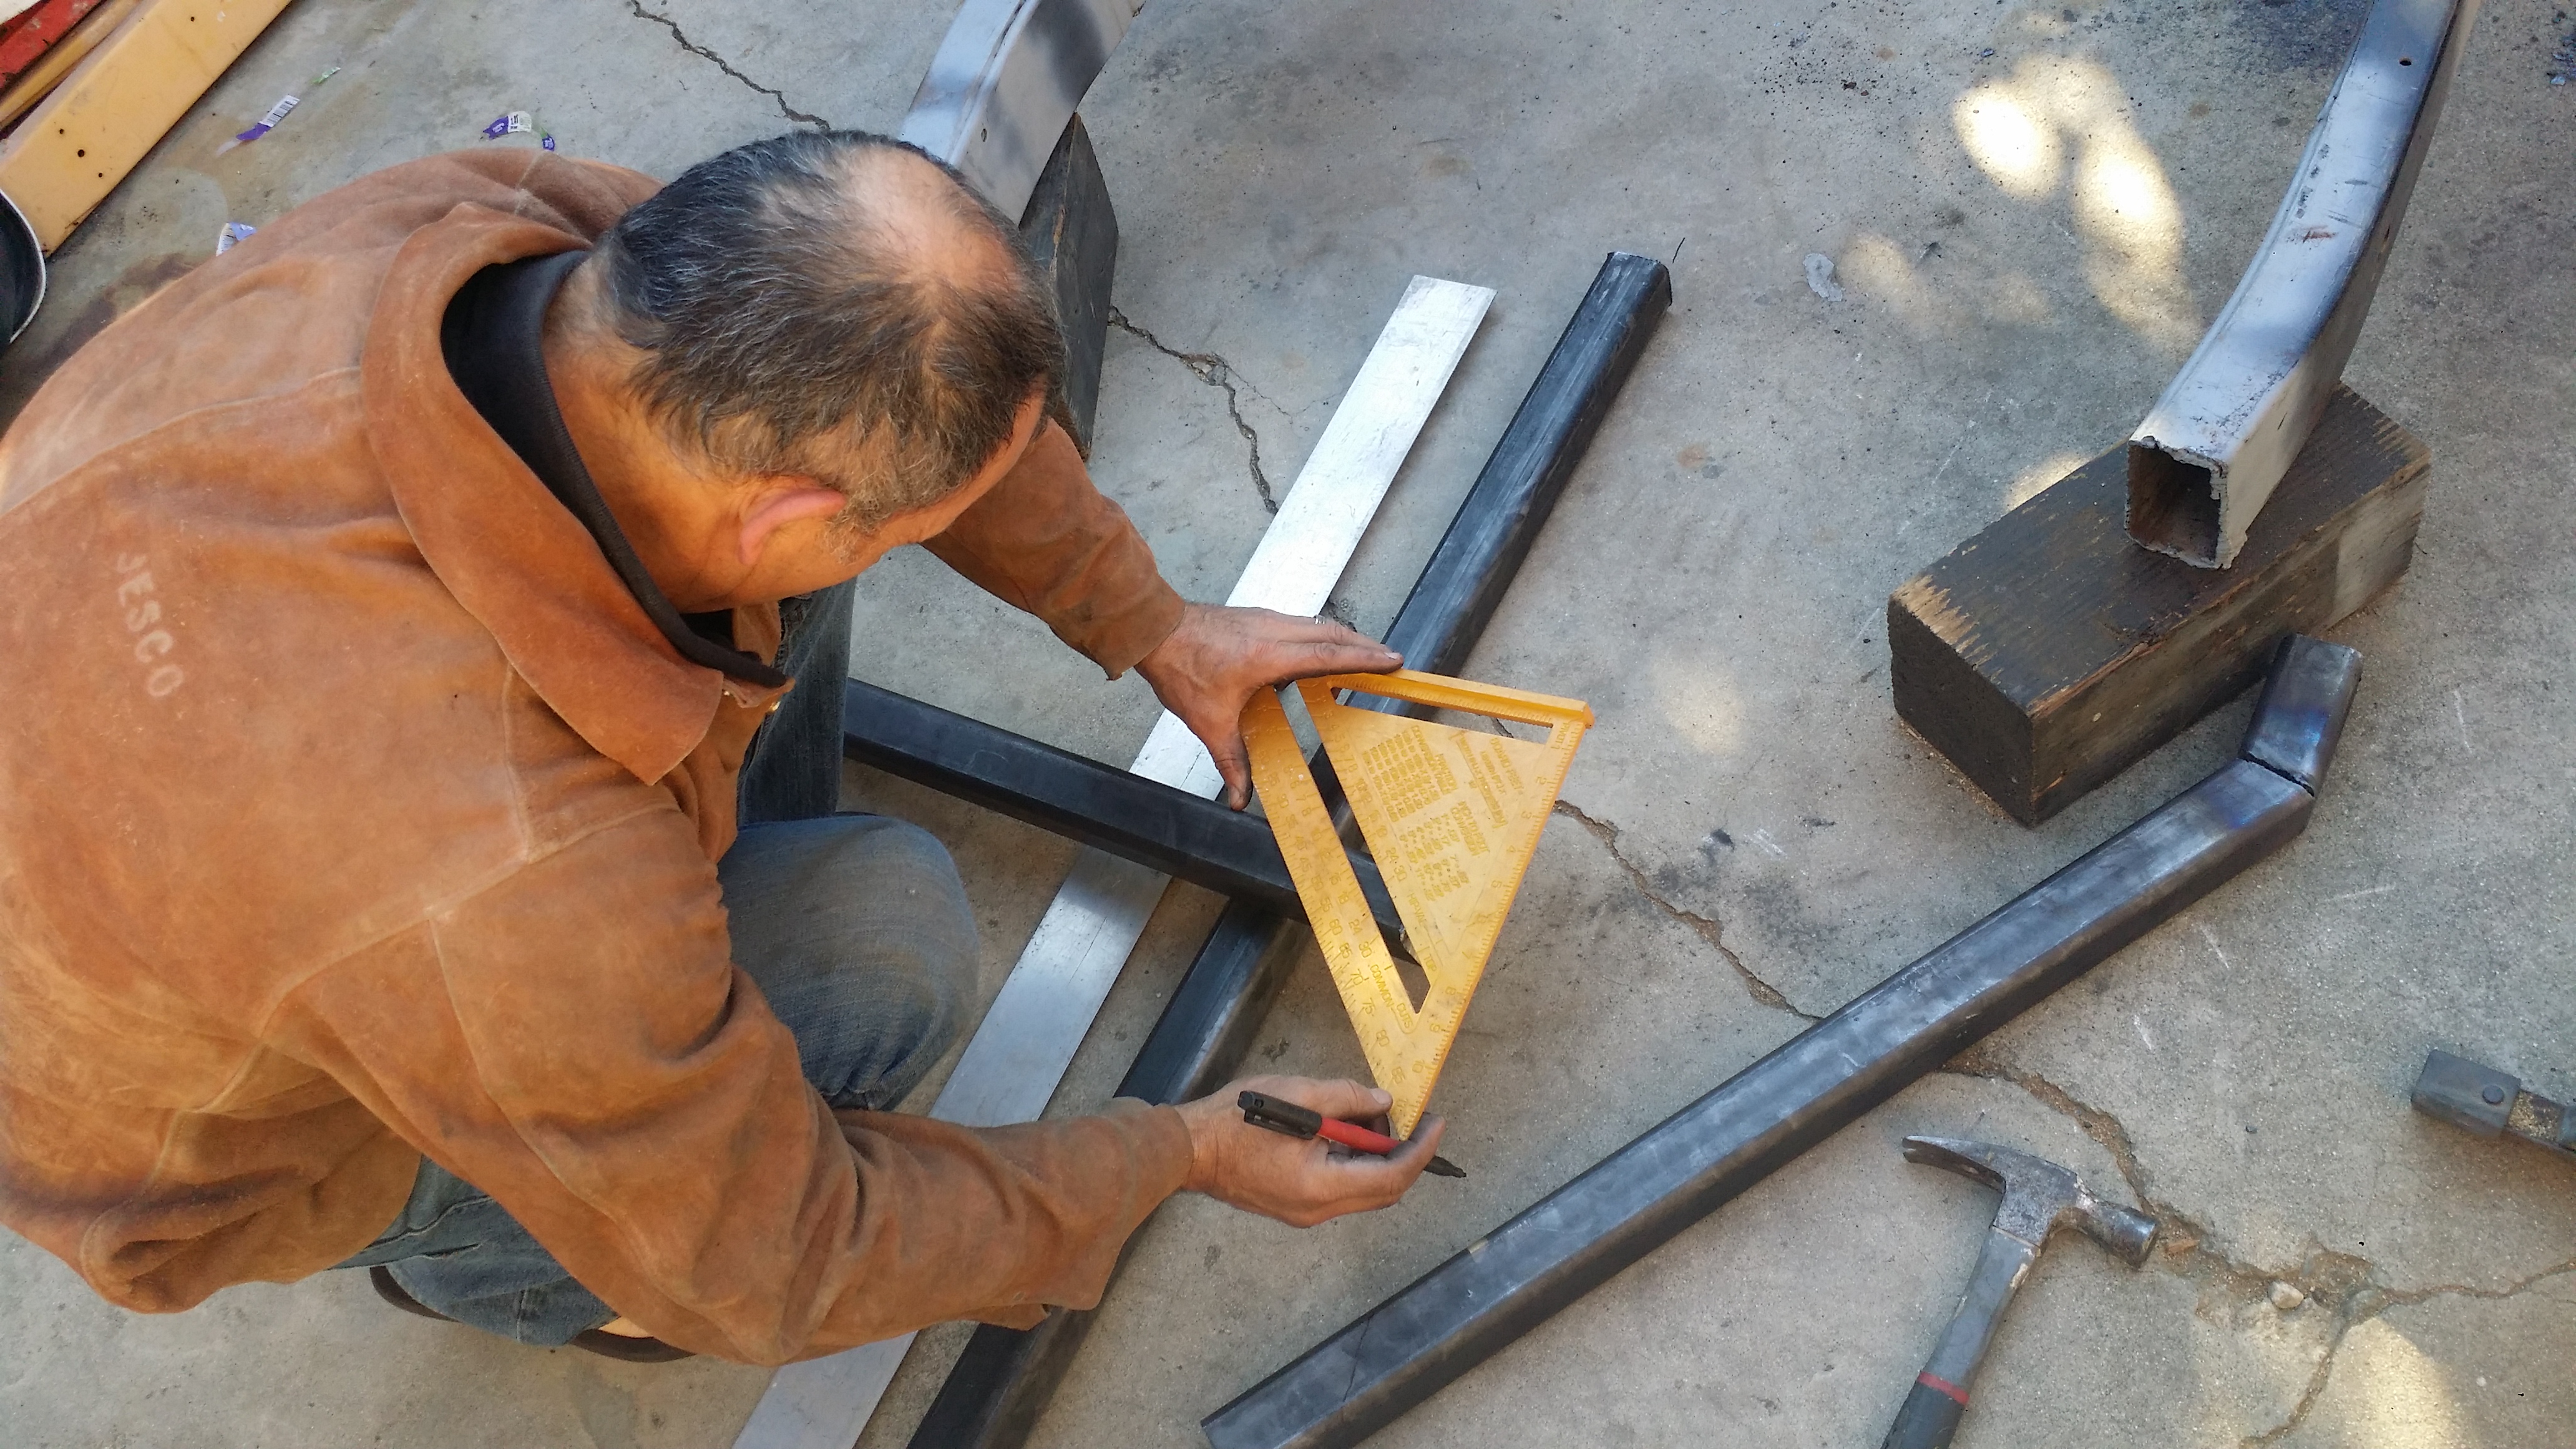
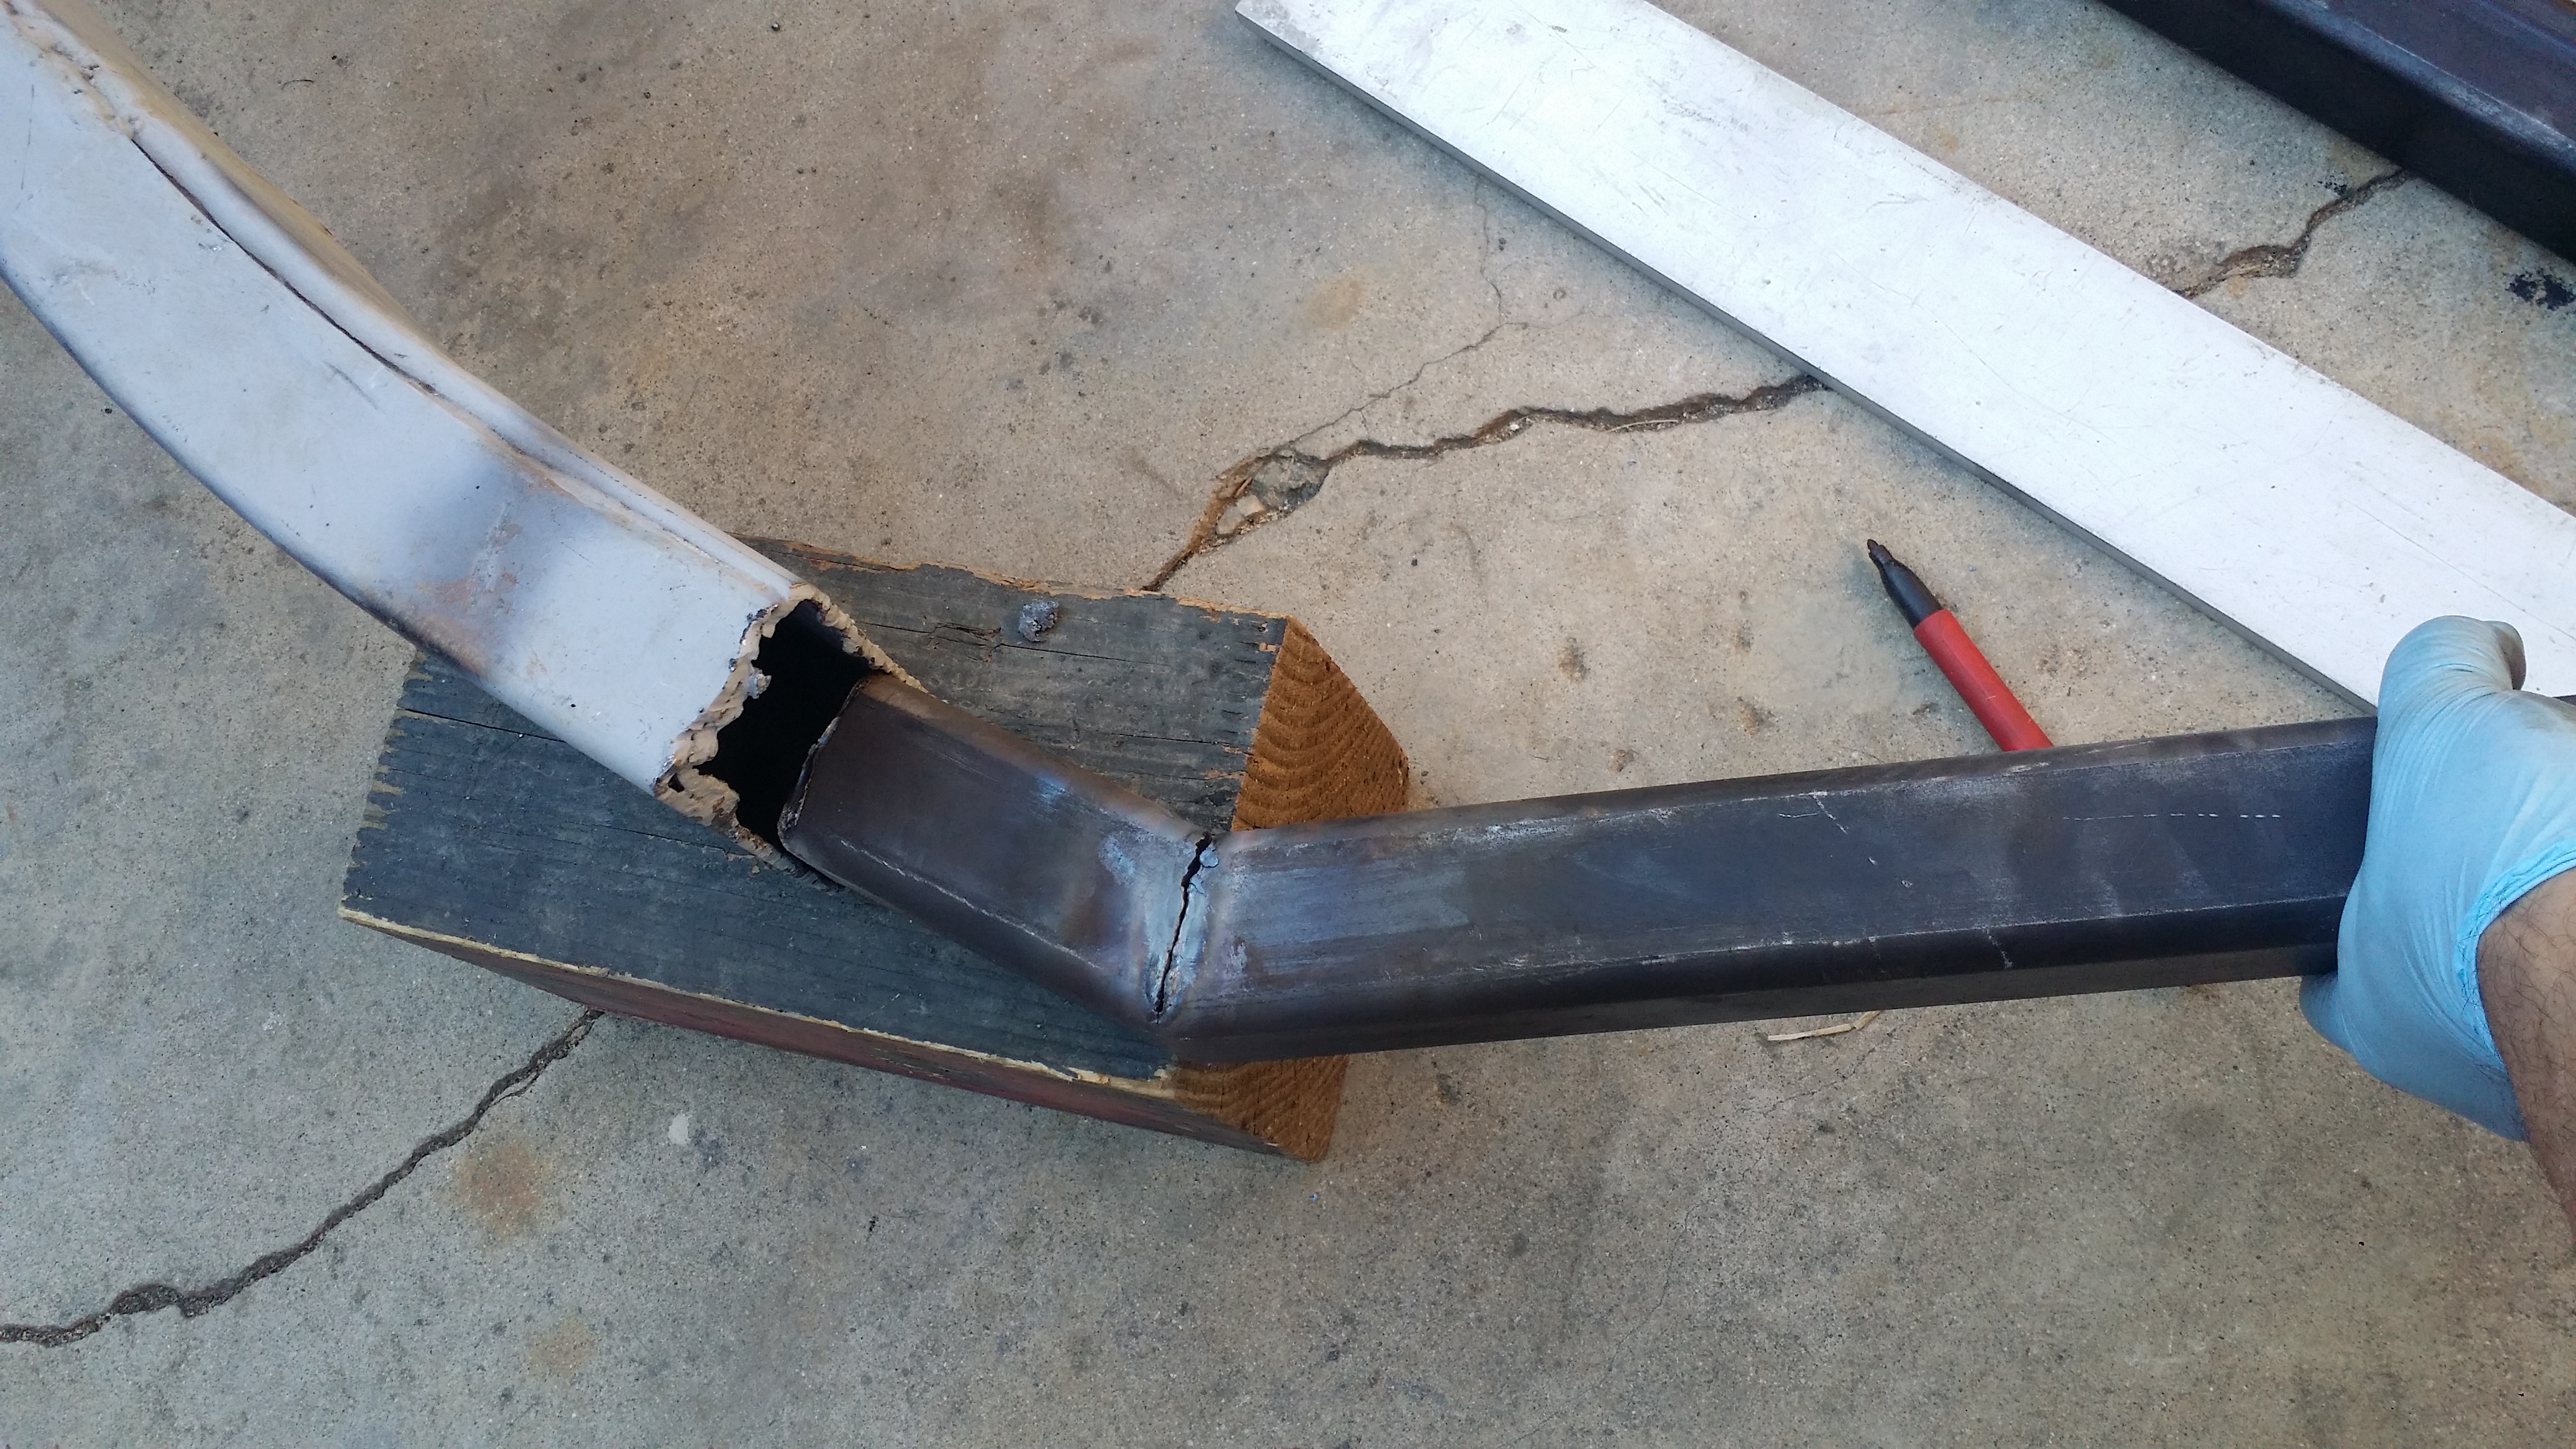
He cut the tube with the acetylene torch because the chop saw takes too long to cut 1/4" tube but he didnt cut it all the way through he left 1 of the sides uncut so he could heat up the metal and bend the tube shut closing the gap as you can see here.
Test fitting into the toyota chassis
Better pic. As you can see in this pic the tube will actually slide into the Toyota chassis. This will allow my dad to throw in a few welds on the inner portion of the chassis with his stick welder for reinforcement then seal the deal with welding it on the outside. We still need to cut the pieces that will close that 2.5" gap from the top of the chassis to the top of that 2"x2" tube.

More cuts to attach the side sides to the center tube which will become the tow hitch
Pieces all cut out

Time to weld it all together. We didnt attach it to the frame yet because he had to leave the house. But for now the tongue is all welded together. Tomorrow we will continue with finishing the tongue and welding it to the chassis.
Drilled out the ubolt holes to 5/8" and the center pin hole to i believe 3/4". Yes that is a syringe. No needle but it works great for adding oil when drilling out the holes for lubrication.

Not the prettiest of creations but i don't work in a machine shop and i gotta do with what I've got.

center pin fits fine. and has enough wiggle room in case i need to move it a little forward or back

Looks pretty solid to me.

A little more view from the top side. Yes i know the nuts aren't tightened. i haven't tightened them yet.

I will continue the axle build as soon as i go buy the nuts and lock washers that hold the brake components on to the axle. Apparently the shop forgot to include those and they are too far away for me to get them. It'd probably cost less to buy at my local nut and bolt store then all the gas i'd spend going to pick up the 8 nuts and washers they owe me. oh well. I'll post pix once i get that situated with.
Here's my dad working his magic with the mathematical angles and other stuff. He trust me and my welds but we both felt it would be best if he were to create my trailer tongue and weld it in place properly since he has so much more experience then me. Plus I wanted him to stick weld these since his machine gets extremely deep penetration into the metal.

He cut the tube with the acetylene torch because the chop saw takes too long to cut 1/4" tube but he didnt cut it all the way through he left 1 of the sides uncut so he could heat up the metal and bend the tube shut closing the gap as you can see here.

Test fitting into the toyota chassis

Better pic. As you can see in this pic the tube will actually slide into the Toyota chassis. This will allow my dad to throw in a few welds on the inner portion of the chassis with his stick welder for reinforcement then seal the deal with welding it on the outside. We still need to cut the pieces that will close that 2.5" gap from the top of the chassis to the top of that 2"x2" tube.

More cuts to attach the side sides to the center tube which will become the tow hitch

Pieces all cut out
 Time to weld it all together. We didnt attach it to the frame yet because he had to leave the house. But for now the tongue is all welded together. Tomorrow we will continue with finishing the tongue and welding it to the chassis.
Last edited by Redeth005; Nov 28, 2015 at 11:42 AM.
Nov 29, 2015 | 05:12 PM
#56
Thread Starter
Registered User
Joined: Apr 2012
Posts: 2,817
Likes: 2
From: Los Angeles CA
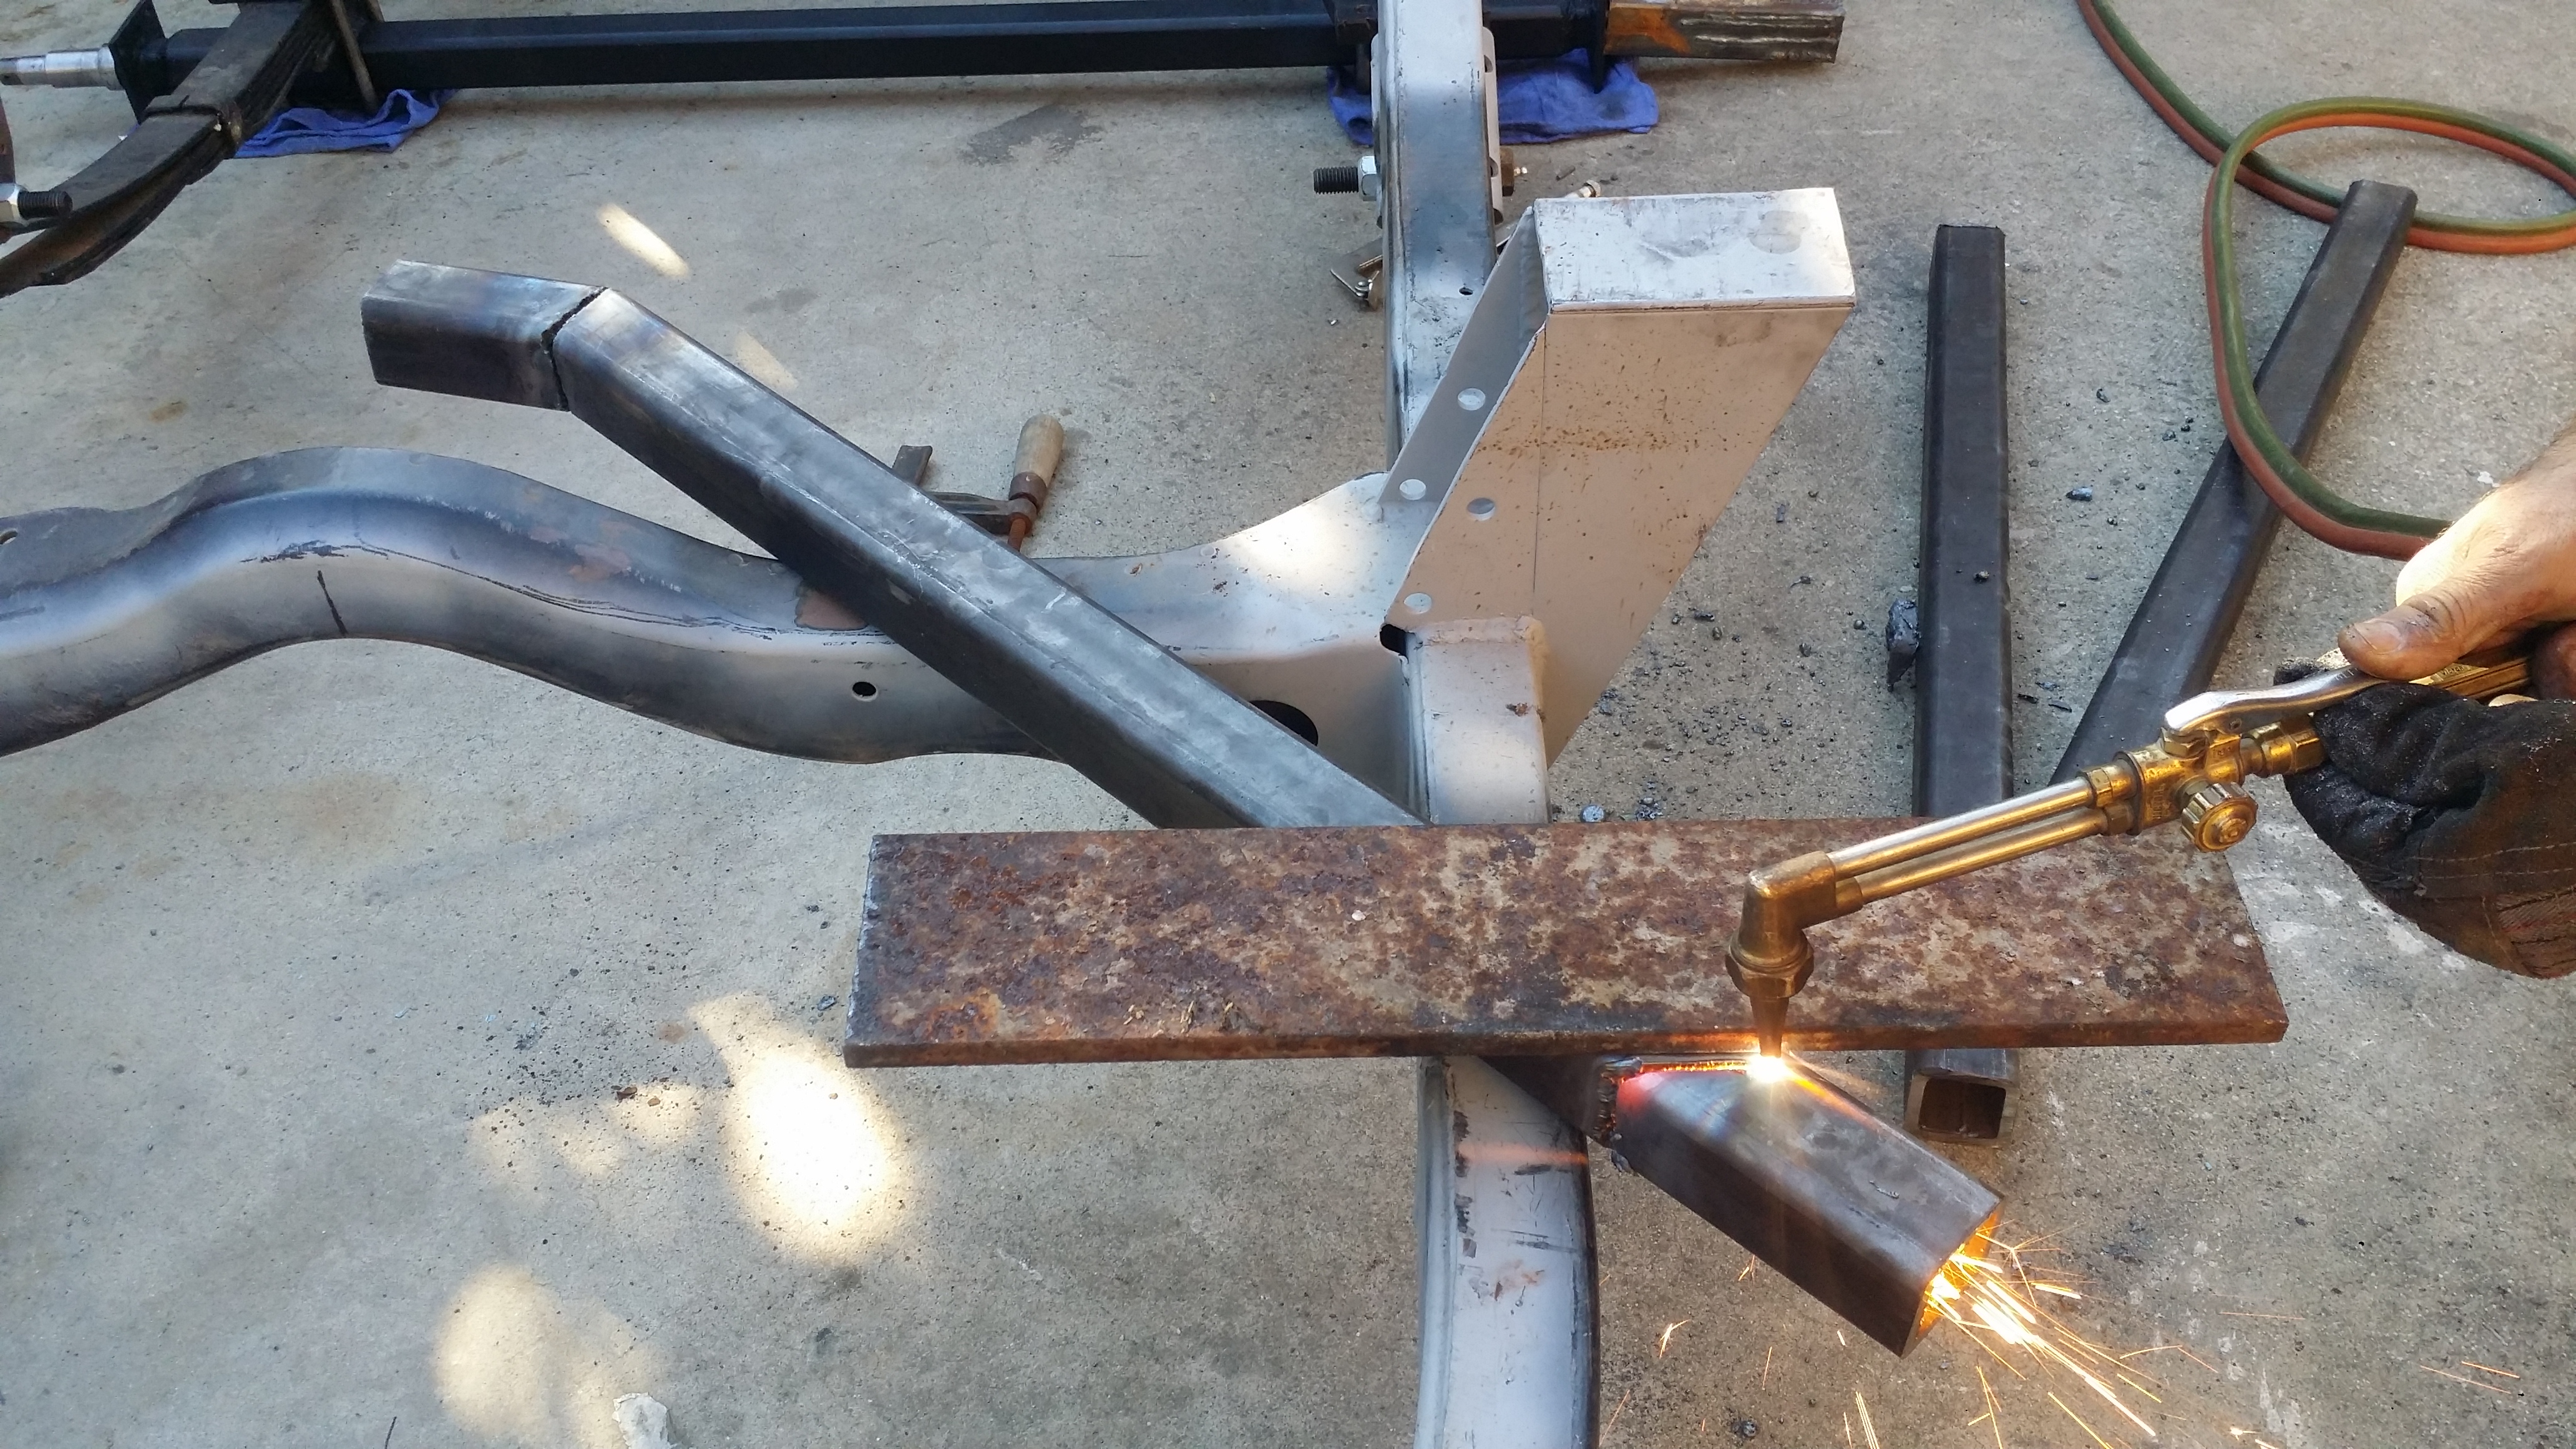
My dad bought a 220v plasma cutter today. That this thing is awesome. Cuts tube like butter and i think it's supposed to be able to cut up to 3/4" thick. I sure could have used this thing the other day lol
After feeling how much weight i have on the trailer I decided not to go with the extra gas storage; This trailer is going to be heavy as it is when i finish the build and I don't need to carry an extra 15-17 gallons of gas anyway. If I absolutely need it I can always use the 5 gallon Jerry can that is mounted to the rear tire swing on my 4Runner. So we decided to cut the stock gas can mount off.
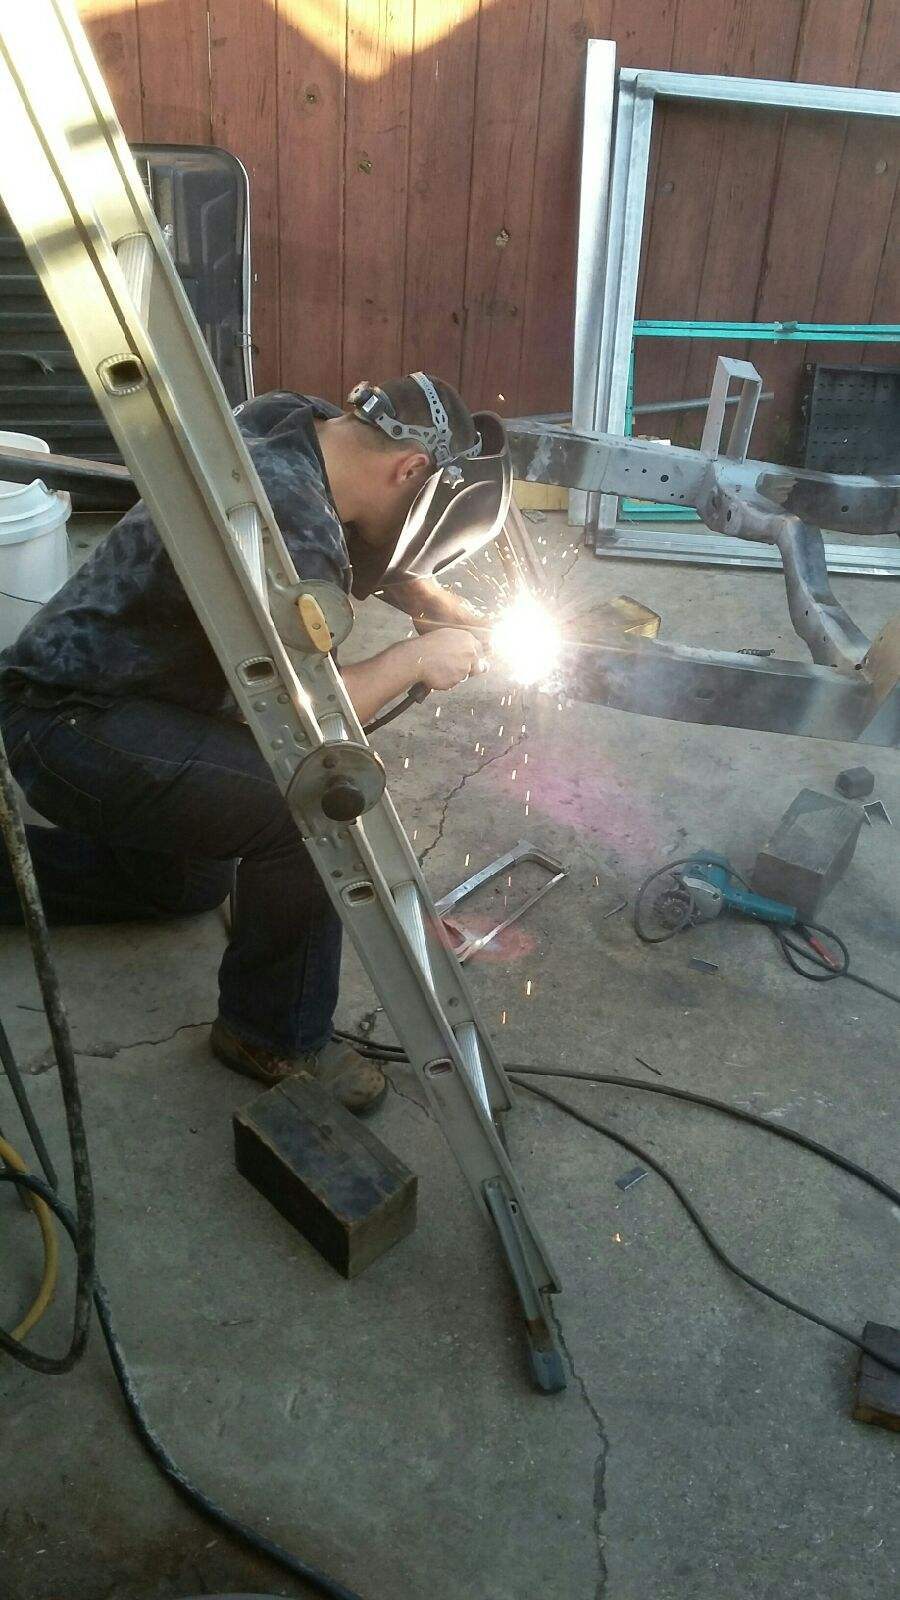
Next up we hammered in the new tongue into the Toyota chassis. Measured about 3 times then tacked it into place.
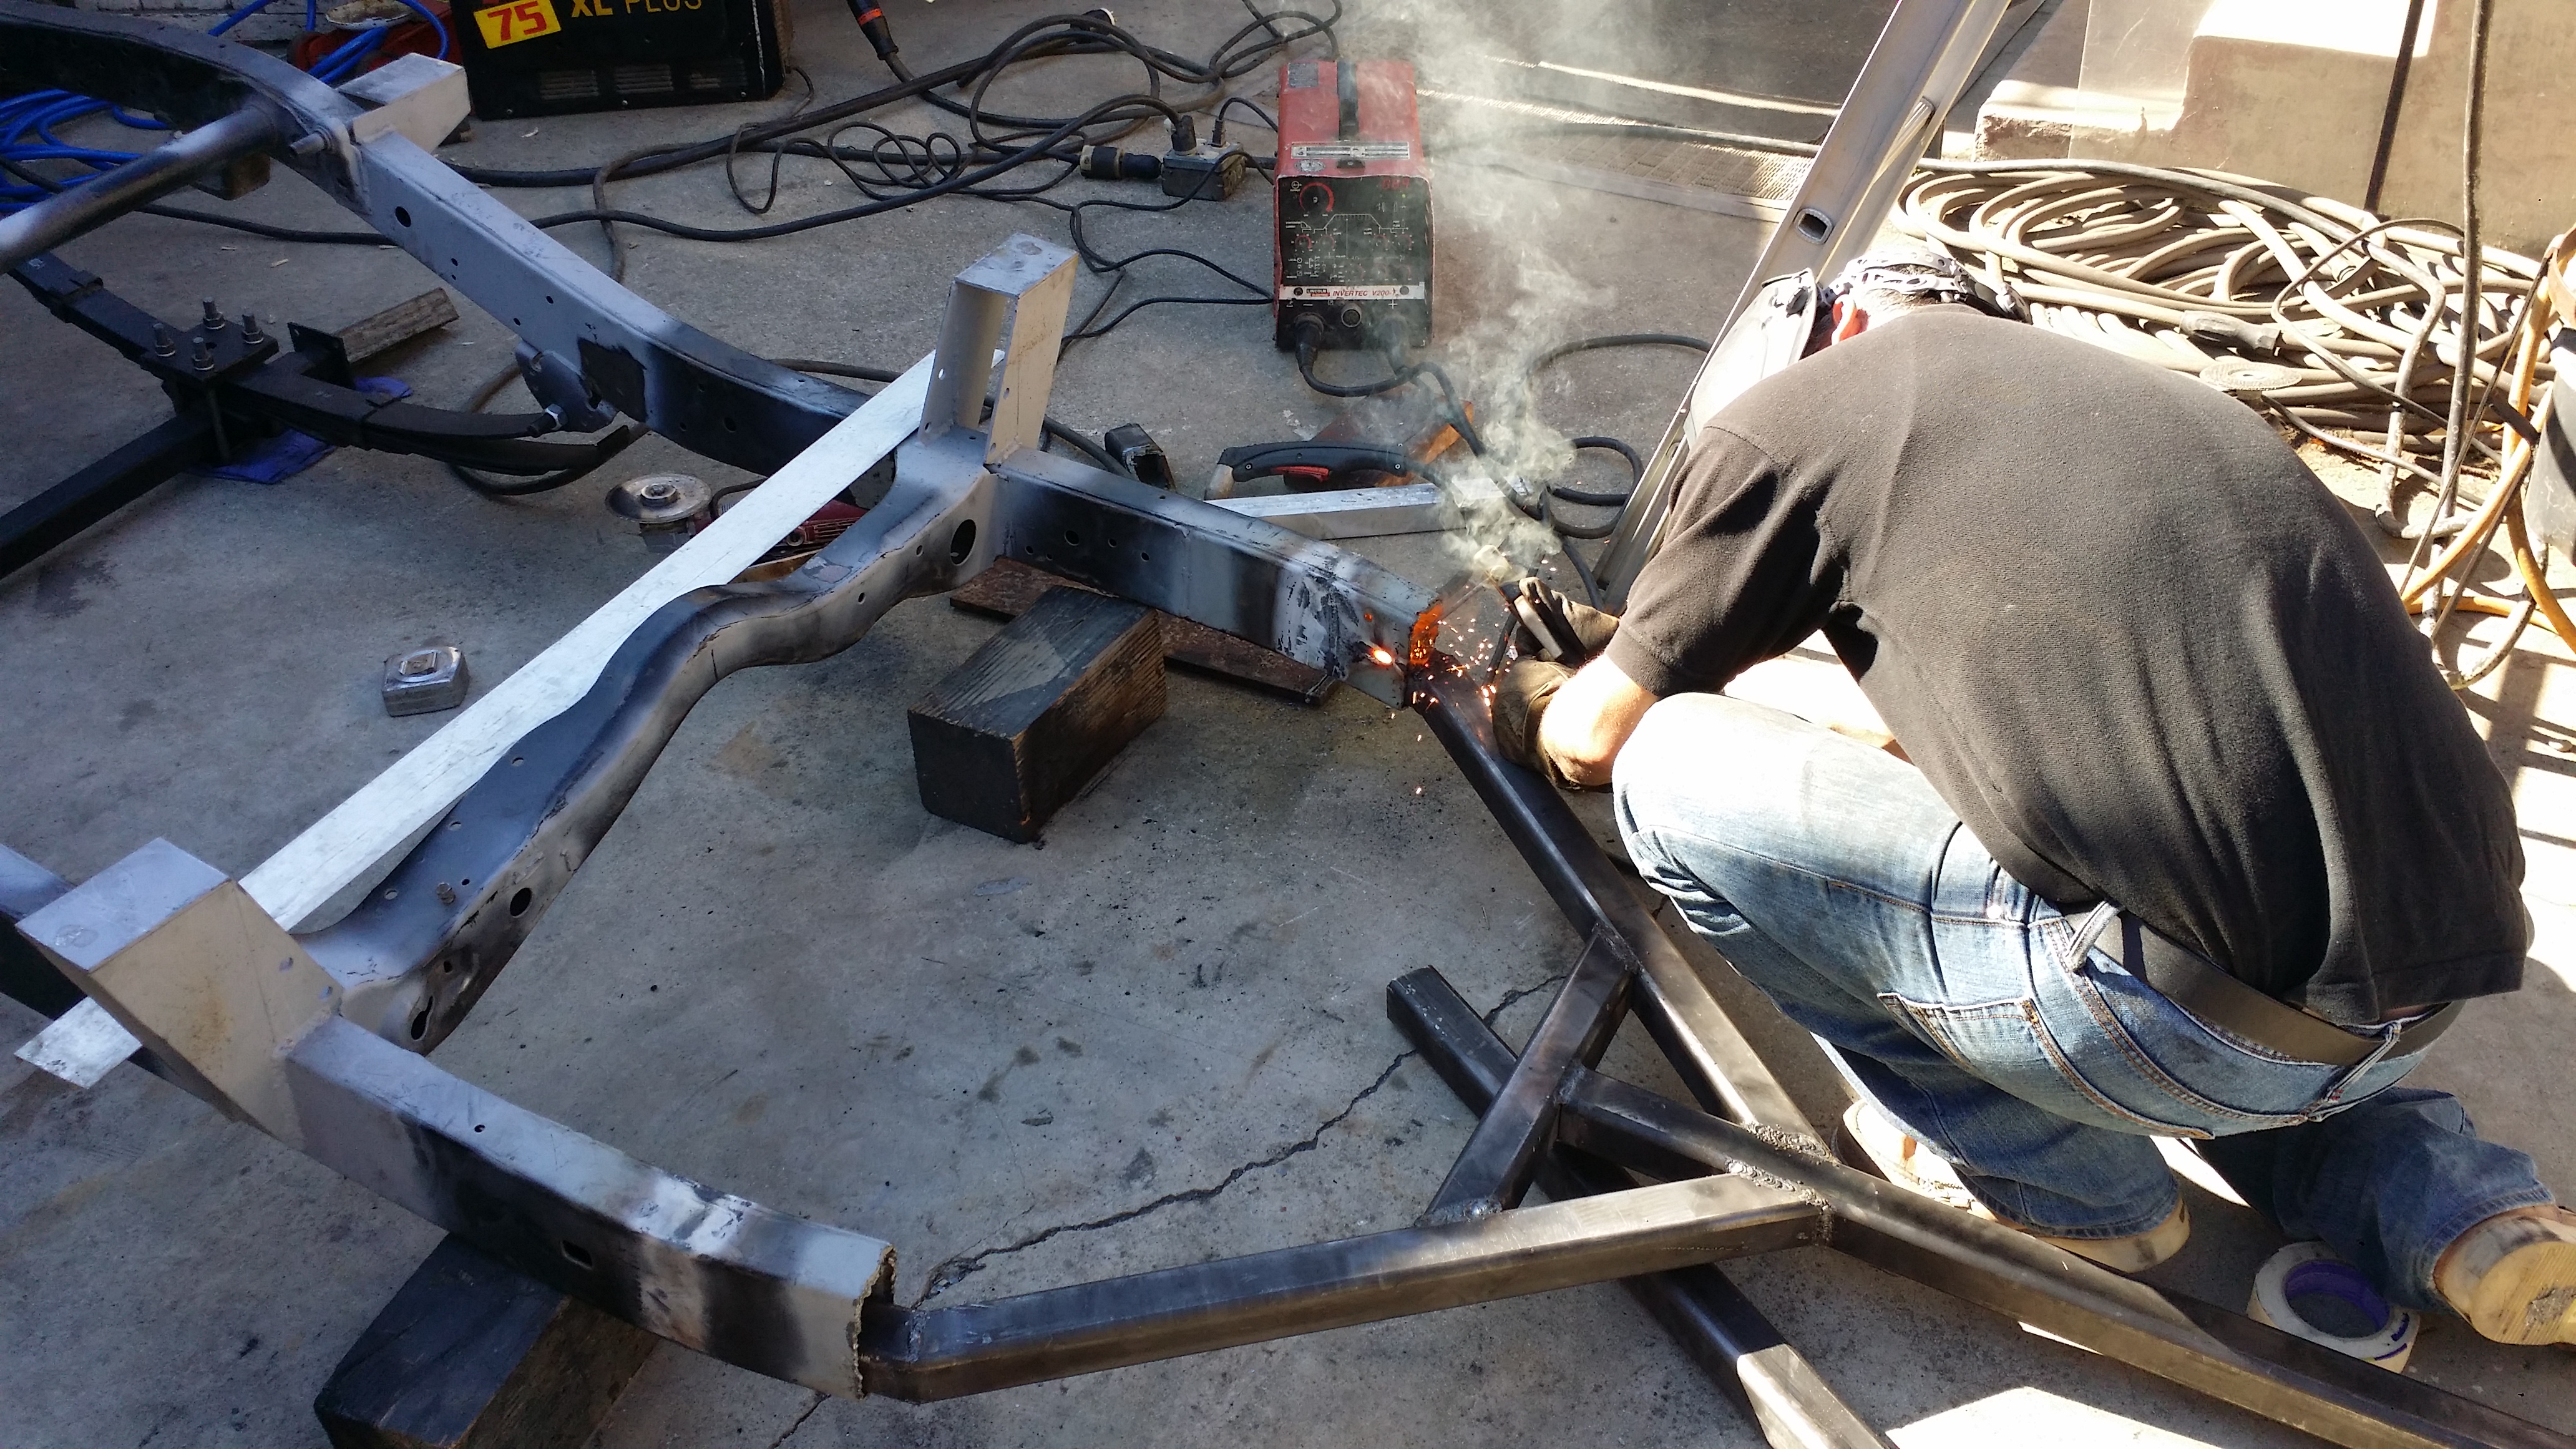
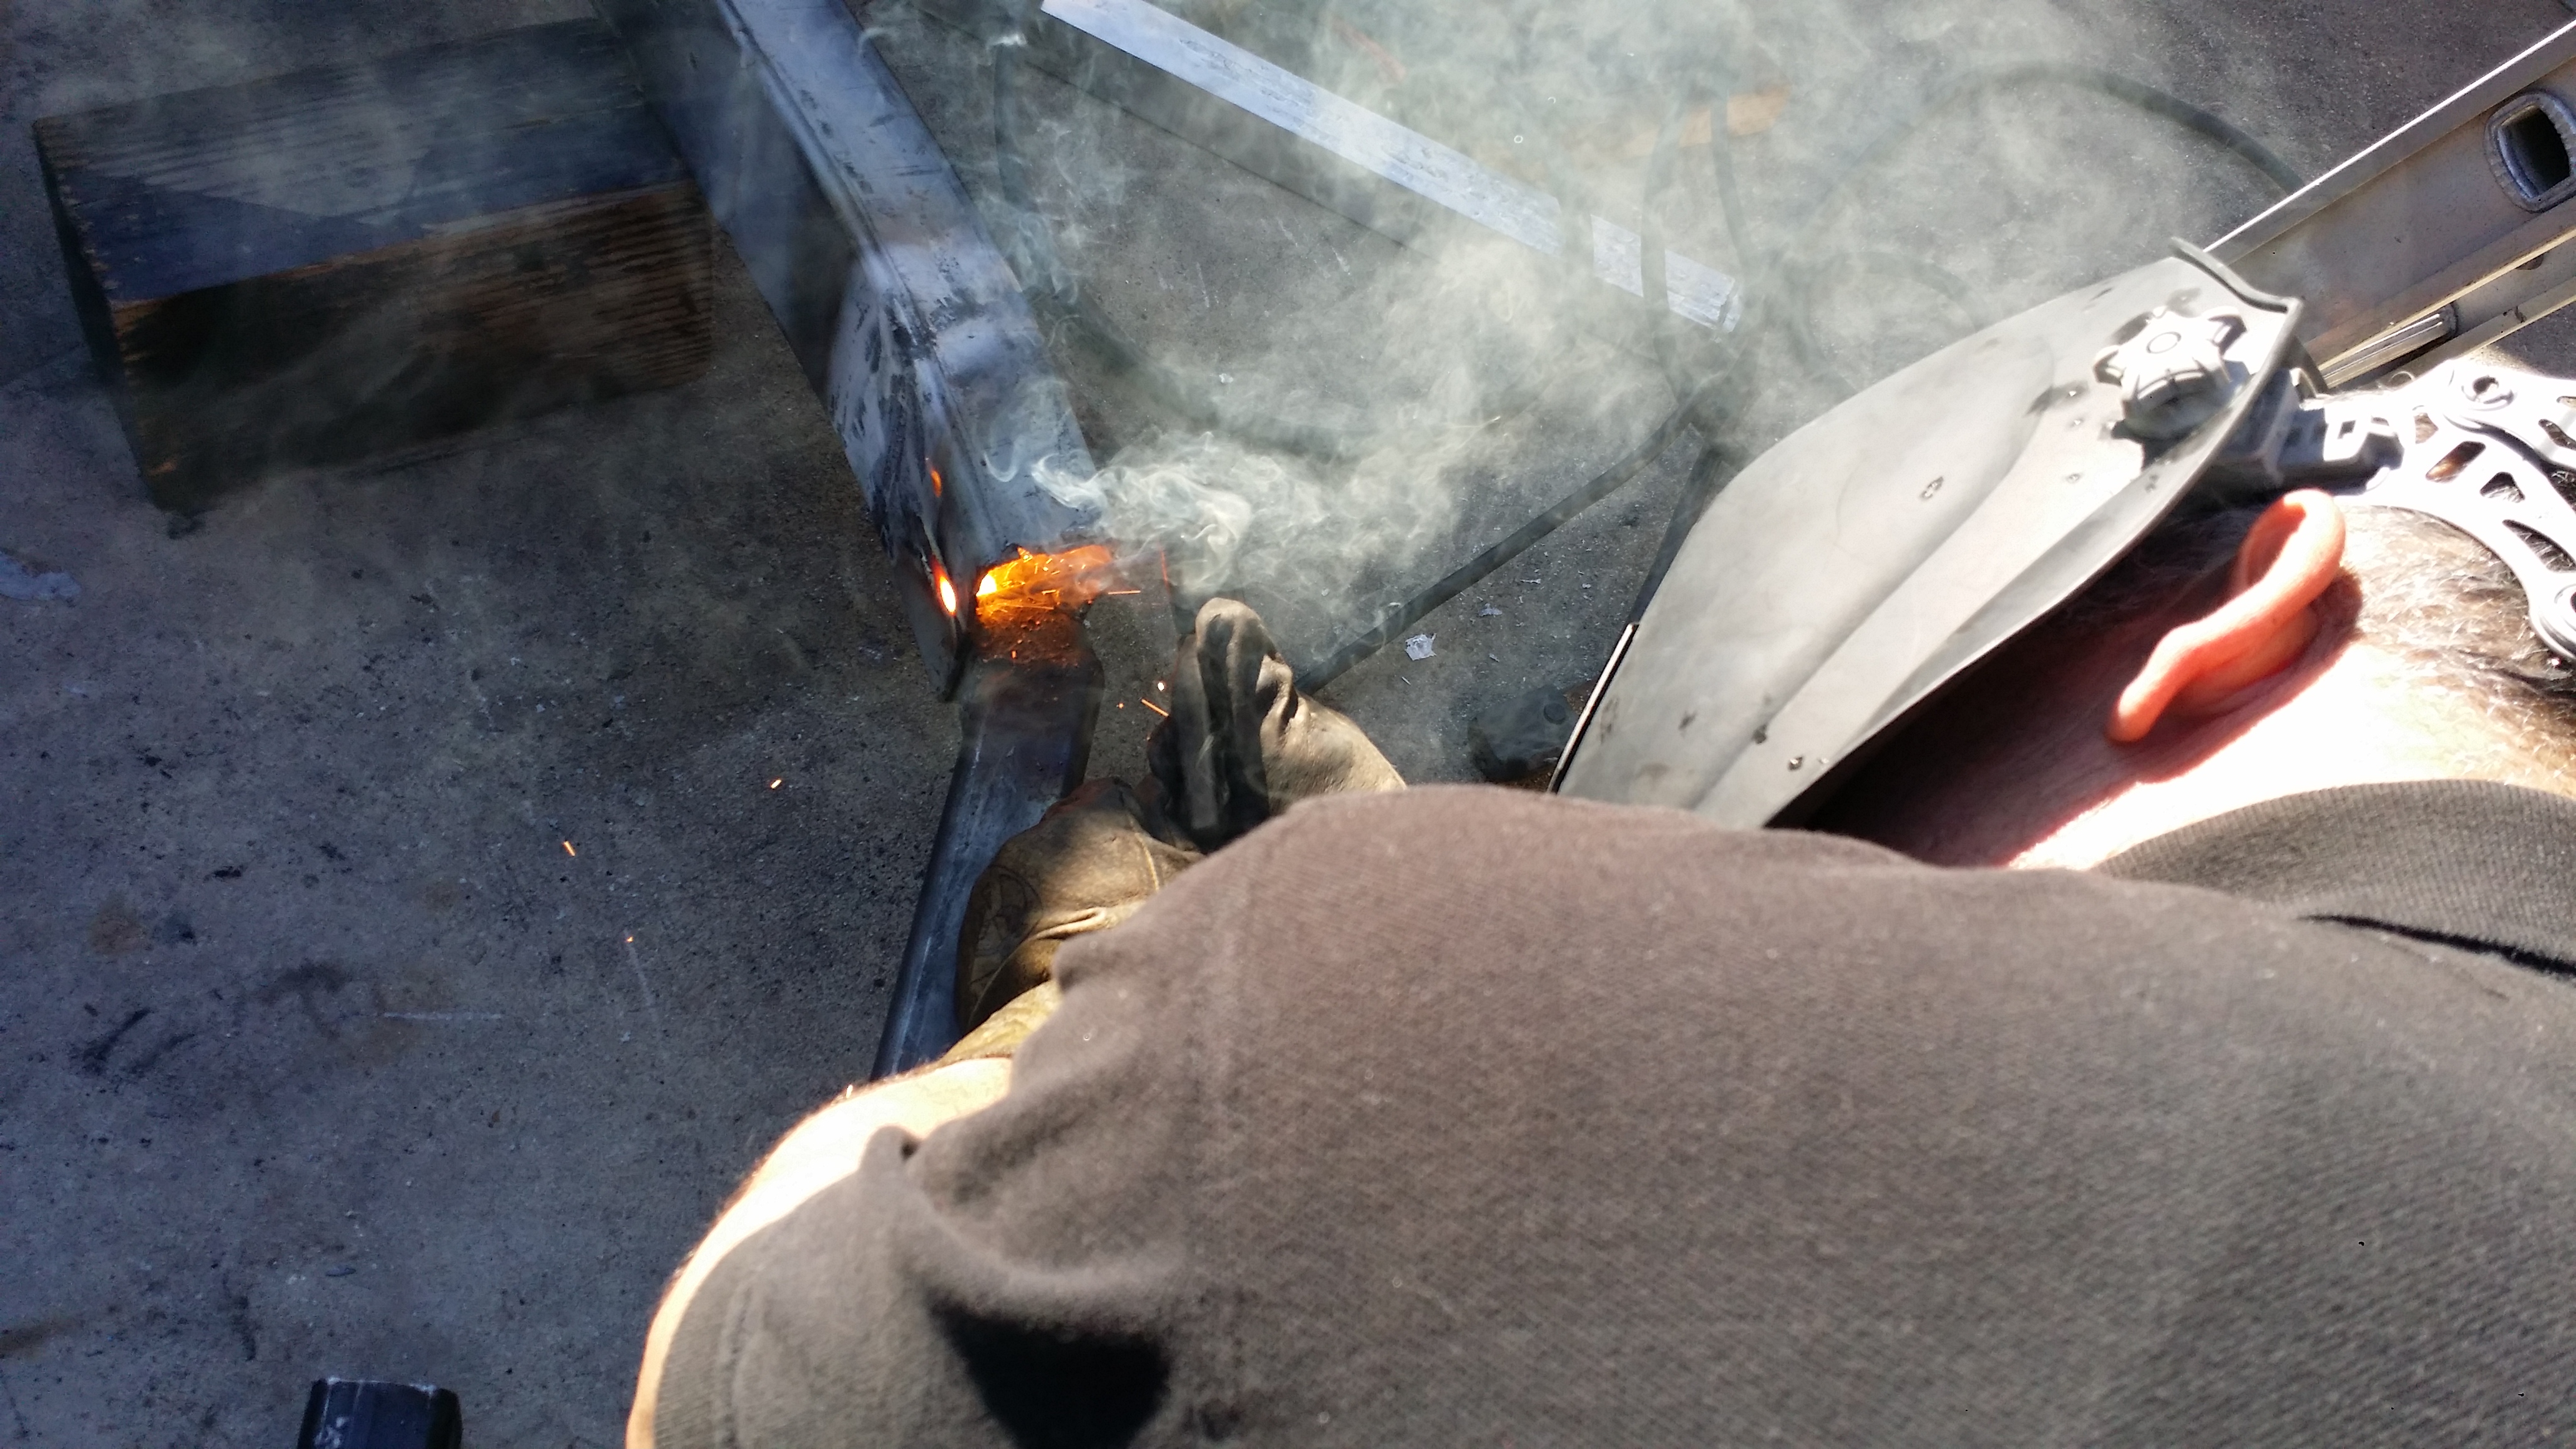
Close up of how nice that welder penetrates all the way through. You can see the glow on the outer portion of the chassis as my dad welds the tongue into the inner portion of the chassis.
Other side

After he finished welding the tongue in place i added a small 16 gauge cross-member in the front/on top of the tongue where the chassis finishes. Not so much to hold any weight, but mainly to close the rest of the gap and so the front cargo box has something to sit on top of.

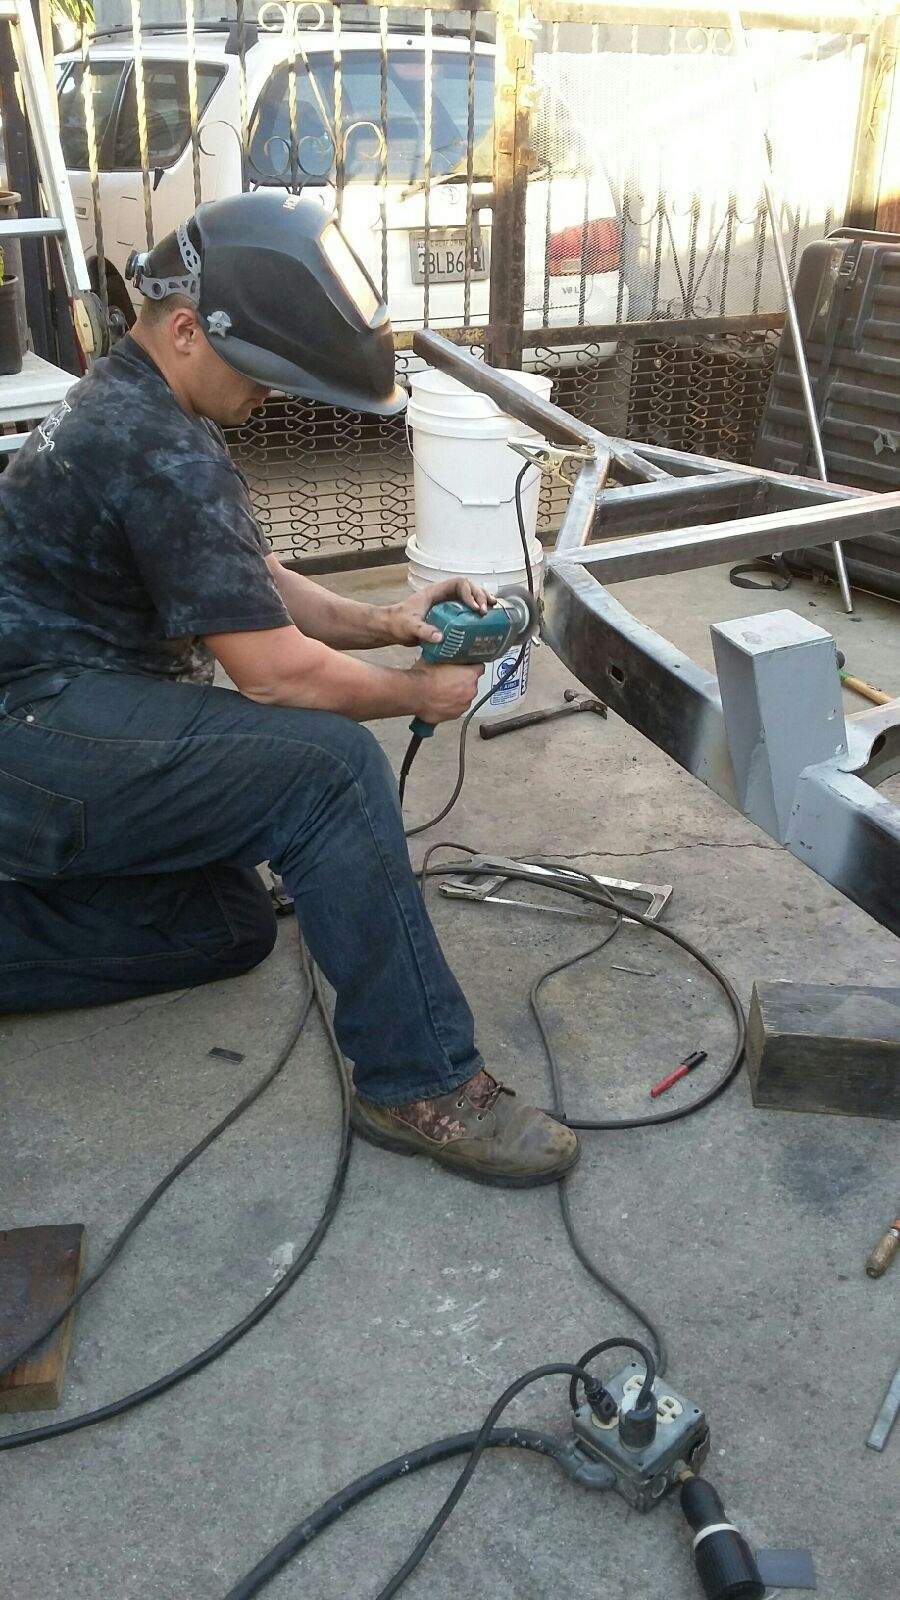
But i gotta say welding all these pieces to this weird shaped Toyota chassis made things really off and difficult to make look pretty. So out of the entire trailer this transition part from tongue to chassis is the about the only part that looks ugly. But oh well i kinda expected it to be difficult.

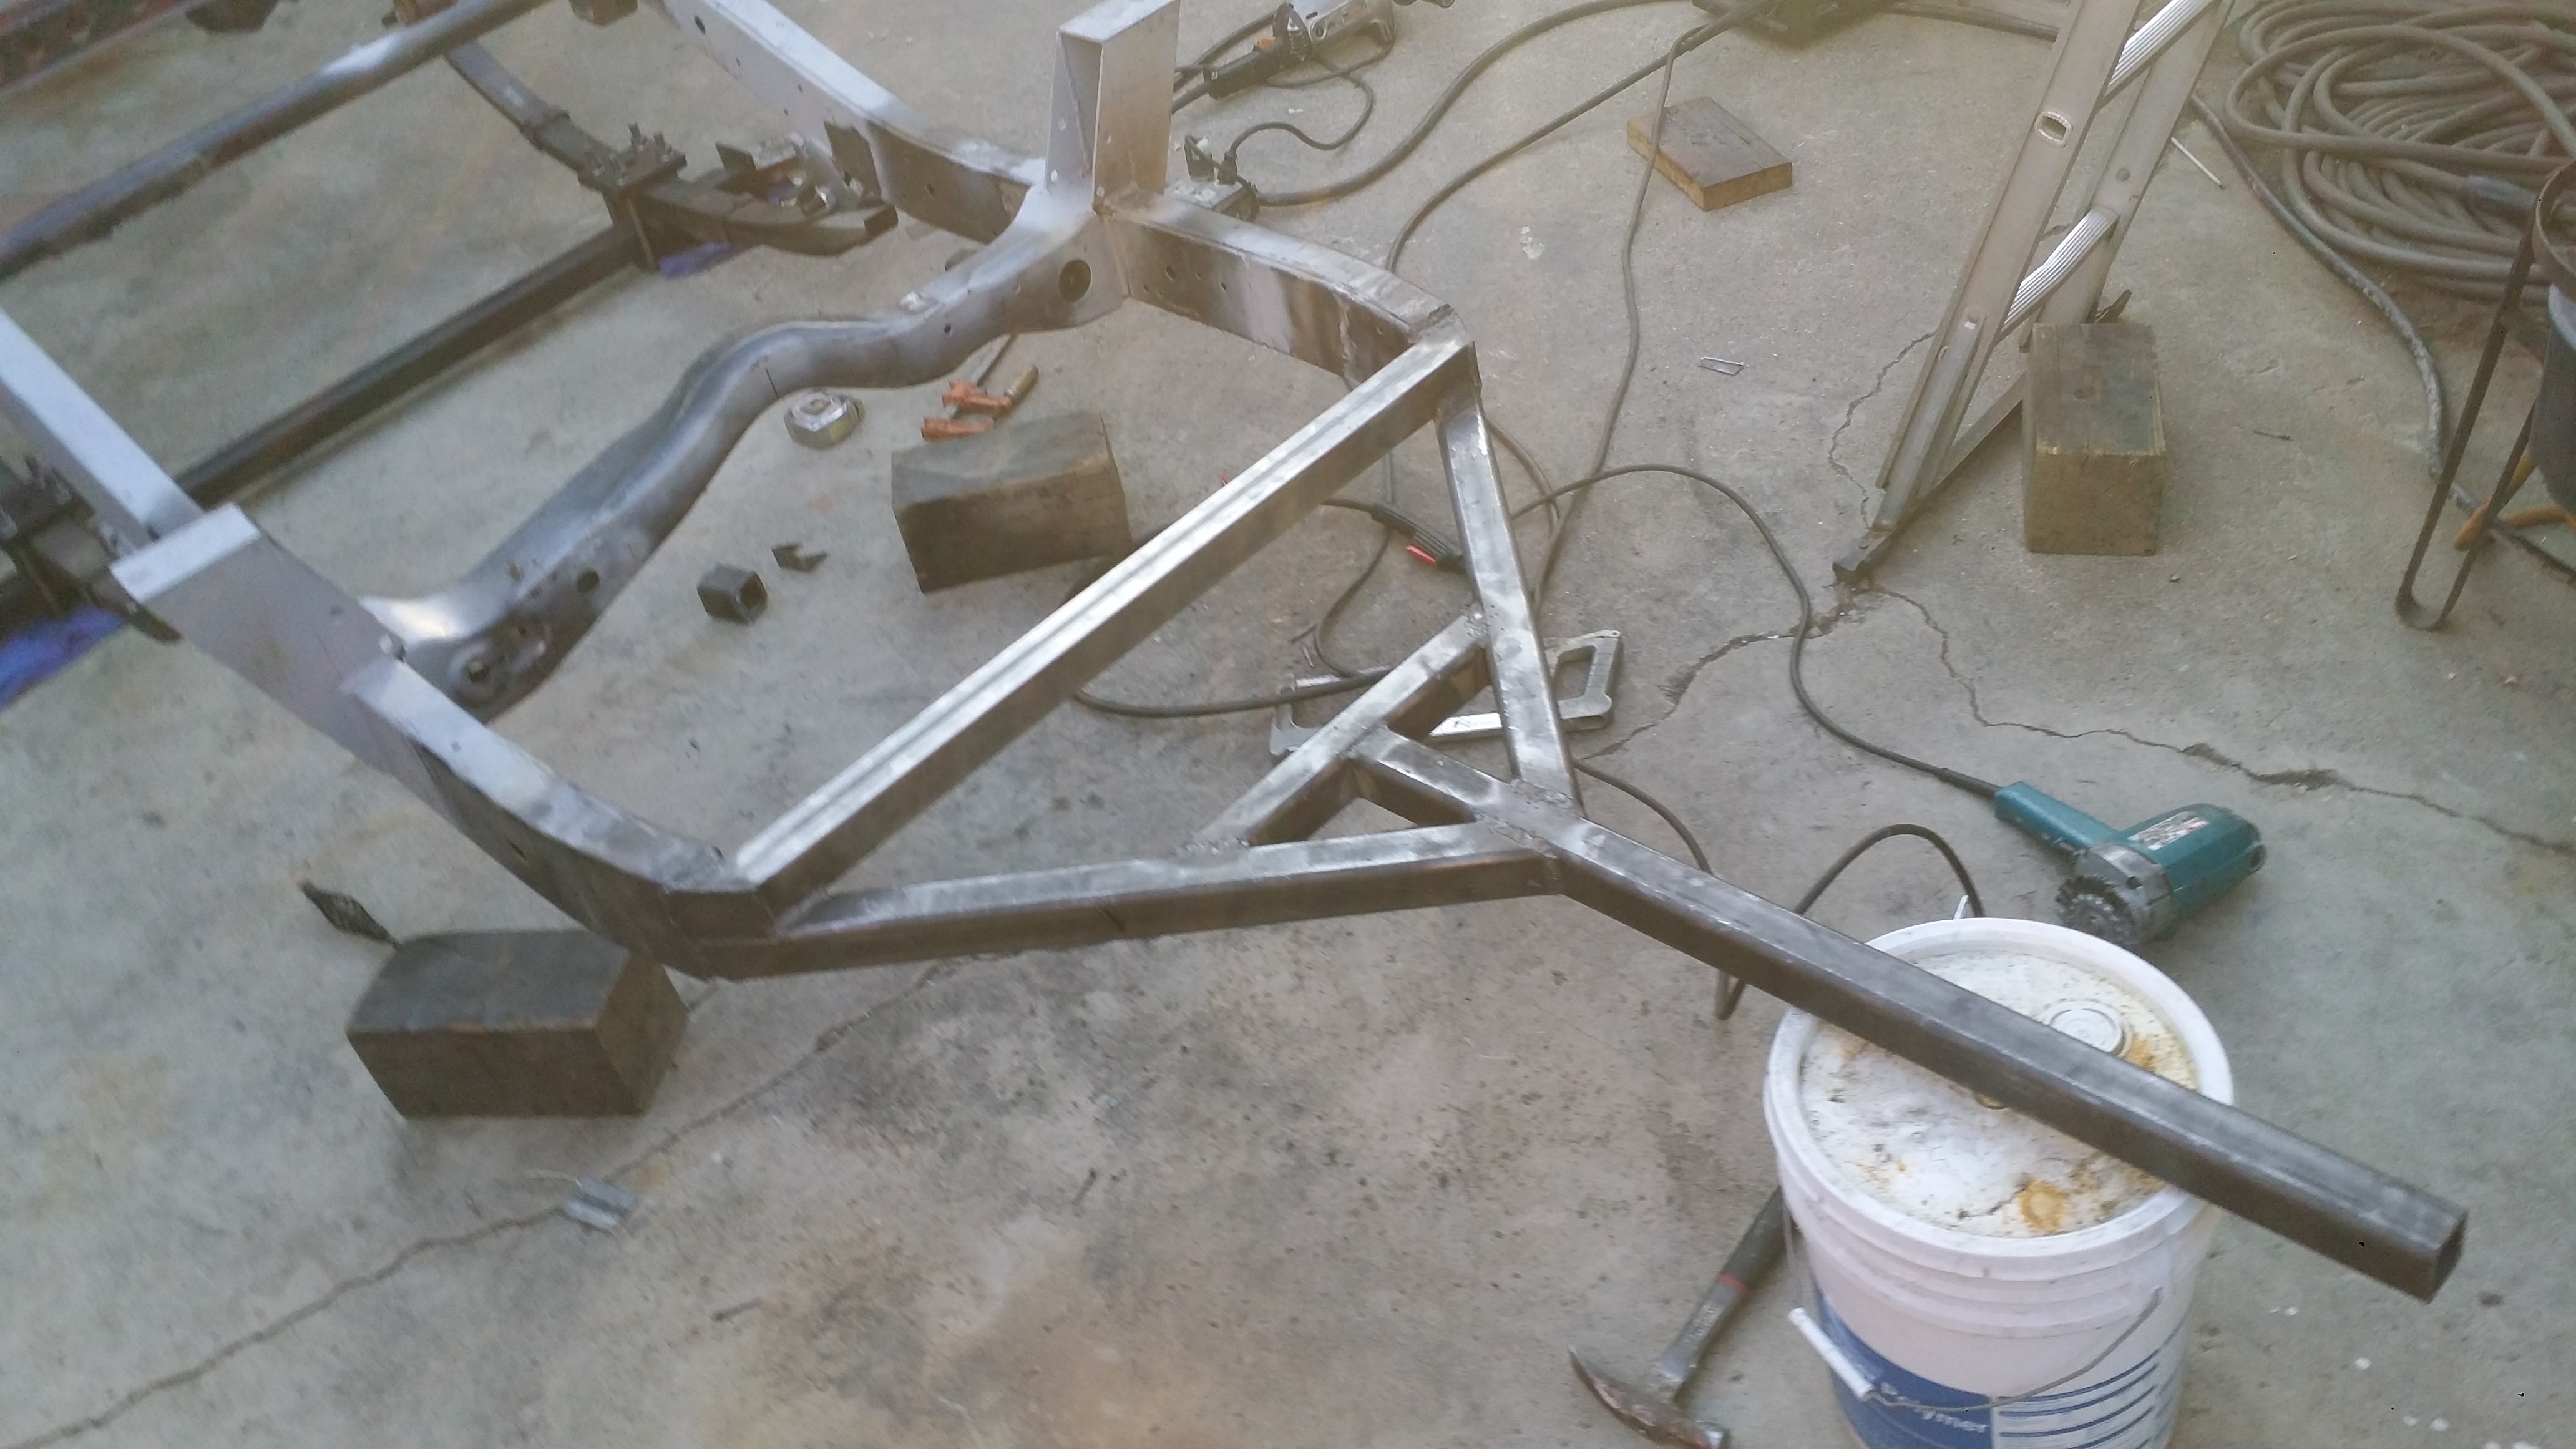
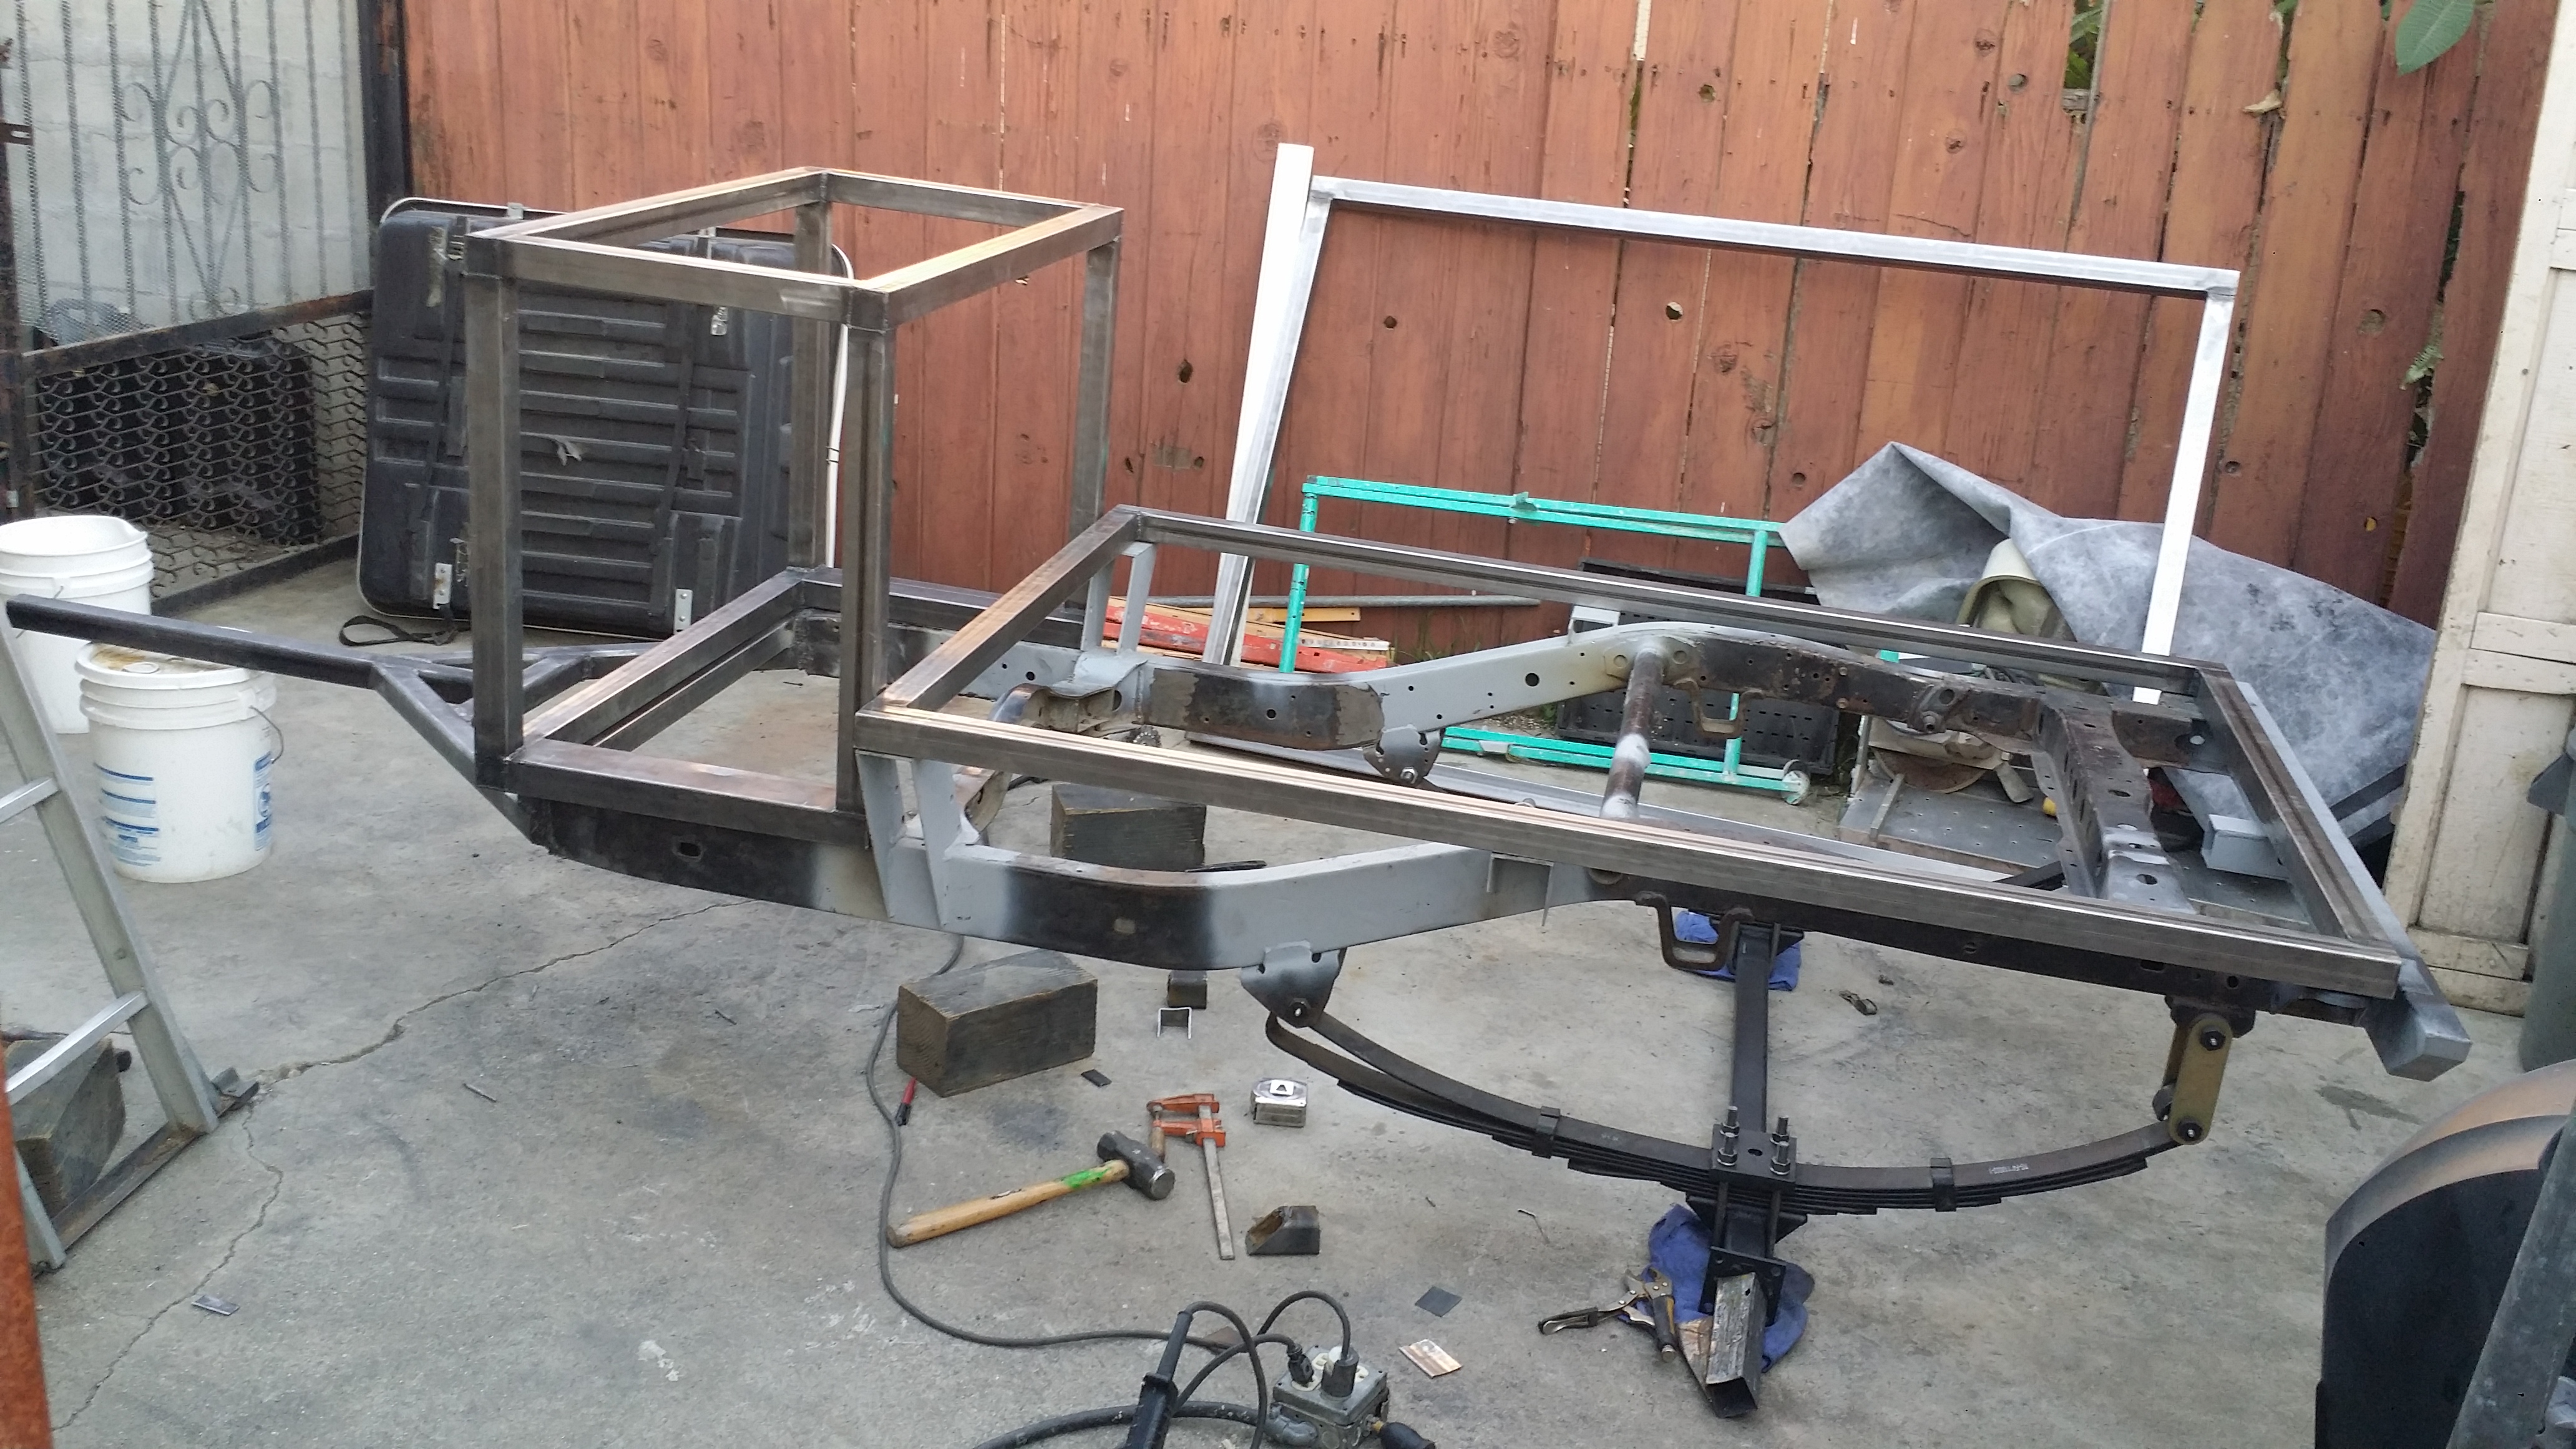
This is just a preview of what the trailer looks like with the front cargo box sitting in place and the rear bottom cargo frame in place as well. It's going to be nice.
I plan to make a propane tank holder on the front triangle part of the tongue when i finish. the tricky part will be creating something with an anti-theft device for keeping people from stealing my tank when we are on the campgrounds or out wheeling while this thing is alone back at camp.

For now that is the way the trailer will sit until i can get started on welding on the water storage brackets that hold the 15 gallon tank in place followed by the front storage box. I can't wait to start getting the cargo boxes fixed into place. That's when the real progress will take off.

After feeling how much weight i have on the trailer I decided not to go with the extra gas storage; This trailer is going to be heavy as it is when i finish the build and I don't need to carry an extra 15-17 gallons of gas anyway. If I absolutely need it I can always use the 5 gallon Jerry can that is mounted to the rear tire swing on my 4Runner. So we decided to cut the stock gas can mount off.

Next up we hammered in the new tongue into the Toyota chassis. Measured about 3 times then tacked it into place.

Close up of how nice that welder penetrates all the way through. You can see the glow on the outer portion of the chassis as my dad welds the tongue into the inner portion of the chassis.

Other side


After he finished welding the tongue in place i added a small 16 gauge cross-member in the front/on top of the tongue where the chassis finishes. Not so much to hold any weight, but mainly to close the rest of the gap and so the front cargo box has something to sit on top of.


But i gotta say welding all these pieces to this weird shaped Toyota chassis made things really off and difficult to make look pretty. So out of the entire trailer this transition part from tongue to chassis is the about the only part that looks ugly. But oh well i kinda expected it to be difficult.


This is just a preview of what the trailer looks like with the front cargo box sitting in place and the rear bottom cargo frame in place as well. It's going to be nice.

I plan to make a propane tank holder on the front triangle part of the tongue when i finish. the tricky part will be creating something with an anti-theft device for keeping people from stealing my tank when we are on the campgrounds or out wheeling while this thing is alone back at camp.

For now that is the way the trailer will sit until i can get started on welding on the water storage brackets that hold the 15 gallon tank in place followed by the front storage box. I can't wait to start getting the cargo boxes fixed into place. That's when the real progress will take off.
Last edited by Redeth005; Nov 29, 2015 at 05:18 PM.
Nov 30, 2015 | 05:51 AM
#57
Registered User
Joined: Jul 2013
Posts: 56
Likes: 0
From: Indianapolis, IN
Maybe look at this for inspiration for the propane holder: http://www.frontrunneroutfitters.com...le-holder.html
Or, make a sturdy ring that hinges down from the front of the firewood box to go around the top of the tank. Put a loop for a padlock on the front of the ring. Lock that to a chain, cable, or hinged metal strap that goes to the front of the triangle. Just be sure to pad where the ring contacts the tank.
Or, make a sturdy ring that hinges down from the front of the firewood box to go around the top of the tank. Put a loop for a padlock on the front of the ring. Lock that to a chain, cable, or hinged metal strap that goes to the front of the triangle. Just be sure to pad where the ring contacts the tank.
Jan 3, 2016 | 09:44 AM
#59
Thread Starter
Registered User
Joined: Apr 2012
Posts: 2,817
Likes: 2
From: Los Angeles CA
Hit up the steel shop last weekend with my dad and when i got back I found my dad showing off my truck to another customer talking about the stuff I do when i rock crawl and the hits my bumpers take that him and I built together. Lol
I kept a distance and was left like " Aww! That's my dad!
  You tell'em!" Let me get a picture
Now that the holidays are off i can begin the build again. December is just filled with so many family birthdays and holidays i barely got any weekends to work on the trailer.
One small thing i tackled last weekend was the water tank holder.
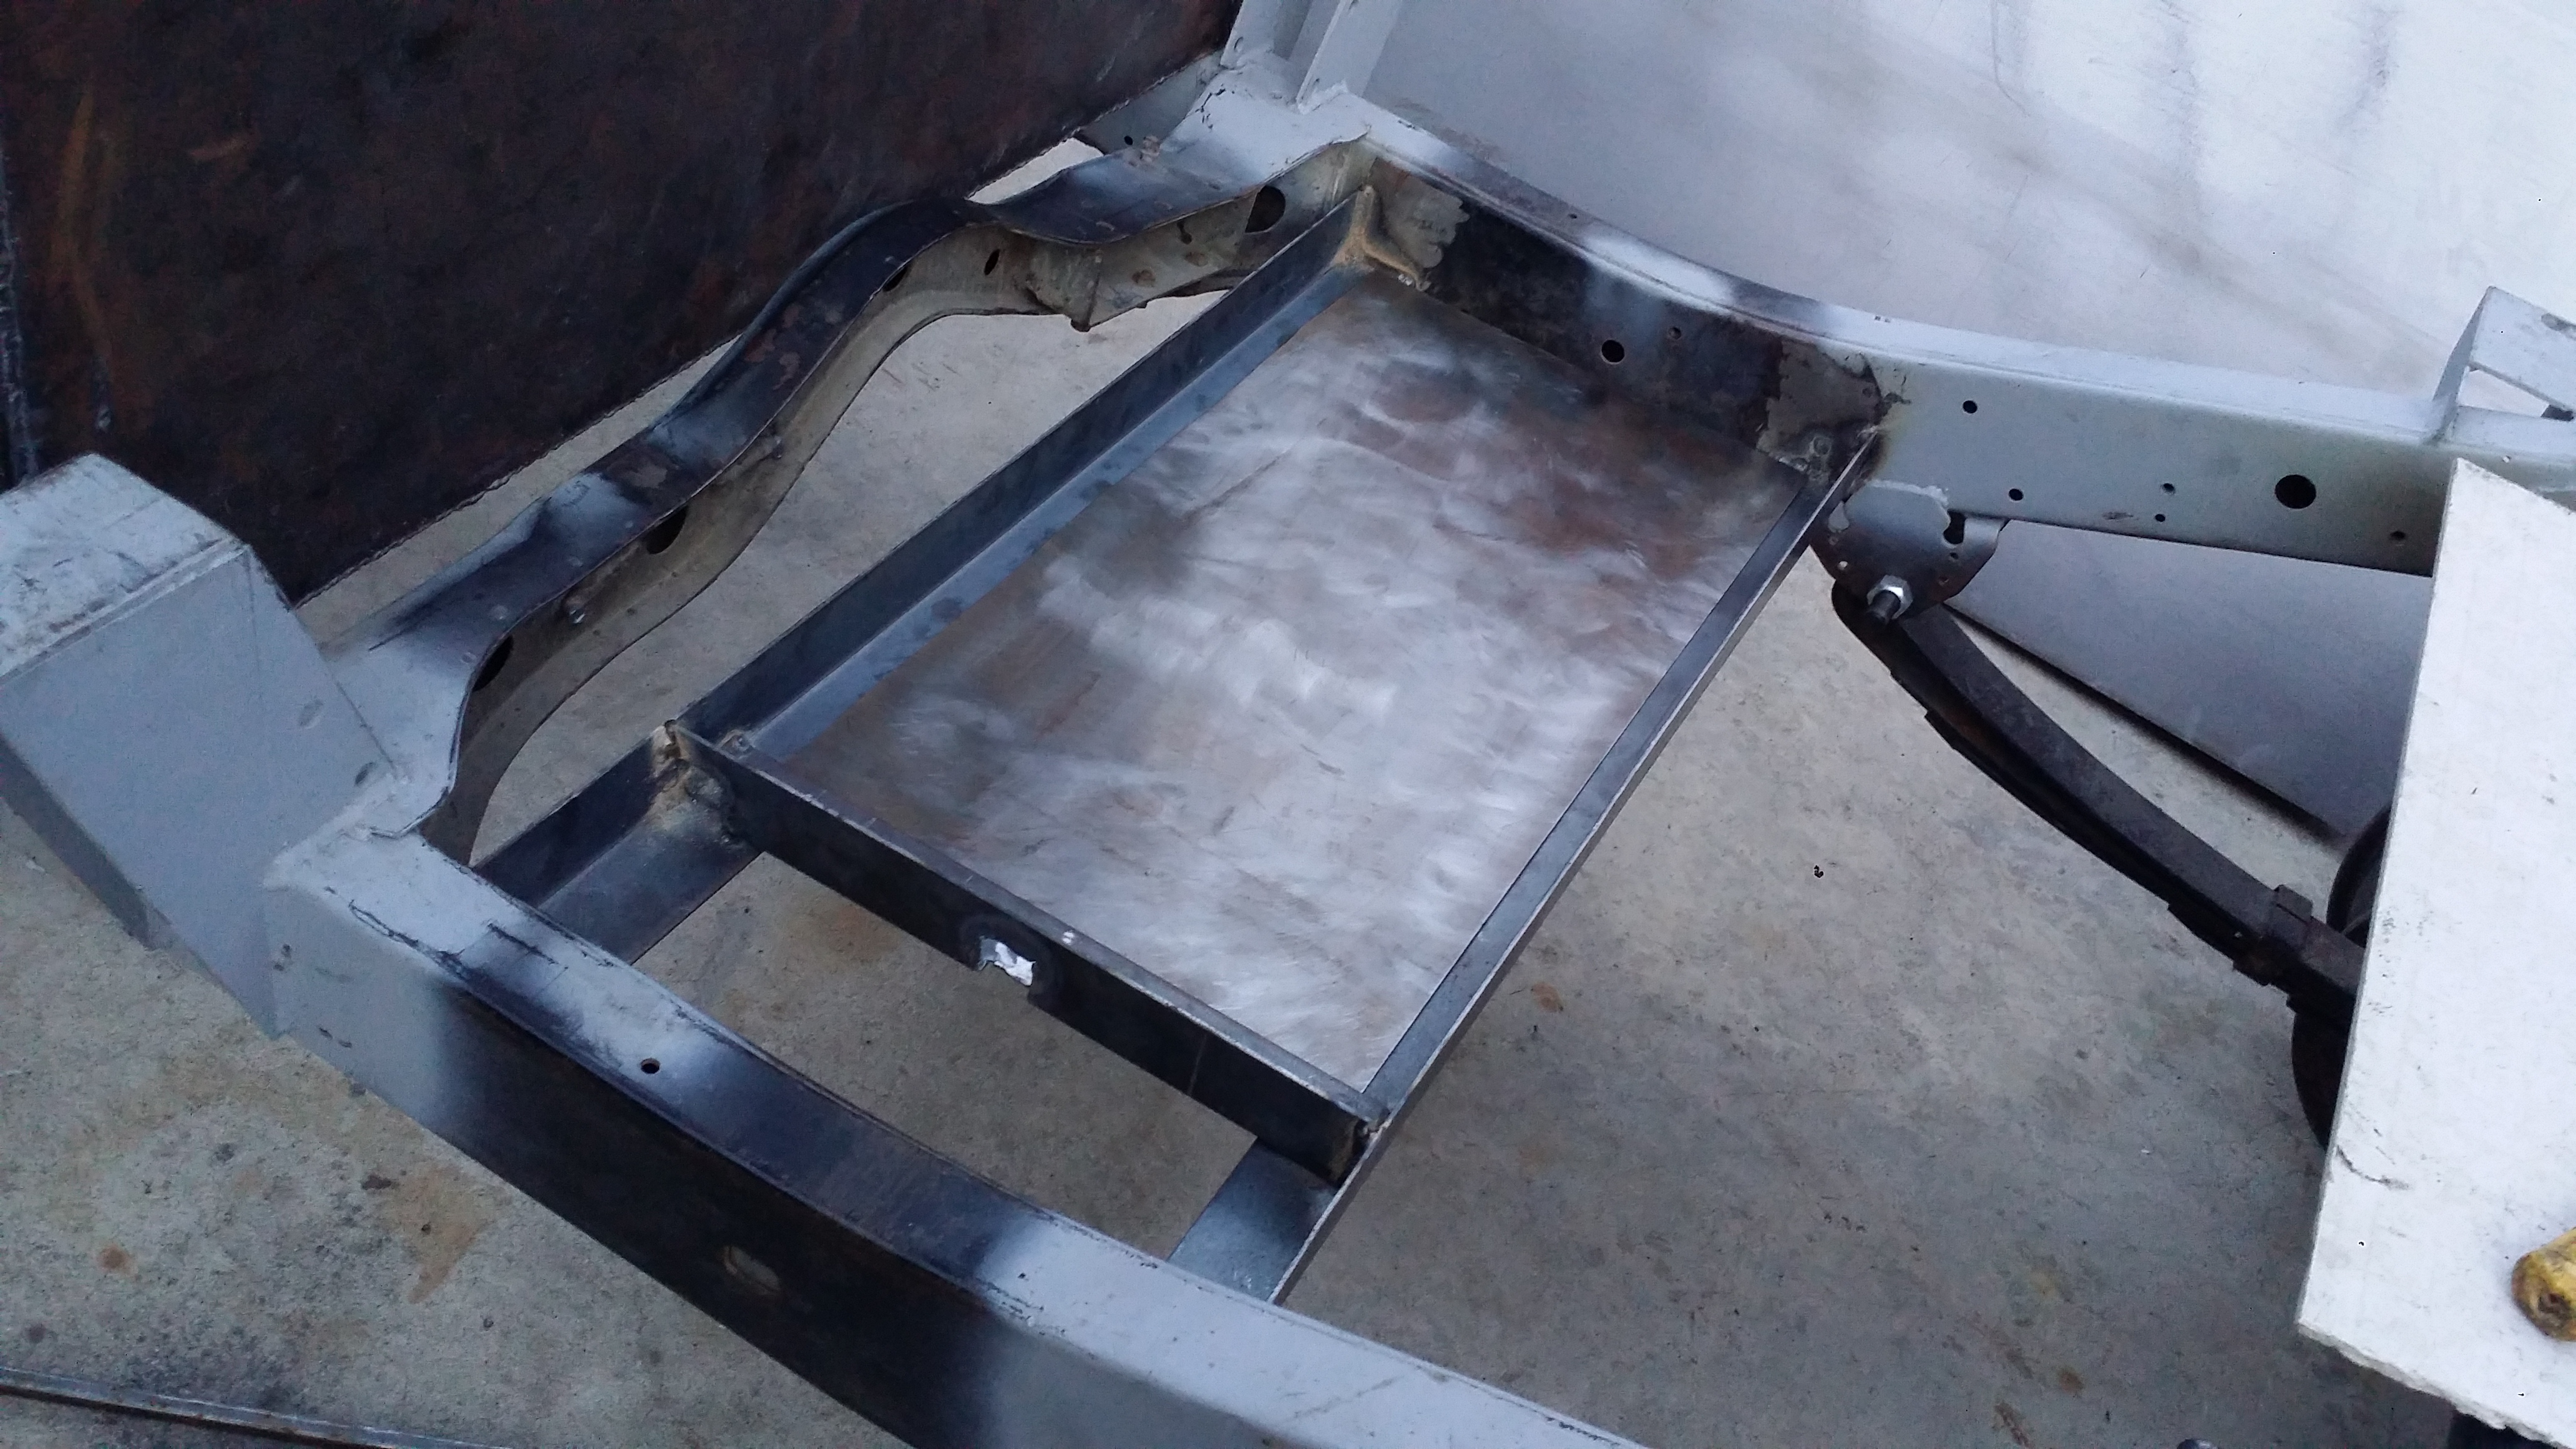
I started by using 2"x2" 90* angle pieces
once the steel cooled a bit the spacing got more narrow then i wanted just slightly lol. I had to bang it out with a hammer and that seemed to fix the issue.
This is what the clearance will be from the bottom of the main storage compartment. Just a few inches but its perfect. I was considering using the 3" body lift spacers after all just in case the water tank ever broke on a trip. at least i would be able to remove it vs if the compartment was welded into place. Still debating on how i will do it but we will see.

I figured the tank would have a possibility of sliding back and forth on those rails so i decided to add anothere 2x2 90* piece just to keep it in one spot.
Had to torch out some holes so i could install the hose line inputs
Once i was satisfied i welded it all into place
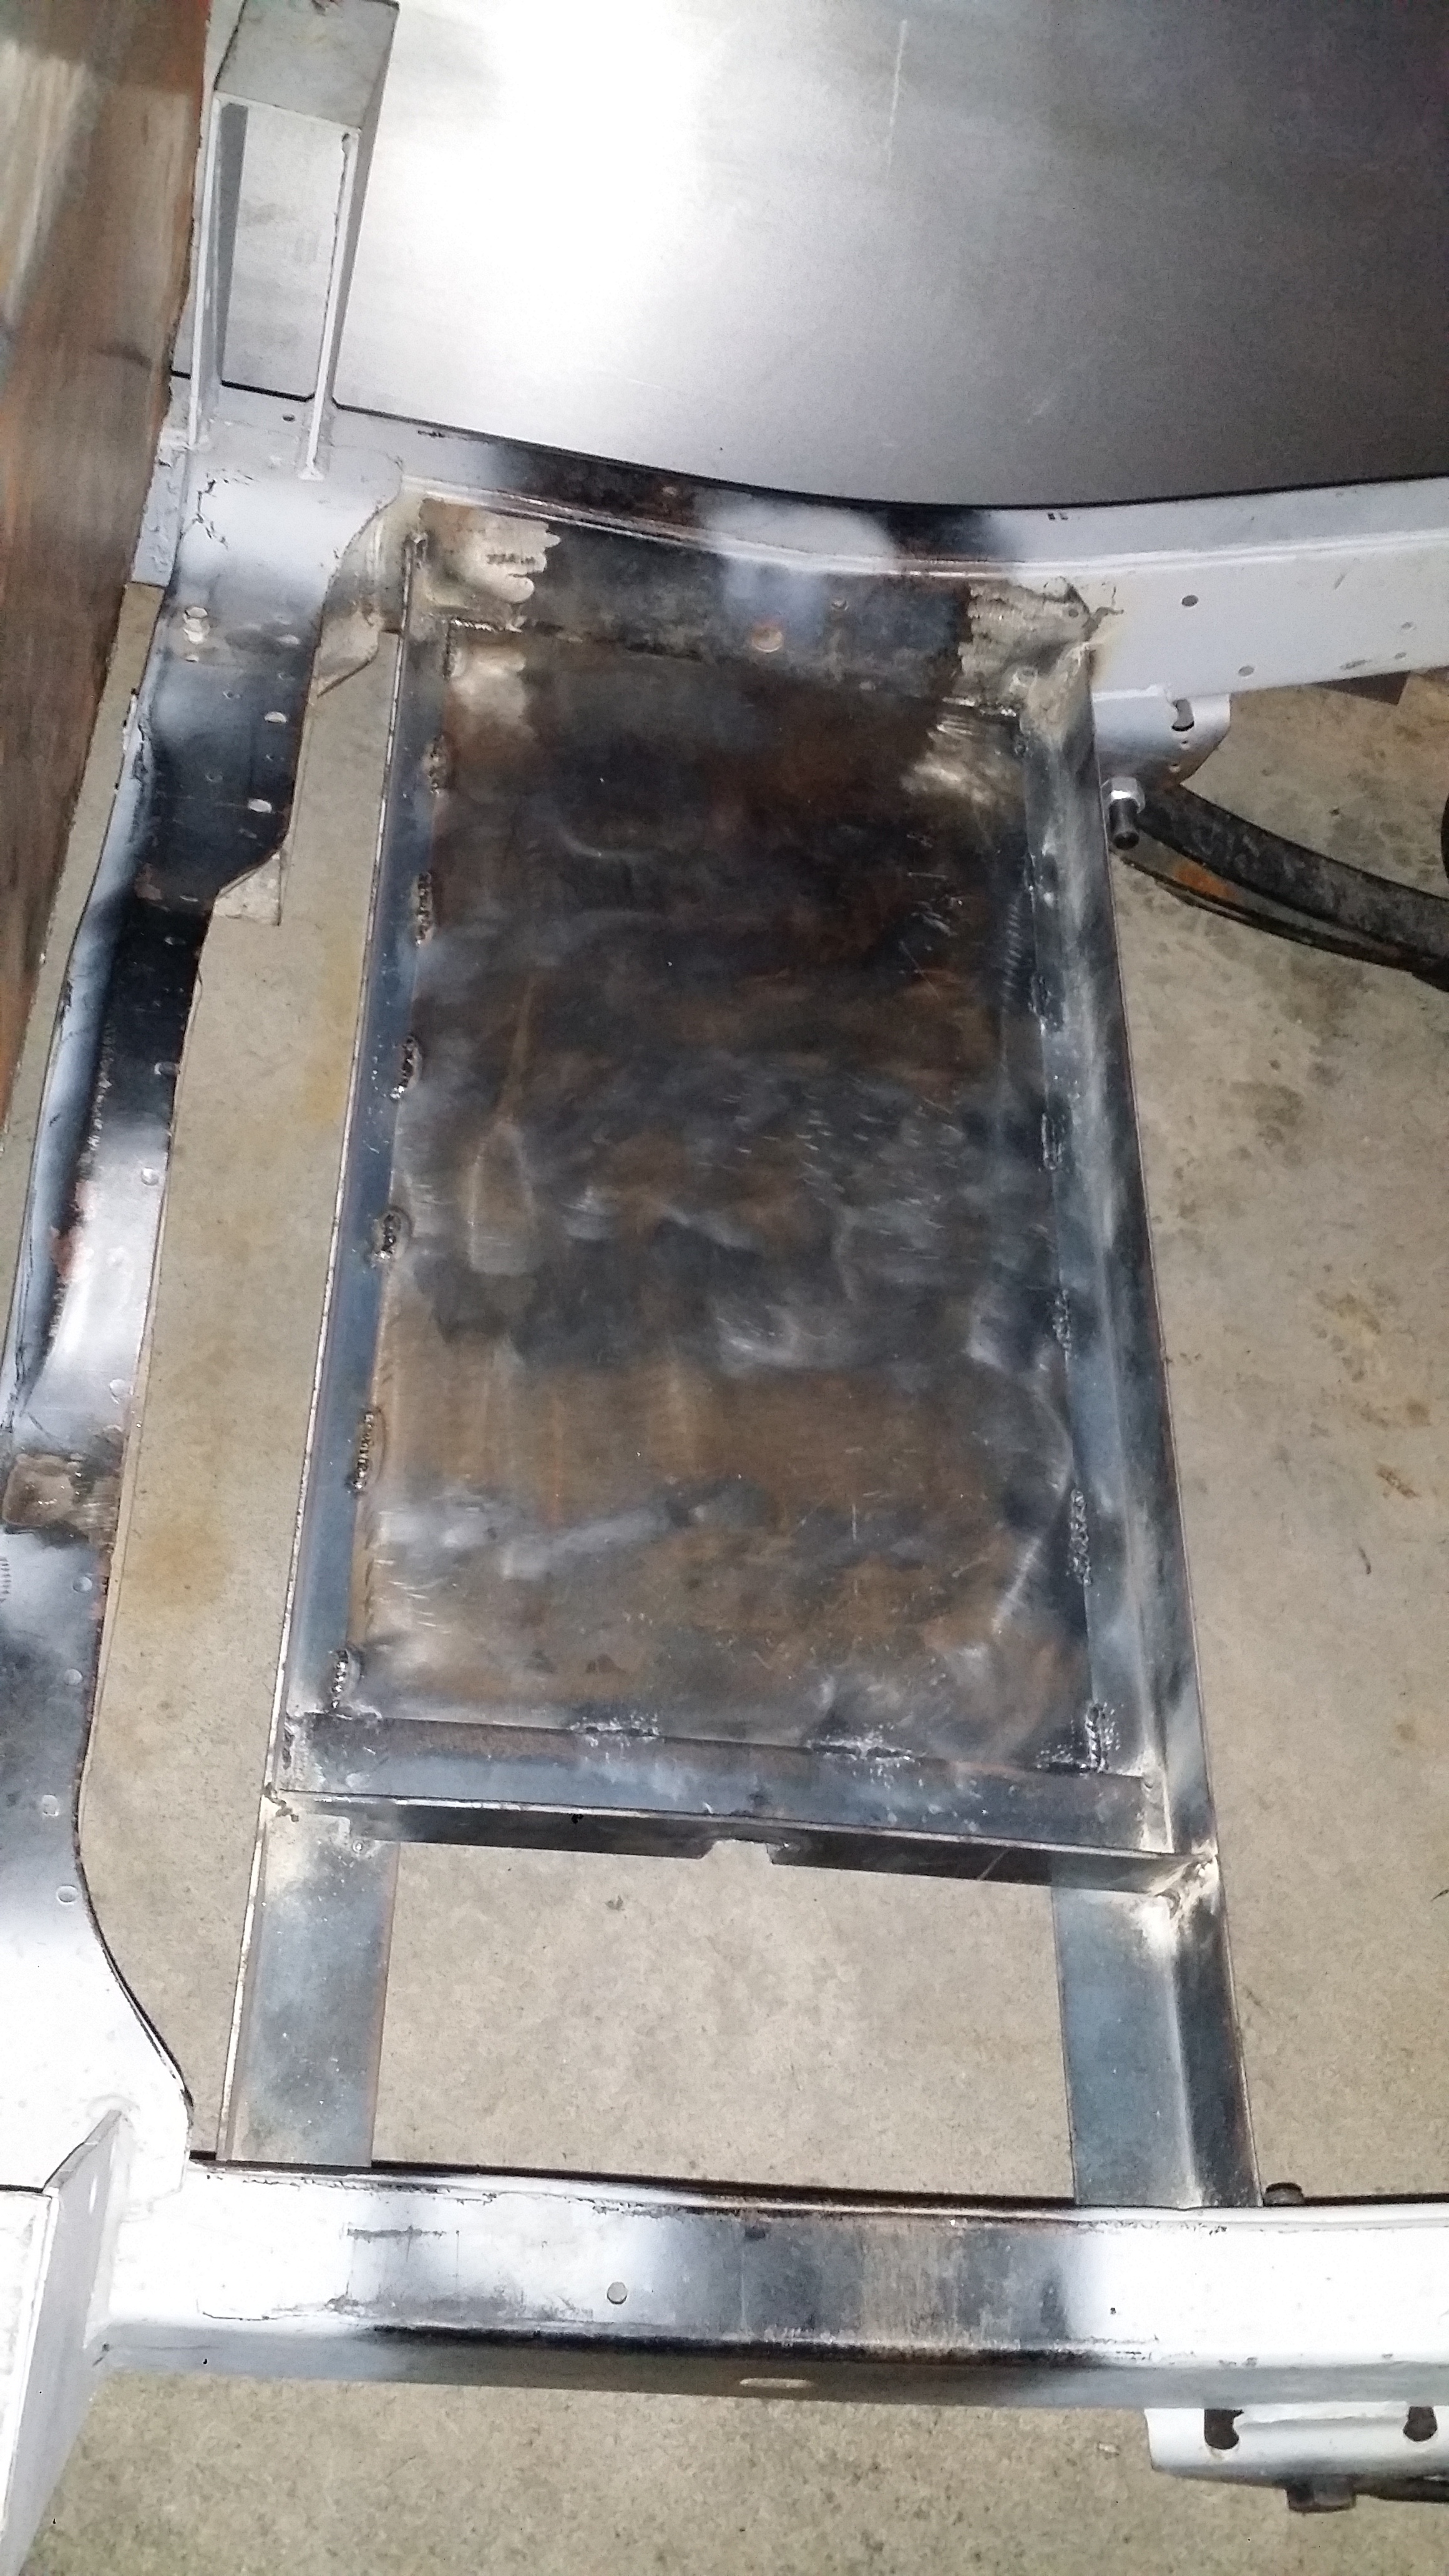
But i was still a little nervous about the underbelly of the tank. If this is going to be an offroad trailer i feared the tank would get smacked by rocks lifting up from the trail ground. and since the water tank is plastic i feared it would break too easily. So i added 16guage sheet metal (maybe 18ga i cant remember) by doing this it would keep it a little more safe from underneath.
welded it in place. now i can stand on the thing and it supports all 244 pounds of my weight lol if it can support me while jumping up and down i'm sure it can hold 15 gallons with no problem.
-------------------------------
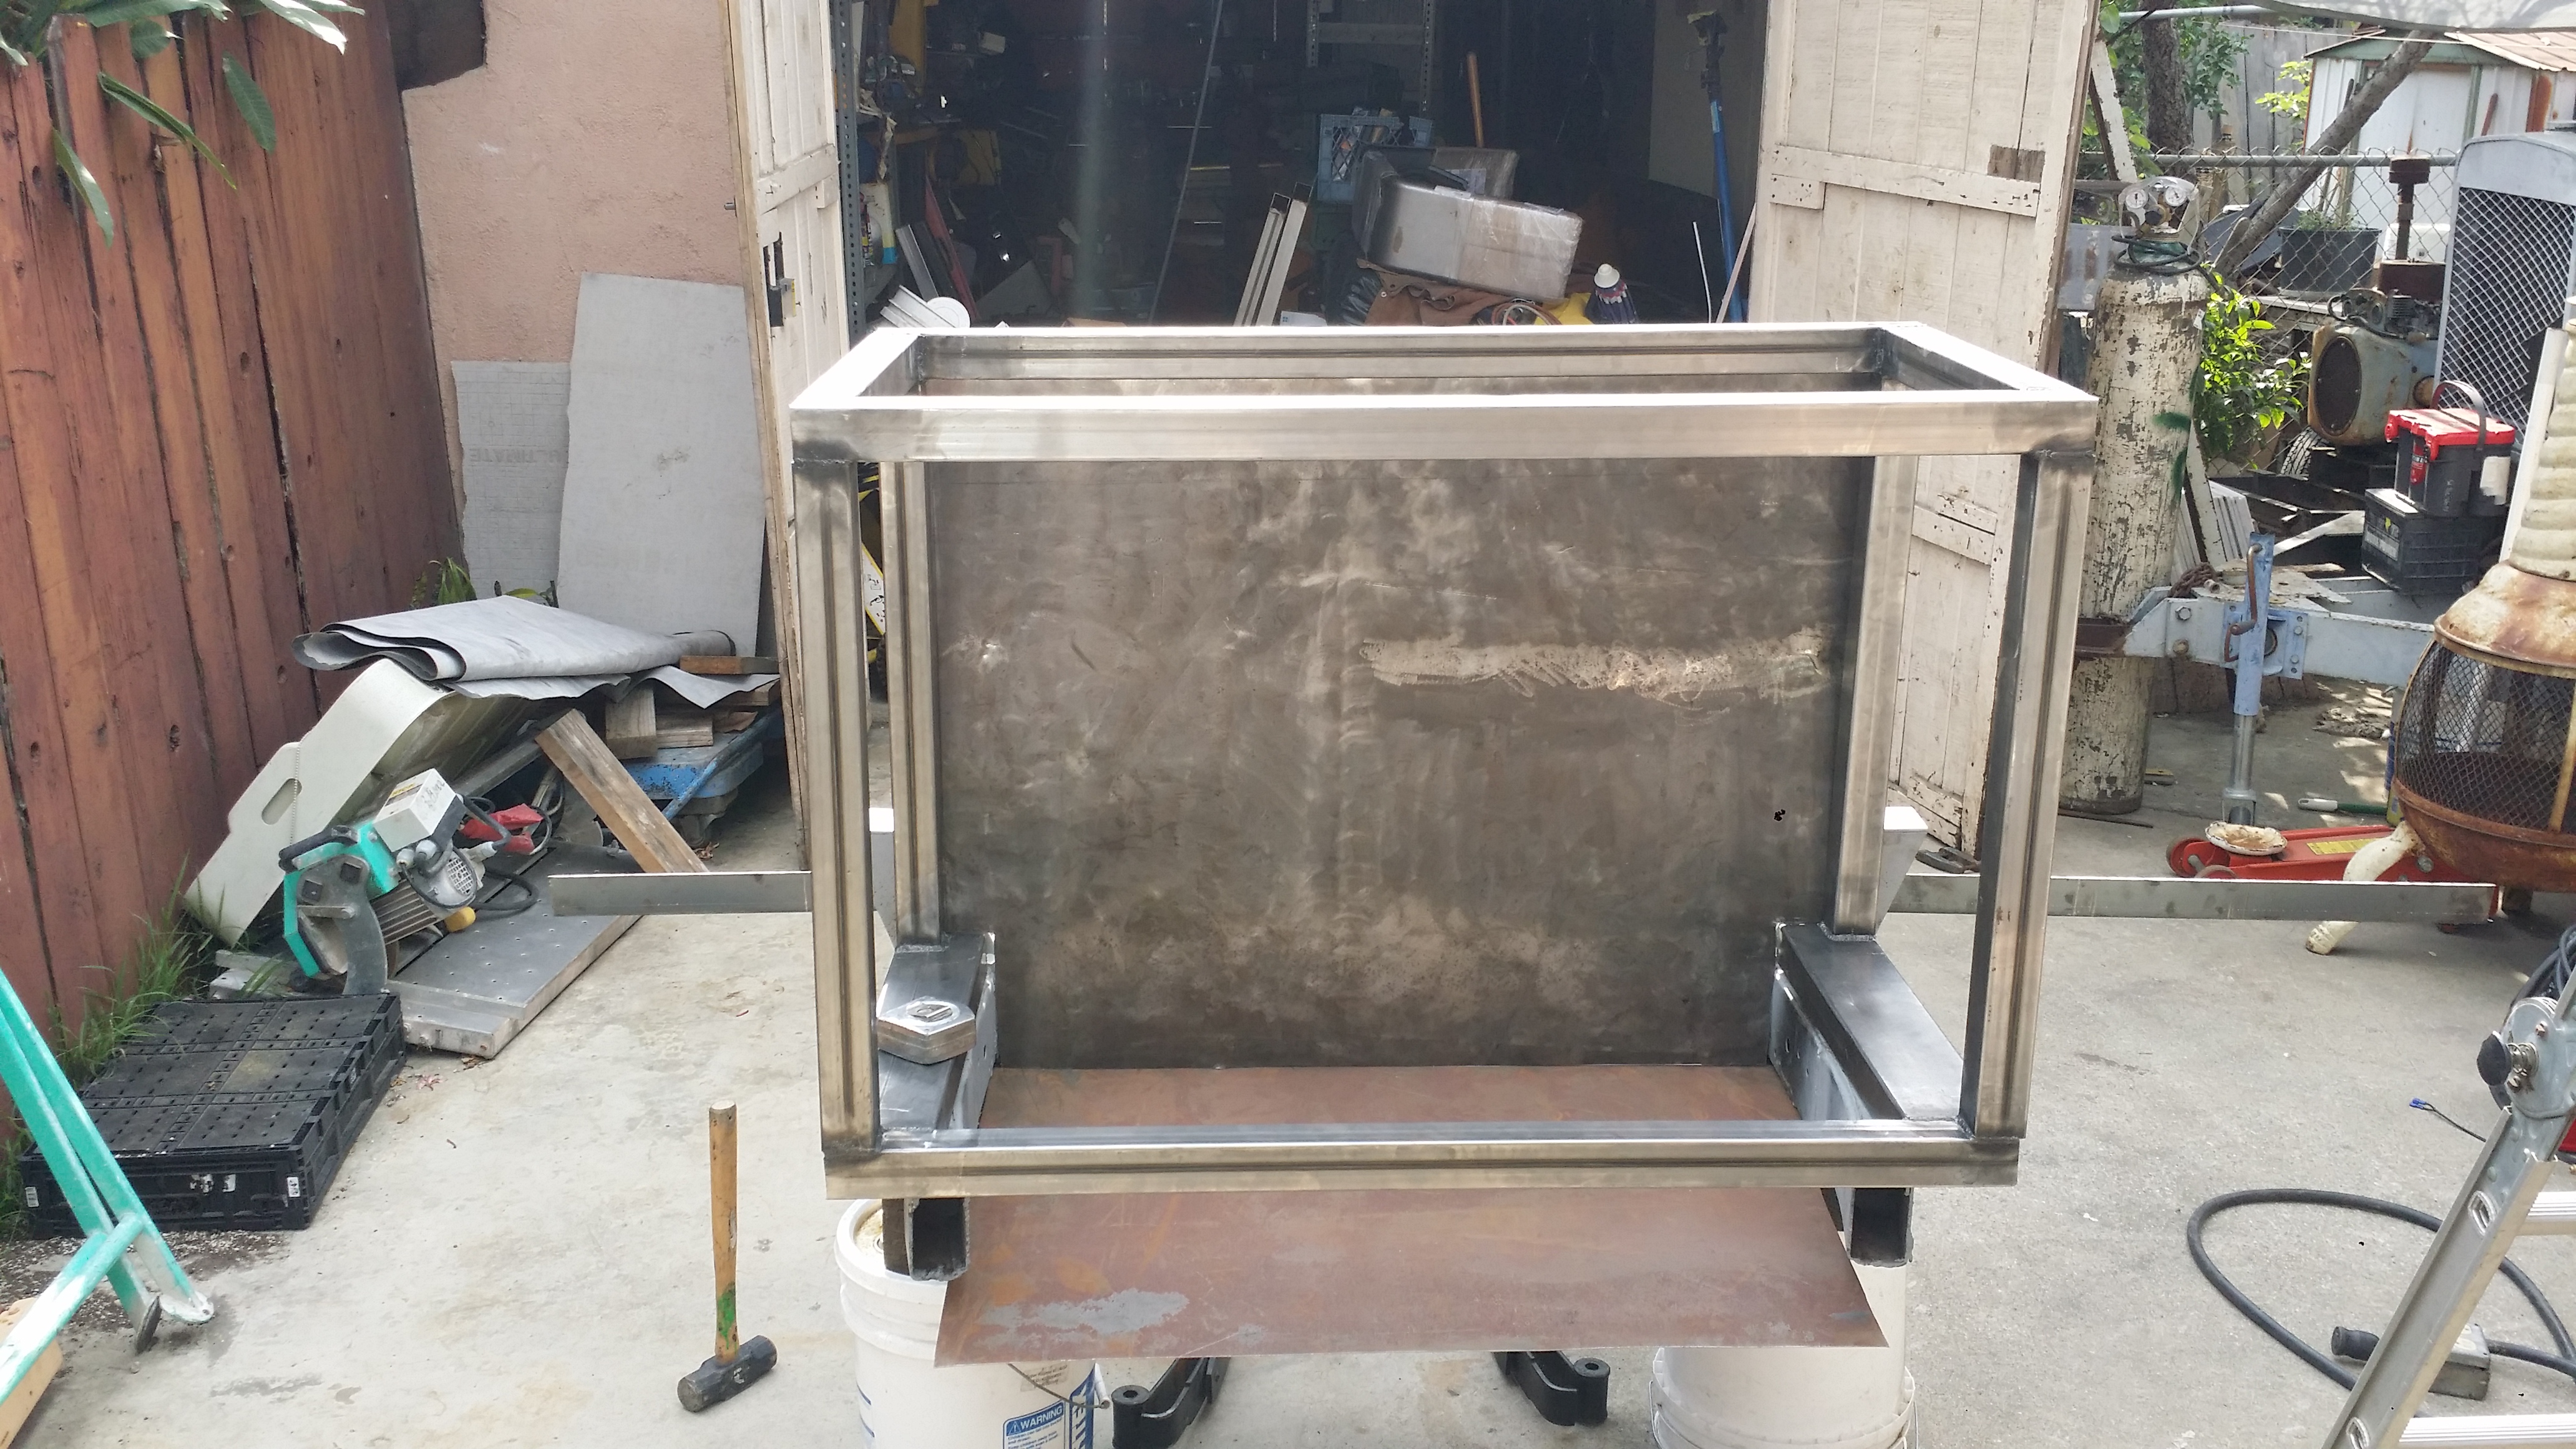
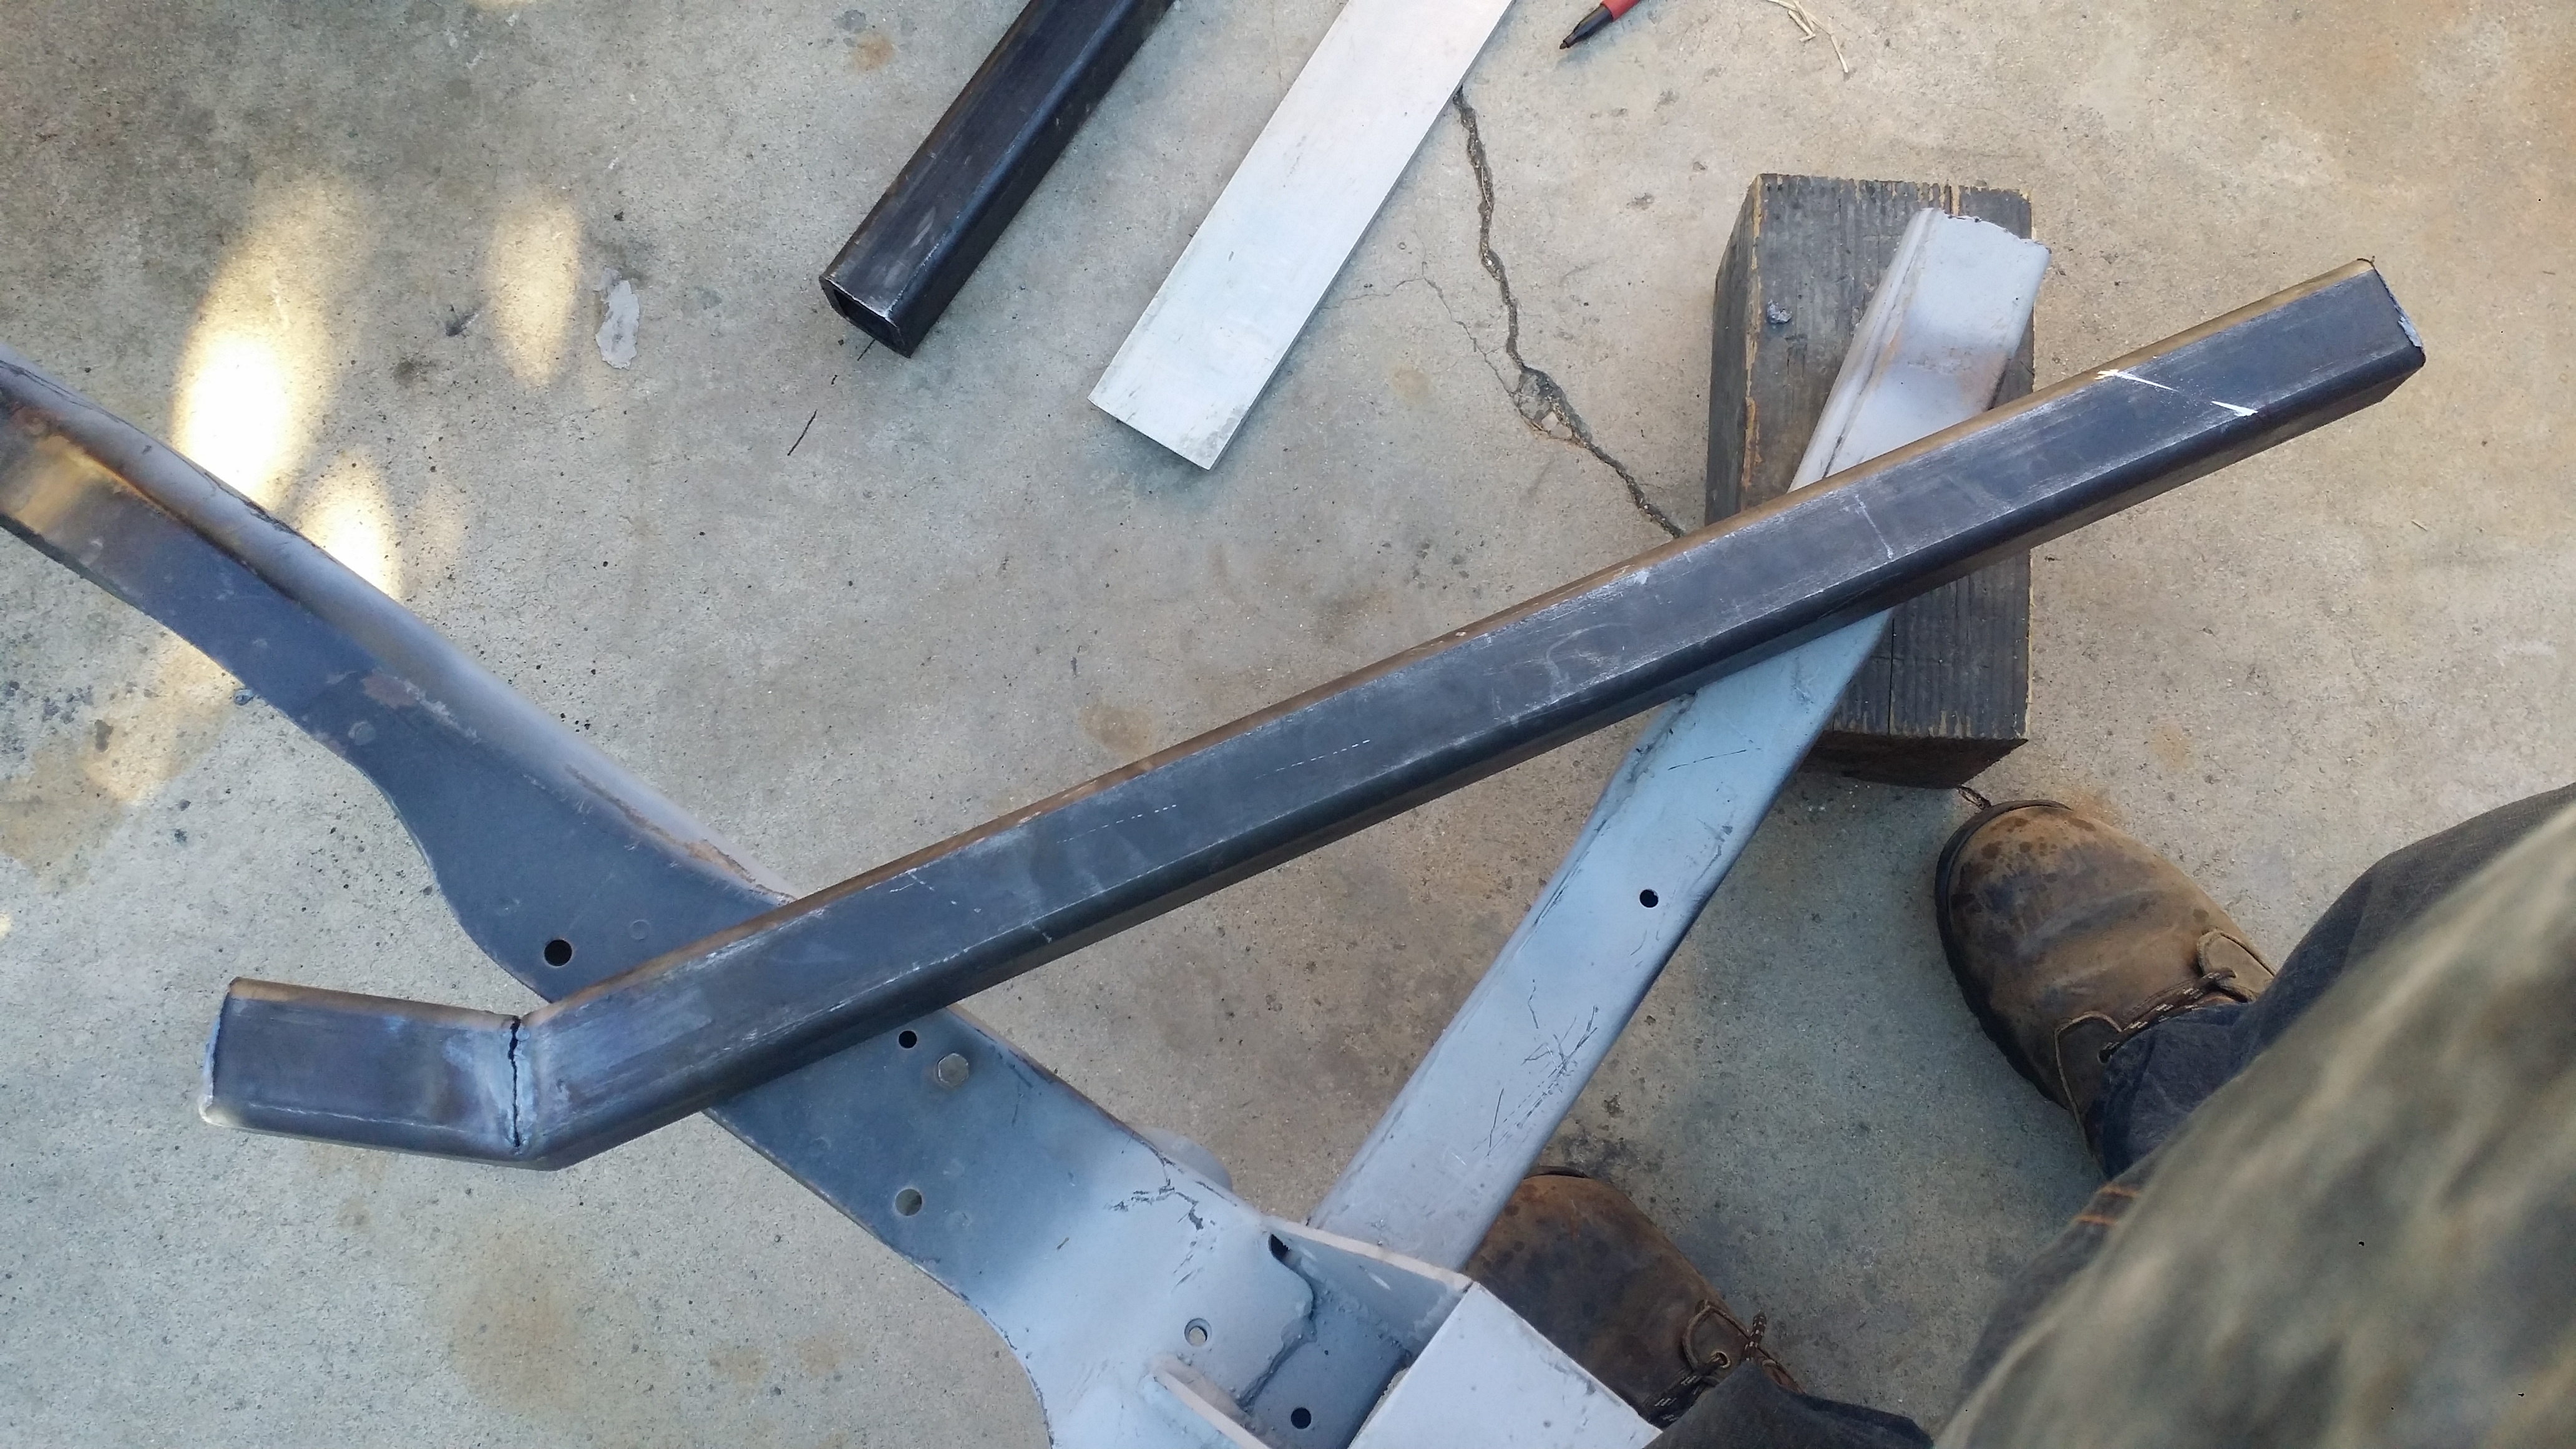
Another thing i did was put caps on the ends of those rectangular tubes for the main compartment. And added more tube for the refrigerator compartment to separate the 2 parts from the inside. I will be building a slide out for the refrigerator on this part.
I kept a distance and was left like "
Aww! That's my dad! You tell'em!" Let me get a picture 
Now that the holidays are off i can begin the build again. December is just filled with so many family birthdays and holidays i barely got any weekends to work on the trailer.
One small thing i tackled last weekend was the water tank holder.
I started by using 2"x2" 90* angle pieces

once the steel cooled a bit the spacing got more narrow then i wanted just slightly lol. I had to bang it out with a hammer and that seemed to fix the issue.

This is what the clearance will be from the bottom of the main storage compartment. Just a few inches but its perfect. I was considering using the 3" body lift spacers after all just in case the water tank ever broke on a trip. at least i would be able to remove it vs if the compartment was welded into place. Still debating on how i will do it but we will see.

I figured the tank would have a possibility of sliding back and forth on those rails so i decided to add anothere 2x2 90* piece just to keep it in one spot.

Had to torch out some holes so i could install the hose line inputs

Once i was satisfied i welded it all into place

But i was still a little nervous about the underbelly of the tank. If this is going to be an offroad trailer i feared the tank would get smacked by rocks lifting up from the trail ground. and since the water tank is plastic i feared it would break too easily. So i added 16guage sheet metal (maybe 18ga i cant remember) by doing this it would keep it a little more safe from underneath.

welded it in place. now i can stand on the thing and it supports all 244 pounds of my weight lol if it can support me while jumping up and down i'm sure it can hold 15 gallons with no problem.

-------------------------------
Another thing i did was put caps on the ends of those rectangular tubes for the main compartment. And added more tube for the refrigerator compartment to separate the 2 parts from the inside. I will be building a slide out for the refrigerator on this part.


