
Redeth's 89 4Runner custom front plate bumper fab.
 Oct 30, 2013 | 09:25 PM
#101
Nice job! Your welds are looking a lot better too! I noticed that it was slight angled downward towards the front of the truck from the side view. I don't know if you intended it to be like that, but if not you might want to try using some thick fender washers on the lower mounts between bumper and the frame. A washer or two should level that beast up nicely!
Last edited by kawazx636; Oct 30, 2013 at 09:27 PM.
Oct 31, 2013 | 09:04 AM
#103
Thread Starter
Registered User
Joined: Apr 2012
Posts: 2,817
Likes: 2
From: Los Angeles CA
Thanks everybody! Ill try my best to get more done today. Dont have any plans for tonight so ill try not to get all the paint coats done by today
Thank you for the compliment. Also thanks for that tip. Ill have to try it out once we add that 1/4" frame reinforcement above the spring hanger.
Nice job! Your welds are looking a lot better too! I noticed that it was slight angled downward towards the front of the truck from the side view. I don't know if you intended it to be like that, but if not you might want to try using some thick fender washers on the lower mounts between bumper and the frame. A washer or two should level that beast up nicely!
Oct 31, 2013 | 06:16 PM
#104
Thread Starter
Registered User
Joined: Apr 2012
Posts: 2,817
Likes: 2
From: Los Angeles CA
Alright guys i finally painted up the bumper! She is all finished and ready to be mounted. just need to allow it to dry.
Here she is guys!

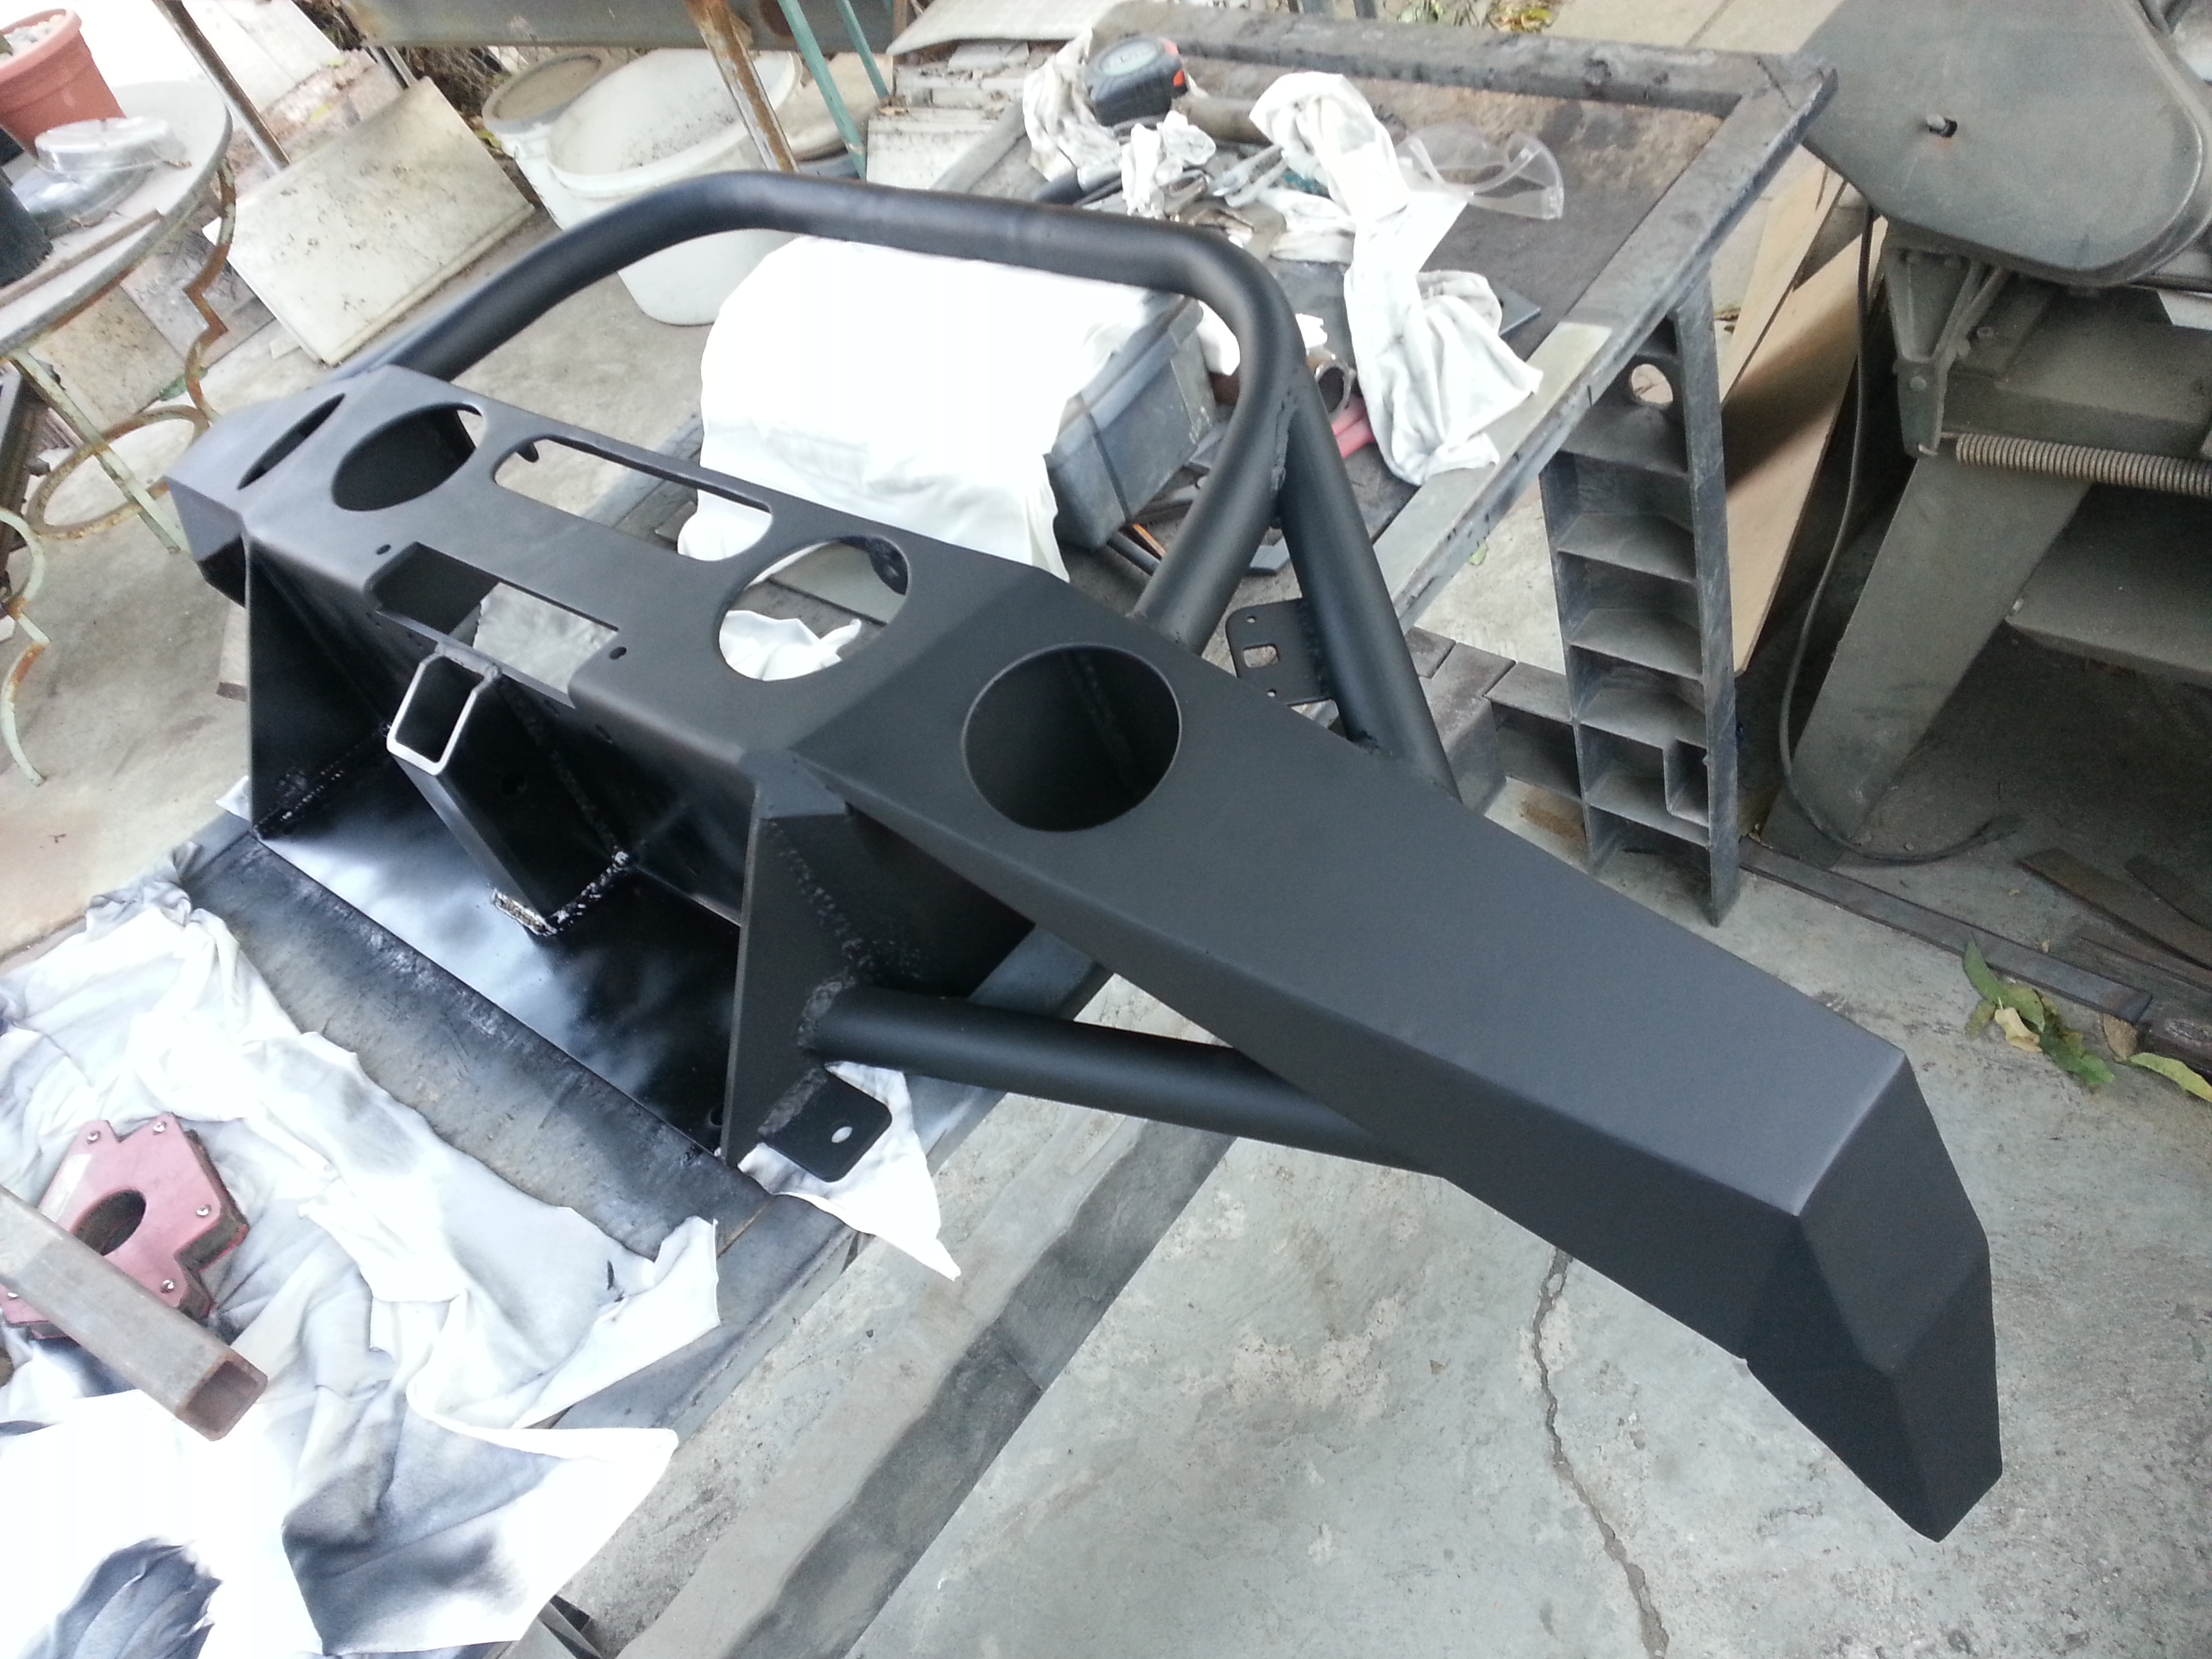
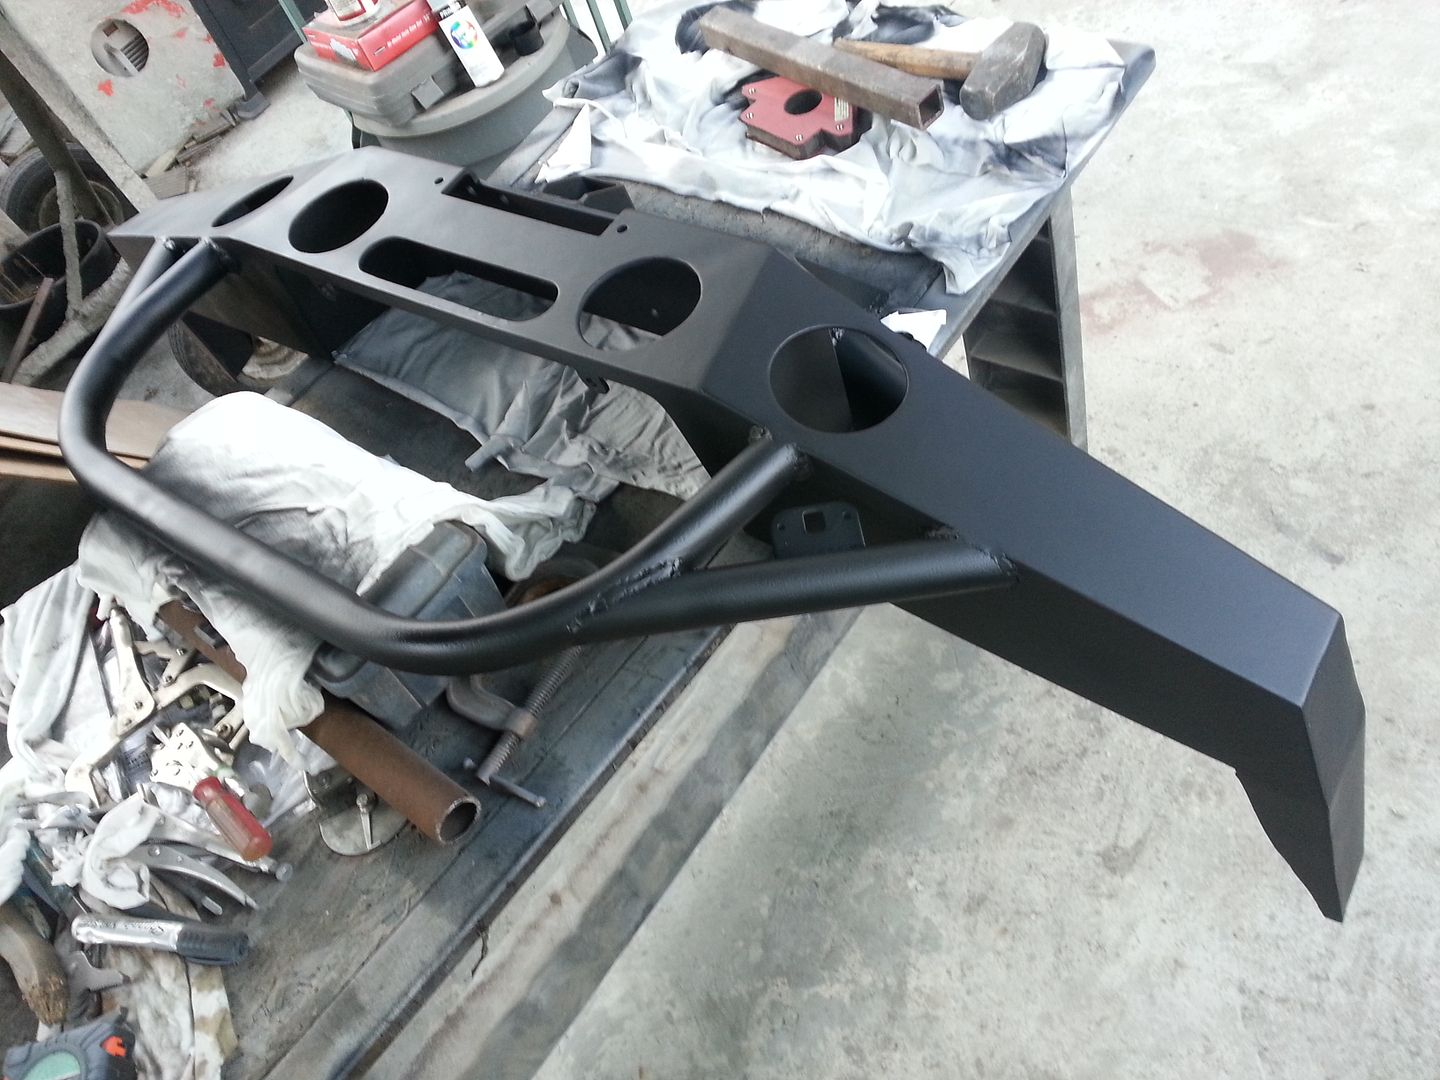
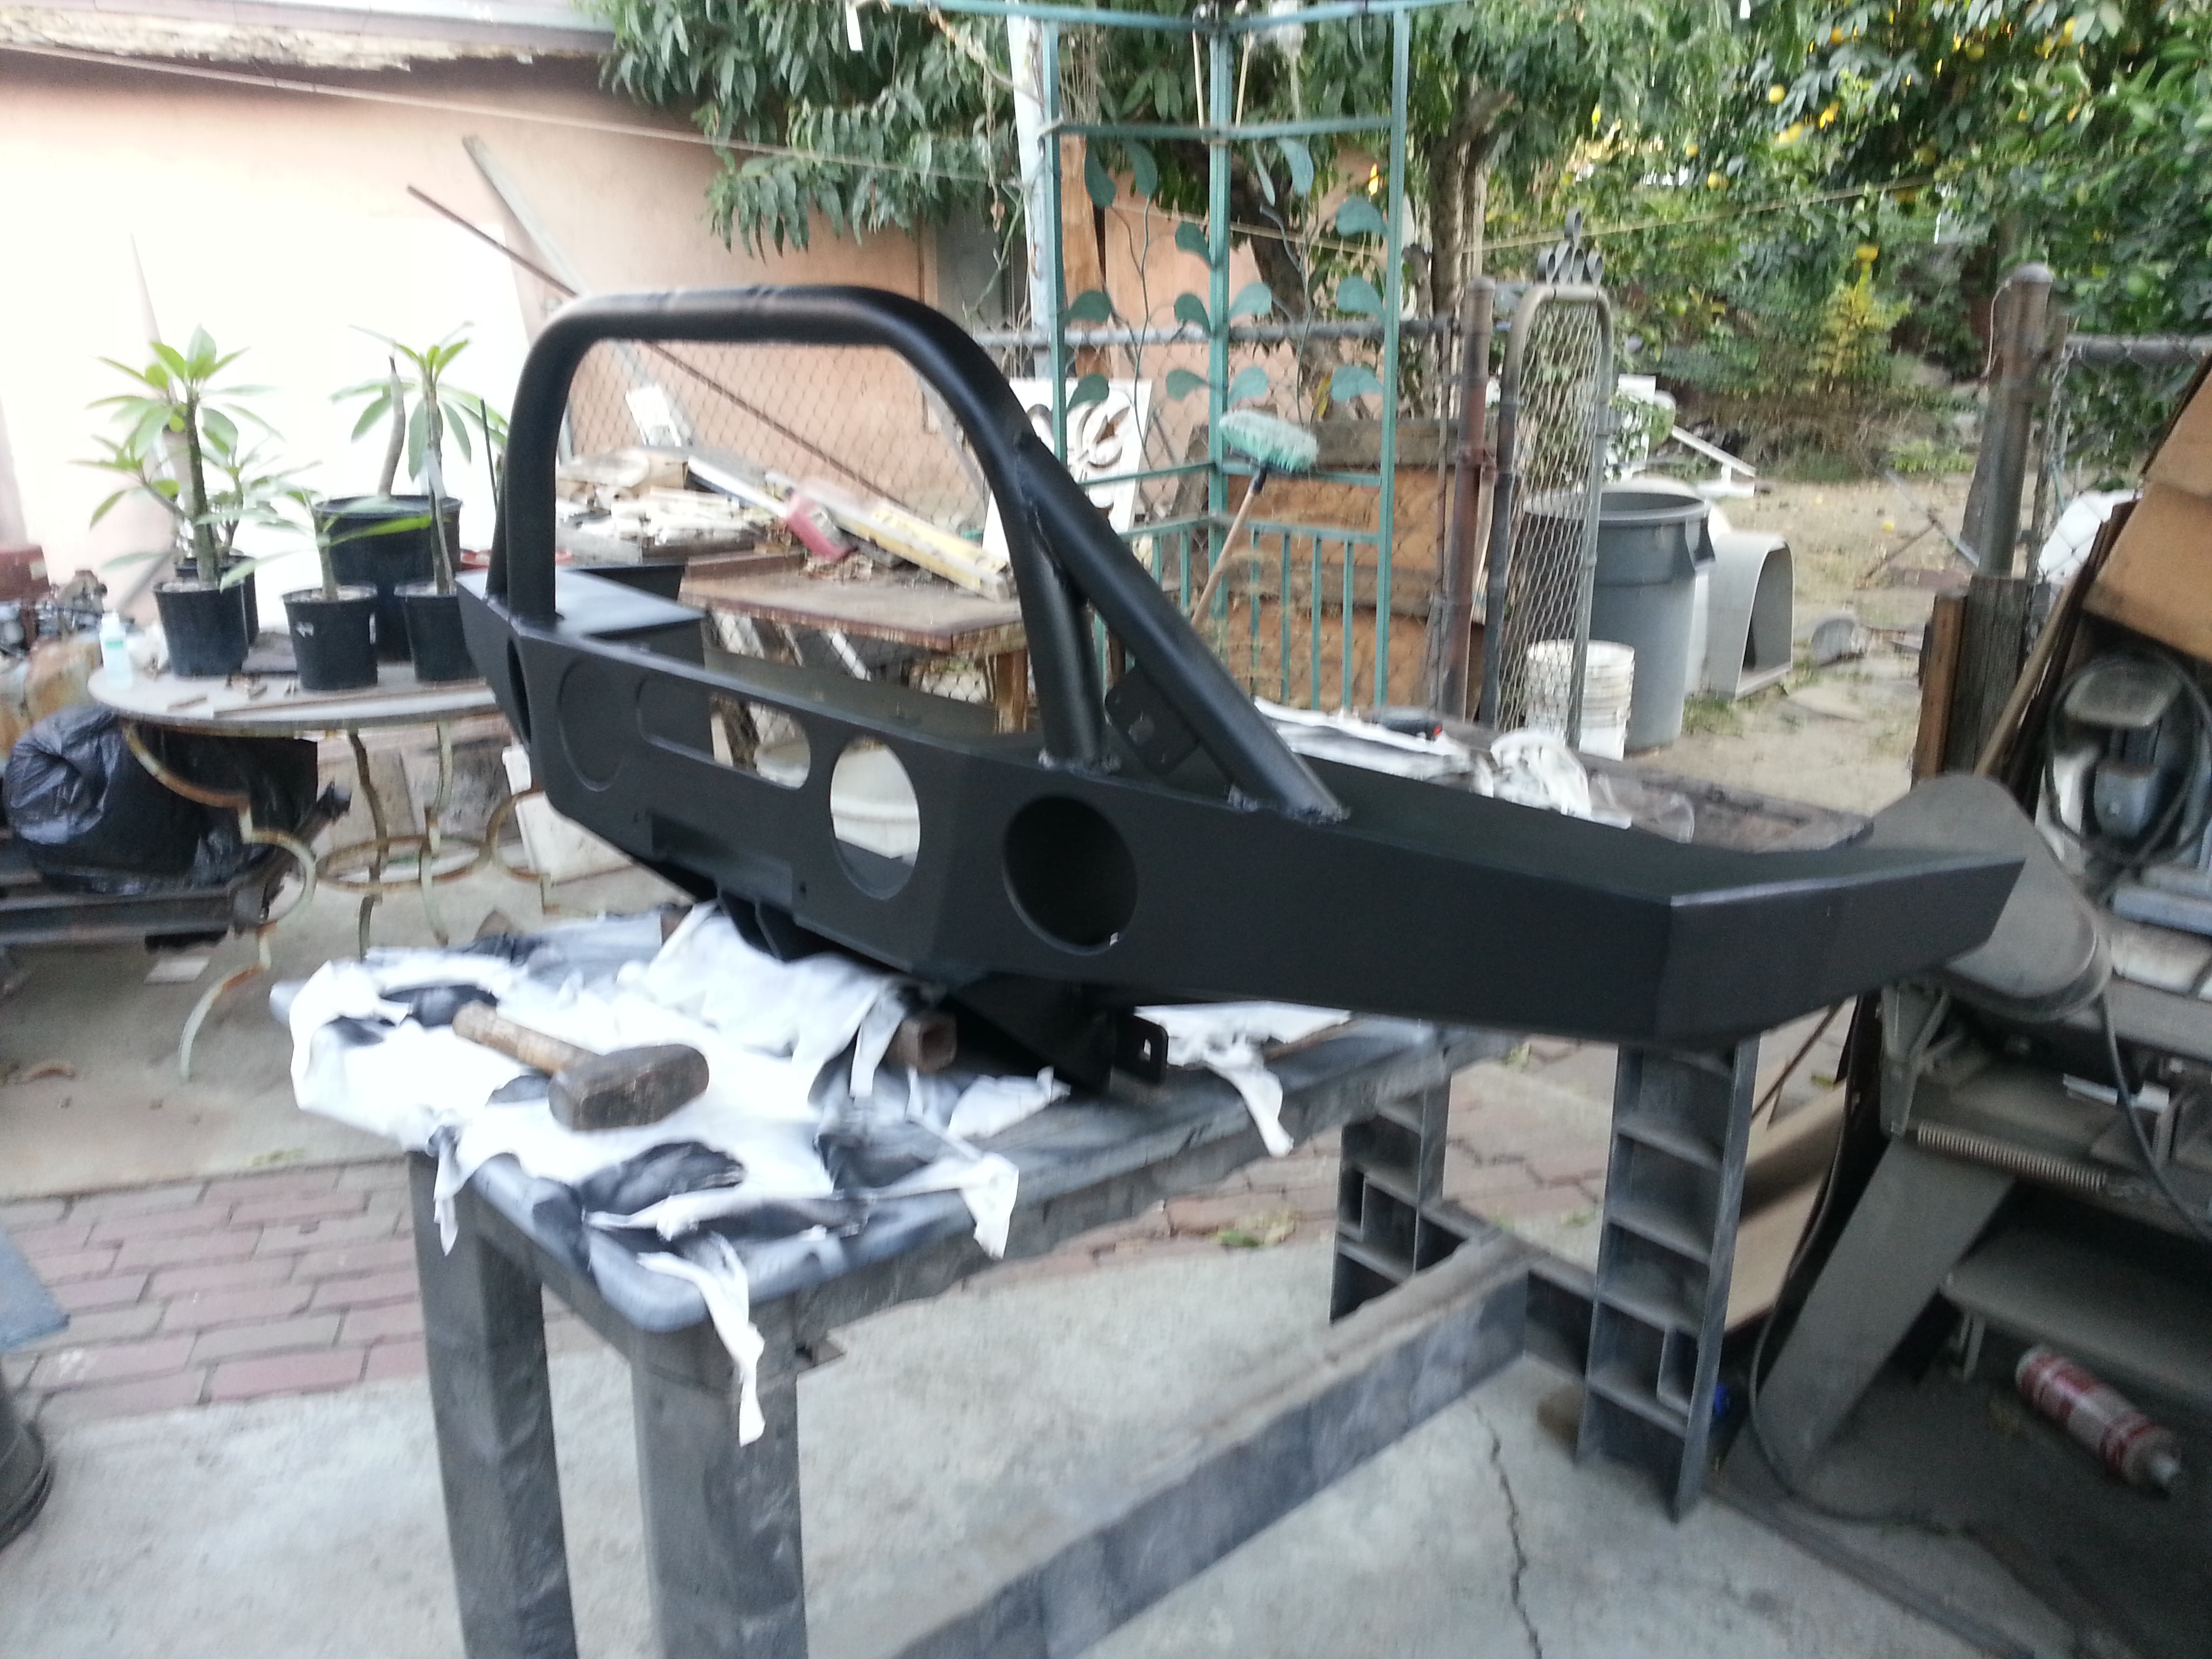
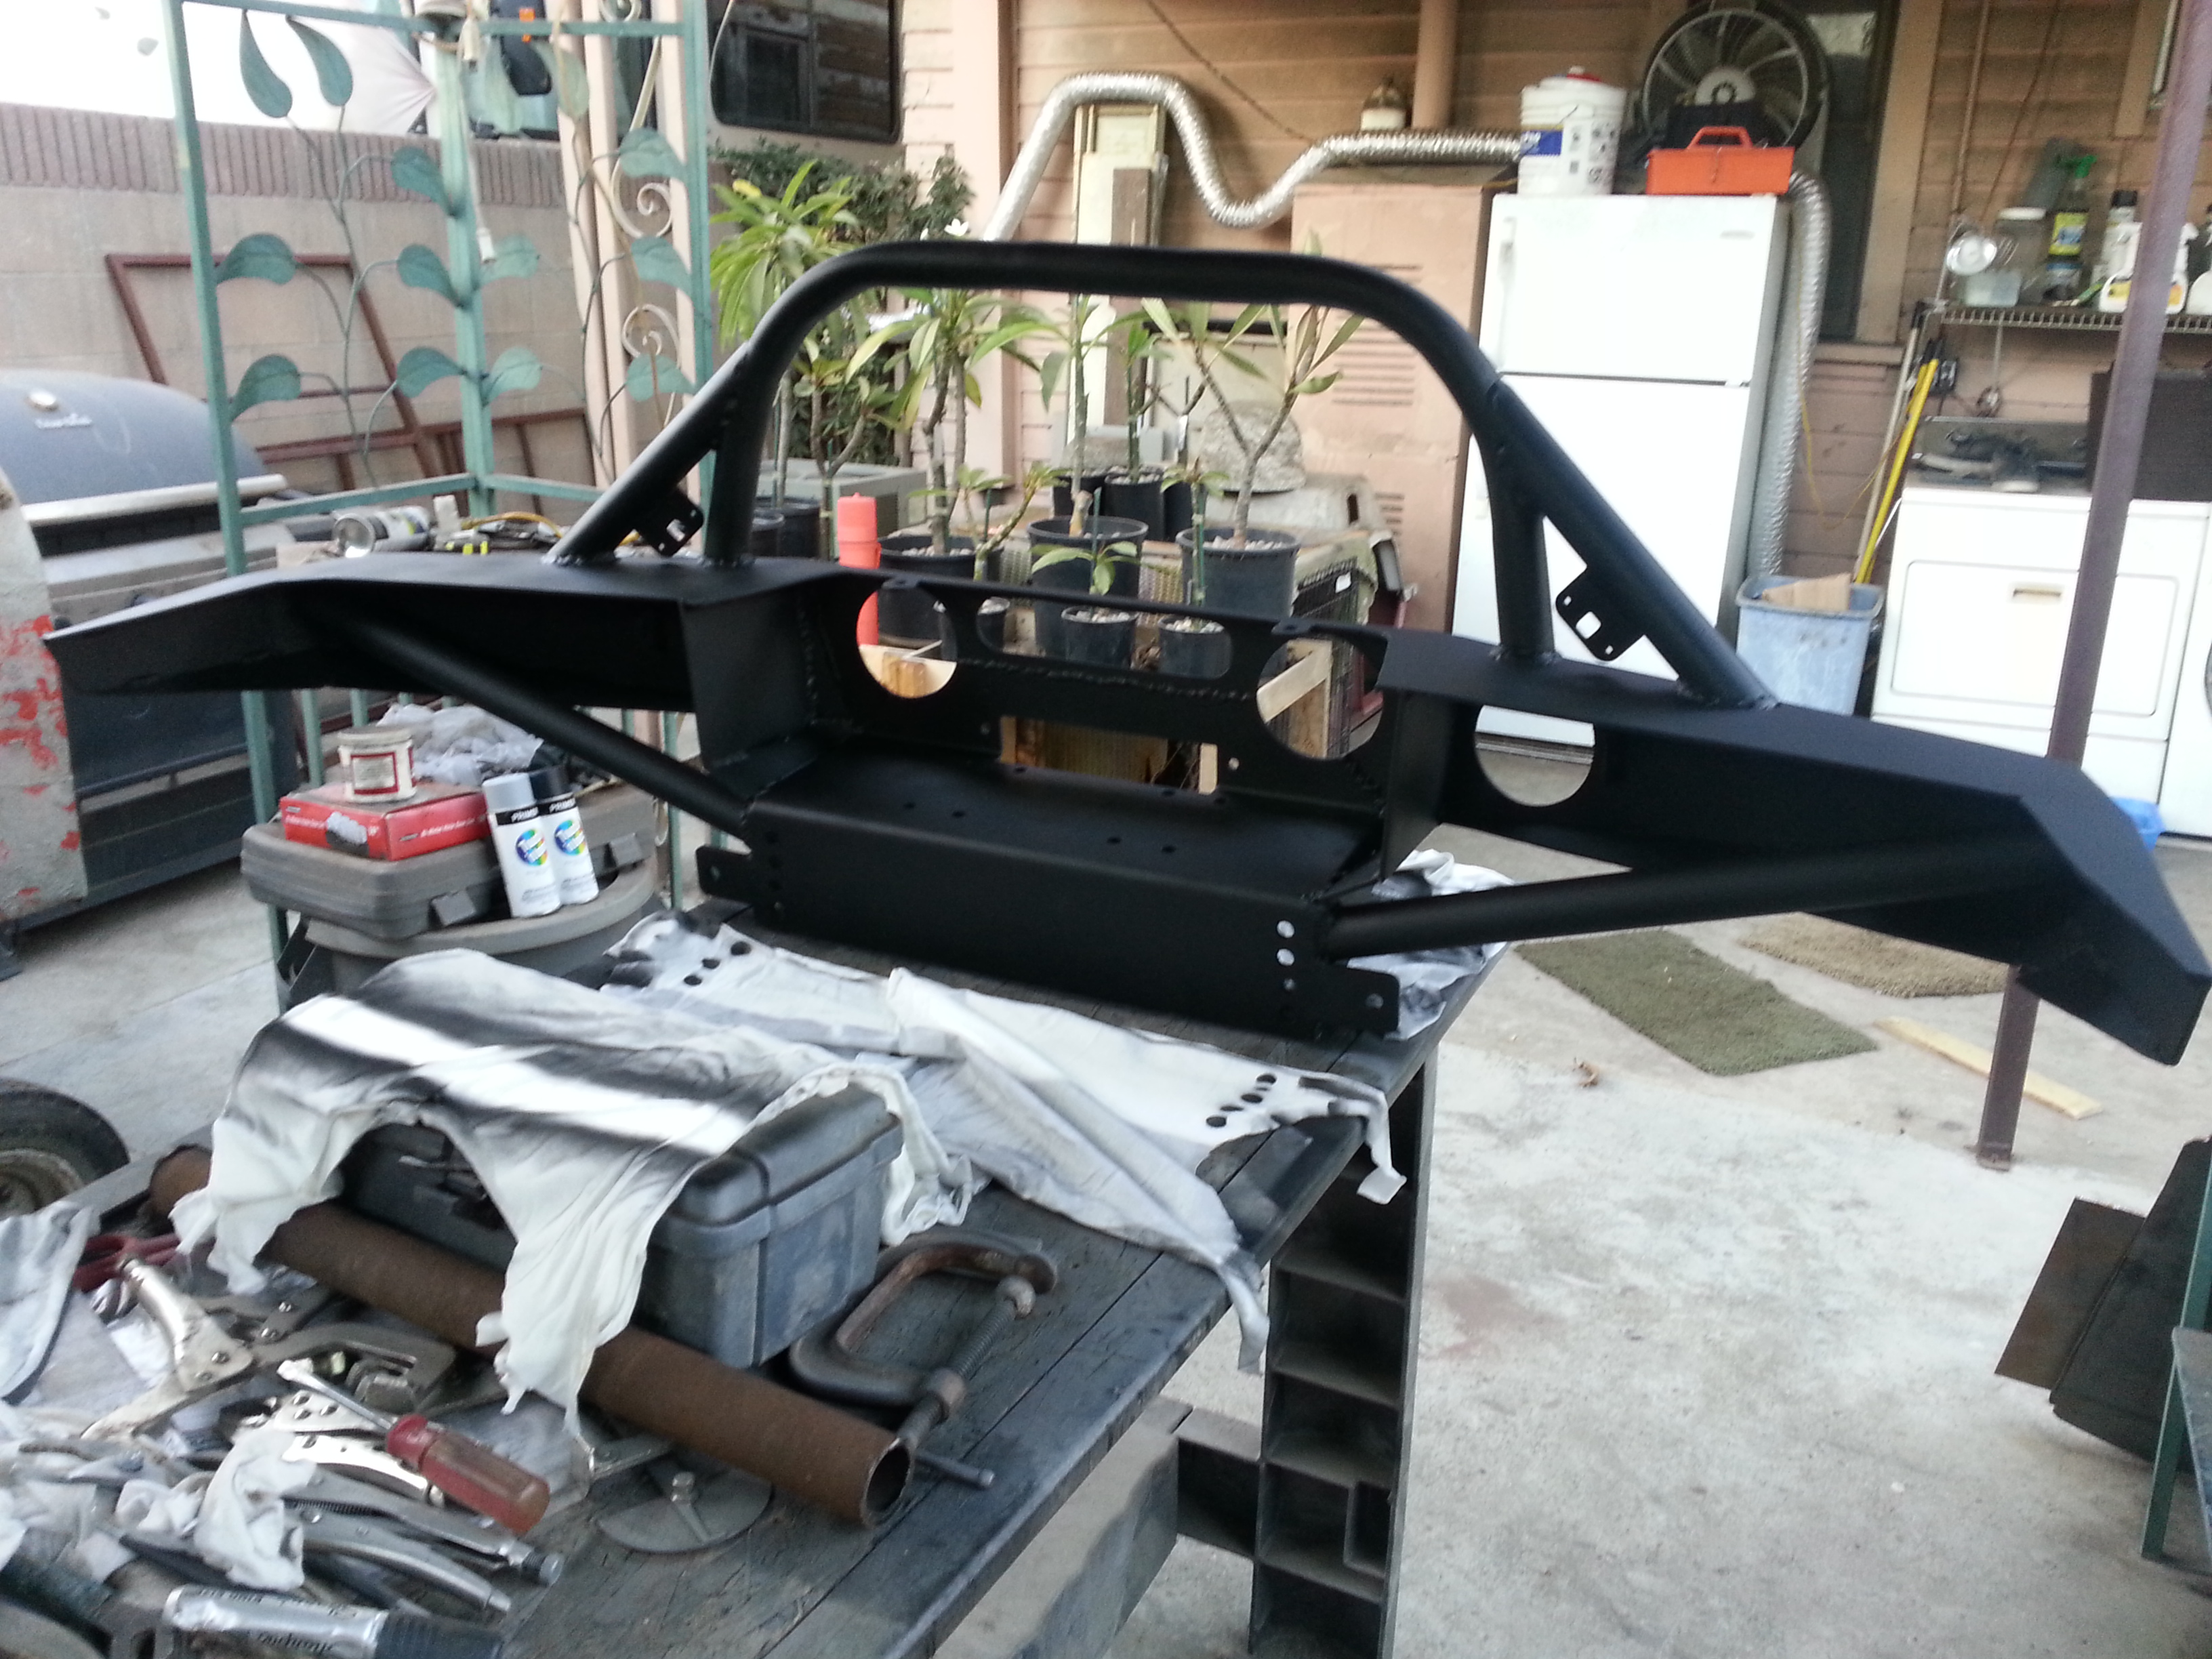
I'll give ya'll some more progress shots either tomorrow or saturday. Depending on when we begin to mount it. Stay tuned everybody!

Here she is guys!


I'll give ya'll some more progress shots either tomorrow or saturday. Depending on when we begin to mount it. Stay tuned everybody!

 Oct 31, 2013 | 09:51 PM
#107
Noooooo! You can absolutely never justify doing that to Jburt.... I tell you what, just bring it over and I'll take you to dinner cause I feel so bad you went through all that work! Hahahahaha... Can't even tell you how b***** that looks man! Congratulations!
Nov 1, 2013 | 04:28 PM
#110
Ran driver side 8" light ground wire to crossmember, passenger ground to same crossmember (those two bolts/ but you could run the two ground wires together and then solder them to a 10 gauge wire or so I'm just secure that one wire with a hoop connector to 1 bolt in the crossmember)......
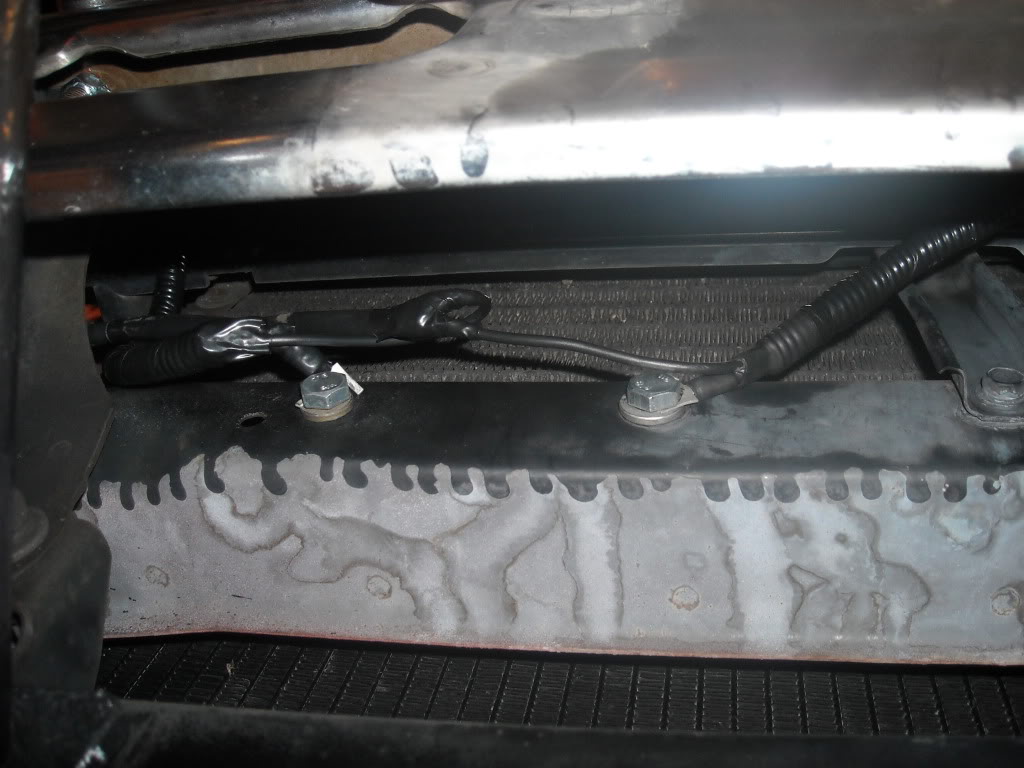
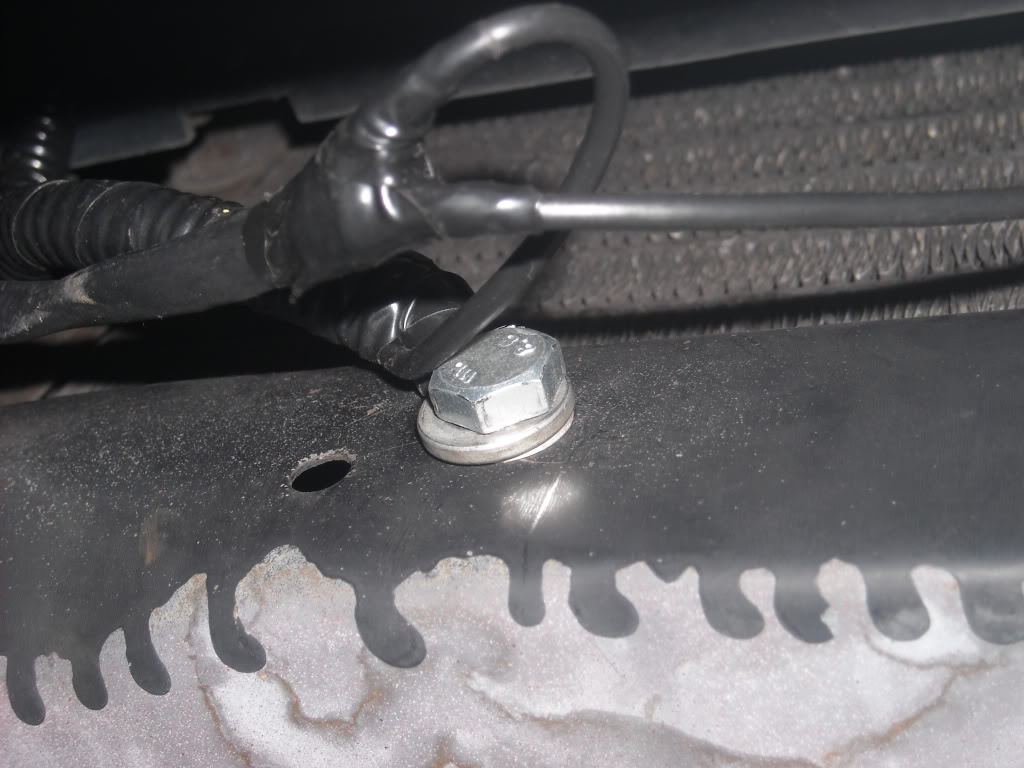
By then ran both 8 inch lights positive wires together and ran a single wire inside plastic wiring loom all the way to the relay.... Can see in the above picture the wires join together into one loom... This is where I run that through a mess around the back of the battery and up to the relay. In the third picture, below, you will see that I have the wiring for the relay ready to go from the lights into the relay which is not yet there. I also ran my power in wire from the fuse block up into that loom. The yellow wire is the two lights combined running to the relay, and I ran a red wire from the auxiliary fuse block to the power in portion of the relay ( I also used I believe a 5/8 rubber grommet to run the positive wire through that hole. It just isn't shown in the picture) ...


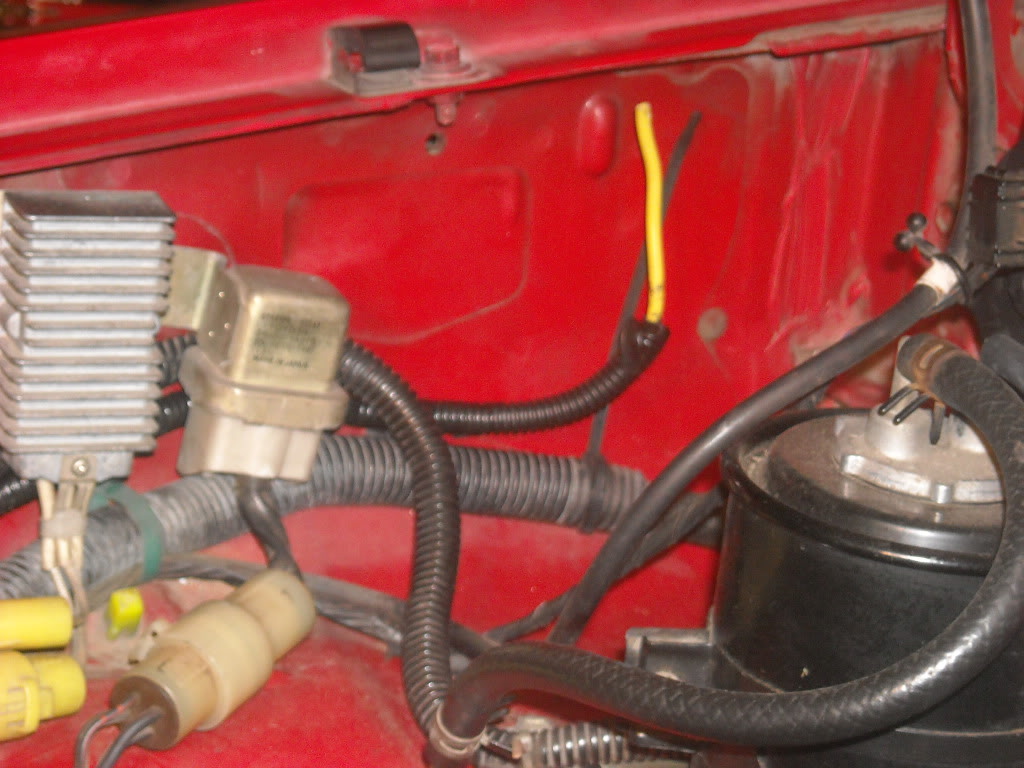
The third of 4 posts on the relay was the ground from the relay ground post directly to the fender wall behind it( I actually used red wire for that as well because I had some leftover, but I marked it with a magic marker. You can see the red wire on the fender wall to the left of the injector resistor( you could do it closer if you want using the self tapping screw... Just remember that there are lots of wires on the other side of that fender wall) . ....
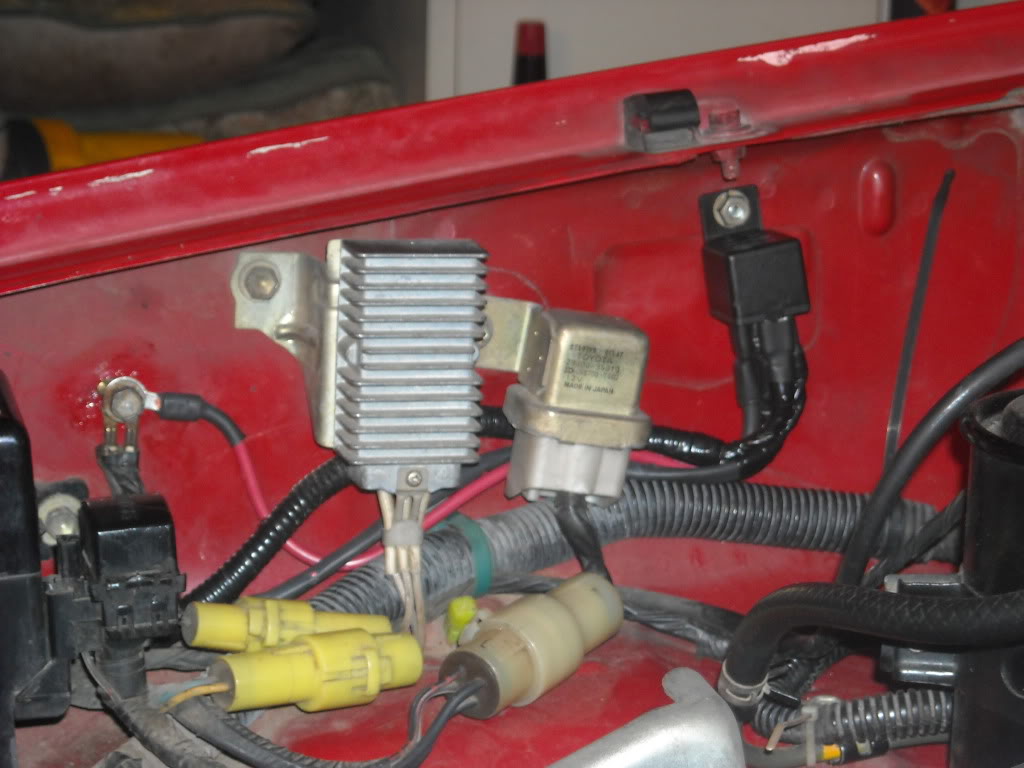
By then ran a white wire from the relay back towards the battery and through the hole in the center right there were the factory wiring harness goes through... I ran it up under the fender skirt and then through the antenna Gromit and up into the dash and then out of the radio bezel above the stereo( the white wire is coming from the relay and the red wire is coming from the defroster circuit on the kick panel fuse block....* if you are going to use a lighted switch, it will have three poles on it, so you will just run the second wire from the defroster circuit to the light pole on the switch... In other words you would have two red wires or a red and a blue or whatever you want, instead of one. Obviously the white wire goes from the switch directly to the switch pole on the relay)....
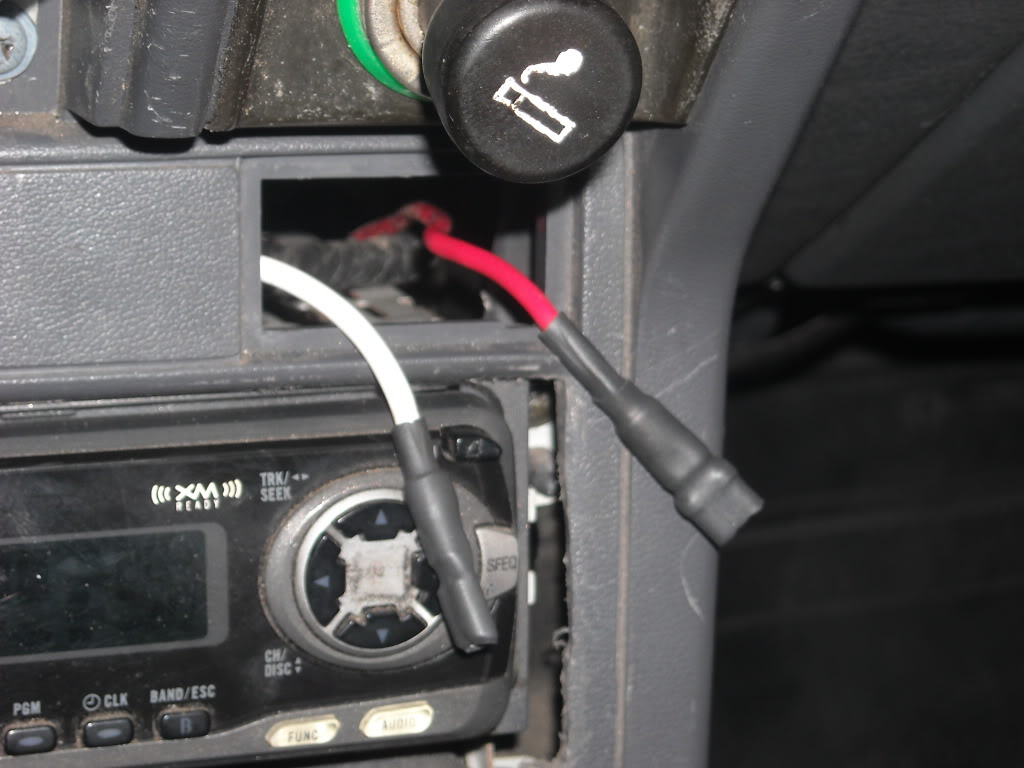
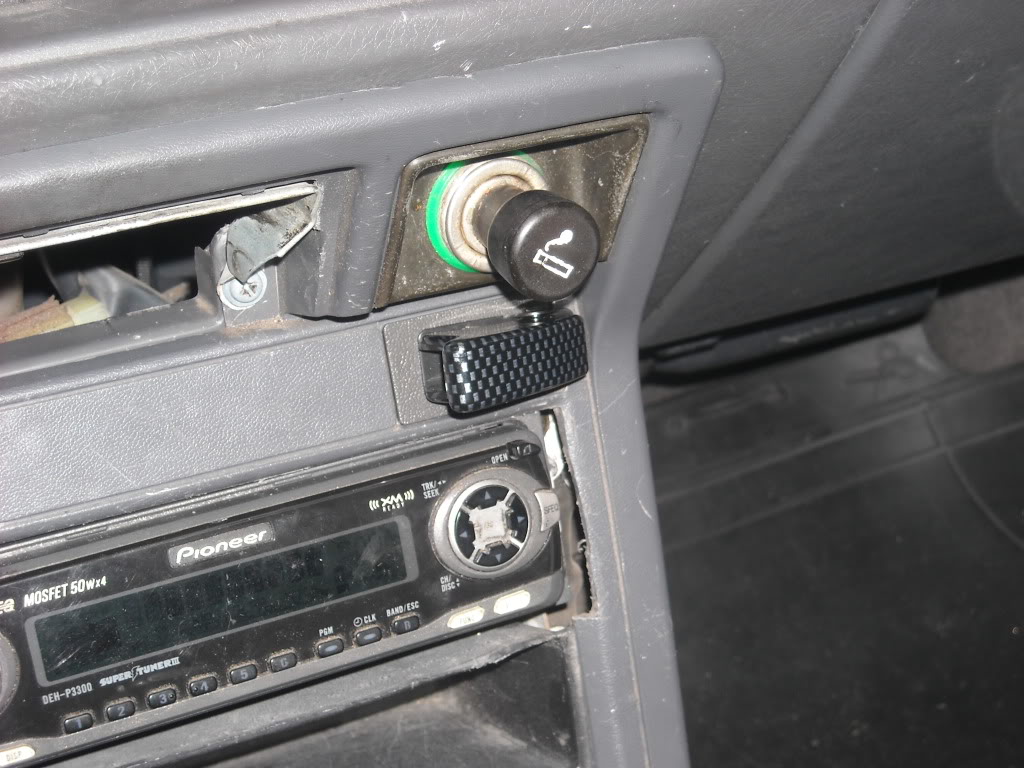
Here is the switch installed which fit perfectly into one of those rectangular caps after I cut the recommended diameter hole to fit the switch( these Texas which is look squared on the back they are around with a nut. Around portion or sleeve bolt goes through the hole in the dash of the nut secures it from behind)...
Seeing this next picture that I got the factory TOYOTA return your plug between the nut and the switch housing...

I did all my connections like this, right at the relay because I didn't want to use the Quick Connect wiring which was smaller then my power source and so forth.... But you can definitely use the 14 gauge wire that they provide in that 2 piece relay kit( you can also see in the picture of the relay mounted that I didn't use that bottom Quick Connect piece).... Everything he trunk right up to the end of the female spade connectors ( the 4th female speed connector was actually the ground that I put on later. ) ....
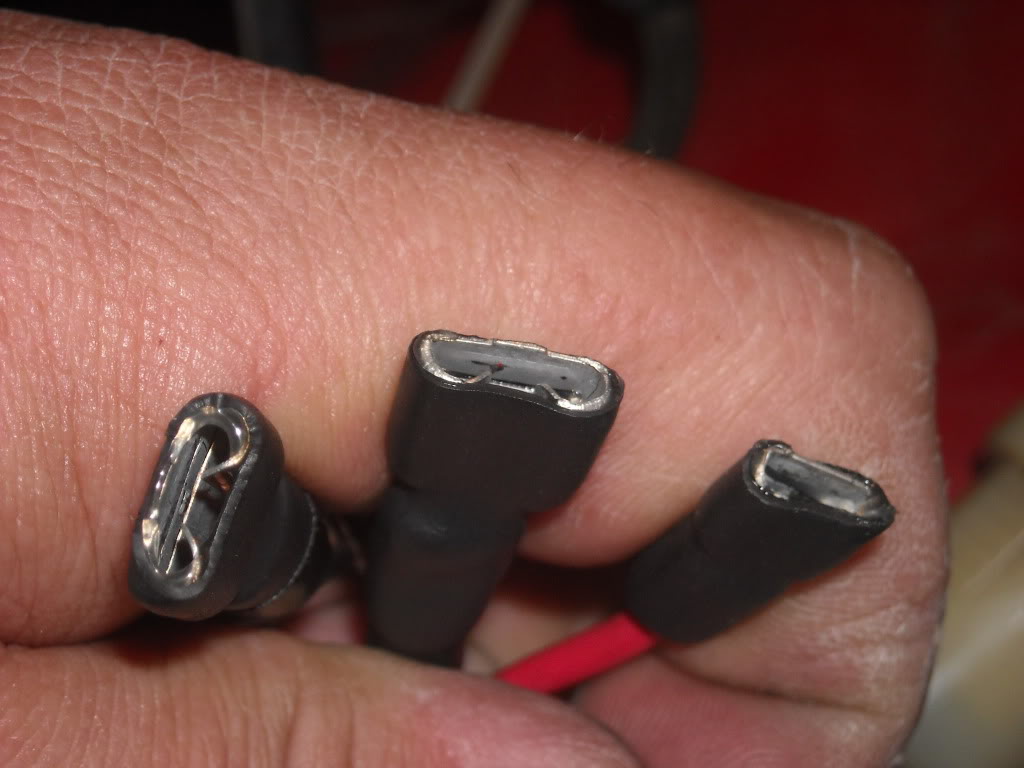
Also, this relay had 5 pins, the center pin not being used I simply made a little spade connector that was closed and he trunk on the other side just like this and covered it up
..

Everything was soldered and you can see how hard I will and everything still works.
You should also check out while you are at Pep Boys the switch is where they have a panel that can hold two switches at a time... You could simply bolted up into the edge of the bottom of the radio bezel.... The second switch, which will run your 4 inch LED's, could sit right next to it . Getting a switch housing like that will prevent you from having to put holes in your radio bezel for now... You may decide to do some fancy switches later, that you would put in the dash, and that way your radio bezel or dash won't be mutilated to the point that you can't put those type switches in( the soft touch one that I used as an example, it is square on the back in there is no securing nut, it rather simply pops into place after a little manipulating of the hold is already in the radio bezel.
I gotta run but I will come back and clean this post up and give you some diagrams as well. In the meantime I'm sure ray or somebody will beat me to it. I'll be glad to help you if I can, give me a call man.
By then ran both 8 inch lights positive wires together and ran a single wire inside plastic wiring loom all the way to the relay.... Can see in the above picture the wires join together into one loom... This is where I run that through a mess around the back of the battery and up to the relay. In the third picture, below, you will see that I have the wiring for the relay ready to go from the lights into the relay which is not yet there. I also ran my power in wire from the fuse block up into that loom. The yellow wire is the two lights combined running to the relay, and I ran a red wire from the auxiliary fuse block to the power in portion of the relay ( I also used I believe a 5/8 rubber grommet to run the positive wire through that hole. It just isn't shown in the picture) ...
The third of 4 posts on the relay was the ground from the relay ground post directly to the fender wall behind it( I actually used red wire for that as well because I had some leftover, but I marked it with a magic marker. You can see the red wire on the fender wall to the left of the injector resistor( you could do it closer if you want using the self tapping screw... Just remember that there are lots of wires on the other side of that fender wall) . ....
By then ran a white wire from the relay back towards the battery and through the hole in the center right there were the factory wiring harness goes through... I ran it up under the fender skirt and then through the antenna Gromit and up into the dash and then out of the radio bezel above the stereo( the white wire is coming from the relay and the red wire is coming from the defroster circuit on the kick panel fuse block....* if you are going to use a lighted switch, it will have three poles on it, so you will just run the second wire from the defroster circuit to the light pole on the switch... In other words you would have two red wires or a red and a blue or whatever you want, instead of one. Obviously the white wire goes from the switch directly to the switch pole on the relay)....
Here is the switch installed which fit perfectly into one of those rectangular caps after I cut the recommended diameter hole to fit the switch( these Texas which is look squared on the back they are around with a nut. Around portion or sleeve bolt goes through the hole in the dash of the nut secures it from behind)...
Seeing this next picture that I got the factory TOYOTA return your plug between the nut and the switch housing...
I did all my connections like this, right at the relay because I didn't want to use the Quick Connect wiring which was smaller then my power source and so forth.... But you can definitely use the 14 gauge wire that they provide in that 2 piece relay kit( you can also see in the picture of the relay mounted that I didn't use that bottom Quick Connect piece).... Everything he trunk right up to the end of the female spade connectors ( the 4th female speed connector was actually the ground that I put on later. ) ....
Also, this relay had 5 pins, the center pin not being used I simply made a little spade connector that was closed and he trunk on the other side just like this and covered it up
..
Everything was soldered and you can see how hard I will and everything still works.
You should also check out while you are at Pep Boys the switch is where they have a panel that can hold two switches at a time... You could simply bolted up into the edge of the bottom of the radio bezel.... The second switch, which will run your 4 inch LED's, could sit right next to it . Getting a switch housing like that will prevent you from having to put holes in your radio bezel for now... You may decide to do some fancy switches later, that you would put in the dash, and that way your radio bezel or dash won't be mutilated to the point that you can't put those type switches in( the soft touch one that I used as an example, it is square on the back in there is no securing nut, it rather simply pops into place after a little manipulating of the hold is already in the radio bezel.
I gotta run but I will come back and clean this post up and give you some diagrams as well. In the meantime I'm sure ray or somebody will beat me to it. I'll be glad to help you if I can, give me a call man.
Nov 1, 2013 | 07:38 PM
#111
Thread Starter
Registered User
Joined: Apr 2012
Posts: 2,817
Likes: 2
From: Los Angeles CA
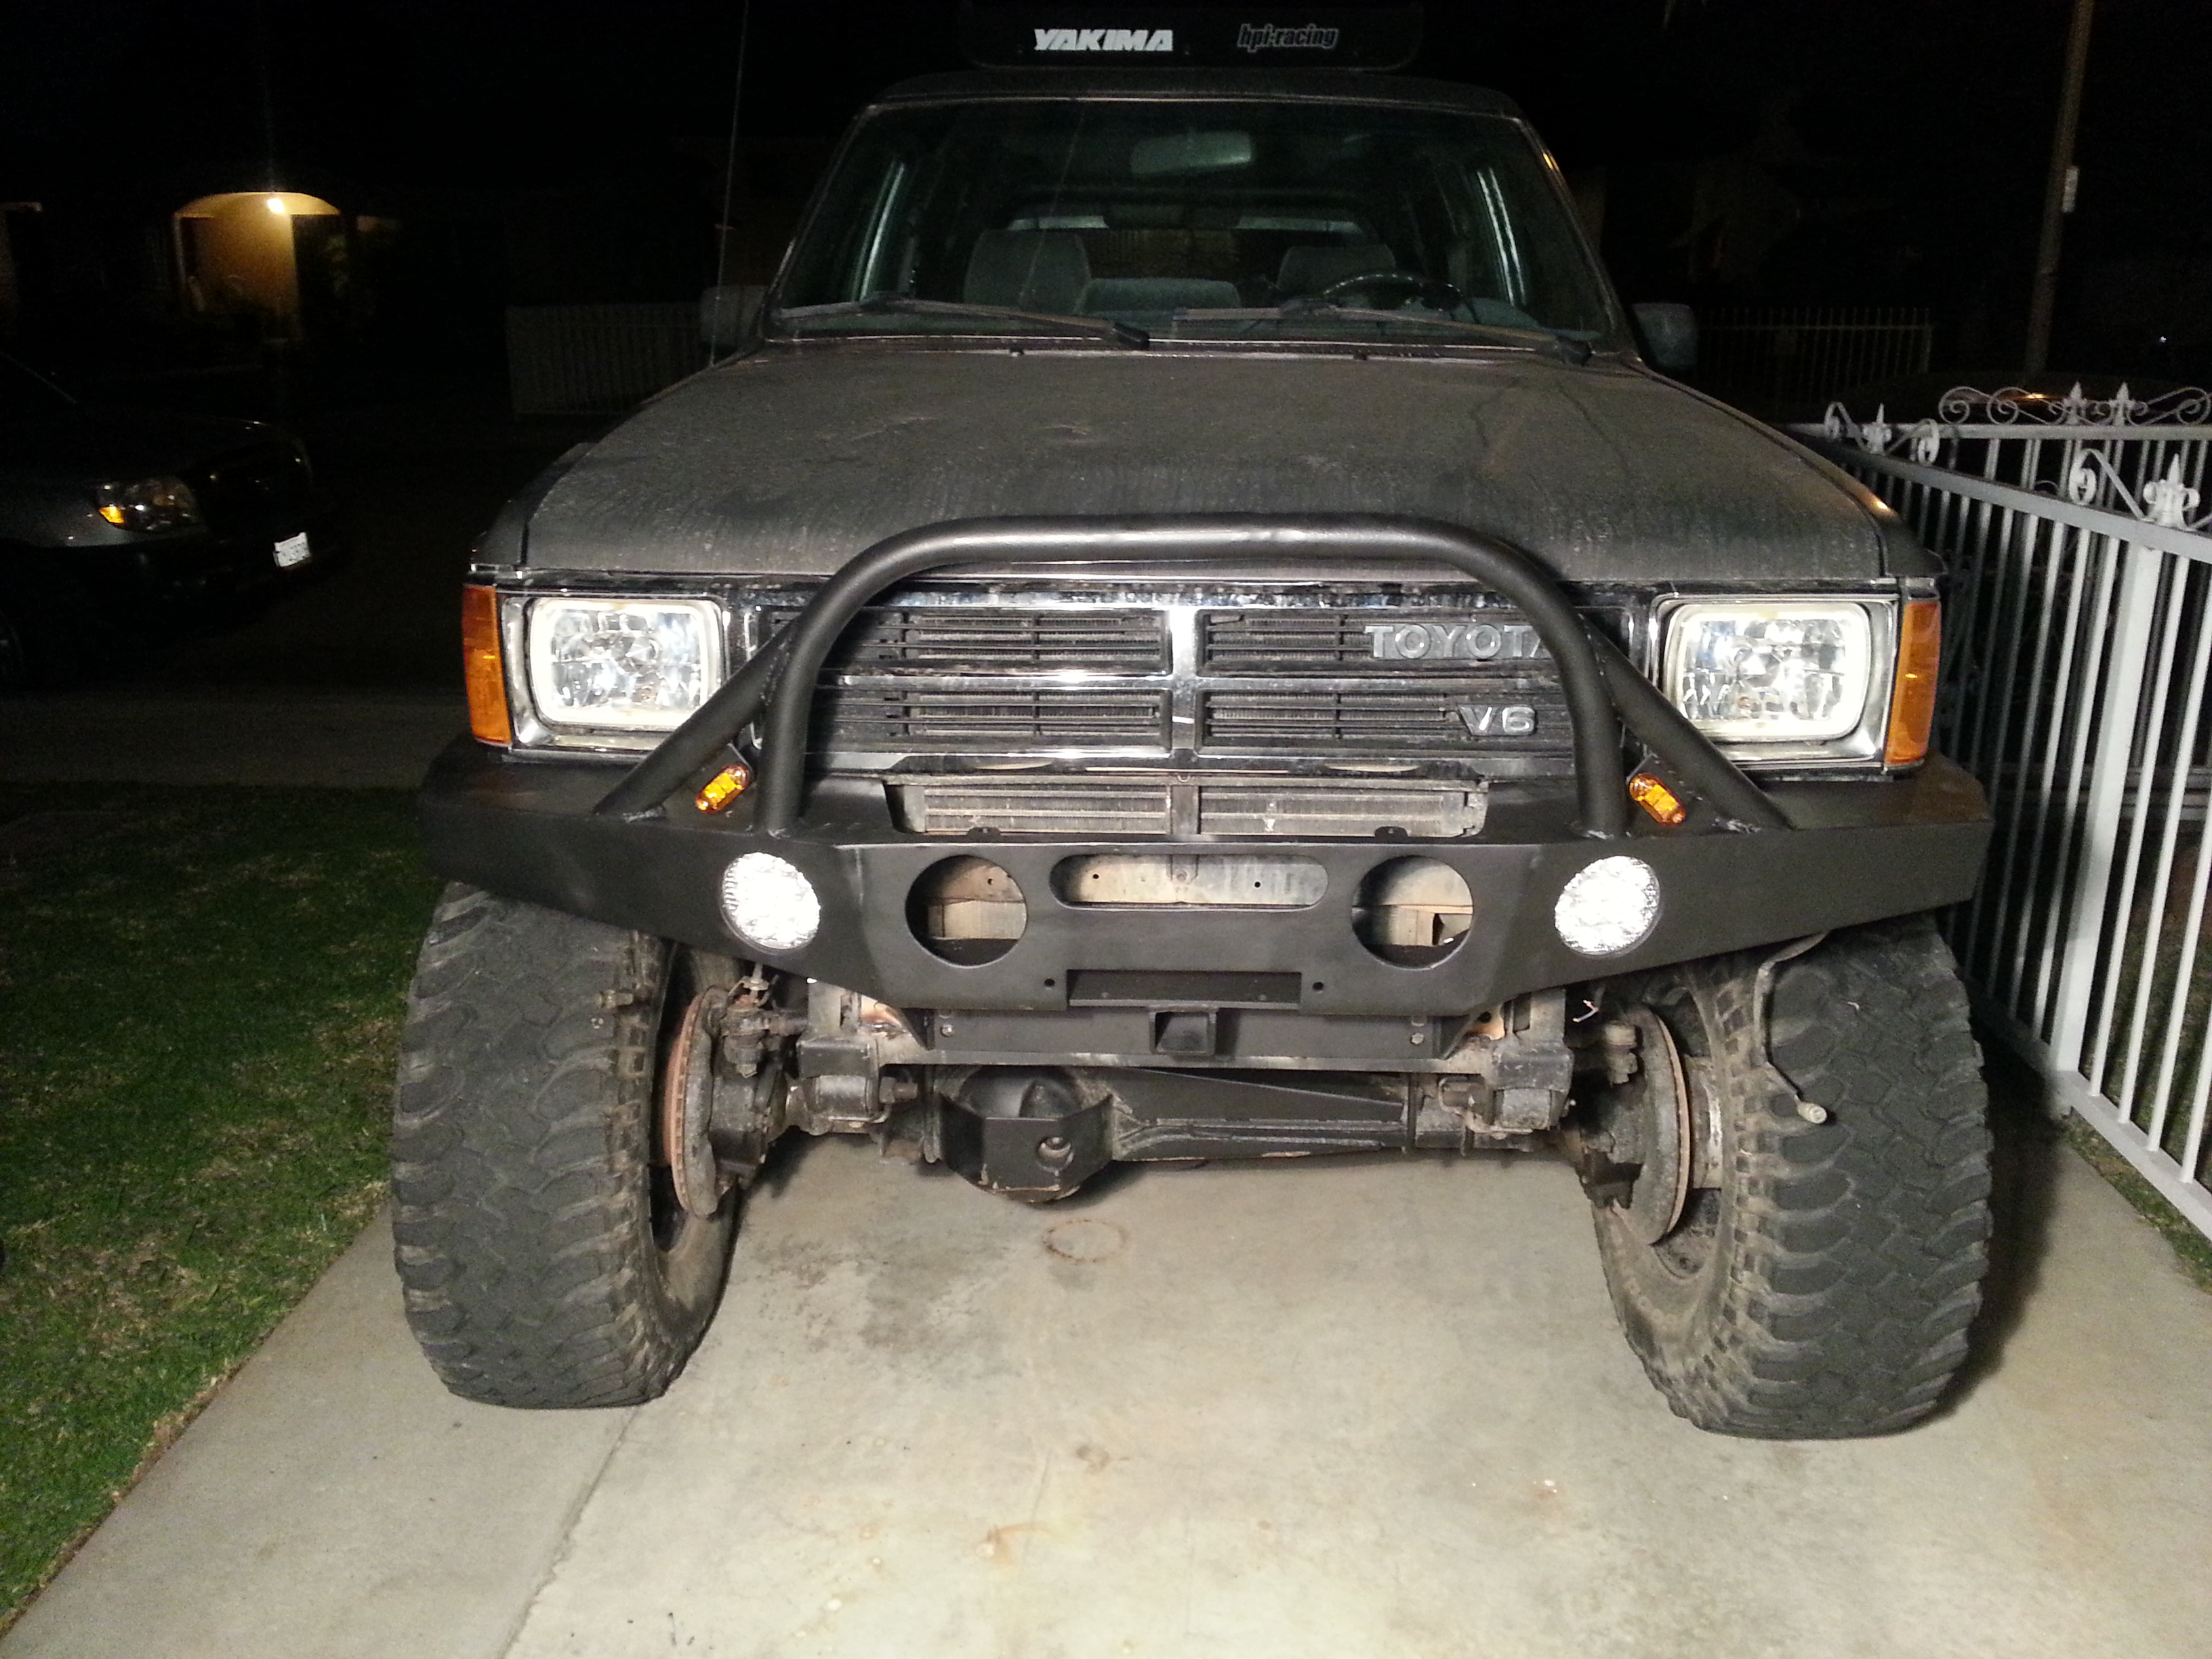
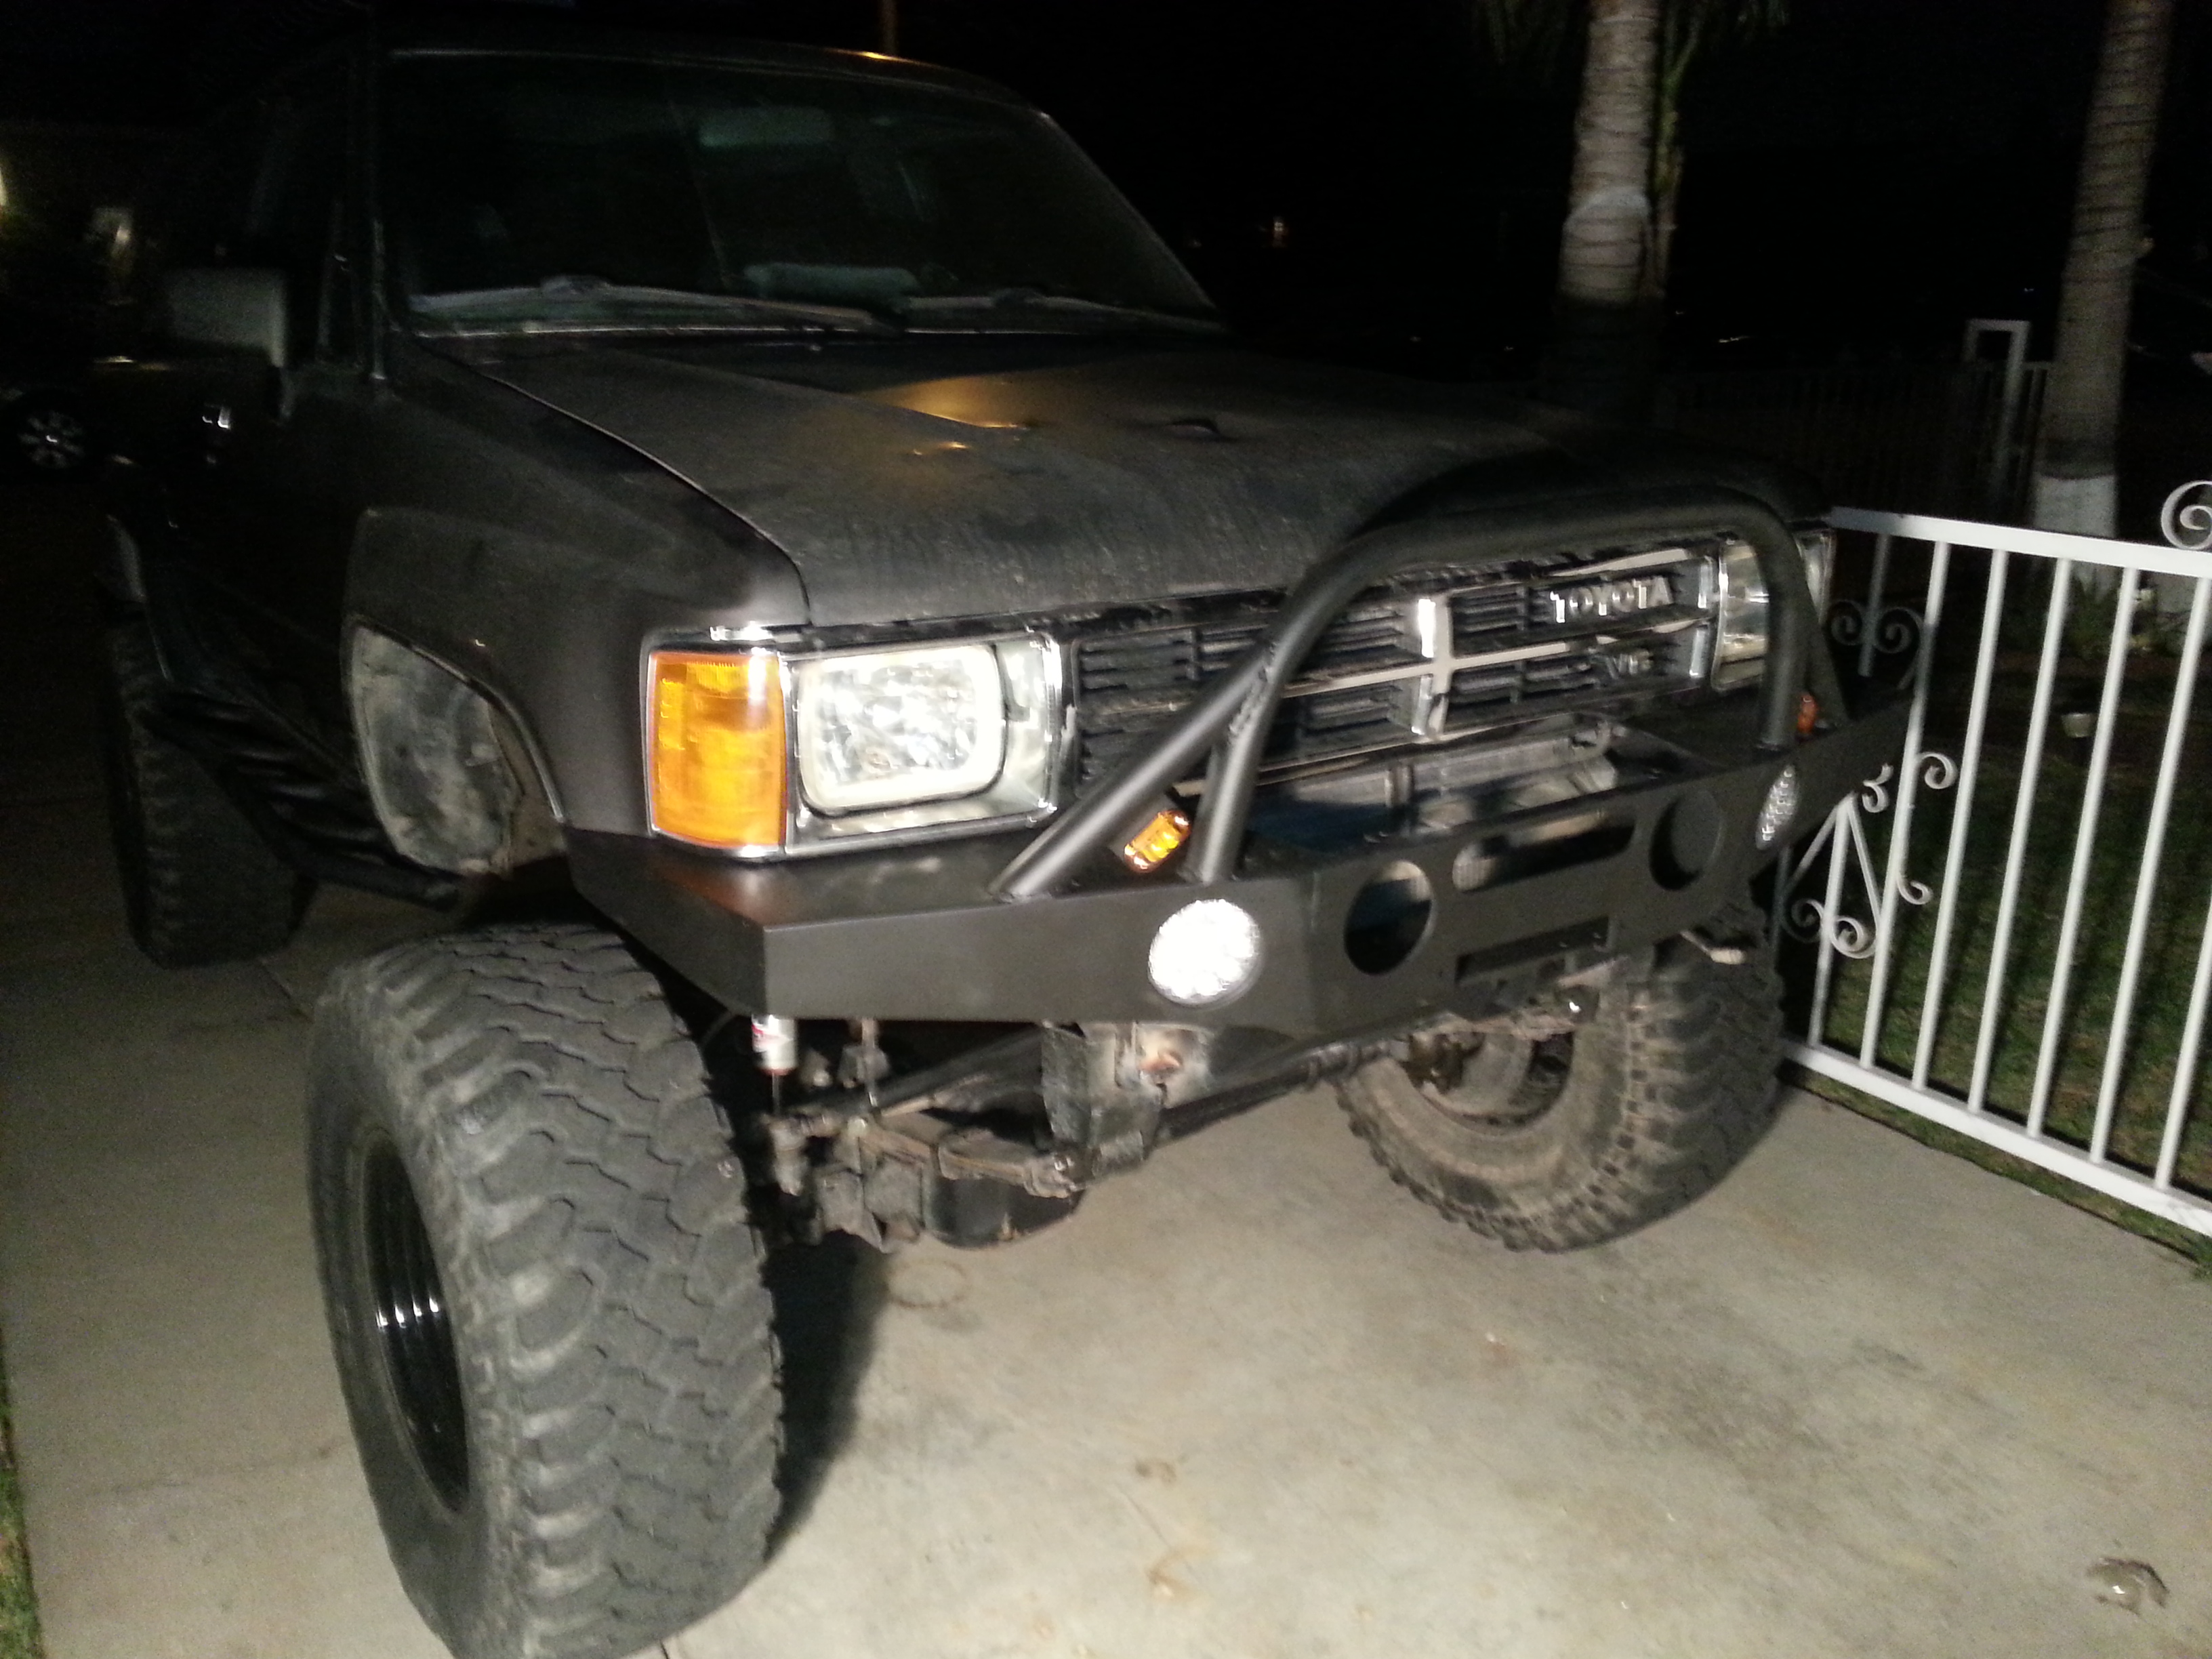
Anyone ask for a face lift?
Only had about 1 hour before it got dark when i got home. But ive been known to be impatient so i started prepping the frame to weld on while my dad made his way home haha! Here we have my dad welding the frame reinforcement on to the truck.
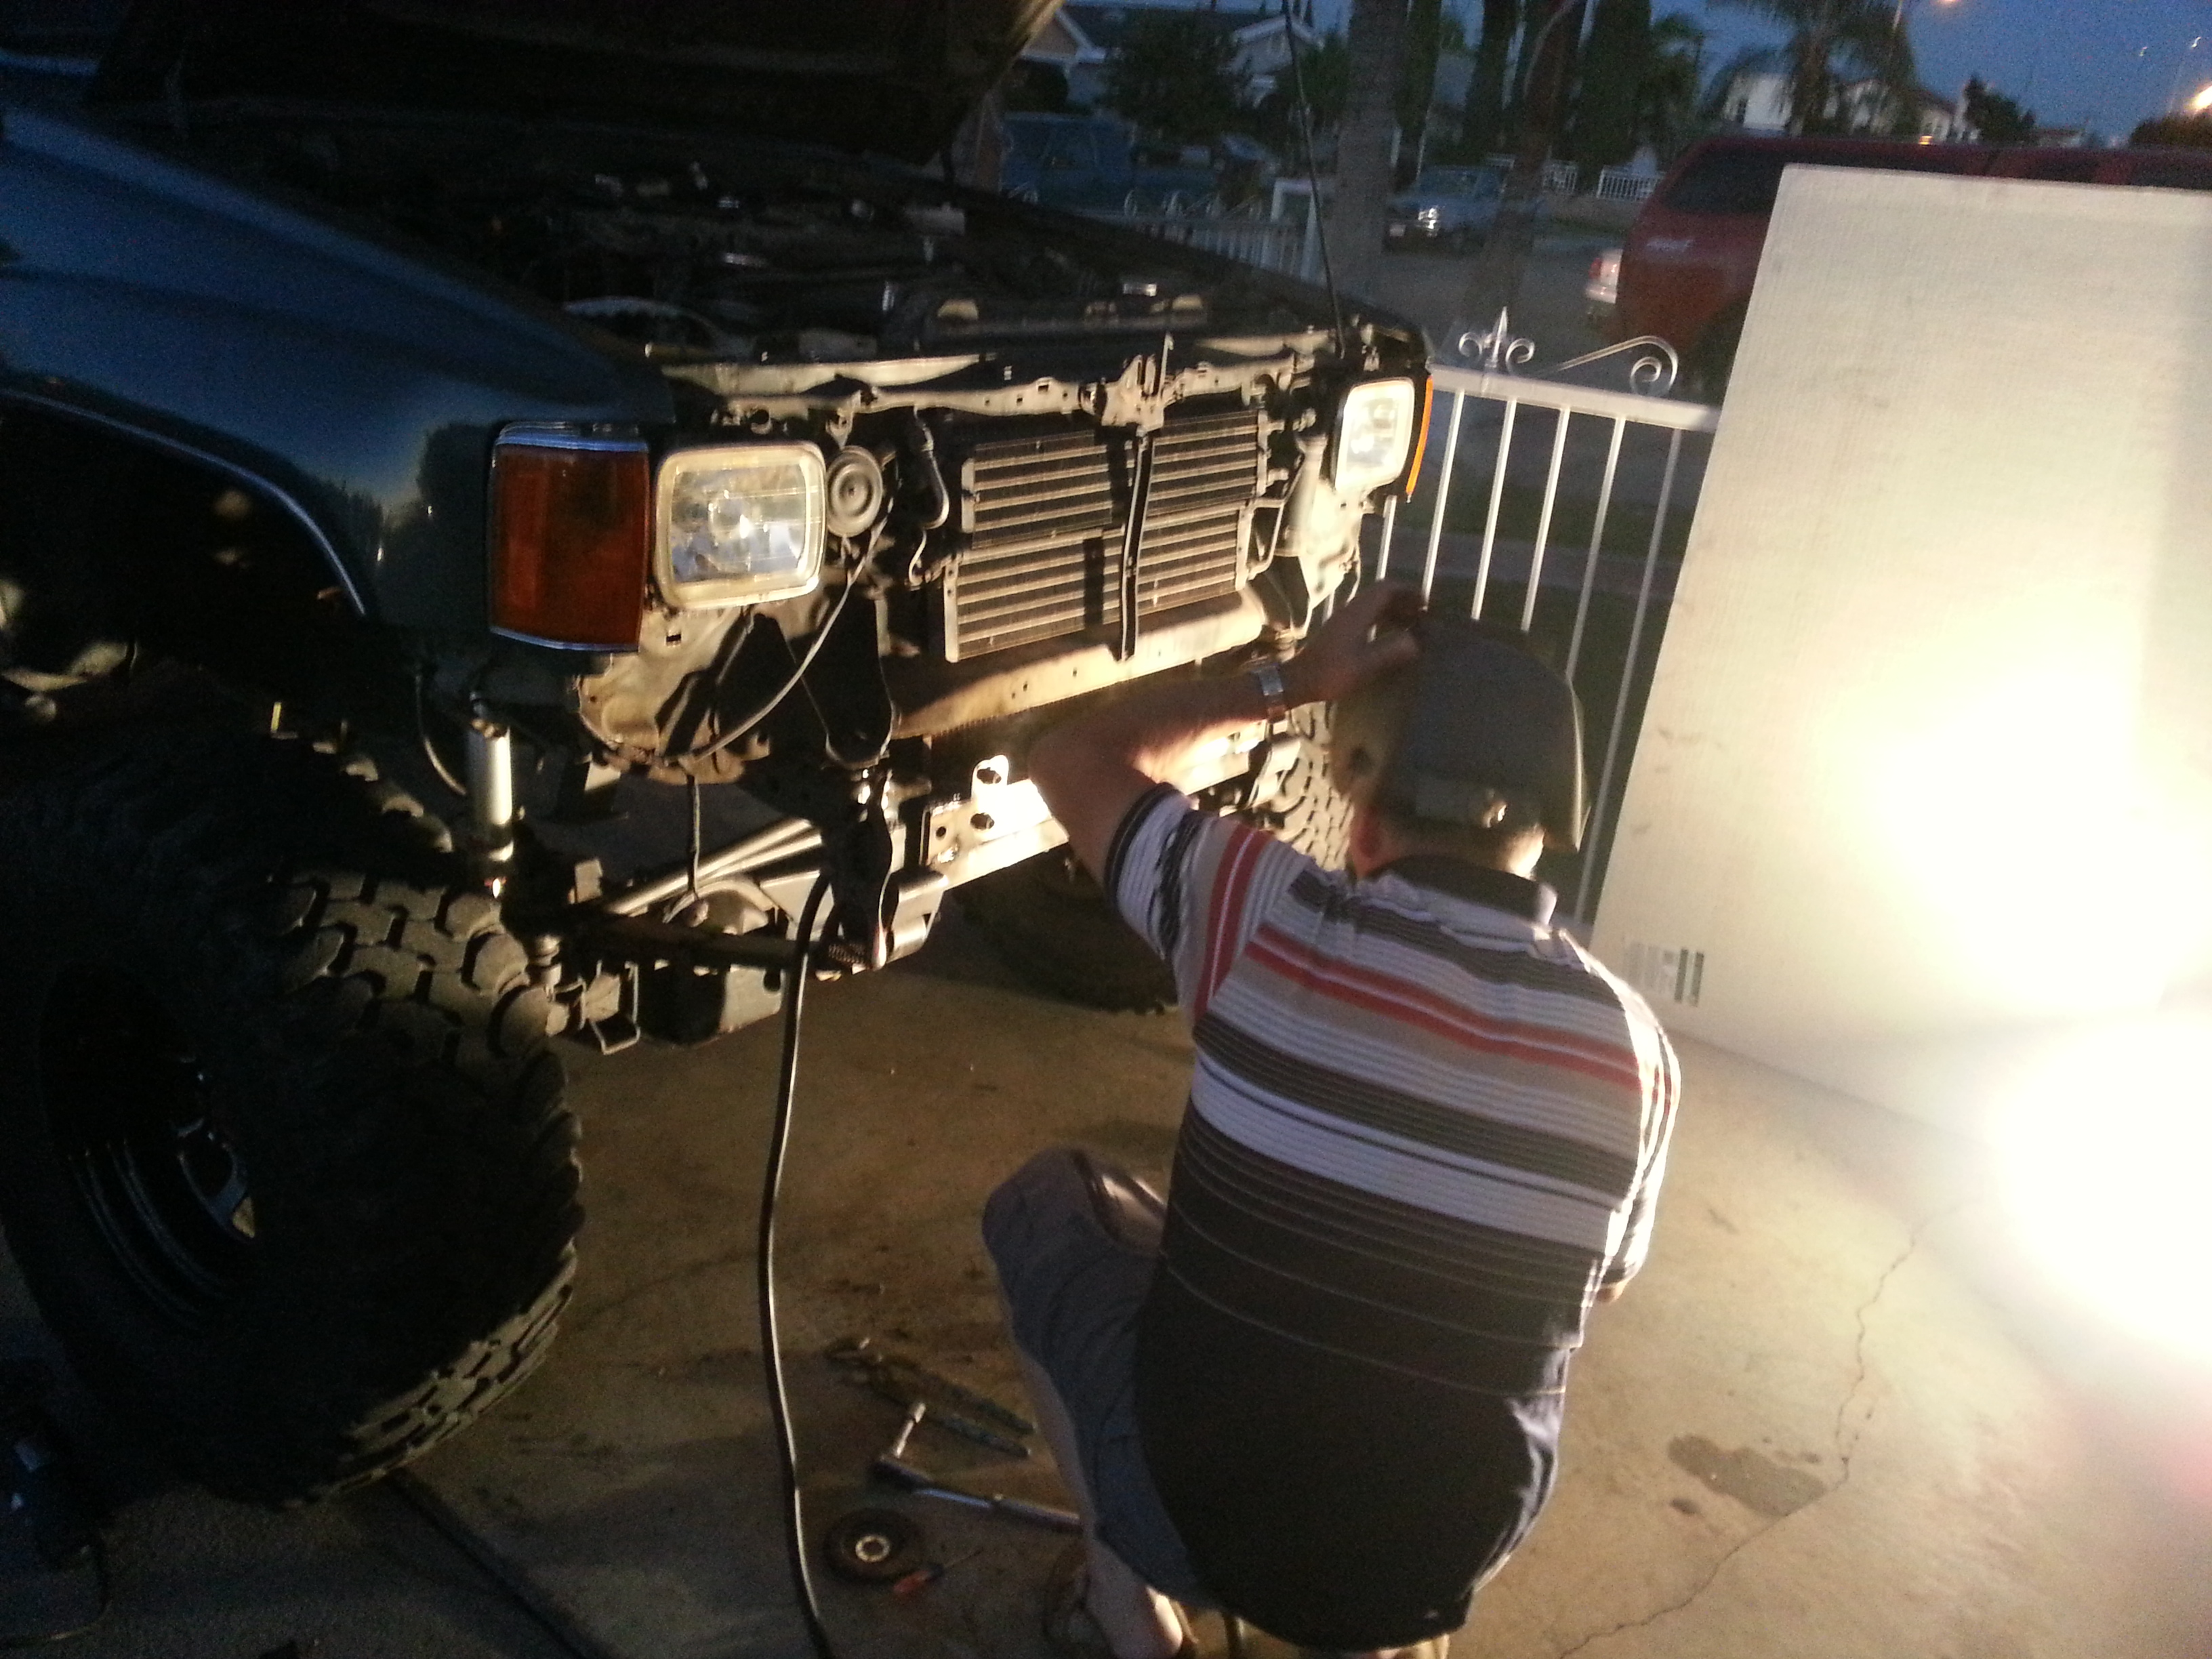
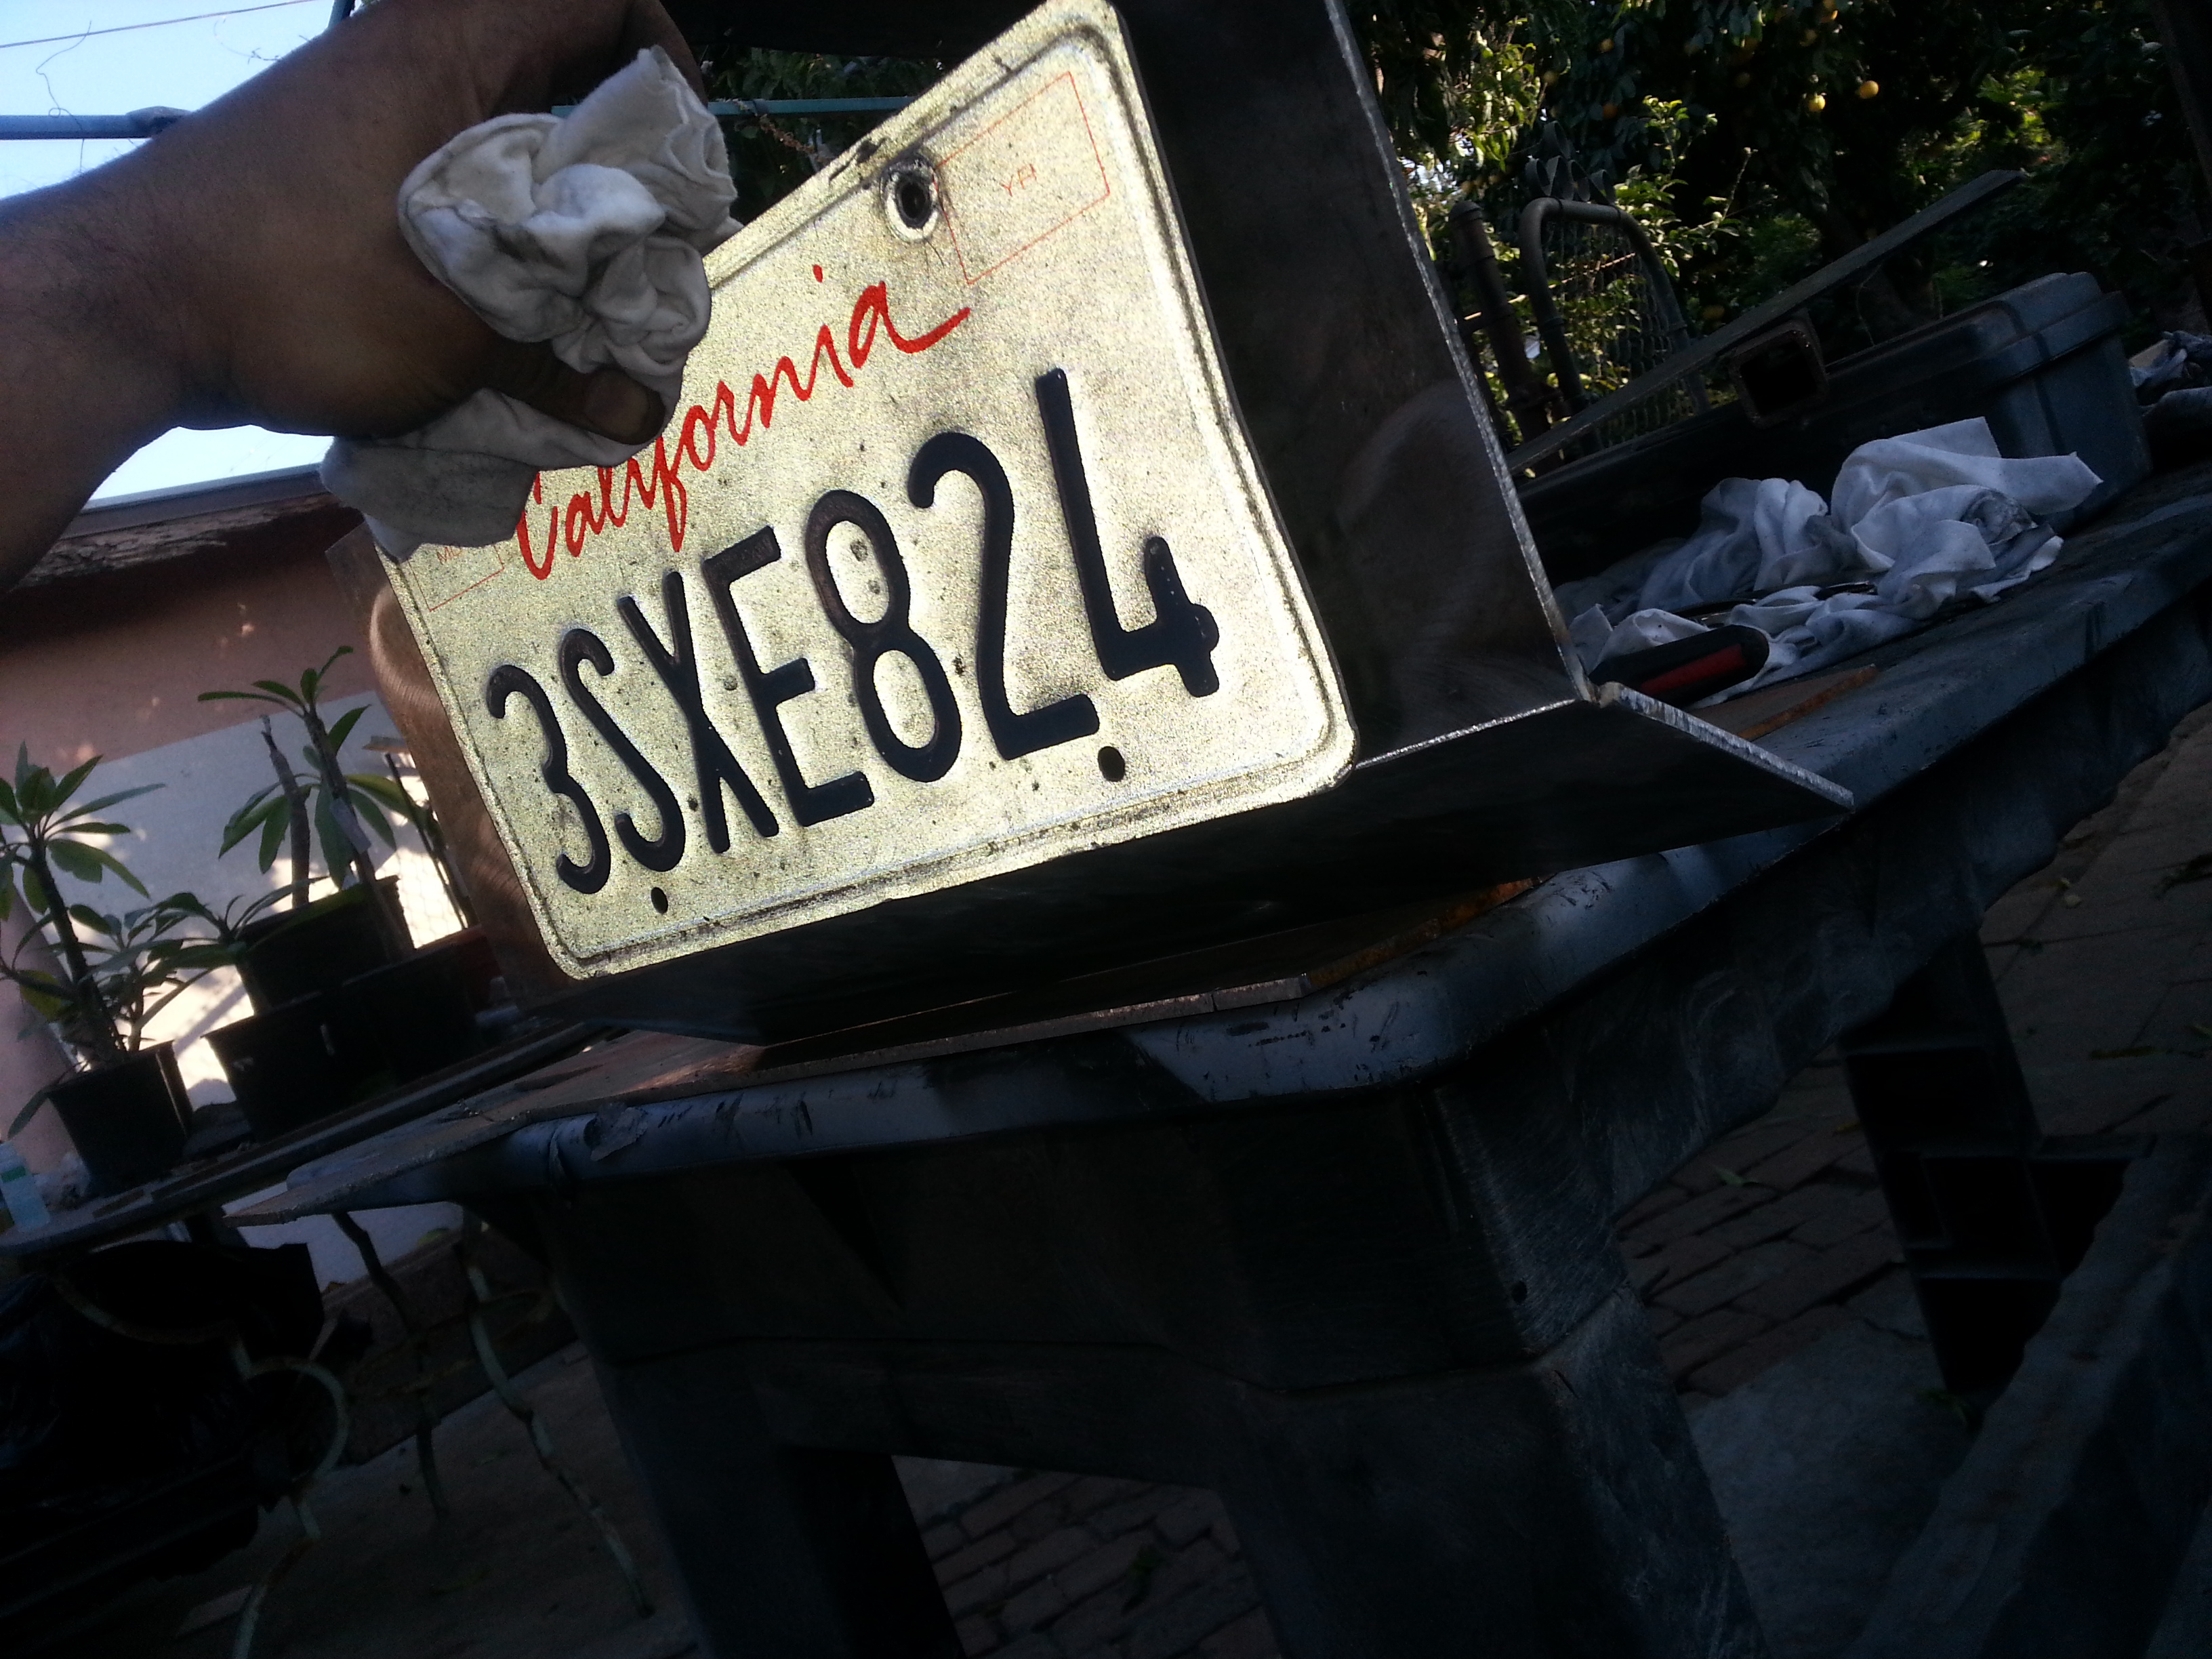
We were going to add on the bumper but found that the bolts were about 1/4 too short. And since it was too late in the day no shops would be open. So We improvised and cut off the washers on the bumper bolts. See the difference???
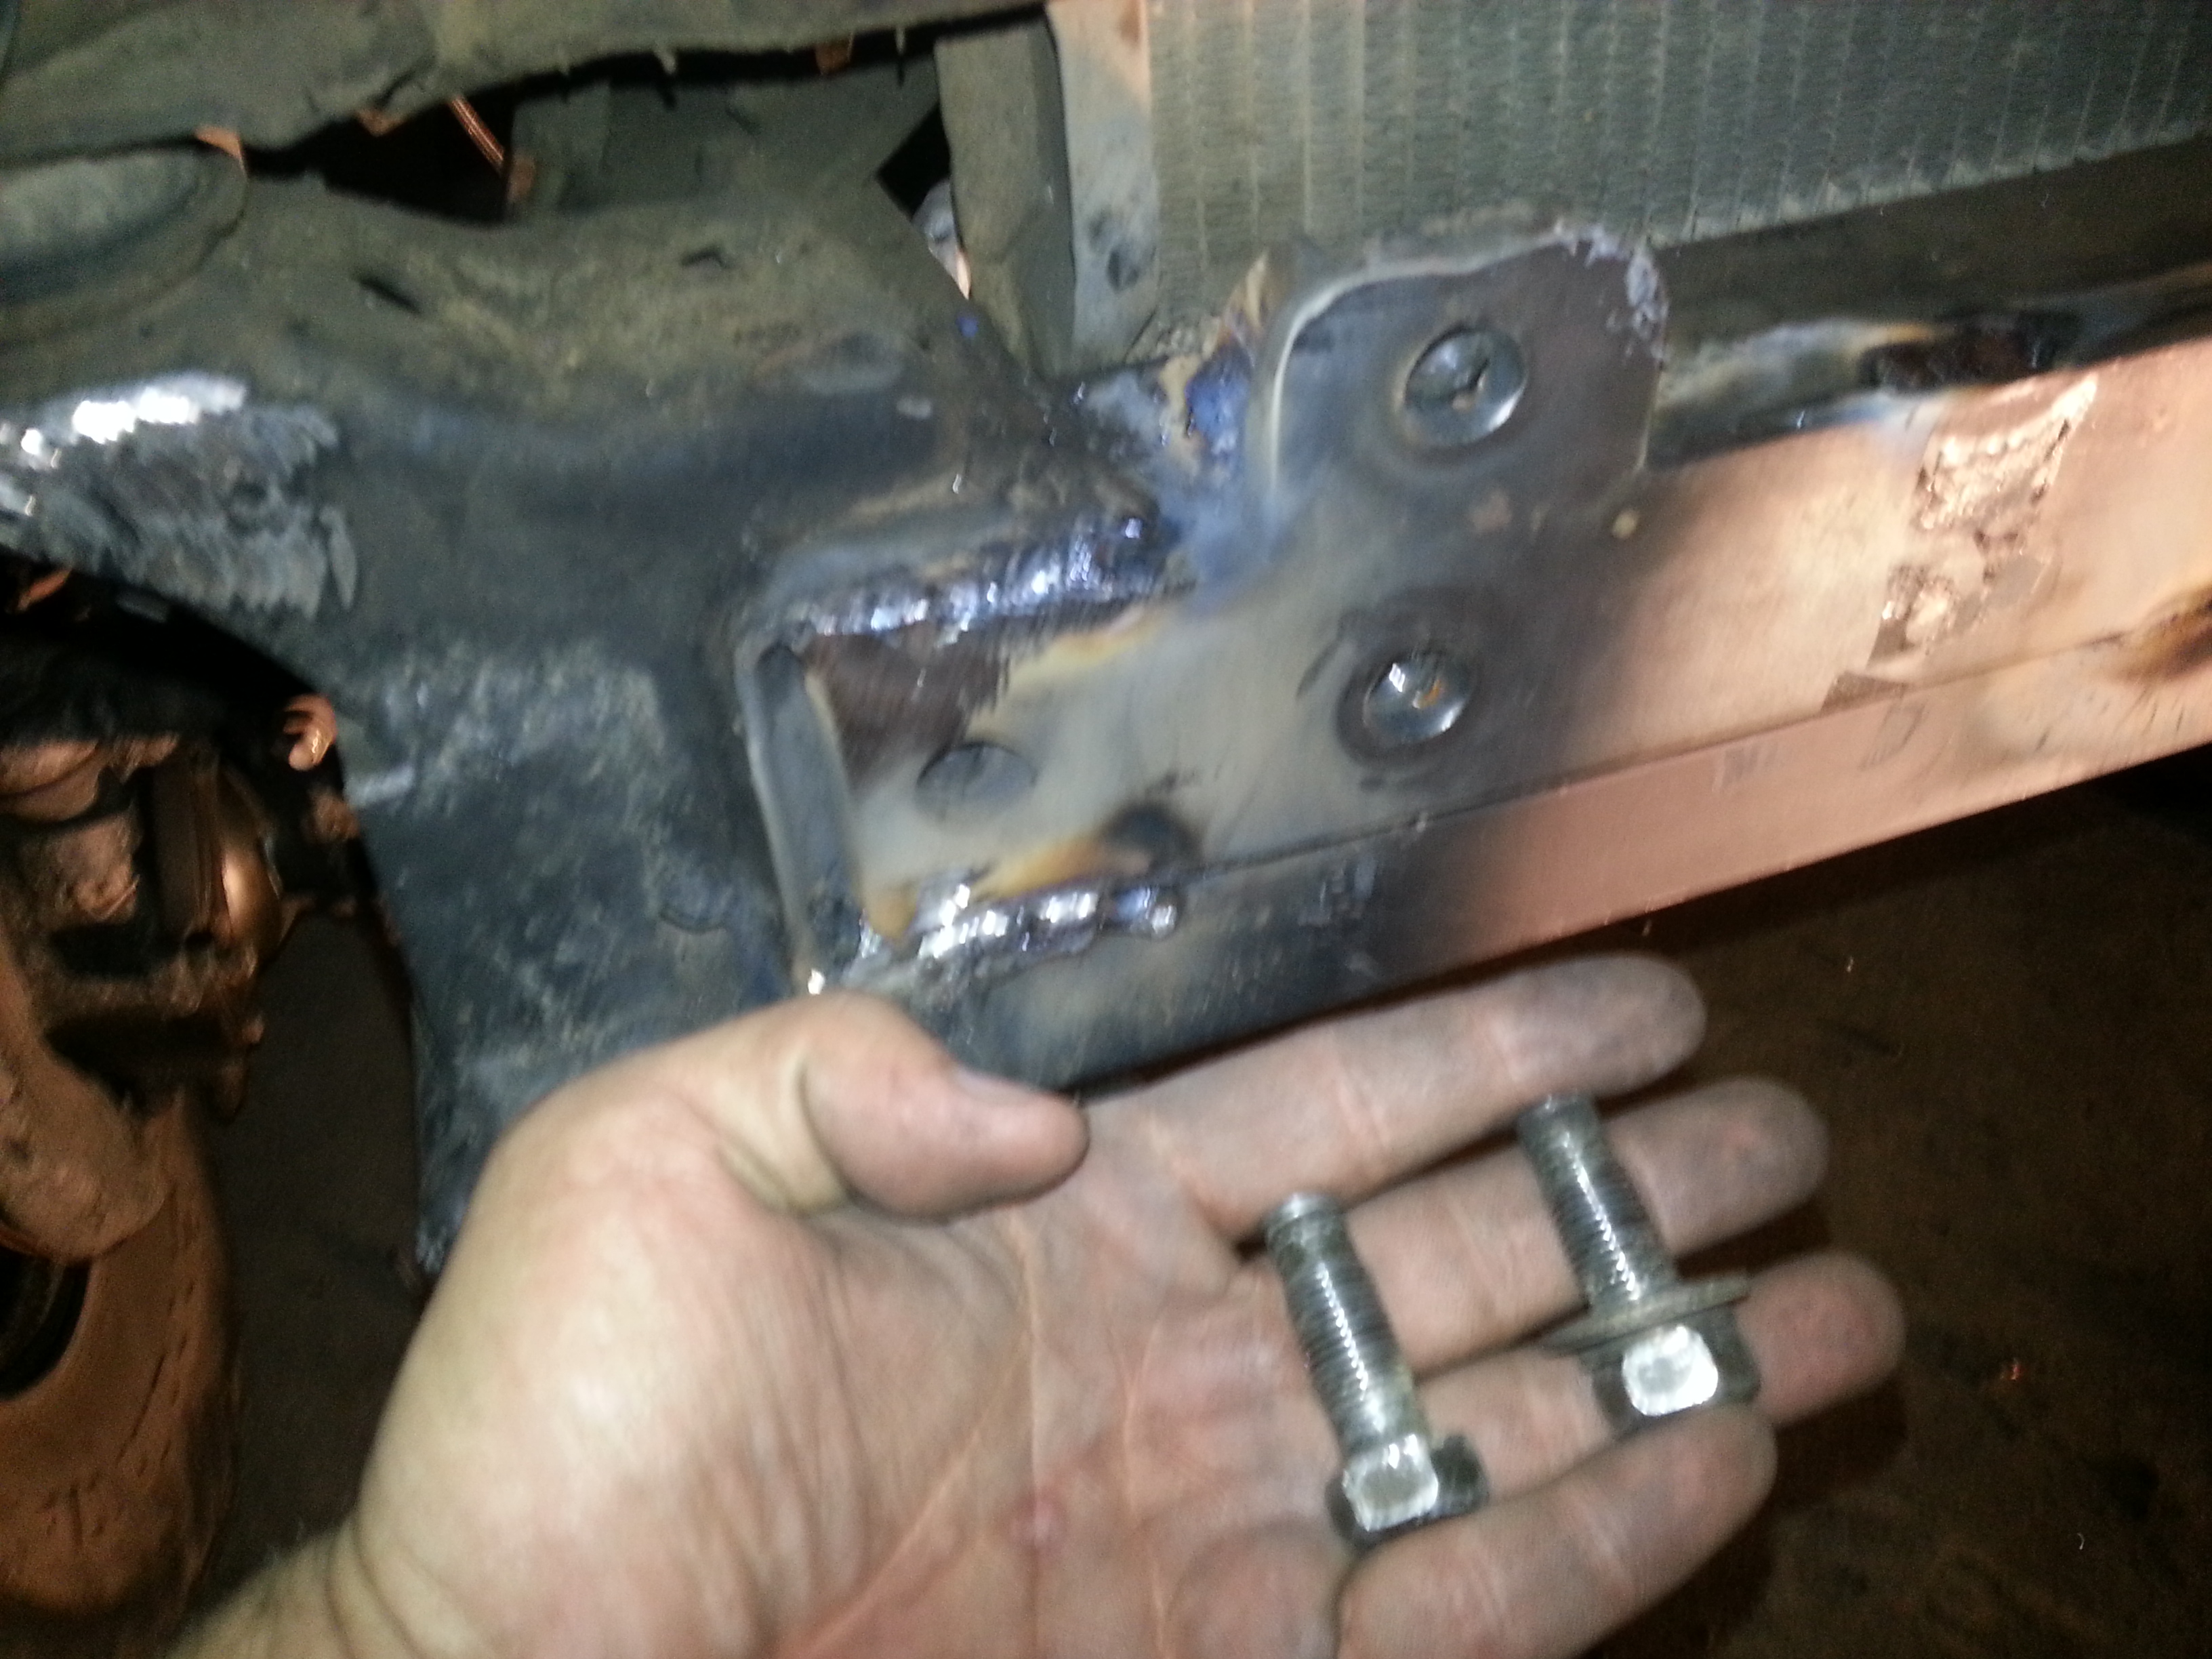
Once we did that we had enough threading to catch to be able to hold the bumper up. But then we found that only 3/4 of the bolts fit in the holes. My dad welded the one on the right side wrong. Oh well it was just meant to hold the bumper in place anyway. its okay because it is now welded i segments so i dont need the bolts anyway lol

Sorry guys this is as good as the pictures are gonna get right now. It was much too dark to take decent shots. I'll work on it some more tomorrow. I'll take better pix then.


After we finished amd cleaned up i Had to buy bread for my dad. He said jokingly that he thinks he deserved some bread for helping me throughout the the whole project. lol I thought it was funny the way he asked. But he's right he deserves it. So as he made his favorite home made brewed cinnamon coffee(Caf� de Olla) I went to get him his favorite sweet bread(pan dulce) from the local Mexican bakery. Yum. Ended the night with a sweet snack.

The one thing i absolutely love is the fact that i can remove the grill easily with no problems at all. I was actually worried that i would have to trim the bottom. but NOPE i didnt have to. And because i have access to remove the grill that means i can still access the AC stuff whenever im ready to fix that stuff. WOOT
Like i said. Sorry i couldnt get more pix but the night got the better of us. I'll give her a nice bath tomorrow install the winch. and possibly build the license plate skid plate/winch bolt cover thing to prevent people from stealing my precious $499 winch.
Later on i'll be possibly heading to Mark's(Chefyota4x4) house so we could properly install my offroad lights. Cant wait. I'm gonna wake up early tomorrow to get that skid plate finished so i could have more time over there because i have no clue how long wiring in the Relays, and switches/running the wires is gonna take. Hopefully he'll still have time for me.
Stay tuned for the next episode of Redeth005's Front Bumper Fab Project.
AWESOME UPGRADES TO BE MOUNTED!
Thanks for watching!
Only had about 1 hour before it got dark when i got home. But ive been known to be impatient so i started prepping the frame to weld on while my dad made his way home haha! Here we have my dad welding the frame reinforcement on to the truck.

We were going to add on the bumper but found that the bolts were about 1/4 too short. And since it was too late in the day no shops would be open. So We improvised and cut off the washers on the bumper bolts. See the difference???

Once we did that we had enough threading to catch to be able to hold the bumper up. But then we found that only 3/4 of the bolts fit in the holes. My dad welded the one on the right side wrong. Oh well it was just meant to hold the bumper in place anyway. its okay because it is now welded i segments so i dont need the bolts anyway lol

Sorry guys this is as good as the pictures are gonna get right now. It was much too dark to take decent shots. I'll work on it some more tomorrow. I'll take better pix then.


After we finished amd cleaned up i Had to buy bread for my dad. He said jokingly that he thinks he deserved some bread for helping me throughout the the whole project. lol I thought it was funny the way he asked. But he's right he deserves it. So as he made his favorite home made brewed cinnamon coffee(Caf� de Olla) I went to get him his favorite sweet bread(pan dulce) from the local Mexican bakery. Yum. Ended the night with a sweet snack.
The one thing i absolutely love is the fact that i can remove the grill easily with no problems at all. I was actually worried that i would have to trim the bottom. but NOPE i didnt have to. And because i have access to remove the grill that means i can still access the AC stuff whenever im ready to fix that stuff. WOOT
Like i said. Sorry i couldnt get more pix but the night got the better of us. I'll give her a nice bath tomorrow install the winch. and possibly build the license plate skid plate/winch bolt cover thing to prevent people from stealing my precious $499 winch.
Later on i'll be possibly heading to Mark's(Chefyota4x4) house so we could properly install my offroad lights. Cant wait. I'm gonna wake up early tomorrow to get that skid plate finished so i could have more time over there because i have no clue how long wiring in the Relays, and switches/running the wires is gonna take. Hopefully he'll still have time for me.
Stay tuned for the next episode of Redeth005's Front Bumper Fab Project.
AWESOME UPGRADES TO BE MOUNTED!
Thanks for watching!
Last edited by Redeth005; Nov 1, 2013 at 08:04 PM.


 Nov 1, 2013 | 10:33 PM
#113
Thread Starter
Registered User
Joined: Apr 2012
Posts: 2,817
Likes: 2
From: Los Angeles CA
Thank you very much man.
-------------------------------------------------------------------------------
Lmao You guys are hilarious. i was laughing my as$ off at these 2 messages. Thanks. Glad you guys liked it haha
-------------------------------------------------------------------------------
thanks Hoss. Check out the update for tomorrow later on in the day. Hoping to have everything mounted. Or at least that is the goal.
Lol everybody wants one! haha
-------------------------------------------------------------------------------
-------------------------------------------------------------------------------
Lol everybody wants one! haha
Nov 4, 2013 | 08:24 AM
#115
Thread Starter
Registered User
Joined: Apr 2012
Posts: 2,817
Likes: 2
From: Los Angeles CA
Lol ahh man you never came so I just mounted it to my truck instead lol. I think it looks better on mine haha
------------------------------------------
I was gonna type out this weekend's update last night but I got home exhausted from band practice. Check in on my thread later on tonight guys. I have a huge update for you all with lots of pix, more fabbing up stuff, and some videos.
------------------------------------------
I was gonna type out this weekend's update last night but I got home exhausted from band practice. Check in on my thread later on tonight guys. I have a huge update for you all with lots of pix, more fabbing up stuff, and some videos.
Nov 4, 2013 | 06:38 PM
#116
Thread Starter
Registered User
Joined: Apr 2012
Posts: 2,817
Likes: 2
From: Los Angeles CA
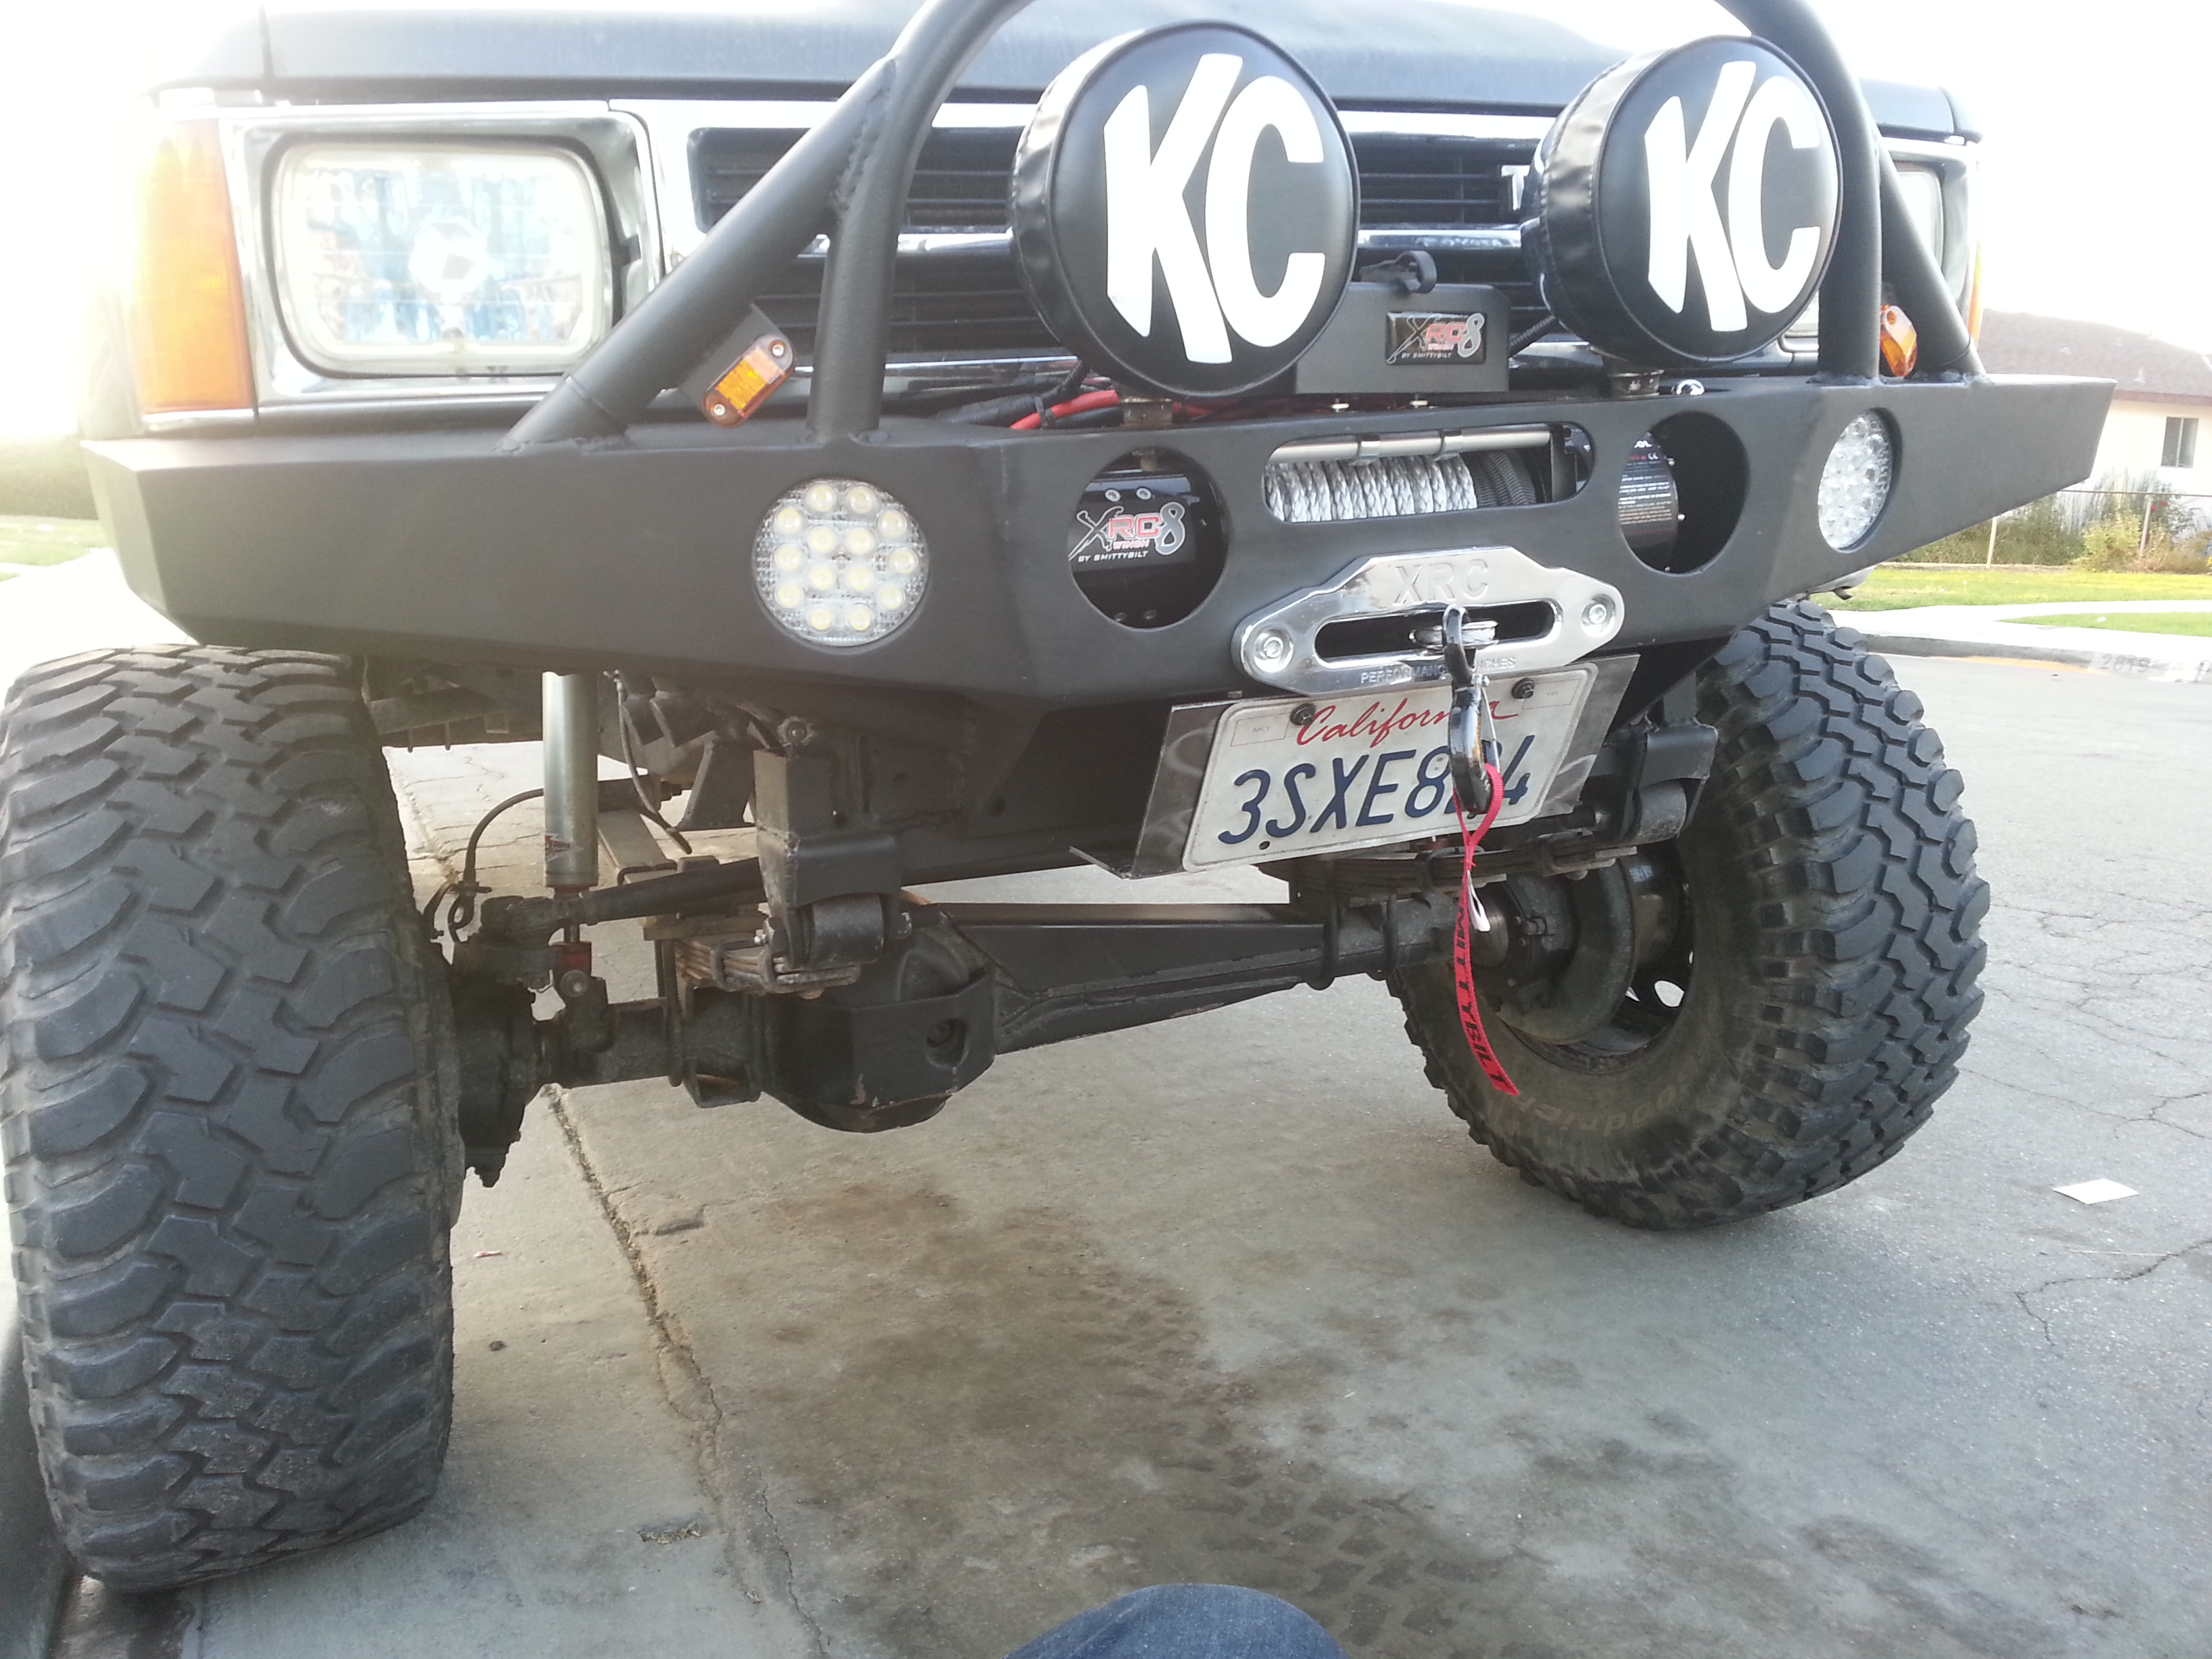
Ladies and Gentlemen we are finished!
As you know my dad and I mounted the front bumper to the truck on friday night.
The following day I woke up nice n' early to begin installing the Smittybilt XRC8 Winch.
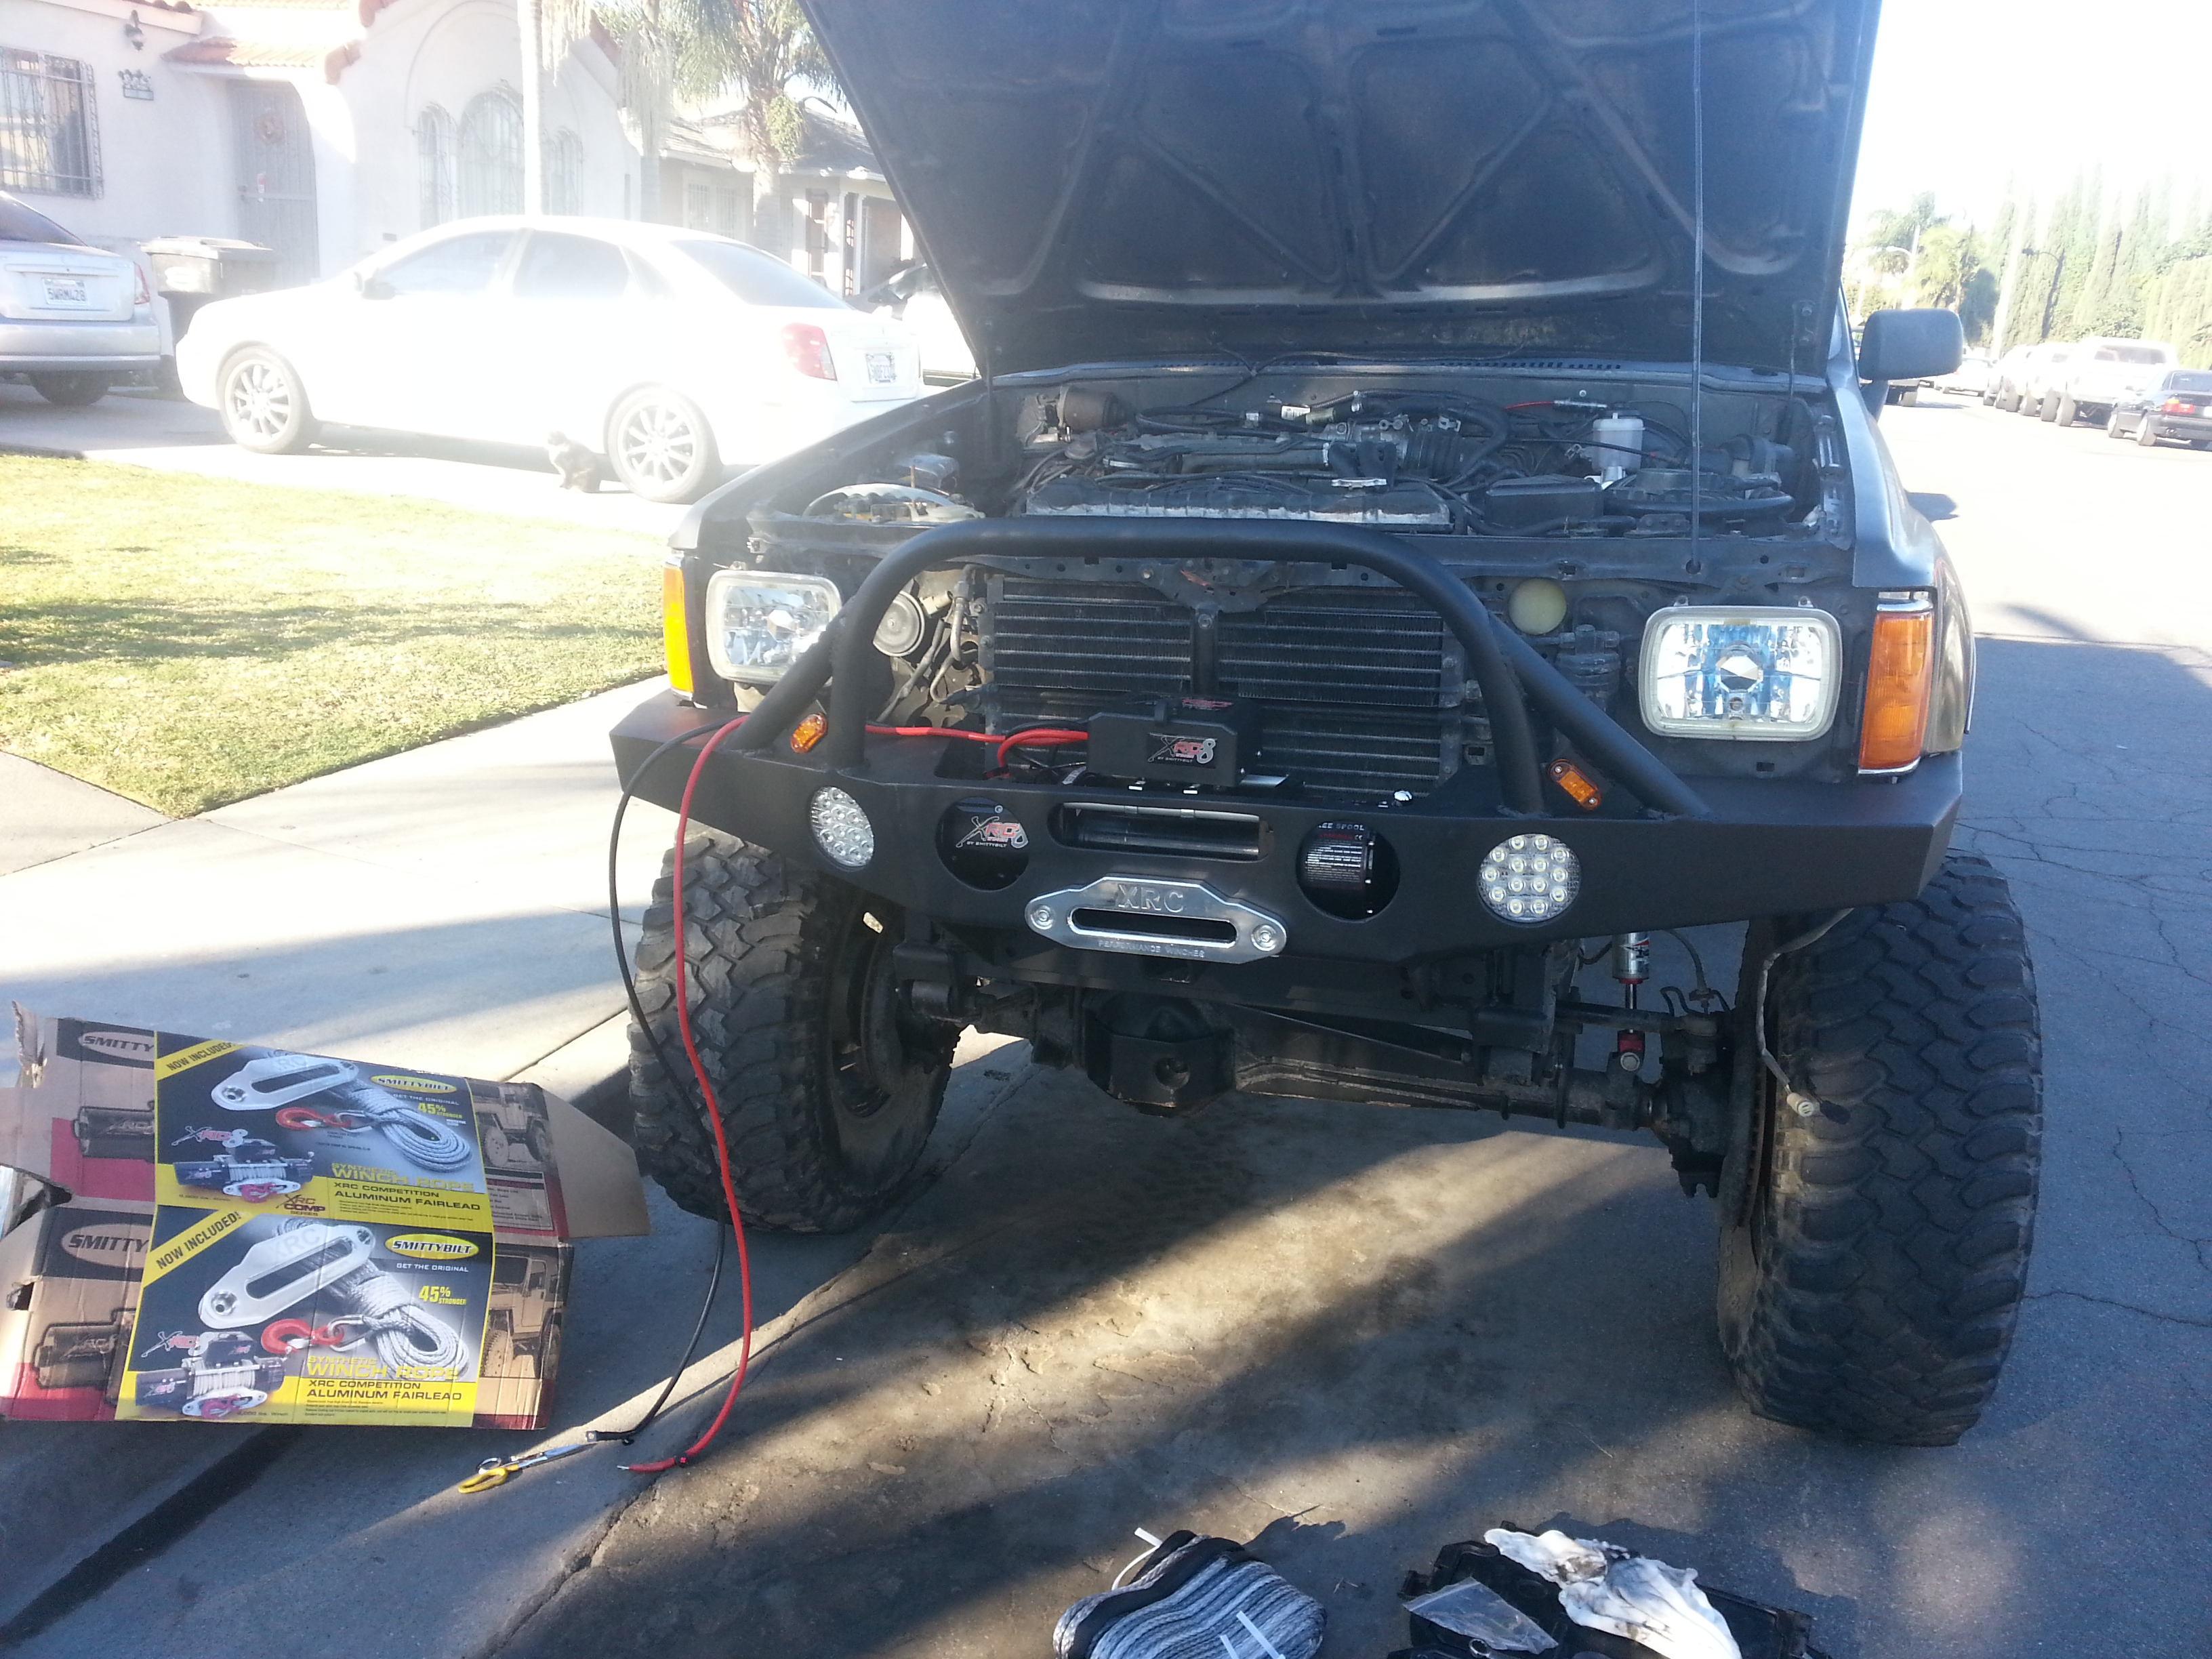
Got the synthetic rope started
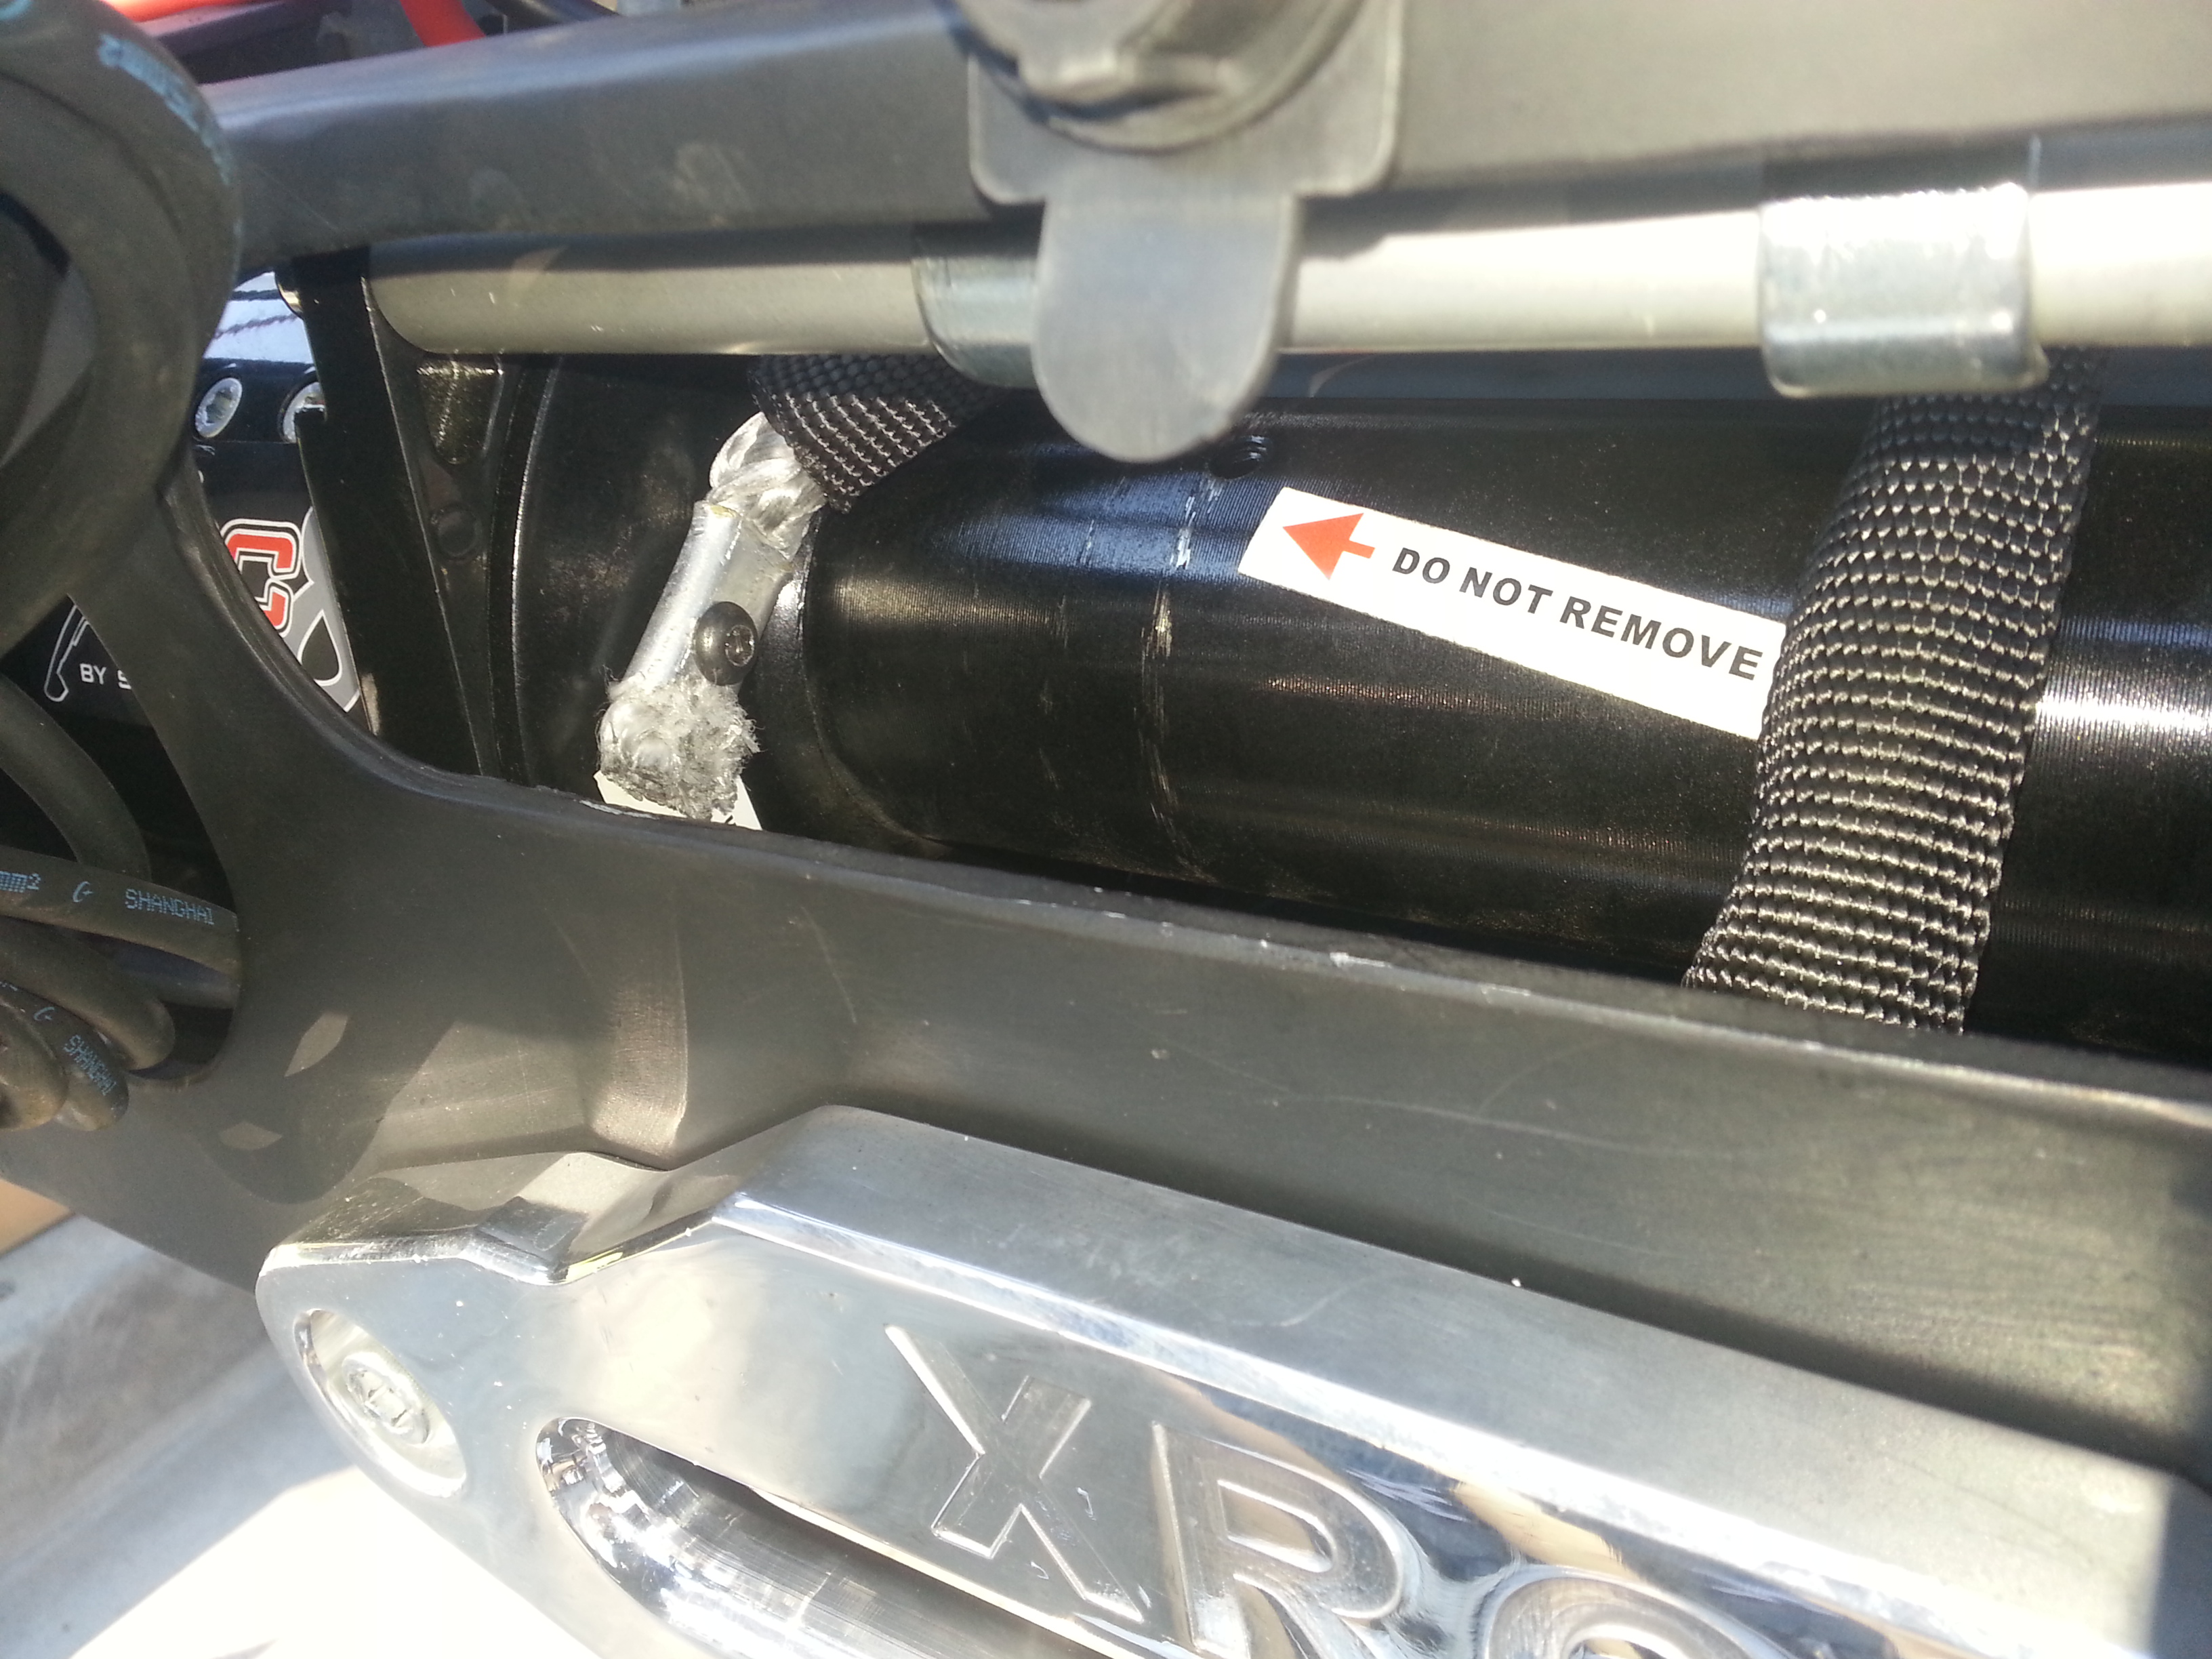
Then I met up with Mark(Chefyota4x4) to get some help and learn how to install off-road lights properly. I'm very sorry everybody but i didn't take as many pictures as i should have taken. Barely took any at all.
Here we are still working on getting everything done. Soldering, heat shrinking covering up with the plastic flex, and wrapping with electrical tape.

Joined up both driver side to the passenger side lights and brought the 2 wires into 1. We used male and female connectors then used heat shrink over it in case i ever had to remove the lights it wouldnt be much of a hassle.
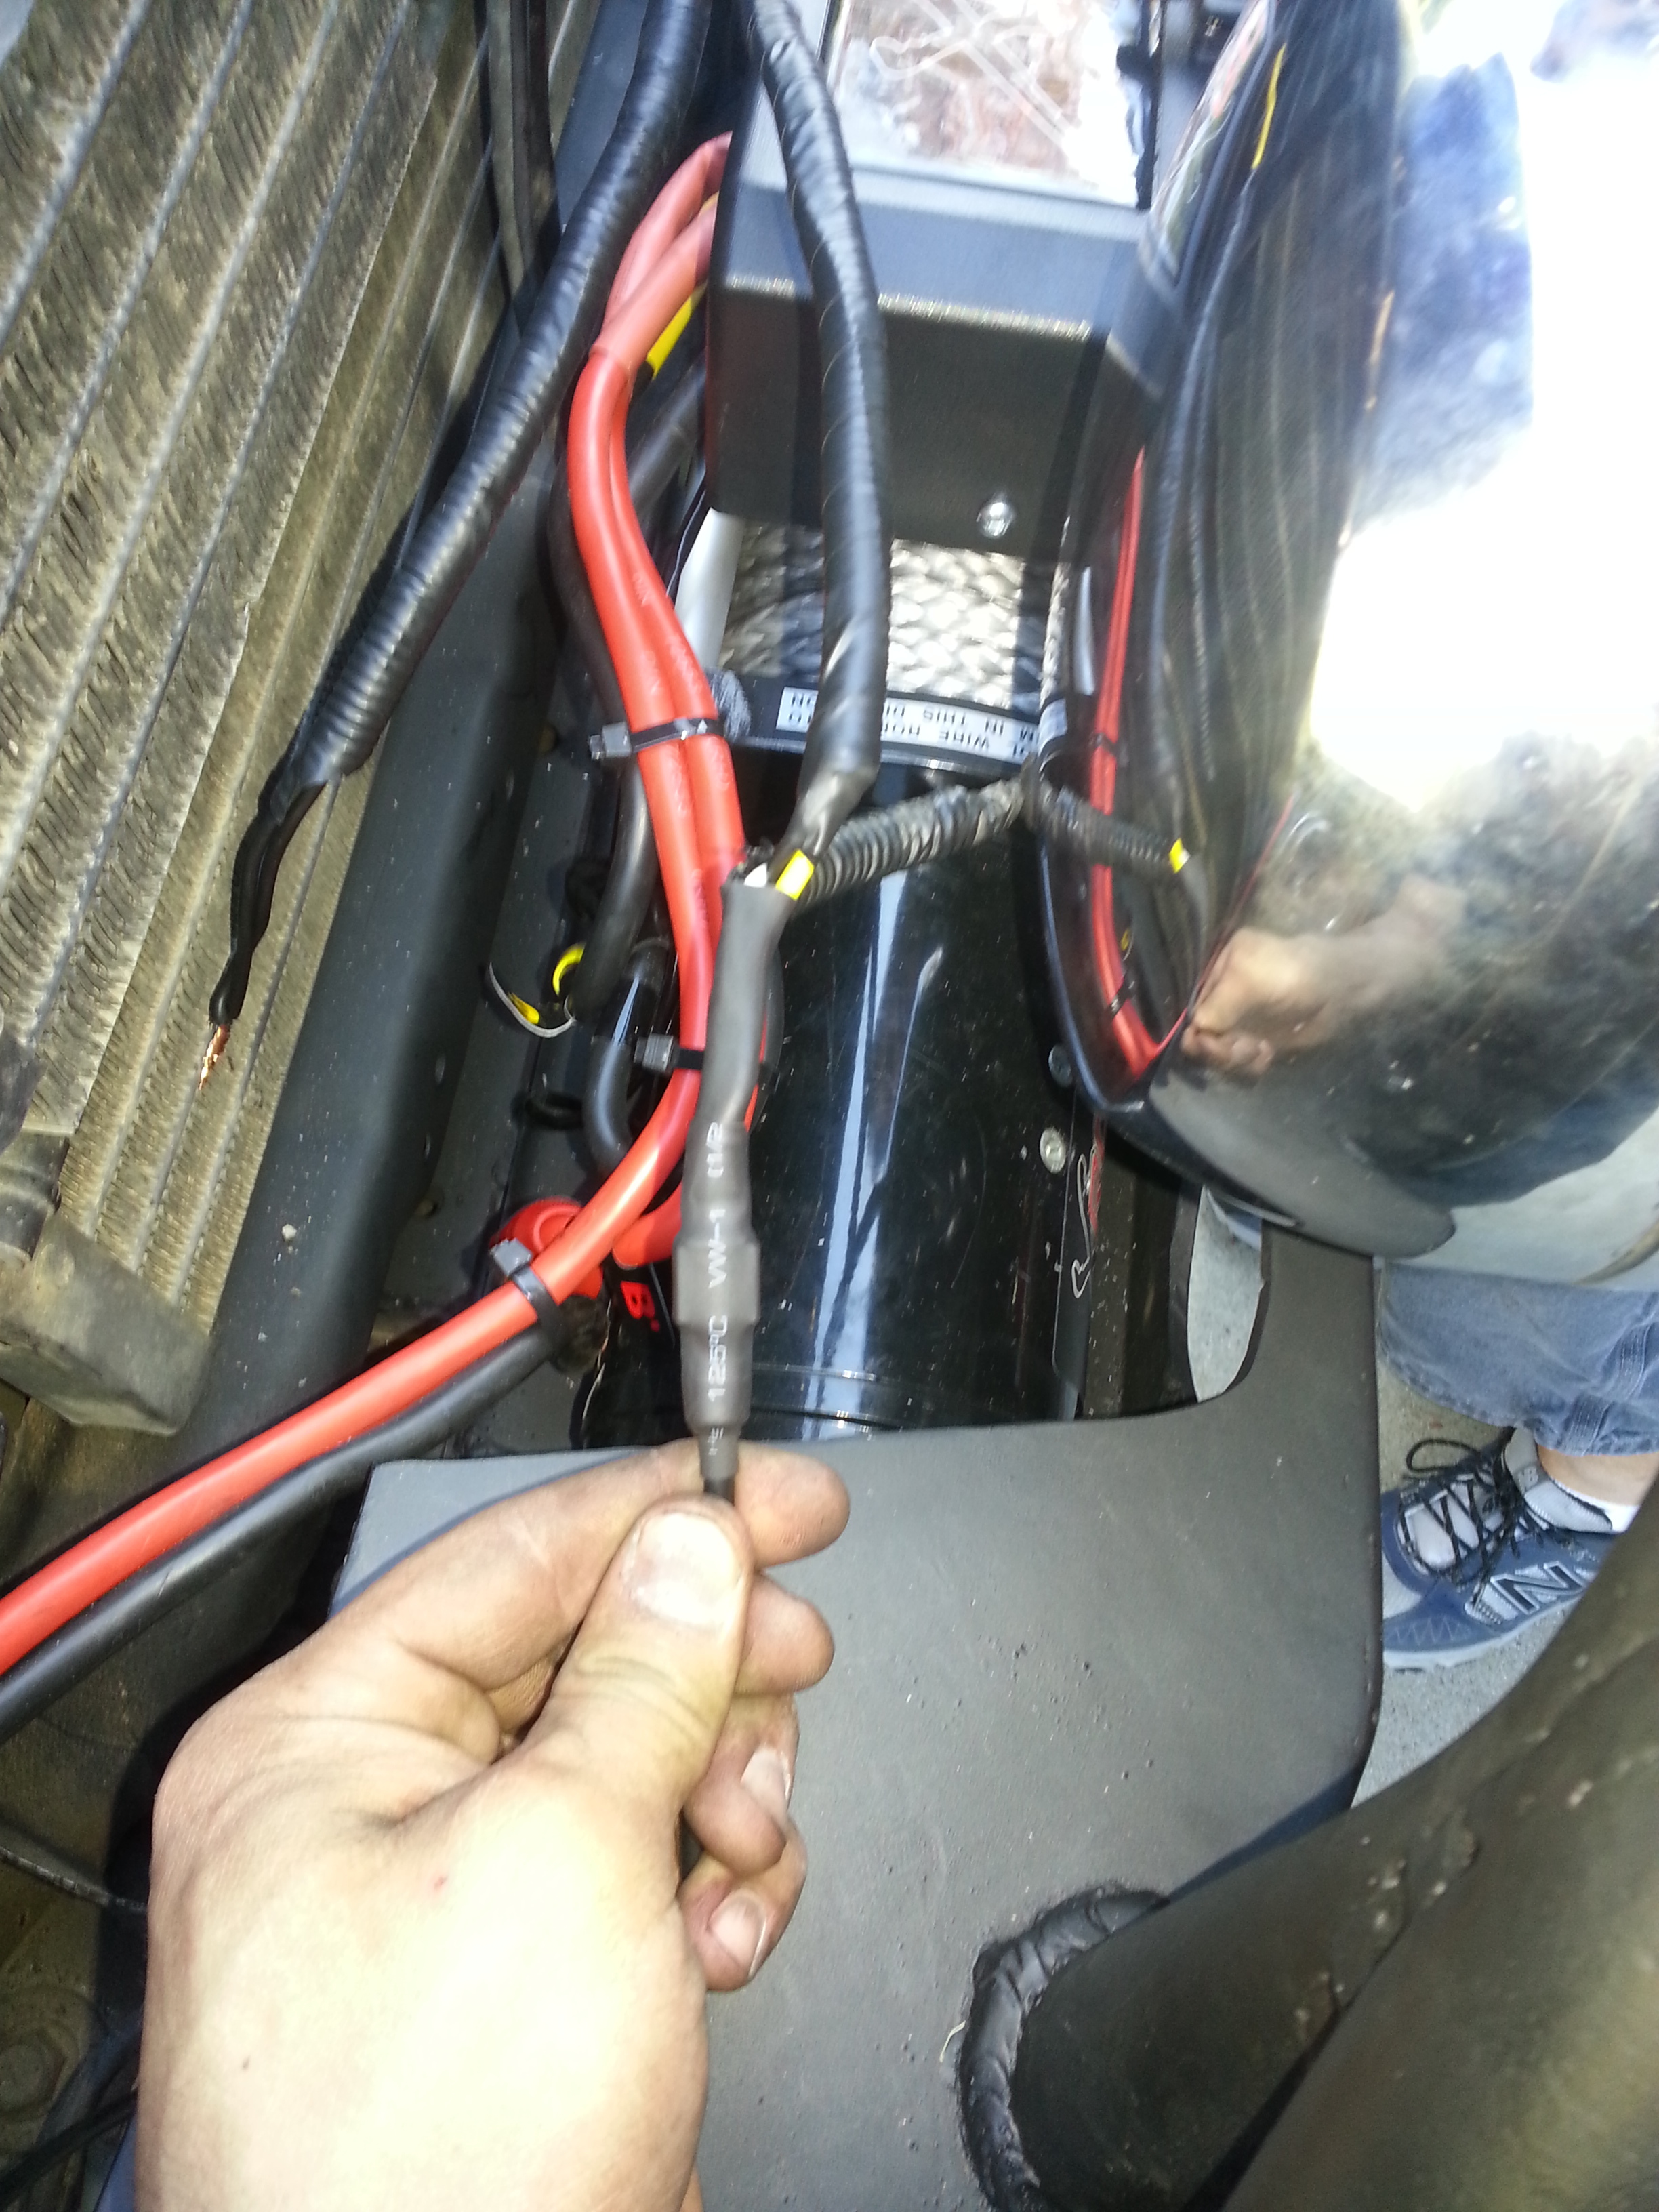
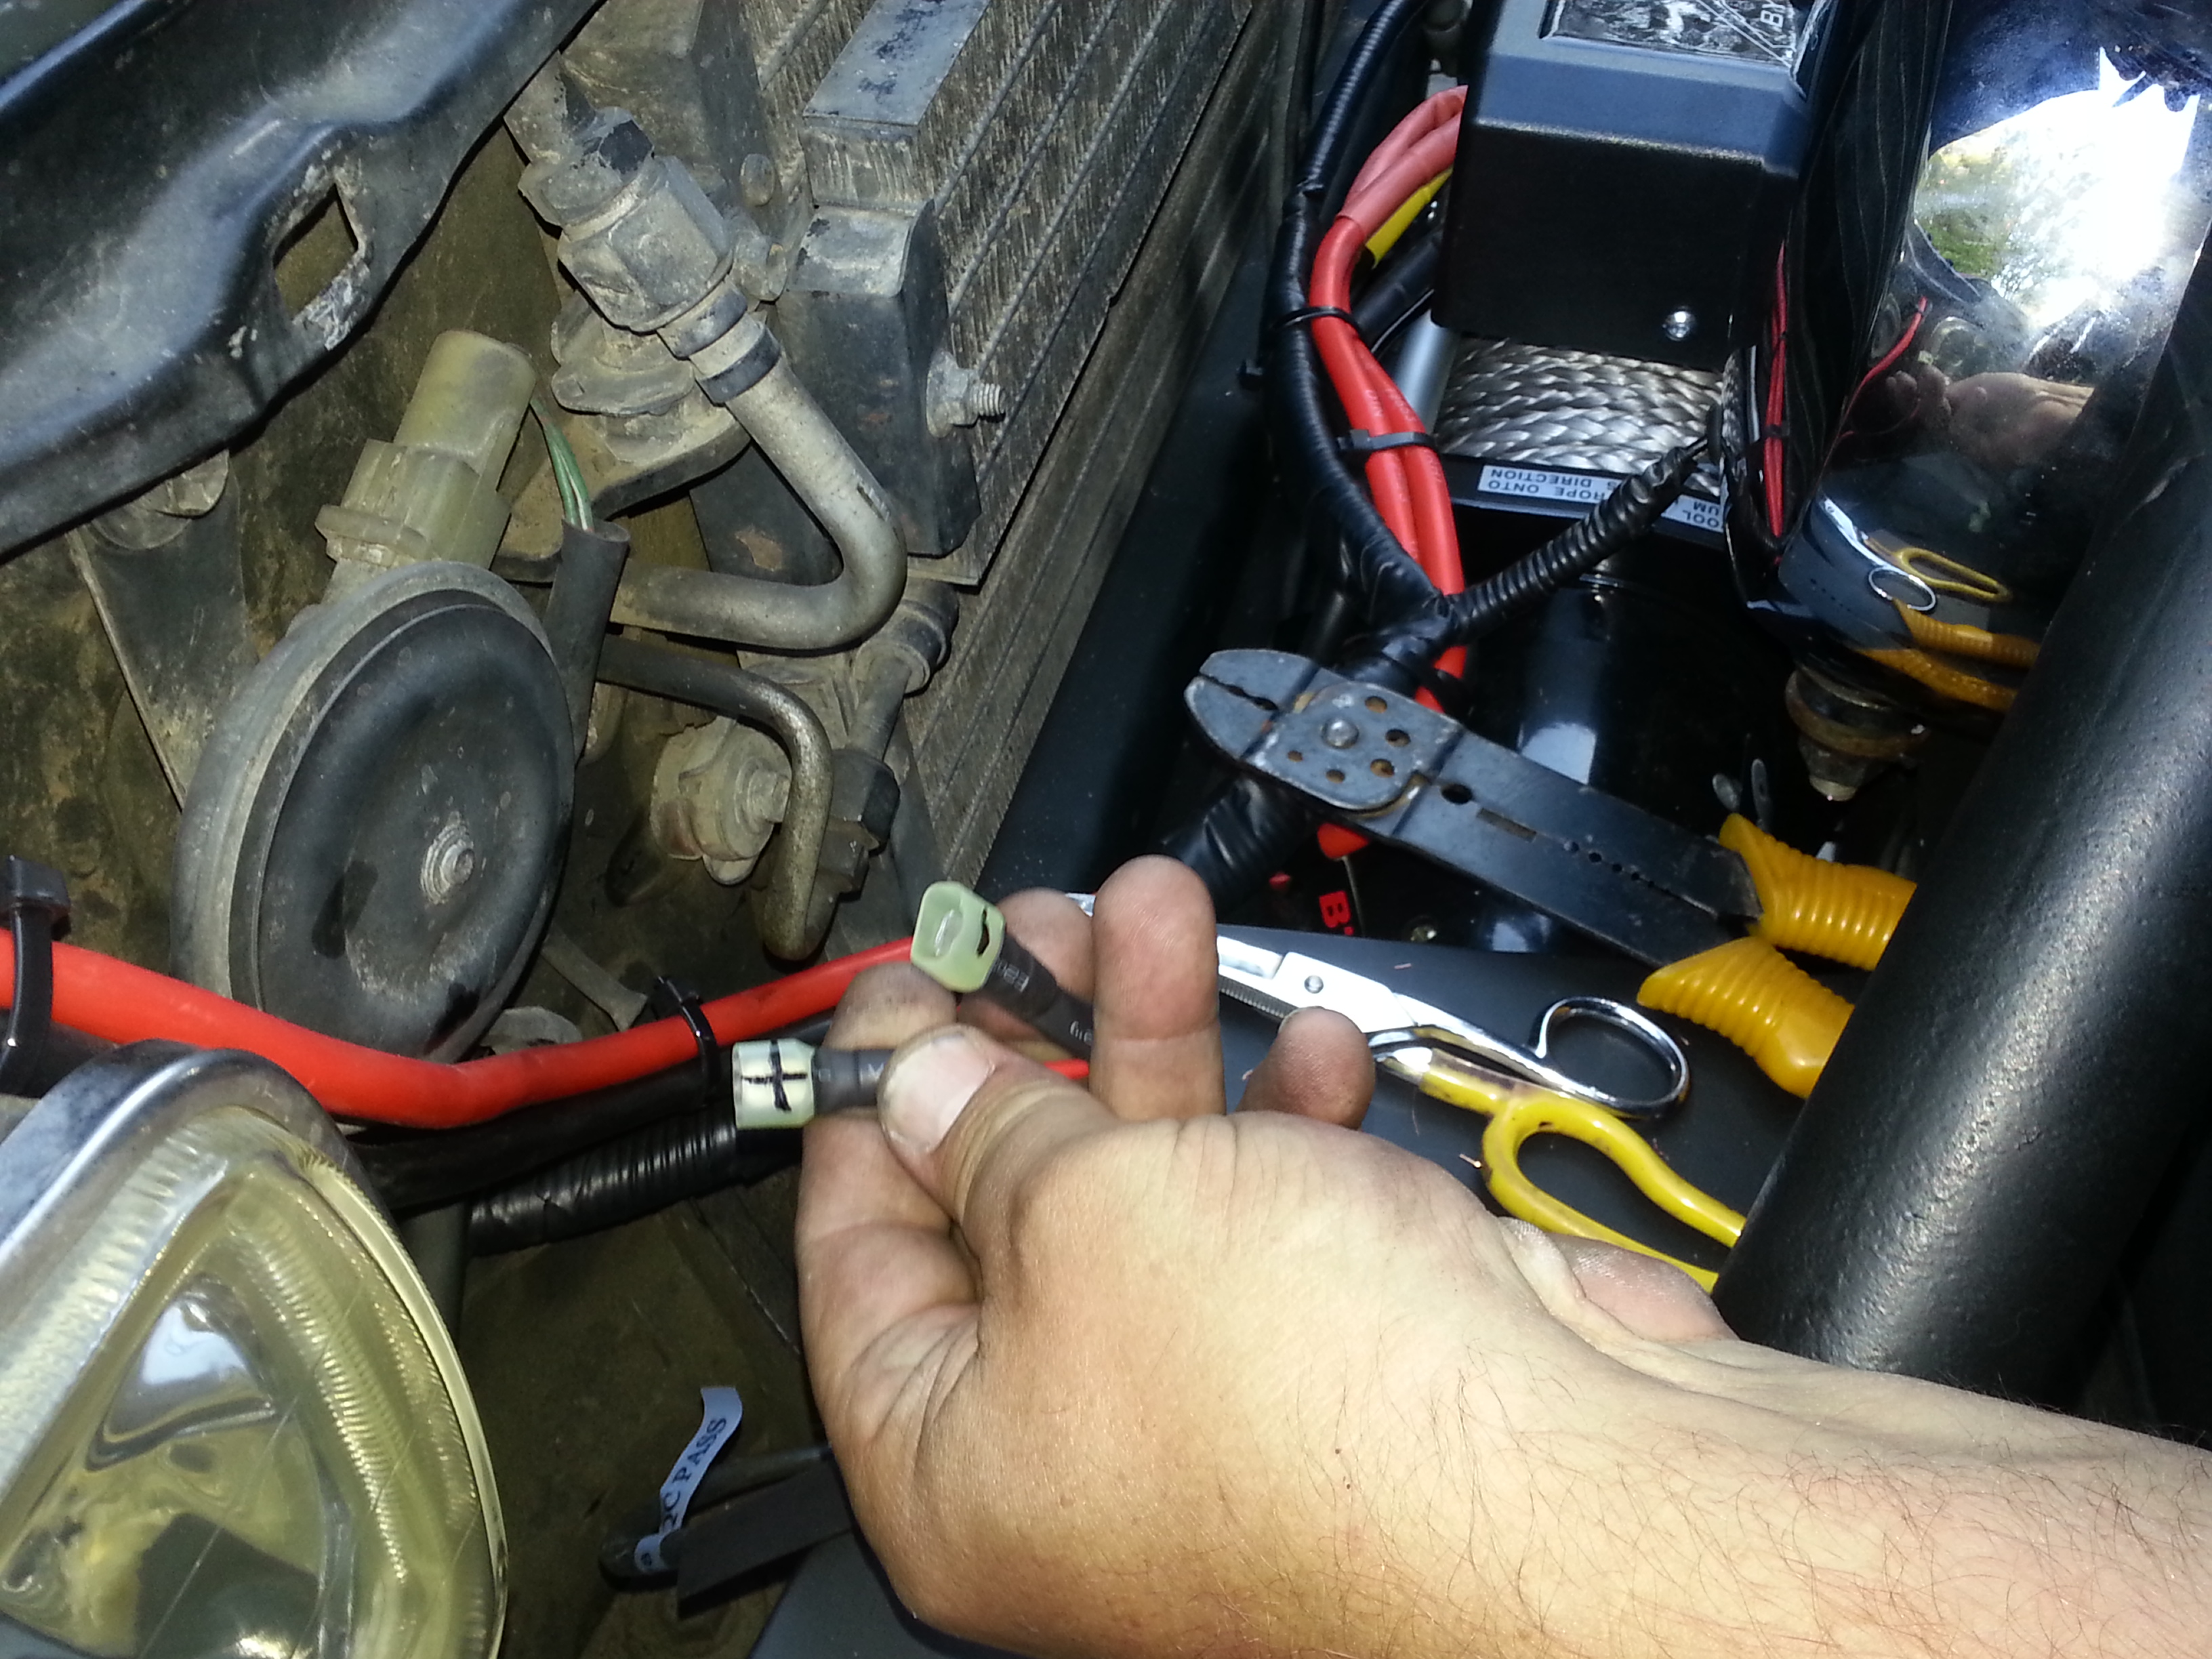
Wiring this stuff is a long process as it is if you want to do it clean and right. But we took a hell of a long time wiring up the Dick Cepek lights due to the wires on the Dick Cepek's being backwards. The white and black wires are switched around. Normally Black is ground! And really the polarity would just change if wired backwards, but the lights are also grounded to the bolt that they are mounted on. Meaning they are ground from the bumper and also to the wire. So every time we went to test out the wires we kept having sparks upon touching the wires together. after about 1hr or 1.5hrs we discovered that the white and black wires were wired wrong lol. For the life of us we just could not find out why we kept shorting out! it wasnt normal lol I guess it didnt help that Mark and i were both running very low on food and neither of us were able to think straight lol. After that we also ran into another problem with the relay wiring. We looked up the offroad light/switch/relay diagrams and the first 2 of 3 diagrams we were working off of were wrong. Apparently not everything on the internet is correct... imagine that lol Anyway after about another hour or so Mark found the wiring diagram he used to his truck's lights then we just used that diagram and BAM we were set! We began the day at 11:45 in the morning and we didnt finish till approx 12:30am. We had so many obstacles to overcome that we got sidetracked a lot. I'm just happy we were able to finish this that day.
Very grateful to Mark and all the help he has been along this project. i know absolutely nothing about wiring, relays and switches, and your experience and dedication to keep things looking clean and professional was definitely appreciated. Sorry we didnt finish in time for me to treat you n your mom to dinner but i will definitely make up for it by taking you two to Lucilles Smokehouse BBQ! yum...
Here is a shot of when we had just finished. I had to mount my license plate to the front on top of the radiator bumper vents for the mean time.

--------------------------------------------------------------------------------
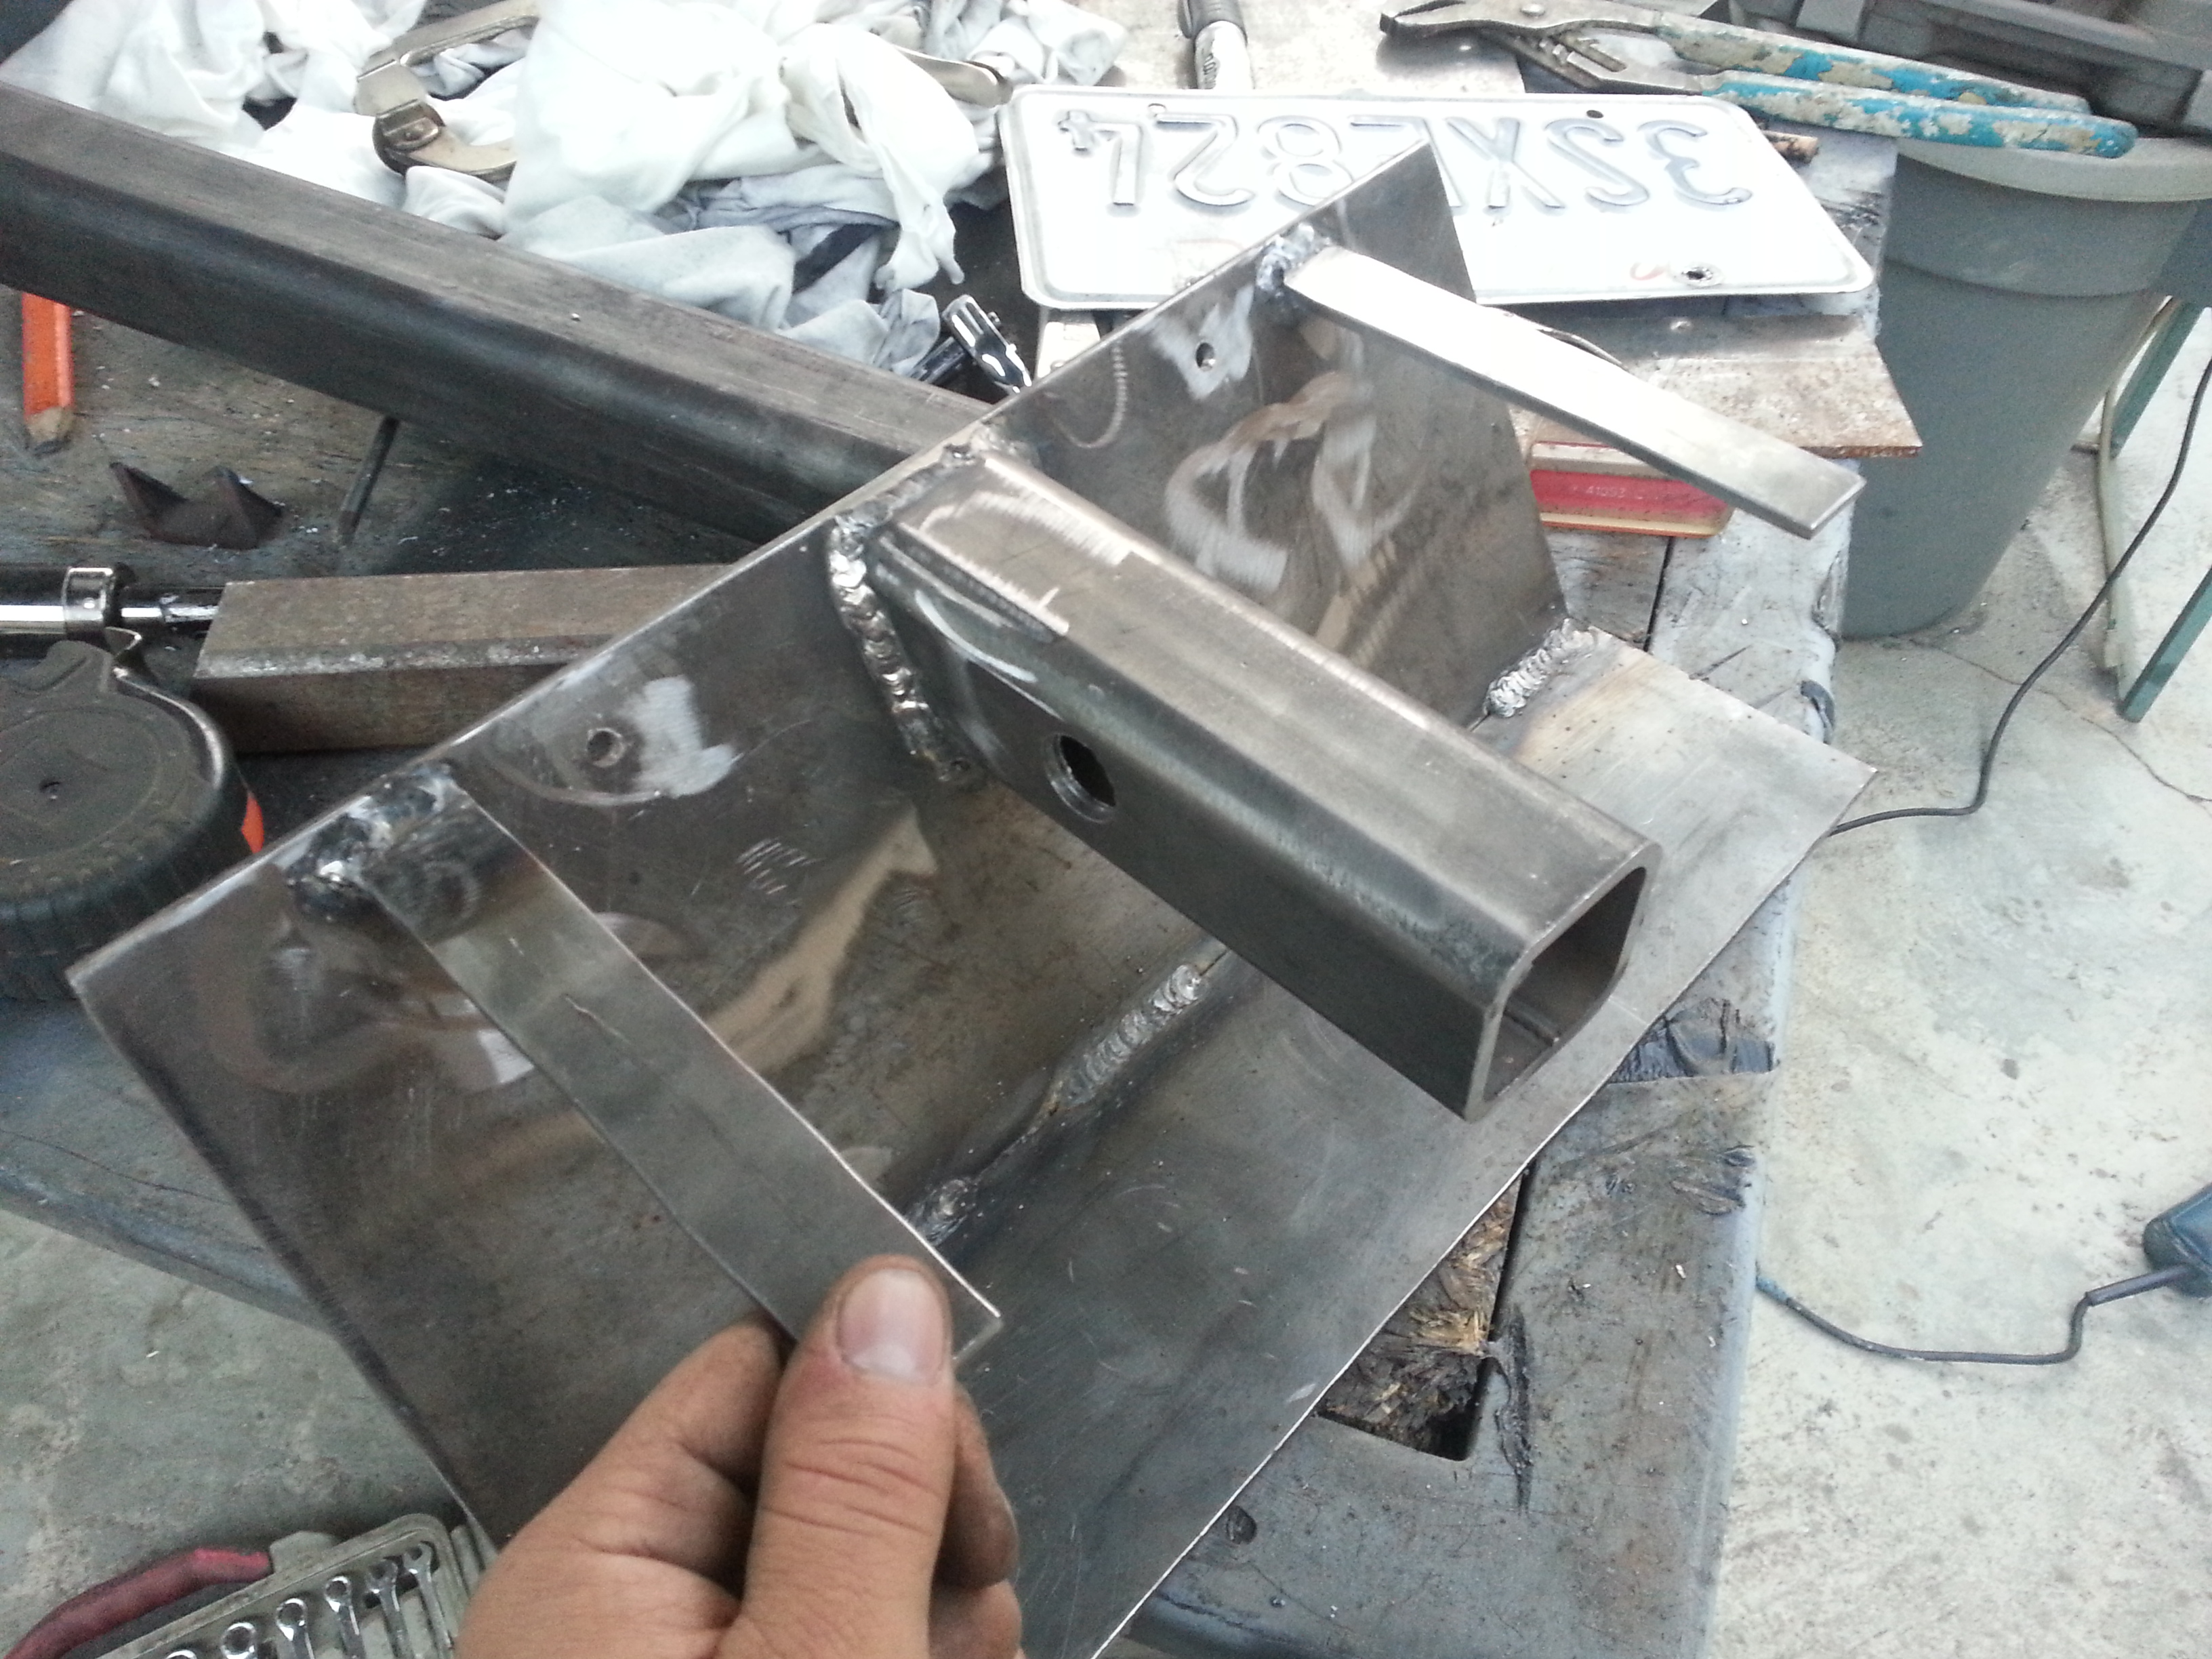
The following day(Sunday) i got to work on the License plate holder/winch bolt cover to restrict access to get to my bolts so people cant steal my winch when its parked on the street.
I drove down to the local steel shop and bought a 52" x 2" x 2" steel square tube.
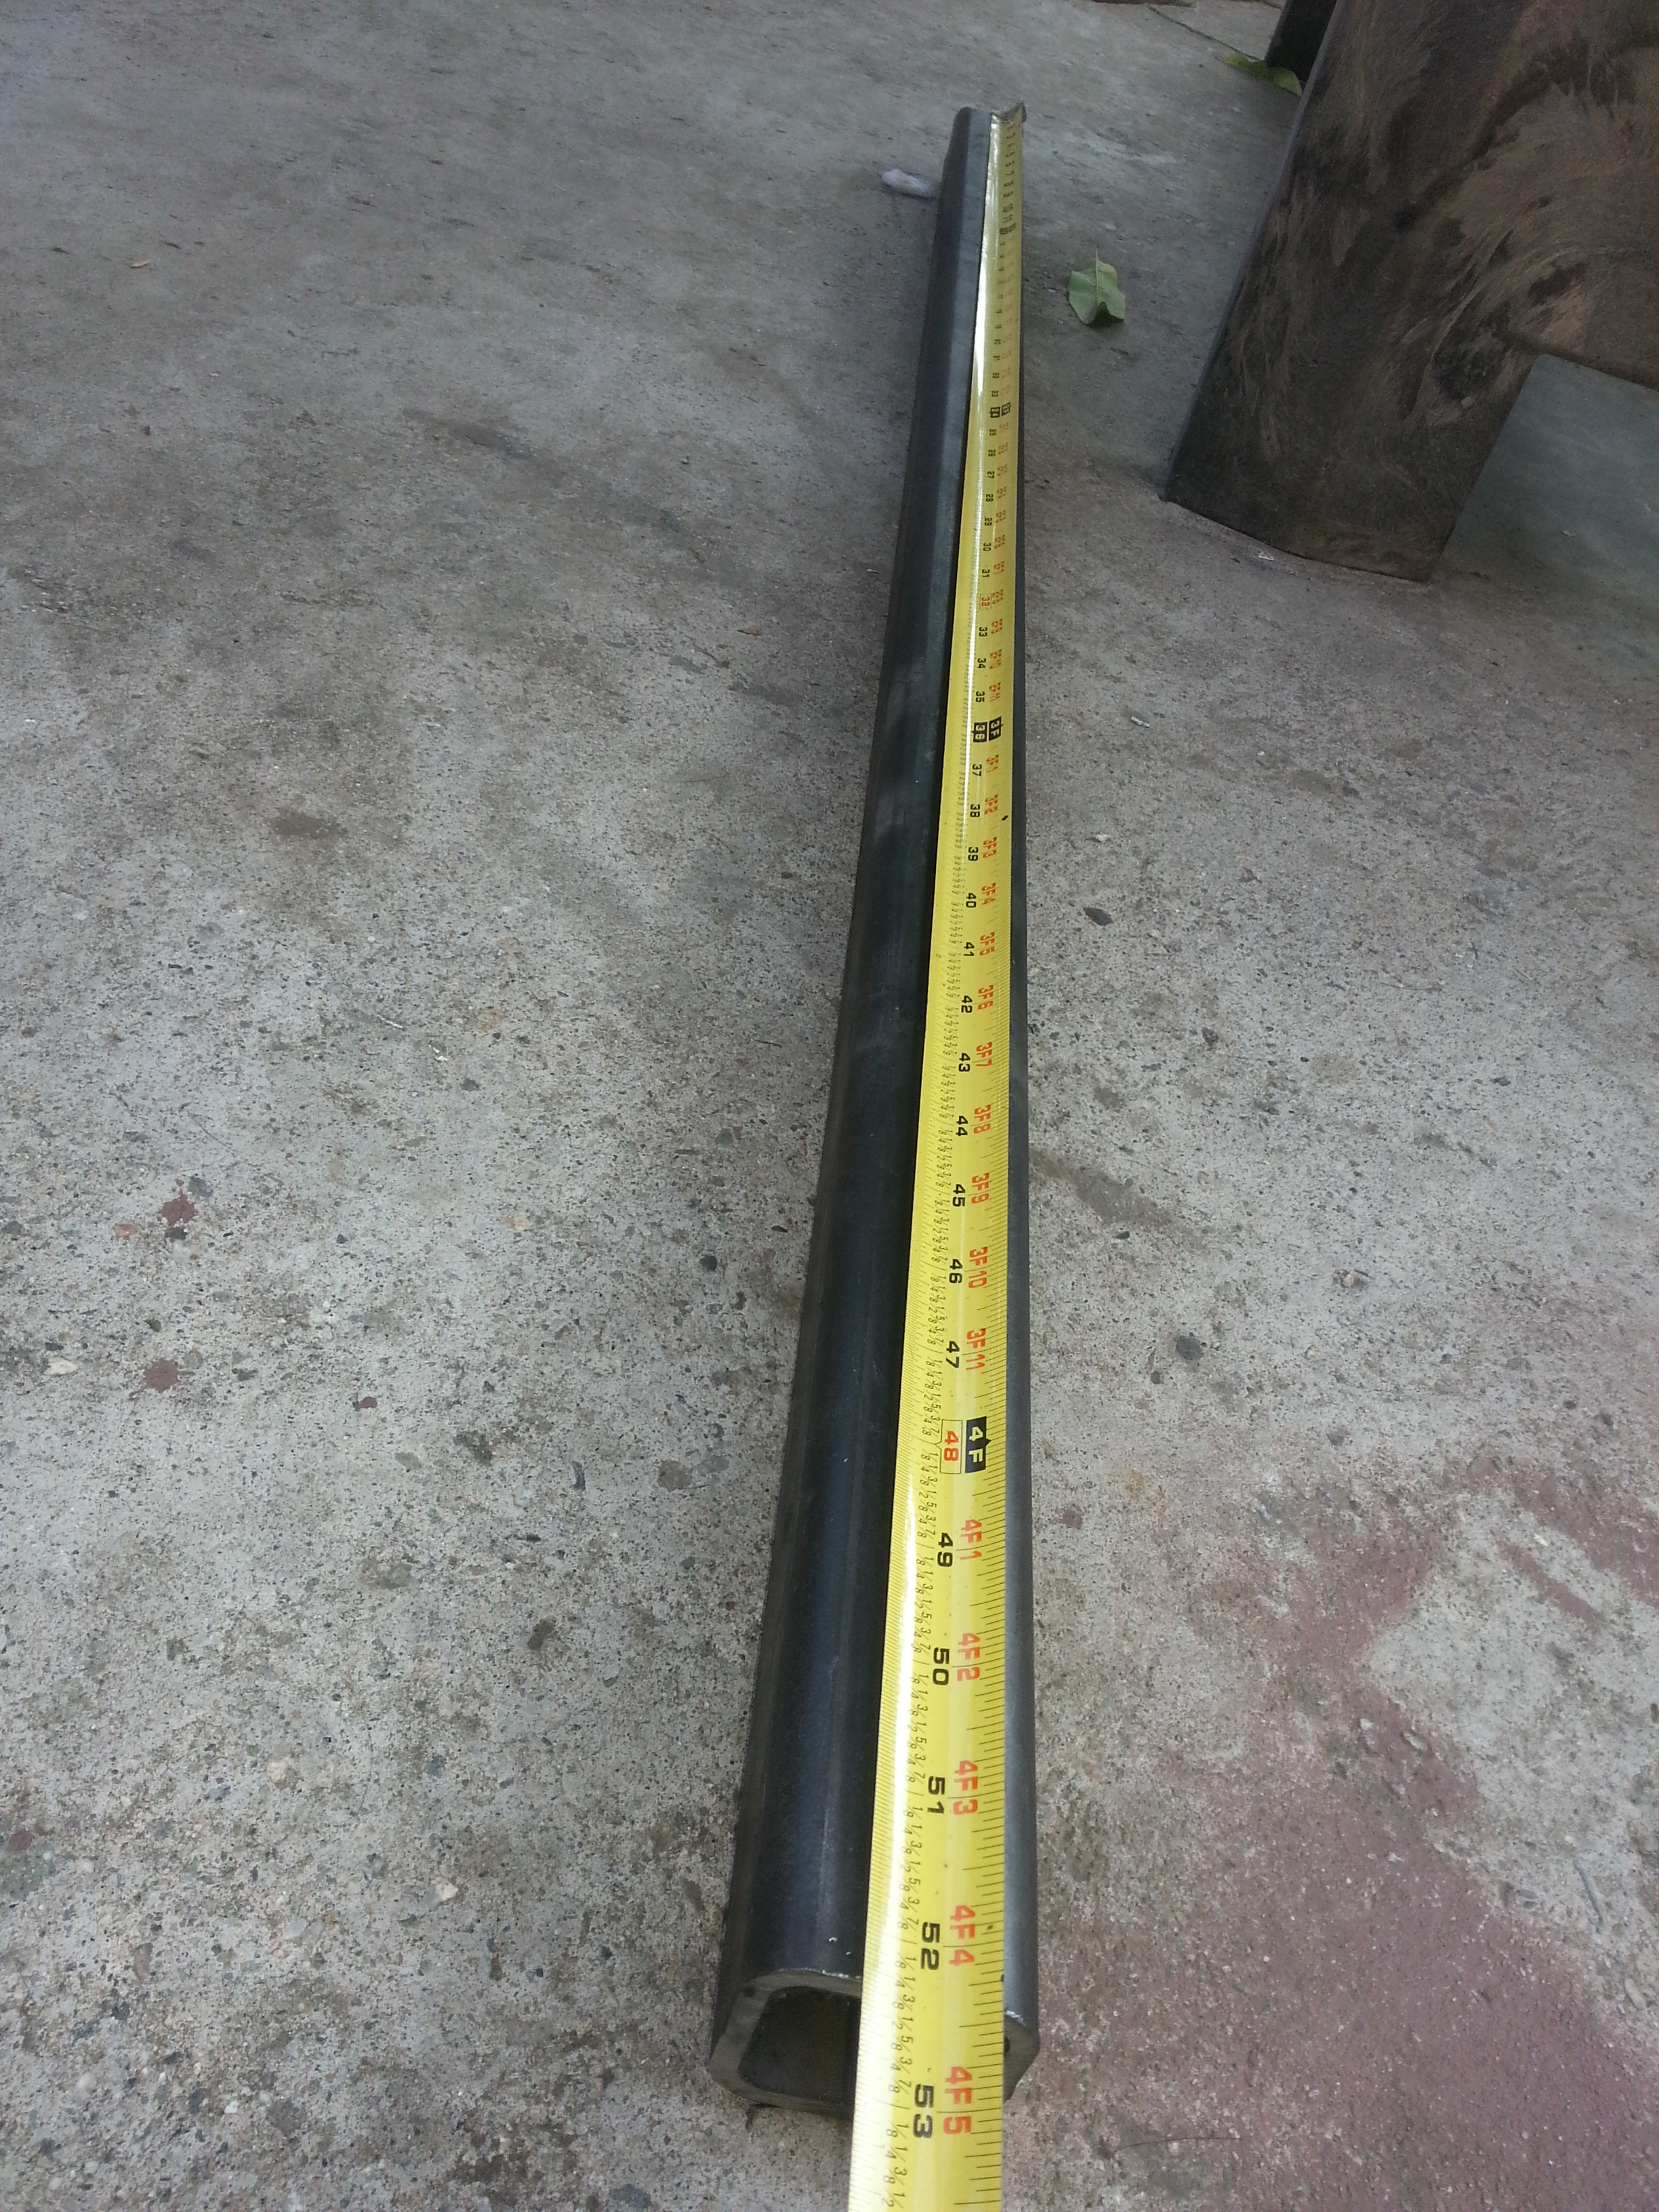
I bought 2" because 2x2 is the correct size that will fit into the tow hitch and winch plate.
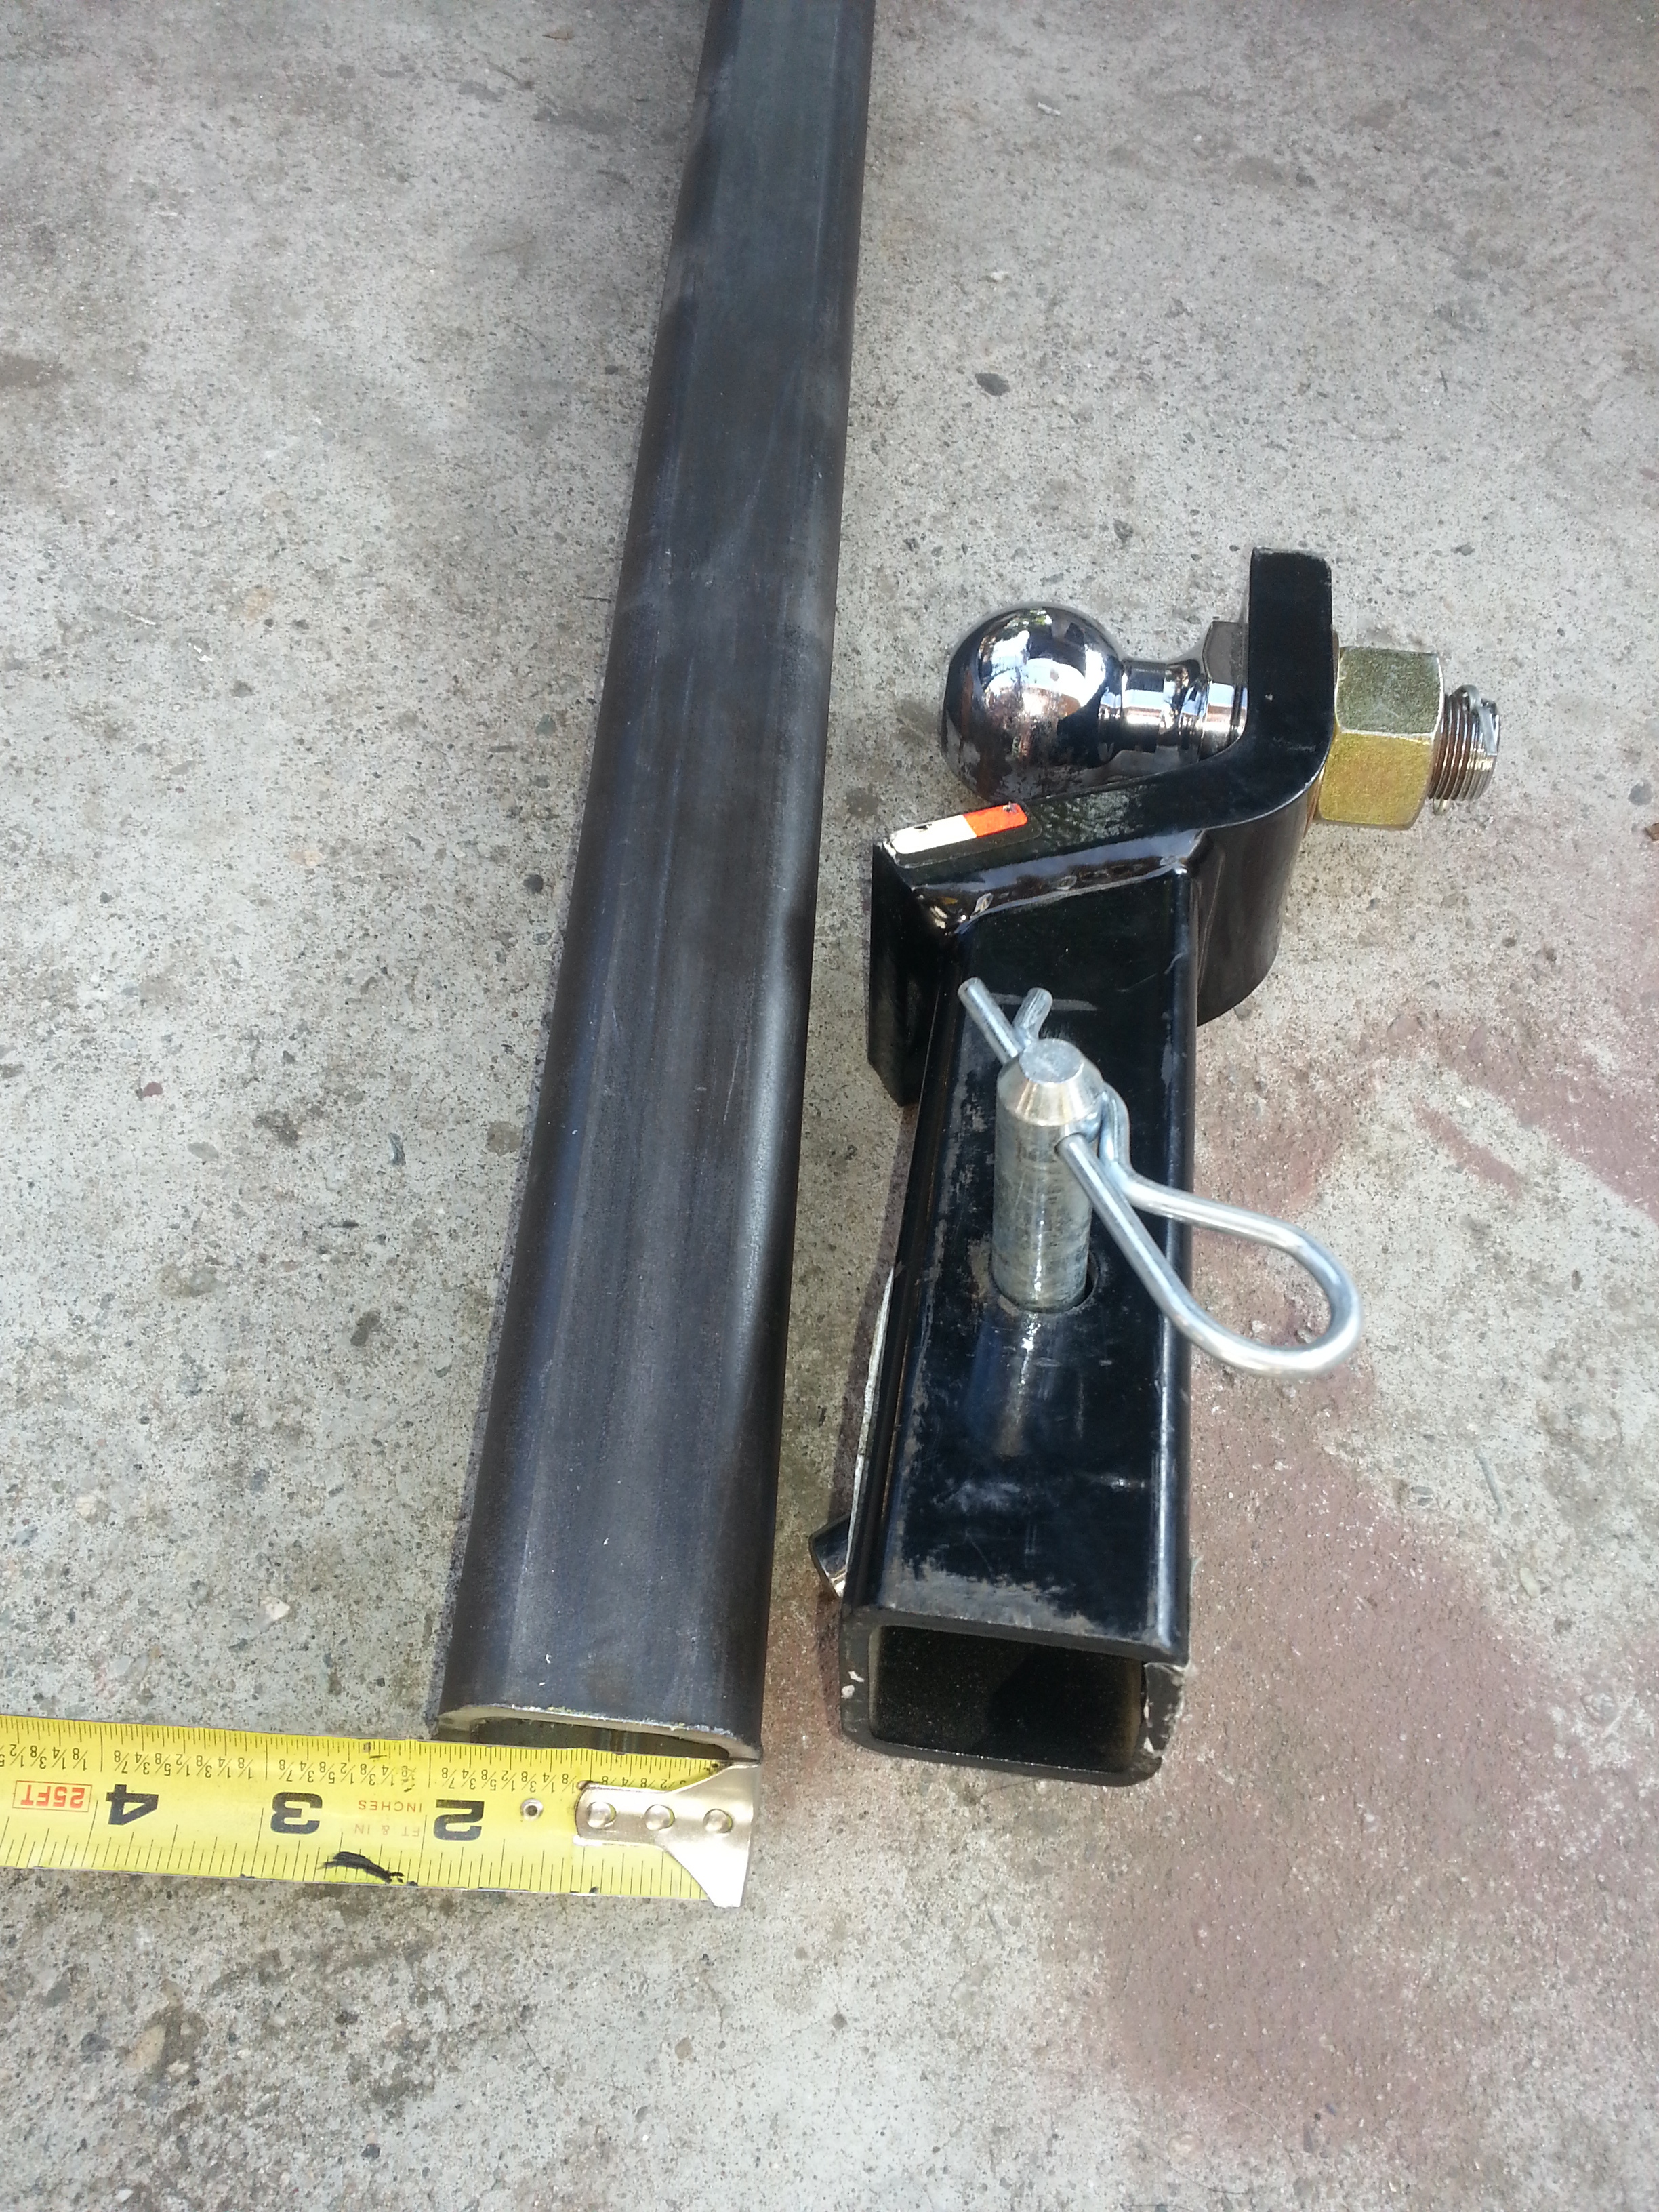
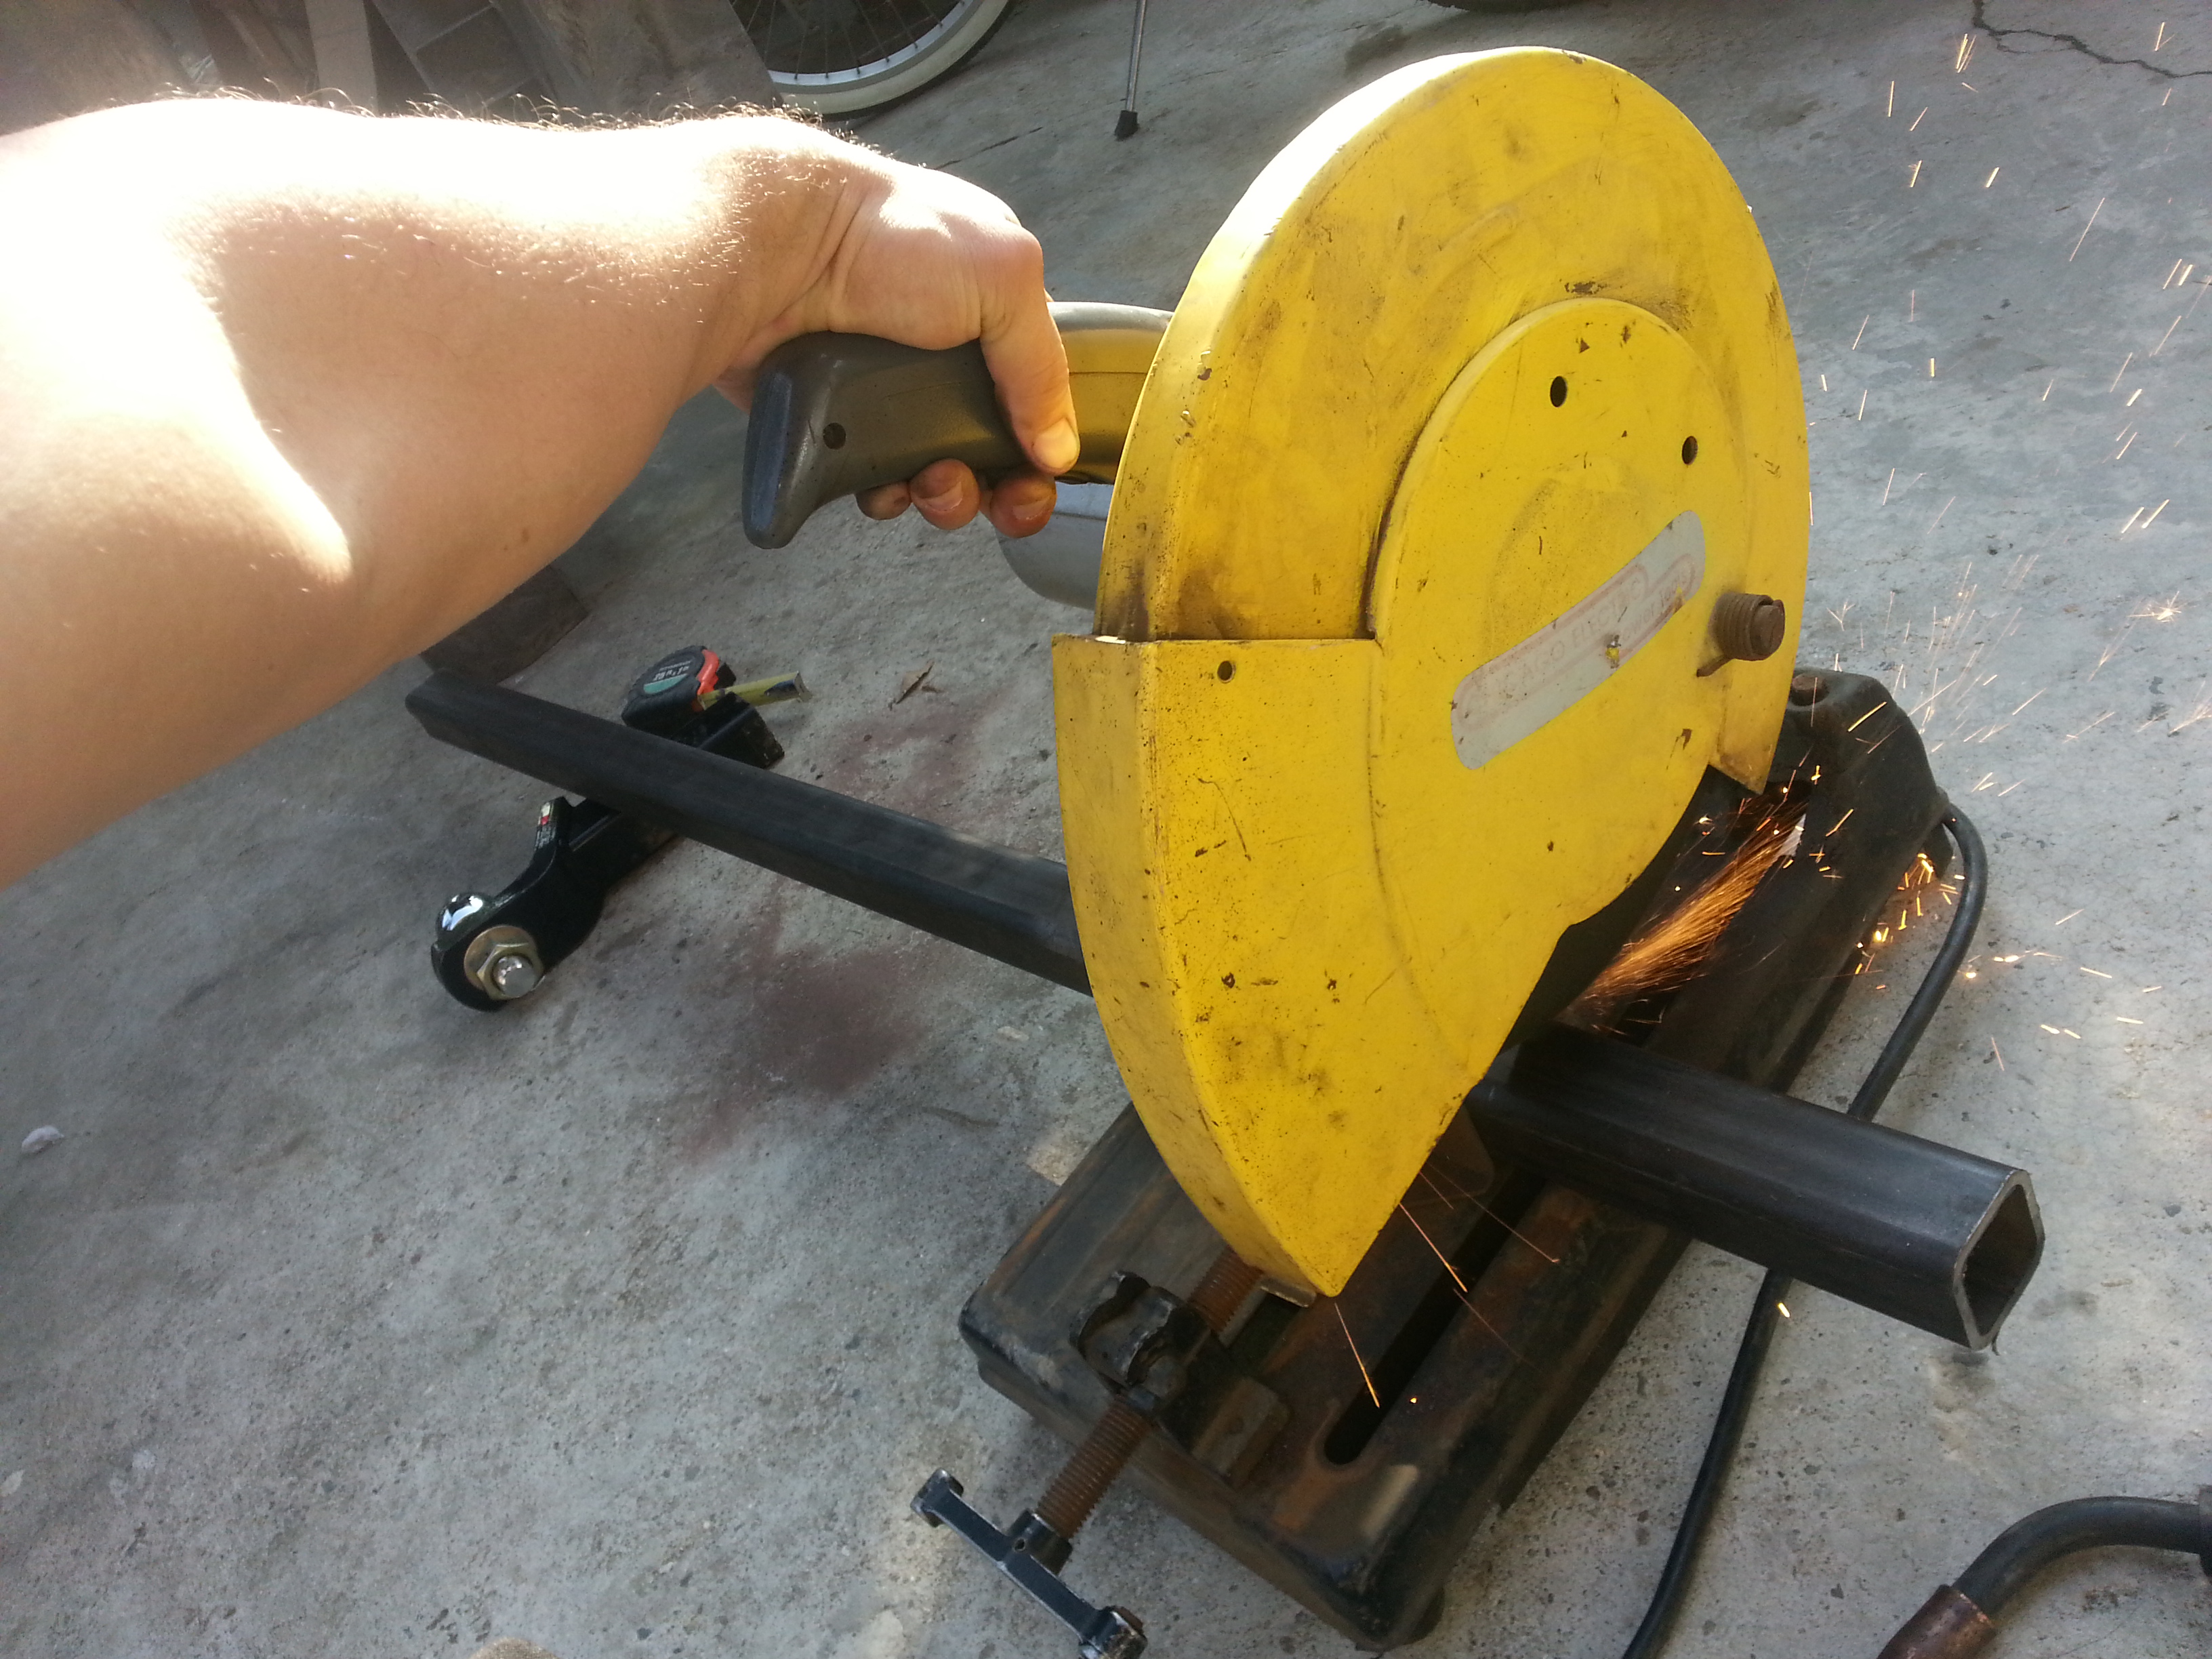
Cut the length to fit 1/4" out of the winch plate tow hitch hole.
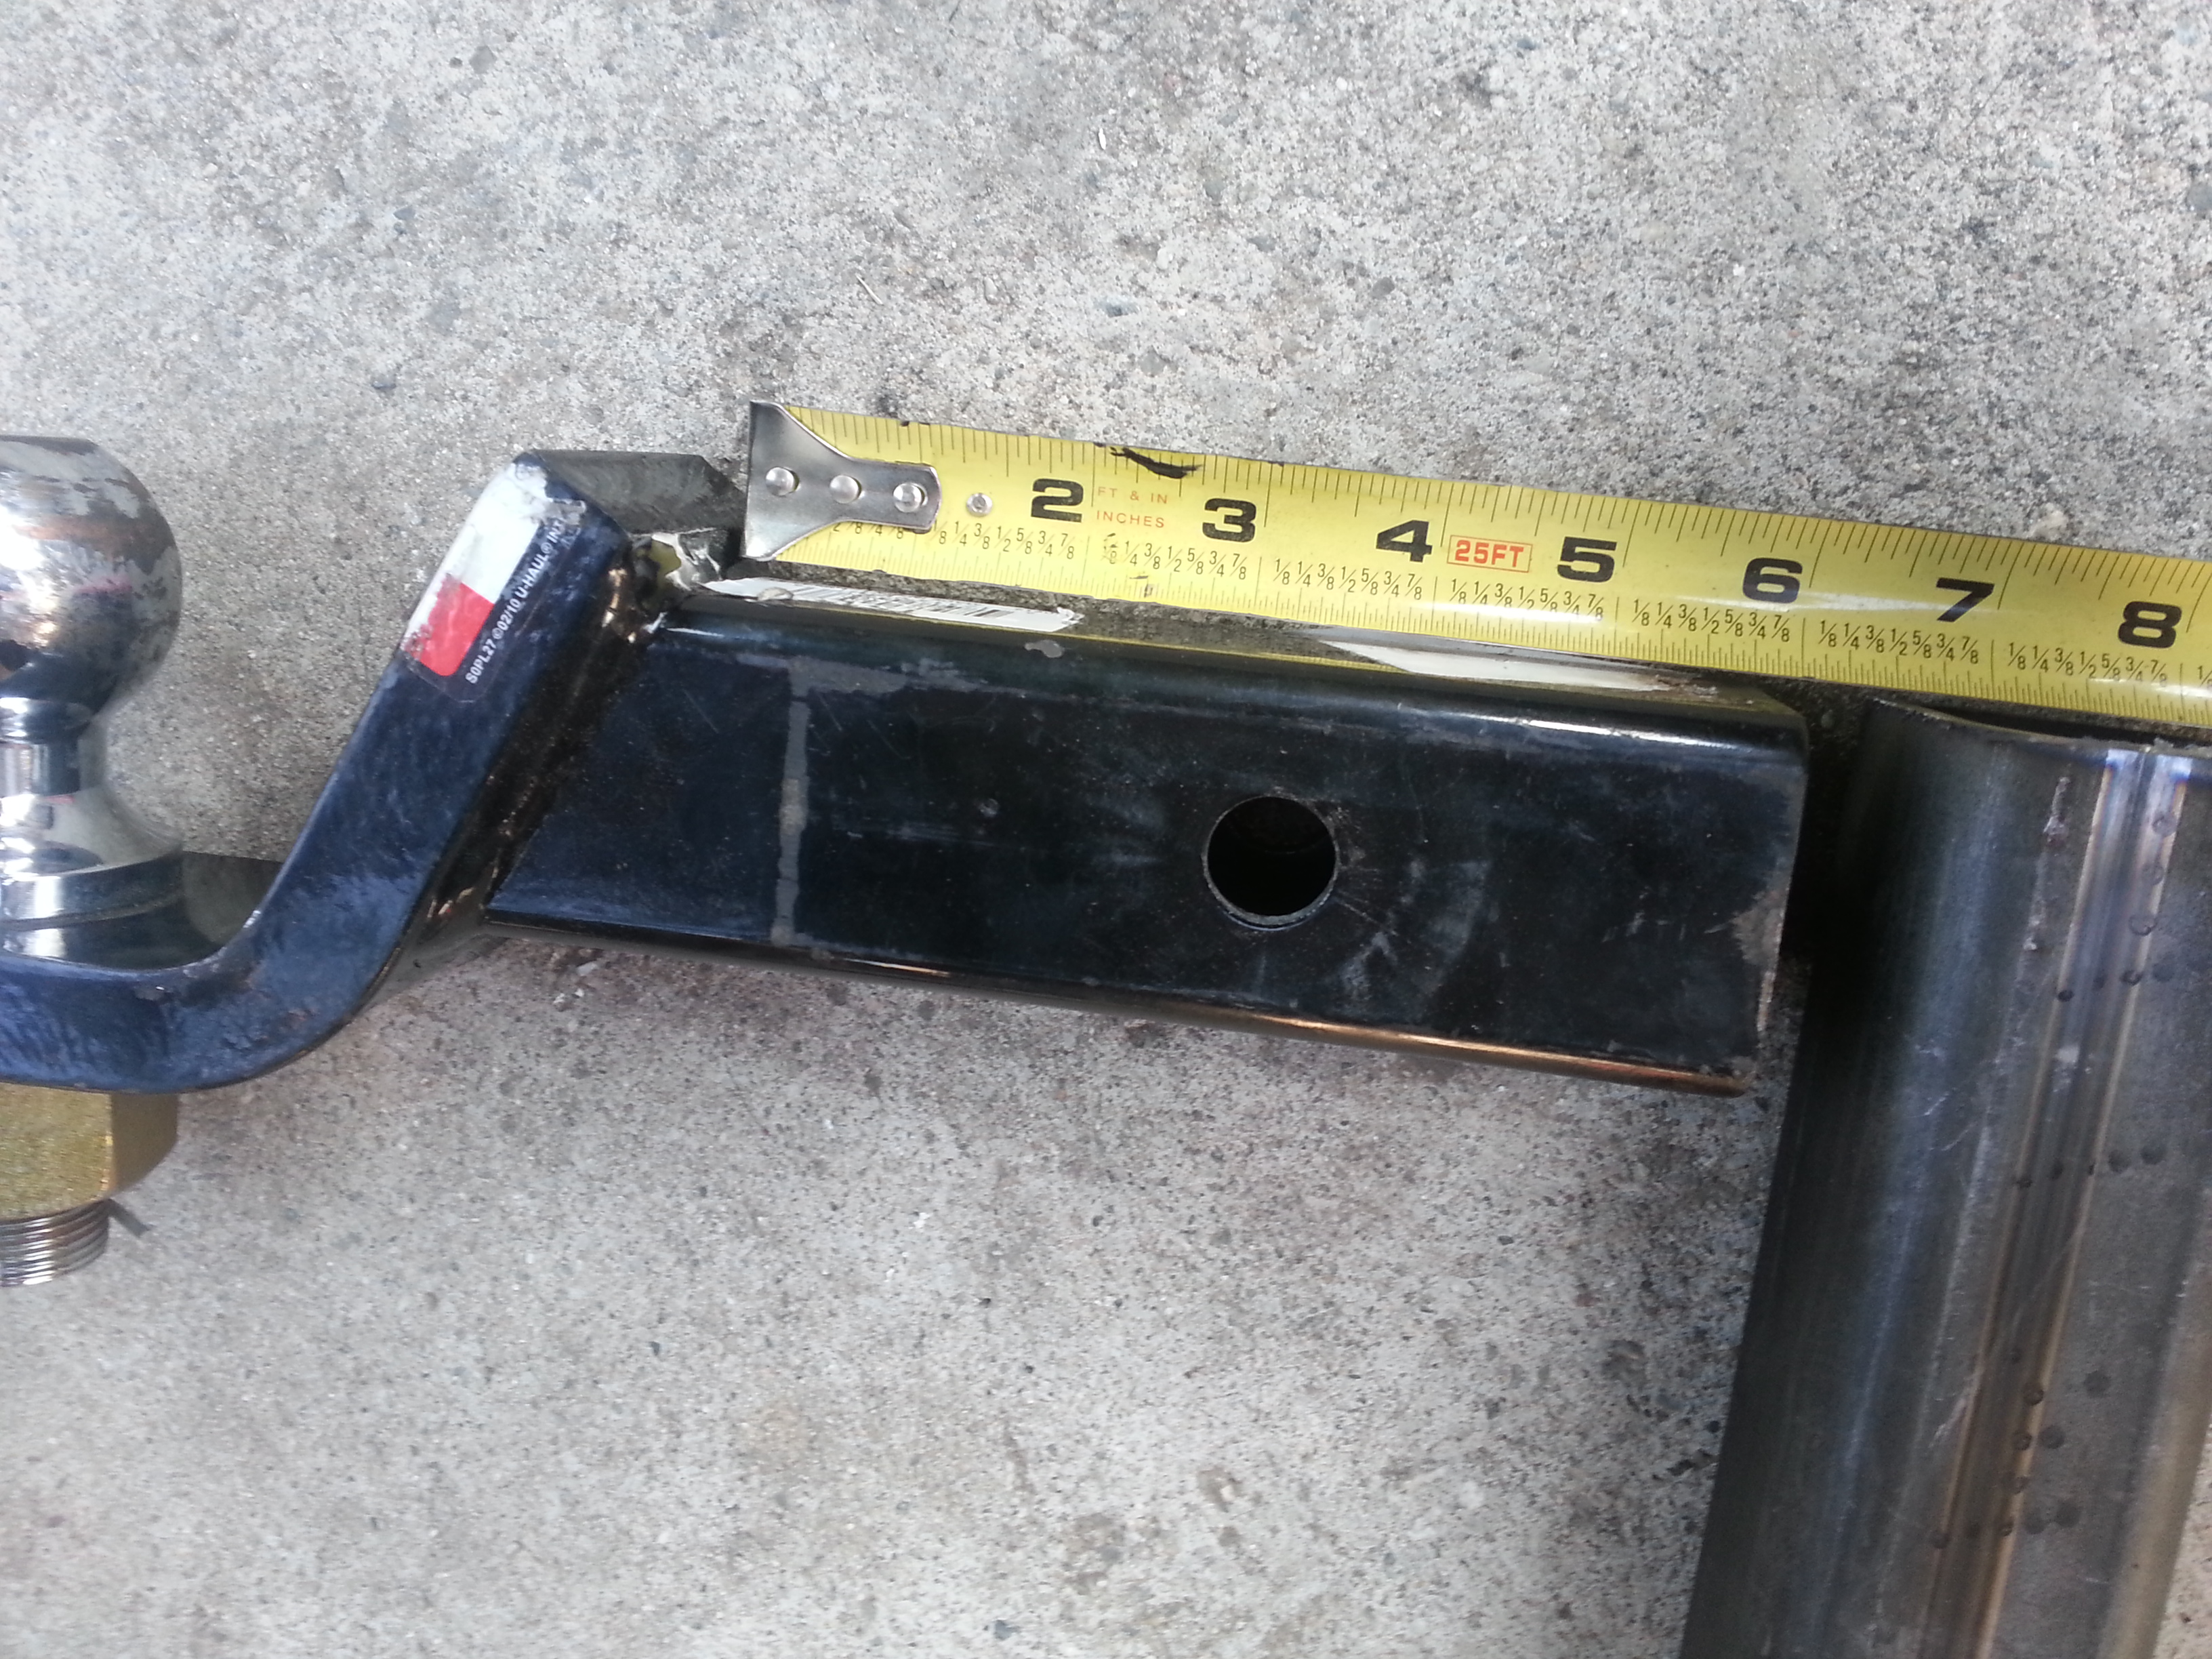
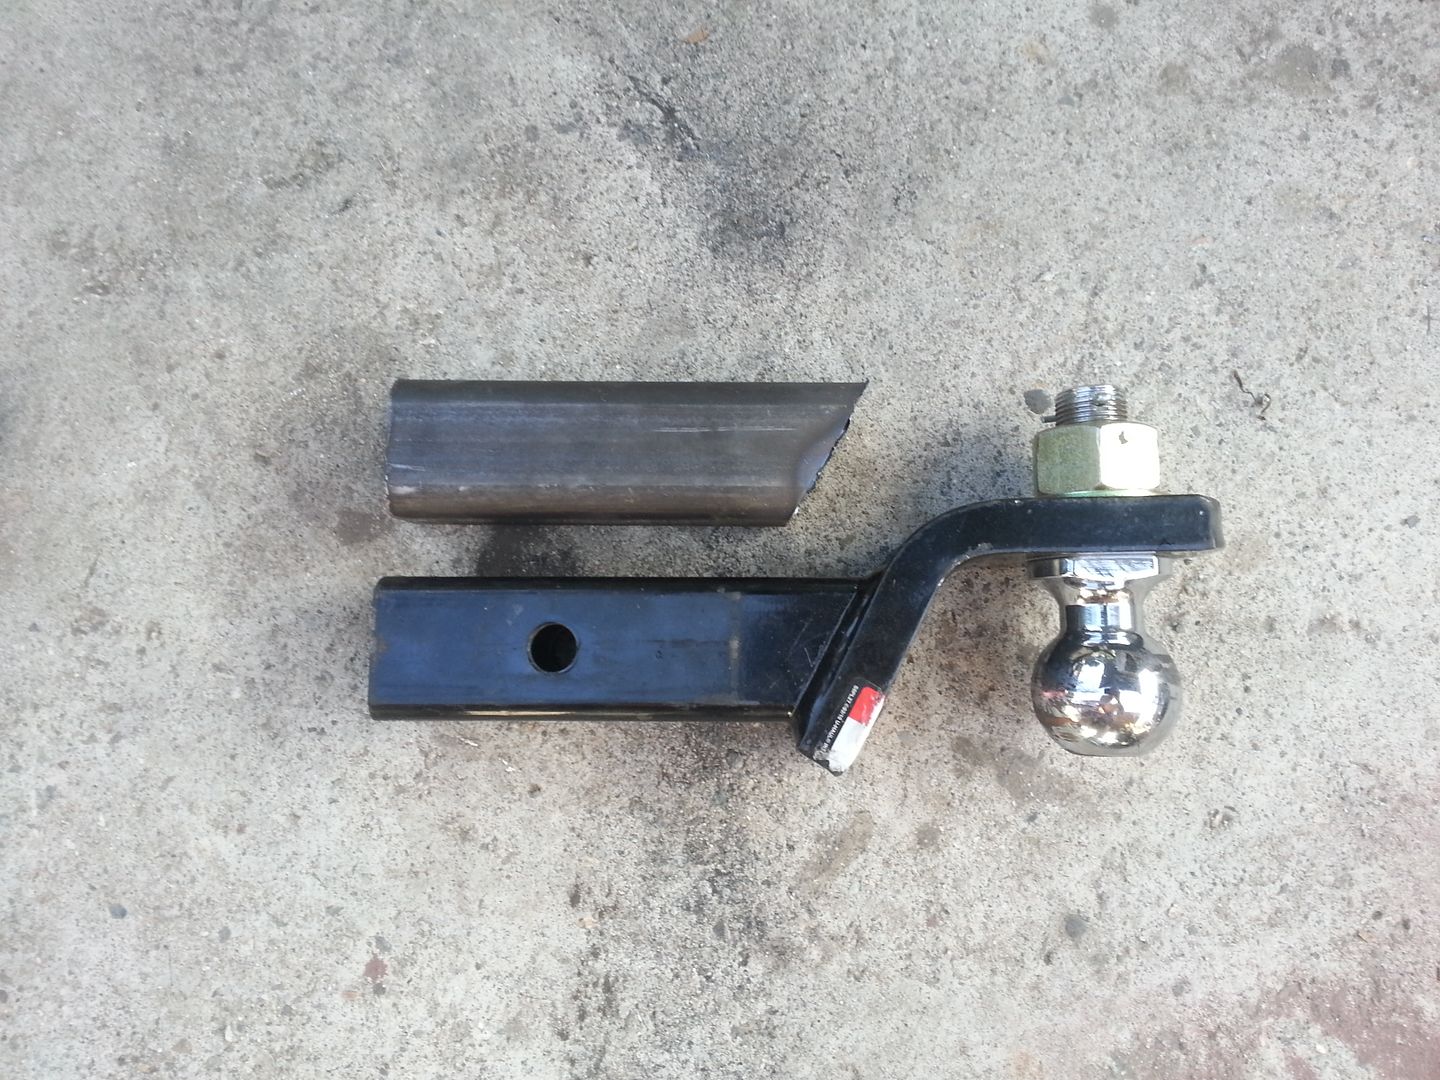
I found that this Uhaul Towing hitch fit exactly where i wanted it when inserted upside down. Perfect! Just measured the top and bottom lengths and cut the angle to those measurements. 5&3/4" and 6&3/4"

Cut the angle perfectly to match the same angle on the winch plate tow hitch tube.

looks about right
Cut the plate out that the license plate is gonna be mounted to. I left about 1&3/4" extra on each side of the bumper. You'll see why in a bit.
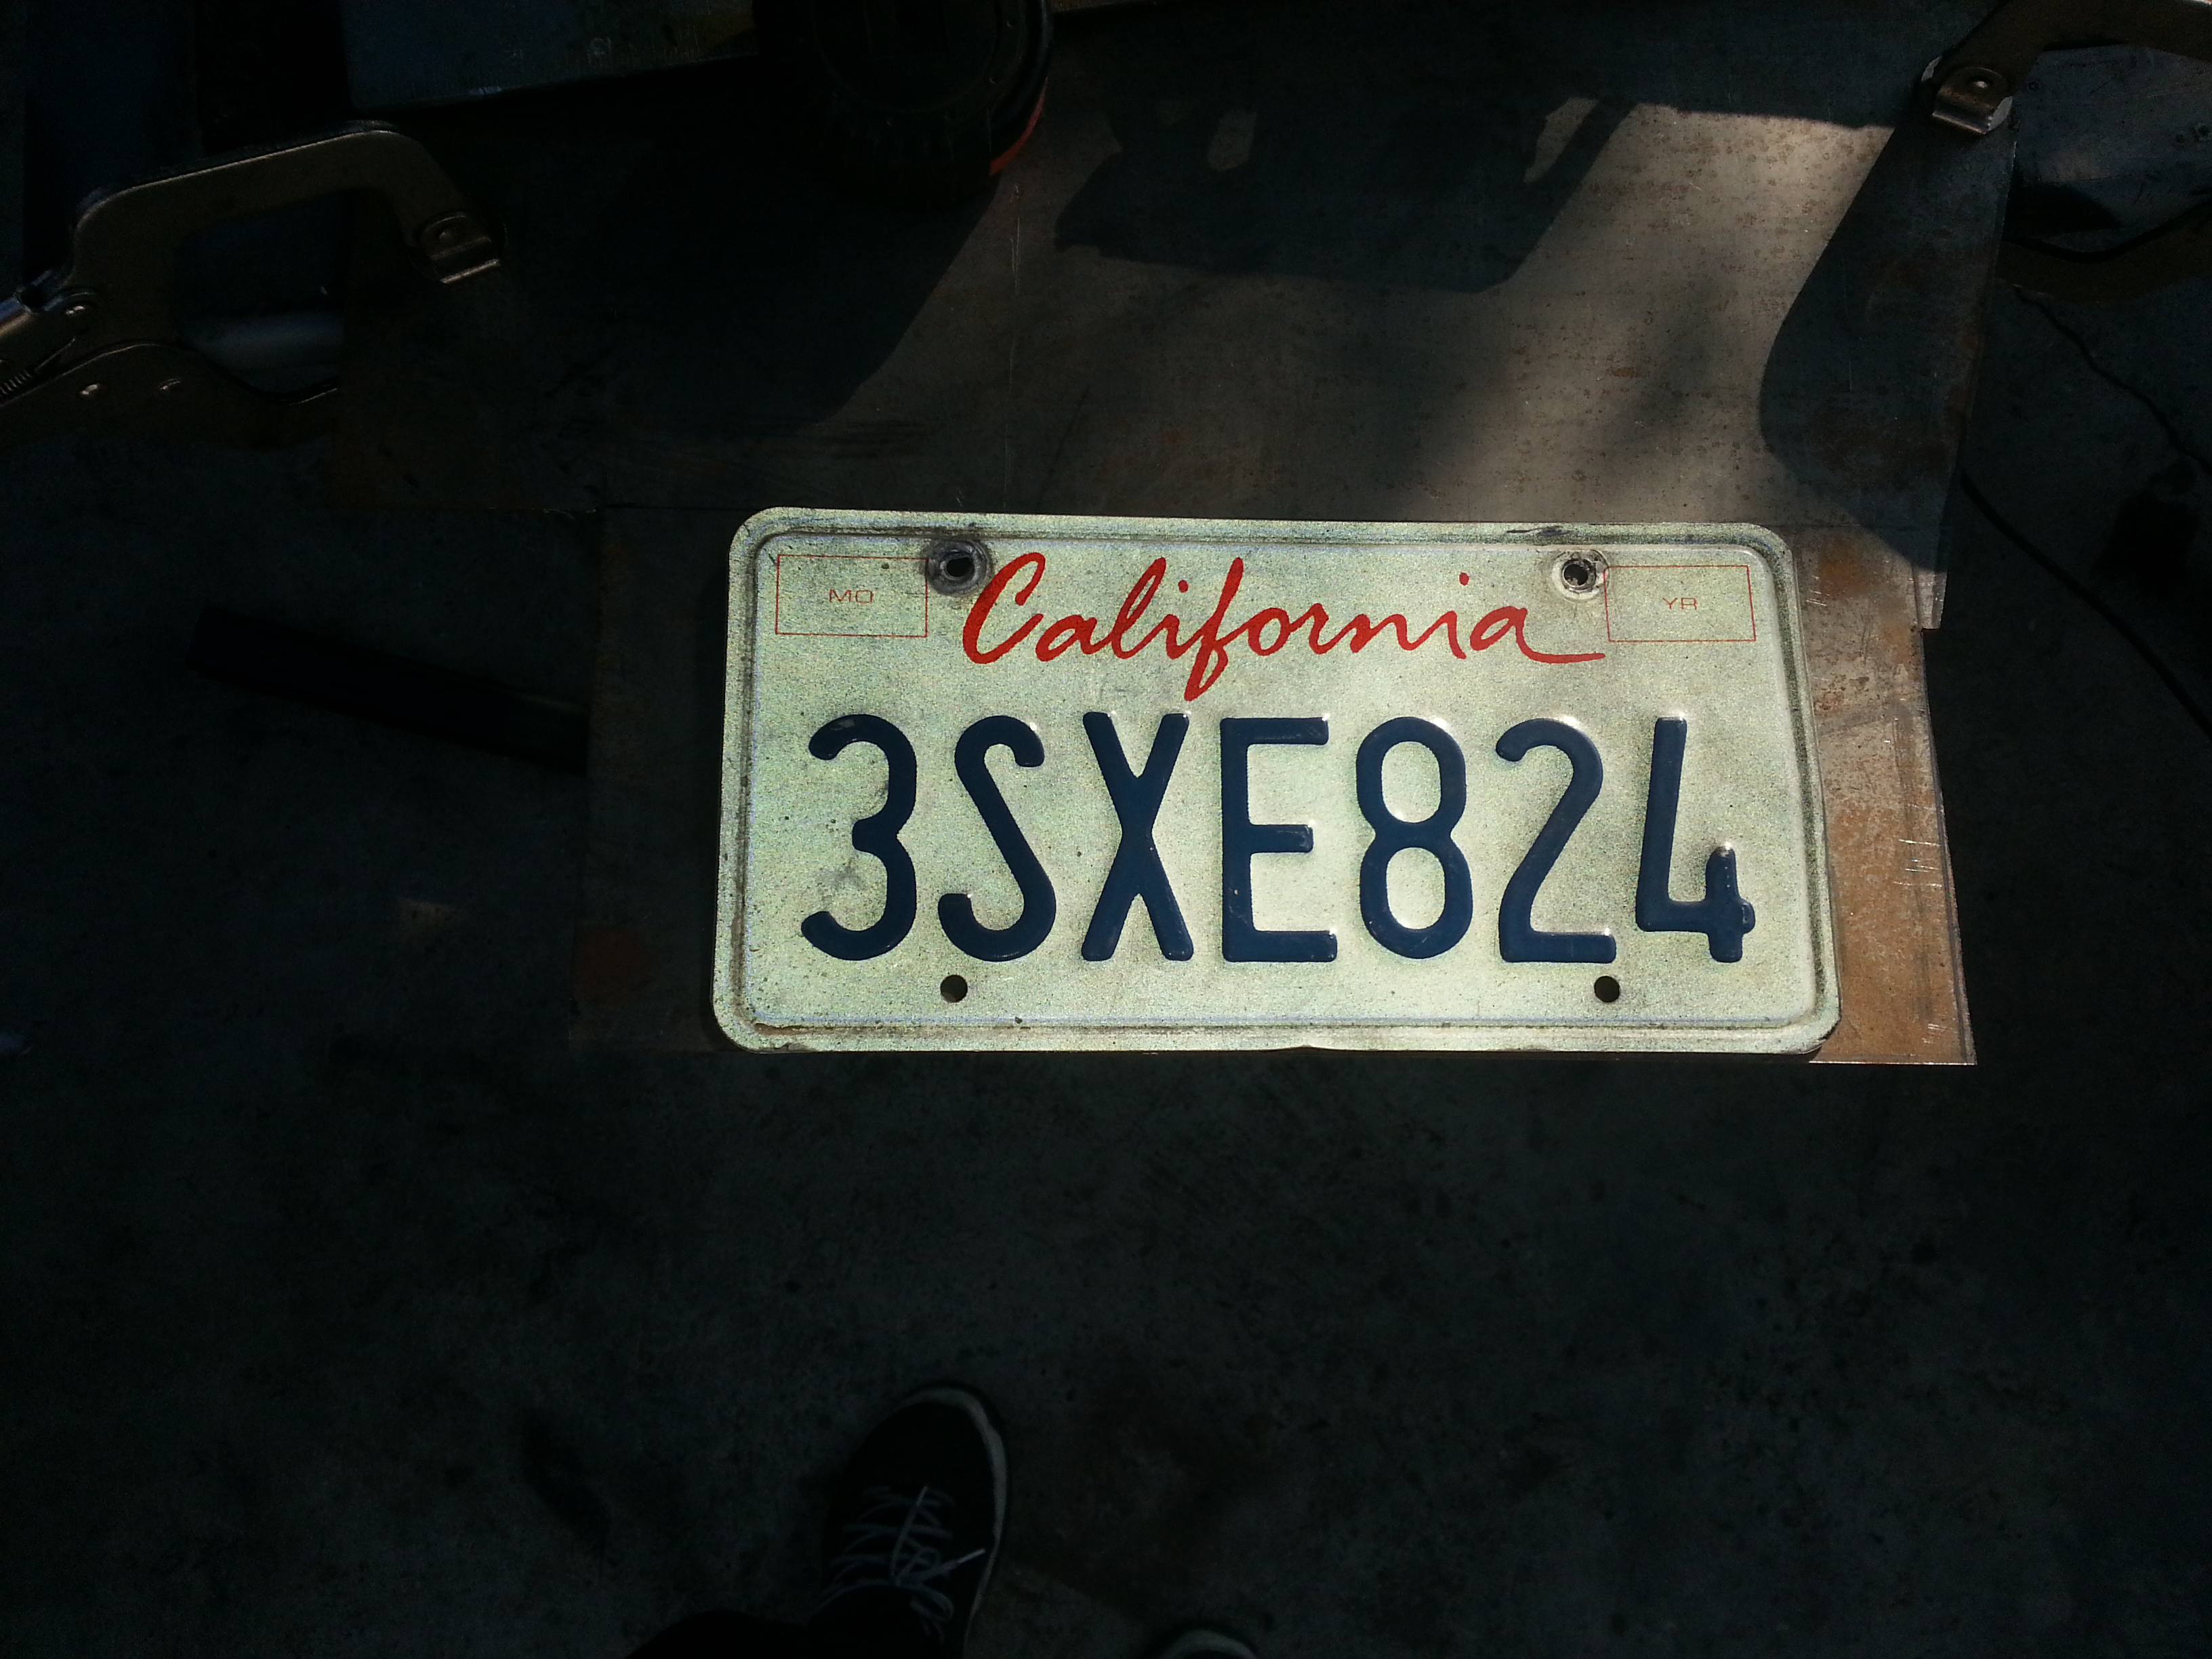
This is why i made it angled.

I like i said earlier, i left it sticking out about 1/4" just so i could weld the licence plate Plate onto the front and still have room for the welds so they dont restrict the tube from entering all the way.

More or less where it will be sitting. I need enough room on both sides to be able to stick my hands on the sides because i will be using the locking hitch bolt behind there.

Also wanted to restrict the bottom side of the so people cant use an extension for their wrenches to get my winch bolts off. I left the welds in tact on the back side. No need to sand down because they wont be visible. plus it will make for a stronger joint.
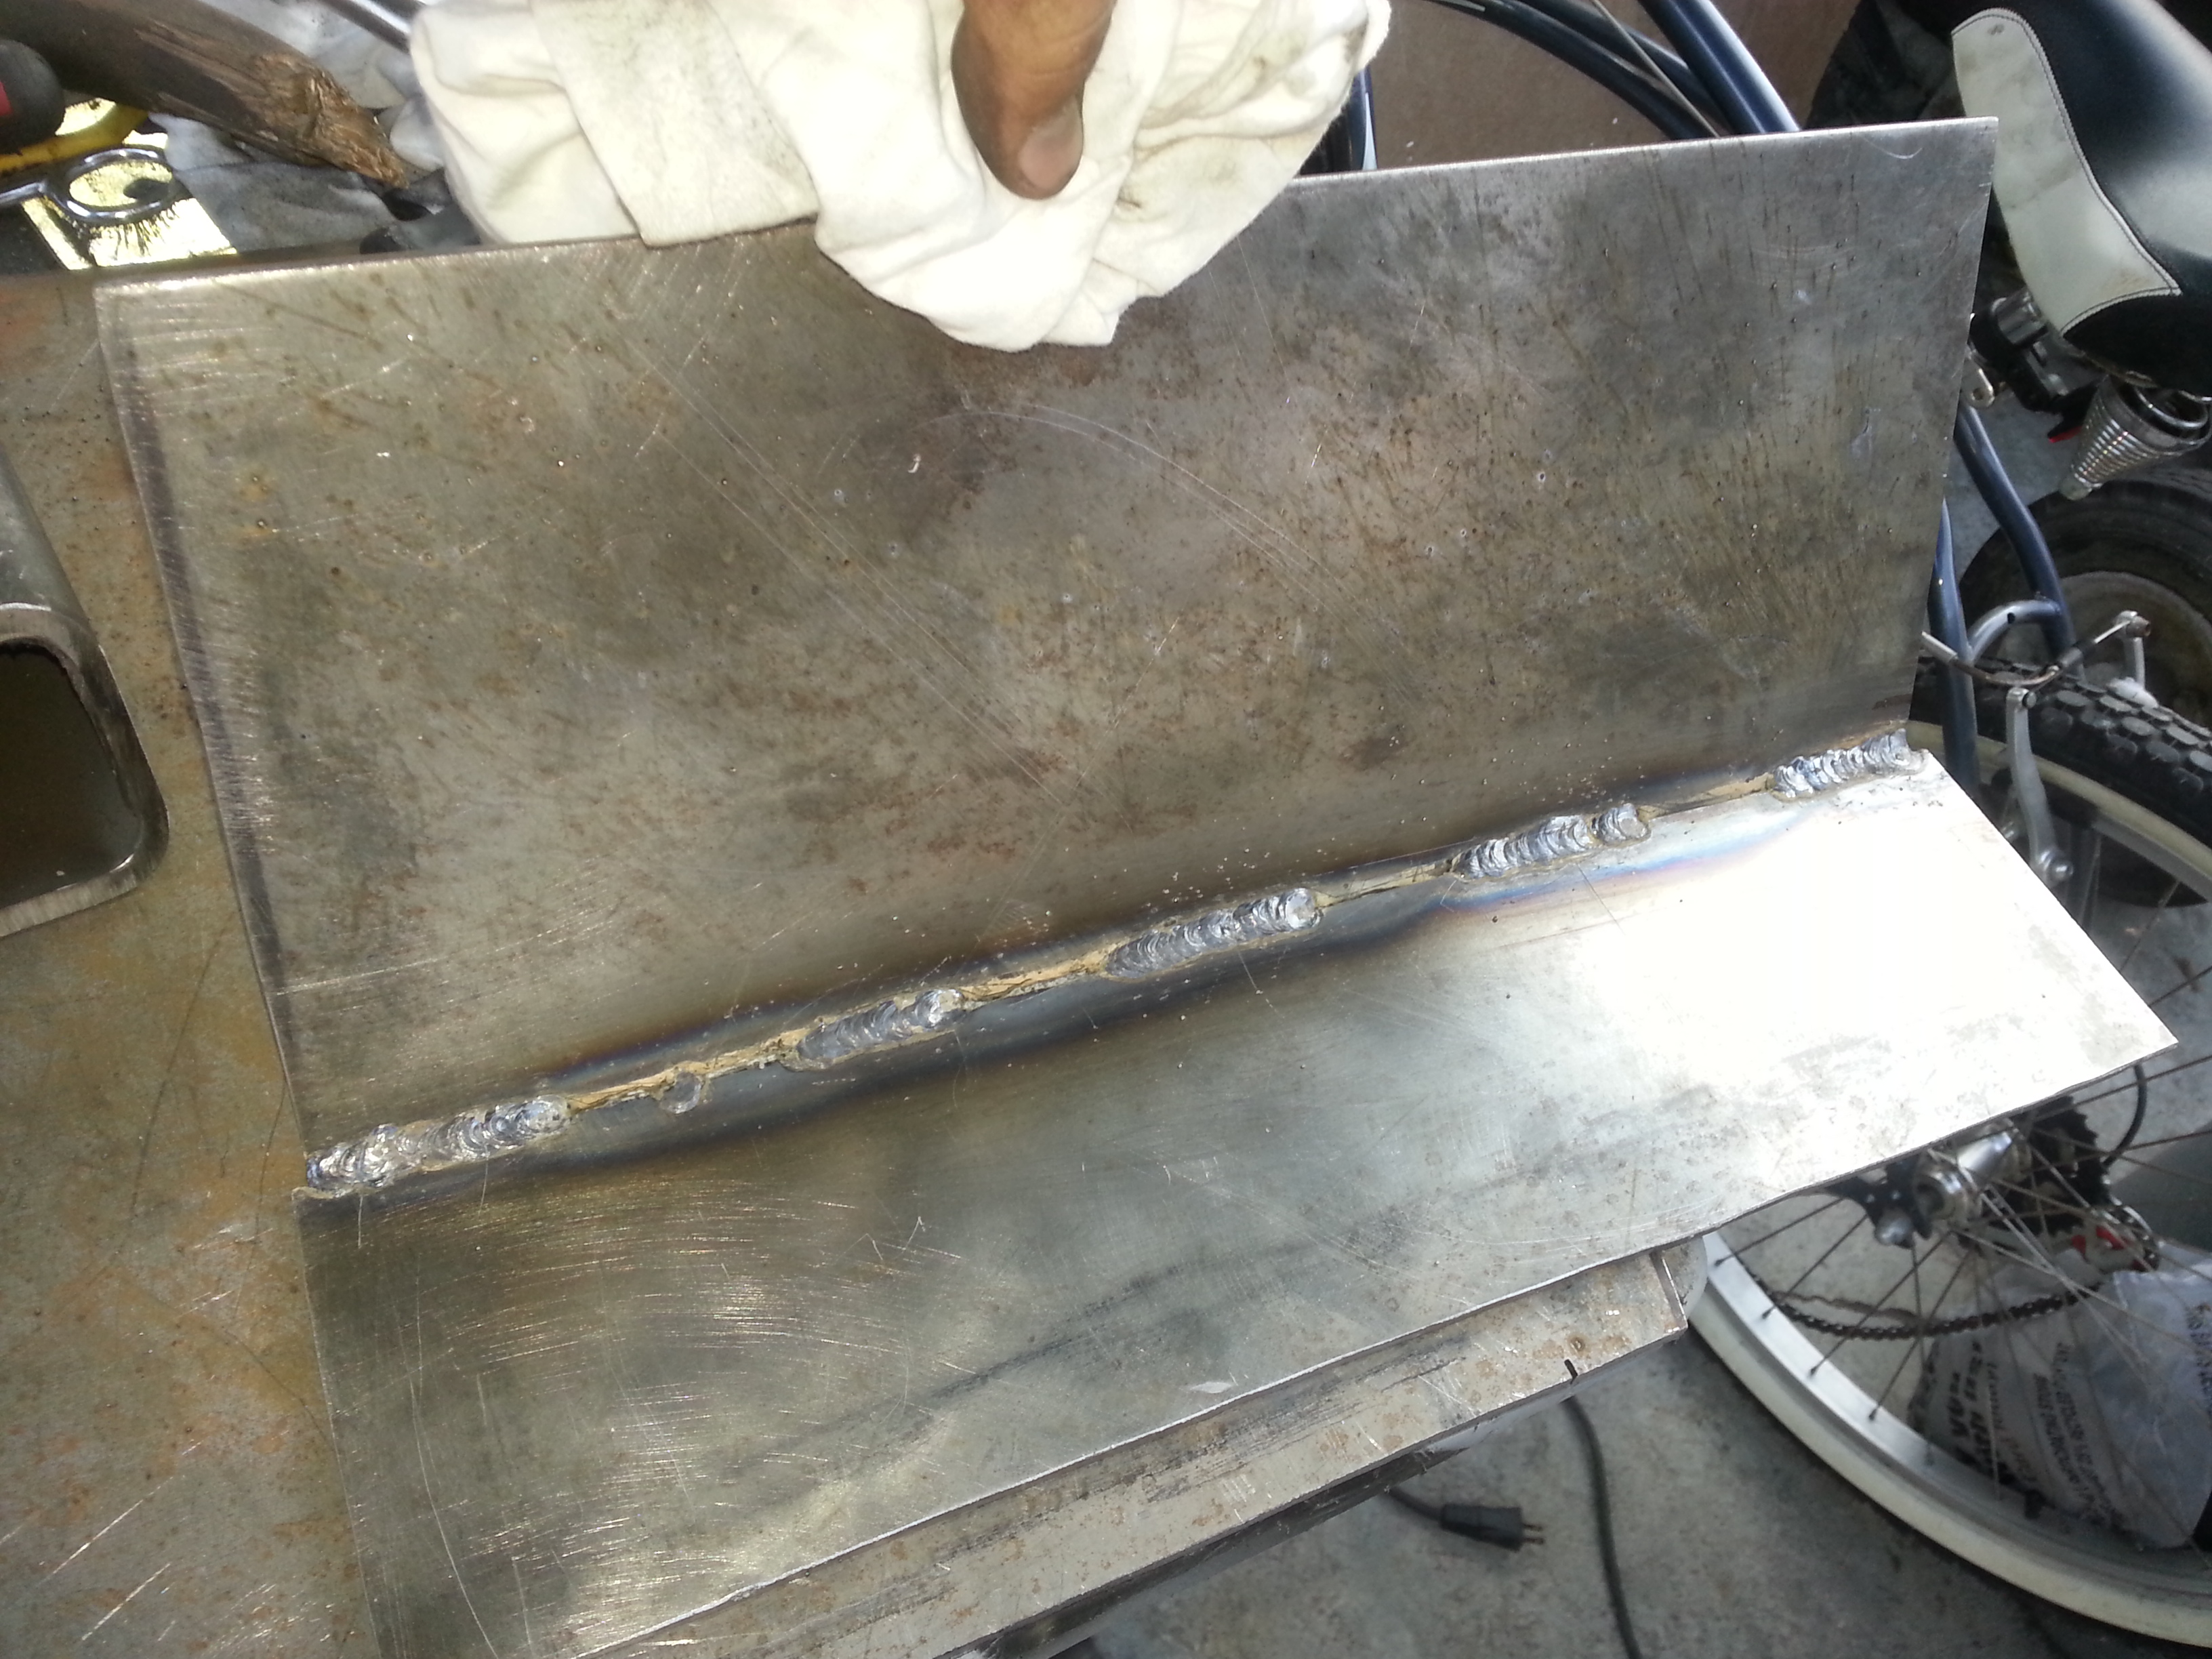
I did a full weld accross from left to right then ground down and sanded down to a clean angle.
I marked where the bolt hole is going to be and i centered the hitch piece on the center of the back part of that plate.

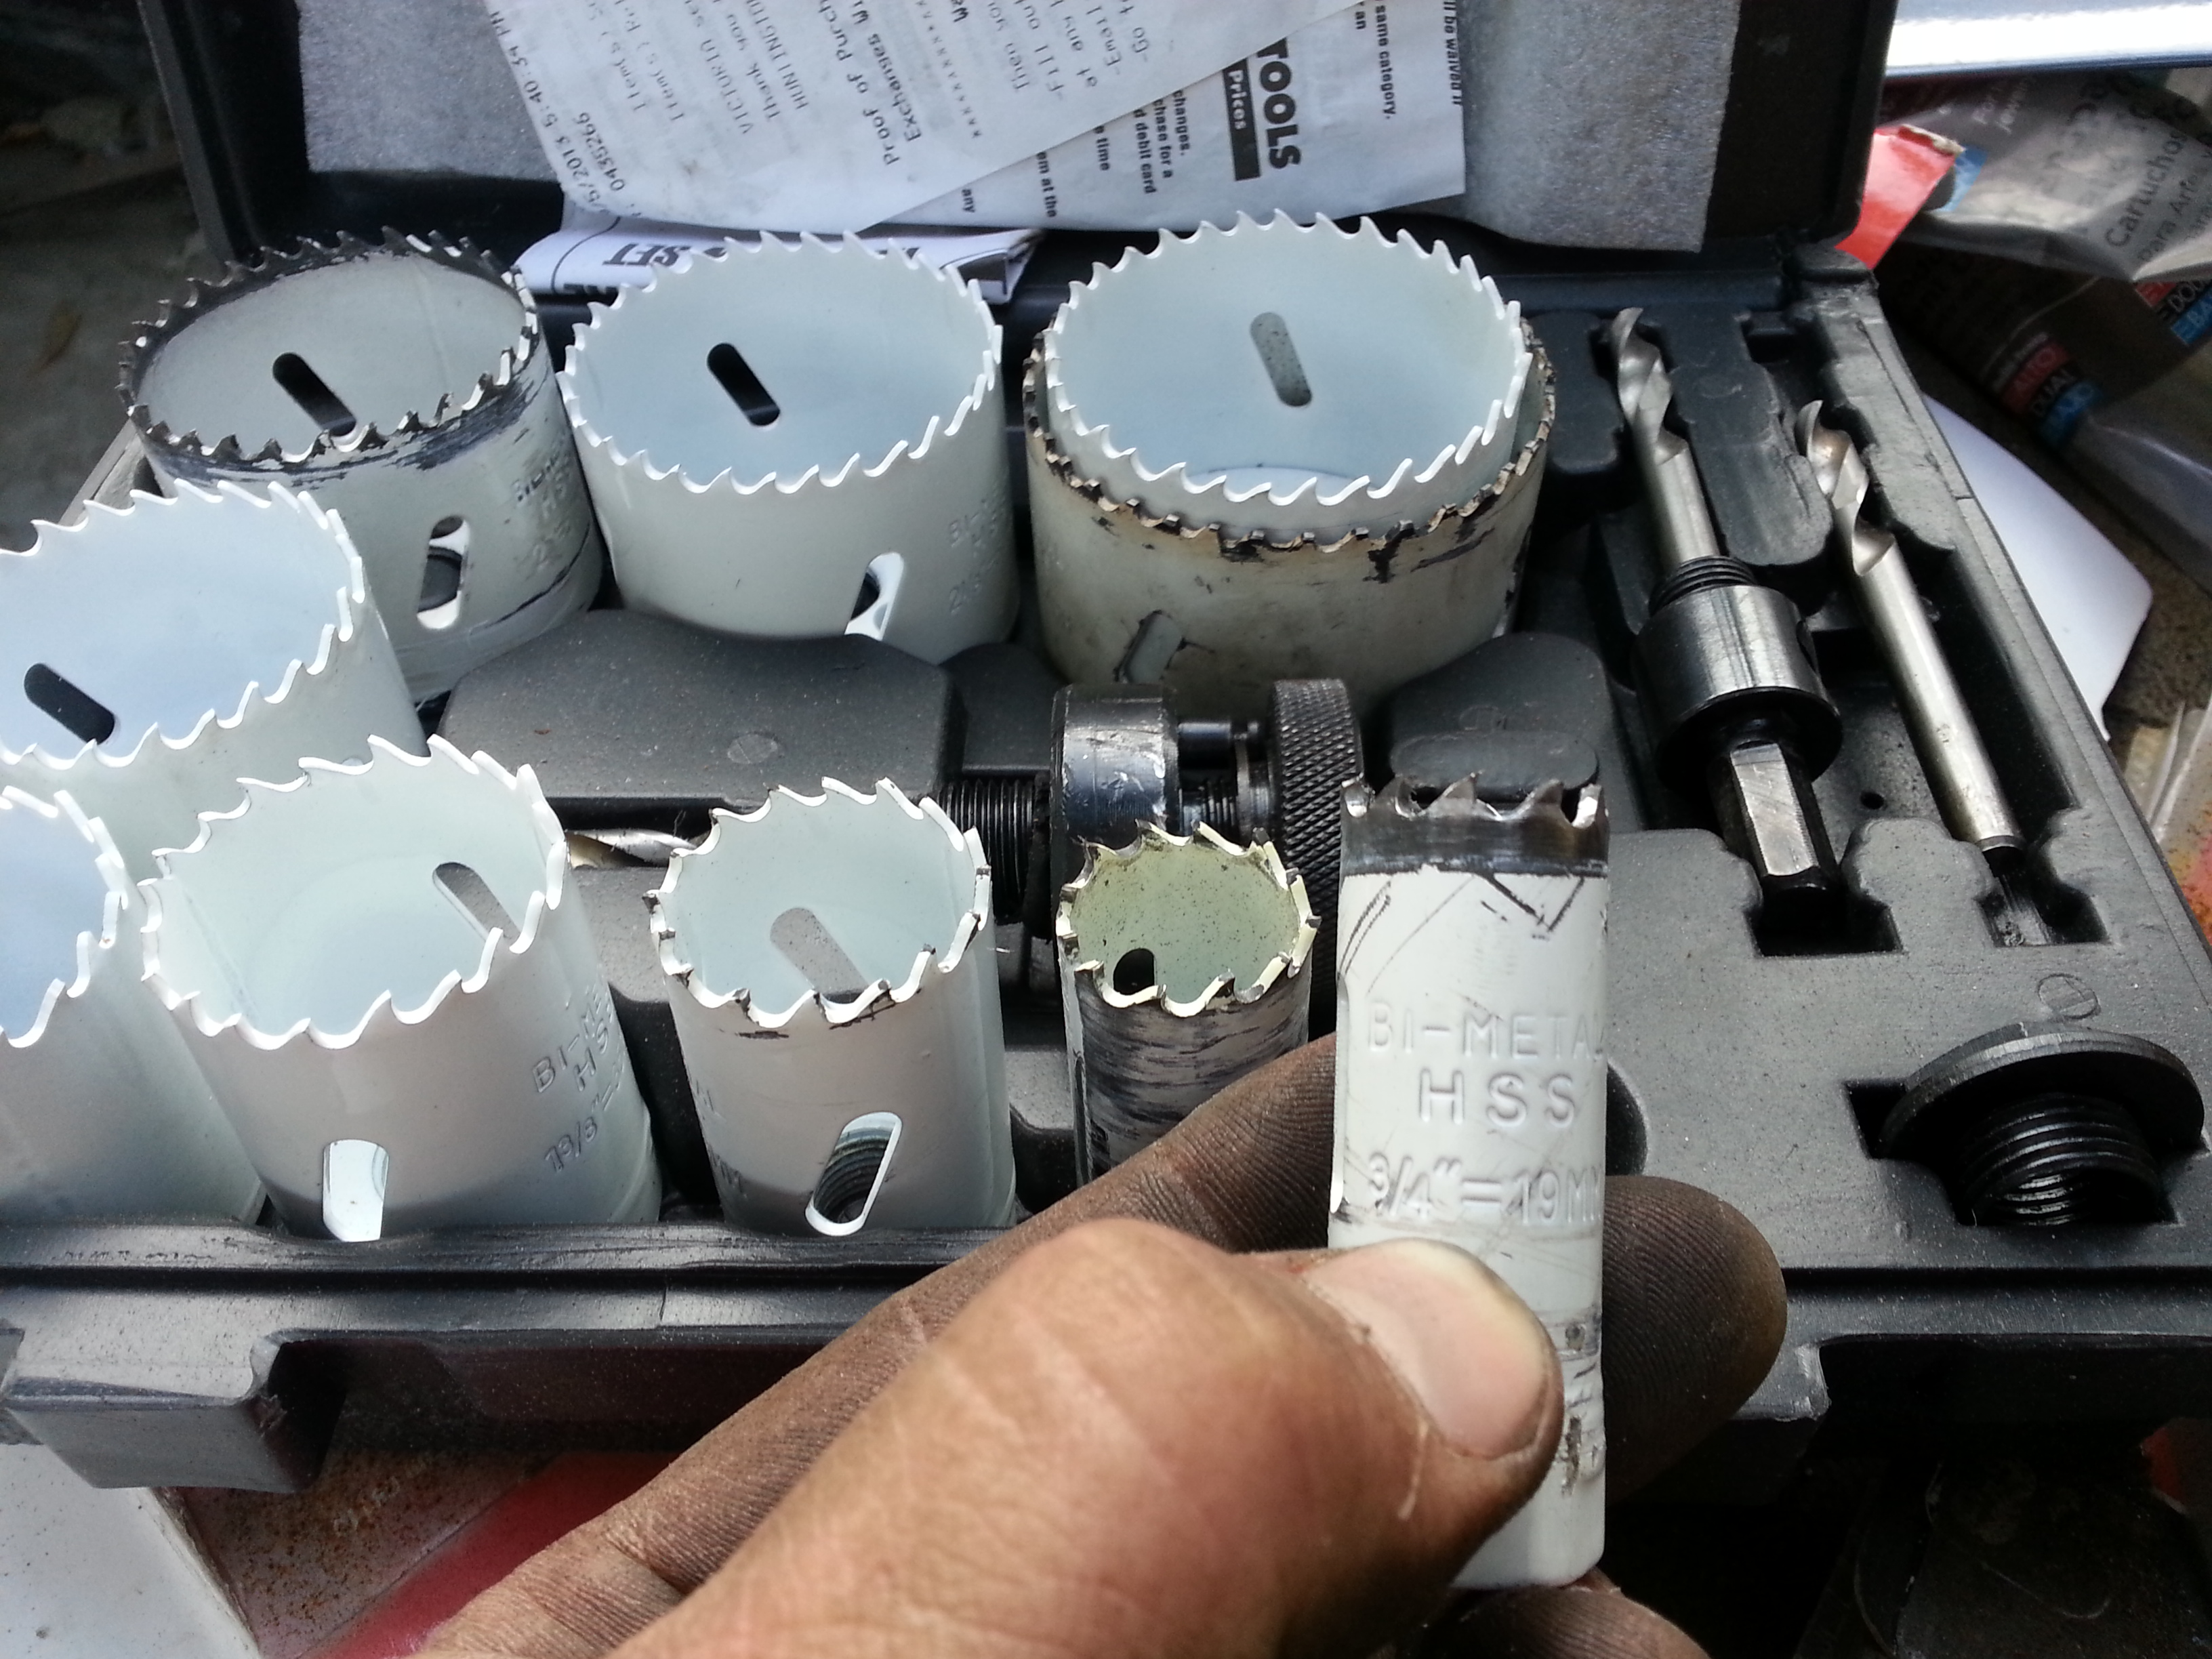
Drilled out the holes on the sides Using a 3/4" hole saw(Included in the Harbor Freight hole saw Saw kit).

Perfect fit. I wasnt supporting it in the picture but the bolt fits right through perfectly.

Bam! all welded up.

Nice. Came out clean.

BEEE-YODA-FUL! Btw sorry but this is the only picture i have at the moment of everything together. Either way you can still tell how clean it looks. It all came together very nicely.
Bolt and pin fit perfectly.

Bought a Reese hitch receiver bolt lock. Woot!

Good luck getting that off with the limited space you are provided with. lol
BTW on a side note; Notice the bolts still exposed there. I had to address this problem ASAP to avoid giving a-hole thieves easy access.

Here I added plates to the top side of that winch plate. These will cover the bolts completely.
As you can see here, there is no way to access those bolts now. and good luck getting a wrench in there jerks! lol That is 3/16" steel fully welded all the way around. It is very solid, That sucker ain't going anywhere!
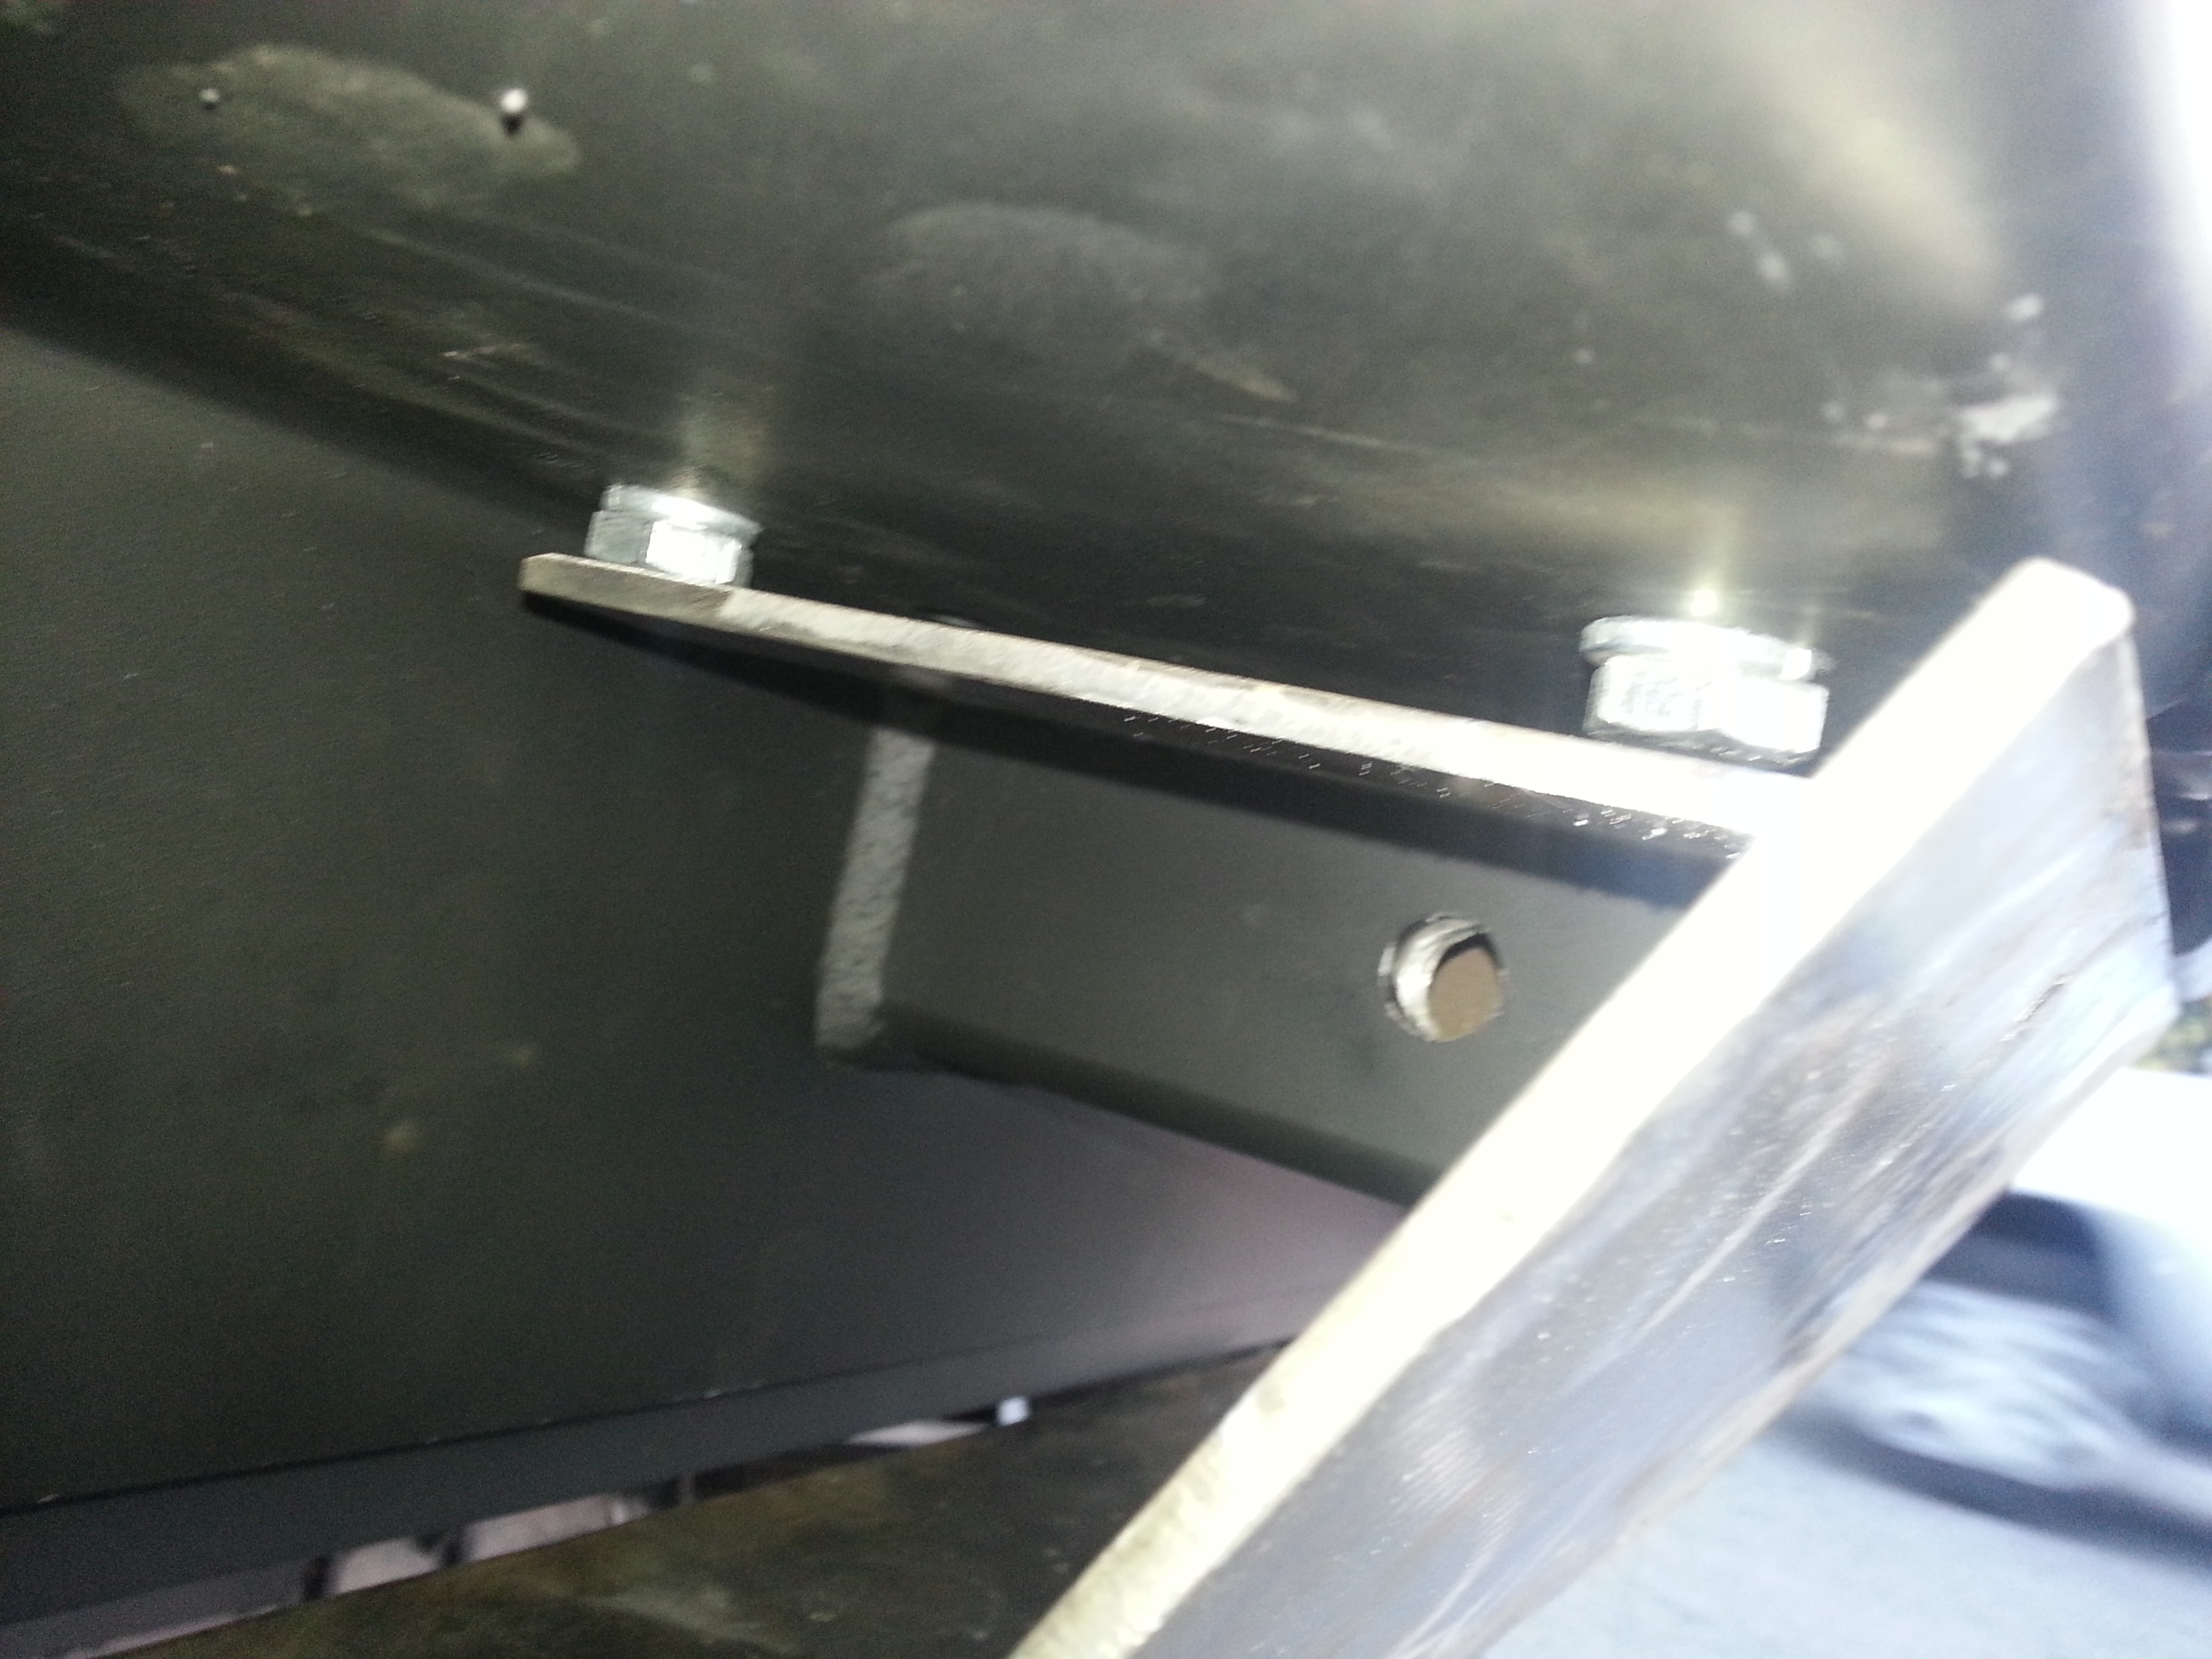
Already Primed and painted matt black.

That is all guys. I've very happy with how this hitch license plate came out. It compliments the bumper very nicely. And best of all is that I can remove the License plate hitch when i go off-roading and slide in a hitch tube with a D-ring!!! Not only that but i will also be making another hitch receiver for towing the truck through the front end. Just in case i ever break down on the trail i will at least be able to get towed back home. When i get started on that hitch i will make sure to show the progress on this thread. So you guys can see what i come out with.
The following day I woke up nice n' early to begin installing the Smittybilt XRC8 Winch.

Got the synthetic rope started

Then I met up with Mark(Chefyota4x4) to get some help and learn how to install off-road lights properly. I'm very sorry everybody but i didn't take as many pictures as i should have taken. Barely took any at all.
Here we are still working on getting everything done. Soldering, heat shrinking covering up with the plastic flex, and wrapping with electrical tape.

Joined up both driver side to the passenger side lights and brought the 2 wires into 1. We used male and female connectors then used heat shrink over it in case i ever had to remove the lights it wouldnt be much of a hassle.


Wiring this stuff is a long process as it is if you want to do it clean and right. But we took a hell of a long time wiring up the Dick Cepek lights due to the wires on the Dick Cepek's being backwards. The white and black wires are switched around. Normally Black is ground! And really the polarity would just change if wired backwards, but the lights are also grounded to the bolt that they are mounted on. Meaning they are ground from the bumper and also to the wire. So every time we went to test out the wires we kept having sparks upon touching the wires together. after about 1hr or 1.5hrs we discovered that the white and black wires were wired wrong lol. For the life of us we just could not find out why we kept shorting out! it wasnt normal lol I guess it didnt help that Mark and i were both running very low on food and neither of us were able to think straight lol. After that we also ran into another problem with the relay wiring. We looked up the offroad light/switch/relay diagrams and the first 2 of 3 diagrams we were working off of were wrong. Apparently not everything on the internet is correct... imagine that lol Anyway after about another hour or so Mark found the wiring diagram he used to his truck's lights then we just used that diagram and BAM we were set! We began the day at 11:45 in the morning and we didnt finish till approx 12:30am. We had so many obstacles to overcome that we got sidetracked a lot. I'm just happy we were able to finish this that day.
Very grateful to Mark and all the help he has been along this project. i know absolutely nothing about wiring, relays and switches, and your experience and dedication to keep things looking clean and professional was definitely appreciated. Sorry we didnt finish in time for me to treat you n your mom to dinner but i will definitely make up for it by taking you two to Lucilles Smokehouse BBQ! yum...
Here is a shot of when we had just finished. I had to mount my license plate to the front on top of the radiator bumper vents for the mean time.

--------------------------------------------------------------------------------
The following day(Sunday) i got to work on the License plate holder/winch bolt cover to restrict access to get to my bolts so people cant steal my winch when its parked on the street.
I drove down to the local steel shop and bought a 52" x 2" x 2" steel square tube.

I bought 2" because 2x2 is the correct size that will fit into the tow hitch and winch plate.

Cut the length to fit 1/4" out of the winch plate tow hitch hole.

I found that this Uhaul Towing hitch fit exactly where i wanted it when inserted upside down. Perfect! Just measured the top and bottom lengths and cut the angle to those measurements. 5&3/4" and 6&3/4"


Cut the angle perfectly to match the same angle on the winch plate tow hitch tube.

looks about right

Cut the plate out that the license plate is gonna be mounted to. I left about 1&3/4" extra on each side of the bumper. You'll see why in a bit.

This is why i made it angled.

I like i said earlier, i left it sticking out about 1/4" just so i could weld the licence plate Plate onto the front and still have room for the welds so they dont restrict the tube from entering all the way.

More or less where it will be sitting. I need enough room on both sides to be able to stick my hands on the sides because i will be using the locking hitch bolt behind there.

Also wanted to restrict the bottom side of the so people cant use an extension for their wrenches to get my winch bolts off. I left the welds in tact on the back side. No need to sand down because they wont be visible. plus it will make for a stronger joint.

I did a full weld accross from left to right then ground down and sanded down to a clean angle.

I marked where the bolt hole is going to be and i centered the hitch piece on the center of the back part of that plate.

Drilled out the holes on the sides Using a 3/4" hole saw(Included in the Harbor Freight hole saw Saw kit).


Perfect fit. I wasnt supporting it in the picture but the bolt fits right through perfectly.

Bam! all welded up.

Nice. Came out clean.

BEEE-YODA-FUL! Btw sorry but this is the only picture i have at the moment of everything together. Either way you can still tell how clean it looks. It all came together very nicely.

Bolt and pin fit perfectly.

Bought a Reese hitch receiver bolt lock. Woot!

Good luck getting that off with the limited space you are provided with. lol
BTW on a side note; Notice the bolts still exposed there. I had to address this problem ASAP to avoid giving a-hole thieves easy access.

Here I added plates to the top side of that winch plate. These will cover the bolts completely.

As you can see here, there is no way to access those bolts now. and good luck getting a wrench in there jerks! lol That is 3/16" steel fully welded all the way around. It is very solid, That sucker ain't going anywhere!

Already Primed and painted matt black.

That is all guys. I've very happy with how this hitch license plate came out. It compliments the bumper very nicely. And best of all is that I can remove the License plate hitch when i go off-roading and slide in a hitch tube with a D-ring!!!
Not only that but i will also be making another hitch receiver for towing the truck through the front end. Just in case i ever break down on the trail i will at least be able to get towed back home. When i get started on that hitch i will make sure to show the progress on this thread. So you guys can see what i come out with.
Last edited by Redeth005; Nov 4, 2013 at 08:34 PM.
Nov 4, 2013 | 06:53 PM
#117
Thread Starter
Registered User
Joined: Apr 2012
Posts: 2,817
Likes: 2
From: Los Angeles CA
Oh and for those of you curious about my offroad lights and how bright they are this is just a quick video i made yesterday night. I still need to adjust the 8" spot lights more centered and pick them up some more to get the light out further. but anyway please watch. Enjoy
 Great job all around. Keep the pics coming!
Nov 5, 2013 | 12:48 PM
Great job all around. Keep the pics coming!
Nov 5, 2013 | 12:48 PM
#119
Man Richard, I know I've said it before, but I really like how your bumper turned out, that thing is awesome, and one of a kind, I had to go back and look at the picture of the CBI front bumper that you were originally thinking of getting, I couldn't quite remember how it looked and If you were building yours to mimic theirs, but I have to say, I like the styling of yours even better! Nice job on the license plate holder, and the anti-theft for your winch, that was a really good idea!


