
Tiki Build Thread
 Apr 6, 2012 | 05:56 PM
#21
Thread Starter
Registered User
Joined: Mar 2012
Posts: 53
Likes: 0
From: Houston, tx
EXCELLENT!!! Wish I had the financial means to buy stuff for my rig ... My lift consists of 4 stock shocks, torsion bars cranked to the max and 4x4x8 inch wood blocks in the rear ... with no brake line extender ... 
I was able to pay for new tires. BFG Mud terrain K/O 2 or something or other.
I want to remove the running boards, but the girlfriend can't get in without it. Searching for an alternative, but can't locate any ...
The 33"x12.50x15 have torn off the front plastic that used to go on the running boards ...
Sep 14, 2013 | 03:13 PM
#22
Thread Starter
Registered User
Joined: Mar 2012
Posts: 53
Likes: 0
From: Houston, tx
LED Tail Lights and a little extra
been a while, but i'm back...
just got my LED tail lights, installed and working correctly....
20130913_102704.jpg?t=1379200518
These cute little lights came with the tail lights, I figure why not put them in the grill for know (they will be moved when I get new bumper and relocated after I actually see how bright they are.) besides the screws look awful.
20130913_102649.jpg?t=1379200533
20130913_112812.jpg?t=1379200563
Last edited by jlehner; Sep 14, 2013 at 03:19 PM.
Sep 14, 2013 | 03:27 PM
#23
Thread Starter
Registered User
Joined: Mar 2012
Posts: 53
Likes: 0
From: Houston, tx
Throttle body Cleaning
THought I would work on the intake, and after what I saw I may need to do more past the TB...
Here is the before, unfortunately no after shot. But it looked shiny and perty. (notice the thumb smudge on the plate) some people dont remove the TB for cleaning, but I found it much easier to get a quality clean by taking it off. really easy to do. And there was a ton of build-up along the center of the plate, where it screws onto the shaft.
20130913_142728.jpg?t=1379200954
while taking this pic I realized she needed a bath
20130913_142631.jpg?t=1379200576
Sep 15, 2013 | 11:59 AM
#24
Thread Starter
Registered User
Joined: Mar 2012
Posts: 53
Likes: 0
From: Houston, tx
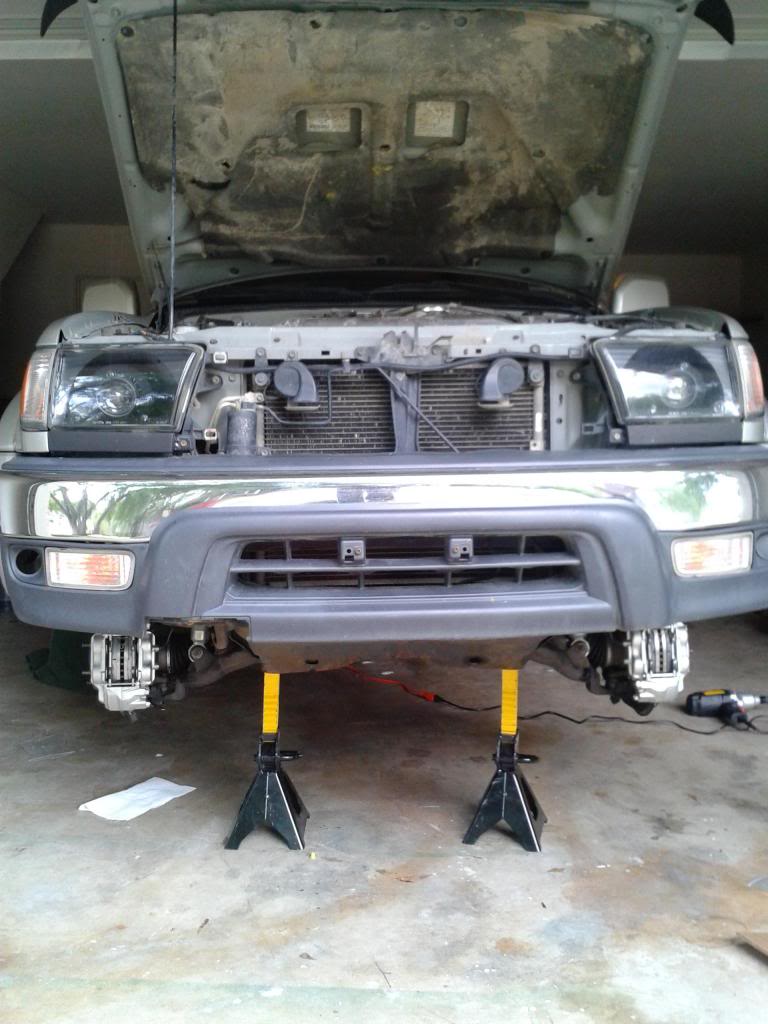
231mm Tundra brake swap
Picked up all the parts I need for the tundra brake swap.
20130915_140948.jpg?t=1379274999
the swap went swimmingly, well kinda, initially we were held up with the lugs on the drivers side were stubborn.
During the swap, made two trips to Autozone, picked up an electric 1/2" impact, and a dremmel tool. definitely two of the best purchases i've made.
The impact sped up everything, and the dremmel went through those rotor shrouds like butter.
old set up...
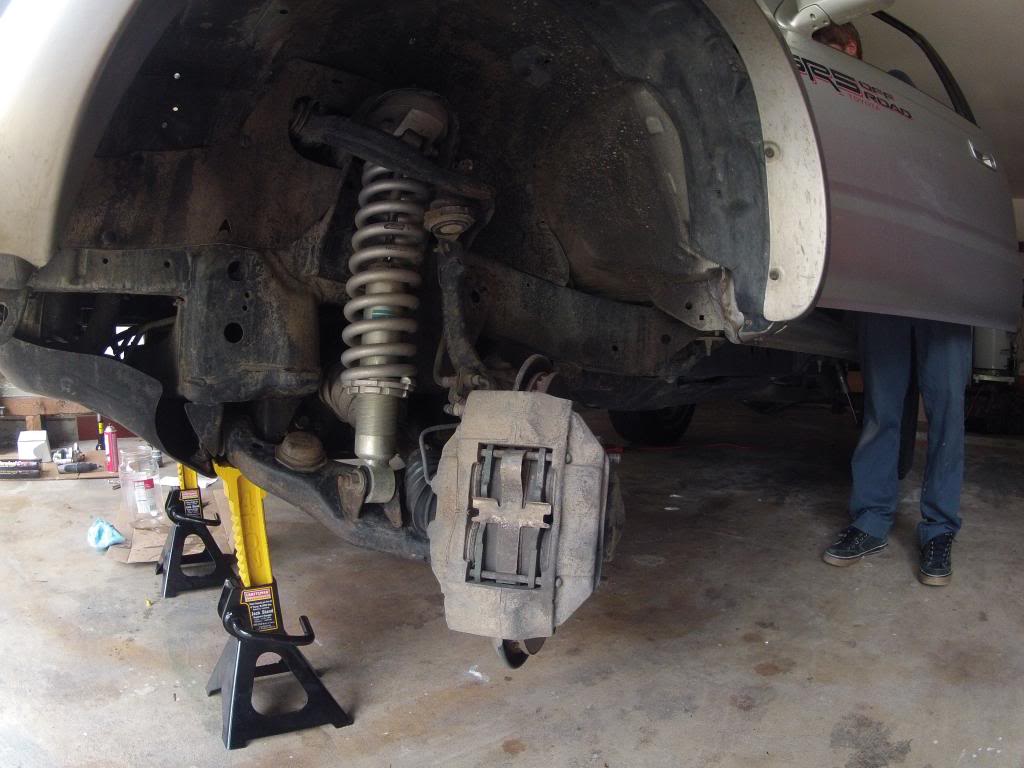
new calipers,
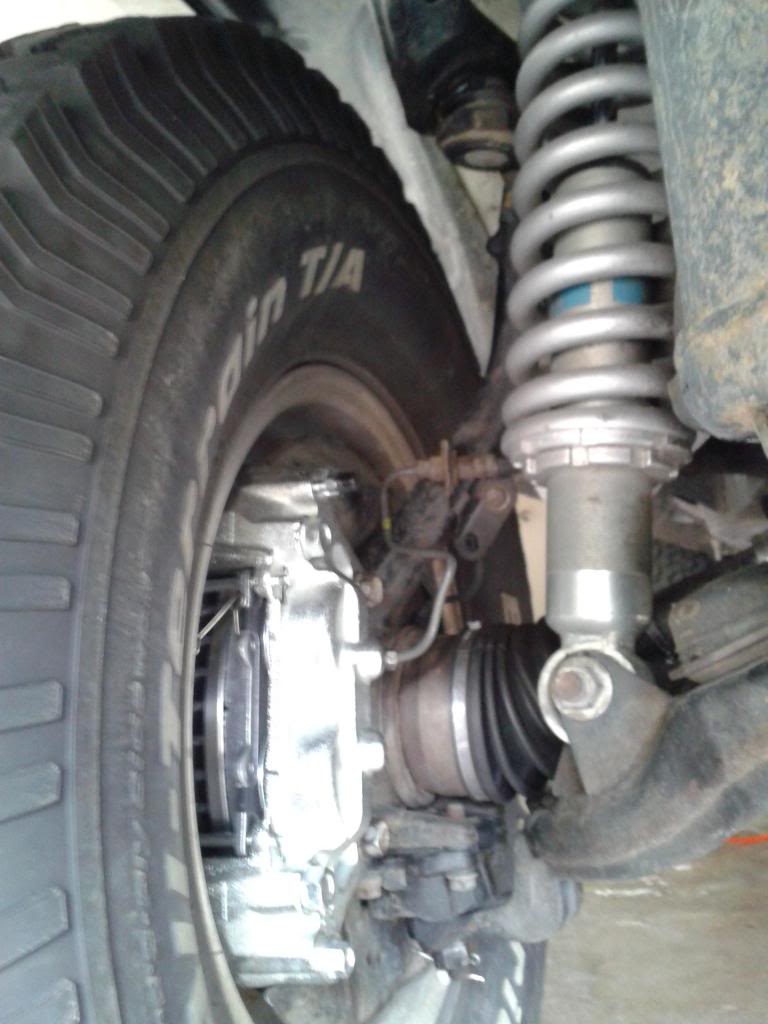
So BEAFY
here is a vid that my buddy made.... Thanks again Harris.
20130915_140948.jpg?t=1379274999
the swap went swimmingly, well kinda, initially we were held up with the lugs on the drivers side were stubborn.
During the swap, made two trips to Autozone, picked up an electric 1/2" impact, and a dremmel tool. definitely two of the best purchases i've made.
The impact sped up everything, and the dremmel went through those rotor shrouds like butter.
old set up...
new calipers,
So BEAFY
here is a vid that my buddy made.... Thanks again Harris.
Last edited by jlehner; Sep 16, 2013 at 05:12 PM.
Oct 7, 2013 | 02:28 PM
#26
Thread Starter
Registered User
Joined: Mar 2012
Posts: 53
Likes: 0
From: Houston, tx
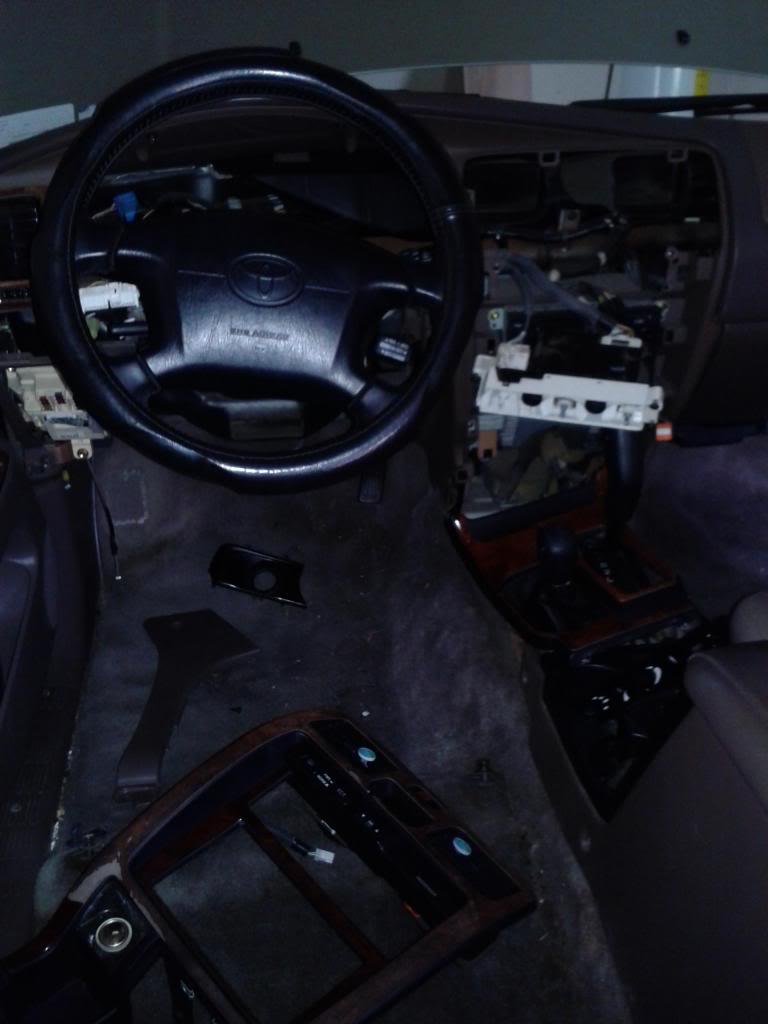
CB, Dually D2's, LED Gauge cluster,
D2's finally came in, got to wait till next week for the install, also going to put in my collection of goodies......had to wait for all parts cause I only want to take the dash apart once.
Uniden PRO520XL, Wilson 4' Flex antenna, PA speaker, 18' COAX to allow mounting anywhere I please, mounting hardware (still need bracket, but unsure where to mount.) and Gauge cluster LED's.
[IMG]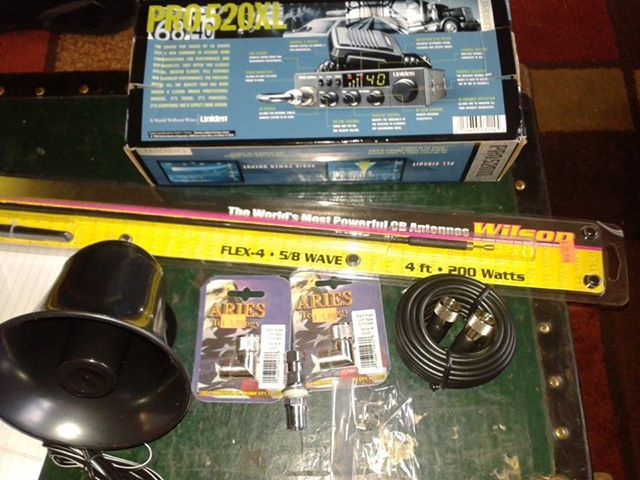 [/IMG]
2 are better than one...
[IMG]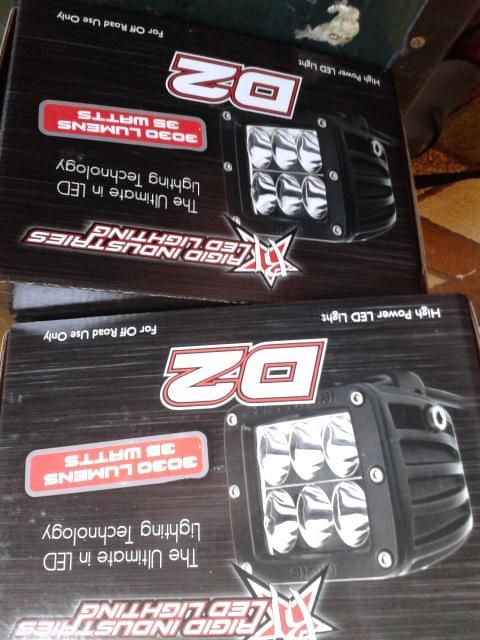 [/IMG]
A bit smaller than expected, but holding off on judgement until I see them in action.
[IMG]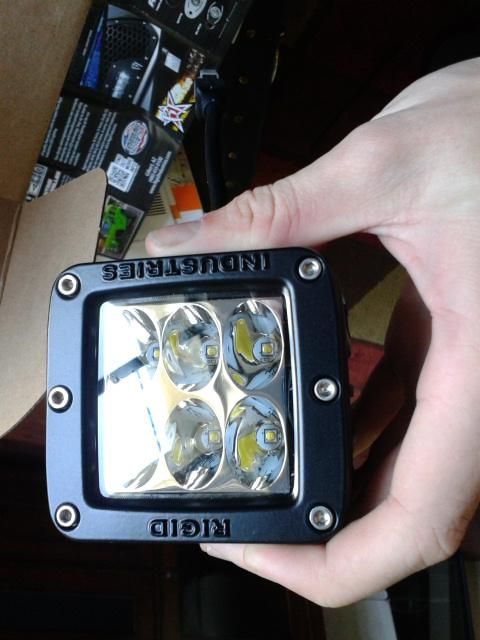 [/IMG]
Uniden PRO520XL, Wilson 4' Flex antenna, PA speaker, 18' COAX to allow mounting anywhere I please, mounting hardware (still need bracket, but unsure where to mount.) and Gauge cluster LED's.
[IMG]
 [/IMG]
2 are better than one...
[IMG]
 [/IMG]
A bit smaller than expected, but holding off on judgement until I see them in action.
[IMG]
 [/IMG]
Oct 16, 2013 | 05:23 AM
[/IMG]
Oct 16, 2013 | 05:23 AM
#27
Thread Starter
Registered User
Joined: Mar 2012
Posts: 53
Likes: 0
From: Houston, tx
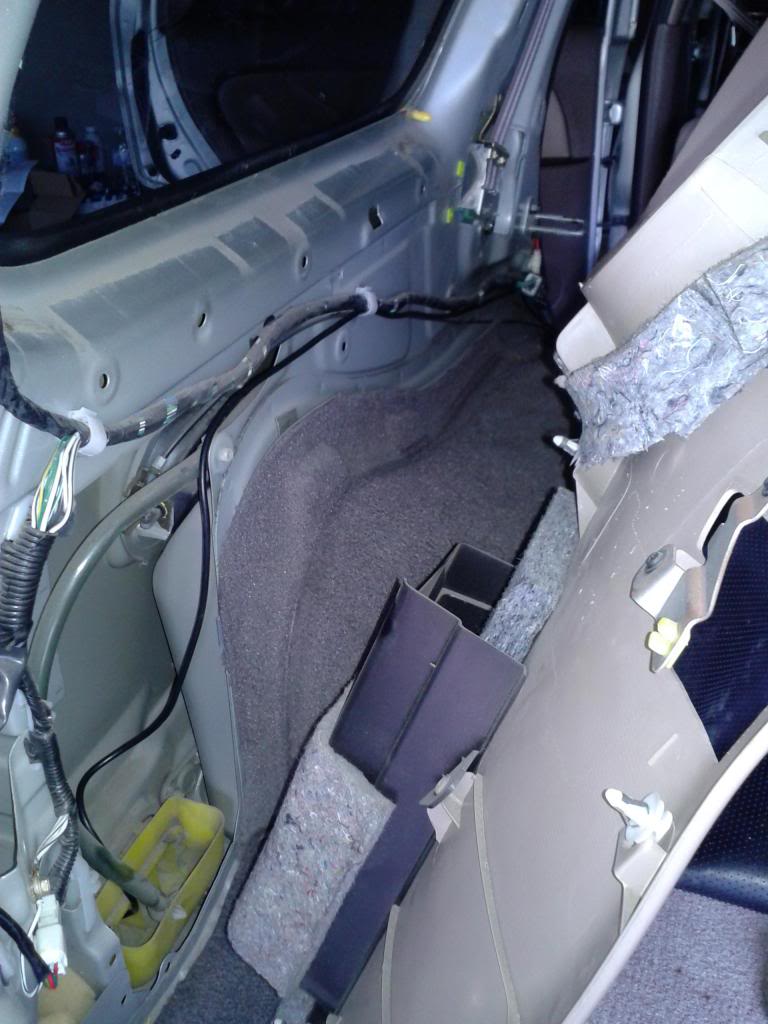
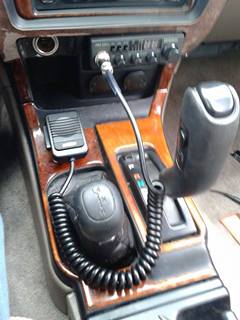
CB radio, PA and Dually D2's
did some work yesterday, had to stop due to mosquitos eating me alive.
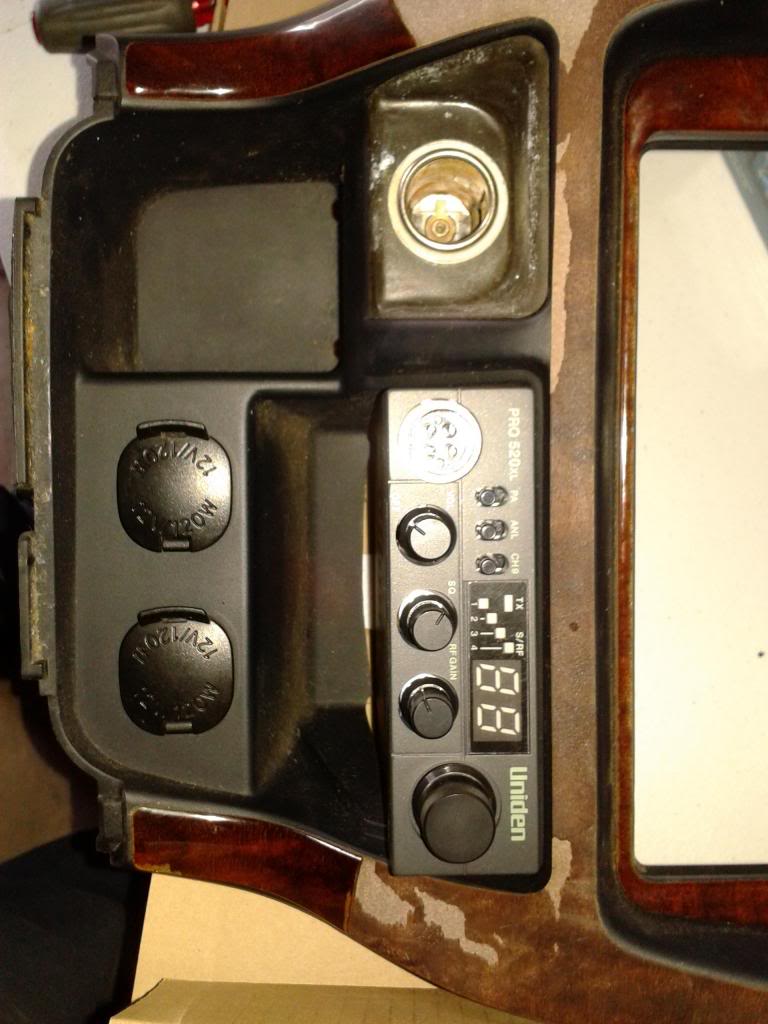
CB was installed in the usual ashtray location...
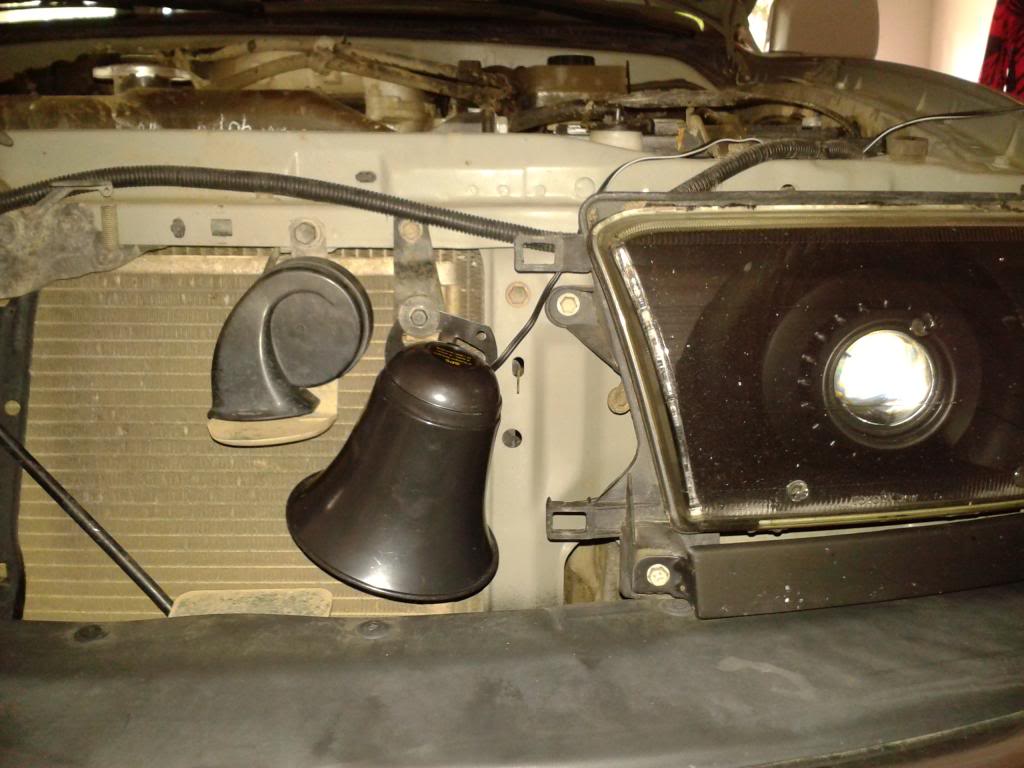
PA speaker put behind the grille..
ran the coax down the driver side interior (under the trim of course) havent mounted the antenna yet, still need to find a mount that will work. (probably going to run it out through the yellow vent box in the bottom corner and up from behind the bumper.) I used and 18' cable to leave room for error and odd running of the cable if needed.
D2's are spectacular, ill put up a location pic later but here are the standard 3 photo examples...
low beams (need to be adjusted)
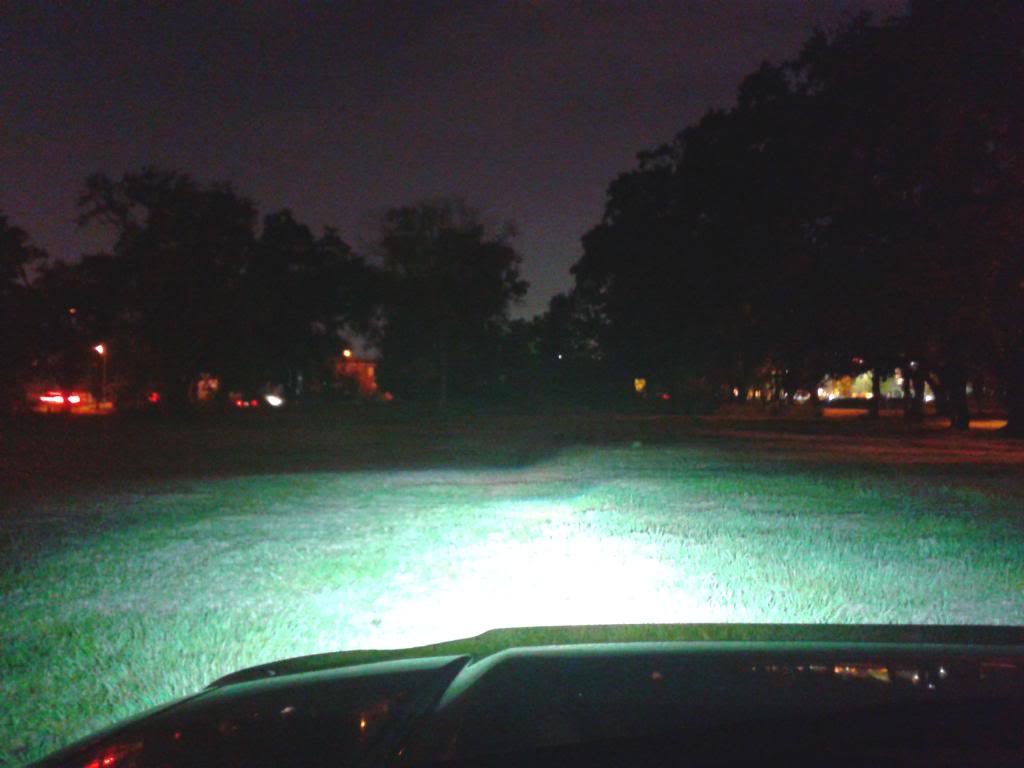
high beams...
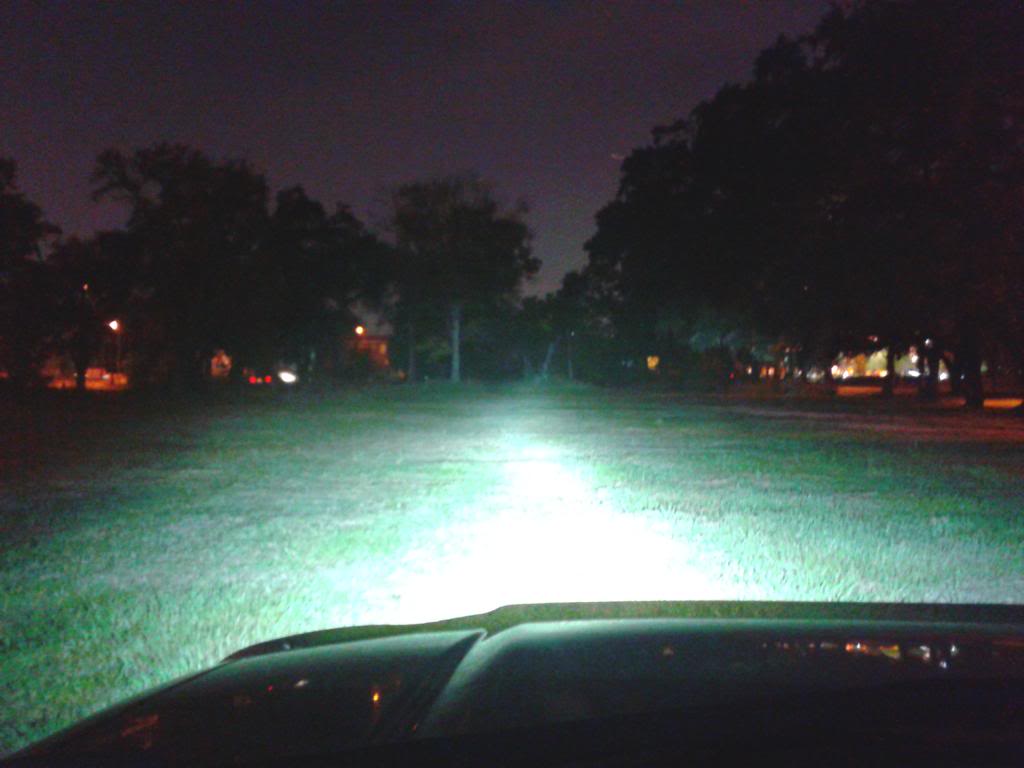
high beams with D2's...
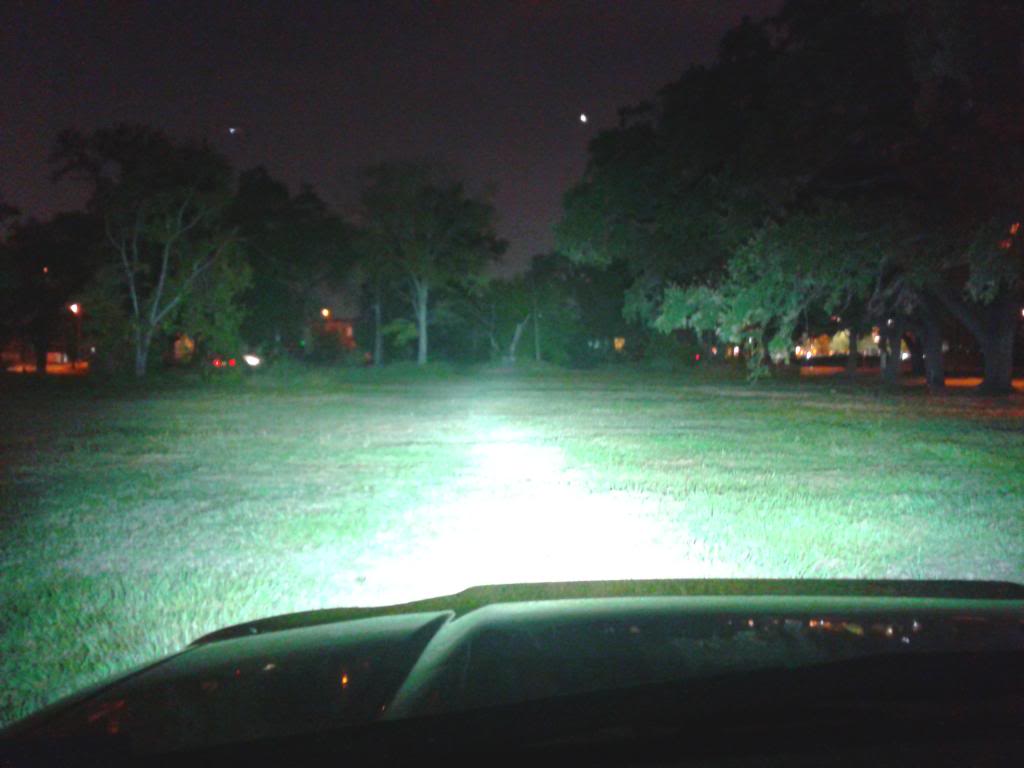
they put out a ton of light, i may adjust them wider later on but so far I am beyond pleased.
and I get to do this again to finish the LED's in the gauges and heater controls...
CB was installed in the usual ashtray location...

PA speaker put behind the grille..

ran the coax down the driver side interior (under the trim of course) havent mounted the antenna yet, still need to find a mount that will work. (probably going to run it out through the yellow vent box in the bottom corner and up from behind the bumper.) I used and 18' cable to leave room for error and odd running of the cable if needed.

D2's are spectacular, ill put up a location pic later but here are the standard 3 photo examples...
low beams (need to be adjusted)

high beams...

high beams with D2's...

they put out a ton of light, i may adjust them wider later on but so far I am beyond pleased.
and I get to do this again to finish the LED's in the gauges and heater controls...
 Oct 16, 2013 | 06:41 PM
#28
Thread Starter
Registered User
Joined: Mar 2012
Posts: 53
Likes: 0
From: Houston, tx
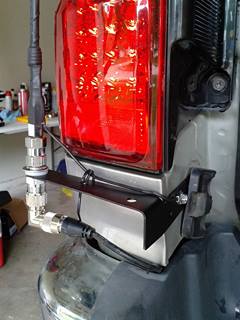
Andymod 2.0, CB antenna, hand held mounted....
SO today started at 10 am, ended at 8 pm.....got my temporary antenna mount in place, moved those ugly LED's from my grille to the rear bumper as extra reverse lights (not sure how bright they are but it cant hurt any), CB hand held mounted, and I finally had the time and the balls to do the Andymod 2.0. This was messing with the computer and I was very nervous.
here is the CB hand held mount location, I like how it lays out.
this is the temporary antenna mount, a 6" by 6" L-bracket. I bent one leg and painted it black....when I get a tube rear bumper it will be mounted to that.
and this is the VSC switch....not much to see here, but if you have done this mod, you know the PITA it is to get to all the wires and how nervous that first turn of the key was...
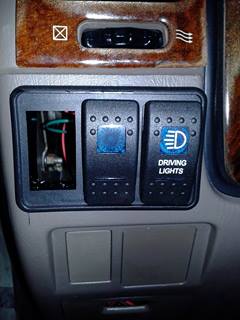
The third switch location is for my rock lights which are in the mail...that install I may wait to do until after I do a SAS.
here is the CB hand held mount location, I like how it lays out.

this is the temporary antenna mount, a 6" by 6" L-bracket. I bent one leg and painted it black....when I get a tube rear bumper it will be mounted to that.

and this is the VSC switch....not much to see here, but if you have done this mod, you know the PITA it is to get to all the wires and how nervous that first turn of the key was...

The third switch location is for my rock lights which are in the mail...that install I may wait to do until after I do a SAS.
Oct 17, 2013 | 04:21 PM
#29
Thread Starter
Registered User
Joined: Mar 2012
Posts: 53
Likes: 0
From: Houston, tx
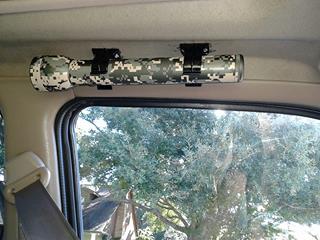
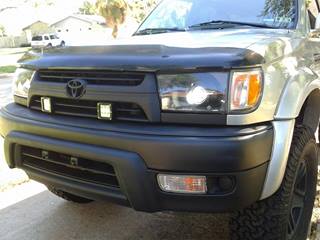
Mag Light, touch up on front bumper
so this morning was a simple process. put up a mag light above the driver side door. and used the last of my black rustolium paint to touch up the front bumper, got rid of that awful chrome across the front of it.
mag light
and touch up paint, also this pic shows how I cut the grille to fit the D2's
next will be painting bed liner on the flares and long the bottom of the doors...also still waiting on the rock lights....
mag light

and touch up paint, also this pic shows how I cut the grille to fit the D2's

next will be painting bed liner on the flares and long the bottom of the doors...also still waiting on the rock lights....


Thread
Thread Starter
Forum
Replies
Last Post
RedRunner_87
95.5-2004 Tacomas & 96-2002 4Runners (Build-Up Section)
84
Jun 1, 2021 01:51 PM
priest16
84-85 Trucks & 4Runners (Build-Up Section)
15
Aug 6, 2015 07:43 AM


