
stockwell45's 97 4runner Build Up Thread
 Jan 19, 2011 | 11:20 PM
#1
stockwell45's 97 4runner Build Up Thread
I'm finally getting around to doing this. I want this to be a place where you can give me feedback on what I have done and advice on things that can be improved on. I think I know a whole heck of a lot about the 3rd gen 4runner short of being an expert, but it's impossible to know everything. So thats where you come in. I'm building it up to suit my needs, which is a 4runner that is designed for expedition on rough, rarely traveled roads far from civilization. It needs to be able to tackle anything in its path, but comfortable and efficient enough to travel across the country and camp out of for weeks at a time. For the time being, it is my winter DD, so down time for tougher and drastic mods has to be minimal. It will stay that way until I graduate college and can afford something else to DD. My philosophy is that the best time in life to have a buildup like this and explore the country is when you are young, after you graduate college and before you start a career, but while still making decent money at a regular job. Practically every penny I earn can go toward this project, which may not be true in later years of my life. Hopefully this thread will help others of you achieve your dream of creating your own ultimate 4runner.
I purchased this 4runner September 24, 2006 with 138,000 on the clock. I have added just under 100,000 miles since then. It was bone stock except for the upgraded stereo. It was in pristine condition, definitely a lucky find. It's main job was to get me to high school and back 10 miles away. Before long, I had dreams of making it more capable.
How it all started...

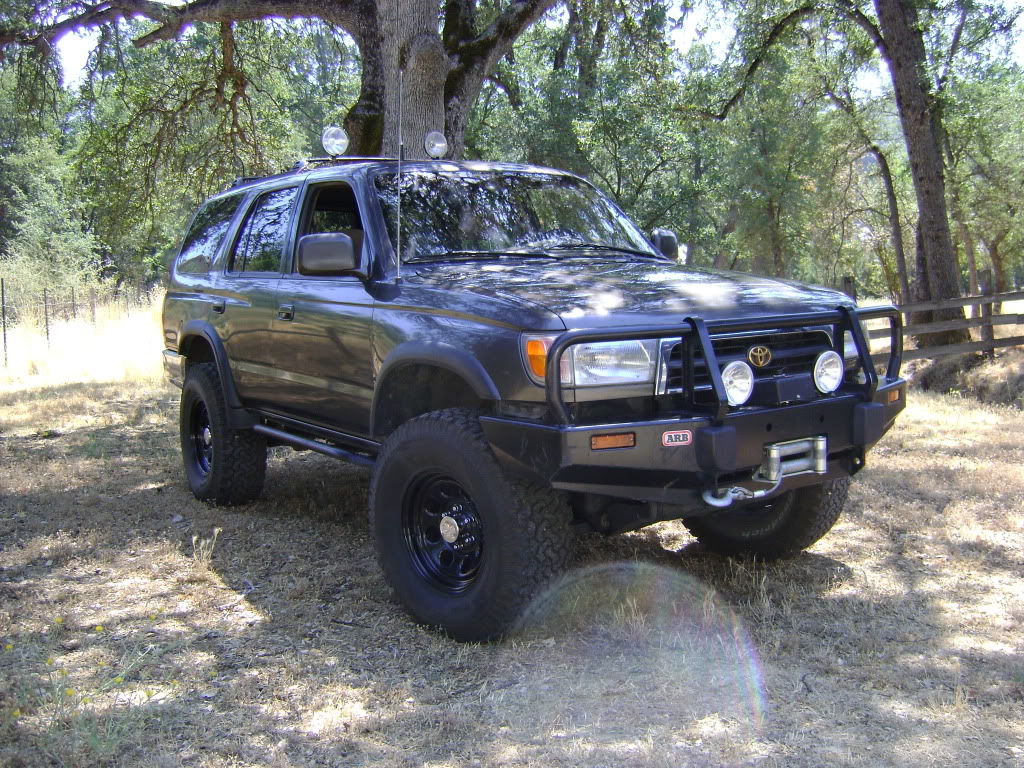
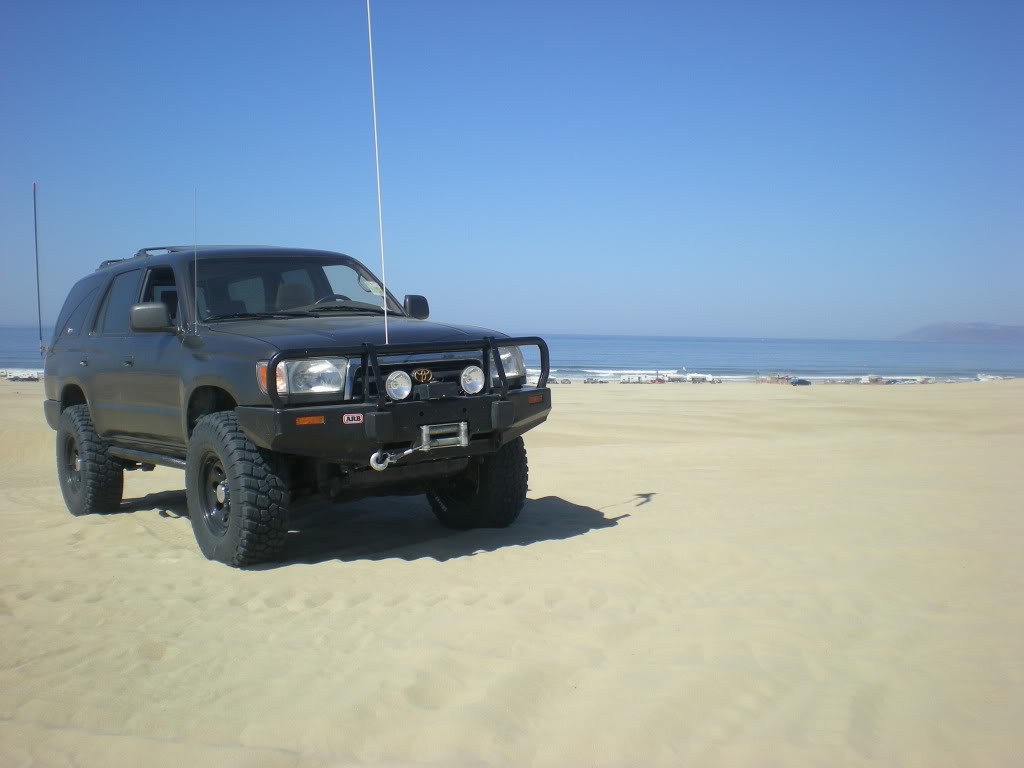
The first change that happened was the removal of the running boards. Good thing I did before the rocks got to them. (by the way, these have been for sale for ages, still in perfect condition. I'll give 'em to you for a steal!) Next came the ARB bumper and the winch. This is the single best mod I have ever done, next to the locker. A winch and even one locker can get you through just about anything. You dont need huge tires or a lift for 98% of the trails that DD 4runners do. As for the ARB bumper, I think it is worth every penny. Its strong, looks great and gives you the protection for the unexpected. 2 winters back, I slid off the road on an icy curve and slammed head on into a pine tree going 25 mph. Without it, I would have suffered major damage no doubt. Now only a small dent helps me tell this story.
The Trail Gear sliders came next. Only being $130 for a pair, I thought it was a great deal. I would recommend them anytime, they sure have saved me more times than I can remember. I decided to weld them on, thinking they would be much stronger than bolt up. The problem with this is they can never come off unless cut off, but I didnt think I would ever need them off. And so they remain, and I still love them.

Then there was the exaust. It's only a Magnaflow muffler, an off brand of Flowmaster. I love it and it was only 40 bucks!
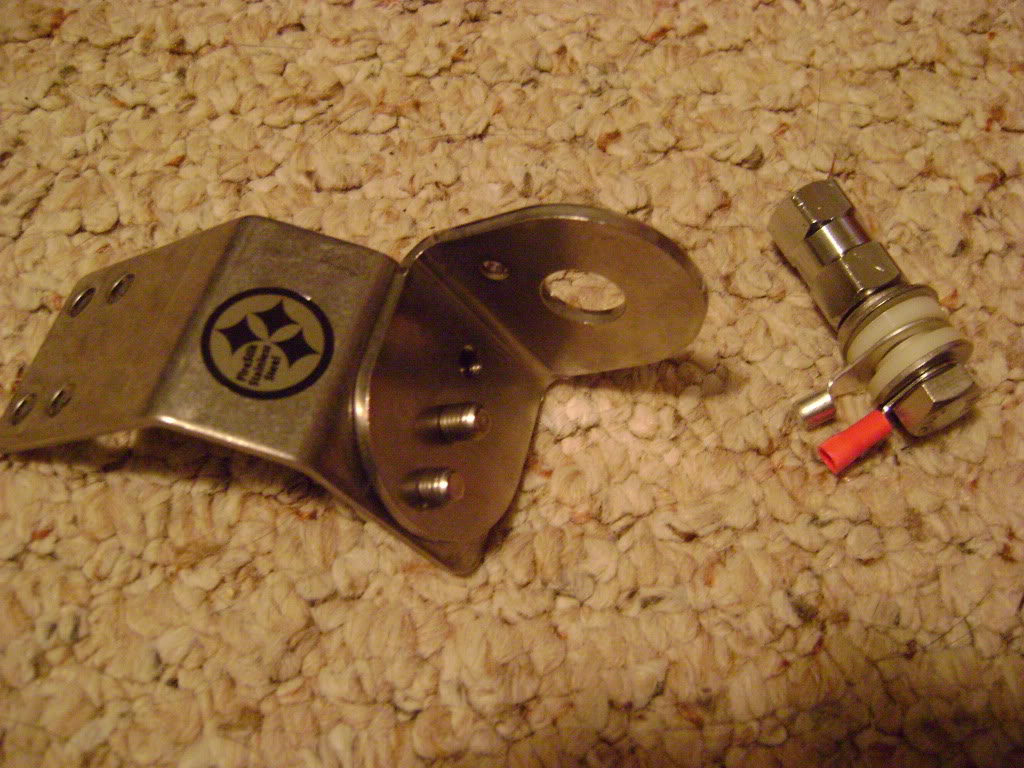
After doing some trail exploring with friends and lacking a CB when everyone else had one, I broke down and purchased a cobra CB from walmart. Coupled with my original Radio Shack magnetic antenna, it worked ok for close range. Eventually I replaced the antenna with a new 3' Firestik antenna mounted just above the passenger tail light on a special bracket that I modified to clear the hatch. Thanks to habanero for telling me how to do this, check out her build thread for more info on this. CB reception seems to be fairly good with the new antenna, I frequently talk to truckers when I'm on the freeway during road trips.
Next came the lift, tires and rims. I chose the Revtec 3" coilovers because they are relatively inexpensive, and had great reviews about a comfortable ride. By now, I was exploring tougher trails with larger rocks, and I found myself bashing an axle or a skid plate quite often. So I also decided to go with the 1" Toytec body lift so I could clear some new 305/70/R16 BF Goodrich All Terrain's. I was absolutely thrilled with these tires. They did great on snow and rocks, made no road noise and didnt reduce my gas mileage at all. This will not be the last time I purchase them.
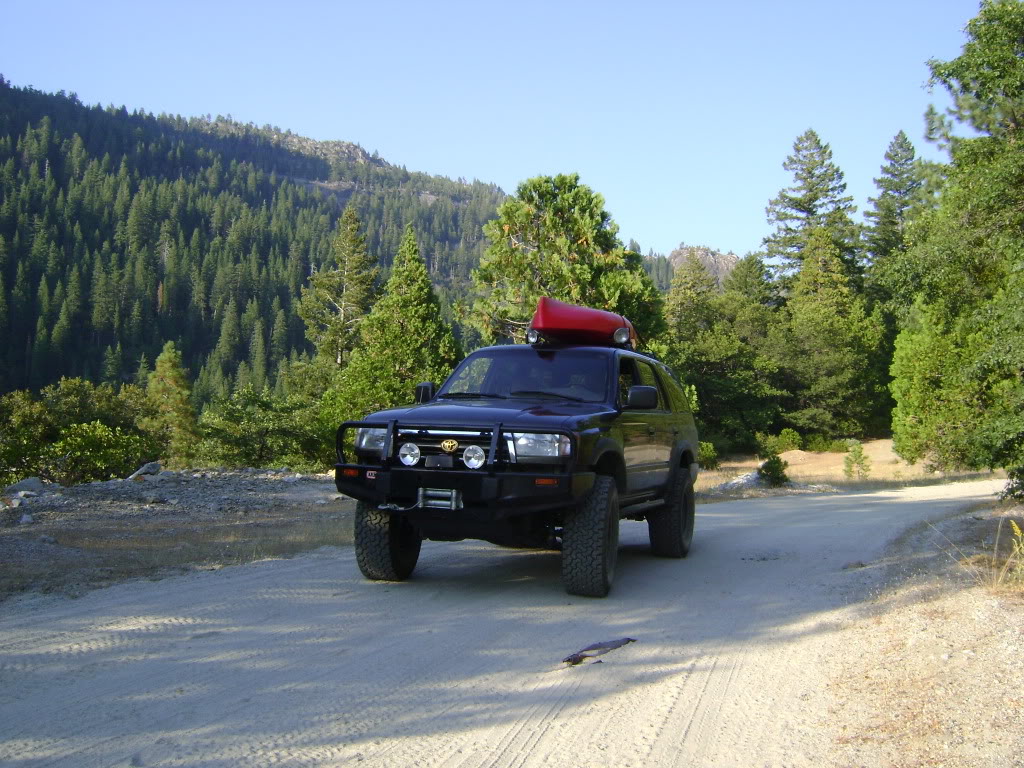
The one thing bad about the body lift is the gap it creates between the front bumper and the body, as you can see. Years later I finally fix it, which I will explain about later.
I decided to Hurculine my rear bumper because as those of you that have the chrome rear bumper know, they are dent magnets. Luckily, I only managed to put a small dent on one corner before this. I also didnt like the fact that the rear bumper really stood out when the rest of the 4runner was either anthracite or black.
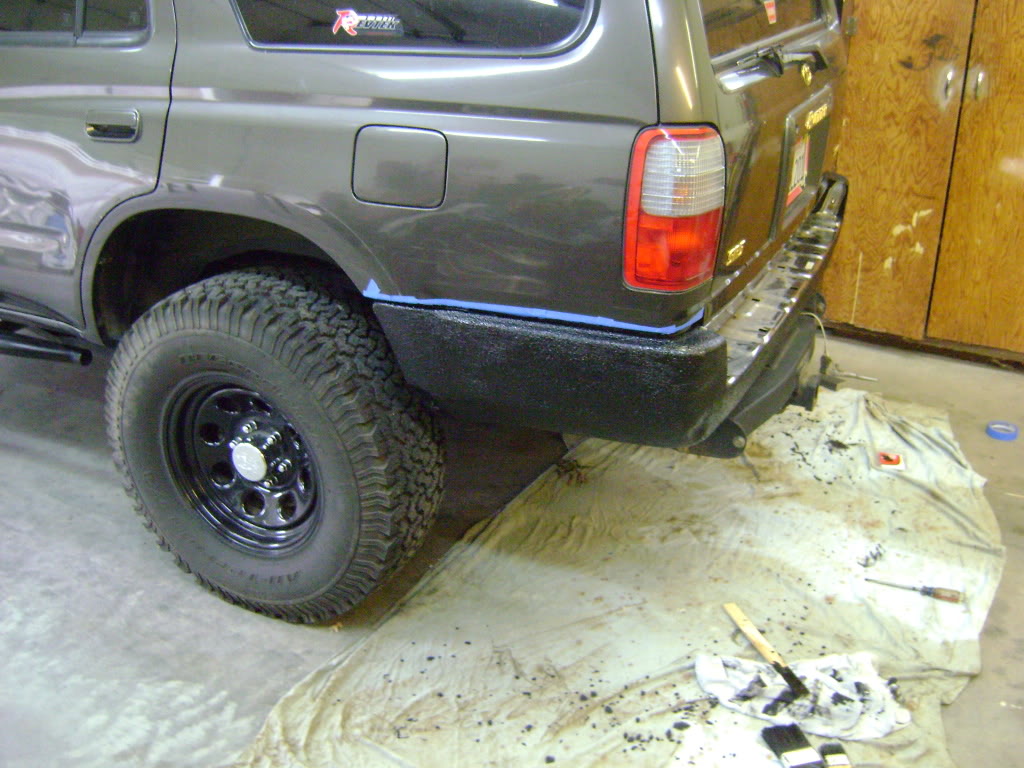


After applying this stuff, it pretty much made the bumper bulletproof. I swear you could shoot the thing with a .22 and the bullets would bounce right off. I lathered it on pretty thick, about 4 coats. I loved the look of it, I still do in fact. It gives it an awesome look as well as protects it. I have since moved on from that bumper, which is for sale if anyone wants it.
As for the Tundra brakes, I always kept hearing about how awesome they were. I also heard that they bolt right up. so eventually it was time to get new pads, so I went to my local brake shop and told them to replace my calipers with Tundra calipers and pads of a similar year. So he did, no problems.I'm really not sure on the size they are. I really didnt feel a huge difference in stopping power, if I could go back I probably wouldnt have spent the money on them.
The next mod to come was the rear differential breather extension mod. The new breather comes out at the gas filler. Follow this thread if you want to do this, its what I did.
https://www.yotatech.com/forums/f129...her-mod-75747/
I think this is one of those must-do mods for all 3rd gen owners. We have weak axle seals as it is, and the vulnerable stock breather location lets moisture easily into the axle. This will blow your axle seals faster. Its cheap and easy, I dont see why everyone doesnt do it.
By the way, there has been one thread that I believe is the bible for all 3rd gen owners that want to do some mods. Here it is. Have at it.
https://www.yotatech.com/forums/f2/a...s-most-113806/
Who Besides me hates the fact that Toyota never made any of their 12v outlets full time? Domestic trucks got this one right. I hated that I could never charge a cell phone or something overnight when camping. On top of that, my outlet was fried because I used a 3 million candle power spotlight in it. All because of the cheap 20 guage wiring Toyota uses. To fix this I bought a couple of new outlets from Kragen, Along with some 12 guage wiring with 20 amp fuses and had at it. I wired these to a fuse block I already had to run some auxillary lights on my bumper and roof, and this was already tied directly to the battery, so I wired the outlets to it. I now use my stock outlet, another one wired near it, as well as one in the back for a future fridge/freezer. They are all full time, and can run up to 20 amps each. Easy to do, comes in handy, everyone should do it.
The next thing that had to be done was get rid of that flimsy power antenna that us SR5'ers were plagued with. If it was up, it would hit every branch and if it was bent at all it wouldnt go down, and it's motor would just constantly run. If it was down, you couldnt listen to the radio on the trail. The solution? order a whip design from a Tacoma. This mod took me less than an hour to accomplish, and I am super happy with it. I used an OEM one from Toyota, which was pricey. I'm sure you could get by with a generic one for less price. Follow this for instructions http://www.4runners.org/writeups/whip/index.html
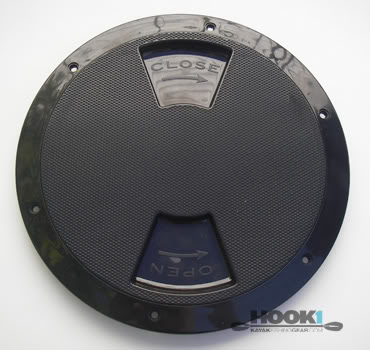
The next mod is one of my favorites. Many people say that deleting the ISR does nothing, but I beg to differ. This, coupled with the deckplate mod, gave me more throttle response and better acceleration. Not to mention the awesome roar it creates under the hood! All it took was the deckplate, which is only about $15 and are available at marine websites and stores, and look like this
and ends up looking like this in the end (not mine, I stole this pic)
Other than that it takes some PVC caps to cap off the parts where the funky plastic boxes were on the intake, and the ISR mod is complete. I love it, others dont, but I'm happy I did it. Heres the link to these mods
https://www.yotatech.com/forums/f130...engines-74837/
(cant find a working thread for the deckplate mod, but you get the idea from the pics)
The next change on the 4runner wasn't really by choice, I had to do it. The front sway bar end links snapped, as you can see
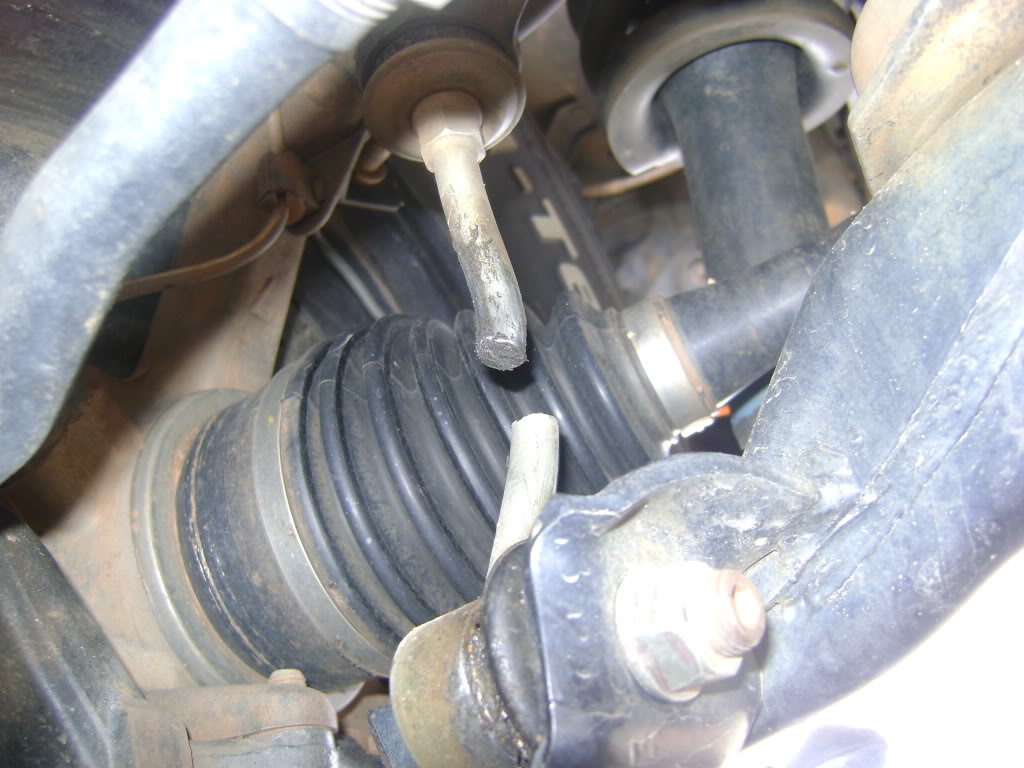
Instead of replacing them, I decided to take the whole sway bar off and try driving it that way. I am convinced that the end links snapped because the IFS was overflexed, which means it would happen again if I replaced it, or got quick disconnect end links for the trails. I didnt mind driving with it off, it does lean a little more than it would with the sway bar on, but I dont drive like an idiot so I'm not worried I'm going to flip. Others have driven my 4runner and said it has scared the crap out of them, but I dont feel that way. This will not change anytime soon for me, I may even get quick disconnects for the rear sway bar to maximize flex.
One day I had nothing to do, and decided to fab up a jerry can carrier that is hitch mounted. This has come in very handy. I also bought an anti rattle bracket so nothing moves around when this is mounted.
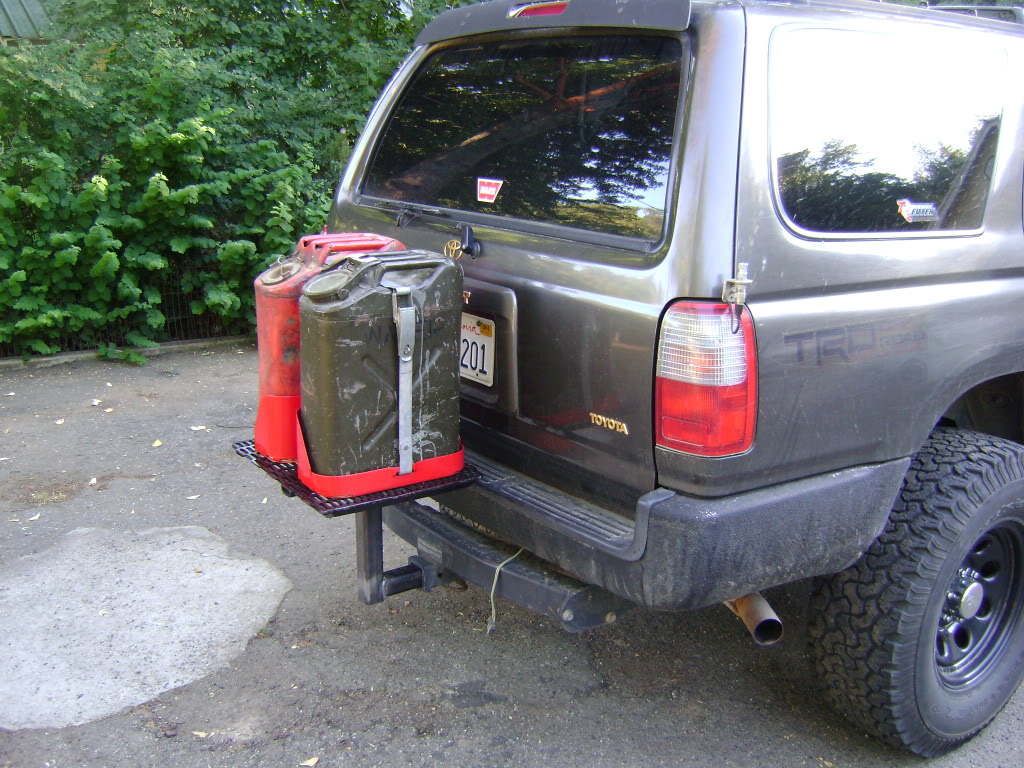
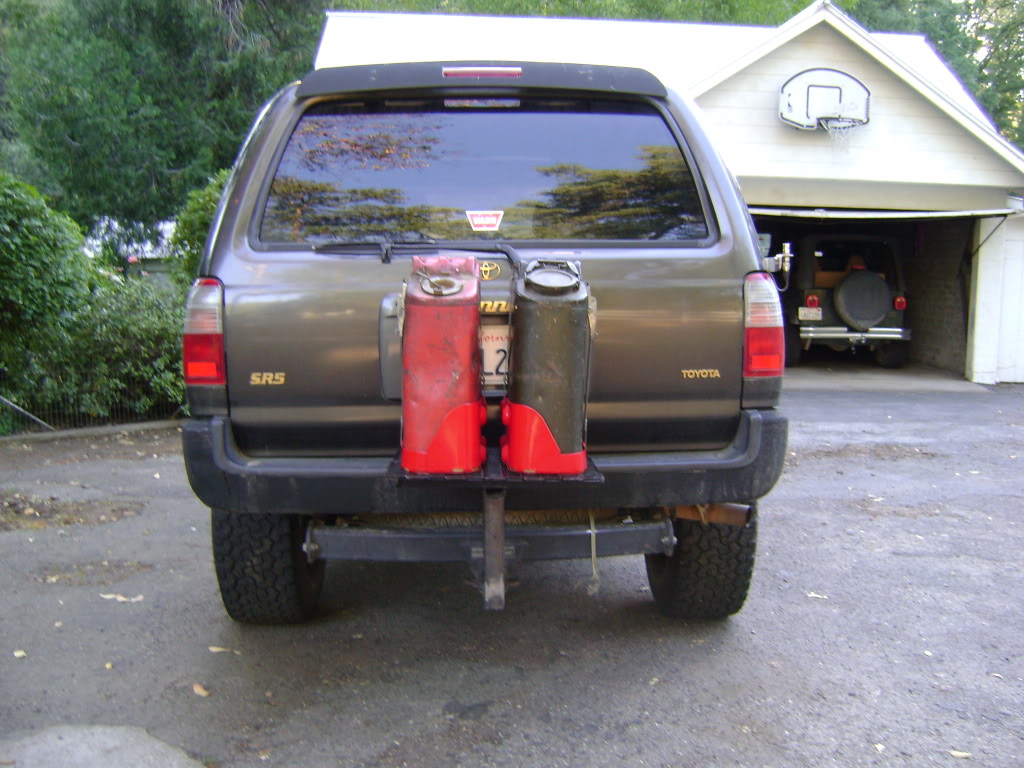
I may soon sell this one and build a new one that better accomodates my new bumper.
Finally I broke down and got my Aussie Locker for the rear diff.
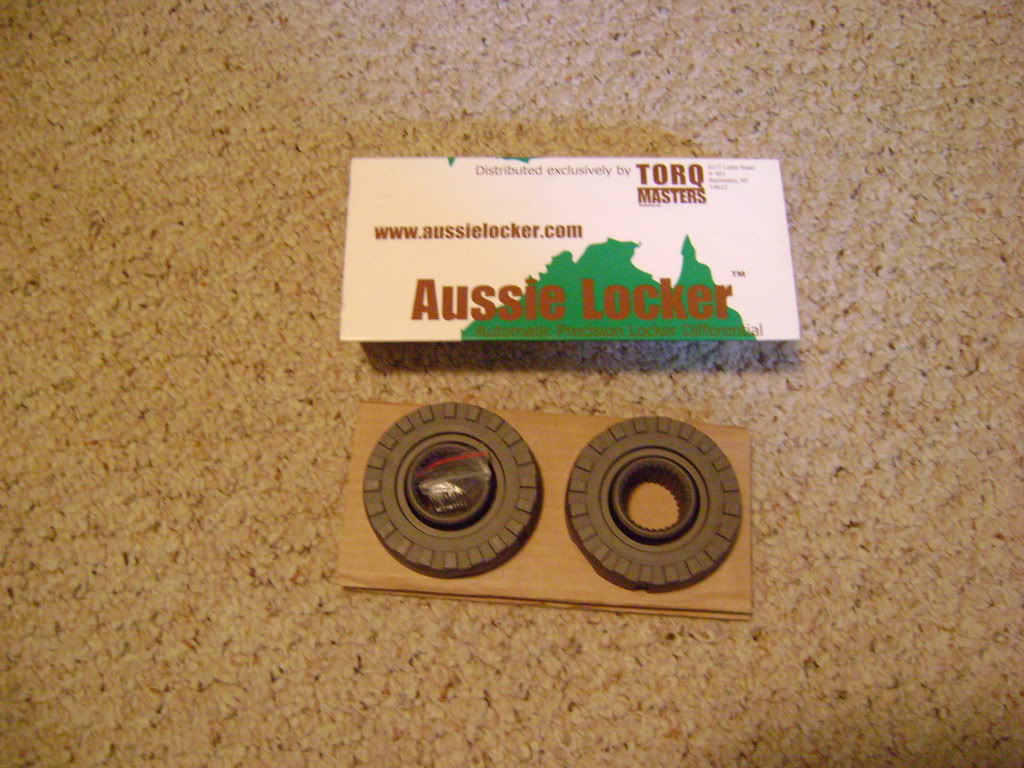
This has done wonders to my offroading experience, as all lockers should. The think about this though is that it absolutely kills my tires, especially in parking lots where I have to make tight turns. Above 20 mph, I dont even know its there. Under 20 mph, my diff might as well be welded. Its not a problem for manual transmissions, because they can just clutch in and cut power to the rear diff in turns. A friend of mine told me I should just punch it into neutral in sharp turns, and it really works but is a hassle. I am saving for an ARB locker for the rear, so I can order that when I order my front ARB locker. After I got the locker, I finally came out of my shell and started going on some wheeling trips with others of you from this site.
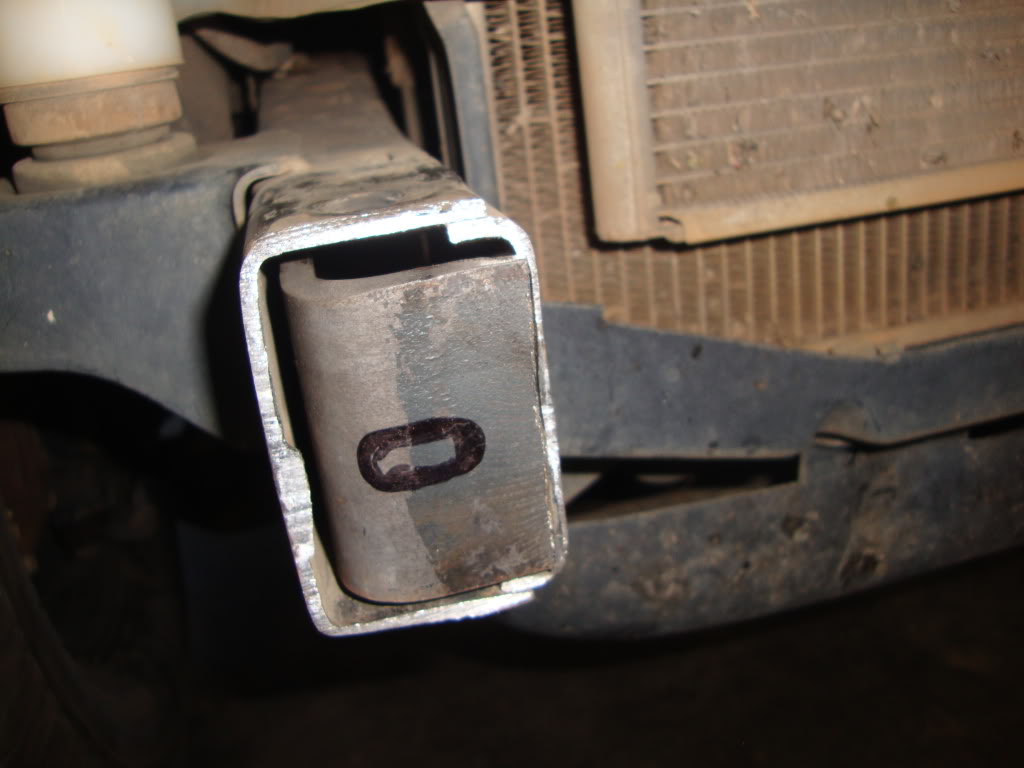
Finally the gap between the front bumper and the body finally got on my nerves enought for me to do something about it. To me this was like surgery. I had to cut the mounts for the bumper in half without damaging the support braces. This was very tough, since I had no access to a plasma cutter at the time. The I had to reweld them up exactly an inch higher than they were previously. On top of this I also cut off the stock end caps on the frame and trimmed and welded a piece of angle iron inside, which really increases the strength for winching capability. everyone who has a winch on their 4runner should do this; anyone who plans to move their winch bumper up an inch and continue to winch, this is a must do. You can also drill a new hole in the front of the new angle iron for new bumper mounts in the front, which I did. I highly recommend doing this. I've seen pics of other peoples 4runner's frames ripping apart because it was not reinforced. Better to be safe than sorry. Thanks to j-money$$$ for being the guinea pig for this - I followed his thread https://www.yotatech.com/forums/f2/a...ft-fix-210005/
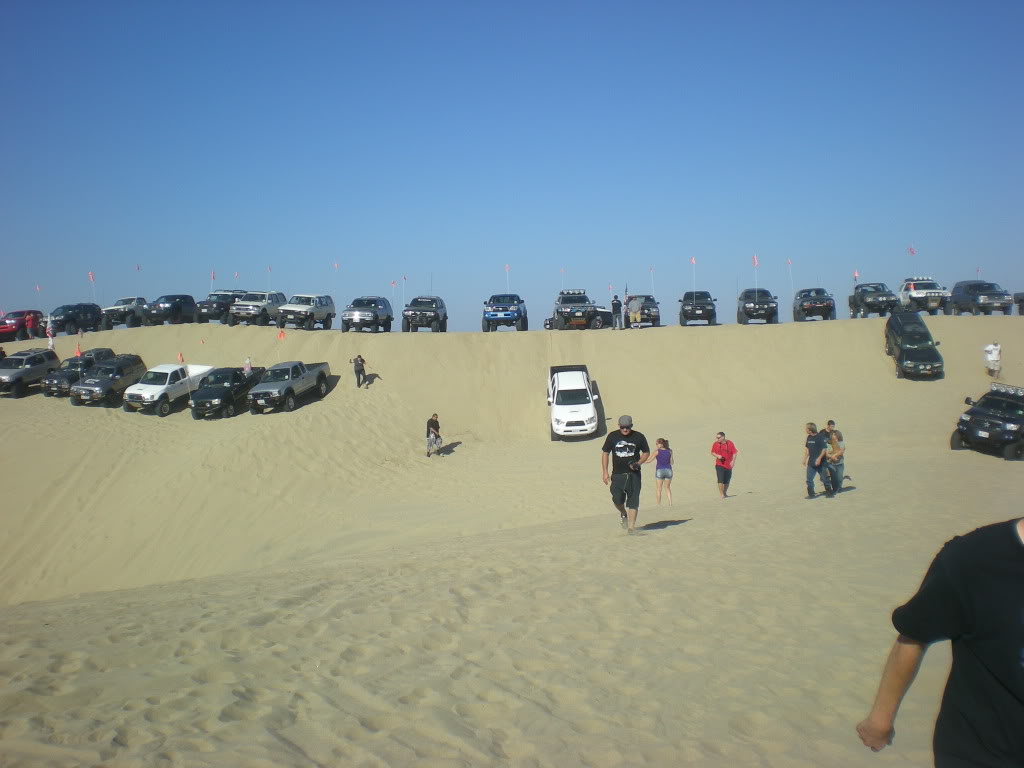
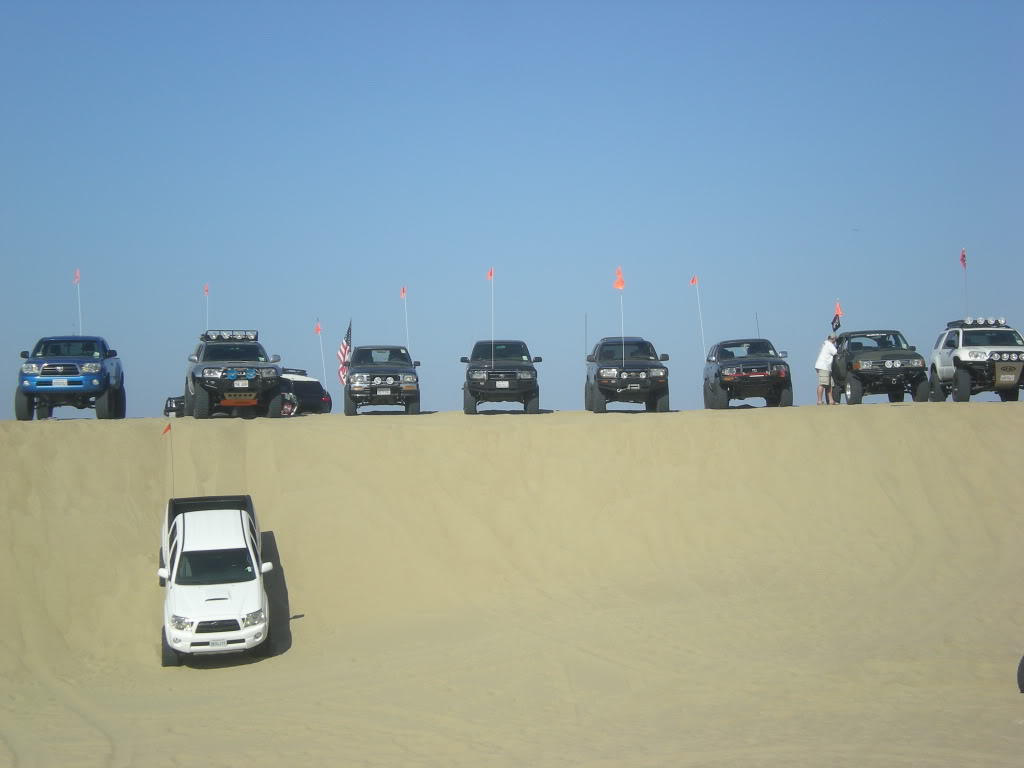
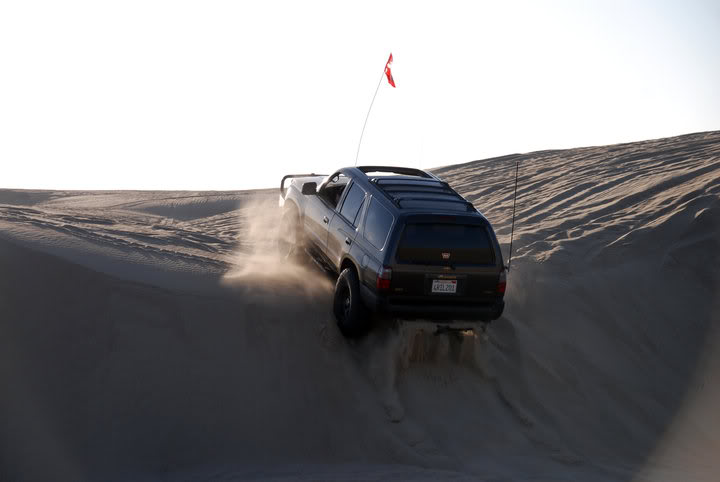
Next I went out with some buddies to the Pismo Jamboree. Awesome experience, It'll be an annual trip for me for now on
Next one morning I noticed that my coolant was slightly redish, and very oily. This could only mean one thing - the milkshake. I immediately flushed my tranny and coolant and got a hayden tranny cooler. I'm an idiot for not doing this earlier. This is destined to happen to every 3rd gen out there, so PLEASE, for your sake, do this before you destroy your drivetrain. Go spend the $50 to prevent the milkshake from ever happening. Luckily I was able to catch it early enough so it didnt cause any damage.
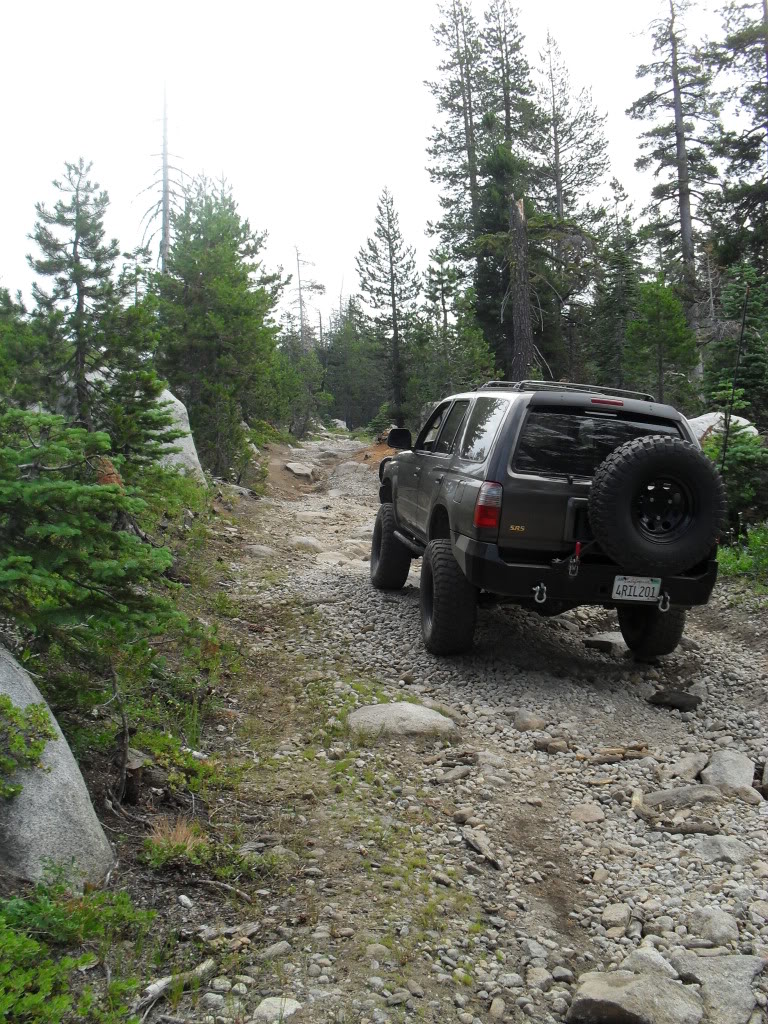
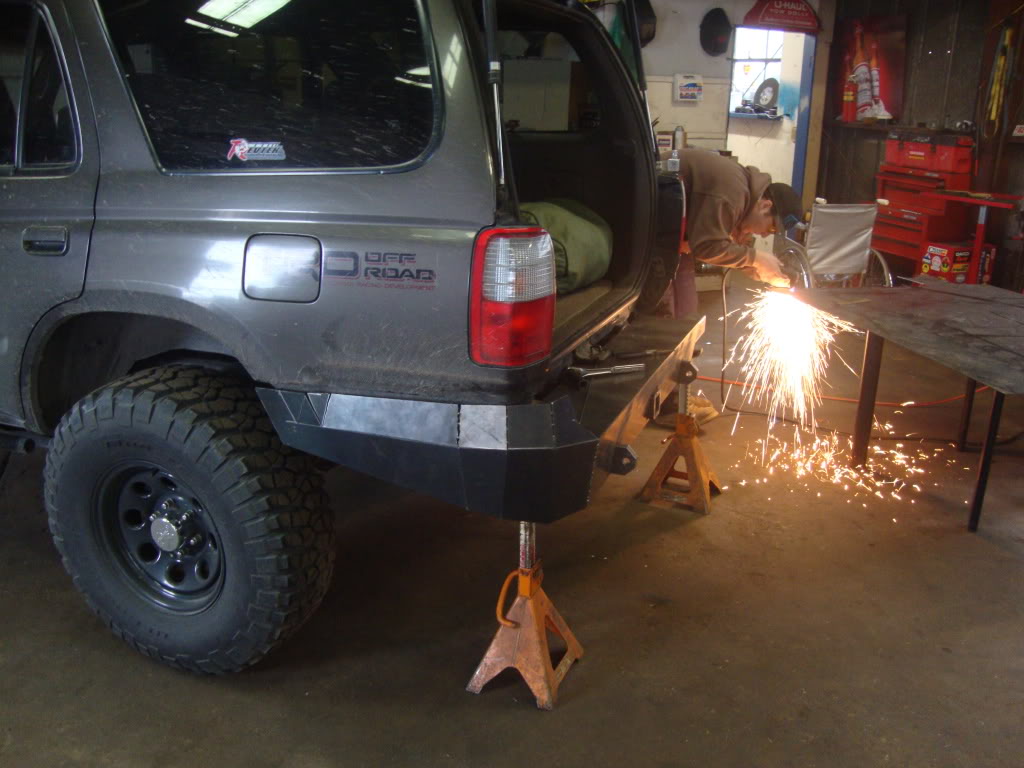
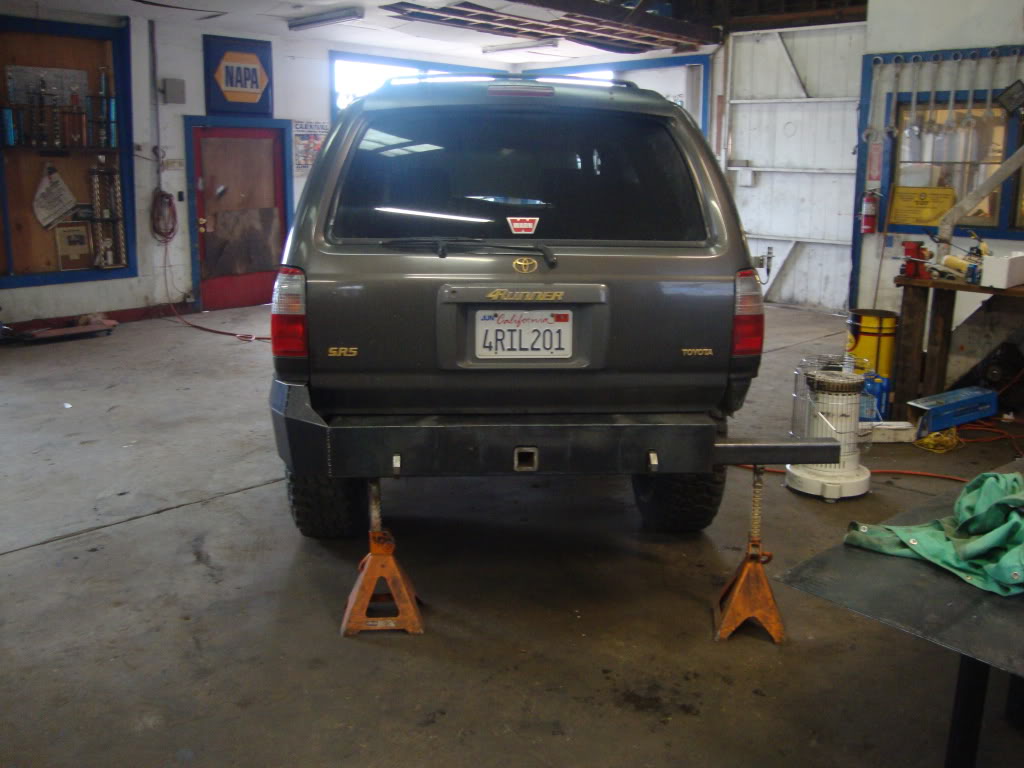
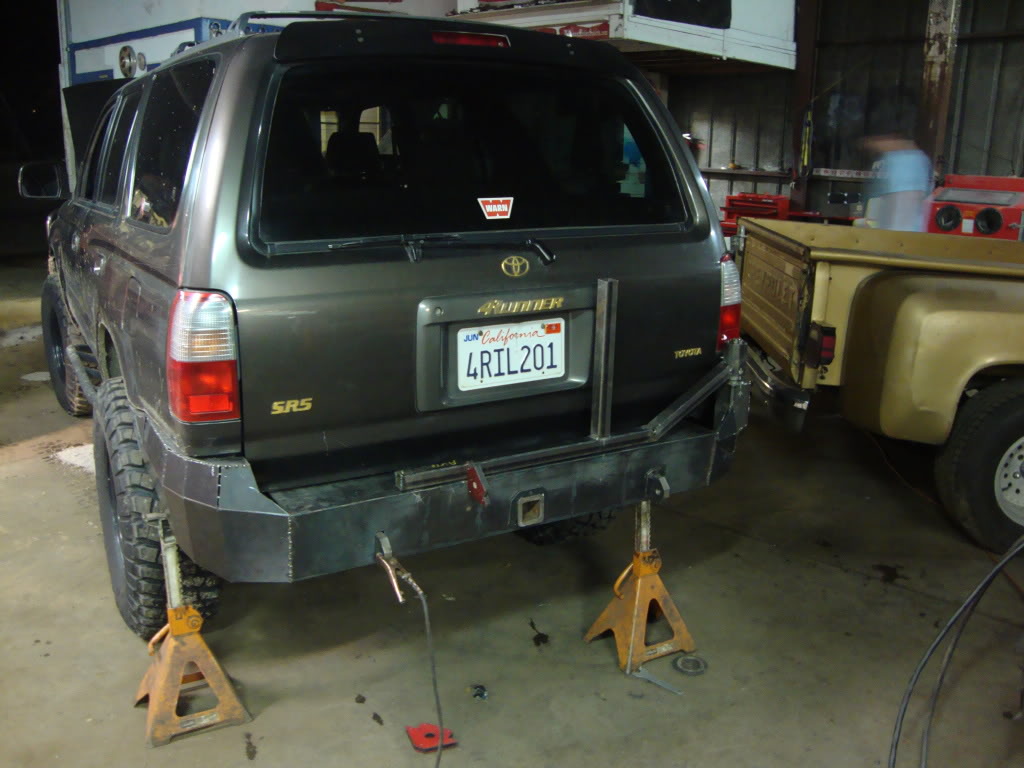
Finally I broke down and finally I am getting a new rear bumper fabricated - someting I should have done years ago. It is made of 1/8th inch steel on the edges and the main structure is made of 3/16ths. It's heavy and strong! It will include a tire carrier and hi lift mount as well as a tow hitch. It should be done in about 2 weeks. I've already bought a new tire and rim for it.
These things I plan on getting by the time summer rolls around:
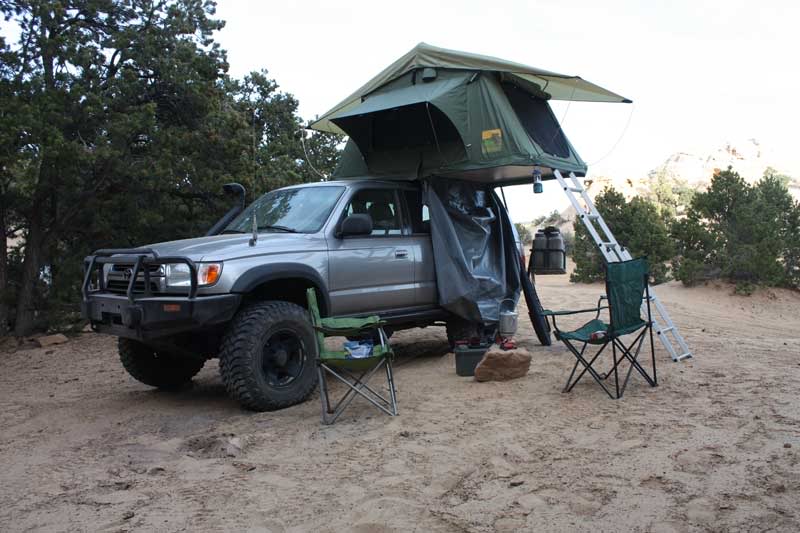
-Camping Lab Rooftop Tent
-ARB Fridge/Freezer
-Yakima Rack System
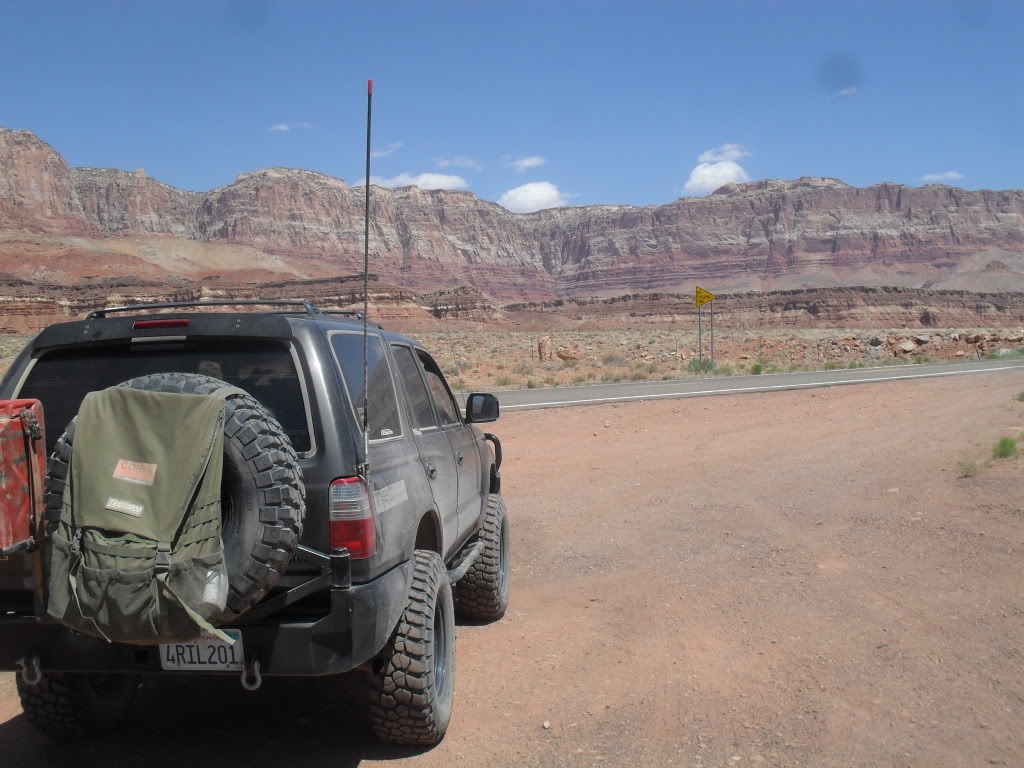
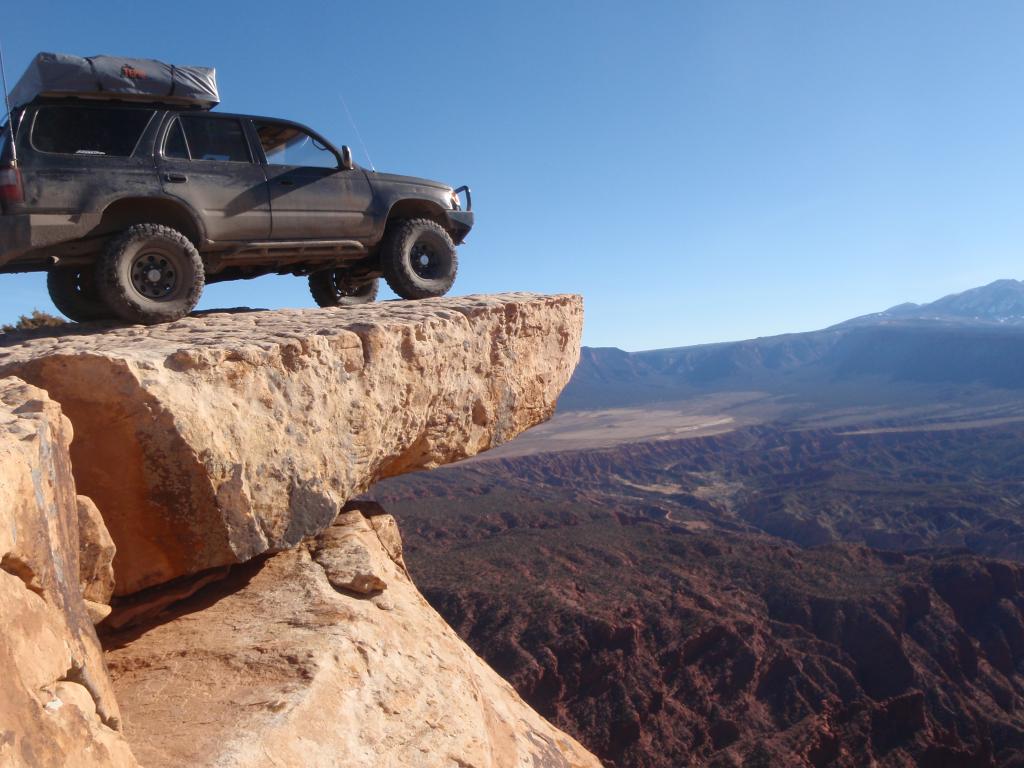
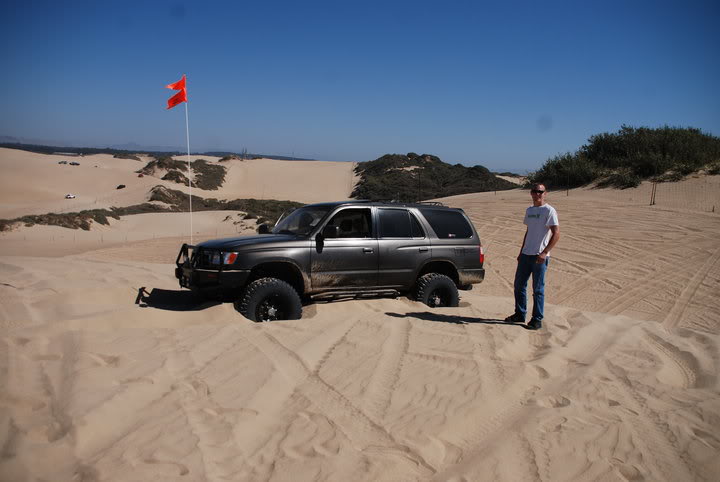
I also plan on creating an onboard shower that runs through the heater core. Like I mentioned earlier, I plan on also getting an ARB air locker for the front too as well, and also a rear storage system with a 42" drawer in the back for storage. If money allows, I will also put in a water storage tank where the old spare tire used to be and a dual battery setup with an inverter. I also plan on getting some Bilstein 5150 shocks and LC coils, to improve the ride. My original suspension is stock anyway, so its probably time to upgrade. I plan on spending most of the summer in 2012 exploring as much of the western US as I can, focusing on Arizona, New Mexico, Utah, Montana and Texas. Hopefully by this summer this will be me
I purchased this 4runner September 24, 2006 with 138,000 on the clock. I have added just under 100,000 miles since then. It was bone stock except for the upgraded stereo. It was in pristine condition, definitely a lucky find. It's main job was to get me to high school and back 10 miles away. Before long, I had dreams of making it more capable.
97 4Runner SR5 4x4
Suspension/Lift
Toytec coilovers
OME 861 Coils Rear
Bilstein 5125's
Toytec 1" Body Lift
Toytec 1" Diff Drop Kit
Camburg UCA's
Tires/Wheels
305/70/R16 BFG KM2's
16" Procomp Rock Crawler Wheels
Drive
3.4 V6
Auto Tranny
4.30 Gears
E-Locker Retrofit
Diff Breather Mod
Performance
ISR/Deckplate Mod
Hiflow Exaust
K&N Filter
Exterior
ARB Front Bumper w/ M8000 Winch
Custom Rear Bumper w/ Tire Carrier
Trail Gear Sliders
Frame Endcap Mod
Custom Bolt on Dual Jerry Can Carrier
Tepui Kukenam Rooftop Tent
Defender Rack Mounts
7" 6000K HID Lights on Front Bumper
Interior
Cobra 19 Ultra III CB
4' Firestik II
Tacoma Whip Mod
Pioneer Stereo
Xplode Speakers All Around
Custom Drawer System
JDM Field Monitor Unit
Full Time Outlets Front and Rear
How it all started...
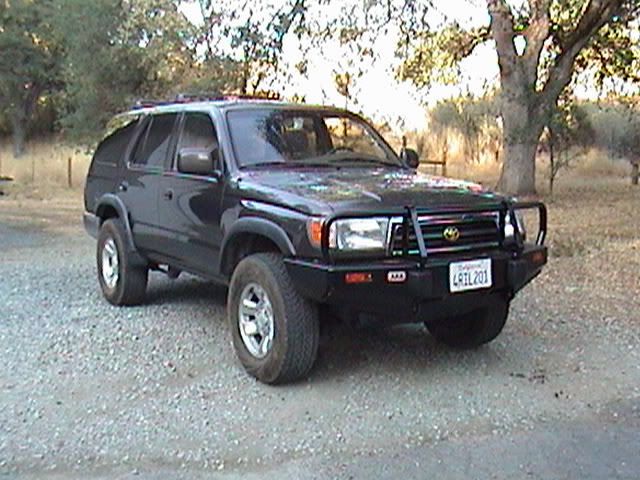
The first change that happened was the removal of the running boards. Good thing I did before the rocks got to them. (by the way, these have been for sale for ages, still in perfect condition. I'll give 'em to you for a steal!) Next came the ARB bumper and the winch. This is the single best mod I have ever done, next to the locker. A winch and even one locker can get you through just about anything. You dont need huge tires or a lift for 98% of the trails that DD 4runners do. As for the ARB bumper, I think it is worth every penny. Its strong, looks great and gives you the protection for the unexpected. 2 winters back, I slid off the road on an icy curve and slammed head on into a pine tree going 25 mph. Without it, I would have suffered major damage no doubt. Now only a small dent helps me tell this story.
The Trail Gear sliders came next. Only being $130 for a pair, I thought it was a great deal. I would recommend them anytime, they sure have saved me more times than I can remember. I decided to weld them on, thinking they would be much stronger than bolt up. The problem with this is they can never come off unless cut off, but I didnt think I would ever need them off. And so they remain, and I still love them.
Then there was the exaust. It's only a Magnaflow muffler, an off brand of Flowmaster. I love it and it was only 40 bucks!
After doing some trail exploring with friends and lacking a CB when everyone else had one, I broke down and purchased a cobra CB from walmart. Coupled with my original Radio Shack magnetic antenna, it worked ok for close range. Eventually I replaced the antenna with a new 3' Firestik antenna mounted just above the passenger tail light on a special bracket that I modified to clear the hatch. Thanks to habanero for telling me how to do this, check out her build thread for more info on this. CB reception seems to be fairly good with the new antenna, I frequently talk to truckers when I'm on the freeway during road trips.
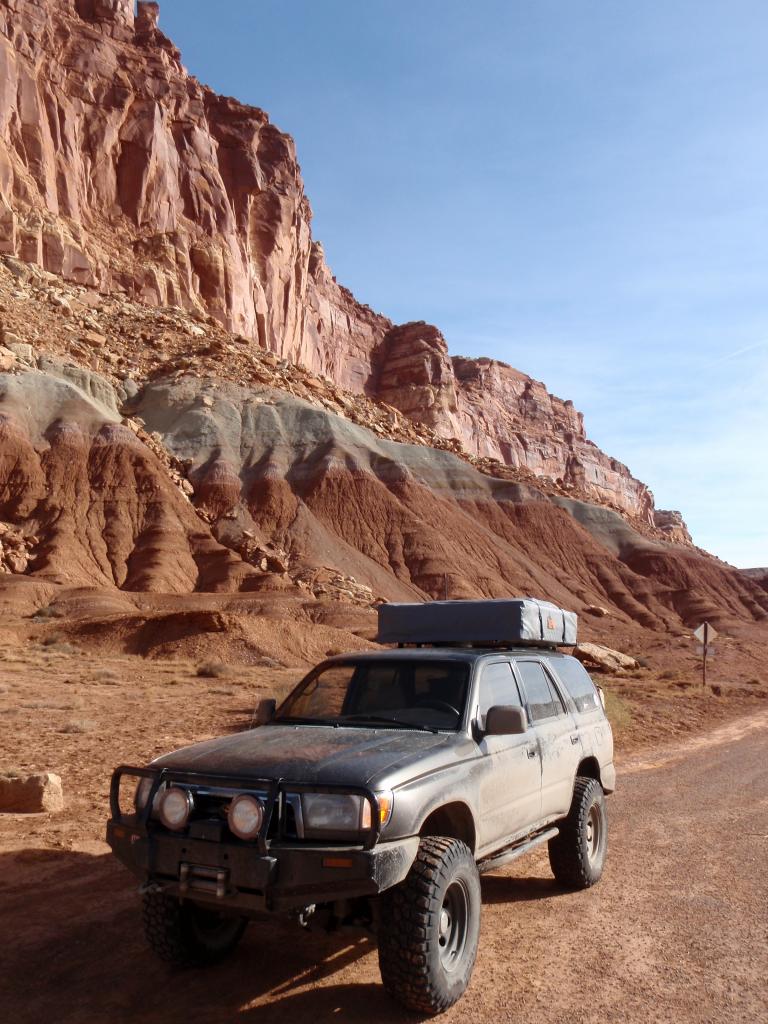
Next came the lift, tires and rims. I chose the Revtec 3" coilovers because they are relatively inexpensive, and had great reviews about a comfortable ride. By now, I was exploring tougher trails with larger rocks, and I found myself bashing an axle or a skid plate quite often. So I also decided to go with the 1" Toytec body lift so I could clear some new 305/70/R16 BF Goodrich All Terrain's. I was absolutely thrilled with these tires. They did great on snow and rocks, made no road noise and didnt reduce my gas mileage at all. This will not be the last time I purchase them.
The one thing bad about the body lift is the gap it creates between the front bumper and the body, as you can see. Years later I finally fix it, which I will explain about later.
I decided to Hurculine my rear bumper because as those of you that have the chrome rear bumper know, they are dent magnets. Luckily, I only managed to put a small dent on one corner before this. I also didnt like the fact that the rear bumper really stood out when the rest of the 4runner was either anthracite or black.
After applying this stuff, it pretty much made the bumper bulletproof. I swear you could shoot the thing with a .22 and the bullets would bounce right off. I lathered it on pretty thick, about 4 coats. I loved the look of it, I still do in fact. It gives it an awesome look as well as protects it. I have since moved on from that bumper, which is for sale if anyone wants it.
As for the Tundra brakes, I always kept hearing about how awesome they were. I also heard that they bolt right up. so eventually it was time to get new pads, so I went to my local brake shop and told them to replace my calipers with Tundra calipers and pads of a similar year. So he did, no problems.I'm really not sure on the size they are. I really didnt feel a huge difference in stopping power, if I could go back I probably wouldnt have spent the money on them.
The next mod to come was the rear differential breather extension mod. The new breather comes out at the gas filler. Follow this thread if you want to do this, its what I did.
https://www.yotatech.com/forums/f129...her-mod-75747/
I think this is one of those must-do mods for all 3rd gen owners. We have weak axle seals as it is, and the vulnerable stock breather location lets moisture easily into the axle. This will blow your axle seals faster. Its cheap and easy, I dont see why everyone doesnt do it.
By the way, there has been one thread that I believe is the bible for all 3rd gen owners that want to do some mods. Here it is. Have at it.
https://www.yotatech.com/forums/f2/a...s-most-113806/
Who Besides me hates the fact that Toyota never made any of their 12v outlets full time? Domestic trucks got this one right. I hated that I could never charge a cell phone or something overnight when camping. On top of that, my outlet was fried because I used a 3 million candle power spotlight in it. All because of the cheap 20 guage wiring Toyota uses. To fix this I bought a couple of new outlets from Kragen, Along with some 12 guage wiring with 20 amp fuses and had at it. I wired these to a fuse block I already had to run some auxillary lights on my bumper and roof, and this was already tied directly to the battery, so I wired the outlets to it. I now use my stock outlet, another one wired near it, as well as one in the back for a future fridge/freezer. They are all full time, and can run up to 20 amps each. Easy to do, comes in handy, everyone should do it.
The next thing that had to be done was get rid of that flimsy power antenna that us SR5'ers were plagued with. If it was up, it would hit every branch and if it was bent at all it wouldnt go down, and it's motor would just constantly run. If it was down, you couldnt listen to the radio on the trail. The solution? order a whip design from a Tacoma. This mod took me less than an hour to accomplish, and I am super happy with it. I used an OEM one from Toyota, which was pricey. I'm sure you could get by with a generic one for less price. Follow this for instructions http://www.4runners.org/writeups/whip/index.html
The next mod is one of my favorites. Many people say that deleting the ISR does nothing, but I beg to differ. This, coupled with the deckplate mod, gave me more throttle response and better acceleration. Not to mention the awesome roar it creates under the hood! All it took was the deckplate, which is only about $15 and are available at marine websites and stores, and look like this
and ends up looking like this in the end (not mine, I stole this pic)
Other than that it takes some PVC caps to cap off the parts where the funky plastic boxes were on the intake, and the ISR mod is complete. I love it, others dont, but I'm happy I did it. Heres the link to these mods
https://www.yotatech.com/forums/f130...engines-74837/
(cant find a working thread for the deckplate mod, but you get the idea from the pics)
The next change on the 4runner wasn't really by choice, I had to do it. The front sway bar end links snapped, as you can see
Instead of replacing them, I decided to take the whole sway bar off and try driving it that way. I am convinced that the end links snapped because the IFS was overflexed, which means it would happen again if I replaced it, or got quick disconnect end links for the trails. I didnt mind driving with it off, it does lean a little more than it would with the sway bar on, but I dont drive like an idiot so I'm not worried I'm going to flip. Others have driven my 4runner and said it has scared the crap out of them, but I dont feel that way. This will not change anytime soon for me, I may even get quick disconnects for the rear sway bar to maximize flex.
One day I had nothing to do, and decided to fab up a jerry can carrier that is hitch mounted. This has come in very handy. I also bought an anti rattle bracket so nothing moves around when this is mounted.
I may soon sell this one and build a new one that better accomodates my new bumper.
Finally I broke down and got my Aussie Locker for the rear diff.
This has done wonders to my offroading experience, as all lockers should. The think about this though is that it absolutely kills my tires, especially in parking lots where I have to make tight turns. Above 20 mph, I dont even know its there. Under 20 mph, my diff might as well be welded. Its not a problem for manual transmissions, because they can just clutch in and cut power to the rear diff in turns. A friend of mine told me I should just punch it into neutral in sharp turns, and it really works but is a hassle. I am saving for an ARB locker for the rear, so I can order that when I order my front ARB locker. After I got the locker, I finally came out of my shell and started going on some wheeling trips with others of you from this site.
Finally the gap between the front bumper and the body finally got on my nerves enought for me to do something about it. To me this was like surgery. I had to cut the mounts for the bumper in half without damaging the support braces. This was very tough, since I had no access to a plasma cutter at the time. The I had to reweld them up exactly an inch higher than they were previously. On top of this I also cut off the stock end caps on the frame and trimmed and welded a piece of angle iron inside, which really increases the strength for winching capability. everyone who has a winch on their 4runner should do this; anyone who plans to move their winch bumper up an inch and continue to winch, this is a must do. You can also drill a new hole in the front of the new angle iron for new bumper mounts in the front, which I did. I highly recommend doing this. I've seen pics of other peoples 4runner's frames ripping apart because it was not reinforced. Better to be safe than sorry. Thanks to j-money$$$ for being the guinea pig for this - I followed his thread https://www.yotatech.com/forums/f2/a...ft-fix-210005/
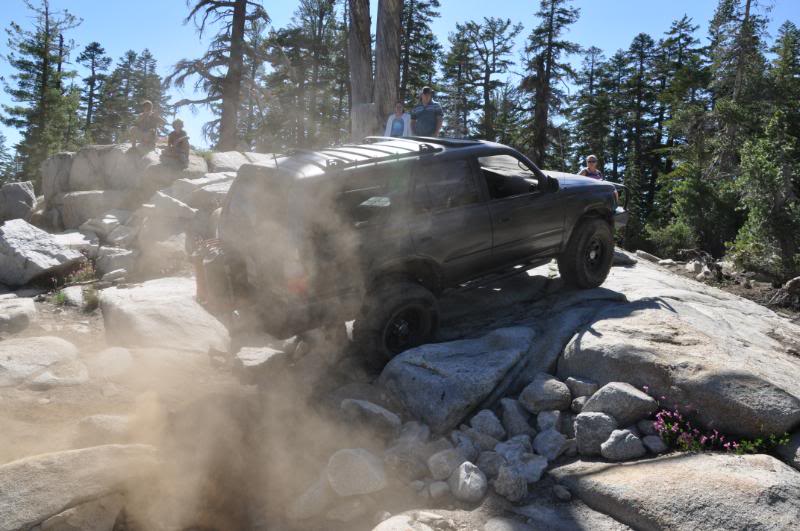
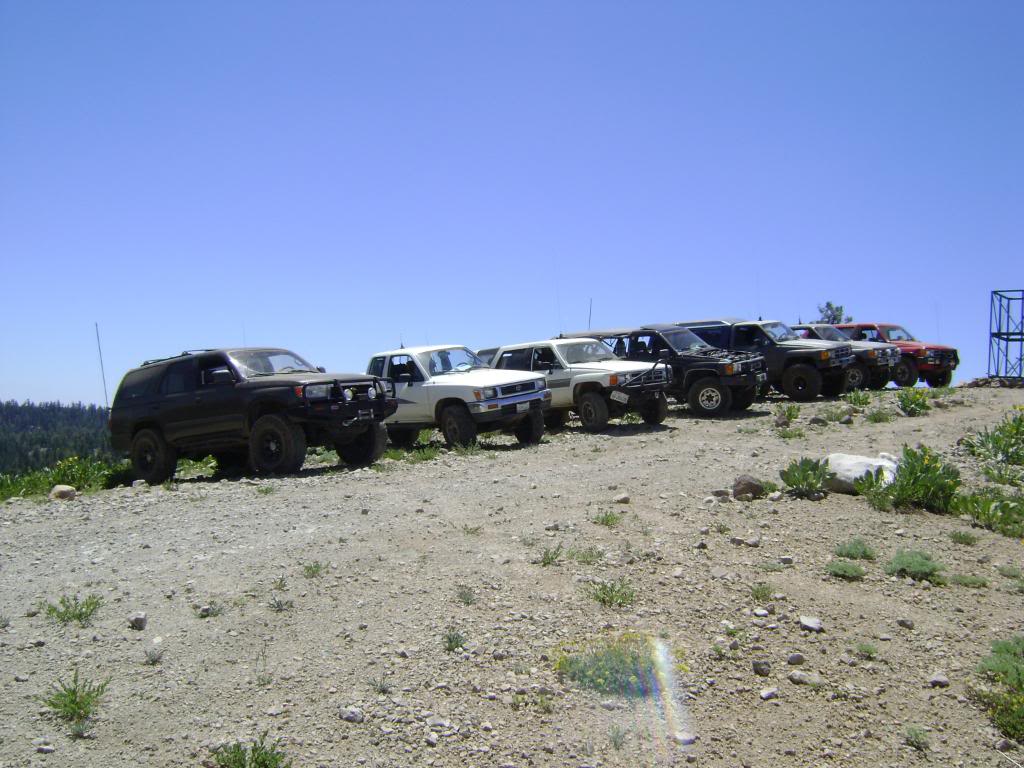
Next I went out with some buddies to the Pismo Jamboree. Awesome experience, It'll be an annual trip for me for now on
Next one morning I noticed that my coolant was slightly redish, and very oily. This could only mean one thing - the milkshake. I immediately flushed my tranny and coolant and got a hayden tranny cooler. I'm an idiot for not doing this earlier. This is destined to happen to every 3rd gen out there, so PLEASE, for your sake, do this before you destroy your drivetrain. Go spend the $50 to prevent the milkshake from ever happening. Luckily I was able to catch it early enough so it didnt cause any damage.
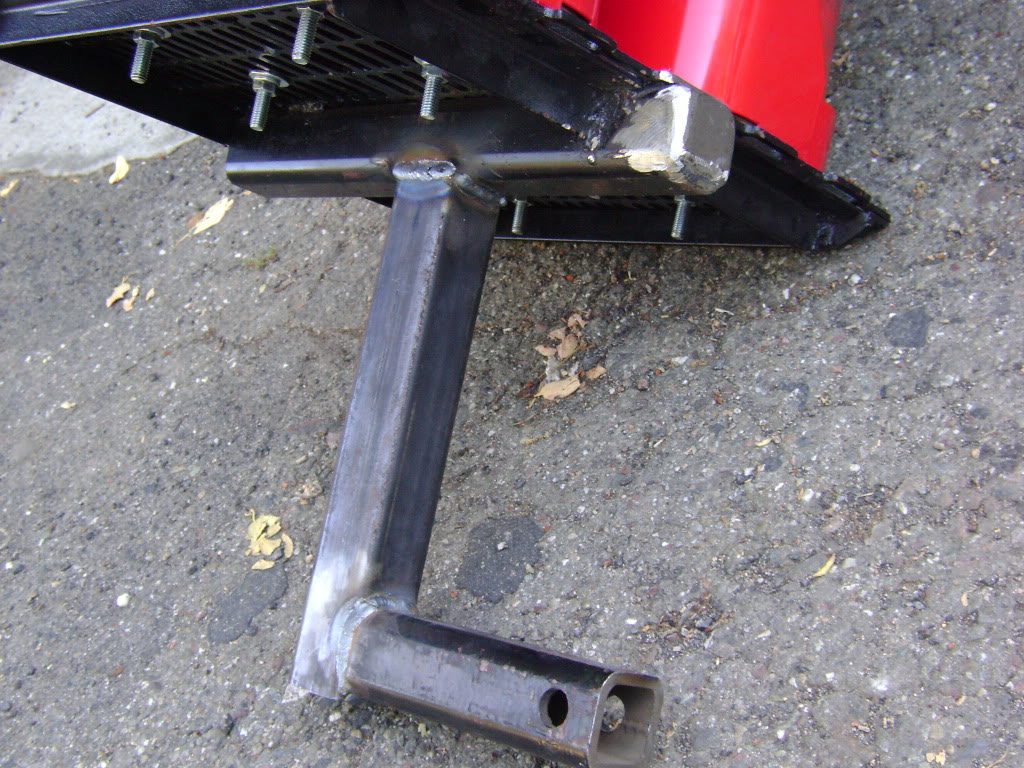
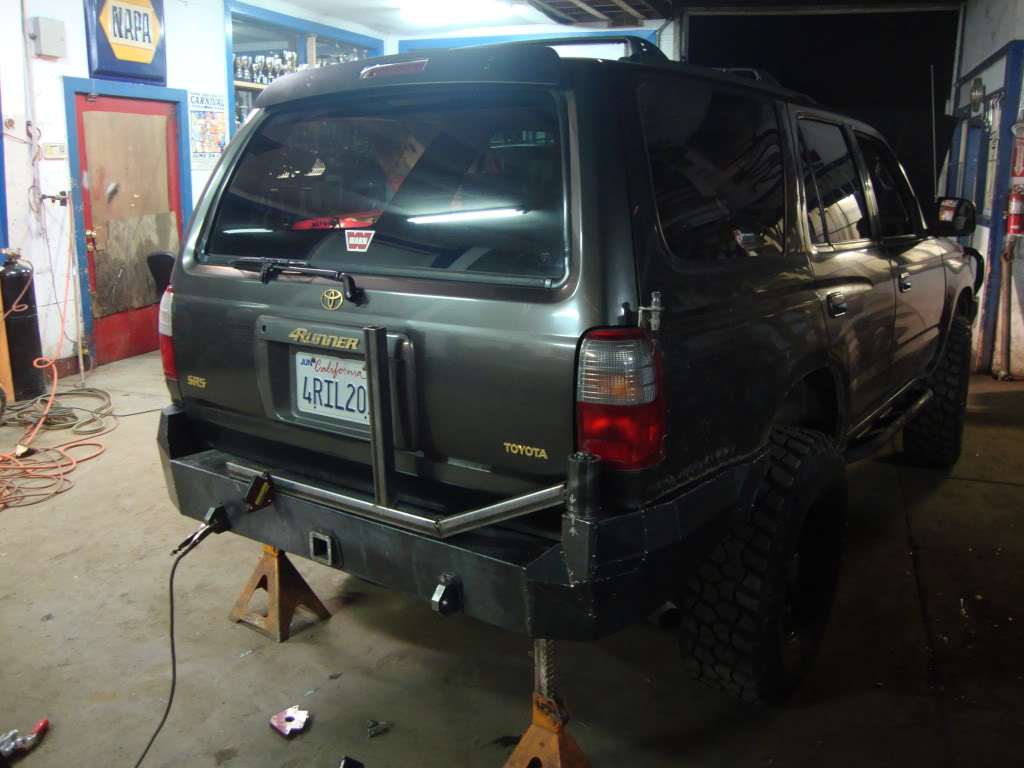
Finally I broke down and finally I am getting a new rear bumper fabricated - someting I should have done years ago. It is made of 1/8th inch steel on the edges and the main structure is made of 3/16ths. It's heavy and strong! It will include a tire carrier and hi lift mount as well as a tow hitch. It should be done in about 2 weeks. I've already bought a new tire and rim for it.
These things I plan on getting by the time summer rolls around:
-Camping Lab Rooftop Tent
-ARB Fridge/Freezer
-Yakima Rack System
I also plan on creating an onboard shower that runs through the heater core. Like I mentioned earlier, I plan on also getting an ARB air locker for the front too as well, and also a rear storage system with a 42" drawer in the back for storage. If money allows, I will also put in a water storage tank where the old spare tire used to be and a dual battery setup with an inverter. I also plan on getting some Bilstein 5150 shocks and LC coils, to improve the ride. My original suspension is stock anyway, so its probably time to upgrade. I plan on spending most of the summer in 2012 exploring as much of the western US as I can, focusing on Arizona, New Mexico, Utah, Montana and Texas. Hopefully by this summer this will be me
Last edited by stockwell45; Apr 20, 2013 at 08:54 PM.
 Jan 20, 2011 | 03:56 PM
#6
Registered User
Joined: Mar 2010
Posts: 365
Likes: 0
From: Sc Pa
LOve the runner man. My little brother has same color lifted black rims to. but since we live in Pa its starting to rust like crazy.
When you Got your ARB did you have to change your front suspension at all? I hear you might have to?
When you Got your ARB did you have to change your front suspension at all? I hear you might have to?
Jan 20, 2011 | 04:04 PM
#7
There is no modification to the suspension required. However, some people have said they had to grind down their frame a little on the sides so the bumper would slide on properly. I never had this problem, mine fit perfectly from the start.
Trending Topics
Jan 20, 2011 | 04:22 PM
#9
Really? thats weird. those bumpers are designed specifically for tacomas, it should be the 4runners that have the trouble with them. Sure is a tight fit on the frame thought, I dread taking it off for any reason because it really is a PITA
Jan 20, 2011 | 04:41 PM
#11
Yeah they are just tough to put on as it is...I used a bunch of tractor grease on my frame to help it slide on. does yours mount to your frame the same way ours do?
Jan 21, 2011 | 01:10 PM
#12
Registered User
Joined: Feb 2007
Posts: 502
Likes: 1
From: Sacramento, Ca
no his mounts alot different, ya my ARB and been backed into by some job site equipment the bumper its self has no damage the mounts for it were 1/8 or so off should of just ordered new mounts and bolts for it but i was in a rush to put it on for pismo
 Feb 16, 2011 | 11:51 PM
#15
All the work is done mostly by my friend from school. Its tough because both of us are full time students with jobs so free time is hard to come by.
Last edited by stockwell45; Mar 25, 2011 at 11:12 PM.
Feb 17, 2011 | 12:02 AM
#16
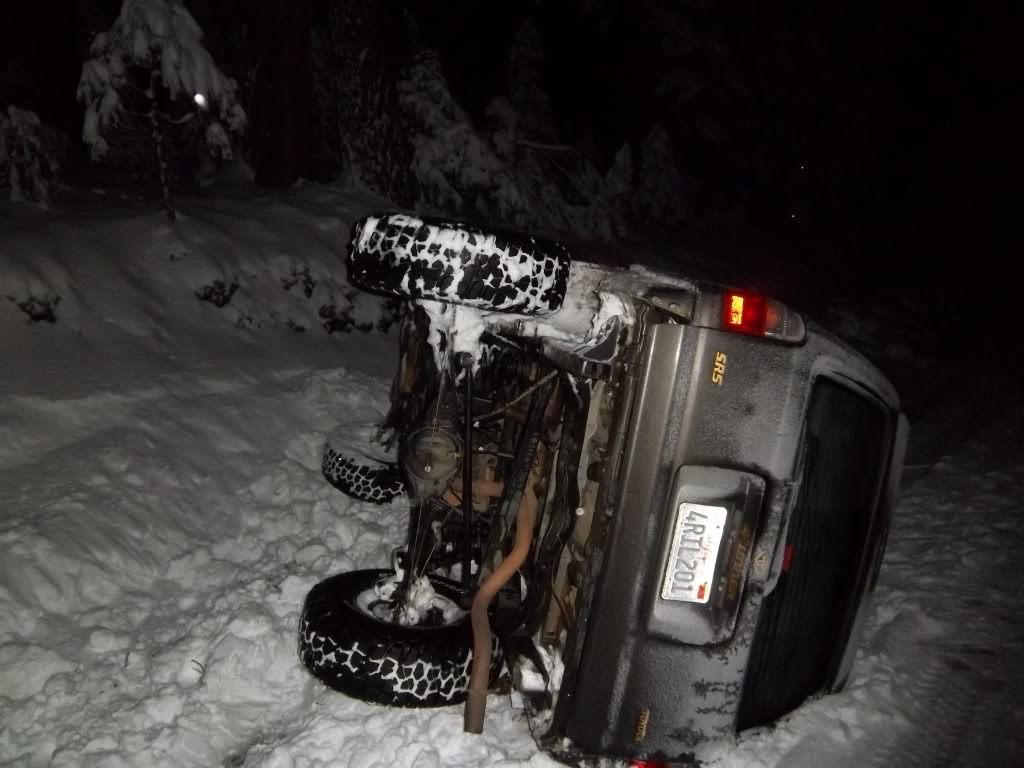
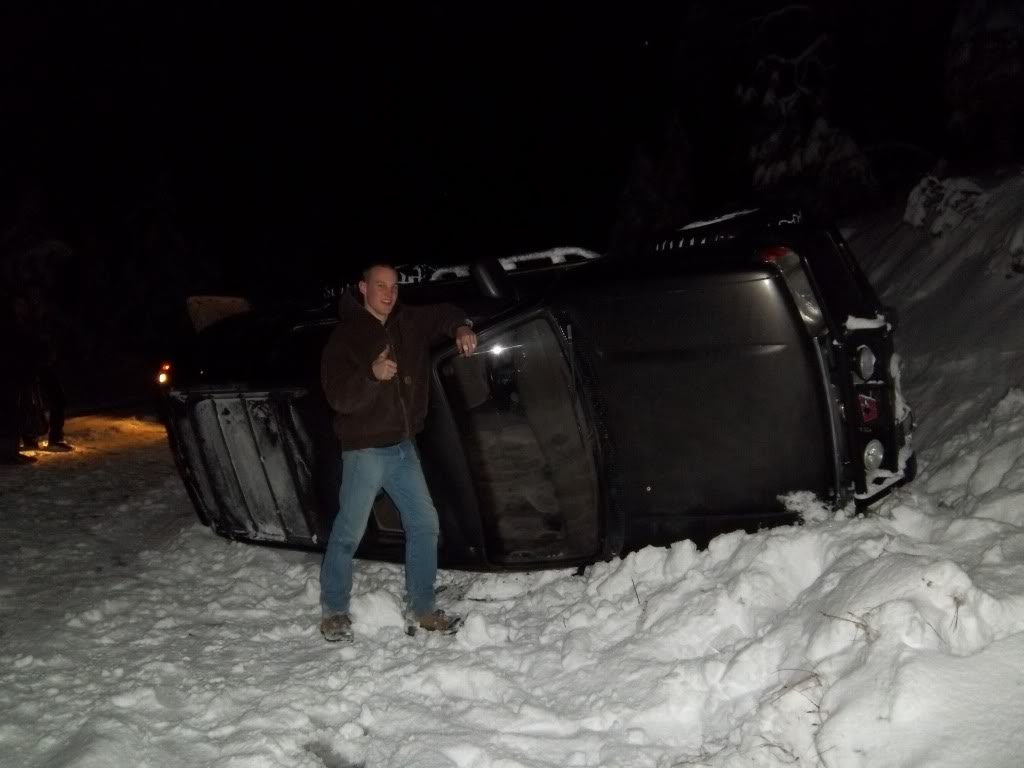
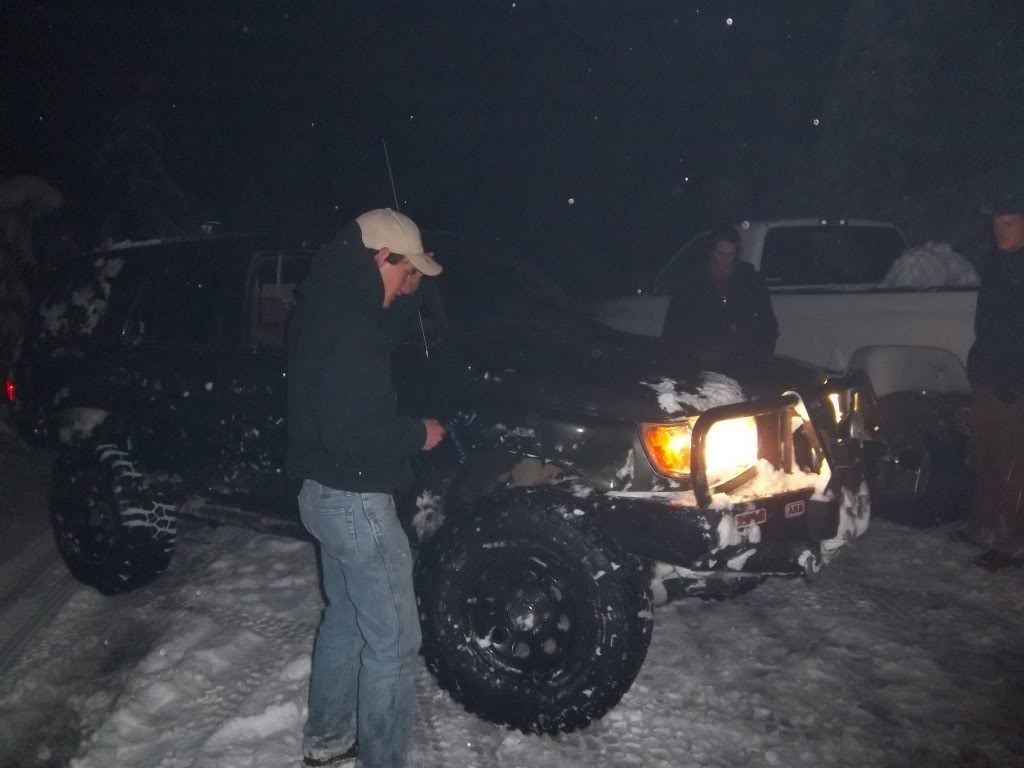
So I had a little mishap during snow wheeling tonight. We were going pretty quick down a snowy road, when my friend in front of me lost control of her jeep and spun sideways. I didnt have time to stop, so I slammed into her front left fender. I then was shot towards the snowbank, which I hit and rolled onto my side. using my buddys cummins and 5 people pushing, we got it back on its wheels. There is barely any damage, and runs like a champ! Just a dent on the front and rear fenders, a slightly bent antenna and now I really need an allignment, but other than that it is good! I'll be changing the oil tomorrow, as lots leaked out and burned off in the cylinders upon restarting the engine. Nobody was hurt, thank God, but the ARB did a job on my friends jeep. Well enough jibber jabber heres the pics:
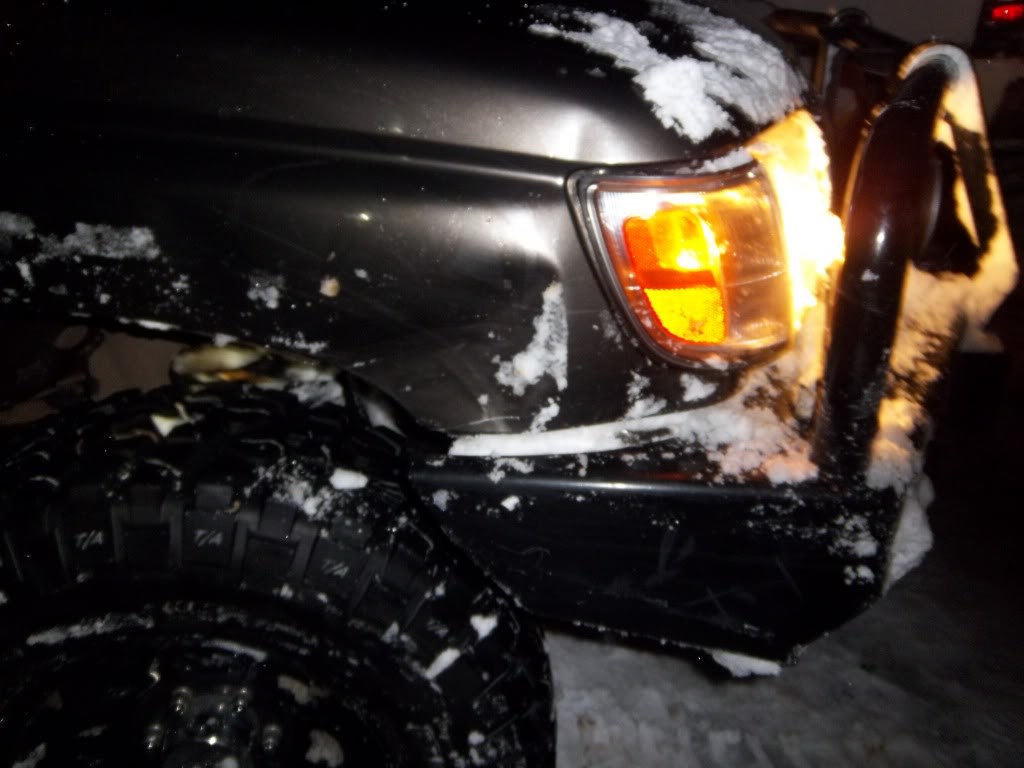
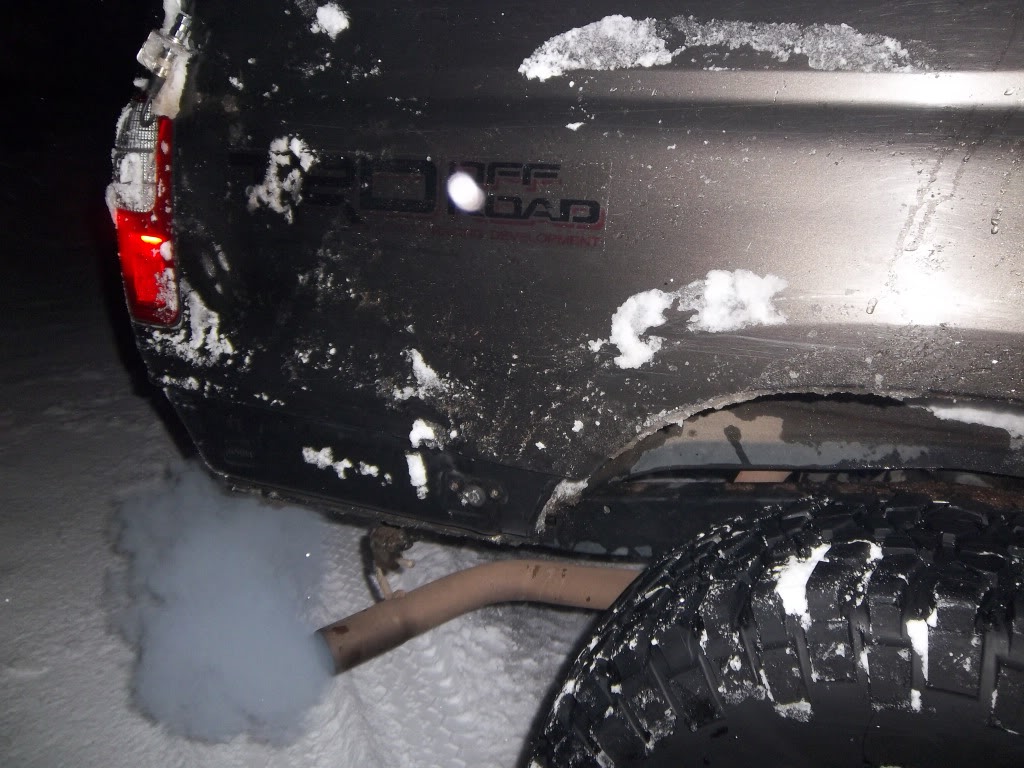
Last edited by stockwell45; Aug 20, 2012 at 10:55 AM.
Feb 17, 2011 | 01:00 AM
#17
Registered User
Joined: Mar 2008
Posts: 6,059
Likes: 101
From: Sacramento, CA
You had me tripping out when you said you rolled it... lmao but like you said, theres barely any damage... you're lucky! I bet that scared the hell out of you, and especially your passenger! lmao and what do you mean lady friend?! what happened to shanna? lmao
Feb 17, 2011 | 09:31 AM
#19
I'm seriously so incredibly lucky...the ARB didn't budge, this is the 3rd time its saved me from serious damage. Imagine a jeep wrangler with the front fender completely ripped off...that's her jeep. No other damage, I'm buying her a fender but jeep fenders are way cheap!
Mike - Shanna and I broke up a few weeks ago, it wasn't working out. Too much of a drama queen for me
Mike - Shanna and I broke up a few weeks ago, it wasn't working out. Too much of a drama queen for me
Feb 17, 2011 | 09:55 AM
#20
Registered User
Joined: Apr 2009
Posts: 529
Likes: 3
From: TX
Good lookin Runner, glad its ok after the roll
How far does the rear bumper your fabbing hang down? Looks like its killing your departure angle but that my just be the angle of the pics...nice work though
How far does the rear bumper your fabbing hang down? Looks like its killing your departure angle but that my just be the angle of the pics...nice work though


