
Siena's Toyota Hilux Gen 6 Make-Over & 3UZ-FE VVTi Swap
 Jul 22, 2014 | 12:03 PM
#81
Thread Starter
Registered User
Joined: Dec 2013
Posts: 214
Likes: 0
From: Aso Rock!
Mini update!
I dropped into the bodyshop after work, to see what progress was being made.
The filling and sanding has begun. The roof has been filled, in the areas where steel was welded into to rain channels, and the hole in the middle of the roof, left after I removed the amber beacon. I was impressed with the finish, despite it being pretty much work in progress.
I am fussy when it comes to bodywork, and so I should be - good bodyshops don't come cheap. I brought a flat rule with me from work, and a set of metric feeler gauges. I found a couple of tiny dips, and circled them. They will be attended to, and I will be checking each stage, until I'm satisfied.
I am getting an auto screen outfit to cut out the front screen. There are a couple of tiny chips at the base, nearside. So I might as well get a replacement. I am using the same guys that supplied me with a heated rear screen.
I didn't take any pictures today, as I didn't feel a sanded roof would be of interest.
I did visit the fabricator of the lid though. Due to the length, I feel there will be a bit of movement, even when locked, due to flexing of the bed. I instructed my guy to weld in a couple of tapered locating pegs at the rear, either side of the tailgate, so on the bed section. I will have corresponding holes drilled into the bed, the exposed steel painted with the rest of the bed. Then blind grommets inserted to accept the pegs. The pegs are 15mm long.
Hopefully, more progress tomorrow.
Jul 23, 2014 | 02:30 PM
#82
Thread Starter
Registered User
Joined: Dec 2013
Posts: 214
Likes: 0
From: Aso Rock!
I got a call back from the windscreen outfit just after getting to work this morning. They confirmed they were able to cut the front screen out, and was I happy for them to replace it, once the truck had been painted?
For the sum of �150.
I originally planned to go through my insurance, as I have glass cover. Unfortunately, Autoglass (or who ever my insurance company use) will NOT cut out a screen, and fit a replacement at a different time. They will only cut out, and fit a new replacement at the same time.
I decided to go with the outfit that had gotten back to me. And when I visited the bodyshop after work, I discovered the glass guys had been and gone. The front screen had been neatly removed.
Rewinding to 08:46 at work, my replacement rear differential e-locker harness and axle breather arrived, and at home, my tailgate handle was delivered.
At this point, I'm not sure it I'm retaining an external handle, or having the handle recess welded flush, relying solely on automation to release the tailgate.
With filling and sanding starting, I don't have much time to decide.
Jul 27, 2014 | 07:57 AM
#83
Thread Starter
Registered User
Joined: Dec 2013
Posts: 214
Likes: 0
From: Aso Rock!
One thing I have not come to terms with, (and probably never will) is the rear suspension on on the Toyota Hilux.
Like most light pick-up trucks, it runs a live rear axle, suspended and located by leaf springs. Whilst this set-up is great when it comes to load-lugging, it limits the handling capabilities on tarmac. Not an issue with the stock 2.5 D-4D DOHC 16V, with it's 102 hp output. But if the ultimate goal is more power, in my case from a breathed-upon Lexus 4.3 V8 2xDOHC 32V, then the rear suspension will certainly limit my exploiting the extra performance.
I believe leaf springs belong on a cart. And indeed, that's where they originated from. Cart horses (pulled by Donkeys) had their axles suspended on leaf springs.
I have decided to go with a 4-link rear suspension, with adjustable coil overs. This dispenses with the leaf springs. The axle is then located by trailing arms at the front, and anti-wrap bars at the rear. Side to side movement is controlled by a Panhard bar, which is a bar located on one side of the chassis, the other end on the axle beam.
Since I have come to this decision late in the build process, very few, if any fabricators would be willing to do the job. Grinding and welding whilst surrounded by fresh paint is not any fabricator's dream.
So, I will be doing the work myself, while the bed is off the chassis. I will make mock-ups of the locating shackles / brackets on the axle and frame, for the trailing arms, anti-wrap bars and Panhard bar. These will be made out of wood, then all I will have to do is give the wooden models to my guy to make out of 3mm steel.
I will also be showing some love to the front end, losing the torsion spring set-up, and having adjustable coil-overs here too.
I will post pictures of this process, as I go along.
Jul 27, 2014 | 10:57 AM
#84
Thread Starter
Registered User
Joined: Dec 2013
Posts: 214
Likes: 0
From: Aso Rock!
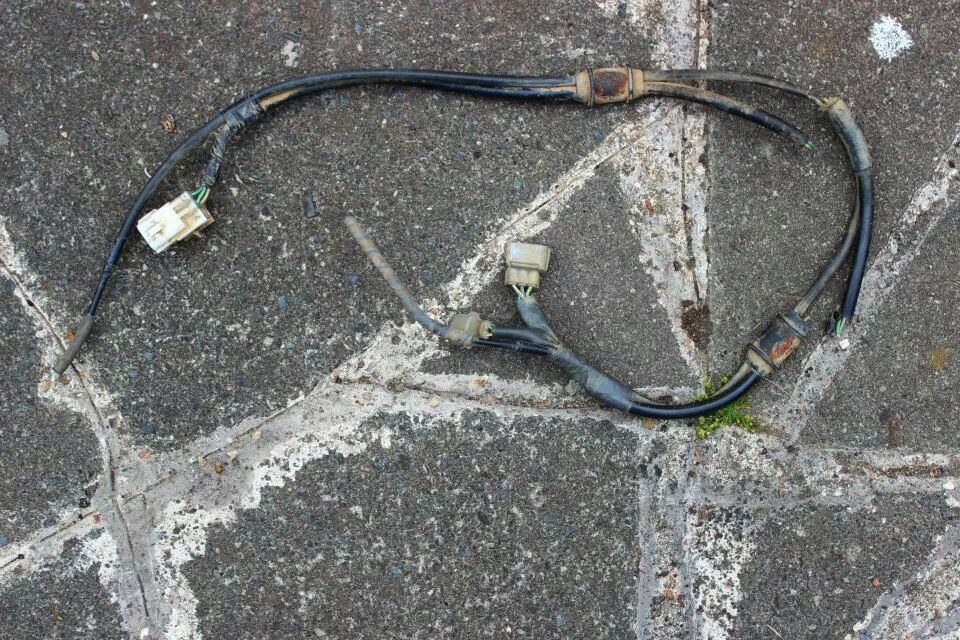
LThe old rear differential e-locker harness. It's actually broken in two ares, and the same wires, all parted company. I don't think it's even worth trying to fix, as it's gotten so stiff and brittle:
And the nice, new flexible replacement. Worth every bit of the �63 it cost me:
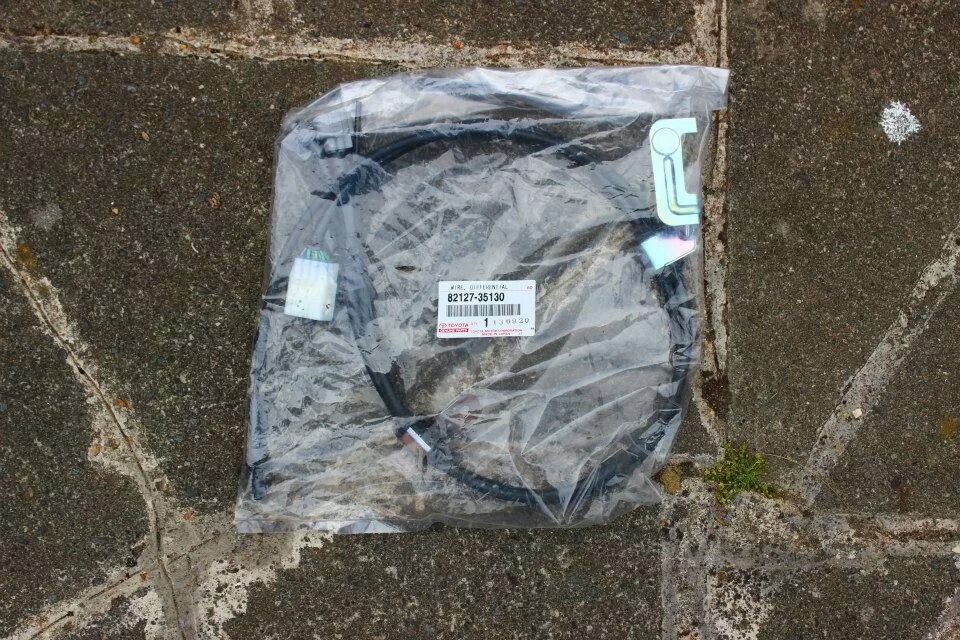
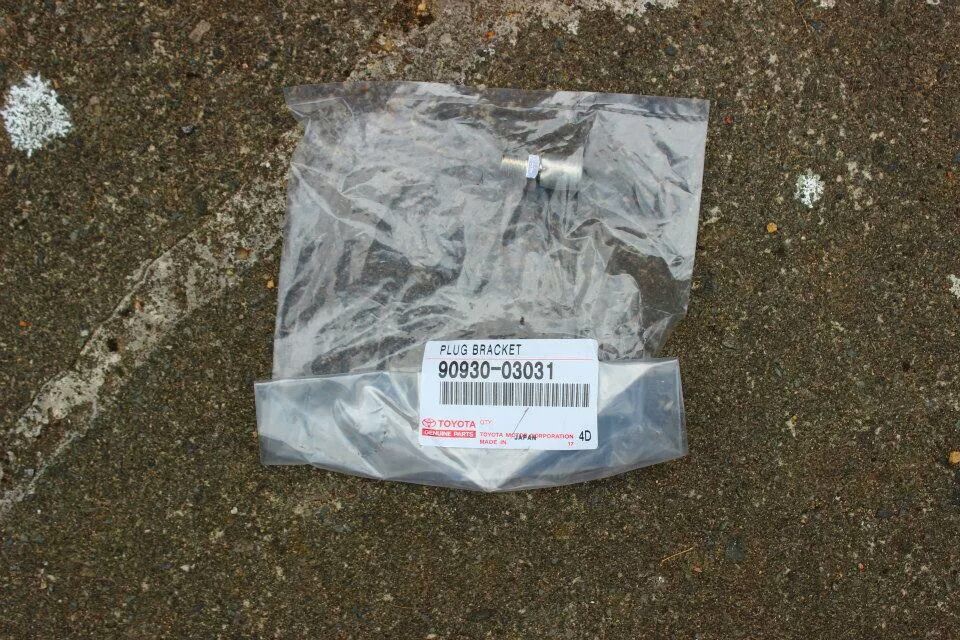
OEM replacement rear axle breather - I may relocate it with stainless steel braided line, the jury's still out on that one:
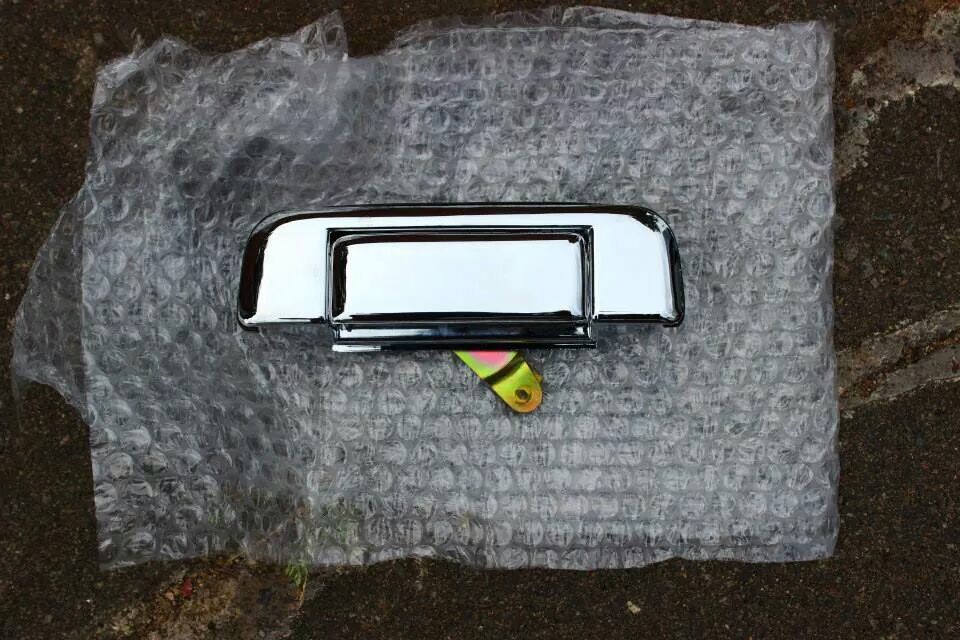
I got a replacement tailgate handle, the chrome-look version as fitted to MK5 VX / Invincible. It carries the same part number as that fitted to the MK6, if the chrome package is specified:

And the nice, new flexible replacement. Worth every bit of the �63 it cost me:

OEM replacement rear axle breather - I may relocate it with stainless steel braided line, the jury's still out on that one:

I got a replacement tailgate handle, the chrome-look version as fitted to MK5 VX / Invincible. It carries the same part number as that fitted to the MK6, if the chrome package is specified:
 Aug 2, 2014 | 11:59 AM
#85
Thread Starter
Registered User
Joined: Dec 2013
Posts: 214
Likes: 0
From: Aso Rock!
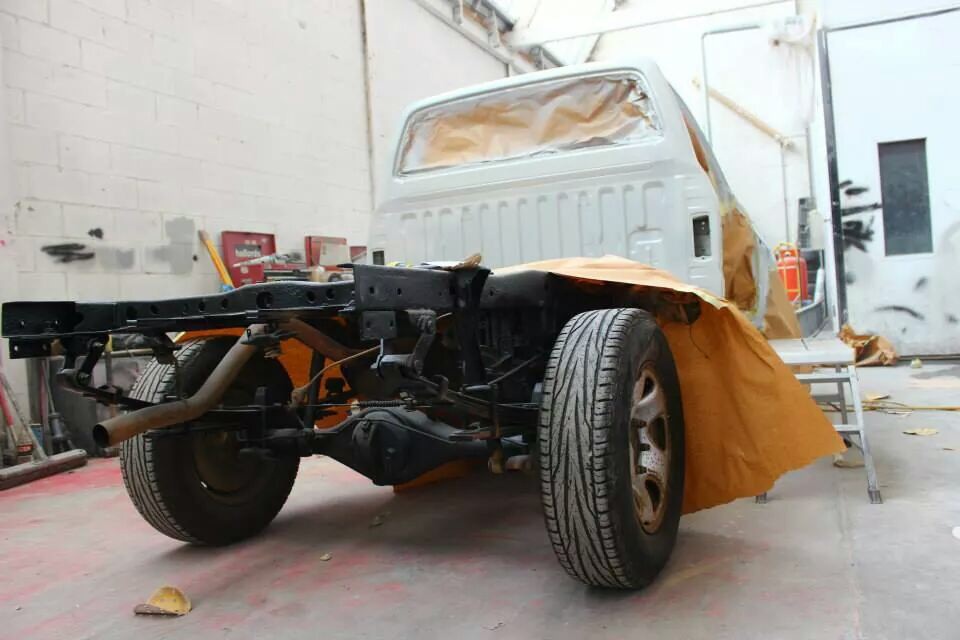
Today, things really moved up a notch.
The front half of the frame was cleaned up, and under sealed. I removed the oil pan bash plate, it was only slightly dented in the middle, and would straighten out real good. But, I've opted to have a new one made out of of 3mm aluminium.
The cabin has had all the filling and sanding down done, the only areas that required Bondo were the roof, where the hole for the old revolving beacon used to live, and now has steel plate welded over it. The same goes for the roof gutters, that now have steel welded on to fill the groove. The cabin then had primer laid down, the roof had a few coats.
I'll upload pictures in a little while, though it's all looking great.
Last edited by Siena; Aug 2, 2014 at 03:39 PM.
Aug 2, 2014 | 03:39 PM
#86
Thread Starter
Registered User
Joined: Dec 2013
Posts: 214
Likes: 0
From: Aso Rock!
Some pictures - please ignore the fuzzy images. Sharp on the camera, once uploaded onto an old PC, then sent to an iPad, quality seems to degrade.
Just for reference, the truck will be painted in the spray booth. The priming can be done pretty much anywhere. I'm particularly pleased the way the roof has turned out:

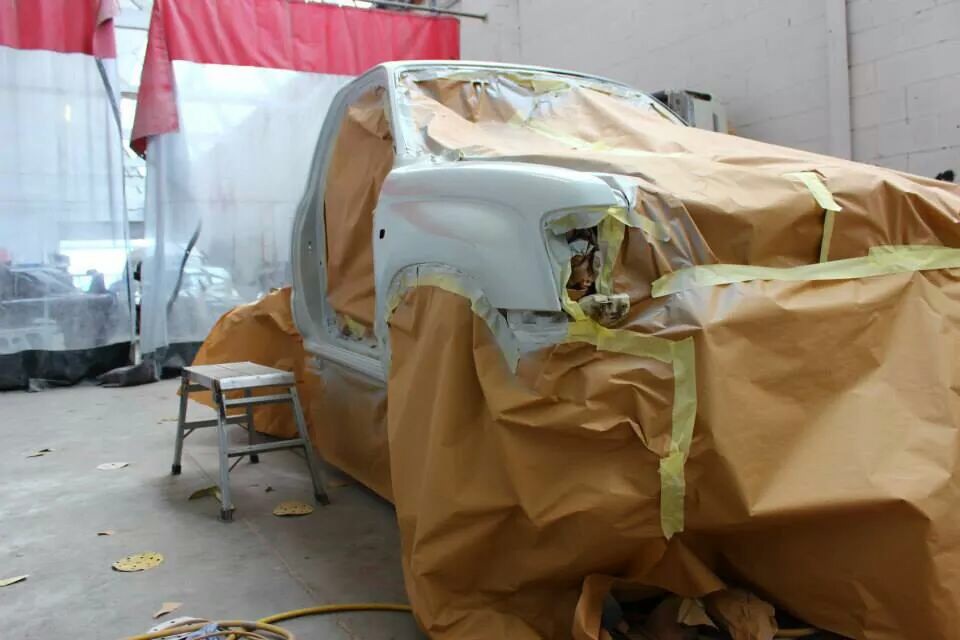
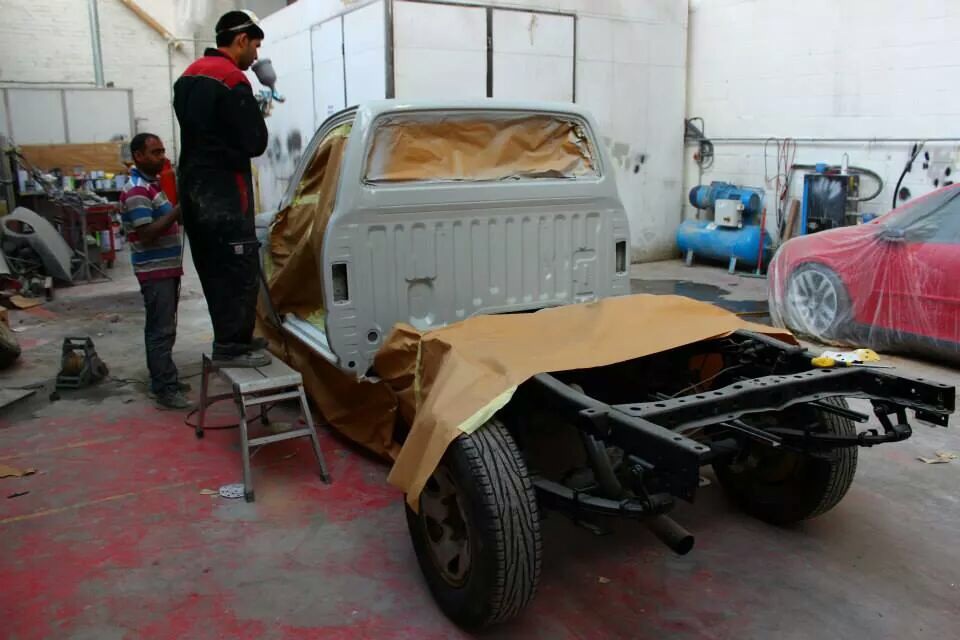
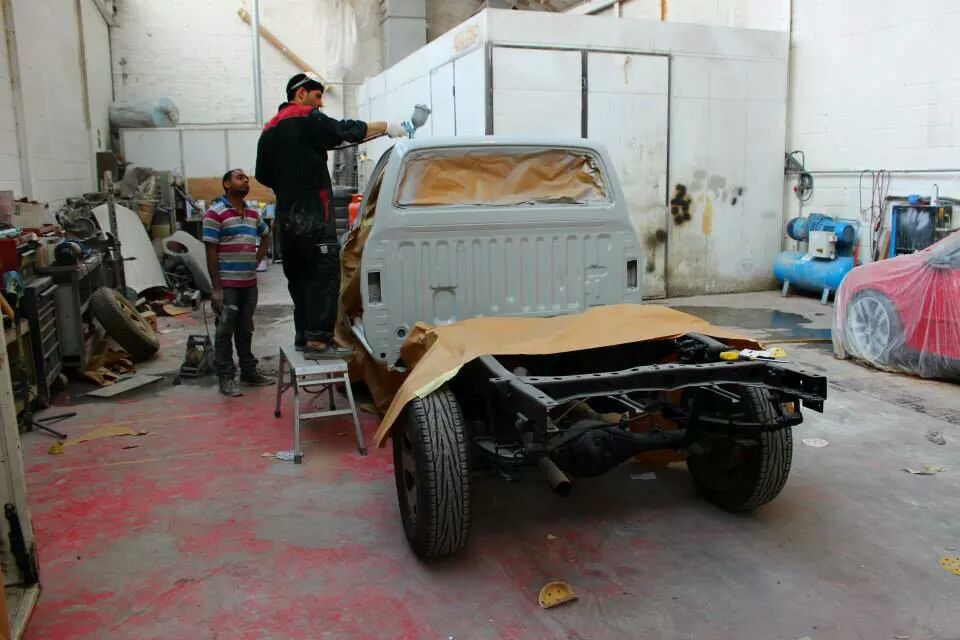
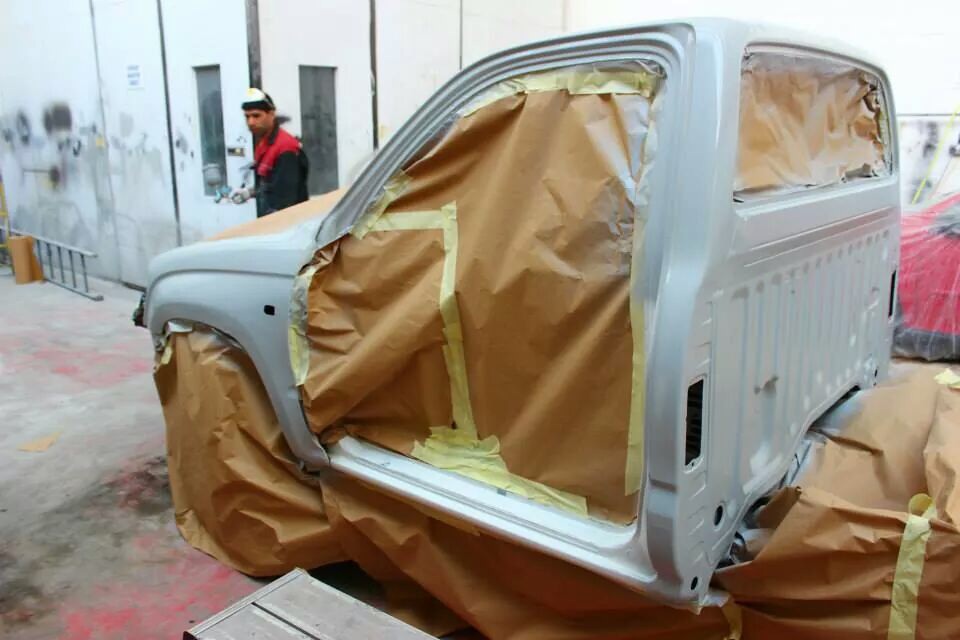
Just for reference, the truck will be painted in the spray booth. The priming can be done pretty much anywhere. I'm particularly pleased the way the roof has turned out:


 Aug 7, 2014 | 11:28 AM
#88
Thread Starter
Registered User
Joined: Dec 2013
Posts: 214
Likes: 0
From: Aso Rock!
My 11-day vacation officially started today.
Not a vacation of travelling, seeing different places, getting embroiled in diverse cultures, taking the wife and children on a road trip.
A vacation of delving into the innards of my Toyota truck.
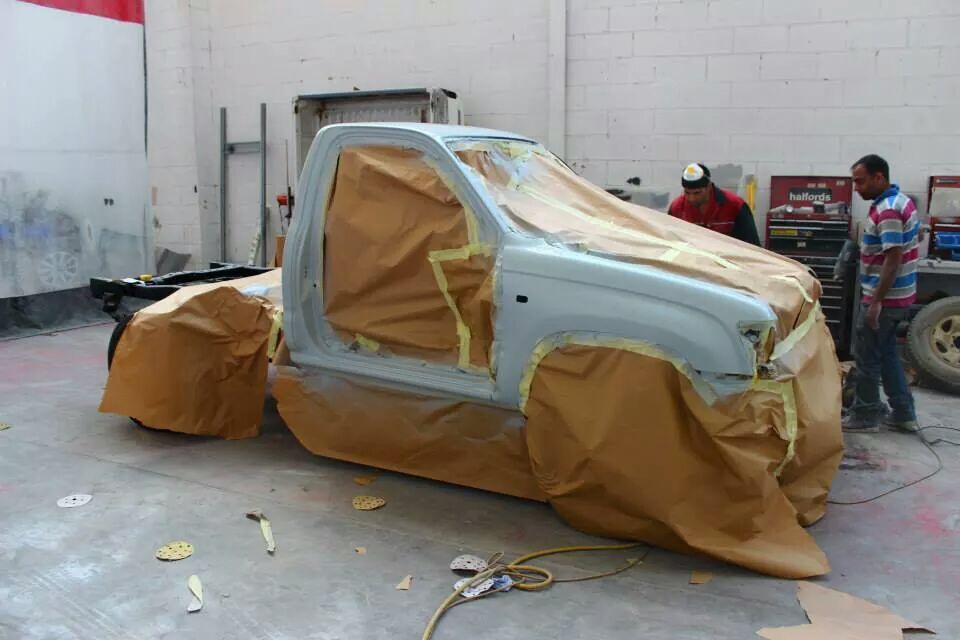
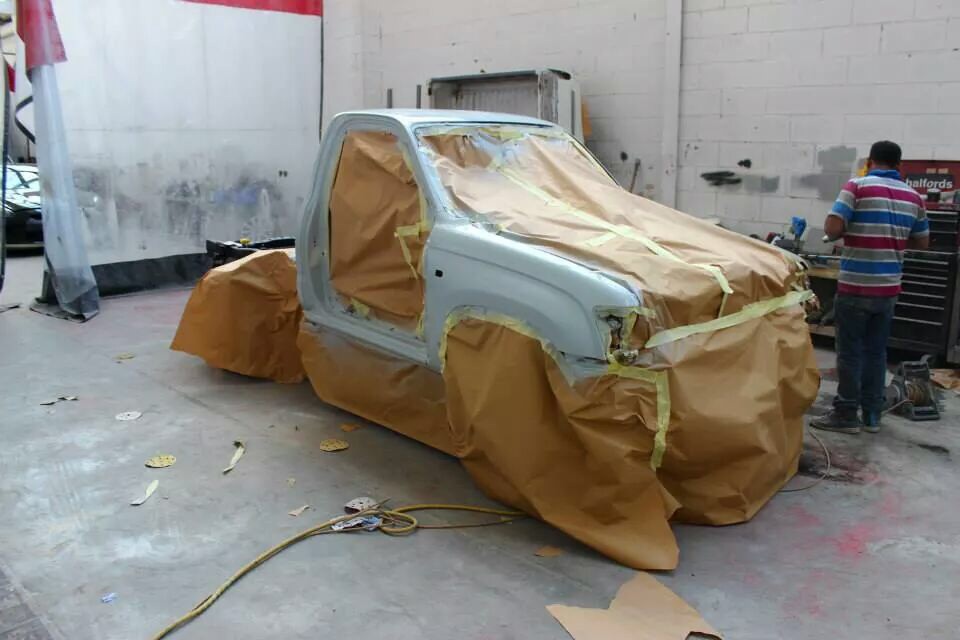
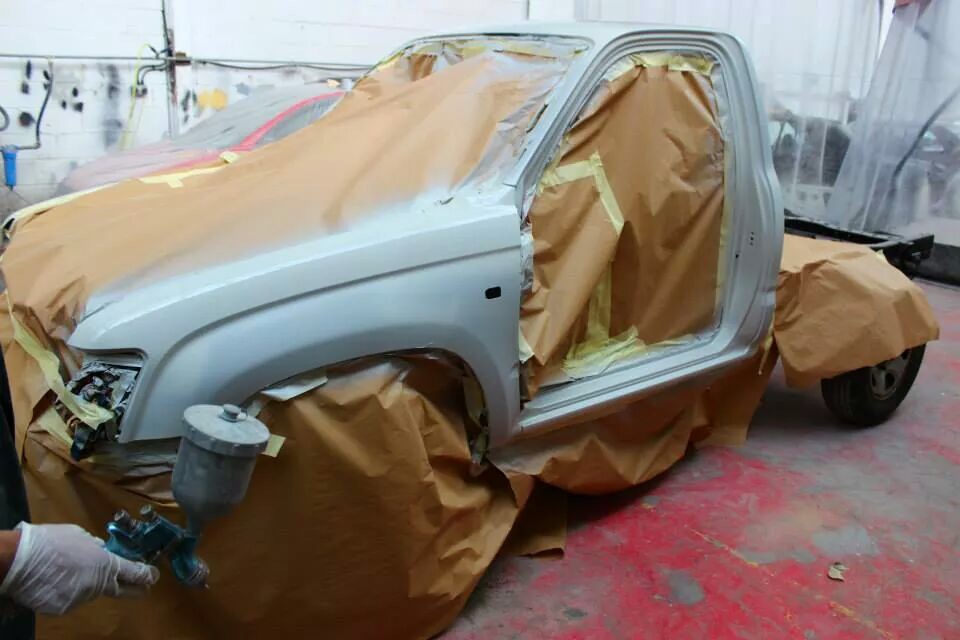
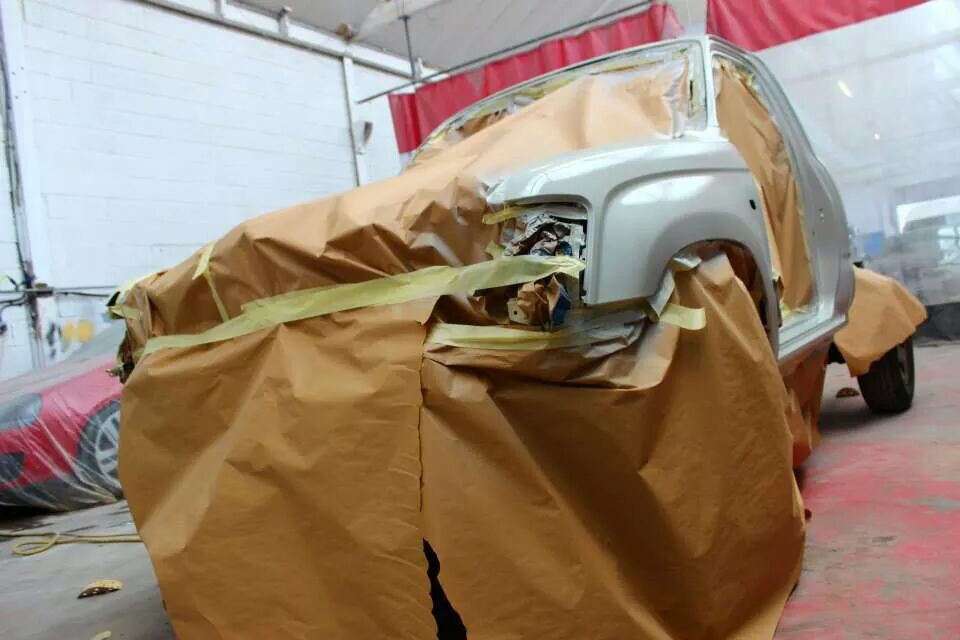
I spent the day in the bodyshop. The cabin is all primered, the front fender flares have been trial fitted, though not with the stock Toyota plastic clips. I opted to use M8 bolts and nuts. Fit is perfect, with the edge of the flares resting snugly against the fenders. I have not fitted the rubber gaskets, those will go on after paint.
As the EX Single Cabin models were designed strictly as Workmate Utes, they left the factory pretty basic. To my knowledge, fender flares were not an option on UK SC's. There's always the glass fibre replica option, a route I did take initially, until I offered them up to my truck, and found they would take hours, if not days to get anywhere close to fitting.
I purchased genuine Toyota Hilux Double Cabin flares in the end. I was going to fit the rears as they come - 2 separate pieces. Today, I ended up bonding them together to make single flares each rear, and additional security in the form of M8 bolts, nuts and washers. Three bolts per side.
The join will be scored with 80 grit paper, then a layer of glass fibre added. Final layer will be a thinner layer of Bondo. They will then be trial fitted to the bed. The fuel filler flap will be modified to clear the flare on that side.
I took some pictures today, tomorrow hopefully there should be more progress. And more pictures.
Not a vacation of travelling, seeing different places, getting embroiled in diverse cultures, taking the wife and children on a road trip.
A vacation of delving into the innards of my Toyota truck.
I spent the day in the bodyshop. The cabin is all primered, the front fender flares have been trial fitted, though not with the stock Toyota plastic clips. I opted to use M8 bolts and nuts. Fit is perfect, with the edge of the flares resting snugly against the fenders. I have not fitted the rubber gaskets, those will go on after paint.
As the EX Single Cabin models were designed strictly as Workmate Utes, they left the factory pretty basic. To my knowledge, fender flares were not an option on UK SC's. There's always the glass fibre replica option, a route I did take initially, until I offered them up to my truck, and found they would take hours, if not days to get anywhere close to fitting.
I purchased genuine Toyota Hilux Double Cabin flares in the end. I was going to fit the rears as they come - 2 separate pieces. Today, I ended up bonding them together to make single flares each rear, and additional security in the form of M8 bolts, nuts and washers. Three bolts per side.
The join will be scored with 80 grit paper, then a layer of glass fibre added. Final layer will be a thinner layer of Bondo. They will then be trial fitted to the bed. The fuel filler flap will be modified to clear the flare on that side.
I took some pictures today, tomorrow hopefully there should be more progress. And more pictures.
Aug 10, 2014 | 12:32 PM
#89
Thread Starter
Registered User
Joined: Dec 2013
Posts: 214
Likes: 0
From: Aso Rock!
Yesterday, I spent half the day at the bodyshop.
The rear fender flares have been trial fitted, so all the holes are in place where they need to match the fitting points on the flares themselves.
Of course, the fuel filler flap needs to be cut down to match the curve in the flare. I removed it, and brought it home. I don't just want the bodyshop to grind it down, I'm taking it over to my guy who has built the bed lid. Here the fuel filler flap will be precision cut, and the new edge folded over on a press to match the original edge.
Once this is done, I'll refit it, and make a cardboard template, which will form the basis for the new steel that needs to be welded into place on the bed. The flares will first of all need to be fibre glassed, and finished off with Bondo at the join, before they are removed.
The bed lid is finished, and it's a work of art! I had a tab welded at the rear to accept the latch, and locating pins that will mate with recesses in the bed rear top rail. I'll bring it home until the bodyshop is ready for it, as I do not want water splashed on the fresh steel surface, which will encourage rust spots before it's even painted and fitted. I'll take some decent pictures of the lid tomorrow, once I get it home.
Transport calls for a van of some sort, which I'll organise tomorrow.
Aug 11, 2014 | 10:37 PM
#90
Thread Starter
Registered User
Joined: Dec 2013
Posts: 214
Likes: 0
From: Aso Rock!
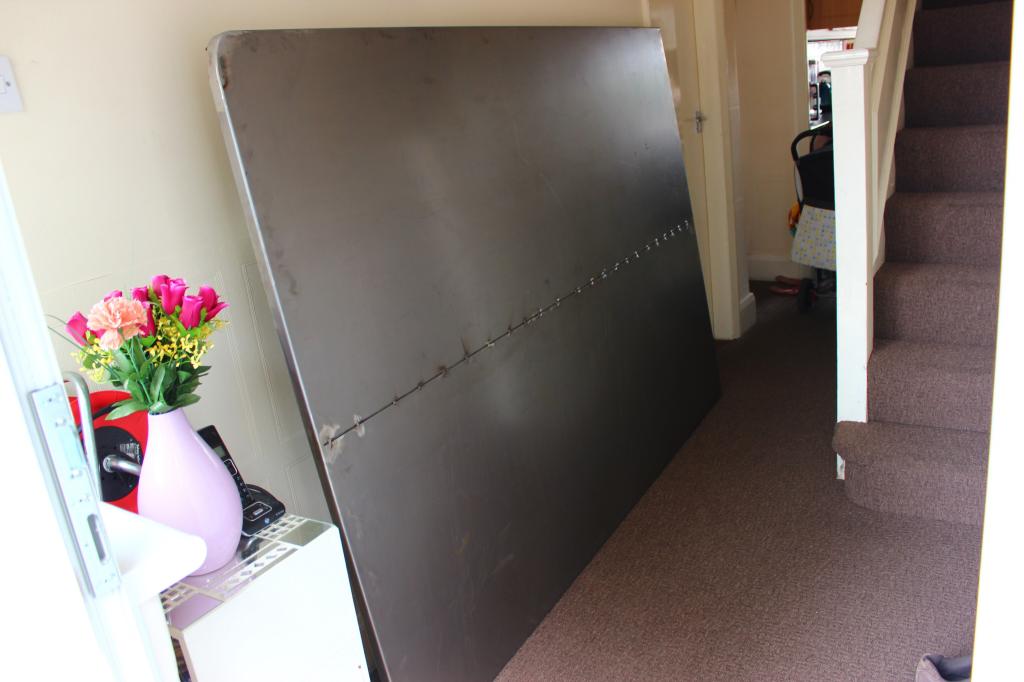
I picked up my custom bed lid yesterday.
Very well constructed, once that's locked, the bed will be as safe as a vault. The steel sheet is 1.4mm thick. Very heavy though! I might have to revise the rams I was going to use (Saab Convertible tonneau cover rams).
I'm looking more at industrial rams, and matching hydraulic pump.
Very well constructed, once that's locked, the bed will be as safe as a vault. The steel sheet is 1.4mm thick. Very heavy though! I might have to revise the rams I was going to use (Saab Convertible tonneau cover rams).
I'm looking more at industrial rams, and matching hydraulic pump.
Aug 13, 2014 | 04:00 PM
#91
Thread Starter
Registered User
Joined: Dec 2013
Posts: 214
Likes: 0
From: Aso Rock!
Some pictures, relatively late from the time the areas were completed.
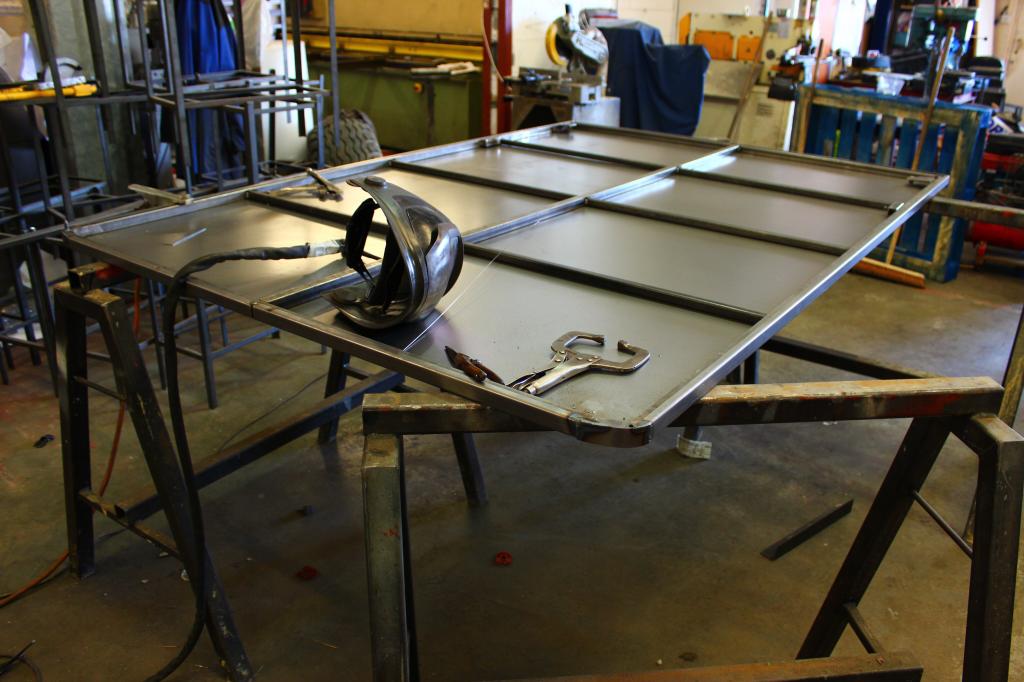
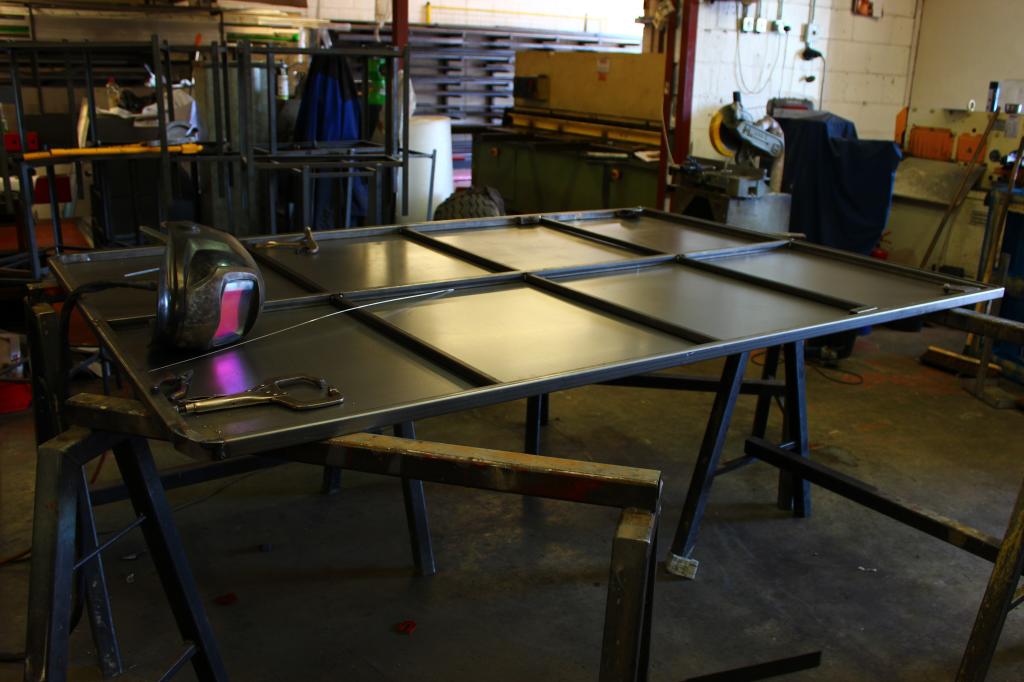
Bed lid. There are no steel sheets wide enough to stretch the entire frame width. So 2 sheets were used. The 3mm gap in the centre was deliberate, to allow a skim of filler to smooth things out. If the sheets were butted together, the filler would sit proud of the surrounding steel.
Underside, during construction:
Underside, showing larch mounting tab:
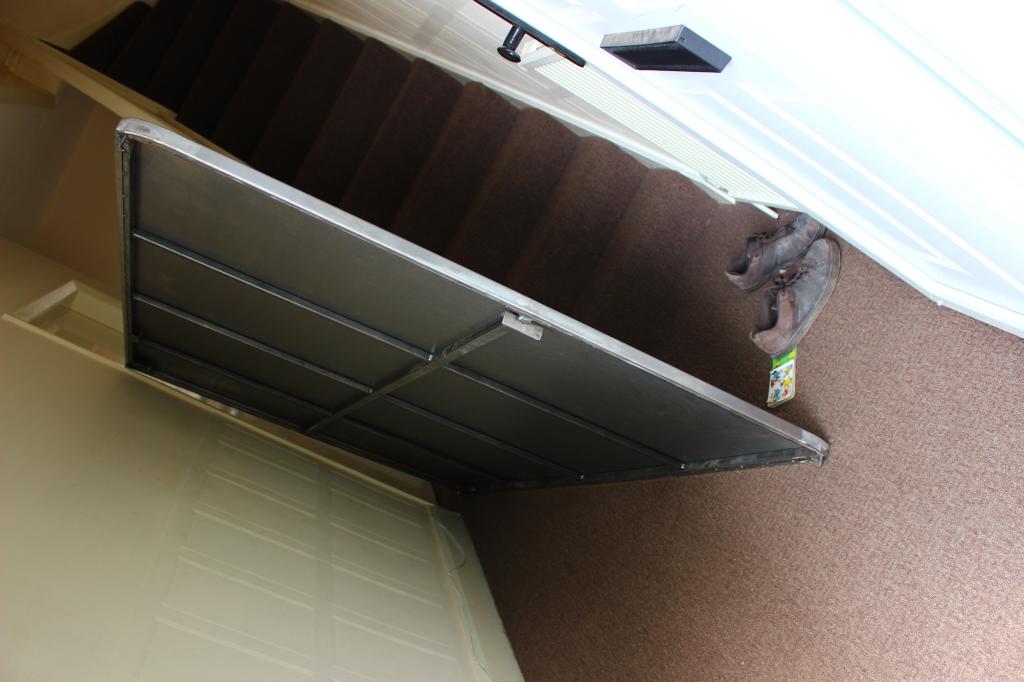
Underside, showing locating pins, to prevent sideways movement when closed, and truck is in motion. They are on each rear corner, and will locate in matching holes in the bed rear top rails:


Bed lid. There are no steel sheets wide enough to stretch the entire frame width. So 2 sheets were used. The 3mm gap in the centre was deliberate, to allow a skim of filler to smooth things out. If the sheets were butted together, the filler would sit proud of the surrounding steel.

Underside, during construction:


Underside, showing larch mounting tab:

Underside, showing locating pins, to prevent sideways movement when closed, and truck is in motion. They are on each rear corner, and will locate in matching holes in the bed rear top rails:

 Aug 13, 2014 | 04:28 PM
#92
Thread Starter
Registered User
Joined: Dec 2013
Posts: 214
Likes: 0
From: Aso Rock!
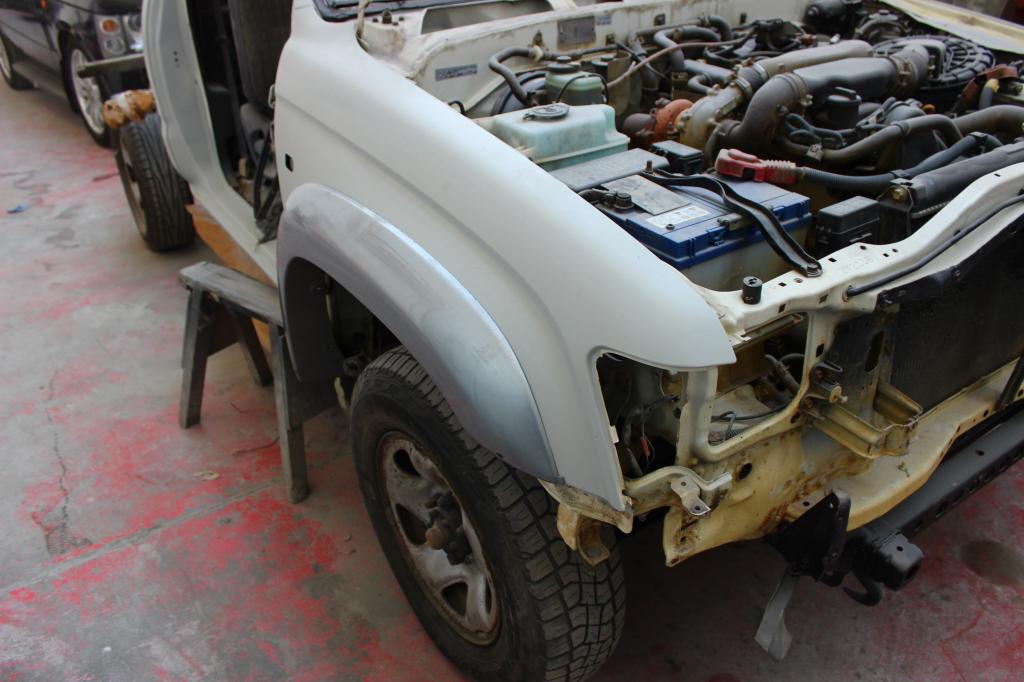
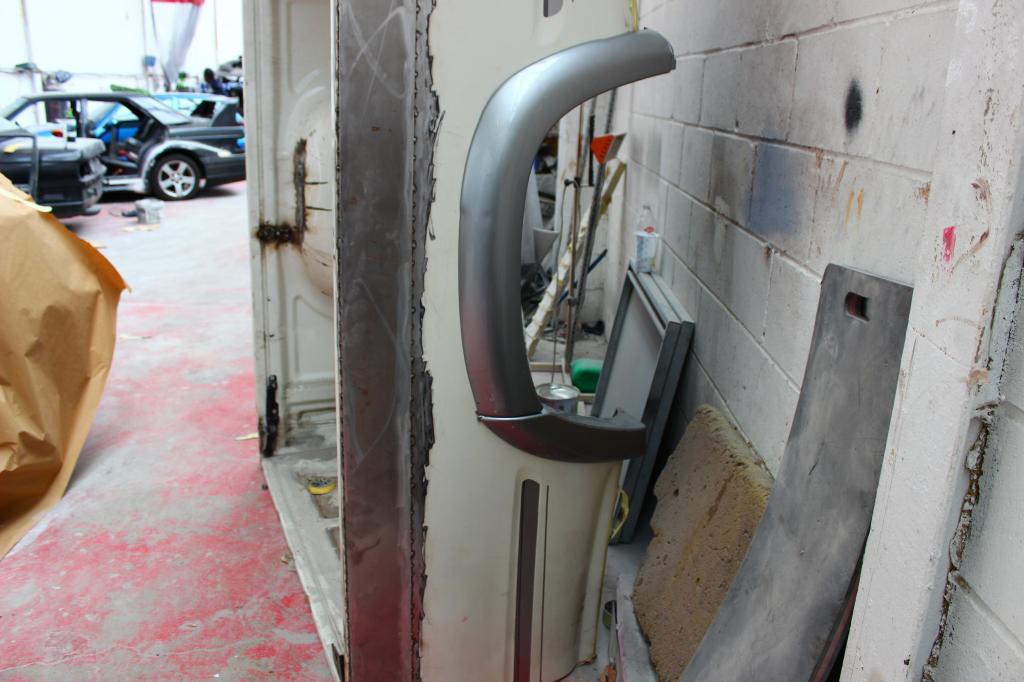
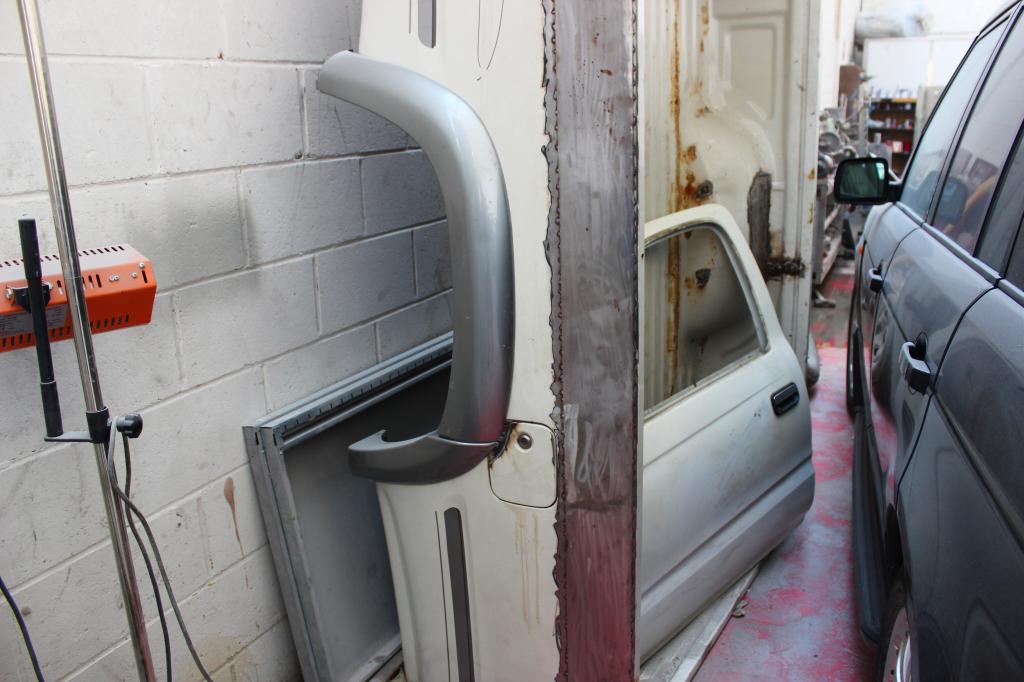
Front fender flares fitted. They are coming off before paint, which is why the rubber gaskets were not fitted:
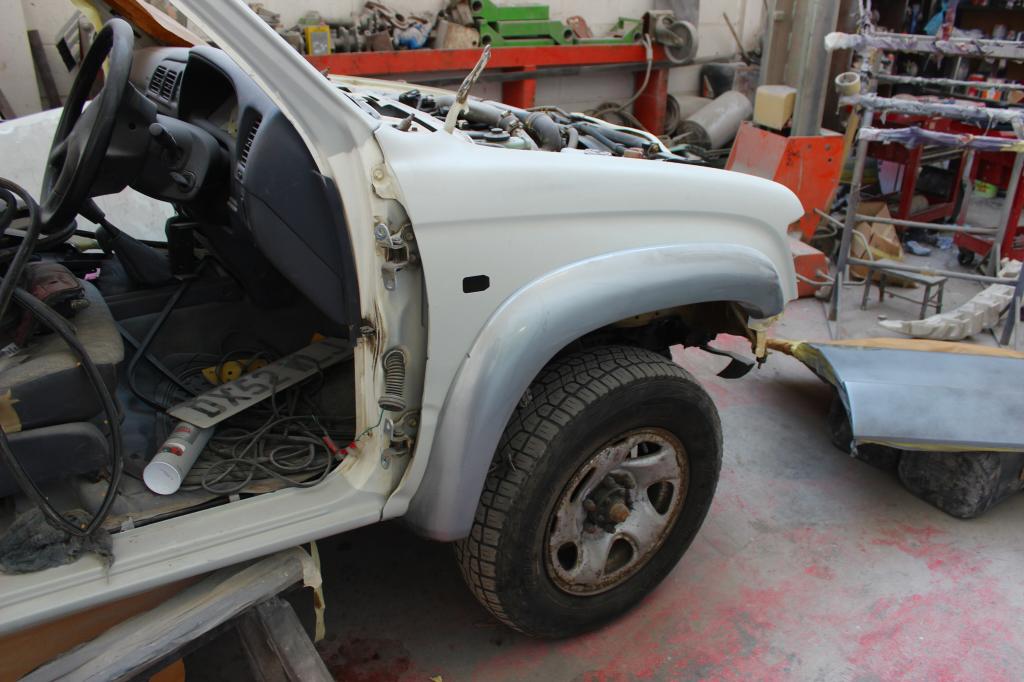
Rear fender flares. These are Double Cab items, hence the join:
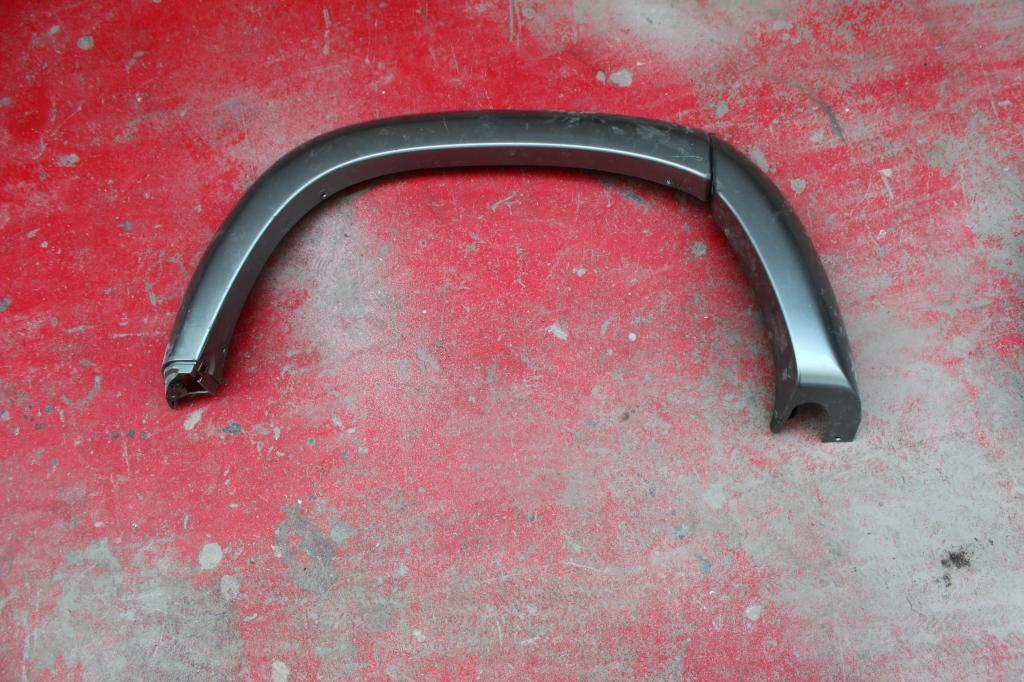
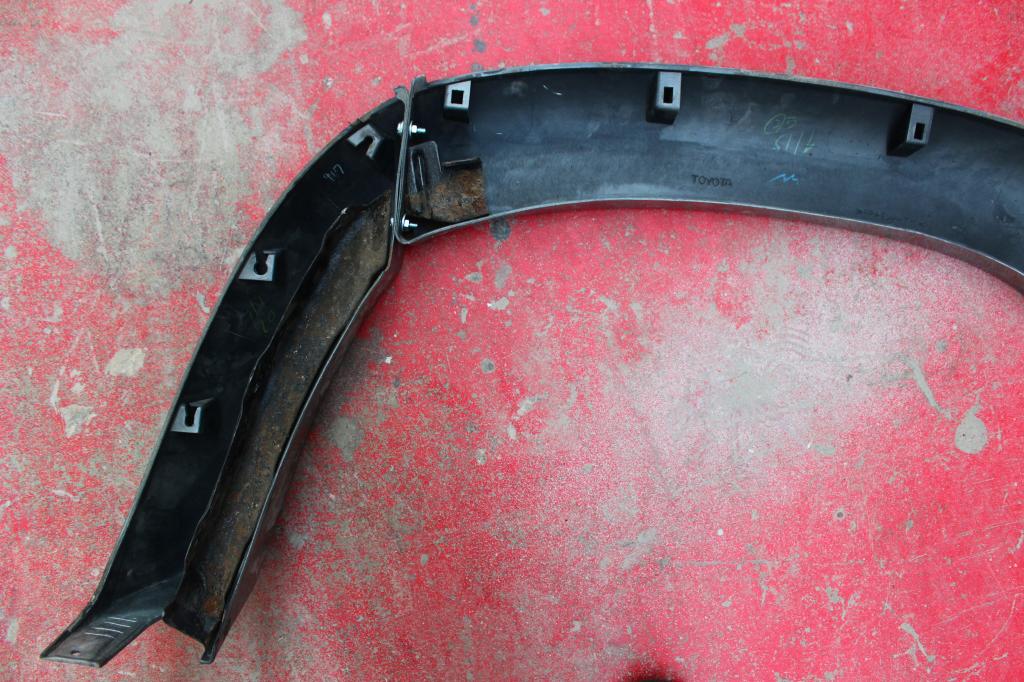
Rear fender flares fitted, again temporarily:
The join in the rear fender flares will be filled with fibre glass, then a light skim of Bondo. Once hardened, the flares will be removed for sanding and shaping.


Rear fender flares. These are Double Cab items, hence the join:


Rear fender flares fitted, again temporarily:


The join in the rear fender flares will be filled with fibre glass, then a light skim of Bondo. Once hardened, the flares will be removed for sanding and shaping.
 Aug 13, 2014 | 08:58 PM
#94
I would avoid using fiberglass on those fender flares (unless they are fiberglass flares). A better product would be SEM bumper repair. It adheres extremly well on well "toothed" plastics, sands extremely easy and has the same flexibility as the plastics used for bumpers and flares. Here's what it looks like:
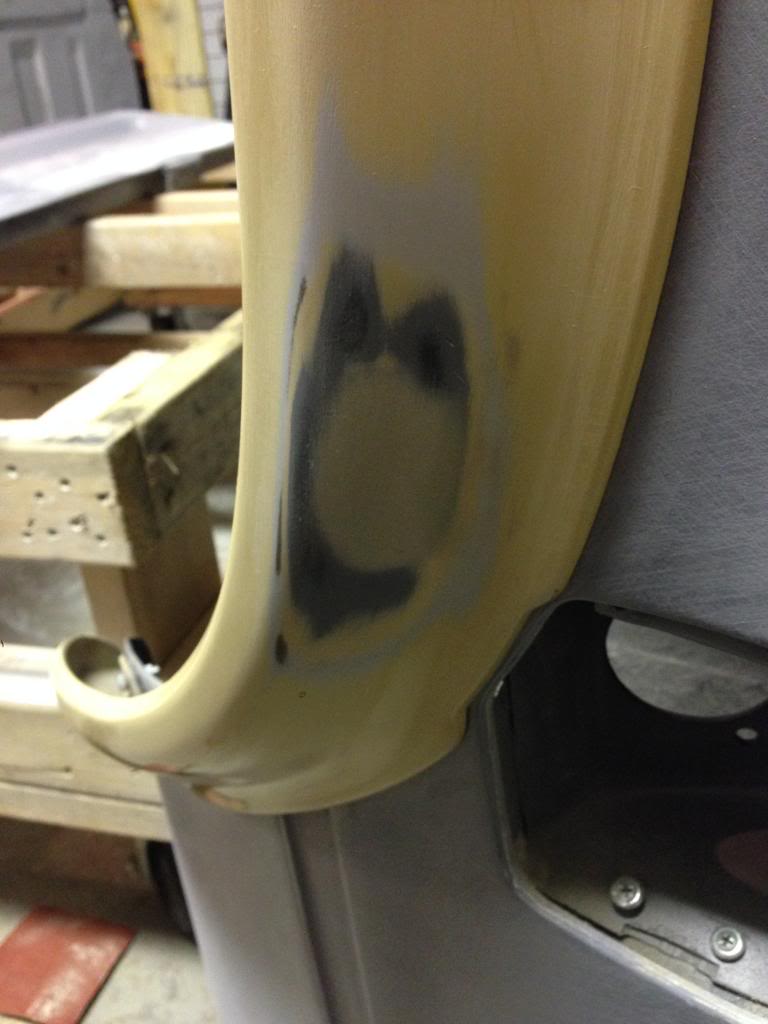
I used it to repair a hole in one of my fender flares and it worked amazingly:
Just my two cents. I'd hate to see you do all this great work and then get some cracked fender flares.

I used it to repair a hole in one of my fender flares and it worked amazingly:
Just my two cents. I'd hate to see you do all this great work and then get some cracked fender flares.
Aug 14, 2014 | 04:09 AM
#95
Registered User

Joined: Jan 2010
Posts: 3,795
Likes: 33
From: Bloodymore
kawazx636 is right about the ABS plastic bumper repair.
I was a body tech for a few years, the stuff he speaks of is perfect for your application , IF the flares are not fiberglass.
I am amazed that you have a 2003 Hilux, with a right hand diff and fuel tank. It appears that you are also running the older style IFS that was phased out in North America in 96.
The UZ swap will make that light little truck a bunch of fun.
Looking forward to your progress.
Aug 14, 2014 | 04:10 AM
#96
Registered User
Joined: Jan 2010
Posts: 3,795
Likes: 33
From: Bloodymore
^^^ Dave (kawazx636) is right about the ABS plastic bumper repair.
I was a body tech for a few years, the stuff he speaks of is perfect for your application , IF the flares are not fiberglass.
I am amazed that you have a 2003 Hilux, with a right hand diff and fuel tank. It appears that you are also running the older style IFS that was phased out in North America in 96.
The UZ swap will make that light little truck a bunch of fun.
Looking forward to your progress.
I was a body tech for a few years, the stuff he speaks of is perfect for your application , IF the flares are not fiberglass.
I am amazed that you have a 2003 Hilux, with a right hand diff and fuel tank. It appears that you are also running the older style IFS that was phased out in North America in 96.


The UZ swap will make that light little truck a bunch of fun.
Looking forward to your progress.
Aug 14, 2014 | 10:48 AM
#97
Thread Starter
Registered User
Joined: Dec 2013
Posts: 214
Likes: 0
From: Aso Rock!
Thanks guys for your advice.
The Bondo used is not the regular type, as used on steel. It's called "Plastic Padding", and is used for repairing ABS bumpers and trim. It can be bent once dry without cracking. This is probably the equivalent of the stuff Kawaz636 used on his flares.
The flares are ABS plastic, genuine Toyota items. Fibre glass still needs to be used, especially underneath where the radius of the mated parts means a big recess is present. Plastic Bondo is not ideal to "build up" deeply recessed areas. Fibre glass is used, and plastic padding becomes the top layer.
Aug 15, 2014 | 11:22 AM
#98
Thread Starter
Registered User
Joined: Dec 2013
Posts: 214
Likes: 0
From: Aso Rock!
I didn't go to the bodyshop today, as I need to balance things out between my truck and family. As I'm back to work on Tuesday, it's only fair I spend some of my vacation with my wife and kids.
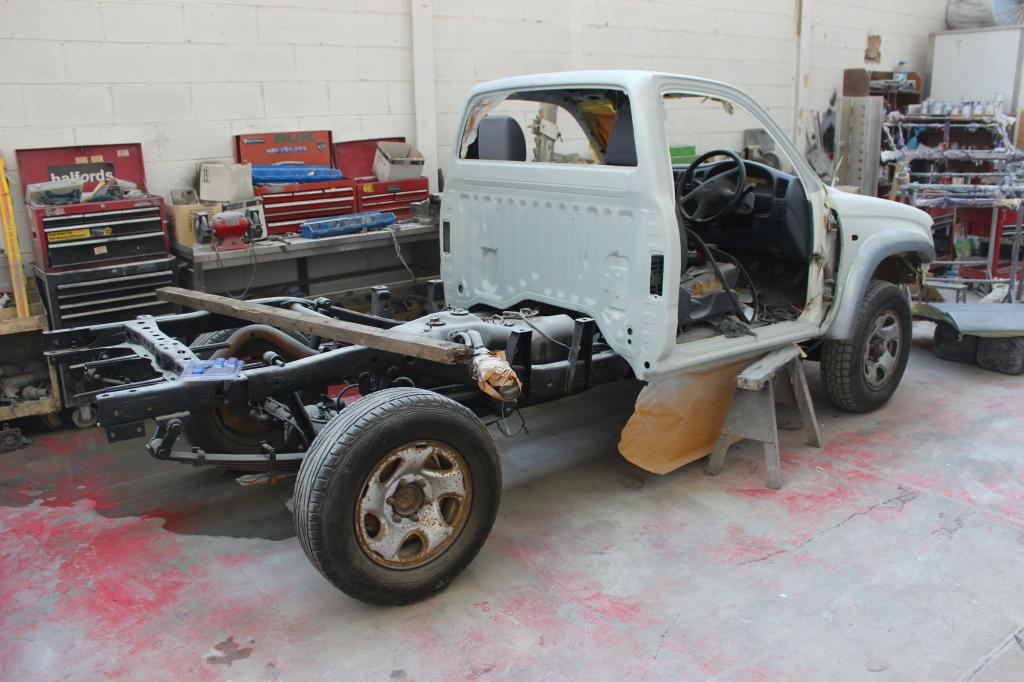
Yesterday though, I was at the shop for an hour. The bed has been temporarily lifted onto the chassis, to make it easier for the filling and sanding of the steel panels, which were welded over the hook recess area. The areas are first filled with fibreglass, sanded down, before Bondo is applied.
Due to the thickness of the steel plate used (1.4mm) using Bondo alone won't be ideal. One side was being sanded down after the fibreglass had been applied whilst I was there. Both front doors are in primer, and as for the hood...
...I opted to have the screen wash nozzle holes welded up, and smoothed.
The rear fender flares have been filled, sanded down, and removed for finishing. The front ones will be removed too prior to the truck moving I to the paint booth.
Tomorrow is another day.
Aug 16, 2014 | 01:54 PM
#99
Thread Starter
Registered User
Joined: Dec 2013
Posts: 214
Likes: 0
From: Aso Rock!
Update!
The bed is 80% filled. Both sides are smooth and level - I took my trusty steel flat rule with me during today's visit, looking for dips and troughs. I found a couple, and marked them for levelling.
The rear reflectors have been junked, so the holes that were plated over much earlier in the build have been filled, and sanded. The same goes for the single foglamp on the rear panel.
The bed floor was being sanded to remove loose surface rust from key areas. The wheel arch tubs are done. The hood needs the Bondo on the tiny welded squares (redundant washer jets) sanding down, then primed.
There are two small square holes in the forward bed rail,where I cut off and ground down the ladder rack / bar stubs. These will be welded over and filled. The 3 lower strips (below the headlamps and grille) need prepping, along with the front plastic valence (below the bumper) as it will be body coloured. That will be plastic primered.


