
Siena's Toyota Hilux Gen 6 Make-Over & 3UZ-FE VVTi Swap
 Jul 8, 2014 | 11:12 AM
#61
Thread Starter
Registered User
Joined: Dec 2013
Posts: 214
Likes: 0
From: Aso Rock!
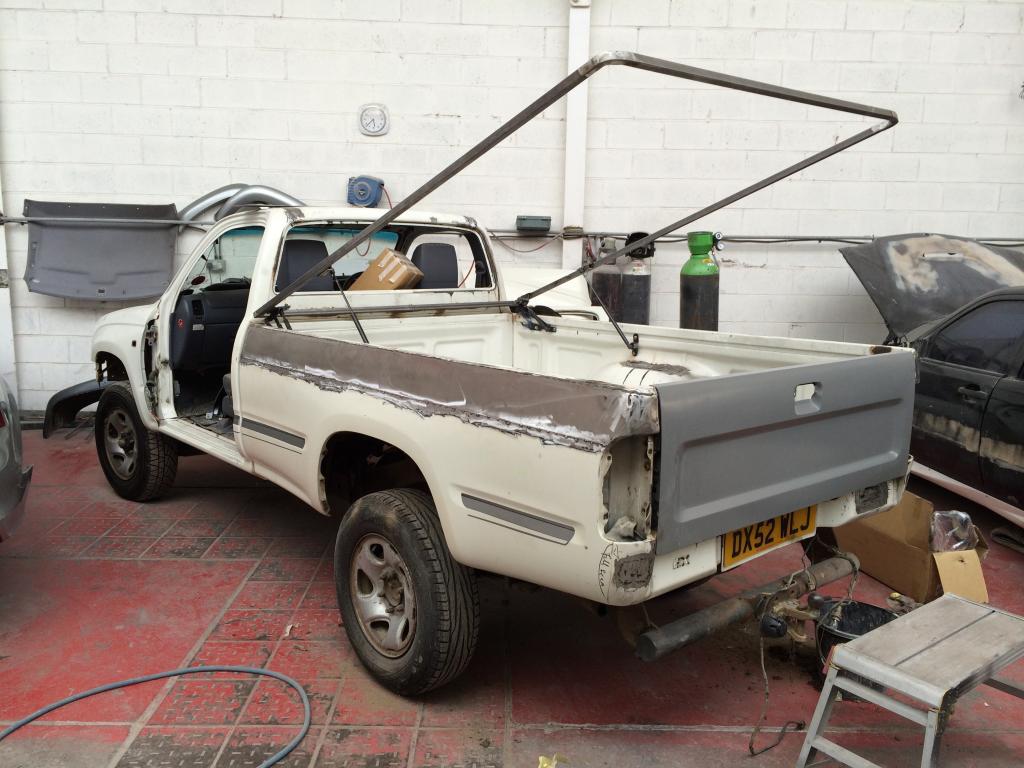
More progress today!
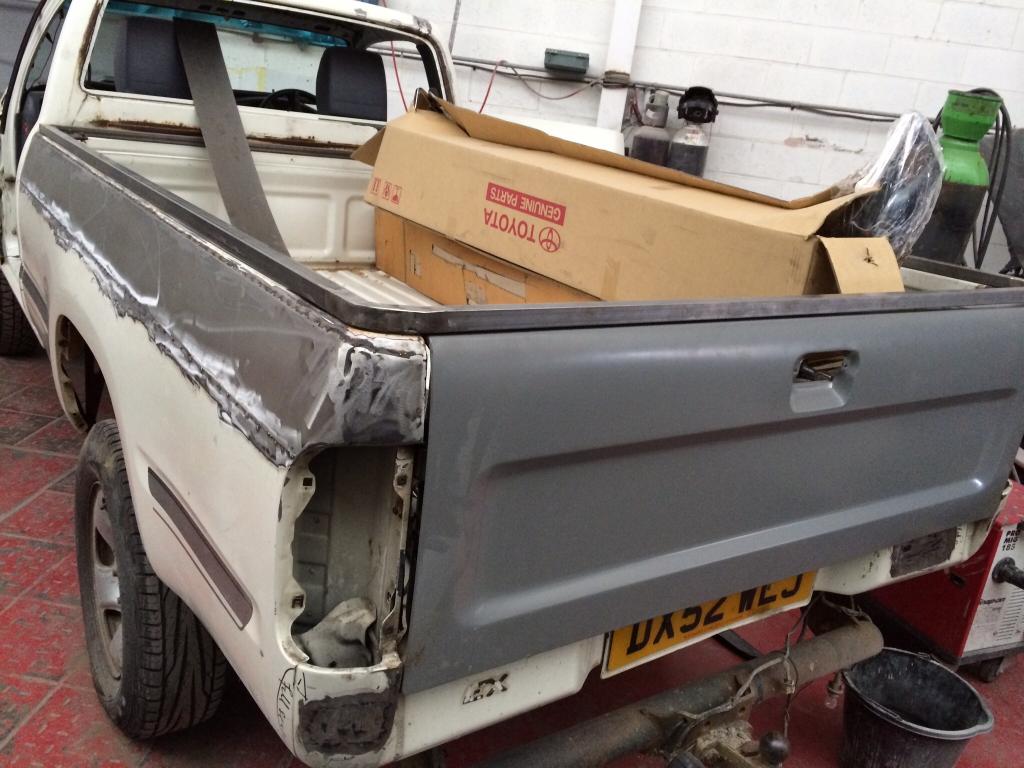
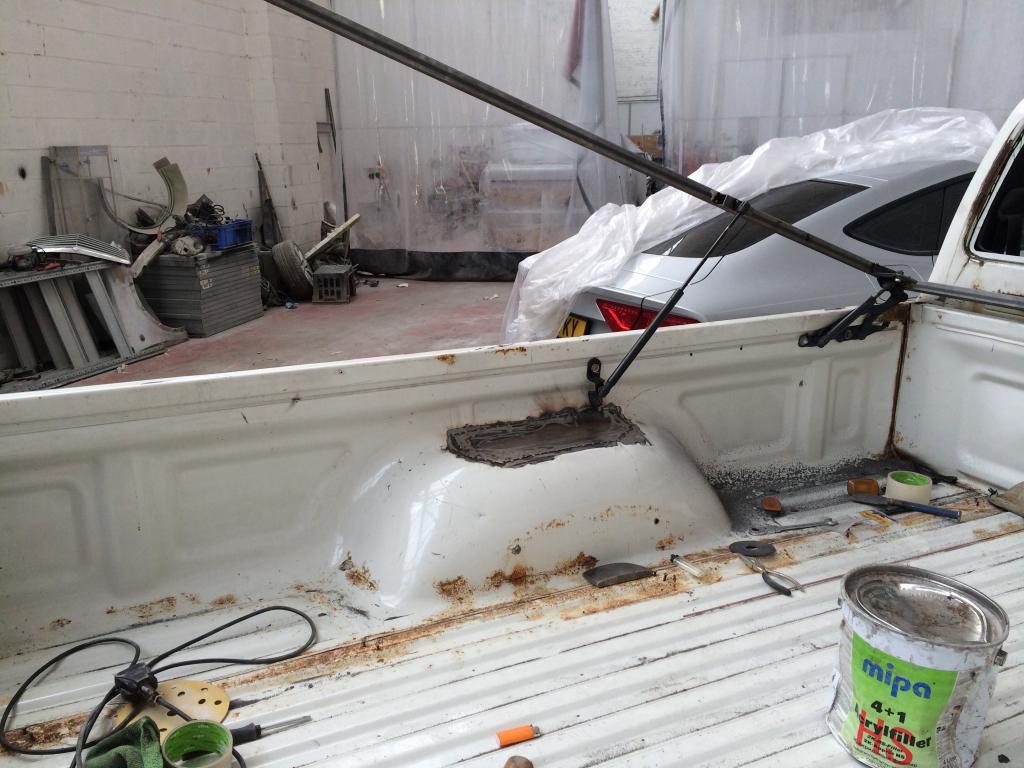
The roof rain channels have been plated over with the steel I had cut to size. And one side of the bed has also been done. Tomorrow, the other bed side will be completed.
The bed lid has to have the automatic hydraulic ram bosses welded to the lid and the bed lid frame, then I can send it off to have the steel skin welded into place.
Saturday is my day off work, so I'm going to spend the day in the bodyshop, and lend a helping hand wherever I can.
Some pictures:


 Jul 9, 2014 | 12:15 PM
#62
Thread Starter
Registered User
Joined: Dec 2013
Posts: 214
Likes: 0
From: Aso Rock!
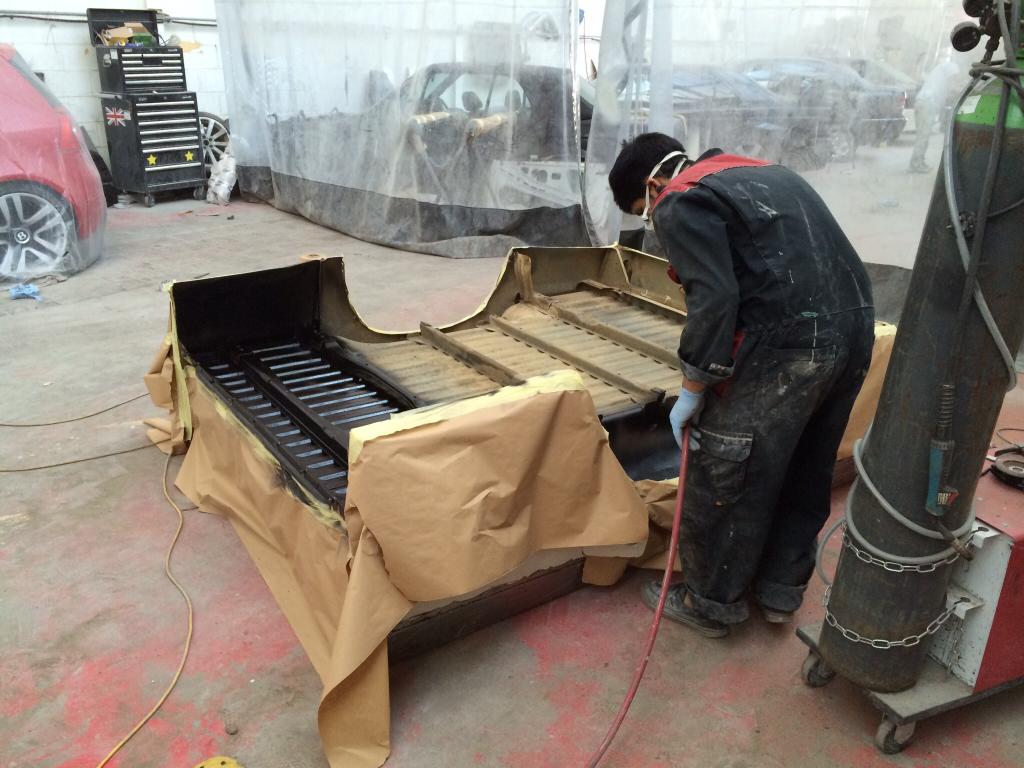
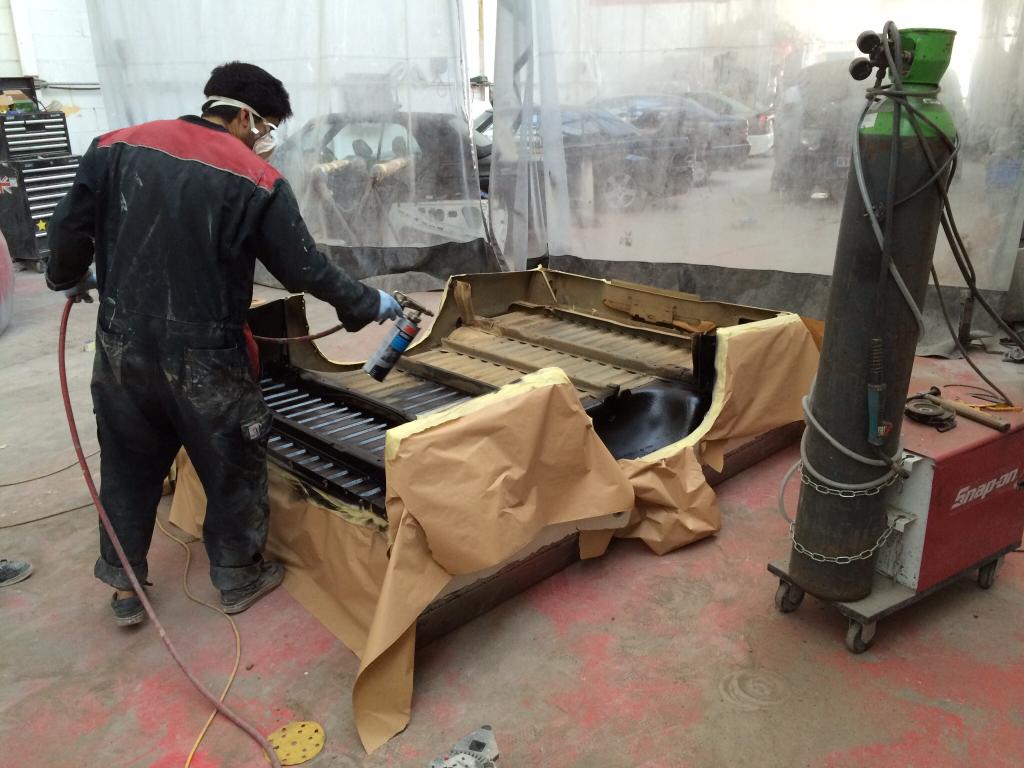
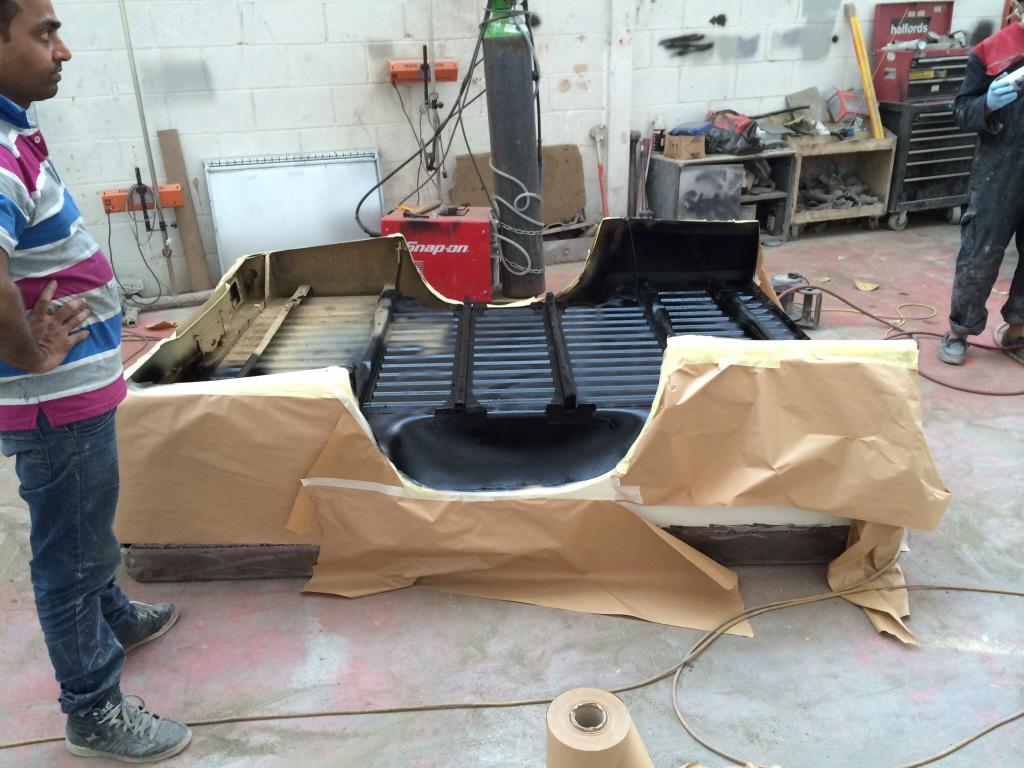
Mini update!
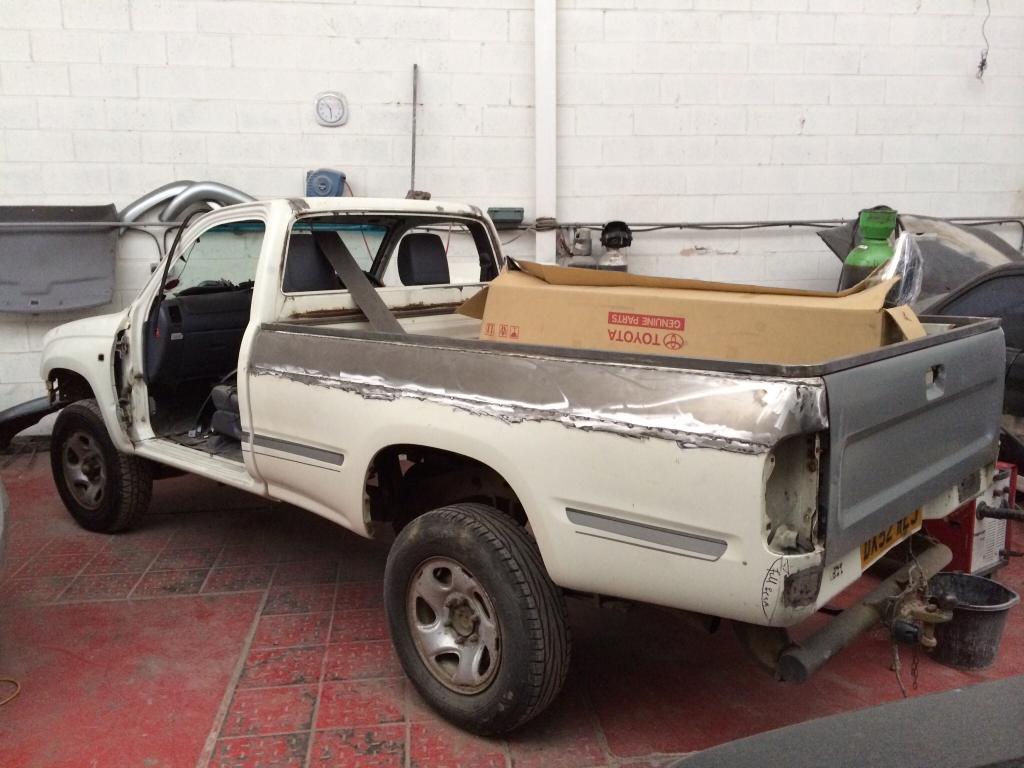
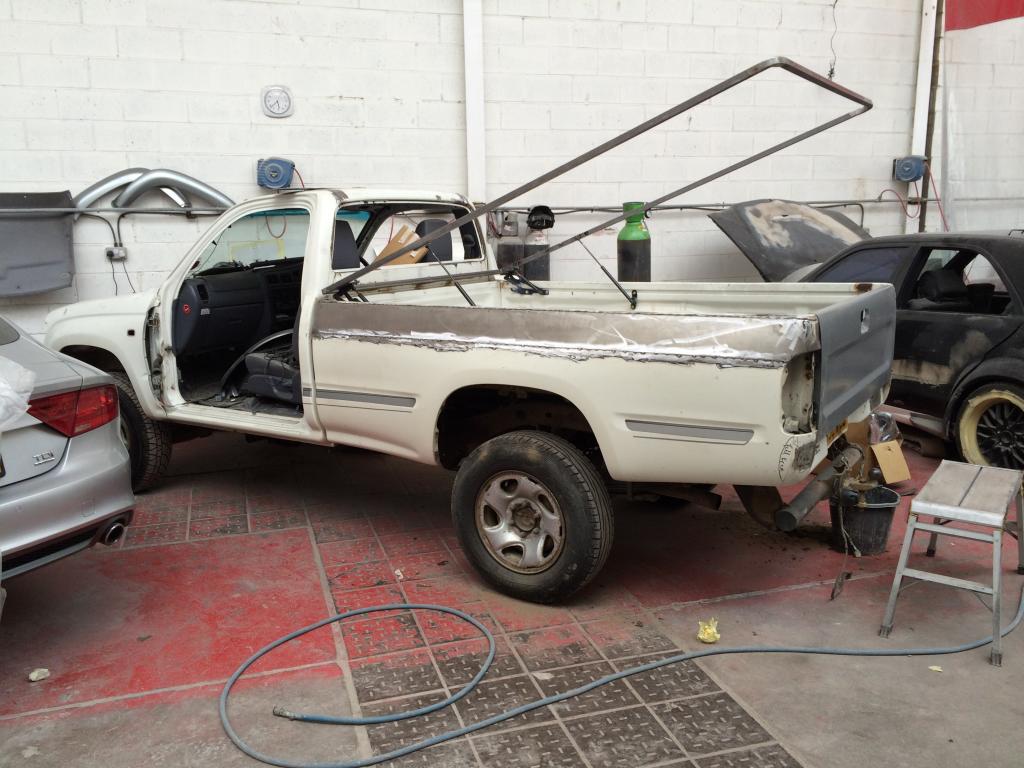
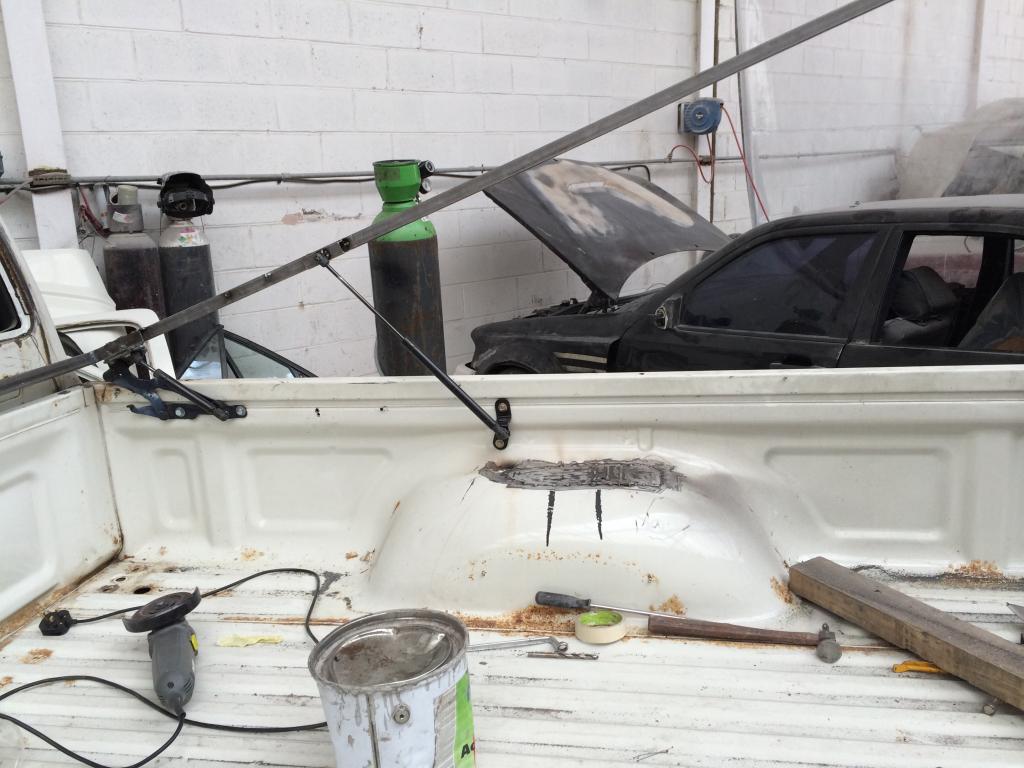
I paid the bodyshop a visit today, actually two visits - briefly during my lunch break, and the other after work.
The bed lid frame is done. During my break visit, I looked over the work. The gas strut fittings on the bed lid frame were not in line with the fitting points on the bed itself. So I gave instructions, for the fittings on the frame to be spaced out, so they were in line with the pivots on the bed.
That has been sorted out. The tie-down hook recess on the other side of the bed has been plated over, so it's looking good. Then the holes left on the wheel arch tubs, after removing the rear roll bar has also been plated over.
So tomorrow, the shop can get on with other aspects of the work. Saturday, I'll be taking the bed lid frame back to the fabricator, so he can skin it, and weld in a tab for the latch. Then I'll be back to the shop to oversee things.
Some pictures. Again, my apologies for the quality, I'll take high-res pictures once the paint starts going on.
The frame is now supported by the hydraulic rams. Enough to actually force the frame up from the bed. The weight of the steel skin will damp that somewhat.


Last edited by Siena; Jul 9, 2014 at 12:23 PM.
Jul 9, 2014 | 12:26 PM
#63
Thread Starter
Registered User
Joined: Dec 2013
Posts: 214
Likes: 0
From: Aso Rock!
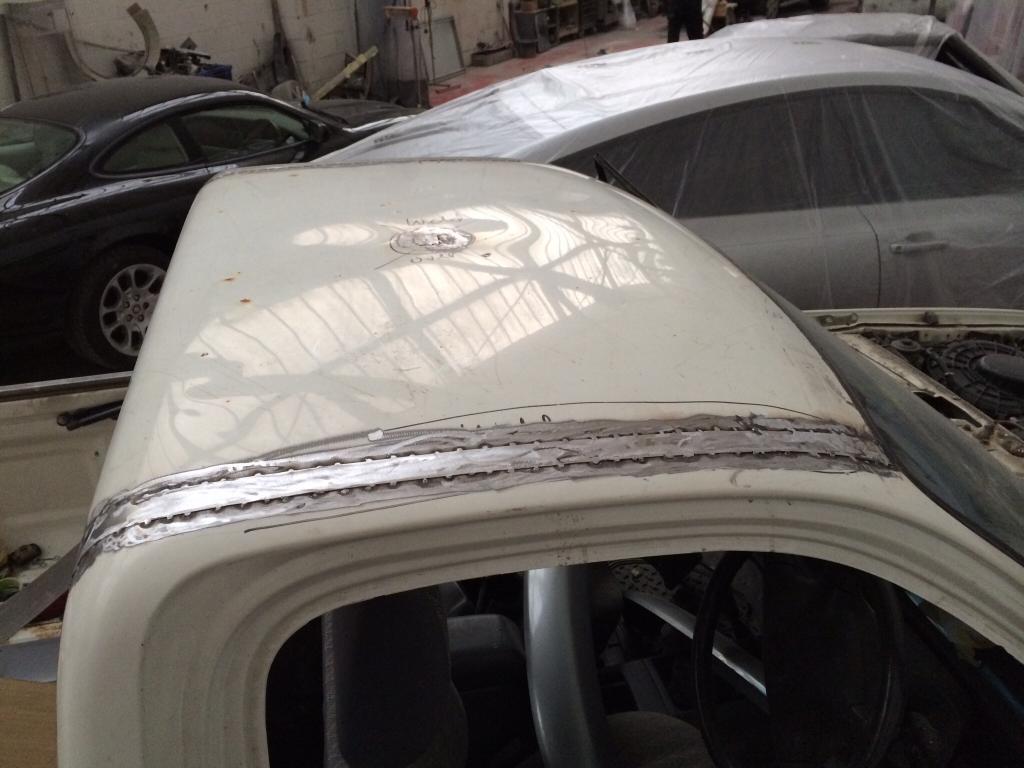
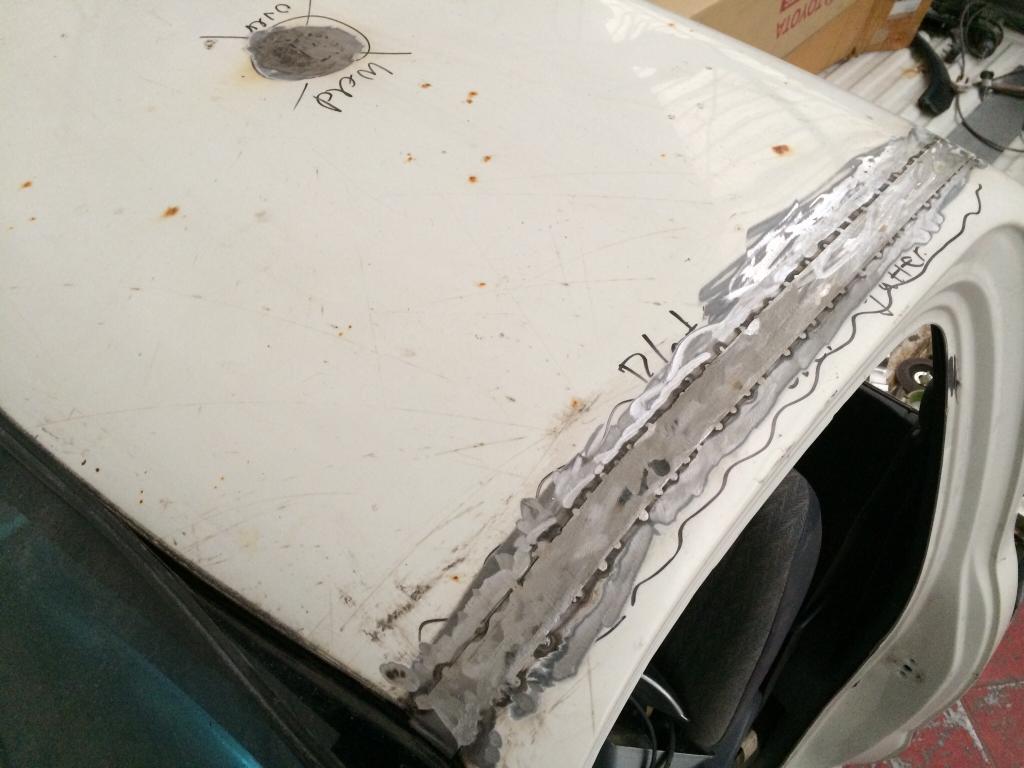
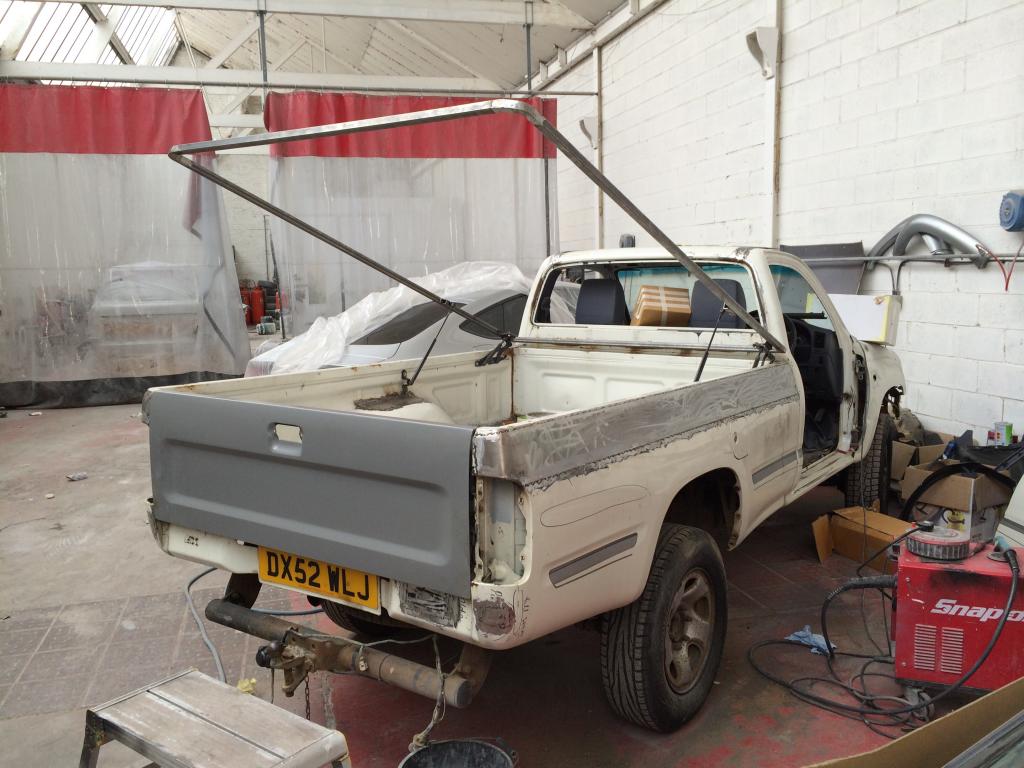
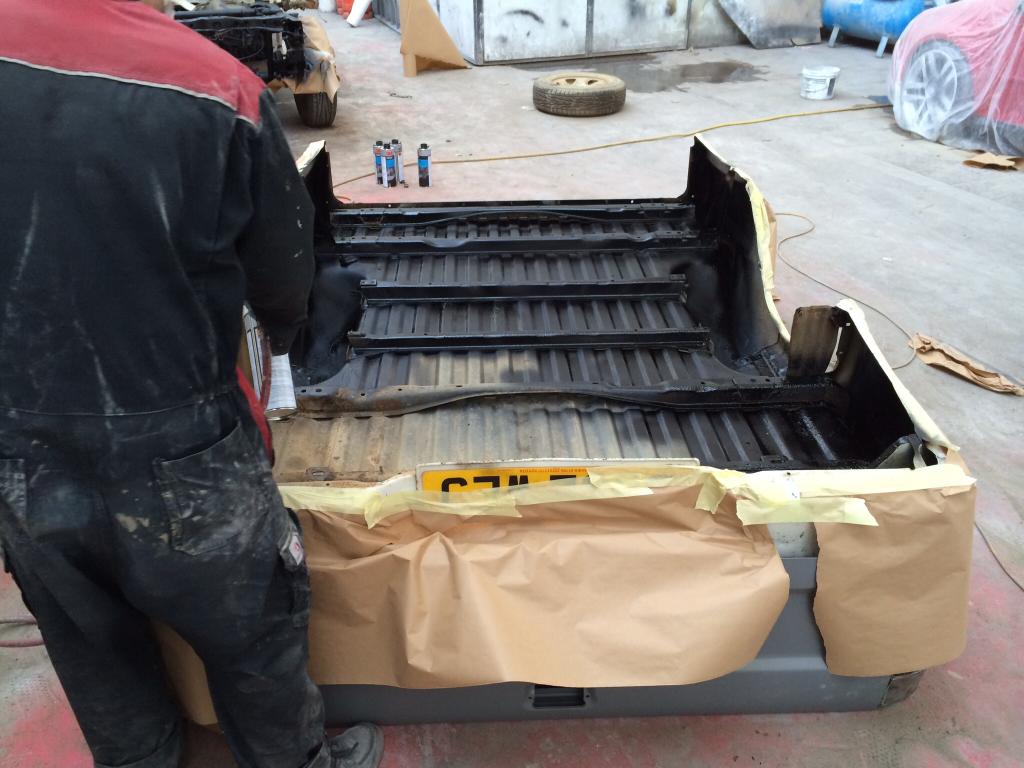
More pictures - note the wheel arch tubs have been welded over. The old steel that would have been underneath has been cut out. It was starting to rust from the holes, which removal of the rear roll bar left behind:


 Jul 11, 2014 | 11:18 PM
#65
Thread Starter
Registered User
Joined: Dec 2013
Posts: 214
Likes: 0
From: Aso Rock!
Today is lift day - just need to drill out the 4 rivets in the fuel filler neck shroud, then the bed is completely separated from the frame.
I'm also taking the bed lid frame to my fabricator, where it will have its steel skin welded into place.
Another job today is pulling the tow hitch. It's just something I'll never use, so it has to go. I'll be putting it up for sale at some point.
I pulled the trigger on a 2" body lift kit a couple of minutes ago. There is a seller (Dan?) on one of the forum, but from what I've gathered reading through posts in his sales thread, he hasn't been on in a while. Family commitments. But as the bed is being lifted today, I want the lift kit to be here for when it all goes back together after paint.
Looking at Tuesday for delivery.
Jul 12, 2014 | 10:41 AM
#66
Thread Starter
Registered User
Joined: Dec 2013
Posts: 214
Likes: 0
From: Aso Rock!
Not much to update today - I drove into work, picked up a van, then went to the bodyshop to pick up the bed lid frame. That has now been dropped off at the fabricators, so it can be skinned. That should be ready sometime in the week, and returned to the bodyshop for prepping.
I did manage to remove the tow hitch, man, what a b!tch! I was expecting the bed and cab-to-frame bolts to be crazy tight and seized, seeing as they'd been on the truck for 11 years, but the tow hitch bolts and nuts were solid. I bust two 19mm sockets, one 1/2" drive ratchet, a stubby 1/2" drive, and the damn thing almost bust my wrist.
The trusty blow torch was pressed into active service. Some of the bolts came undone when they were heated, and glowing cherry red. I was left with two, that actually bolt into captive nuts (where the stock rear bumper brackets fit). The captives broke free, so these stubborn mules had to be roasted, till they were molten, and fell out.
I was surprised at the weight of the hitch, it's no lightweight, and I was glad to lose it. Besides not being of any use to me, it would certainly upset the clean look I'm after.
 Jul 15, 2014 | 08:19 AM
#68
Thread Starter
Registered User
Joined: Dec 2013
Posts: 214
Likes: 0
From: Aso Rock!
My 2" body lift kit turned up today.
I'll be fitting this once the bed is ready to go back onto the frame, and the cab is painted too. So pretty much after my truck comes out of paint.
I sprayed copious amounts of WD-40 onto all 6 cab-to-frame bolts and nuts, and did so daily for 2 weeks, prior to the truck going into the shop, so they should all come off easily. The bed bolts were okay coming off with an impact wrench, with just the two 17mm ones at the rear giving me any real grief.

 Jul 16, 2014 | 01:03 PM
#70
Thread Starter
Registered User
Joined: Dec 2013
Posts: 214
Likes: 0
From: Aso Rock!
I had a 2007 Land Cruiser Colorado in today, that needed a clutch. I got the job of stripping it down, and replacing the clutch (3 piece).
I did have a good look at the suspension, particularly the rear. I have always preferred coil springs, as opposed to the leaf spring set-up the Hilux was blessed with.
I also had a MK5 single cabin truck in for a service, so I was able to have both the truck and SUV on vehicle hoists, next to each other.
There are some similarities at the rear. The Land Cruiser rear axle locating bar forward brackets (as welded to the chassis frame) are 25.5" away from the axle tubes. The same as the Hilux's rear axle leaf spring forward brackets, in terms of dimensions. Of course, the Hilux axle tubes don't have the welded on brackets to accept the locating bars, but they can be welded in.
And spring platforms won't be difficult to weld onto the axle and chassis frame.
I am also looking at ways to get rid of the front torsion bars. But, there's no rush, time is on my side.
Jul 19, 2014 | 11:52 AM
#71
Thread Starter
Registered User
Joined: Dec 2013
Posts: 214
Likes: 0
From: Aso Rock!
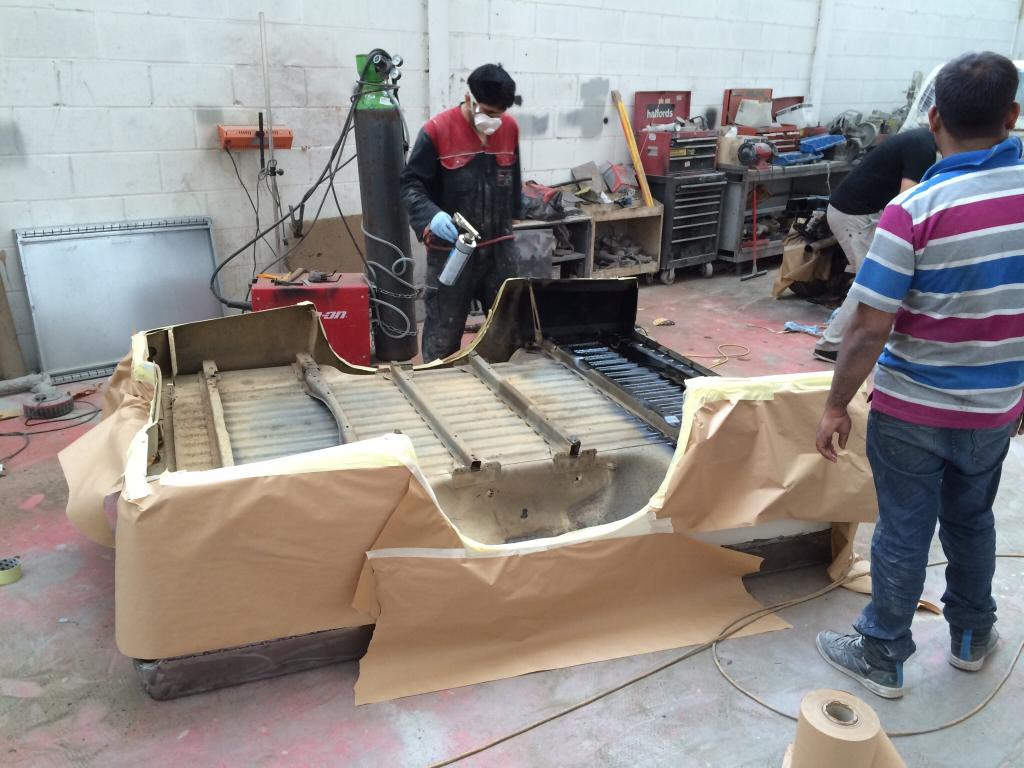
Today, a few days later than planned, was bed-lift day.
The bed had just been sitting on the frame since the days the truck went in, all 8 bolts removed. It was surprisingly lighter than I thought it would be, needing just three of us to lift it clear of the frame. I ended up drilling out the 4 rivets that secure the fuel filler funnel / bezel to the bed. I planed to take the advise of undoing the worm clips that secure the 2 hoses to the filler neck, but after looking at the corrosion on the screws, I decided not to bother. Besides, leaving the filler neck attached, meant the fuel tank was not open to the atmosphere. Diesel isn't volatile, but still...
I must admit, I was half looking forward to a rotten frame, to give me the perfect excuse to locate an Extra Cab and matching frame, but it was fine. Some surface rust, under the dried mud. I spent an hour with a sanding disc and wire wheel, mounted on an angle grinder and drill respectively.
It was good to see the truck bed less, as it gave me an opportunity to see normally hidden items.
I also found out why my rear differential lock has never worked since I got the truck. The short harness is damaged. The warning light actuator connector is fine, but the multi plug to the lock itself has NO connection to the controller up front. The 5 wires are all broken - the outer sheath has become hard and brittle, and all the wires are shot. I suppose I could clean them up, expose their ends, and solder them back in place, but in view of how short the harness is, I'm ordering a replacement from my dealership. Being a Toyota Diagnostic Technician DOES have it's perks.
The rear brake compensator / load valve is also shot. The operating lever is pretty much seized, I managed to get it moving, but again, a replacement valve is the best solution.
The rear differential breather - well, what can I say? Seized solid. I'm going to replace it with a genuine Toyota part, extended to an area free of underbody spray. As this truck is being built mostly for tarmac use, I don't see any reason to purchase a fancy kit.
Cleaning of the frame will be completed on Monday, then it can be under sealed. The same goes for under the bed itself.
Today makes it 4 weeks since my truck went I to the shop. Despite the 4 day delay in lifting the bed, we're still on schedule. I'll post pictures once I've downloaded them from my camera.
Last edited by Siena; Jul 19, 2014 at 12:41 PM.


 Jul 20, 2014 | 05:25 AM
#74
Thread Starter
Registered User
Joined: Dec 2013
Posts: 214
Likes: 0
From: Aso Rock!
I am considering junking the stock steering box in my 2003 MK5 Single Cabin 4x4, in favour of a steering rack.
And yes, I'm aware this won't be a bolt-in solution, and will most certainly require welding mounting tabs onto the frame, and locating allowing the track rod ends to reach the steering knuckles on the hubs. And still clearing other obstacles.
I would be using a manual steering rack, using an electronically-assisted steering column from a 2013 Toyota Prius (which I already have).
Whilst the steering box works well enough, it lacks the directness of a rack and pinion set-up. I drove a 1999 Tacoma, which is as close to the KDN165 Hilux as you could get, and the difference between the Taco and any MK5 is like night and day.
The MK6 isn't really directly comparable, as it's a much larger and heavier truck.
I think a rack would transform the handling of a MK5.


 Jul 20, 2014 | 08:08 AM
#76
Thread Starter
Registered User
Joined: Dec 2013
Posts: 214
Likes: 0
From: Aso Rock!
There are 2 ways I can run the Toyota Prius EMPS in the Hilux.
1) Directly. So with just an interrupter switch, and ignition feed to the motorised column, which will default to ASSISTED each time the truck is started. The interrupter switch can then be used to turn ASSISTANCE off whilst on the move
2) Automatic (ECU controlled). This will mean using the Toyota Prius EMPS ECU. The ECU receives data from a myriad of sources, and varies steering ASSISTANCE accordingly.
Road speed (via ABS sensors / VSS.
Engine rpm
Engine load.
Brake pedal switch.
Alternator charge rate.
Steering angle.
With the above, the ASSISTANCE is calculated, and pretty much right for whatever conditions the vehicle is driven in. There is also a K-line feed, so the EMPS system can be interrogated via the OBD port.
The system sounds complex, but it really isn't, as long as a basic understanding of how it works exists. I also have the privilege of having access to Techdoc, with it's wealth of information and EWD's (Electric Wiring Diagrams).
With all this in mind, I've decided to go with option 2, so fully ECU-controlled. The assisted column is the most expensive part, the ECU is way cheaper to buy.
Jul 21, 2014 | 12:10 PM
#77
Thread Starter
Registered User
Joined: Dec 2013
Posts: 214
Likes: 0
From: Aso Rock!
Update!
I was able to drop into the bodyshop during a sneaky test drive, to see what progress had been made since lifting the bed on Saturday.
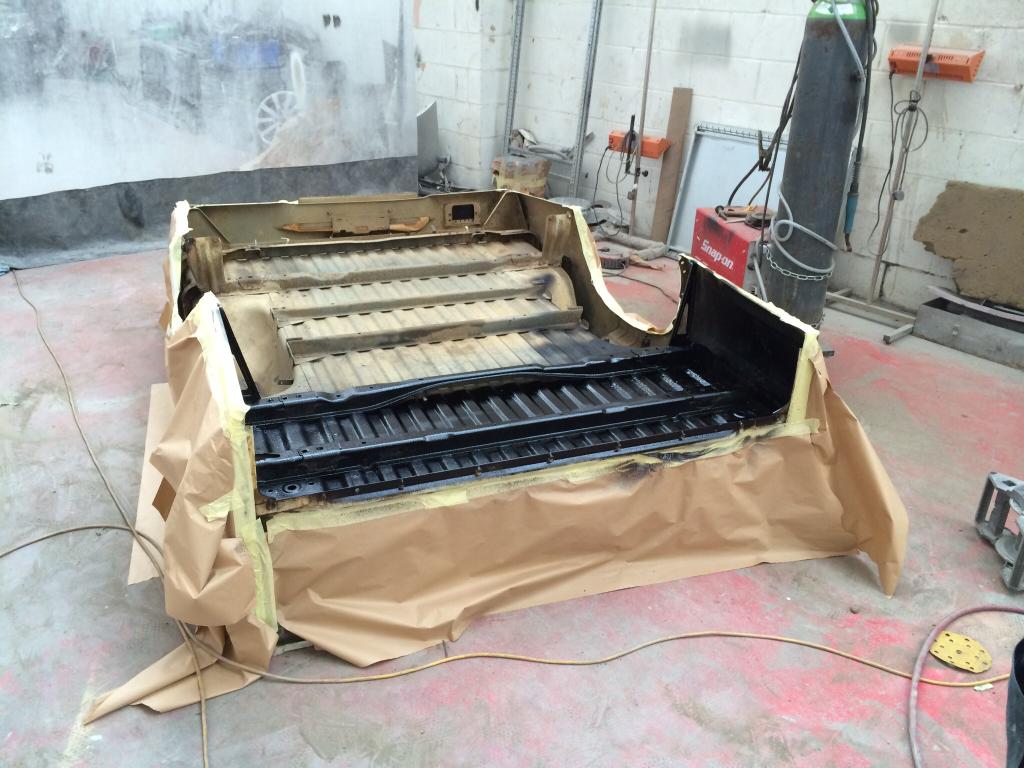
I was pleased to see the bed upside down, being cleaned. Very little surface rust at the rear, just behind the valence (license plate area). It came off easily with a rotary brush, the rest of the bed just had dried mud, especially between the outer skins.
A power wash was all that was needed, and the whole lot dried with compressed air, before going into the oven for 25 minutes. It is essential that no trapped moisture is over looked, as it was being under sealed. Sealing in water droplets, well the Red Terror would make an early comeback.
The chassis was also cleaned, I was pleased to run my hands over the surfaces, and find it smooth. I did say I did NOT want any underseal on the frame and underneath the bed, UNTIL I had inspected the preparation, and was happy with the finish. The frame was actually silver in places, it was that clean.
My second visit was after work. The frame was being under sealed, as was the bed. The bed was completed whilst I was there, the frame needs a bit more, especially the front underside.
I will upload pictures shortly, really pleased with progress.
I was able to drop into the bodyshop during a sneaky test drive, to see what progress had been made since lifting the bed on Saturday.
I was pleased to see the bed upside down, being cleaned. Very little surface rust at the rear, just behind the valence (license plate area). It came off easily with a rotary brush, the rest of the bed just had dried mud, especially between the outer skins.
A power wash was all that was needed, and the whole lot dried with compressed air, before going into the oven for 25 minutes. It is essential that no trapped moisture is over looked, as it was being under sealed. Sealing in water droplets, well the Red Terror would make an early comeback.
The chassis was also cleaned, I was pleased to run my hands over the surfaces, and find it smooth. I did say I did NOT want any underseal on the frame and underneath the bed, UNTIL I had inspected the preparation, and was happy with the finish. The frame was actually silver in places, it was that clean.
My second visit was after work. The frame was being under sealed, as was the bed. The bed was completed whilst I was there, the frame needs a bit more, especially the front underside.
I will upload pictures shortly, really pleased with progress.
Jul 21, 2014 | 12:44 PM
#78
Thread Starter
Registered User
Joined: Dec 2013
Posts: 214
Likes: 0
From: Aso Rock!
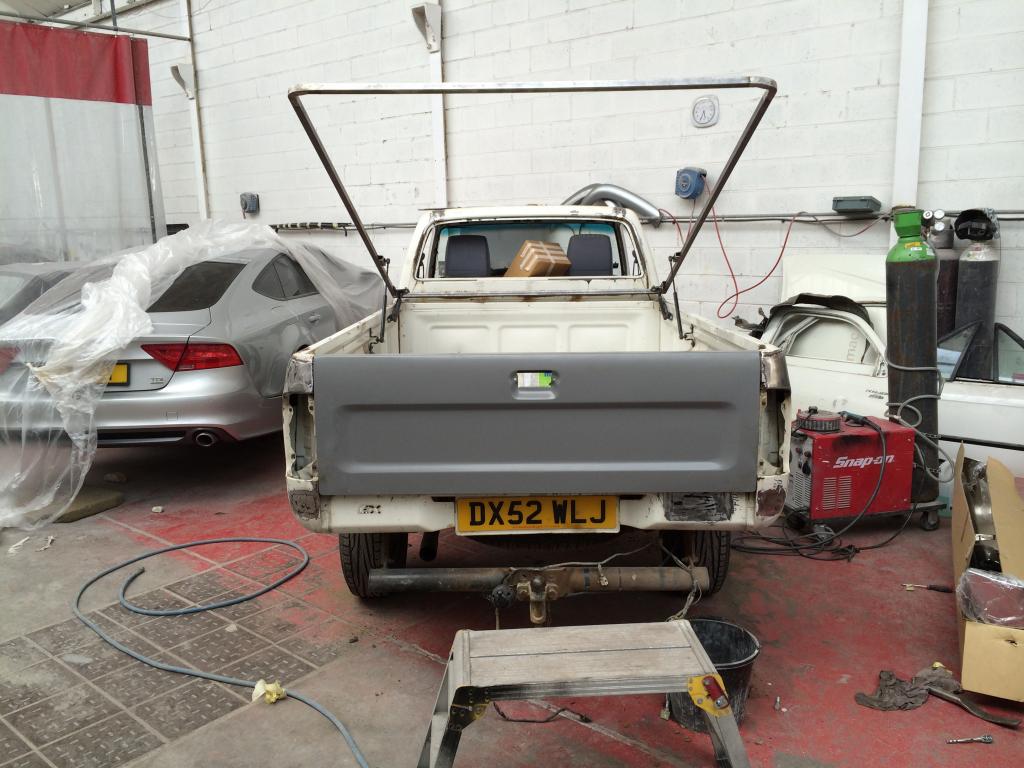
I set up my camera to take some nice high-resolution pictures, only to realise I'd left the SD card at home, in my PC. Doh! Back-up in the form of my iPhone.
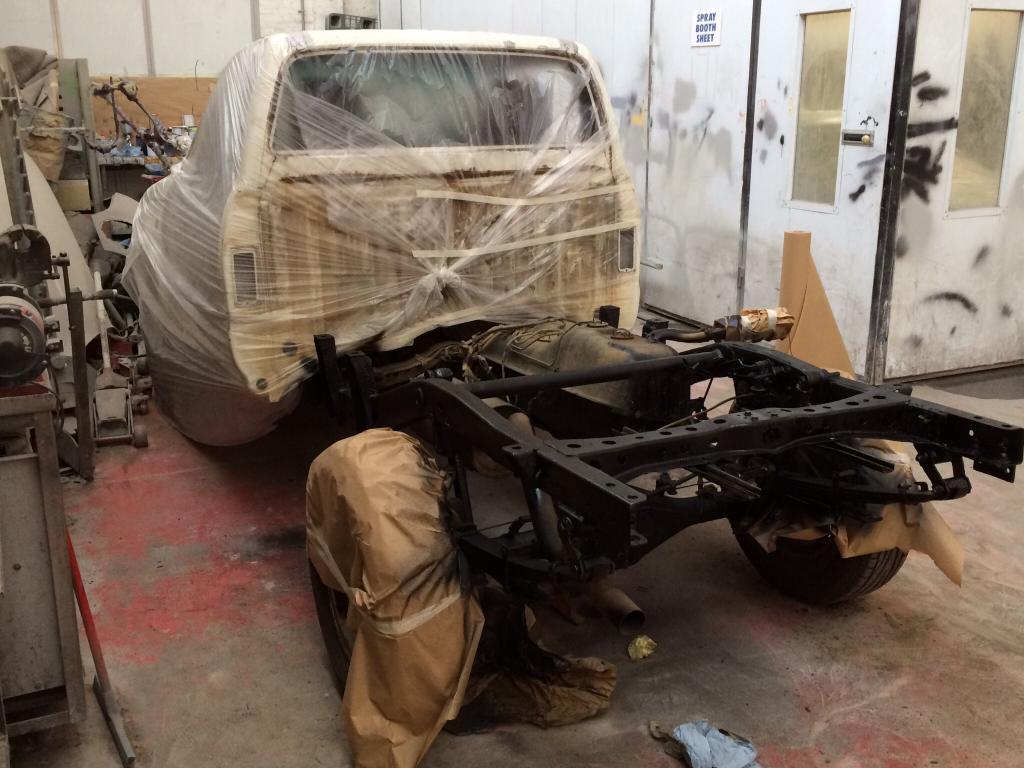
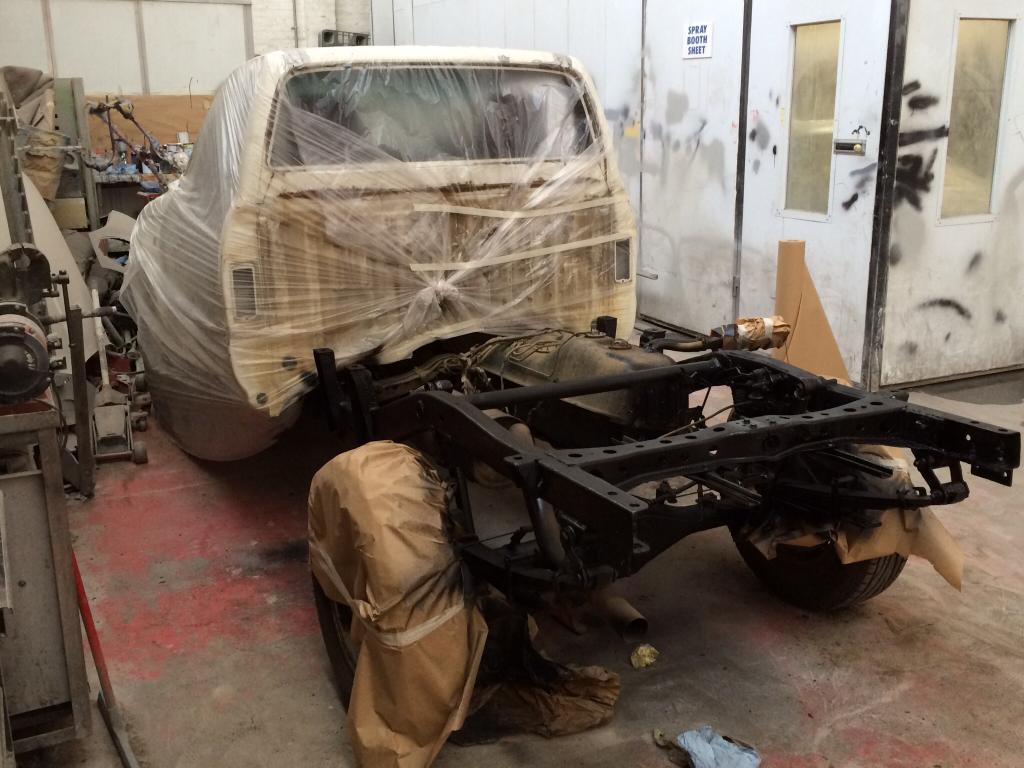
Pictures of the bed, in progress, and completed:
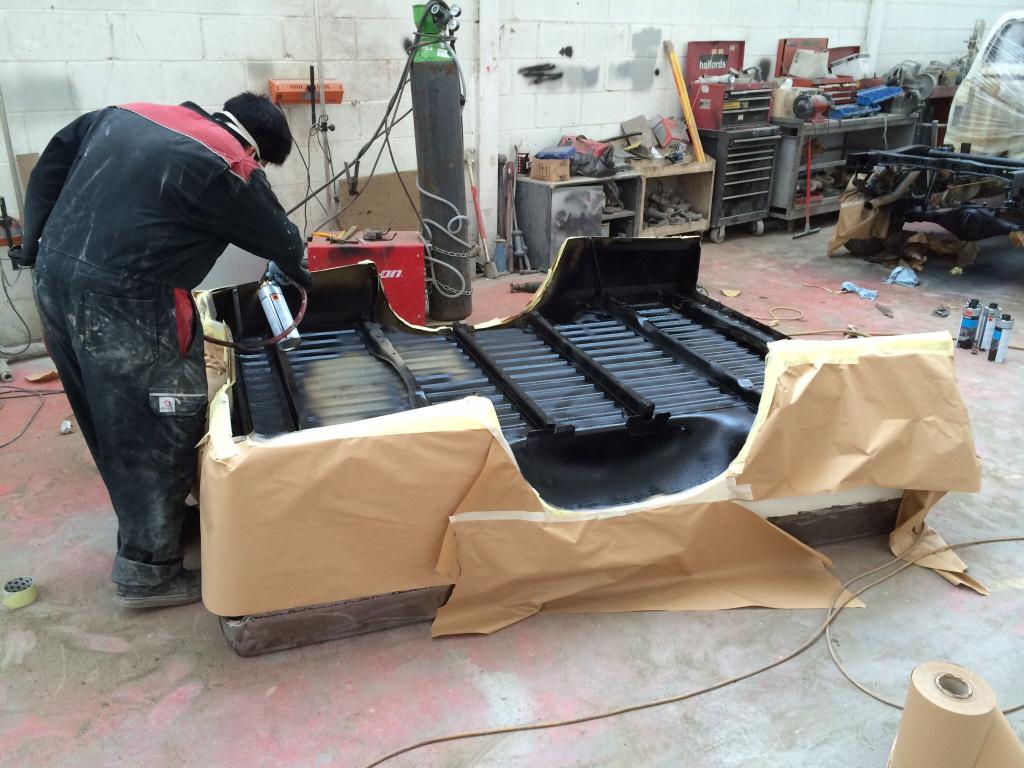
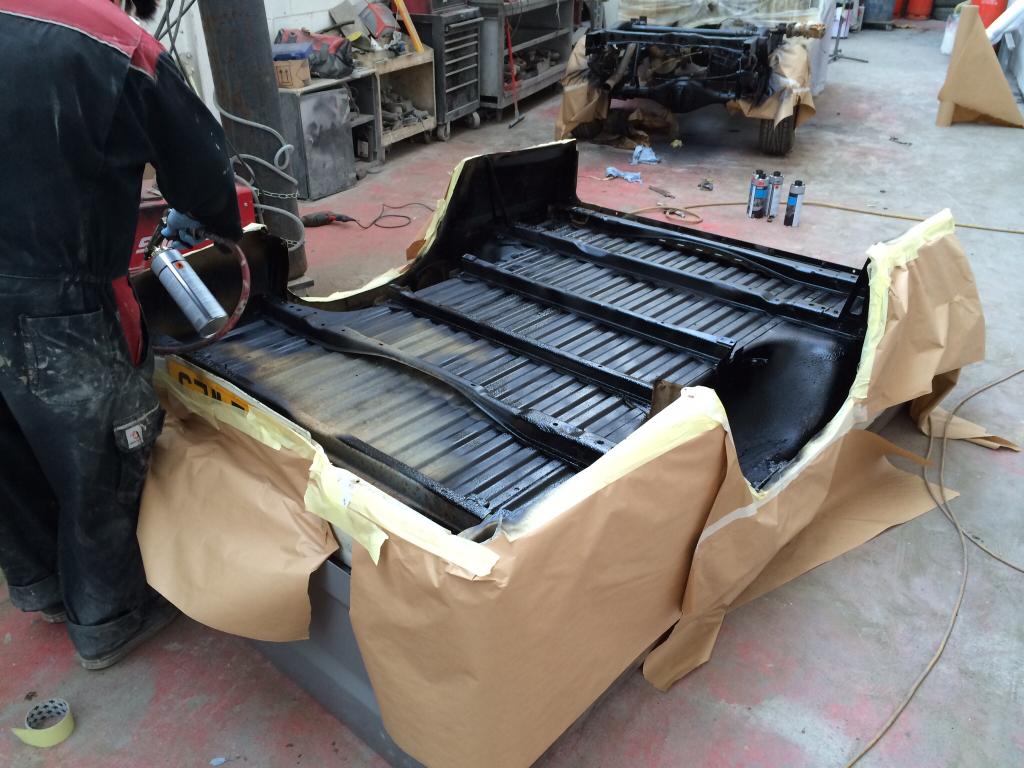
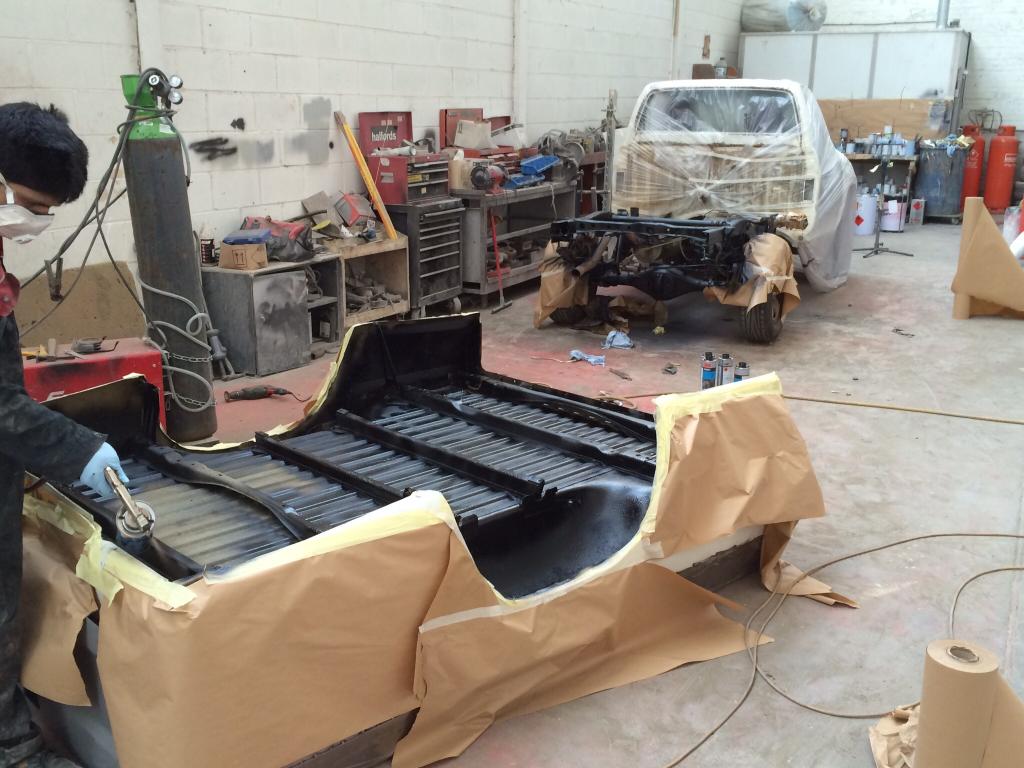
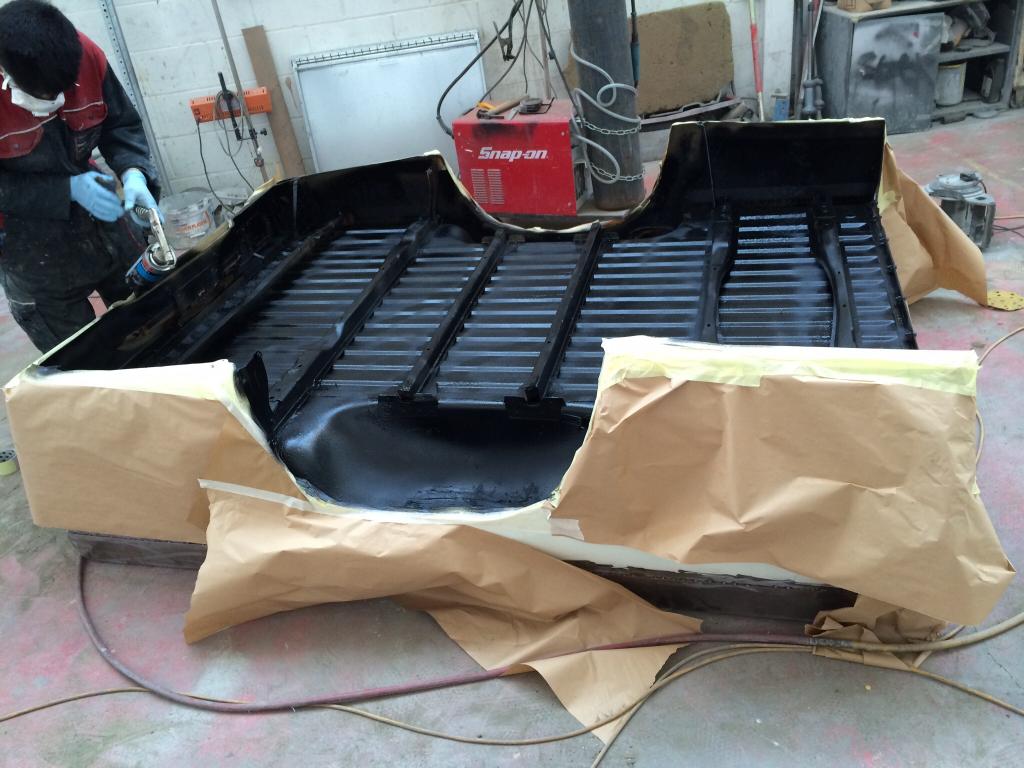

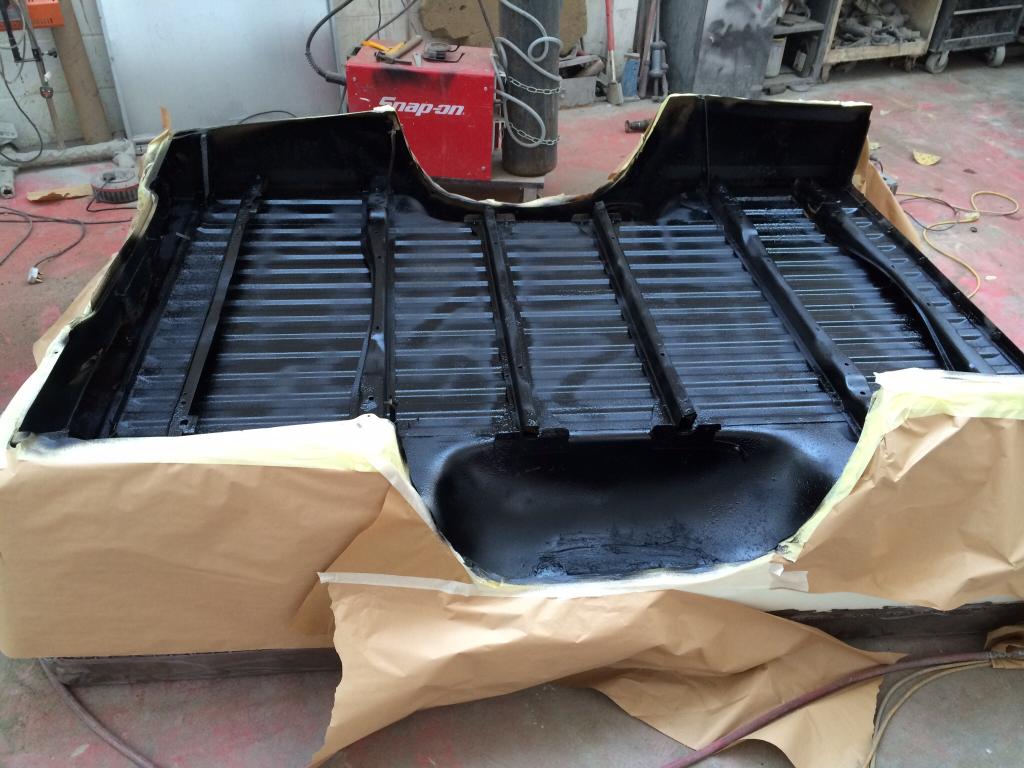
Pictures of the bed, in progress, and completed:


 Jul 21, 2014 | 12:56 PM
#79
Thread Starter
Registered User
Joined: Dec 2013
Posts: 214
Likes: 0
From: Aso Rock!
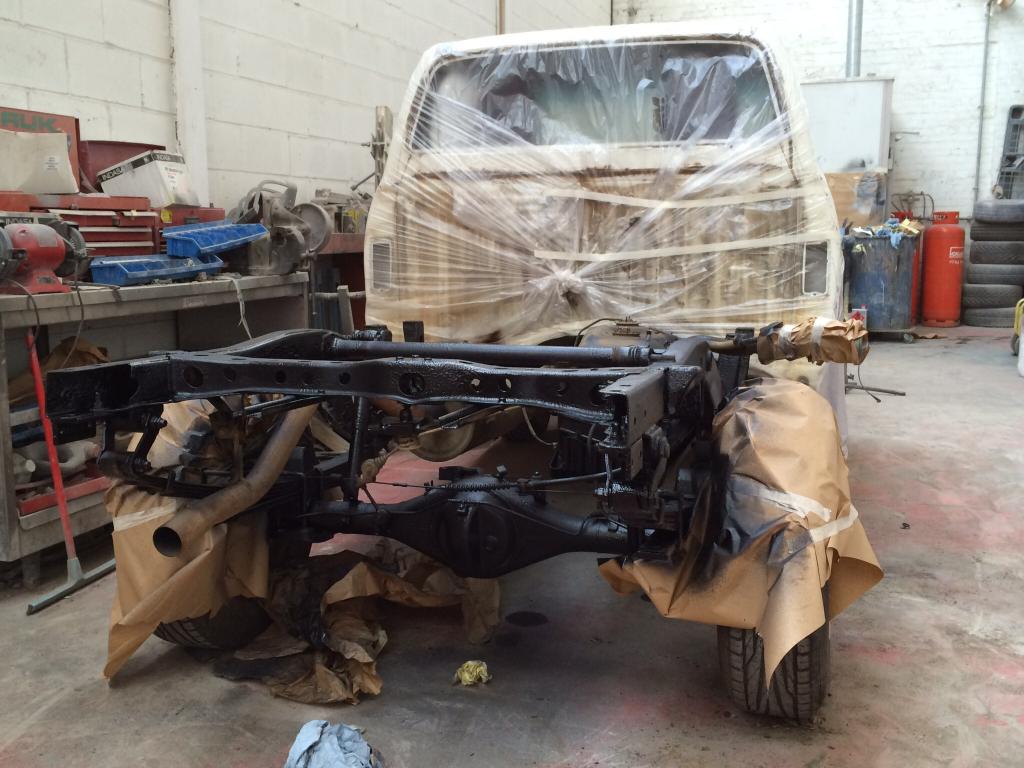
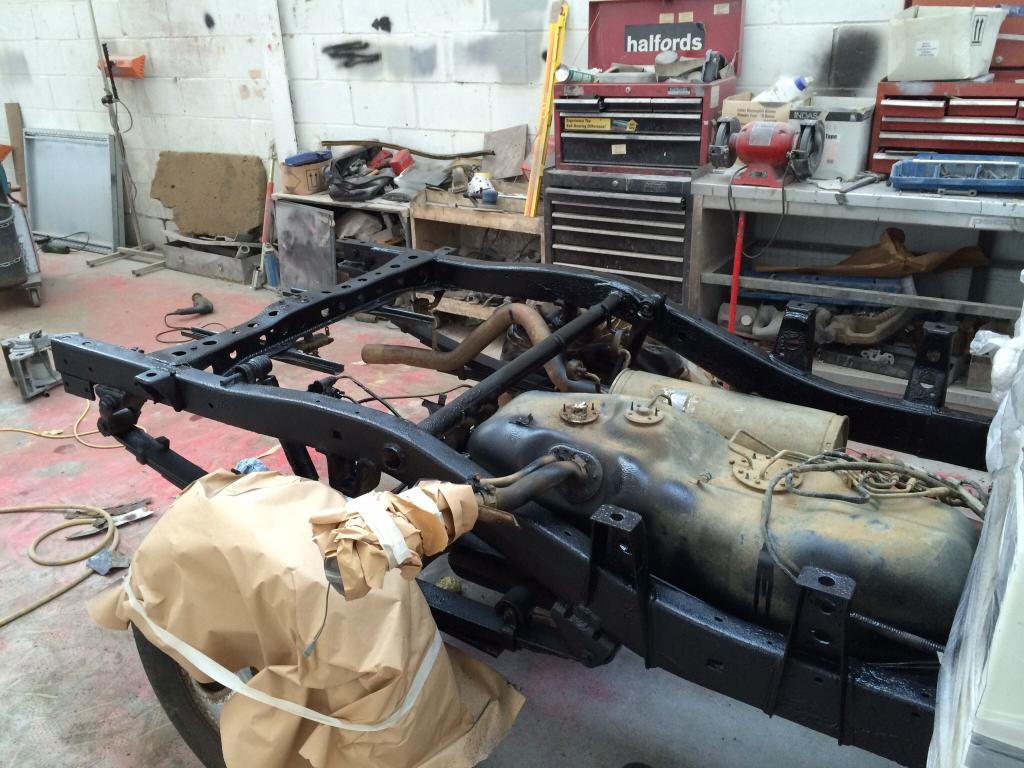
The cab and frame, looking like a mini tractor-unit. The rear section of the frame has been started, though not completed. The front section is also yet to be under sealed. The shop ran out of 3M underseal, more will be delivered tomorrow. The bed and the rear section of the bed has taken 5 large cans!


 Jul 21, 2014 | 01:21 PM
#80
Thread Starter
Registered User
Joined: Dec 2013
Posts: 214
Likes: 0
From: Aso Rock!
As I posted earlier, my rear differential e-locker wiring harness was all busted. I priced up a replacement at work today. At �63, it wasn't worth attempting to salvage the old one. It can certainly be soldered and heat-shrunk, but I opted for a new one.
I ordered a new harness, and replacement differential breather valve, again at �8, not worth trying to free up the old one. The new parts will be with me by Wednesday.
I ordered a new harness, and replacement differential breather valve, again at �8, not worth trying to free up the old one. The new parts will be with me by Wednesday.


