
02 Taco Build
 Oct 19, 2012 | 09:04 AM
#1

Thread Starter
Registered User
Joined: May 2008
Posts: 17
Likes: 0
From: Central PA
Xcelr8s 02 Taco Build
Hello all, new guy from TTORA. Tired of the bashing/drama over there and heard good things about this forum. With that being said, here is my current build! This is my first build, so I would greatly appreciate any recommendations/feedback!
This is my 2002 Tacoma that I purchased stock over 6 years ago. It served me well during my time in the military and never left me stranded once. However, since it has over 200,000 miles now...it's being promoted to a 20% DD/80% trial rig. The end result I'm shooting for is a mildly capable SAS'd Taco. I'd like to maintain the ability to drive it on the road, legally, but it definitely won't be a daily driver in any regard. I'm into expedition/slow crawling type trips.
As of several months ago it looked like this...
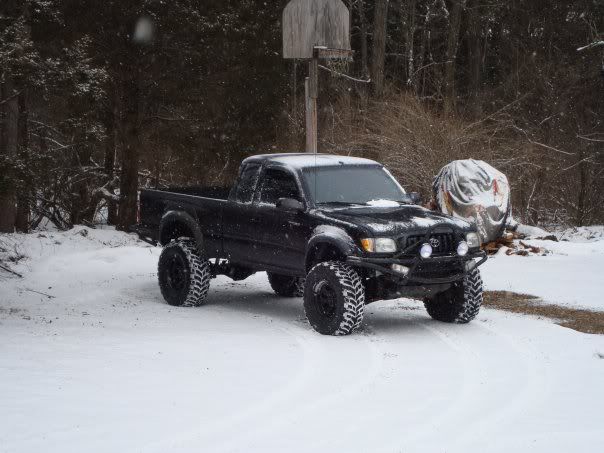
I had added 3" Allpro rear leafs, AllPro UCA's, 2.0 SAWS, and an Allpro rear and 4xInnovations front bumper. This setup was great, however, I honestly wanted more capability off-road and love the challenge of fabrication!
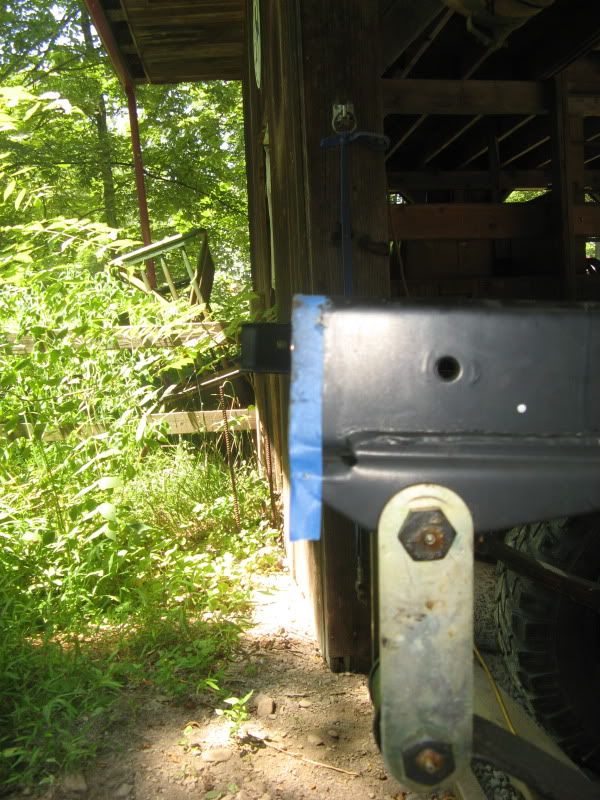
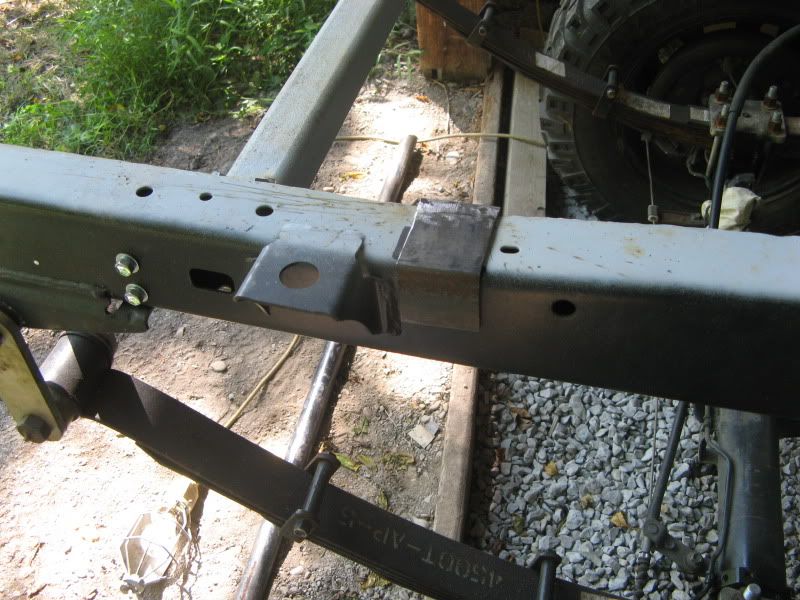
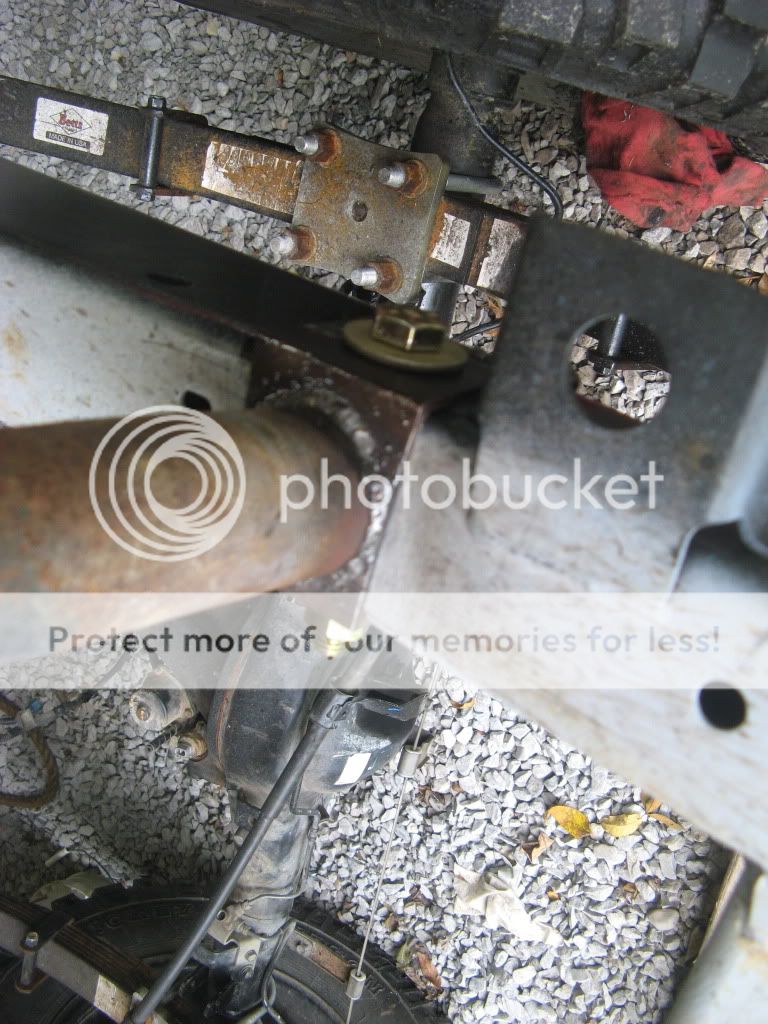
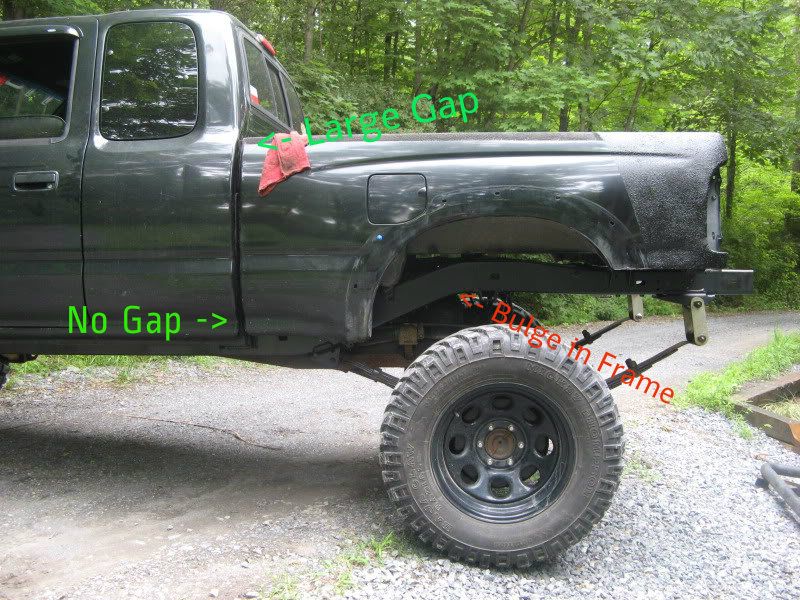
But, before my fun could begin, I found this after taking my bed off...
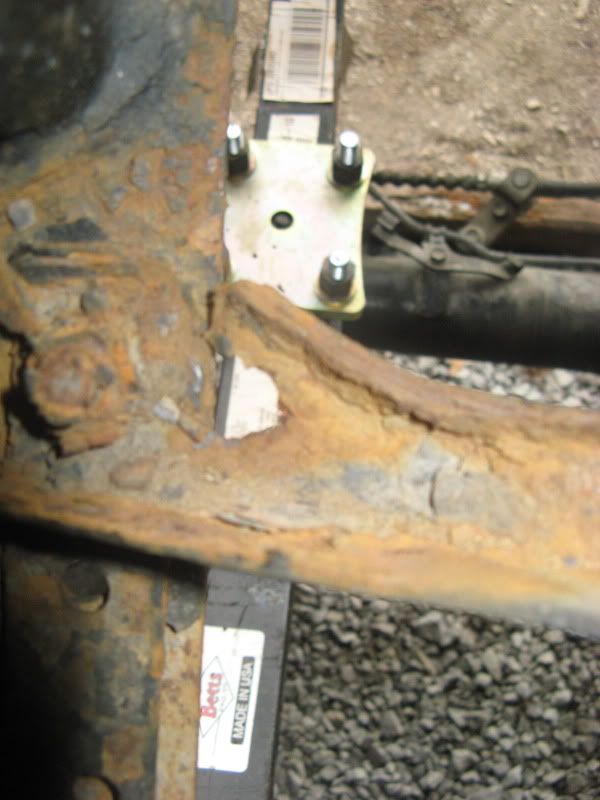
AND
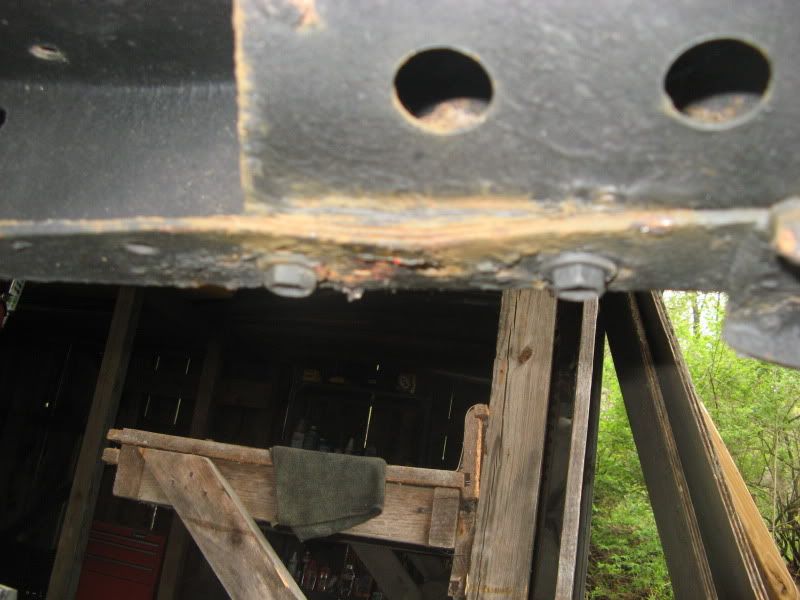
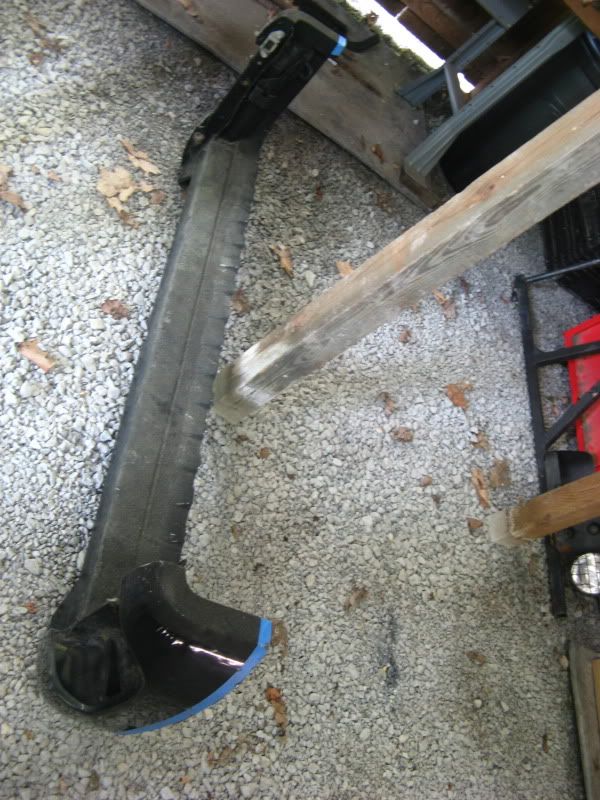
So, thankfully Toyota warrantied the frame, and now I have new rails to work with. Before Toyota warrantied the frame I was able to replace my 8.4 rear diff with an 8" diff I acquired a long time ago. I had the third rebuilt by ECGS with 5.29's, Currently running 5" AllPro leafs with 6" Shackles. The plan is to match the lift of the D44 up front with the rear. But we will see.
Toyota finished replacing the frame in under two weeks, also replaced all brake lines and the BPV under the warranty. I do not have a pic yet of the truck's new frame but I'll add it soon.
This is my 2002 Tacoma that I purchased stock over 6 years ago. It served me well during my time in the military and never left me stranded once. However, since it has over 200,000 miles now...it's being promoted to a 20% DD/80% trial rig. The end result I'm shooting for is a mildly capable SAS'd Taco. I'd like to maintain the ability to drive it on the road, legally, but it definitely won't be a daily driver in any regard. I'm into expedition/slow crawling type trips.
As of several months ago it looked like this...
I had added 3" Allpro rear leafs, AllPro UCA's, 2.0 SAWS, and an Allpro rear and 4xInnovations front bumper. This setup was great, however, I honestly wanted more capability off-road and love the challenge of fabrication!
But, before my fun could begin, I found this after taking my bed off...
AND
So, thankfully Toyota warrantied the frame, and now I have new rails to work with. Before Toyota warrantied the frame I was able to replace my 8.4 rear diff with an 8" diff I acquired a long time ago. I had the third rebuilt by ECGS with 5.29's, Currently running 5" AllPro leafs with 6" Shackles. The plan is to match the lift of the D44 up front with the rear. But we will see.
Toyota finished replacing the frame in under two weeks, also replaced all brake lines and the BPV under the warranty. I do not have a pic yet of the truck's new frame but I'll add it soon.
Last edited by xcelr8; Oct 19, 2012 at 09:23 AM.
Oct 19, 2012 | 09:07 AM
#2
Thread Starter
Registered User
Joined: May 2008
Posts: 17
Likes: 0
From: Central PA
SORRY FOR BLURRY PICS.
Well, towed the Taco to the dealer w/out the bed. So, I decided to bob it during the time it is gone. Total I took off was 12.25"...
I basically followed the guide that was posted by waskillywabbit on the TTORA forum. Here's a link to his thread... http://www.tacomaterritory.com/forum...ht=bed+bobbing ...he has a very detailed description on the process.
Step 1) Level the bed, measure 10x, and tape...

Step 2) Cut. Use a cut-off wheel on a grinder. Worked 10x better and more accurate, for me, than using my sawzall:2cents:. The sawzall was deermined to keep walking off course. Obviously, take your time and re-check your measurements 10 times before you start cutting.
After you finish your first cut, hopefully this happens...

Step 3) Cut again...
Step 4) Clean it up!
Step 5) I highly recommend the use of backing strips. They are very helpful in the process. Just cut a piece of your "extra" bed, drill some holes, and make some rosette welds.
Step 6) Make sure everything is clean, take the tail piece and mock it up to the bed. I focused on keeping the top of the rails of the bed level to each other. Then I trimmed for a high clearance rear bumper.
Step 7) I had minor width differences on the sides of the bed, I used a little bondo to even it all out. I haven't sanded it down yet but will put more pics up once I complete it...
Well, towed the Taco to the dealer w/out the bed. So, I decided to bob it during the time it is gone. Total I took off was 12.25"...
I basically followed the guide that was posted by waskillywabbit on the TTORA forum. Here's a link to his thread... http://www.tacomaterritory.com/forum...ht=bed+bobbing ...he has a very detailed description on the process.
Step 1) Level the bed, measure 10x, and tape...
Step 2) Cut. Use a cut-off wheel on a grinder. Worked 10x better and more accurate, for me, than using my sawzall:2cents:. The sawzall was deermined to keep walking off course. Obviously, take your time and re-check your measurements 10 times before you start cutting.
After you finish your first cut, hopefully this happens...
Step 3) Cut again...
Step 4) Clean it up!
Step 5) I highly recommend the use of backing strips. They are very helpful in the process. Just cut a piece of your "extra" bed, drill some holes, and make some rosette welds.
Step 6) Make sure everything is clean, take the tail piece and mock it up to the bed. I focused on keeping the top of the rails of the bed level to each other. Then I trimmed for a high clearance rear bumper.
Step 7) I had minor width differences on the sides of the bed, I used a little bondo to even it all out. I haven't sanded it down yet but will put more pics up once I complete it...
Oct 19, 2012 | 09:11 AM
#3
Thread Starter
Registered User
Joined: May 2008
Posts: 17
Likes: 0
From: Central PA
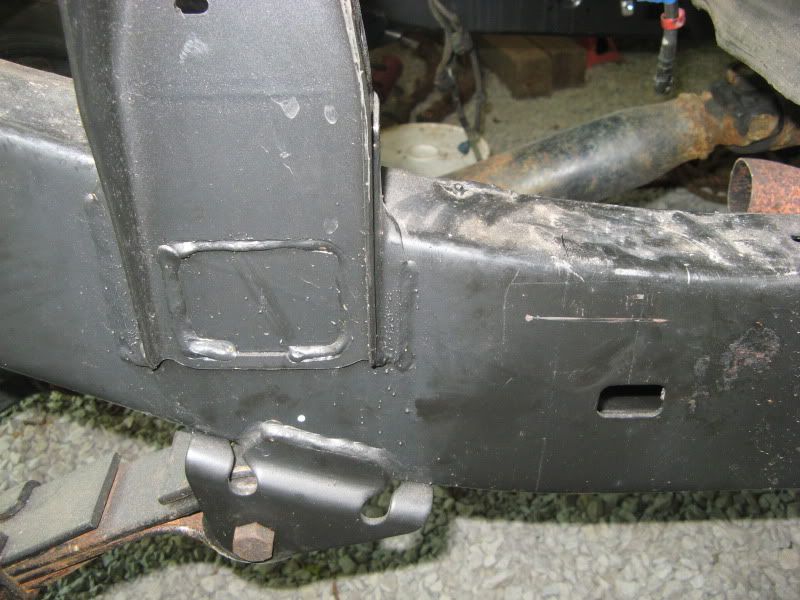
Moving on, classes/work/a kid on the way have slowed my funds/progress. Regardless, I chopped the frame rail as close to the rear leaf perches as I could. Doing so removed 5.5" of frame rail...
Removed the gas tank, planning on using the stock pump in a fuel cell which I will be inside the bed. According to PA, this is still street legal. In addition, I figured removing the tank will be one less thing I need to worry about hitting rocks. Also removed the stock BPV and will be using a Wilwood manual BPV.
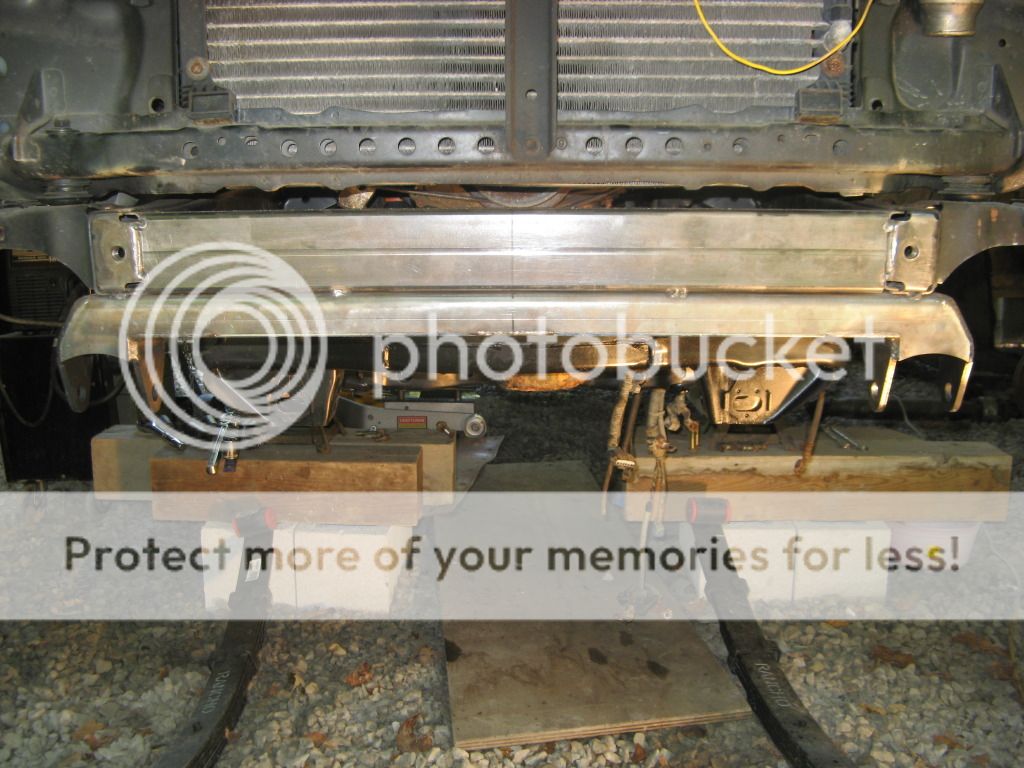
Frame is plated...Cross-members welded in...
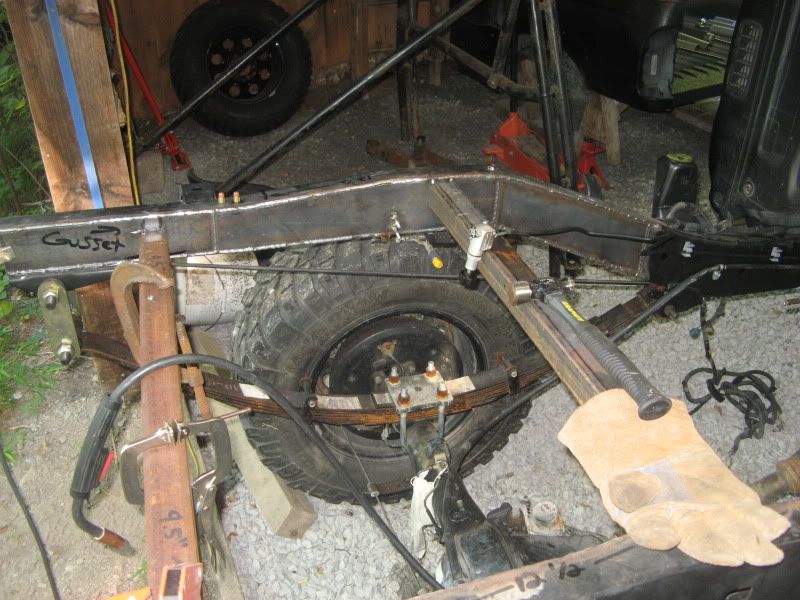
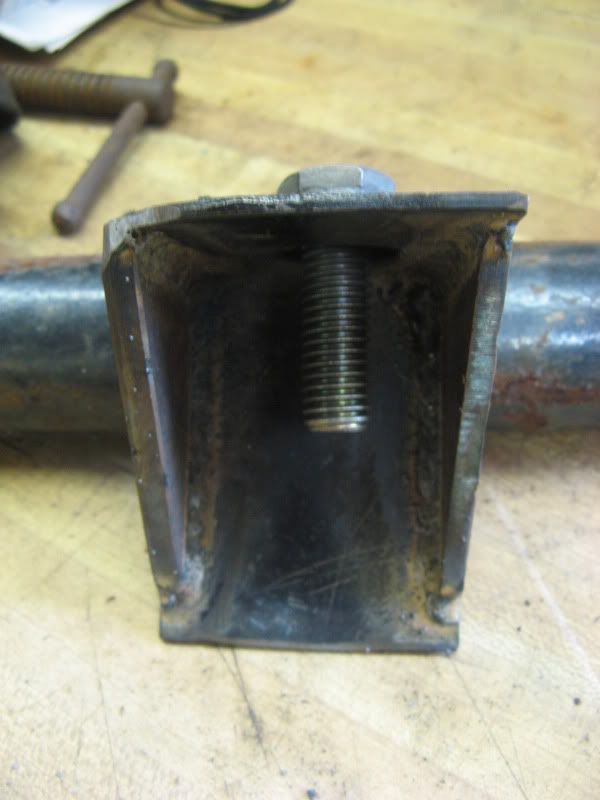
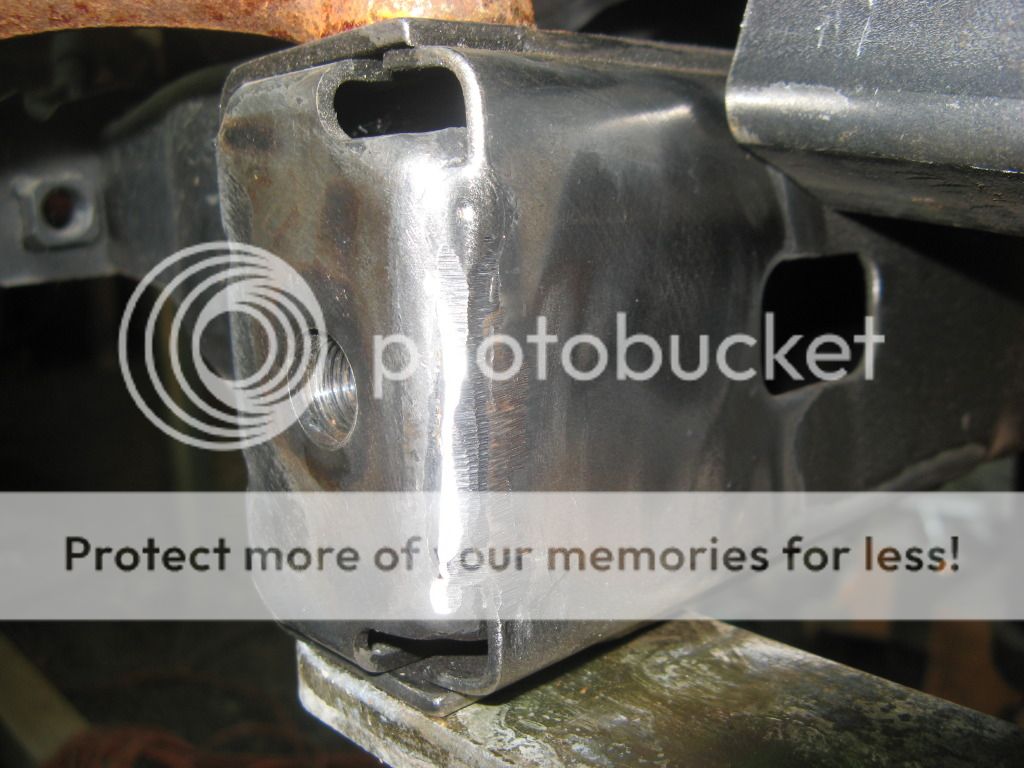
Lower shock mount...
After a little math...created a shock hoop for the 14"ers I plan to be running.
NOTE: This isn't what you want to do. This setup greatly reduces your dampening. I will create a wider hoop which will put the shocks at a 20-25 degree angle, laterally. Will be fixed sometime in a future update.
Moving on, now the cage. Since I planned on having this cage run through my bed, I decided to not weld it to the frame and make it a "bolt on" application. This has slowed down progress, however I believe it will be worth it.
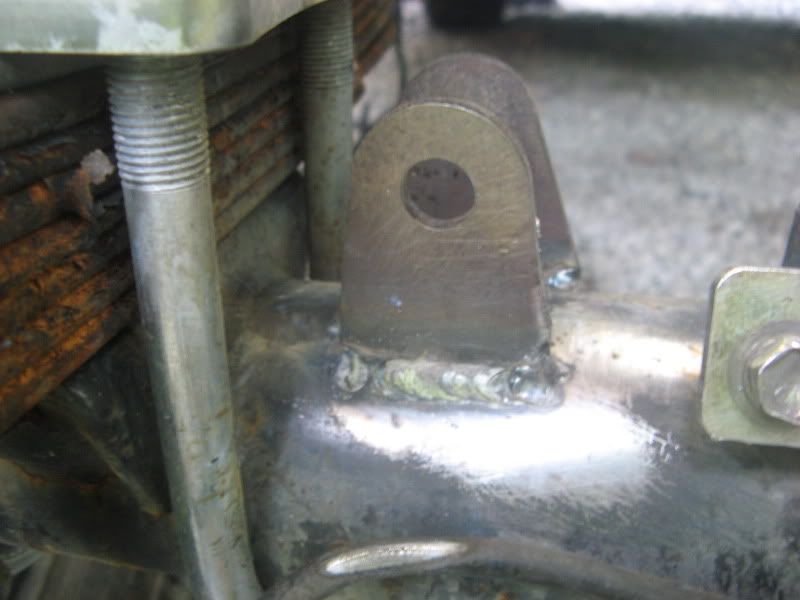
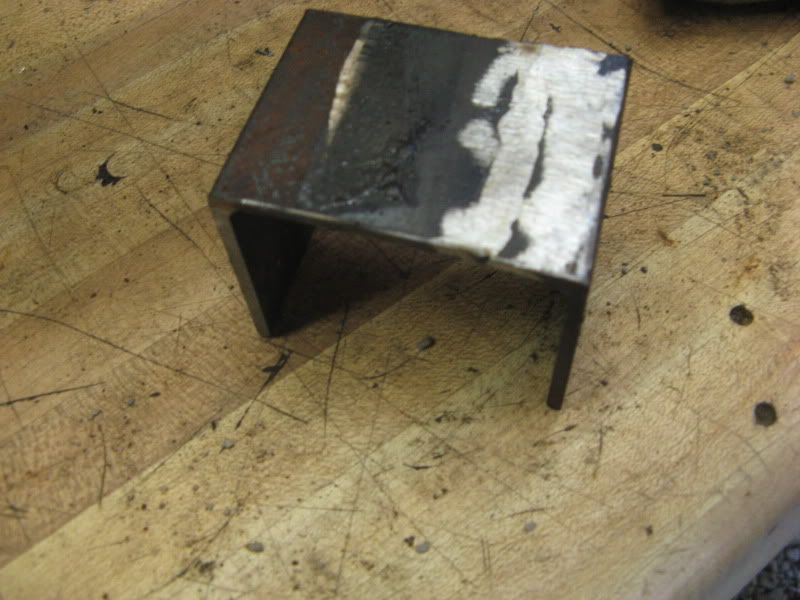
Created mounts for the front using part of my frame rails I cut off and scrap for gussets...

Not sure if you can see my markings...
Welded a plate and grade 8 bolt to the bottom of the cage where it will mount to the front 2 mounts. In essence, I recreated the mounts for the bed. If this doesn't make sense, the pictures will.

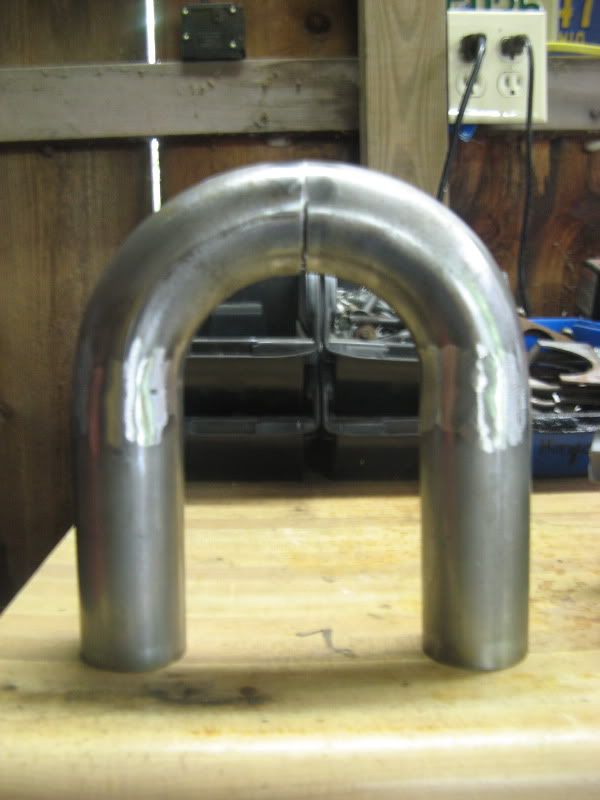
On the cage...
These are going to be welded to the feet of the rear hoops, which will be bolted to the frame.
Like so...
And that's as far as I've gotten in what seems like months. Progress is SLOW. Next steps are to finish the cage, modify the bumper, and cut a lot of holes in the bed (for the cage & fuel lines). Good times! I plan on running the outside of the cage into sliders like it was intended...it can only help
Removed the gas tank, planning on using the stock pump in a fuel cell which I will be inside the bed. According to PA, this is still street legal. In addition, I figured removing the tank will be one less thing I need to worry about hitting rocks. Also removed the stock BPV and will be using a Wilwood manual BPV.
Frame is plated...Cross-members welded in...
Lower shock mount...
After a little math...created a shock hoop for the 14"ers I plan to be running.
NOTE: This isn't what you want to do. This setup greatly reduces your dampening. I will create a wider hoop which will put the shocks at a 20-25 degree angle, laterally. Will be fixed sometime in a future update.
Moving on, now the cage. Since I planned on having this cage run through my bed, I decided to not weld it to the frame and make it a "bolt on" application. This has slowed down progress, however I believe it will be worth it.
Created mounts for the front using part of my frame rails I cut off and scrap for gussets...
Not sure if you can see my markings...
Welded a plate and grade 8 bolt to the bottom of the cage where it will mount to the front 2 mounts. In essence, I recreated the mounts for the bed. If this doesn't make sense, the pictures will.
On the cage...
These are going to be welded to the feet of the rear hoops, which will be bolted to the frame.
Like so...
And that's as far as I've gotten in what seems like months. Progress is SLOW. Next steps are to finish the cage, modify the bumper, and cut a lot of holes in the bed (for the cage & fuel lines). Good times! I plan on running the outside of the cage into sliders like it was intended...it can only help
Oct 19, 2012 | 09:12 AM
#4
Thread Starter
Registered User
Joined: May 2008
Posts: 17
Likes: 0
From: Central PA
HOPE YOU'RE NOT LOOKING FOR A LOT OF PROGRESS...college isn't easy...for me.
Regardless, have some pics so I'll post em up.
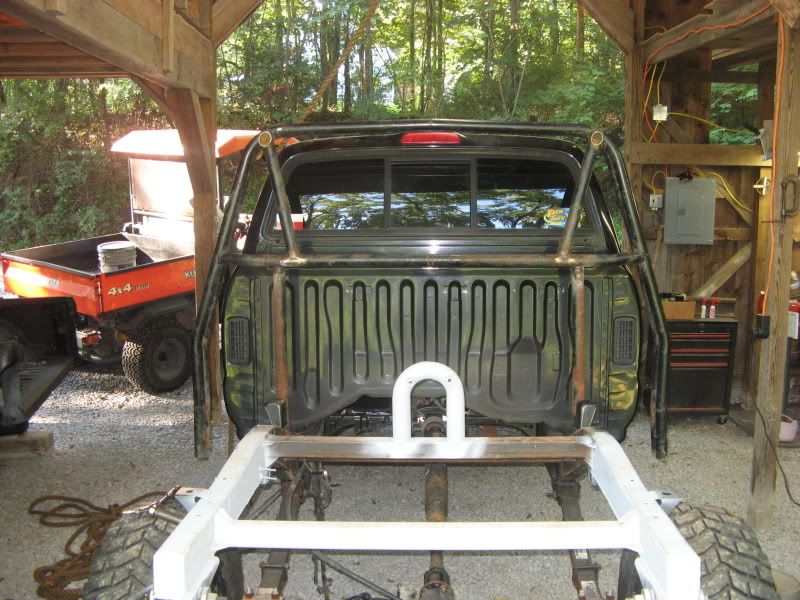
Had to shorten the rear hoops around 14" due to the shortened frame/bed bob.

Cage partially completed and temporarily on truck to check clearances

Design idea for the mounting of the rear hoops, hope it works.
Fabbed up a mount for the radiator on the roll cage. 2 pieces of flat bar topped off w/ angle iron to strengthen it. It's not going anywhere. Plan on using a Taurus fan, will have to mount on the cab side and be a "pusher"

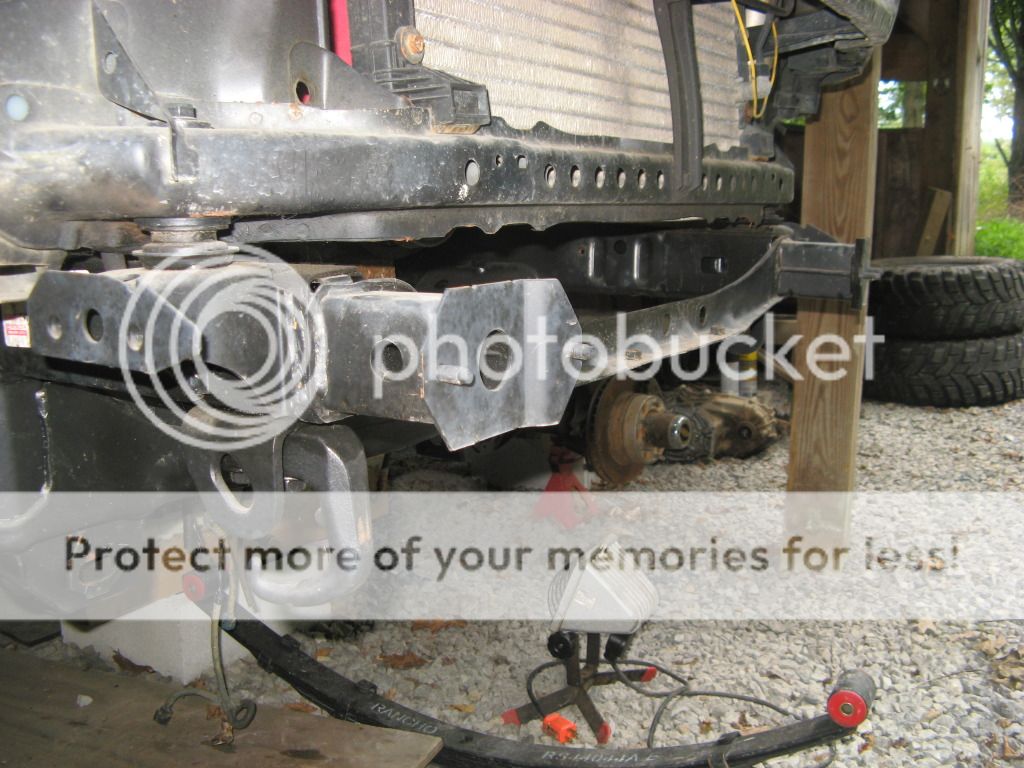
Everything is off, waiting for a front hanger from Front Range Offroad. Being that this is my first build, I'll play it safe and use a previously engineered hanger.

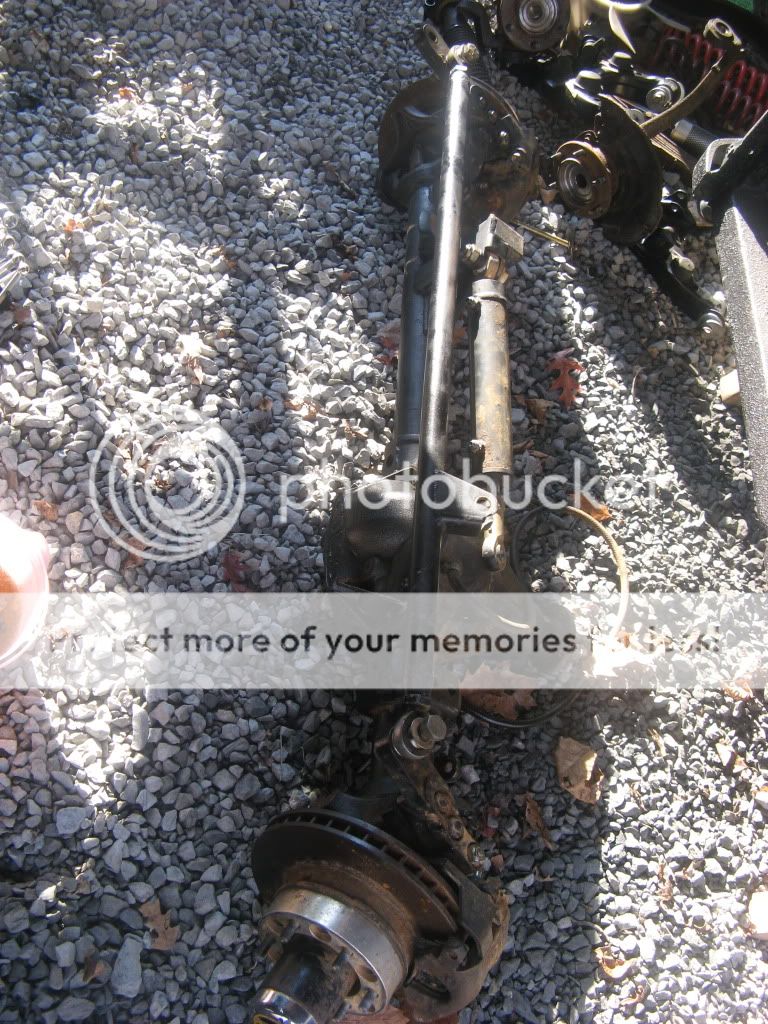
Picked up an already built Waggy D44 from another member. Will have to be re-geared for obvious reasons..
Regardless, have some pics so I'll post em up.
Had to shorten the rear hoops around 14" due to the shortened frame/bed bob.
Cage partially completed and temporarily on truck to check clearances
Design idea for the mounting of the rear hoops, hope it works.
Fabbed up a mount for the radiator on the roll cage. 2 pieces of flat bar topped off w/ angle iron to strengthen it. It's not going anywhere. Plan on using a Taurus fan, will have to mount on the cab side and be a "pusher"
Everything is off, waiting for a front hanger from Front Range Offroad. Being that this is my first build, I'll play it safe and use a previously engineered hanger.
Picked up an already built Waggy D44 from another member. Will have to be re-geared for obvious reasons..
Oct 19, 2012 | 09:13 AM
#5
Thread Starter
Registered User
Joined: May 2008
Posts: 17
Likes: 0
From: Central PA
Well, it's been a while. Life has delayed my progress drastically. With that being said, I finally got the front hangar from FROR about 3 weeks ago. For all those prospective SAS'ers out there, I am very pleased with the end product that FROR builds, however, they are a small company and get back-logged. Add weeks or months on top of what time they estimate you. This is not a complaint, simply some advice...or an observation. Small companies like this need to survive...in my opinion. Regardless, don't order the hangar and expect to be welding it in 3 weeks later. Moving on...
I'm going to attempt to make a user friendly step by step (Leaf-Spring) SAS guide. This has been done before A LOT. However in my research I had to piece together a lot of different builds in order to learn what I needed to learn. Hopefully I can accomplish a detailed guide from tacking on the front spring hangar to checking clearances during compression and droop.
With that being said, obviously no one can comment on this since it is in the "garage" section, so if I am misinformed about something or really fu[k something up, please PM me so I can fix it and stop anyone else from making the mistake. I am only human, I will make mistakes.
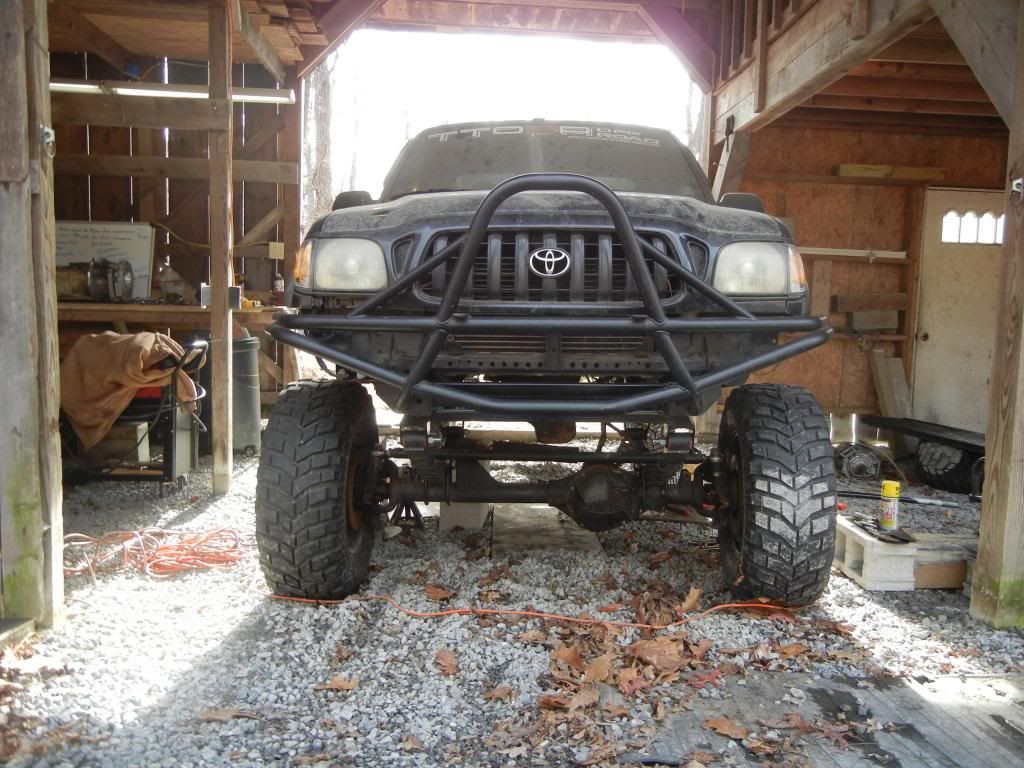
With all that out of the way, this is a leaf-spring SAS on a 2002 ext-cab Tacoma w/ 2.7 & 5-speed, accomplished with FROR's SAS kit. http://frontrangeoffroadfab.com/nfos...products_id=39
NOTE: For your reference, the radiator has already been removed prior to these pictures...
First off, the front 2 frame horns will need to be unbolted from the frame.
Before...
After...

Once that is done, you will want to tack weld the 2x3" tube (Provided in the FROR kit, pictured below) in place in-between your frame rails. You may need to trim this down, I had to remove 1/4" to make it fit in-between my rails. Due to the fact that my frame is brand new, I assumed that my rails have not been tweaked and that FROR probably sends pieces that are slightly longer than necessary because everyone's frames are tweaked a little different.

In order to get the cross-member to fit flush with the front of your frame rails, you will most likely have to grind down the welds on the inside of your frame horns...
Before...

After...
At this point, use some sort of device to ensure the bottom of your cross-member to level to the bottom of your frame rails. In my case, I used a set of shackles...

Check that everything is flush and level 15 times. Granted you can always fix it later on, it makes things easier. After this picture was taken, I re-did it twice before I was confident with it's placement. Moving on, once you are positive that you are flush the front and bottom of the frame rails...tack weld this cross-member in place.

Next, you will want to find the center of the cross-member. You will use this mark to center the front spring hangar that you will be tacking in place next. For your reference, I measured from the outside of each frame rail to get my center mark. I'm sure there are other methods to use, however, this is the method I used.

Now, with the spring hangar still on the ground, find your center and mark it. Use a set of C-clamps to hold the hangar in place, but loose enough that you can still move it, and match up your two center marks. (Cross-member and hangar) Once that is accomplished ensure the front of your hangar is flush with your cross-member...

Again, ensure everything is perfect 15 times. This is extremely important. Once you are confident everything is good, tack weld your hangar in place...
Next, begin cutting out your IFS cross-members and shock towers. I highly recommend borrowing or renting a torch to do this. I did it with several cut off wheels and a sawzall...it is difficult and dangerous to say the least.
NOTE: Do not do this before tacking the new cross-member and leaf spring hangar in place.

Now, grind off all the welds and such from the old cross-members. This step is very time consuming...which is why I'm still doing it... Enjoy!
I'm going to attempt to make a user friendly step by step (Leaf-Spring) SAS guide. This has been done before A LOT. However in my research I had to piece together a lot of different builds in order to learn what I needed to learn. Hopefully I can accomplish a detailed guide from tacking on the front spring hangar to checking clearances during compression and droop.
With that being said, obviously no one can comment on this since it is in the "garage" section, so if I am misinformed about something or really fu[k something up, please PM me so I can fix it and stop anyone else from making the mistake. I am only human, I will make mistakes.
With all that out of the way, this is a leaf-spring SAS on a 2002 ext-cab Tacoma w/ 2.7 & 5-speed, accomplished with FROR's SAS kit. http://frontrangeoffroadfab.com/nfos...products_id=39
NOTE: For your reference, the radiator has already been removed prior to these pictures...
First off, the front 2 frame horns will need to be unbolted from the frame.
Before...
After...
Once that is done, you will want to tack weld the 2x3" tube (Provided in the FROR kit, pictured below) in place in-between your frame rails. You may need to trim this down, I had to remove 1/4" to make it fit in-between my rails. Due to the fact that my frame is brand new, I assumed that my rails have not been tweaked and that FROR probably sends pieces that are slightly longer than necessary because everyone's frames are tweaked a little different.
In order to get the cross-member to fit flush with the front of your frame rails, you will most likely have to grind down the welds on the inside of your frame horns...
Before...
After...
At this point, use some sort of device to ensure the bottom of your cross-member to level to the bottom of your frame rails. In my case, I used a set of shackles...
Check that everything is flush and level 15 times. Granted you can always fix it later on, it makes things easier. After this picture was taken, I re-did it twice before I was confident with it's placement. Moving on, once you are positive that you are flush the front and bottom of the frame rails...tack weld this cross-member in place.
Next, you will want to find the center of the cross-member. You will use this mark to center the front spring hangar that you will be tacking in place next. For your reference, I measured from the outside of each frame rail to get my center mark. I'm sure there are other methods to use, however, this is the method I used.
Now, with the spring hangar still on the ground, find your center and mark it. Use a set of C-clamps to hold the hangar in place, but loose enough that you can still move it, and match up your two center marks. (Cross-member and hangar) Once that is accomplished ensure the front of your hangar is flush with your cross-member...
Again, ensure everything is perfect 15 times. This is extremely important. Once you are confident everything is good, tack weld your hangar in place...
Next, begin cutting out your IFS cross-members and shock towers. I highly recommend borrowing or renting a torch to do this. I did it with several cut off wheels and a sawzall...it is difficult and dangerous to say the least.
NOTE: Do not do this before tacking the new cross-member and leaf spring hangar in place.
Now, grind off all the welds and such from the old cross-members. This step is very time consuming...which is why I'm still doing it... Enjoy!
Oct 19, 2012 | 09:19 AM
#6
Thread Starter
Registered User
Joined: May 2008
Posts: 17
Likes: 0
From: Central PA
Camera was lost temporarily, so I don't have any progress pics in this update.
Grinding takes forever. In addition, NEVER attempt to put the rear hangars on by yourself. One of the stupidest decisions I've made in a long time. It is nearly impossible, and took me around 4 hours to get both rear hangers aligned and in the correct position.
With that being said, I have the rear hangers mounted 43 1/4" back from the front of the spring. This is a center to center measurement. Below is my shackle hangar at ride height, I was very happy with it, so I've proceeded with welding everything together.

Currently I need to plate the frame where the rear hangars are located, in addition to welding in gussets from the hangars to the top of the frame. Along with the never ending list of things to complete. School is sucking my life away so my progress is not extremely exciting. Enjoy!
Grinding takes forever. In addition, NEVER attempt to put the rear hangars on by yourself. One of the stupidest decisions I've made in a long time. It is nearly impossible, and took me around 4 hours to get both rear hangers aligned and in the correct position.
With that being said, I have the rear hangers mounted 43 1/4" back from the front of the spring. This is a center to center measurement. Below is my shackle hangar at ride height, I was very happy with it, so I've proceeded with welding everything together.
Currently I need to plate the frame where the rear hangars are located, in addition to welding in gussets from the hangars to the top of the frame. Along with the never ending list of things to complete. School is sucking my life away so my progress is not extremely exciting. Enjoy!
Oct 19, 2012 | 09:44 AM
#7
Registered User

Joined: Jun 2003
Posts: 342
Likes: 1
From: Las Vegas
Nice build! Curious, on the plates you used to box in the rear. Did you cut and fab those yourself or were those something premade/cut that were a simple weld in? I'll be doing the same on my project here in the next couple weeks and was going to just cut my own but for the right price some prefabbed ones would be nice and save some work!
Trending Topics
Oct 19, 2012 | 01:11 PM
#8
Thread Starter
Registered User
Joined: May 2008
Posts: 17
Likes: 0
From: Central PA
Thanks! That was not a buy and weld-in. To my knowledge, no company makes a kit for boxing in the frame on the Tacos. Point being, everyone's frames are tweaked after 10 years of driving and/or wheeling. With that being said, the Taco they use to make the templates would probably have a slightly different frame geometry than other Taco's. Not a huge deal, but for the price I assume they'd charge for the kit...having to fab the kit would probably not make a lot of people ecstatic.
If you're interested, I measured the inside of my frame in 3 sections (on each side) gave those measurements to a local metal yard and they cut the plate for me. At that point I just had to put the plates on the frame, use a marker to trace the excess, and cut off the excess with a cut-off wheel and weld them in. Not that bad of a process.
If you're interested, I measured the inside of my frame in 3 sections (on each side) gave those measurements to a local metal yard and they cut the plate for me. At that point I just had to put the plates on the frame, use a marker to trace the excess, and cut off the excess with a cut-off wheel and weld them in. Not that bad of a process.
Last edited by xcelr8; Oct 19, 2012 at 01:12 PM.
Oct 19, 2012 | 02:45 PM
#9
Registered User
Joined: Jun 2003
Posts: 342
Likes: 1
From: Las Vegas
Thanks for the info. I'm lucky enough to cheat and have access to a cnc plasma table and I do cad work for a living so I just work with paper templates, draw them in cad and my friend cuts for me but I if there's premade stuff I save the cut favors for when there isn't you know. LOL
Curious more on it though... Did you trim it till the plate tucked inside the frame rail just a hair or did you simply lay right to the inside surface and buzz it up along the edges?
There are these but I don't know anyone that's tried them out first hand and they don't look like they truly go all the way to the rear. Is it worth that extra bit? Who knows but if I'm doing it I might as well do it all you know...
http://www.ballisticfabrication.com/...es_p_1820.html
Our builds are totally different for different purposes but I like what you've got going there and can totally respect the work involved and it'll be a darn fun crawler when it's finished up!
Last edited by sirhk100; Oct 19, 2012 at 02:46 PM.
Oct 19, 2012 | 03:41 PM
#10
Thread Starter
Registered User
Joined: May 2008
Posts: 17
Likes: 0
From: Central PA
A CNC plasma table would be nice! Not that I'd have any idea how to use it. Regardless, that's a sweet setup you've got and I understand trying to keep your favors for when you need them LOL.
In regards to the plates, I trimmed them so that they would fit on the inside of the frame. For me, it made the rest of the process easier doing it this way. I don't see why butting it up to the outside of the frame would cause any negative effect for you. Anyway, when I made my marks on the plate I simply cut on the inside of the marks with the cut-off wheel. Worked out rather painless. You can see in my pictures of the boxed frame how I sectioned off the plates judging off of the geometry of the frame.
I never knew Ballistic made these. I'm sure it's worth a try, however the price is double what I paid for my 3/16. In addition, I understand why they didn't go all the way to the back of the frame...but I don't see why you'd go through all that work to leave the last foot our your frame unboxed...? If you're looking to save a favor I'd say go for it, the most important part that needs to get boxed is the "s" of the frame, which is what that kit will accomplish. That's where the frame tend to bend...from what I've seen at least. You'll probably still have to do some trimming, however, from looking at your build I think you can handle it! What's your plan for the cross-members?
I think our builds are polar opposites LOL. However, like you said, I can see and respect all the work you've put into it. You do some great work! Should be an awesome truck when it's all said and done.
Oct 19, 2012 | 04:48 PM
#11
Registered User
Joined: Jun 2003
Posts: 342
Likes: 1
From: Las Vegas
Well I grew up crawling and I literally just sold my jeep (badword i know...) that was locked up on 35's about 4 hours ago. I'm building something else to crawl with that will also be my daily driver, it's neither jeep nor yota though. LOL, I'm far from brand loyal!
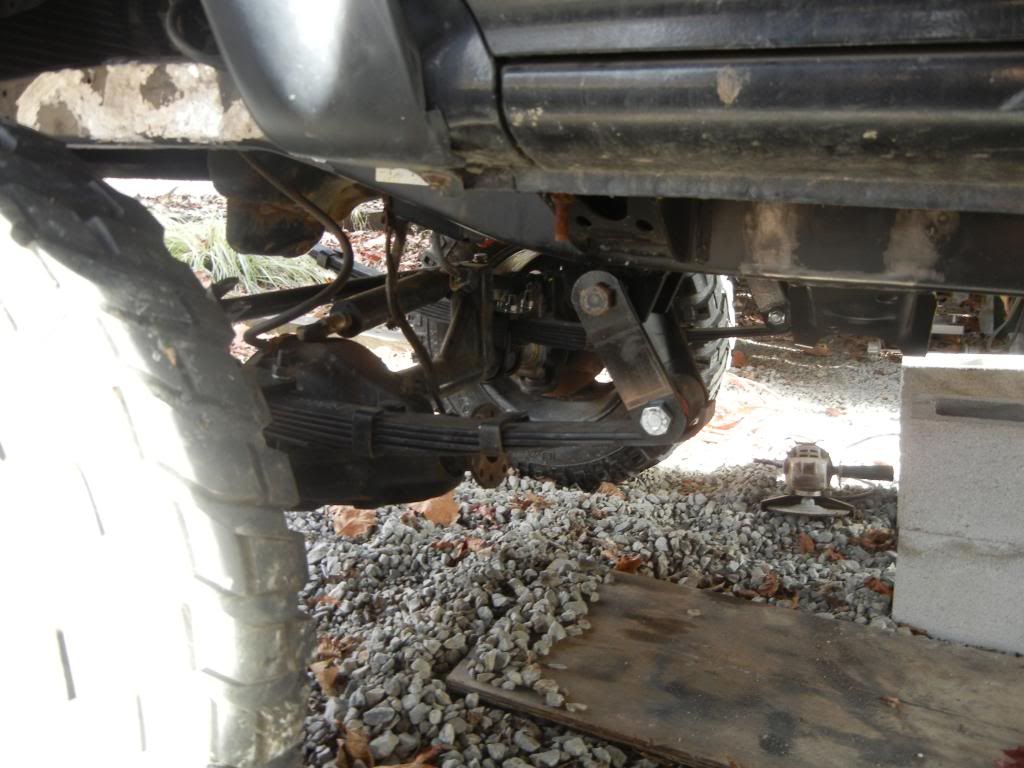
For crossmembers on ours I've got some 2x4 (that's off memory, it's something close to that) rectangular tube running across the back. It slid pretty much perfectly inside the "C" of the frame rails. I've got one all the way across at the very back. Then about 8-10" or so behind where the stock bumps would go I've got another one running across there. That one is acting as my platform to mount the batteries and also is what I tied the spare tire mounts into. Then behind the cab I've actually got a couple pieces of 2x2 angle iron running across the frame rails that I turned into the cradle for the fuel cell. I "think" I've got enough support built back into it along with the cage work to hold up. Between all of that and boxing in the frame similar to what you've done I think I'll be fine. I'm realisitically probably 3 weeks out from turning the truck around and getting started on the rear work that I have left. Axle swap, shock mounts, frame boxing, better fuel cell hold downs and mounting bedsides...
Anyways, thanks for the input, I figured it couldn't hurt to ask since you'd done something virtually identical to what I'm planning here pretty soon...
I've heard of people having frame issues right near the front leaf hangers which would be in that "S" area of the frame so boxing it in definitely isn't going to hurt! I just haven't seen first hand exactly what's happening to the frames there, just that they have issues when beat on which ours will probably be used in an abusive way. LOL If it isn't I'm wasting my time that's for sure! LOL
Oct 20, 2012 | 06:43 AM
#13
Thread Starter
Registered User
Joined: May 2008
Posts: 17
Likes: 0
From: Central PA
Well I grew up crawling and I literally just sold my jeep (badword i know...) that was locked up on 35's about 4 hours ago. I'm building something else to crawl with that will also be my daily driver, it's neither jeep nor yota though. LOL, I'm far from brand loyal!
For crossmembers on ours I've got some 2x4 (that's off memory, it's something close to that) rectangular tube running across the back. It slid pretty much perfectly inside the "C" of the frame rails. I've got one all the way across at the very back. Then about 8-10" or so behind where the stock bumps would go I've got another one running across there. That one is acting as my platform to mount the batteries and also is what I tied the spare tire mounts into. Then behind the cab I've actually got a couple pieces of 2x2 angle iron running across the frame rails that I turned into the cradle for the fuel cell. I "think" I've got enough support built back into it along with the cage work to hold up. Between all of that and boxing in the frame similar to what you've done I think I'll be fine. I'm realisitically probably 3 weeks out from turning the truck around and getting started on the rear work that I have left. Axle swap, shock mounts, frame boxing, better fuel cell hold downs and mounting bedsides...
I've heard of people having frame issues right near the front leaf hangers which would be in that "S" area of the frame so boxing it in definitely isn't going to hurt! I just haven't seen first hand exactly what's happening to the frames there, just that they have issues when beat on which ours will probably be used in an abusive way. LOL If it isn't I'm wasting my time that's for sure! LOL
Anyway, if you plate the S with that kit, you should be fine. Even if you wanted to box in the last foot of the frame, cutting that plate would be extremely easy. Plating the S is the time consuming part.
Granted, I've never built or driven a rig such as yours, however it sounds like you have enough strength in the rear of your frame. I've noticed in your build you've upgraded fuel cells, do you still have your old one? 22 gallon I think? I don't remember at the moment. Anyway if shipping isn't ridiculous I'd take it off your hands if you don't have plans for it.
What's your current crawling rig you're building? Never had a Jeep, but always thought they would be fun. I'm gearing this build for 37's, however, I believe I'm going to start with 35's in an effort to not keep breaking parts.
Last edited by xcelr8; Oct 20, 2012 at 06:47 AM.
Oct 20, 2012 | 06:50 AM
#14
Thread Starter
Registered User
Joined: May 2008
Posts: 17
Likes: 0
From: Central PA
Thanks man! I wish I had a double-cab. Although if I did, I probably wouldn't SAS it. Wife and kids LOL. Regardless, this is my first attempt at an SAS so I decided to proceed with leafs. Perhaps when I get bored with it I'll switch over to links. The work never ends!
Oct 20, 2012 | 09:48 PM
#15
Registered User
Joined: Jun 2003
Posts: 342
Likes: 1
From: Las Vegas
Yep the frame issue totally makes sense! I'll have to go look the frame over to see if it's had any issues. I doubt it but doesn't hurt to investigate.
Sorry, I don't have the 22 anymore. Sold it to a friend and I actually watched my fuel cell race in his truck this morning. LOL
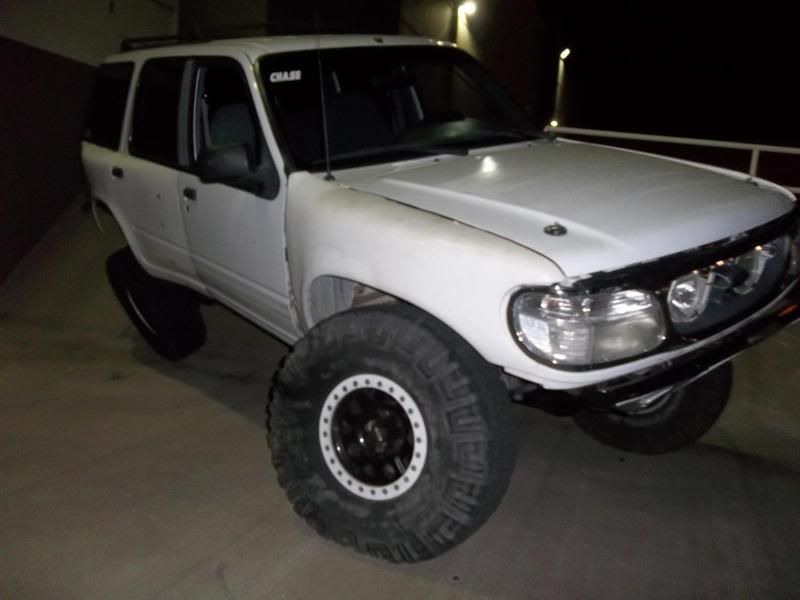
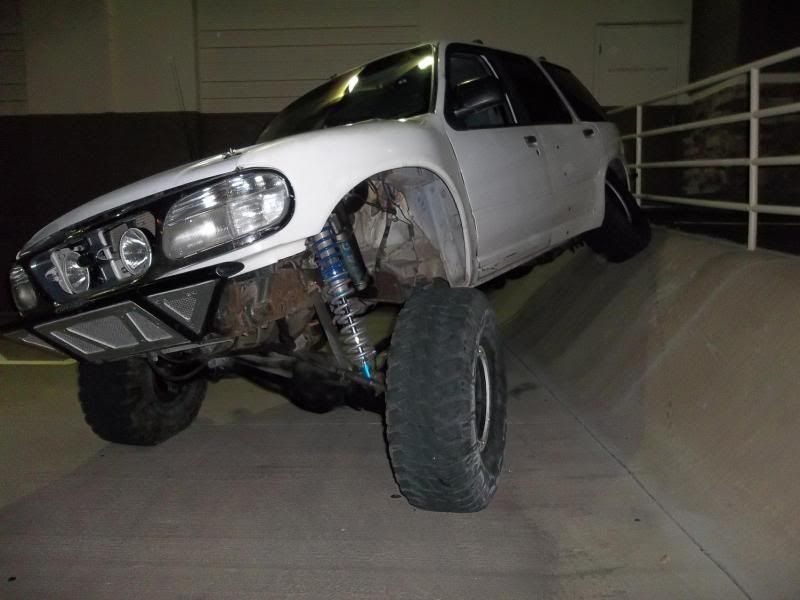
I'm going grocery gettin with a ford exploder! I should be able to conquer any speed bump or curb at the mall!

It's already on 35's and those are real beadlocks. I've got the front 3rd member being geared with 4.56 right now to match the rear and am also waiting for some custom machined front axles to be made that I have on order.
Plans are some better shocks in the rear, a custom steering kit to fix fords absurd idea of a steering system, rock sliders and a locker in the rear.
Sorry, I don't have the 22 anymore. Sold it to a friend and I actually watched my fuel cell race in his truck this morning. LOL
I'm going grocery gettin with a ford exploder! I should be able to conquer any speed bump or curb at the mall!
It's already on 35's and those are real beadlocks. I've got the front 3rd member being geared with 4.56 right now to match the rear and am also waiting for some custom machined front axles to be made that I have on order.
Plans are some better shocks in the rear, a custom steering kit to fix fords absurd idea of a steering system, rock sliders and a locker in the rear.
Last edited by sirhk100; Oct 20, 2012 at 09:50 PM.
 Nov 20, 2012 | 12:01 PM
#18
Thread Starter
Registered User
Joined: May 2008
Posts: 17
Likes: 0
From: Central PA
Quite the mall cruiser man! I'm going to be completely honest, I had no idea they made fiberglass bedsides for explorers...
Nov 20, 2012 | 12:01 PM
#19
Thread Starter
Registered User
Joined: May 2008
Posts: 17
Likes: 0
From: Central PA
So. Yea. Due to not having a camera until recently, there is a large gap in my progress via pictures. I'll do my best to make up for it, in order for any confused individuals out there, to explain the process for mounting the hangars etc.
So, as I stated in the previous post, I ended up having my rear shackle hangars 43 1/4" back from the front hangar. This was a center to center measurement and I'm using Rancho 44044 leaf springs. Obviously, if you are using different springs, your measurements could be significantly different. The methods out there to calculate this measurement, such as measuring the length of the spring flat and subtracting half an inch, etc. generally get you in the ballpark. I tried two different methods, purely out of curiosity, and they both generally end up with the same measurement. Which is a good thing.
With that being said, I used those methods to initially tack up my rear hangars. Then, assemble your axle and mount your leafs in order to get your shackle angles. My initial angle at full droop was maybe 10 degrees negative, so, I moved the rear hangar forward (1" I believe, don't quite remember) and proceeded with the same process. At full droop, the shackles are at 0 degrees and I've pictured my angle at ride height...
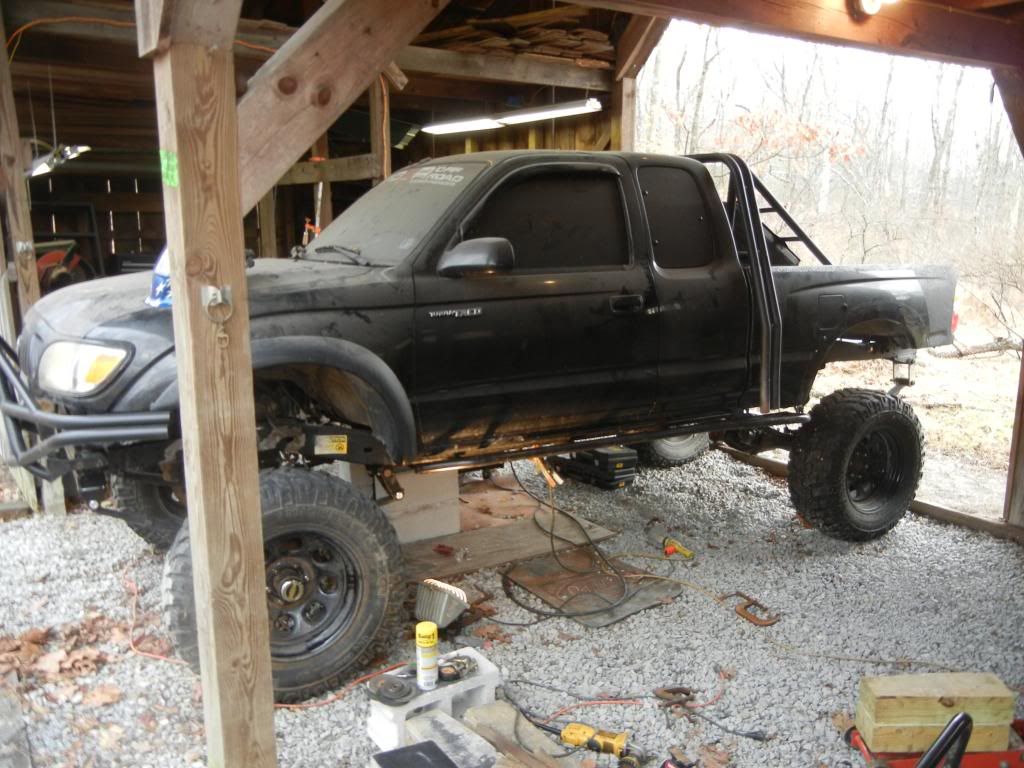
SO. Here is how it sits. Again, don't mind the small tires. It's all a work in progress and rubber isn't cheap.
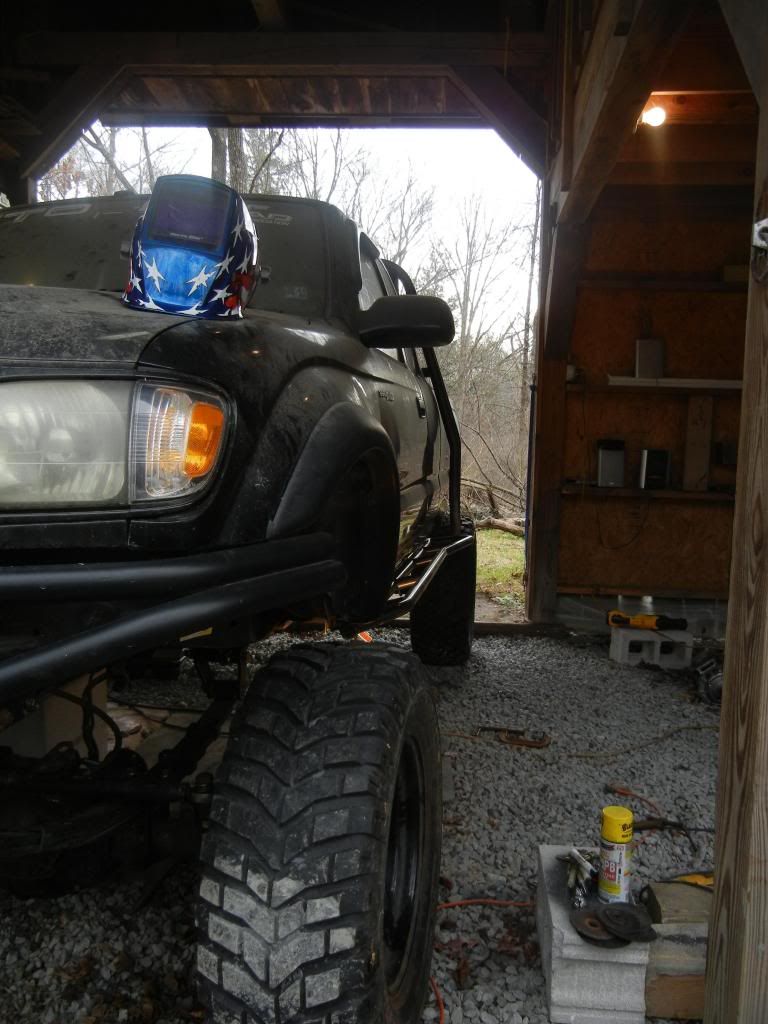
I've been working through a lot of little side projects in order to get the truck rolling since I'm moving in about a month. Put on the sliders and cage...
I still have to tie the two together, but it doesn't look like it will be difficult at all. Fixed the parking brake, replaced front calipers, acquired some older steering shafts to make a Frankenstein etc. I have a few days of free time and last thing I really need to get done in order for this to roll is the steering.
So this is somewhat of an update. Side note, if you see something in the pictures that makes you think to yourself...WTF? It's probably due to the fact that I'm skipping some projects/steps etc. solely so I can move this thing in a month. My free time is limited, so I'm ecstatic if I get to put in 4 hours on a weekend. Second side note, this whole process would go a million times faster if you had several close-by friends willing to lend you help. That is all.
So, as I stated in the previous post, I ended up having my rear shackle hangars 43 1/4" back from the front hangar. This was a center to center measurement and I'm using Rancho 44044 leaf springs. Obviously, if you are using different springs, your measurements could be significantly different. The methods out there to calculate this measurement, such as measuring the length of the spring flat and subtracting half an inch, etc. generally get you in the ballpark. I tried two different methods, purely out of curiosity, and they both generally end up with the same measurement. Which is a good thing.
With that being said, I used those methods to initially tack up my rear hangars. Then, assemble your axle and mount your leafs in order to get your shackle angles. My initial angle at full droop was maybe 10 degrees negative, so, I moved the rear hangar forward (1" I believe, don't quite remember) and proceeded with the same process. At full droop, the shackles are at 0 degrees and I've pictured my angle at ride height...
SO. Here is how it sits. Again, don't mind the small tires. It's all a work in progress and rubber isn't cheap.
I've been working through a lot of little side projects in order to get the truck rolling since I'm moving in about a month. Put on the sliders and cage...
I still have to tie the two together, but it doesn't look like it will be difficult at all. Fixed the parking brake, replaced front calipers, acquired some older steering shafts to make a Frankenstein etc. I have a few days of free time and last thing I really need to get done in order for this to roll is the steering.
So this is somewhat of an update. Side note, if you see something in the pictures that makes you think to yourself...WTF? It's probably due to the fact that I'm skipping some projects/steps etc. solely so I can move this thing in a month. My free time is limited, so I'm ecstatic if I get to put in 4 hours on a weekend. Second side note, this whole process would go a million times faster if you had several close-by friends willing to lend you help. That is all.


Thread
Thread Starter
Forum
Replies
Last Post
CPD4runner
86-95 Trucks & 4Runners (Build-Up Section)
9
Nov 5, 2017 06:01 AM
nvwiggins
86-95 Trucks & 4Runners (Build-Up Section)
13
Jun 16, 2016 03:05 PM
1965chevy
86-95 Trucks & 4Runners (Build-Up Section)
1
Sep 20, 2015 07:33 PM


