
Remove interior pieces
 Aug 26, 2010 | 07:49 AM
#1
Thread Starter
Registered User
Joined: Jan 2003
Posts: 147
Likes: 0
From: Nevada City, CA
Remove interior pieces
I have an '02 4Runner that the trailer box has failed. I see from diagrams that it is behind the plastic interior panel. What is the best way to remove this panel without any damage?
Thanks
Thanks


 Aug 26, 2010 | 12:29 PM
#5

Registered User
Joined: Jul 2009
Posts: 8
Likes: 0
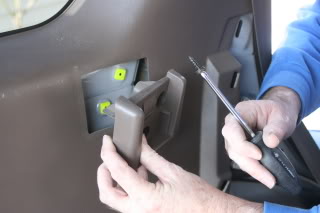
Take out the screws on the trim piece when you open the back hatch. Unscrew the screw that is in the bracket above on the rear of the panel...then it should pop off.
Drivers side, fyi. You can get a replacement on Amazon for about $30 or so that you will connect to the other side. Really easy.
Drivers side, fyi. You can get a replacement on Amazon for about $30 or so that you will connect to the other side. Really easy.
Aug 30, 2010 | 09:30 PM
#6
Registered User
Joined: May 2007
Posts: 2,175
Likes: 2
From: Denver metro area-CO
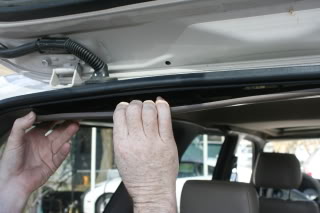
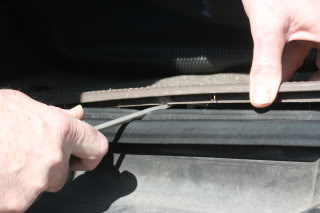
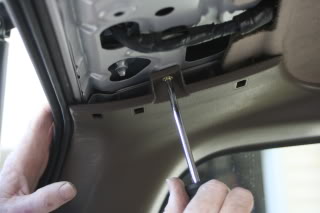
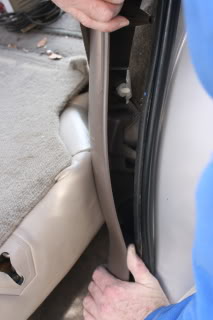
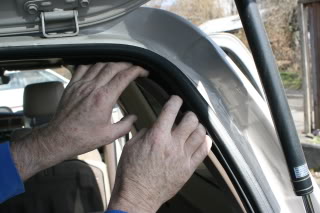
you have to remove the rear trim pieces at the door top (roof) and bottom (carpet). The top is a bit tricky because of the light-take your time and you will see how they all overlap. The side trim jumbo pieces in the cargo area are those pop in fasteners. The piece pulls straight out but the fasteners slide in the trim-so if they stick to the body remove them and slide them back into their grooves.
You even have to remove the rear door sills plate trim to give everything room to move around. And the cargo cover bracket squares.
Hopkins sells on Amazon and is plug and play to the taillight assembly but will require both sides trim to be removed. You may choose to go one side only and splice in. Just keep track of your wire colors and test everything out before you put the vehicle all back together. Trust me on this....
A simple 4 pin tester will help verify it's on the vehicle side and not on the trailer side where you are having the issue. Lastly while you are at it-the 4 pin LED sold also by Hopkins is nice piece of visual reference for any future towing hookups. Relatively easy to splice in instead of just a plain 4 pin that tells you nothing at a glance.
Detailed pics at my Facebook link. Trailer converter or taillight converter is a search topic.
Can't wait to see this 7th injector setup.
Sep 1, 2010 | 08:59 AM
#7


This is along the same route that Ron described, but if you need to completely remove the panel you will need to go a few steps further. I recommend the followingitems you will need to remove;
1) the interior light at the lift gate
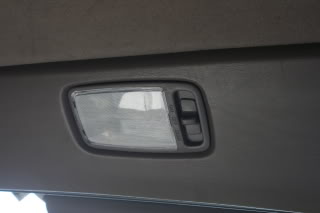
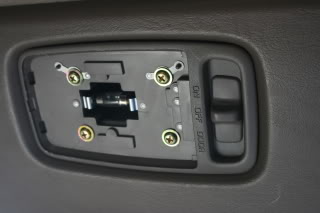
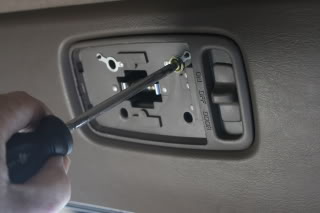
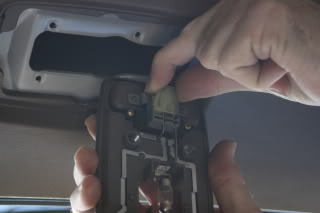
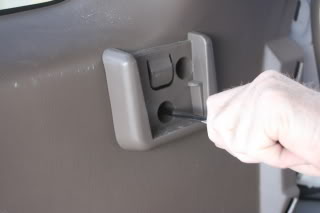
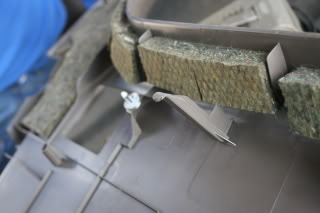
2) remove the upper trim panel that the light goes into.
3) remove the liftgate scruff plate.
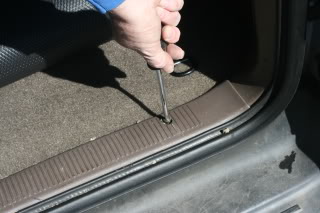
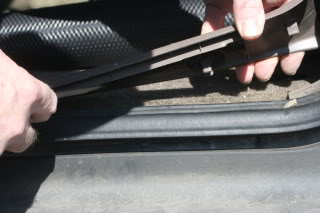
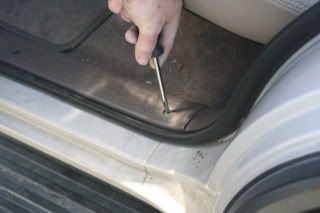
4) remove the passenger door scuff plate screws and pry the plate up. Be careful not to damage or break the screw posts in the scuff plate.
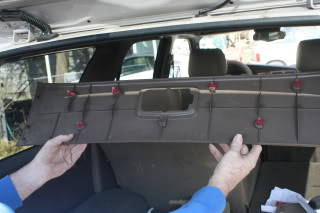
6) remove the cargo cover mounts.
7) remove the upper screw securing the rear cargo cover to the overhead, this is near the lift gate.
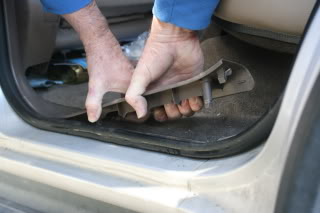
8) begin removing the rear panel starting at the rear passenger door working your way to the rear liftgate. Lift the edge enough to get your fingers under it and lift outward. Be sure to be careful with this step as there is a standoff behind the cover that hooks into a sqaure hole in the fenderwell. If you are not aware of this you can damage your panel.
This is the caution I mentioned:
9) I would recommend laying the rear seats down so you can lay the panel over so as to get at the rear areas and not have to remove the seatbelts.
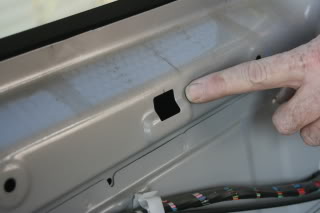
10) to make it easier I would disconnect the wires/connectors going to your rear 12vdc oultet.
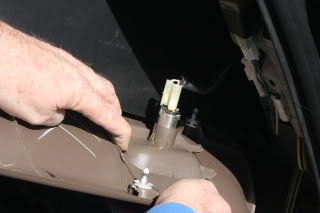
You should have free and clear access to the rear tail light cables/harness to install your trailer light box. Installation is just the reverse. If you need to remove both sides, then repeat the removal of the applicable pieces on the left side. Hope I didn't forget something and also that this helps you to get to the rear lighting harness

Trending Topics

Thread
Thread Starter
Forum
Replies
Last Post
HookahRoo
86-95 Trucks & 4Runners (Build-Up Section)
4
Jul 20, 2015 07:06 PM
crashburnoveride
86-95 Trucks & 4Runners
1
Jul 10, 2015 06:39 AM


