
Painted LC Wheels for my Runner
 Nov 25, 2007 | 10:54 AM
#1
Thread Starter
Registered User
Joined: Oct 2006
Posts: 148
Likes: 0
From: Christiansburg, VA
Painted LC Wheels for my Runner
Before and after sanding

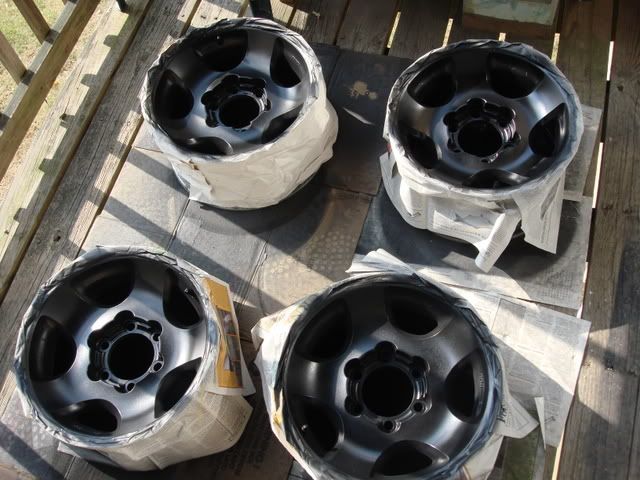
Primer and masked silver rim
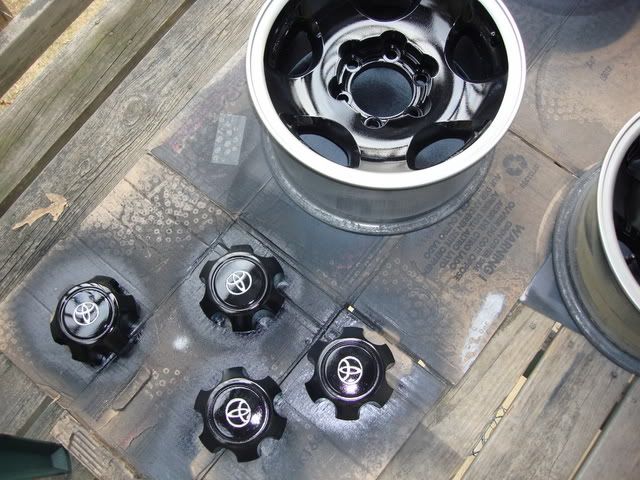
Center caps painted black and masked for silver symbol paint

Center caps done
Wheels done!
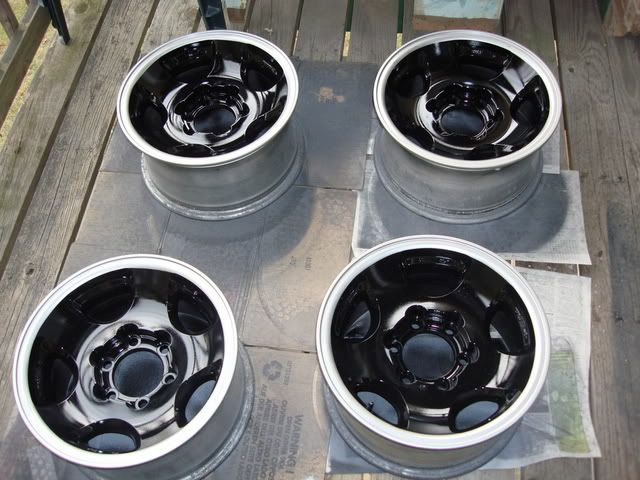
Overall, I am happy with the results. I used duplicolor wheel paint with the same methods described on this board many times. There are some imperfections that I will be able to live with. I chose a nice windy fall day to do this out on my apartment balcony and had to deal with many leaves and crap flying around. I have some doubts for longterm durablity, but time will tell. Let me know what you think. I am preparing to get 285 MTZs mounted on these and install the Toytec OME lift next weekend.
Primer and masked silver rim
Center caps painted black and masked for silver symbol paint
Center caps done
Wheels done!
Overall, I am happy with the results. I used duplicolor wheel paint with the same methods described on this board many times. There are some imperfections that I will be able to live with. I chose a nice windy fall day to do this out on my apartment balcony and had to deal with many leaves and crap flying around. I have some doubts for longterm durablity, but time will tell. Let me know what you think. I am preparing to get 285 MTZs mounted on these and install the Toytec OME lift next weekend.
Nov 25, 2007 | 11:25 AM
#4
Thread Starter
Registered User
Joined: Oct 2006
Posts: 148
Likes: 0
From: Christiansburg, VA
Thanks! I would guess about 3-4 hours total with prep work and 3-4 hours painting. I had to wait for the paint to dry fairly well before masking. The prep would have gone faster if I didn't hand sand everything. I too can't wait to have them mounted. My runner is silver and should match pretty close to the silver used.
 Nov 25, 2007 | 03:24 PM
#7
Thread Starter
Registered User
Joined: Oct 2006
Posts: 148
Likes: 0
From: Christiansburg, VA
Clear is on. I used 2 coats primer, 3 coats color, and 2 coats clear. The black was not as glossy until the clear coat went on, but I think I like it better than the flat black.
Trending Topics
Nov 26, 2007 | 06:23 AM
#12
Registered User
Joined: Jul 2006
Posts: 1,836
Likes: 0
From: Tennessee
Looks good. Personally, I'd just paint the whole thing black. Never knew what the big deal was with the silver lips. I've painted my track wheels for my old Integra and used flat black. Came out very nice, even with some cheap paint.
The good thing about this is you can touch up any parts that flake/chip really easy.
The good thing about this is you can touch up any parts that flake/chip really easy.
Nov 26, 2007 | 07:59 AM
#13
Thread Starter
Registered User
Joined: Oct 2006
Posts: 148
Likes: 0
From: Christiansburg, VA
Looks good. Personally, I'd just paint the whole thing black. Never knew what the big deal was with the silver lips. I've painted my track wheels for my old Integra and used flat black. Came out very nice, even with some cheap paint.
The good thing about this is you can touch up any parts that flake/chip really easy.
The good thing about this is you can touch up any parts that flake/chip really easy.
Total cost for paint, sanding paper, and tape was right around $50. I have some paint left over for touchups. It was a little less than a can of paint to give a nice med. thick coat to all 4 wheels and center caps.

 Nov 29, 2007 | 01:56 PM
#17
Registered User
Joined: Jan 2007
Posts: 564
Likes: 3
From: Kingston, WA
those look nice!
they remind me of these procomp wheels:
http://www.4wheelparts.com/PDT64875.aspx
only they look better, they are toyota, and they don't have the stupid little ring arount the edge, with the little indents in between the screws that are impossible to clean (ask me how i know )
)
I think I could go without the silver ring, but it does fit your 4runner nicely, overall great job though, and not something I have seen before,
how hard was it to mask the logo on the center caps?
they remind me of these procomp wheels:
http://www.4wheelparts.com/PDT64875.aspx
only they look better, they are toyota, and they don't have the stupid little ring arount the edge, with the little indents in between the screws that are impossible to clean (ask me how i know
)I think I could go without the silver ring, but it does fit your 4runner nicely, overall great job though, and not something I have seen before,
how hard was it to mask the logo on the center caps?
Nov 29, 2007 | 02:00 PM
#18
Registered User
Joined: Jan 2007
Posts: 564
Likes: 3
From: Kingston, WA
Overall, I am happy with the results. I used duplicolor wheel paint with the same methods described on this board many times. There are some imperfections that I will be able to live with. I chose a nice windy fall day to do this out on my apartment balcony and had to deal with many leaves and crap flying around. I have some doubts for longterm durablity, but time will tell. Let me know what you think. I am preparing to get 285 MTZs mounted on these and install the Toytec OME lift next weekend.
Nov 29, 2007 | 02:02 PM
#19

Registered User
Joined: Sep 2007
Posts: 386
Likes: 0
From: Ft.Lauderdale, FL


