
Gauge and dash backlighting
 Feb 9, 2010 | 08:59 AM
#341

Registered User
Joined: Feb 2003
Posts: 99
Likes: 0
From: BC
You need to remove the cluster "glass" and the black bezel. The blinkers covers are green plastic things that are clipped in. If you want to get them out, take out the bulb from behind and poke a screwdriver threw to push them out.
Feb 9, 2010 | 09:01 AM
#342

just sand it..look at my post on this thread, you can use colored tape to get the color you want, oh nevermind your referring to the blinker arrows, thought you were talking about the gauges
https://www.yotatech.com/forums/f116...06/index4.html
https://www.yotatech.com/forums/f116...06/index4.html
Last edited by joeynational; Feb 9, 2010 at 12:11 PM.
 Feb 9, 2010 | 10:18 PM
#345
Registered User
Joined: Jul 2009
Posts: 13
Likes: 0
Feb 10, 2010 | 03:16 PM
#346
Registered User
Joined: Sep 2009
Posts: 228
Likes: 0
Ok, I'm going to post this here, and see if I get any help.
I took apart my cigarette lighter bulb holder, and got the stock bulb out intact. I have to melt the solder that holds the two wire leads from the bulb to the pins...and then I'll be replacing the factory bulb with a plain jane white LED from Radio Shack. Now my question: I don't what specs I need for the LED or a resistor. I'm trying to research how this works, but right now I'm a butt naked noob.
I know different color's equal different voltage drops. Basically a blue led uses more voltage to get the blue color than a red led uses to be red. What I don't know is how to actually figure out if I need a resistor, and if so, what type.
I've looked at the resistor calculators, but they don't make sense to me yet, because I don't know what numbers to plug in where. What is my supply voltage? 12? or 13.9? How precise do I have to be when figuring? Or is the cig lighter not even getting the full voltage in the first place because there is already a resistor inline from the factory?
Help?
Last edited by quicksilvr; Feb 10, 2010 at 03:20 PM.
Feb 10, 2010 | 05:45 PM
#347
Ok, I'm going to post this here, and see if I get any help.
I took apart my cigarette lighter bulb holder, and got the stock bulb out intact. I have to melt the solder that holds the two wire leads from the bulb to the pins...and then I'll be replacing the factory bulb with a plain jane white LED from Radio Shack. Now my question: I don't what specs I need for the LED or a resistor. I'm trying to research how this works, but right now I'm a butt naked noob.
I know different color's equal different voltage drops. Basically a blue led uses more voltage to get the blue color than a red led uses to be red. What I don't know is how to actually figure out if I need a resistor, and if so, what type.
I've looked at the resistor calculators, but they don't make sense to me yet, because I don't know what numbers to plug in where. What is my supply voltage? 12? or 13.9? How precise do I have to be when figuring? Or is the cig lighter not even getting the full voltage in the first place because there is already a resistor inline from the factory?
Help?
I took apart my cigarette lighter bulb holder, and got the stock bulb out intact. I have to melt the solder that holds the two wire leads from the bulb to the pins...and then I'll be replacing the factory bulb with a plain jane white LED from Radio Shack. Now my question: I don't what specs I need for the LED or a resistor. I'm trying to research how this works, but right now I'm a butt naked noob.
I know different color's equal different voltage drops. Basically a blue led uses more voltage to get the blue color than a red led uses to be red. What I don't know is how to actually figure out if I need a resistor, and if so, what type.
I've looked at the resistor calculators, but they don't make sense to me yet, because I don't know what numbers to plug in where. What is my supply voltage? 12? or 13.9? How precise do I have to be when figuring? Or is the cig lighter not even getting the full voltage in the first place because there is already a resistor inline from the factory?
Help?
you can probably get more for your money on ebay, plus most of the sellers throw in resistors as well
here is the calculator i use, i like it because it gives you multiple ways to look at it,schematic,diagram etc.
http://led.linear1.org/led.wiz
Feb 10, 2010 | 08:01 PM
#348
Registered User
Joined: Sep 2009
Posts: 228
Likes: 0
you can check what your truck is actually putting out or just go by 12v for source voltage(keep in mind if you go by what your truck is putting out when running, the leds will not be as bright when it is off), then your going to get the specs of the LEDs you buy, they almost always come with specs, your forward voltage is what they run at for example; 2.3v-2.8v..if you can run them at the minimum, limit or anywhere in between, next your forward current is what they are rated at in mA, the regular dome leds your probably going to get from radio shack are probably 20mA
you can probably get more for your money on ebay, plus most of the sellers throw in resistors as well
here is the calculator i use, i like it because it gives you multiple ways to look at it,schematic,diagram etc.
http://led.linear1.org/led.wiz
you can probably get more for your money on ebay, plus most of the sellers throw in resistors as well
here is the calculator i use, i like it because it gives you multiple ways to look at it,schematic,diagram etc.
http://led.linear1.org/led.wiz
Sweet, awesome, muchos gracias! After poking around on that site, it all makes sense. I know exactly what I need now.
Last question: one of the leads off the LED is longer than the other....is that the + or the -? I assume I have to put the resistor on the correct side.
Feb 19, 2010 | 04:51 PM
#349
Registered User
Joined: Sep 2009
Posts: 228
Likes: 0
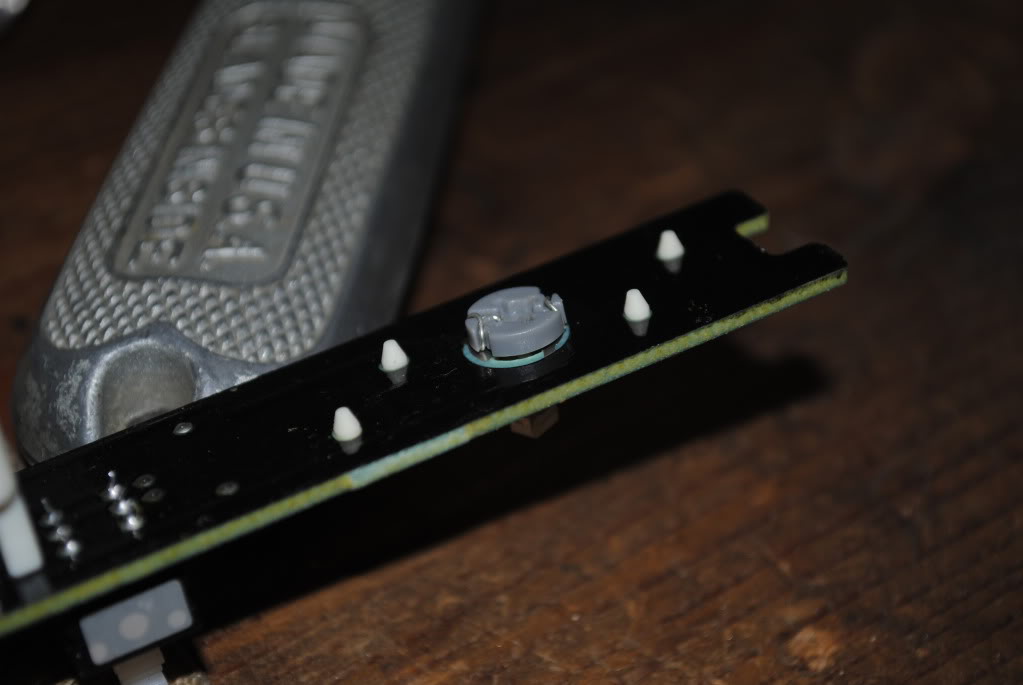
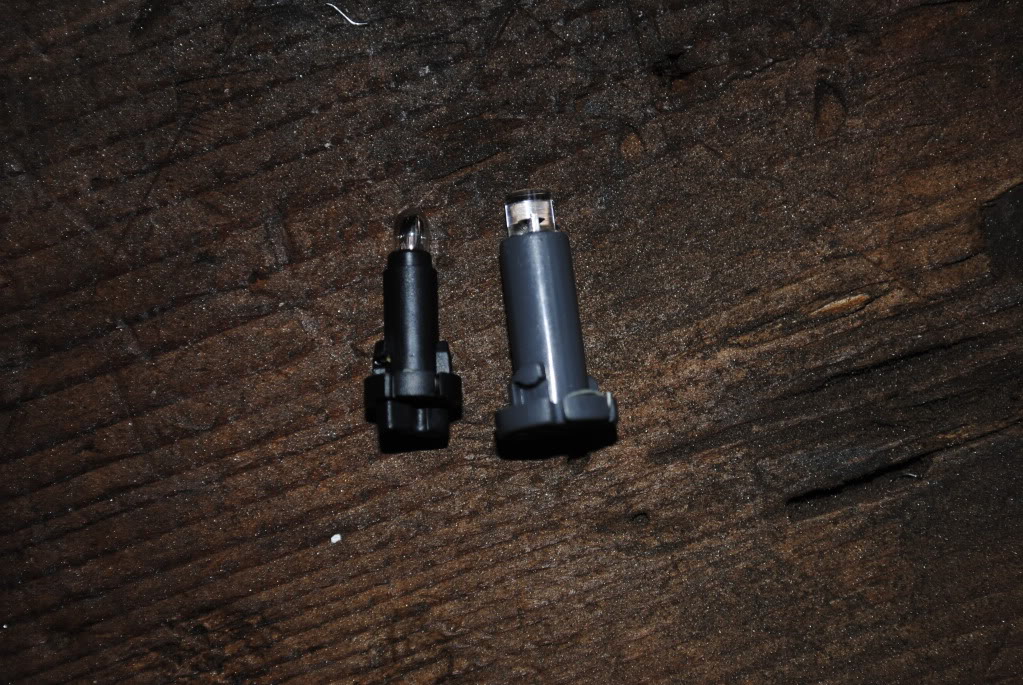
I ditched the radio shack LED idea as soon as I realized I had leftover neo-wedge LED's that I could simply take the LED out of the base and use. I took some pictures for reference since the cigarette lighter seems to baffle people more than any of the others.
Plastic base with bulb and pins out of it.
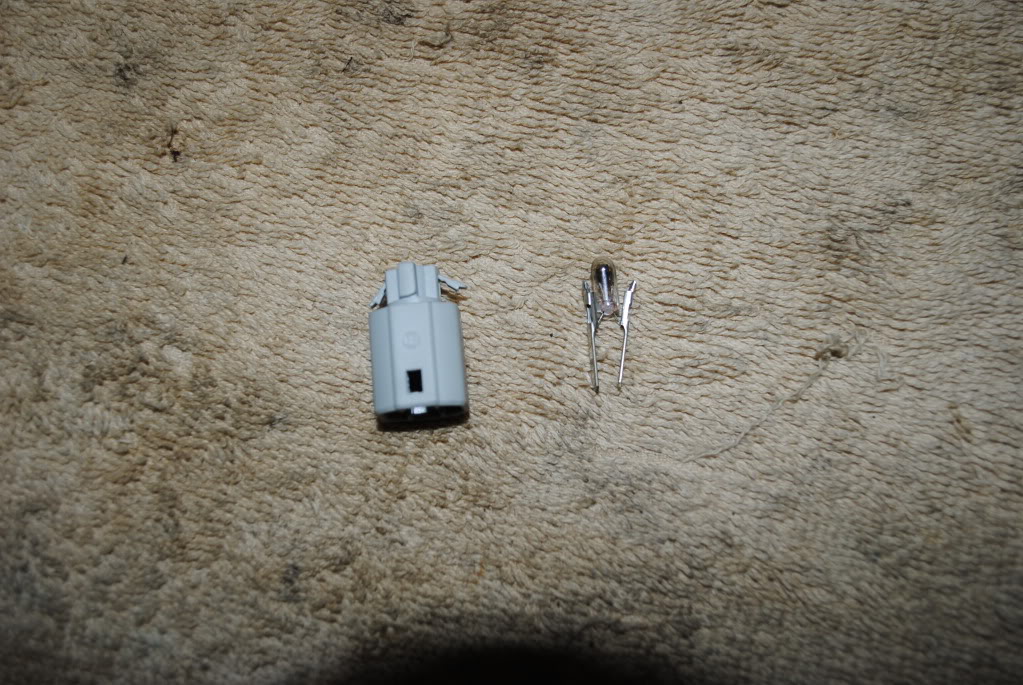
Factory bulb and pins after removal from base
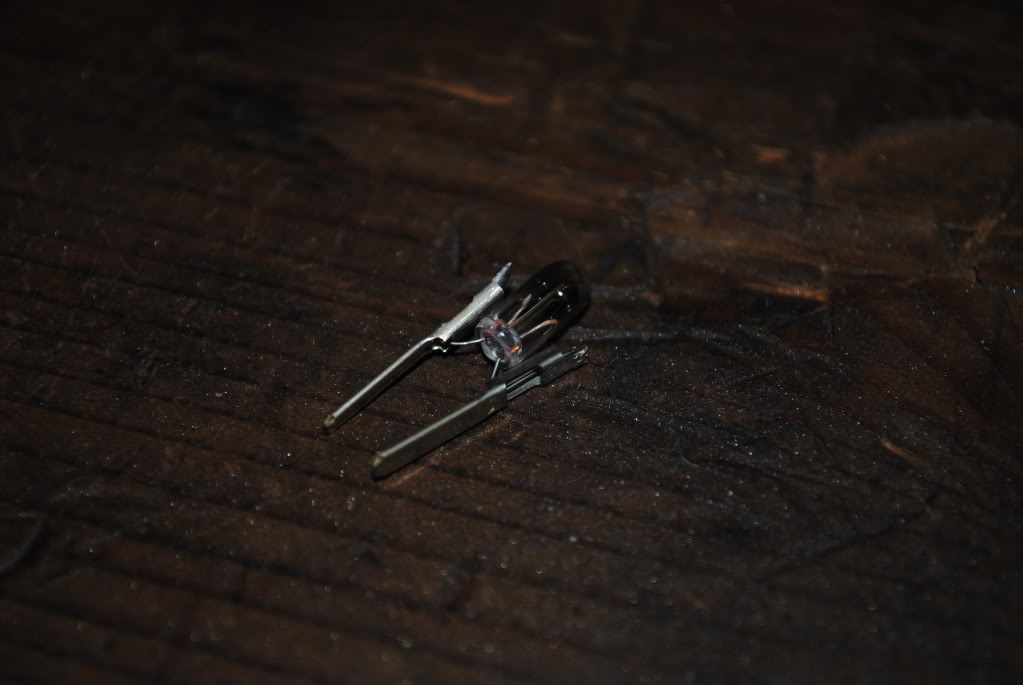
Japanese style Type A neo-wedge from autolumination. This is the smallest they have...the other Type A's are larger. Left is original, right is after soldering into 4runner pins.
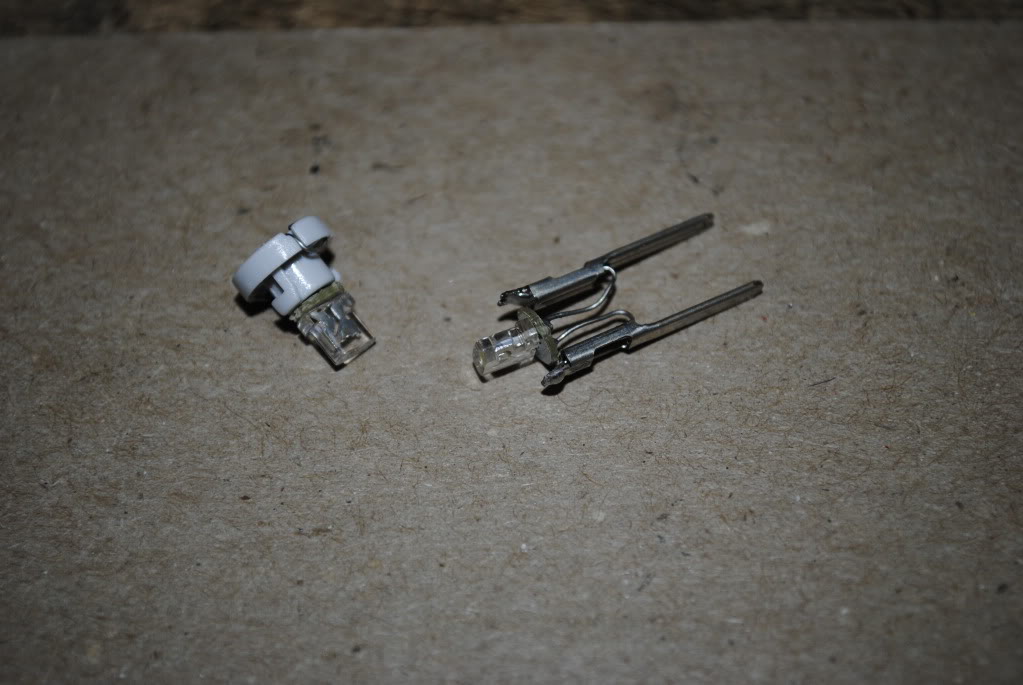
Single neo-wedge LED completely installed into cig lighter plastic base.

Plastic base with bulb and pins out of it.
Factory bulb and pins after removal from base
Japanese style Type A neo-wedge from autolumination. This is the smallest they have...the other Type A's are larger. Left is original, right is after soldering into 4runner pins.
Single neo-wedge LED completely installed into cig lighter plastic base.
Last edited by quicksilvr; Feb 19, 2010 at 04:53 PM.
Feb 19, 2010 | 05:00 PM
#350
Registered User
Joined: Sep 2009
Posts: 228
Likes: 0
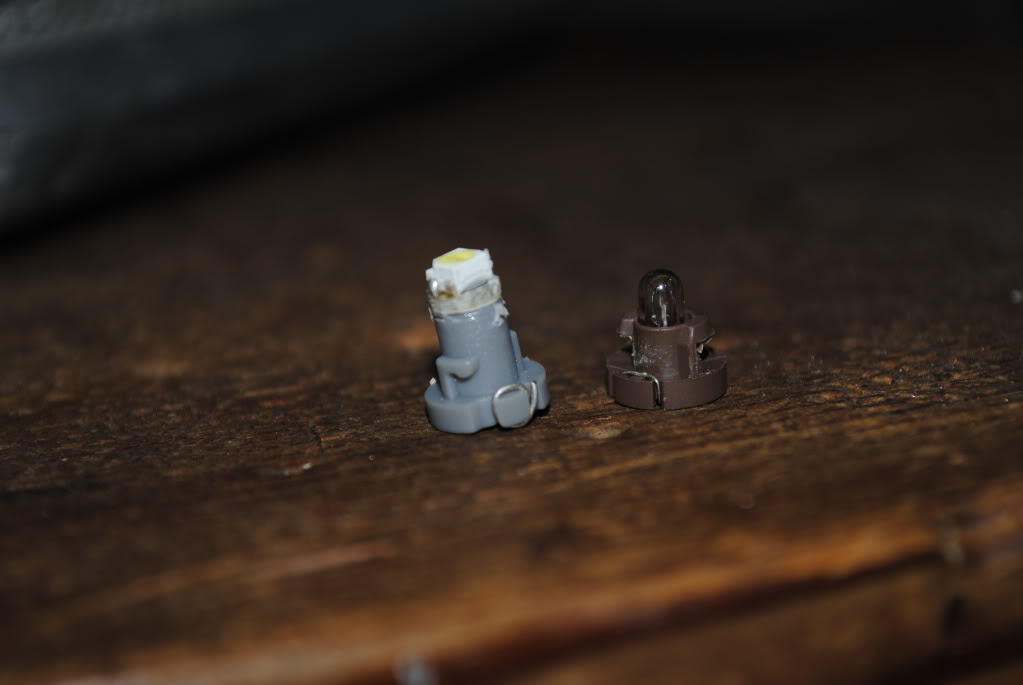
And here are some pictures for the bulbs for the rear window button, defrost button and ECT button. It's just two bulbs.
1999 SR5.
Stock bulb (right) compared to a Type A smt LED from autolumination. I had to turn down the LED on my bench grinder to make it fit...it's already been ground down in this picture. The disc under the SMT LED is too big initially...that's what I ground off.
Installed. They would not turn and lock into place, cause the notches aren't big enough. But since the whole entire bulb base was so big, they stuck just fine by friction.
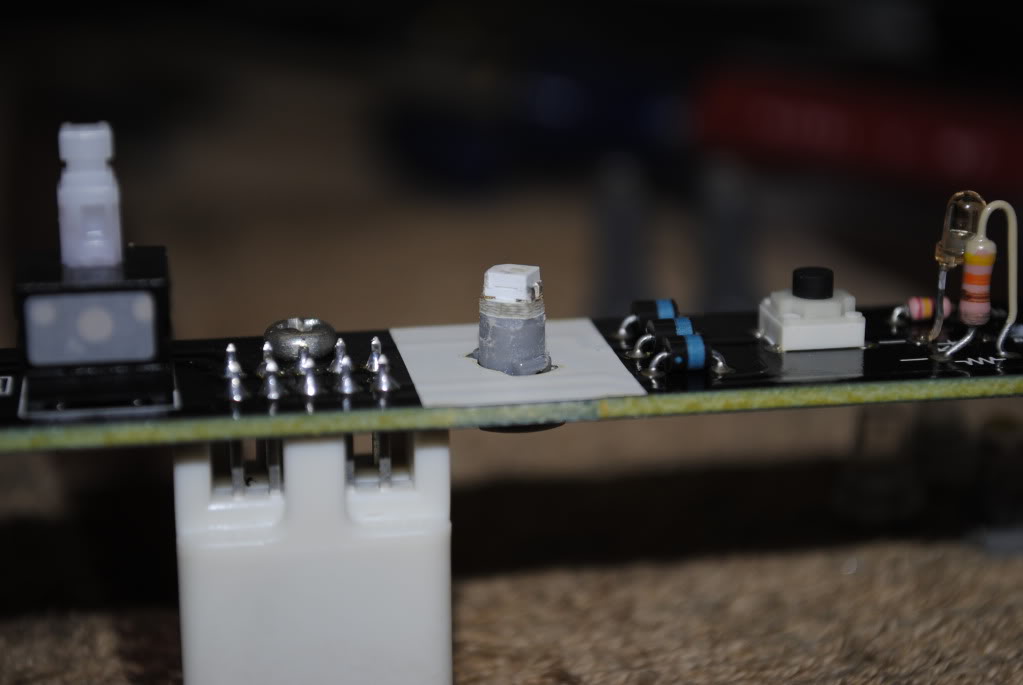
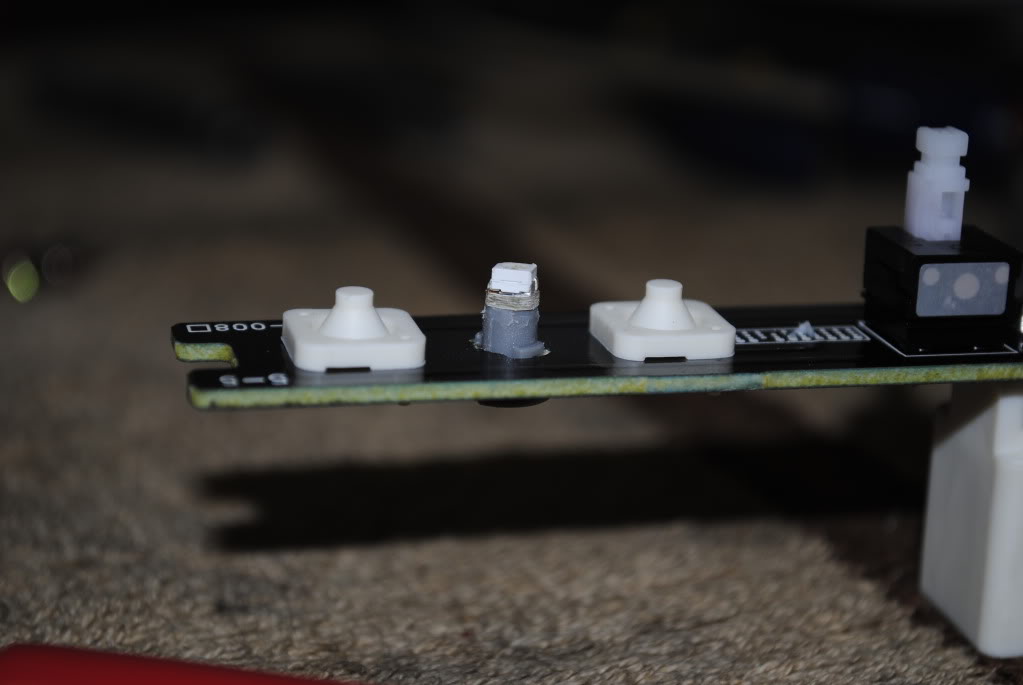

I used two of the exact same bulb...even though the factory bulbs are not the same. One is tall and one is short. The only tall LED's available are Type B though....WAY too big. Pic for reference. The short LED works great in the spot where the factory had a tall bulb....because it's so much brighter than the stock bulb.
1999 SR5.
Stock bulb (right) compared to a Type A smt LED from autolumination. I had to turn down the LED on my bench grinder to make it fit...it's already been ground down in this picture. The disc under the SMT LED is too big initially...that's what I ground off.
Installed. They would not turn and lock into place, cause the notches aren't big enough. But since the whole entire bulb base was so big, they stuck just fine by friction.
I used two of the exact same bulb...even though the factory bulbs are not the same. One is tall and one is short. The only tall LED's available are Type B though....WAY too big. Pic for reference. The short LED works great in the spot where the factory had a tall bulb....because it's so much brighter than the stock bulb.
Feb 19, 2010 | 05:09 PM
#351
Registered User
Joined: Sep 2009
Posts: 228
Likes: 0
Summary of 1999 SR5 Highlander LED install:
Gauge Cluster: 3 #24. The bases were too big and I had to grind them down. I almost could have used #74's, but they would have been a little loose.
Gauge Cluster warnings, etc: All #74. I didn't change any, but that's what they are.
Key Ring: #74
Rear Window, ECT and Defrost: 2 Type A Neo-wedge SMT LED's. Had to grind these a little as well to make them fit. See pics above.
HVAC: 2 #74
Cig Lighter: I used a single LED out of a type-a neowedge. It must be soldered onto the pins that click into the plastic base. Any LED that is designed for car use will work....a generic LED will need a resistor. Pics in previous post.
Ash Tray: 1 #74
Glove Box: 1 #74
Shifter PRND2L: 1 #74. There is still a green film on the plastic selector. Since I did white, it's pretty obvious. Any other color LED's probably wouldn't matter as much.
Mar 6, 2010 | 04:53 PM
#352
Registered User
Joined: Feb 2003
Posts: 99
Likes: 0
From: BC
Summary of 1999 SR5 Highlander LED install:
Gauge Cluster: 3 #24. The bases were too big and I had to grind them down. I almost could have used #74's, but they would have been a little loose.
Gauge Cluster warnings, etc: All #74. I didn't change any, but that's what they are.
Key Ring: #74
Rear Window, ECT and Defrost: 2 Type A Neo-wedge SMT LED's. Had to grind these a little as well to make them fit. See pics above.
HVAC: 2 #74
Cig Lighter: I used a single LED out of a type-a neowedge. It must be soldered onto the pins that click into the plastic base. Any LED that is designed for car use will work....a generic LED will need a resistor. Pics in previous post.
Ash Tray: 1 #74
Glove Box: 1 #74
Shifter PRND2L: 1 #74. There is still a green film on the plastic selector. Since I did white, it's pretty obvious. Any other color LED's probably wouldn't matter as much.
Gauge Cluster: 3 #24. The bases were too big and I had to grind them down. I almost could have used #74's, but they would have been a little loose.
Gauge Cluster warnings, etc: All #74. I didn't change any, but that's what they are.
Key Ring: #74
Rear Window, ECT and Defrost: 2 Type A Neo-wedge SMT LED's. Had to grind these a little as well to make them fit. See pics above.
HVAC: 2 #74
Cig Lighter: I used a single LED out of a type-a neowedge. It must be soldered onto the pins that click into the plastic base. Any LED that is designed for car use will work....a generic LED will need a resistor. Pics in previous post.
Ash Tray: 1 #74
Glove Box: 1 #74
Shifter PRND2L: 1 #74. There is still a green film on the plastic selector. Since I did white, it's pretty obvious. Any other color LED's probably wouldn't matter as much.
Do you have any pics of the final setup at night? I just tried to do mine with LEDs from Superbrite and the bulbs were loose to the point where they fall out. And they put out nothing but hot spots.
Also, were the Autoillumination lights good? I've heard bad things about them but it seems like all these style things are cheaply made.
Mar 7, 2010 | 12:56 PM
#353
Do you have any pics of the final setup at night? I just tried to do mine with LEDs from Superbrite and the bulbs were loose to the point where they fall out. And they put out nothing but hot spots.
Also, were the Autoillumination lights good? I've heard bad things about them but it seems like all these style things are cheaply made.
Also, were the Autoillumination lights good? I've heard bad things about them but it seems like all these style things are cheaply made.
"#74 too small?.....#194 too big?.....This is your bulb:
#24 (T6-1/2, T2-1/4) bulbs are 3/4" (20mm) x 3/8 (8mm)" diameter"
UPDATE: #24s DO NOT FIT! I had hoped that since the last batch of #74s I bought were loose in the sockets that #24s would do the trick, but they are significantly larger than the base of the #74s, DON'T BUY #24s and expect them to fit where #74s were. I did get some #74s from autolumination and they fit very nicely, I guess I must have gotten a bad batch last time.
So I may buy a couple of those and see if they fit right and give off a better light pattern for the heat and A/C controls. I'll be purchasing in the next week or so and I'll post back with any relevant info.
Last edited by pattycakes77; Mar 30, 2010 at 03:10 PM.
Mar 7, 2010 | 01:56 PM
#354
Contributing Member
Joined: Nov 2006
Posts: 1,434
Likes: 0
From: GSU/ATL/SD
I had problems with the #74s being too loose as well, tried using various products like rubber cement to lock them in but they work themselves out eventually. Other bulbs have simply burned out, much quicker than the stock incandescent bulbs. I think the LEDs are brighter and give off better color, as well as an abundance of color options and products for light dissipation. I bought mine of Ebay and was raped on shipping charges for such a light weight package. This time I'll try out Autolumination and see what happens. They advertise a #24 bulb with 5 LEDs saying
"#74 too small?.....#194 too big?.....This is your bulb:
#24 (T6-1/2, T2-1/4) bulbs are 3/4" (20mm) x 3/8 (8mm)" diameter"
So I may buy a couple of those and see if they fit right and give off a better light pattern for the heat and A/C controls. I'll be purchasing in the next week or so and I'll post back with any relevant info.
Mar 7, 2010 | 06:19 PM
#355
Already working on one, for my own reference and for anyone else in the '96-'98 range. I got my digital caliper last week and already spec'd out the various neo wedge bulbs to buy. I'll post everything once it's done, if I find which bulbs fit and give a good light pattern. Maybe just get the list of the bulbs first and then people can experiment with different style of bulbs and report on the light pattern good or bad.
Mar 7, 2010 | 09:49 PM
#356
Registered User
iTrader: (2)
Joined: Dec 2009
Posts: 2,159
Likes: 7
From: Pleasanton, CA - SF Bay Area
I've been looking through what I think is all of the 15 pages here and most seems to focus on newer generations of trucks and 4runners....have any of you guys done this with first gen 4runners? My SR5 dash's lights are faded and sometimes don't work in certain parts of the dash (I have to whack the top of the dash to get them back on).
Would like to explore replacing with brighter LEDs in either green or orange/red (like my BMW and Datsun - easier on the eyes).
Did I miss something?
Would like to explore replacing with brighter LEDs in either green or orange/red (like my BMW and Datsun - easier on the eyes).
Did I miss something?
Mar 8, 2010 | 08:38 AM
#357
I've been looking through what I think is all of the 15 pages here and most seems to focus on newer generations of trucks and 4runners....have any of you guys done this with first gen 4runners? My SR5 dash's lights are faded and sometimes don't work in certain parts of the dash (I have to whack the top of the dash to get them back on).
Would like to explore replacing with brighter LEDs in either green or orange/red (like my BMW and Datsun - easier on the eyes).
Did I miss something?
Would like to explore replacing with brighter LEDs in either green or orange/red (like my BMW and Datsun - easier on the eyes).
Did I miss something?
 Mar 30, 2010 | 08:08 AM
#359
Registered User
Joined: Feb 2010
Posts: 71
Likes: 0
From: Denver, CO
just about finished on my 99. I had to re-order my gauge lights cause I thought they were 194 but definitely not! So the gauge lights are on the way. During this process I had about 20 massive led's lyin around so I decided to do some courtesy lighting and illumination in the box behind the cup holders and inside the lower compartment of the center console. Finished everything (but the gauges) up yesterday. I am VERY impressed how good it looks. Thanks to EVERYONE on this forum for all the information. it was really helpful.


