
Fuel Injector Removal Pictures (How To)
 Mar 6, 2007 | 11:15 PM
#1
Thread Starter
Registered User
Joined: May 2002
Posts: 402
Likes: 0
From: LA, CA
Fuel Injector Removal Pictures (How To)
1997 V6 4Runner - Engine 5VZFE
Well, I figured I might as well post my pictures for anyone who might search for this later on. I also want to type it all out so I don't forget so that I know how to put it back together later on
I got the info I needed mostly from this thread.
Ignore the dirt please I haven't bothered cleaning the engine bay in a couple years, and snowboarding trips really do a number on it. Also, consider this a rough guide, as there were a lot of hoses, so I probably missed something!
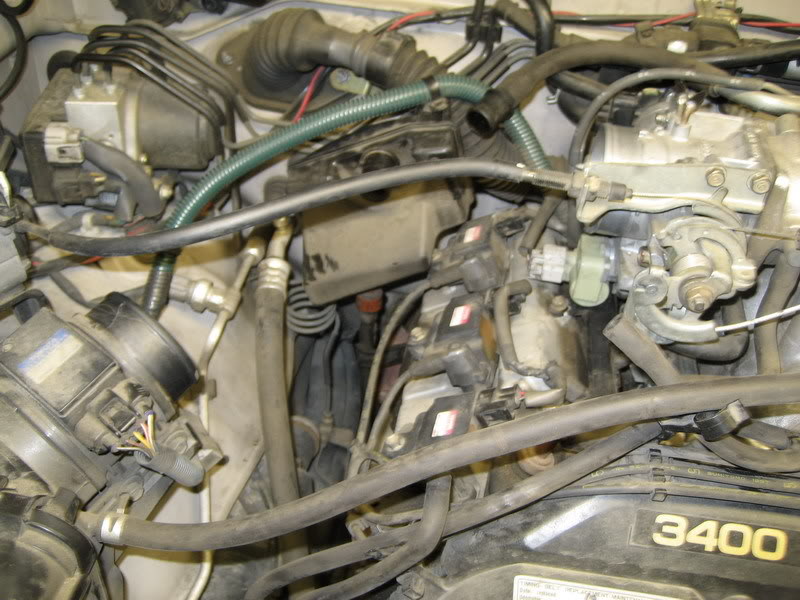
Here's before pics to use as reference later when I put it all back together.
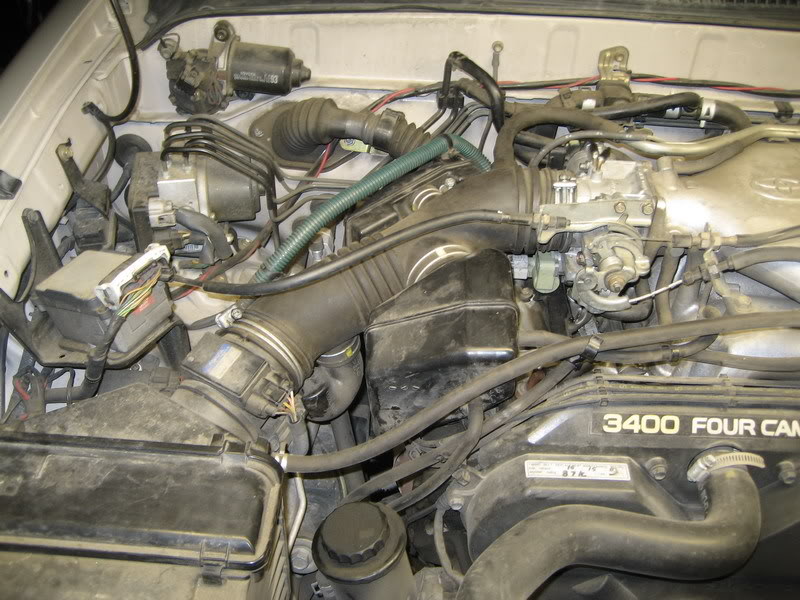
Left side
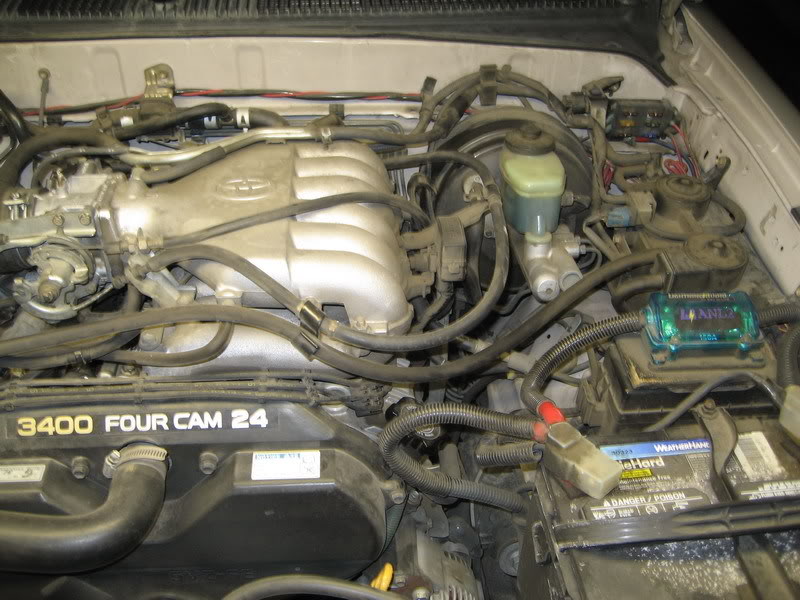
Right side
From the left fender
From the right fender
Well, I figured I might as well post my pictures for anyone who might search for this later on. I also want to type it all out so I don't forget so that I know how to put it back together later on
I got the info I needed mostly from this thread.
Ignore the dirt please
I haven't bothered cleaning the engine bay in a couple years, and snowboarding trips really do a number on it. Also, consider this a rough guide, as there were a lot of hoses, so I probably missed something!Here's before pics to use as reference later when I put it all back together.
Left side
Right side
From the left fender
From the right fender
Last edited by DuB; Mar 6, 2007 at 11:41 PM.
Mar 6, 2007 | 11:25 PM
#2
Thread Starter
Registered User
Joined: May 2002
Posts: 402
Likes: 0
From: LA, CA
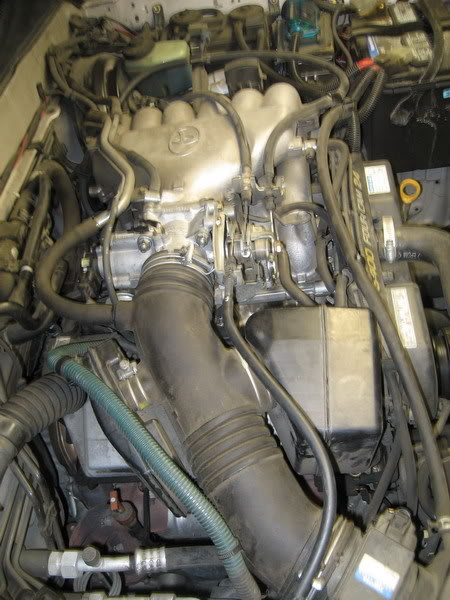
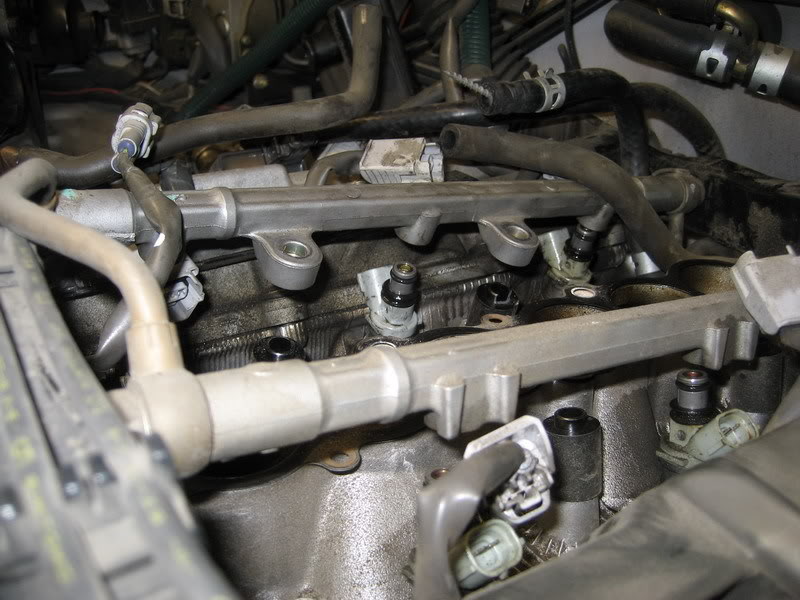
First, I removed the intake tube. I left the back intake silencer on because it was zip tied to a harness. To take it out, just loosen the two clamps on the MAF and the throttle body, slip them off, and disconnect any tubes that will prevent you from removing the intake.
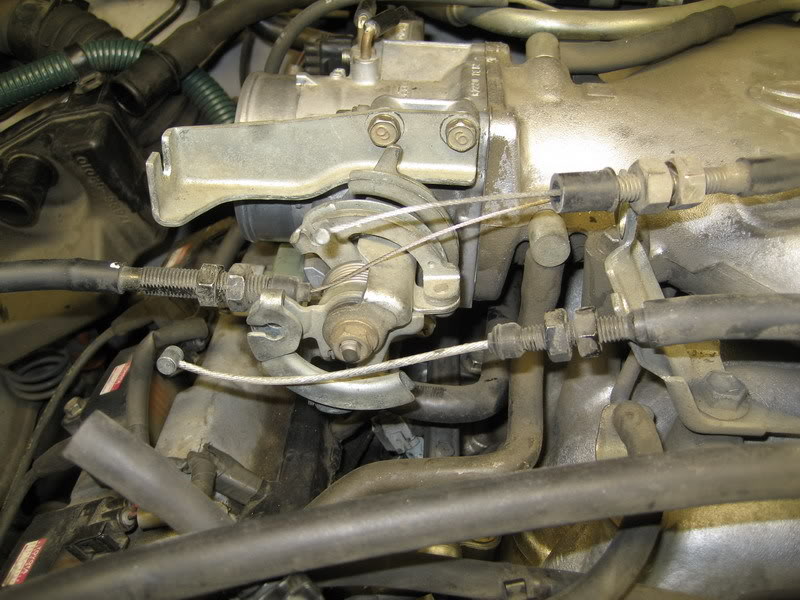
Use a wrench (14mm I think) to loosen the nuts holding these cables onto their brackets, then slide the round thingys out from the side.

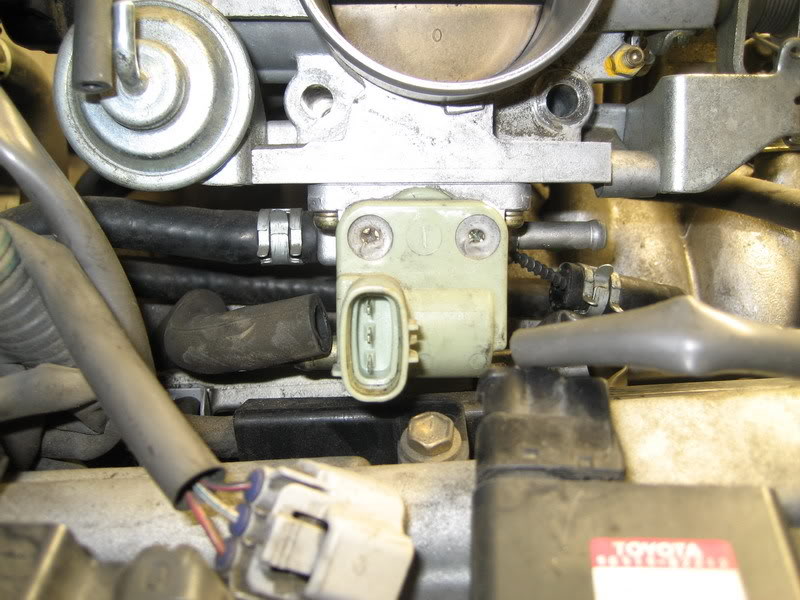
Two nuts on top, and two bolts on the bottom hold the throttle body in. Take those off. There's also the two electrical connectors on the left (black) and bottom (grey), the skinny hose (middle left), and three more hoses in the next pic.
I've disconnected two of the hoses here, one middle left, and middle right (has a screw sticking out of it). The third is still clamped in place, which I removed later. I didn't see it until I started moving the throttle body around. The two hoses with clamps might not need to be disconnected. You might be able to set it aside to the passenger side.
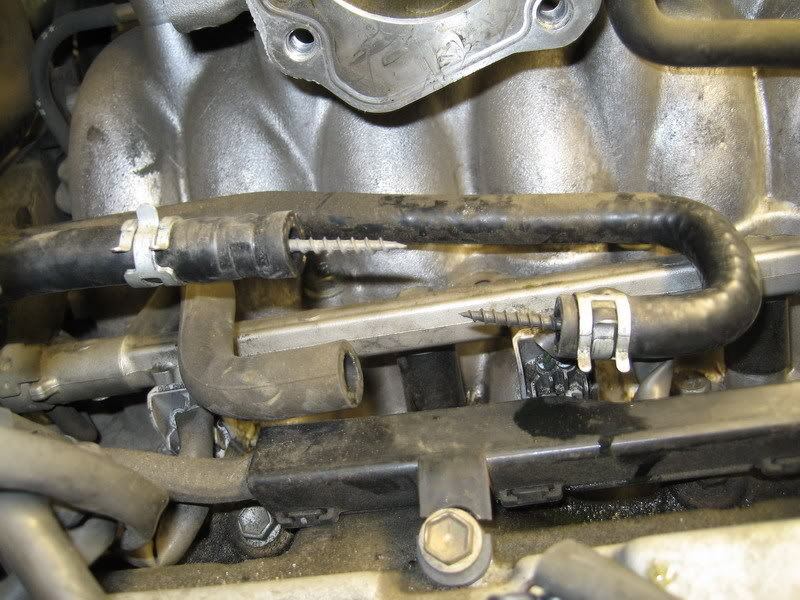
I disconnected both of them though. Here are the three hoses which were underneath the throttle body. I stuck screws in the hoses to plug them because they were leaking coolant.
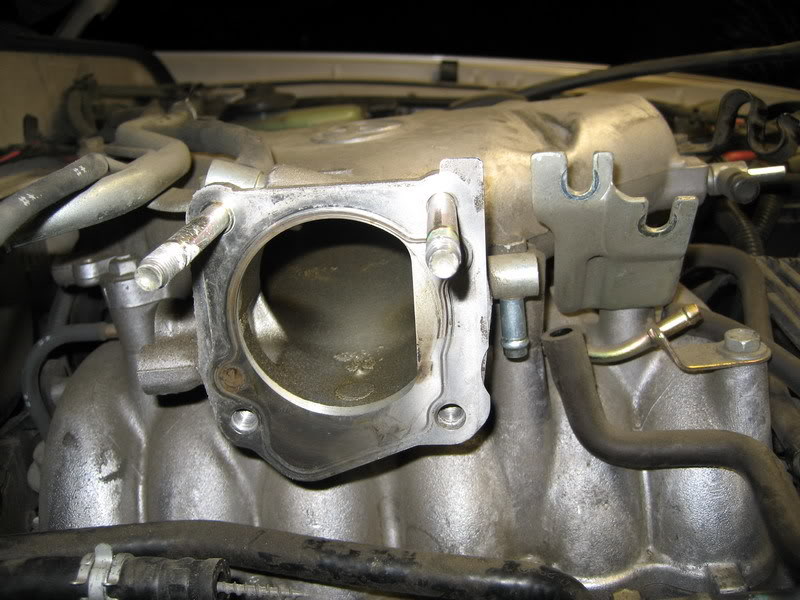
After the throttle body is removed, there's a gasket that you should probably take off and put somewhere safe where it won't get damaged.
Last edited by DuB; Mar 6, 2007 at 11:31 PM.
Mar 6, 2007 | 11:37 PM
#4
Thread Starter
Registered User
Joined: May 2002
Posts: 402
Likes: 0
From: LA, CA

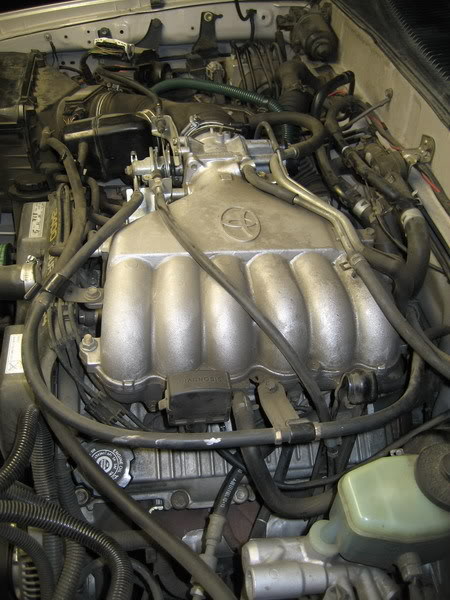
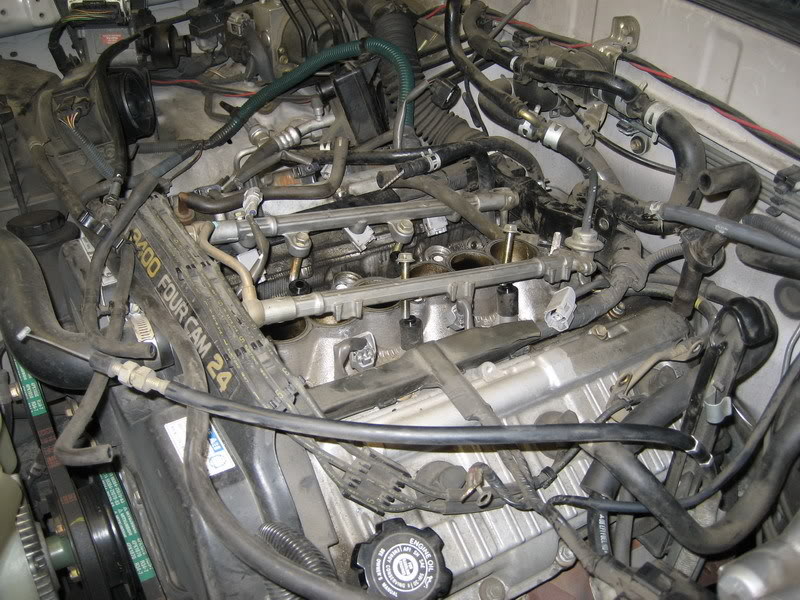
These three hoses need to come off.
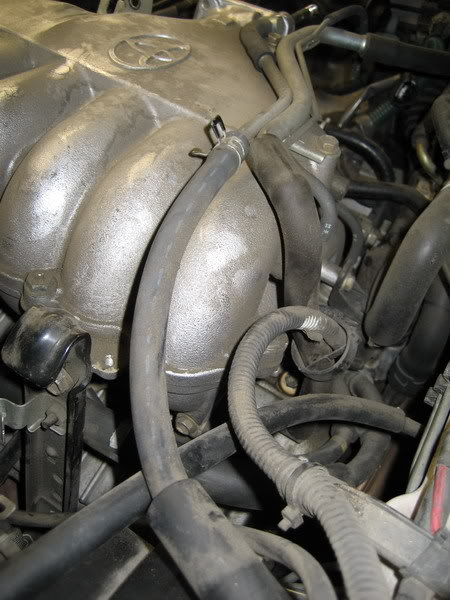
These two hoses on the back driver's side need to come off, too.
This wide shot shows where they are located. The DIAGNOSIS box needs to be unhooked.

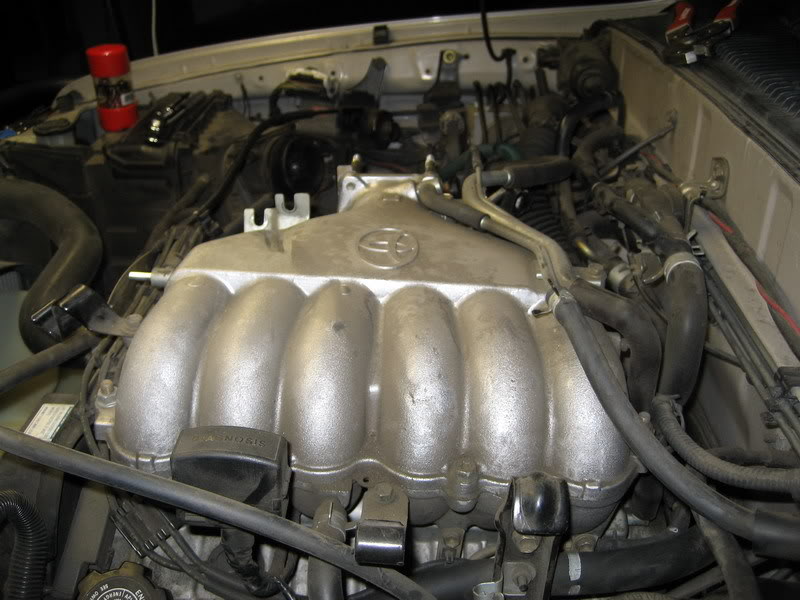
There are 6 bolts holding the top half on. This pic shows their approximate location. They're pretty easy to find. There's actually another bolt that should be at the top of this pic that's the opposite of the bottom bolt.
Then the top half should now lift off.
Last edited by DuB; Mar 6, 2007 at 11:38 PM.
Mar 6, 2007 | 11:53 PM
#6
Thread Starter
Registered User
Joined: May 2002
Posts: 402
Likes: 0
From: LA, CA
Oops! I forgot, I have a 1997 V6 4Runner. I added the info to the top post!
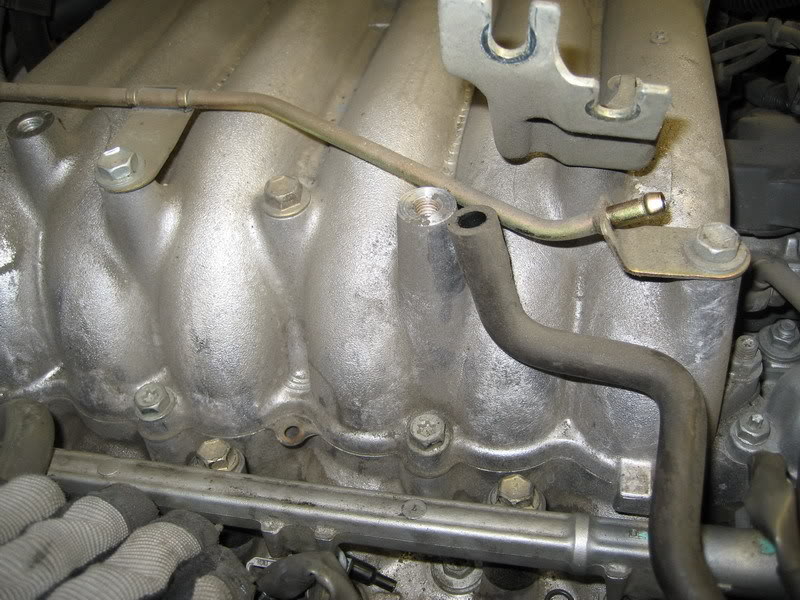
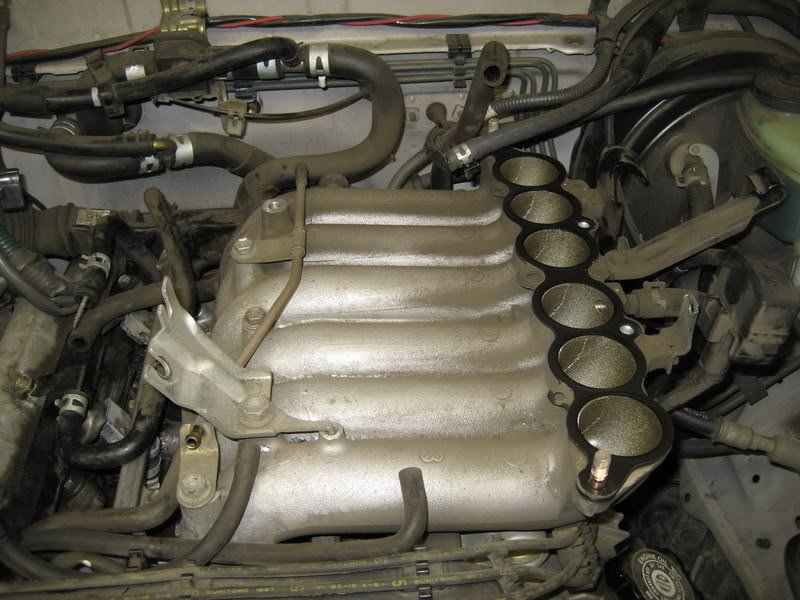
This end of the lower plenum has two bolts and two nuts in the same position as the upper plenum. You can see two of those bolts, and one of the nuts in this pic. You also have to remove the bolt in the middle left of the picture. I forgot that one and was tugging at the top for a minute or two. haha
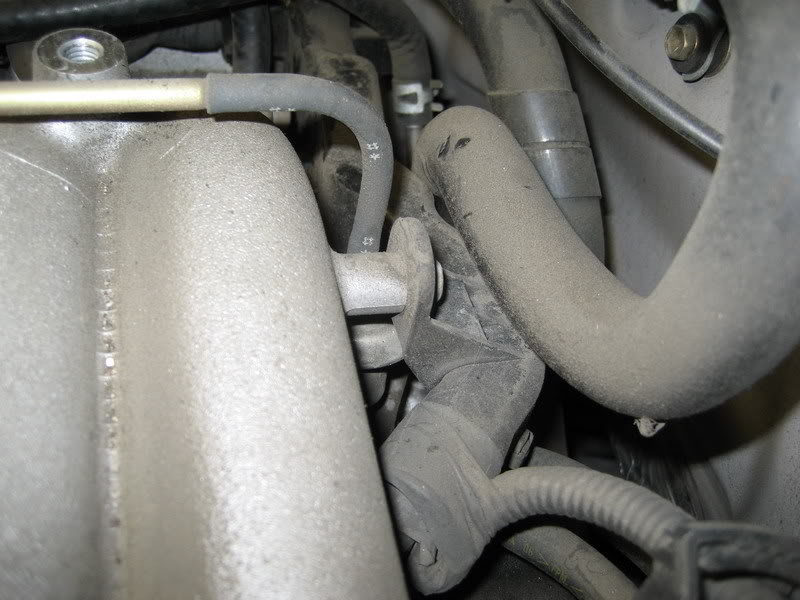
This bolt on the back, close to the firewall, also has to be removed. It's a little tricky to squeeze a 3/8" socket wrench in there but it's not too tough.
The skinny hose in this pic needs to be removed.

A wide shot to show you where it's located. It's in the middle of this picture.
There are 3 bolts visible in this picture that need to be removed.
-Left most bolt grounding the wire. (10mm?)
-Middle right bolt holding a metal bracket which I believe holds the fuel line but I might be wrong. (10mm?)
-Right most visible bolt inside the black bracket (12mm?)
-There is a fourth bolt that is blocked by the black bracket in this picture that needs to be removed. This bolt is holding another fuel line bracket.
The hose in the middle of this pic w/ the clamp needs to be removed, too.
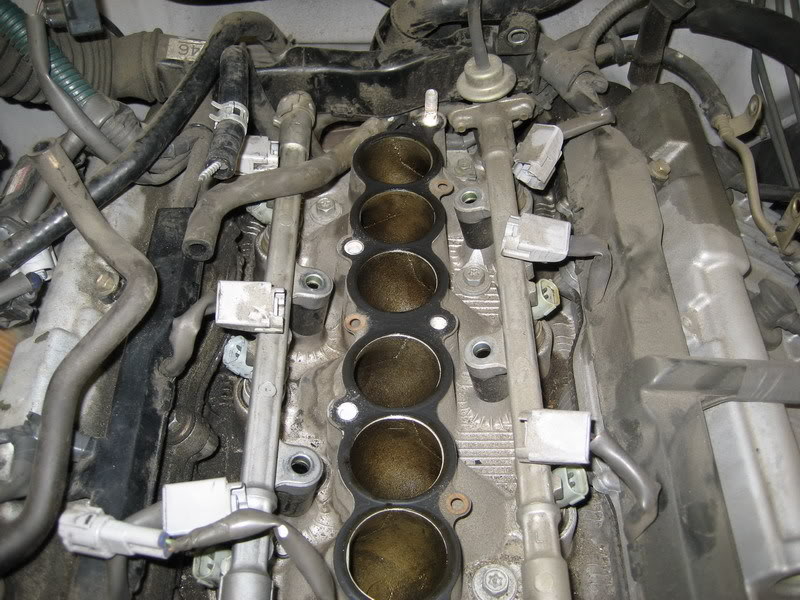
The lower plenum should now lift off.
This end of the lower plenum has two bolts and two nuts in the same position as the upper plenum. You can see two of those bolts, and one of the nuts in this pic. You also have to remove the bolt in the middle left of the picture. I forgot that one and was tugging at the top for a minute or two. haha
This bolt on the back, close to the firewall, also has to be removed. It's a little tricky to squeeze a 3/8" socket wrench in there but it's not too tough.
The skinny hose in this pic needs to be removed.
A wide shot to show you where it's located. It's in the middle of this picture.
There are 3 bolts visible in this picture that need to be removed.
-Left most bolt grounding the wire. (10mm?)
-Middle right bolt holding a metal bracket which I believe holds the fuel line but I might be wrong. (10mm?)
-Right most visible bolt inside the black bracket (12mm?)
-There is a fourth bolt that is blocked by the black bracket in this picture that needs to be removed. This bolt is holding another fuel line bracket.
The hose in the middle of this pic w/ the clamp needs to be removed, too.
The lower plenum should now lift off.
Mar 6, 2007 | 11:54 PM
#7
Thread Starter
Registered User
Joined: May 2002
Posts: 402
Likes: 0
From: LA, CA

Trending Topics
Mar 7, 2007 | 12:03 AM
#8
Thread Starter
Registered User
Joined: May 2002
Posts: 402
Likes: 0
From: LA, CA
This would be a good time to loosen your gas cap to relieve pressure.
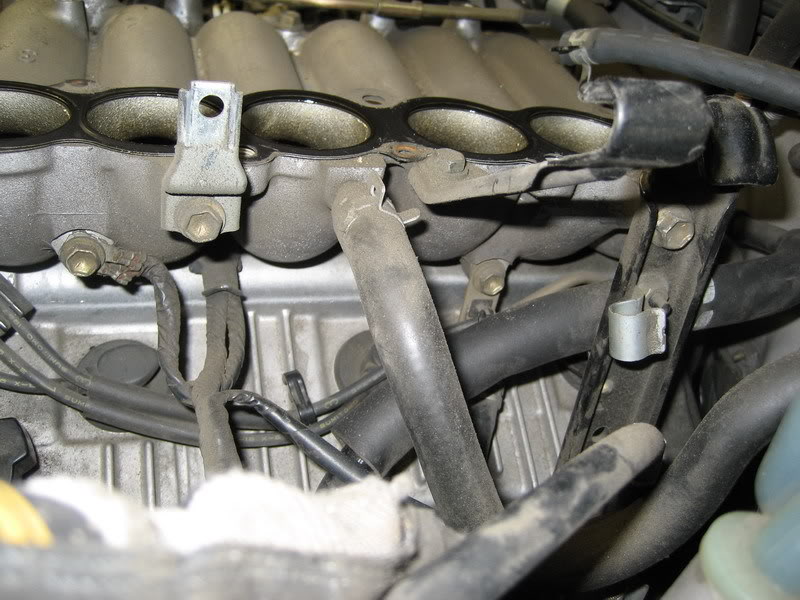
There's 4 bolts, 2 on each fuel rail, holding the rails in.
I've unplugged the injectors in this pic.
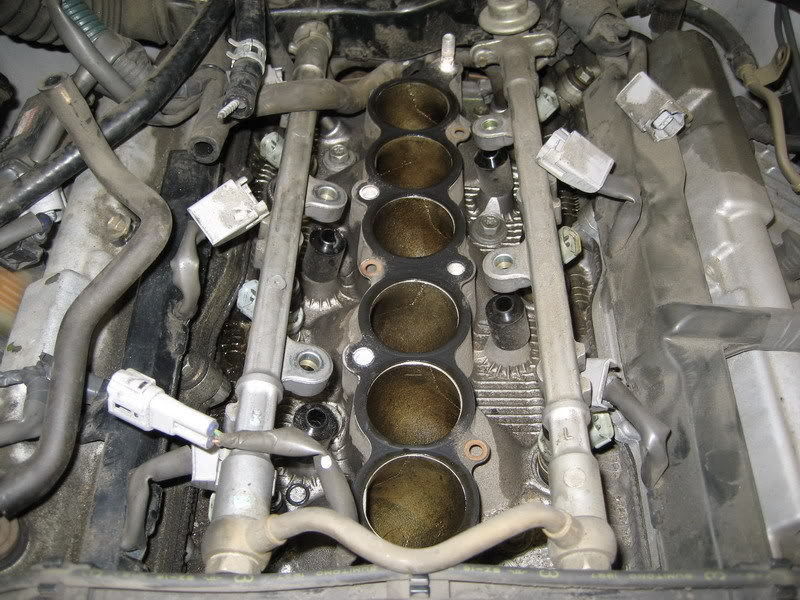
As Mark (midiwall) described, the fuel rails pivot from the back (firewall side), and lift up off the injectors. Just tug a bit, and as each one pops off, it'll leak a little gas.
Side shot to show the pivot.
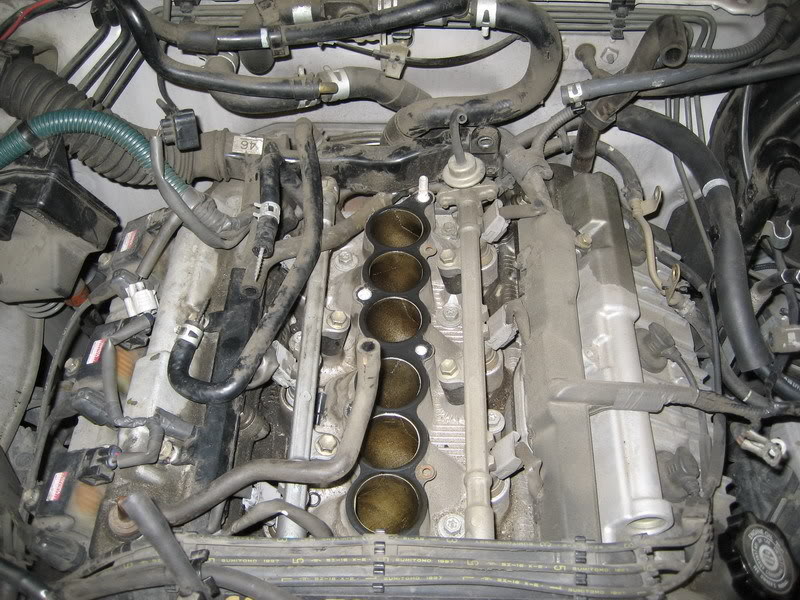
You can see there isn't much clearance for the injectors towards the back, which makes them a little more difficult to get out. Cylinder 6's injector was really tough to get out for me. Some of them took quite a bit of tugging to get out for me.
Don't push too hard on the plastic covers that cover the injector wires as they're really brittle from the heat. They're cosmetic, so you don't have to be that careful if you don't care. I shattered my driver's side one You can see it in the pic below.
And the injectors are out!
There's 4 bolts, 2 on each fuel rail, holding the rails in.
I've unplugged the injectors in this pic.
As Mark (midiwall) described, the fuel rails pivot from the back (firewall side), and lift up off the injectors. Just tug a bit, and as each one pops off, it'll leak a little gas.
Side shot to show the pivot.
You can see there isn't much clearance for the injectors towards the back, which makes them a little more difficult to get out. Cylinder 6's injector was really tough to get out for me. Some of them took quite a bit of tugging to get out for me.
Don't push too hard on the plastic covers that cover the injector wires as they're really brittle from the heat. They're cosmetic, so you don't have to be that careful if you don't care. I shattered my driver's side one
You can see it in the pic below.And the injectors are out!
Last edited by DuB; Mar 7, 2007 at 12:04 AM.


 Mar 7, 2007 | 06:36 AM
#11
Contributing Member
Joined: Dec 2003
Posts: 2,893
Likes: 2
From: Fort Worth, TX
Oh, but you forgot something that is VERY important:
Put tape over the intake ports as soon as they are exposed!!! If you leave them open like that, it's very likely something very bad will fall in there!!!
Like so:

If a bolt, or even some dirt got in there you'll do irrepairable damage to your intake valves, unless you take off the head and clean it out...
Put tape over the intake ports as soon as they are exposed!!! If you leave them open like that, it's very likely something very bad will fall in there!!!
Like so:
If a bolt, or even some dirt got in there you'll do irrepairable damage to your intake valves, unless you take off the head and clean it out...
Mar 7, 2007 | 09:28 AM
#13
Contributing Member
Joined: Aug 2003
Posts: 849
Likes: 0
From: Tempe, AZ
Very wise to document your work. I was working by myself and had nightmares of my car never running again. Ultimately I only missed reconnecting a temp sensor. Found that the next day.
Interestingly enough - it appears the SC is easier to remove than the normally aspirated version.
And yes - the early engines (96 and 97) have extra vacuum hoses. Quite the hassle. By 2002 (my only other comparison was a friend's taco) about half of the vacuum hoses are gone.
Interestingly enough - it appears the SC is easier to remove than the normally aspirated version.
And yes - the early engines (96 and 97) have extra vacuum hoses. Quite the hassle. By 2002 (my only other comparison was a friend's taco) about half of the vacuum hoses are gone.
Mar 8, 2007 | 01:12 PM
#16
Thread Starter
Registered User
Joined: May 2002
Posts: 402
Likes: 0
From: LA, CA
I hope this helps someone out there! Or at least convinces them to try doing it themselves so they don't get ripped off by the stealer like I did!
Yeah, it's probably a good idea to put tape over the opening as soon as you have it open. I took my work gloves off, and was just really careful not to drop anything in there, but I'd recommend using the tape.
Yeah, it's probably a good idea to put tape over the opening as soon as you have it open. I took my work gloves off, and was just really careful not to drop anything in there, but I'd recommend using the tape.
Apr 4, 2008 | 02:52 PM
#17
Contributing Member
Joined: Nov 2002
Posts: 10,666
Likes: 5
From: Oklahoma State
Oh, but you forgot something that is VERY important:
Put tape over the intake ports as soon as they are exposed!!! If you leave them open like that, it's very likely something very bad will fall in there!!!
Like so:
If a bolt, or even some dirt got in there you'll do irrepairable damage to your intake valves, unless you take off the head and clean it out...

Here's my tape job, never mind the finger pointing:

BTW nice writeup Dub.
Last edited by mt_goat; Apr 4, 2008 at 02:58 PM.
 Apr 4, 2008 | 03:06 PM
#19
this is also a nice step by step for the valve cover seals if some one is planning on doing that. this is exactly what you need to do to get down enough to take the valve covers off, except for the fuel rail stuff. i took pics of how i did my valve cover seals, but with this out there it would be pointless to post up the same pics and same information now. great job Dub! 


