Bolt-On Swing Out Complete
 Mar 16, 2010 | 09:35 AM
#1
Thread Starter
Registered User
Joined: Jul 2004
Posts: 384
Likes: 0
From: HB, CA
Bolt-On Swing Out Complete
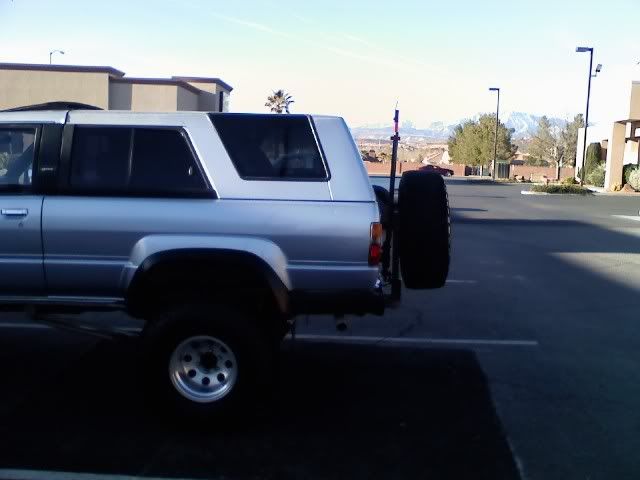
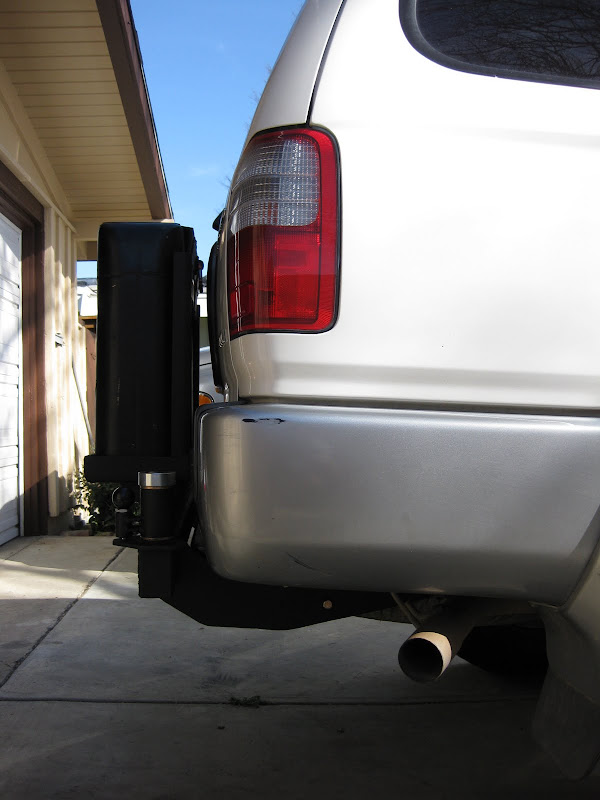
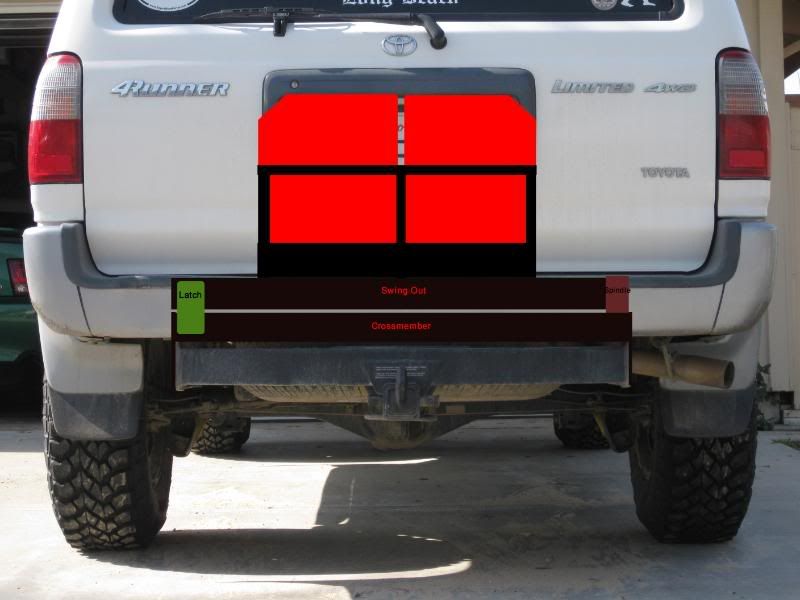
After many hours in the garage and the use of primitive power tools, I've completed the proposed swing out. It took an upcoming Death Valley trip to light the fire under me, but I now have an extra 10 gallons of fuel at my disposal.
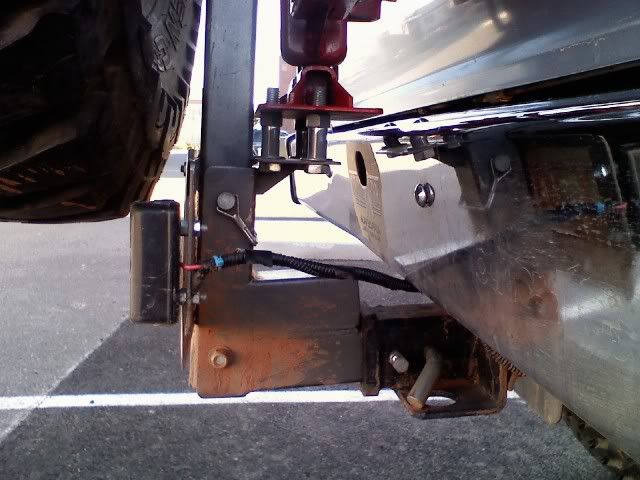
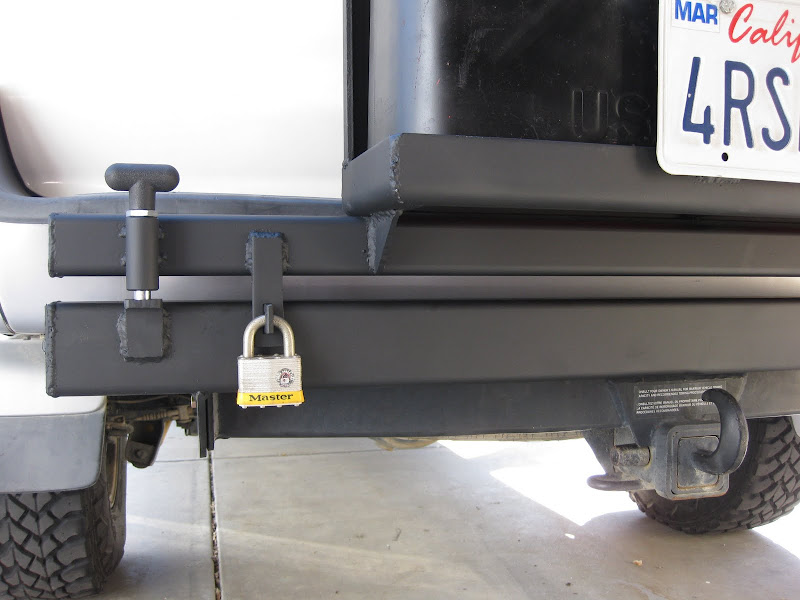
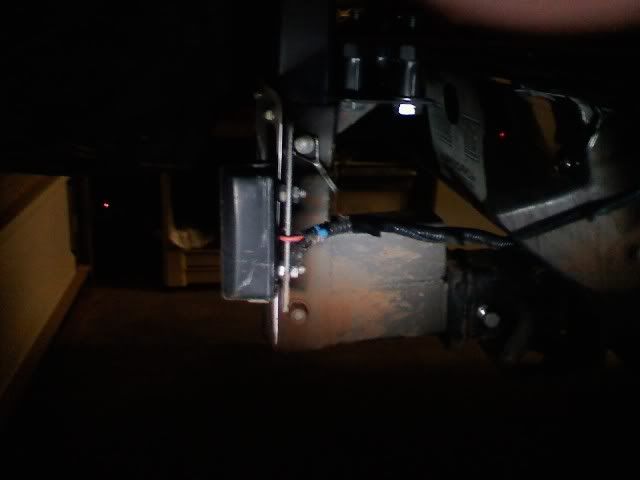
I was initially going to run the standard red toggle clamps you see everywhere, but then ran across Wilman's updated latch design. Instead of using a clamp to hold the up down/side to side movements, he isolated them via a pull pin and a lock tab. I don't have to worry about the clamp coming undone, the arm swinging open, or the arm lifting off of the spindle. I also saved about $30 going with the two spring pins versus one clamp and one spring pin to hold the gate open on an incline. Spring pins were acquired from McMaster Carr.
The spindle is an Iron Pig Offroad (IPOR) creation consisting of 1.5" cold rolled rod surrounded by oilite bushings and wrapped in a piece of 2" DOM sleeve.
The side supports are bolted through the factory receiver hitch making it a snap to remove if necessary, as well as sell in the future if desired.
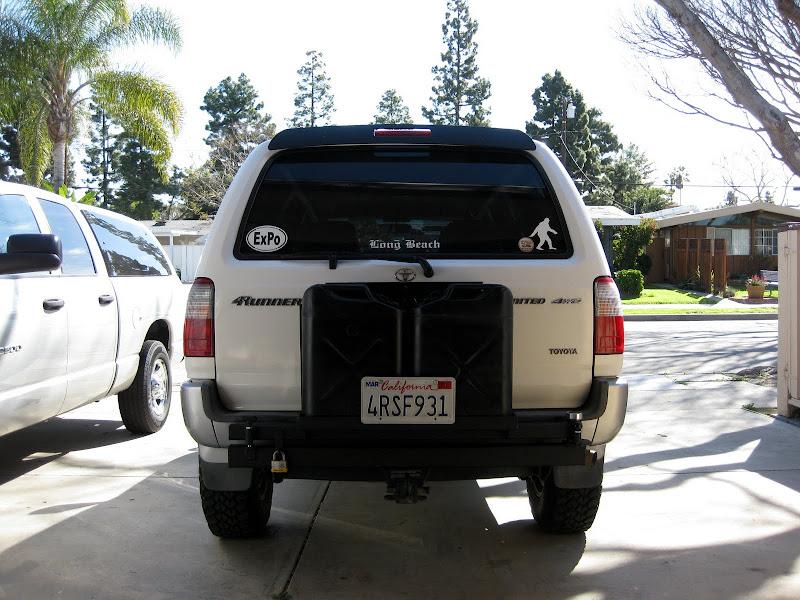
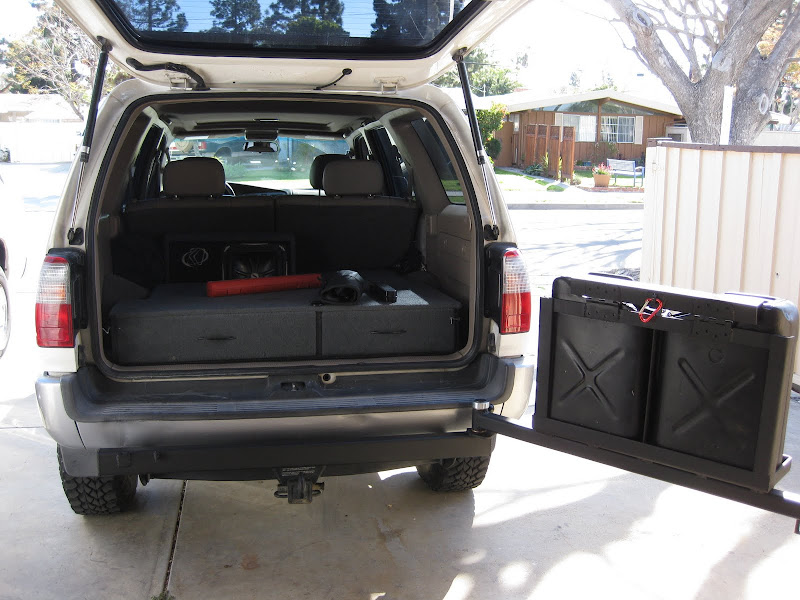
The jerry can holder clamps over the rear of the cans, but I'm still debating if I like it or not. I'd rather shed some weight and go with a locking strap design but I haven't quite figured out a system for that yet. It is also locking which I desire.
Total funds spent came to around $150 including parts, metal, and shipping. Total time i'd estimate around 25 hours. I just acquired a plasma cutter so that will cut the time down significantly!


Initial conception:
I was initially going to run the standard red toggle clamps you see everywhere, but then ran across Wilman's updated latch design. Instead of using a clamp to hold the up down/side to side movements, he isolated them via a pull pin and a lock tab. I don't have to worry about the clamp coming undone, the arm swinging open, or the arm lifting off of the spindle. I also saved about $30 going with the two spring pins versus one clamp and one spring pin to hold the gate open on an incline. Spring pins were acquired from McMaster Carr.
The spindle is an Iron Pig Offroad (IPOR) creation consisting of 1.5" cold rolled rod surrounded by oilite bushings and wrapped in a piece of 2" DOM sleeve.
The side supports are bolted through the factory receiver hitch making it a snap to remove if necessary, as well as sell in the future if desired.
The jerry can holder clamps over the rear of the cans, but I'm still debating if I like it or not. I'd rather shed some weight and go with a locking strap design but I haven't quite figured out a system for that yet. It is also locking which I desire.
Total funds spent came to around $150 including parts, metal, and shipping. Total time i'd estimate around 25 hours. I just acquired a plasma cutter so that will cut the time down significantly!
Initial conception:
Mar 16, 2010 | 10:38 AM
#7
Thread Starter
Registered User
Joined: Jul 2004
Posts: 384
Likes: 0
From: HB, CA
 .
.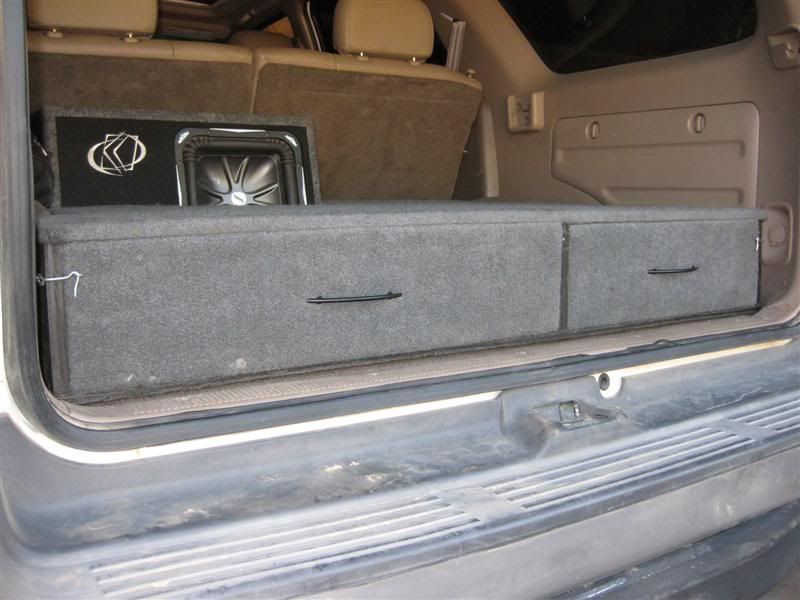
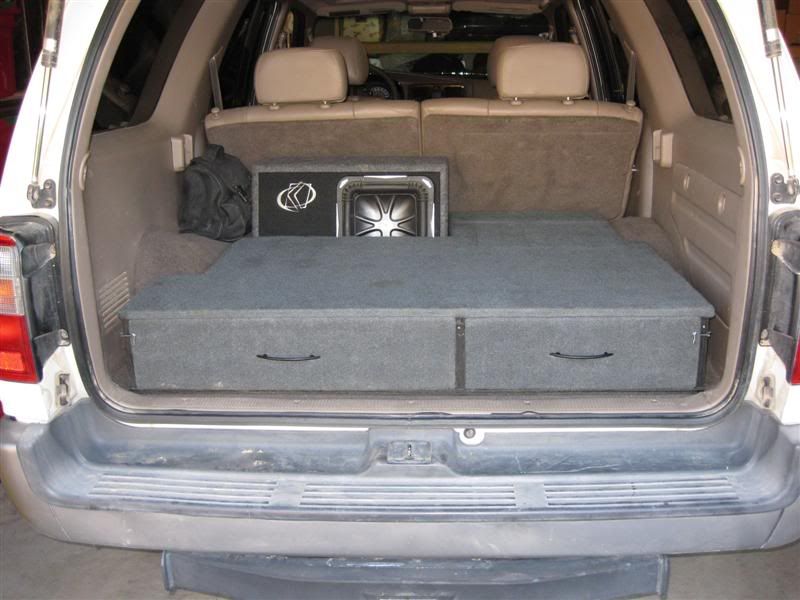
There is enough room on the front left corner for a spare quart of oil and on the right 2 maglights in quickfists.

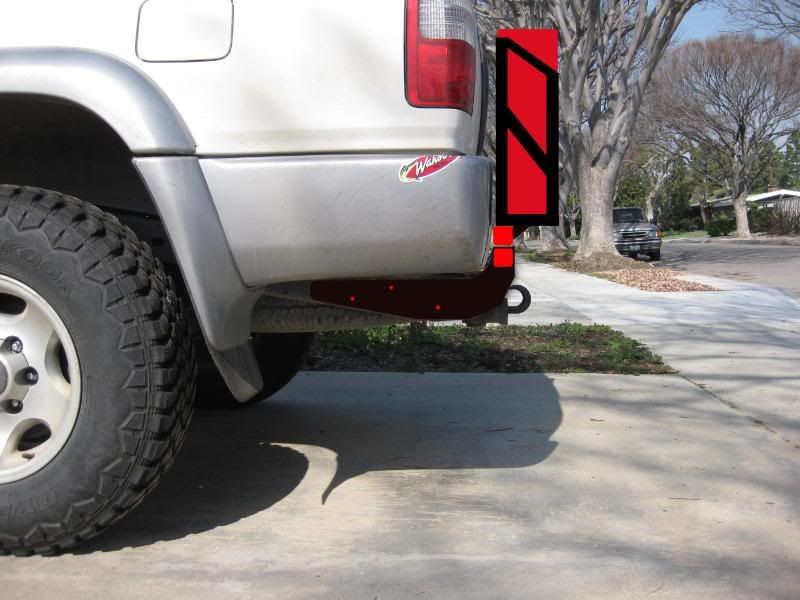
I hope no one rear ends me period!

Last edited by CYi5; Mar 16, 2010 at 10:40 AM.
Trending Topics


 Mar 16, 2010 | 04:51 PM
#9
Registered User
Joined: May 2009
Posts: 1,829
Likes: 1
From: Lake Arrowhead, CA
Good work! Are you planning on adding a light to your license plate? I ask because my bulbs were out a couple months ago and I got a fix-it ticket from the friendly neighborhood CHP. Gotta love CA!
Mar 16, 2010 | 06:10 PM
#11
Registered User
Joined: Jun 2008
Posts: 141
Likes: 1
From: Southern Utah
looks good! x2 on the license plate light. cops here have a heyday with that one, and won't pass inspection if they find it either
i bought a drop down tire carrier off a member here, he used a small, flat hella light that plugs into the flat, 4 wire harness from your tow package.
i bought a drop down tire carrier off a member here, he used a small, flat hella light that plugs into the flat, 4 wire harness from your tow package.
Mar 16, 2010 | 06:17 PM
#12
Thread Starter
Registered User
Joined: Jul 2004
Posts: 384
Likes: 0
From: HB, CA
 Mar 16, 2010 | 10:06 PM
#17
Thread Starter
Registered User
Joined: Jul 2004
Posts: 384
Likes: 0
From: HB, CA
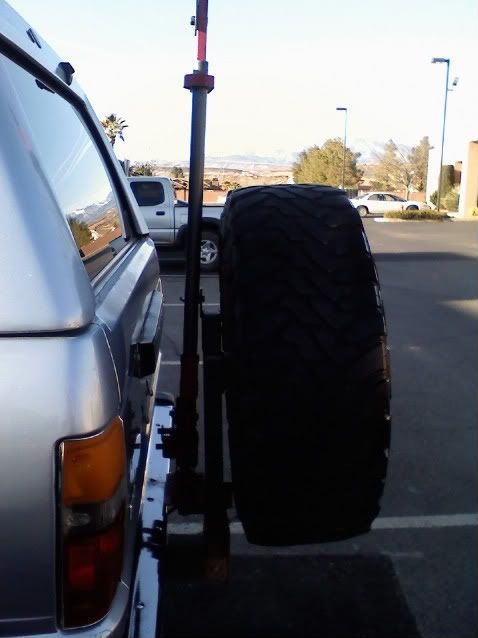
 Gas can on one side and tire on the other would be sicky.
Last edited by CYi5; Mar 16, 2010 at 10:07 PM.