
Toms 87 4Runner Build
 Sep 9, 2016 | 12:54 PM
#201
Thread Starter
Super Moderator
iTrader: (1)
Joined: Aug 2008
Posts: 11,787
Likes: 28
From: Anderson Missouri
I am determined to spend $10-20 a week on tools that would come in handy. I like working with other mechanics to see how they do things. A friend of mine is always using these magnetic trays for nuts and bolts. I am always putting the nuts and bolts on the Intake, Battery or where ever seems to be the handiest place at the time and then they fall down and I am spending half the day trying to find where they went. These were only $2 a piece and the hook screw drivers are what he uses for getting water hoses off of pipes when they are corroded together. I have hundreds more tools then my dad ever thought of having and still want and need more but some of the handiest tools are really not that much.
2 Magnetic trays and hook screw drivers for less then $6.
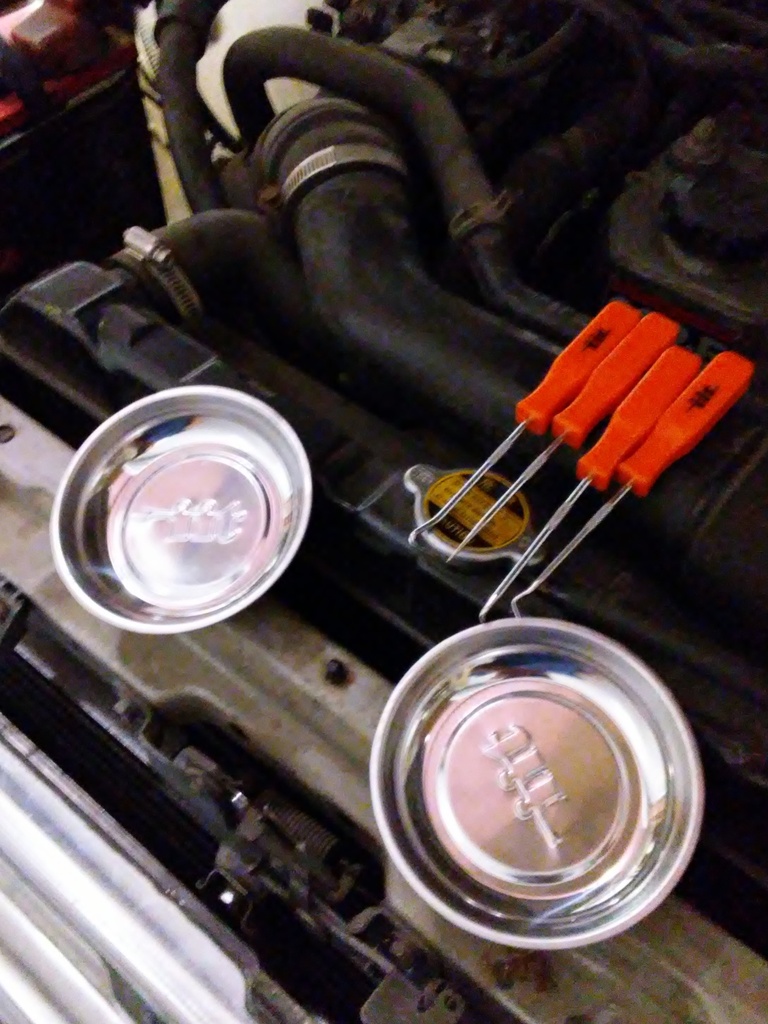
2 Magnetic trays and hook screw drivers for less then $6.
 Sep 9, 2016 | 03:36 PM
#202
Registered User


Joined: Jun 2013
Posts: 3,112
Likes: 582
From: Portland, Oregon, USA
The pitting on my windshield isn't bad at all and not noticeable unless you are driving at night when an oncoming car passes you but still doesn't affect my visibility.
I like the two magnetic trays I got from Harbor Freight. I do not have to worry about bumping the tray and loosing bolts where they will never be found. I also put bolts and screws back into the holes they came out of after taking something apart. This way I know where they came from.
The 4Runner is looking great! Your attention to detail is why I like your restorations and your build threads. Keep up the great work and I will look forward to seeing what you do with the Ford. I am not a Ford guy but always love watching a good restoration from start to finish.
Sep 10, 2016 | 07:43 PM
#204
Thread Starter
Super Moderator
iTrader: (1)
Joined: Aug 2008
Posts: 11,787
Likes: 28
From: Anderson Missouri
Thanks old87yota... I too like seeing restorations on about anything. There cant be many restorations on YT that I have missed and have checked out many other forums just to see other restorations. When I get on the 76, you will see a lot of similarities that I do on my Toyota restorations.
Hello jakey poo... I plan on stopping by Lowes and getting some paper board, which is actually a thin sheet of plywood and trace out the original panel and then wrap it and see how it turns out. You are correct that new carpet can make everything else stand out at how bad it is faded. I learned that when I replaced the front section on a runner one time.
Hello jakey poo... I plan on stopping by Lowes and getting some paper board, which is actually a thin sheet of plywood and trace out the original panel and then wrap it and see how it turns out. You are correct that new carpet can make everything else stand out at how bad it is faded. I learned that when I replaced the front section on a runner one time.
Sep 10, 2016 | 07:45 PM
#205
Thread Starter
Super Moderator
iTrader: (1)
Joined: Aug 2008
Posts: 11,787
Likes: 28
From: Anderson Missouri
I am taking a broken interior piece that covers the cap and trying to glue it. Toyota should of made this a two piece. Been slowly trying to get it glued back together for the past two day. I think I will try to fiber glass the back side in the next couple of days.
 Sep 12, 2016 | 08:43 AM
#206
Thread Starter
Super Moderator
iTrader: (1)
Joined: Aug 2008
Posts: 11,787
Likes: 28
From: Anderson Missouri
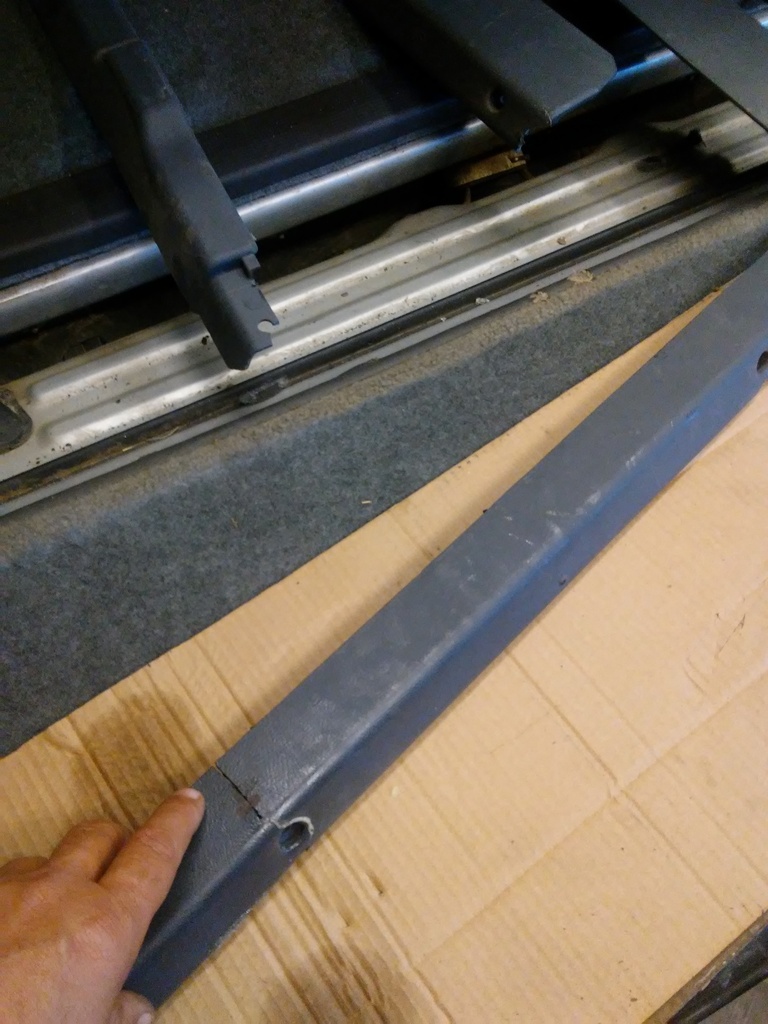
I went to Lowes looking for some thin ply wood like material for the tail gate and they dont sell it any smaller then 4x8. Not having a truck again I will have to check Hobby Lobby or something similar. Will look again tomorrow for a place that sells something like that.
I will be having the Timing Chain done by a friend that has changed many of these out. He has a lift and can get to it easier then I can. I have done Timing Chains but I will pull a motor to do one and take care of other things such as new gaskets, clean and paint the motor, and just give the motor a complete going thru. Usually pulling a motor you will run into other issues such as Exhaust problems that would just drag this build out longer. Goal is to have this runner done in about 3 weeks.
I have gotten some flak over steel vs plastic guides. I have used both. Doesnt matter to me but my friend will only use steel guides. You can get them for about the same price. If I get a rebuild kit, I use what comes in the kit. Other wise it is what is available. Steel guides are the better guides but the weak link is the chain as it stretches and in some cases the Tensioner fails. The chain stretches and beats the drivers side plastic guide and then eats a whole in the Timing Chain Cover. Usually by the time the chain has stretched, the motor is needing serviced in my opinion. Steel guides to me just prolongs the needed maintenance that should be performed. Since my friend will be doing the job that is fine with me. Just explaining why steel guides is not my only choice.
I prefer the single bright link but I have used two links as well. When you use the steel guides, they will provide new bolts for the steel guide. You need to keep your other bolts.
 Sep 12, 2016 | 11:23 AM
#207
Registered User
Joined: Jun 2010
Posts: 1,448
Likes: 100
From: Virginia
Just get the rough measurements for the tailgate and have Lowes cut the 4x8 for you. If they don't have a panel saw I know Home Depot does. You should be able to get at least three of tailgates out of a panel and it's not like you won't have a use for them. You'll still have to get out the jigsaw for the finer fitting of it. I recently measured carefully and had Home Depot cut all the pieces for a desk hutch I made for my son's dorm room. It sure saved time and trouble and it was free. You might even experiment by making an extra tailgate cover and auctioning it on eBay. Those things never come up on there. Mine's a hard vinyl but it's really showing a lot of wear. It's a shame because it was nearly perfect when I got it. I'd love to find a thin hard plastic tread plate pattern, ideally in gray, to make one from.
ETA: If it's so thin they refuse to cut it take a saw, square and extension cord with you. We cut insulation panels under the canopy at Home Depot once. I see contractors do it fairly often.
ETA: If it's so thin they refuse to cut it take a saw, square and extension cord with you. We cut insulation panels under the canopy at Home Depot once. I see contractors do it fairly often.
Last edited by Nervo19; Sep 12, 2016 at 11:27 AM.
Sep 15, 2016 | 07:05 AM
#208
Thread Starter
Super Moderator
iTrader: (1)
Joined: Aug 2008
Posts: 11,787
Likes: 28
From: Anderson Missouri
Thanks Nervo19... I got to looking at Toyotas way of doing it and it is just card board and staples so I thought I would give it a try with something I hope is a little better then how the factory did it. I might yet wind up having to get a piece like you suggested if I cant get my way of doing it to work.
Sep 15, 2016 | 07:08 AM
#209
Thread Starter
Super Moderator
iTrader: (1)
Joined: Aug 2008
Posts: 11,787
Likes: 28
From: Anderson Missouri
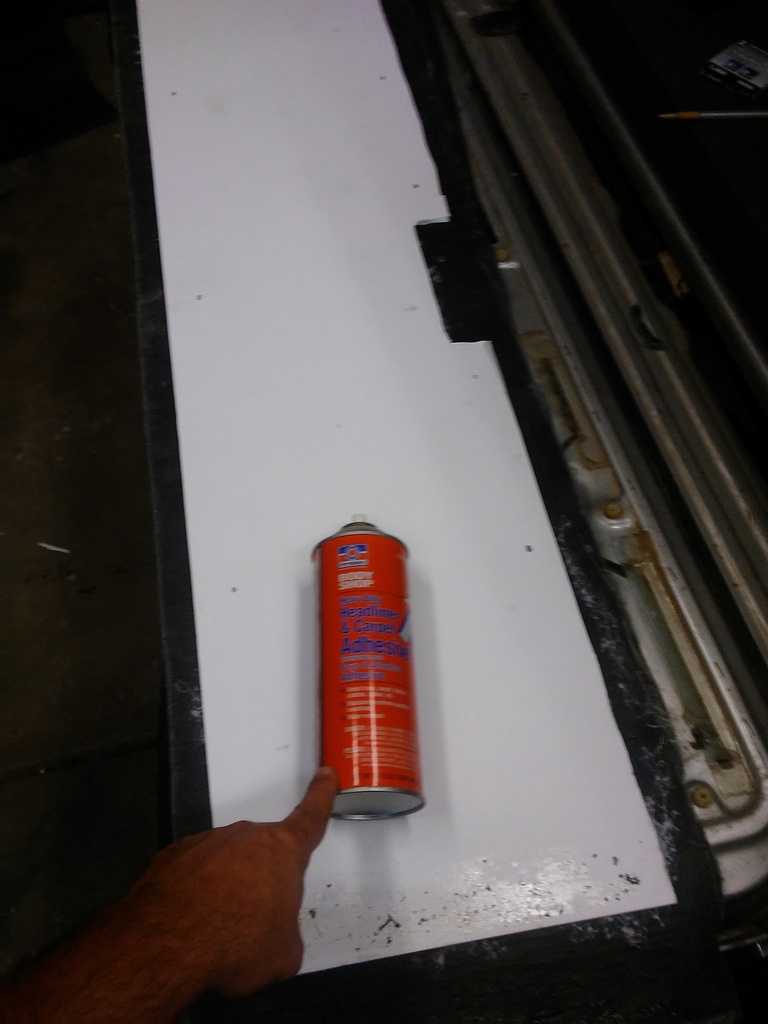
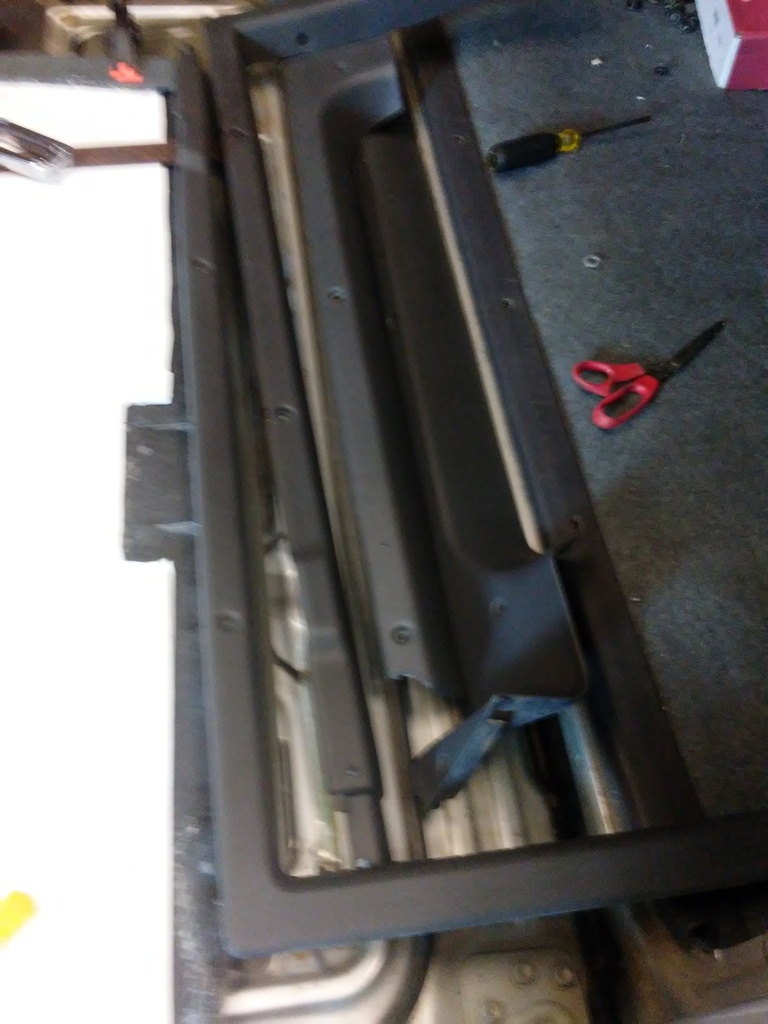
I got a sheet of board from Hobby Lobby and think it is better then what the factory uses. I used the original for a template and cut it out. Then I used some carpet spray to attach the carpet to the board.
While waiting for the carpet spray to dry and to not get impatient, I moved on to the interior trim pieces and got them cleaned up.
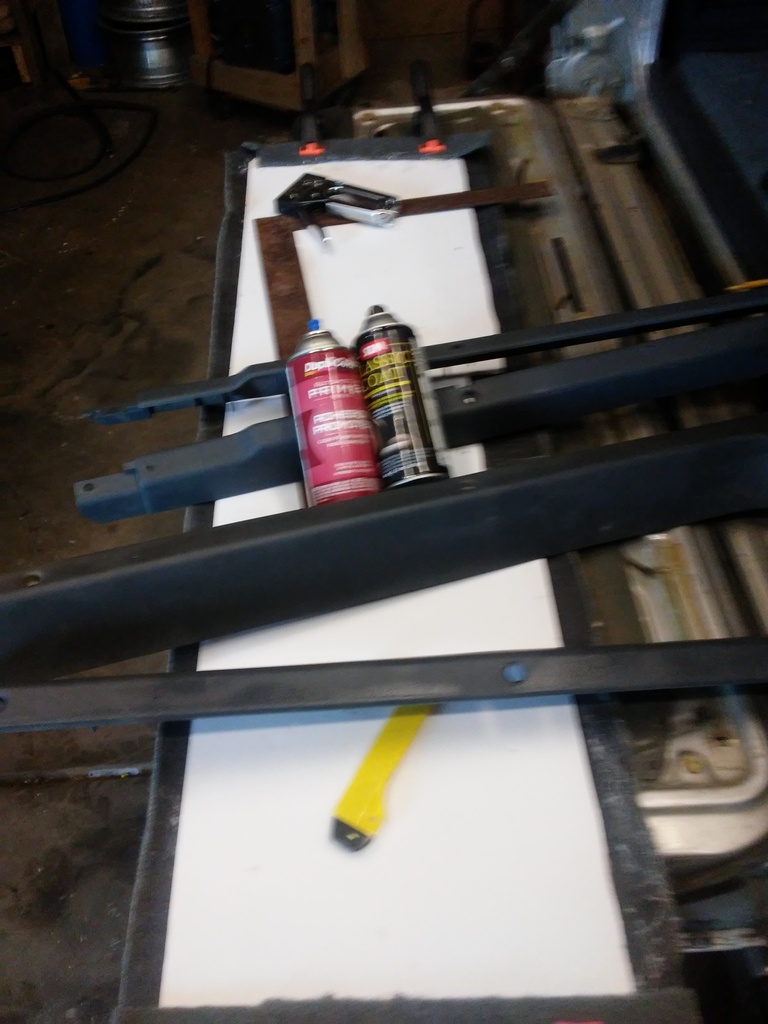
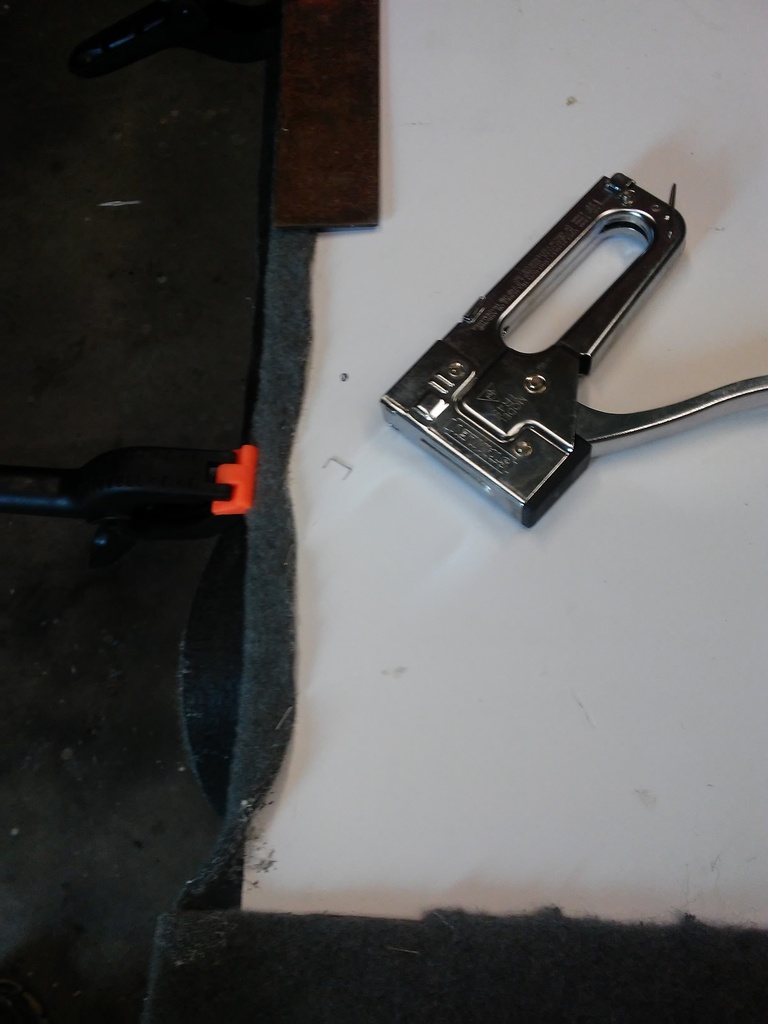
Interior paint dries quick but letting everything dry. I will use the square and some clamps to hold the edges for the next step.
Here I am showing that I have staples, glue, and a square holding down the carpet. I am doing all of the straight edges first and will google some suggestions on getting the curves down right.
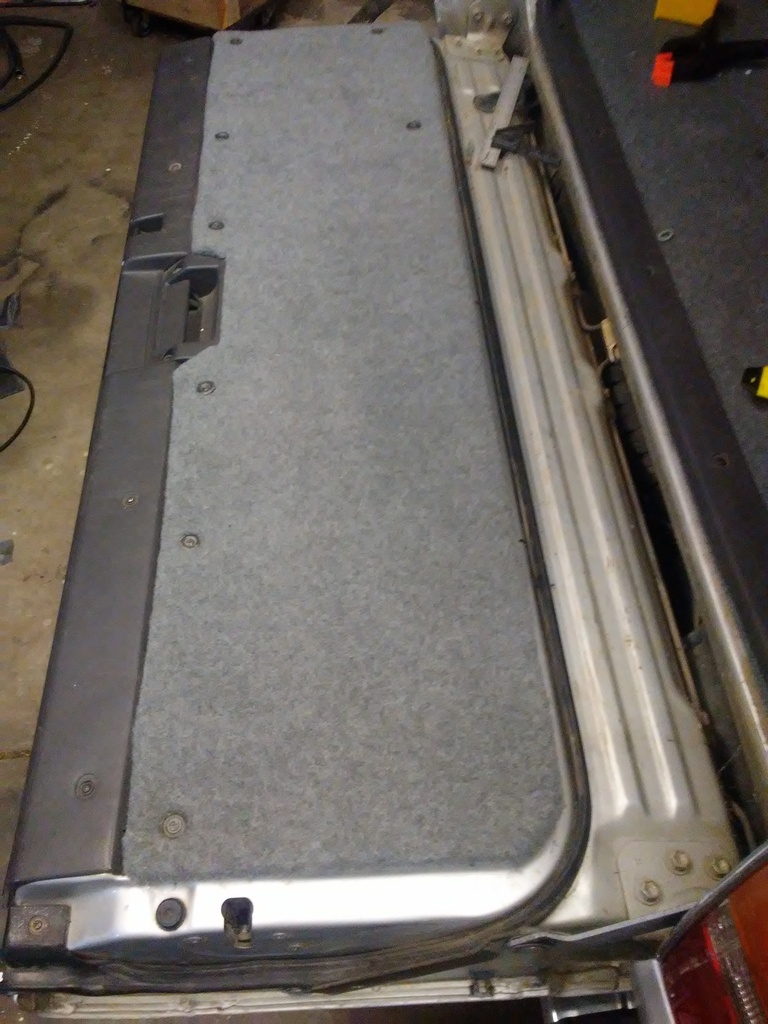
I got the interior trim for the cap installed. I still need some more screws to finish the job. Also showing some other edges I am getting fastened down.
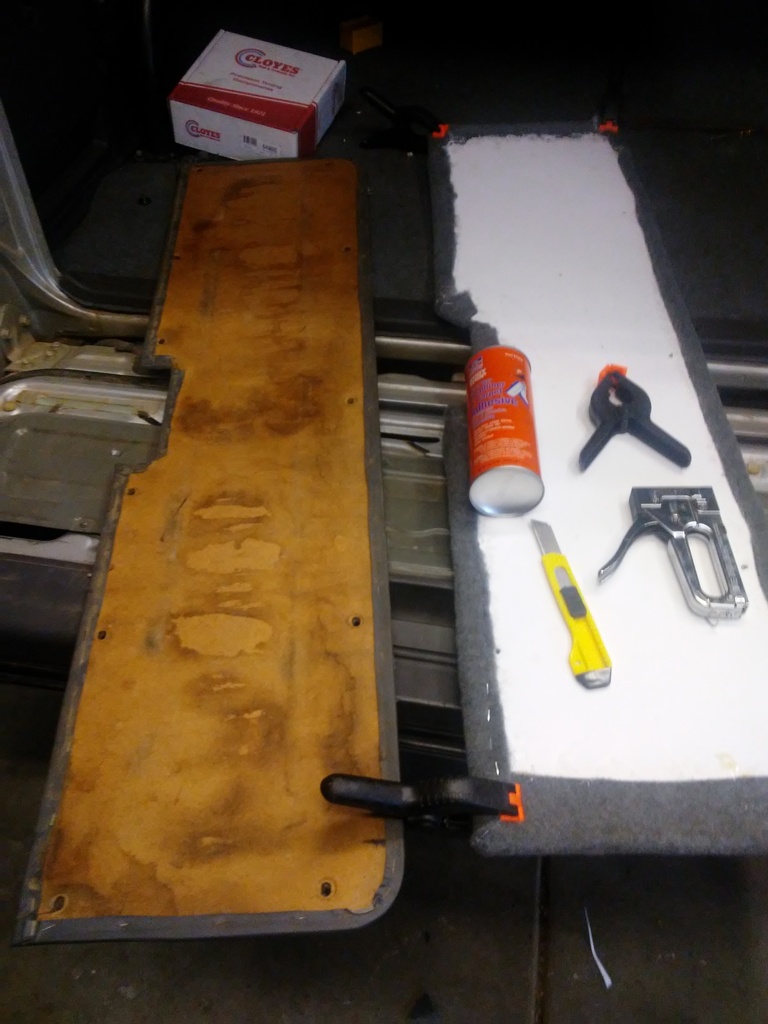
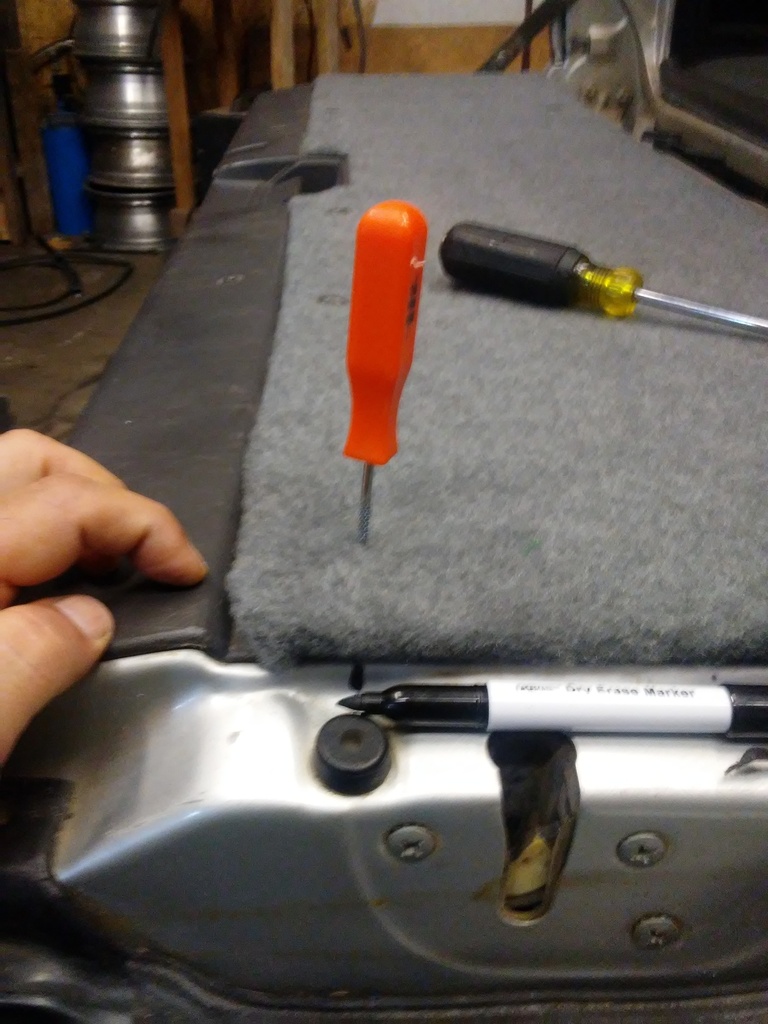
Here is a picture of how Toyota did it and the card board they used. I am getting close to getting the back piece installed. Looking forward to see how it looks. Also tools that I used.
I went around the edges and marked the screw holes so I had an idea where the screws need to go. I did mark the back of the panel but some of the screws are not in alignment so then I used a pic to see poke thru the material and locate the screw hole. I was able to lift the panel up just a little bit and see where I needed to poke thru at.
Here it is in. I still have to install the lower right screws. Come in the house to cool off. It is muggy out side.
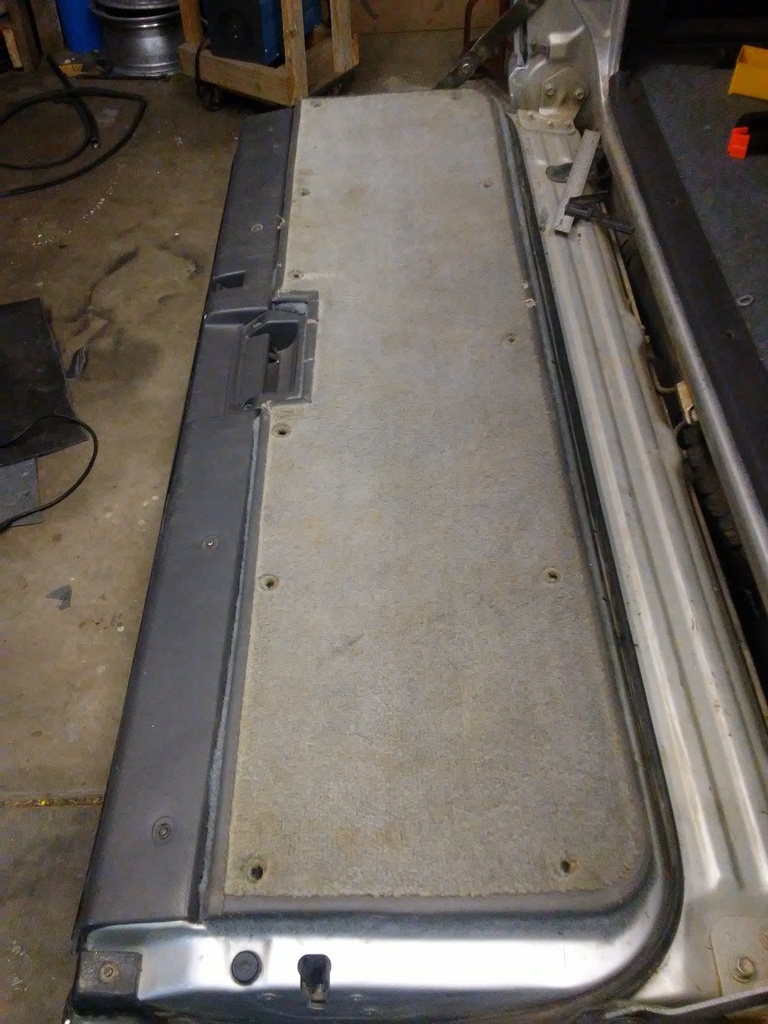
Here is the old one laying on top. I hope it is an improvement.
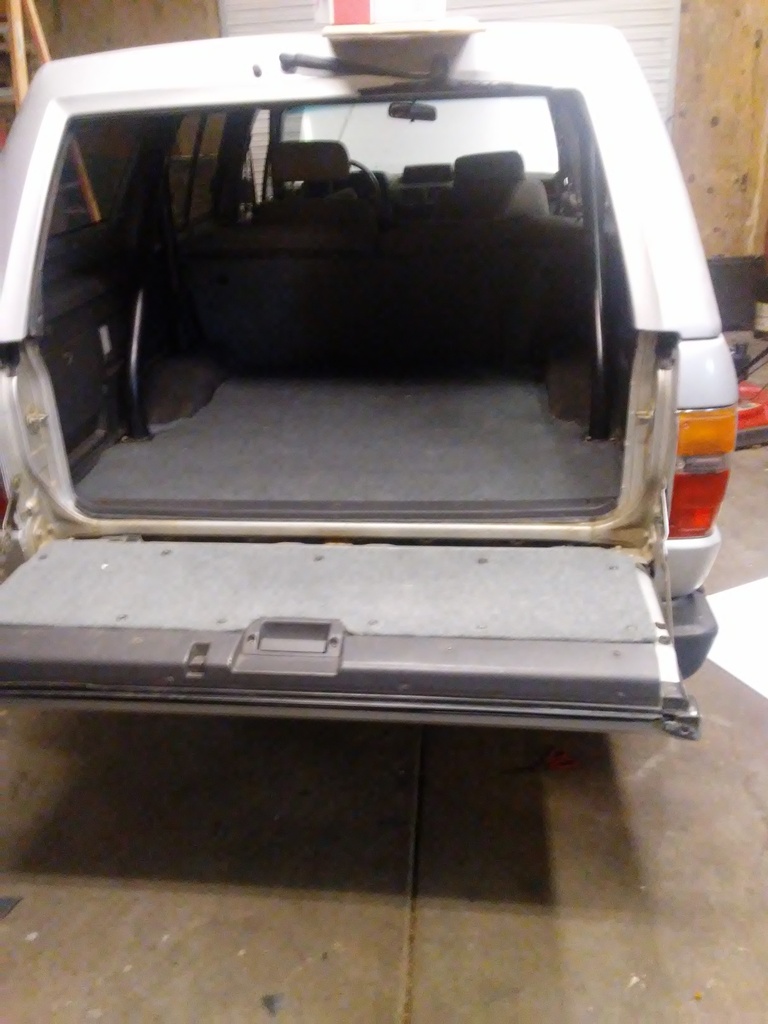
Must be the lighting as the carpet is all from the same roll. Got the carpet attached to the seats and nearly finished with the back end. I am to receive some springs from ebay tomorrow so plan on doing the ZUK mod if all goes planned.

While waiting for the carpet spray to dry and to not get impatient, I moved on to the interior trim pieces and got them cleaned up.

Interior paint dries quick but letting everything dry. I will use the square and some clamps to hold the edges for the next step.

Here I am showing that I have staples, glue, and a square holding down the carpet. I am doing all of the straight edges first and will google some suggestions on getting the curves down right.

I got the interior trim for the cap installed. I still need some more screws to finish the job. Also showing some other edges I am getting fastened down.

Here is a picture of how Toyota did it and the card board they used. I am getting close to getting the back piece installed. Looking forward to see how it looks. Also tools that I used.

I went around the edges and marked the screw holes so I had an idea where the screws need to go. I did mark the back of the panel but some of the screws are not in alignment so then I used a pic to see poke thru the material and locate the screw hole. I was able to lift the panel up just a little bit and see where I needed to poke thru at.

Here it is in. I still have to install the lower right screws. Come in the house to cool off. It is muggy out side.

Here is the old one laying on top. I hope it is an improvement.

Must be the lighting as the carpet is all from the same roll. Got the carpet attached to the seats and nearly finished with the back end. I am to receive some springs from ebay tomorrow so plan on doing the ZUK mod if all goes planned.

Last edited by Terrys87; Sep 15, 2016 at 12:26 PM.
Sep 15, 2016 | 04:46 PM
#210
Thread Starter
Super Moderator
iTrader: (1)
Joined: Aug 2008
Posts: 11,787
Likes: 28
From: Anderson Missouri
I have tried several different colors trying to get the 4Runner gold. I even bought some that said it was gold and it looked yellow. After numerous test, I finally went with a yellow I got from Hobby Lobby that looks similar or as good as I can get. I painted the 4Runner gold.
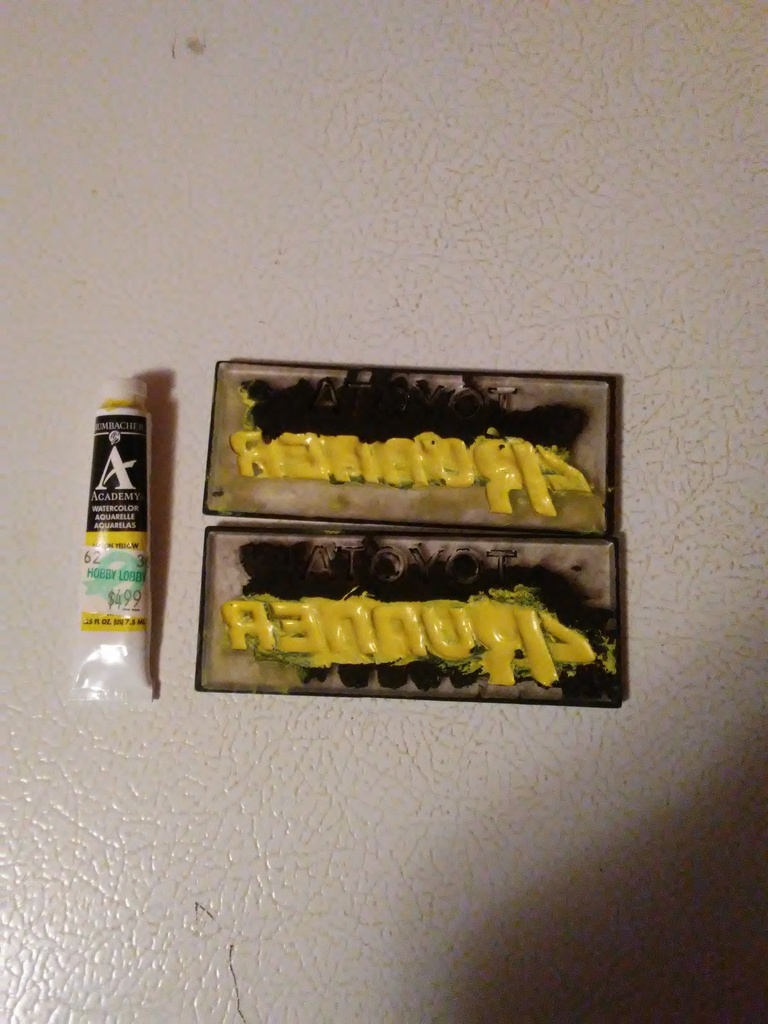
Next I took some silver paint and sprayed into the bottom of a soda can and used a tooth pick and flat blade screw driver and dipped them in the paint. In the morning I am going to take a sanding block to the back side and get the excess off of the high part and that should leave a nice back ground to where I will put a black coat over both the silver and the gold like the factory did it and get them glued back on. I can hold them over my head and I think they are going to look good. Morning will tell.

I am hoping the springs get here in the morning so I can do the no cut ZUK mod.
The gold paint still has not completely dried so will have to wait until morning and see if I can clean around the edges a little better and then put a coat of black on the back.

Last edited by Terrys87; Sep 15, 2016 at 05:42 PM.
Sep 15, 2016 | 05:49 PM
#211
Registered User
Joined: Jun 2010
Posts: 1,448
Likes: 100
From: Virginia
Those two projects look great. Your tailgate cover looks really good. It just occurred to me that the corrugated plastic that they make political signs out of would be a perfect backer. There should be plenty around for free on Wednesday November 9.
Sep 16, 2016 | 03:38 AM
#212
Thread Starter
Super Moderator
iTrader: (1)
Joined: Aug 2008
Posts: 11,787
Likes: 28
From: Anderson Missouri
Thanks Nervo19...I got quite a bit of time in it and tried to get it looking as factory as possible. Hopefully it is better then what the factory did. lol, There should be plenty of signs in month or so.
Sep 16, 2016 | 03:40 AM
#213
Thread Starter
Super Moderator
iTrader: (1)
Joined: Aug 2008
Posts: 11,787
Likes: 28
From: Anderson Missouri
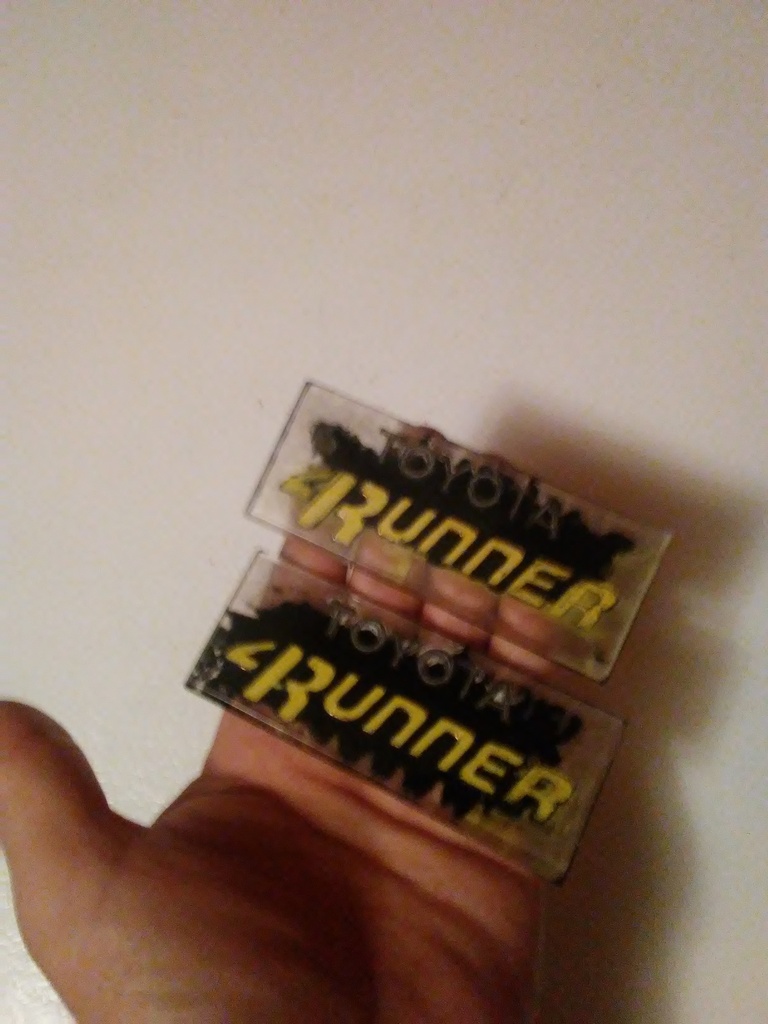
After getting the badges painted with silver and gold, I sprayed the back side with black.

Got them installed. Not perfect but at least you can read them now. I am hoping UPS gets here early so as I can do the no cut ZUK mod.
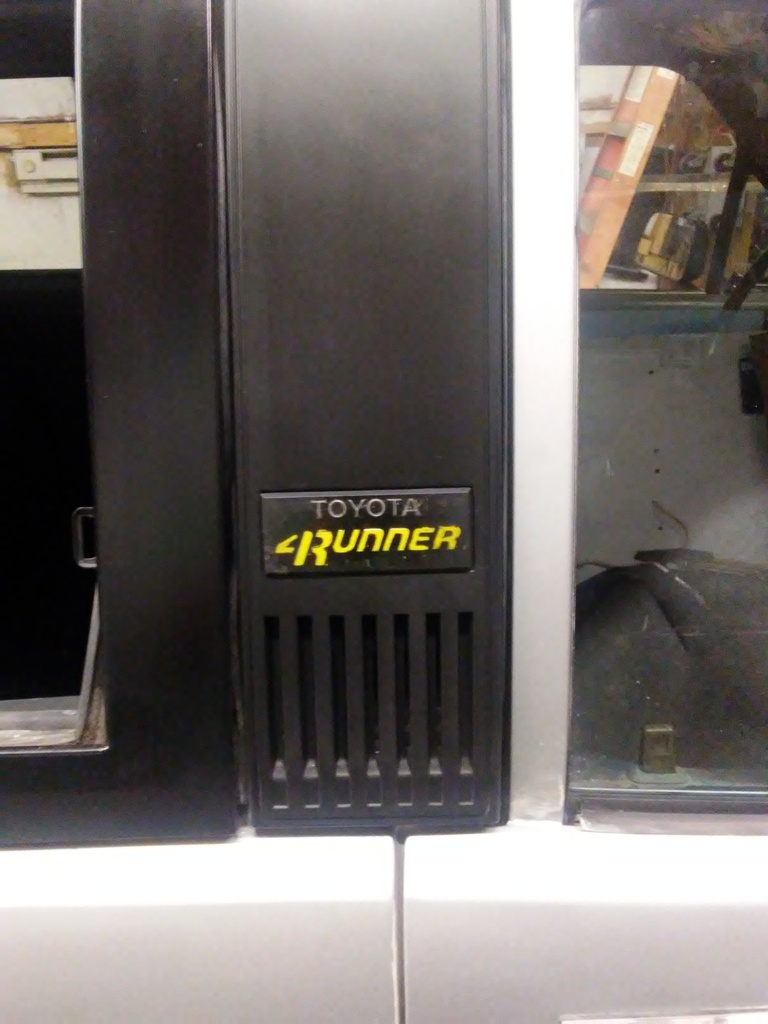

Got them installed. Not perfect but at least you can read them now. I am hoping UPS gets here early so as I can do the no cut ZUK mod.


 Sep 16, 2016 | 08:41 AM
#215
Thread Starter
Super Moderator
iTrader: (1)
Joined: Aug 2008
Posts: 11,787
Likes: 28
From: Anderson Missouri
Thanks CamTom12...I am glad I went with the plastic board as that would take precise measuring to get the hole lined up. Using a pic, I was able to poke thru all the material and get them correct without showing any holes.
Sep 16, 2016 | 08:43 AM
#216
Thread Starter
Super Moderator
iTrader: (1)
Joined: Aug 2008
Posts: 11,787
Likes: 28
From: Anderson Missouri
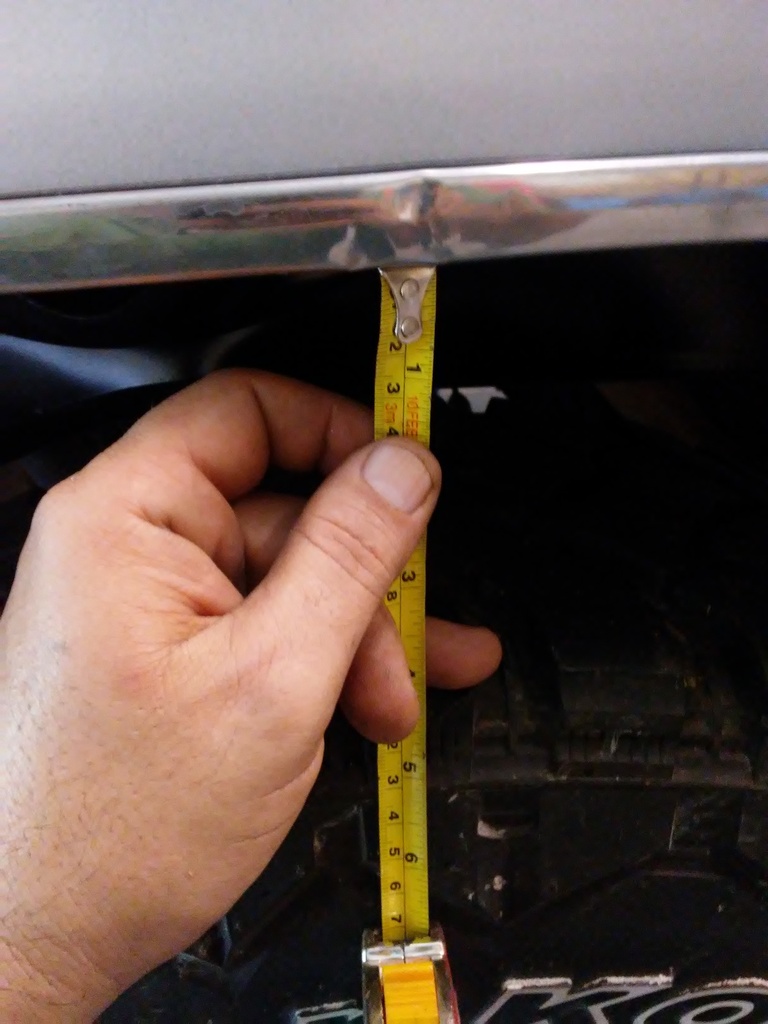
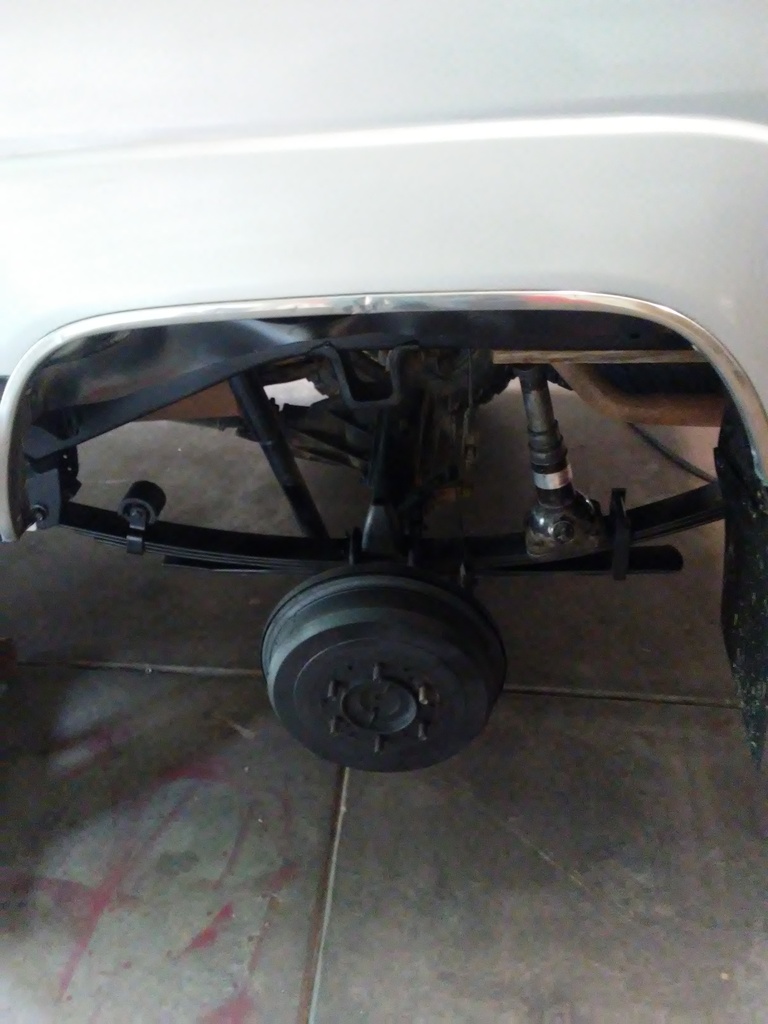
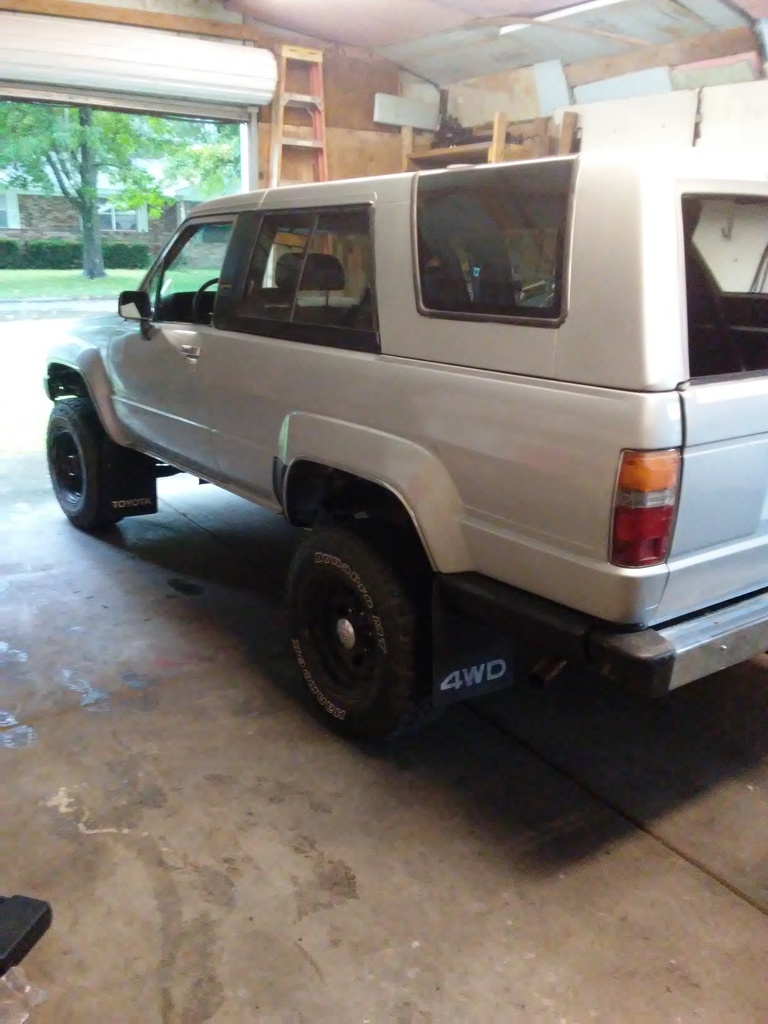
This picture shows the saggy butt.
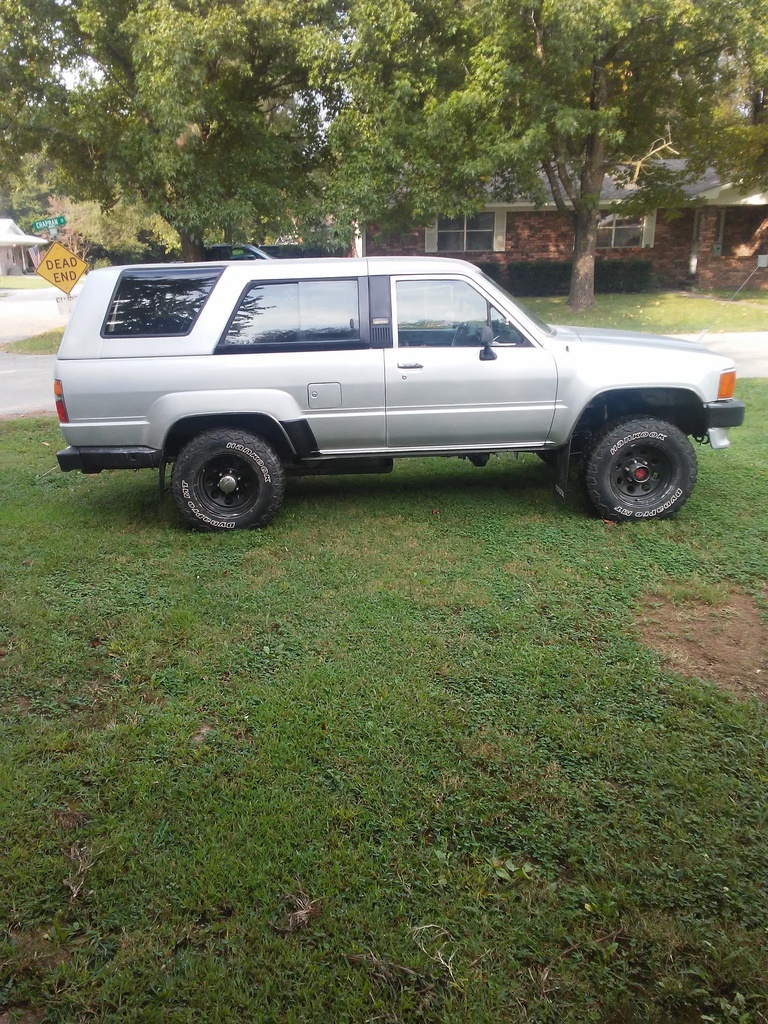
Here it is about 4 1/2 inches from the top of the tire (my pinky) to the fender lip.
I got the drivers side ready to go. Waiting on the UPS guy. FedEx has already run by.

Here it is about 4 1/2 inches from the top of the tire (my pinky) to the fender lip.

I got the drivers side ready to go. Waiting on the UPS guy. FedEx has already run by.

Last edited by Terrys87; Sep 19, 2016 at 07:00 AM.

 Sep 16, 2016 | 12:23 PM
#219
Thread Starter
Super Moderator
iTrader: (1)
Joined: Aug 2008
Posts: 11,787
Likes: 28
From: Anderson Missouri
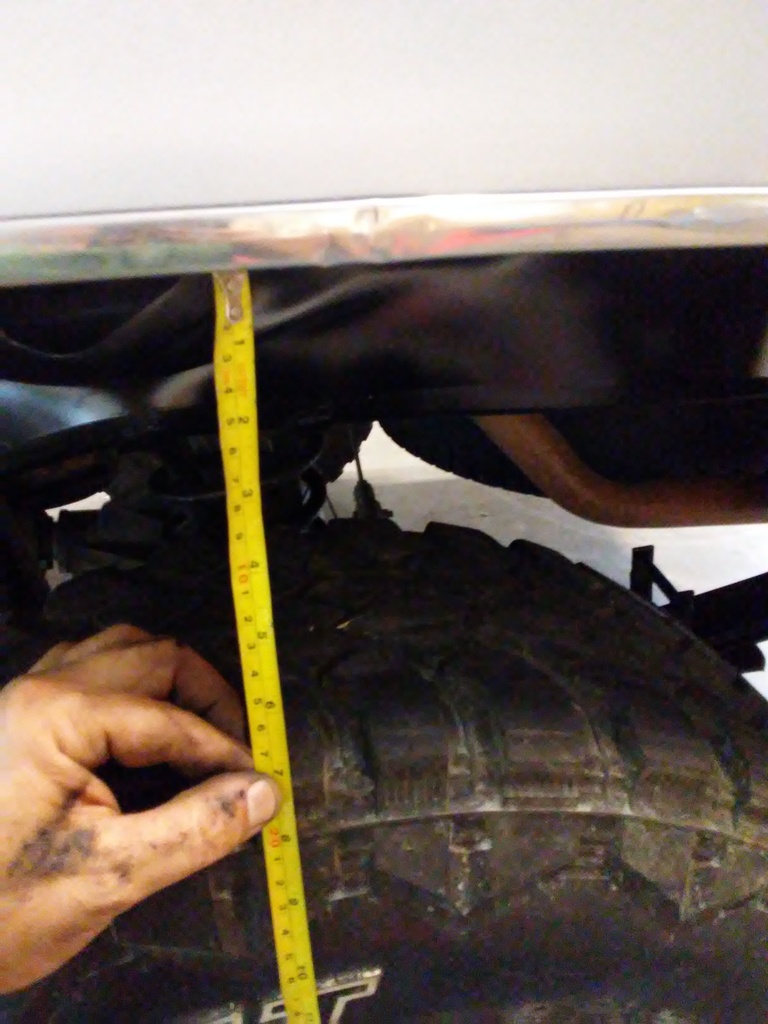
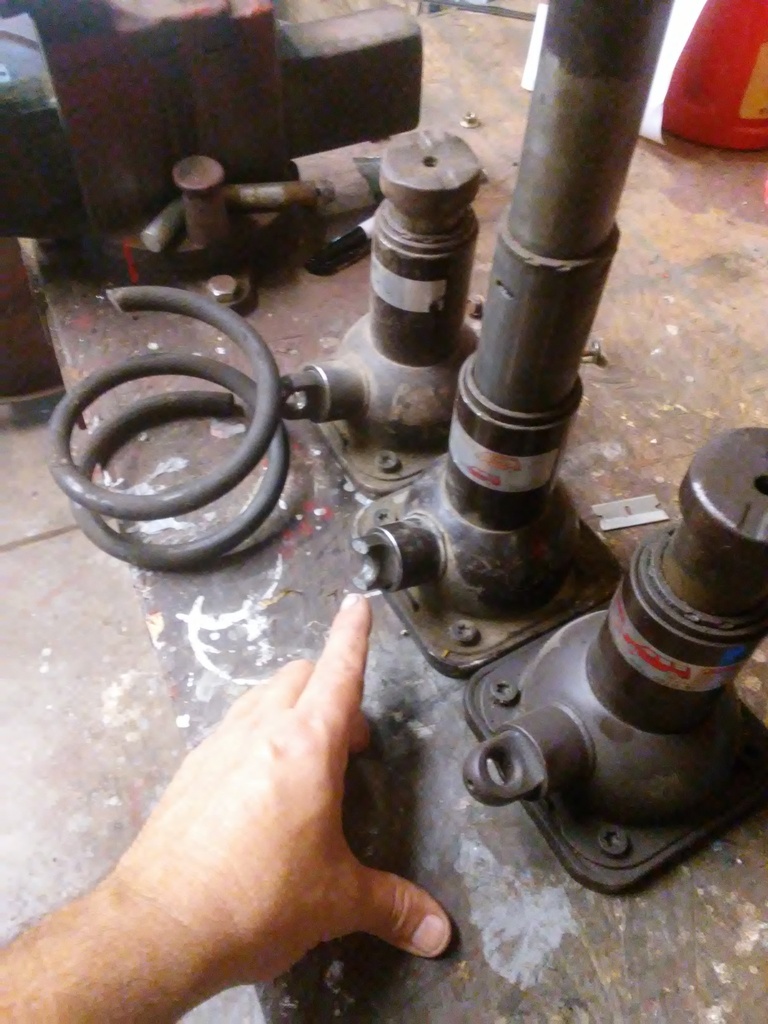
I had to cut off a 2 1/2 coils to get the springs to get them under the truck. I did not cut the bump stop. I did try using a spring compressor but gave up as I was afraid it was going to pop loose on me. It lifted the rear about 3 more inches to around 7 total.
Coils spring in. UPS did not get here until 1 so that took some time. Also did some touch up on the under side with black paint.
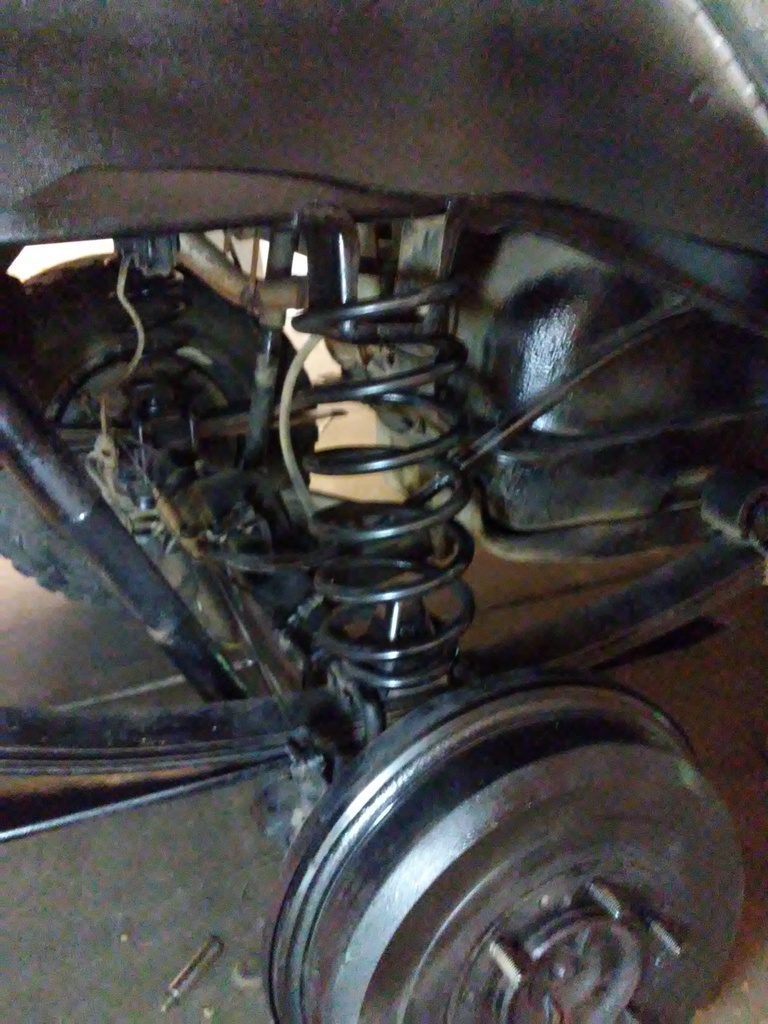
It is raining hard out side so dont want to get everything all muddy so just took an inside shot. Tuesday it goes and gets a Timing Chain installed. That will take 2-3 days.
Ever since I was a kid, I could destroy a wrecking ball without even trying. I was using a Toyota jack to spread the springs and frame apart and the eye of the jack snapped on me. It is made of pot metal. I cut 2 1/2 coils and luckily I have some spare jacks.

Coils spring in. UPS did not get here until 1 so that took some time. Also did some touch up on the under side with black paint.

It is raining hard out side so dont want to get everything all muddy so just took an inside shot. Tuesday it goes and gets a Timing Chain installed. That will take 2-3 days.

Ever since I was a kid, I could destroy a wrecking ball without even trying. I was using a Toyota jack to spread the springs and frame apart and the eye of the jack snapped on me. It is made of pot metal. I cut 2 1/2 coils and luckily I have some spare jacks.

Last edited by Terrys87; Sep 16, 2016 at 01:46 PM.


