
Mak92-4RnR's 1988 4Runner Build
 Jan 20, 2014 | 10:02 AM
#21
Very cool shots, bud! Especially love that panoramic at the end! Redeth005 got the little LED for the climate control panel... It looks good there! I'm not a huge fan of putting them in the gauges in the dash because I just find it a little bit distracting... Plus mine are really bright, after pulling the cluster a couple times and then cleaning it all thoroughly, including the bulbs, when I had it out.
I did get an email from someone telling me that they make a new cluster bulb that is a much wider angle beam and doesn't cause hot spots... They haven't responded as to who is making it, so I'm holding off.
I did get an email from someone telling me that they make a new cluster bulb that is a much wider angle beam and doesn't cause hot spots... They haven't responded as to who is making it, so I'm holding off.
Jan 20, 2014 | 10:16 AM
#22
Thread Starter
Registered User
Joined: Mar 2008
Posts: 6,059
Likes: 101
From: Sacramento, CA
Very cool shots, bud! Especially love that panoramic at the end! Redeth005 got the little LED for the climate control panel... It looks good there! I'm not a huge fan of putting them in the gauges in the dash because I just find it a little bit distracting... Plus mine are really bright, after pulling the cluster a couple times and then cleaning it all thoroughly, including the bulbs, when I had it out.
I did get an email from someone telling me that they make a new cluster bulb that is a much wider angle beam and doesn't cause hot spots... They haven't responded as to who is making it, so I'm holding off.
I did get an email from someone telling me that they make a new cluster bulb that is a much wider angle beam and doesn't cause hot spots... They haven't responded as to who is making it, so I'm holding off.
Jan 20, 2014 | 10:43 AM
#23
What tires again?
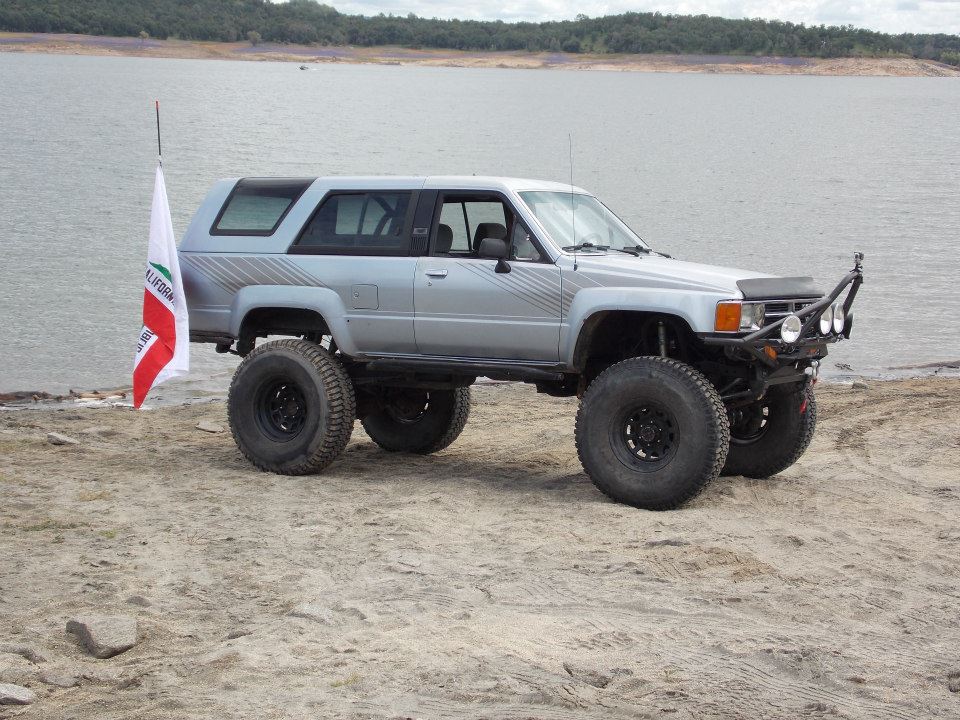
On the KM 1 35 inch tires that I had on there, even though they were 80 percent tread... I had a pretty good shake between 55 and 65... Slapped on new km2 set and no vibes at all. We couldn't figure it out, and we really didn't think it was the tires... They were all balanced well. Go figure...... Now I can do 90 on these 35 inch tires and don't have a single shake or vibration... Its just my little 22 re: reaching its max! Lol. I totally understand wanting to get it at the height and with the tires that you want though.... looking at that one picture, I'm sure you are not on perfectly level ground... But, wow, it sure does look like you have quite a bit of forward rake. I kind of like it! Lol.
On the KM 1 35 inch tires that I had on there, even though they were 80 percent tread... I had a pretty good shake between 55 and 65... Slapped on new km2 set and no vibes at all. We couldn't figure it out, and we really didn't think it was the tires... They were all balanced well. Go figure...... Now I can do 90 on these 35 inch tires and don't have a single shake or vibration... Its just my little 22 re: reaching its max! Lol. I totally understand wanting to get it at the height and with the tires that you want though.... looking at that one picture, I'm sure you are not on perfectly level ground... But, wow, it sure does look like you have quite a bit of forward rake. I kind of like it! Lol.
Jan 20, 2014 | 11:04 AM
#24
Thread Starter
Registered User
Joined: Mar 2008
Posts: 6,059
Likes: 101
From: Sacramento, CA
What tires again?
On the KM 1 35 inch tires that I had on there, even though they were 80 percent tread... I had a pretty good shake between 55 and 65... Slapped on new km2 set and no vibes at all. We couldn't figure it out, and we really didn't think it was the tires... They were all balanced well. Go figure...... Now I can do 90 on these 35 inch tires and don't have a single shake or vibration... Its just my little 22 re: reaching its max! Lol. I totally understand wanting to get it at the height and with the tires that you want though.... looking at that one picture, I'm sure you are not on perfectly level ground... But, wow, it sure does look like you have quite a bit of forward rake. I kind of like it! Lol.
On the KM 1 35 inch tires that I had on there, even though they were 80 percent tread... I had a pretty good shake between 55 and 65... Slapped on new km2 set and no vibes at all. We couldn't figure it out, and we really didn't think it was the tires... They were all balanced well. Go figure...... Now I can do 90 on these 35 inch tires and don't have a single shake or vibration... Its just my little 22 re: reaching its max! Lol. I totally understand wanting to get it at the height and with the tires that you want though.... looking at that one picture, I'm sure you are not on perfectly level ground... But, wow, it sure does look like you have quite a bit of forward rake. I kind of like it! Lol.
I can do 95 no problem in them. they just develop a shake past 70. I'd love to drop down to 35s, lower the truck about 2-3" and remove the blocks in the rear. 5.29s with the 35s would be great going up hills.
Yeah, the truck definitely rakes to the front. when I bought the truck the front springs were new and stiff. now with about 7k miles on them ( wheeling and DD combined ) they're dropping in the front. I might pull a leaf in the front and remove the blocks in the rear and hopefully itll be good to go.
Jan 20, 2014 | 11:34 AM
#25
Sounds like a decent, investigatory plan! I'm anxious to see what you come up with. I'm having problems with my rear springs. I posted my build thread some other problems I'm having regarding steering adjustment being all the way out on the rod ends on both sides... If you are any of your homies have any ideas, let me know. Aside from what I've already posted for verification purposes or I should say, for the purpose of process of elimination. Lots of pics and information. I also separated the rear springs thing at the end because it's totally different... Its just really weird that I'm sagging on one side after over 5,000 miles and lots of Wheeling.
Freaking love your rig man! Very nice! Can't wait to see whatever you do to her!
Freaking love your rig man! Very nice! Can't wait to see whatever you do to her!
Jan 24, 2014 | 06:58 AM
#27
Thread Starter
Registered User
Joined: Mar 2008
Posts: 6,059
Likes: 101
From: Sacramento, CA
a roller 302 is always an option too. I'd love to have the v8 power in this rig.
Jan 24, 2014 | 02:28 PM
#28
Registered User
Joined: Feb 2010
Posts: 301
Likes: 0
From: Southern California
Money is kept in the savings account for the 3.4. all the 3.0 is getting is maintenance done until its completely tired. I'm currently getting 14-17 mpg in this giant rig, so I cant complain right now.
a roller 302 is always an option too. I'd love to have the v8 power in this rig.
a roller 302 is always an option too. I'd love to have the v8 power in this rig.
 Jan 26, 2014 | 07:47 AM
#30


Very nice runner you have there. Im always jealous of the rust free Cali rigs. Its hard to find anything here in the rust belt that still has a solid frame and or floor.
Treadwright makes some decent retreads. They have a different process for making them rather than the traditional retread. There was a great write up in a 4x4 magazine a while back, i cannot remember exactly which one, but they tested the heck out of them with great results.
More pics please!
Treadwright makes some decent retreads. They have a different process for making them rather than the traditional retread. There was a great write up in a 4x4 magazine a while back, i cannot remember exactly which one, but they tested the heck out of them with great results.
More pics please!
 Jan 30, 2014 | 09:12 AM
#32
Money is kept in the savings account for the 3.4. all the 3.0 is getting is maintenance done until its completely tired. I'm currently getting 14-17 mpg in this giant rig, so I cant complain right now.
a roller 302 is always an option too. I'd love to have the v8 power in this rig.
a roller 302 is always an option too. I'd love to have the v8 power in this rig.
Really nice clean 4runner! Look forward to seeing what else you do to her. I may be a little biased, but I vote go with the 302

Last edited by rustED; Jan 30, 2014 at 09:13 AM.
Jan 31, 2014 | 01:33 PM
#33
Thread Starter
Registered User
Joined: Mar 2008
Posts: 6,059
Likes: 101
From: Sacramento, CA
Well what I was thinking is that if I sell the mustang ( 2004 roush ) and bought another truck ( double cab tundra or Tacoma ) I'd swap the 3.0 to a 5.0 that way I can have the mustang and the truck all in one.
May 14, 2014 | 08:03 AM
#34
Thread Starter
Registered User
Joined: Mar 2008
Posts: 6,059
Likes: 101
From: Sacramento, CA
It's been awhile since I've updated this.
As many already know. my truck blew a headgasket traveling down I99 near elk grove about 2-3 months ago. I wasn't too excited to do the headgasket myself and lacked the desire to do it. I supplied the parts ( OEM gaskets and head studs ) while also replaced a few things ( knock sensor, timing belt, water pump ) and had a shop do it while i drove my Mustang. But anywho, I've had the truck back now for about a month and its running better than ever! Here's a few things I've done with/to the truck since I've had her back:
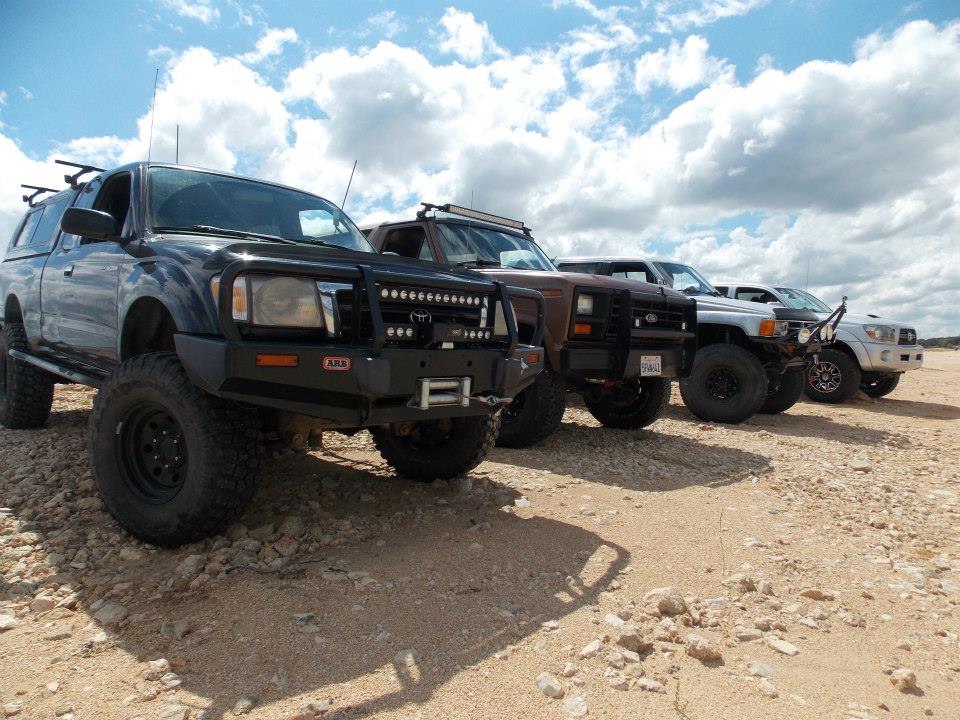
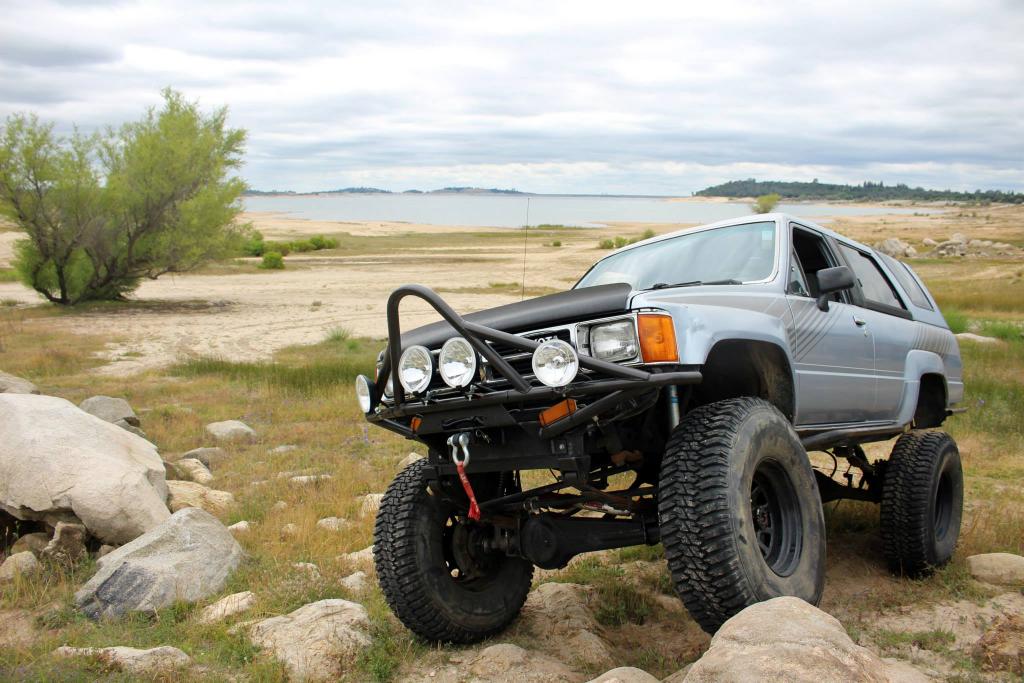
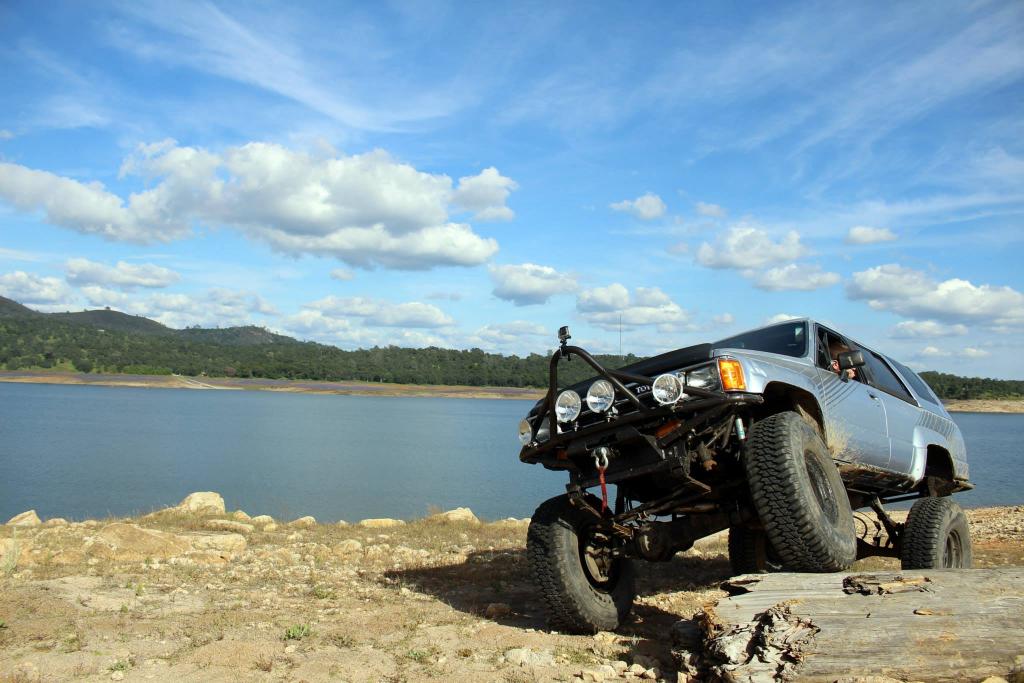
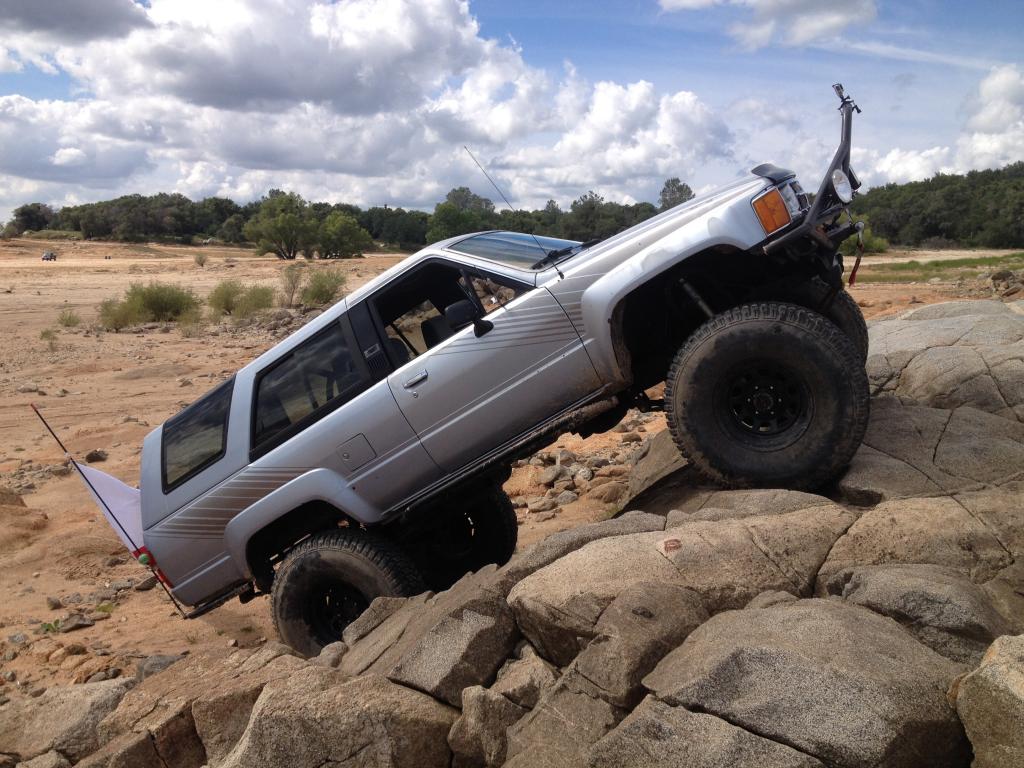
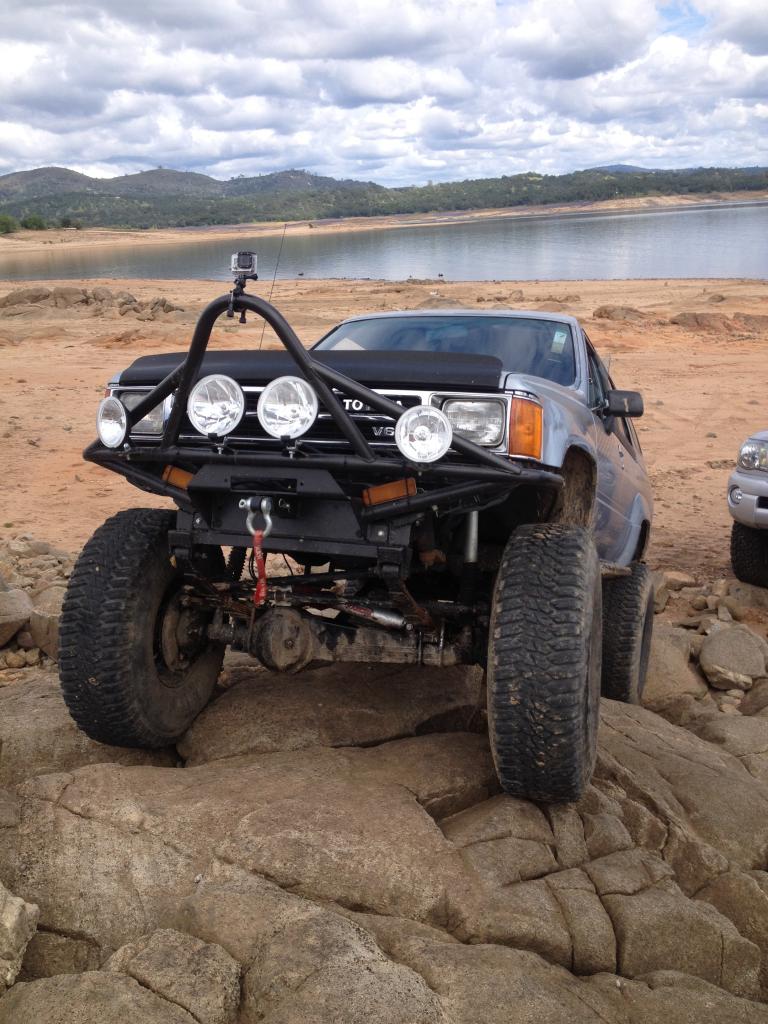
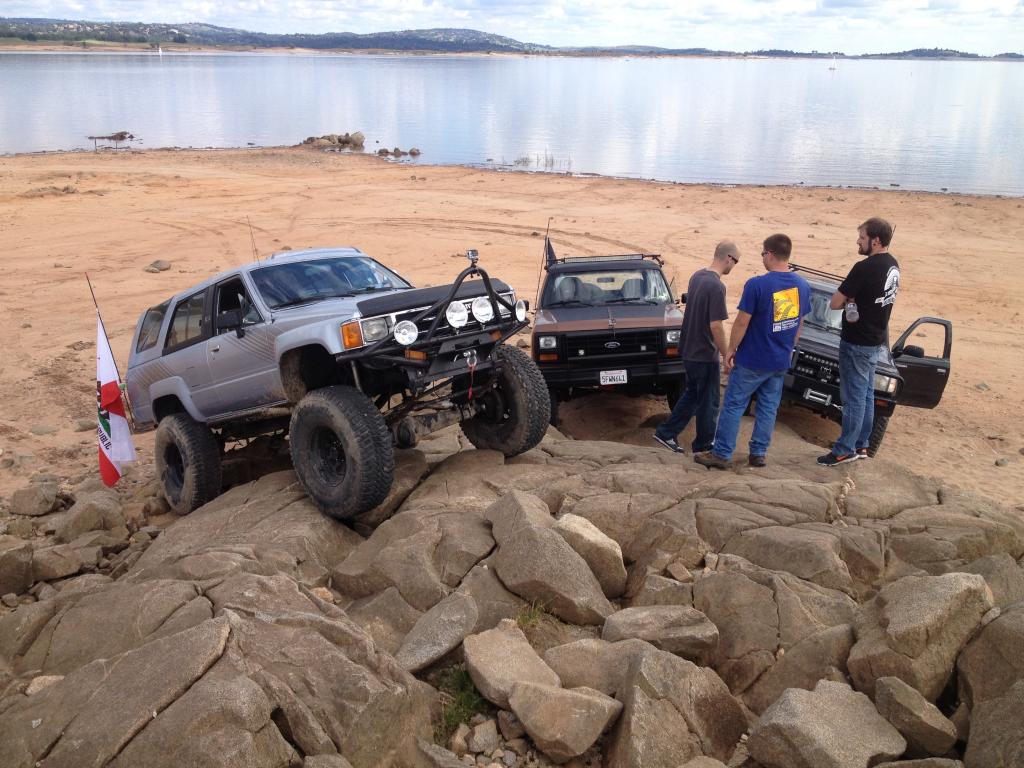
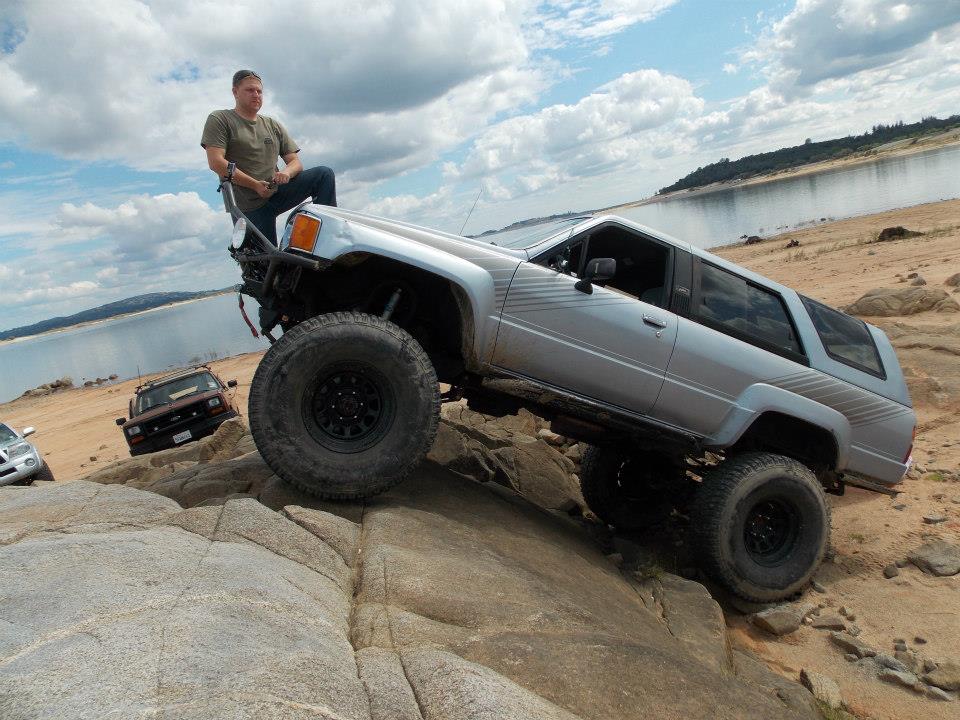
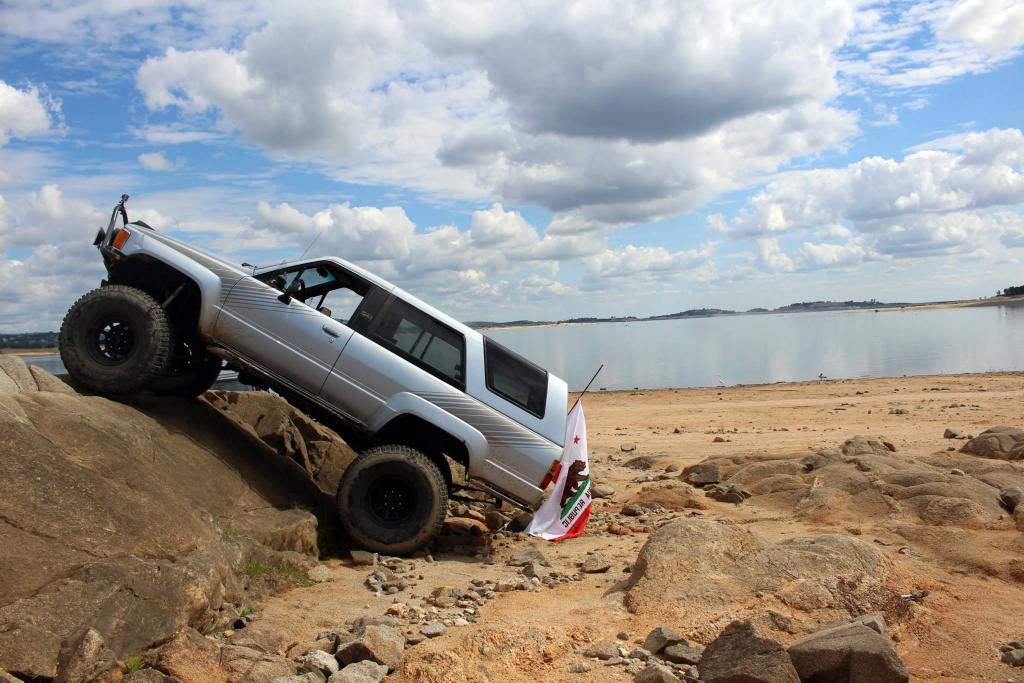
I recently installed lift kits on a friend's FS Bronco and a 2011 Tacoma, and they wanted to break it in it a little, so with a new top end on the 4Runner, we made a quick day trip to folsom lake. with the water level low, it makes a good place for some wheeling, but while we were out there, we were asked to not climb around on the rocks and such since everything is protected. It made for some good photo opportunities until the Ranger asked politely for us to get down.
Group shot:


As many already know. my truck blew a headgasket traveling down I99 near elk grove about 2-3 months ago. I wasn't too excited to do the headgasket myself and lacked the desire to do it. I supplied the parts ( OEM gaskets and head studs ) while also replaced a few things ( knock sensor, timing belt, water pump ) and had a shop do it while i drove my Mustang. But anywho, I've had the truck back now for about a month and its running better than ever! Here's a few things I've done with/to the truck since I've had her back:
I recently installed lift kits on a friend's FS Bronco and a 2011 Tacoma, and they wanted to break it in it a little, so with a new top end on the 4Runner, we made a quick day trip to folsom lake. with the water level low, it makes a good place for some wheeling, but while we were out there, we were asked to not climb around on the rocks and such since everything is protected. It made for some good photo opportunities until the Ranger asked politely for us to get down.
Group shot:


 May 14, 2014 | 08:34 AM
#36
Thread Starter
Registered User
Joined: Mar 2008
Posts: 6,059
Likes: 101
From: Sacramento, CA
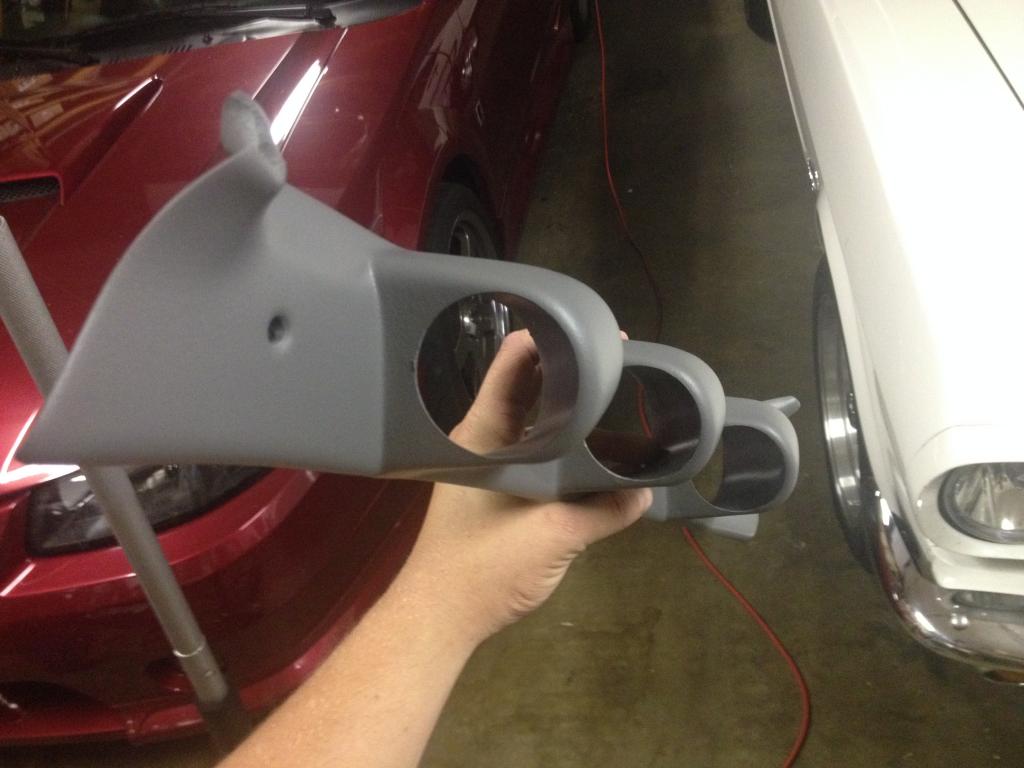
After my headgasket blew in this truck, I decided I wanted to keep a closer eye on things. The temperature gauge has been getting extremely tired lately. Right when I start my truck up in the morning the gauge just goes to half instantly, and after a few seconds it drops to cold, and then after 3 seconds goes back to half again. So rather than deal with that, I decided to just put my own gauge in. Ordered the pod, 3 gauges ( oil pressure, volts and water temperature ) and slapped them in. I went with volts because my truck is originally an automatic.
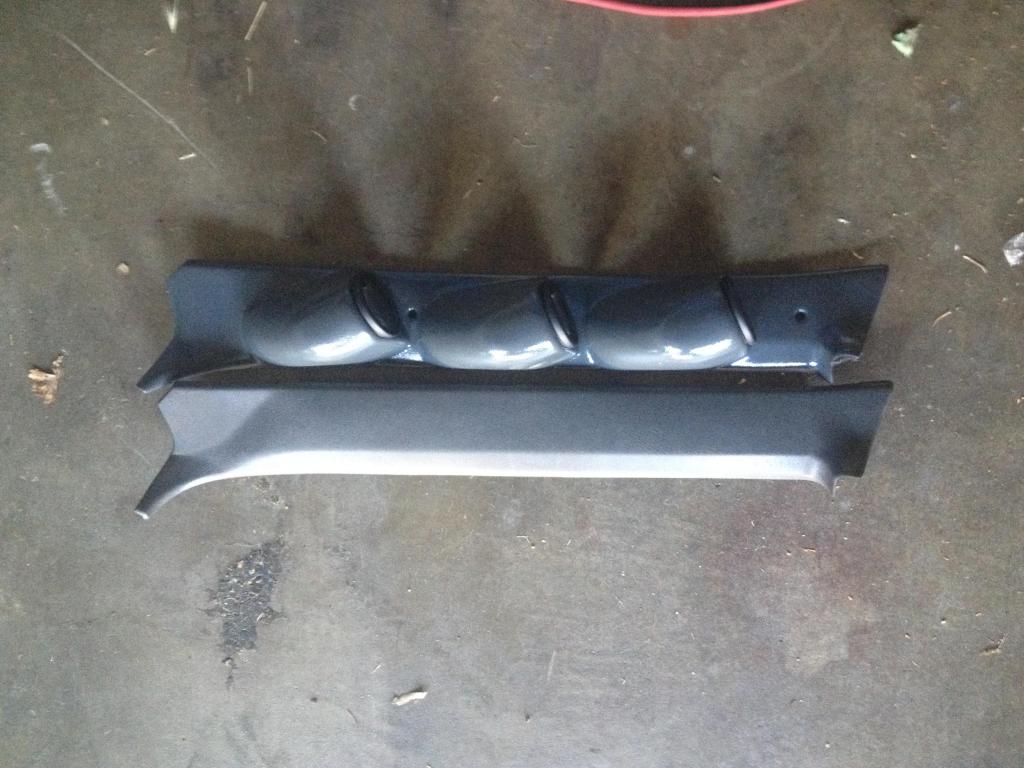
Anyway, Ordered the gauge pod gray, but it was more of a silver color so I made a trip to home depot for the closest match. its a glossy gray, but its the closest I could get. I have no complaints, you can barely tell the difference inside the truck.
Pre paint:
After paint w/ gauges installed:
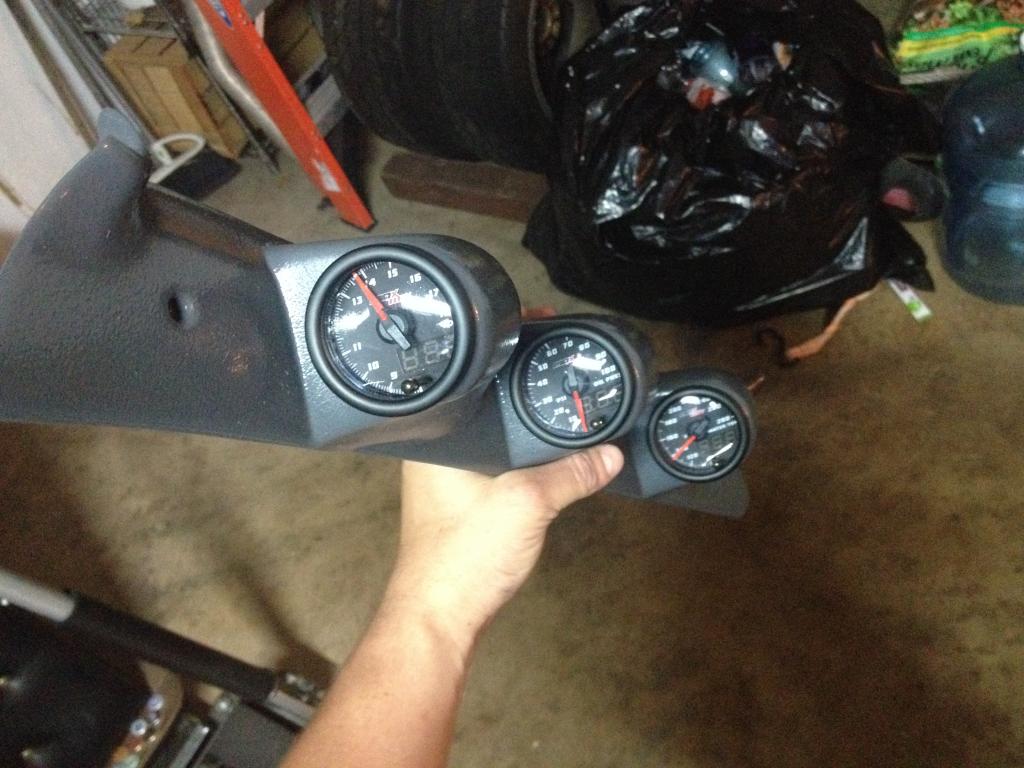
interior panel pulled next to new panel with gauges:
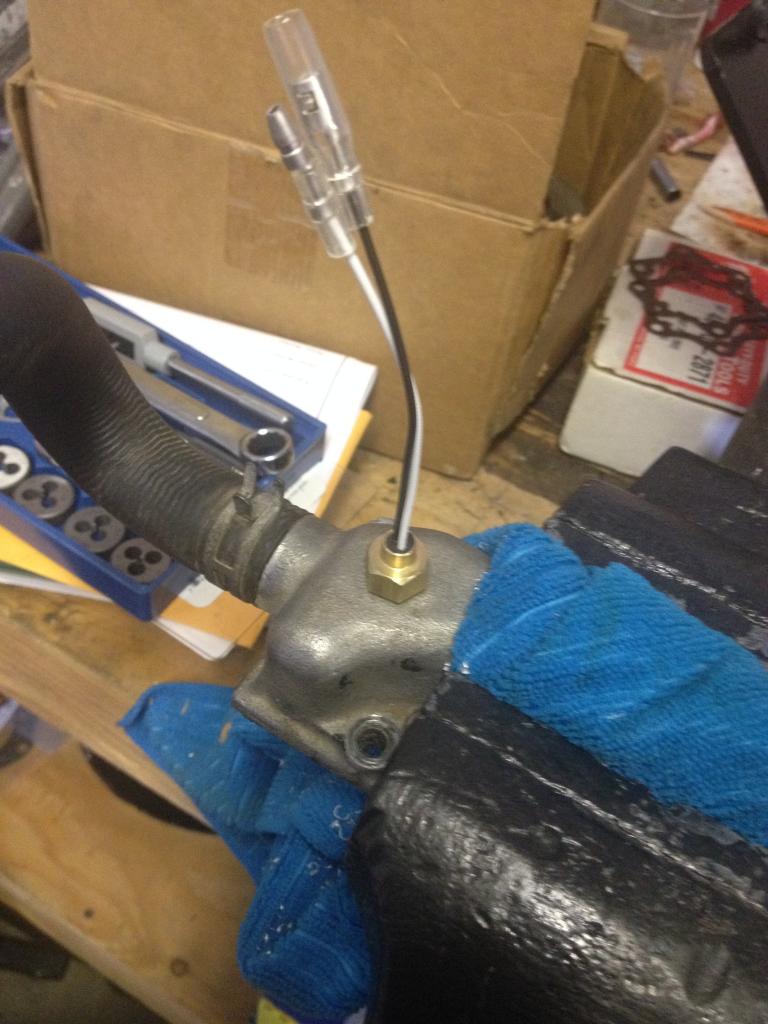
Drilled & tapped 1/8 sender into the upper radiator hose neck and wrapped the threads with Teflon tape:
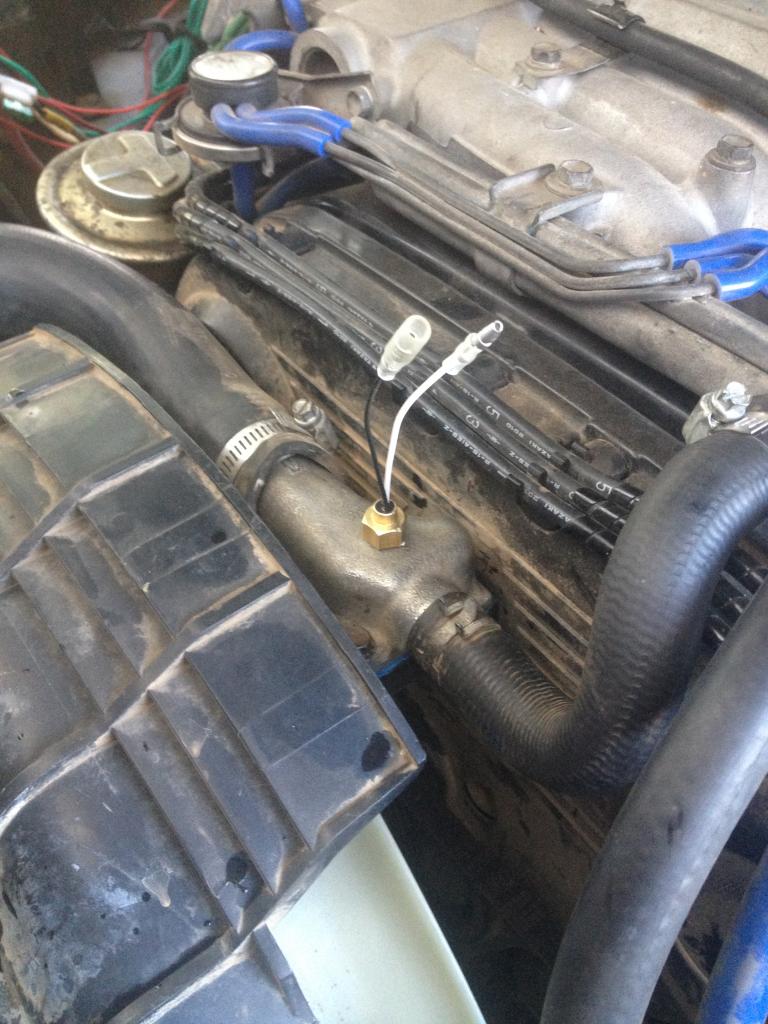
installed the modified neck w/ sender:
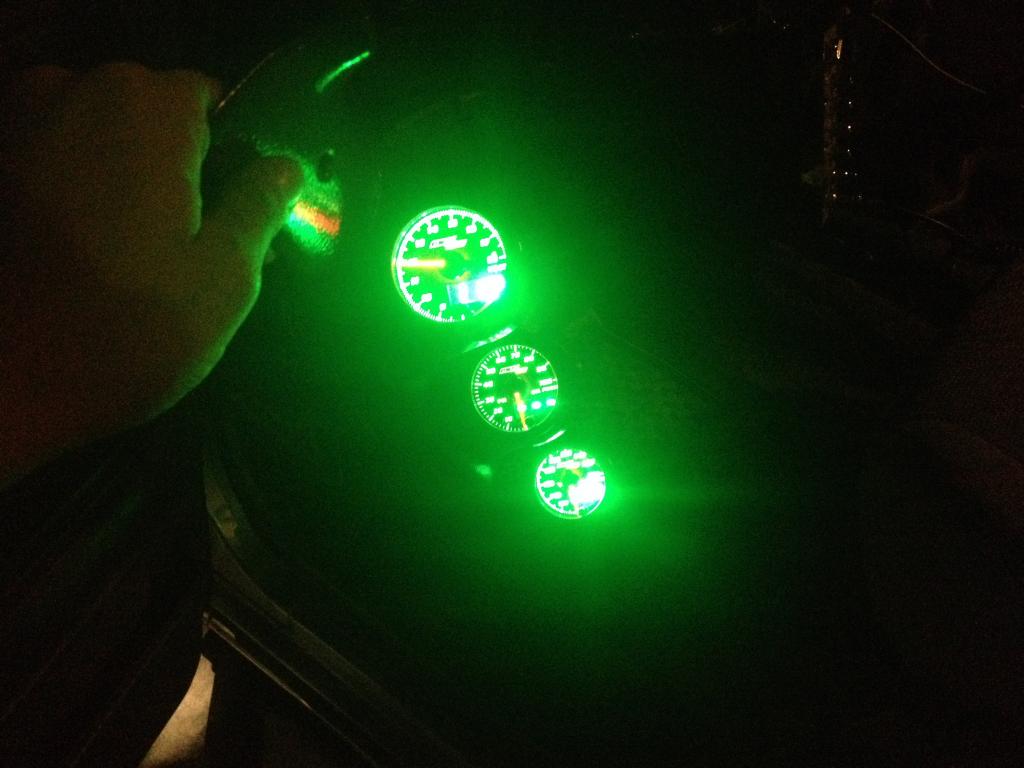
gauges wired up and installed. This is before I modified the brightness on the gauge:
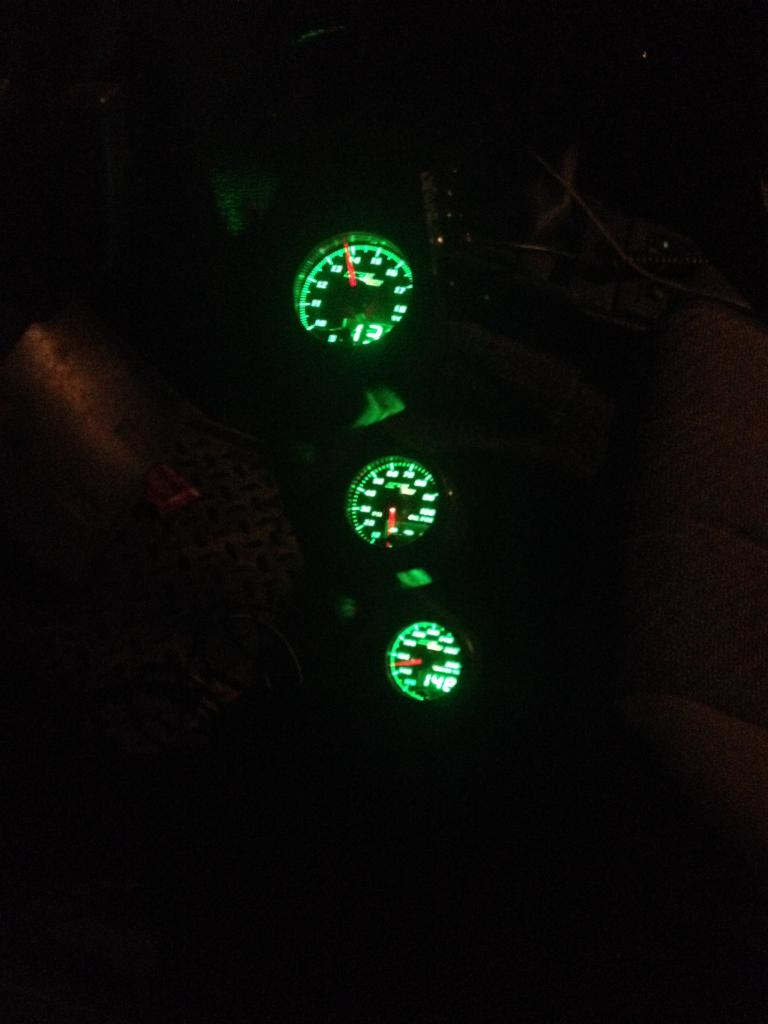
This is after the brightness has been modified:
Here's the pod installed:
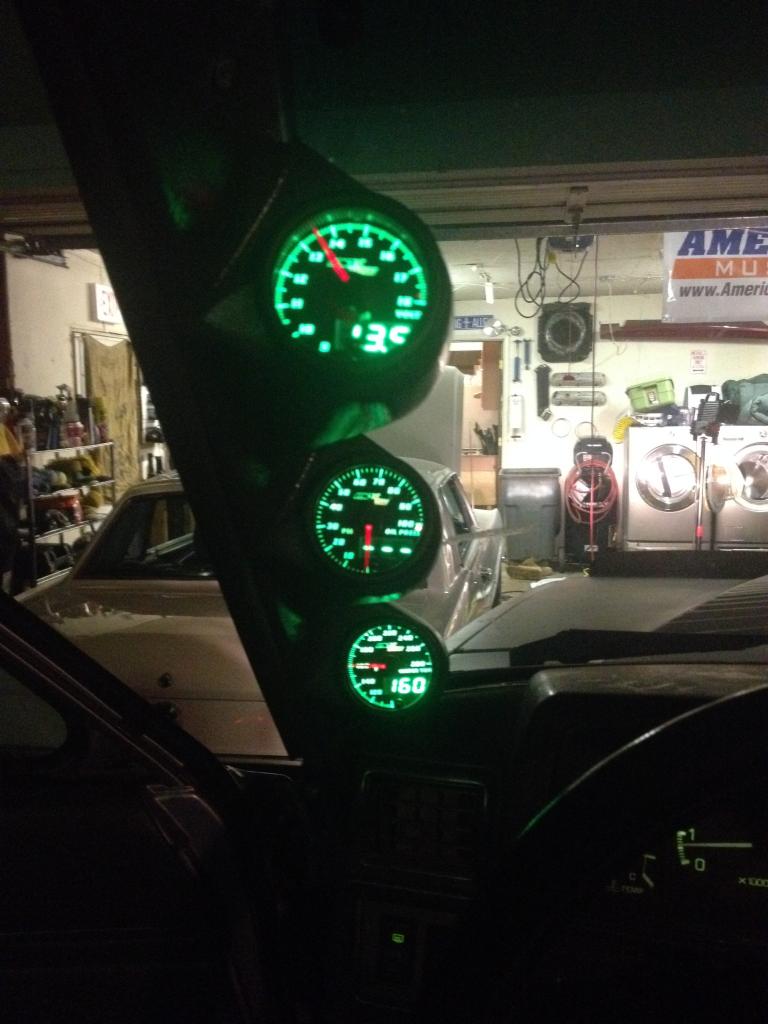
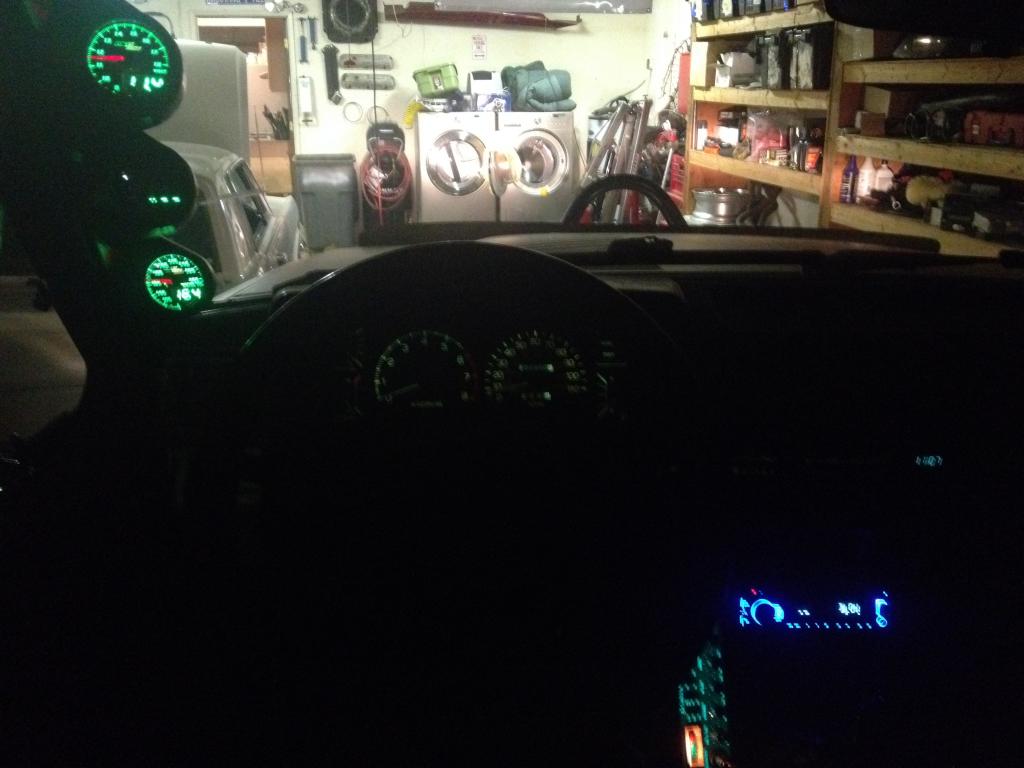
picture of the whole interior and how the gauges face me:
Here's a quick video of how the gauges work. They're wired into my headlight switch. the analog needle works as intended, but the gauges don't light up unless the running lights are on. The oil pressure gauge is currently not hooked up because I still need to get a T fitting to mate the stock oil pressure sender and add the new one. So yes, it flashes letting me know the gauge isn't working correctly.
https://www.youtube.com/watch?v=0fmN...ature=youtu.be
All in all, its definitely a great setup, definitely a must for ANY 3vz owner. The gauge pod was an exact copy of the stock pillar interior trim piece. The bottom two gauges are extremely easy to see, but the top one ( where I mounted my volt gauge ) I cant really see the digital number on the gauge, but I can read the needle no problem. But then again, its volts... who cares. lol
Anyway, Ordered the gauge pod gray, but it was more of a silver color so I made a trip to home depot for the closest match. its a glossy gray, but its the closest I could get. I have no complaints, you can barely tell the difference inside the truck.
Pre paint:

After paint w/ gauges installed:

interior panel pulled next to new panel with gauges:

Drilled & tapped 1/8 sender into the upper radiator hose neck and wrapped the threads with Teflon tape:

installed the modified neck w/ sender:

gauges wired up and installed. This is before I modified the brightness on the gauge:

This is after the brightness has been modified:

Here's the pod installed:

picture of the whole interior and how the gauges face me:

Here's a quick video of how the gauges work. They're wired into my headlight switch. the analog needle works as intended, but the gauges don't light up unless the running lights are on. The oil pressure gauge is currently not hooked up because I still need to get a T fitting to mate the stock oil pressure sender and add the new one. So yes, it flashes letting me know the gauge isn't working correctly.
https://www.youtube.com/watch?v=0fmN...ature=youtu.be
All in all, its definitely a great setup, definitely a must for ANY 3vz owner. The gauge pod was an exact copy of the stock pillar interior trim piece. The bottom two gauges are extremely easy to see, but the top one ( where I mounted my volt gauge ) I cant really see the digital number on the gauge, but I can read the needle no problem. But then again, its volts... who cares. lol
Last edited by MaK92-4RnR; May 14, 2014 at 08:38 AM.
May 14, 2014 | 10:01 AM
#37
Registered User
Joined: Apr 2013
Posts: 478
Likes: 4
From: Louisiana
I like the pillar pod. Im going to be adding at least a coolant temp and oil pressure guage to mine when I finish up the 4.3 swap. Ive been contemplating buying one of those or mounting down in front of the shifter.
May 14, 2014 | 11:49 AM
#38
Sorry to hear about the headgasket, but glad you got her up and going again! Nice wheelin pics, look like you guys had a good time!
I like the how your gauges turned out, I was on the fence about getting the A-piller gauge pod, I wasn't sure if it would be too distracting, but after seeing yours installed I kinda wish I'd oredered one of those. I just got a universal 3 gauge mount to put on the dash (were the inclinometer would go) and went with Glowshift water temp, oil pressure, and volts gauges.... its kinda funny, in the middle of typing this the UPS driver just delivered mine, lol.
I like the how your gauges turned out, I was on the fence about getting the A-piller gauge pod, I wasn't sure if it would be too distracting, but after seeing yours installed I kinda wish I'd oredered one of those. I just got a universal 3 gauge mount to put on the dash (were the inclinometer would go) and went with Glowshift water temp, oil pressure, and volts gauges.... its kinda funny, in the middle of typing this the UPS driver just delivered mine, lol.
Last edited by rustED; May 14, 2014 at 11:56 AM.
May 14, 2014 | 11:53 AM
#39
Thread Starter
Registered User
Joined: Mar 2008
Posts: 6,059
Likes: 101
From: Sacramento, CA
Sorry to hear about the headgasket, but glad you got her up and going again! Nice wheelin pics, look like you guys had a good time!
I like the how your gauges turned out, I was on the fence about get the A-piller gauge pod, I wasn't sure if it would be too distracting, it after seeing yours installed I kinda wish I'd oredered one of those. I just got a universal 3 gauge mount to put on the dash (were the inclinometer would go) its kinda funny, in the middle of typing this the UPS driver just delivered mine, lol.
I like the how your gauges turned out, I was on the fence about get the A-piller gauge pod, I wasn't sure if it would be too distracting, it after seeing yours installed I kinda wish I'd oredered one of those. I just got a universal 3 gauge mount to put on the dash (were the inclinometer would go) its kinda funny, in the middle of typing this the UPS driver just delivered mine, lol.


