
Kiyobrown's 1987 4Runner Build-Up Thread
 Aug 31, 2010 | 09:50 PM
#4
Thread Starter
Registered User
Joined: Feb 2009
Posts: 7,591
Likes: 76
From: Tacoma, WA
Kiyobrown's 1987 4Runner Build-Up Thread
Exterior
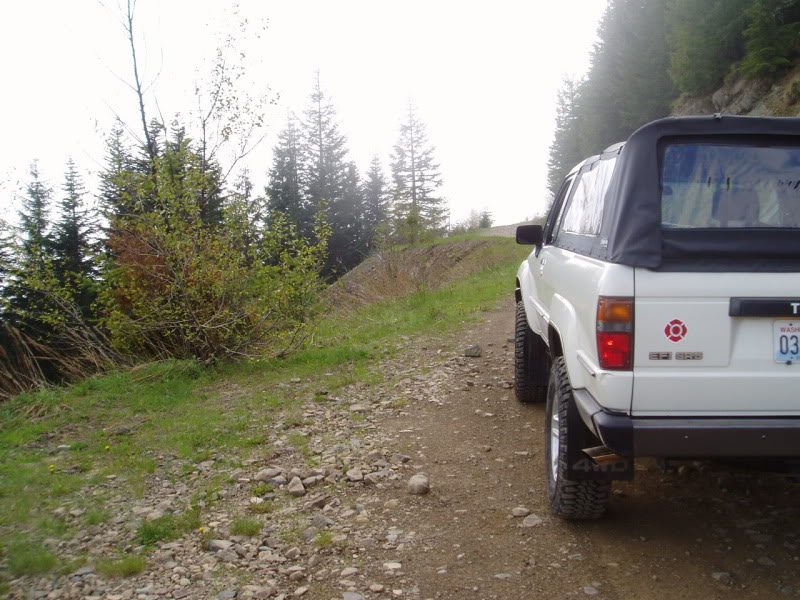
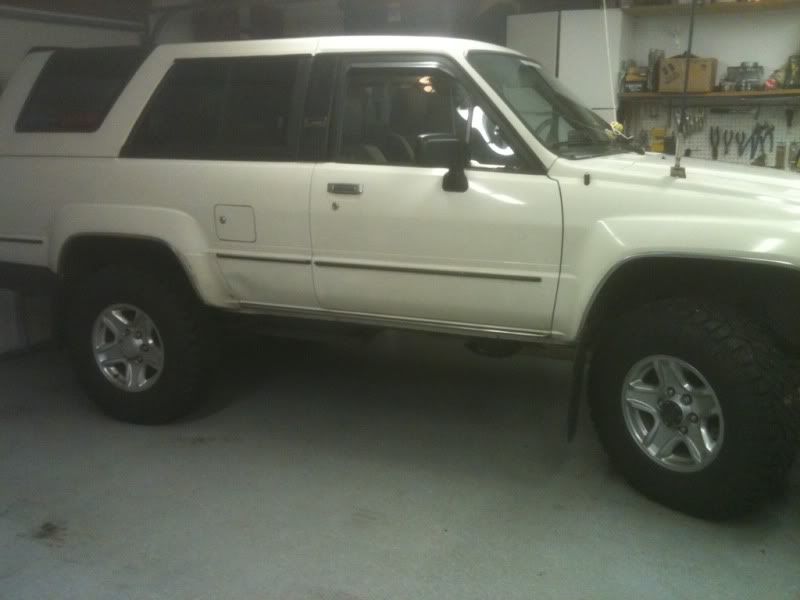
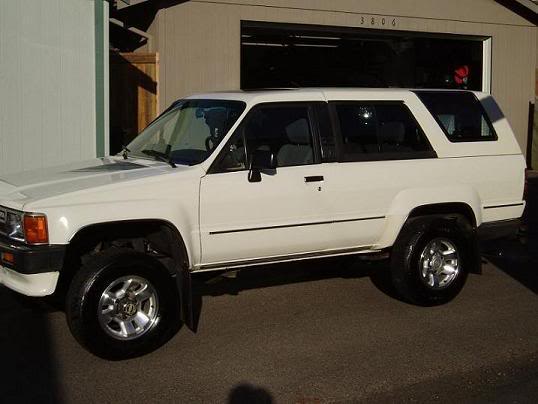
Tried looking for a pic of it when I brought it home, but I didn't get one til after I had removed the stripes. (a necessity since the second a pressure washer hit it the decal exploded and all that was left was sticky residue in the shape of old SR5 decals.) And I had already swapped rims from the old brake dust stained alloys to Tacoma rims with 235/75/15's on 'em....

It came with a Smittybilt bumper when I got it. Took me a while but I found a stock painted rear bumper to match the front. It also came with the hitch.
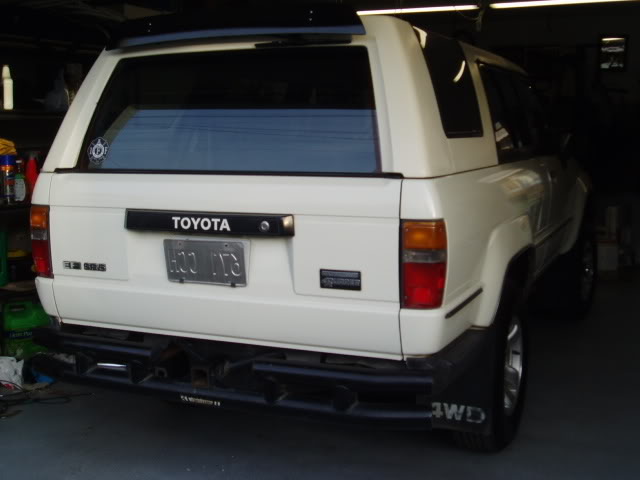
Best pic of rear bumper I had. Also if you look close, you can see the damage to the rear corner, which is why they bought a smittybilt bumper in the first place.
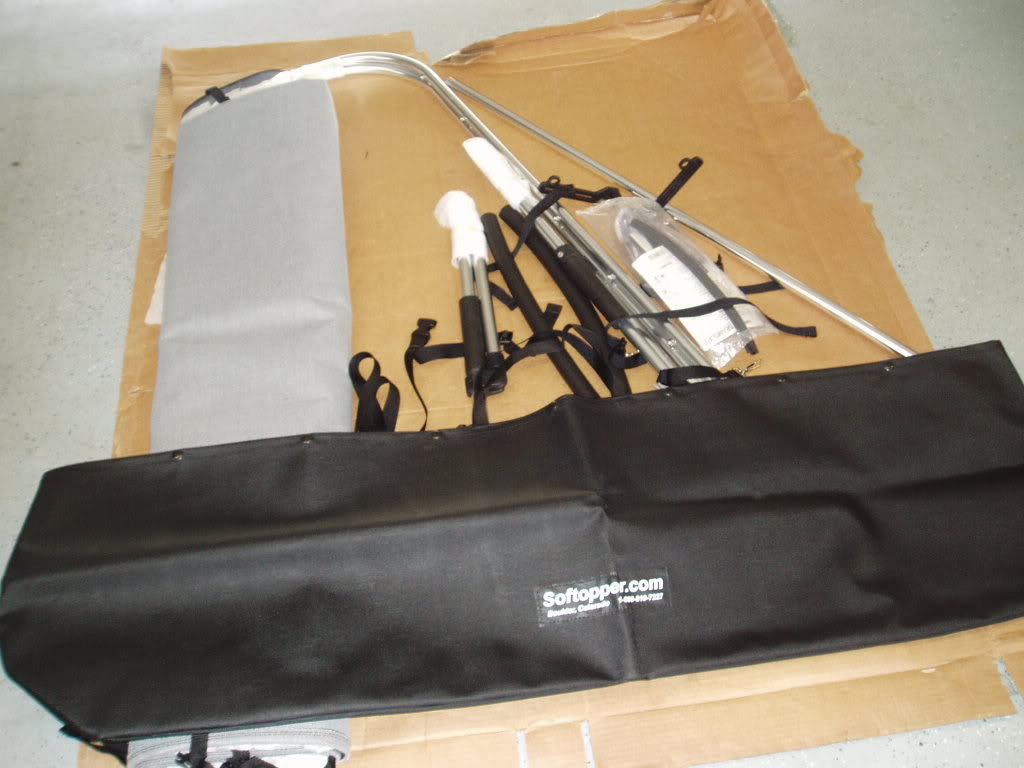
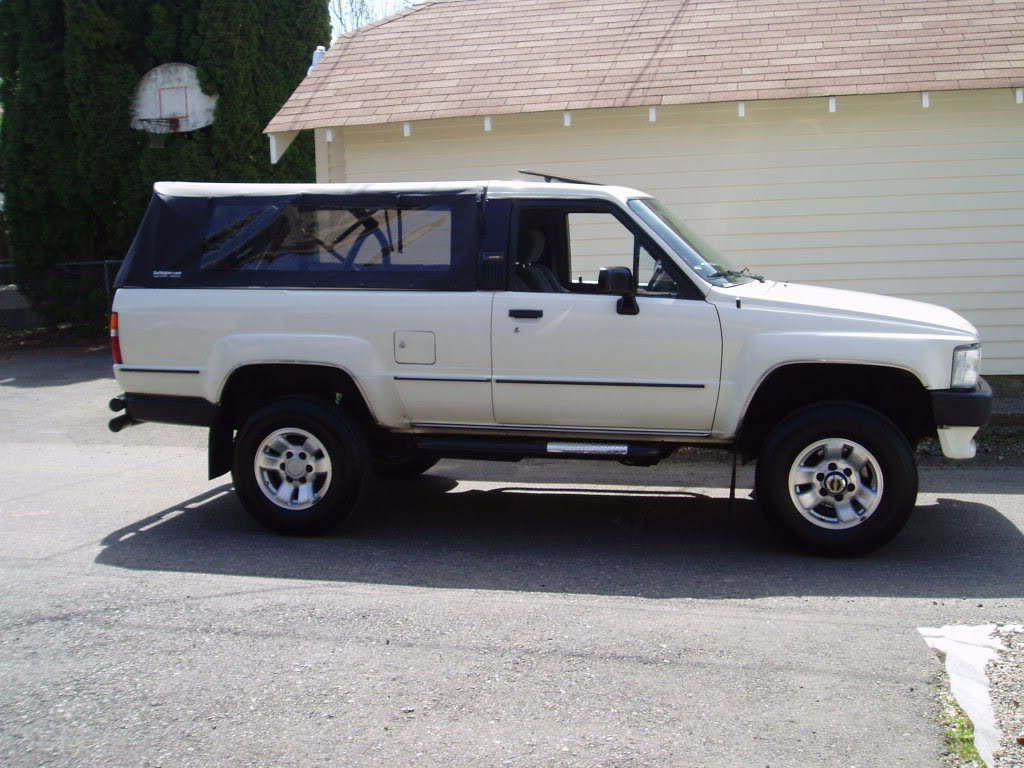
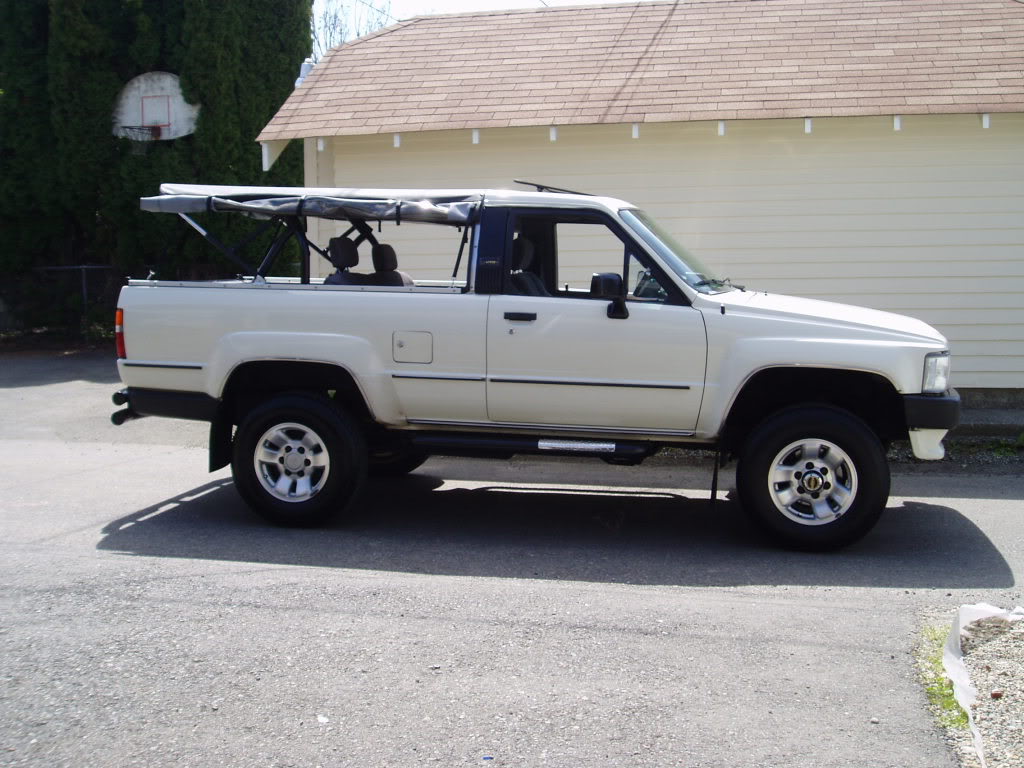
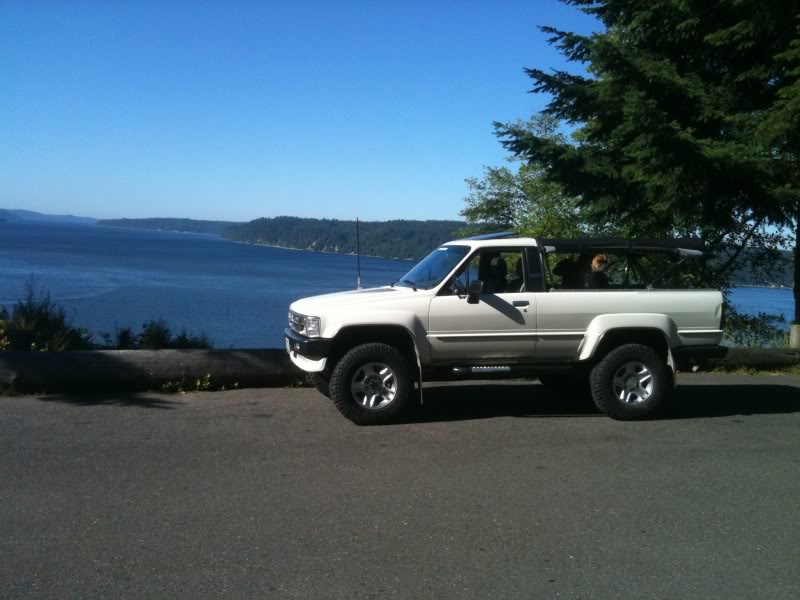
Birthday present from the wife....... Softopper. I have used it 2 full summers. LOVE IT!! Easy to assemble, easy to move from full top to safari to full sun.
Apparently they now come in black, grey, tan and white!!!!
http://www.softopper.com/Softopper_M...04Runner%20All
full
safari
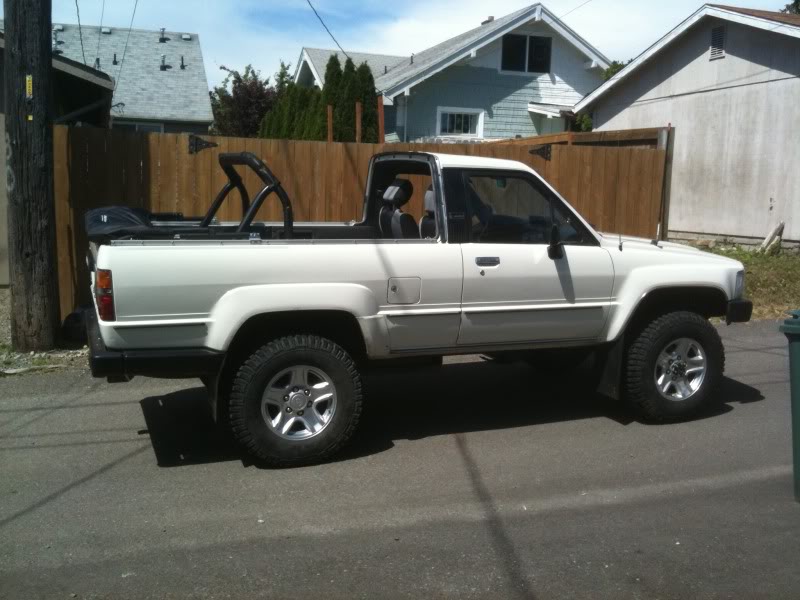
Found one all the way stowed.....
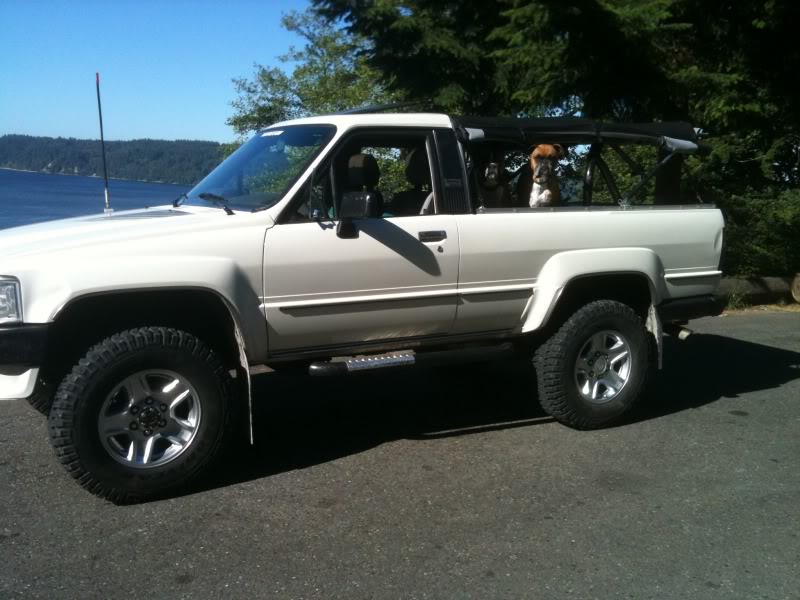
Sliders from 4X innovations. Love the rear kickout. Helps in the summer for messing with the soft top. Thanks to Levi for the welding skills. Used zero rust paint on them. It has held up very well, and a fresh coat looks like powdercoat. And when you touch up chips it fills in nicely, so it doesn't look like you just filled in a chip.
Hood scoop. Probably belongs in the 3.4 swap section, but its on the exterior so it goes here.
Tried looking for a pic of it when I brought it home, but I didn't get one til after I had removed the stripes. (a necessity since the second a pressure washer hit it the decal exploded and all that was left was sticky residue in the shape of old SR5 decals.) And I had already swapped rims from the old brake dust stained alloys to Tacoma rims with 235/75/15's on 'em....
It came with a Smittybilt bumper when I got it. Took me a while but I found a stock painted rear bumper to match the front. It also came with the hitch.
Best pic of rear bumper I had. Also if you look close, you can see the damage to the rear corner, which is why they bought a smittybilt bumper in the first place.
Birthday present from the wife....... Softopper. I have used it 2 full summers. LOVE IT!! Easy to assemble, easy to move from full top to safari to full sun.
Apparently they now come in black, grey, tan and white!!!!
http://www.softopper.com/Softopper_M...04Runner%20All
full
safari
Found one all the way stowed.....
Sliders from 4X innovations. Love the rear kickout. Helps in the summer for messing with the soft top. Thanks to Levi for the welding skills. Used zero rust paint on them. It has held up very well, and a fresh coat looks like powdercoat. And when you touch up chips it fills in nicely, so it doesn't look like you just filled in a chip.
Hood scoop. Probably belongs in the 3.4 swap section, but its on the exterior so it goes here.
Last edited by kiyobrown; Mar 16, 2013 at 03:59 PM.
Aug 31, 2010 | 09:50 PM
#5
Thread Starter
Registered User
Joined: Feb 2009
Posts: 7,591
Likes: 76
From: Tacoma, WA
Kiyobrown's 1987 4Runner Build-Up Thread
Interior/Stereo
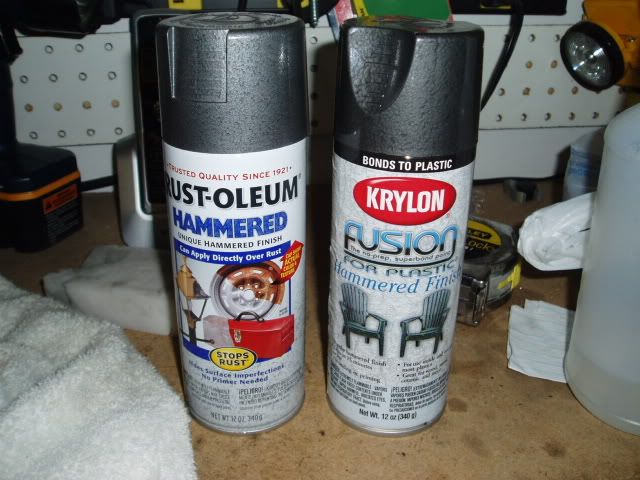
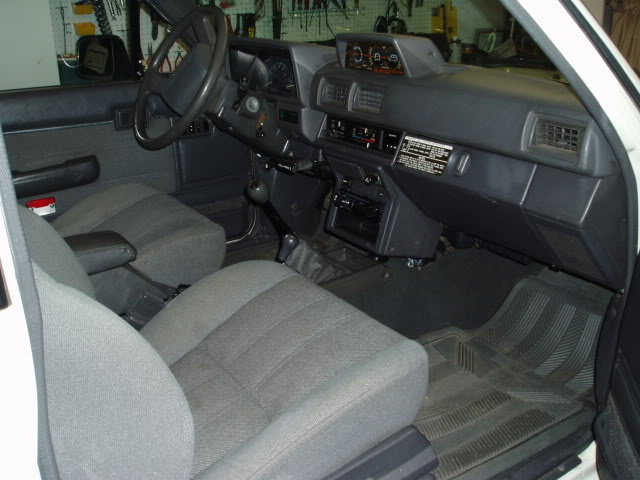
Cleaned up the interior. Pulled and painted the carpets using duplicolor vinyl and fabric spray. Stinks like hell for about a week, but has held up well. Also painted the cargo panels with Krylon Fusion for plastics (sorry DC). Bumpers got duplicolor rim paint in Charcoal (almost a dead ringer for the stock paint)
interior

Panels
Bumpers

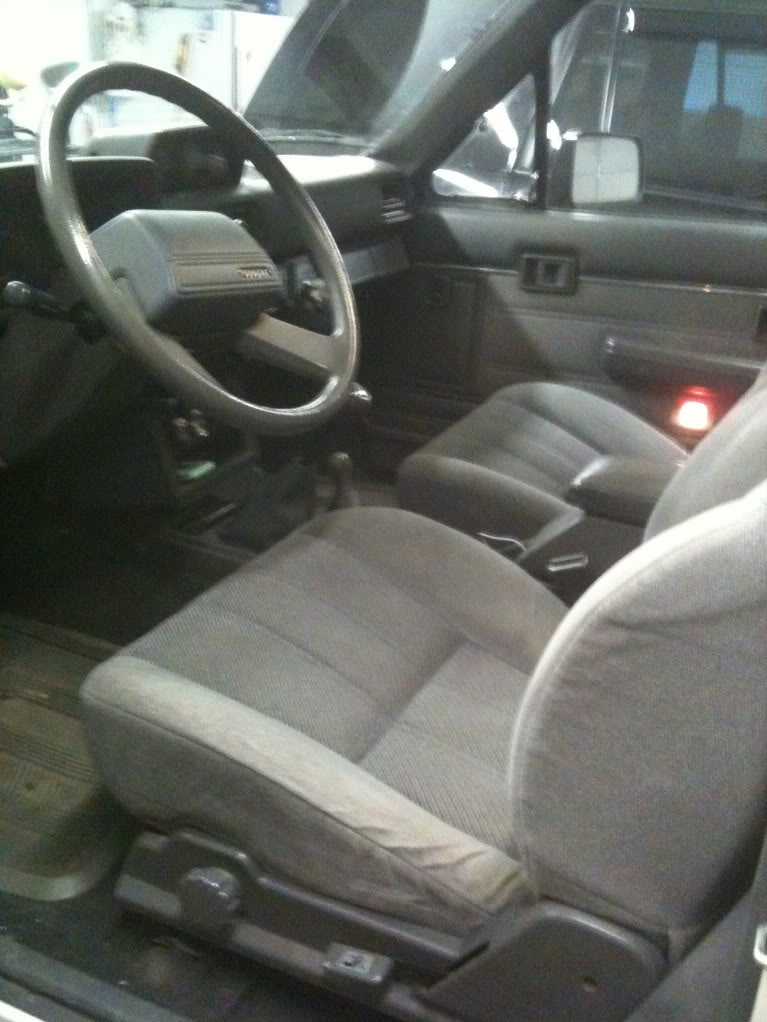
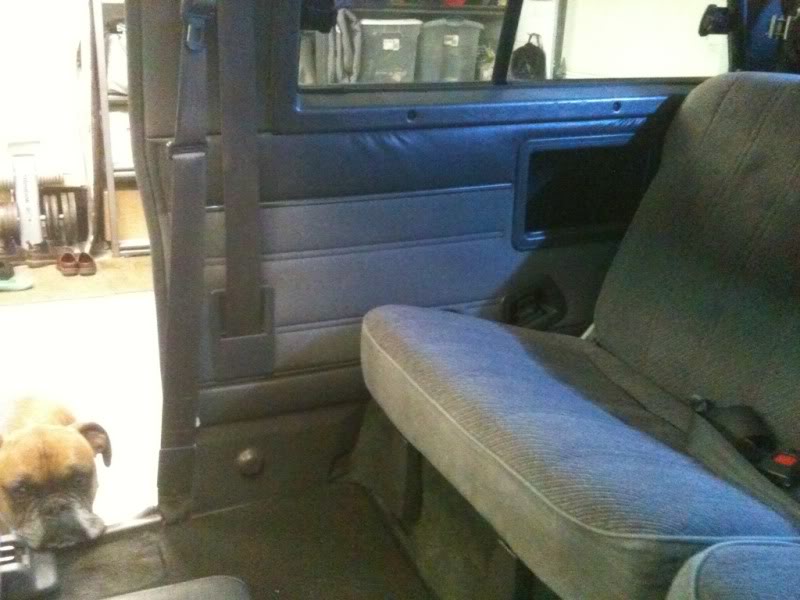
Some interior shots......
Thats original, its not all cracked and falling apart
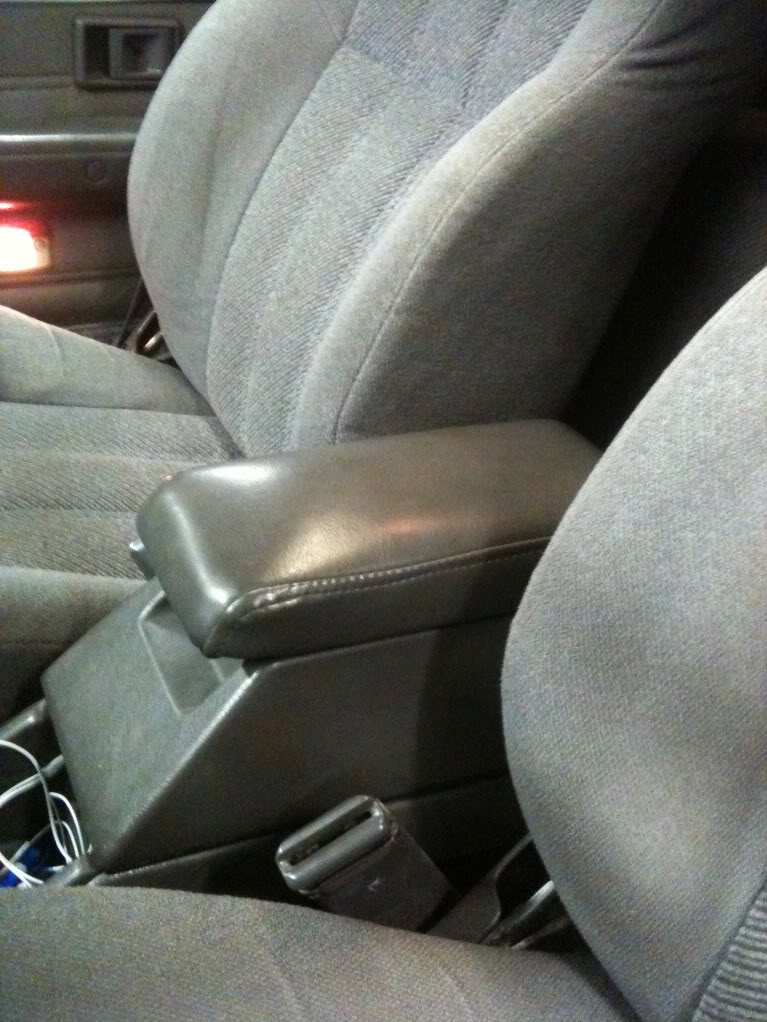
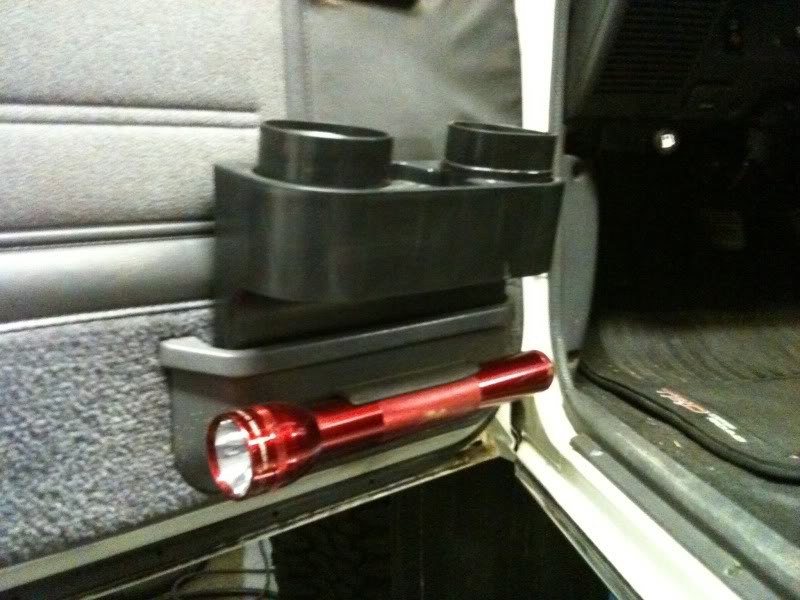
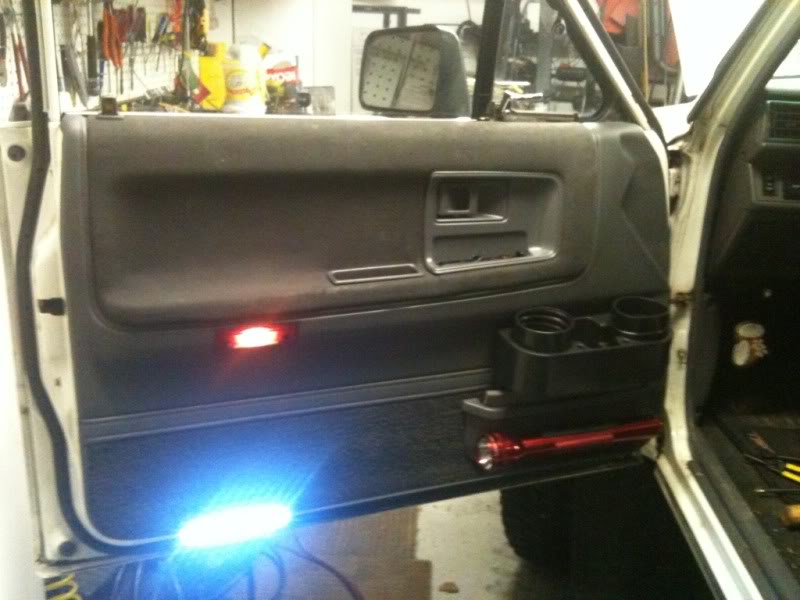
Cupholders!! Yes, another idea "borrowed" from BBP. Thanks Logan! Called "the wedgie" fits in the map pocket, I have a spare piece of Anti fatigue matting from the sound deadening stuffed behind it to keep it a tighter fit.
Don't forget the maglite mount! Used a piece of PVC pipe (1 1/2"??? Can"t remember off the top of my head) cut out the center section, filed the edges smooth, used rivets and a piece of bar stock inside the pocket for reinforcement.
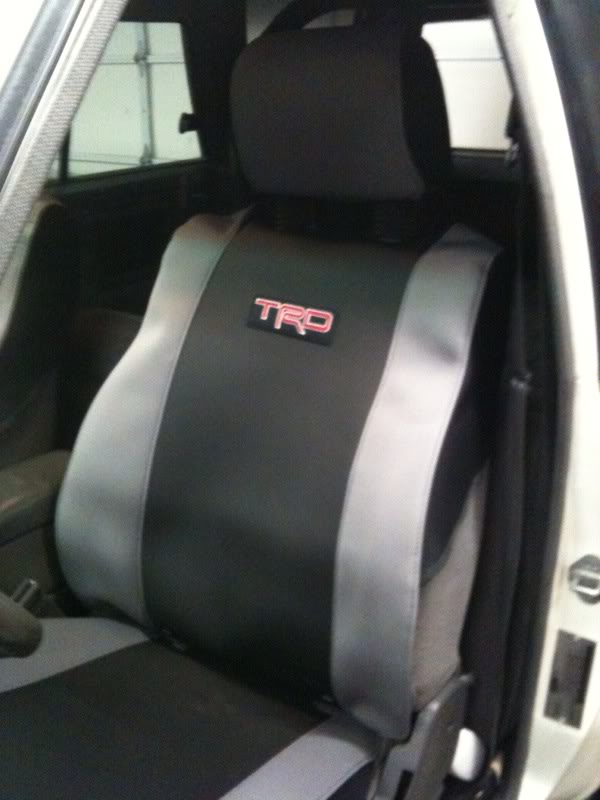
Picked these up. Yes I know they say TRD, but When Wet Okoles are over $200, and these were less then half, and just as thick, I can deal with 'em saying TRD on em. Also, the sides are not full sides, so you can still access the adjustments on the side for Lumbar and such.
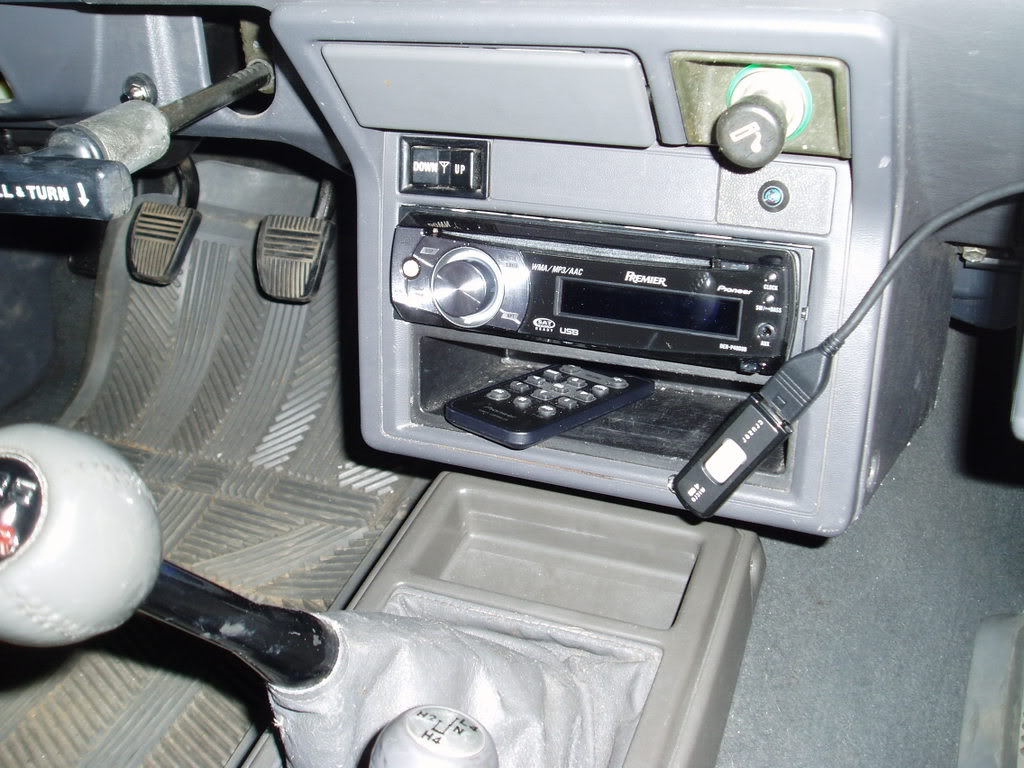
Installed a new stereo, and of course, did it on the cheap.
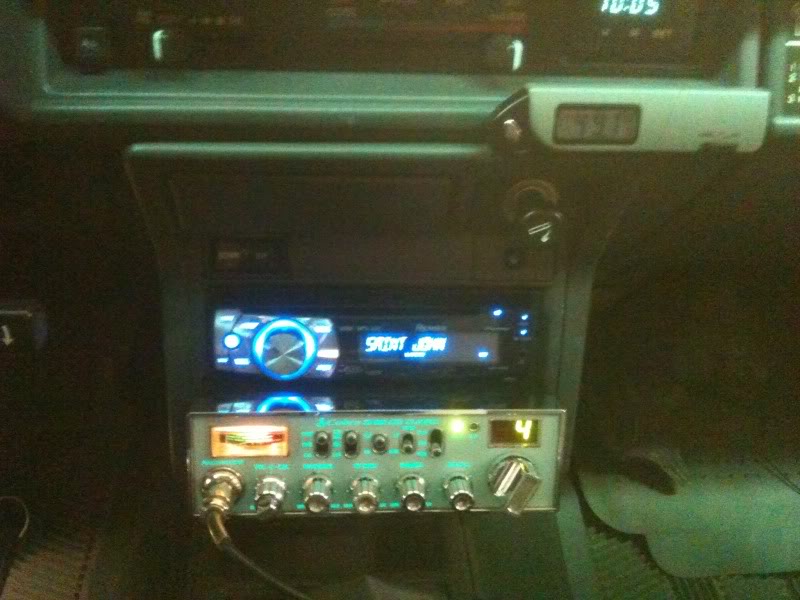
Pioneer DEH- 400UB. Had USB and Ipod hookup, cable run to the glove box.
Fronts 4' boston acoustic separates RC420
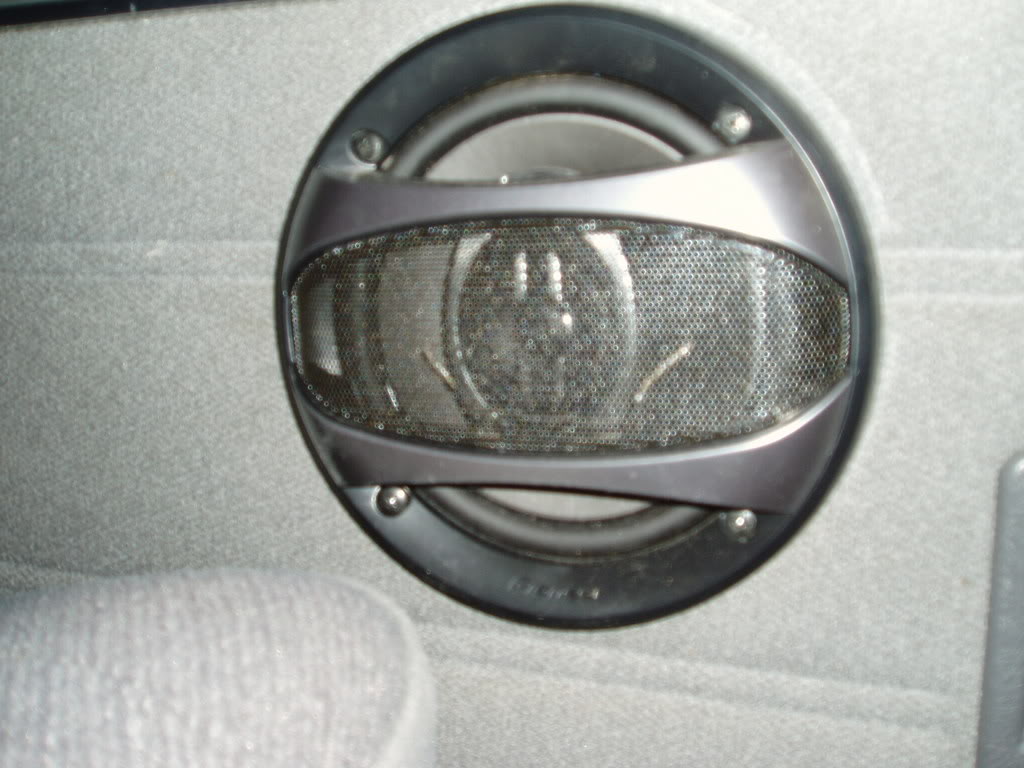
Rear - Pioneer 6 1/2' 3 way
2 kenwood amps (4 channel plus a 2 channel for the sub)
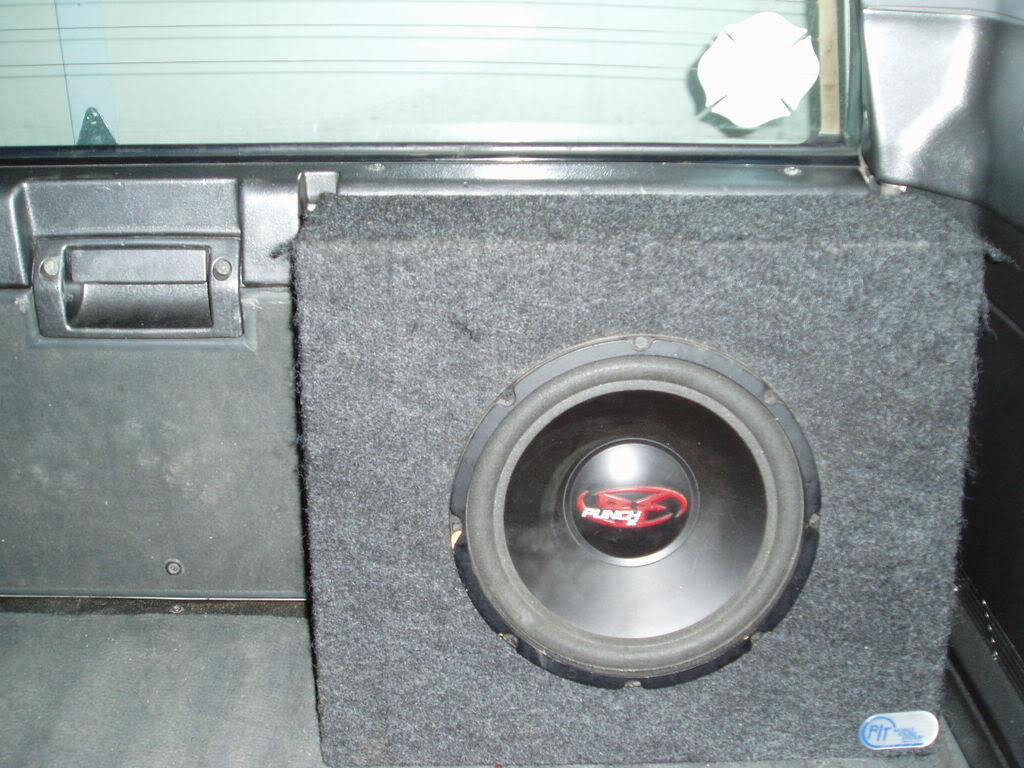
10" Rockford Fosgate Sub
Mounted one amp under drivers seat (did the 4crawler style seat lift, of course)
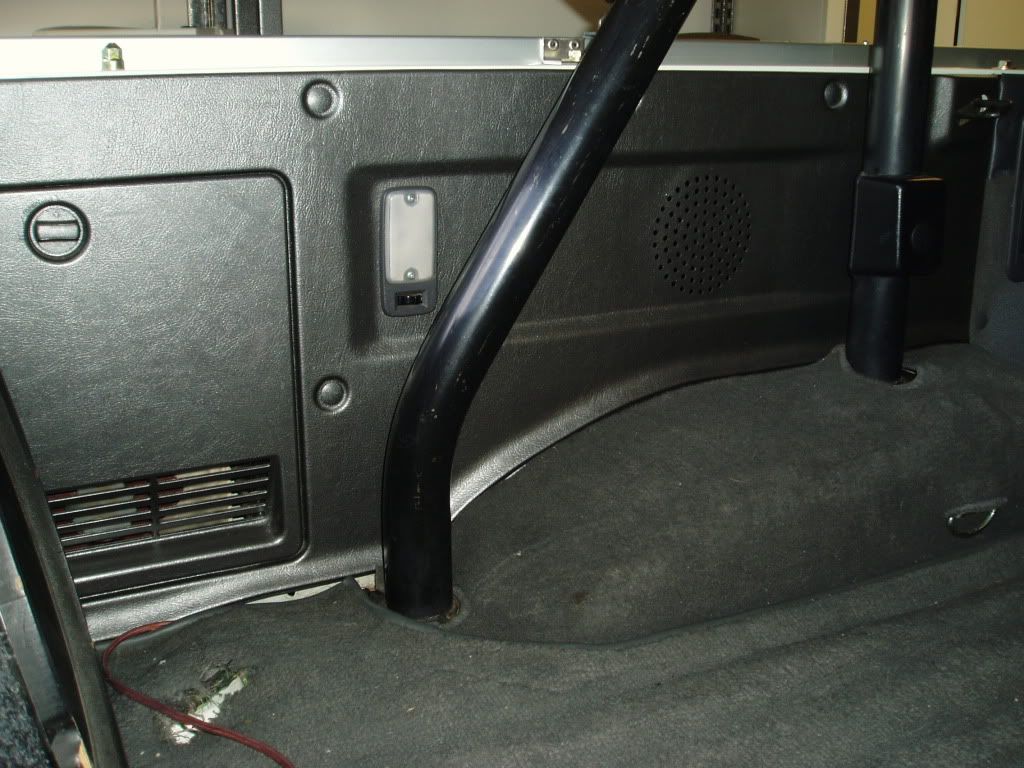
Sub amp mounted behind passenger side cargo panel.
Seat lift from 4Crawler
While I was at it, bought and installed a 2 way alarm.
Thing fried after motor install. A nicer Viper was bought in its place. details at the end.
Tweeter from BA components

Rear speaker area cut out of rear seat panel by PO.
Installed a Cobra 29. Also, you can see the temp gauge above the stereo, the probe was run into the air filter box to measure intake temps. (BBP's idea. Thanks, Logan)
Any car style indoor outdoor temp gauge setup will work, this one had a small enough face it fit just fine.
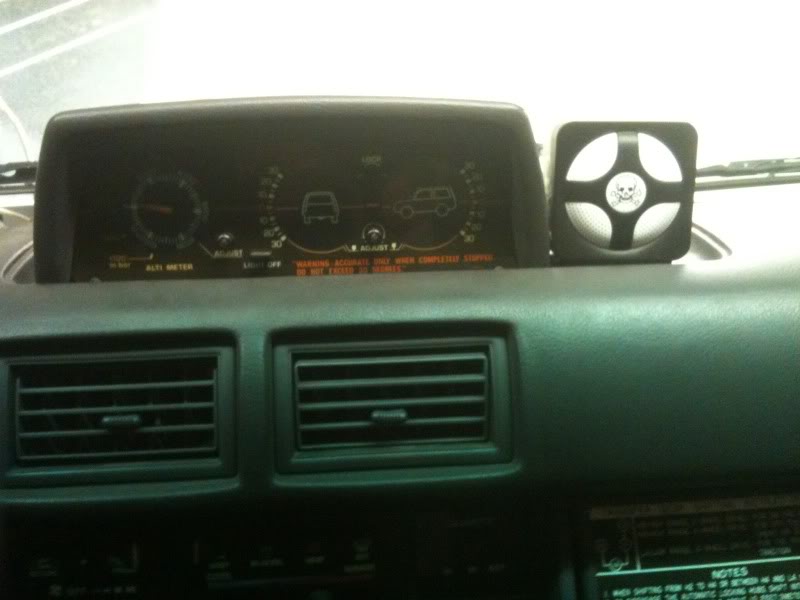
Used an mp3 speaker set for a cheap external speaker, ran the wire through the inclinometer mount.
*** Soundproofing***
Peel and seal, a roofing compound, has the same make up and thickness of dynamat. comes in 6" x15' rolls, and off I went.
*linky* Lowe's - Peel and seal roof repair
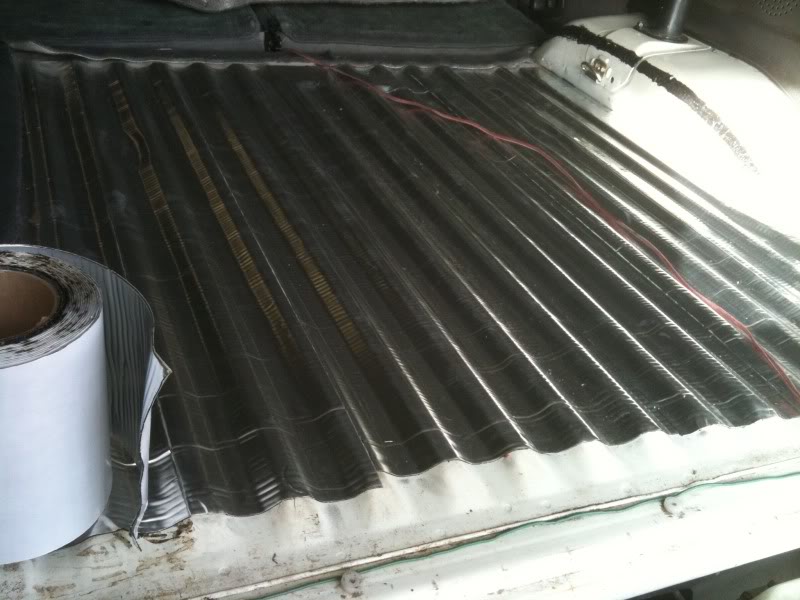

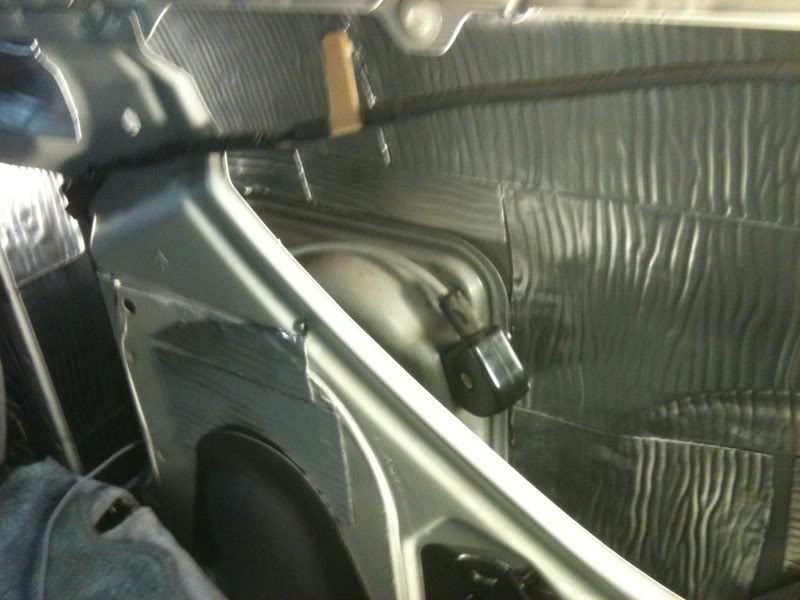
And to go one step further, got some "anti-fatigue" matting, and put that over the peel and seal. Went from a hollow knock to a solid "thud" Made it quieter, but not enough.
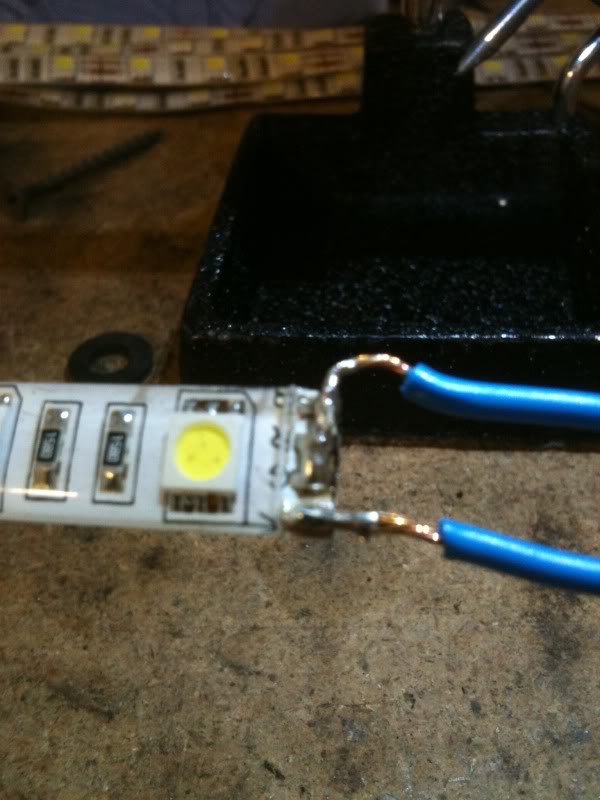
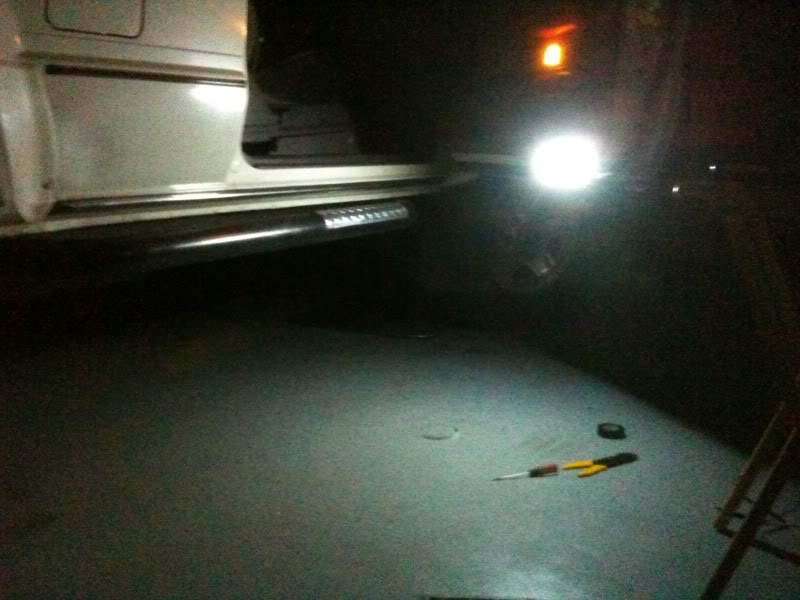
Ok, craigslist time. Found a ricer selling some sweet flexible LED Strips. Had the idea for a cargo light and some courtesy lights...........
what it looks like before you start cutting, about 40 inches long.
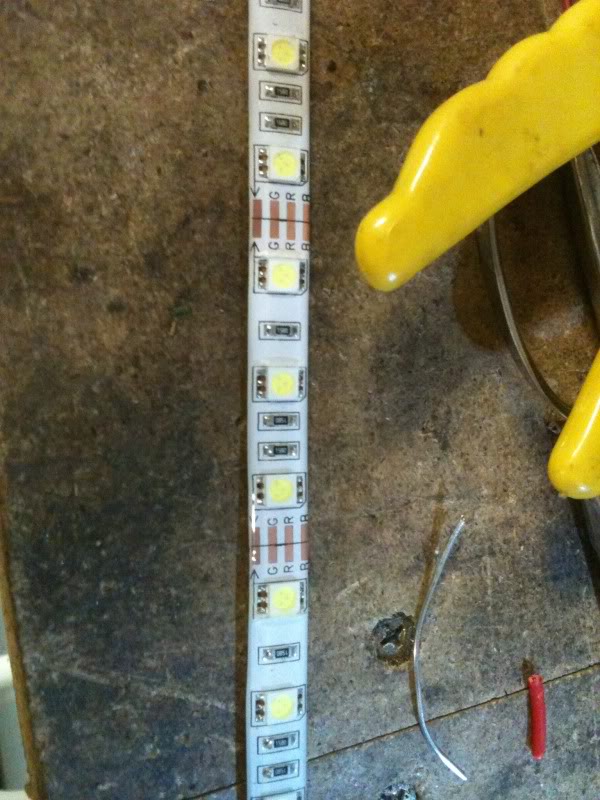
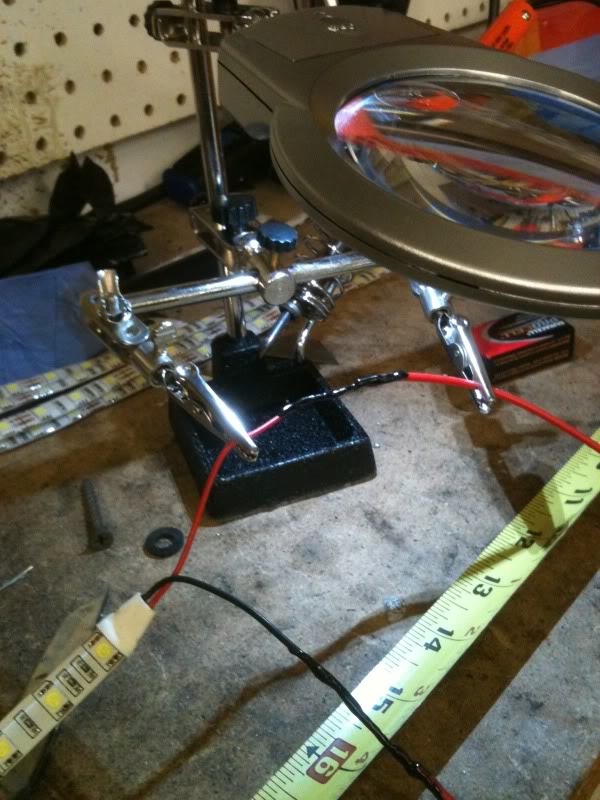
And solder in new wires.
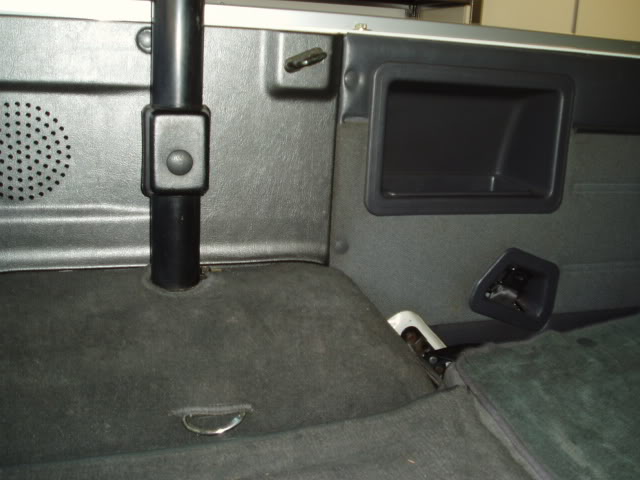
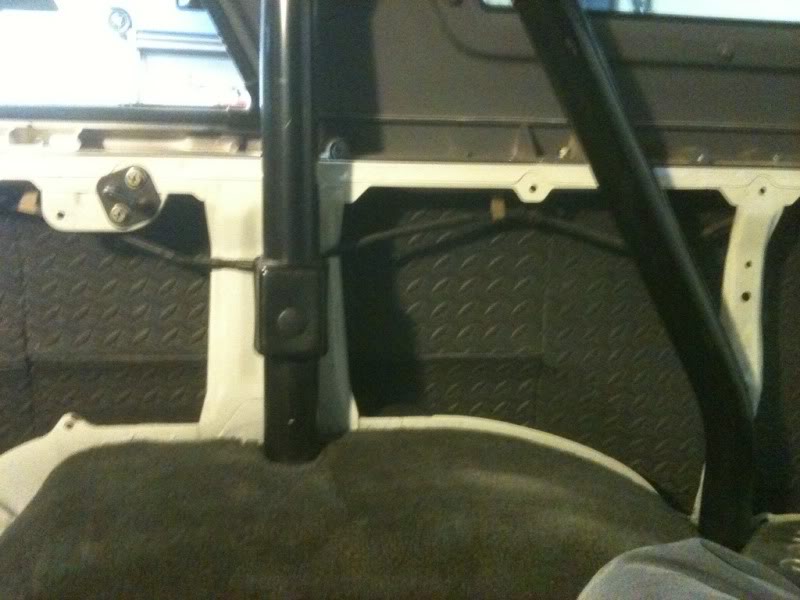
Before, stock cargo light (you can barely see the reflection off of the rollbar.

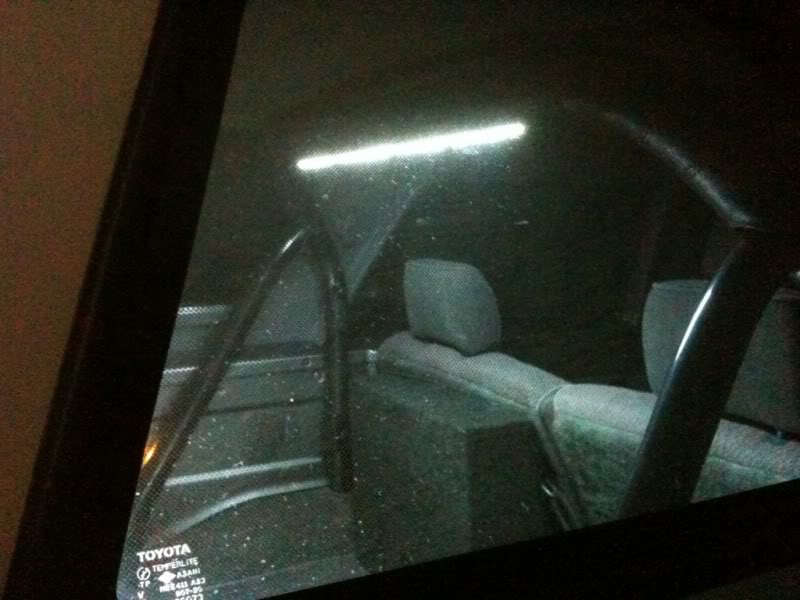
And the strip attached to the bottom of the rollbar.
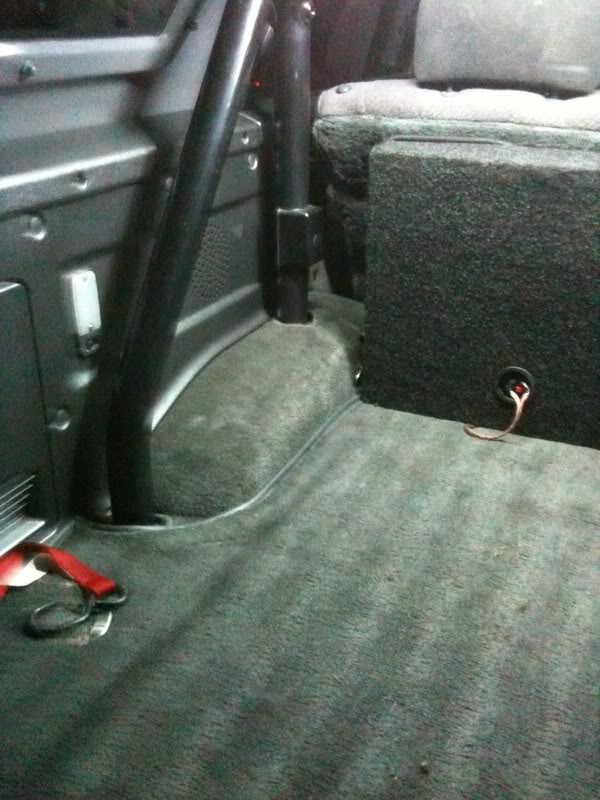
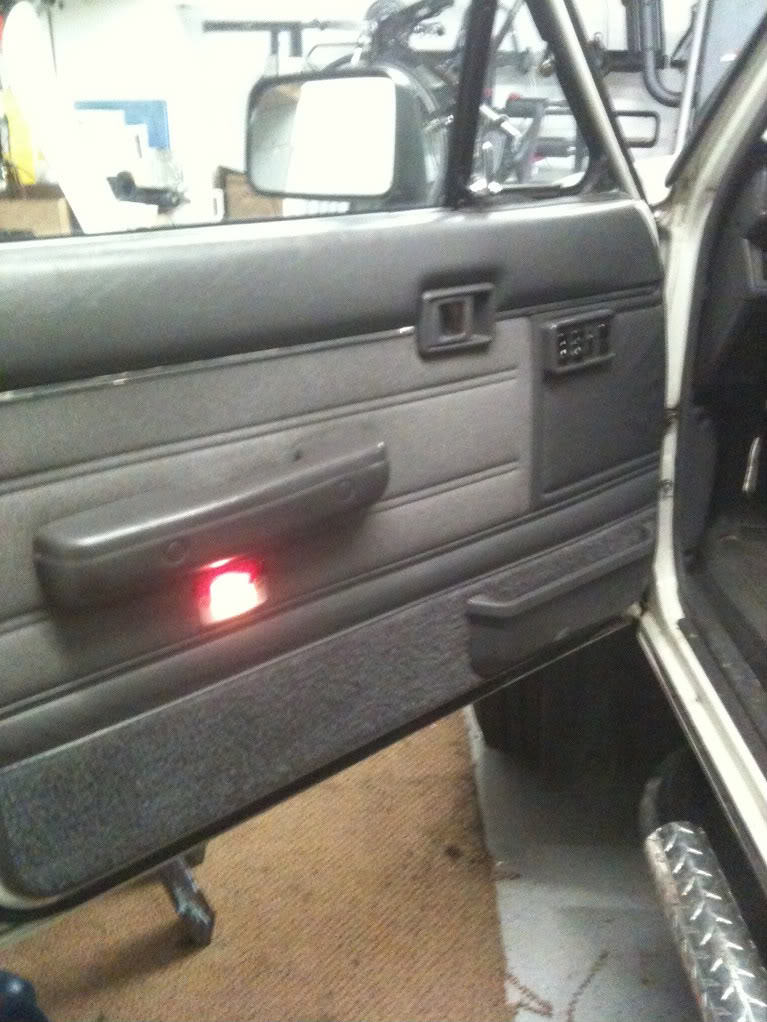
And last but not least, the courtesy lights. Put em just under the door panel. They are hidden, but still above the weatherstripping so its safe from the elements.
Thanks to Vital22re (Thanks Vitaly!!) who found me a set of rollbar speakers off of Craigslist for 50 bucks. replaced the low end pioneers in there for a set of Alpine components. They sound great. If I cant hear the rear speakers this summer with the top off, nothing will work.
right when I bought em.
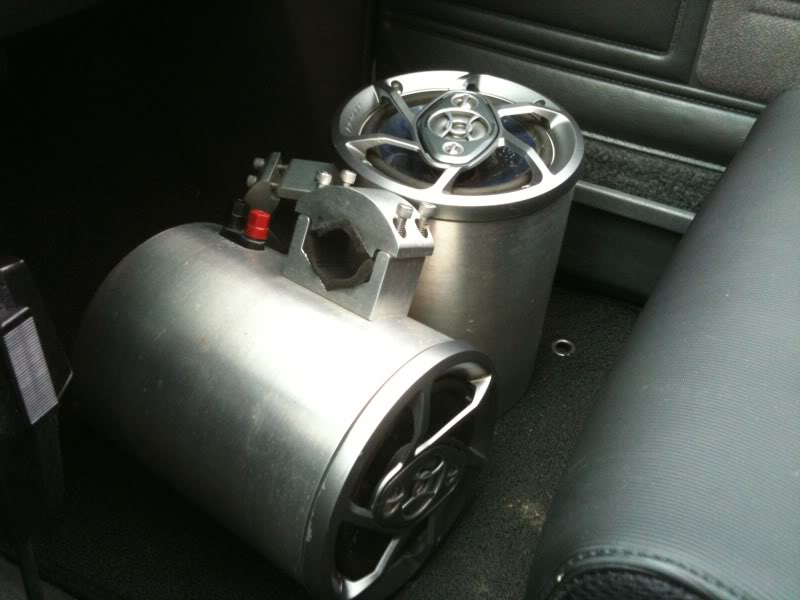
Installed.
because the clamps are a fixed 90, this is the place to mount without getting rid of the rollbar pad. They sound great, and I don't really ever have passengers in the back seat. That's what the wifes car is for.
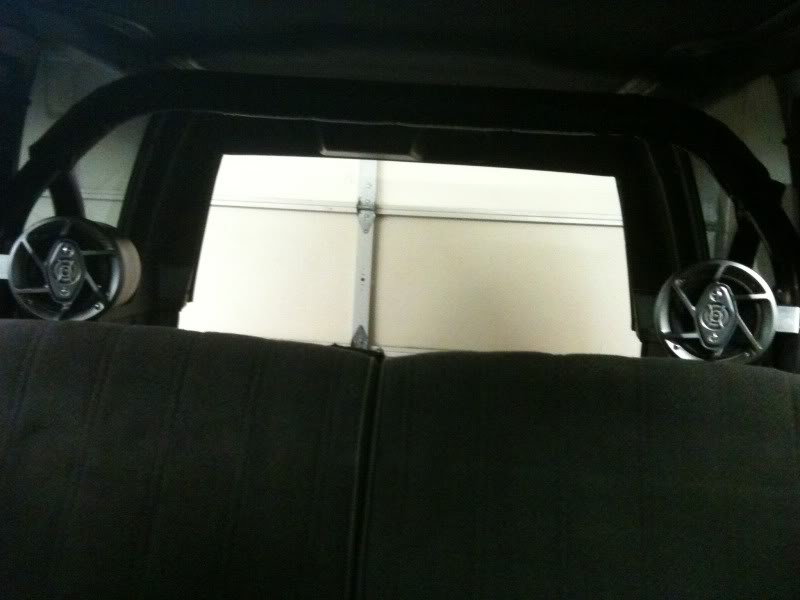
Since I have the rollbar speakers now, I disconnected the speakers in the rear seat panels. Finally tracked down a set of pristine rear seat panels, and got em swapped in. Pretty happy with those.
Before...... Yes I know this is a repost.....
After.......
And swapped in. Note the awesome glow of the rollbar LEDs. hehehe
Inspired by Pismojoe's write up. Thanks Joe! https://www.yotatech.com/forums/f116...ite-up-203044/
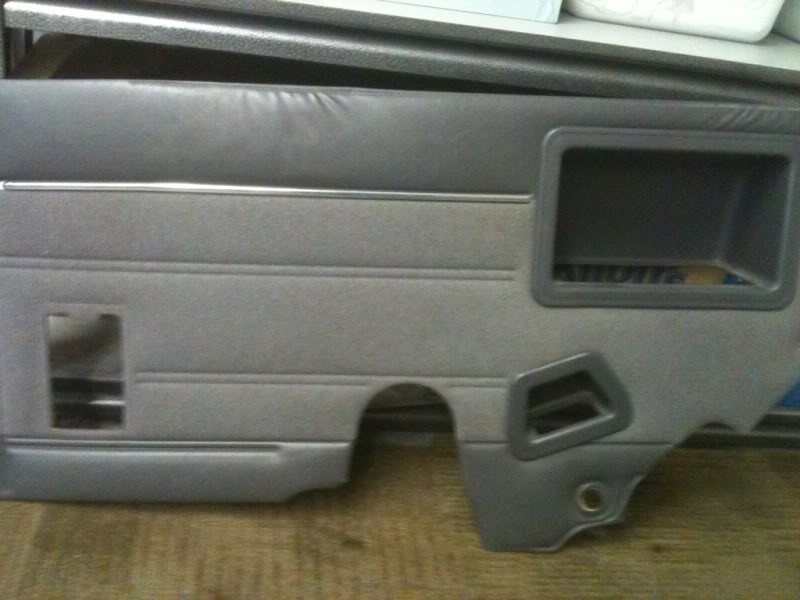
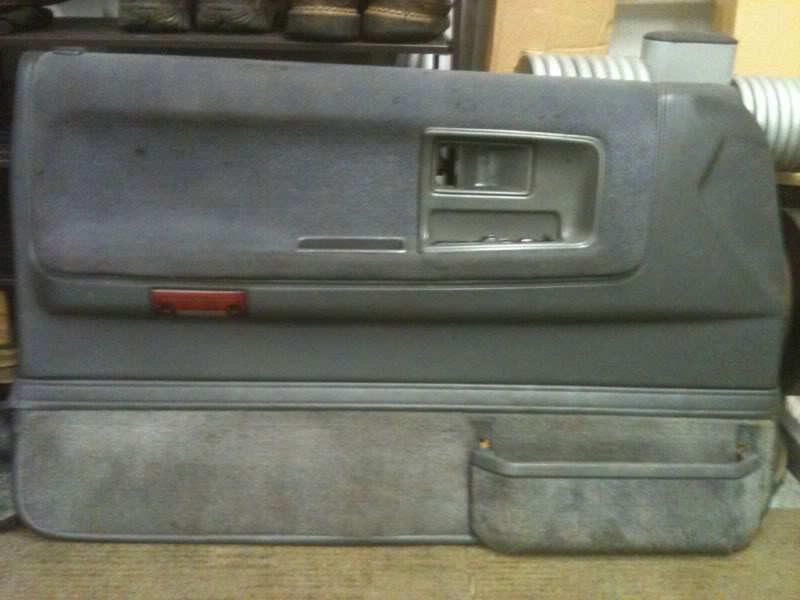
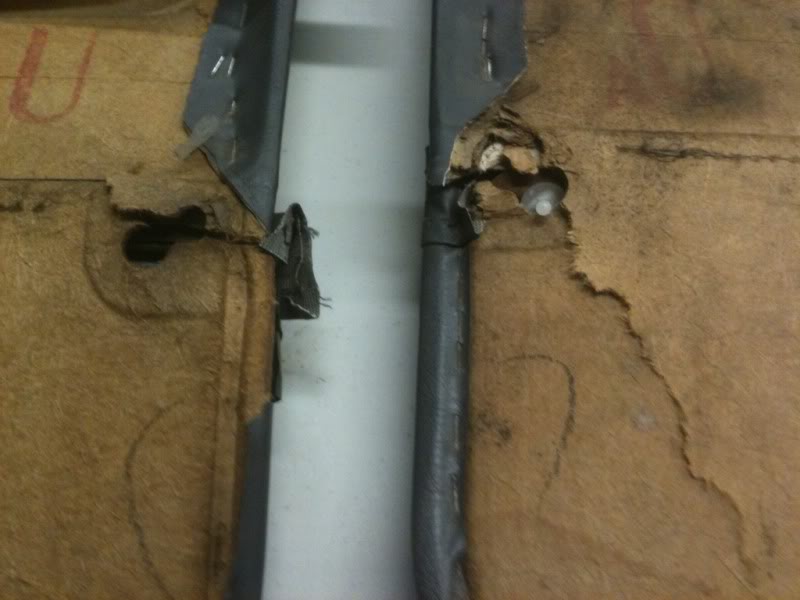
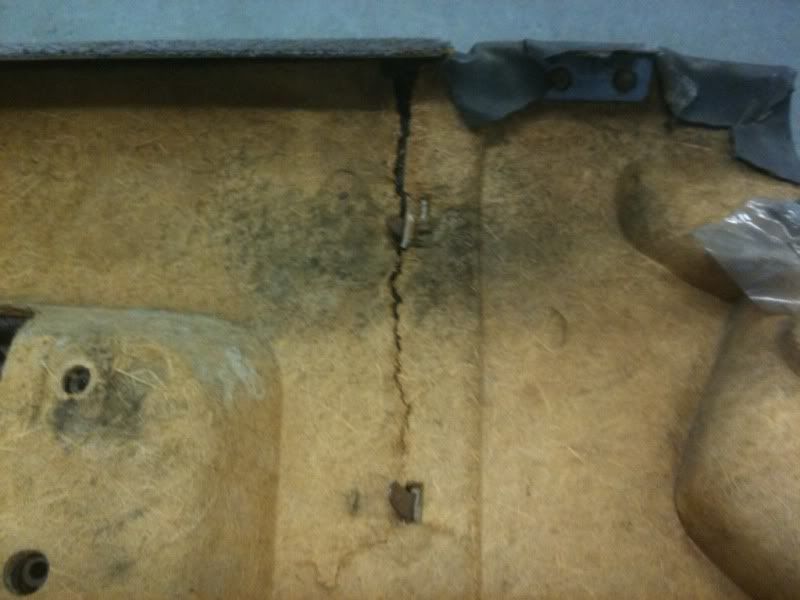
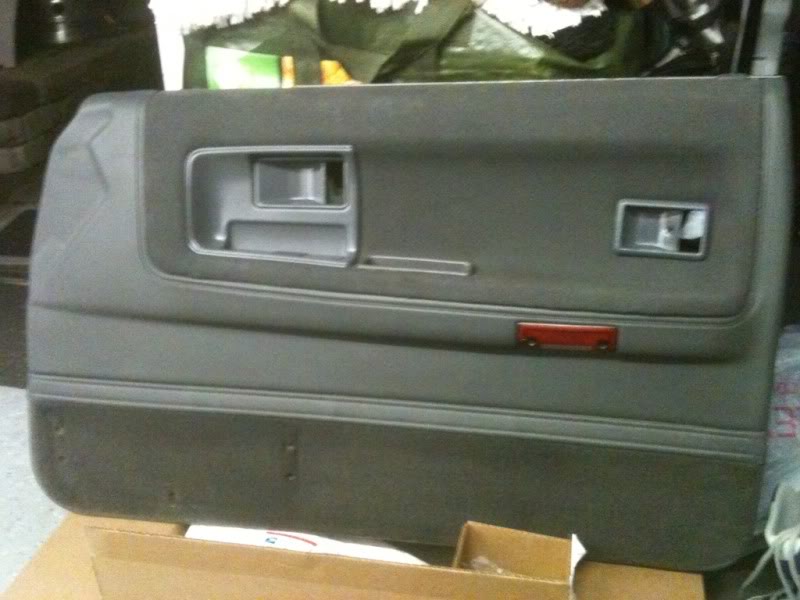
Sooo, I finally found a set of front door panels out of an 89 4Runner, with the power switches built into the armrest. Mine work fine, but I like the looks of these better.
They were in ok condition, I figured I would try and salvage them. Turns out the drivers one was shot and the passenger one was decent. Just my luck, a second set came up on ebay, with a nice drivers side and trashed passenger side!! lol.
pics of the progress....... Hoping to swap them in on Saturday.
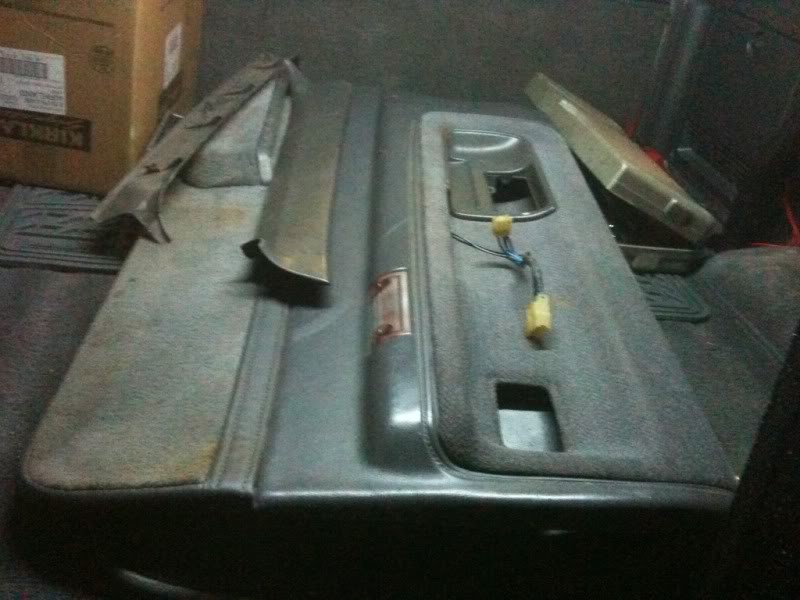
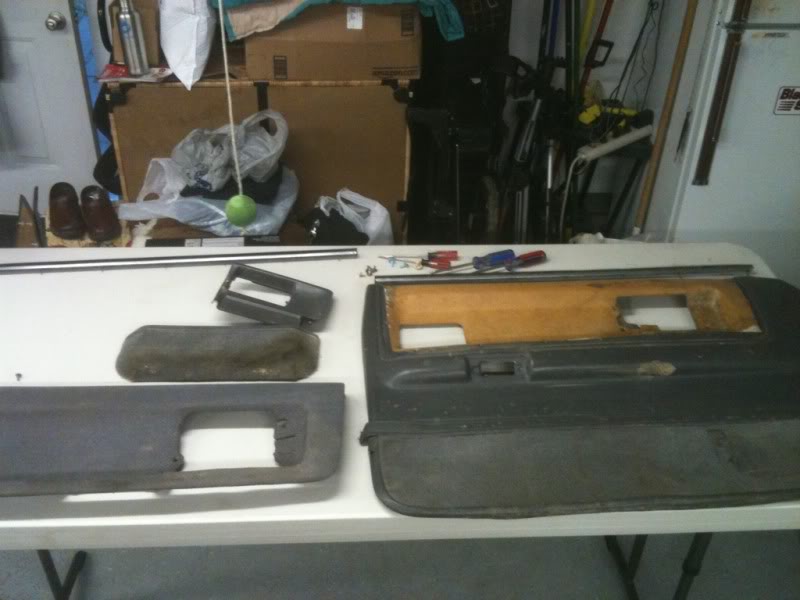
With some duplicolor vinyl fabric paint

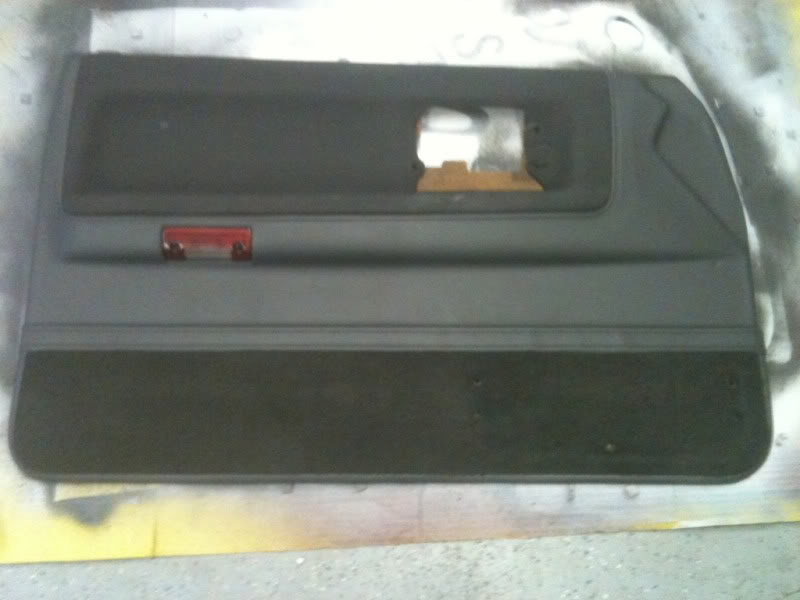
First try painting the plastics.......
the paint for the plastic was supposed to be dark gray. not so much. went back and got some charcoal
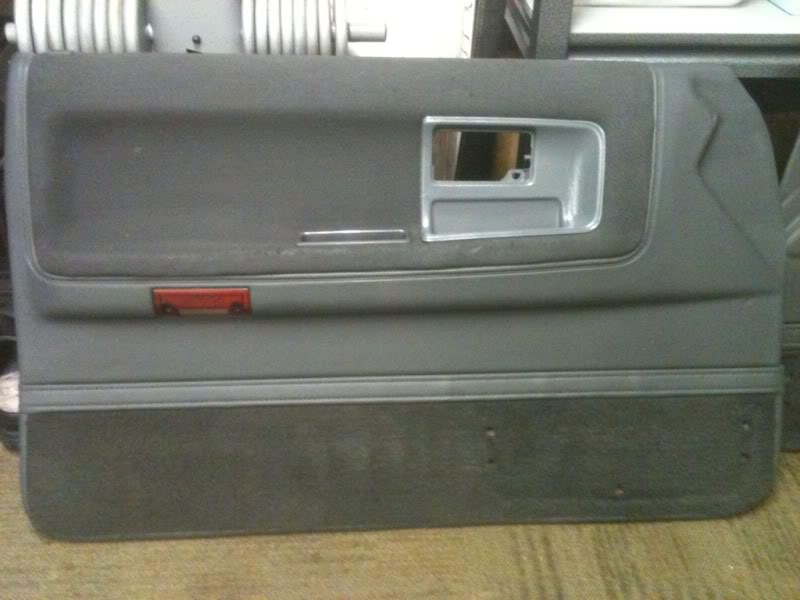
Soooo, panel swap went according to plan.
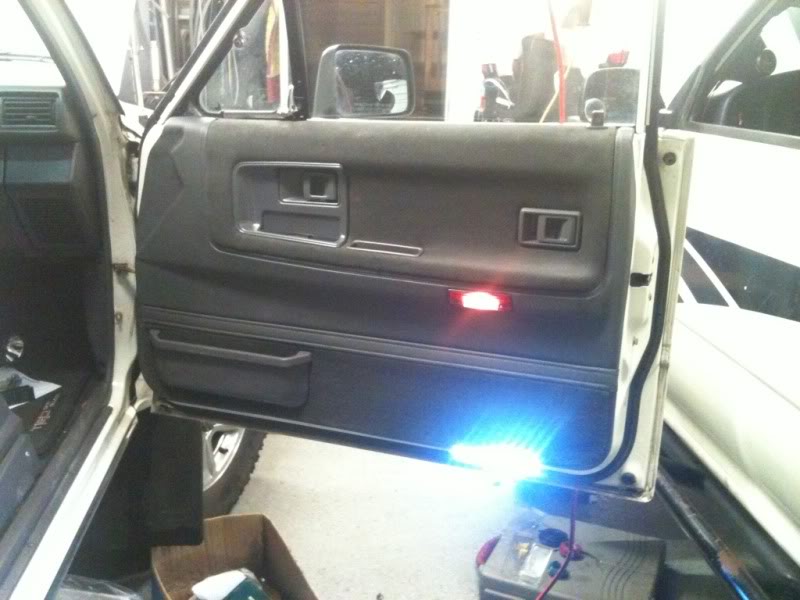
the switches work as advertised. Pretty happy with the result. Thanks JOE!!!
Alarm has been ordered, running through diagrams planning my plan of attack.
Got a viper 2 way with proximity alarm for soft top/ no top weather.
Edit* Alarm has been installed. Radar/ proximity alarm works great. But got a vid of a feature of the alarm I love. REMOTE CONTROL REAR WINDOW!!!!! Added only the down function, as the wanted it to be tied in so that when you arm it the window goes up. Not a good idea with the soft top, so it was not hooked up.Went up to Logan's and we both installed the alarm side by side, making it easier to pick off wires. Thanks Big Blue Pile for the help with the install!!!
Cleaned up the interior. Pulled and painted the carpets using duplicolor vinyl and fabric spray. Stinks like hell for about a week, but has held up well. Also painted the cargo panels with Krylon Fusion for plastics (sorry DC). Bumpers got duplicolor rim paint in Charcoal (almost a dead ringer for the stock paint)
interior
Panels
Bumpers
Some interior shots......
Thats original, its not all cracked and falling apart
Cupholders!! Yes, another idea "borrowed" from BBP. Thanks Logan!
Called "the wedgie" fits in the map pocket, I have a spare piece of Anti fatigue matting from the sound deadening stuffed behind it to keep it a tighter fit.Don't forget the maglite mount! Used a piece of PVC pipe (1 1/2"??? Can"t remember off the top of my head) cut out the center section, filed the edges smooth, used rivets and a piece of bar stock inside the pocket for reinforcement.
Picked these up. Yes I know they say TRD, but When Wet Okoles are over $200, and these were less then half, and just as thick, I can deal with 'em saying TRD on em.
Also, the sides are not full sides, so you can still access the adjustments on the side for Lumbar and such. Installed a new stereo, and of course, did it on the cheap.
Pioneer DEH- 400UB. Had USB and Ipod hookup, cable run to the glove box.
Fronts 4' boston acoustic separates RC420
Rear - Pioneer 6 1/2' 3 way
2 kenwood amps (4 channel plus a 2 channel for the sub)
10" Rockford Fosgate Sub
Mounted one amp under drivers seat (did the 4crawler style seat lift, of course)
Sub amp mounted behind passenger side cargo panel.
Seat lift from 4Crawler
While I was at it, bought and installed a 2 way alarm.
Thing fried after motor install. A nicer Viper was bought in its place. details at the end.
Tweeter from BA components
Rear speaker area cut out of rear seat panel by PO.
Installed a Cobra 29. Also, you can see the temp gauge above the stereo, the probe was run into the air filter box to measure intake temps. (BBP's idea. Thanks, Logan
)Any car style indoor outdoor temp gauge setup will work, this one had a small enough face it fit just fine.
Used an mp3 speaker set for a cheap external speaker, ran the wire through the inclinometer mount.
*** Soundproofing***
Peel and seal, a roofing compound, has the same make up and thickness of dynamat. comes in 6" x15' rolls, and off I went.
*linky* Lowe's - Peel and seal roof repair
And to go one step further, got some "anti-fatigue" matting, and put that over the peel and seal. Went from a hollow knock to a solid "thud" Made it quieter, but not enough.
Ok, craigslist time. Found a ricer selling some sweet flexible LED Strips. Had the idea for a cargo light and some courtesy lights...........
what it looks like before you start cutting, about 40 inches long.
And solder in new wires.
Before, stock cargo light (you can barely see the reflection off of the rollbar.
And the strip attached to the bottom of the rollbar.
And last but not least, the courtesy lights. Put em just under the door panel. They are hidden, but still above the weatherstripping so its safe from the elements.
Thanks to Vital22re (Thanks Vitaly!!
) who found me a set of rollbar speakers off of Craigslist for 50 bucks. replaced the low end pioneers in there for a set of Alpine components. They sound great. If I cant hear the rear speakers this summer with the top off, nothing will work. right when I bought em.
Installed.
because the clamps are a fixed 90, this is the place to mount without getting rid of the rollbar pad. They sound great, and I don't really ever have passengers in the back seat. That's what the wifes car is for.
Since I have the rollbar speakers now, I disconnected the speakers in the rear seat panels. Finally tracked down a set of pristine rear seat panels, and got em swapped in. Pretty happy with those.
Before...... Yes I know this is a repost.....
After.......
And swapped in. Note the awesome glow of the rollbar LEDs. hehehe
Inspired by Pismojoe's write up. Thanks Joe!
https://www.yotatech.com/forums/f116...ite-up-203044/Sooo, I finally found a set of front door panels out of an 89 4Runner, with the power switches built into the armrest. Mine work fine, but I like the looks of these better.
They were in ok condition, I figured I would try and salvage them. Turns out the drivers one was shot and the passenger one was decent. Just my luck, a second set came up on ebay, with a nice drivers side and trashed passenger side!! lol.
pics of the progress....... Hoping to swap them in on Saturday.
With some duplicolor vinyl fabric paint
First try painting the plastics.......
the paint for the plastic was supposed to be dark gray. not so much. went back and got some charcoal
Soooo, panel swap went according to plan.
the switches work as advertised. Pretty happy with the result. Thanks JOE!!!
Alarm has been ordered, running through diagrams planning my plan of attack.
Got a viper 2 way with proximity alarm for soft top/ no top weather.
Edit* Alarm has been installed. Radar/ proximity alarm works great. But got a vid of a feature of the alarm I love. REMOTE CONTROL REAR WINDOW!!!!! Added only the down function, as the wanted it to be tied in so that when you arm it the window goes up. Not a good idea with the soft top, so it was not hooked up.Went up to Logan's and we both installed the alarm side by side, making it easier to pick off wires. Thanks Big Blue Pile for the help with the install!!!
Last edited by kiyobrown; Mar 16, 2013 at 03:54 PM.
Aug 31, 2010 | 09:50 PM
#6
Thread Starter
Registered User
Joined: Feb 2009
Posts: 7,591
Likes: 76
From: Tacoma, WA
Kiyobrown's 1987 4Runner Build-Up Thread
Drivetrain/suspension
Started stock with a W56 and 4.10's
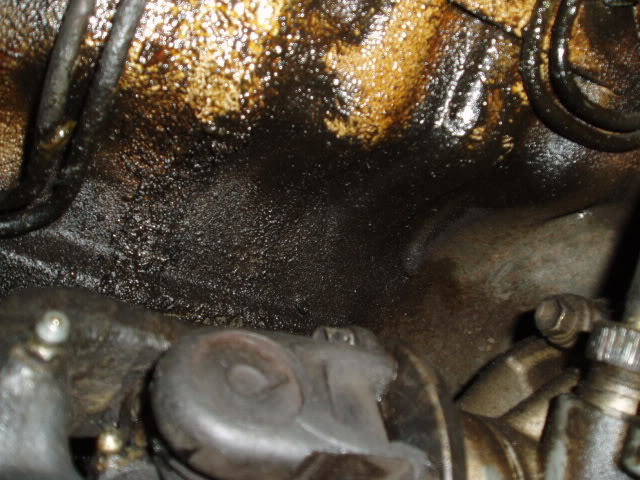
Tracked leak under the vehicle to the transfer case output seal. used 4Crawlers write up....
http://www.4crawler.com/4x4/CheapTri...eal/index.html
Where it was leaking from.

What it did to the undercarriage... Rustproofing!
part numbers, for reference.
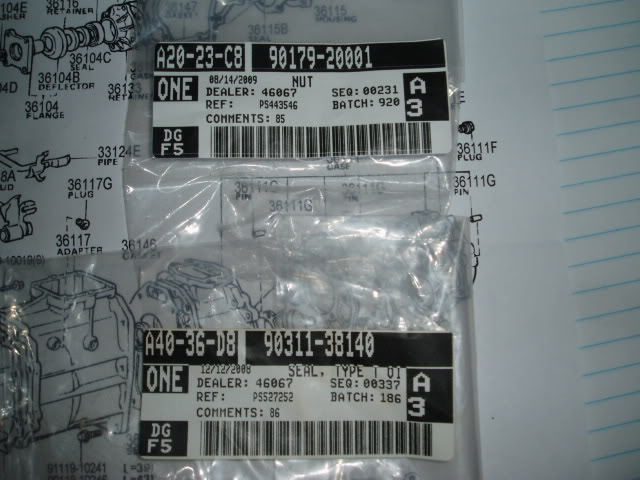
Also picked up some new shifter bushings from my local dealer.
Now we get to gears. Had stock 4.10's, made to push 28's. picked up some 265/70/16's (31's), and I was feeling the lack of power on the freeway. Did some research, hunted down a bunch of links, read some threads. Knew 4.56's were the way to go for me, tracked some down, and swapped em in. Best bang for the buck. Used these links.........
https://www.yotatech.com/forums/f116...osting-204178/
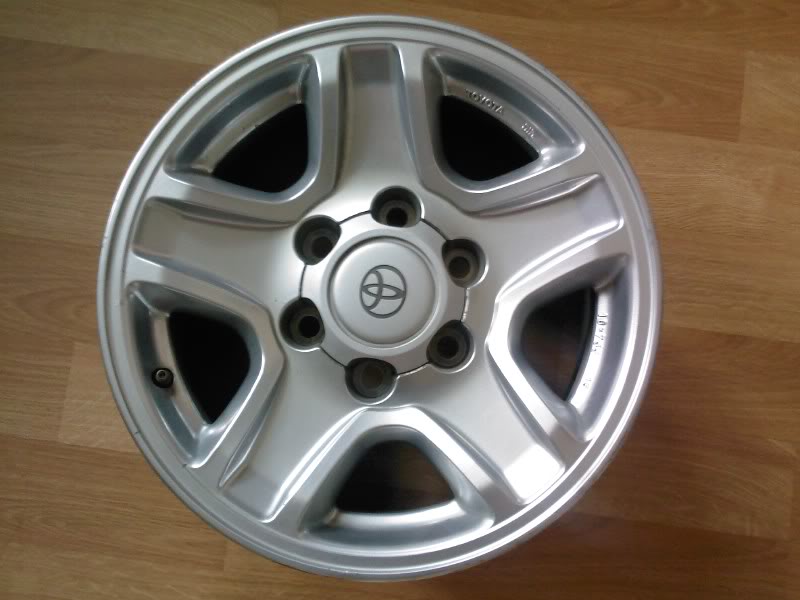
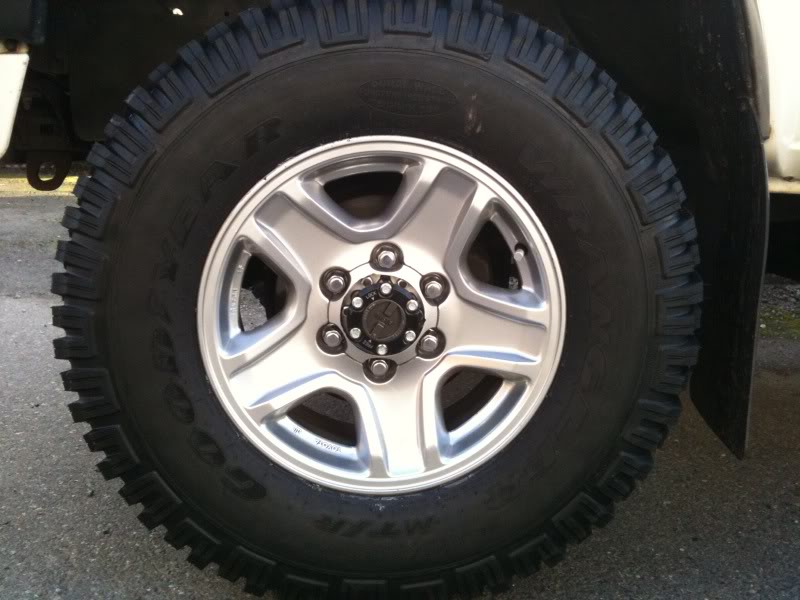
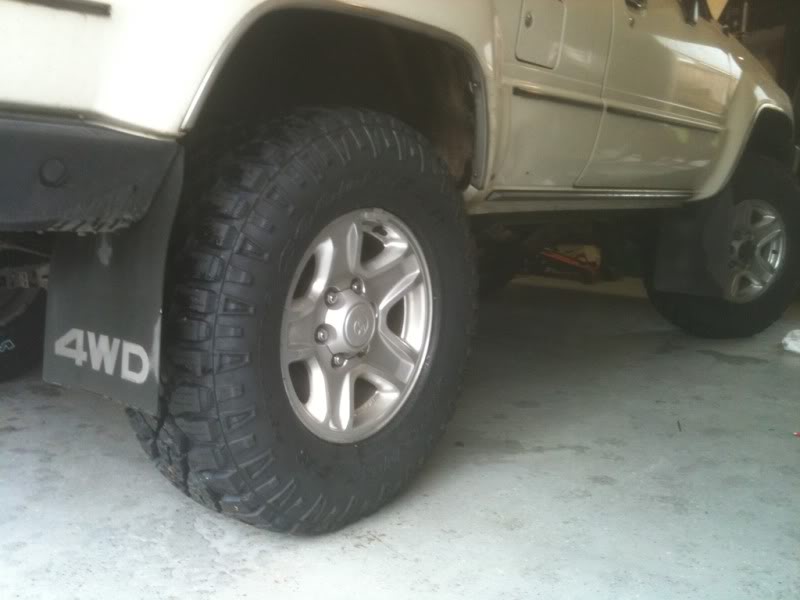
Picked up some 2001 4Runner limited rims, and some 245/75/16 treadwright guard dog M/T's. (Goodyear Wrangler MT/R's.)
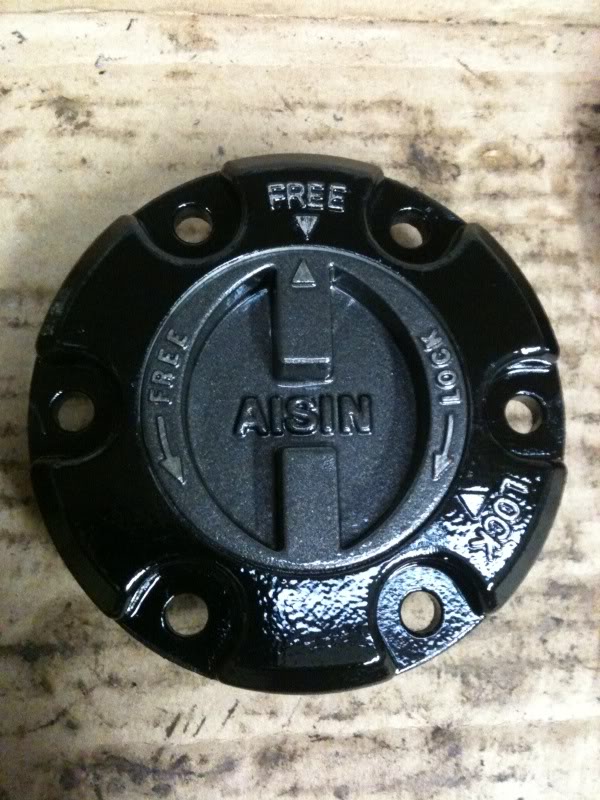
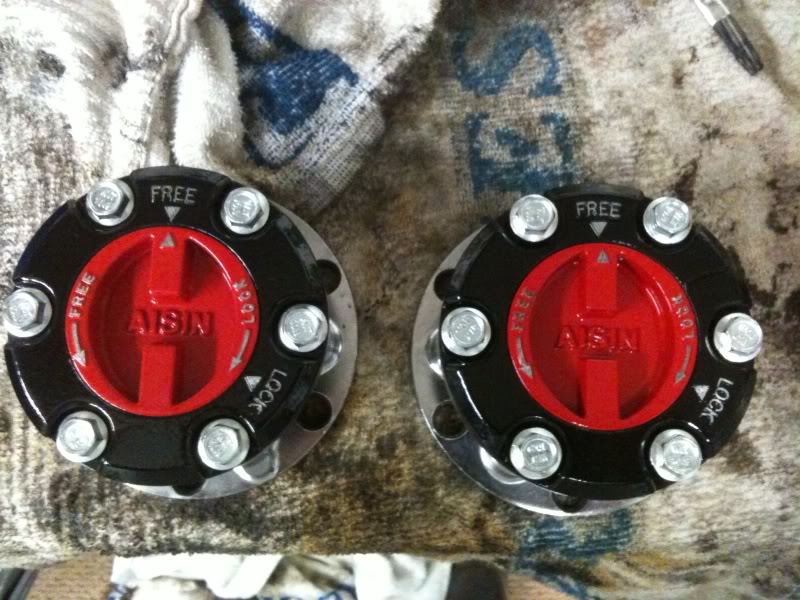
I guess now would be a good time to mention I found some Aisin hubs, painted the dial Charcoal to match the bumpers....
Although I did do a set of classics for Codyx36.
upgraded to some 265/75/16 C range Duratracs. Great tire. Runs perfectly with the 22re and 4.56's. Also runs great with the 3.4 and 4.30's.
Duratracs Purchased!! went through Discount Tire on Pearl St. They matched 4 wheel parts online price, since they have an actual store in Tacoma.
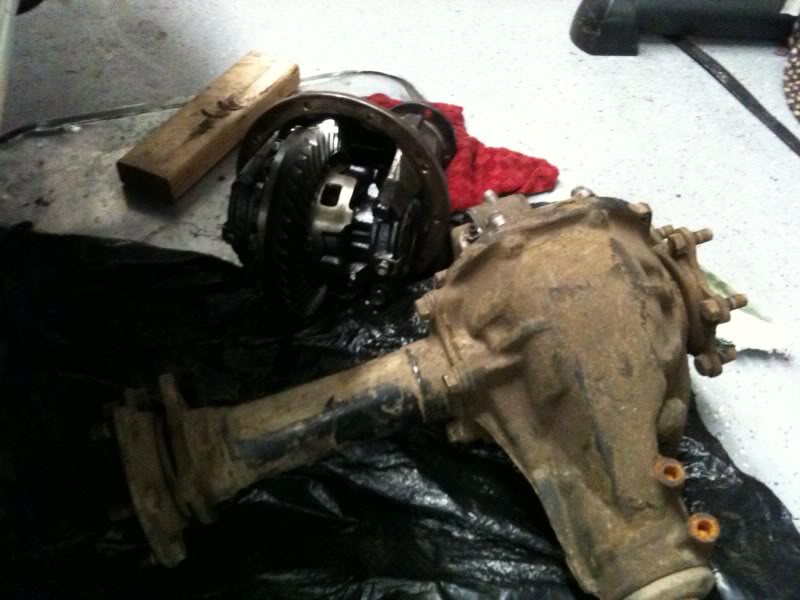
Elocker. Picked up an Elocker on a great deal from DC. My choices were to regear the rear from the factory 4.30 to a 4.56 gear set to match my current front Diff, or buy a 4.30 front diff, and sell my 4.56's as a set. Financially I went with the 4.30's With the help of BBP, DC, and the Russian, got the axle modified and both diffs swapped out in a beer drinking, multi project weekend.
Swapped out from a w56 to an R150f in order to accommodate the 3.4. Took the shifters out and the shifter bushings looked brand new and the fluids also looked new. Good $100 craigslist find, even if I had to pull it by myself in a downpour.
Being on a budget, finally decided on a set of Gabriel Max Control Shocks. Cheap, have worked great, and I have a sneaking suspicion Les Schwab uses a rebadged one as their premium shock (same color shock, writing is similar, MAX control vs. RMX monotube)
Les Schwab's

Gabriel's

EDIT ** After the unfortunate wreck of a.wilson013, I also acquired his HD bilsteins. Compressed the 2 shocks side by side. The Bilstein was a constant pressure and the gabriel started easy and built resistance. So I swapped them out. VERY NICE!!! Daddy like. Now I have the BJ spacers and the zuk mod in the rear, but the stock length shocks fit perfectly and ride great. Part numbers......
F4-B46-1139-H1 Front
F4-B46-1140-H2 Rear

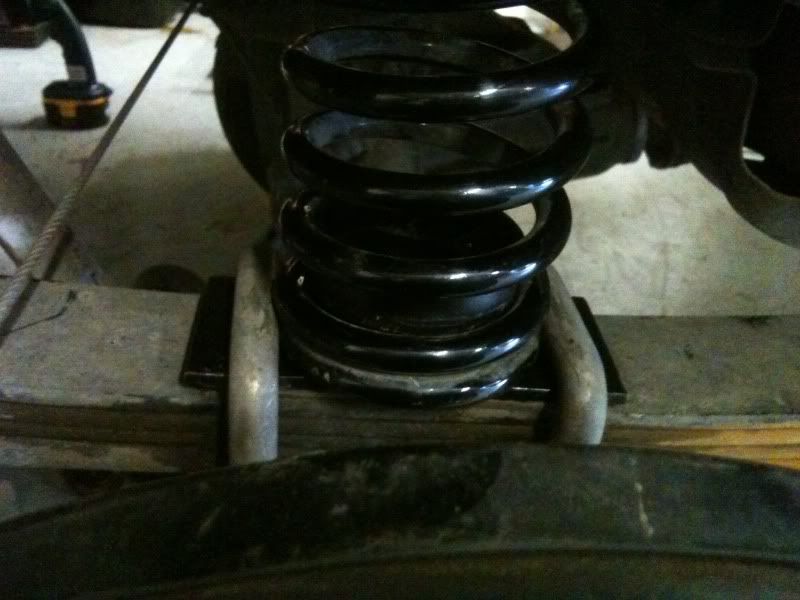
Big difference, but still bottomed out on hard bumps. So Added BJ spacers (purchased from 4Crawler) and did a Zuk mod (springs from "kratter" on Ebay) 14" x 125lb spring. Used a bottom plate made by Truckfiend (Thanks Levi) and hacked the whole bumpstop off and used a bodylift puck for a top retainer. Zero problems.
Where to buy ball joint spacers
Zuk Mod threads..........
https://www.yotatech.com/forums/f116...uk-mod-215876/
https://www.yotatech.com/forums/f116...photos-207564/
https://www.yotatech.com/forums/f116...ks-zuk-157035/
Where to buy 12" springs......
Where to buy 14" springs......
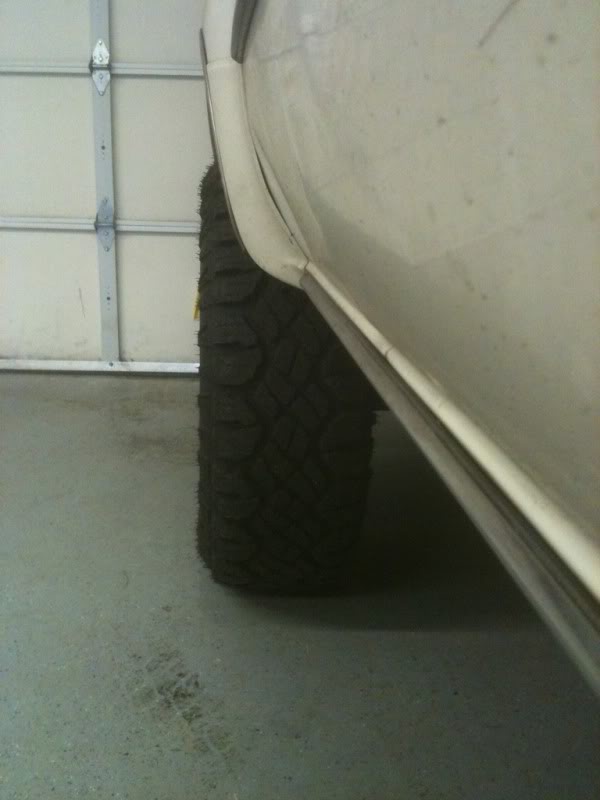
HUGE difference in the ride.
Sorry no ACTUAL before and after pics.......
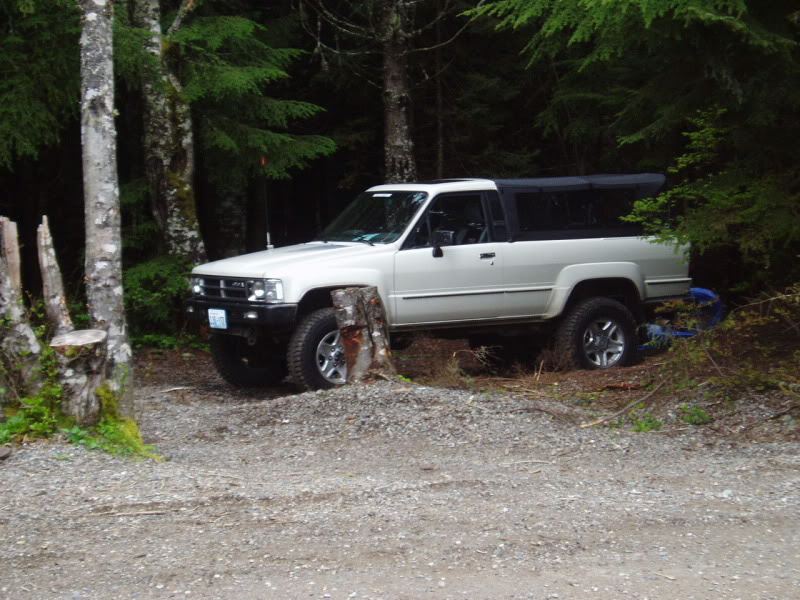
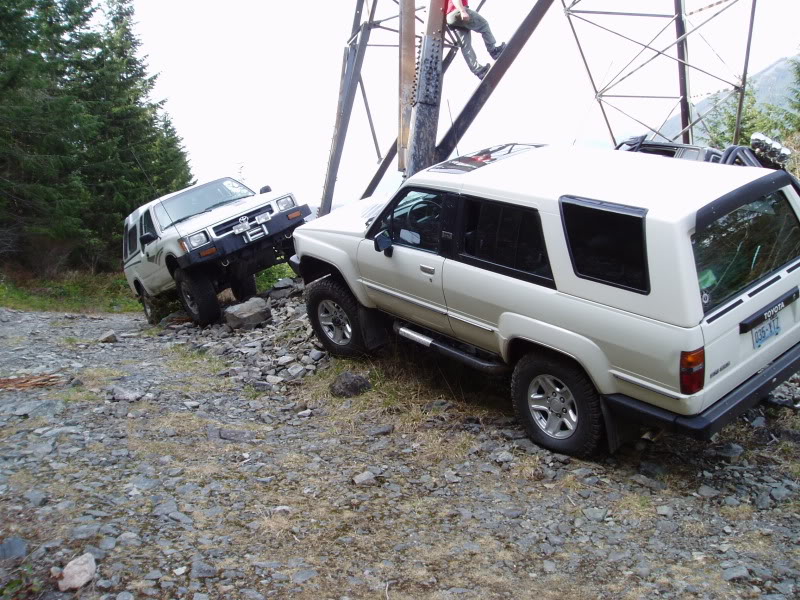
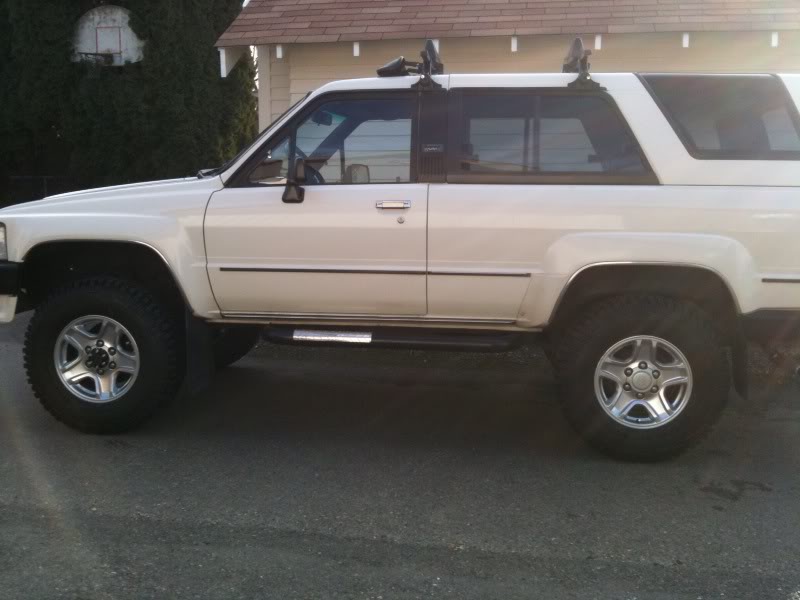
How it sits now though..... Was able to buy my old Thule rack back from my brother, btw.
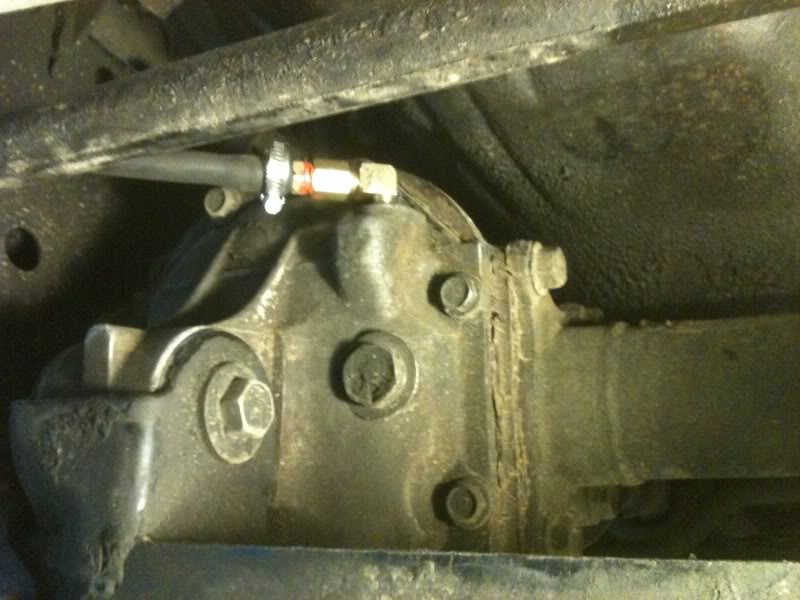
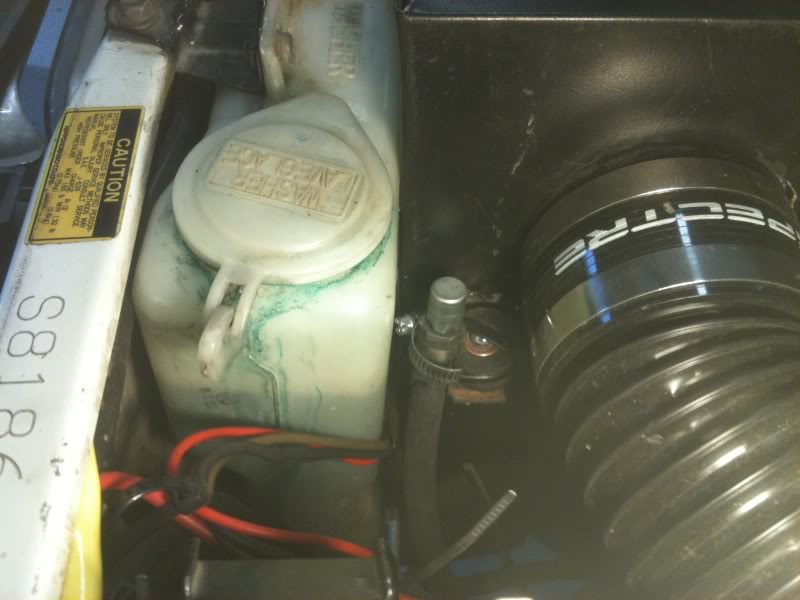
Differential breathers. Picked up the fittings from Tacoma Screw. (also where I get the new hub bolts from.)
Ran the rear up to the back of the gas tank.
The front ends up next to the washer fluid bottle.
Started stock with a W56 and 4.10's
Tracked leak under the vehicle to the transfer case output seal. used 4Crawlers write up....
http://www.4crawler.com/4x4/CheapTri...eal/index.html
Where it was leaking from.
What it did to the undercarriage... Rustproofing!
part numbers, for reference.
Also picked up some new shifter bushings from my local dealer.
Now we get to gears. Had stock 4.10's, made to push 28's. picked up some 265/70/16's (31's), and I was feeling the lack of power on the freeway. Did some research, hunted down a bunch of links, read some threads. Knew 4.56's were the way to go for me, tracked some down, and swapped em in. Best bang for the buck. Used these links.........
https://www.yotatech.com/forums/f116...osting-204178/
Picked up some 2001 4Runner limited rims, and some 245/75/16 treadwright guard dog M/T's. (Goodyear Wrangler MT/R's.)
I guess now would be a good time to mention I found some Aisin hubs, painted the dial Charcoal to match the bumpers....
Although I did do a set of classics for Codyx36.
upgraded to some 265/75/16 C range Duratracs. Great tire. Runs perfectly with the 22re and 4.56's. Also runs great with the 3.4 and 4.30's.
Duratracs Purchased!! went through Discount Tire on Pearl St. They matched 4 wheel parts online price, since they have an actual store in Tacoma.
Elocker. Picked up an Elocker on a great deal from DC. My choices were to regear the rear from the factory 4.30 to a 4.56 gear set to match my current front Diff, or buy a 4.30 front diff, and sell my 4.56's as a set. Financially I went with the 4.30's With the help of BBP, DC, and the Russian, got the axle modified and both diffs swapped out in a beer drinking, multi project weekend.
Swapped out from a w56 to an R150f in order to accommodate the 3.4. Took the shifters out and the shifter bushings looked brand new and the fluids also looked new. Good $100 craigslist find, even if I had to pull it by myself in a downpour.
Being on a budget, finally decided on a set of Gabriel Max Control Shocks. Cheap, have worked great, and I have a sneaking suspicion Les Schwab uses a rebadged one as their premium shock (same color shock, writing is similar, MAX control vs. RMX monotube)
Les Schwab's
Gabriel's
EDIT ** After the unfortunate wreck of a.wilson013, I also acquired his HD bilsteins. Compressed the 2 shocks side by side. The Bilstein was a constant pressure and the gabriel started easy and built resistance. So I swapped them out. VERY NICE!!!
Daddy like. Now I have the BJ spacers and the zuk mod in the rear, but the stock length shocks fit perfectly and ride great. Part numbers......F4-B46-1139-H1 Front
F4-B46-1140-H2 Rear
Big difference, but still bottomed out on hard bumps. So Added BJ spacers (purchased from 4Crawler) and did a Zuk mod (springs from "kratter" on Ebay) 14" x 125lb spring. Used a bottom plate made by Truckfiend (Thanks Levi) and hacked the whole bumpstop off and used a bodylift puck for a top retainer. Zero problems.
Where to buy ball joint spacers
Zuk Mod threads..........
https://www.yotatech.com/forums/f116...uk-mod-215876/
https://www.yotatech.com/forums/f116...photos-207564/
https://www.yotatech.com/forums/f116...ks-zuk-157035/
Where to buy 12" springs......
Where to buy 14" springs......
HUGE difference in the ride.
Sorry no ACTUAL before and after pics.......
How it sits now though..... Was able to buy my old Thule rack back from my brother, btw.
Differential breathers. Picked up the fittings from Tacoma Screw. (also where I get the new hub bolts from.)
Ran the rear up to the back of the gas tank.
The front ends up next to the washer fluid bottle.
Last edited by kiyobrown; Mar 16, 2013 at 03:42 PM.
Aug 31, 2010 | 09:50 PM
#7
Thread Starter
Registered User
Joined: Feb 2009
Posts: 7,591
Likes: 76
From: Tacoma, WA
Kiyobrown's 1987 4Runner Build-Up Thread
Engine/ Exhaust
Started with the stock motor, a good runner with a bad exhaust leak. PO tried to crank down the warped manifold and ended up stripping out the studs. Awesome.
1/14/09 1982 Supra MAF picked up for $20. Battery /intake swap done at same time. After a couple trips out in the woods, And comparing intake temps to BigBluePile and his snorkel, decided to make a box for it to keep it a little cooler. (Thanks Logan)
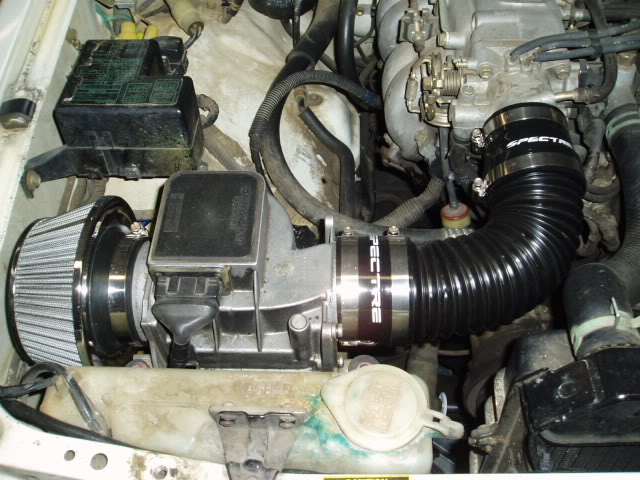
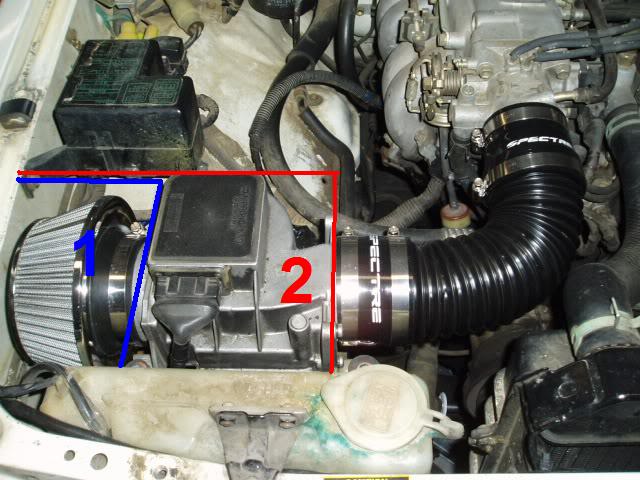
Option #2 it was.
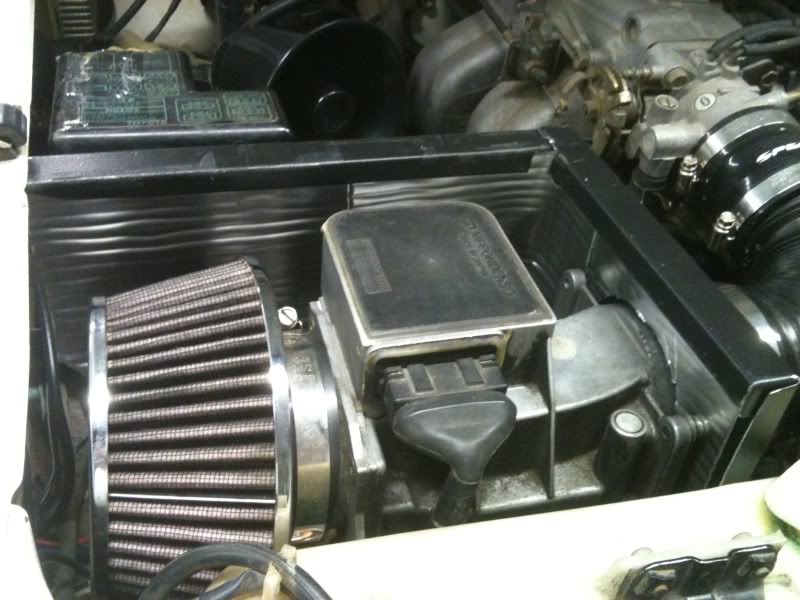
At the same time, picked up a used Black Magic 165 E-fan and threw it in. Had one problem with it not turning on while wheeling, but turn the a/c override and it worked fine. Got it home, has worked perfectly ever since.
http://www.flex-a-lite.com/auto/html/black-magic.html
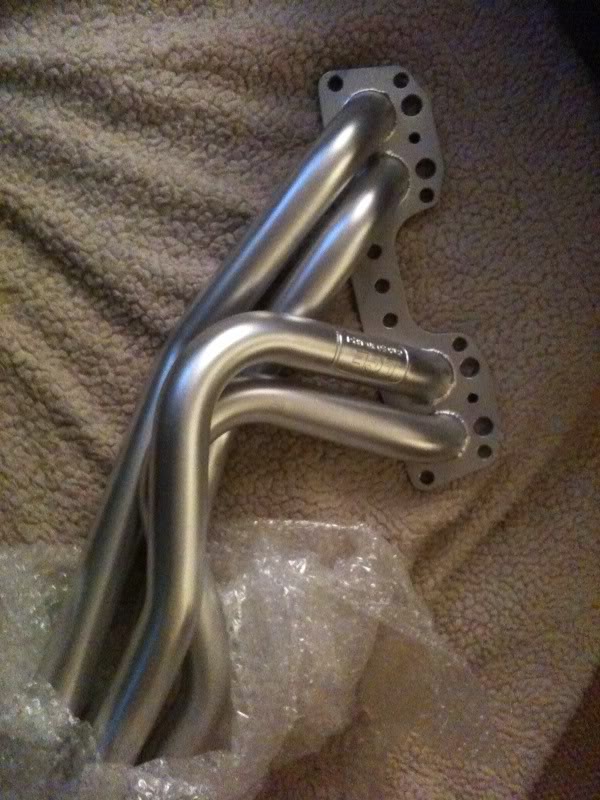
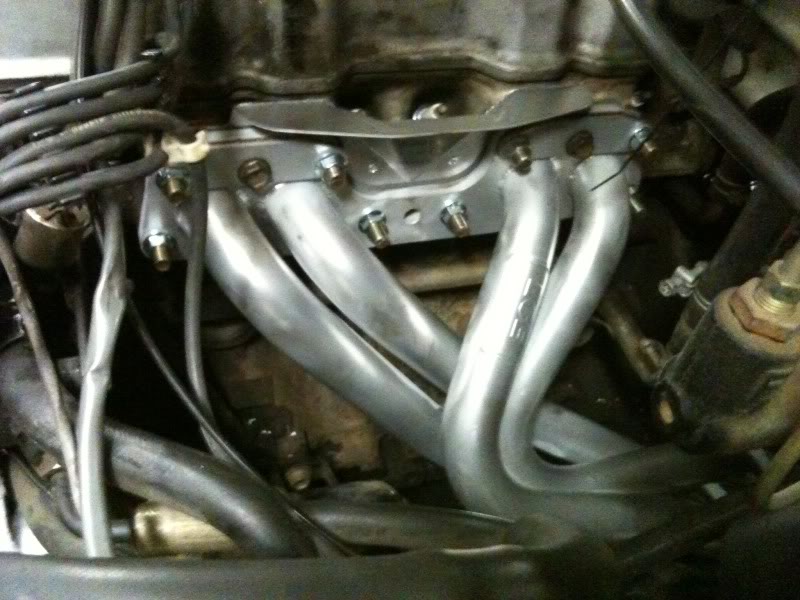
Exhaust. So many choices. Too many threads.... LOL. Its all personal preference. Saved up for a while and picked up the full LCE set. Header, 2 1/4" high flow cat, and 2 1/4" cat back exhaust. M10x1.25 helicoil kit to fix the stripped out head and I was back in business.
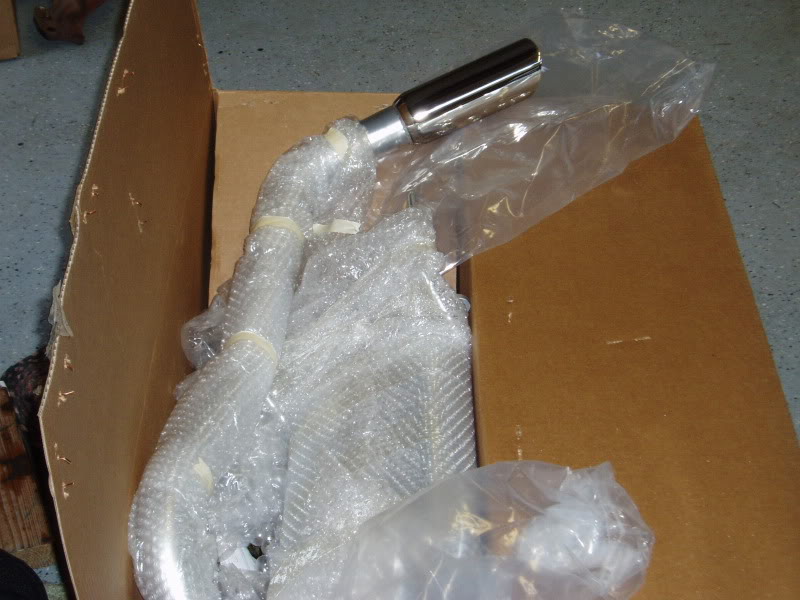
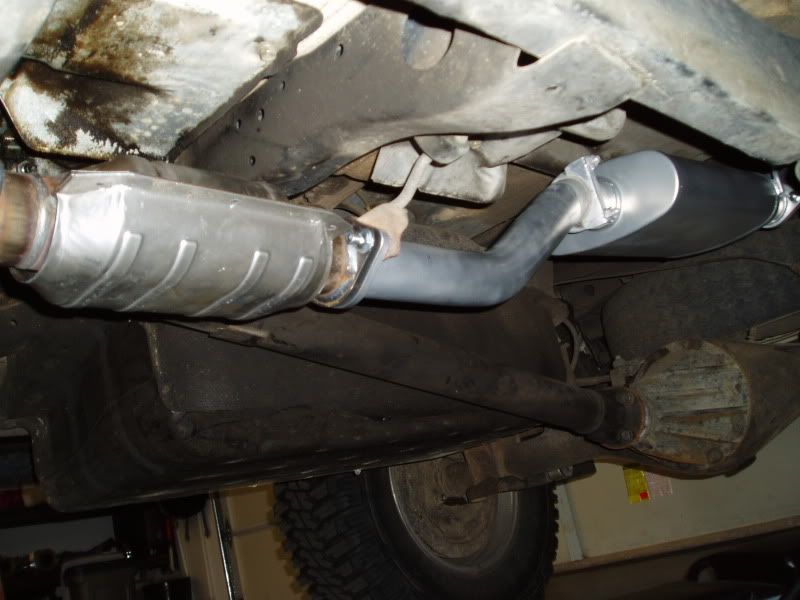
flow through muffler is no joke
I did get a code, and I believe it was because a shielding wire that got in with the signal wire when I relocated the O2 sensor. But I bought a new Denso O2 sensor and cleaned up the connection, no more codes.
Ease of install - Not bad, one person can do it. Still had leaks at the slip joints, though. They were eventually welded up by Vital22re. (Thanks, Vitaly)
Now, I am not in high school. I get up at 5:30 am to go to work. This exhaust was not for me. TOOO LOUD. Very ricey. I was very disappointed, especially when they explain it on their website as not being overly loud.
Bottom line, when I get annoyed running on the freeway, and my friends can hear me pulling up before they can see me, it's time for a new exhaust. But before I cut out a $300 exhaust, had to try and see if I could quiet it down.
See interior section for soundproofing
Finally went to a Local Shop (Austin's Pro/max) and they recommended a Flowmaster 50 SUV muffler to quiet it down. MUCH BETTER. Its not anywhere close to stock, but I can hear the mud terrains singing on the road now unless I stomp on it.
The old muffler?? Birdbrain took it off my hands. BTW, the LCE exhaust sounds WAAAY better on the 3.0 then it does the 22re.
BTW...... 200,000!!!!!

Also, due to an unfortunate wreck, I ended up with a nice new motor. It's from Sunwest engines in Deer Park, WA.
http://www.sunwestautomotiveengines....-22REHPLB.html
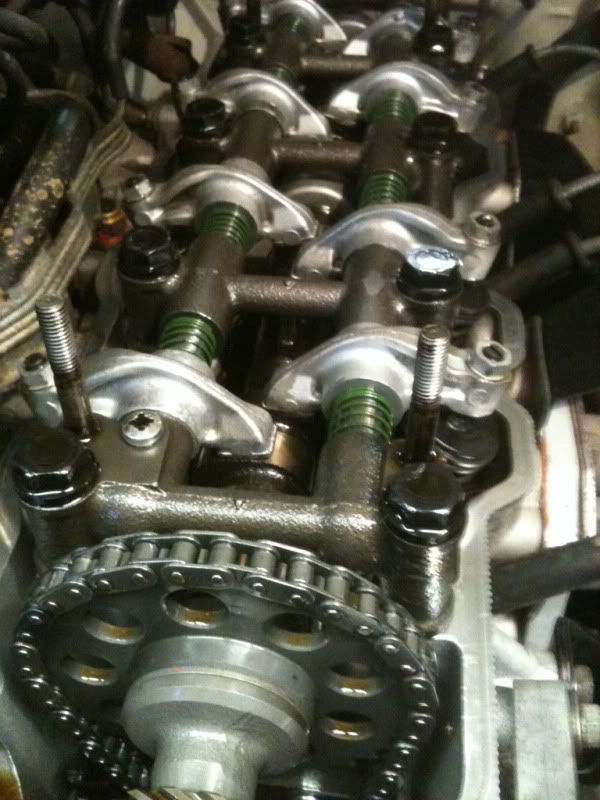
As of Feb. 14th, the swap is finished. looking good, running good. but honestly, its a 22re, not like you haven't seen it before, but I'll still add a little something.
260 rv cam, brand new head with oversized valves, port and polished.
08/01/2011- Engine was running great until I started loosing coolant and was having a hard start issue. pinhole leak due to the "Victor Reinz" gasket set being used instead of factory Toyota Head gasket. Cleaned it up, factory head gasket, runs as good as info.
Got sucked into a 3.4 swap by Vital22re and Deathcougar.
coming soon..... 3.4 swap info
Started with the stock motor, a good runner with a bad exhaust leak. PO tried to crank down the warped manifold and ended up stripping out the studs. Awesome.
1/14/09 1982 Supra MAF picked up for $20. Battery /intake swap done at same time. After a couple trips out in the woods, And comparing intake temps to BigBluePile and his snorkel, decided to make a box for it to keep it a little cooler. (Thanks Logan
)Option #2 it was.
At the same time, picked up a used Black Magic 165 E-fan and threw it in. Had one problem with it not turning on while wheeling, but turn the a/c override and it worked fine. Got it home, has worked perfectly ever since.
http://www.flex-a-lite.com/auto/html/black-magic.html
Exhaust. So many choices. Too many threads.... LOL. Its all personal preference. Saved up for a while and picked up the full LCE set. Header, 2 1/4" high flow cat, and 2 1/4" cat back exhaust. M10x1.25 helicoil kit to fix the stripped out head and I was back in business.
flow through muffler is no joke
I did get a code, and I believe it was because a shielding wire that got in with the signal wire when I relocated the O2 sensor. But I bought a new Denso O2 sensor and cleaned up the connection, no more codes.
Ease of install - Not bad, one person can do it. Still had leaks at the slip joints, though. They were eventually welded up by Vital22re. (Thanks, Vitaly)
Now, I am not in high school. I get up at 5:30 am to go to work. This exhaust was not for me. TOOO LOUD. Very ricey. I was very disappointed, especially when they explain it on their website as not being overly loud.
Bottom line, when I get annoyed running on the freeway, and my friends can hear me pulling up before they can see me, it's time for a new exhaust. But before I cut out a $300 exhaust, had to try and see if I could quiet it down.
See interior section for soundproofing
Finally went to a Local Shop (Austin's Pro/max) and they recommended a Flowmaster 50 SUV muffler to quiet it down. MUCH BETTER. Its not anywhere close to stock, but I can hear the mud terrains singing on the road now unless I stomp on it.
The old muffler?? Birdbrain took it off my hands. BTW, the LCE exhaust sounds WAAAY better on the 3.0 then it does the 22re.
BTW...... 200,000!!!!!
Also, due to an unfortunate wreck, I ended up with a nice new motor. It's from Sunwest engines in Deer Park, WA.
http://www.sunwestautomotiveengines....-22REHPLB.html
As of Feb. 14th, the swap is finished. looking good, running good. but honestly, its a 22re, not like you haven't seen it before, but I'll still add a little something.
260 rv cam, brand new head with oversized valves, port and polished.
08/01/2011- Engine was running great until I started loosing coolant and was having a hard start issue. pinhole leak due to the "Victor Reinz" gasket set being used instead of factory Toyota Head gasket. Cleaned it up, factory head gasket, runs as good as info.
Got sucked into a 3.4 swap by Vital22re and Deathcougar.
coming soon..... 3.4 swap info
Last edited by kiyobrown; Mar 16, 2013 at 03:17 PM.
Trending Topics
Aug 31, 2010 | 09:50 PM
#8
Thread Starter
Registered User
Joined: Feb 2009
Posts: 7,591
Likes: 76
From: Tacoma, WA
Kiyobrown's 1987 4Runner Build-Up Thread
This is my 3rd- 1st gen 4Runner.
1- 88 v6 5spd sr5 - Stolen
2 - 87 22re auto sr5 - too gutless, sold
3 - 87 22re 5spd sr5 - Juuuuust riiiight.
Found on Craigslist down in Cottage Grove, Oregon. Some 270 miles away. Owner says they picked it up from the original owner for their son, but their son didn't want it and would rather have the money for college. When I went down to check it out, they showed me a stack of receipts from the date of purchase. Fully loaded SR5, bought originally in August of 1987 for $17530.00 from Precision Toyota in Tuscon, AZ. Bought by me in January of '09 with 185k miles on it. Picked it up to be my daily driver.
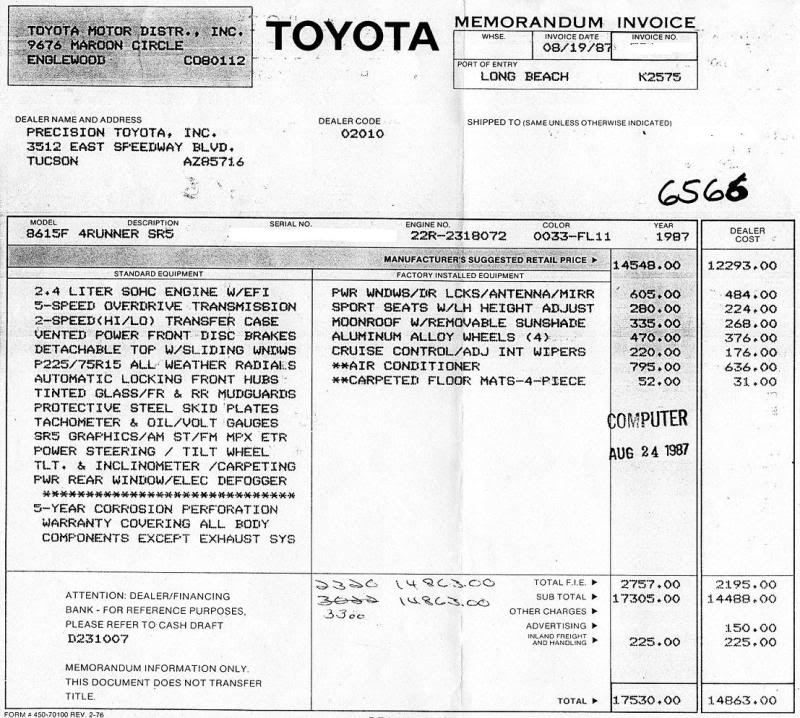
As you can see, it originally came with auto hubs, which the PO swapped out in 2004 to Warn premiums. The sports seats were $280. Really?
Problems when I brought it home:
No rear defrost
Cruise control did not work
stereo was shot
butt sag
suspension needed an upgrade
heater face broken
one power mirror broken
underside of vehicle covered in oil
Exhaust leak from manifold as well as muffler
Tried looking for a pic of it when I brought it home, but I didn't get one til after I had removed the stripes. (a necessity since the second a pressure washer hit it the decal exploded and all that was left was sticky residue in the shape of old SR5 decals.) And I had already swapped rims from the old brake dust stained alloys to Tacoma rims with 235/75/15's on 'em....
Started as:
22re
w56
4.10's
235/75/15 on offset 8's
Currently:
3.4 (5VZE)
R150f
4.30 (rear factory Toyota Elocker)
265/75/16 Duratracs on 3rd gen 5 stars
softopper
1- 88 v6 5spd sr5 - Stolen
2 - 87 22re auto sr5 - too gutless, sold
3 - 87 22re 5spd sr5 - Juuuuust riiiight.
Found on Craigslist down in Cottage Grove, Oregon. Some 270 miles away. Owner says they picked it up from the original owner for their son, but their son didn't want it and would rather have the money for college. When I went down to check it out, they showed me a stack of receipts from the date of purchase. Fully loaded SR5, bought originally in August of 1987 for $17530.00 from Precision Toyota in Tuscon, AZ. Bought by me in January of '09 with 185k miles on it. Picked it up to be my daily driver.
As you can see, it originally came with auto hubs, which the PO swapped out in 2004 to Warn premiums. The sports seats were $280. Really?
Problems when I brought it home:
No rear defrost
Cruise control did not work
stereo was shot
butt sag
suspension needed an upgrade
heater face broken
one power mirror broken
underside of vehicle covered in oil
Exhaust leak from manifold as well as muffler
Tried looking for a pic of it when I brought it home, but I didn't get one til after I had removed the stripes. (a necessity since the second a pressure washer hit it the decal exploded and all that was left was sticky residue in the shape of old SR5 decals.) And I had already swapped rims from the old brake dust stained alloys to Tacoma rims with 235/75/15's on 'em....
Started as:
22re
w56
4.10's
235/75/15 on offset 8's
Currently:
3.4 (5VZE)
R150f
4.30 (rear factory Toyota Elocker)
265/75/16 Duratracs on 3rd gen 5 stars
softopper
Last edited by kiyobrown; Mar 16, 2013 at 04:09 PM.
Aug 31, 2010 | 10:18 PM
#10
Thread Starter
Registered User
Joined: Feb 2009
Posts: 7,591
Likes: 76
From: Tacoma, WA
Well, exhaust vids are not posting properly, gonna try it again here.
Stock. With rotted muffler rattle.
http://s686.photobucket.com/albums/v...t=IMG_0007.flv
Stock. With rotted muffler rattle.
http://s686.photobucket.com/albums/v...t=IMG_0007.flv
Last edited by kiyobrown; Aug 31, 2010 at 10:23 PM.
Aug 31, 2010 | 10:23 PM
#11
Thread Starter
Registered User
Joined: Feb 2009
Posts: 7,591
Likes: 76
From: Tacoma, WA
Last edited by kiyobrown; Sep 21, 2010 at 10:02 PM.
Aug 31, 2010 | 10:24 PM
#12
Thread Starter
Registered User
Joined: Feb 2009
Posts: 7,591
Likes: 76
From: Tacoma, WA
 Aug 31, 2010 | 10:43 PM
#14
Thread Starter
Registered User
Joined: Feb 2009
Posts: 7,591
Likes: 76
From: Tacoma, WA
That's on the list!! I only got the nerfs bc they were cheap and the wife needed a step to get in.
What's left:
Sliders
Door panels
Lighter tires for daily driving.
And maybe a 4.56 e-locker if Pismojoe ever leaks out his address.
What's left:
Sliders
Door panels
Lighter tires for daily driving.
And maybe a 4.56 e-locker if Pismojoe ever leaks out his address.


 Sep 2, 2010 | 08:43 PM
#20
Thread Starter
Registered User
Joined: Feb 2009
Posts: 7,591
Likes: 76
From: Tacoma, WA
Thanks guys. It was 86 Toy's idea to do the write up. Kinda glad I did. Got some editing to do, and a clip of the new exhaust to do, too. But it's a solid start.
And yes, speaker pods. Dork. Don't worry, I will be adding links to everything, so you will get your credit.
And yes, speaker pods. Dork. Don't worry, I will be adding links to everything, so you will get your credit.


