
JonnyBoy's 1990 4Runner build
 Sep 12, 2013 | 07:53 PM
#241
Registered User
Joined: Dec 2009
Posts: 2,762
Likes: 1
opps. i wasnt sure if the hole was drilled incorrectly or that was how it is.
now that you explained a little. TG better replace that housing on their cost for return shipping as well. other than the poor drilling. i know those housings are really strong and the welds looks good
now that you explained a little. TG better replace that housing on their cost for return shipping as well. other than the poor drilling. i know those housings are really strong and the welds looks good
Sep 13, 2013 | 09:16 AM
#242
Registered User
Joined: Aug 2011
Posts: 1,507
Likes: 2
From: Fraser Valley, British Columbia
Exactly my reasoning for buying that Blazeland kit. It's a potential stop gap until I can build something properly myself.
I'm sure they will help you out so you can get your SAS done now.
Sep 13, 2013 | 12:49 PM
#243

Thread Starter
Registered User
Joined: Apr 2007
Posts: 1,580
Likes: 1
From: Park City, UT
Hopefully soon. Tried calling a couple times yesterday and got busy signals, I'll try again today if I get a chance. I don't really want to do a long travel just in the interim, I'm just saying I could for the money.
The elocker just showed up, though! My supt said he just about herniated himself picking it up at the post office.
Edit:You did say it was insured, right 4x4?
The elocker just showed up, though! My supt said he just about herniated himself picking it up at the post office.
Edit:You did say it was insured, right 4x4?
Last edited by JonnyBoy; Sep 13, 2013 at 01:00 PM.
Sep 13, 2013 | 01:02 PM
#244
Registered User
Joined: Aug 2011
Posts: 1,507
Likes: 2
From: Fraser Valley, British Columbia
I know you don't. I'm just doing it because I don't have the facilities to do as much of the swap as I can before I bring in a 3rd party.
It's still going to be a regularly driven vehicle so I figure having a professional do the critical welds might be a good plan for myself and anyone I'm driving around.
If I where to do a swap now I'd have to bring someone in to do the entire job and I'd be a bit disappointed.
It's still going to be a regularly driven vehicle so I figure having a professional do the critical welds might be a good plan for myself and anyone I'm driving around.
If I where to do a swap now I'd have to bring someone in to do the entire job and I'd be a bit disappointed.
Sep 19, 2013 | 06:46 AM
#245
Thread Starter
Registered User
Joined: Apr 2007
Posts: 1,580
Likes: 1
From: Park City, UT
Well, another step closer, and another step further away...I'm up in Yosemite now at Crane Flat, working on another helicopter from my normal.
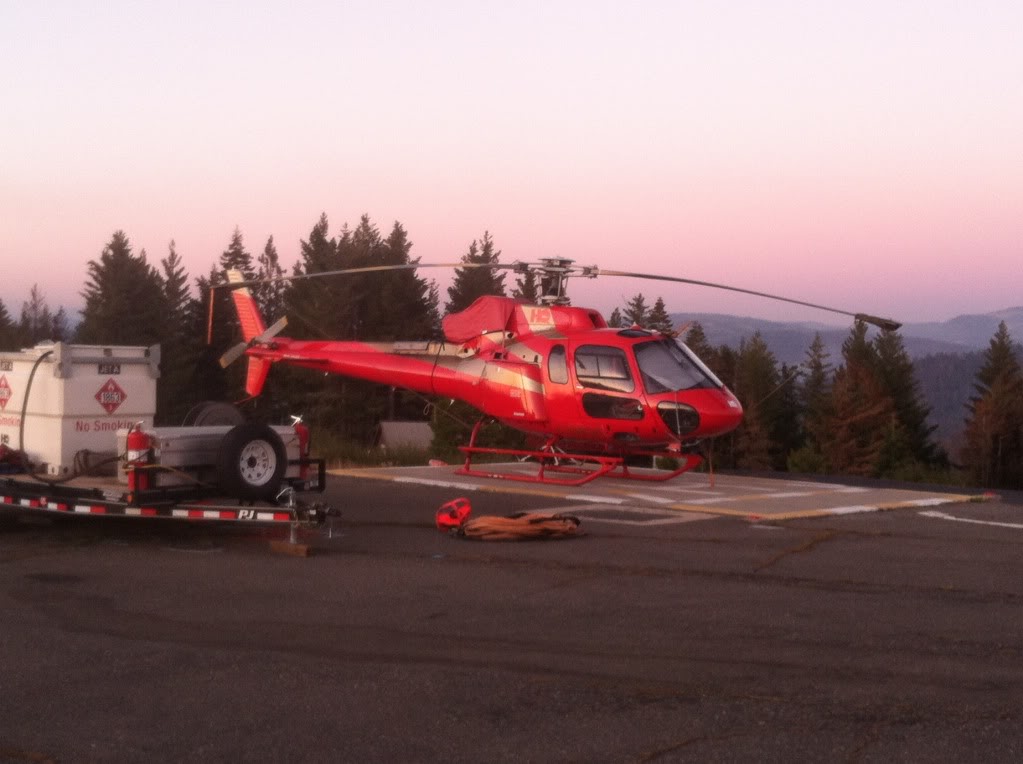
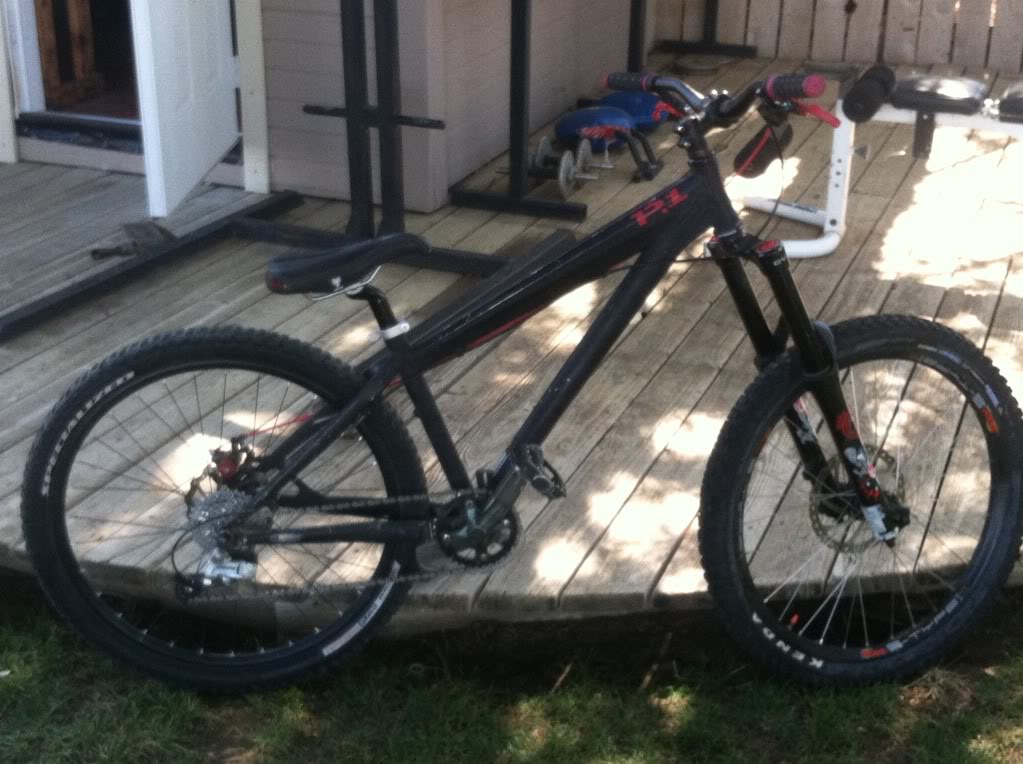
Pretty snazzy, flies nice, too. Also got another mt bike(dirt jump bike, actually)
So, no word from LowRange or TG, and I'm not home to send it off right now, anyhow. Hope they don't take it as laziness on my part!
Pretty snazzy, flies nice, too. Also got another mt bike(dirt jump bike, actually)
So, no word from LowRange or TG, and I'm not home to send it off right now, anyhow. Hope they don't take it as laziness on my part!
 Sep 19, 2013 | 12:37 PM
#247
Thread Starter
Registered User
Joined: Apr 2007
Posts: 1,580
Likes: 1
From: Park City, UT
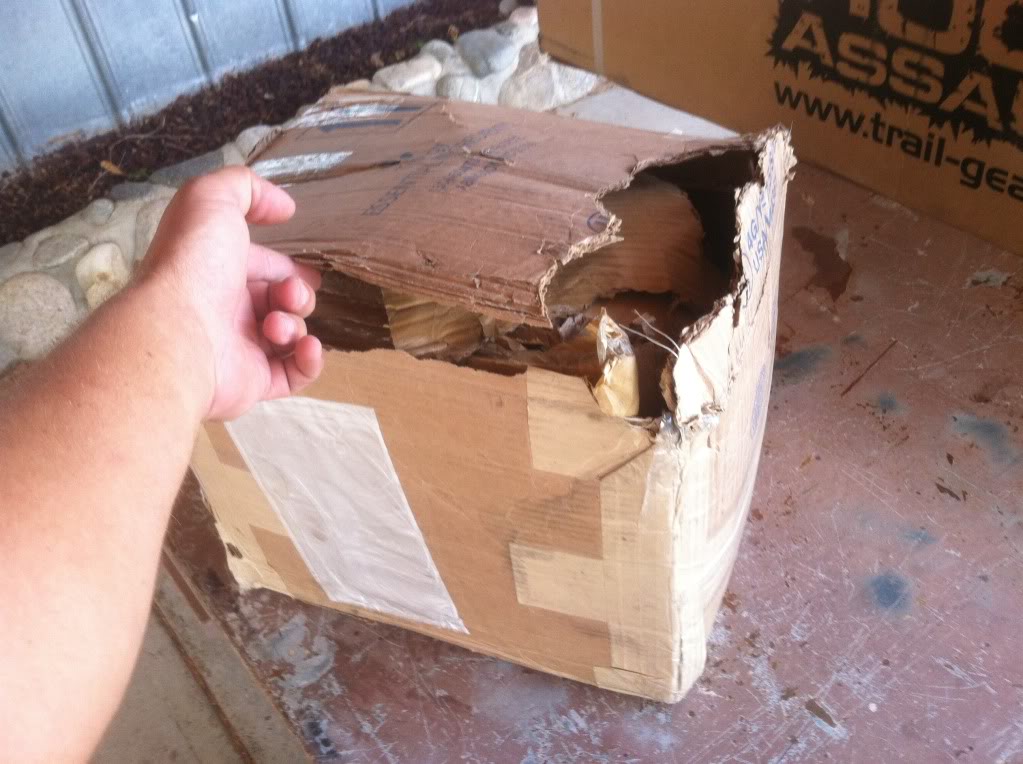
Haha, abused, then dropped out of the back of the truck a couple times! It looked ok, I still haven't gotten a chance to do a full inspection, but just a glance inside it looked ok and it was still padded with the cardboard pieces. Maybe I should try to claim the ring gear was undamaged before shipping...?
Thanks for the receipt 4x4.
Thanks for the receipt 4x4.
Sep 23, 2013 | 01:18 PM
#248
Thread Starter
Registered User
Joined: Apr 2007
Posts: 1,580
Likes: 1
From: Park City, UT
Newest update on the axle dilemma: LowRange had forgotten about it, or forgot to get back to me on how to proceed, when I called today they directed me to call TG direct. Called TG and they want pics of it with the stud installed and with the stud removed so they can see that it's not just bent. Of course, I'm not near the axle, but I'll deal with it when I get home. If it is threaded crooked, they said they'll definitely take care of it. Didn't ask them about the elocker pattern instead, that'll be for when they agree it needs to be replaced.
Sep 28, 2013 | 02:59 PM
#249
Thread Starter
Registered User
Joined: Apr 2007
Posts: 1,580
Likes: 1
From: Park City, UT
Well, time for me to confess...I had assumed the stud was threaded incorrectly cause the box it was shipped in was in good shape, no dents, punctures, deformations of any sort. So thinking that the stud absolutely couldn't be bent, I never tried to remove it. Well TG wanted a pic of it removed, and in removing it I realized it's just bent. Still sorta comes back to TG's quality control since the stud had to have been bent before it was put in the box, but I made a mountain out of a molehill. Still gotta call them Monday to let them know all is good, in case they wanted to know the resolution of the issue.
Oct 6, 2013 | 12:46 PM
#250
Thread Starter
Registered User
Joined: Apr 2007
Posts: 1,580
Likes: 1
From: Park City, UT
Well a small update is better than no update, right? Since the housing is good and it was my error on the reason for the crooked stud, I'm keeping it. Of course, even though I'm still working, I don't know when I'll get paid now. So I'm holding off on the e locker for a moment and using my old v6 rear that was original on the Runner.
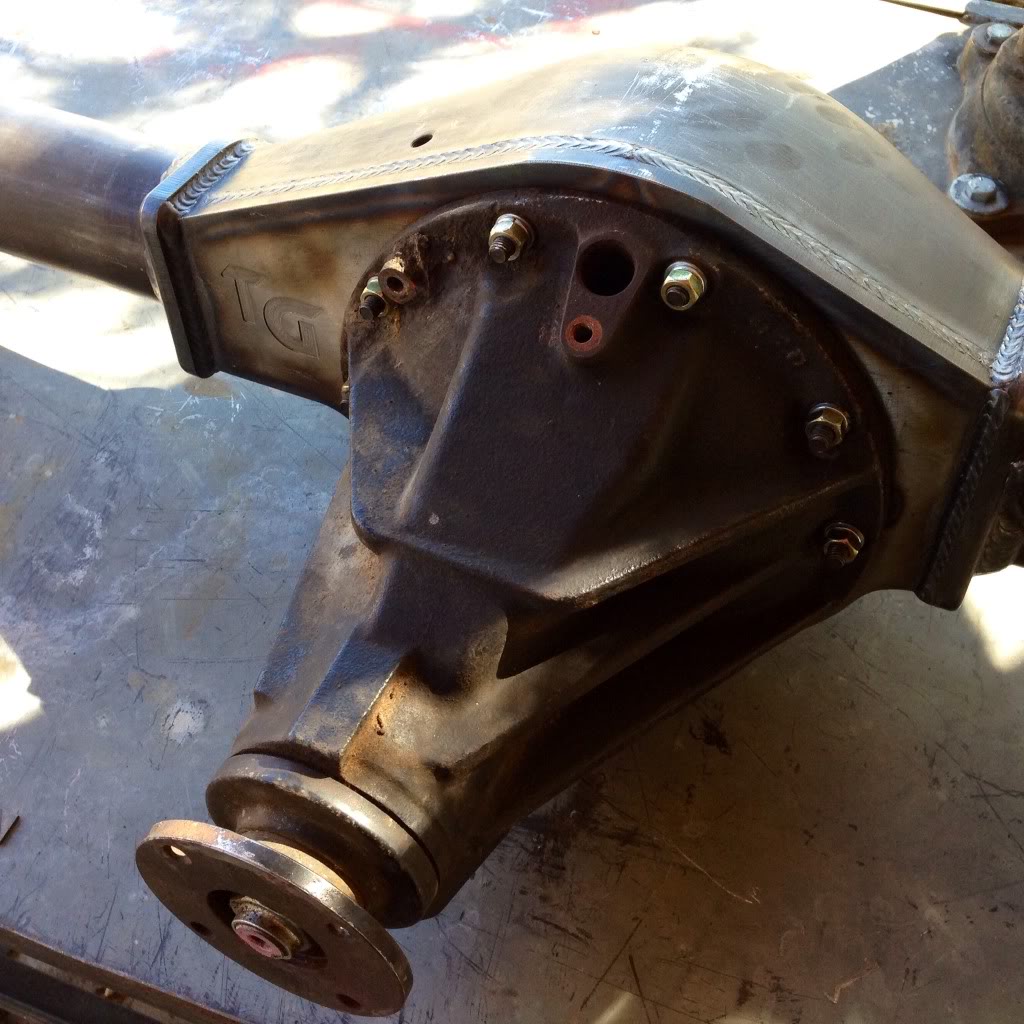
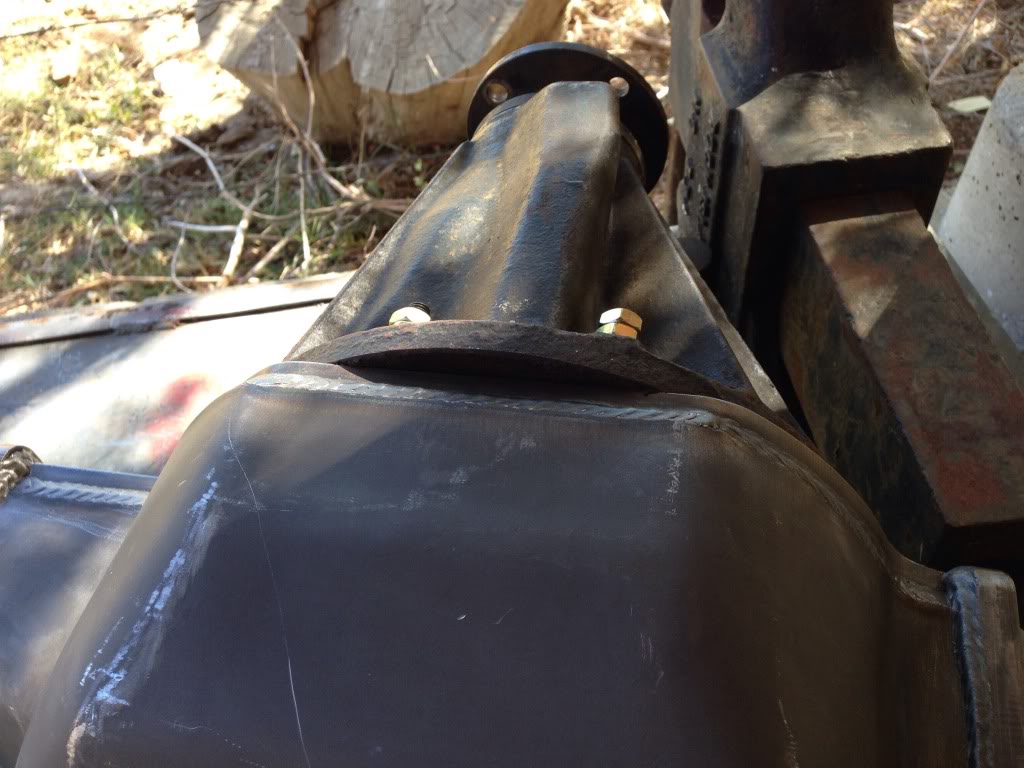
Looks better with a diff in it! It is just temporary to keep debris from making it's way into both pieces, but it's good to know how tight of a fit it is, plus now I can mark how much material needs to be shaved from the bottom of the diff.
Looks better with a diff in it! It is just temporary to keep debris from making it's way into both pieces, but it's good to know how tight of a fit it is, plus now I can mark how much material needs to be shaved from the bottom of the diff.
Nov 1, 2013 | 06:14 PM
#252
Thread Starter
Registered User
Joined: Apr 2007
Posts: 1,580
Likes: 1
From: Park City, UT
Not exactly a 4Runner update, but it's sort of practice in case I do take on the SAS myself...
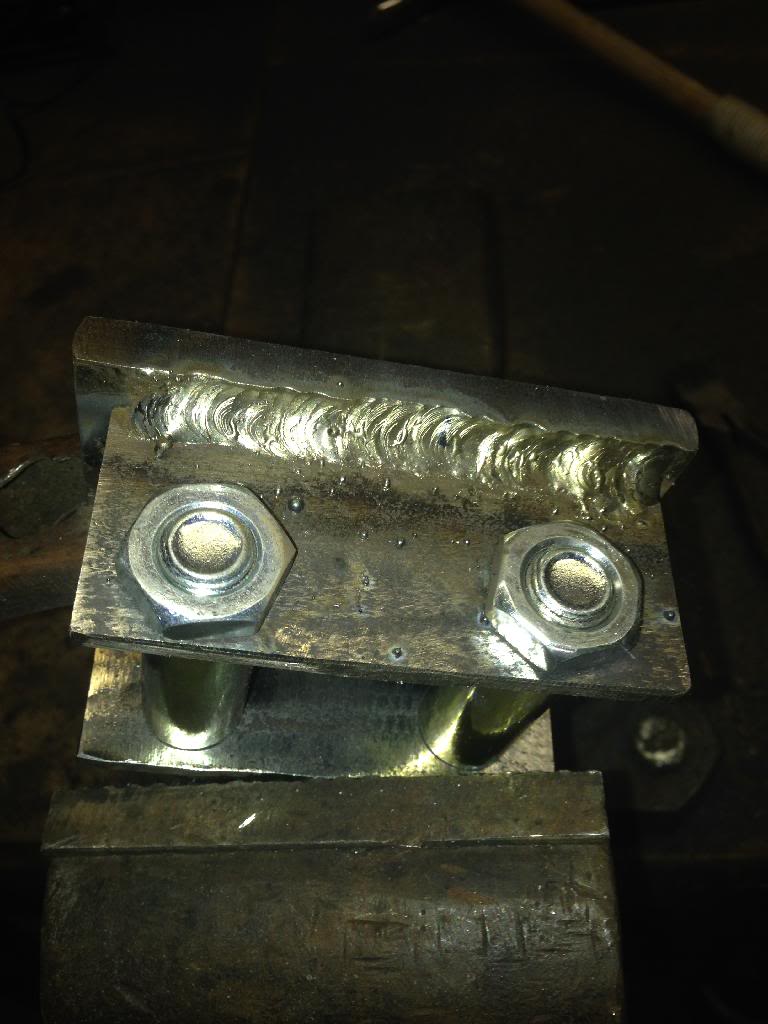
The engine in my Subie spun a rod bearing, so I'm in process of rebuilding right now. When I was removing the engine, the nut holding the motor mount to the frame on the passenger side rounded off very quickly and was on there way too dang tight, anyway. So, I had to cut the nut in half, also cutting the stud in half and ruining the motor mount. Being that even the stock mounts are pretty stupid expensive, and aftermarket options are even more stupid expensive, I bought and scrounged some metal and polyurethane to fab my own. Pretty tight area to work with, and it looks like the mount may end up about 1/4" taller than the stock, but I'm thinking the stock mount compressed some over time, anyhow. Here's the progress so far:
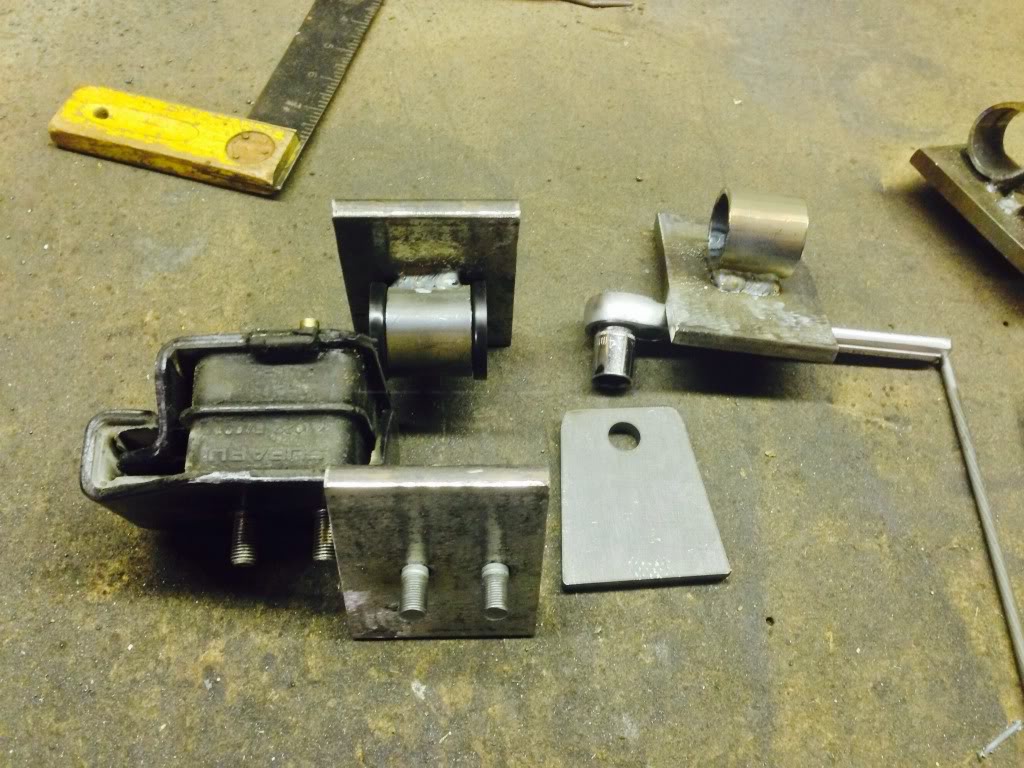
You can see the stock mount on the left, the bottom of my fabbed mount above it, and the top(not finished yet) is below it. Sitting on the ratchet is the bottom of the other mount
Filling a pretty big gap with the bead, but there's just not enough room to fit a cradle in between the plate and tube, so it'll have to do
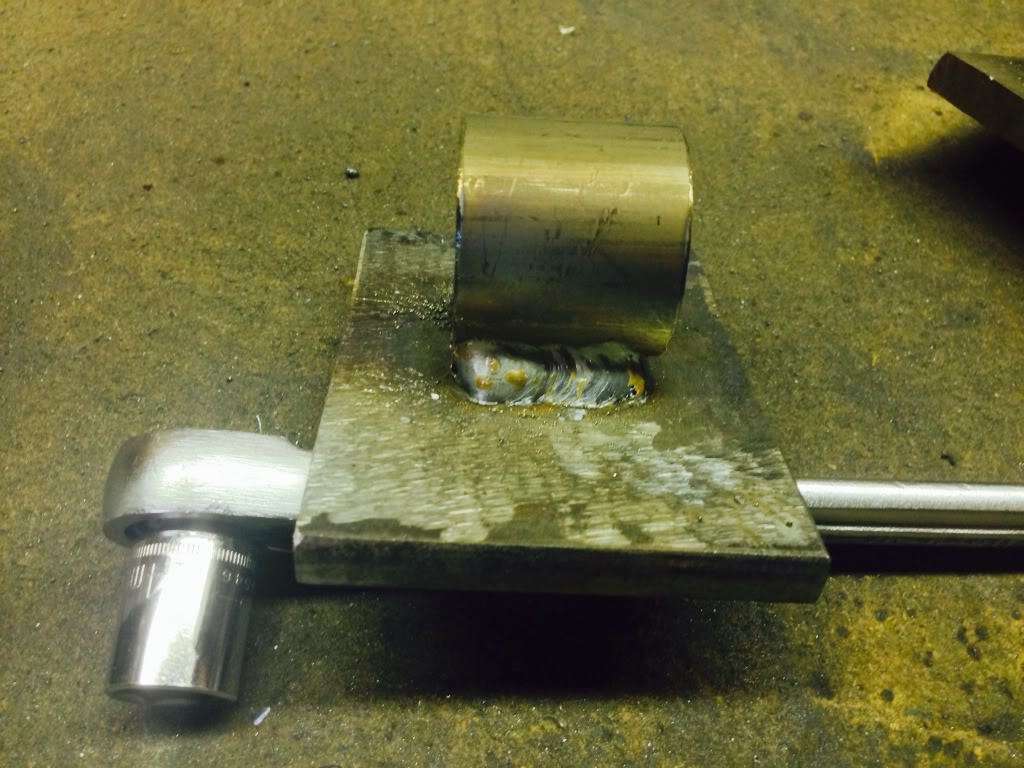
The other bottom weld
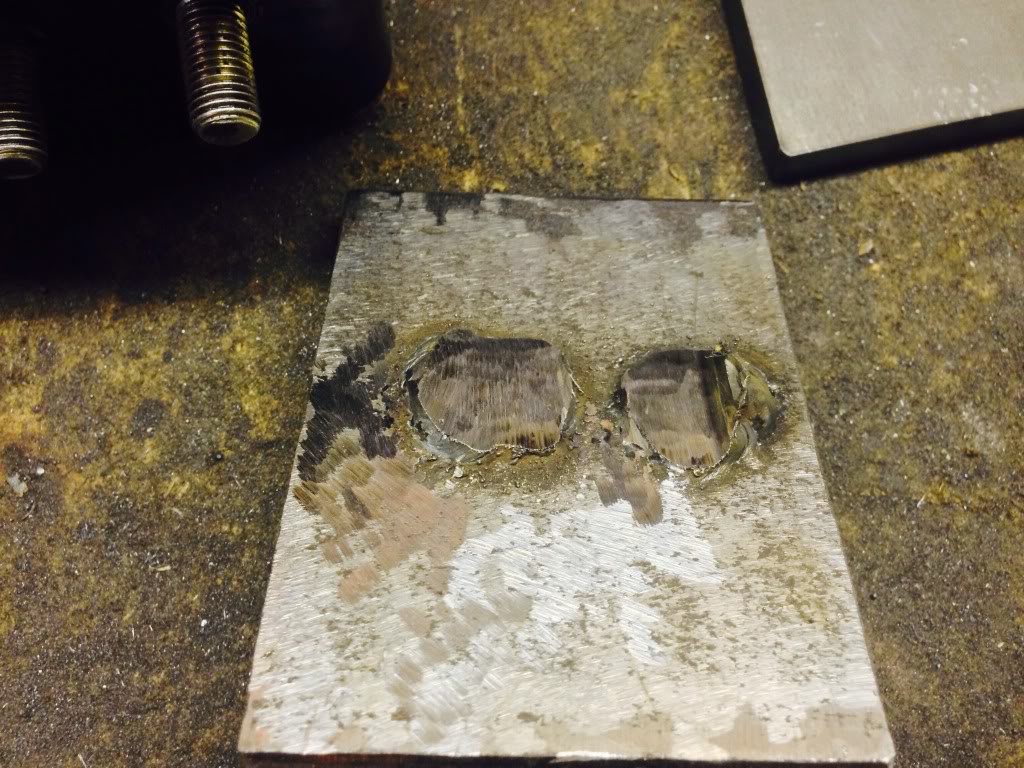
Had to grind down the heads of the top mounts bolts, was happy to see the weld material isn't swiss cheese. Maybe I'm actually getting this welding stuff down to a passable skill
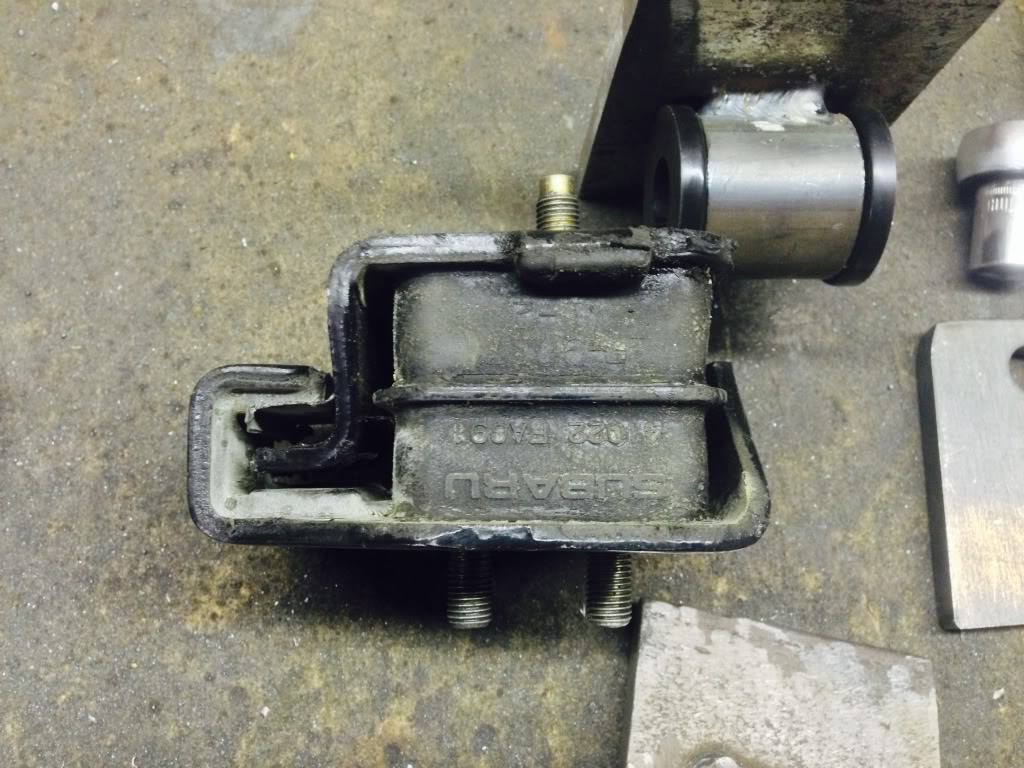
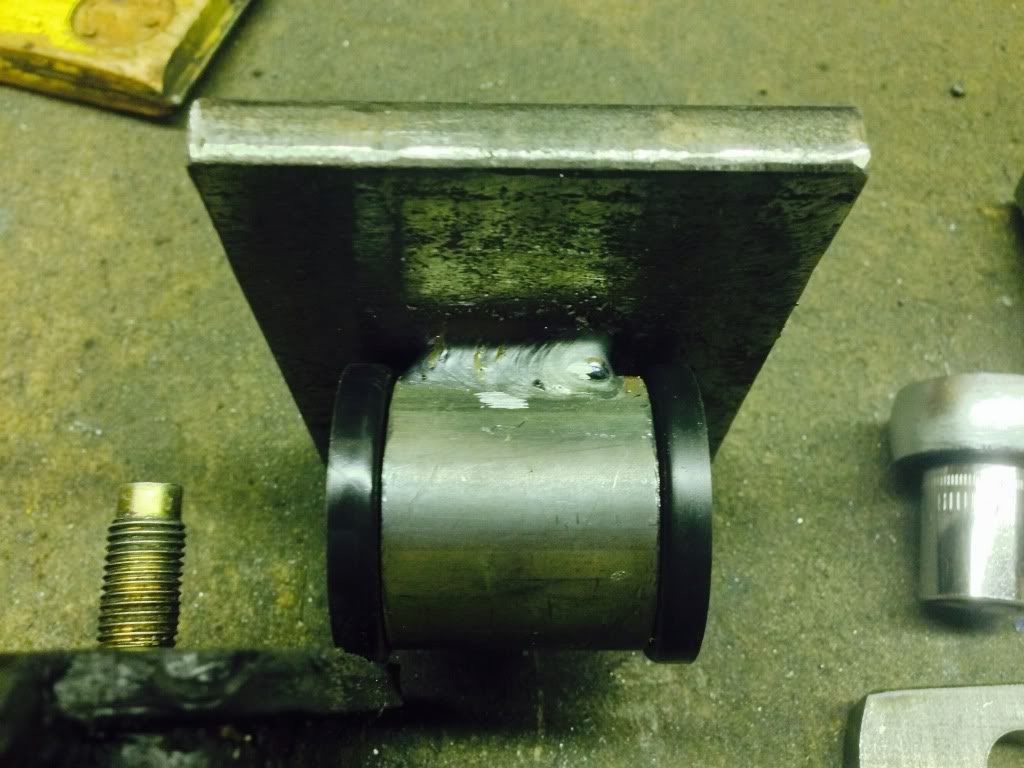
The stock mount. You can see how there was a lot of flex in that mount, letting the motor just flop wherever it wanted for the most part.
Anyway, it was just nice to get to welding and grinding again, thought I'd share some of my welding progress. Any tips of criticism is appreciated!
The engine in my Subie spun a rod bearing, so I'm in process of rebuilding right now. When I was removing the engine, the nut holding the motor mount to the frame on the passenger side rounded off very quickly and was on there way too dang tight, anyway. So, I had to cut the nut in half, also cutting the stud in half and ruining the motor mount. Being that even the stock mounts are pretty stupid expensive, and aftermarket options are even more stupid expensive, I bought and scrounged some metal and polyurethane to fab my own. Pretty tight area to work with, and it looks like the mount may end up about 1/4" taller than the stock, but I'm thinking the stock mount compressed some over time, anyhow. Here's the progress so far:

You can see the stock mount on the left, the bottom of my fabbed mount above it, and the top(not finished yet) is below it. Sitting on the ratchet is the bottom of the other mount

Filling a pretty big gap with the bead, but there's just not enough room to fit a cradle in between the plate and tube, so it'll have to do

The other bottom weld

Had to grind down the heads of the top mounts bolts, was happy to see the weld material isn't swiss cheese. Maybe I'm actually getting this welding stuff down to a passable skill

The stock mount. You can see how there was a lot of flex in that mount, letting the motor just flop wherever it wanted for the most part.
Anyway, it was just nice to get to welding and grinding again, thought I'd share some of my welding progress. Any tips of criticism is appreciated!
Last edited by JonnyBoy; Nov 1, 2013 at 06:16 PM.
Nov 2, 2013 | 09:20 AM
#254
Oh yeah, I forgot to add some tips in regards to the welding. They look alright,... But, I think you need to come over and figure out how we are going to do that 1UZ Swap! Lol... In all seriousness, very cool that you figured out a way to save a chunk of cash. I just saw one of those WRX motors for sale the other day. I wish I could put one of those in mine! Lol
Nov 3, 2013 | 11:06 AM
#256
A whatchamawhoooozit? Haha. Jk, I would love to put in a high powered four cylinder or 6 cylinder, not only just to have the room but better mileage. Something about that throaty V8 though, man, ....you know what I mean! Lol. So you're on your way, right? Hahaha
Dec 19, 2013 | 06:29 PM
#257
Thread Starter
Registered User
Joined: Apr 2007
Posts: 1,580
Likes: 1
From: Park City, UT
I let my build get all the way back to page 2...and it's been over a month since I updated it! I suck at this
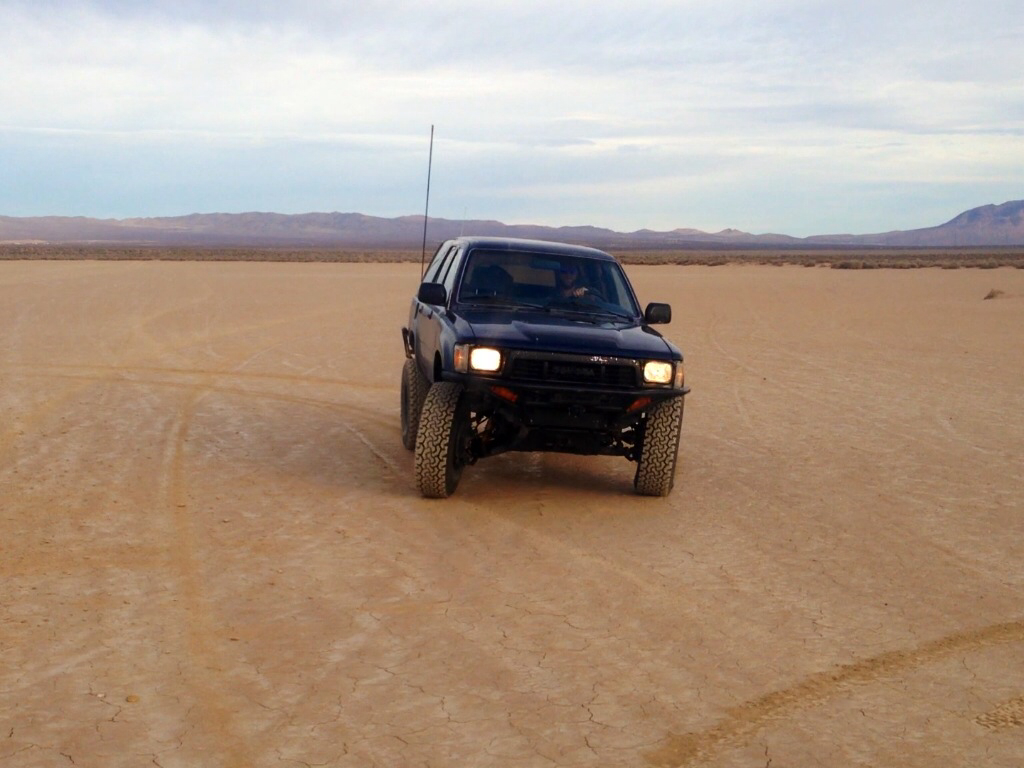
In the interest of making this post worth anything, I can now say the Runner is 4wd again. Just put in the front diff, bought some new axles from Autozone, and slapped the Aisin locking hubs back on. Went for a short trip with one of my buddies from Ridgecrest, then another little trip down a rough dirt road with a couple guys from a Ridgecrest wheeling group. I only took a couple pics when I went out with my buddy, but a girlfriend of one of the guys in the group got a ton of pics of my Runner when they were behind me on the dirt road adventure, so I'll get ahold of them soon. Til then, here's a couple since my last update
Mean IFS flex even on flat ground when I have the Elocker engaged
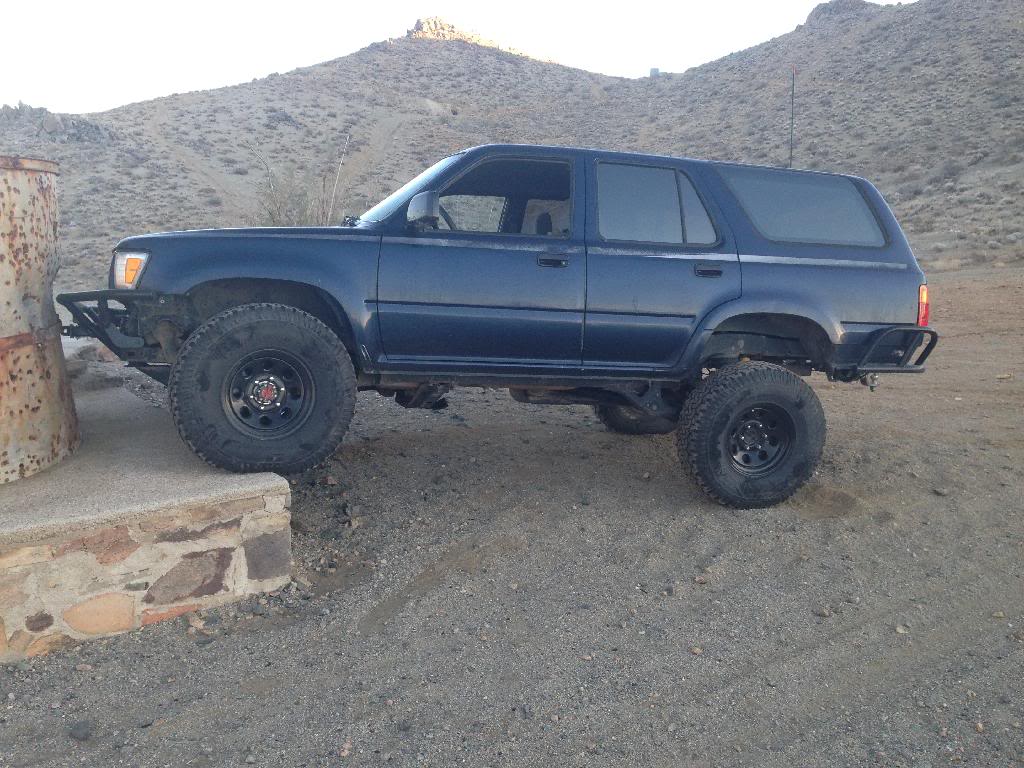
Climbing a vertical wall to pose...my buddy was surprised it did it with virtually no wheelspin, even with the Elocker
Couldn't find the snap rings the day before Thanksgiving when I was reinstalling 4wd components, so I improvised with the spacer, a large nylon washer trimmed down to fit under the spacer, and a nylon fender washer so I could hold the axle tight in the hub with a bolt in the end of the axle
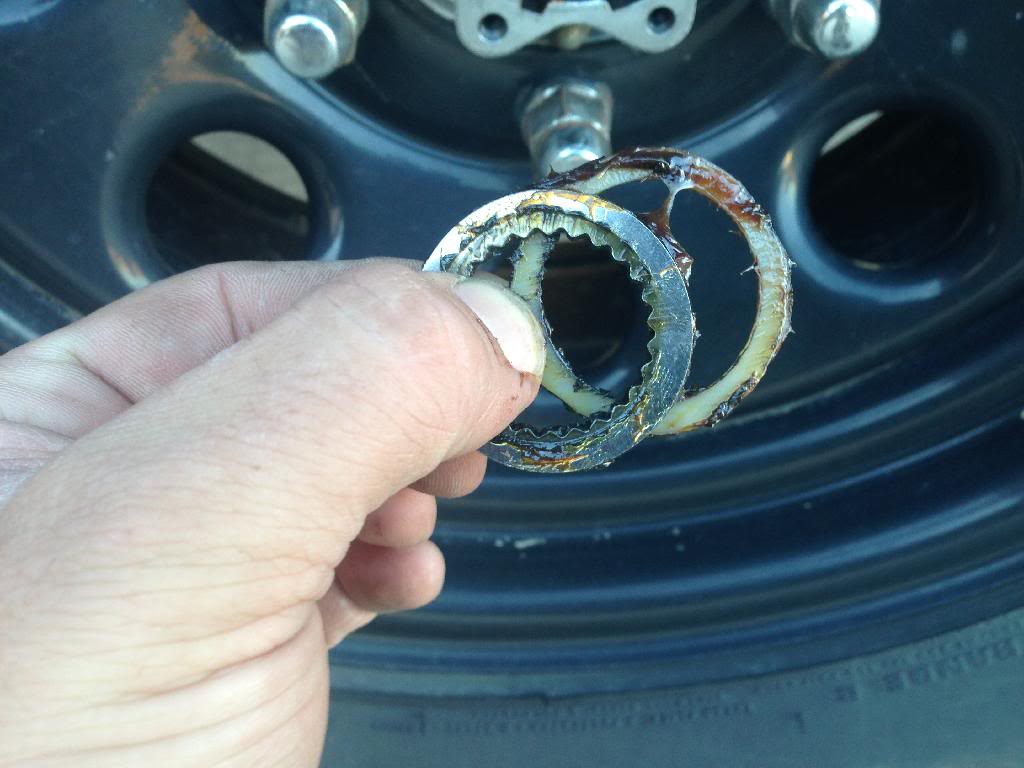
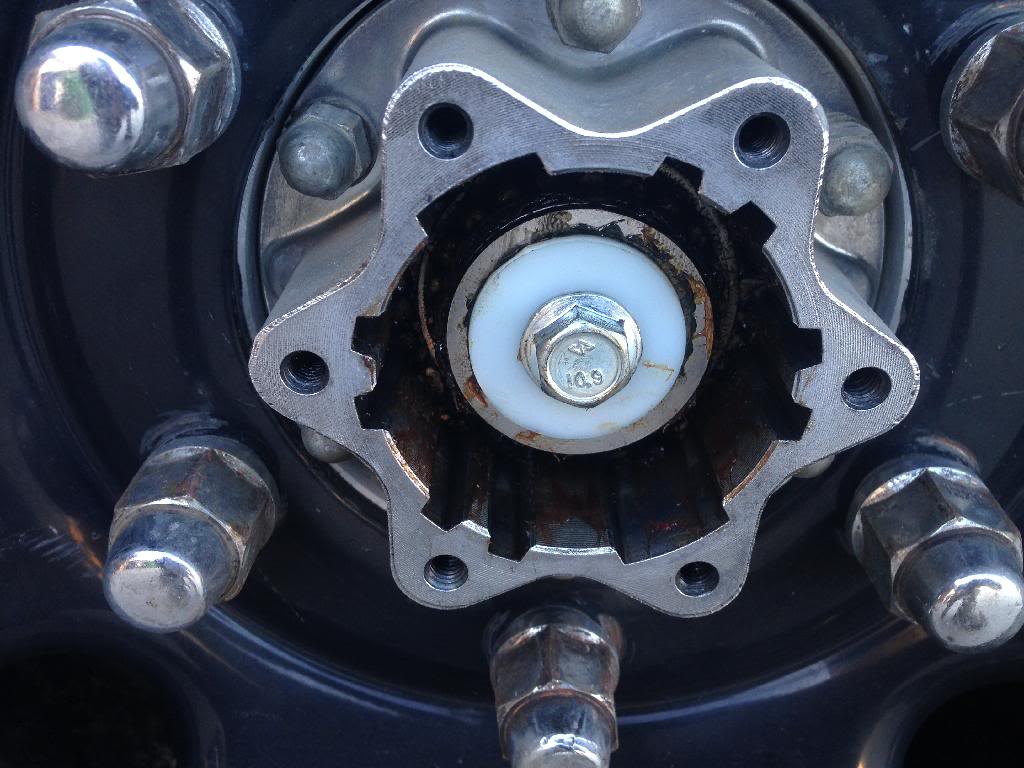
Got ahold of another pair of the spacers, so they're doubled up now instead of the large nylon washer, but here's what it looks like all tightened down. Works good, too, no debris getting in there yet
And lastly, I'm done except for paint on one of the Subaru motor mounts I was building. Starting to feel like I could maybe pull off the sas myself if I got access to a 220 welder...
Thanks for lookin y'all!
In the interest of making this post worth anything, I can now say the Runner is 4wd again. Just put in the front diff, bought some new axles from Autozone, and slapped the Aisin locking hubs back on. Went for a short trip with one of my buddies from Ridgecrest, then another little trip down a rough dirt road with a couple guys from a Ridgecrest wheeling group. I only took a couple pics when I went out with my buddy, but a girlfriend of one of the guys in the group got a ton of pics of my Runner when they were behind me on the dirt road adventure, so I'll get ahold of them soon. Til then, here's a couple since my last update
Mean IFS flex even on flat ground when I have the Elocker engaged

Climbing a vertical wall to pose...my buddy was surprised it did it with virtually no wheelspin, even with the Elocker

Couldn't find the snap rings the day before Thanksgiving when I was reinstalling 4wd components, so I improvised with the spacer, a large nylon washer trimmed down to fit under the spacer, and a nylon fender washer so I could hold the axle tight in the hub with a bolt in the end of the axle

Got ahold of another pair of the spacers, so they're doubled up now instead of the large nylon washer, but here's what it looks like all tightened down. Works good, too, no debris getting in there yet

And lastly, I'm done except for paint on one of the Subaru motor mounts I was building. Starting to feel like I could maybe pull off the sas myself if I got access to a 220 welder...

Thanks for lookin y'all!
Dec 31, 2013 | 05:42 PM
#258
Registered User
Joined: Apr 2012
Posts: 2,817
Likes: 2
From: Los Angeles CA
Dude i could have sworn i had checked out your thread before. I was almost positive i looked through it. I just checked it out. and it was an awesome 13 pages. I just wish you would have had more pictures of the engine swap. Johnny I am soooo looking forward to that SAS and rear rock assault swap you plan on doing. Please don't be stingy; Take lots of pictures of your progress for us will ya.
PS your welds look a hell of a lot better over the few months. All it takes is practice. Actually your beginning welds looked a lot like mine when i first started haha! That Flux core wire really looks bad dont it. Leaves too many splatter balls. I had the same problem. I prefer using gas with regular wire. but that flux core gasless wire is much cheaper to buy so that is what i mostly used. for my projects.
PS your welds look a hell of a lot better over the few months. All it takes is practice. Actually your beginning welds looked a lot like mine when i first started haha! That Flux core wire really looks bad dont it. Leaves too many splatter balls. I had the same problem. I prefer using gas with regular wire. but that flux core gasless wire is much cheaper to buy so that is what i mostly used. for my projects.
Last edited by Redeth005; Dec 31, 2013 at 05:47 PM.
Dec 31, 2013 | 08:19 PM
#259
Thread Starter
Registered User
Joined: Apr 2007
Posts: 1,580
Likes: 1
From: Park City, UT
The Rock Assault is going up front, actually. I'll probably eventually get a Tacoma width rear to match, but that'll be awhile. Instead, I plan to use the 1.5" spacers in the rear and get some 1" spacers for the front, just to make sure I clear the calipers. The first axle I built up is under the front of Mark's Runner. By the way, did you check my 3.4 swap thread? Pretty sure I linked it in the first page of my build here.
On the weld wire, I actually found pretty decent pricing at usaweld.com, and free shipping for over a $35 order. I was using wire bought by work, so I just bought more to replace the .035 wire I was using and a roll of .030 wire, which should be better for welding thinner stuff I think.
Thanks for checking it out Richard


