
Jagger's Build, Shine Runner.
 Mar 20, 2013 | 04:36 PM
#21
Thread Starter
Registered User
Joined: Jan 2013
Posts: 104
Likes: 0
From: Peterborough Ontario
Working during the summer at a trucking place, i got alot of cb related stuff they were tossing. So why go and buy a cb antenna when you can make 2 or 3 into one? I started with one with a stripped bolt end:
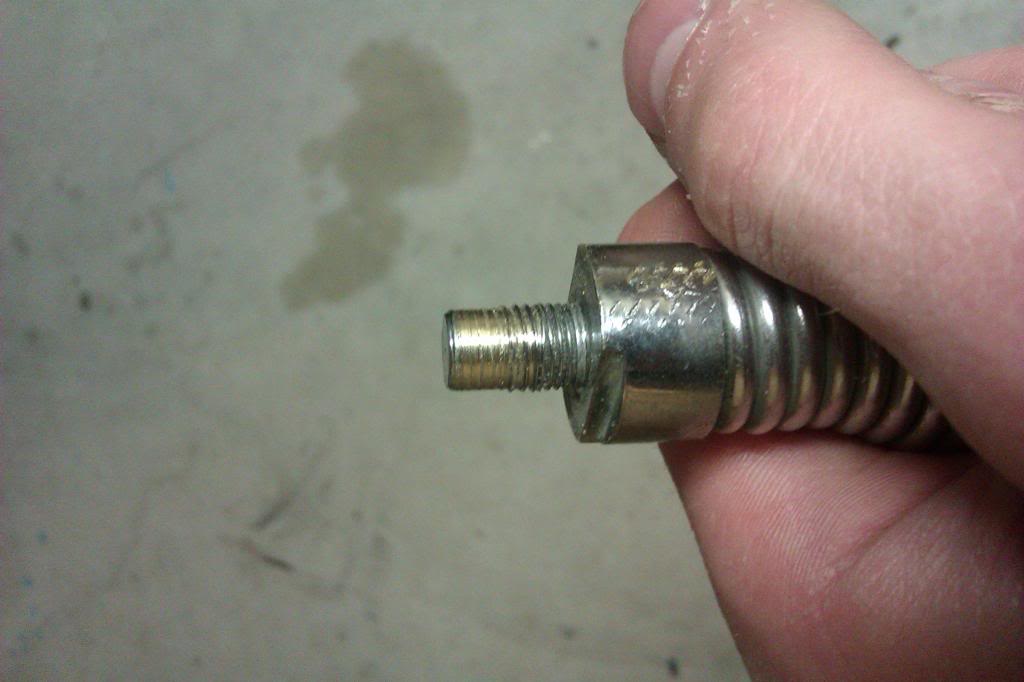
But it had the antenna coil on it:
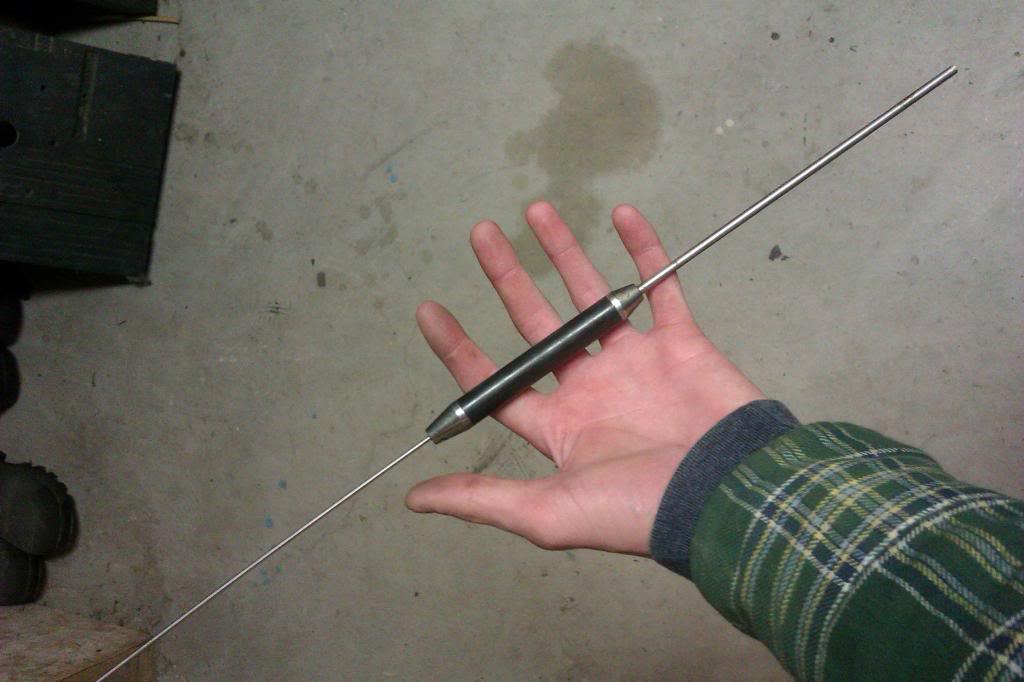
Then i had one where the coil was in the plastic magnetic part. (Broken on all of them.)
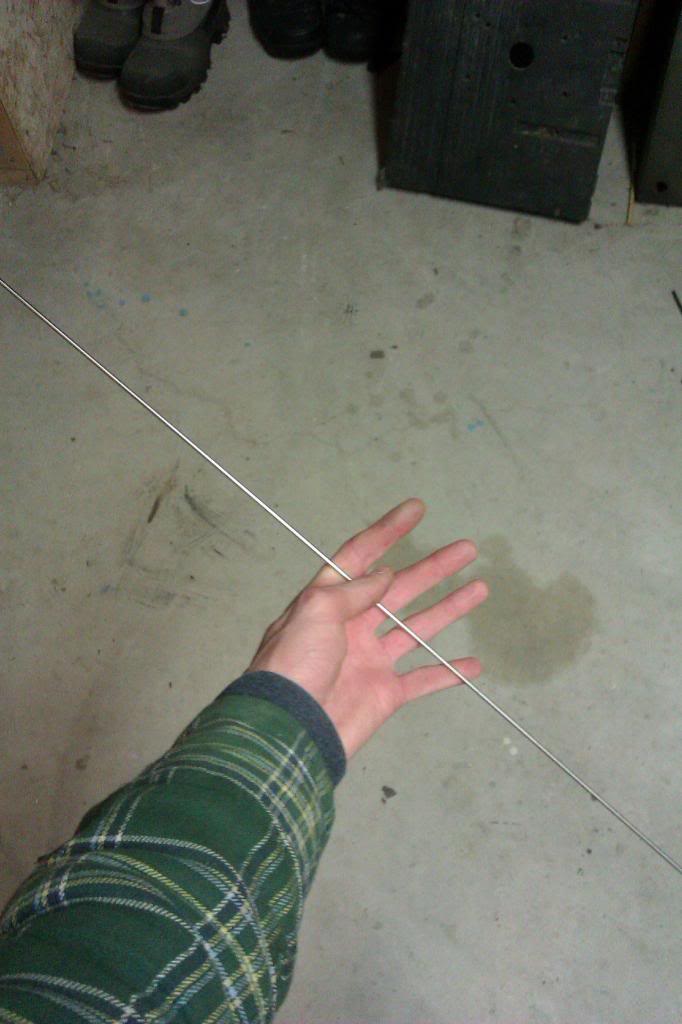
I took the antenna out:
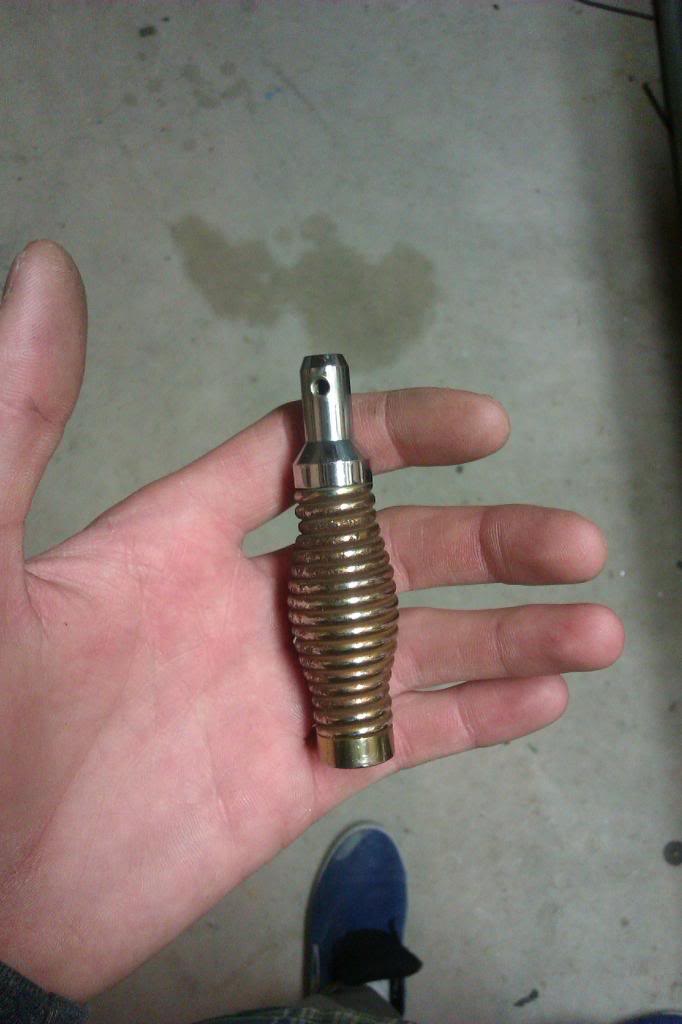
I drilled out the spring to fit the slightly bigger antenna with coil. Slid it in, tightened up the allen keys and made a mount out of a shelf angle piece. Had a plastic washer type thing out of a shower foucet to isolate it so it doesn't ground out or get lots of static. That will be in between the cable connector. For the cable im just putting and eyelet on the end of the cable i have. (one end has regular connector, other is cut.)
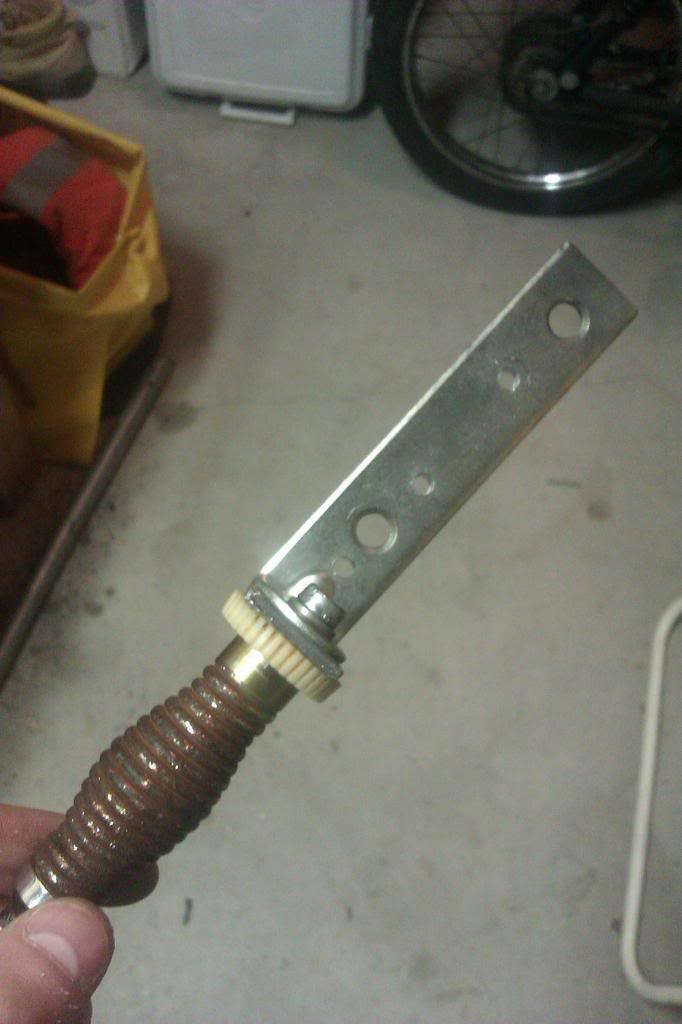
Total cost of a better made (I think) then those magnetic ones, $0!
But it had the antenna coil on it:
Then i had one where the coil was in the plastic magnetic part. (Broken on all of them.)
I took the antenna out:
I drilled out the spring to fit the slightly bigger antenna with coil. Slid it in, tightened up the allen keys and made a mount out of a shelf angle piece. Had a plastic washer type thing out of a shower foucet to isolate it so it doesn't ground out or get lots of static. That will be in between the cable connector. For the cable im just putting and eyelet on the end of the cable i have. (one end has regular connector, other is cut.)
Total cost of a better made (I think) then those magnetic ones, $0!
Mar 22, 2013 | 12:10 PM
#23
Thread Starter
Registered User
Joined: Jan 2013
Posts: 104
Likes: 0
From: Peterborough Ontario
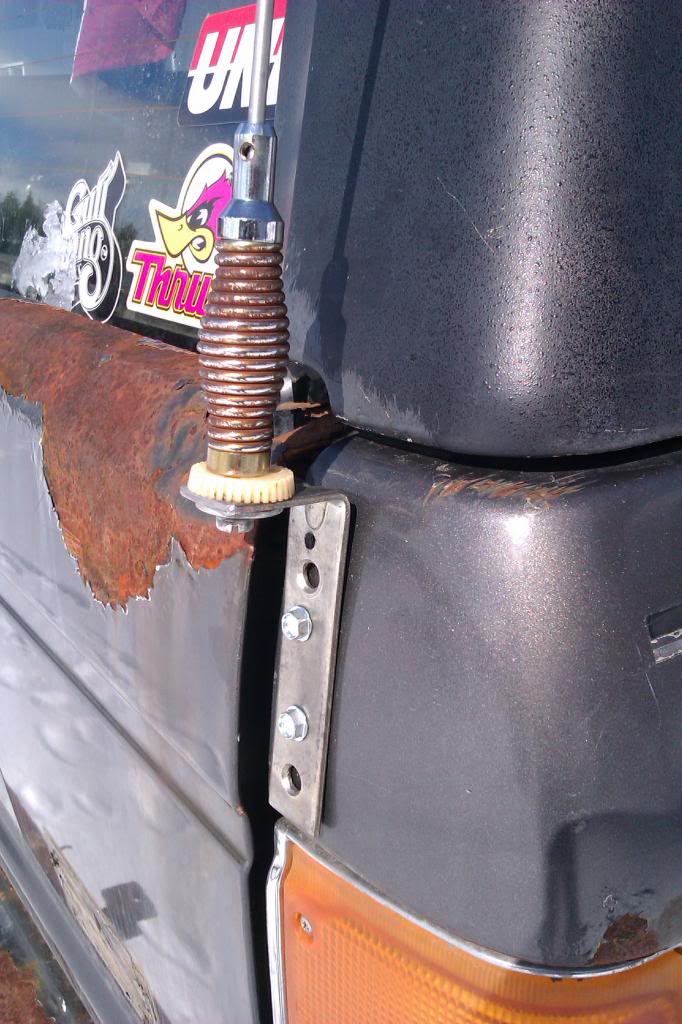
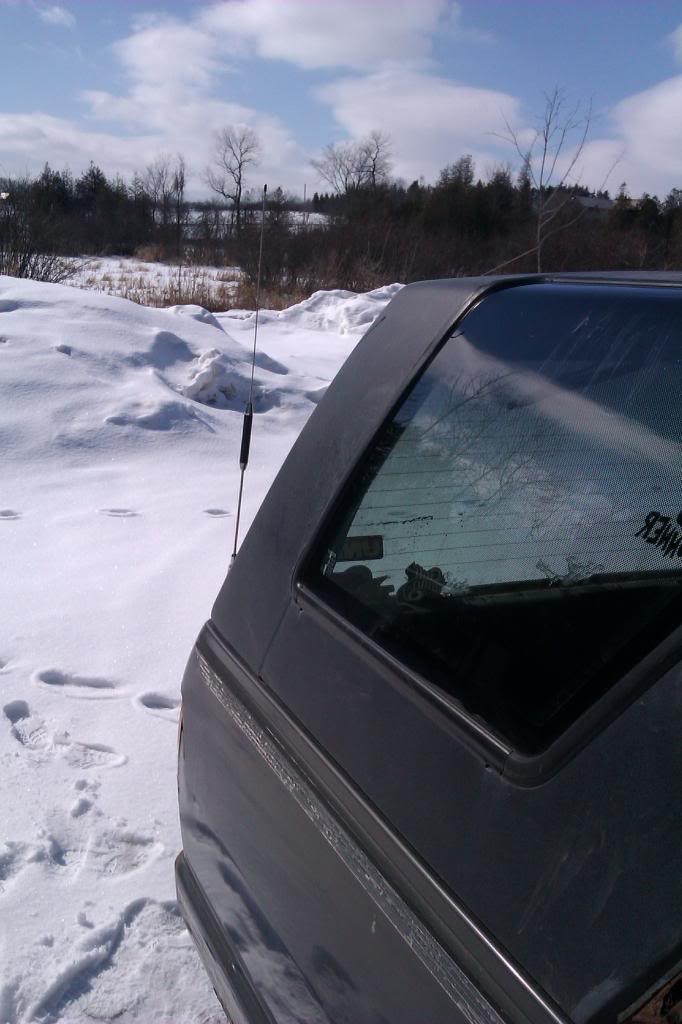
Mounted the cb antenna today.
Got some more parts from the chev. Two new speakers to fit in the front to replace the blown ones. I also got the master cylinder from it, I seen on nick89toy's thread he made an adapter plate to mount a gm master to the toyota master cylinder. Sure i could go out and buy a brand new toyota one, but this one ends up being free, and is a better master cylinder. I'm keeping price as low as i can go to see what i can do with the supplies i have. Saving moneys a big part too!
Got some more parts from the chev. Two new speakers to fit in the front to replace the blown ones. I also got the master cylinder from it, I seen on nick89toy's thread he made an adapter plate to mount a gm master to the toyota master cylinder. Sure i could go out and buy a brand new toyota one, but this one ends up being free, and is a better master cylinder. I'm keeping price as low as i can go to see what i can do with the supplies i have. Saving moneys a big part too!
Mar 23, 2013 | 12:02 PM
#24
Thread Starter
Registered User
Joined: Jan 2013
Posts: 104
Likes: 0
From: Peterborough Ontario
Finally fitted the Push button!

Lights up too! Except it was too bright when i took the picture so it looks like a little glow.

This didn't make me a happy camper.... Really need to find that carb setup soon....
Lights up too!
Except it was too bright when i took the picture so it looks like a little glow.This didn't make me a happy camper....
Really need to find that carb setup soon....
Mar 24, 2013 | 04:45 PM
#25
Thread Starter
Registered User
Joined: Jan 2013
Posts: 104
Likes: 0
From: Peterborough Ontario
This is out of a Z71 chev, i believe it only came in the z71's not sure. It's cool, retracts about 20 feet, really good light for being stuck somewhere. It'll literally reach everywhere on the truck, or help someone else.
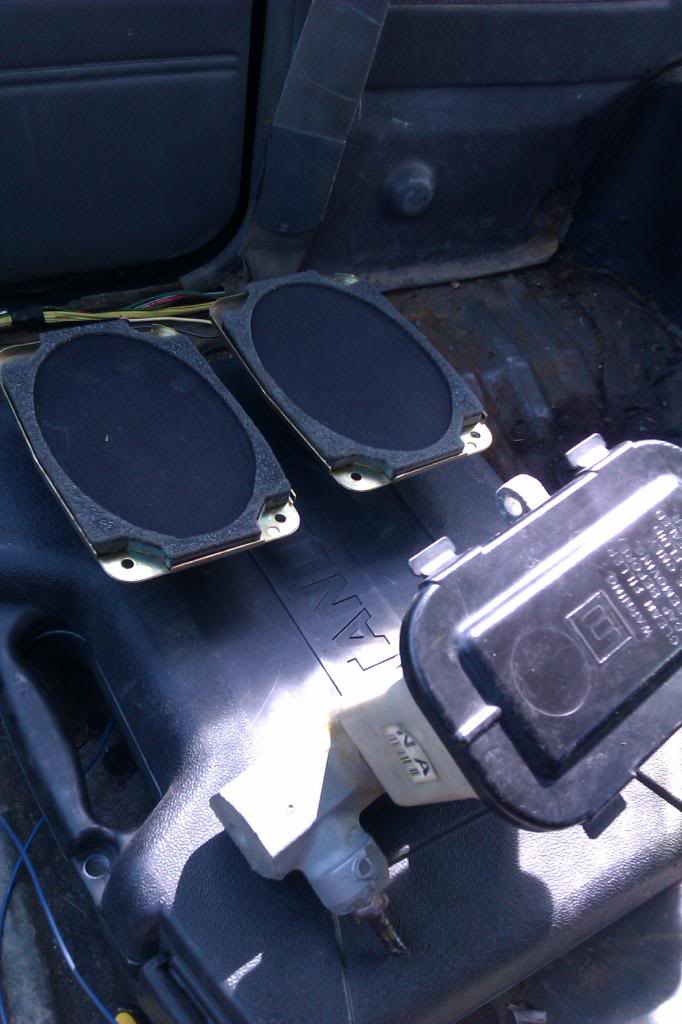
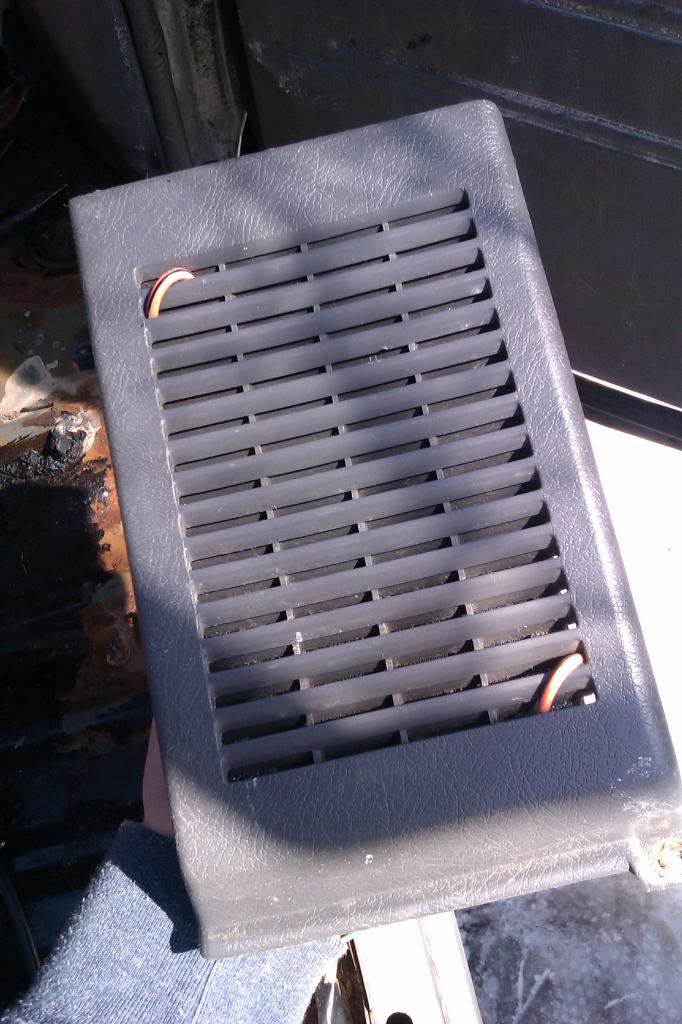
Put in the new front speakers. These are the rears out of a chev half ton. They fit in there pretty good. Reeeeaaallly tight when you close it back up, some hacking required. I have cables holding it through the vents because there was no good looking way of bolting them to it. So i decided cables look the least horrible.
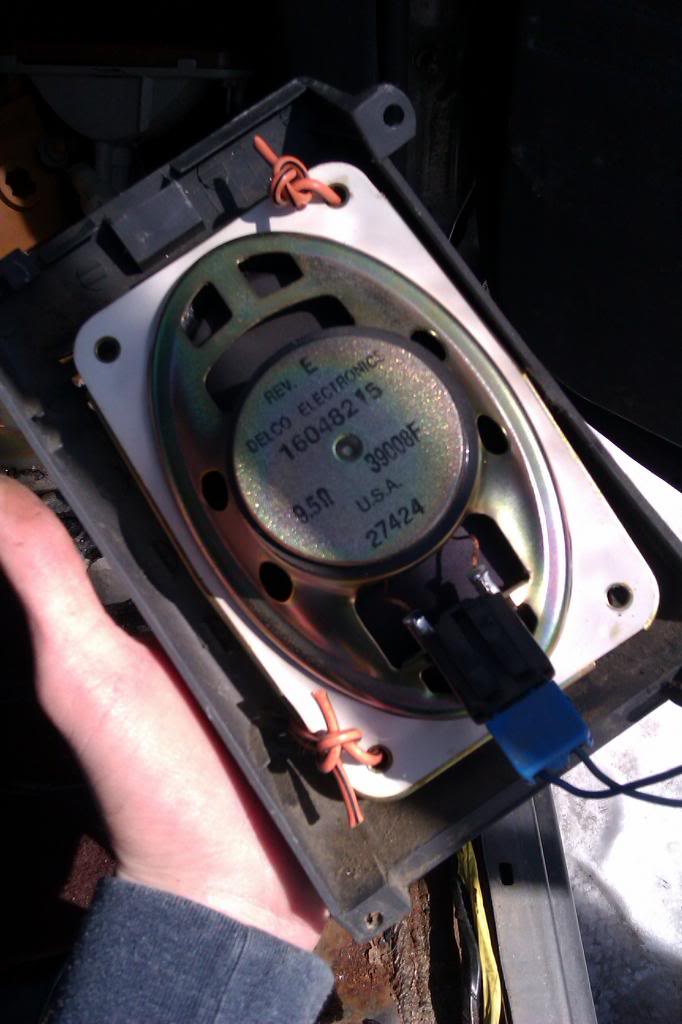
Front view of it. These added A LOT of volume compared to those little stock ones. Id strongly suggest it if people want a cheap and quick way to add some volume to their rig.
Put in the new front speakers. These are the rears out of a chev half ton. They fit in there pretty good. Reeeeaaallly tight when you close it back up, some hacking required. I have cables holding it through the vents because there was no good looking way of bolting them to it. So i decided cables look the least horrible.
Front view of it. These added A LOT of volume compared to those little stock ones. Id strongly suggest it if people want a cheap and quick way to add some volume to their rig.
Mar 26, 2013 | 04:11 PM
#26
Thread Starter
Registered User
Joined: Jan 2013
Posts: 104
Likes: 0
From: Peterborough Ontario
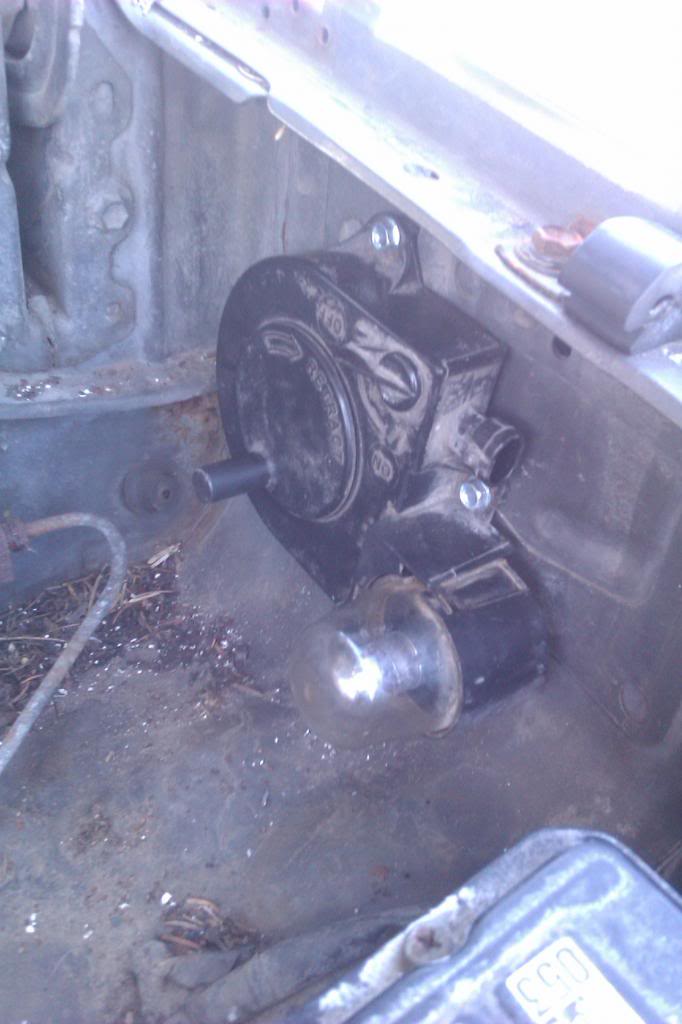
Did some work today. Decided to try my luck with the battery/air swap. I have more pictures then just this one. But my computer is giving me issues. I will throw them on tomorrow! I really like the look of the swap. Cleans it up quite a bit. Now just to find a new AFM...  BTW! it is an eeeeaaassy swap if people wanna clean up the engine bay!
Got the hood tie downs done! They look awesome!
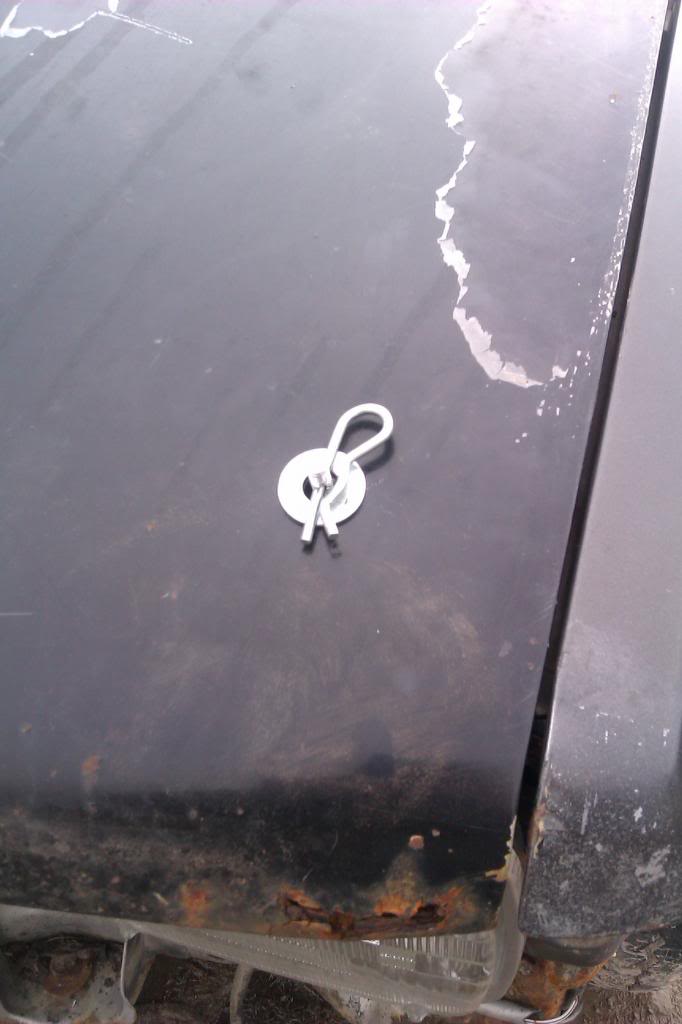
Quick question aswell. I had to move the battery over to the other side which ment moving the negative cable aswell (Positive i just lengthened) Is it alright to mount the (-) cable to the frame? There isn't any non "exhaust heat" spots to mount it.
BTW! it is an eeeeaaassy swap if people wanna clean up the engine bay!Got the hood tie downs done! They look awesome!
Quick question aswell. I had to move the battery over to the other side which ment moving the negative cable aswell (Positive i just lengthened) Is it alright to mount the (-) cable to the frame? There isn't any non "exhaust heat" spots to mount it.
Mar 26, 2013 | 05:15 PM
#27

Don't think there is a frame t body ground strab but I didn't check. Didn't check what is common, moving the ground or lengthening the wires. Fender should be fine, electricaly they should be identical.
Mar 28, 2013 | 04:24 PM
#28
Thread Starter
Registered User
Joined: Jan 2013
Posts: 104
Likes: 0
From: Peterborough Ontario
Thanks man! I wasn't entirely sure, but it's working fine with me having it on the frame. It hasn't done anything crazy yet lol
Mar 28, 2013 | 04:33 PM
#29
Thread Starter
Registered User
Joined: Jan 2013
Posts: 104
Likes: 0
From: Peterborough Ontario
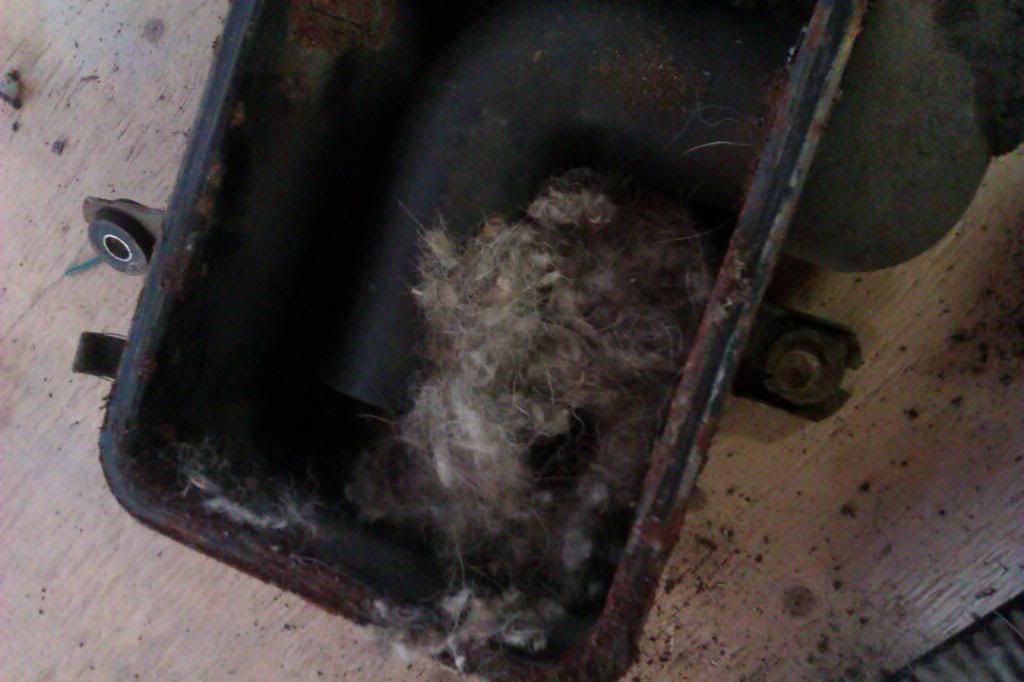
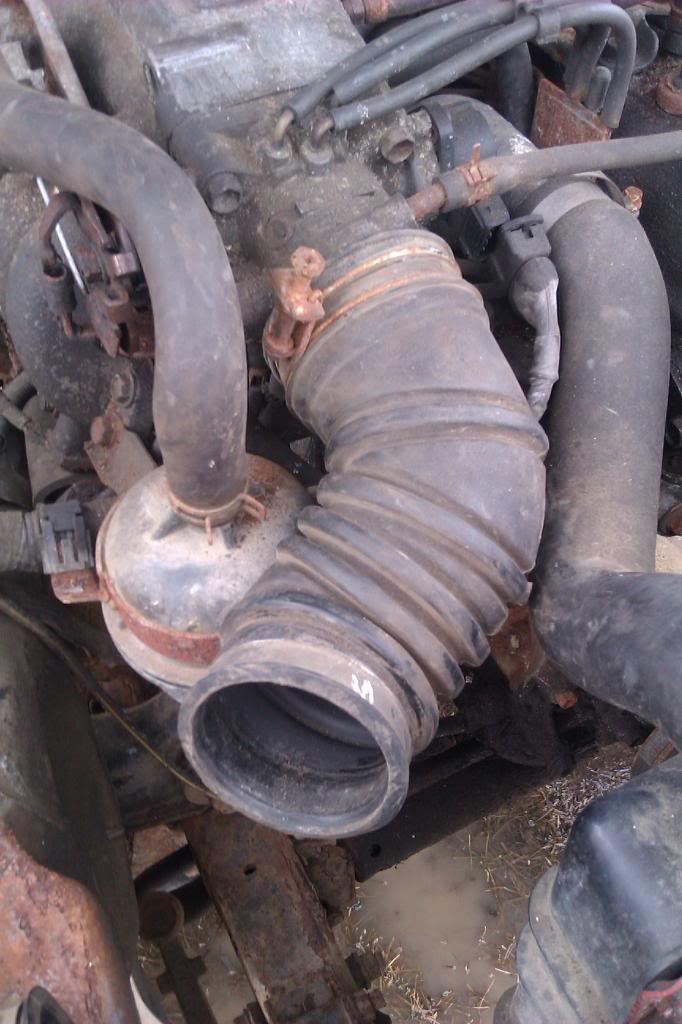
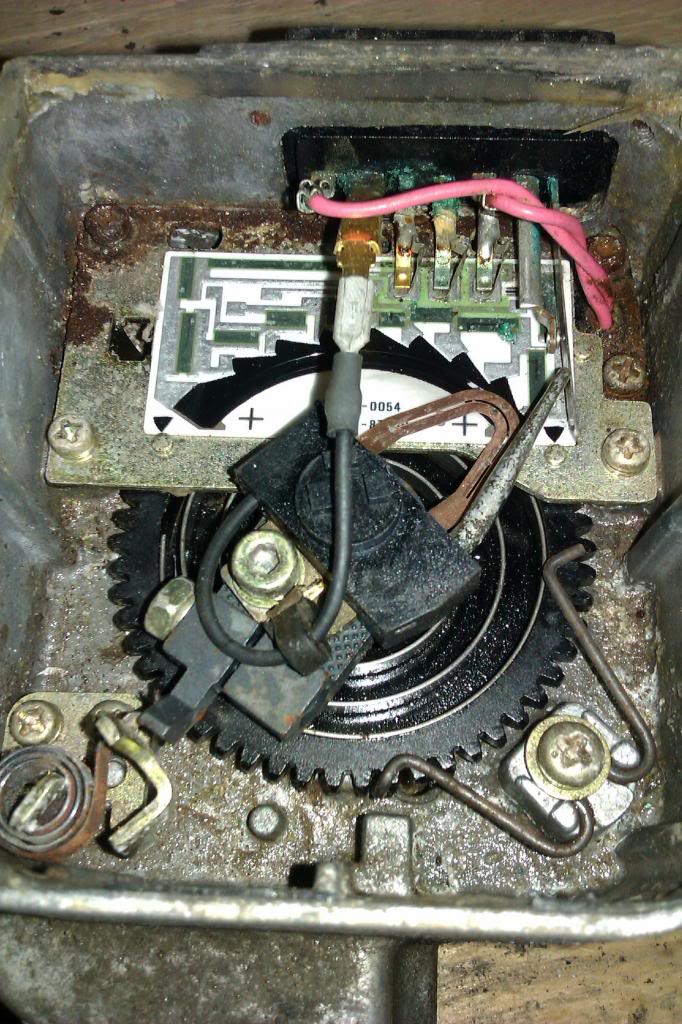
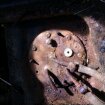
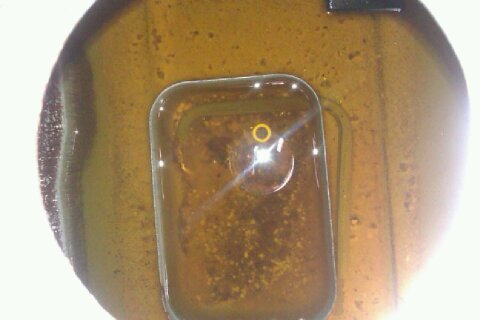
My afm was all clogged up and sticky due to those freakin' mice... So i did my best to clean it up. I popped the cap off and found a delightful sight....
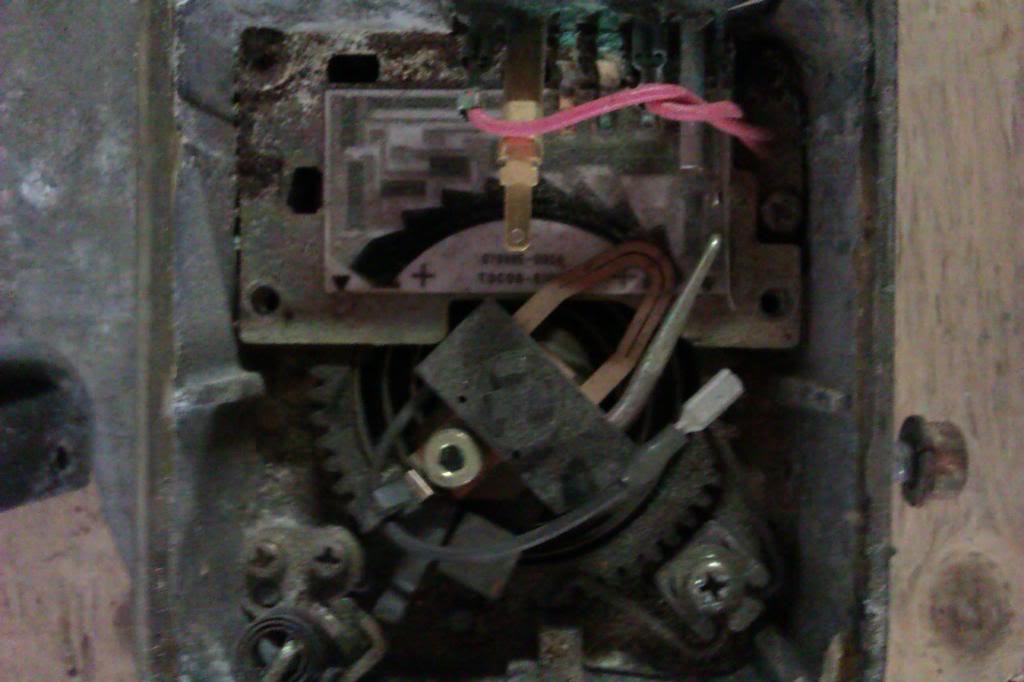
Did my best to clean it up. Most of the little phillips screws were toast. The little spot were it reads how much are flow is needed is still mostly there. It is however scratched off at the "closed" position, which shouldn't bother it too much. All wire conections are still good! Little warning label do not pull the circuit board out without the plug part taken off, i was close to rip the sodered ends. But after the cleaning, and a little spring tightening the flapper works great!
Made up this shirt after seeing a toyota emblem with devil horns. (No it is not spray paint) I'm thinking of making one with deer antlers aswell.
Last edited by Jagger_MeisterJE; Apr 20, 2013 at 11:02 AM.
Mar 28, 2013 | 05:23 PM
#30
Registered User
iTrader: (2)
Joined: Dec 2009
Posts: 2,159
Likes: 7
From: Pleasanton, CA - SF Bay Area
This is a great thread for the 22RE ground locations:
https://www.yotatech.com/forums/f116...-guide-194413/
I'm doing the battery/AFM swap right now while I put my motor back together - how did you address securing the battery? That's what I'm most worried about...any more pics/recommendations? Did you fab a new tray that bolts into the 3 airbox OEM holes in the engine bay?
Mar 28, 2013 | 05:28 PM
#31
That is pretty damn disgusting man. Was definately leaking, kinda looks like the mouses favorite spot to urinate.
The wear spot might be ok, it's dual pole, but you'll want to check it with the Ohm meter to make sure. Preferably while it's still open so you know exactly where that spot is.
Conductive glue link, Waterbased conductive paint link
The first I expect is more durable, and it's cheap enough to try even on my ramen budget. But I don't have this problem yet.
Mar 29, 2013 | 04:58 PM
#32
Thread Starter
Registered User
Joined: Jan 2013
Posts: 104
Likes: 0
From: Peterborough Ontario
That is pretty damn disgusting man. Was definately leaking, kinda looks like the mouses favorite spot to urinate.
The wear spot might be ok, it's dual pole, but you'll want to check it with the Ohm meter to make sure. Preferably while it's still open so you know exactly where that spot is.
Conductive glue link, Waterbased conductive paint link
The first I expect is more durable, and it's cheap enough to try even on my ramen budget. But I don't have this problem yet.
The wear spot might be ok, it's dual pole, but you'll want to check it with the Ohm meter to make sure. Preferably while it's still open so you know exactly where that spot is.
Conductive glue link, Waterbased conductive paint link
The first I expect is more durable, and it's cheap enough to try even on my ramen budget. But I don't have this problem yet.
Mar 30, 2013 | 03:48 PM
#34
Thread Starter
Registered User
Joined: Jan 2013
Posts: 104
Likes: 0
From: Peterborough Ontario
Mar 30, 2013 | 03:54 PM
#35
Thread Starter
Registered User
Joined: Jan 2013
Posts: 104
Likes: 0
From: Peterborough Ontario
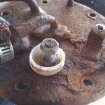
I've never been able to afford a winch so I've become very aquaint with one of these.
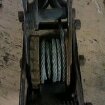
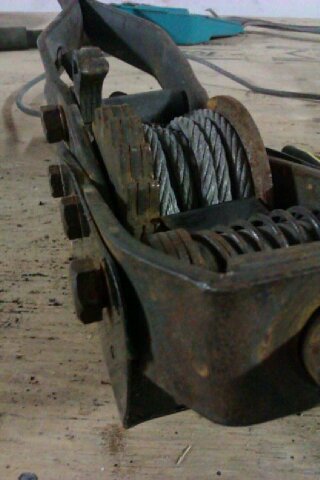
This'll be a little side build, I've had this one forever, and it is really well made, just needs a little clean up and greasing, should be back to good operation in no time.
Will definately have to find a replacement for this...
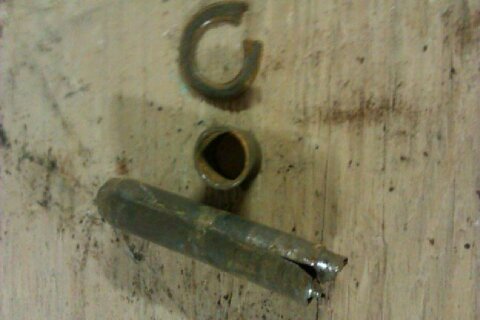
All the parts needed. Luckily the cable is still good one it. Only one or two strands that stick out, a little bit of electrical tape will fix that. I will be build a mount for it in the bed of the runner aswell.
This'll be a little side build, I've had this one forever, and it is really well made, just needs a little clean up and greasing, should be back to good operation in no time.
Will definately have to find a replacement for this...
All the parts needed. Luckily the cable is still good one it. Only one or two strands that stick out, a little bit of electrical tape will fix that. I will be build a mount for it in the bed of the runner aswell.
Mar 30, 2013 | 04:03 PM
#36
Thread Starter
Registered User
Joined: Jan 2013
Posts: 104
Likes: 0
From: Peterborough Ontario
Really don't know what the hell happened with those little pictures.... Anyways on to the truck work for the day.
This bastard has been causing me trouble non stop. Connections points wore out. Relay doesnt work, just a mess. So i made my new relay with inline toggle. (Yeah i know people say otherwise) The key has to be in the run position and toggle on to let the pump run.
Figured I'd have to do this... CARNAGE
More carnage.
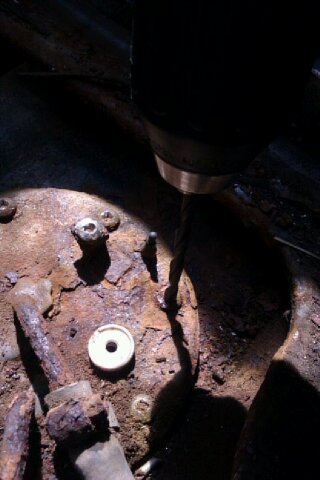
This was what happened when the conection point dropped through the tank...
Pump is in good condition thank god.

The inside needs a good clean. I need to drain the gas it's got that lovely rotten apple smell from sitting.
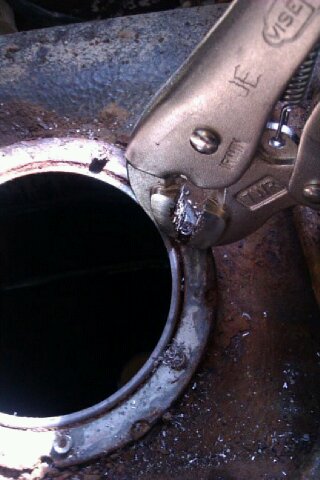
The new connection point i made out of 2 little plastic cup things i found and a small standard screw driver bolt.
Definately a better connection point the stock.
This bastard has been causing me trouble non stop. Connections points wore out. Relay doesnt work, just a mess. So i made my new relay with inline toggle. (Yeah i know people say otherwise) The key has to be in the run position and toggle on to let the pump run.
Figured I'd have to do this... CARNAGE
More carnage.
This was what happened when the conection point dropped through the tank...
Pump is in good condition thank god.
The inside needs a good clean. I need to drain the gas it's got that lovely rotten apple smell from sitting.
The new connection point i made out of 2 little plastic cup things i found and a small standard screw driver bolt.
Definately a better connection point the stock.
Apr 1, 2013 | 09:59 AM
#38
Thread Starter
Registered User
Joined: Jan 2013
Posts: 104
Likes: 0
From: Peterborough Ontario
Just a little update today, weather has been wayyy to S***ty to be working outside very long. Heres were i put the fuel pump switch. Its a 2 wire key switch, from my old honda cb. Was going to use it for the ignition setup but switched out. This should add a little more security to the rig. It is attached to the black and white wire (if i remeber correctly) which is the run position wire. Stock key has to be in the run position and the fuel pump on to run. Fuel pump key off you can test lights turn signals. etc. Just placed it right beside the ebrake.

My tailgate was greeeeasy inside so i decided to take it all apart and clean it up. For some reason it was impossible to push close all the way. The hinges seemed to be super stiff on it.

The culprit hinges. These things were solid. It took a full on sledge hammer swing to move it even a centimeter. I sprayed some cleaner into the hinge and started to work it back and forth with the hammer until it got loose then spray white grease in them and continued to open and close them until they worked like they should.
Not pictured is the rear window mech., and guide seals. Of course the mech was all grungy too so i cleaned it up with some spray nine then greased all the moving parts. The guide seals are all in all good condition but were a little rough and it was stopping the window from sliding easily. (even with the electric motor) I added a little bit of grease to those and it works great!
My tailgate was greeeeasy inside so i decided to take it all apart and clean it up. For some reason it was impossible to push close all the way. The hinges seemed to be super stiff on it.
The culprit hinges. These things were solid. It took a full on sledge hammer swing to move it even a centimeter. I sprayed some cleaner into the hinge and started to work it back and forth with the hammer until it got loose then spray white grease in them and continued to open and close them until they worked like they should.
Not pictured is the rear window mech., and guide seals. Of course the mech was all grungy too so i cleaned it up with some spray nine then greased all the moving parts. The guide seals are all in all good condition but were a little rough and it was stopping the window from sliding easily. (even with the electric motor) I added a little bit of grease to those and it works great!
Apr 2, 2013 | 05:14 PM
#39
Thread Starter
Registered User
Joined: Jan 2013
Posts: 104
Likes: 0
From: Peterborough Ontario
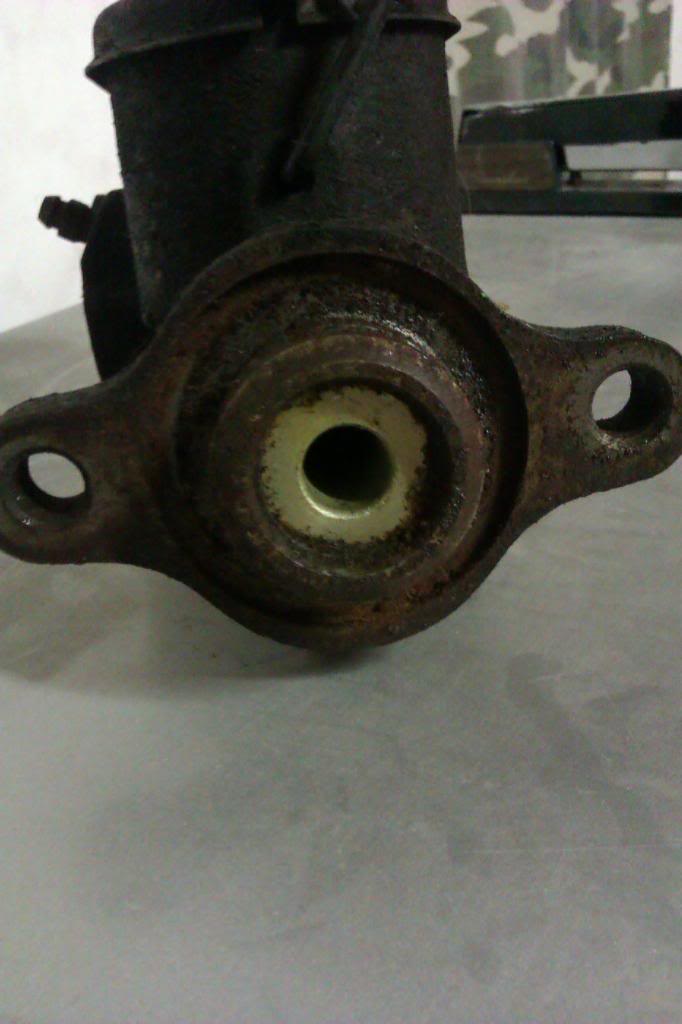
I started cleaning up around the old shop at my place. I looked at my dads old '69 chevelle parts car to see if there was anything useable left. I found a way better solution to my brake master problem. In a box was a nos brake master! It fits in the toyota brake booster but would need to make some sort of mount to bolt down. The thing is brand new with only shelf rust. I asked my dad if he needed it and he said go right ahead. He also has the brake booster for it, which i may swap out the old toyota one for... I have two pictures of each one to show resemblance.
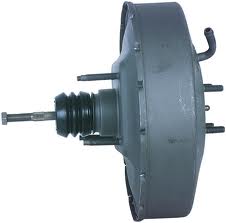
Here is the stock '87 yoter one:
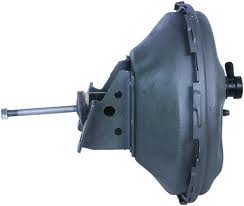
Here is the stock chevelle one:
Surprisingly the chevelle one that i have is in wayyyy better shape then my yota one. As far as hooking it up, the vacuum line hoses are the same size only really work would be making new bolt holes for the chev booster. Issue i can see myself having is the chev booster sits tilted up so it can make it flat for the chevelle which has a slanted fire wall in that spot. Tomorrow ill pop them both of the rigs and see where I'm at. I think it'll give me a little better stopping power for the runner. Especially as i am going to be running 35's so i'll need all i can get. If i can get the chevy booster to work it'll save me making a plate for the conversion, and i'm worried the conversion plate wouldn't pass inspection.
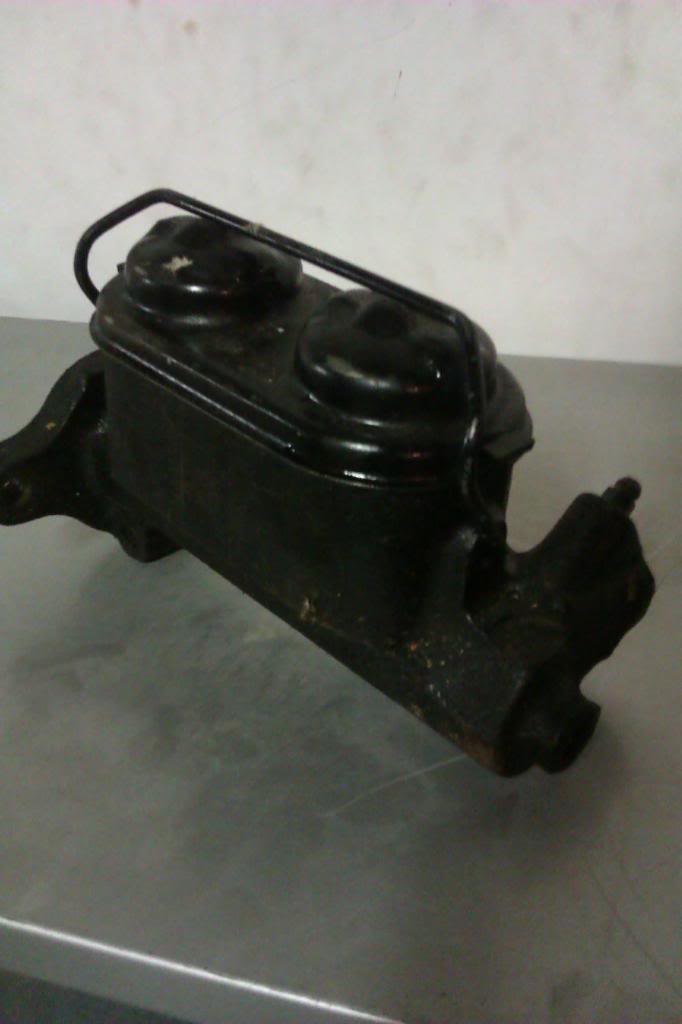
Here's the nos brake master:
Once i clean it up it should look a lot better!
Here is the stock '87 yoter one:
Here is the stock chevelle one:
Surprisingly the chevelle one that i have is in wayyyy better shape then my yota one. As far as hooking it up, the vacuum line hoses are the same size only really work would be making new bolt holes for the chev booster. Issue i can see myself having is the chev booster sits tilted up so it can make it flat for the chevelle which has a slanted fire wall in that spot. Tomorrow ill pop them both of the rigs and see where I'm at. I think it'll give me a little better stopping power for the runner. Especially as i am going to be running 35's so i'll need all i can get. If i can get the chevy booster to work it'll save me making a plate for the conversion, and i'm worried the conversion plate wouldn't pass inspection.
Here's the nos brake master:
Once i clean it up it should look a lot better!
Apr 5, 2013 | 04:27 PM
#40
Thread Starter
Registered User
Joined: Jan 2013
Posts: 104
Likes: 0
From: Peterborough Ontario
I appologize for no pictures with this up date but i was too damn excited!
To begin with my automotive class' teacher and i were talking about rigs and motorcycles as he rides. He asked me if i could haul away all the scrap metal at the shop which includes the bin and the upstairs room, which i've never seen, so i went up there to see what there is. I found a nice 2.8 ford carb! Thing is immaculate, which i may use when i can find a stock 22r intake and do the conversion i've seen been done.
Next thing i found was 2 sets of coils, both the same length (12 or so inches) Either set has a different spring weight so i will test them out for the zuk mod. They are brand new in the box!
And finally, under a pile of old parts and a blanket was a fully rebuilt yota rear end!!! Not that i need it, but i could keep it as a spare or sell it off. When i head back there monday I'll be picking them up and I'll snap a few pics. Best part is I'm literally getting paid to take these things away with all the scrap there is!
To begin with my automotive class' teacher and i were talking about rigs and motorcycles as he rides. He asked me if i could haul away all the scrap metal at the shop which includes the bin and the upstairs room, which i've never seen, so i went up there to see what there is. I found a nice 2.8 ford carb! Thing is immaculate, which i may use when i can find a stock 22r intake and do the conversion i've seen been done.
Next thing i found was 2 sets of coils, both the same length (12 or so inches) Either set has a different spring weight so i will test them out for the zuk mod. They are brand new in the box!
And finally, under a pile of old parts and a blanket was a fully rebuilt yota rear end!!!
Not that i need it, but i could keep it as a spare or sell it off. When i head back there monday I'll be picking them up and I'll snap a few pics. Best part is I'm literally getting paid to take these things away with all the scrap there is!


