
Grawg's 86 4Runner

 Feb 27, 2014 | 12:02 PM
#22
With the head being shaved and needing a thicker gasket to make up the difference and a .040 bore, I would just replace the motor. I have gotten motors from http://www.unitedengine.com/ for around $1100-1300 (depending if they want a core) shipped to my local parts store. Have done great with them on 2 of my motors and 2 other motors that I know of.
With that much work needed, besides cost, you are really pushing the limits on it. Around here they want almost as much for a low mileage motor ($800) and 600 for a high mileage motor. You can find one on Craigslist, but you never know what you are getting. Some good deas and some bad ones.
With that much work needed, besides cost, you are really pushing the limits on it. Around here they want almost as much for a low mileage motor ($800) and 600 for a high mileage motor. You can find one on Craigslist, but you never know what you are getting. Some good deas and some bad ones.
Mar 3, 2014 | 06:26 PM
#23
Thread Starter
Registered User
Joined: Feb 2014
Posts: 38
Likes: 0
From: Graham, WA
I have decided not to rebuild tht motor, and have found a replacement motor. Not a new remanned. But a used motor, mostly because of cost. I was able to find a 22re that the starter had caught fire, and burnt up all the wiring on that side if the motor. So I'll go through it and check it out and with a little luck, have it installed in the next couple weeks. I'll be using the intake and injectors from the old motor.
Mar 4, 2014 | 09:17 PM
#24
Thread Starter
Registered User
Joined: Feb 2014
Posts: 38
Likes: 0
From: Graham, WA
So far the only problem with the new motor. A head bolt with some stripped threads. I have been able to run a different head bolt down the entire length of the hole, but there is some damage to the block threads towards the bottom. Here's a pic of the damaged head bolt. 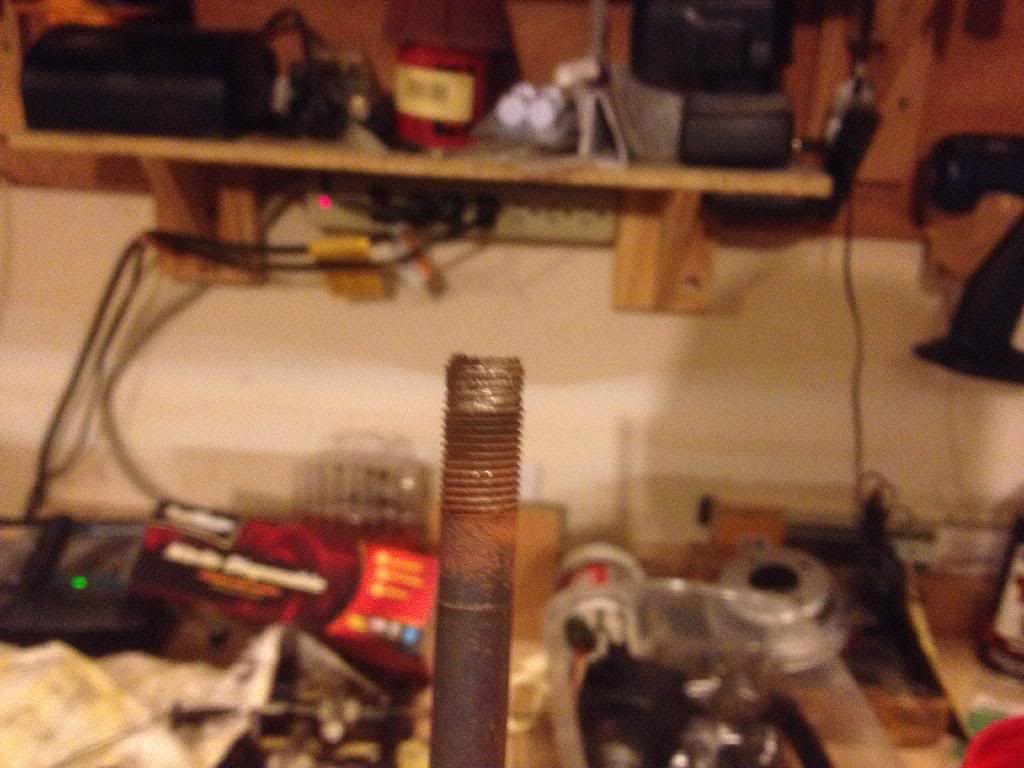
The #1 rod bearing looks great. I think in going to put this thing back together, and run it! I am excited to get this on the road.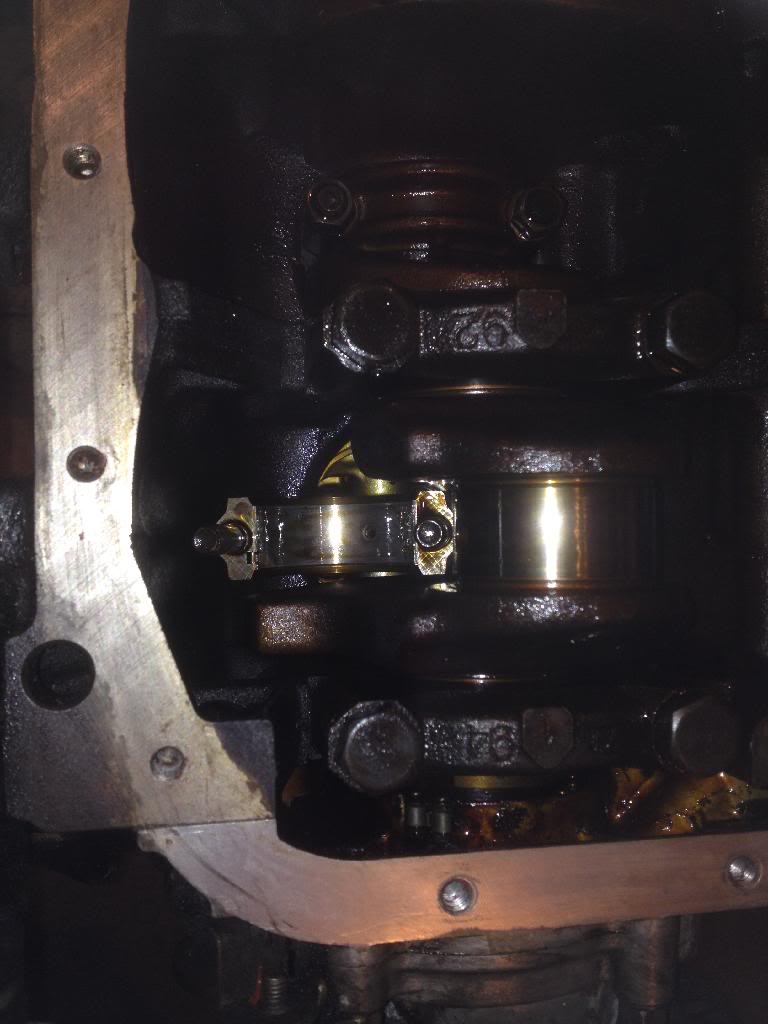

The #1 rod bearing looks great. I think in going to put this thing back together, and run it! I am excited to get this on the road.
 Mar 5, 2014 | 07:49 AM
#25
Registered User
iTrader: (4)
Joined: May 2010
Posts: 720
Likes: 16
From: People's Republic of California
Don,
I don't know what to do with that head bolt hole except maybe to tap it to get the threads back in line?
The bearing does look good, but personally I would rebuild it since everything is out already. Looks like you have enough varnish and build up on the bottom end to warrant a good bath. Of course it depends on budget and time available, so only you can make that decision.
Everything is looking good for you!
Last edited by Grego92; Mar 5, 2014 at 07:50 AM.
Mar 5, 2014 | 07:41 PM
#26
Thread Starter
Registered User
Joined: Feb 2014
Posts: 38
Likes: 0
From: Graham, WA
I checked all the rod bearings tonite, and the all look like the one I posted earlier. Then I moved onto the main bearings. #1 looked good, #2 concerns me. I stopped at the second one. Like I said earlier, this is my first tear down, and funds are limited. But I think it's time for new main bearings, and while I am at it new rod bearings too.
Here is a pic of the #2 main bearing.
I am taking the head into work tomorrow and putting it through the parts washer (aka the CUDA) I guess I'll check on those bearings while I'm at it. Plus I still have to drill out the one broken clutch bolt on the flywheel. Working at a Toyota dealer does have some advantages, but I hate going into my work on my days off.
Here is a pic of the #2 main bearing.

I am taking the head into work tomorrow and putting it through the parts washer (aka the CUDA) I guess I'll check on those bearings while I'm at it. Plus I still have to drill out the one broken clutch bolt on the flywheel. Working at a Toyota dealer does have some advantages, but I hate going into my work on my days off.
Mar 6, 2014 | 12:12 PM
#28
Thread Starter
Registered User
Joined: Feb 2014
Posts: 38
Likes: 0
From: Graham, WA
Pulled all the pistons and marked which cylinder they came out of. Going to order a set of main and rid bearings along with some rings. Also a timing kit, because one of the chain guides is broken. Probably going to be a bit longer till u have it up and running.
Here's the pistons I pulled out of the motor.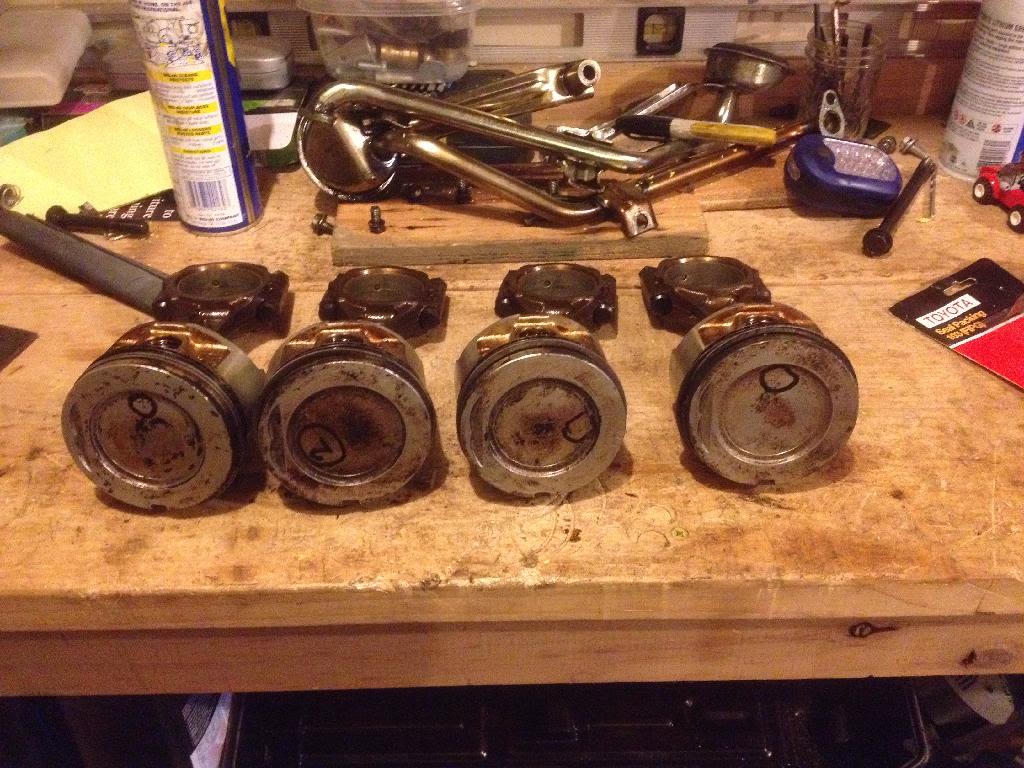
I am constantly fight the urge to just throw it all back together and run it. This is the hard part for me, because I just want to go play in the mud with it.
Here's the pistons I pulled out of the motor.

I am constantly fight the urge to just throw it all back together and run it. This is the hard part for me, because I just want to go play in the mud with it.
Mar 9, 2014 | 07:21 PM
#29
Thread Starter
Registered User
Joined: Feb 2014
Posts: 38
Likes: 0
From: Graham, WA
While I'm waiting for parts, I found a set of factory split rear seats. So I'm installing those. The tough part is that the PO put bedliner inside the cab covering all the mounting holes. So it's slow work, but I am making progress.
Mar 14, 2014 | 08:06 PM
#30
Thread Starter
Registered User
Joined: Feb 2014
Posts: 38
Likes: 0
From: Graham, WA
Here is the progress for the week.
1. Got the factory seats, with retracting seatbelts cleaned and installed.
2. Received the parts I ordered. Main and rod bearings, new rings, and a timing kit with metal guides.
3. Installed all those parts, and started reassembly. The last thing I did tonite was torque down the head.
Progress is coming along, and I hope to be able to put the motor back in by next Friday.
Rear seats installed.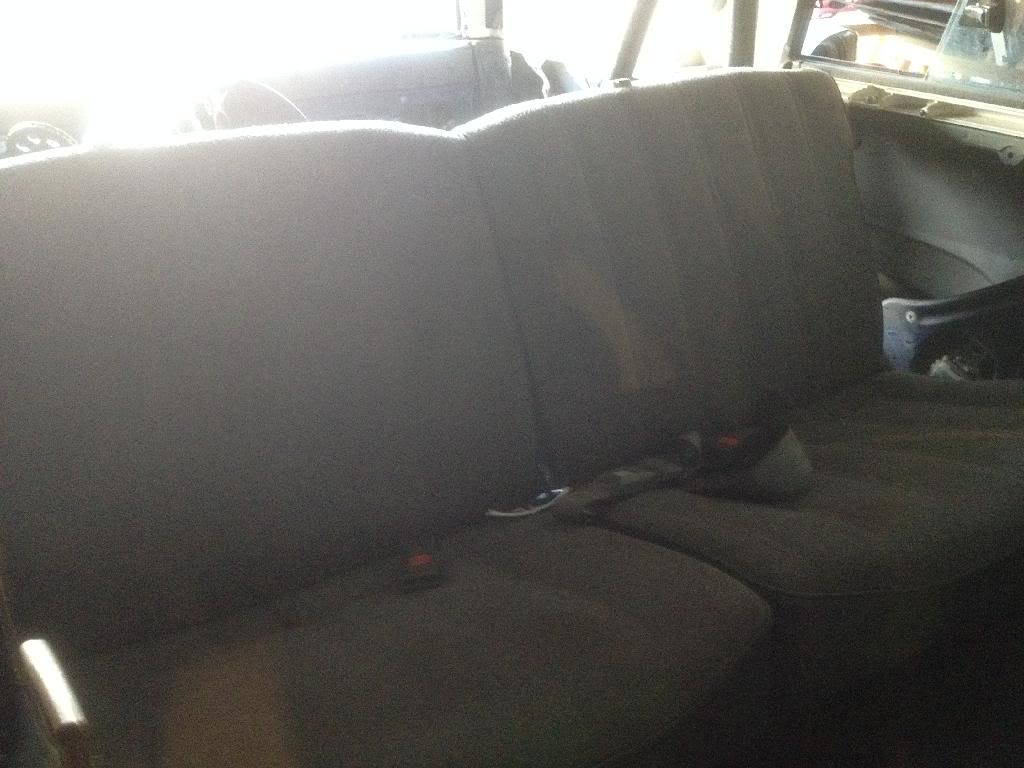
Timing kit and cover installed.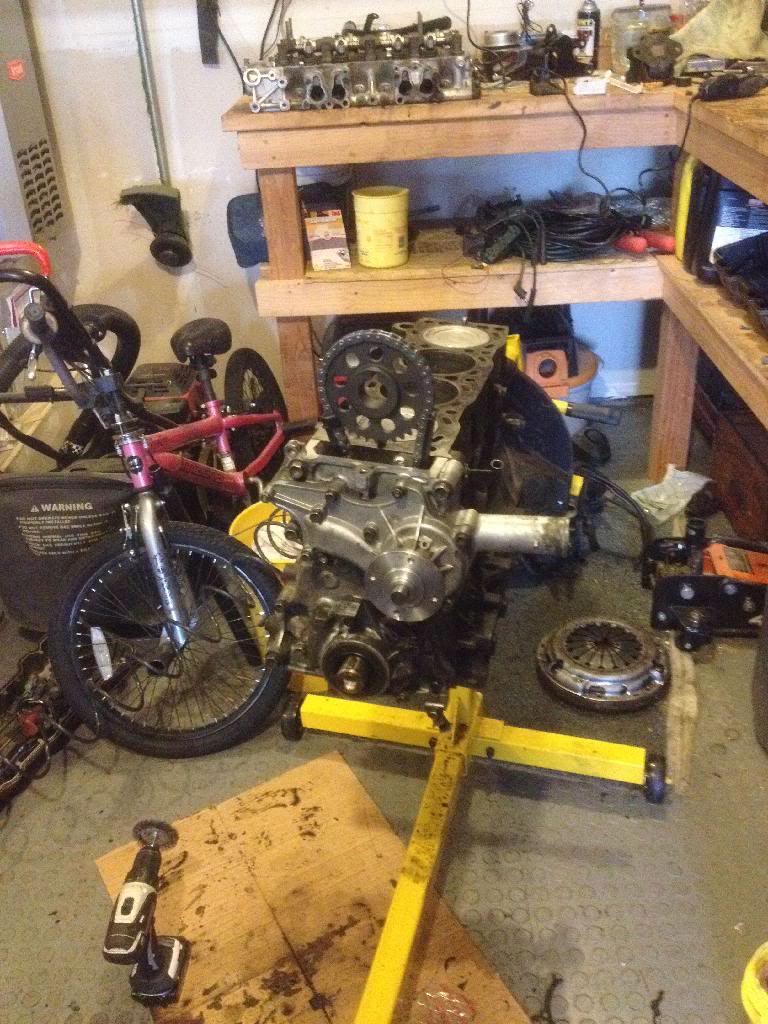
And finally the head.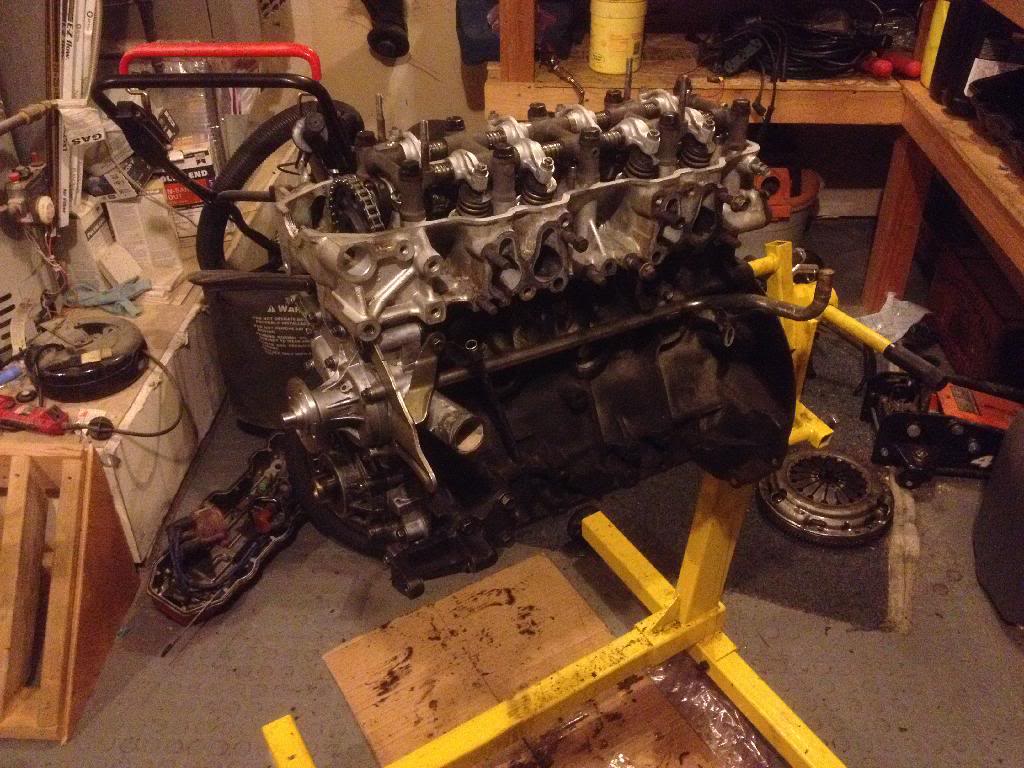
1. Got the factory seats, with retracting seatbelts cleaned and installed.
2. Received the parts I ordered. Main and rod bearings, new rings, and a timing kit with metal guides.
3. Installed all those parts, and started reassembly. The last thing I did tonite was torque down the head.
Progress is coming along, and I hope to be able to put the motor back in by next Friday.
Rear seats installed.

Timing kit and cover installed.

And finally the head.
 Mar 20, 2014 | 08:10 PM
#31
Thread Starter
Registered User
Joined: Feb 2014
Posts: 38
Likes: 0
From: Graham, WA
The motor is in! Now to figure out/ remember where everything goes. I still have the lower bell housing bolts, starter, and coolant hoses to do. But with a little luck, I hope to fire it up tomorrow! Then off with the top, and put the softy on. I also need to figure out the stereo. The PO spliced some wires, and I've got no power. But I am excited to be close to having it up and running. Pics tomorrow.
Mar 22, 2014 | 08:37 PM
#32
Thread Starter
Registered User
Joined: Feb 2014
Posts: 38
Likes: 0
From: Graham, WA
It's alive! But something is amiss, it idles just fine, the oil pressure gauge starts out high with the ignition on. But then slowly goes all the way to the bottom if the gauge? And if I try to give it some throttle, it idles up, then stalls, but catches before it completely dies. Almost like its cutting the timing.
I am pleased that I was able to rebuild the motor, and get it running again. It's nice that I can get it out of my garage, but it is bittersweet. Mainly because it's not running quite right.
I am pleased that I was able to rebuild the motor, and get it running again. It's nice that I can get it out of my garage, but it is bittersweet. Mainly because it's not running quite right.
Mar 25, 2014 | 09:53 AM
#33
Thread Starter
Registered User
Joined: Feb 2014
Posts: 38
Likes: 0
From: Graham, WA
It turns out that my removal of the TPS is my throttle issue. One of the techs at work is going to reset it for me. But now another issue has arose. With the TPS unplugged, I went to take it for a spin around the block, and while it shifts into gear very easily, the clutch won't disengage. I was able to get it down the drive way, but the clutch is not fully disengaged and just cooking off. My 4Runner is stuck in the garage. I did check the slave cylinder and it moves just fine, and can see the fork pushing on the pressure plate fingers. I saw on YouTube a video where the is an adjustment near the clutch pedal. I might try that. I hope I don't have to pull the tranny.
And my oil pressure issue was I had the wrong sending unit on the block. I had the sending unit for a light, and switched it to the sending unit with a gauge, and now works fine.
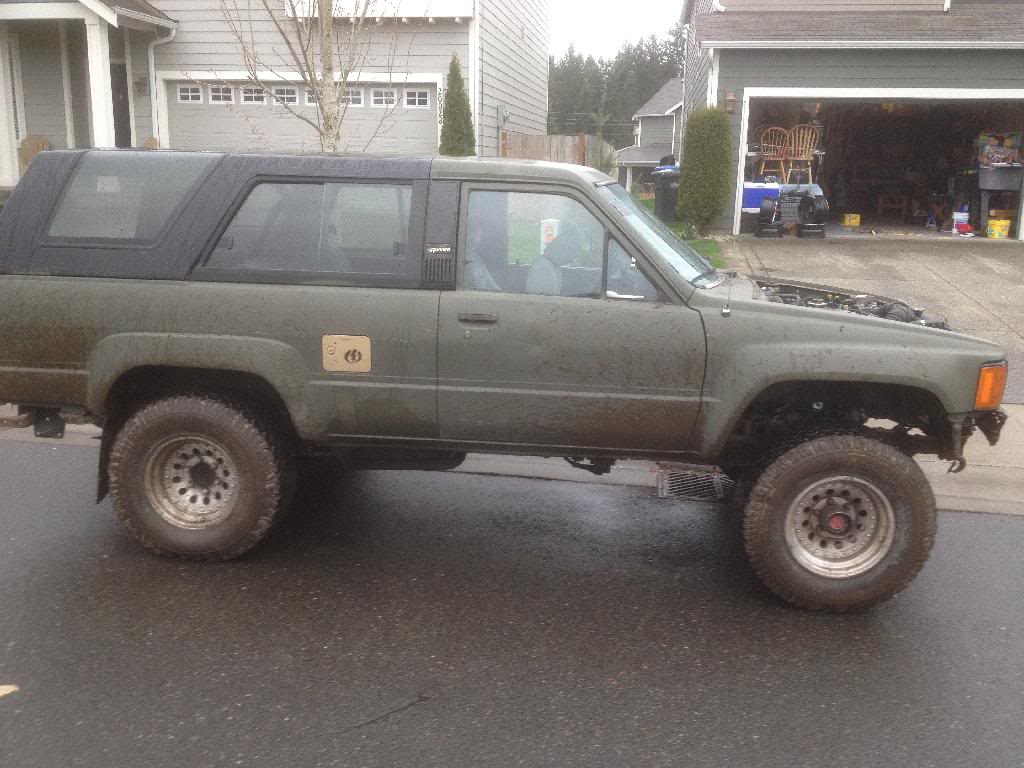
Here is a pic with the motor in.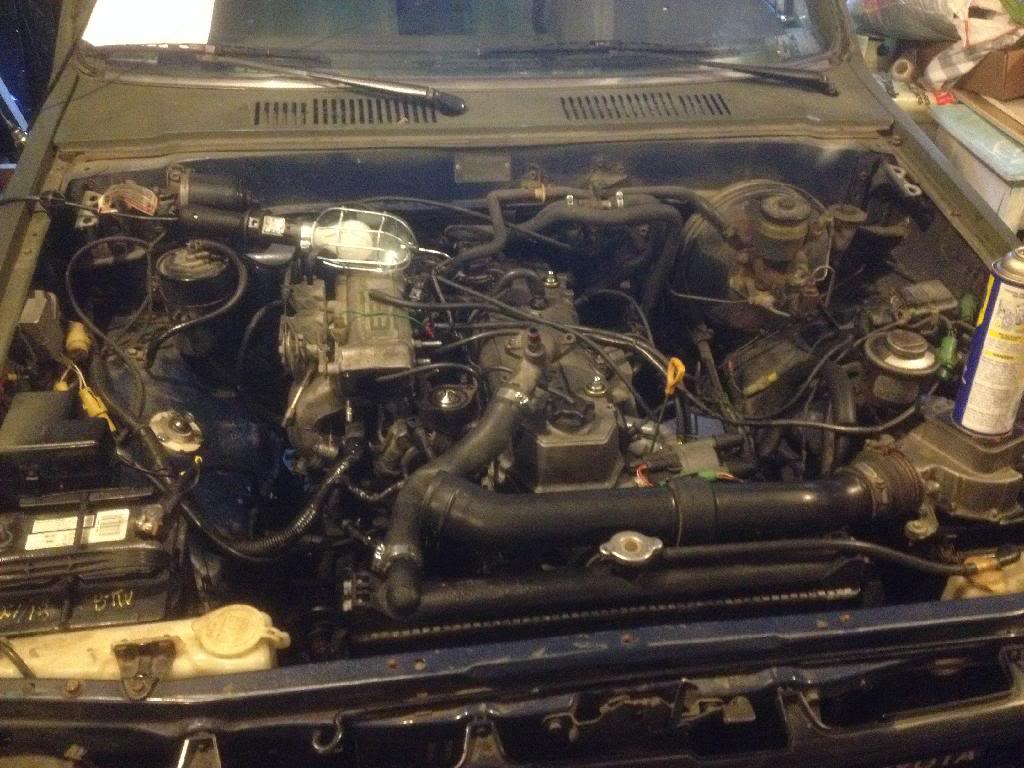
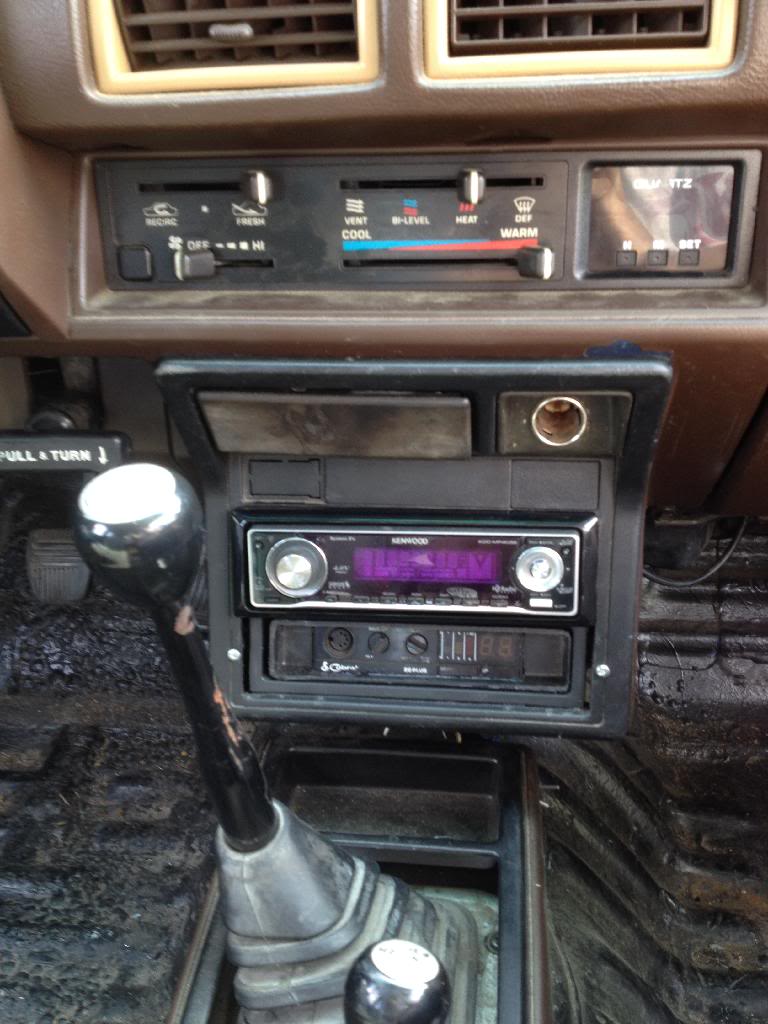
And here is a pic of a mock up for the stereo and CB. This is of course a work in progress.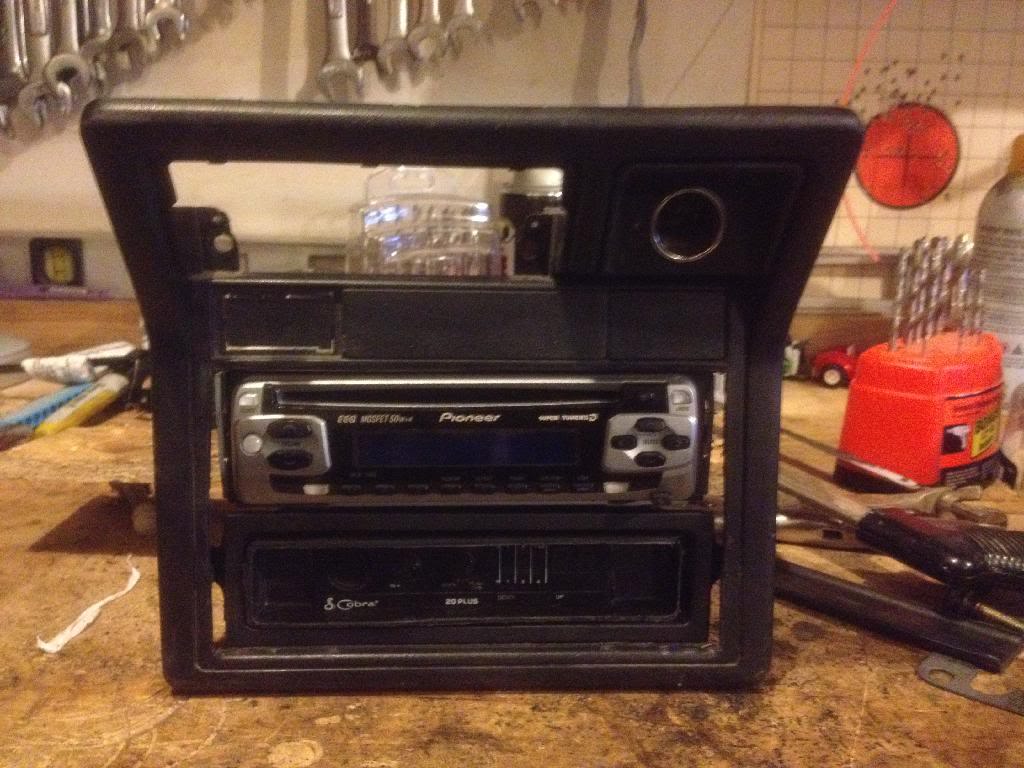
Oh yeah, one more thing. I was leaking coolant fairly bad for the thermostat housing. Turns out one of the bolts was broken. Now I have to drill it out and replace. Is it normal for there not to be a gasket between the intake, and thermo housing?
And my oil pressure issue was I had the wrong sending unit on the block. I had the sending unit for a light, and switched it to the sending unit with a gauge, and now works fine.
Here is a pic with the motor in.

And here is a pic of a mock up for the stereo and CB. This is of course a work in progress.

Oh yeah, one more thing. I was leaking coolant fairly bad for the thermostat housing. Turns out one of the bolts was broken. Now I have to drill it out and replace. Is it normal for there not to be a gasket between the intake, and thermo housing?
Mar 25, 2014 | 02:55 PM
#34
Registered User
iTrader: (4)
Joined: May 2010
Posts: 720
Likes: 16
From: People's Republic of California
 Mar 27, 2014 | 04:01 PM
#35
Thread Starter
Registered User
Joined: Feb 2014
Posts: 38
Likes: 0
From: Graham, WA
So frustrated with this thing right now!
1. I have a broken thermostat bolt. Now with broken extractor as well.
2. Tried to adjust the clutch pedal, but bolt is bottomed out against the pedal itself.
I'm so close to being able to drive it, but the simplest things are holding me back. Very frustrated.
1. I have a broken thermostat bolt. Now with broken extractor as well.
2. Tried to adjust the clutch pedal, but bolt is bottomed out against the pedal itself.
I'm so close to being able to drive it, but the simplest things are holding me back. Very frustrated.
Apr 1, 2014 | 10:42 AM
#36
Thread Starter
Registered User
Joined: Feb 2014
Posts: 38
Likes: 0
From: Graham, WA
After taking the weekend off from the 4Runner, I went back to work on it yesterday. And after 4 hours of grinding the extractor and bolt out it's finally done. What a tedious task! Now onto putting a Helicoil in, then into removing the transmission and see what's going on with the clutch.
Apr 4, 2014 | 05:24 AM
#37
Thread Starter
Registered User
Joined: Feb 2014
Posts: 38
Likes: 0
From: Graham, WA
Well the thermo housing is repaired, and found another coolant leak. But a quick trip to the parts store for a hose clamp, and it's fixed as well.
When it comes to the clutch issue, it was excessive pressure in the lines. Don't know how it happened, but I loosened the bleeder valve and it seems to be working great now.
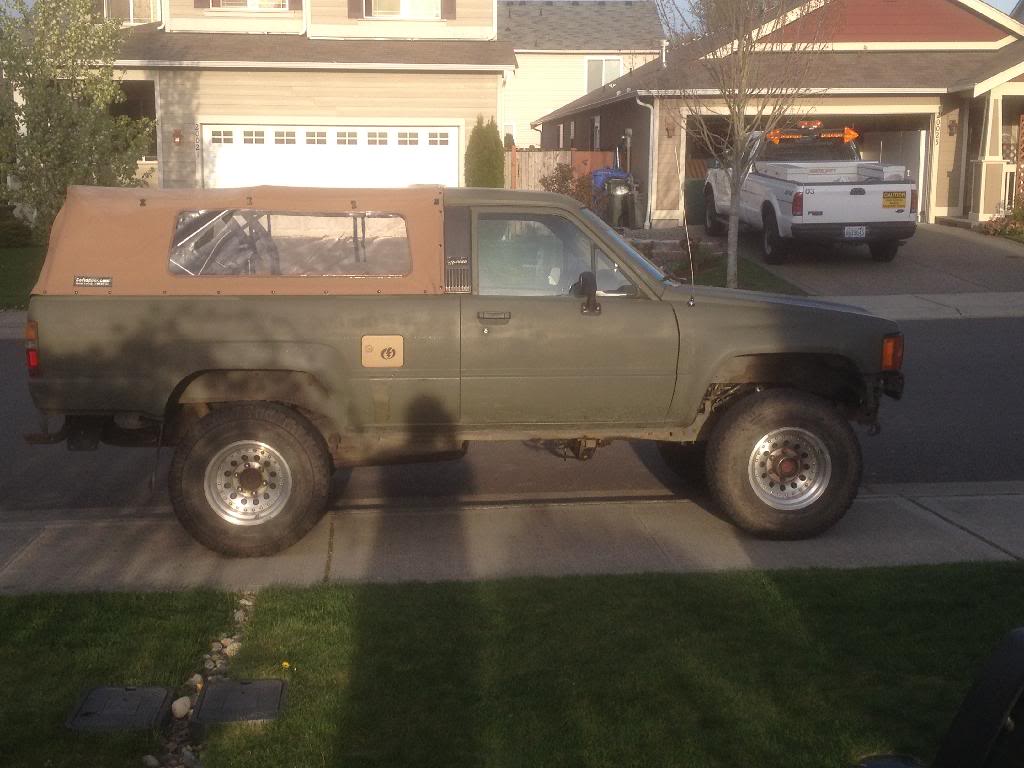
So here are a couple picks of its maiden voyage. The gas station, and a quick trip through a mud hole here by the house. It performed very well!

When it comes to the clutch issue, it was excessive pressure in the lines. Don't know how it happened, but I loosened the bleeder valve and it seems to be working great now.
So here are a couple picks of its maiden voyage. The gas station, and a quick trip through a mud hole here by the house. It performed very well!

 Apr 9, 2014 | 07:35 PM
#38
Thread Starter
Registered User
Joined: Feb 2014
Posts: 38
Likes: 0
From: Graham, WA
Now that I have put a few miles on the 4Runner, I have noticed a few things. I know the 22re does not produce a lot of power, but this struggles to get to 50mph. I had one of the techs at work listen to it, and he thinks I have a compression issue, due to a stuck valve. So tomorrow I'll be working on that. From what I've read, the intake needs to be at 0.008, and the exhaust at 0.012. And the engine needs to be warmed up.
Tonite I was working on the CB and radio, and I am closer to a final product. Here is the latest mock up.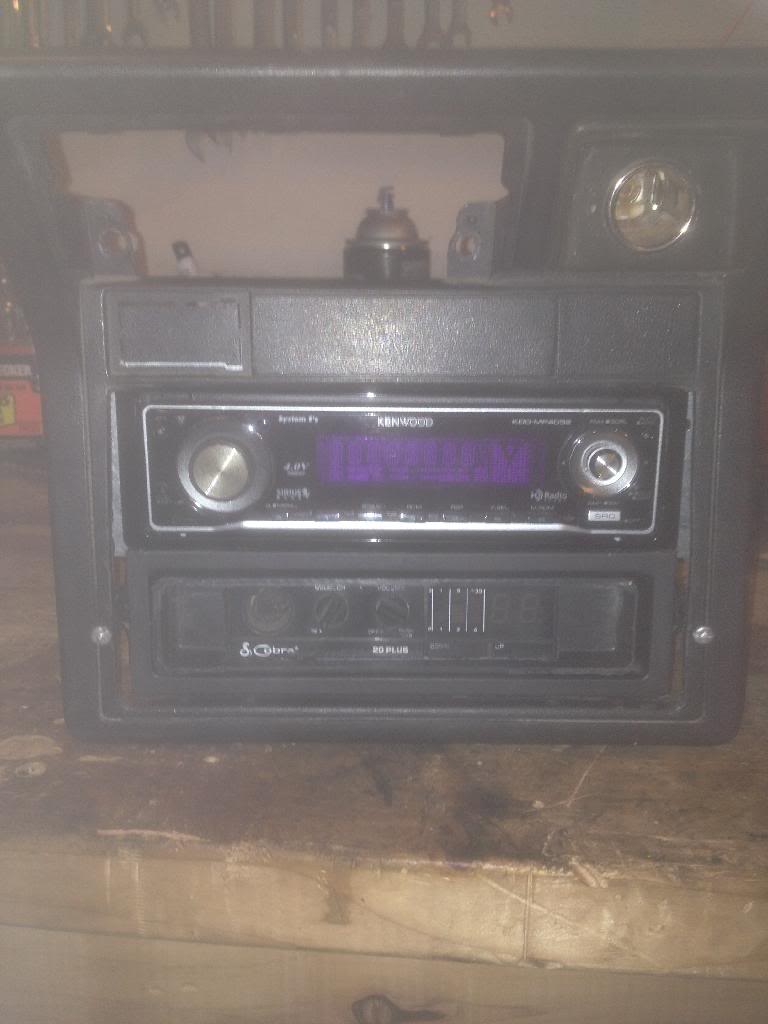
Also tomorrow I'd like to put in a set of 1-1/2" lift blocks that I have just to level it out a bit. Hopefully I'll get it all done.
Tonite I was working on the CB and radio, and I am closer to a final product. Here is the latest mock up.

Also tomorrow I'd like to put in a set of 1-1/2" lift blocks that I have just to level it out a bit. Hopefully I'll get it all done.
Apr 10, 2014 | 06:54 PM
#39
Thread Starter
Registered User
Joined: Feb 2014
Posts: 38
Likes: 0
From: Graham, WA
Made some good progress today. Adjusted the valves, put the lift blocks in, removed the hard top, and put on the Softopper.
The only bad thing is #2 cylinder is dead. Pulled the spark plug, and it looked brand new, never fired. Changed the cap, rotor, and plug wires. No help. Pulled the #2 wire and started it, no change. Pulled the #3 wire and it ran really bad! I think the fuel injector is either plugged, or dead.
Any insight is always appreciated!
Apr 11, 2014 | 03:02 PM
#40
Thread Starter
Registered User
Joined: Feb 2014
Posts: 38
Likes: 0
From: Graham, WA
Feel pretty dumb, but also relieved and excited. The number 2 injector was fine. I was missing the retainer clip that keeps it plugged in. Made up one with some wire I had lying around and bam, runs like a champ! Fiddled with the stereo/CB and this is what it will look like when it's all done.
I'm going to rewire all of it, and make it capable of handling auxiliary lights, and if I want to go crazy with electronics, I can.

I'm going to rewire all of it, and make it capable of handling auxiliary lights, and if I want to go crazy with electronics, I can.


