When you click on links to various merchants on this site and make a purchase, this can result in this site earning a commission. Affiliate programs and affiliations include, but are not limited to, the eBay Partner Network.
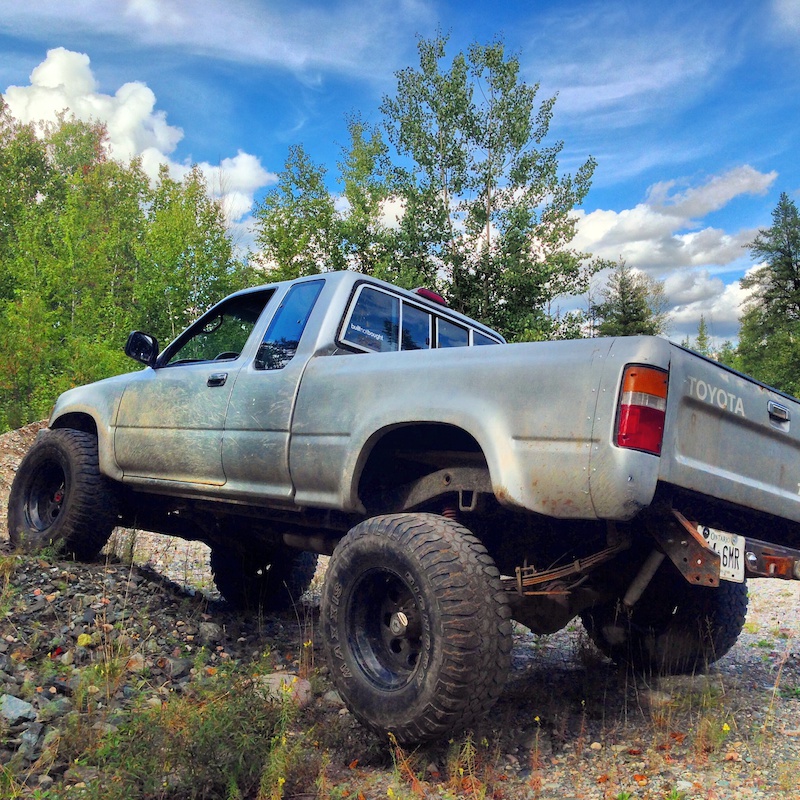
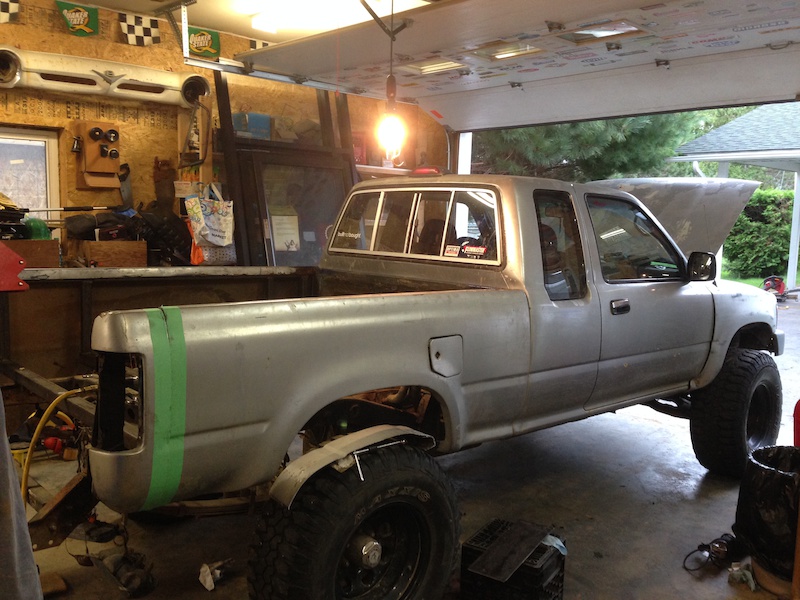
Where she sits now. 6" fiberglass bed bob with custom steel tubing inner frame. Painted grille/bumper/mirrors and installed a 20" lightbar behind the grille. Could not be any happier with how far this truck has come.
I've also acquired a new 5 speed donor truck with a great frame and only 220xxx! The best part was the price... a case of beer and all the parts I could ever want.. how could I say no!
anyways here she is. more photos when I have time, hope you all enjoy!
Yes those are rivets! I apologize to everyone for the lack of build detail in the previous post. So here's the the dirty work..
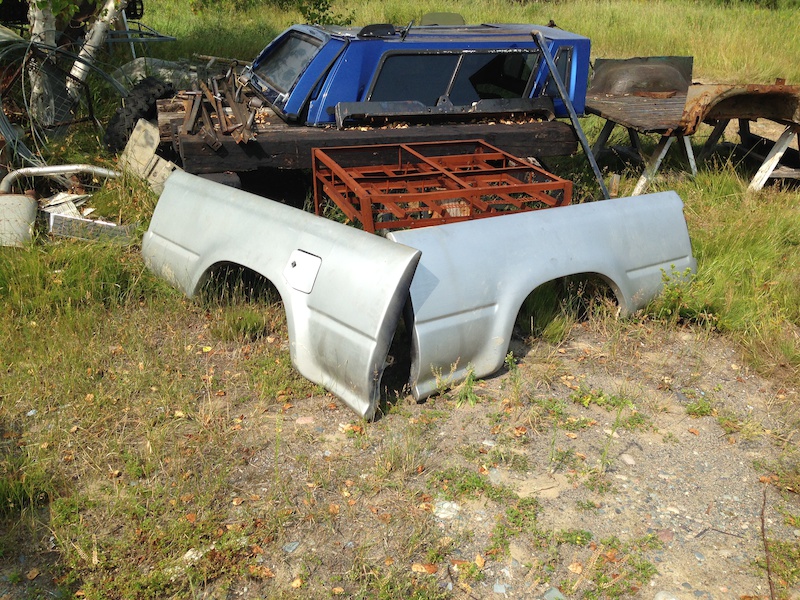
Started by cutting and removing the fiberglass sides from the old bed.. And wasn't left with much of a bed at all..
(you can kinda make out the remnants of it in the background)
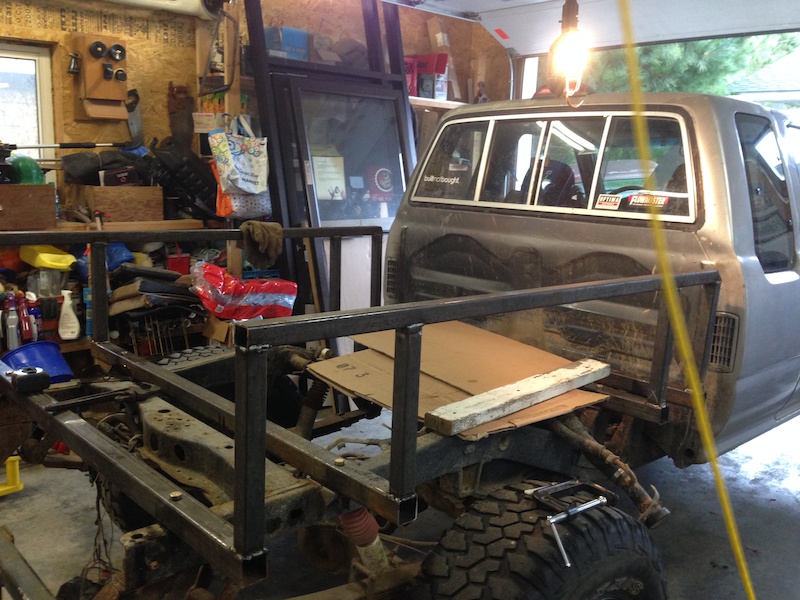
Then proceeded to piece things together for measurement purposes.
Once i had the measurement's it was fairly easy to build the inner frame. For the crossers and uprights, i used 2x2x1/8" and 1.5x1.5x1/8" for the main bed rail section.
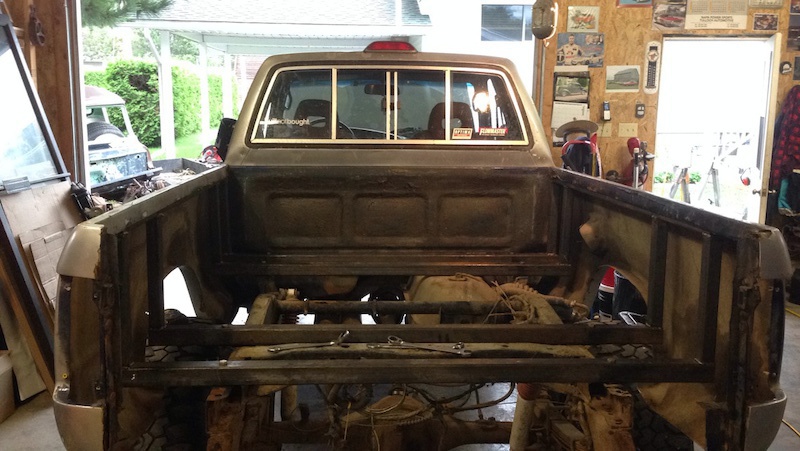
Dropped the bedsides on and gave her a quick 6" trim, so that the bed only extends 1" passed the stock toyota frame.
To finish off the deck i used a sheet of 1" thick marine plywood cut to the width of the factory toyota frame. I then re-installed the plastic bed liner trimmed to fit and fastened in with self tappers. Yes i could have done much better work without a doubt but for the simplicity and function i couldn't be happier to have a factory looking bed back in place. Now all that remains is to finish fiber glassing the bob seam.
Nice job on the bob man! Came out great! Have any plans for a bumper?
rear bumper is going to be built the next time i'm back home, just going to build a simple 2x2 square tubing bumper with my left overs, either just straight across or trim the lowers of the rear bed and make a wrap around styled square tube bumper!
Idler Arm Upgrade, Taco grille and Bumper Upgrades
Back things up to a few weeks ago where i had a slight issue with the lift blocks i was running... One of the center pins snapped on the aluminum lift block. Then led to mushrooming of the block.. and then it began to slide out and cause excessive crab walking due to axle un-alignment. NOT COOL. So, installed a pair of tapered steel blocks my cousin had left over from his Chevy, with new U-bolts.
The Carnage:
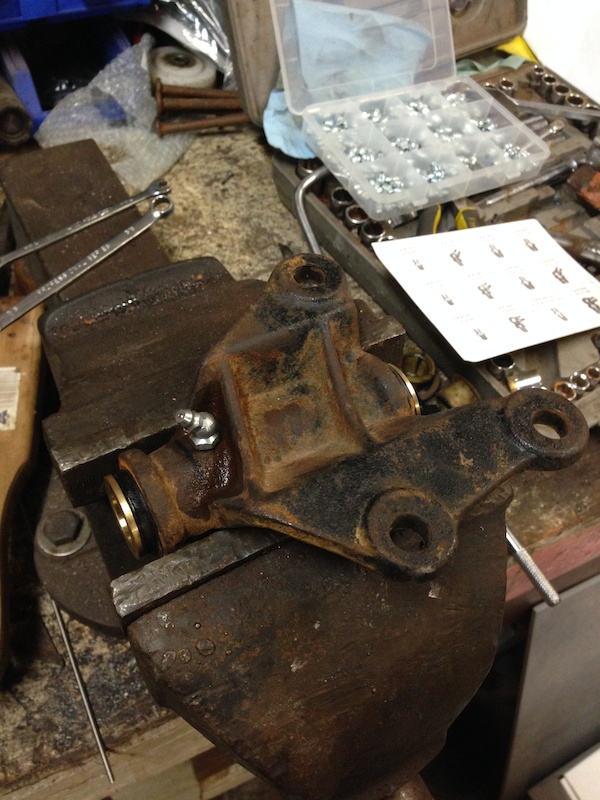
As for the ever long issue of the bent idler arms... repeatedly, I upgraded to the 4crawler bushing kit. I also took the opportunity to drill and tap for a grease fitting in a way that does not interfere with the frame or idler arm brace. The bushings took bit of work on the inner bore due to the idler arm shaft fitting far too tight, 3ft of leverage and all my force and barely an inch of movement.. a little too tight for my liking.
Idler Arm Upgrades:
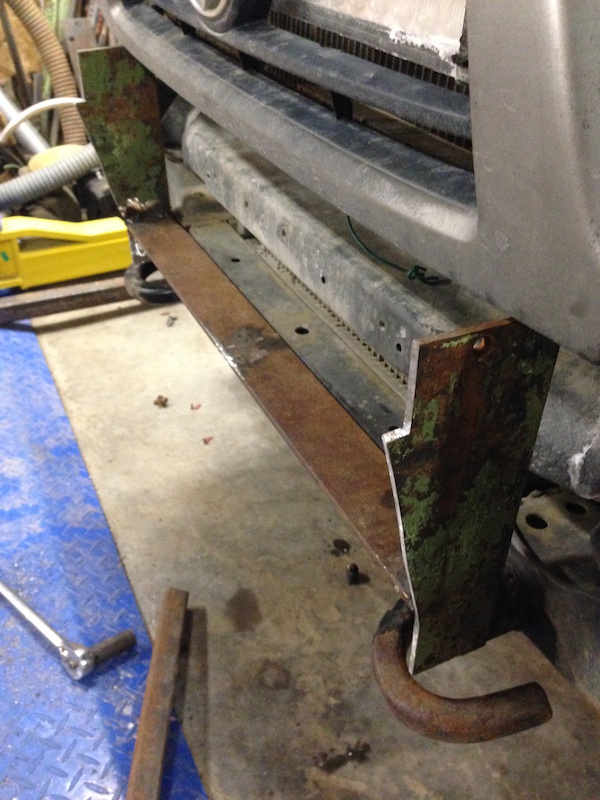
And finally for the most recent and exciting upgrade, the rear bumper. Built of 2x2x1/8" square tube, the mounting brackets are made of 1/4" angle and side re-enforcement mounts are 3x8" cutoffs i had around the shop. Gave it a coat of zinc primer and a heavy coating of gravel guard.
I was also given a galore of Toyota parts of multiple generations aswell as an fj60 and fj55 and 1st gen taco for my pickings whenever i please... the catch? only a case of beer So i pulled the door pockets and grille from the taco and swapped it in with some minor trimming and redneck bracket fabrication. I thought it was only fitting since the truck sported a TACOMA sticker on the rear gate since the day i have owned it.. so i have now self proclaimed her a '94 TACO, zoom in to the door and check out the badging
Changed the fuel filter yesterday what a PITA that was. The original 20year old filter was seized to the line and i had the pleasure of twisting and kinking it! A micro piping cutter and some knuckle busting between the trans x-member and floor. Good ol piece of rubber fuel line and away she went running great!
so i recently noticed that the photos in my last update did not work, so.. here are the idler arm upgrades and tacoma grill that were installed to the truck, as well as the broken lift block.
The deadly blocks..
and here is the idler arm drilled for grease nipple with 4crawler bushings:
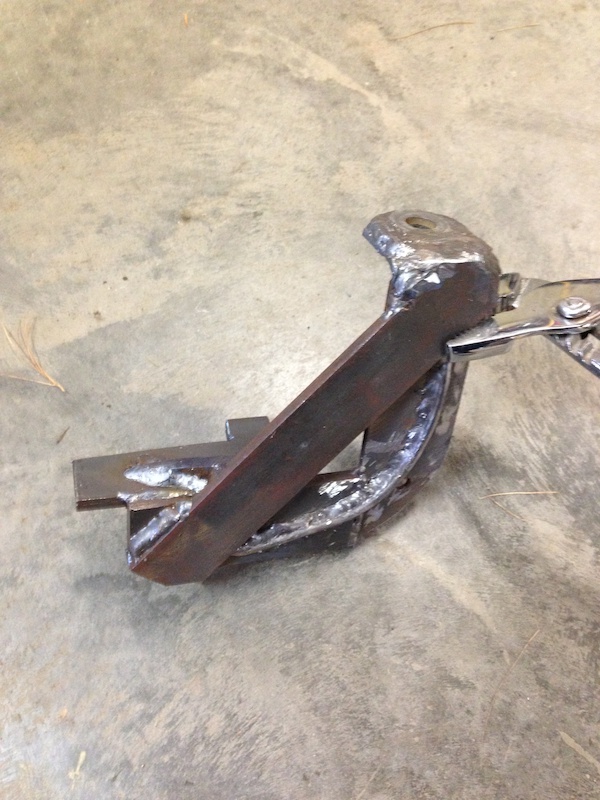
I also built this idler arm brace:
and finally Tacoma grille:
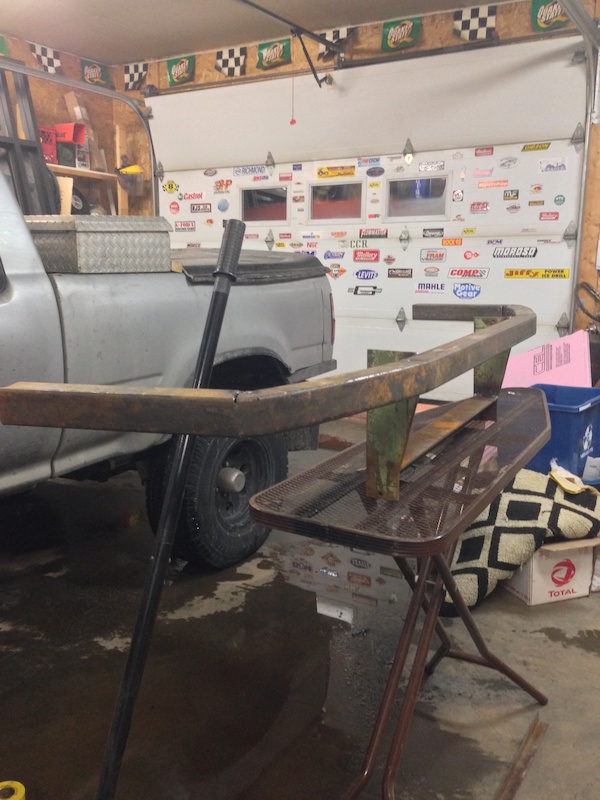
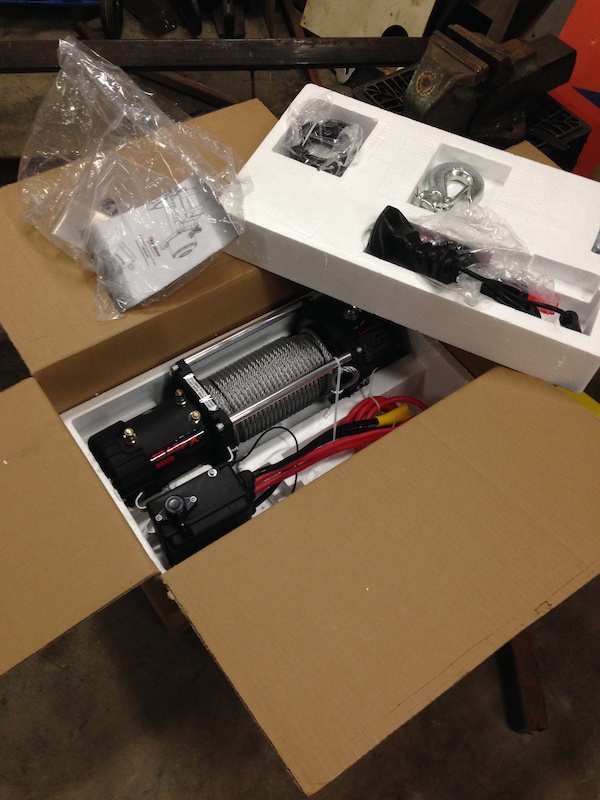
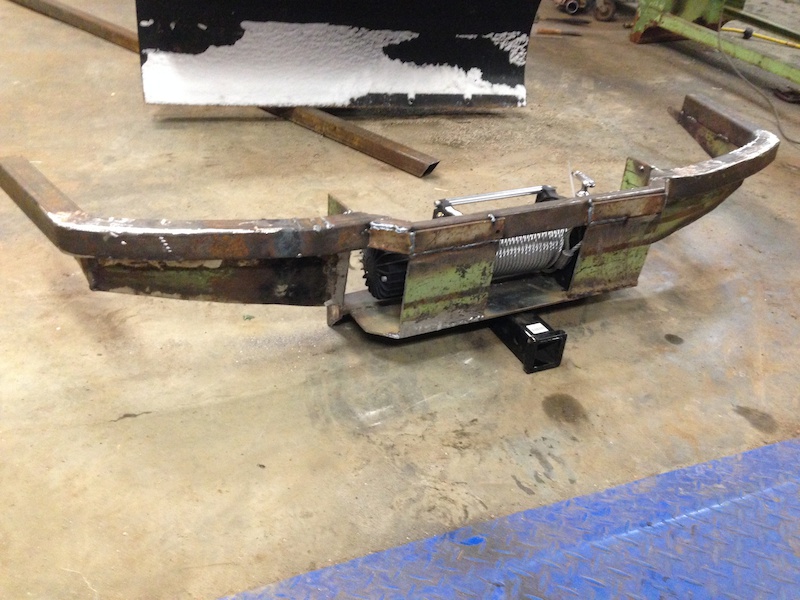
since then, santa left me a nice 8000lb Trail Fx winch and i have made serious progress on the bumper.. Here's the goodies
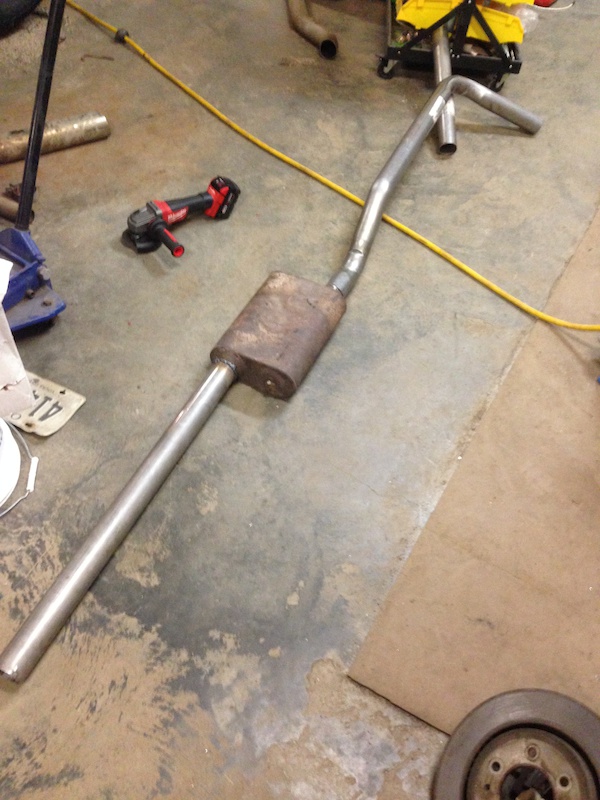
And also added a full stainless exhaust from the 02 sensor back... exiting in the stock location with 2 1/4 piping. No more side exit crushing hazzard. And she is loud without the cat
Last edited by gilbert72; Dec 30, 2014 at 01:28 PM.
i'm really hoping that this helps. I've been meaning to ask you how you managed to run 35's on the ifs for so many years? anything you did to help the idler arm situation?
To answer your question about the mounting, the bumper has undergone some serious modification since my last post. The bumper was fabbed prior to getting the winch, so mounting was kind of an after thought. I built the winch plate out of 8"x1/4" hardenned steel flat plate from an old piece of equipment, it's welded to the angle iron and boxed to the same 1/4" flat plate uprights that i had previously welded prior to undergoing this late modification. The side wings are also 1/4". I will be plating the front cross member with a piece of angle iron to prevent from tearing the factory frame. just need to finish plating the top section and cut holes for the signal lights and drill for winch mount and fairlead, then wire it all in
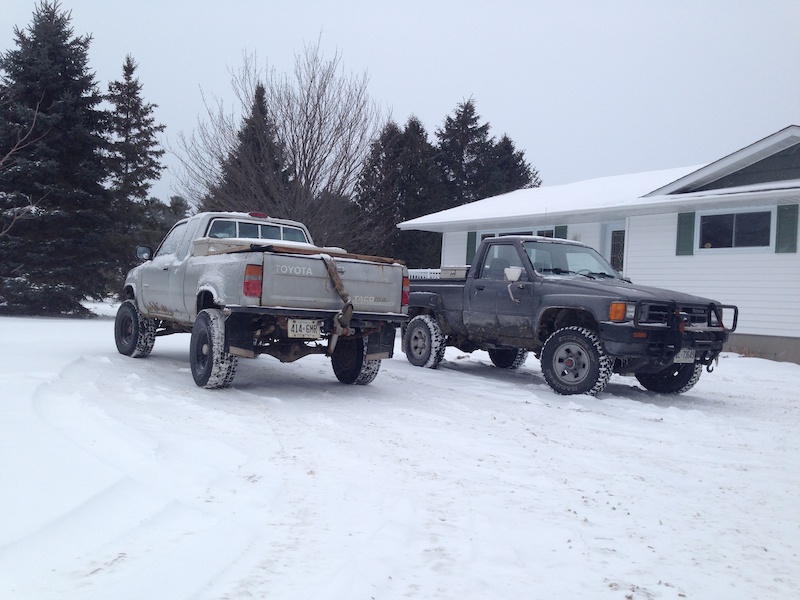
mine with my cousins 86 22r
Last edited by gilbert72; Jan 6, 2015 at 05:40 PM.
My truck didnt see the street, so I just let the idler arm be loose. Haha.
That iron pig is cool. Whats the deal with that?
the deal with the iron pig, is that it and several other trucks.. 86 roll over xtra cab, 92xtra cab, 1990 xtra cab (complete) with great frame and manual trans, a 96 tacoma aswell as a mid 80's diesel 60series were all sold/traded to me for a case of beer. i was instruced to take whatever i wanted so i have been stripping and tearing away at all of them slowly. the owner may scrap them, as i noticed the 60 had been moved the other day. so i need to find out what is going to become of them. i would really like to strip the 60 of its front axle, although my research has shown that it may not be worth-while to use it for a pickup sas swap. and unfortunately for me i can never seem to find a pickup axle..
3rz is a good engine.. Basically, it's as powerful/torquey as the bigger 3vze, but MUCH smaller and easier to work on! There's a few 3rz swaps here on YT.
3rz is a good engine.. Basically, it's as powerful/torquey as the bigger 3vze, but MUCH smaller and easier to work on! There's a few 3rz swaps here on YT.
Thanks for your input, as of now im unsure of the trucks future. It was driven until yesterday when it ran out of coolant and died. Owner sold it on the spot at the repair shop. So i am unsure of what engine repairs it may need at this point, it has 393xxxkm but is a british columbia truck and has only seen one ontario winter with salt
Hey guys, just wanted to update on the status of my custom built winch bumper. I have had it painted and on the truck for about two weeks. It was a very tight fit for the winch since i had started to build the bumper before having a winch and had no dimensions on it. So the bumper received some modifications and just like that it all fit into place. The winch control box was also an after thought and due to the light bar i didn't want to hack into the grille anymore or reduce airflow. Simple solution, relocated under the hood next to the battery (washer fluid tank removed). I have since ordered a universal inline washer pump and will be retrofitting some kind of bottle/tank to fit onto the driver side of the truck next to the rad overflow with extended wiring to the factory signal wires. Anyways here's how it all turned out, i'm very happy with the outcome and my own fab skills. Enjoy!
And i even got to put it to good use when i went snow wheeling solo.. wasn't so much fun and in reality the shovel was my life saver that day.
Hey everyone, i hope you're are all enjoying the summer weather. Anyways allow me to cut to the chase.. Over the last few months I have been hard at work on the yota and have made a few interesting acquisitions. For starters I did end up buying the 96 tacoma I had mentioned in a previous post. The 3rz has 393xxx km on the clock, I was told by the mechanic's shop where Ibought it that the timing chain had jumped after the engine was overheated and ran dry of coolant. I have yet to confirm any of this as I have not opened it up yet. But for 350$ I can't see a reason to complain just yet.. I plan on doing the HG, waterpump and timing chain all at once. My girlfriend is showing interest in the truck so i guess I'll be passing it on to her or selling to make a profit.
Here is a photo of the Taco:
I have also recently done some extensive work to my 94 Pickup also, new firestone destination MT tires aswell as jungle fender flares and a fresh paintjob.
Here she is in the painting progress:
And the final product:
I can't say that I did it all on my own, my uncle who is a veteran bodyman helped me thru the process. It was a long 6 days but well worth it. We painted the truck inside and out and took care of a few rust spots. The paint that I chose was tractor supply co. ford grey.. I was expecting a darker color as I was unsure of the actual shade until opening the can.. Based on internet search results it appeared to be a dark grey/charcoal color. These results were false. I was surprised upon opening the can to find a very vomit inducing light grey/cream colored paint... So uncle came to the rescue and this is the final color. 2qts of ford tractor grey to a 1/2qt of tractor supply gloss black. I'm happy with the overall outcome and I know I wont be seeing another truck this color for a long time.
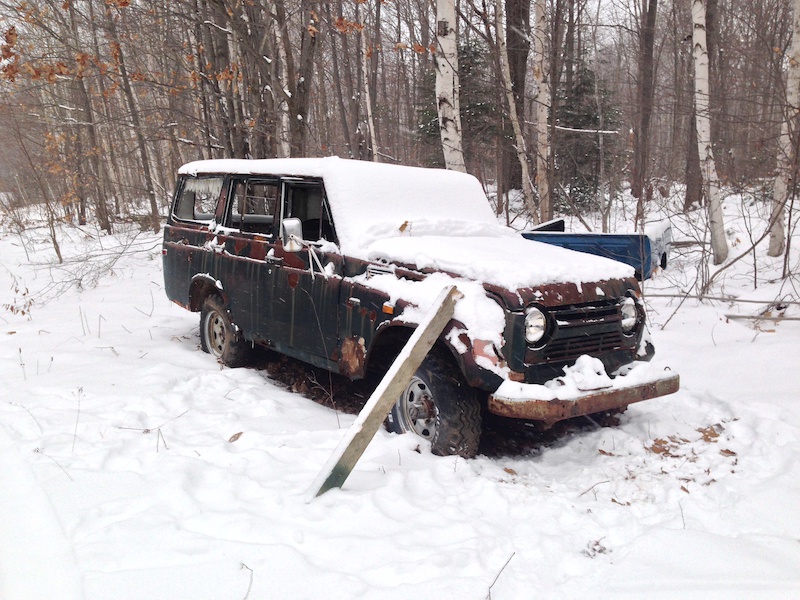
In other news.. I saved the BEST for last. My latest and greatest acquisition.. it speaks for itself. And for a measly 100$ I couldn't deny it.
:
So I guess next is to order the TG kit.
I'm looking for everyone's input who has done the sas swap. Seeing as I have just purchased brand new 32" tires i really want to stay with a mild lift. After some research, mostly just that listed on the TG site and a few threads on here. Please correct me if I am wrong, but the 3" kit will actually give me 4" of lift? I feel like this is going to be too much lift for 32" tall tires. I live by the motto of lifting as little as necessary to clear the tires desired. Is 4" the least amount of lift i can get from this kit? Are there ways to alter this? Last question. Since it's a v6 truck should i go with the HD kit? Bare in mind this is my DD and weekend wheeler, I wanna have a comfortable ride with offroad capability. Thank you all in advance, I appreciate all input from those with experience with an sas swap.
The only way I know to get to run 32" tires on a SAS is to do a complete custom set up. From what Ive read, the 3" and 4" kits net about the same amount of lift. I have the 4" HD kit and its almost too much for my 36s. There are plenty of ppl that have pretty low setups with a RUF setup. Not sure how it would look with 32s, but could be okay.
The only way I know to get to run 32" tires on a SAS is to do a complete custom set up. From what Ive read, the 3" and 4" kits net about the same amount of lift. I have the 4" HD kit and its almost too much for my 36s. There are plenty of ppl that have pretty low setups with a RUF setup. Not sure how it would look with 32s, but could be okay.
Do you have a v6 equipped truck? Are the HD springs too stiff?
My 4Runner is equipped with a vortec v6 although I can't commit on how stiff it is. I've barely got to drive it since building it. Hopefully that will change this weekend

 Oct 17, 2014 | 01:46 PM


 So i pulled the door pockets and grille from the taco and swapped it in with some minor trimming and redneck bracket fabrication. I thought it was only fitting since the truck sported a TACOMA sticker on the rear gate since the day i have owned it.. so i have now self proclaimed her a '94 TACO, zoom in to the door and check out the badging


 A micro piping cutter and some knuckle busting between the trans x-member and floor. Good ol piece of rubber fuel line and away she went
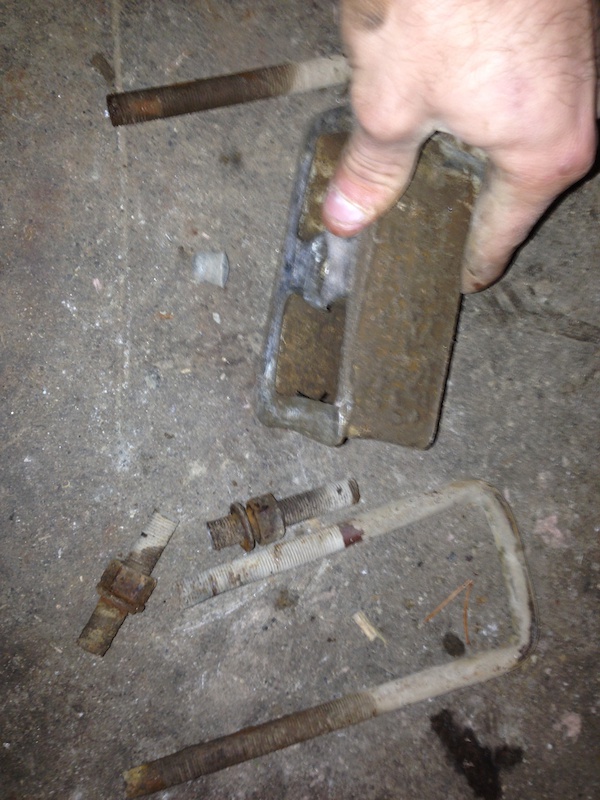


 :
:


