
diableri's 1989 4Runner Build-Up Thread
 May 6, 2013 | 11:29 AM
#1
Thread Starter
Registered User
Joined: Feb 2013
Posts: 121
Likes: 0
From: Central CA
diableri's 1989 4Runner Build-Up Thread
Hello everyone,
After several months of hunting around and some tough decisions, I've finally settled on my Toyota project the 89' SR5 4Runner you'll see below and throughout this thread.
I found her on the CA coast being used as a tertiary work vehicle and she served well from what the previous owner explained. While she's led a life as a workhorse, I'm hoping to provide a bit easier second life for her.
For this first post, I'll just put up a few pictures in the thread and link to the Flickr album if someone wants to see all my reference photos for some reason.
First order of business, find out which shop manuals I need and get them ordered and finish cleaning up my work space and replacing some missing tools and items.
Short list.
I know I have electrical issues to sort out.
Gas gauge is all over the place.
Passenger turn signals do not function ditto for low beam passenger headlight. Cruise control also will not engage.
Ticking up front (no timing belt/water pump change and at 177K miles).
Shocks are gone, she's like driving a hover craft.
Alignment.
Tires.
Windshield is cracked and there's visible rust on the driver pillar so I'm guessing it's lost some integrity and will need a fair amount of repair.
Front seat foam and support is utterly shot as is fabric.
Door glass is hazed even after thorough cleaning.
It needs to be driven into an autoclave before I even begin cleaning it but she was a work truck.
Exhaust as a leak towards the back.
There's plenty more, but that's enough for now.
Motor is really strong, flew up I5 on the way up without any hesitation and way more power than I expected or was safe given the suspension condition.
Brakes are good, new master cylinder and recently done break job.
Transfer case feels great and seems fine with no bad feeling or noise.
Hubs worked perfectly.
Tailgate glass raises and lowers albeit slowly. I don't know if the key is only up or supposed to be up and down because mine only goes up right now.
Top is in excellent condition and I am not sure if it's ever even been off.
Back seats are in great condition as I am not sure they've ever been used either.
All advice and comments welcome, I've got thick skin and just glad to have this place as a resource; you folks are amazing.
Vehicle stats:
1989 4Runner
V6
R150F 5 Speed
4.10 Rear
Full Album:
diableri's 89' Flickr Album
Last edited by diableri; Jun 2, 2013 at 05:24 PM.


 May 12, 2013 | 01:34 AM
#3
That is probably the color I would of ordered if I was buying one back in 89. Always like seeing the 1st gen runners being brought back to life. They are alot of fun during the summer and fun to drive.
I have a Factory Service Manual and it is good. You can find them on ebay used for a great price if you keep checking and one will pop up. I will say that a Haynes Manual has taught me so much and is what I have always used and has worked great for me. Alot will tell you to get or down load the FSM. I feel a Haynes will do just fine for you and an FSM if you really want one, but I personally dont think it is necessary. I do not recommend a Chiltons Manual. It is very vague in alot of its repair information. It is good if you have done a repair before but not for a first time on fixing things.
A basic tool set works great on these trucks. 8mm, 10mm,12mm,14mm, 17mm,and a 19mm wrench,sockets and extention set, plus the basic screw driver,pliers and such will get you thru 99% of the fixes you will need to do.
Being in California, I wouldnt suspect that you have the humidity issues like we do here in the midwest, but I am not familiar with the humidity in central California but know southern california is dry. I try to point out in each of my builds about how bad the tanks can get. Unfortunately to check the float assembly, and it can get rusted up bad that it cant move freely as it should, you will need to drop the tank to pull it out and clean and check it. If you have access to another float assembly, you cand hook it up next to the passenger rear tire and see if the guage moves slow and steady as it should.
I would take the guage cluster out and tighten all the screws and reseat your ribbon cables first before pulling the tank and checking the float assembly.
I use a test light for the plug connection at the turn signals, I would suspect that the bulb holder is corroded up or the white ground wire isnt making a great connection to the bulb holder. It isnt the best design of how the wire is connected to the holder.
You got a great little runner and a great platform to work off of. I had a 3.0 5 speed and those trucks are little tanks on wheels. Welcome to Yotatech.
May 12, 2013 | 10:32 AM
#4
Thread Starter
Registered User
Joined: Feb 2013
Posts: 121
Likes: 0
From: Central CA
That is probably the color I would of ordered if I was buying one back in 89. Always like seeing the 1st gen runners being brought back to life. They are alot of fun during the summer and fun to drive.
I have a Factory Service Manual and it is good. You can find them on ebay used for a great price if you keep checking and one will pop up. I will say that a Haynes Manual has taught me so much and is what I have always used and has worked great for me. Alot will tell you to get or down load the FSM. I feel a Haynes will do just fine for you and an FSM if you really want one, but I personally dont think it is necessary. I do not recommend a Chiltons Manual. It is very vague in alot of its repair information. It is good if you have done a repair before but not for a first time on fixing things.
A basic tool set works great on these trucks. 8mm, 10mm,12mm,14mm, 17mm,and a 19mm wrench,sockets and extention set, plus the basic screw driver,pliers and such will get you thru 99% of the fixes you will need to do.
Being in California, I wouldnt suspect that you have the humidity issues like we do here in the midwest, but I am not familiar with the humidity in central California but know southern california is dry. I try to point out in each of my builds about how bad the tanks can get. Unfortunately to check the float assembly, and it can get rusted up bad that it cant move freely as it should, you will need to drop the tank to pull it out and clean and check it. If you have access to another float assembly, you cand hook it up next to the passenger rear tire and see if the guage moves slow and steady as it should.
I would take the guage cluster out and tighten all the screws and reseat your ribbon cables first before pulling the tank and checking the float assembly.
I use a test light for the plug connection at the turn signals, I would suspect that the bulb holder is corroded up or the white ground wire isnt making a great connection to the bulb holder. It isnt the best design of how the wire is connected to the holder.
You got a great little runner and a great platform to work off of. I had a 3.0 5 speed and those trucks are little tanks on wheels. Welcome to Yotatech.
I have a Factory Service Manual and it is good. You can find them on ebay used for a great price if you keep checking and one will pop up. I will say that a Haynes Manual has taught me so much and is what I have always used and has worked great for me. Alot will tell you to get or down load the FSM. I feel a Haynes will do just fine for you and an FSM if you really want one, but I personally dont think it is necessary. I do not recommend a Chiltons Manual. It is very vague in alot of its repair information. It is good if you have done a repair before but not for a first time on fixing things.
A basic tool set works great on these trucks. 8mm, 10mm,12mm,14mm, 17mm,and a 19mm wrench,sockets and extention set, plus the basic screw driver,pliers and such will get you thru 99% of the fixes you will need to do.
Being in California, I wouldnt suspect that you have the humidity issues like we do here in the midwest, but I am not familiar with the humidity in central California but know southern california is dry. I try to point out in each of my builds about how bad the tanks can get. Unfortunately to check the float assembly, and it can get rusted up bad that it cant move freely as it should, you will need to drop the tank to pull it out and clean and check it. If you have access to another float assembly, you cand hook it up next to the passenger rear tire and see if the guage moves slow and steady as it should.
I would take the guage cluster out and tighten all the screws and reseat your ribbon cables first before pulling the tank and checking the float assembly.
I use a test light for the plug connection at the turn signals, I would suspect that the bulb holder is corroded up or the white ground wire isnt making a great connection to the bulb holder. It isnt the best design of how the wire is connected to the holder.
You got a great little runner and a great platform to work off of. I had a 3.0 5 speed and those trucks are little tanks on wheels. Welcome to Yotatech.
I'm really torn on the color. I think this color and even the graphics look great on this truck but I've always wanted a tan body/white top one of these with black rims or white rims and bumpers. I don't know why but that's always what I've pictured in my head. The idea of tearing it down enough to paint the engine compartment and interior the right way though... That decision is a ways off thankfully as I want it mechanically complete before I worry about that. The only body stuff I'm going to work on will be arresting the rust. I am assuming I'm going to find more once I pull the windshield.
I was able to locate the FSM and wiring book and got them ordered but them a friend dug up a haynes and brought it over yesterday so it appears I'll have one of each for the shelf. If I can't find something between the books and the web well, I suppose I'm doing something wrong.
I have most of my tools squared away now and a small space in the work room (no garage here) for them all. I haven't built up the tub brace for a makeshift parts washer yet (and boy does she need that) but it's on the list for next weekend. I have a few electrical tools to pick up like finding a good analog multimeter and a test light. Stuff I just haven't really needed in the past since I worked on old cars (street rods).
I'll take a look at that gas gauge here real soon as it should be one of the easier things to rule in or out and I need to get the cluster (and whole dash really) apart to clean it up anyway.
Thanks for the advice on the signals and lights. That is an immediate concern. Thankfully she's not my driver so I don't have to take it anywhere until it's safe other than a couple local shops that will help me get some of the work done.
May 12, 2013 | 10:41 AM
#5
Thread Starter
Registered User
Joined: Feb 2013
Posts: 121
Likes: 0
From: Central CA
I spent a few hours yesterday tearing out the old carpet since it was giving my lungs fits (and they aren't so great to begin with) due to all the stuff caked in it. Got the grease (a pot of deep frying oil had been spilled in the interior by the PO), rocks, dirt, mud and fast food cleaned out and started working on the general grime as well as cleaning the seats and disinfecting the interior.
I'll have a local muffler shop bend a new exhaust for me this week or next to fix that up as after I got under there, it's riddled with holes.
Seats cleaned up pretty good considering the shape they were in. I picked up a really cheap seat cover just for an extra layer of fabric between me and the frame for now. Open box $8.99 was too good to pass up.
I was missing the pull knobs for the rear seat backs and didn't want to bur up the threads so I didn't pull them. Will do that later in the week and clean them up with the second pass on the rest of the seats.
Will be going to work on the floor pan with cleaner and plastic brushes in the evenings. Was 100 degrees here yesterday so we let up in the afternoon to let the seats dry out before we started in on cleaning them again.
Once the interior cleaning is done and it's a little less of rough inside, I'll go to work on troubleshooting electrical.
Last edited by diableri; May 12, 2013 at 06:15 PM.
May 14, 2013 | 08:15 PM
#6
Thread Starter
Registered User
Joined: Feb 2013
Posts: 121
Likes: 0
From: Central CA
Just posting this up for reference for myself for later. Real quick and dirty photoshop paint of the top on a tan runner. If I loose my marbles and decide to do a complete tear down for paint later instead of just going back to the stock blue, this is likely the scheme I would choose with flat white bars, rims, trim etc.

May 16, 2013 | 03:35 PM
#7
Thread Starter
Registered User
Joined: Feb 2013
Posts: 121
Likes: 0
From: Central CA
So I got my smog check today and failed. Was wondering if anyone happens through the thread that is really good with this stuff could offer some advice.
I'll spend some time tonight and tomorrow looking for myself but on the off chance someone sees this and it's straight forward, would love advice.

Below are my results:
15 MPH: RPM 1560
%CO2=12.9
%O2=1.2
HC(PPM) MAX=84 (Fail) AVE=28 Measurement=223(Fail)
CO(%) Max=0.49 AVE=0.04 Measurement=0.26
NO(PPM) MAX=1006 AVE= 232 Measurement=514
All the 25MPH measurements were fine. The shop wasn't one of those that gives any feedback, they just give results.
If I remember what I've read in the past, O2 sensors and cats can affect these? I need to read up though, I've always built older cars that never needed to worry about this stuff so it's all new to me and a learning opportunity.
With any luck, my manuals will be here soon and I can get to work.
I'll spend some time tonight and tomorrow looking for myself but on the off chance someone sees this and it's straight forward, would love advice.
Below are my results:
15 MPH: RPM 1560
%CO2=12.9
%O2=1.2
HC(PPM) MAX=84 (Fail) AVE=28 Measurement=223(Fail)
CO(%) Max=0.49 AVE=0.04 Measurement=0.26
NO(PPM) MAX=1006 AVE= 232 Measurement=514
All the 25MPH measurements were fine. The shop wasn't one of those that gives any feedback, they just give results.
If I remember what I've read in the past, O2 sensors and cats can affect these? I need to read up though, I've always built older cars that never needed to worry about this stuff so it's all new to me and a learning opportunity.
With any luck, my manuals will be here soon and I can get to work.
Last edited by diableri; May 16, 2013 at 06:13 PM.
Trending Topics
May 16, 2013 | 08:06 PM
#8
Diggin' that paint scheme. How about a 3.4 to match those 4runner/tacoma wheels and get rid of that smog issue in the process ;] Bolt that sucker in!
Also like how there's a McDonalds large number 8 that was sitting next to your seat there.
Also like how there's a McDonalds large number 8 that was sitting next to your seat there.
May 16, 2013 | 08:32 PM
#9
Thread Starter
Registered User
Joined: Feb 2013
Posts: 121
Likes: 0
From: Central CA
The motor swap has been considered the entire time I've been researching these but it would definitely be late in the build if I go that direction. For that effort, it would be tough to not go diesel but I don't know if there's any further CARB headache with that vs a traditional swap.
This poor truck has certainly been used and abused as far as the interior goes. I wouldn't normally have messed with taking the interior apart like that before most of the major mechanicals weren't sorted but I'm waiting on manuals and well... as you can see; it needed it.

 It just had to get done.
The before shots will just make it more worth it when it's done though. I'm used to doing full, frame off, every nut and bolt work on street rods so this project will be a new challenge since that is a bit more interesting than just pulling the body of a 30's Ford or Chevy, 50's F100, TBucket etc.
Last edited by diableri; May 16, 2013 at 08:36 PM.
May 17, 2013 | 09:25 PM
#10
Thread Starter
Registered User
Joined: Feb 2013
Posts: 121
Likes: 0
From: Central CA
Did some more cleaning tonight. Picked up new door lock knobs to screw into the release screws for the rear seat backs so I could take them out easily to shampoo tomorrow. Cleaned up the rest of the interior console parts except the switch panel which I'm saving for tomorrow as well. May start cleaning up the floor pans tomorrow as well depending on how far I get on painting the console parts and take a look at the dash and gauges.
Came across a picture of myself mugging for the camera and one of my past trucks. If I remember correctly, we were somewhere in the western sierras backpacking and had used the truck to get up to some remote trail head. Used to do a lot of that so no telling where this one was taken. We hadn't repacked the truck at this point so the gear must have all been dumped and being sorted to get stowed.

Came across a picture of myself mugging for the camera and one of my past trucks. If I remember correctly, we were somewhere in the western sierras backpacking and had used the truck to get up to some remote trail head. Used to do a lot of that so no telling where this one was taken. We hadn't repacked the truck at this point so the gear must have all been dumped and being sorted to get stowed.
May 18, 2013 | 01:31 PM
#11
I had a long post typed out on my laptop top and hit the wrong button this morning. I will try this again. The truck above looks sharp, this generation of trucks are my fav, I think they just look good. Nice truck you had.
I dont know the 3.0 but on a 4 banger, I have always been able to get rid of the code and get the EGR working again with a good cleaning. I have seen several threads on here about the California emissions and if the EGR isnt working right, they will catch it. The EGR gets carbon everywhere, I have pulled chunks the size of a quarter and about 3/8th thick out of Plenums before. You will need a drill bit to get the hose connection cleaned out as it getsw hard as a rock. It is some tough stuff.
I have never had to replace an EGR and have always got them working, but I also have never had to have a sniff test done on one either. On the O2 sensor, I get mine from www.sparkplugs.com You can take the part number from their website and do a search on ebay and get it a little cheaper off of ebay as well. What the parts store wanted for one O2 sensor, I was able to get from sparkplugs.com for two sensors as I had a California emissions truck and they have a sensor infront and in back of the catalytic converter.
I have been getting into doing frame off restorations. I alway liked the oldies. Thinking after I get my current projects done I want to do a oldie. My grandfather had a 51 ford F100 that I wanted to restore and my uncle sold it. I had a 49 GMC truck and several 70s cars. I have even thought of something like a Tbucket. I will know when the time gets here. Who knows what it will be.
I like the color scheme you have above. Doing a color change isnt bad at all with the exception of doing the engine bay and that is the worst. I will be doing a color change on my 85 truck and that is the part I am really not looking forward to but it isnt bad with the motor out.
If you are into doing frame off restores on these trucks, it is alot easier in some ways over the domestics. The front clip is spot welded on does not need to come off. These trucks are easy to do if you know a few steps to look for. I had to do one out of desperation, didnt know the frames were a weak link in these but am so glad it made me get out of my comfort zone and have helped several since then. Somethign about tearing one completely down just isnt the same as a typical repair.
May 18, 2013 | 07:57 PM
#12
Thread Starter
Registered User
Joined: Feb 2013
Posts: 121
Likes: 0
From: Central CA
Thanks for that site and the emissions advice Terry! That site actually looks great. As soon as I get my manuals, I'm going to start troubleshooting, im just missing an analog multimeter.
I did even more cleaning today and went out and got some 800 sandpaper, prep, adhesion promoter, primer and a couple different colors. Don't think I want to mess with having them mix up something for me since this isn't the final interior (things are broken every other screw hole and cracked everywhere) so ill get get something close and use this for a working interior only.
We had to change out the water in the shampo machine all morning it was so dirty. Spent 20 minutes alone on the driver's seatbelt and the muck just still kept coming off into the water. Soaked and soaked stuff with good ole simple green even more. I know I'll wind up replacing most of this stuff but I just want it halfway clean to work in.
I'll see how far into things I want to gt once the major mechanicals have been checked out but I would like to get things all cleaned up and in the process really familiarize myself with the truck so that if I have an issue on the trail, I have a fair chance of sorting it and getting back to civilization.
I've never done an early fifties F100 but I did a 56 complete rod many years ago (I think there's pics on my Flickr account in a set, just not all of them). VERY easy to work on and since you can do body work, the biggest issue would be something you can work through (those big beautiful curves).
Thanks again for stopping by Terry. I've been learning even more from you lately as I'm about halfway through Chefs build thread and you and he and many others have offered up so much in there. Man was it rough reading about his machinist woes early on. Thanks again.
May 23, 2013 | 09:17 PM
#13
Thread Starter
Registered User
Joined: Feb 2013
Posts: 121
Likes: 0
From: Central CA
Manuals are finally here!  Will be spending every spare minute (which isn't much, I've been pulling 16s for a few weeks now and sneaking in a couple hours of cleaning here and there on the truck) reading up on gauges and sensors to try to sort out a few of my issues. Pretty excited to actually do something besides scrubbing.
Will be spending every spare minute (which isn't much, I've been pulling 16s for a few weeks now and sneaking in a couple hours of cleaning here and there on the truck) reading up on gauges and sensors to try to sort out a few of my issues. Pretty excited to actually do something besides scrubbing.
Last edited by diableri; May 23, 2013 at 09:21 PM.
May 24, 2013 | 08:53 PM
#14
Thread Starter
Registered User
Joined: Feb 2013
Posts: 121
Likes: 0
From: Central CA
Just a few of the trucks and their owner's I'm trying to learn from and I know I'm missing a bunch still! =p
LUCY! I gotta lotta readin ta do!

I'm really interested in the Blaze Land IFS set ups but haven't done any research yet. Here's a link for my future reference a reminder to dig into Toyo's build.
http://blazeland.us/
LUCY! I gotta lotta readin ta do!
I'm really interested in the Blaze Land IFS set ups but haven't done any research yet. Here's a link for my future reference a reminder to dig into Toyo's build.
http://blazeland.us/
May 25, 2013 | 09:08 AM
#15
Thread Starter
Registered User
Joined: Feb 2013
Posts: 121
Likes: 0
From: Central CA
Going to start adding in some notes here for future work since my bookmarks are getting out of control.
Master Cyl Upgrade info:
From Red's 89 Build Thread
Camry rear window motor mod:
From Red's 89 Build Thread
Car Camping Tent:
From Red's 89 Build Thread
Master Cyl Upgrade info:
From Red's 89 Build Thread
Camry rear window motor mod:
From Red's 89 Build Thread
Car Camping Tent:
From Red's 89 Build Thread
Last edited by diableri; May 25, 2013 at 09:48 AM.
May 25, 2013 | 08:32 PM
#16
Looking good man. Glad to see you are diving in on this project. I agree with Terry on the Haynes manual. That's all I have ever really needed when it comes to these yotas.
It's crazy how some people can just let their interiors get so filthy. I always hate cleaning out other people's messes. But can't wait to see the after pics when it's all cleaned.
I want to do the Camry motor mod for my tailgate. It's soooo slow right now.
Keep up the good work.
Oh yeah your old reg cab is really nice.
Last edited by Gizler00; May 25, 2013 at 08:41 PM.
May 25, 2013 | 11:59 PM
#17
Not familiar with the Blazeland kit, have heard of it though. Dont know how many times I have referred back to my threads for information and it comes in handy. Adding links to your thread will pay off for you later as well.
One of the easier ways to search Yotatech for example in Google put in "Tailgate with a space and Yotatech" Trying to use the search feature on here, it has to be word for word.
The tailgate can be troublesome, but it isnt nearly as scary as when I first started working on it. If you run into some problems let me know on here or ask on one of my threads and I have links or info that could help.
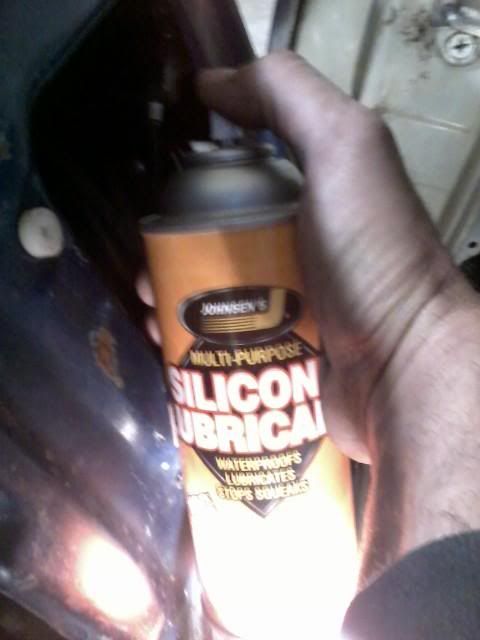
One thing that could both of you guys window issues, not just the tailgate but the front windows as well. Lubricate the rubber seals that the window slides up and down on. I didnt know about this for a long time and what a differece it can make. I usually do it 2 or 3 times a year. There are other brands as well.

One of the easier ways to search Yotatech for example in Google put in "Tailgate with a space and Yotatech" Trying to use the search feature on here, it has to be word for word.
The tailgate can be troublesome, but it isnt nearly as scary as when I first started working on it. If you run into some problems let me know on here or ask on one of my threads and I have links or info that could help.
One thing that could both of you guys window issues, not just the tailgate but the front windows as well. Lubricate the rubber seals that the window slides up and down on. I didnt know about this for a long time and what a differece it can make. I usually do it 2 or 3 times a year. There are other brands as well.
May 26, 2013 | 06:28 AM
#18
Not familiar with the Blazeland kit, have heard of it though. Dont know how many times I have referred back to my threads for information and it comes in handy. Adding links to your thread will pay off for you later as well.
One of the easier ways to search Yotatech for example in Google put in "Tailgate with a space and Yotatech" Trying to use the search feature on here, it has to be word for word.
The tailgate can be troublesome, but it isnt nearly as scary as when I first started working on it. If you run into some problems let me know on here or ask on one of my threads and I have links or info that could help.
One thing that could both of you guys window issues, not just the tailgate but the front windows as well. Lubricate the rubber seals that the window slides up and down on. I didnt know about this for a long time and what a differece it can make. I usually do it 2 or 3 times a year. There are other brands as well.
Thats a good idea on lubing the tracks. I never even thought of that. I know my rear window reg assembly needs lubed up for sure. Im not real fond of the tailgate/window assembly and how it works. But I guess i just need to get better at all the relays, wiring, switches that control it.
May 26, 2013 | 07:23 AM
#19
Thread Starter
Registered User
Joined: Feb 2013
Posts: 121
Likes: 0
From: Central CA
Thanks Terry! I haven't picked up any of my lubricants yet and I'll add that to list and just start right off with with those window seals since I need to pull all three panels anyway for cleaning and repair. I should be able to get them well at that point and see how much that help. Thanks for the tip!
May 26, 2013 | 07:40 AM
#20
Thread Starter
Registered User
Joined: Feb 2013
Posts: 121
Likes: 0
From: Central CA
Looking good man. Glad to see you are diving in on this project. I agree with Terry on the Haynes manual. That's all I have ever really needed when it comes to these yotas.
It's crazy how some people can just let their interiors get so filthy. I always hate cleaning out other people's messes. But can't wait to see the after pics when it's all cleaned.
I want to do the Camry motor mod for my tailgate. It's soooo slow right now.
Keep up the good work.
Oh yeah your old reg cab is really nice.
It's crazy how some people can just let their interiors get so filthy. I always hate cleaning out other people's messes. But can't wait to see the after pics when it's all cleaned.
I want to do the Camry motor mod for my tailgate. It's soooo slow right now.
Keep up the good work.
Oh yeah your old reg cab is really nice.
It was funny when we started cleaning her up, we'd get one layer of stuff up only to find another...
I think we're on number three right now and about five gallons of simple green and a LOT of the cheap wire and plastic brushes from Harbor Freight.  But that's all part of it sometimes.
 So many great solutions I keep coming across here and that Camry motor is a perfect fix for one of my problems. My rear window motor sounds really tired and takes about 10 seconds to go up so I am assuming it'll be soon. Might as well get in front of the problem.
Thanks for the compliment on the old rig. She was a good truck. I hope the young man that got her treated her well because she was good to me and I didn't (and still don't) have any idea what I was doing off roading and she never left me stranded in any of the weird places we went.


