
Christopher D Burch 1989 Pickup Build-Up Thread
 May 19, 2013 | 08:29 PM
#1
Thread Starter
Registered User
Joined: May 2013
Posts: 31
Likes: 0
From: I live in Georgia, USA
Christopher D Burch 1989 Pickup Build-Up Thread
So here goes.
First a little background. My adventure actually begins with a little '86 Honda rebel I acquired a few years ago. It was purple, covered in rust, had giant holes in the exhaust, and the carb was so gunked up it would only run with the choke on. Well, this spring I finally got off my rear and fixed it up real nice.


I wanted to sell it for cash and get a Ford Ranger, thinking that was my only affordable option for a pickup. I knew there was no way I could afford a nice Yota. But then I got a message... 1989 Toyota 4x4 pickup, doesn't run, but willing to trade for the Rebel if I was interested in it! I was definitely interested.
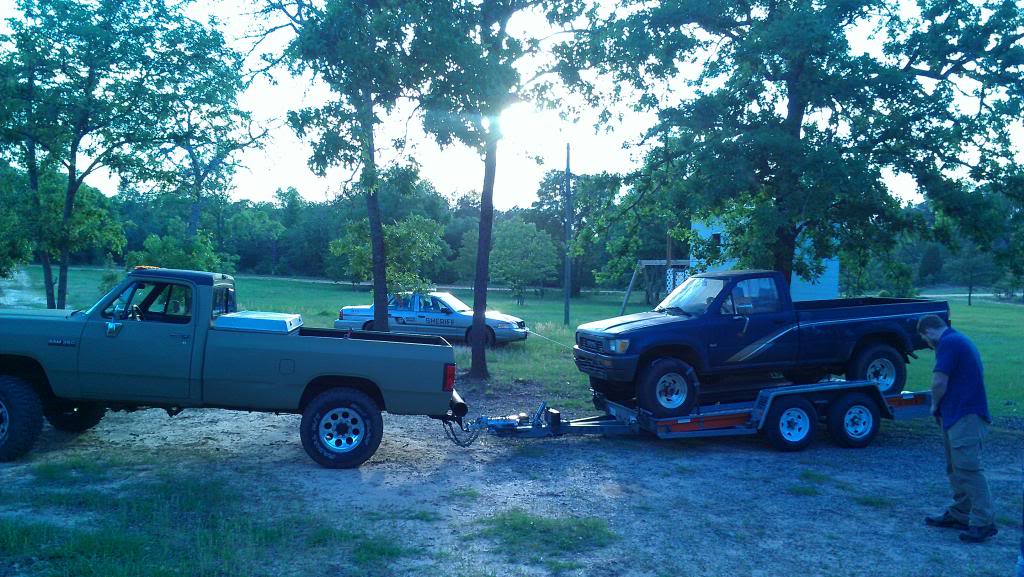
So, we arrange the trade and I get a buddy's diesel Power Wagon to go pick it up...

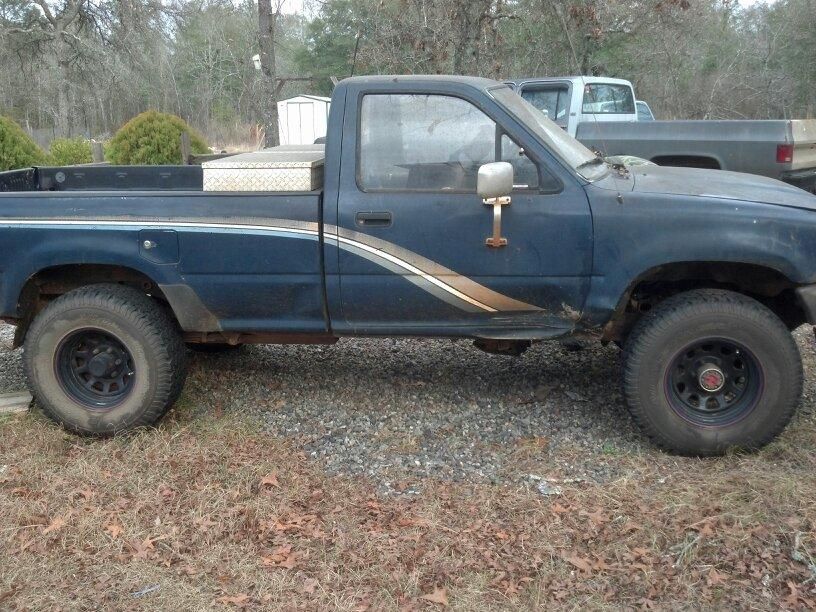
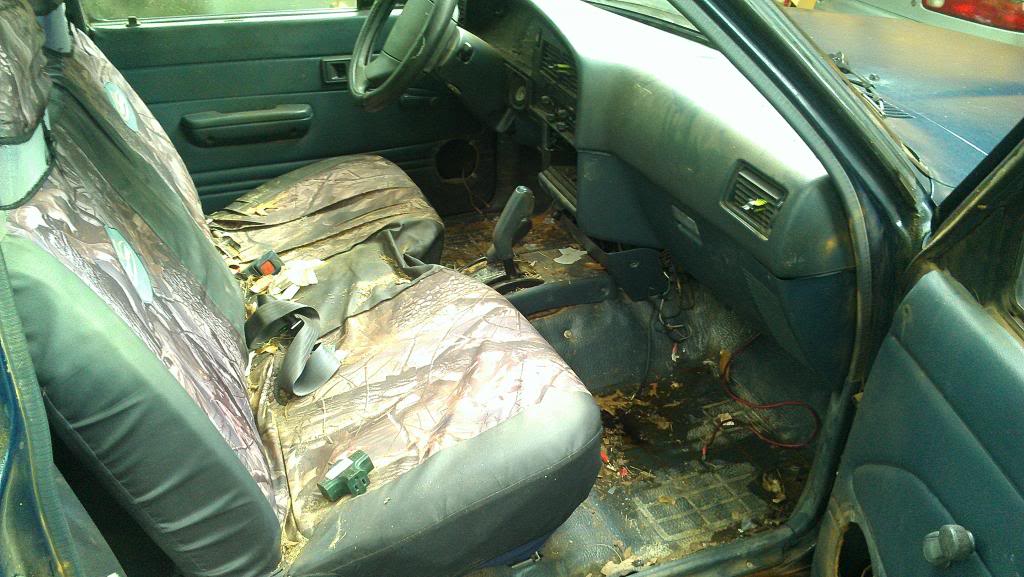
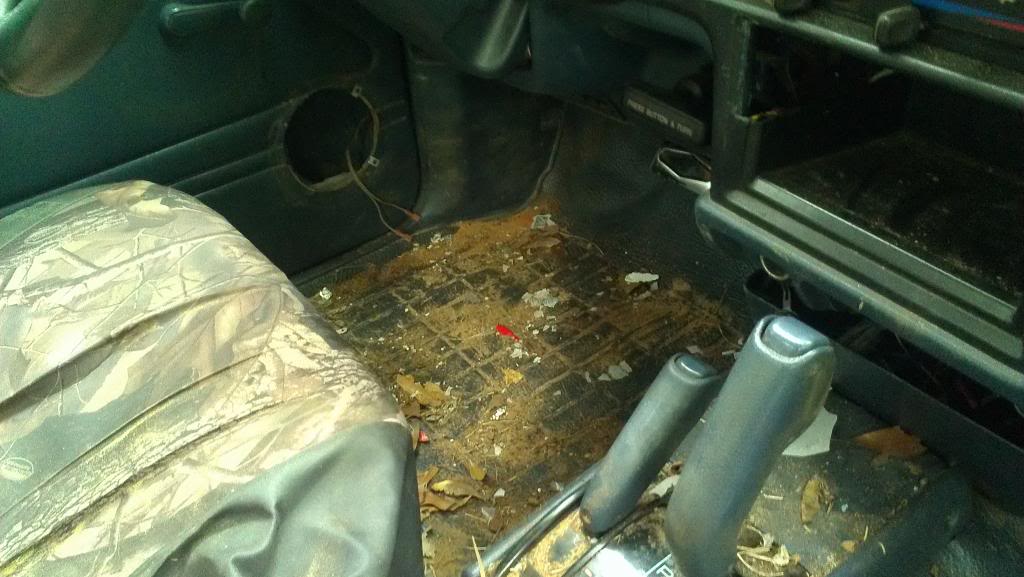
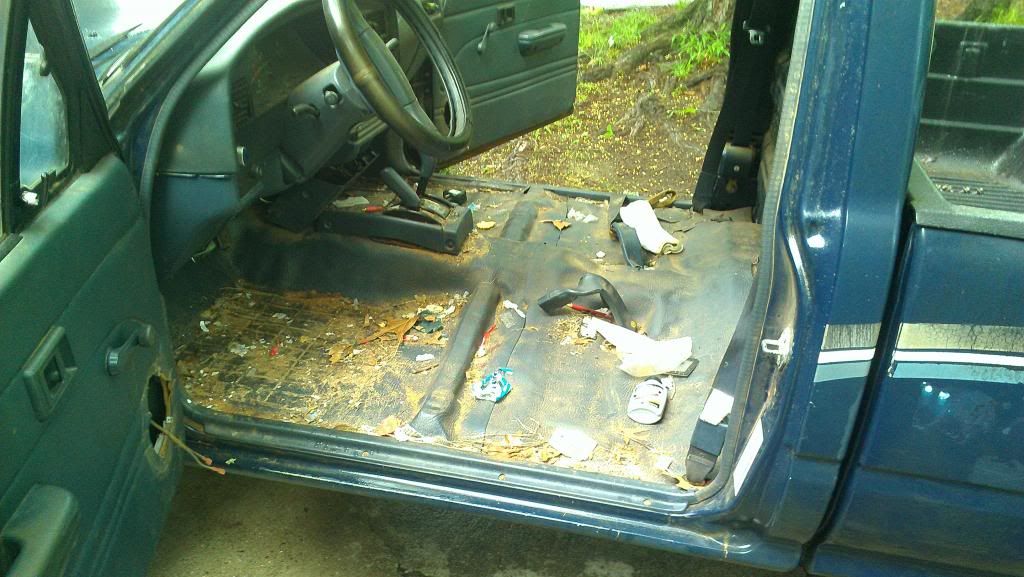
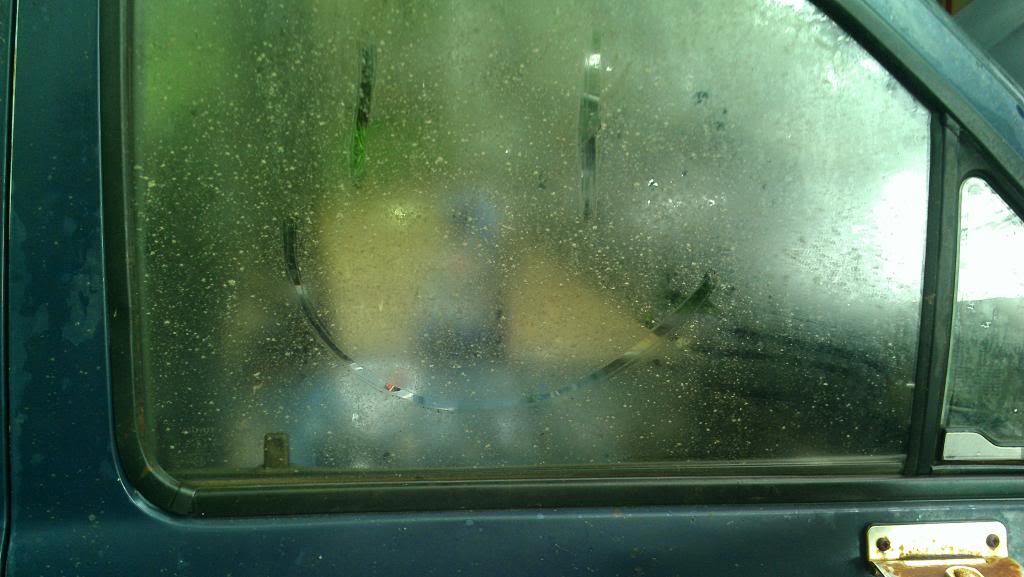
...And this is where things get a little exciting.The previous owner had the truck on a relative's property. In the interest of being civil, we'll say the relative was not a nice person. He had removed the tool box, the nice aftermarket radio, most of the lug nuts, the battery, and had filled the truck (both the bed and the interior) with as much trash as he could find on his property. Really not a nice person. In fact, just to make sure there was no trouble, we were escorted to pick the truck up by a sheriff. I don't even know why he went to such great lengths to do all this - there was a giant rat that had made a nest under the hood and had pooped everywhere and chewed on nearly every wire anyway!
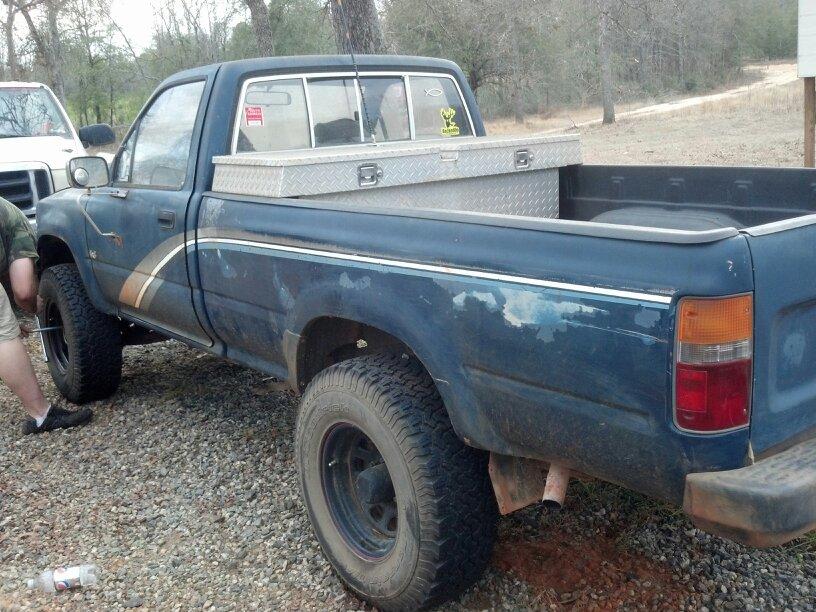
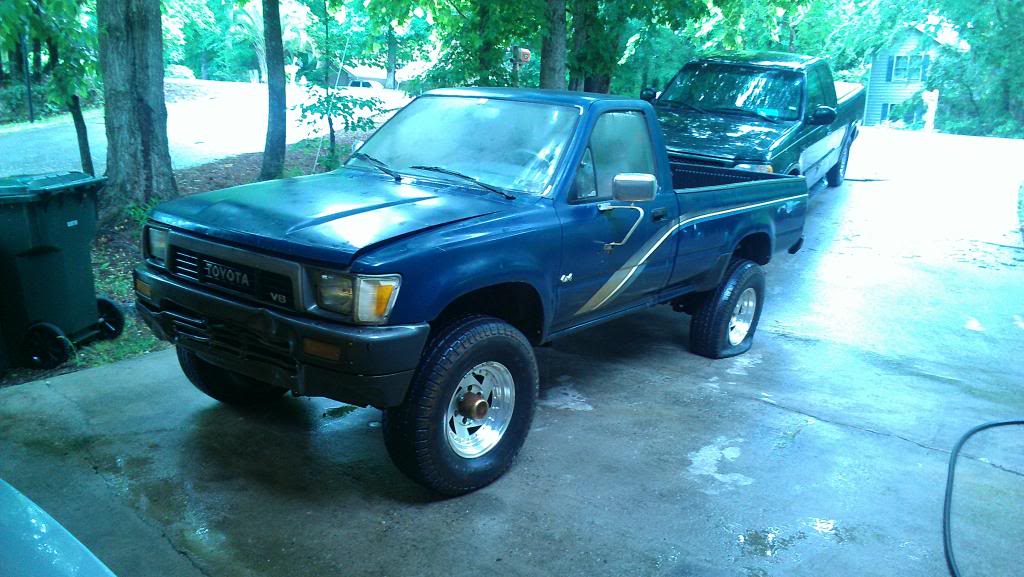
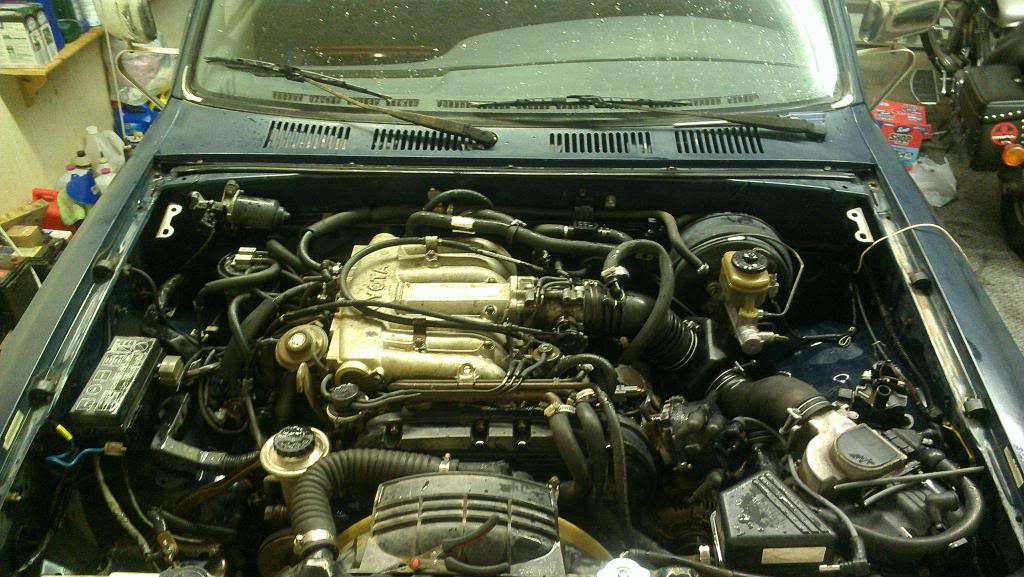
Here's a few of the truck (with most of the trash removed)...
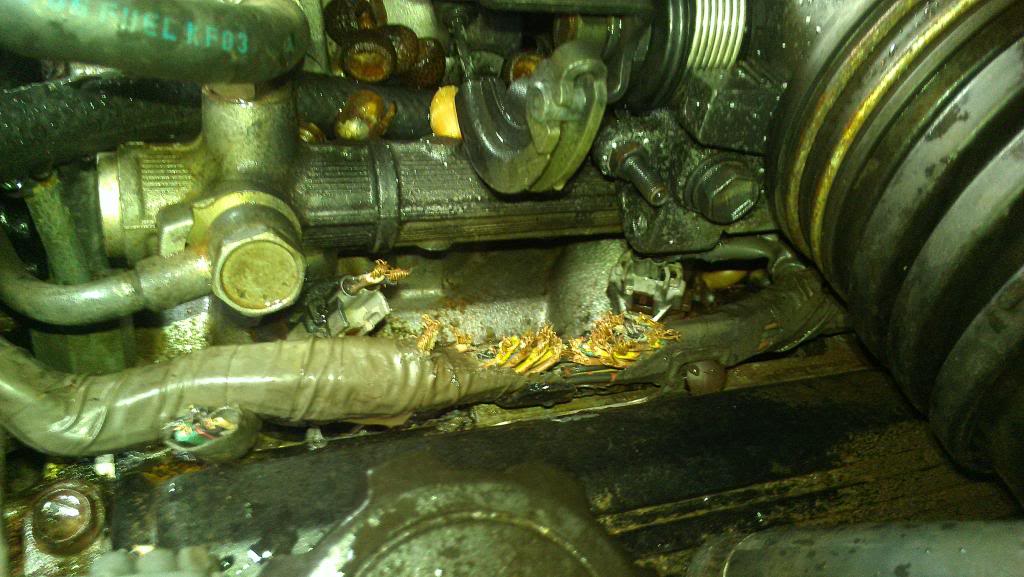
And some shots of what the damn rat did under the hood:

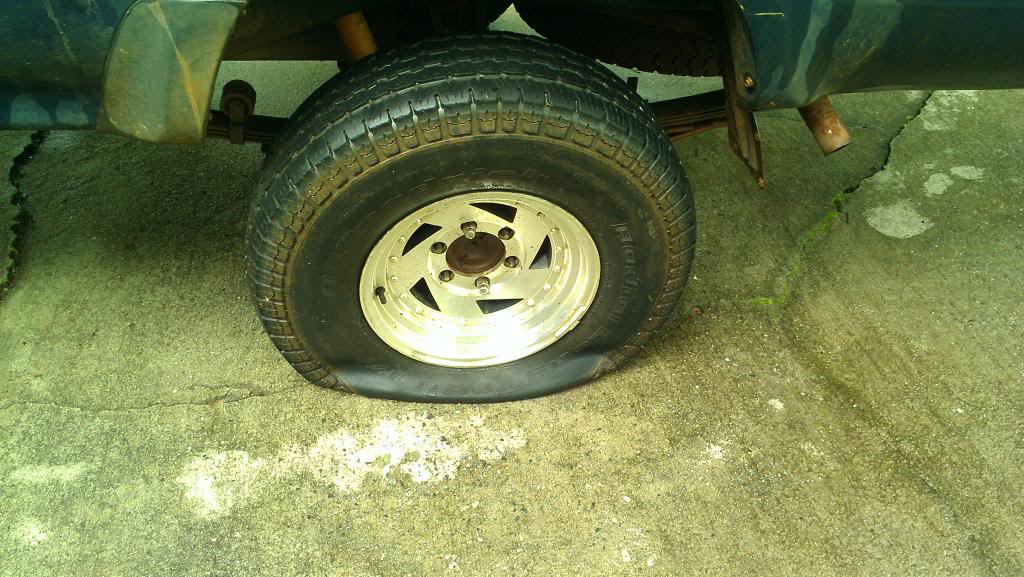
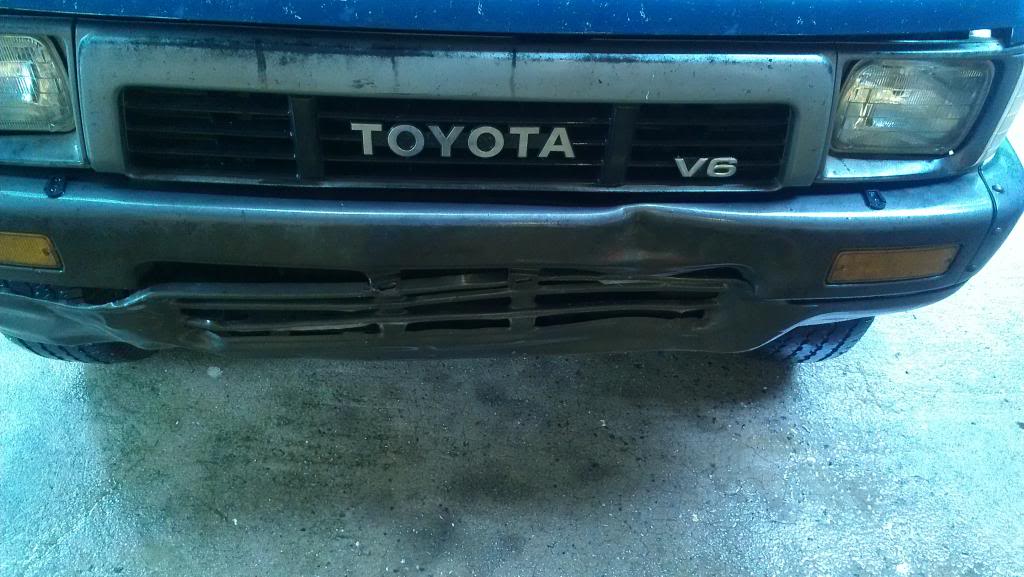
And a few shots of its initial cosmetic problems:

So, I guess I've got a project on my hands! First step for me is gonna be to get it cleaned up (I just can't deal with a vehicle being dirty for no reason!) Then I will see if it turns over manually. If yes, then I will replace the wire harness. If no, then I will get ready to rebuild the motor. I promise to take as many pictures as I can and post here as it goes on. But at least for now, my excitement level is high and I can't wait to get this thing done!
-Christopher D. Burch
First a little background. My adventure actually begins with a little '86 Honda rebel I acquired a few years ago. It was purple, covered in rust, had giant holes in the exhaust, and the carb was so gunked up it would only run with the choke on. Well, this spring I finally got off my rear and fixed it up real nice.


I wanted to sell it for cash and get a Ford Ranger, thinking that was my only affordable option for a pickup. I knew there was no way I could afford a nice Yota. But then I got a message... 1989 Toyota 4x4 pickup, doesn't run, but willing to trade for the Rebel if I was interested in it! I was definitely interested.


So, we arrange the trade and I get a buddy's diesel Power Wagon to go pick it up...

...And this is where things get a little exciting.The previous owner had the truck on a relative's property. In the interest of being civil, we'll say the relative was not a nice person. He had removed the tool box, the nice aftermarket radio, most of the lug nuts, the battery, and had filled the truck (both the bed and the interior) with as much trash as he could find on his property. Really not a nice person. In fact, just to make sure there was no trouble, we were escorted to pick the truck up by a sheriff. I don't even know why he went to such great lengths to do all this - there was a giant rat that had made a nest under the hood and had pooped everywhere and chewed on nearly every wire anyway!
Here's a few of the truck (with most of the trash removed)...


And some shots of what the damn rat did under the hood:


And a few shots of its initial cosmetic problems:


So, I guess I've got a project on my hands! First step for me is gonna be to get it cleaned up (I just can't deal with a vehicle being dirty for no reason!) Then I will see if it turns over manually. If yes, then I will replace the wire harness. If no, then I will get ready to rebuild the motor. I promise to take as many pictures as I can and post here as it goes on. But at least for now, my excitement level is high and I can't wait to get this thing done!
-Christopher D. Burch
May 19, 2013 | 09:51 PM
#2
Registered User
Joined: Jan 2011
Posts: 1,051
Likes: 0
From: Memphis, TN
I am excited for this one! But I got to ask, how did you like your Rebel? Was it a 250, and if so, was it a decent rider for how you used it? I'm seriously contemplating picking one up and can't decide between scouring for an old 450 or just picking up a used, newer 250, mostly based on power concerns with the 250.
Anyways.. Welcome to Yotatech!
Anyways.. Welcome to Yotatech!
May 20, 2013 | 04:50 AM
#3


Very nice find on the truck. I did the same thing. I traded a bike I had put together for the 4runner that I currently have now.
Thats crazy you guys had to get escorted there my the sheriff. Some people are such A-Holes!! And why trash the vehicle!!!! And you should have killed that damn rat and ate if for what he did to the poor truck.
I cant wait to see what you are going to do with it. Theres definitely a solid base to work from.
May 20, 2013 | 02:28 PM
#4
Thread Starter
Registered User
Joined: May 2013
Posts: 31
Likes: 0
From: I live in Georgia, USA
Mr Duke,
The Rebel was a 250. It was a decent rider but don't expect to fly down the interstate on it. As long as you don't have plans to go any faster than 75mph it is just fine. In fact, it is downright peppy and tossable below 55mph. It also isn't great for people over 5'8" (I'm 6') if you plan on going for an extended ride. It is a bit of a cramped cockpit for larger riders.
Even with the above stated problems, I prefer the little Rebel to my buddy's 1100cc Honda Shadow. Sure, the Shadow could do 100+ mph but it is a dog in the corners and isn't any faster to 50mph.
-Chris
May 20, 2013 | 03:19 PM
#5
Registered User
Joined: Jan 2011
Posts: 1,051
Likes: 0
From: Memphis, TN
Mr Duke,
The Rebel was a 250. It was a decent rider but don't expect to fly down the interstate on it. As long as you don't have plans to go any faster than 75mph it is just fine. In fact, it is downright peppy and tossable below 55mph. It also isn't great for people over 5'8" (I'm 6') if you plan on going for an extended ride. It is a bit of a cramped cockpit for larger riders.
Even with the above stated problems, I prefer the little Rebel to my buddy's 1100cc Honda Shadow. Sure, the Shadow could do 100+ mph but it is a dog in the corners and isn't any faster to 50mph.
-Chris
The Rebel was a 250. It was a decent rider but don't expect to fly down the interstate on it. As long as you don't have plans to go any faster than 75mph it is just fine. In fact, it is downright peppy and tossable below 55mph. It also isn't great for people over 5'8" (I'm 6') if you plan on going for an extended ride. It is a bit of a cramped cockpit for larger riders.
Even with the above stated problems, I prefer the little Rebel to my buddy's 1100cc Honda Shadow. Sure, the Shadow could do 100+ mph but it is a dog in the corners and isn't any faster to 50mph.
-Chris
And be sure to update this thread every day! Everybody loves seeing the transformation of an old truck
May 20, 2013 | 07:58 PM
#6
Registered User
Joined: Dec 2008
Posts: 2,391
Likes: 1
From: tecumseh nebraska
Trading that rebel for that truck was a great move.X2 on calling the sheriff. what a tool for taking the battery out and seats and such, my runner was also molested by some thug life mice that like to munch on wiring.DAMN THEM. But its fixable. invest in a soldering iron and start splicing. Whens the last time it ran??
Welcome
Welcome
May 20, 2013 | 08:02 PM
#7
Thread Starter
Registered User
Joined: May 2013
Posts: 31
Likes: 0
From: I live in Georgia, USA
Well, I guess I better post an update then!
@kornhuskerwizard - he didn't remove the seats, he just covered them in trash. No problem. I'm sure he spent more time filling the truck with trash than it took me to empty it. Joke's on him. I think the one thing that might suck the most is not having the spare tire lowering rod - those look expensive on ebay. Luckily a neighbor had a friend with another Yota over so I could borrow theirs. Not sure about the last time it ran. Maybe a couple of months ago? Supposedly it was going down the road and seized up, so I will be looking into that. I'm hoping that maybe it was just the snapped alternator belt or maybe the rat was actually living under there and chewing on stuff before they parked it. I don't know. I'm gonna pull the spark plugs and see if I can turn it over manually.
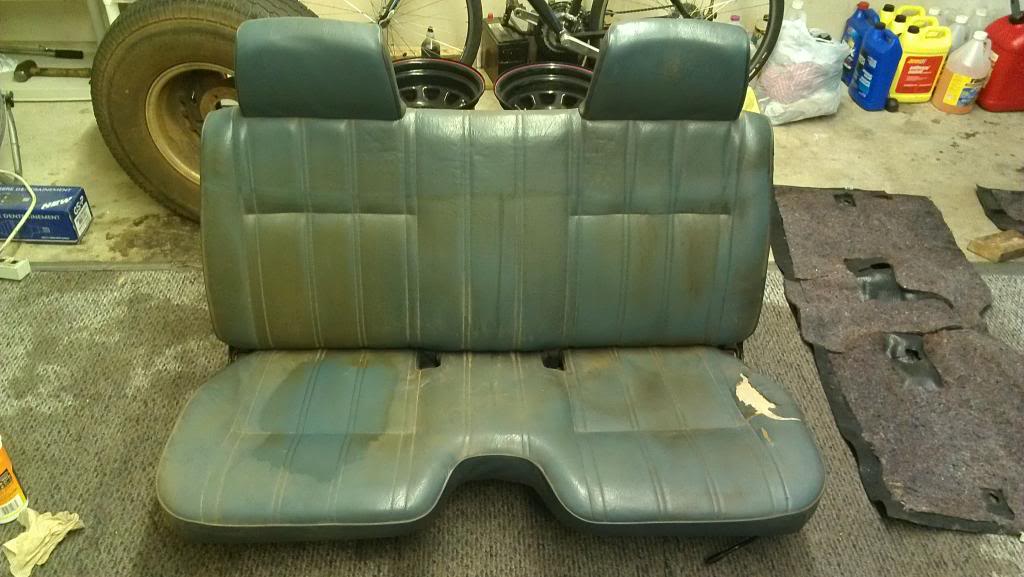
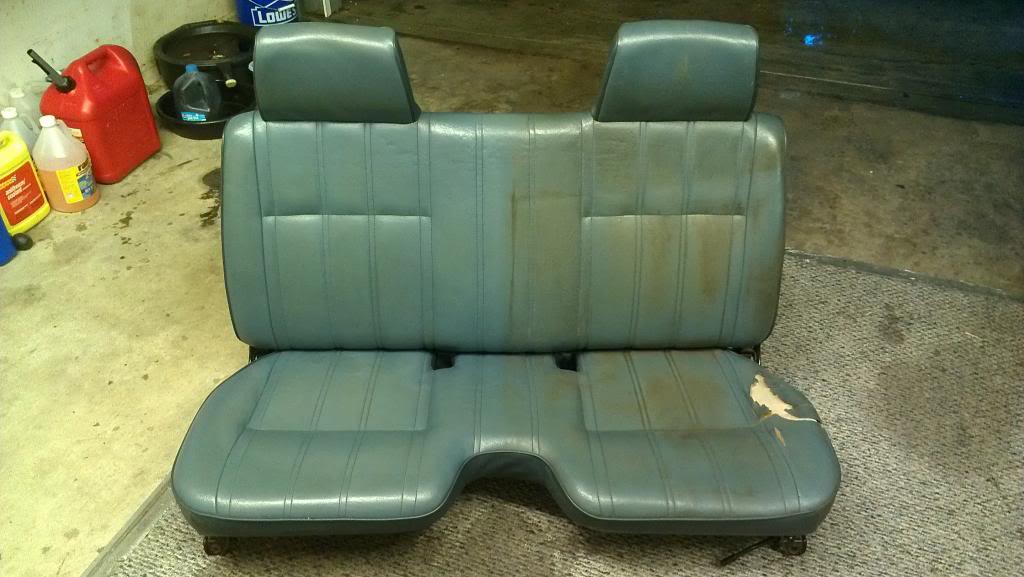
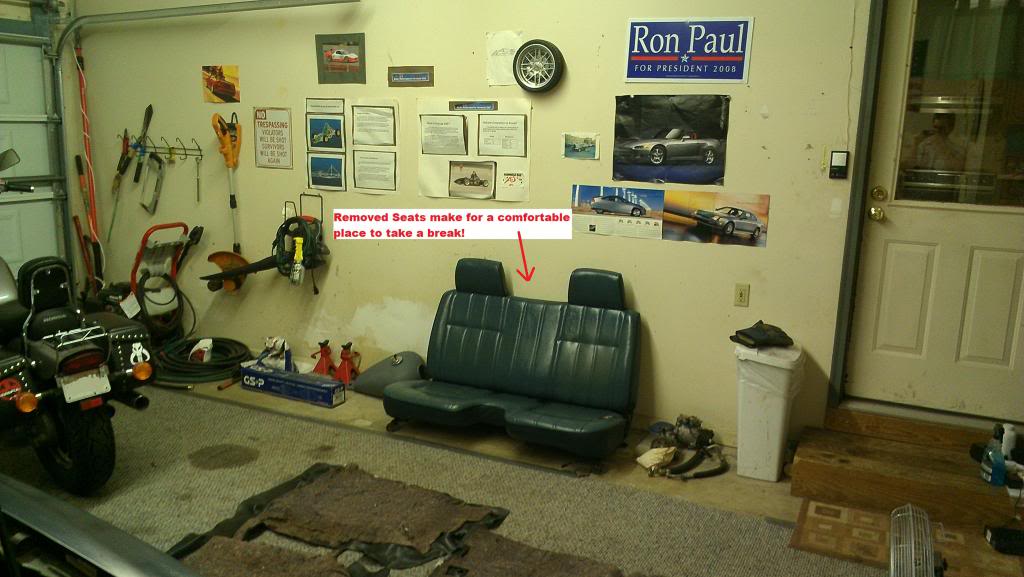
First things first though: I hate a dirty vehicle. Yes, I know it doesn't make it run to clean it, but I know that friends and family will see the potential I see if it is clean. Plus it makes me feel better about it too. =) So, I cleaned the exteriorand then I completely pulled out the interior to clean it. It had lots of Georgia clay & sand to be removed. Also, the seats were thankfully in pretty good shape. Especially so since they had been covered up by not one, but TWO seat covers! I didn't know what I might find under there. A little Armor-all and we're looking good enough. Plus they're gonna make a for a great place to rest and have a beer while I'm fixing the motor.

After cleaning out the inside really good, cleaning the seats up, and removing what I hope to be most of the rat poop from the engine bay I decided I better clean up the garage and make some space. Of course, there's always time for a photo op...
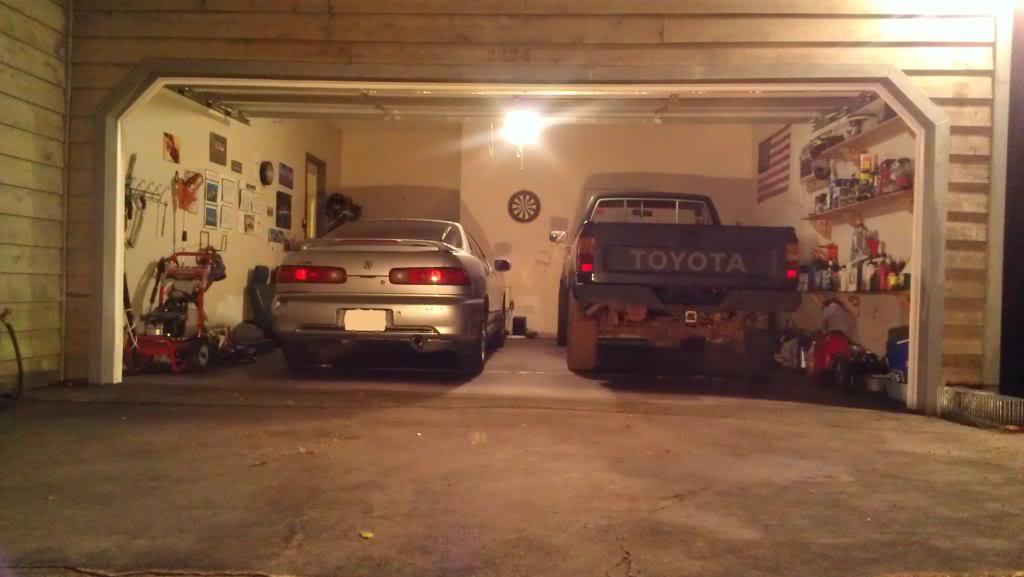
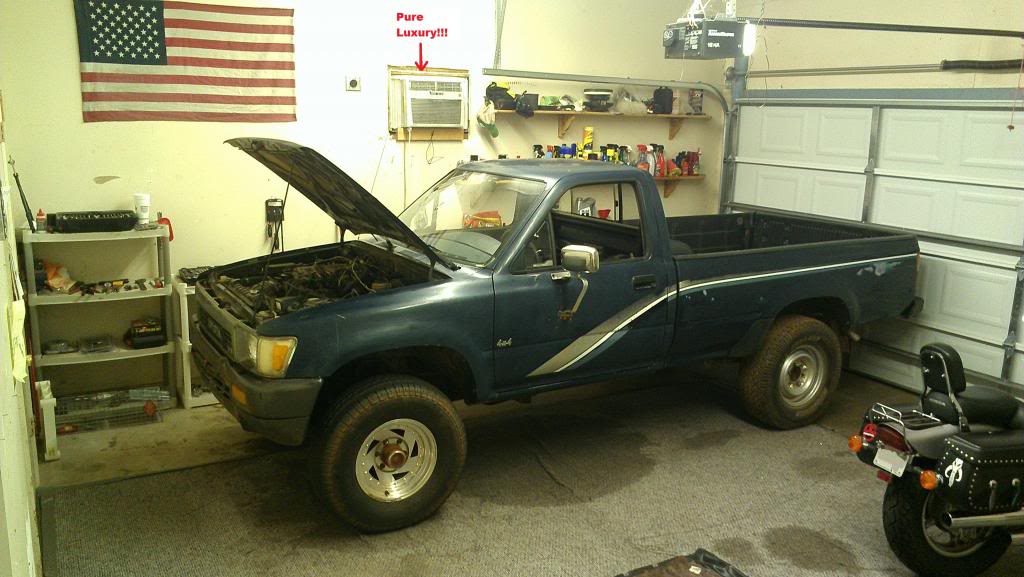
Astute viewers will notice the little box above the truck that feeds conditioned, frigid air into the garage - a very nice thing when working in your garage during the GA summer. If you're really good, you can find me in the last picture. =)
Tomorrow I plan to roll it back outside and give the engine bay one last thorough cleaning since I really hate rat poop. Then the real work can begin on Wednesday.
Goodnight!
-Chris
@kornhuskerwizard - he didn't remove the seats, he just covered them in trash. No problem. I'm sure he spent more time filling the truck with trash than it took me to empty it. Joke's on him. I think the one thing that might suck the most is not having the spare tire lowering rod - those look expensive on ebay. Luckily a neighbor had a friend with another Yota over so I could borrow theirs. Not sure about the last time it ran. Maybe a couple of months ago? Supposedly it was going down the road and seized up, so I will be looking into that. I'm hoping that maybe it was just the snapped alternator belt or maybe the rat was actually living under there and chewing on stuff before they parked it. I don't know. I'm gonna pull the spark plugs and see if I can turn it over manually.
First things first though: I hate a dirty vehicle. Yes, I know it doesn't make it run to clean it, but I know that friends and family will see the potential I see if it is clean. Plus it makes me feel better about it too. =) So, I cleaned the exteriorand then I completely pulled out the interior to clean it. It had lots of Georgia clay & sand to be removed. Also, the seats were thankfully in pretty good shape. Especially so since they had been covered up by not one, but TWO seat covers! I didn't know what I might find under there. A little Armor-all and we're looking good enough. Plus they're gonna make a for a great place to rest and have a beer while I'm fixing the motor.


After cleaning out the inside really good, cleaning the seats up, and removing what I hope to be most of the rat poop from the engine bay I decided I better clean up the garage and make some space. Of course, there's always time for a photo op...


Astute viewers will notice the little box above the truck that feeds conditioned, frigid air into the garage - a very nice thing when working in your garage during the GA summer. If you're really good, you can find me in the last picture. =)
Tomorrow I plan to roll it back outside and give the engine bay one last thorough cleaning since I really hate rat poop. Then the real work can begin on Wednesday.
Goodnight!
-Chris
Last edited by Christopher D Burch; May 20, 2013 at 08:11 PM.
Trending Topics
May 22, 2013 | 08:32 AM
#8
Thread Starter
Registered User
Joined: May 2013
Posts: 31
Likes: 0
From: I live in Georgia, USA
No pictures for today's update, despite that fact that I took several. They were mainly just to help me remember what I was disconnecting so I can put it back together again!
After a final clean of the engine bay I pushed it into the garage and began work. Took off the hood, removed the air box, cut the remaining spark plug wires out (the rat had done most of this work for me already), and checked the spark plugs. It appears that the previous owners had used multiple different spark plugs and wires - a sign of poor maintenance practices. I generally replace them as a set and I recommend that anyone else does so too.
There is a little build up on three of the six plugs - two from the passenger side and one from the driver side. Additionally, the #1 plug was very difficult to remove. However, once it was free and I put some WD40 in there it went back in smoothly. I was almost positive that someone had cross-threaded it considering how difficult it was to remove so that was a relief.
Now, on to something I don't really understand but I'm gonna find out. I was able to turn all of the accessories and have all the pulleys move, but I don't think the crankshaft was moving. If everything is working right I wouldn't think you could do this. The main crankshaft bolt was not rotating at the front of the engine. I'm gonna have to crack a book open and do some reading.
-Chris
 May 22, 2013 | 06:56 PM
#10
Thread Starter
Registered User
Joined: May 2013
Posts: 31
Likes: 0
From: I live in Georgia, USA
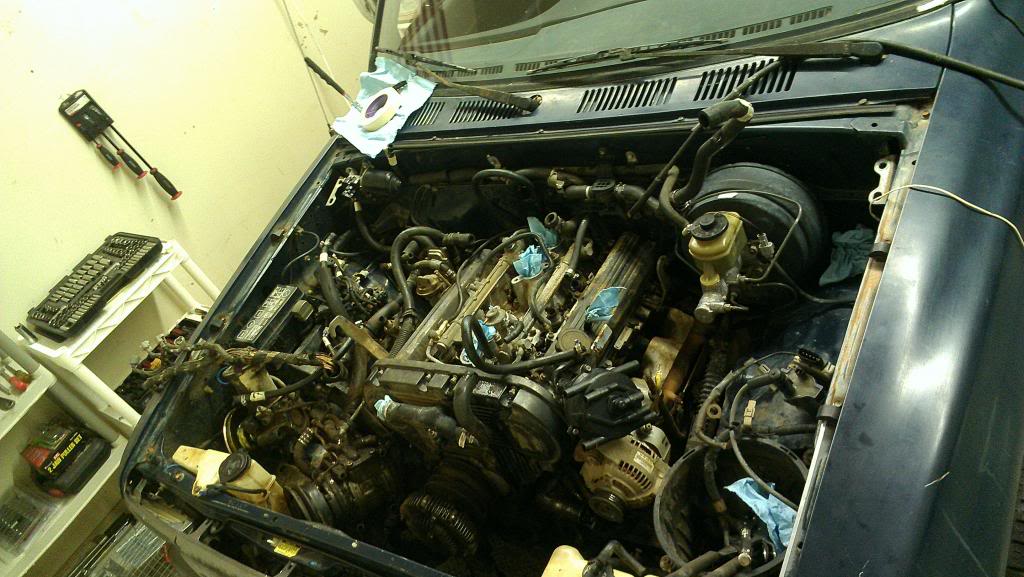
Well we have some good news and some bad news for today's post. First we'll start with the good: Progress has been steady. Today I drained the coolant and removed the radiator fan shroud, the radiator, and the radiator fan. This gave me access to the 19mm bolt for the crankshaft. Also listed under the good news is that I was able to disconnect the power steering pump and move it to the side.
Now for the bad news. There is something seriously wrong with something connected to the crankshaft. When I finally got access to the 19mm bolt I found that it was loose, which explains why I was able to turn the accessories without the motor turning. Unfortunately, after I tightened the bolt I found the engine incredibly hard to turn over - it would go but it was "crunchy". Additionally, the crankshaft was not firmly in place. Instead of just spinning it was definitely not secured in place properly. So there's got to be some screwed up items inside the motor. This situation definitely calls for a complete tear-down and rebuild!
Anyways, a few pics of the progress so far:
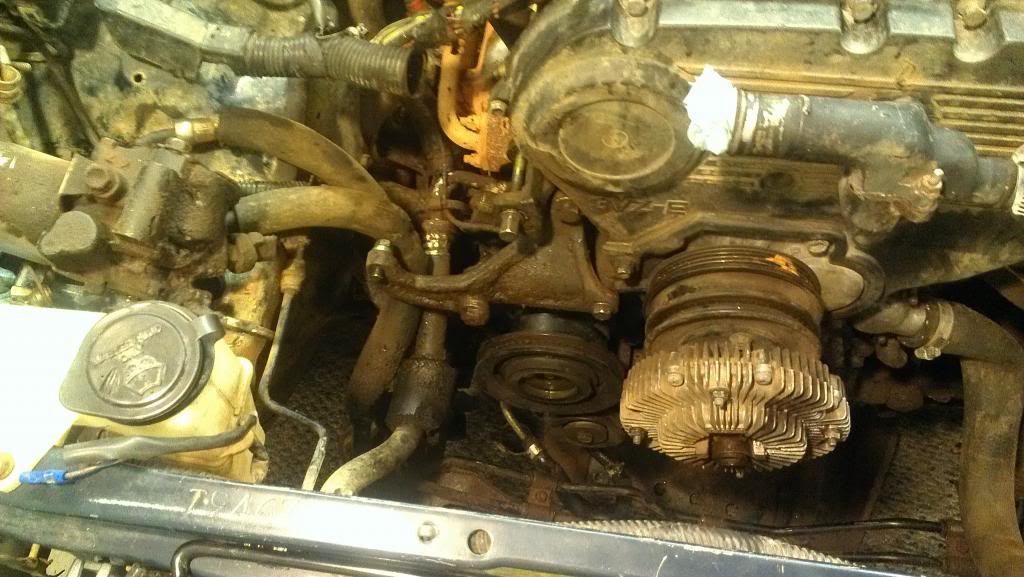
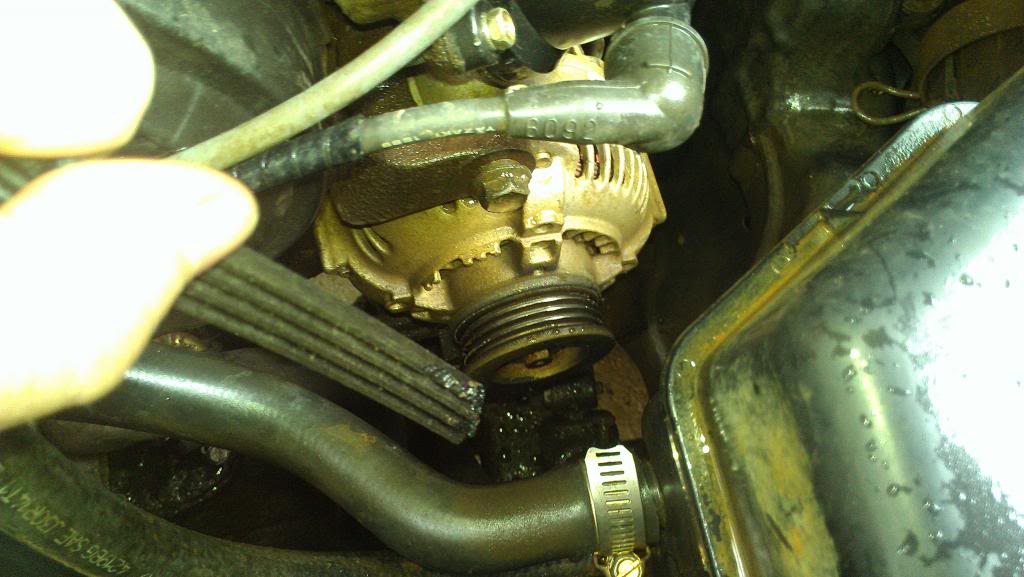
The A/C unit looks to be a PITA to separate from the engine. I guess I'll find out tomorrow:
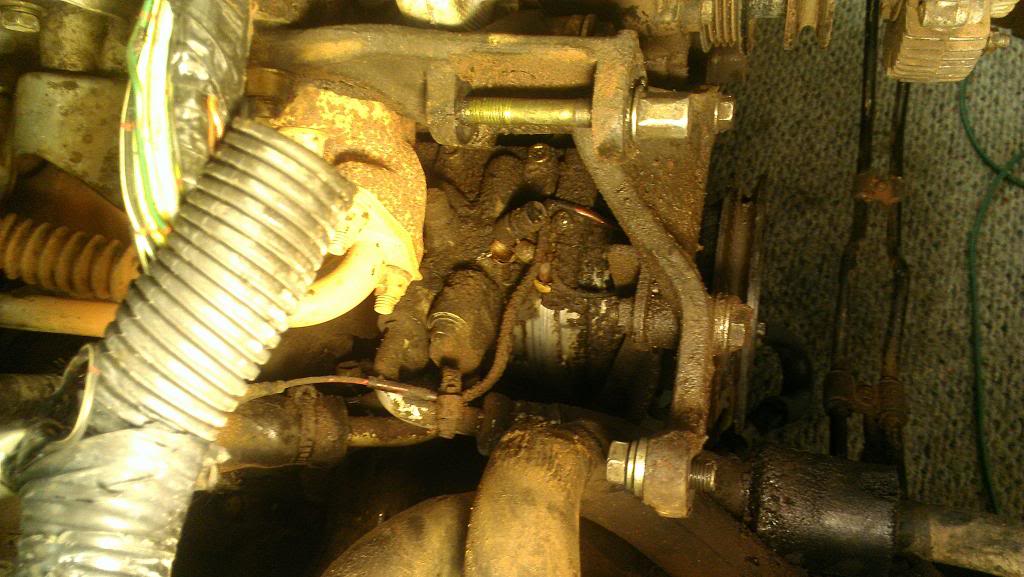
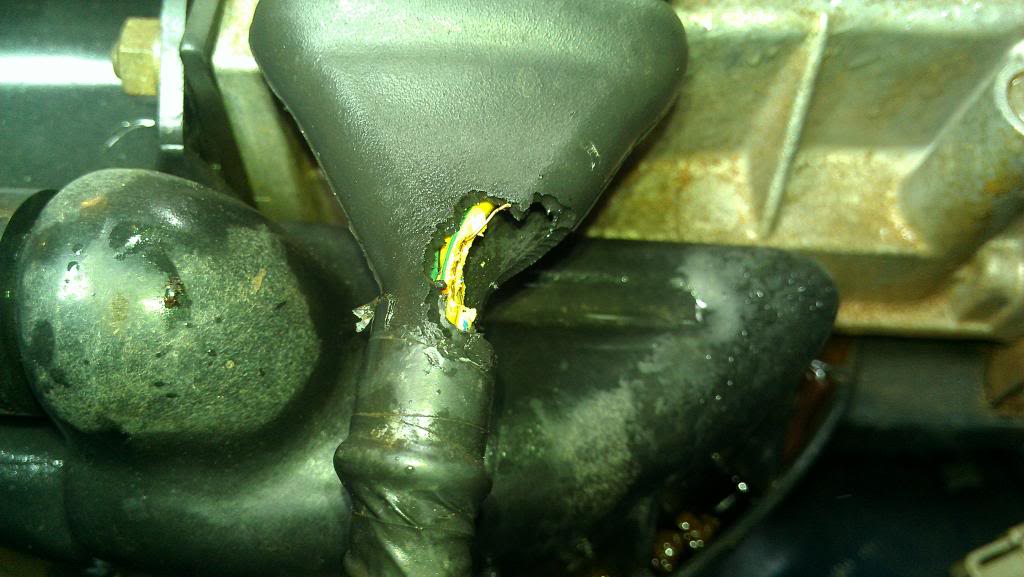
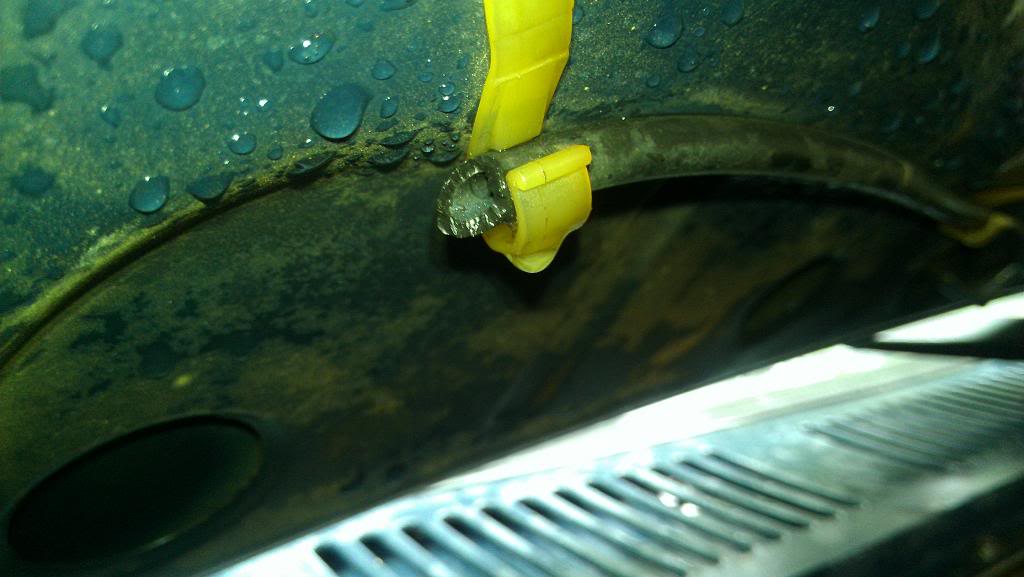
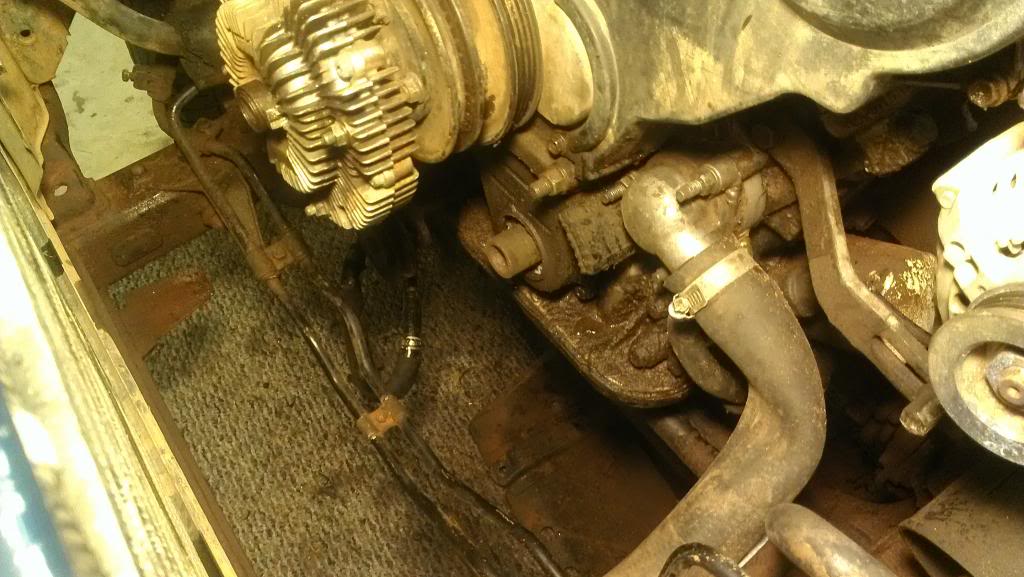
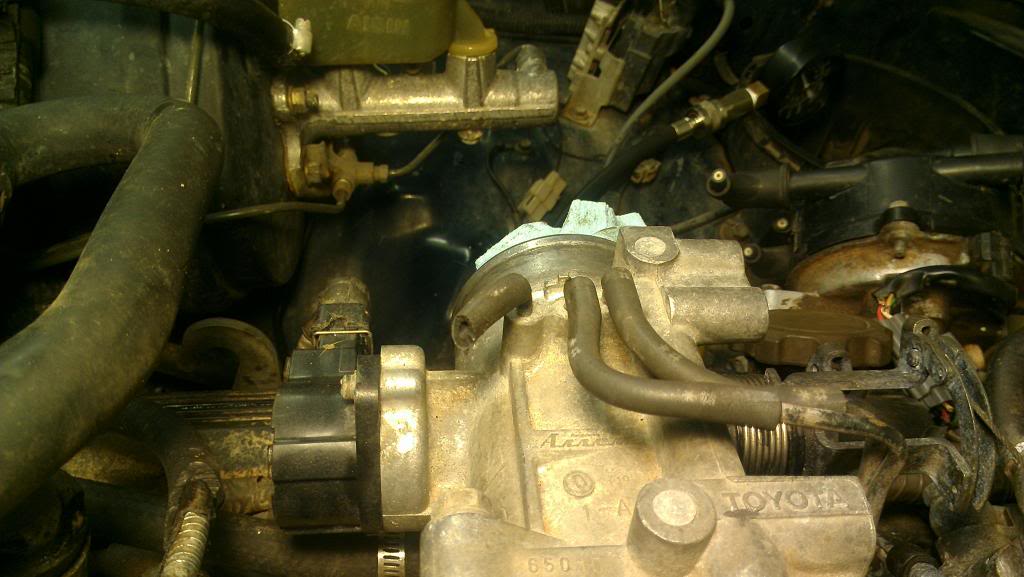
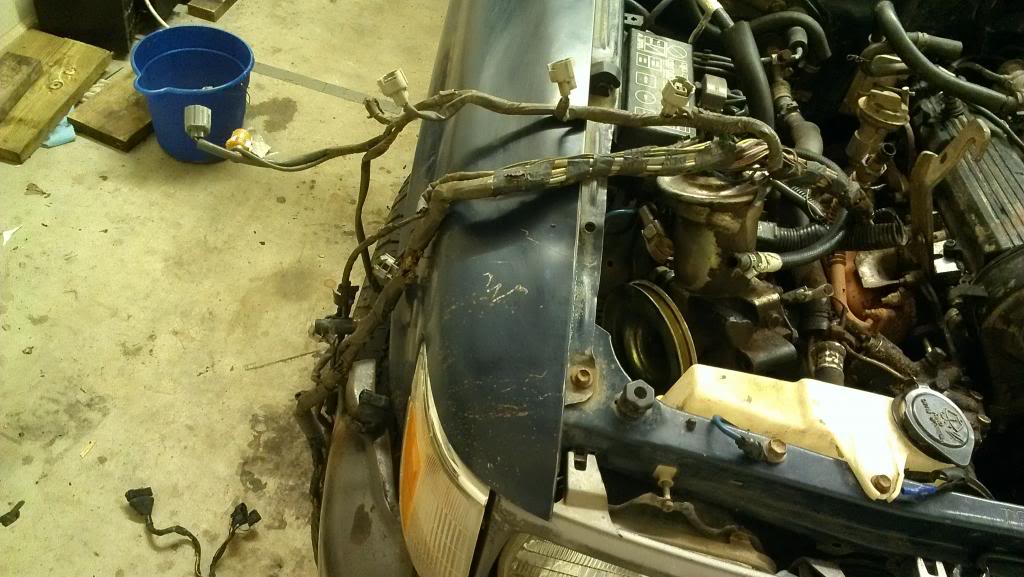
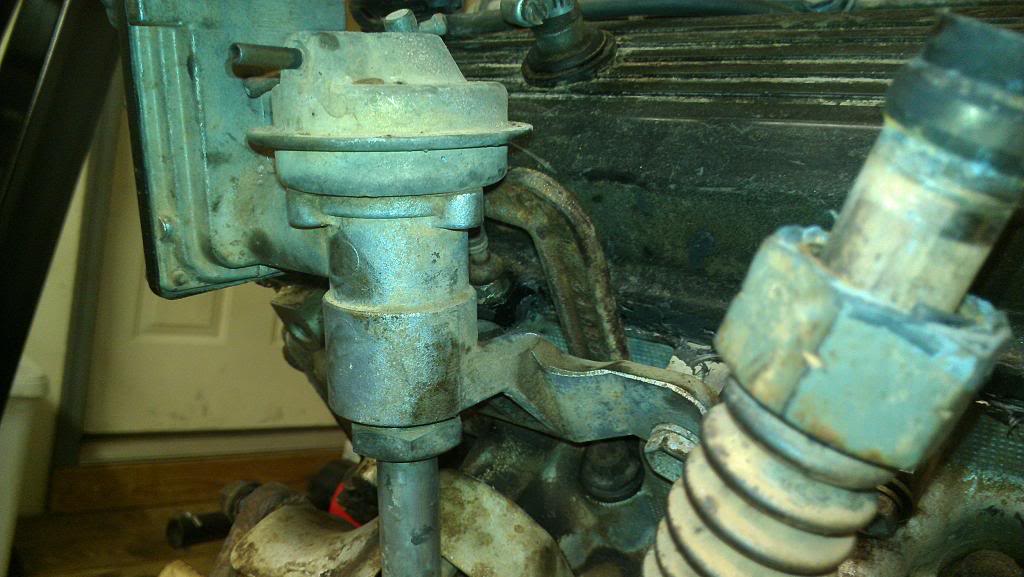
1980's emissions control: What a nightmare of hoses!
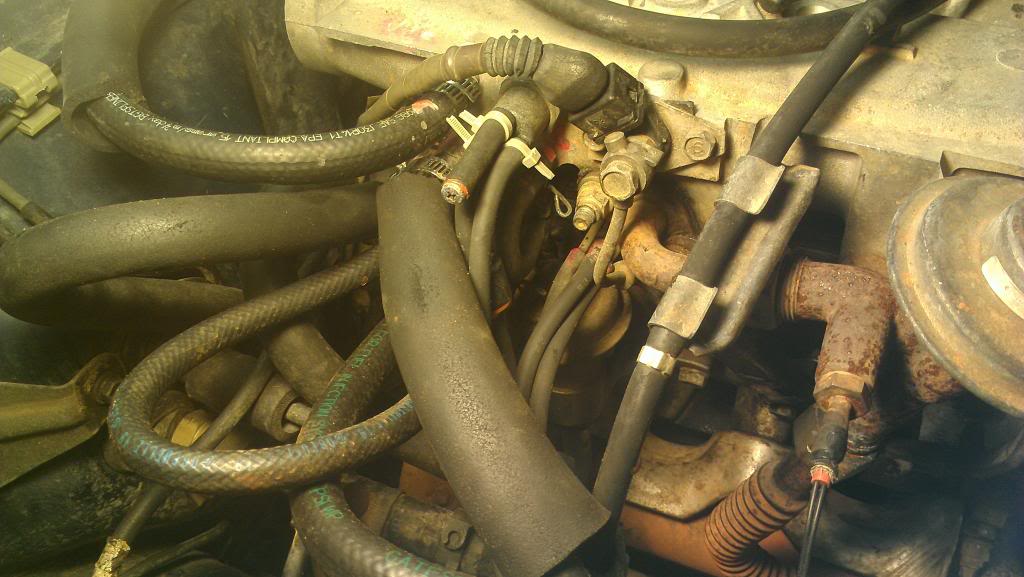
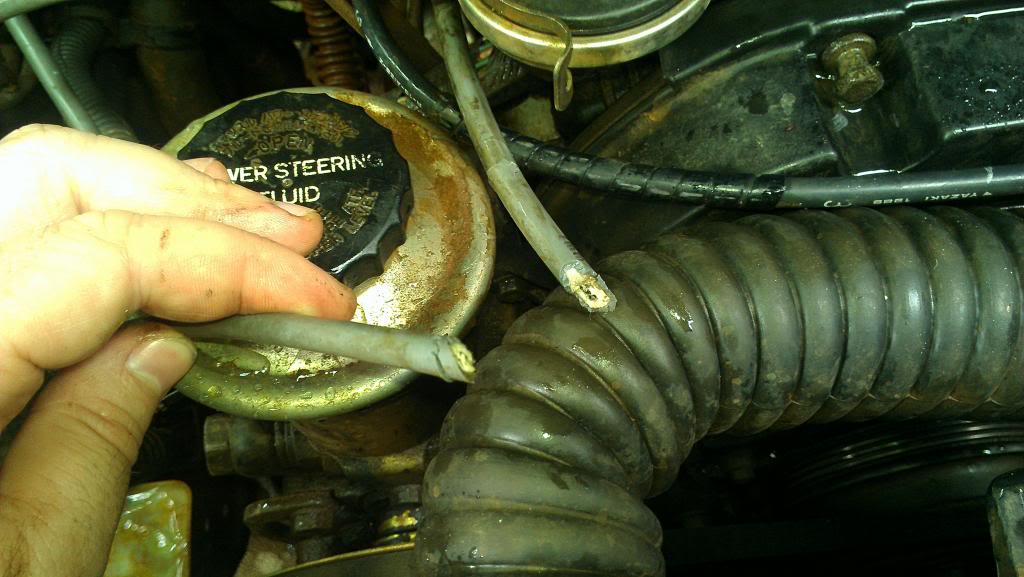
Anyone know where the cut hose goes to? This end sticks in the throttle body but I think the rat ate the rest of it:
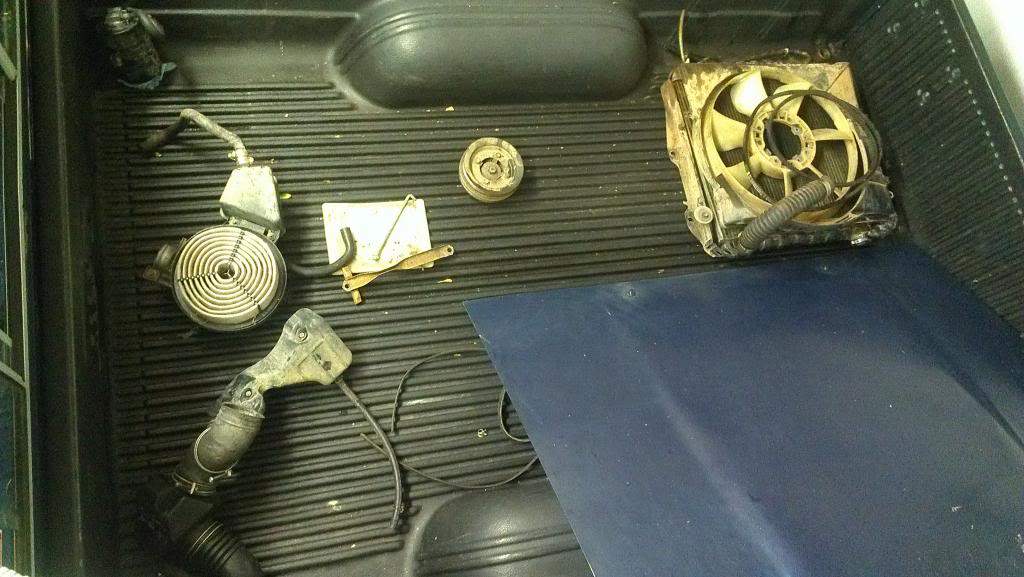
The bed is starting to fill up with components:
A socket extension set with U-joints is the best investment I have ever made, fyi:

Anyways, at this point I'm gonna bite the bullet and get a repair manual so I do the rest of this rebuild properly... I've just been winging it so far
Also, any thoughts on whether I should go ahead and convert it to a 5spd trans after I get the engine out? If there was a time to do it it would be now. I've always like 5spds better but I don't know if there is some off-roading reason I should stick with the auto trans...
-Chris
Now for the bad news. There is something seriously wrong with something connected to the crankshaft. When I finally got access to the 19mm bolt I found that it was loose, which explains why I was able to turn the accessories without the motor turning. Unfortunately, after I tightened the bolt I found the engine incredibly hard to turn over - it would go but it was "crunchy". Additionally, the crankshaft was not firmly in place. Instead of just spinning it was definitely not secured in place properly. So there's got to be some screwed up items inside the motor. This situation definitely calls for a complete tear-down and rebuild!
Anyways, a few pics of the progress so far:


The A/C unit looks to be a PITA to separate from the engine. I guess I'll find out tomorrow:

1980's emissions control: What a nightmare of hoses!

Anyone know where the cut hose goes to? This end sticks in the throttle body but I think the rat ate the rest of it:

The bed is starting to fill up with components:

A socket extension set with U-joints is the best investment I have ever made, fyi:

Anyways, at this point I'm gonna bite the bullet and get a repair manual so I do the rest of this rebuild properly... I've just been winging it so far
Also, any thoughts on whether I should go ahead and convert it to a 5spd trans after I get the engine out? If there was a time to do it it would be now. I've always like 5spds better but I don't know if there is some off-roading reason I should stick with the auto trans...
-Chris
May 23, 2013 | 05:08 AM
#13
Glad to see that you are making progress. Its stinks that there are obviously some internal issues. But nows the time to get to know the engine a little bit better. The 3.0 isnt that difficult to work on if you take your time. And pulling it can be done in a few hours if your working steady.
Last year I had a few students help me do an engine swap on a 92 4runner with the 3.0. And the biggest pain in the A$$ was taking the time to label all the vacuum lines and hard lines going to the engine.
If you have the time, I would tear the block down and see whats going on. Maybe rebuild it or get another 3.0 to swap in. Some people would rather swap in a 3.4L but I never had the funds for something like that. Plus by digging into the engine, it will give you a better understanding of how it works. Which will ultimately help you tremendously later on. Especially when you are driving it and something goes wrong.
Keep up the good work.
Oh yeah and I like the Custom wall air unit and yota love seat.
May 24, 2013 | 10:42 AM
#14
Thread Starter
Registered User
Joined: May 2013
Posts: 31
Likes: 0
From: I live in Georgia, USA
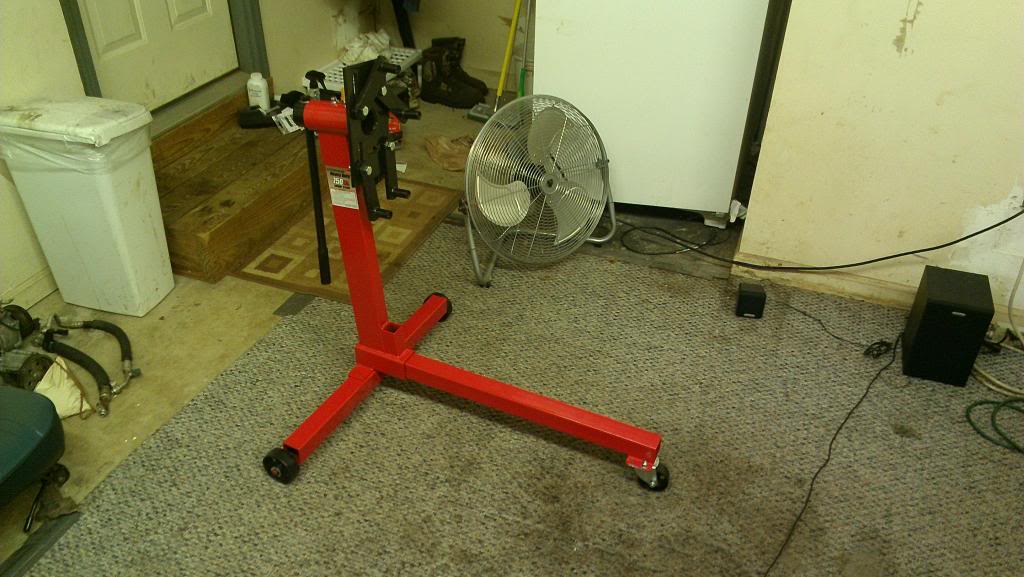
Quick update: Yesterday I bought an engine stand and a sweet aluminum jack from Harbor Freight. While I was there I decided to purchase a come-along winch - I figure I'm gonna need one when I get her fixed and take her into the woods for playtime.
More progress on the engine removal. Labeled and removed all the vacuum hoses from the engine, removed the throttle body, removed the intake plenum, removed the A/C unit (well, unbolted it from the engine and moved it to the side), disconnected a few more hoses, and disconnected the wire harness from everything.
Tonight I plan on disconnecting the exhaust from the cat and from the header pipes. Also, I am wondering if the starter motor comes out with the engine. I figure it does but it looks like a PITA to the leads disconnected from it. Can this be done after hoisting the engine up a bit? Saturday the motor should be coming out.
Anyways, a couple of pics... I will post all of my vacuum hose pics later.


 May 24, 2013 | 08:15 PM
#15
Thread Starter
Registered User
Joined: May 2013
Posts: 31
Likes: 0
From: I live in Georgia, USA
Today's update:
Finally managed to get to the starter motor wires and get them disconnected. Removed the exhaust between the cat and the header. Removed the alternator. Disconnected the trans fluid level tube. Had lots of rat poop and acorns fall on me, which is gross. Luckily I bought and was wearing some sweet nitrile gloves and I had a filter mask on.
I can't wait to get this engine out and eliminate the rest of the remainders from the rat. I'm gonna have to look around and find out exactly how to unbolt the trans from the engine, but if all goes to plan the engine comes out tomorrow.
I've been looking around a bit and I think that I want to put some sweet headers on when I'm done rebuilding the engine. I think I'm gonna keep this truck for a long time so I might as well make it something nice, right? On that note, since I like 5spds I should probably go ahead and make that switch too.
Anyway, I also picked this up today:
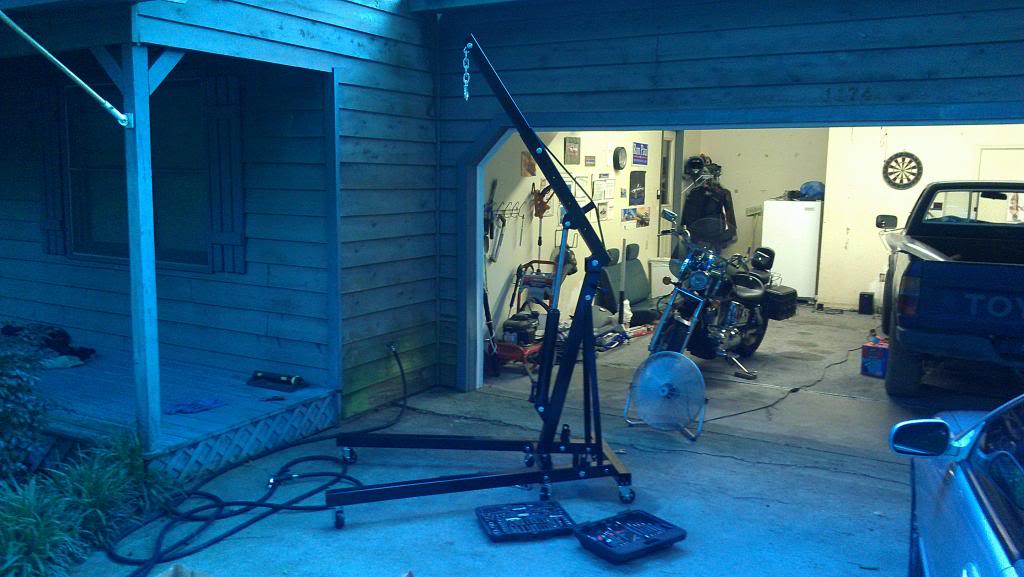
I hope it will lift it up high enough without removing the front tires and lowering the truck away from the engine but the truck has 31" tires on, so that could be a challenge.
-Chris
May 25, 2013 | 08:14 PM
#16
Thread Starter
Registered User
Joined: May 2013
Posts: 31
Likes: 0
From: I live in Georgia, USA
Well, we made some progress but wound up with some bad news.
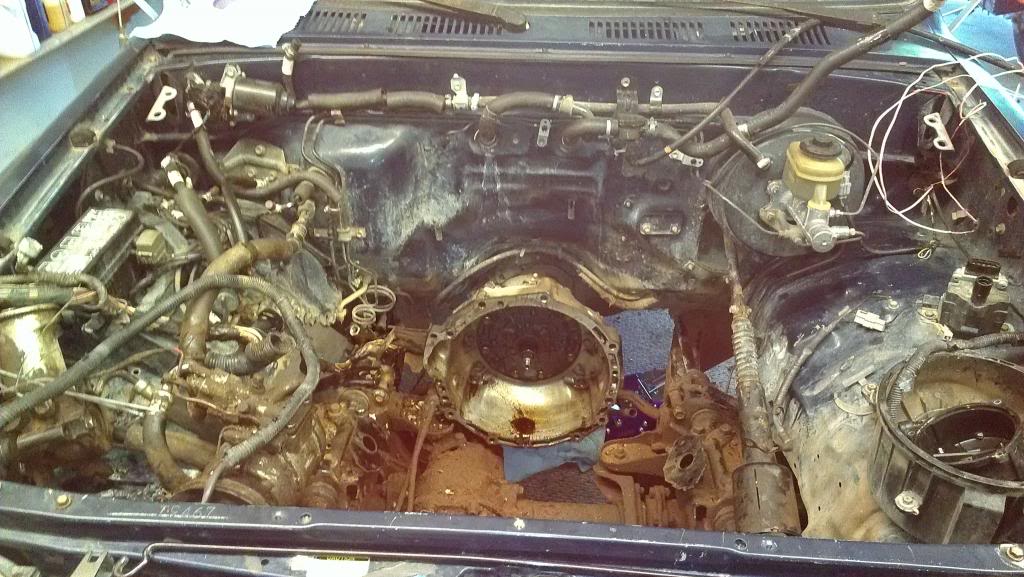
First off, pulling the engine was a success! Also, unrelated, there was a yellow jacket hive in the walls of my house and they are all dead now.
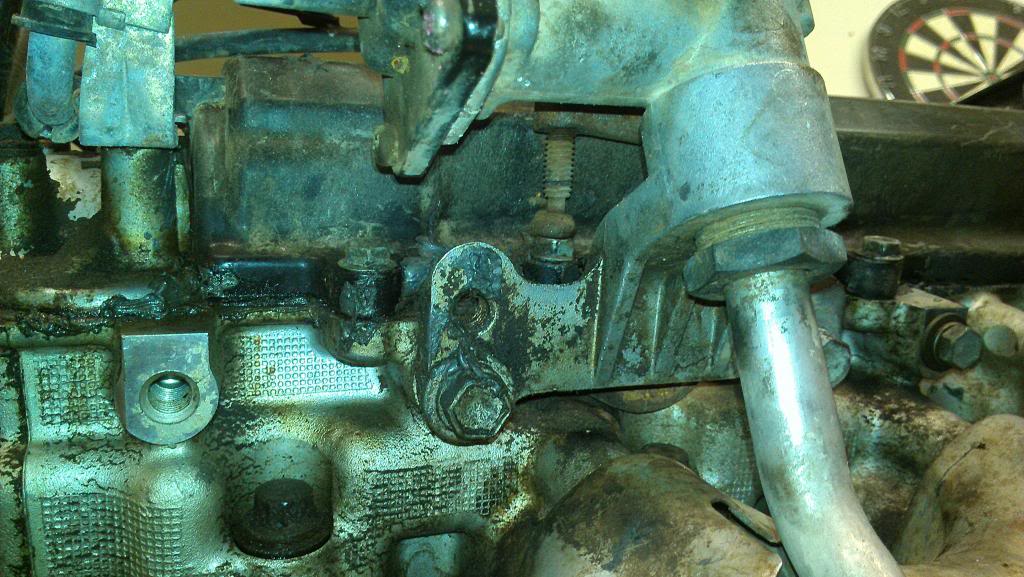
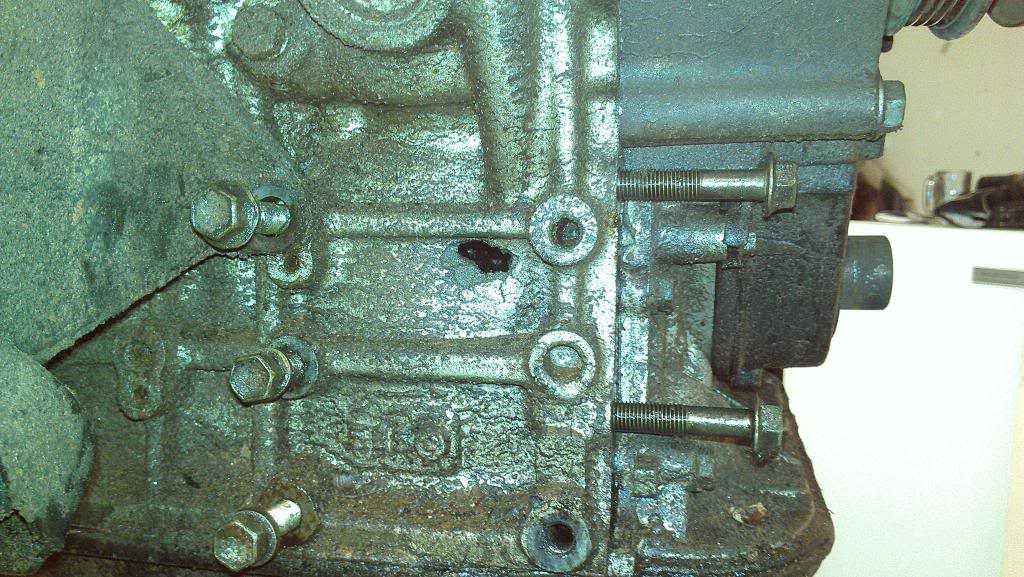
Back on topic - bad news. My motor has a 1.5" X .375" hole in the block at the #1 piston. So this motor is probably done for. Additionally, I found that the PO had one of the bolts for the passenger side valve covers being held in place by a C-clamp. You've got to be kidding me. I'm not surprised that this engine died.
So, good news is I now have a real need for a new motor instead of a rebuilt one. I'm thinking 5vzfe. Ebay looks like a good place to get one, stop me if I'm wrong. Where is the best place here to read about how to put it in? I've tried looking but maybe I'm not searching for the right terms.
Anyways, pics of the latest:
A C-clamp should not be holding your engine together!

The hat keeps the rat poop out of my hair:

Hmmmm, what will I put back in here...
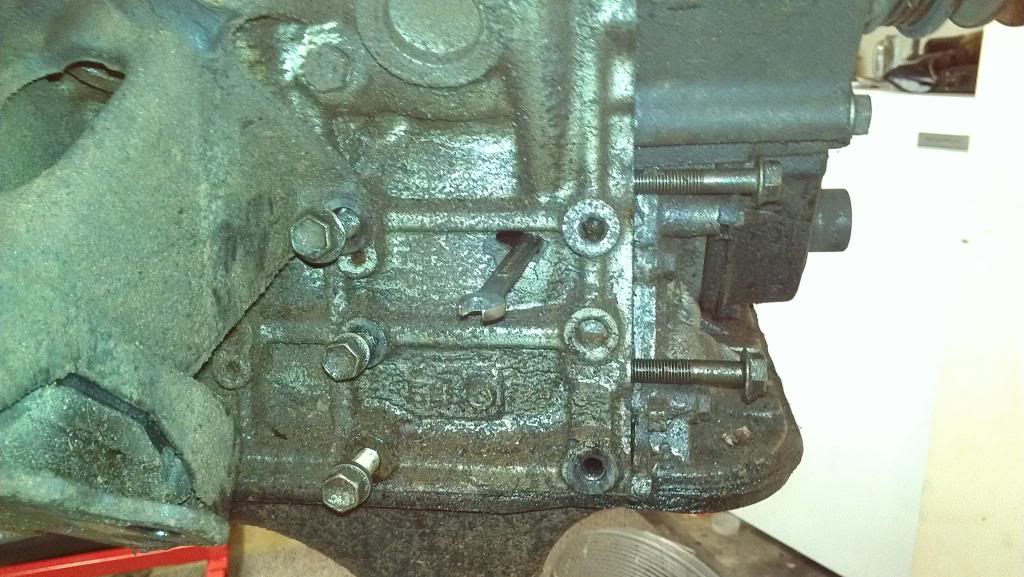
Yep, there's your problem:
Time to find a replacement heart.
-Chris
First off, pulling the engine was a success! Also, unrelated, there was a yellow jacket hive in the walls of my house and they are all dead now.
Back on topic - bad news. My motor has a 1.5" X .375" hole in the block at the #1 piston. So this motor is probably done for. Additionally, I found that the PO had one of the bolts for the passenger side valve covers being held in place by a C-clamp. You've got to be kidding me. I'm not surprised that this engine died.
So, good news is I now have a real need for a new motor instead of a rebuilt one. I'm thinking 5vzfe. Ebay looks like a good place to get one, stop me if I'm wrong. Where is the best place here to read about how to put it in? I've tried looking but maybe I'm not searching for the right terms.
Anyways, pics of the latest:
A C-clamp should not be holding your engine together!


The hat keeps the rat poop out of my hair:

Hmmmm, what will I put back in here...

Yep, there's your problem:


Time to find a replacement heart.
-Chris
Last edited by Christopher D Burch; May 25, 2013 at 08:15 PM.
May 25, 2013 | 08:54 PM
#17
Man sorry to hear about the hole in the block. But at least you aren't afraid to dive in and possibly do a 3.4 swap. There are alot of great write ups on the forum if you search.
Here's a link to the 3.4 swap page
https://www.yotatech.com/forums/f160/
Here's a link to the 3.4 swap page
https://www.yotatech.com/forums/f160/
May 26, 2013 | 07:35 PM
#18
Thread Starter
Registered User
Joined: May 2013
Posts: 31
Likes: 0
From: I live in Georgia, USA
I am on a tight budget here. My goal all along has been to have a cheap reliable truck (see the original post where I considered a humble Ford Ranger). I think my eyes were getting bigger than my wallet when I started looking at 5vz replacements... then I started looking up supercharging and water injection and 7th injectors and lift kits. I had a little chat with myself last night, seeing as I'm not married and the dog doesn't care what I'm saying, and had to remind myself that a goal this year is to reduce my debt load significantly.
With that said, I'm really going to have to evaluate my options. The hole appears to be below the cylinder in the crank area of the block. I'm going to have to tear the motor right down and take a closer look. I may even have to sleeve a few cylinders. I don't love my options but I'm not afraid of doing a little bit of block repair if it saves me $$$.
-Chris
Last edited by Christopher D Burch; May 26, 2013 at 07:42 PM.
May 26, 2013 | 08:48 PM
#19
There's alot of options to be had for fixing holes in blocks. I hear you with staying on a tight budget. I myself am taking the same route with my rig. Doing a little here and there
May 26, 2013 | 09:08 PM
#20
Thread Starter
Registered User
Joined: May 2013
Posts: 31
Likes: 0
From: I live in Georgia, USA
Well, I've finally decided on a course of action. I'm purchasing a re-manufactured long block from http://www.unitedengine.com/. What sold me on them was that they included the water pump, oil pump, and timing belt attached for about the same total price (after core and shipping) as the guys selling long blocks without those items. They even say they're going to send the gaskets I need to finish the assembly (valve cover gaskets and such). Fingers crossed that this turns out to be the real deal and I can get the motor over the next couple of weeks.
After that I will have to figure out what to do with my block... Coffee table base? Recycle for cash?
-Chris
After that I will have to figure out what to do with my block... Coffee table base? Recycle for cash?
-Chris


