
BlazeN8's 1986 4Runner Build-Up Thread
 Jun 3, 2013 | 09:18 AM
#261
Thread Starter
Registered User
Joined: Jun 2009
Posts: 977
Likes: 4
From: Southern California
I just weighed it with my bathroom scale. It came in at 85 lbs. I also sent ARB's tech department an e-mail about the application sticker confusion. I'll post their reply when I receive it.
Jun 5, 2013 | 09:50 AM
#262
Thread Starter
Registered User
Joined: Jun 2009
Posts: 977
Likes: 4
From: Southern California
ARB got back to me yesterday with some information on the fitment. Basically for 1986-1989 the upper OE Bumper tabs on the frame a the cross member need to be cut off. This makes reverting back to the stock bumper difficult as one would need to weld them back on. Secondly, ARB mentions that the second set of attachment brackes are not used. They explain that in most cases this has not compromised strength even for winching, but if one has the ability to construct additional attachment points even better.
As for the bumper protruding past the fender into the wheel well that is just a result of this bumper being a universal fit. Like Toyo and another guy I know (Cody) the end cap can be cut and reconfigured to fit better and add tire clearance.
In my situation I am not sure if I am wanting to go through the above steps. I am not wanting the weight either. I may keep this for a while as a future project? I may sell it to someone with a 1989 or newer rig?
Jun 5, 2013 | 03:50 PM
#264
Thread Starter
Registered User
Joined: Jun 2009
Posts: 977
Likes: 4
From: Southern California
Will do Toyo! I'm just not sure I am wanting this style of bumper and to cut off the brackets just to do a test fit seems like a bad plan. Seems like notching the bumper would work better. I also have a 1" body lift so it will sit low. Anyway, I have some other ideas in mind on building my own design out of 2x4 .120 rectangular tube to match the rear bumper. Rock sliders too. I'll probably just sit on the ARB bumper for a while till I decide what I want to do.
Jun 6, 2013 | 08:07 PM
#266
Thread Starter
Registered User
Joined: Jun 2009
Posts: 977
Likes: 4
From: Southern California
Well I had a few hours to spare today so I messed around with the ARB bumper. I figured rather than sit on it and take up room in my garage I should either sell it or use it. I decided I am going to keep it.
Here are a few photos of how it turned out.
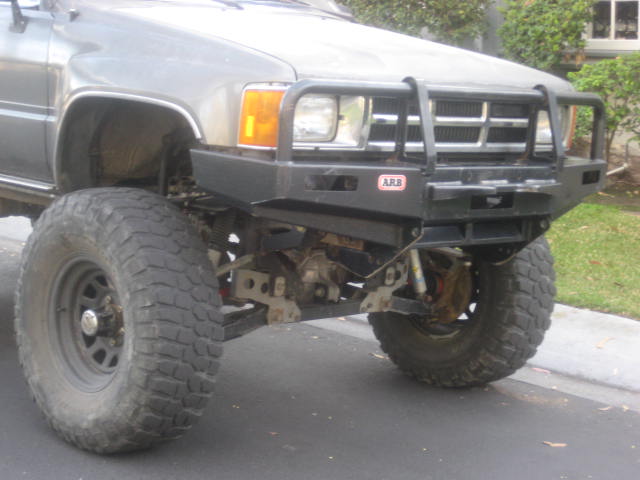
Here are a few photos of how it turned out.
Jun 6, 2013 | 08:09 PM
#267
Thread Starter
Registered User
Joined: Jun 2009
Posts: 977
Likes: 4
From: Southern California
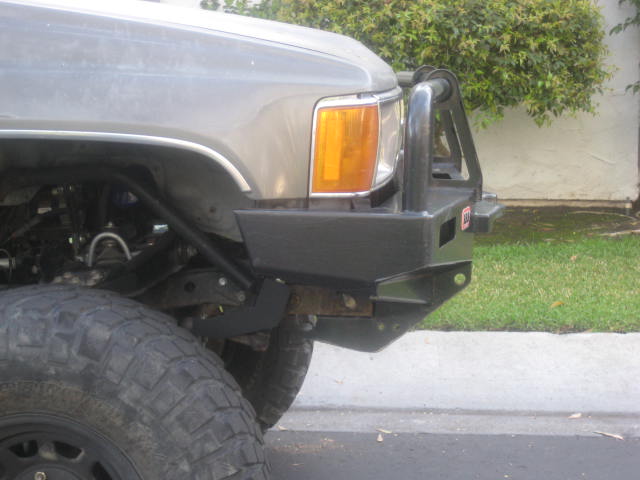
As I mentioned earlyer I had a few concerns. The first concern I had was the interference of the bumper with the factory upper bumper mounting tab. I decided I would rather notch the bumper than cut up my frame! After notching the bumper, I fitted it to my mock up frame to check attachment. Looks like I could add a tab to the bumper and use the upper factory bumper mount; I'm glad I didn't cut it off like ARB suggested. I think with this mounting point restored it will add some peace of mind to my strength concern.
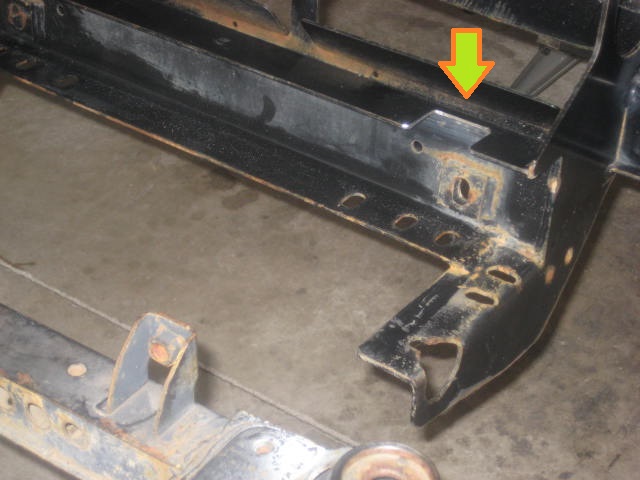
You can see in the second picture the extra bracket that isn't being used on the 1986-1989 rigs. I may cut it off to save weight and also to keep it a clean install.

You can see in the second picture the extra bracket that isn't being used on the 1986-1989 rigs. I may cut it off to save weight and also to keep it a clean install.
Jun 6, 2013 | 08:10 PM
#268
Thread Starter
Registered User
Joined: Jun 2009
Posts: 977
Likes: 4
From: Southern California
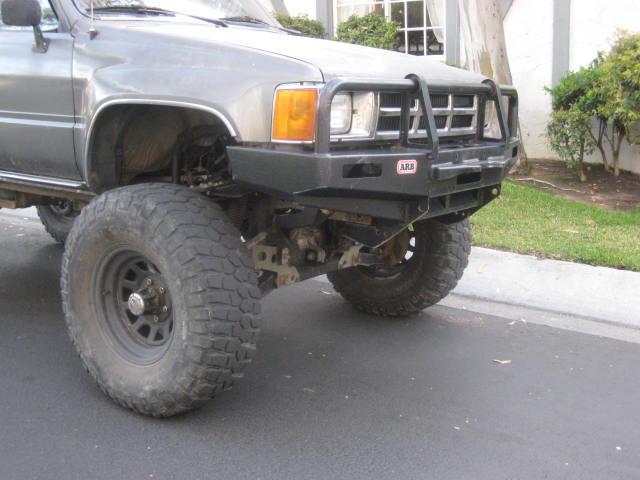
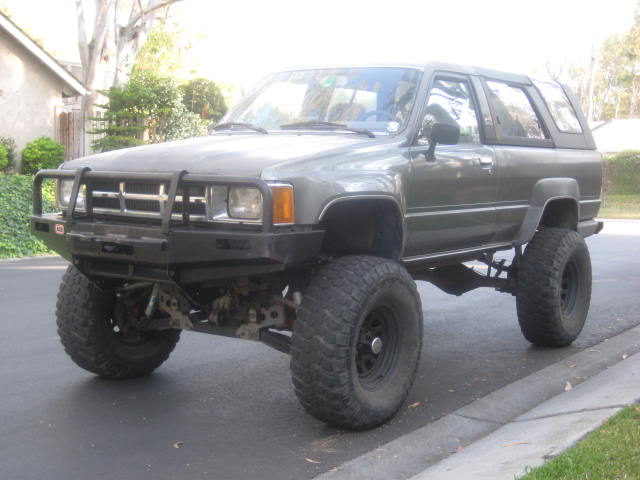
The other concern was with my one inch body lift. It turned out the gap wasn't a big deal and the headlights weren't blocked by the bull bar. When behind the wheel I don't see the bumper. I was sort of wanting to see something as a visual reference for protrusion cues but nope!

Jun 6, 2013 | 08:13 PM
#269
Registered User
Joined: Dec 2009
Posts: 2,762
Likes: 1
wow. doesnt look bad at all with a one inch body lift. too bad i already had to rear bumper custom fitted for zero body lift. im suppose to go get swing outs added, maybe i can get it redone....
that extra mounting point for newer runner. you could use that to mount rock lights
that extra mounting point for newer runner. you could use that to mount rock lights
Sep 16, 2013 | 09:41 PM
#270
Thread Starter
Registered User
Joined: Jun 2009
Posts: 977
Likes: 4
From: Southern California
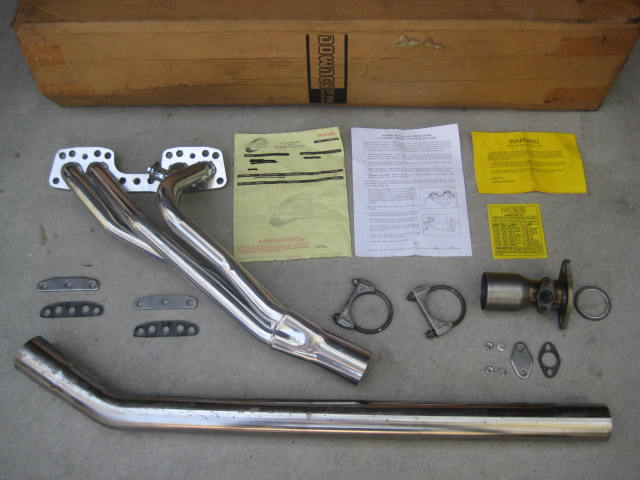
My friend came across some brand new out of the box Downey headers. The plan was to get rid of those bomb proof motor mounts and go back to the stock rubber ones then install the headers. Well I swapped out the motor mounts and what a huge difference, no more noise and vibration. I have been driving around with the stock cast iron manifold and enjoying the mellow exhaust tones of the Flowmaster muffler. Loud enough to hear but not so loud as to compete with the stereo. I suspect the headers will bump it up a notch and it will be too loud? Hmmm what to do? Would like a few more pony's but I don't know if that's only at higher RPMs and at a loss of torque? Anyone know what I can expect from these headers?
Sep 23, 2013 | 10:31 PM
#274
Thread Starter
Registered User
Joined: Jun 2009
Posts: 977
Likes: 4
From: Southern California
It was great seeing everyone, Fun Times! Zach, that run in the whoops where we got out of shape got scary! We were doing between 40-50 MPH when things got out of sync. Overall the Mega Travel maiden voyage was a success. I have a few things to work on but it was a good initial test. ToyoTech, thanks for posting the videos of me and Mantruck jumping!
Sep 24, 2013 | 11:44 AM
#276
Registered User
Joined: Mar 2011
Posts: 505
Likes: 1
From: Socal
Out of sync is the best test for it. That's when things fail. I think with a little more power/speed and rear dampening you would have been more stable.
But man that front set up is going to make a few people switch from fords with beams to an ifs yota.
But man that front set up is going to make a few people switch from fords with beams to an ifs yota.
Sep 24, 2013 | 03:08 PM
#278
Registered User
Joined: Dec 2009
Posts: 2,762
Likes: 1
Oct 16, 2013 | 07:27 PM
#279
Thread Starter
Registered User
Joined: Jun 2009
Posts: 977
Likes: 4
From: Southern California
Before I made the trip to Pismo, I had installed that All Pro 4" lift Long travel leaf spring. I outgrew the SkyJacker springs. They just couldn't handle the abuse. I bent the passenger side by allowing a bit too much negative arch. It could also have been damaged by axle wrap and wheel hop. What ever the case, these springs were just a place holder till I got a more aggressively engineered spring. Here are some photos of the old spring once I got it off the 4Runner. No wonder the passenger side was sitting low!
1
2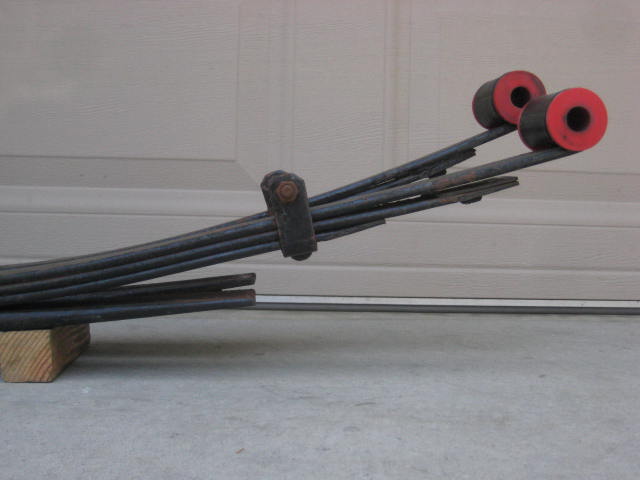
1
2
Oct 16, 2013 | 07:28 PM
#280
Thread Starter
Registered User
Joined: Jun 2009
Posts: 977
Likes: 4
From: Southern California
The All Pro springs resulted in about the same lift. Rather than cover the installation and photos, as its probably been covered a few times, I'll just skip to the initial test findings and the fine tuning aspects. First off the rear spring worked great. I wasn't able to articulate the crawl flex in the sand but I was able to completely cycle the spring in the whoops and with jumping. As you can see from the photos and videos it worked well. The shock would tend to heat up and fade after a few passes in the whoops. The tire was rubbing the rear of the fender well and the mud flap bracket. I was experiencing a good deal of drive line vibration on the freeway. Just needs some tuning.
The first problem I wanted to address was the drive line vibration. I suspected the spring was causing too low of a pinion angle at the differential. I went to Deaver Spring to see about some shims. Jeff and Scott took a look and confirmed the pinion angel was off. Jeff also mentioned I should check the bump stop configuration as he thought the spring might be going into a negative arch. Then he pointed out some issues with the drive shaft being too short allowing the slip yoke to have play. Lastly the differential side U-joint was sloppy.
Next it was a trip to Drive lines Unlimited. Wade determined I should get a 3 degree shim to correct the pinion angle. He felt the drive shaft could be lengthened about 2". I may also need a double CV style drive shaft; like what is on the front. And definitely a new U-joint.
The leaf spring shims I got were 3 degrees. Note: I had to notch the shims with a grinder to fit the spring width and U-bolts. The installation was fairly easy. I removed the center pin and re-instal with the shim.
1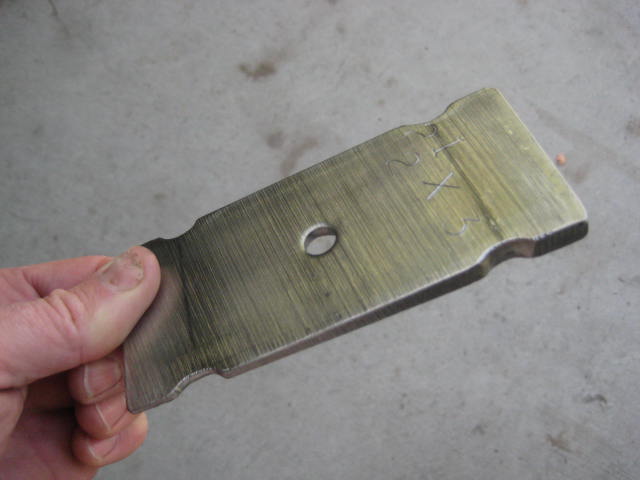
2
3


