
BlazeN8's 1986 4Runner Build-Up Thread
 Feb 5, 2010 | 04:19 AM
#1
Thread Starter
Registered User
Joined: Jun 2009
Posts: 977
Likes: 4
From: Southern California
BlazeN8's 1986 4Runner Build-Up Thread
"Leave it to Deaver"
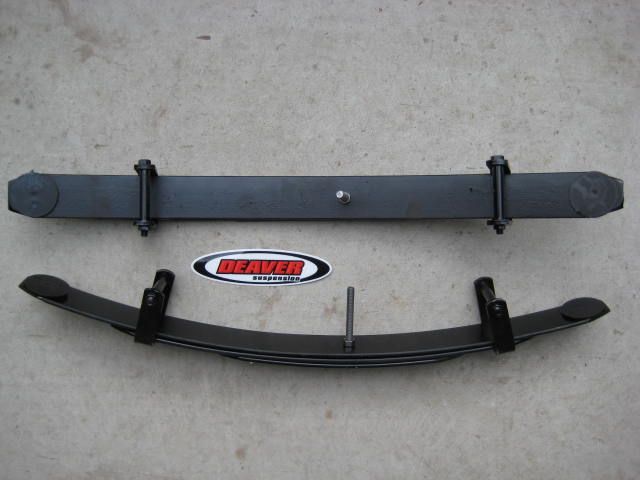
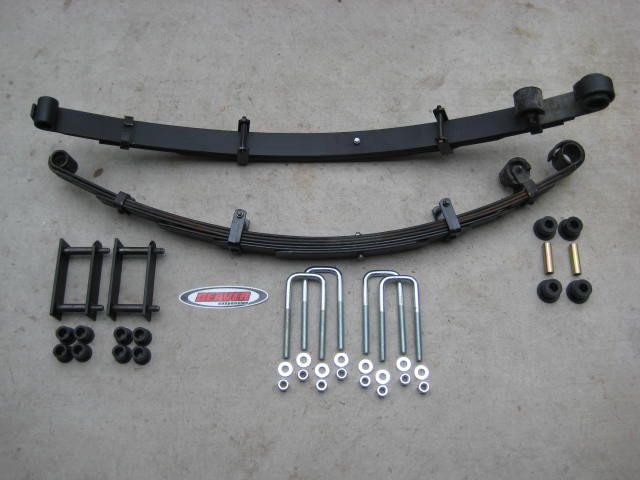
I struck gold in my search for a "low buck" rear leaf spring for my 1986 4 Runner 4x4. I was looking for 3" of lift to match the front Blazeland Long travel. I was aware from word of mouth, and from browsing the internet, that Deaver offers a "long travel" Stadium leaf spring pack, but it involves a new 61-1/2" long leaf spring pack and requires some custom work to install. I suspected there might be some other options so I dropped by the shop. I met with Jeff Crosby the Spring Designer at Deaver. The Stadium spring pack (Deaver part #F67) would be awsome, but Jeff agreed it is little more involved and not a simple bolt on install. He had some other ideas for something less expensive and 100% bolt on to match the budget friendly Blazeland concept up front.
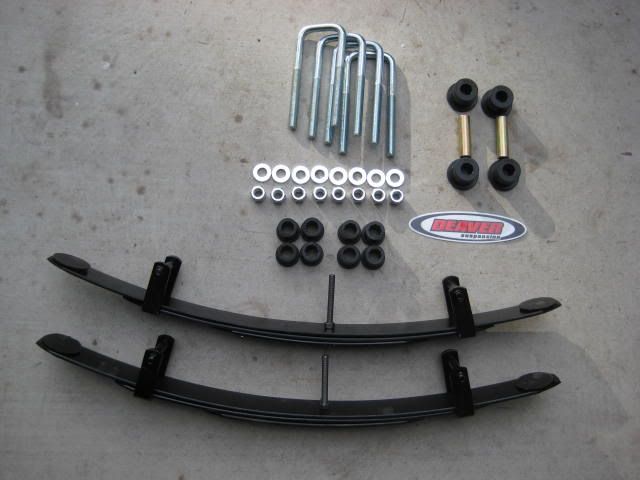
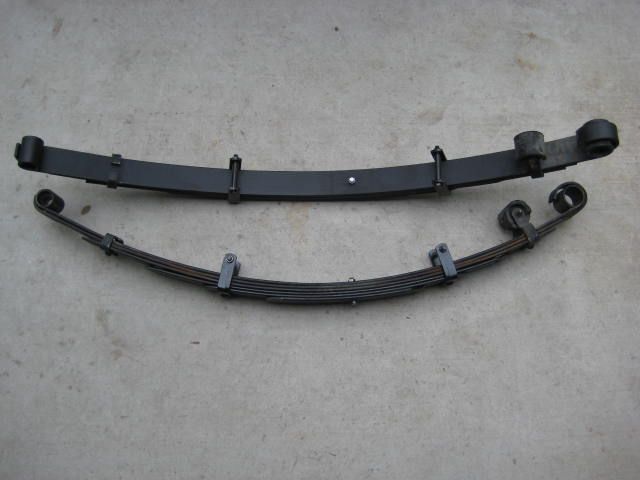
Enter in the Deaver "MiniPack" This is designed around the stock leaf springs. Jeff's plan was to dial in about 2" of lift by removing the overload leafs and installing a progressively decreasing set of smaller leafs. Then get another 1" of lift by installing longer shackles. It took Jeff a few days and some R&D on my 4 Runner, but it came out AWSOME. Read the write up on my install. Enjoy!
I struck gold in my search for a "low buck" rear leaf spring for my 1986 4 Runner 4x4. I was looking for 3" of lift to match the front Blazeland Long travel. I was aware from word of mouth, and from browsing the internet, that Deaver offers a "long travel" Stadium leaf spring pack, but it involves a new 61-1/2" long leaf spring pack and requires some custom work to install. I suspected there might be some other options so I dropped by the shop. I met with Jeff Crosby the Spring Designer at Deaver. The Stadium spring pack (Deaver part #F67) would be awsome, but Jeff agreed it is little more involved and not a simple bolt on install. He had some other ideas for something less expensive and 100% bolt on to match the budget friendly Blazeland concept up front.
Enter in the Deaver "MiniPack" This is designed around the stock leaf springs. Jeff's plan was to dial in about 2" of lift by removing the overload leafs and installing a progressively decreasing set of smaller leafs. Then get another 1" of lift by installing longer shackles. It took Jeff a few days and some R&D on my 4 Runner, but it came out AWSOME. Read the write up on my install. Enjoy!
Last edited by BlazeN8; Sep 17, 2012 at 09:04 PM.
Feb 5, 2010 | 04:21 AM
#2
Thread Starter
Registered User
Joined: Jun 2009
Posts: 977
Likes: 4
From: Southern California
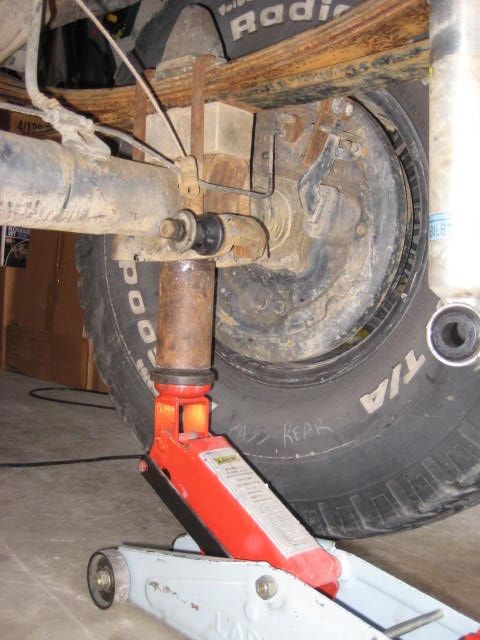
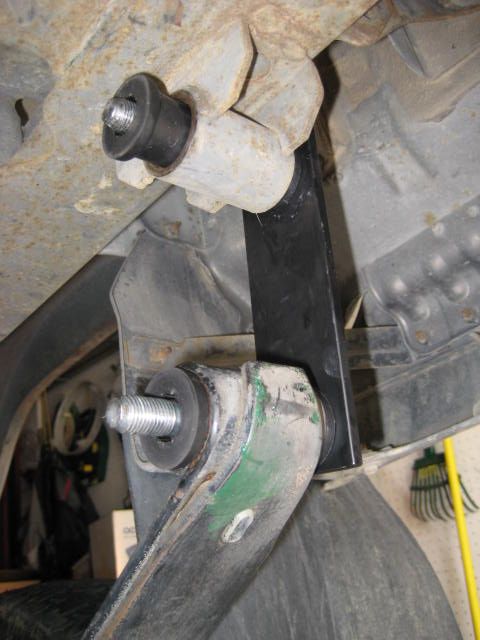
As with all installs safety first. A level surface, wheel chocks, an adequate range floor jack, and a sturdy set of jack stands is a must. Jackstands need to be capable of at least 28" height to support the vehicle by the frame, and let the rear axle drop out completly. What I am removing is stock set of springs with an add a leaf and a set of 2" spacer blocks. I have some respectable shocks, 5100 Bilsteins for a 4" lifted Toyota that I will be re-using. The shocks are long enough for drop out but are too long for compression without the 2" blocks and a bump stop spacer. New shock mounts will eventually be installed.
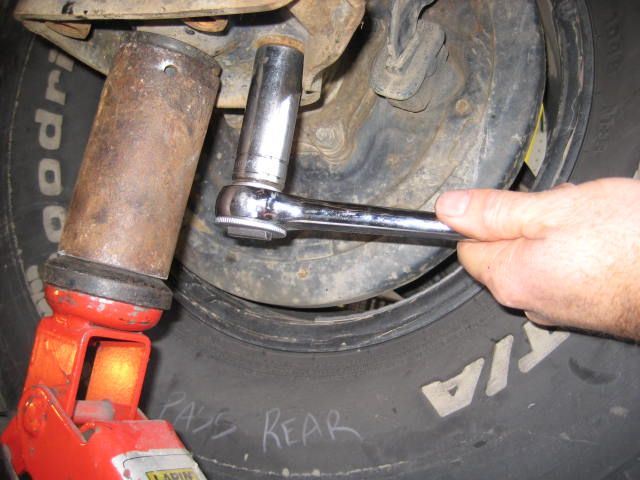
Photo:B1 Rear axle drop out
Photo:B2 Remove lower shock bolts (17mm)
Photo:B3 Swing shock out of the way
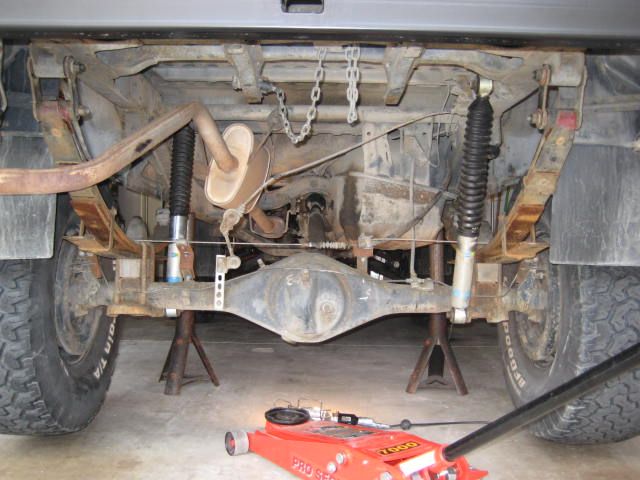
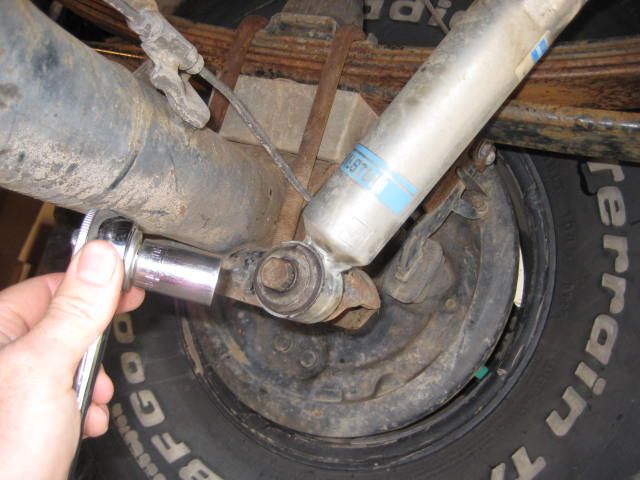
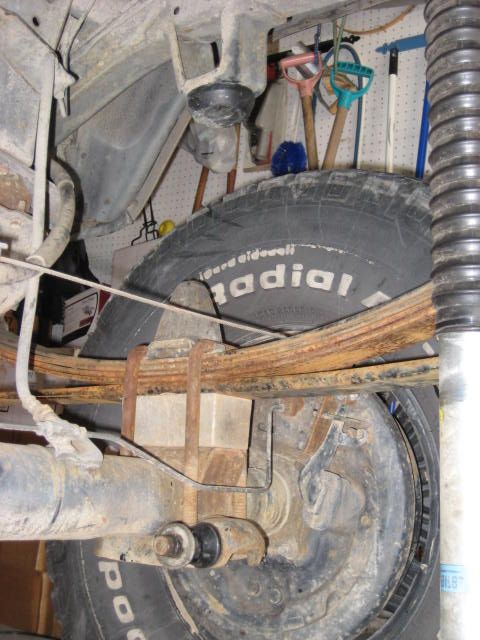
Photo:B1 Rear axle drop out
Photo:B2 Remove lower shock bolts (17mm)
Photo:B3 Swing shock out of the way
Last edited by BlazeN8; Sep 17, 2012 at 09:06 PM.
 Feb 5, 2010 | 04:23 AM
#4
Thread Starter
Registered User
Joined: Jun 2009
Posts: 977
Likes: 4
From: Southern California
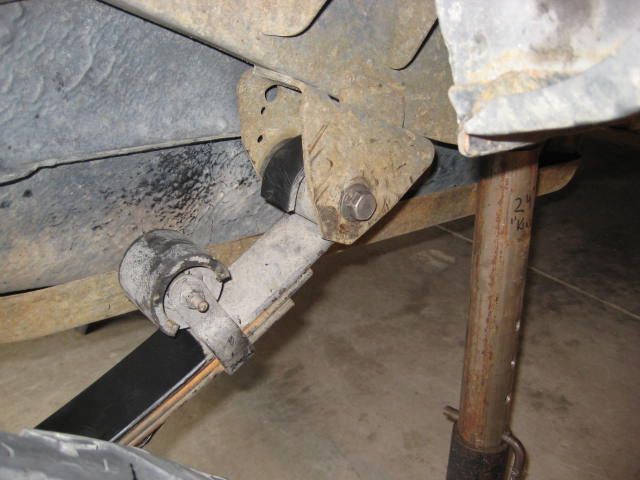
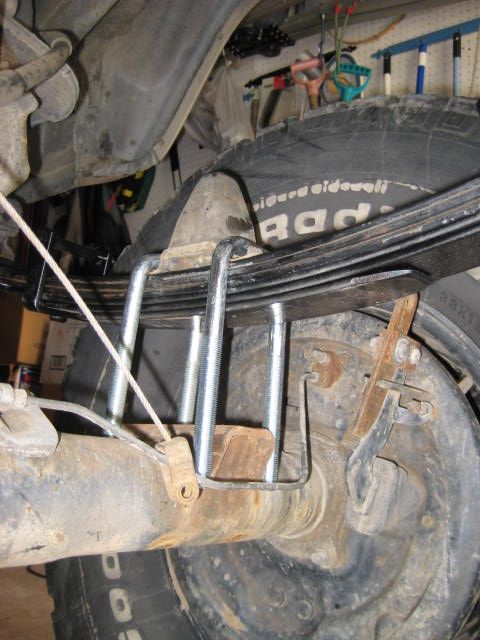
Photo 1 Jack placement at u-bolt axle plate
Photo2 Remove u-bolt nuts (22mm deep socket)
Photo3 Lower jack let tire rest on the ground
1 Jack placement at u-bolt axle platePhoto
2 Remove u-bolt nuts (22mm deep socket)Photo
3 Lower jack let tire rest on the ground
Last edited by BlazeN8; Sep 17, 2012 at 09:08 PM.
Feb 5, 2010 | 04:24 AM
#5
Thread Starter
Registered User
Joined: Jun 2009
Posts: 977
Likes: 4
From: Southern California
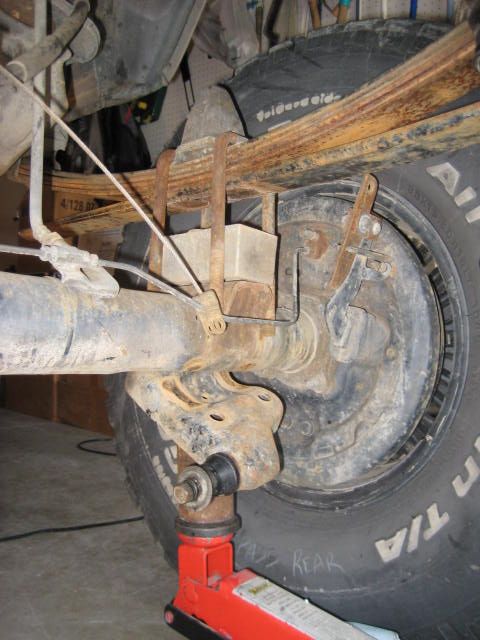
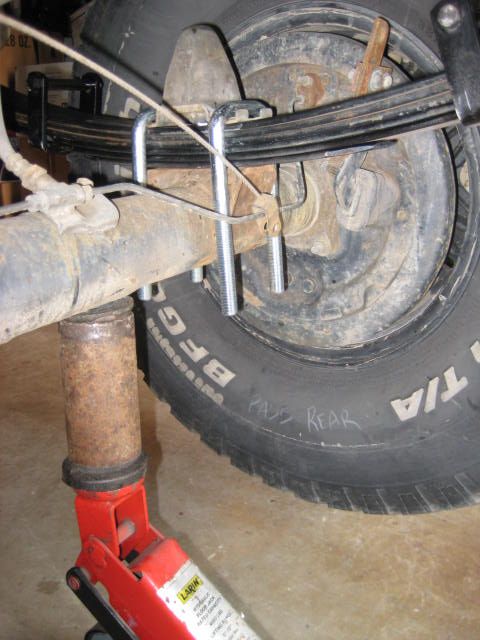
Photo:E1 Remove u-bolt and bump stop assembly
Photo:E2 Remove blocks (if applicable)
Photo:E3 Set u-bolt assembly off to the side
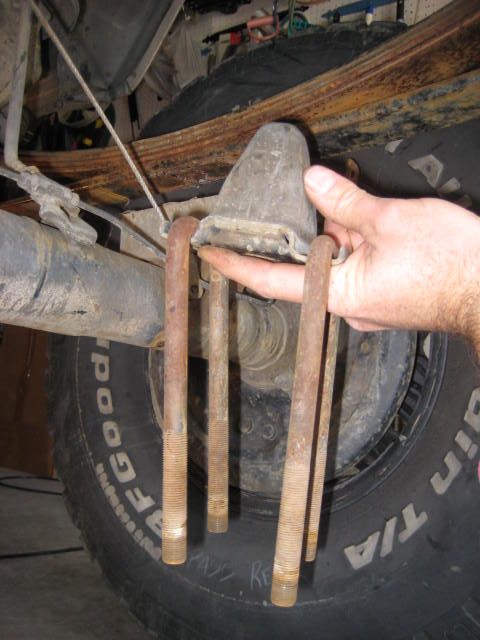
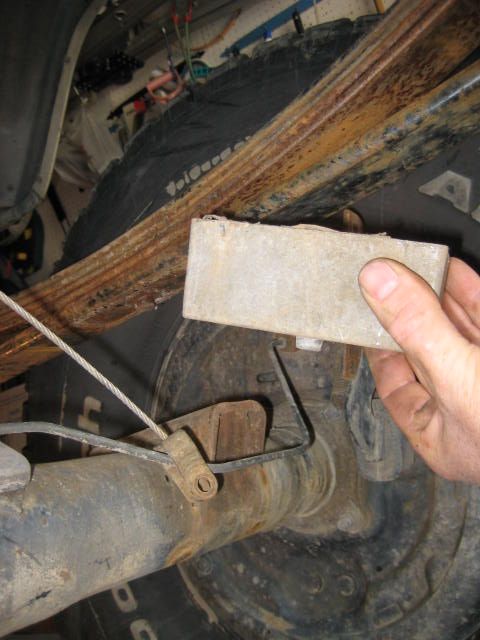
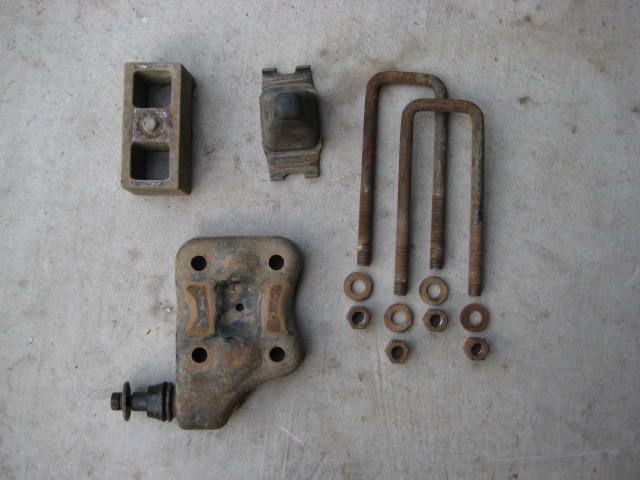
Photo:E2 Remove blocks (if applicable)
Photo:E3 Set u-bolt assembly off to the side
Last edited by BlazeN8; Sep 17, 2012 at 09:09 PM.
 Feb 5, 2010 | 04:27 AM
#7
Thread Starter
Registered User
Joined: Jun 2009
Posts: 977
Likes: 4
From: Southern California
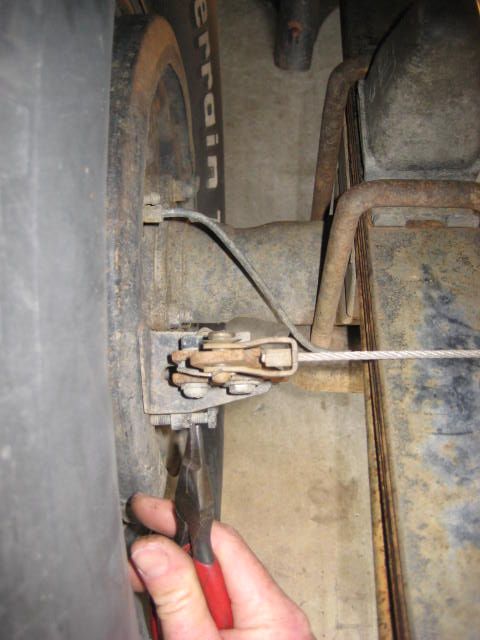
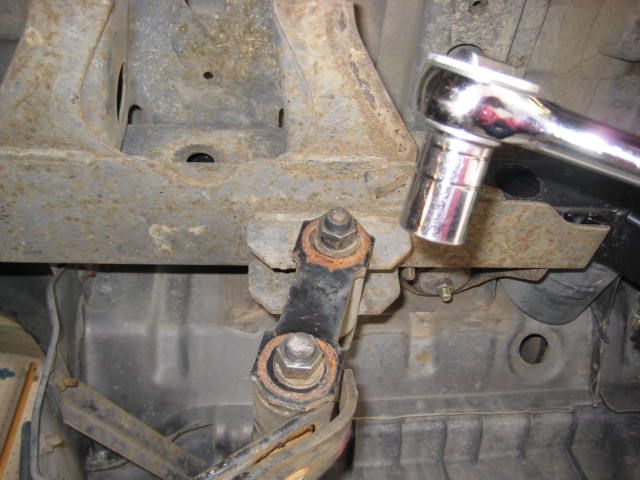
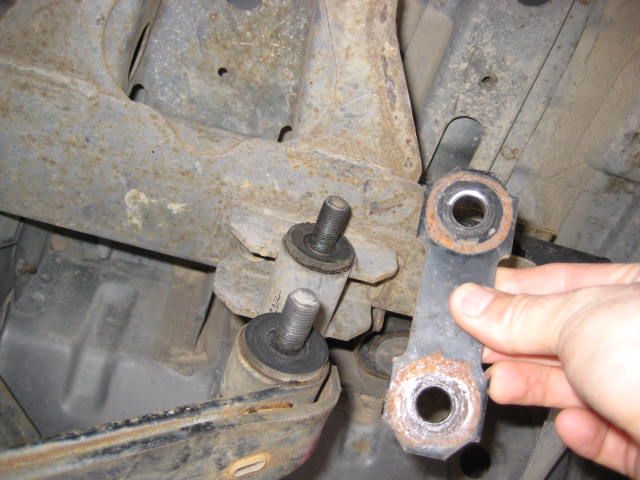
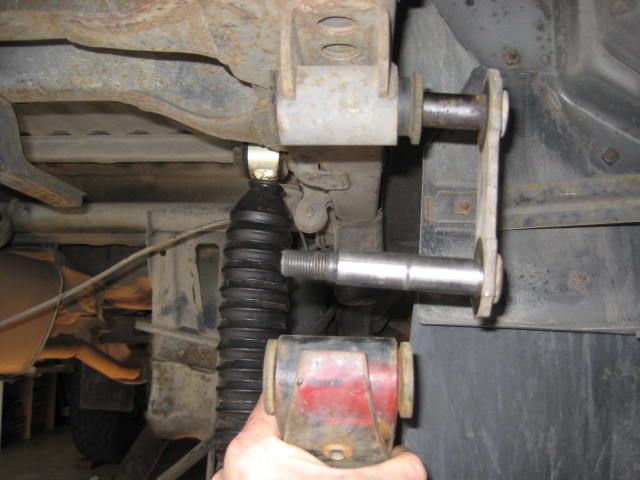
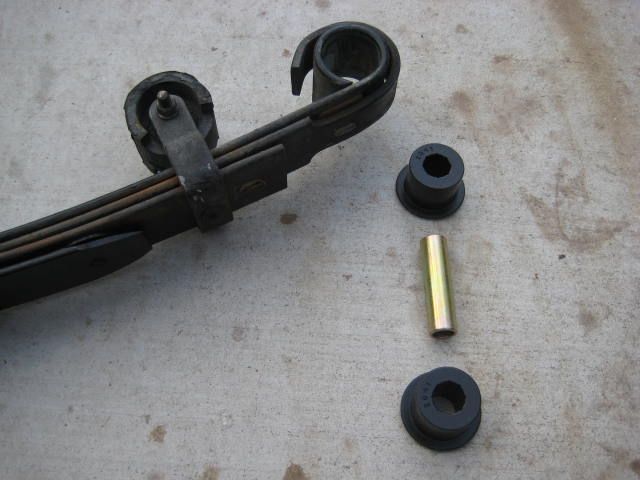
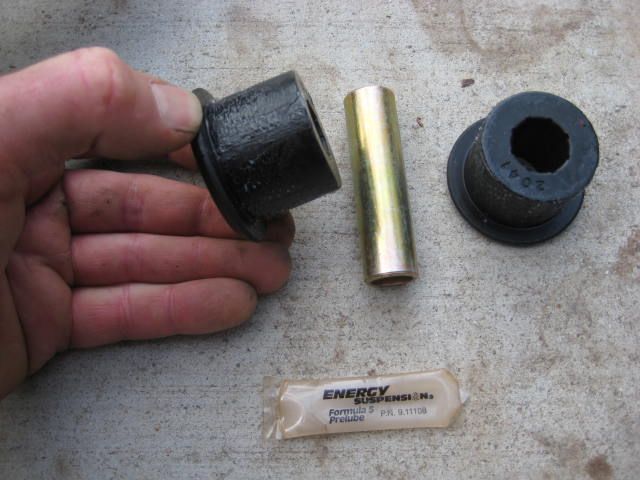
Photo:H1 Let spring rest on axle
Photo:H2 Recover old bushings from spring and frame eye
Photo:H3 Set shackle assembly aside
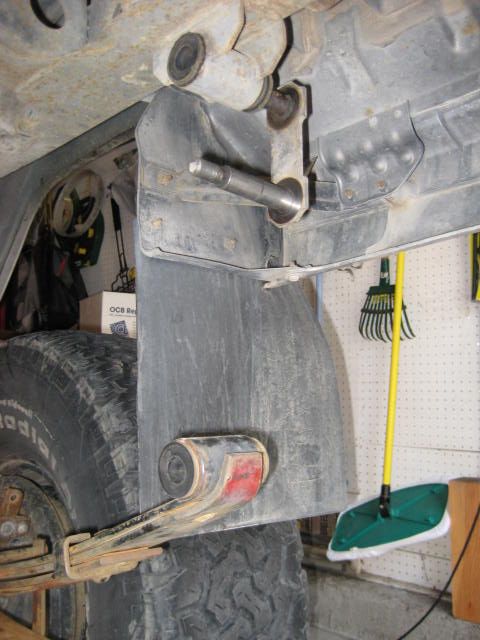
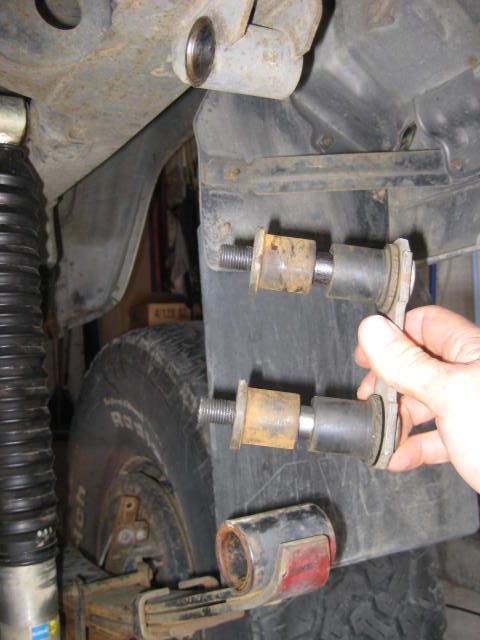
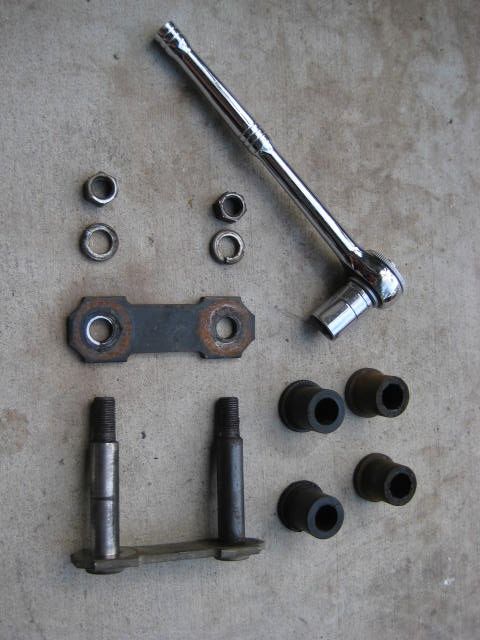
Photo:H2 Recover old bushings from spring and frame eye
Photo:H3 Set shackle assembly aside
Last edited by BlazeN8; Sep 17, 2012 at 09:11 PM.
Trending Topics
Feb 5, 2010 | 04:28 AM
#8
Thread Starter
Registered User
Joined: Jun 2009
Posts: 977
Likes: 4
From: Southern California
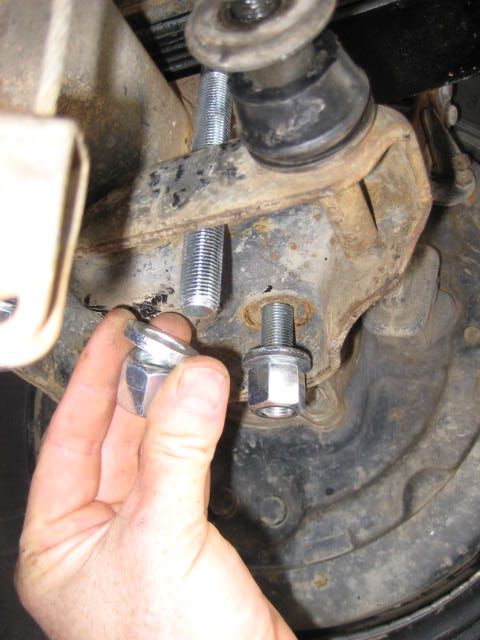
Photo:I1 Remove front spring eye nuts and lock washers (19mm socket and 19mm box wrench)
Photo:I2 Remove Bolt and free spring from frame
Photo:I3 Remove spring thru wheel well
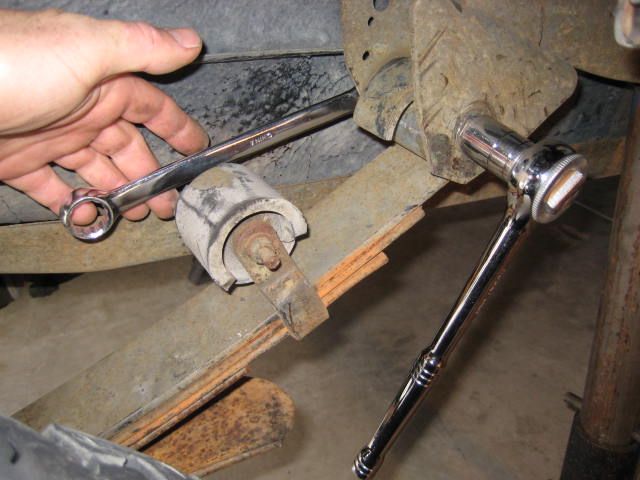
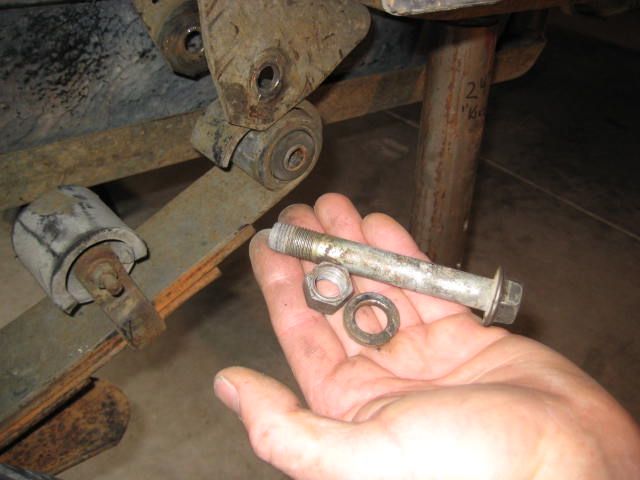
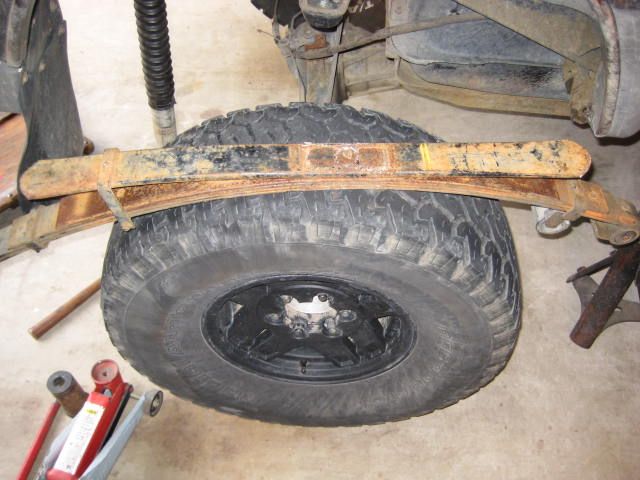
Photo:I2 Remove Bolt and free spring from frame
Photo:I3 Remove spring thru wheel well
Last edited by BlazeN8; Sep 17, 2012 at 09:12 PM.
Feb 5, 2010 | 04:29 AM
#9
Thread Starter
Registered User
Joined: Jun 2009
Posts: 977
Likes: 4
From: Southern California
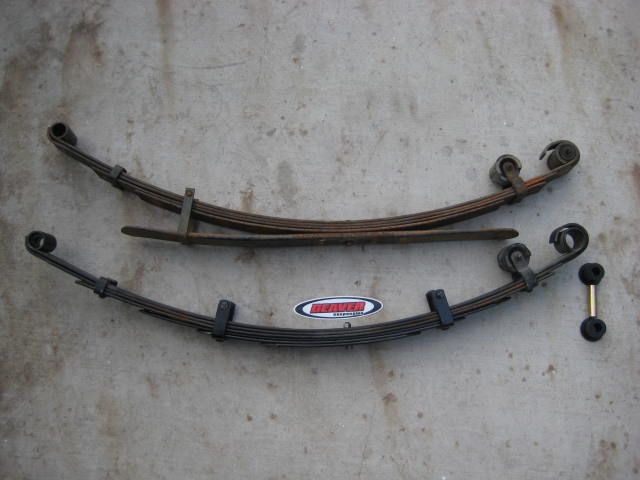
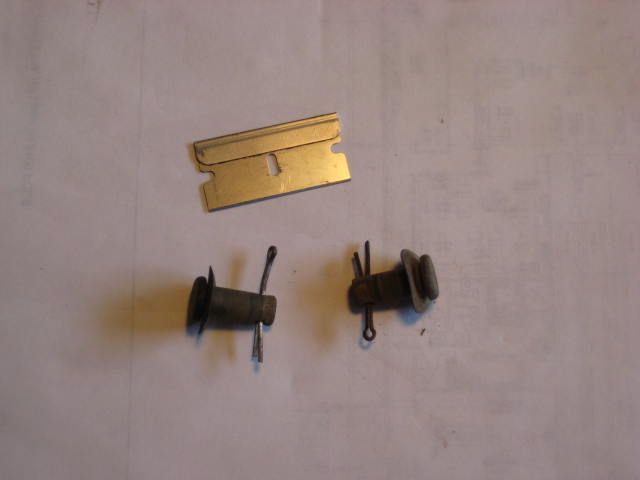
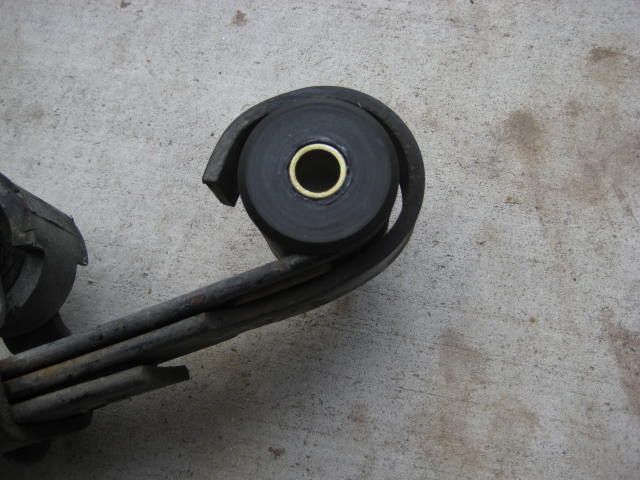
Photo:J1 Dissasemble stock leaf spring pack
Photo:J2 Remove Front eye bushing if planning to replace. This is pressed in, so it needs to be pressed out.
Photo:J3 Oveload leaf assembly and hardware
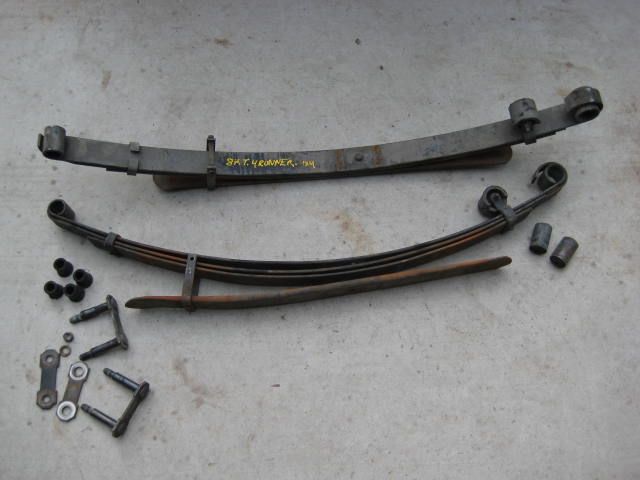
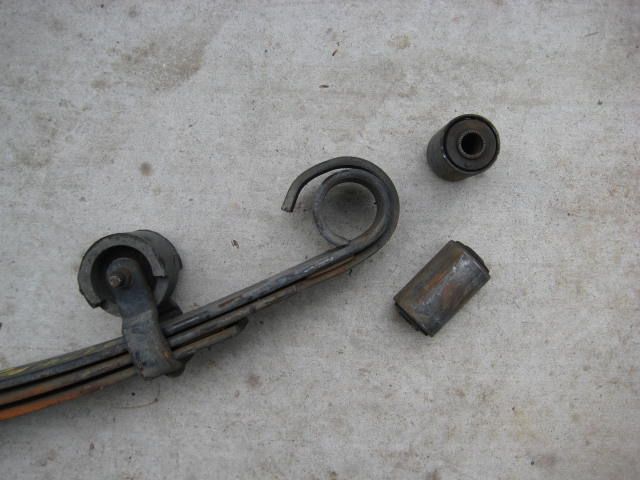
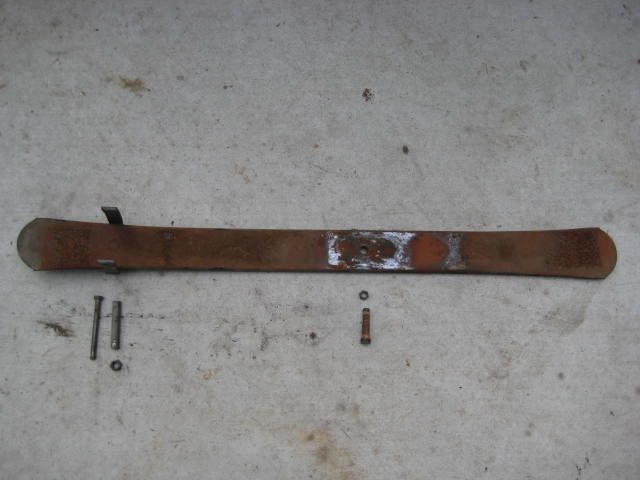
Photo:J2 Remove Front eye bushing if planning to replace. This is pressed in, so it needs to be pressed out.
Photo:J3 Oveload leaf assembly and hardware
Last edited by BlazeN8; Sep 17, 2012 at 09:13 PM.
Feb 5, 2010 | 04:30 AM
#10
Thread Starter
Registered User
Joined: Jun 2009
Posts: 977
Likes: 4
From: Southern California
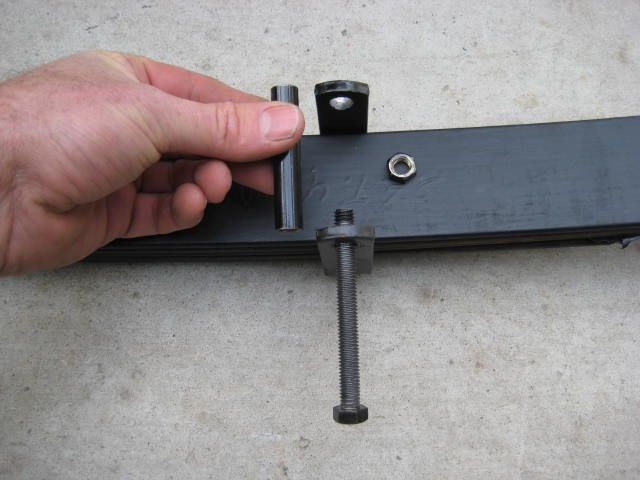
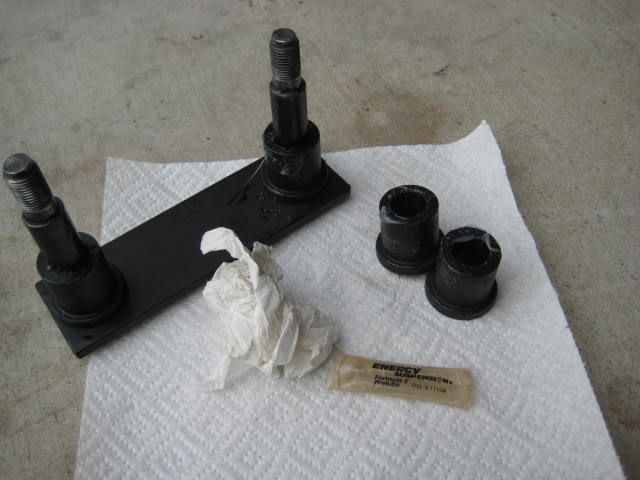
Photo:K1 Prep MiniPack for install to re-furbished and freshly painted stock main leafs
Photo:K2 Lower Main pack onto MiniPack and tighten center pin
Photo:K3 Trim excess center pin bolt
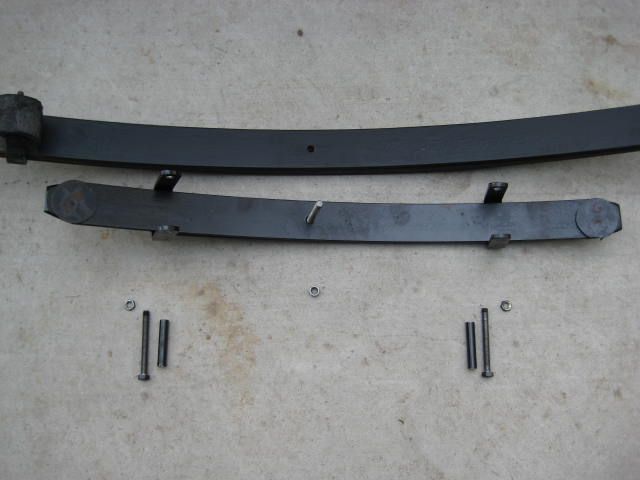
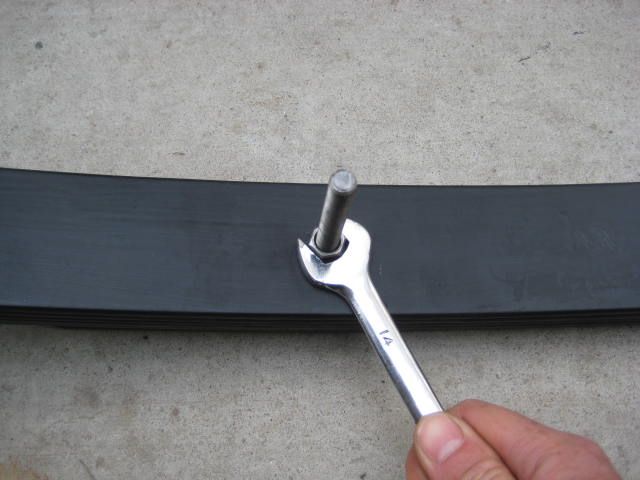

Photo:K2 Lower Main pack onto MiniPack and tighten center pin
Photo:K3 Trim excess center pin bolt
Last edited by BlazeN8; Sep 17, 2012 at 09:14 PM.
 Feb 5, 2010 | 04:36 AM
#15
Thread Starter
Registered User
Joined: Jun 2009
Posts: 977
Likes: 4
From: Southern California
Photo 1 Measure exposed bolts tighten to equal length
Photo2 Jack up vehicle, remove jackstands, lower to ground
Photo3 Final Torque fasteners, your done.
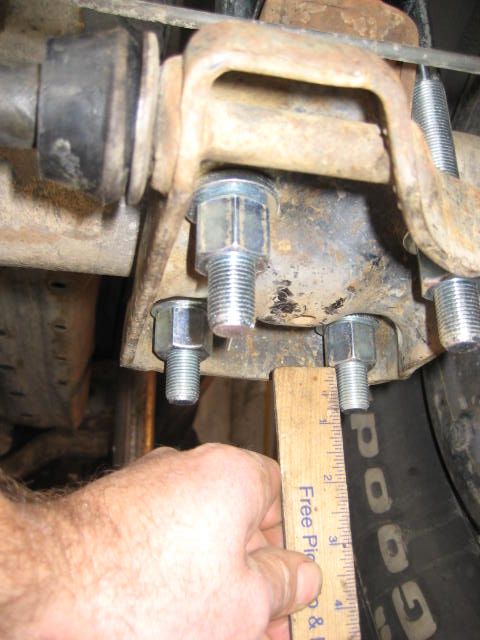
1 Measure exposed bolts tighten to equal lengthPhoto
2 Jack up vehicle, remove jackstands, lower to groundPhoto
3 Final Torque fasteners, your done.
Last edited by BlazeN8; Sep 17, 2012 at 09:19 PM.
Feb 5, 2010 | 04:36 AM
#16
Thread Starter
Registered User
Joined: Jun 2009
Posts: 977
Likes: 4
From: Southern California
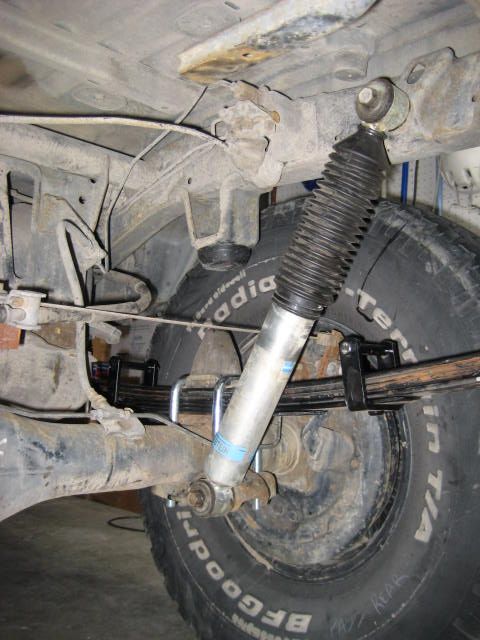
There are still some details for me to take care of like removing the parking brake extension brackets and adjusting the brake proportioning bracket. I will also be removing the additional bump stop spacers. At some pint I will need re-locate and install new upper shock mounts further up the frame. As it is now the shocks are acting like the bump stops (not a good idea) Stay tuned for fine tuning.


 Feb 5, 2010 | 08:31 AM
#19
Thread Starter
Registered User
Joined: Jun 2009
Posts: 977
Likes: 4
From: Southern California
The cost is as follows:
$196.00 MiniPack
$8.50 Front Eye Bushings
$6.38 Bushing Seeve
$22.88 Rear Shackle / Frame bushings
$52.80 U-Bolt kit
$25.07 CA sales tax
$311.63 Total
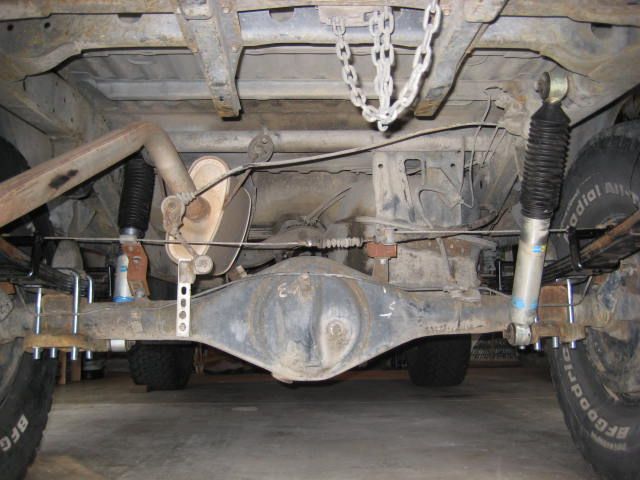
Not bad to freshen up an old set of springs, gain 3" of lift, and obtain a supper cush ride. I'll get back to you on the wheel travel measurments. The ride quality is excellent on the street. I'll have to take care of the shock mounts befor I can get a feel for how it performs on the trail and in the whoops.
$196.00 MiniPack
$8.50 Front Eye Bushings
$6.38 Bushing Seeve
$22.88 Rear Shackle / Frame bushings
$52.80 U-Bolt kit
$25.07 CA sales tax
$311.63 Total
Not bad to freshen up an old set of springs, gain 3" of lift, and obtain a supper cush ride. I'll get back to you on the wheel travel measurments. The ride quality is excellent on the street. I'll have to take care of the shock mounts befor I can get a feel for how it performs on the trail and in the whoops.
Feb 5, 2010 | 08:39 AM
#20
Thread Starter
Registered User
Joined: Jun 2009
Posts: 977
Likes: 4
From: Southern California
Oh, I forgot to add in the cost for the extended length shackles. Since I built them, the cost was FREE. Well the cost for a 5 foot section of cold roll steel bar cost me $6.74 and I only used about half of it. I'll post some pictures of how I made the shackles in a few.


