
Baby Beast Morph 2
 Mar 13, 2011 | 01:38 PM
#101
Thread Starter
Contributing Member
Joined: Apr 2004
Posts: 5,464
Likes: 6
From: Arvada, Colorado
Mar 13, 2011 | 05:24 PM
#102
Registered User
Joined: Sep 2009
Posts: 3,943
Likes: 102
From: Woodinville, WA
And axleike, try making little check marks in the weld, not Cs or Us, also, move forward about an 1/8th inch, and back about 3/16th of an inch. Try that, go slow, and basically try making every puddle the same size. move your tip forward that 1/8" after the puddle is about the size of the last, and then move it back 3/16" until the puddle is ~ the same size.
Cheers
Mar 13, 2011 | 07:49 PM
#103
Registered User
Joined: Oct 2009
Posts: 1,560
Likes: 1
From: Santa Cruz, CA
I've never used a mig machine but i under the impression that a lot of spatter is due to having too much stick out. For the look try different wire feed speeds and travel speeds. Personally I dont trust mig mUch, I see a lot of great looking test plates snap and crack under the bend test in my welding class
Mar 14, 2011 | 08:21 AM
#104
Thread Starter
Contributing Member
Joined: Apr 2004
Posts: 5,464
Likes: 6
From: Arvada, Colorado
Thats so you dont warp the frame.
And axleike, try making little check marks in the weld, not Cs or Us, also, move forward about an 1/8th inch, and back about 3/16th of an inch. Try that, go slow, and basically try making every puddle the same size. move your tip forward that 1/8" after the puddle is about the size of the last, and then move it back 3/16" until the puddle is ~ the same size.
Cheers
I've never used a mig machine but i under the impression that a lot of spatter is due to having too much stick out. For the look try different wire feed speeds and travel speeds. Personally I dont trust mig mUch, I see a lot of great looking test plates snap and crack under the bend test in my welding class
I disagree. MIG welding is very strong, and works awesome if done properly. I've never had a mig weld break on me. In fact, my old 1/8" sliders broke ahead of the weld on the kick out from the metal flexing. The weld was stronger than the material.
I know my welds are good in terms of strength, but the presentation chaps my rear. I am a bit OCD on this stuff, so that is why I want it to be better.
Mar 14, 2011 | 08:21 AM
#105
Thread Starter
Contributing Member
Joined: Apr 2004
Posts: 5,464
Likes: 6
From: Arvada, Colorado
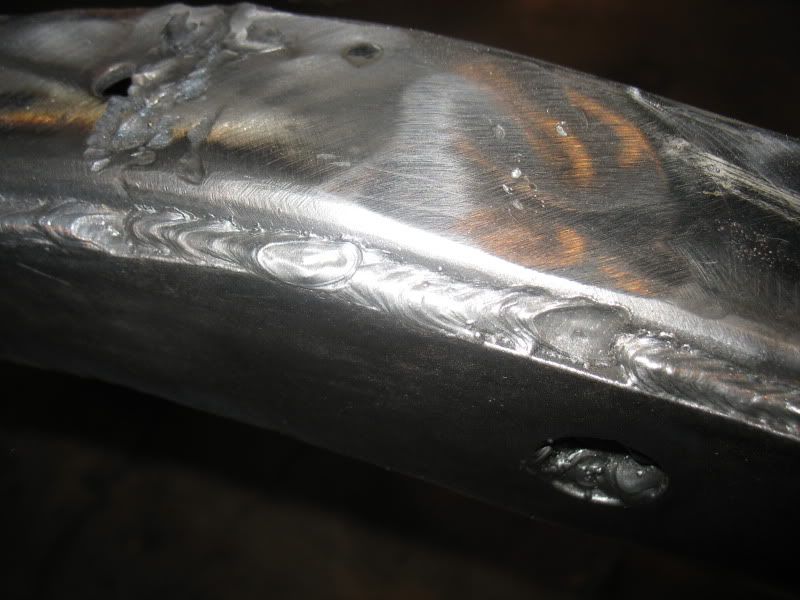
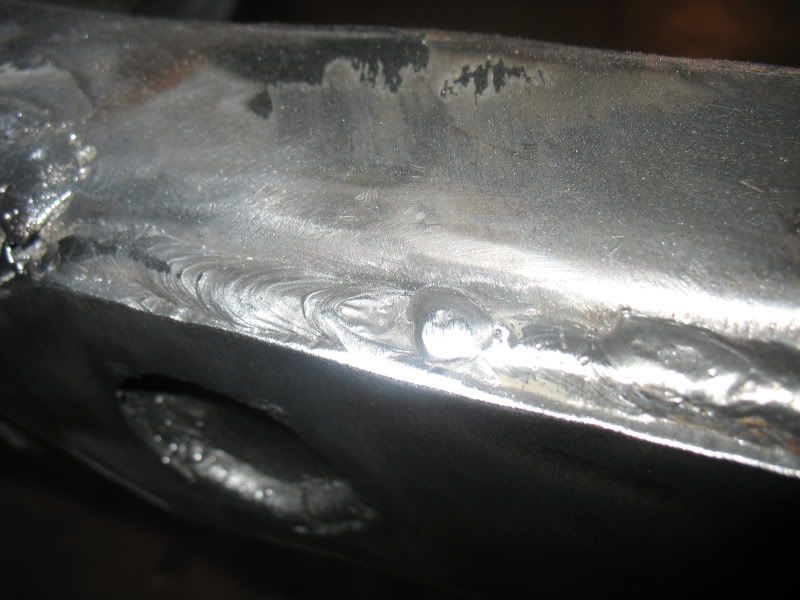
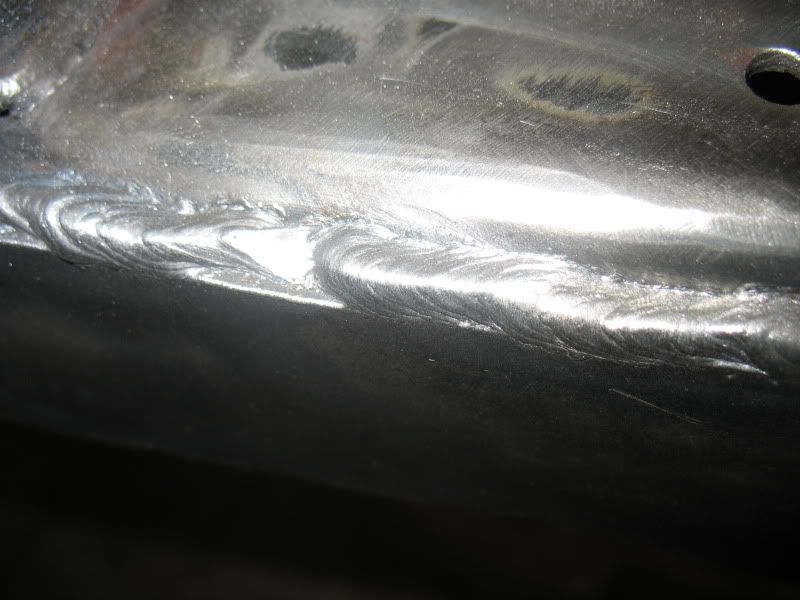
Well, I did the other side today. I ran a lot of practice beads before hand. I tried a slower wire speed, as this is a 175, and with the mix I've got, I'm running the highest voltage possible. Didn't make a difference with the wire speed. Also tried a slower weld speed, and it just bubbled up and screwed up the tip.
Got onto Miller's website and saw that you can make a tighter bead with better penetration by pulling the bead, rather than pushing. Tried it, and nothing. Bead is tighter, but still not ideal. Fairly frustrated with it.
Anyway, here is the final product.
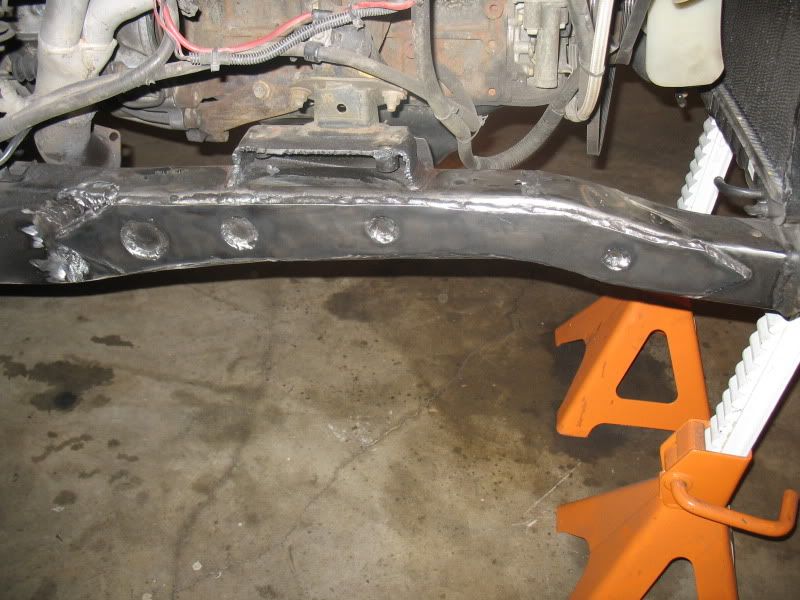
Welds:
Got onto Miller's website and saw that you can make a tighter bead with better penetration by pulling the bead, rather than pushing. Tried it, and nothing. Bead is tighter, but still not ideal. Fairly frustrated with it.
Anyway, here is the final product.
Welds:
Mar 14, 2011 | 08:22 AM
#106
Thread Starter
Contributing Member
Joined: Apr 2004
Posts: 5,464
Likes: 6
From: Arvada, Colorado
Since I need to rework the subframe, and have been doing a ton of thinking about the suspension, I decided to start looking at the basics: wheel base and axle placement.
So, I took 3 measurements: Stock at 103 ish, 106, and 110.
The tire is on the jack to simulate ride height at my ideal height, 20" at the frame.
Here is stock for reference:
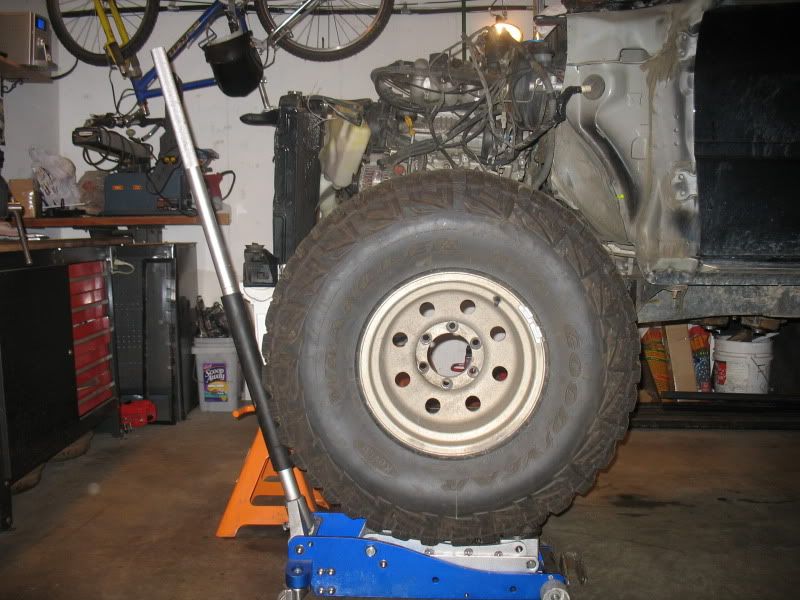
My preference is here, at 106. The pro's are that the axle is back far enough to make fenders easy enough to modify to fit the tires, and everything looks nice. Cons are frame fitment, and uptravel.
Here is where the tire sits:
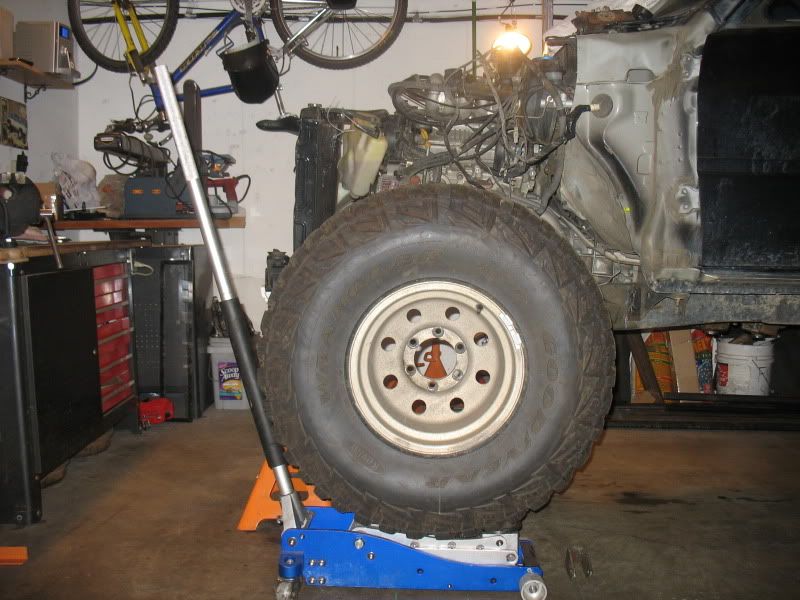
As you can see, uptravel sucks, which is why this would almost necessitate frame modification:
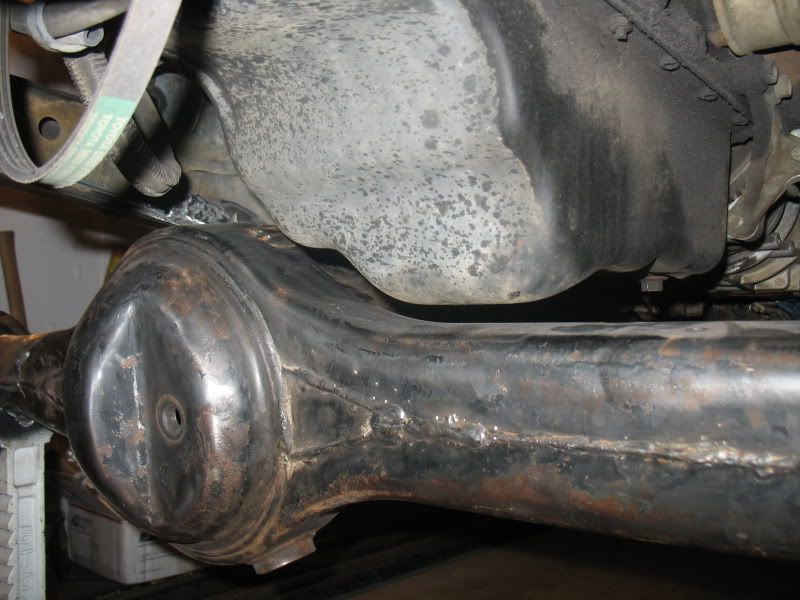
The oil pan is going away:
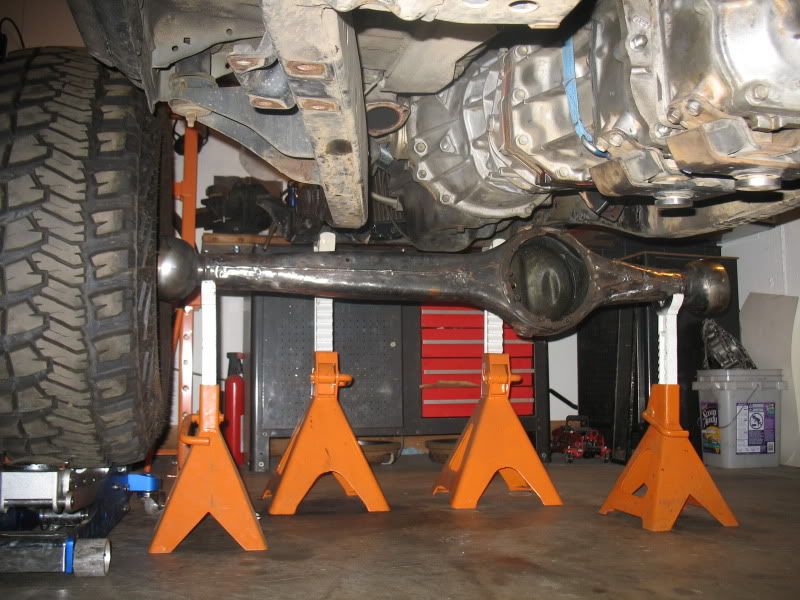
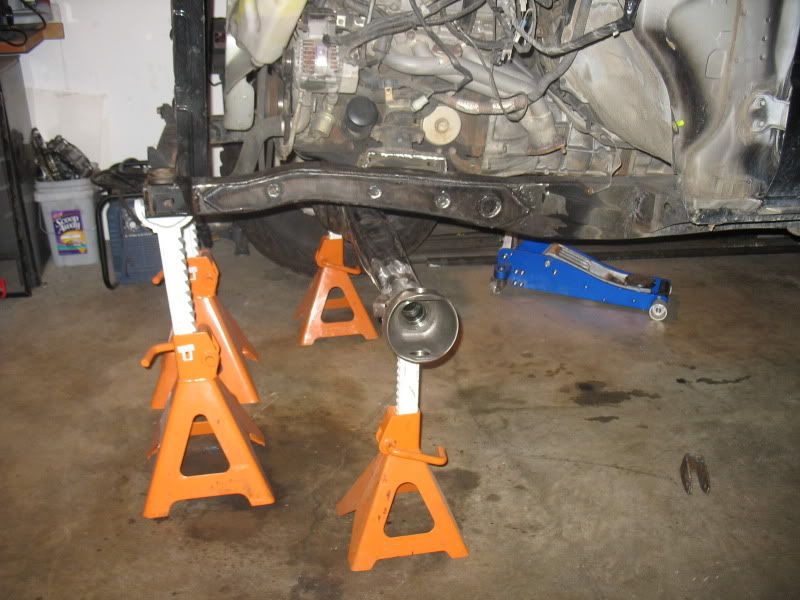
Now, the other option is 110. The axle is in front of the oil pan, and the frame comes up, giving a lot more uptravel. The approach angle becomes almost 90 deg as the tires push forward of frame, though a bumper would likely stick out a bit.

The problem here is making the fenders work. It would almost require a dovenose, which would not work to keep the police off my back. I could work some tube fenders, and go for the 70 series LC look, but still, tricky. Steering also becomes a hassle here, as, even with a reverse throw box, the pitman arm is going to stick out a ways.
Anyway, any thoughts or ideas are welcome. I haven't made up my mind, and haven't thought of everything. If anyone has an idea, shout it out
So, I took 3 measurements: Stock at 103 ish, 106, and 110.
The tire is on the jack to simulate ride height at my ideal height, 20" at the frame.
Here is stock for reference:
My preference is here, at 106. The pro's are that the axle is back far enough to make fenders easy enough to modify to fit the tires, and everything looks nice. Cons are frame fitment, and uptravel.
Here is where the tire sits:
As you can see, uptravel sucks, which is why this would almost necessitate frame modification:
The oil pan is going away:
Now, the other option is 110. The axle is in front of the oil pan, and the frame comes up, giving a lot more uptravel. The approach angle becomes almost 90 deg as the tires push forward of frame, though a bumper would likely stick out a bit.
The problem here is making the fenders work. It would almost require a dovenose, which would not work to keep the police off my back. I could work some tube fenders, and go for the 70 series LC look, but still, tricky. Steering also becomes a hassle here, as, even with a reverse throw box, the pitman arm is going to stick out a ways.
Anyway, any thoughts or ideas are welcome. I haven't made up my mind, and haven't thought of everything. If anyone has an idea, shout it out
Mar 14, 2011 | 09:19 AM
#107
Registered User
Joined: Jun 2009
Posts: 414
Likes: 0
From: North Carolina
I know a guy here with 106" and 40's, he's fairly convinced its the perfect combination with his frame height being around 24-25" I believe. He's also leaf sprung, not street legal by any stretch of the imagination and not concerned at all with the appearance/functionality of any of his sheet metal. I'm sure everyone's opinions vary but by that school of thought, I would try to stick it as close to 103 as you can.
Looking good though, glad to see progress!
Looking good though, glad to see progress!
Mar 14, 2011 | 11:08 AM
#108
Thread Starter
Contributing Member
Joined: Apr 2004
Posts: 5,464
Likes: 6
From: Arvada, Colorado
103 isn't going to work, as it would require massive re work on the fenders. I'm leaning towards 110. I think it will give me the clearance I want without other issues. We'll see.
Mar 14, 2011 | 08:48 PM
#109
Registered User
Joined: Aug 2010
Posts: 42
Likes: 0
From: mukilteo
ok so i dont know much about doing a SAS (well nothing really) but plan to do one in the future but in one of your pictures you say the oil pan is going away. what do you mean by that? I can see where clearance would be an issue while on the trails but how would you fix that problem?
Mar 14, 2011 | 08:56 PM
#110
Registered User
Joined: Sep 2009
Posts: 3,943
Likes: 102
From: Woodinville, WA
ok so i dont know much about doing a SAS (well nothing really) but plan to do one in the future but in one of your pictures you say the oil pan is going away. what do you mean by that? I can see where clearance would be an issue while on the trails but how would you fix that problem?
Run no oil pan!!!

But thats a dumb idea. Most people either swap to a different oil pan, or modify their stock one to fit. For example, a 3rd gen at our shop we are doing a SAS on with a 3.4, picked up a t100 (i think?) oil pan that allows more clearance up front.
Mar 15, 2011 | 05:56 AM
#111
Thread Starter
Contributing Member
Joined: Apr 2004
Posts: 5,464
Likes: 6
From: Arvada, Colorado
ok so i dont know much about doing a SAS (well nothing really) but plan to do one in the future but in one of your pictures you say the oil pan is going away. what do you mean by that? I can see where clearance would be an issue while on the trails but how would you fix that problem?
 Mar 15, 2011 | 12:06 PM
#112
Registered User
Joined: Aug 2010
Posts: 42
Likes: 0
From: mukilteo
Thanks for the info... i admit to being a newbi but i am slowly learning.
ha yeah no oil pan! good idea but do you always have to put in a new oil pan when doin a SAS?
ha yeah no oil pan! good idea but do you always have to put in a new oil pan when doin a SAS?
Last edited by nick-crain-87yota; Mar 15, 2011 at 12:10 PM.
Mar 15, 2011 | 04:11 PM
#113

Registered User
Joined: Jan 2009
Posts: 12
Likes: 0
Nice looking setup you got going there. I caught some talk about the welding. By the looks of the welds, I would be curious to know what kind and size wire your running and what kind of gas. In my experiences running either copper coated wire or straight CO2 will usually give some results like that. I always prefer a bare wire and some 75-25 gas, because they are alot easier to weld with. IMO But I run TIG 99% of the time now so its been awhile......
Last edited by king0581; Mar 15, 2011 at 04:18 PM.
Mar 17, 2011 | 09:51 AM
#114
Thread Starter
Contributing Member
Joined: Apr 2004
Posts: 5,464
Likes: 6
From: Arvada, Colorado
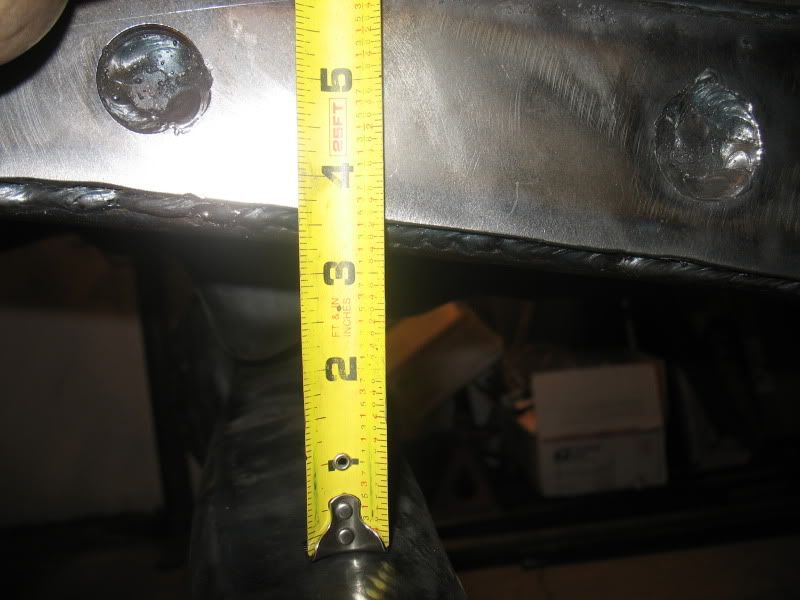
So, this is my first verison of the 3link. I will have to tweak a few measurements I think, but this is where I have the axle now, and where I'm guessing the links will sit. I have to check clearance here, but for a first stab, I like the numbers.
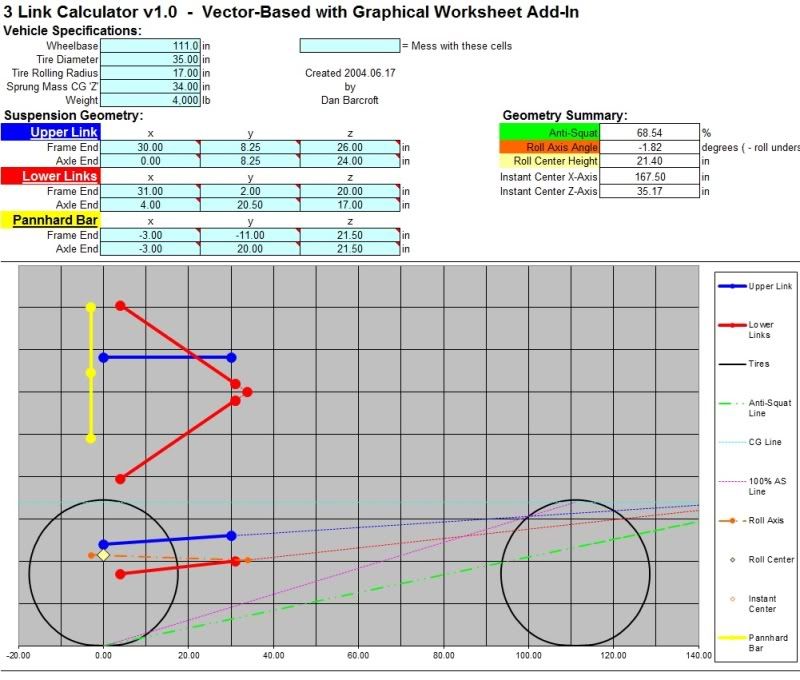
Still have to check on the COG, but I think that is fairly close.
Its looking like 22" at the frame will have to do, though I may be able to sneak it down to 21. However, I'm looking at it, and I think a 2 piece front driveshaft may be needed. I see no way to make the driveshaft clear everything when flexing with the one piece. It also will make a belly pan much easier to install.
Mar 17, 2011 | 09:52 AM
#115
Thread Starter
Contributing Member
Joined: Apr 2004
Posts: 5,464
Likes: 6
From: Arvada, Colorado
Nice looking setup you got going there. I caught some talk about the welding. By the looks of the welds, I would be curious to know what kind and size wire your running and what kind of gas. In my experiences running either copper coated wire or straight CO2 will usually give some results like that. I always prefer a bare wire and some 75-25 gas, because they are alot easier to weld with. IMO But I run TIG 99% of the time now so its been awhile......
Mar 17, 2011 | 10:16 AM
#117
Registered User
Joined: Jan 2009
Posts: 12
Likes: 0
The straight CO2 will do better for the penetration. If I'm going for looks on the welds then I like the 75 argon 25 CO2 with bare wire. But the welds still need to hold! I do have a 250 miller at home that's basically collecting dust but I run 75 25 and bare wire to repair the junk on the farm. I would say the copper coated wire is some of the problem with your spatter, if your settings aren't changing the results. For fun I've tried the settings listed under the hood on my miller and really didn't like the way it ran. I generally run a fuzz more wire.
Mar 17, 2011 | 01:58 PM
#118
Thread Starter
Contributing Member
Joined: Apr 2004
Posts: 5,464
Likes: 6
From: Arvada, Colorado
Thanks!
The straight CO2 will do better for the penetration. If I'm going for looks on the welds then I like the 75 argon 25 CO2 with bare wire. But the welds still need to hold! I do have a 250 miller at home that's basically collecting dust but I run 75 25 and bare wire to repair the junk on the farm. I would say the copper coated wire is some of the problem with your spatter, if your settings aren't changing the results. For fun I've tried the settings listed under the hood on my miller and really didn't like the way it ran. I generally run a fuzz more wire.
Mar 26, 2011 | 05:52 PM
#119
Thread Starter
Contributing Member
Joined: Apr 2004
Posts: 5,464
Likes: 6
From: Arvada, Colorado
Today I spent A LONG time measuring, remeasuring, adjusting, then remeasuring, double checking, etc...
The result: The axle is positioned under the truck. WB is 110. 22 " frame height at ride height. Caster is at a *rough* 3 degrees. That will be adjusted finally when the truck is done, at a shop.
Then, I welded it to the frame with scrap. Well, strong tack welds.
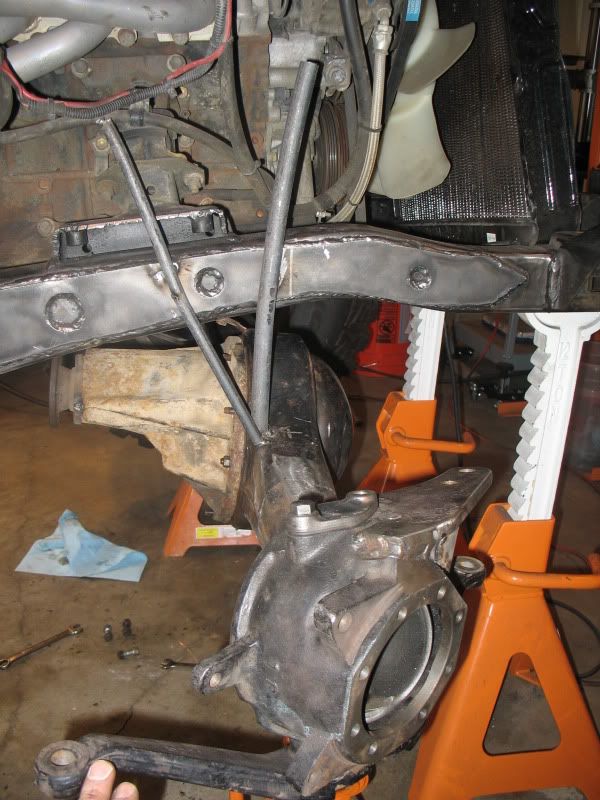
Then, I put the driver hub together, and mounted a tire to check for clearance, and just to get a feel for how things will look. Even stuck a CO in there to look at where I've tenatively placed link mounts in the calculator, and see how CO fits around the other junk.
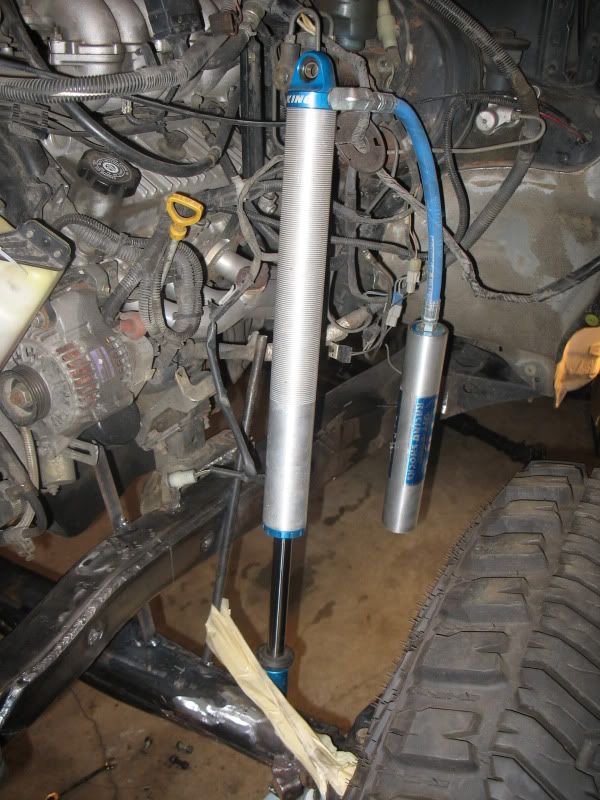
The shock is at 1/2 travel in this pic. Ultimately, it will come down a bit, with hopefully a 60/40 down/up ratio.
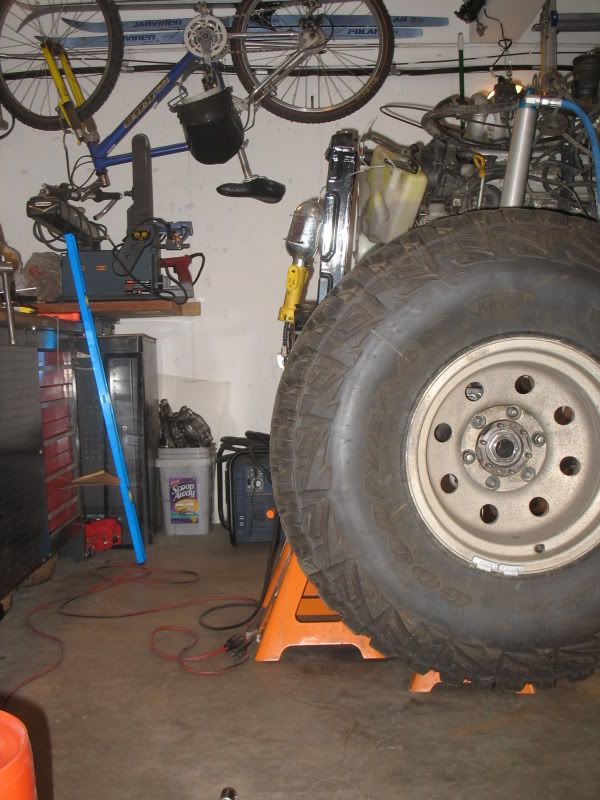
Here is where the tire sits:

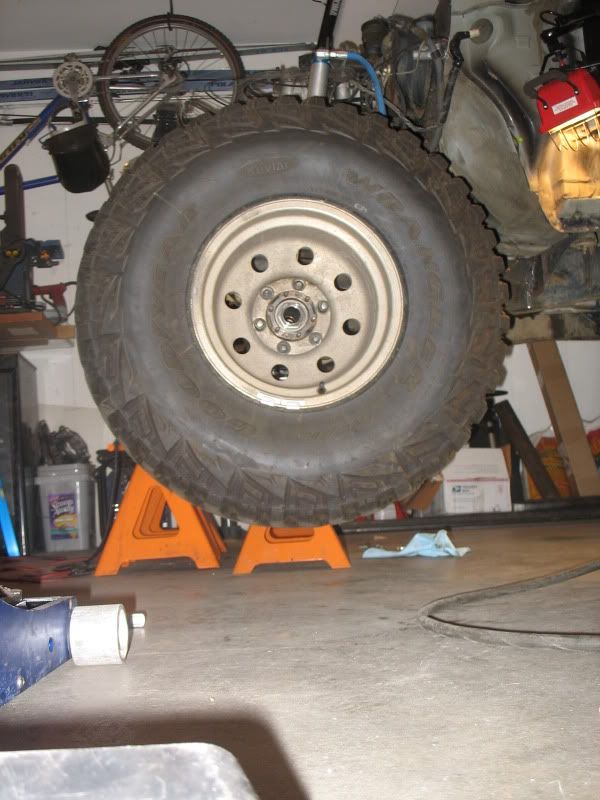
Approach will be halfway decent:
Floor shot to show the total drop. About 4.5"
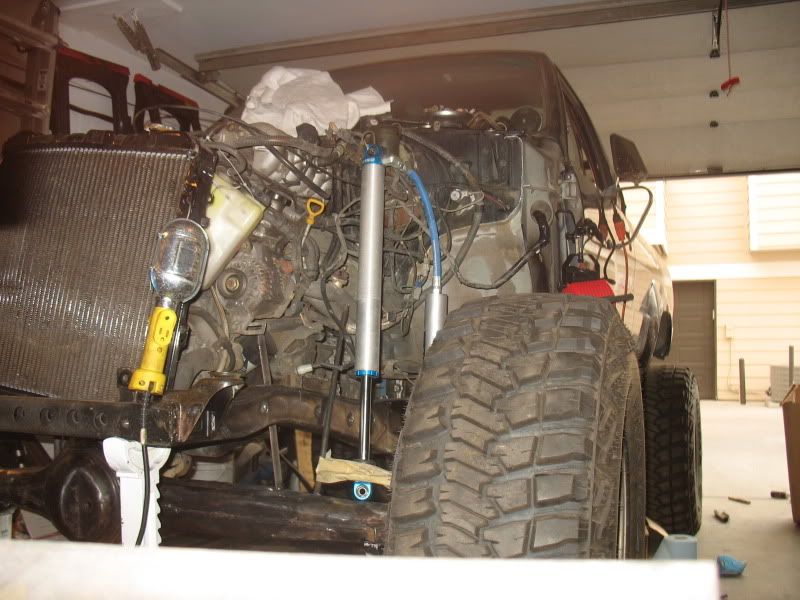
My garage is short, I wanted to get a front shot, but this is about all I got. At full lock, the tire will hit that front body mount, so off they come.
After that I started measuring out and designed the brackets for the lower link crossmember. Tomorrow, I'll cut them out and get that mounted into the truck. Then finalize the numbers in the calculator, check that things fit, and start building link mounts.
The result: The axle is positioned under the truck. WB is 110. 22 " frame height at ride height. Caster is at a *rough* 3 degrees. That will be adjusted finally when the truck is done, at a shop.
Then, I welded it to the frame with scrap. Well, strong tack welds.
Then, I put the driver hub together, and mounted a tire to check for clearance, and just to get a feel for how things will look. Even stuck a CO in there to look at where I've tenatively placed link mounts in the calculator, and see how CO fits around the other junk.
The shock is at 1/2 travel in this pic. Ultimately, it will come down a bit, with hopefully a 60/40 down/up ratio.
Here is where the tire sits:
Approach will be halfway decent:
Floor shot to show the total drop. About 4.5"
My garage is short, I wanted to get a front shot, but this is about all I got. At full lock, the tire will hit that front body mount, so off they come.
After that I started measuring out and designed the brackets for the lower link crossmember. Tomorrow, I'll cut them out and get that mounted into the truck. Then finalize the numbers in the calculator, check that things fit, and start building link mounts.


