
Baby Beast Morph 2
 Jun 26, 2011 | 08:28 PM
#141
Thread Starter
Contributing Member
Joined: Apr 2004
Posts: 5,464
Likes: 6
From: Arvada, Colorado
Today sucked, and was kinda good. It sucked in that I figured out that my frame is tweaked up front. Just a bit on the passenger side. However, given that I have to notch the frame for the links, and the IFS frames kinda suck, I am giving some serious thought to chopping the frame just rearward of the firewall body mount and using tube (probably 2x3) for the front.
I spent a lot of time measuring today, and decided I need a second person to be sure. But something is off.
I'm also trying to figure out how to mount my steering box. Currently, if I use an FJ80 box, It will want to sit directly over the axle= bad for compression travel.
A shorter pitman arm would do the trick, but I'm still trying to wrap my head around how that will affect my turning radius.
Anyway, I decided I needed to think for a while.
I did take off my pitman arm, and reverse it to simulate an FJ80 box. Then put in a PVC drag link, and panhard rod after that.
Sorry, pictures will have to wait, camera was dead.
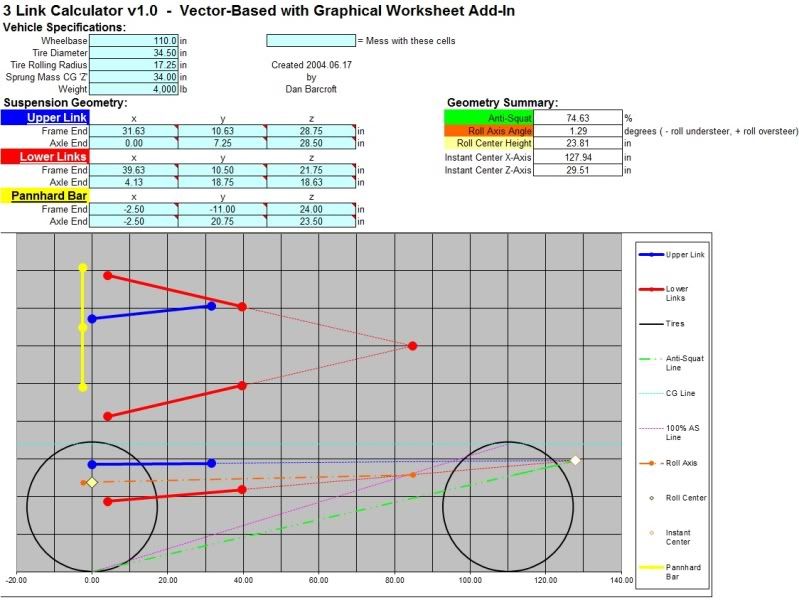
This is the updated calculator:
I spent a lot of time measuring today, and decided I need a second person to be sure. But something is off.
I'm also trying to figure out how to mount my steering box. Currently, if I use an FJ80 box, It will want to sit directly over the axle= bad for compression travel.
A shorter pitman arm would do the trick, but I'm still trying to wrap my head around how that will affect my turning radius.
Anyway, I decided I needed to think for a while.
I did take off my pitman arm, and reverse it to simulate an FJ80 box. Then put in a PVC drag link, and panhard rod after that.
Sorry, pictures will have to wait, camera was dead.
This is the updated calculator:
Jun 26, 2011 | 08:34 PM
#142
Sorry? I'm not following that one? Those are the stock 80 arms in the pic there, that are just holding the trunion bearings in until I get my new knuckles from Hellfire. These are mock up knuckles, so there are plates welded up top to simulate the new high steer for this axle.
Jul 2, 2011 | 01:22 PM
#144
Thread Starter
Contributing Member
Joined: Apr 2004
Posts: 5,464
Likes: 6
From: Arvada, Colorado
DETOUR!!!
It turns out that IFS frames are great for keeping IFS trucks low, but NOT good for keeping the truck low with a solid axle. It is doable, but requires some sacrifices that I don't want to do.
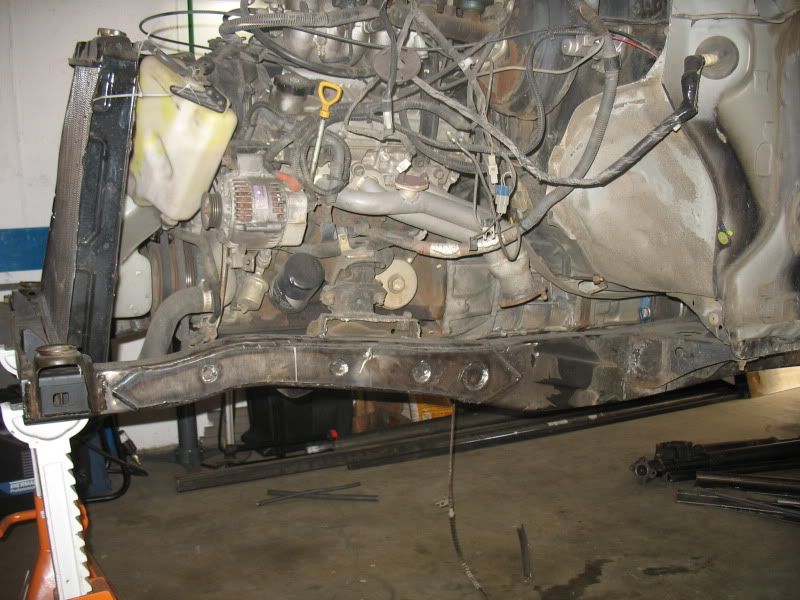
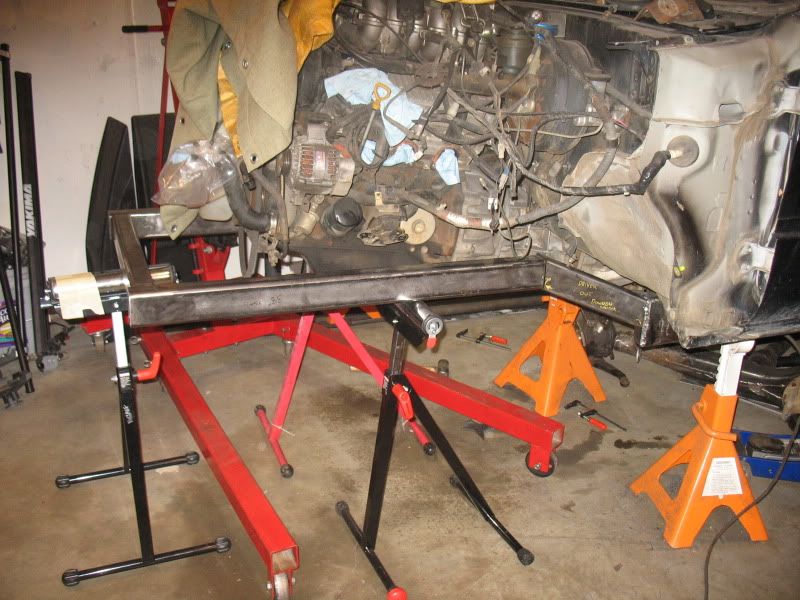
So, thankfully, I was able to borrow an engine hoist, and with some work of the plasma cutter, sawzall, and grinder, I went from this:
To this:
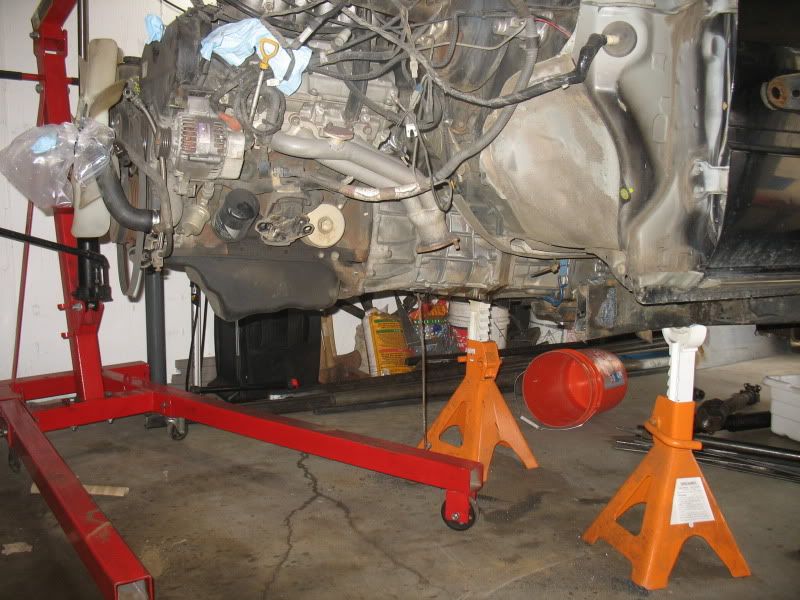
In a couple of labor intensive hours.
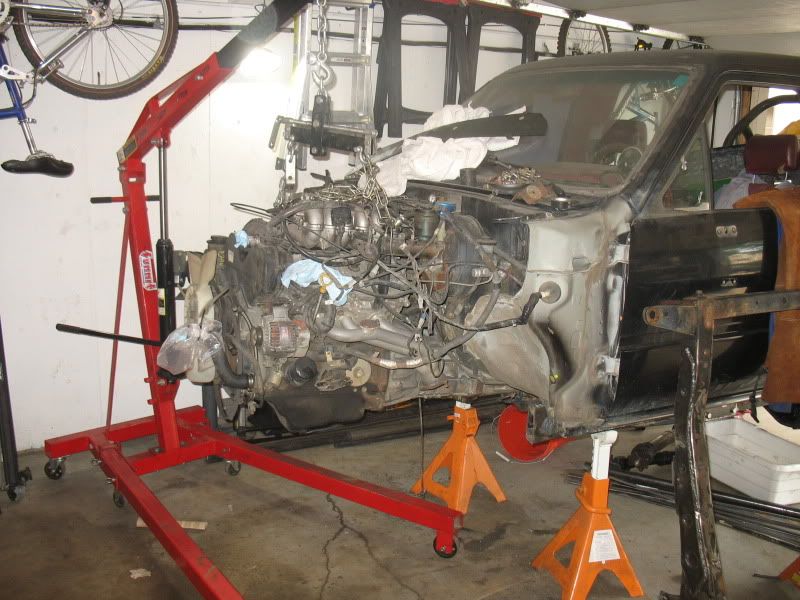
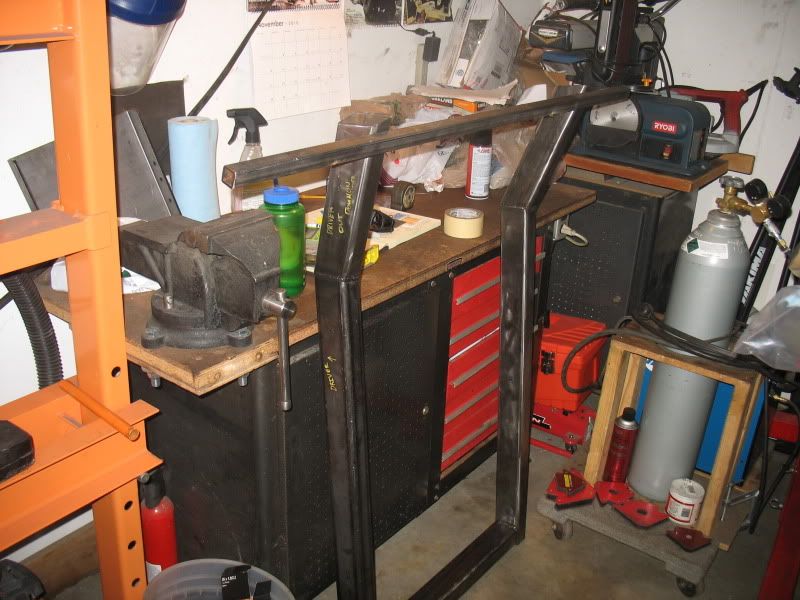
So i have a new sculpture in my garage:
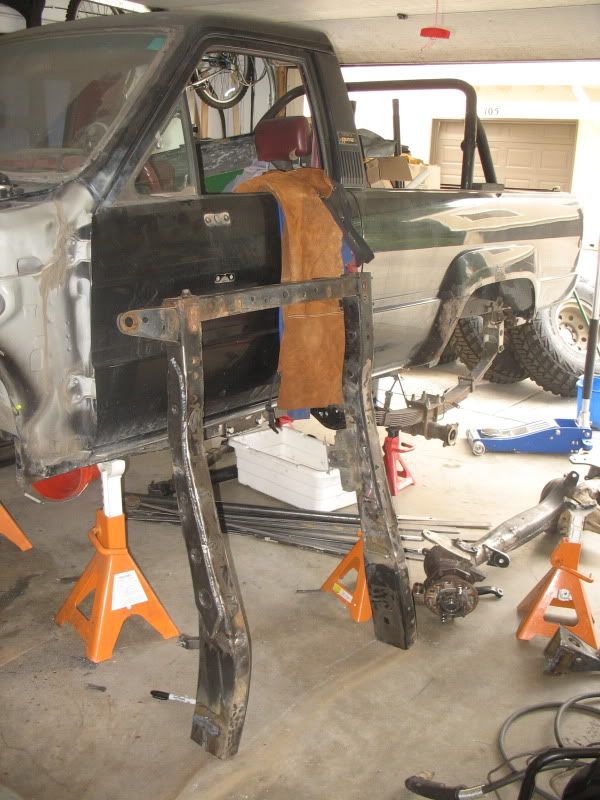
I hope to have the new frame built over the rest of the weekend, but I know that there are some large, unforseen, obstacles that will undoubtedly show up and put me further behind.
It turns out that IFS frames are great for keeping IFS trucks low, but NOT good for keeping the truck low with a solid axle. It is doable, but requires some sacrifices that I don't want to do.
So, thankfully, I was able to borrow an engine hoist, and with some work of the plasma cutter, sawzall, and grinder, I went from this:
To this:
In a couple of labor intensive hours.
So i have a new sculpture in my garage:
I hope to have the new frame built over the rest of the weekend, but I know that there are some large, unforseen, obstacles that will undoubtedly show up and put me further behind.
Jul 2, 2011 | 10:16 PM
#147
Thread Starter
Contributing Member
Joined: Apr 2004
Posts: 5,464
Likes: 6
From: Arvada, Colorado
Jul 3, 2011 | 02:58 AM
#149
have you thought about using the front of a 2WD frame?
your route is probably a lot better though. the frame plates you made were awesome.
I am debating about cutting off my shock hoops and doing a set of those on my '81...it would be a good excuse to correct my 1st timer's crappy IFS steering box mount mistake
can't wait to see how this turns out...
your route is probably a lot better though. the frame plates you made were awesome.
I am debating about cutting off my shock hoops and doing a set of those on my '81...it would be a good excuse to correct my 1st timer's crappy IFS steering box mount mistake
can't wait to see how this turns out...
Jul 5, 2011 | 07:33 AM
#150
Thread Starter
Contributing Member
Joined: Apr 2004
Posts: 5,464
Likes: 6
From: Arvada, Colorado
The 2wd frame is good, but this is better. Here I can set the height where I like, AND I don't have to do any more plating because of the new material already being thick enough. It is going to suck to drill out, but in the end, should be nice and strong.
Jul 5, 2011 | 07:28 PM
#151
Thread Starter
Contributing Member
Joined: Apr 2004
Posts: 5,464
Likes: 6
From: Arvada, Colorado
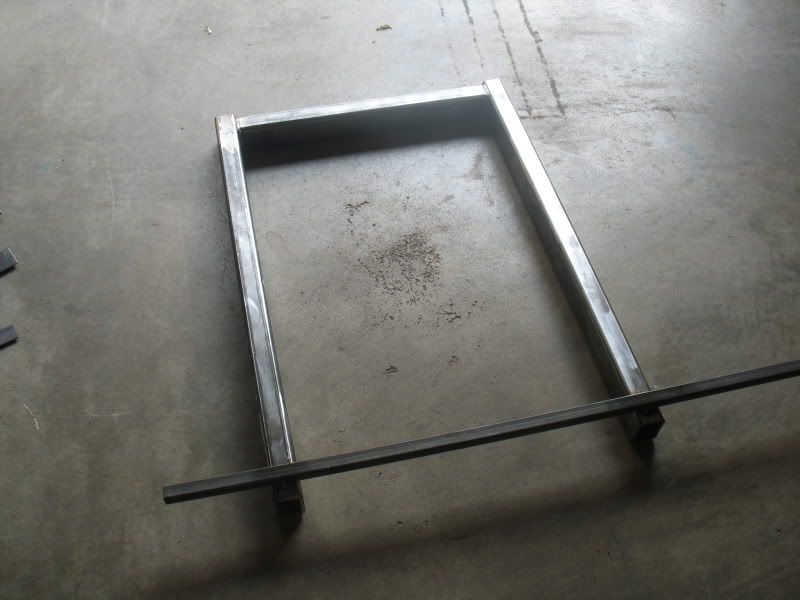
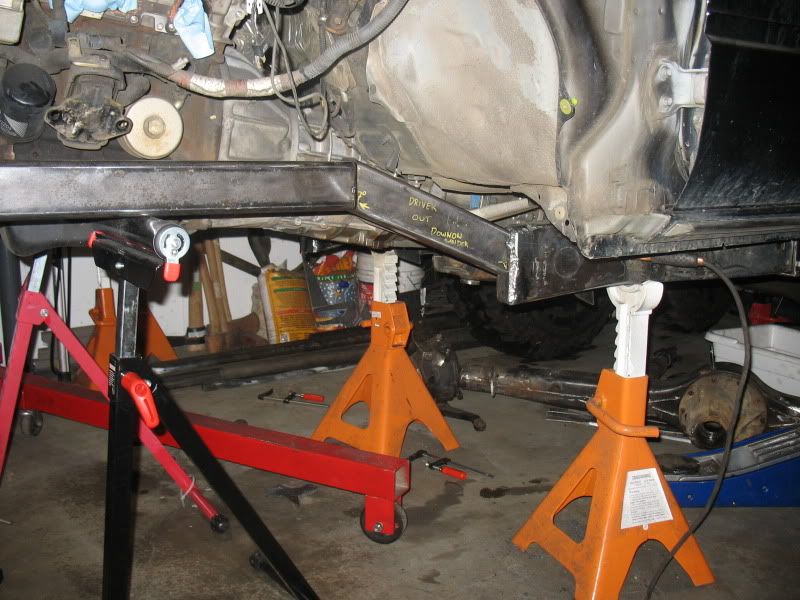
Here is the short progress I made yesterday.
This is essentially the new frame from the firewall forward. The cross piece of 1x1 is just to hold the whole thing square during welding.
This is the same width as stock, but will be around 3-4" higher than the original (depending on what part you measure from, the stock frame is curved.)
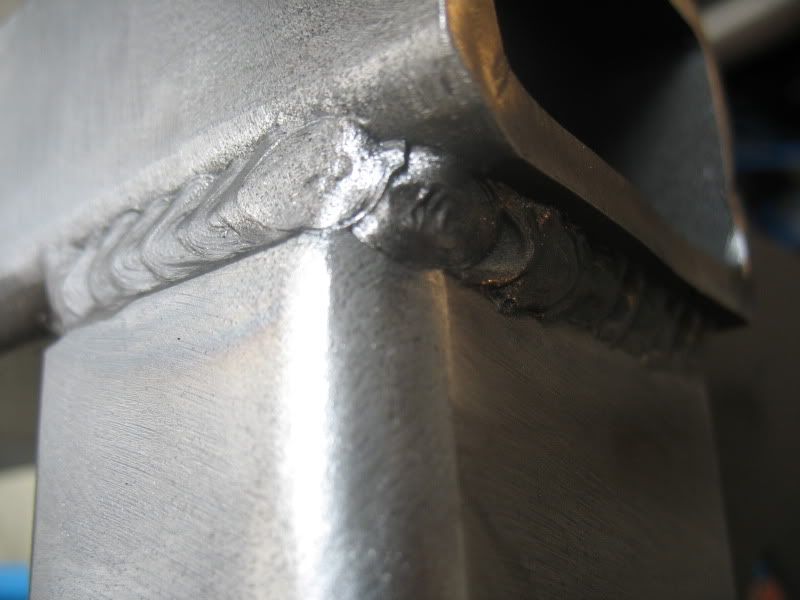
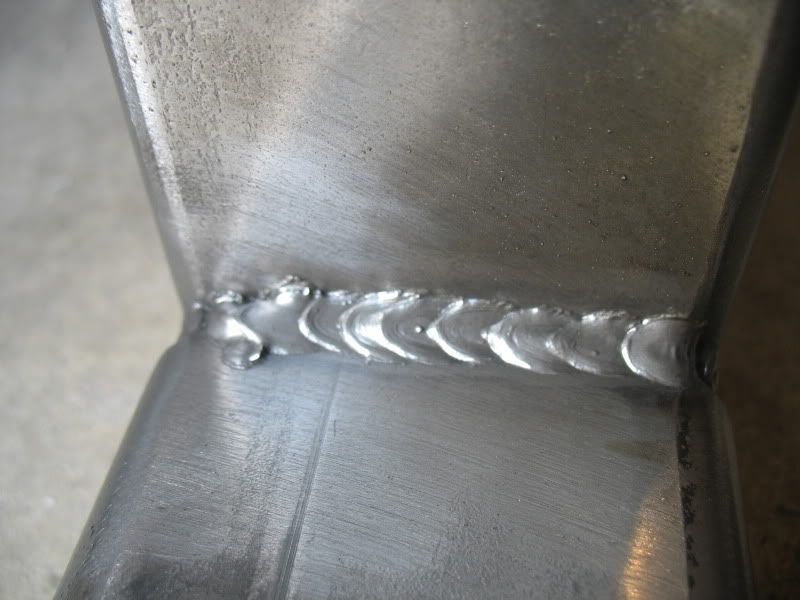
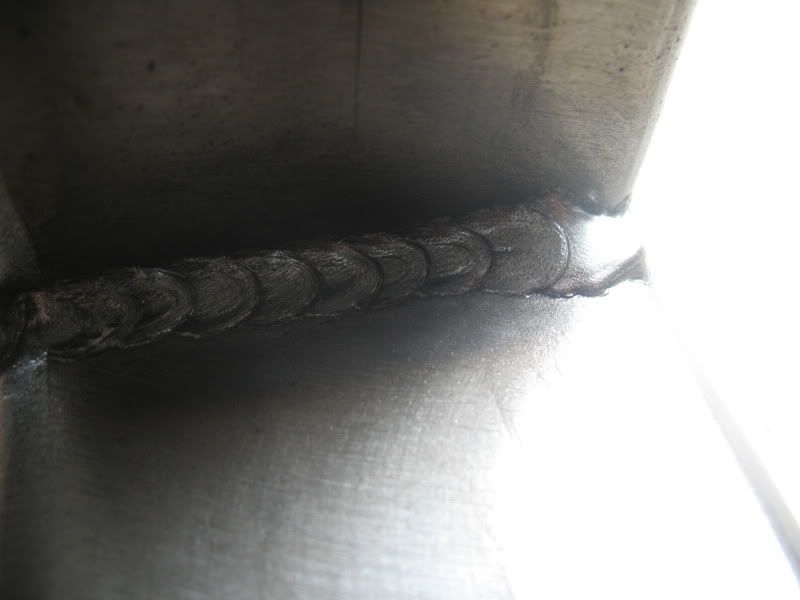
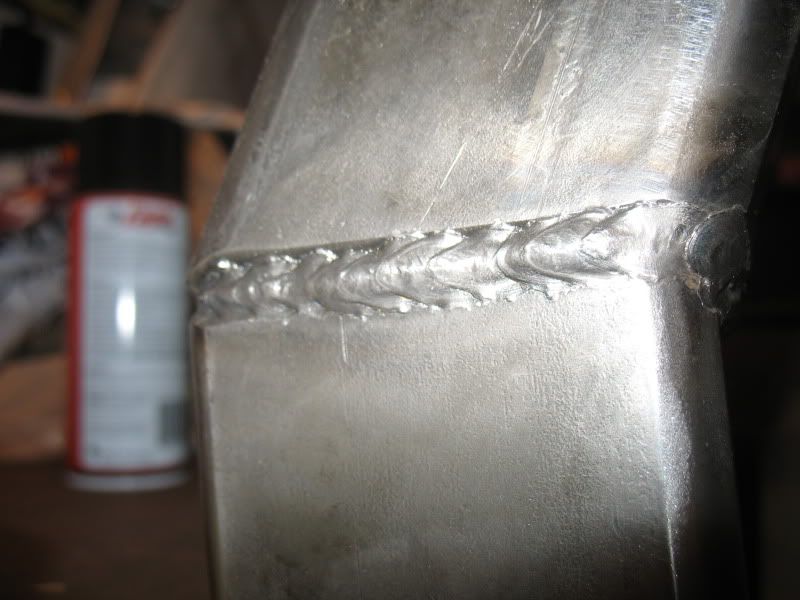
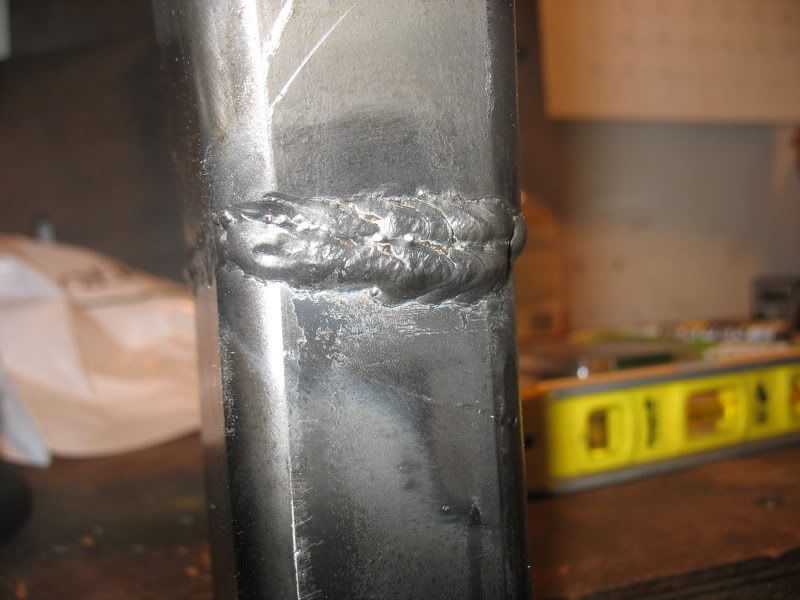
Here are my welds. I feel like I'm getting better, but I am still having issues with getting a very consistant electrode stick-out. I wander a bit in and out, which makes, I think, for the the slight irregularities in the bead. I also seem to be better at welding longer sections, on the inside of a joint, rather than on the outside seam.
Here, the center, front piece, was beveled at as close to 45 on all sides, and was set back just slightly from the front to give an adequate weld surface for my rather newb technique. The side pieces were simply prepped to bare metal with a prep disk, and wiped off clean with a towel.
The slight "shine" you see is my anti-spatter spray. I don't know what exactly I'm doing wrong, but I get TONS of spatter, and with 1/4", the welder is as high up as it goes. Wire speed adjustment seems to get me nowhere. The spray makes it manageable after you hit the welded areas with a wire wheel/brush.
I'm currently using the circle, pause, circle technique, where I am pushing the puddle, I make a circle/oval up the seam on one piece, curve through the seam, back into the other piece, and back to essentially the center of the circle. Then, pause, then move forward with the next. Its more like a swirl motion, so the bead moves along. Part of the issue is that I'm not yet hitting circles, and I generally sit more on the oval side.
Critique's welcome.

This is essentially the new frame from the firewall forward. The cross piece of 1x1 is just to hold the whole thing square during welding.
This is the same width as stock, but will be around 3-4" higher than the original (depending on what part you measure from, the stock frame is curved.)
Here are my welds. I feel like I'm getting better, but I am still having issues with getting a very consistant electrode stick-out. I wander a bit in and out, which makes, I think, for the the slight irregularities in the bead. I also seem to be better at welding longer sections, on the inside of a joint, rather than on the outside seam.
Here, the center, front piece, was beveled at as close to 45 on all sides, and was set back just slightly from the front to give an adequate weld surface for my rather newb technique. The side pieces were simply prepped to bare metal with a prep disk, and wiped off clean with a towel.
The slight "shine" you see is my anti-spatter spray. I don't know what exactly I'm doing wrong, but I get TONS of spatter, and with 1/4", the welder is as high up as it goes. Wire speed adjustment seems to get me nowhere. The spray makes it manageable after you hit the welded areas with a wire wheel/brush.
I'm currently using the circle, pause, circle technique, where I am pushing the puddle, I make a circle/oval up the seam on one piece, curve through the seam, back into the other piece, and back to essentially the center of the circle. Then, pause, then move forward with the next. Its more like a swirl motion, so the bead moves along. Part of the issue is that I'm not yet hitting circles, and I generally sit more on the oval side.
Critique's welcome.
 Spatter may be too much shielding gas or too little. If the flow is too high it can actually make little eddies of swirling oxygen into the weld.
Jul 5, 2011 | 07:53 PM
Spatter may be too much shielding gas or too little. If the flow is too high it can actually make little eddies of swirling oxygen into the weld.
Jul 5, 2011 | 07:53 PM
#153
Registered User
Joined: Jan 2008
Posts: 11,338
Likes: 120
From: Austin, Texas
Honestly you're hand speed looks too fast. I'd turn the wire speed down and really try to build the puddle up more so you can get more heat in there. Also, before doing any of that, instead of pushing the puddle, try pulling it. If you're having trouble with the trigger hand wandering, try supporting your trigger hand's wrist with your other hand. I can weld dimes all day with support under my trigger hand but if I take that away they start looking like crap.

Jul 6, 2011 | 06:25 AM
#154
Thread Starter
Contributing Member
Joined: Apr 2004
Posts: 5,464
Likes: 6
From: Arvada, Colorado
Hmmm, great points.
Scuba, sadly, I already do support my hand
Excellent point on the shielding gas. I have it up higher because I thought, "why not"? Good to know that it can be too high. Thanks!
Scuba, sadly, I already do support my hand
Excellent point on the shielding gas. I have it up higher because I thought, "why not"? Good to know that it can be too high. Thanks!
Jul 8, 2011 | 10:23 PM
#155
Thread Starter
Contributing Member
Joined: Apr 2004
Posts: 5,464
Likes: 6
From: Arvada, Colorado
Spent a bunch of time running around today, but did get some work done.
I also spent a bunch of time on the belt sander. Takes forever, but gets good, clean angles. Wish I had something better than I do, but it works.
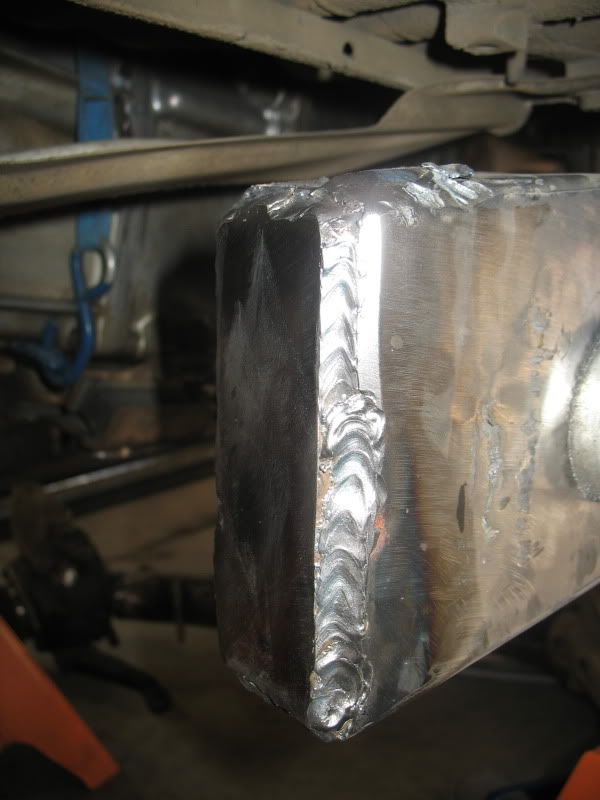
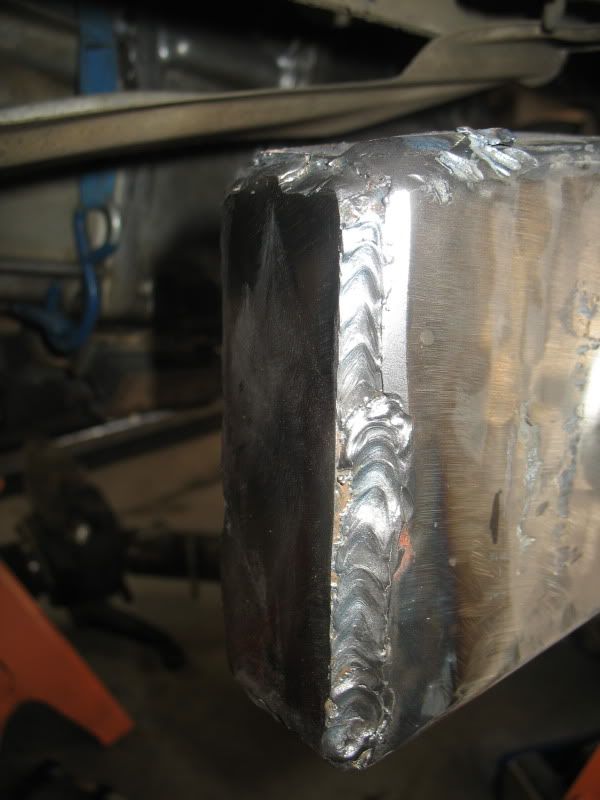
Anyway, just starting to mock things in place. The first thing I did was cap the ends of the frame with some 1/4" plate. I practiced some welds going vertical and overhead before trying this. They came out okay. The issue I had was that my practice welds were 1/4 to 1/4, and this was 1/4 to 1/8. Here is how they came out:
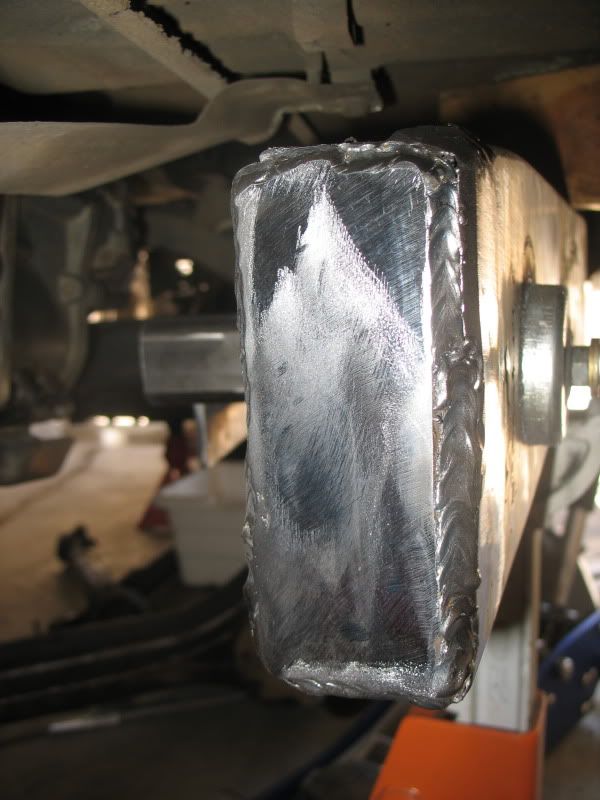
Anyway, I'm not too worried about them because after the new frame is in place, all weld joints will be getting plated over.
I am still fighting angles and getting the main frame mocked up with connection pieces to the old. I seriously need a second me to hold the tape, and help think through this.
Here is where I ended up this evening:
Hopefully better progress tomorrow.
I also spent a bunch of time on the belt sander. Takes forever, but gets good, clean angles. Wish I had something better than I do, but it works.
Anyway, just starting to mock things in place. The first thing I did was cap the ends of the frame with some 1/4" plate. I practiced some welds going vertical and overhead before trying this. They came out okay. The issue I had was that my practice welds were 1/4 to 1/4, and this was 1/4 to 1/8. Here is how they came out:
Anyway, I'm not too worried about them because after the new frame is in place, all weld joints will be getting plated over.
I am still fighting angles and getting the main frame mocked up with connection pieces to the old. I seriously need a second me to hold the tape, and help think through this.
Here is where I ended up this evening:
Hopefully better progress tomorrow.
Jul 10, 2011 | 05:27 PM
#156
Thread Starter
Contributing Member
Joined: Apr 2004
Posts: 5,464
Likes: 6
From: Arvada, Colorado
Spent most of yesterday re-measureing and re-cutting and re-sanding all the angles. Even though the belt sander is slow, it does get the correct angles very nicely.
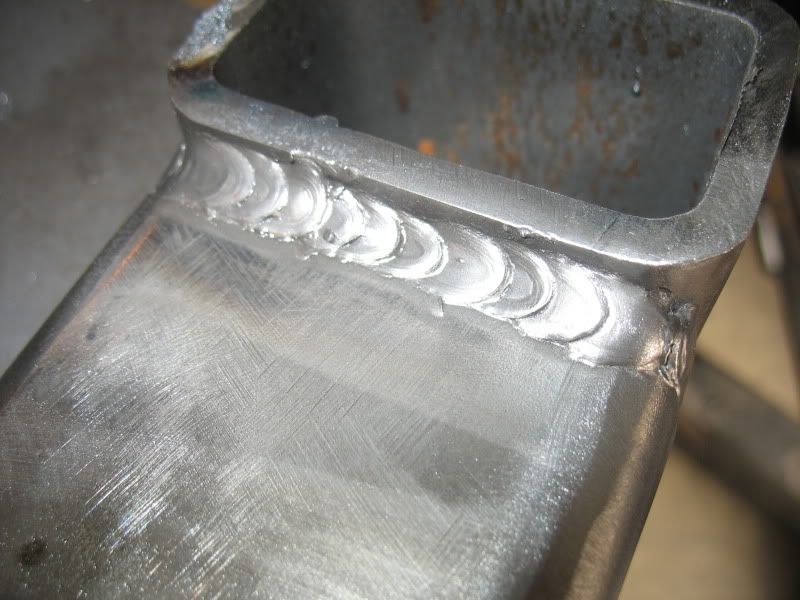
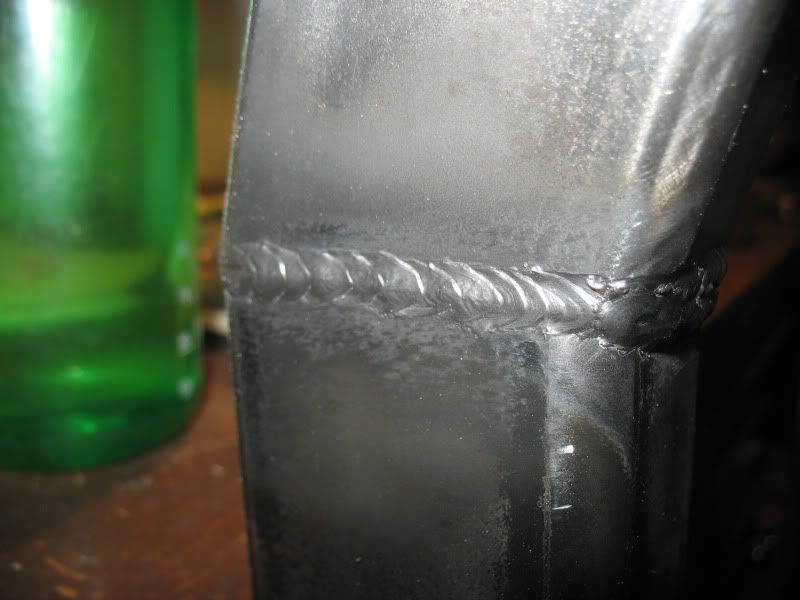
So, I got the drop sections of the frame welded up:
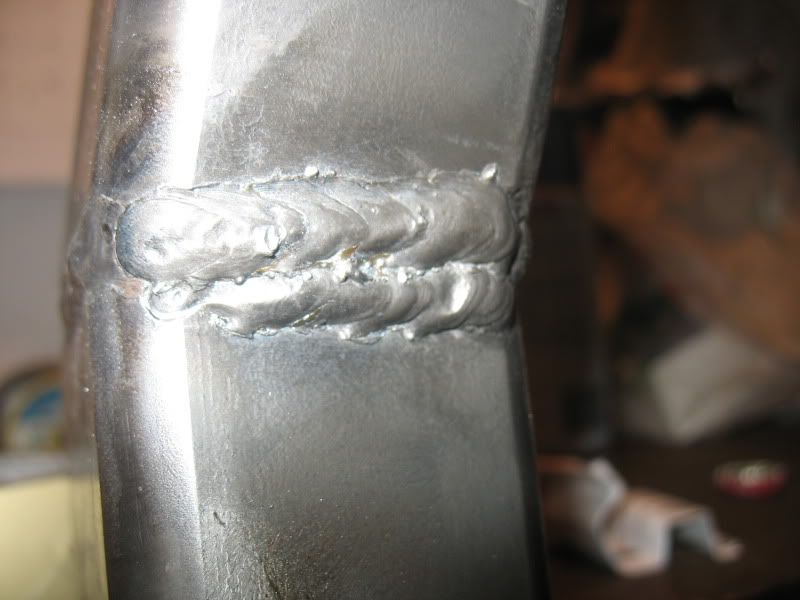
And I worked on slowing down my travel speed, but, IMO, the welds seem worse. Still structurally sound, but not "stacking" as I would prefer. The only thing that got ugly was when I went to try triple pass welds on on the bottom side. First one layed in the beveled area nicely, but it was too deep, so I welded one pass on the one side, and then a third on the other, and it came out crappy. :confused:
Anyway, a couple shots:
Sides:
And the multi pass garbage:
So, I got the drop sections of the frame welded up:
And I worked on slowing down my travel speed, but, IMO, the welds seem worse. Still structurally sound, but not "stacking" as I would prefer. The only thing that got ugly was when I went to try triple pass welds on on the bottom side. First one layed in the beveled area nicely, but it was too deep, so I welded one pass on the one side, and then a third on the other, and it came out crappy. :confused:
Anyway, a couple shots:
Sides:
And the multi pass garbage:
Jul 10, 2011 | 07:27 PM
#158
Thread Starter
Contributing Member
Joined: Apr 2004
Posts: 5,464
Likes: 6
From: Arvada, Colorado
Total chaos would have been the bomb. If I could have kept it, I would have. But I also wanted to do this for a long, long time. For me, fabricating and wrenching are a blast, and something I love to do, about as much as I like wheeling.
In the end, I'll get to have something that I put together and thats what its about for me.
Who knows? When this is done, it might be time for a LT runner for going fast
In the end, I'll get to have something that I put together and thats what its about for me.
Who knows? When this is done, it might be time for a LT runner for going fast
Jul 16, 2011 | 03:05 PM
#159
Thread Starter
Contributing Member
Joined: Apr 2004
Posts: 5,464
Likes: 6
From: Arvada, Colorado
I have a front frame again! Well, almost. I need to overlap the joint between the original frame and the new frame, but the measurement and double checking is finally done.

This is actually about 5" longer than the original frame. This is to accomodate a winch mount in front of the radiator.
Shot of the other joint overlap plates. I was experimenting with a couple different techinques, and I think, finally got what I wanted.


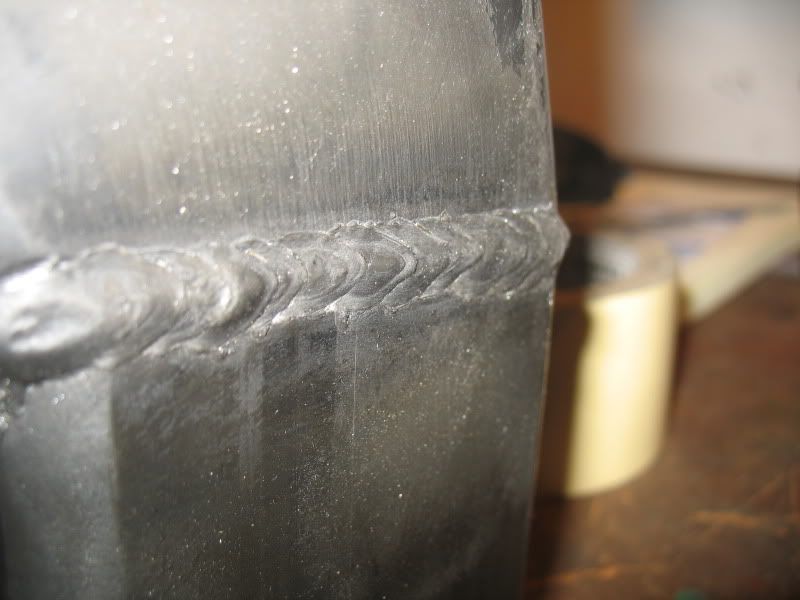
Here are a couple shots of the tripple pass welds I made, this time cleaning out the joints in between. These are vertical welds.


Here is one of the ones with the techinque that I like, that I made on the bench. IMO, a bit better

This is actually about 5" longer than the original frame. This is to accomodate a winch mount in front of the radiator.
Shot of the other joint overlap plates. I was experimenting with a couple different techinques, and I think, finally got what I wanted.
Here are a couple shots of the tripple pass welds I made, this time cleaning out the joints in between. These are vertical welds.
Here is one of the ones with the techinque that I like, that I made on the bench. IMO, a bit better


