
Baby Beast Morph 2

 Feb 13, 2011 | 05:41 PM
#84
Thread Starter
Contributing Member
Joined: Apr 2004
Posts: 5,464
Likes: 6
From: Arvada, Colorado
Got a bunch of errands run this weekend, as well as the house cleaned and taxes done.
Bought a bunch of steel on Friday, and today I picked up the rest from my folks place.

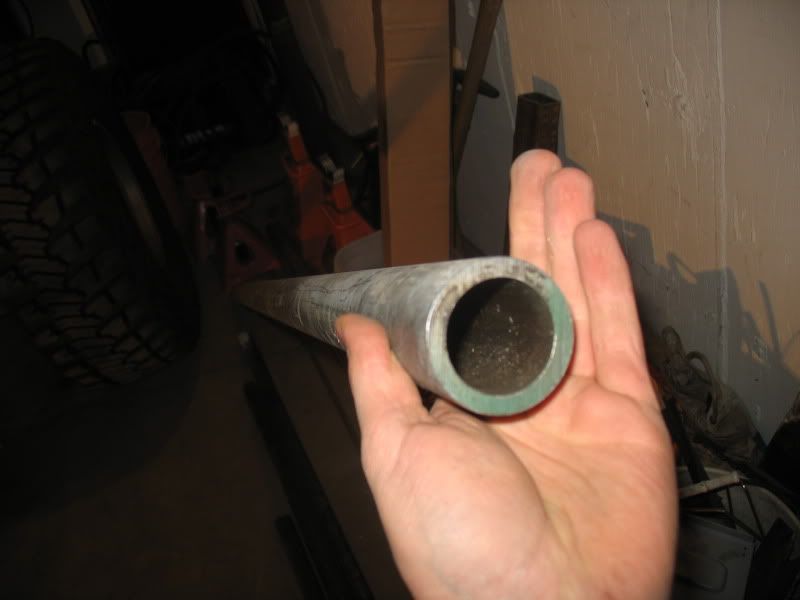
Lower link material is .250 wall 2" OD DOM. May also sleeve this inside with .120 wall tube, just for the heck of it. We'll see. To me, this 2" seems SUPER strong, but I've thought that before.
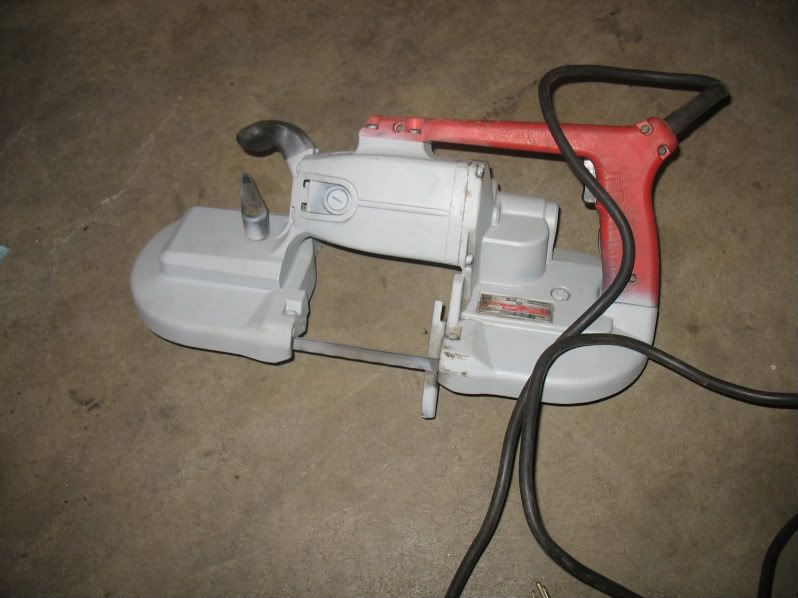
Also on Friday, I got a screaming deal on this. Refurbed Milwaukee portable band saw. Oh man, does it cut REALLY nice, super clean, and very quiet. Don't even need hearing protection.
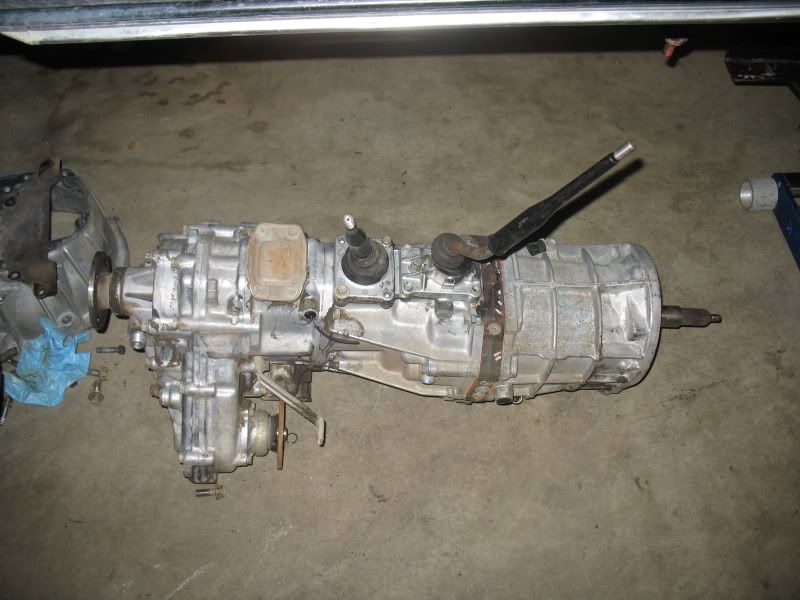
I cleaned off the R151 and transfercase at the local carwash. Took 20 bucks, and its still not perfect, but its a TON better than it was, and the little bits of extra crap I can take off pretty quickly.
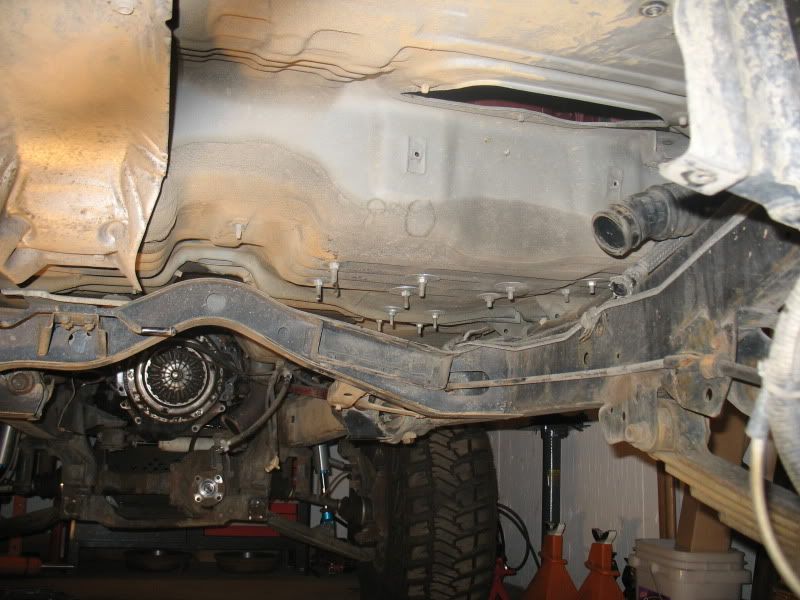
On Saturday I got the fuel and exhuast systems removed, so I'm close to having my blank canvas.
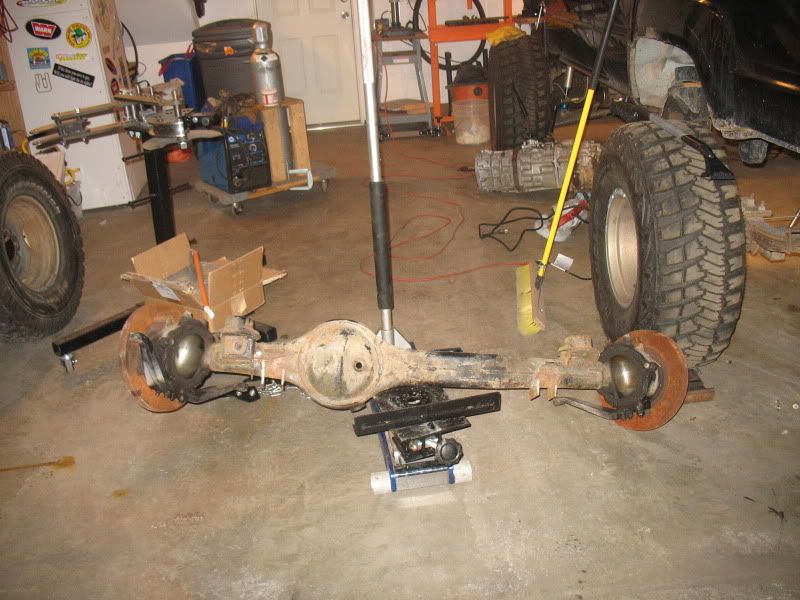
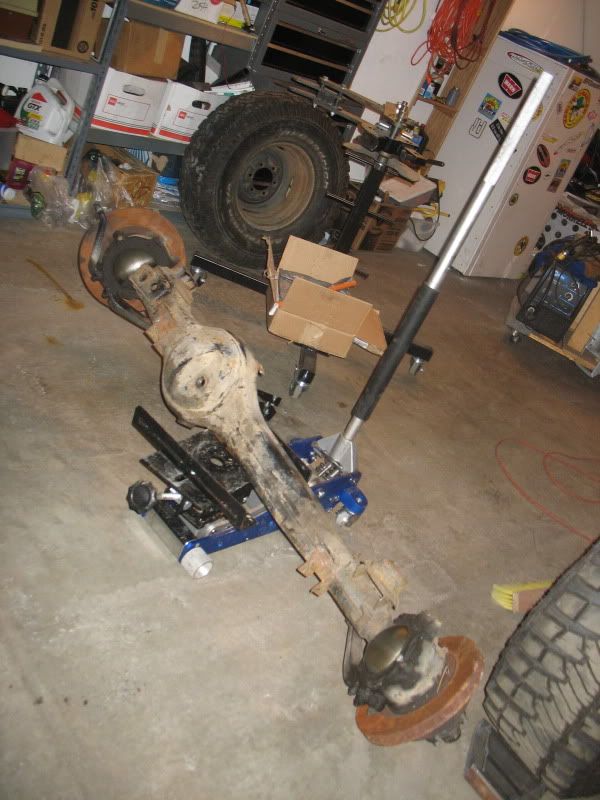
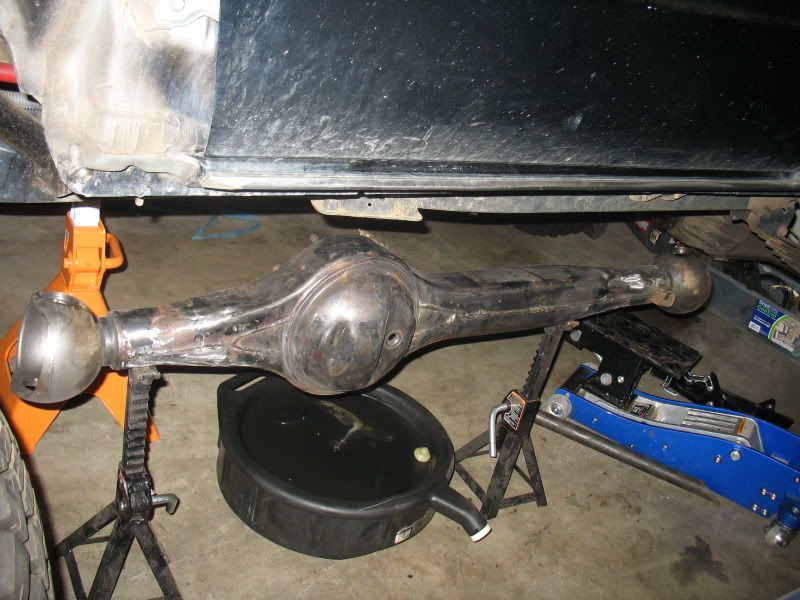
Lastly, I picked up my axle from my folks place. I'm super excited to get this baby under the truck. Obviously, it will also need a visit to the car wash first.
Bought a bunch of steel on Friday, and today I picked up the rest from my folks place.
Lower link material is .250 wall 2" OD DOM. May also sleeve this inside with .120 wall tube, just for the heck of it. We'll see. To me, this 2" seems SUPER strong, but I've thought that before.
Also on Friday, I got a screaming deal on this. Refurbed Milwaukee portable band saw. Oh man, does it cut REALLY nice, super clean, and very quiet. Don't even need hearing protection.
I cleaned off the R151 and transfercase at the local carwash. Took 20 bucks, and its still not perfect, but its a TON better than it was, and the little bits of extra crap I can take off pretty quickly.
On Saturday I got the fuel and exhuast systems removed, so I'm close to having my blank canvas.
Lastly, I picked up my axle from my folks place. I'm super excited to get this baby under the truck. Obviously, it will also need a visit to the car wash first.
Feb 16, 2011 | 07:59 AM
#86
Thread Starter
Contributing Member
Joined: Apr 2004
Posts: 5,464
Likes: 6
From: Arvada, Colorado
Other than that, its not any different, just stronger.
Feb 27, 2011 | 08:03 PM
#87
Thread Starter
Contributing Member
Joined: Apr 2004
Posts: 5,464
Likes: 6
From: Arvada, Colorado
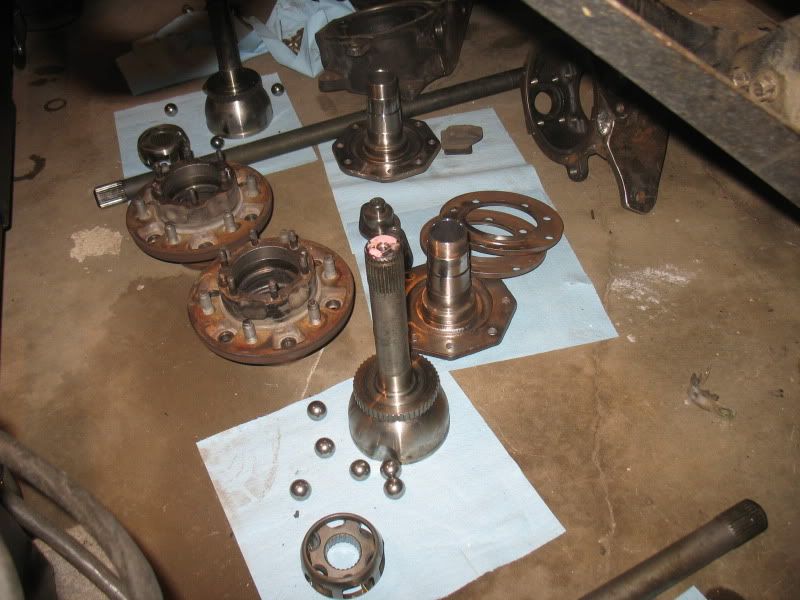
Last weekend, I got the 80 axle all cleaned up, all the brackets, etc.. plasma's off, and the axles/birfs/knuckles cleaned up. Took a long time, as everything was quite rusted. However, the birfs, bells and knuckles all look good, and there was plenty of good grease left inside.
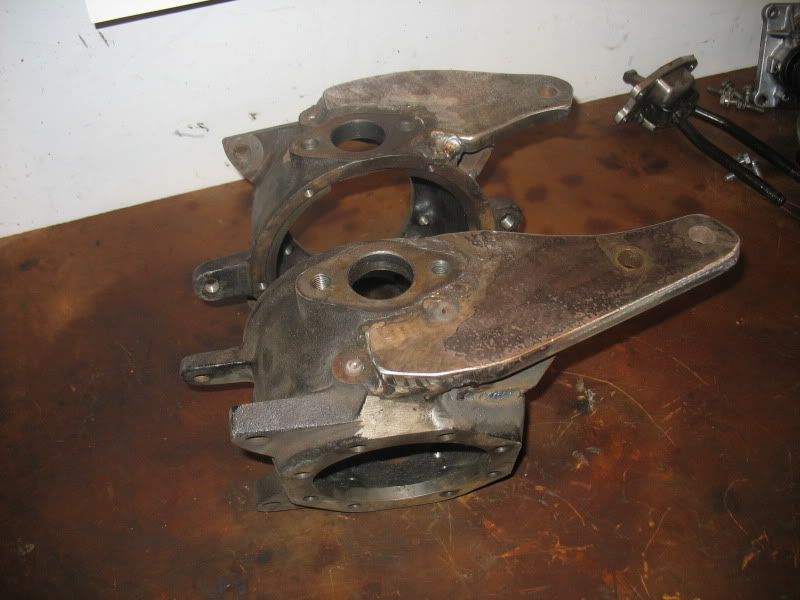
Last week, I got some mock up knuckles from HellFire Fab-Works. Billy is a GREAT guy to work with, and has been really cool in all our communications. These are mock up ONLY, and are simply to allow me to set up the steering, and panhard angles before the new knuckles come out.
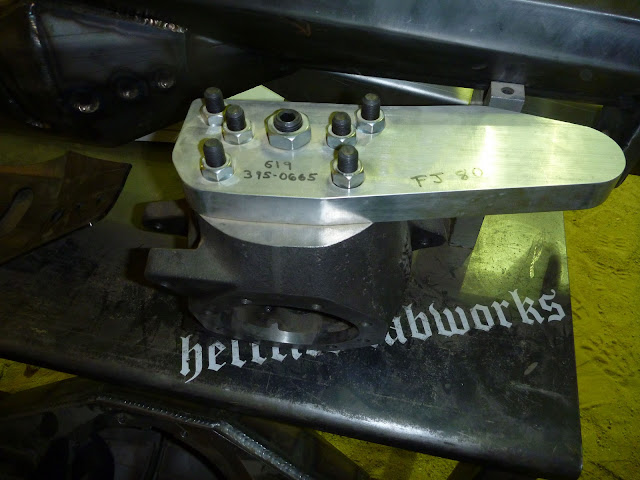
To get everyone on the same page, these are what the actual knuckles will be like, once the next batch is done being cast:

Next, I tore down my old dual cases, and found this lovely gem awaiting me:
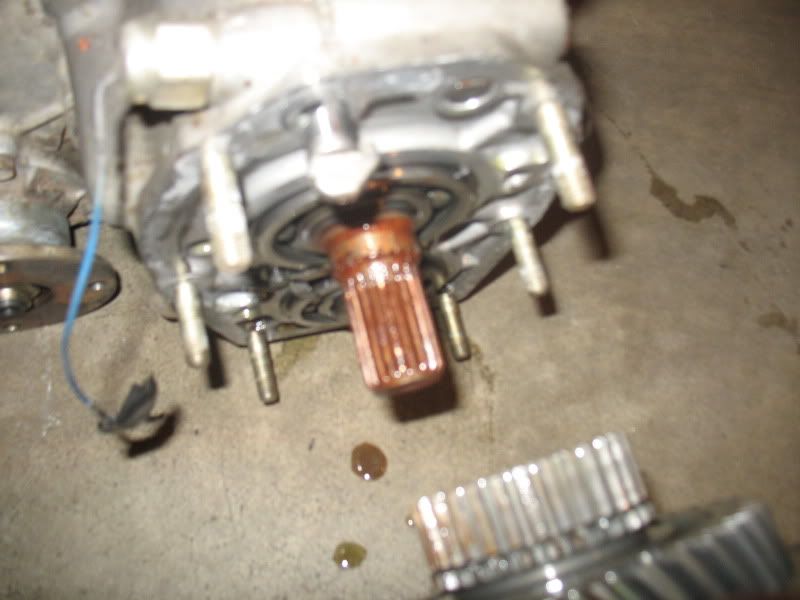
Looks like that area isn't seeing oiling as it should. Everything else in the case was clean.
I cleaned up the r151 case and installed that as my new crawl box. Nothing is sealed and no oil is in, as everything will need to be pulled again, so I can install 23 spline stuff from Marlin. For mock up, this will work just fine.
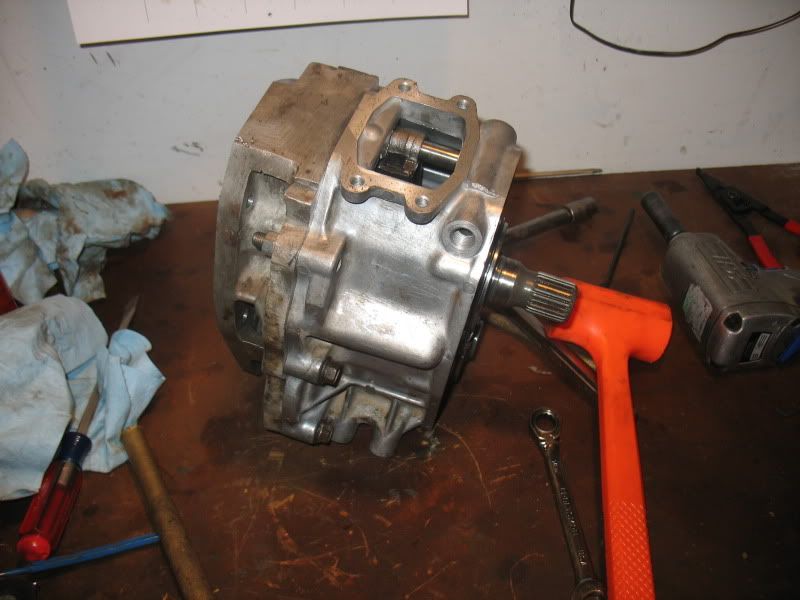
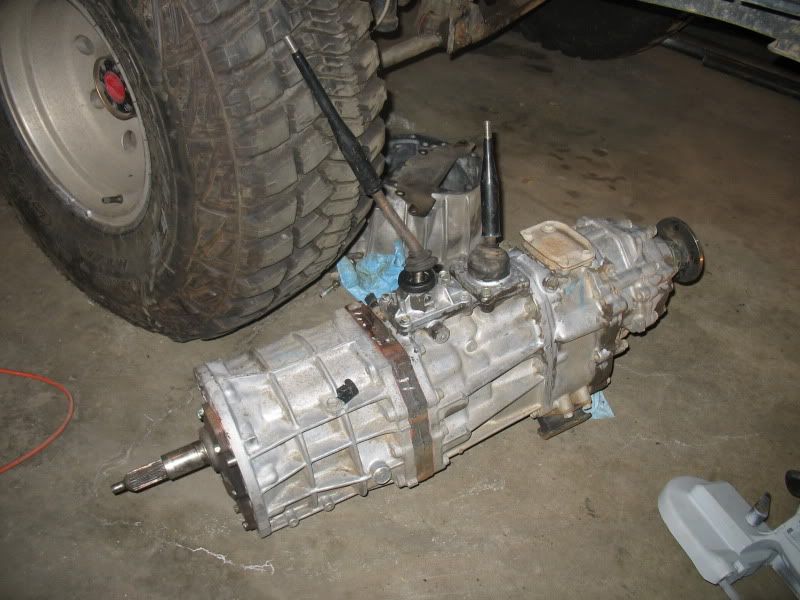
Then, everything got bolted back together. I always forget how LONG this thing is.
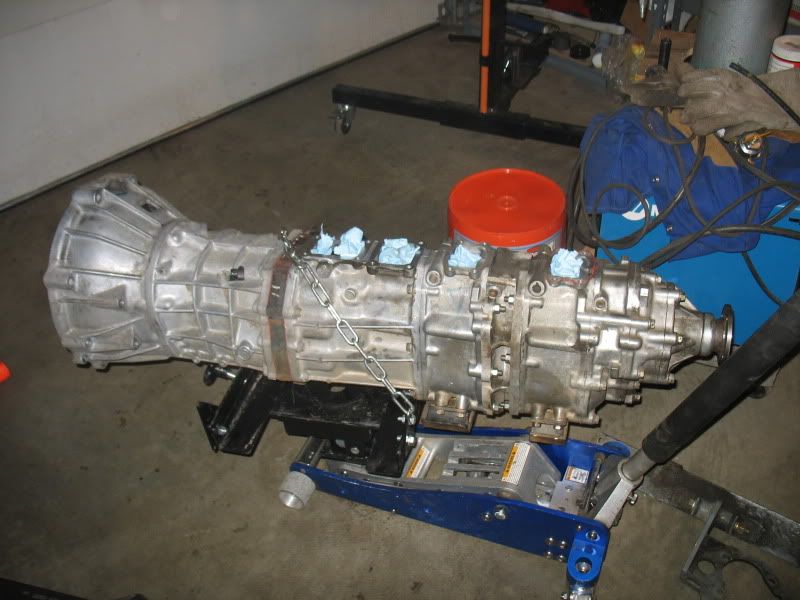
Got everything in the truck, and started messing with drivetrain angles.
Then I spent about 2 hours with a tape measure, and a beer, sitting on the floor staring at this thing.
This is where it sits.
On my other runner, I cut out the floor, and did a full flat bottom. I hated the noise of that thing, and the lack of a center console, as well as the position it forced the seats to be in.
This has the 3.4 at a 3 deg back angle, stock appears to be 5. I'm tempted to leave it here. However, the loss of clearance is what has kept me from calling this final.
On the one hand, in order to triangulate the lowers on the front, to cut down on over-steer, I will need to drop the lowers slightly below frame level to keep them from hitting on the frame rails at full bump (theoretically. The bump may not be that severe, or even possible given the engine position)
However, this is far lower than those will need to be.
Anyway, this will result in some more thinking, and deciding what compromises are acceptable.
Last week, I got some mock up knuckles from HellFire Fab-Works. Billy is a GREAT guy to work with, and has been really cool in all our communications. These are mock up ONLY, and are simply to allow me to set up the steering, and panhard angles before the new knuckles come out.
To get everyone on the same page, these are what the actual knuckles will be like, once the next batch is done being cast:
Next, I tore down my old dual cases, and found this lovely gem awaiting me:
Looks like that area isn't seeing oiling as it should. Everything else in the case was clean.
I cleaned up the r151 case and installed that as my new crawl box. Nothing is sealed and no oil is in, as everything will need to be pulled again, so I can install 23 spline stuff from Marlin. For mock up, this will work just fine.
Then, everything got bolted back together. I always forget how LONG this thing is.
Got everything in the truck, and started messing with drivetrain angles.
Then I spent about 2 hours with a tape measure, and a beer, sitting on the floor staring at this thing.
This is where it sits.
On my other runner, I cut out the floor, and did a full flat bottom. I hated the noise of that thing, and the lack of a center console, as well as the position it forced the seats to be in.
This has the 3.4 at a 3 deg back angle, stock appears to be 5. I'm tempted to leave it here. However, the loss of clearance is what has kept me from calling this final.
On the one hand, in order to triangulate the lowers on the front, to cut down on over-steer, I will need to drop the lowers slightly below frame level to keep them from hitting on the frame rails at full bump (theoretically. The bump may not be that severe, or even possible given the engine position)
However, this is far lower than those will need to be.
Anyway, this will result in some more thinking, and deciding what compromises are acceptable.
Mar 6, 2011 | 05:07 PM
#89
Thread Starter
Contributing Member
Joined: Apr 2004
Posts: 5,464
Likes: 6
From: Arvada, Colorado
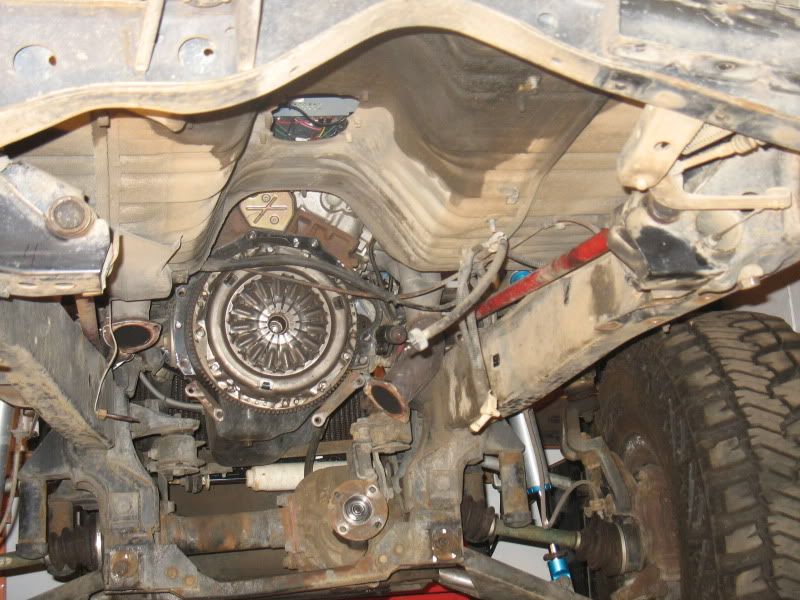
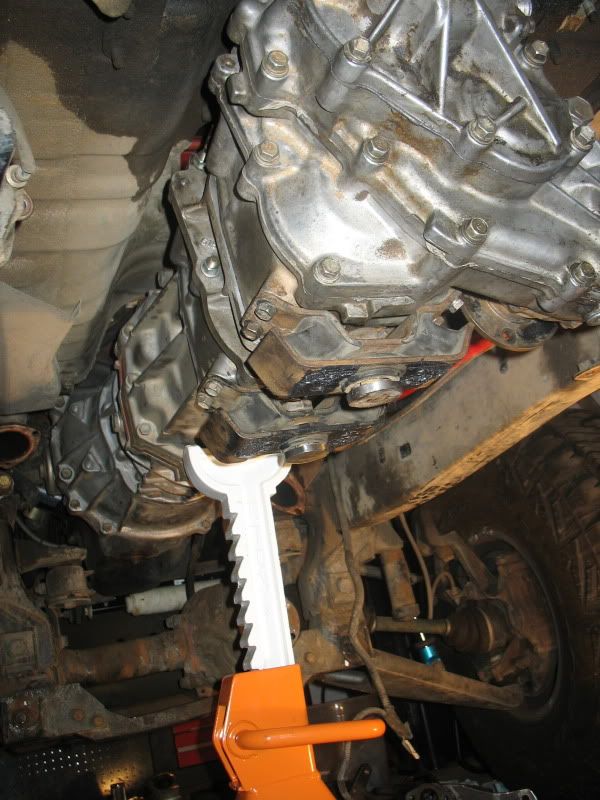
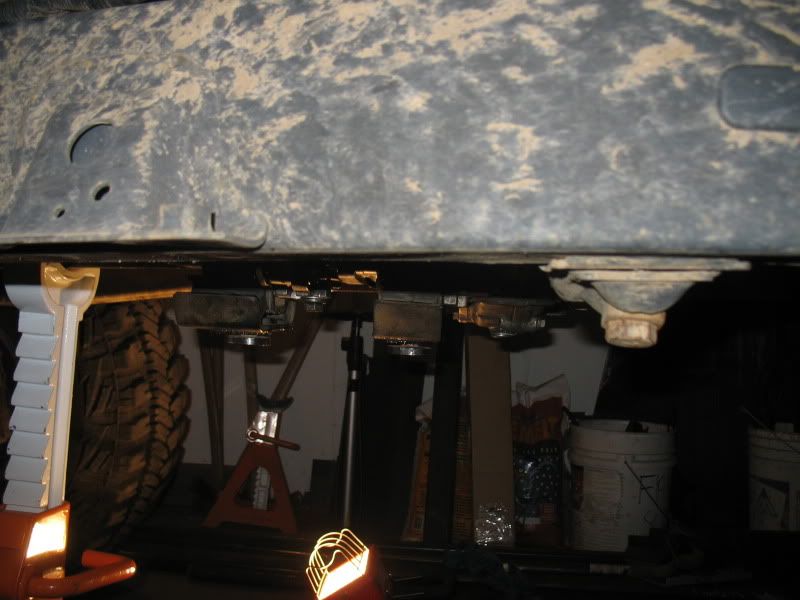
Not a lot of time to work this weekend, but I got all of the IFS carefully removed so it can be shipped out, and started cutting. I'm not looking forward to the grinding.
All of the IFS out:
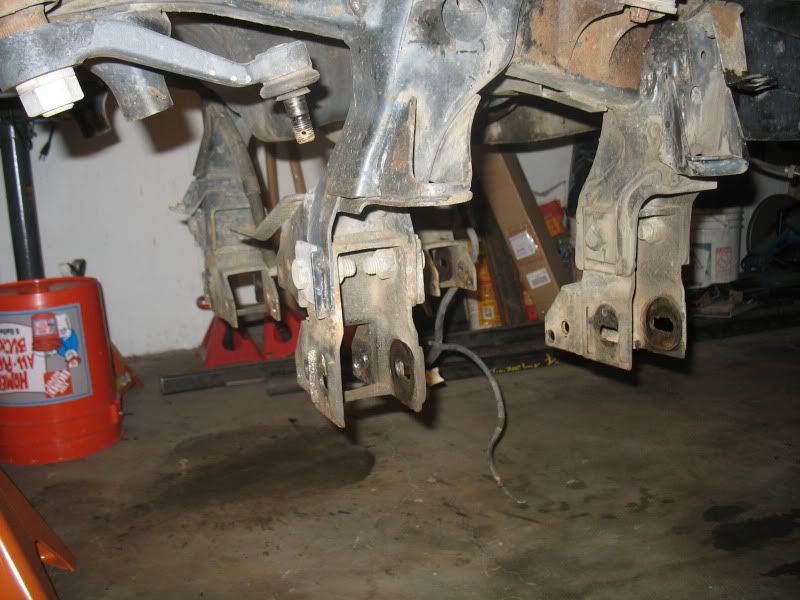
And 10 minutes with the plasma got rid of everything on one side. Got later, and I don't like to be loud late.
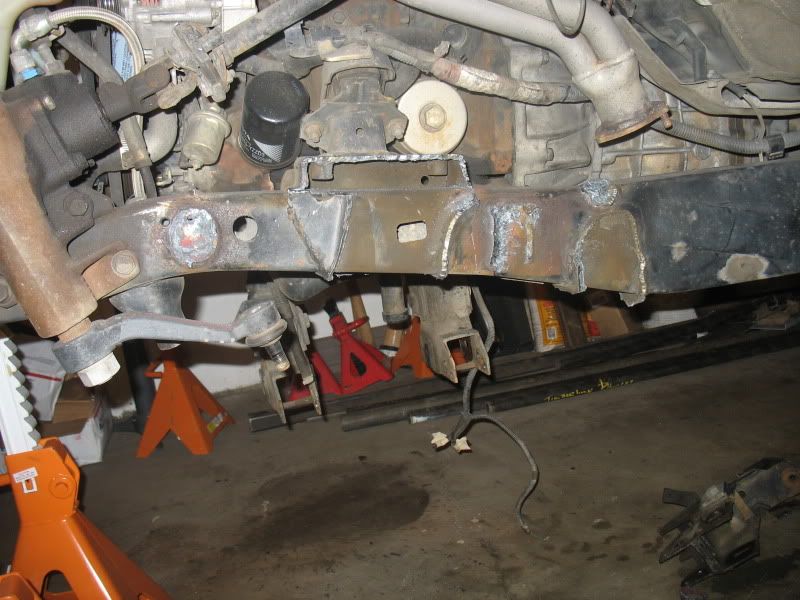
Hopefully I'll have more time next weekend, and can get the rest cleaned up.
All of the IFS out:
And 10 minutes with the plasma got rid of everything on one side. Got later, and I don't like to be loud late.
Hopefully I'll have more time next weekend, and can get the rest cleaned up.
Mar 8, 2011 | 12:24 PM
#90
Registered User
Joined: Oct 2008
Posts: 1,018
Likes: 2
From: New Britain, CT
In the immortal words of Dr. Smith:
http://www.wavsource.com/snds_2011-0...space/pain.wav
Still can't wait to see how this turns out!
http://www.wavsource.com/snds_2011-0...space/pain.wav
Still can't wait to see how this turns out!
Mar 8, 2011 | 01:49 PM
#91
Thread Starter
Contributing Member
Joined: Apr 2004
Posts: 5,464
Likes: 6
From: Arvada, Colorado
In the immortal words of Dr. Smith:
http://www.wavsource.com/snds_2011-0...space/pain.wav
Still can't wait to see how this turns out!
http://www.wavsource.com/snds_2011-0...space/pain.wav
Still can't wait to see how this turns out!
Mar 8, 2011 | 03:30 PM
#92
Registered User
Joined: Oct 2008
Posts: 1,018
Likes: 2
From: New Britain, CT
That's really weird. Try this:
http://www.wavsource.com/snds_2011-03-06_3519476934527464/tv/lost_in_space/pain.wav
It's a short .wav recording from the classic Lost in Space show.
http://www.wavsource.com/snds_2011-03-06_3519476934527464/tv/lost_in_space/pain.wav
It's a short .wav recording from the classic Lost in Space show.
Last edited by Zelephant; Mar 8, 2011 at 03:32 PM.
Mar 8, 2011 | 04:29 PM
#94
Registered User
Joined: Aug 2009
Posts: 299
Likes: 0
From: Sandy Eggo
While you're working on links for the front, not sure if you're aware of this setup...
http://www.4wheelunderground.com/
No relationship, just liked the details of it.
http://www.4wheelunderground.com/
No relationship, just liked the details of it.
Mar 9, 2011 | 03:37 PM
#95
Thread Starter
Contributing Member
Joined: Apr 2004
Posts: 5,464
Likes: 6
From: Arvada, Colorado
Eh, that kit is okay, but won't work for me. I don't like the bracket locations (rock anchors) and it doesn't have enough triangulation. My lowers will sit below the frame, but will be integrated into a subframe/skid pan, which will allow then to slide over rocks rather than hang up.
Mar 11, 2011 | 07:01 AM
#96
Registered User
Joined: Jun 2009
Posts: 414
Likes: 0
From: North Carolina
Eh, that kit is okay, but won't work for me. I don't like the bracket locations (rock anchors) and it doesn't have enough triangulation. My lowers will sit below the frame, but will be integrated into a subframe/skid pan, which will allow then to slide over rocks rather than hang up.
Last edited by stock as possible; Mar 11, 2011 at 07:08 AM.
Mar 12, 2011 | 09:20 PM
#97
Thread Starter
Contributing Member
Joined: Apr 2004
Posts: 5,464
Likes: 6
From: Arvada, Colorado
The issue I have with the Ballistic stuff is just money. I love Ballistic products and used them on my last build. I just can't afford it with all the other stuff. I have the tools, so all it takes is time.
Mar 12, 2011 | 09:24 PM
#98
Thread Starter
Contributing Member
Joined: Apr 2004
Posts: 5,464
Likes: 6
From: Arvada, Colorado
Progress has been good and bad this weekend.
I started off yesterday trying to bend up some tube for the skeleton of my subframe. Mistook a line in the bending grease for my actual line, and messed up 40 bucks worth of tube. Spent a bunch of time trying to figure out if it was salvageable, decided it wasn't, and then decided I didn't like the design at all anyway.
Back to the drawing board, but I was really frustrated so I decided to continue work on the front.
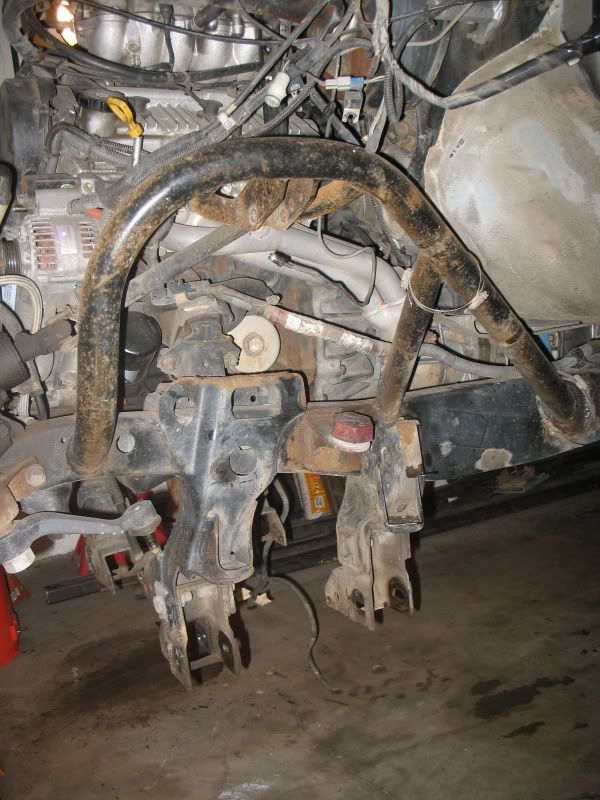
I got some gouging tips for the plasma, which work really well. Took off all of the welds reasonably quickly, but more importantly, without the numbing, deafening experience of the grinder. Quick work with a disk and it was all cleaned up:
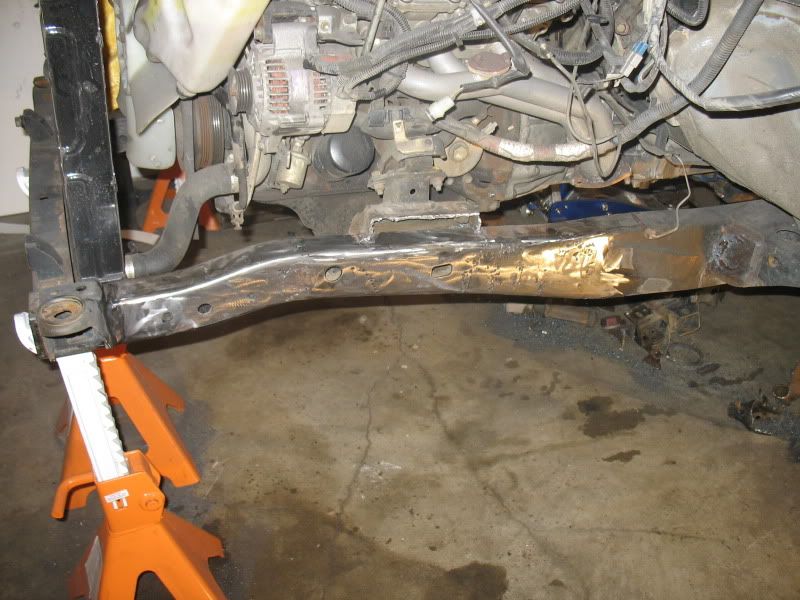
Finished off the other side as well.
I also got a stand off for the plasma tip, and it works amazing. I was able to whip out some frame plates fairly quickly, touched up the edges with the belt sander, and hole sawed/step drilled some weld holes.
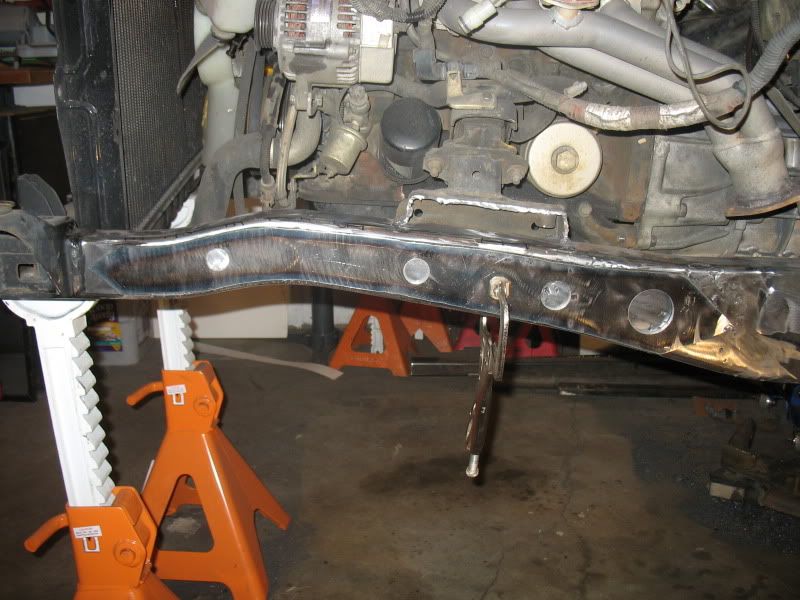
I only got the driver side cleaned up and drilled, the passenger side will have to wait until tomorrow.
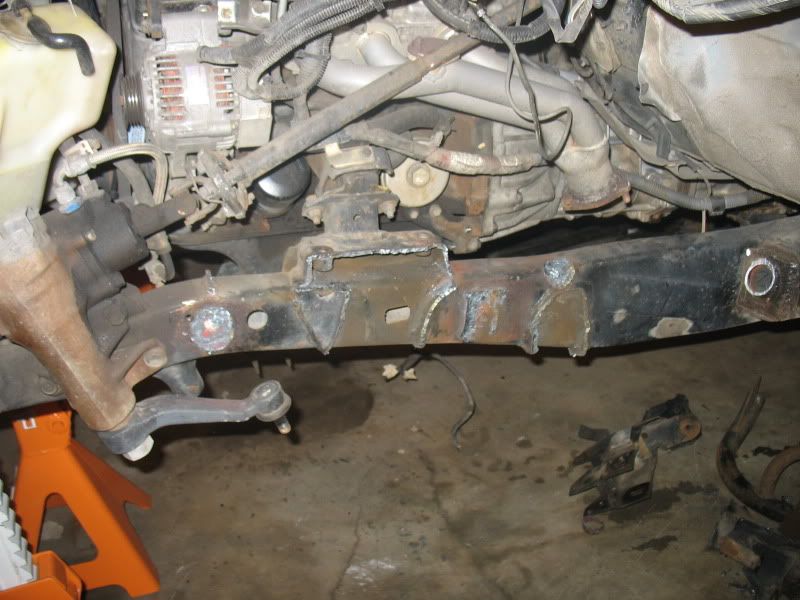
I got this side all welded up. I'm happy with the weld penetration, as it seems really solid on both surfaces, but I'm not happy with the presentation of the welds. While I realize that the quality, and not the look, counts, I am trying hard to improve my technique. I just cannot, for the life of me, get a "stacked dimes" look. It ALWAYS comes out looking like this long blobous bead, with no stacking at all. I'm thinking it has to be the angle that I hold the gun at, because I notice on my overhead welds, they look a lot less uniform, and that has to do with the awkward position. I also think it may be that I'm moving more of a U than a C when stitching the weld, but I can't seem to get the C.
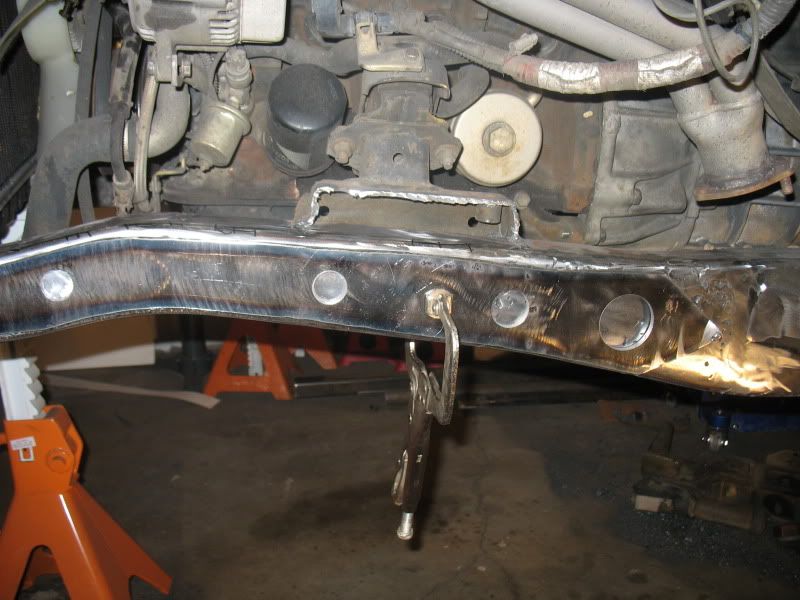
Anyway, here is the finished product:
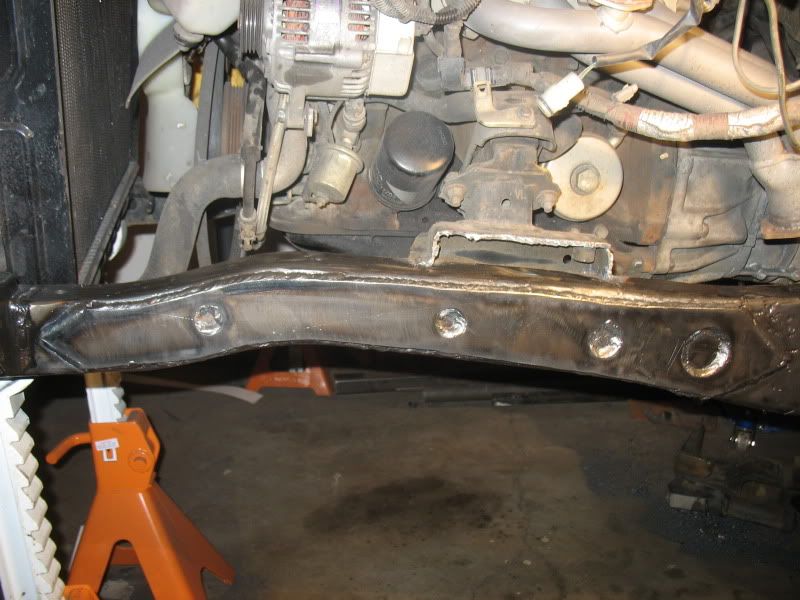
and the weld
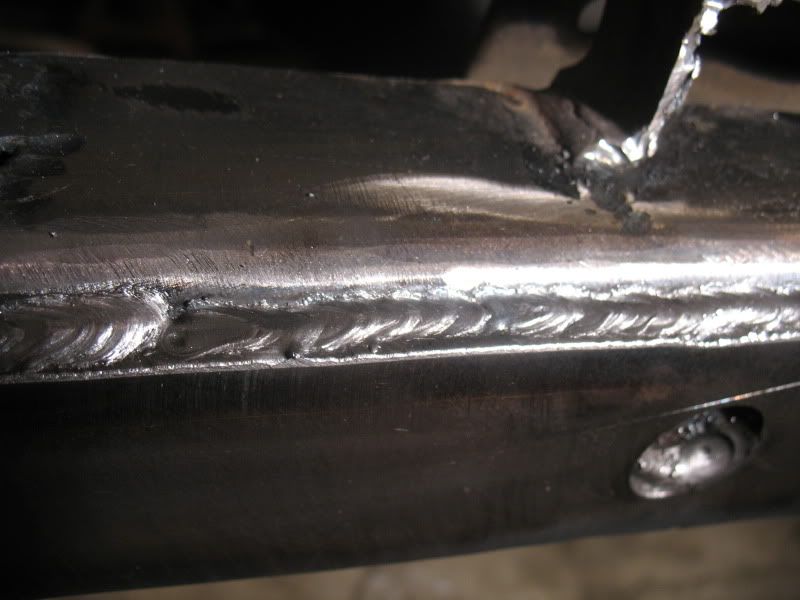
I also get a ton of spatter. Others I talk to get hardly any. I've found the anti-spatter spray works really well, but I can't figure out where the settings are off. I have the tip out of the cup a bit, so it maintains a good arc, the gas pressure is good, cup is kept fairly clear, and I follow the settings listed inside the machine. I've tried playing around, and don't get much difference in the spatter.
Anyway, thoughts or suggestions are welcome on the welding techniques, I'm at a bit of a loss.
I started off yesterday trying to bend up some tube for the skeleton of my subframe. Mistook a line in the bending grease for my actual line, and messed up 40 bucks worth of tube. Spent a bunch of time trying to figure out if it was salvageable, decided it wasn't, and then decided I didn't like the design at all anyway.
Back to the drawing board, but I was really frustrated so I decided to continue work on the front.
I got some gouging tips for the plasma, which work really well. Took off all of the welds reasonably quickly, but more importantly, without the numbing, deafening experience of the grinder. Quick work with a disk and it was all cleaned up:
Finished off the other side as well.
I also got a stand off for the plasma tip, and it works amazing. I was able to whip out some frame plates fairly quickly, touched up the edges with the belt sander, and hole sawed/step drilled some weld holes.
I only got the driver side cleaned up and drilled, the passenger side will have to wait until tomorrow.
I got this side all welded up. I'm happy with the weld penetration, as it seems really solid on both surfaces, but I'm not happy with the presentation of the welds. While I realize that the quality, and not the look, counts, I am trying hard to improve my technique. I just cannot, for the life of me, get a "stacked dimes" look. It ALWAYS comes out looking like this long blobous bead, with no stacking at all. I'm thinking it has to be the angle that I hold the gun at, because I notice on my overhead welds, they look a lot less uniform, and that has to do with the awkward position. I also think it may be that I'm moving more of a U than a C when stitching the weld, but I can't seem to get the C.
Anyway, here is the finished product:
and the weld
I also get a ton of spatter. Others I talk to get hardly any. I've found the anti-spatter spray works really well, but I can't figure out where the settings are off. I have the tip out of the cup a bit, so it maintains a good arc, the gas pressure is good, cup is kept fairly clear, and I follow the settings listed inside the machine. I've tried playing around, and don't get much difference in the spatter.
Anyway, thoughts or suggestions are welcome on the welding techniques, I'm at a bit of a loss.
Mar 13, 2011 | 07:31 AM
#99
Registered User
Joined: Aug 2009
Posts: 299
Likes: 0
From: Sandy Eggo


