
arlindsay1992's 1987 4Runner Build Up Thread
 Jan 16, 2016 | 04:40 AM
#22
Thread Starter
Registered User
iTrader: (8)
Joined: May 2011
Posts: 1,517
Likes: 354
From: Southeast Virginia
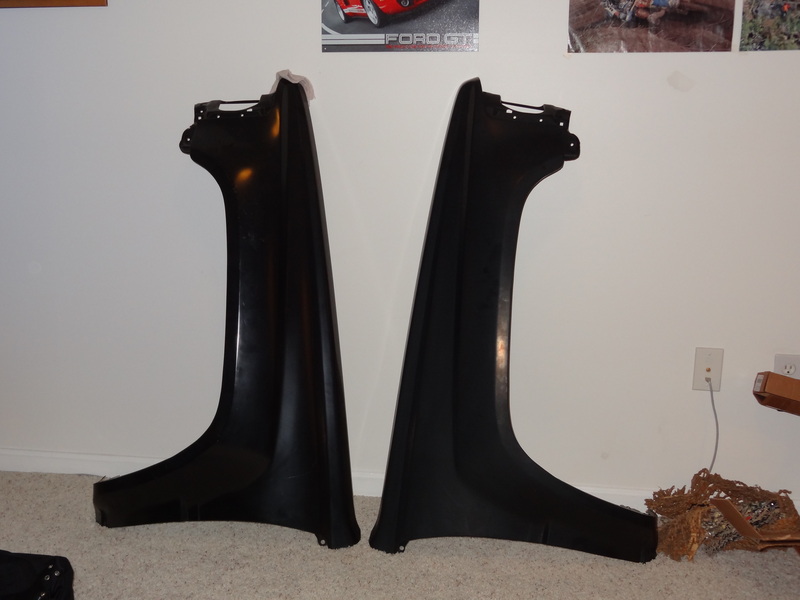
They are replacement fenders. I found them both on Craigslist separately a few year ago but only installed them a few months back when my originals became too rusty to me to accept. They are both the same brand, made in Taiwan, and CAPA certified. They fit pretty nice. The paint is just the closest rattle can I could find at Advance Auto.
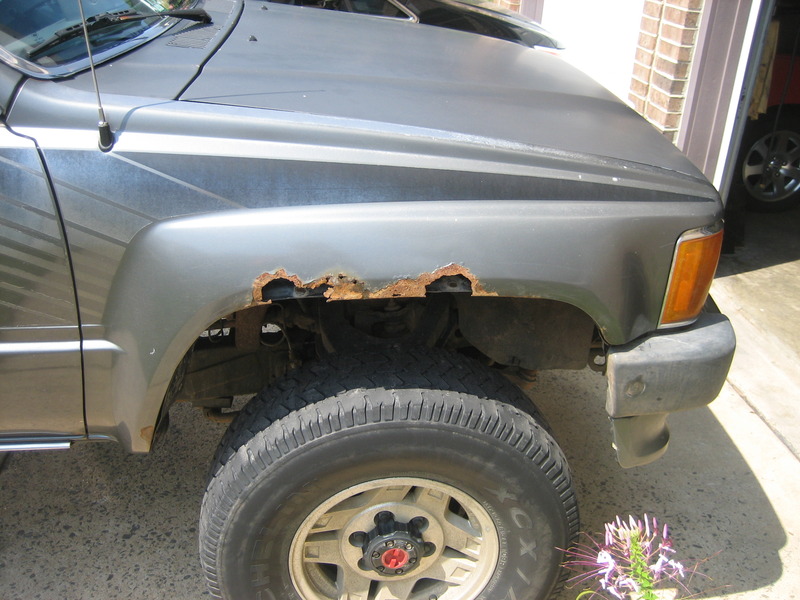
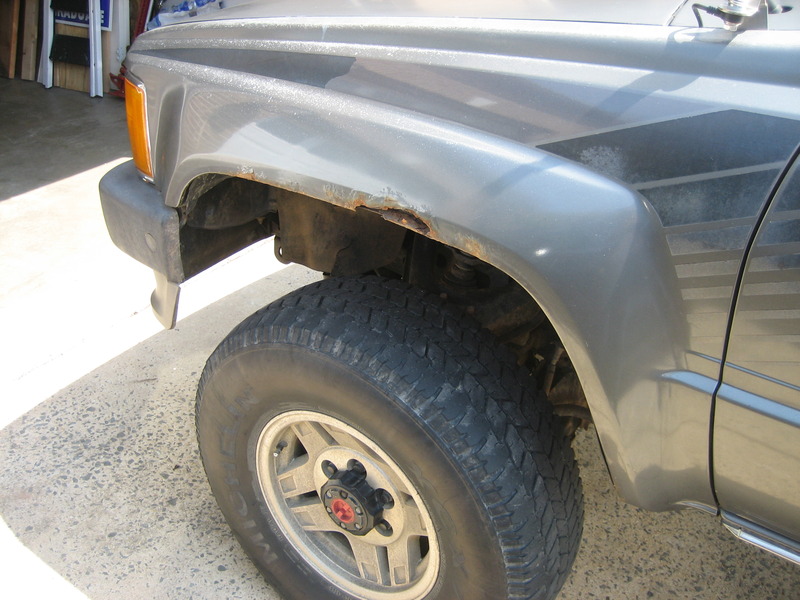
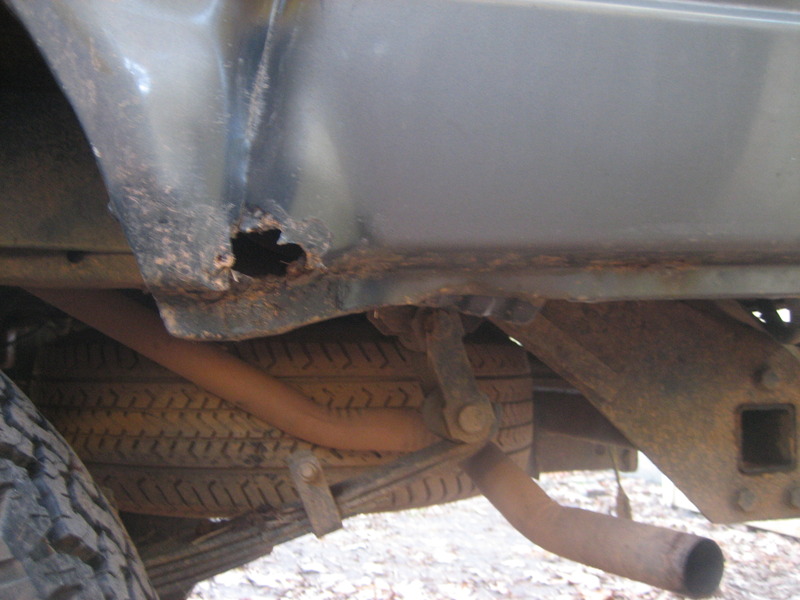
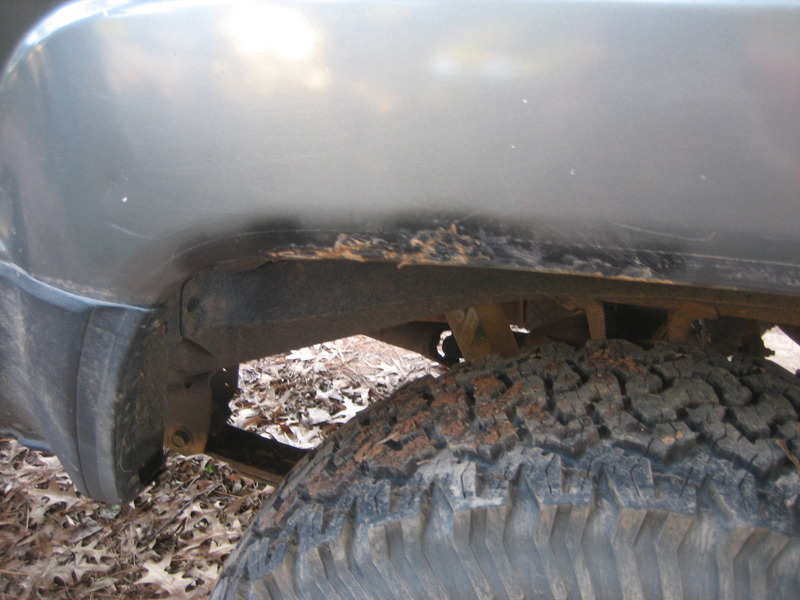
These are the original fenders right before I replaced them. I still have them if anyone wants to attempt a repair. I'm not sure if there's a market for these at all.
These are the original fenders right before I replaced them. I still have them if anyone wants to attempt a repair. I'm not sure if there's a market for these at all.
Jan 17, 2016 | 07:45 AM
#24
I've got a pair of fenders rust similar to your old ones. I've got replacements I've been working on, but one day i want to see if I can repair those rusted fenders by welding new sections in.
On the replacements, I've cleaned them up primed and undercoated the inside. Hopefully that will give me a few years after I actually pain them.
On the replacements, I've cleaned them up primed and undercoated the inside. Hopefully that will give me a few years after I actually pain them.
Jan 19, 2016 | 04:06 AM
#25
Thread Starter
Registered User
iTrader: (8)
Joined: May 2011
Posts: 1,517
Likes: 354
From: Southeast Virginia
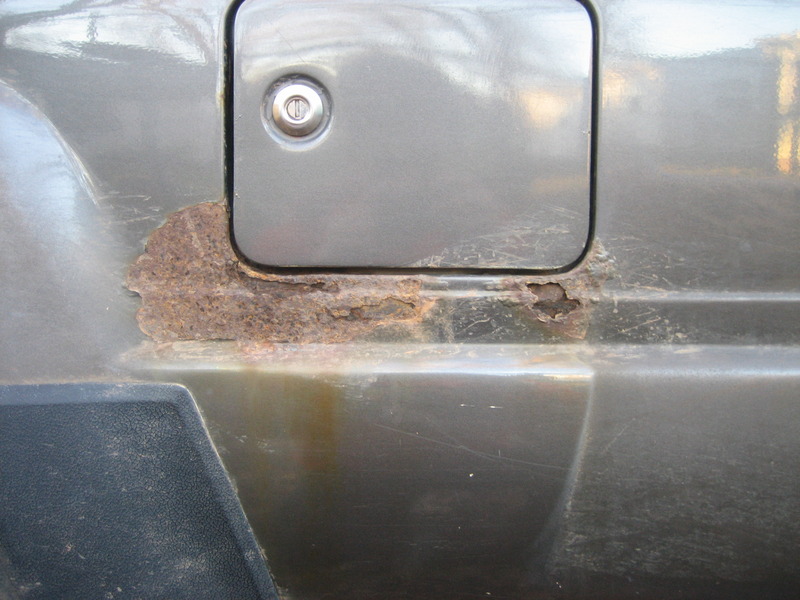
So my next big project is bodywork. When I bought this truck it was 95% rust free on the exterior. But of course rusts usually starts from inside the panels and works its way out. So after owning this for about 4 years, driving it in West Virginia winters, and parking it outside, rust has been showing it's ugly face.


Jan 20, 2016 | 03:58 AM
#26
Thread Starter
Registered User
iTrader: (8)
Joined: May 2011
Posts: 1,517
Likes: 354
From: Southeast Virginia
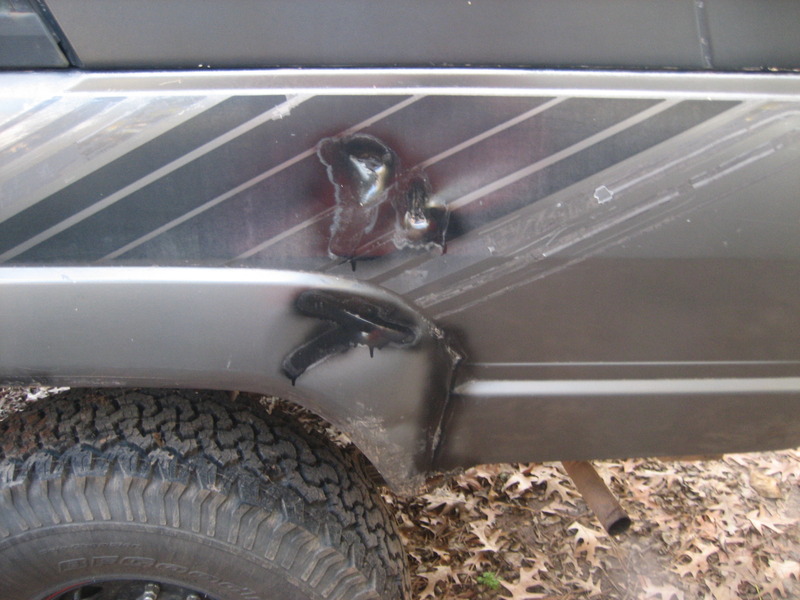
First thing I attacked was the big dent on the left rear quarter. It's been like that since I bought it and it always bugged me.
Before.

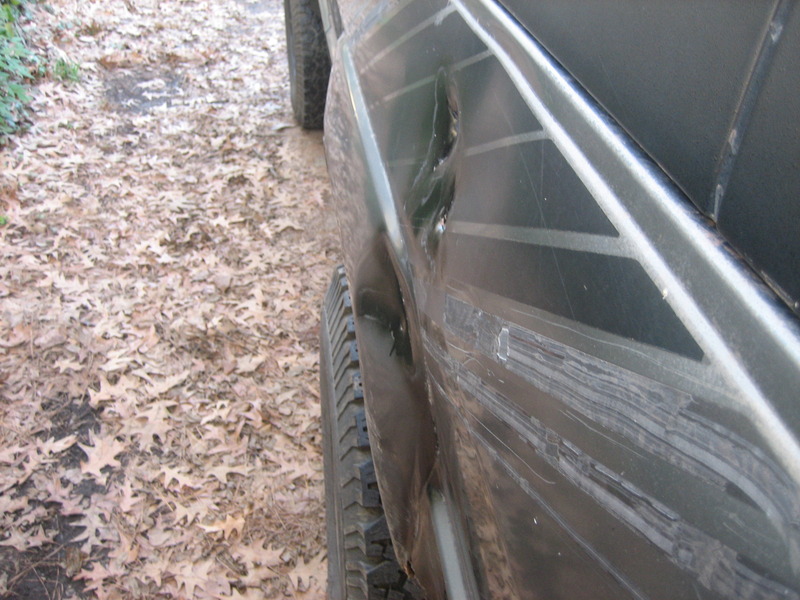
I managed to hammer some of the surrounding area out but the worst part was really kinked and actually had punctured the metal. No can do. So I cut it out.
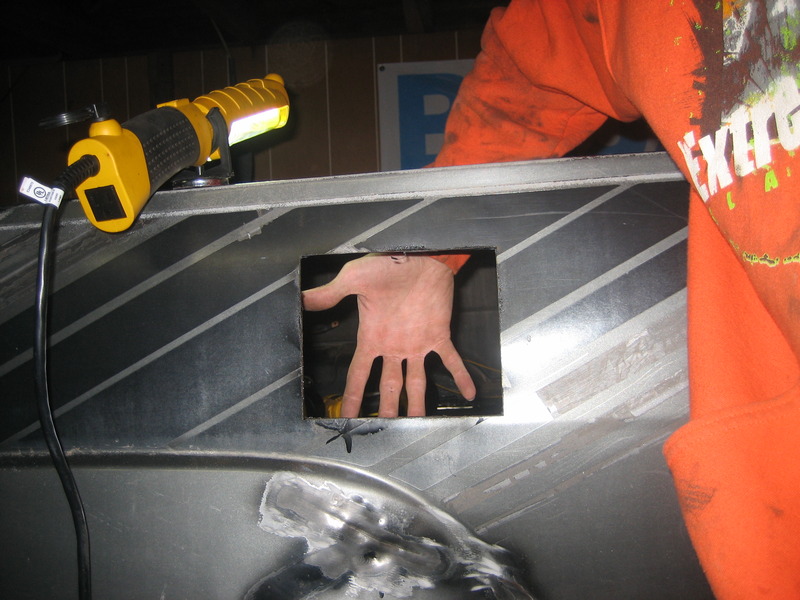
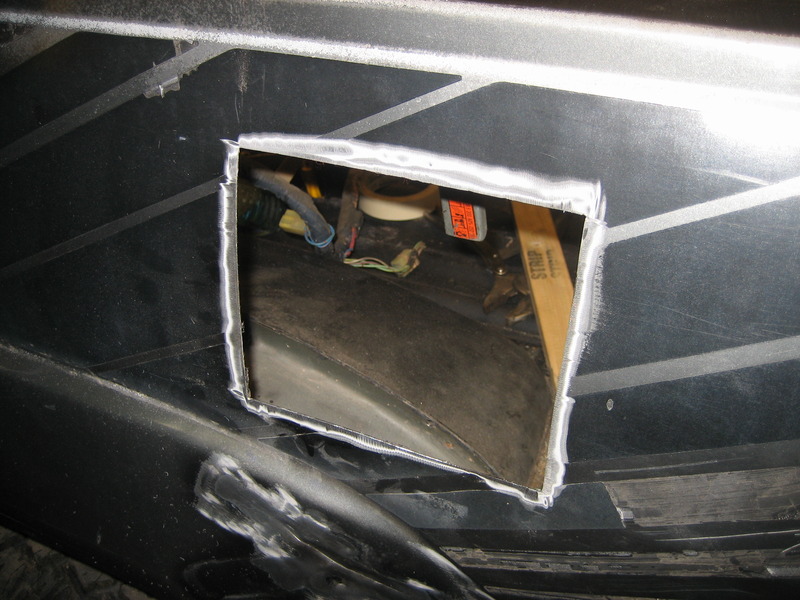
And welded in a new piece. I gave it a bit of curve before welding it so it would at least be close to the right contour.
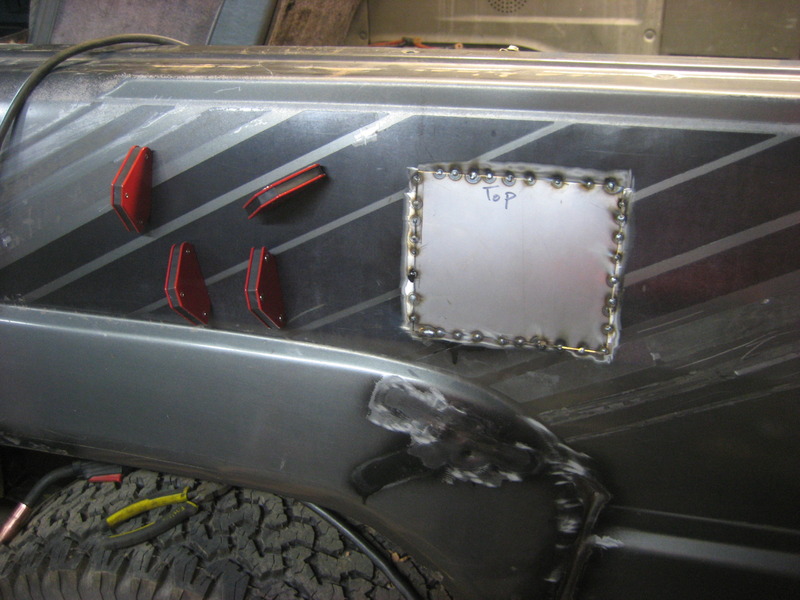
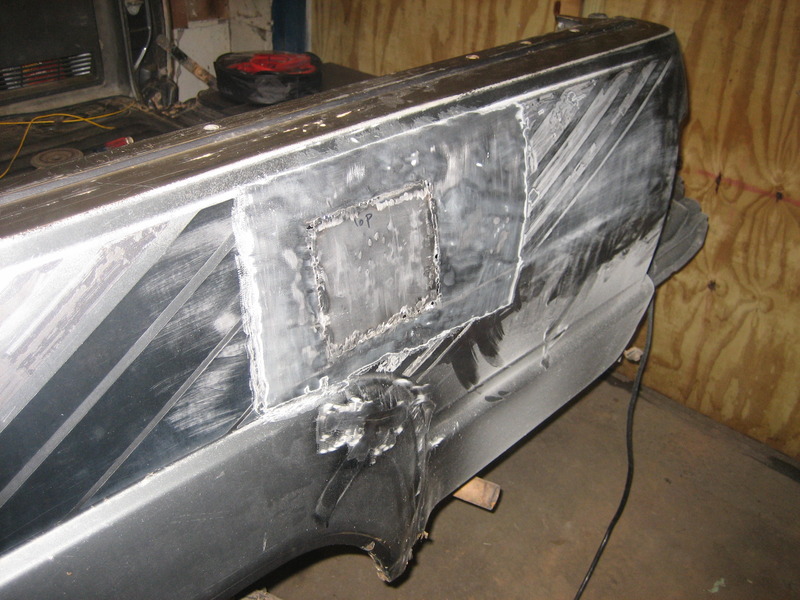
A bit of filler and that'll be invisible, hopefully.
Before.
I managed to hammer some of the surrounding area out but the worst part was really kinked and actually had punctured the metal. No can do. So I cut it out.
And welded in a new piece. I gave it a bit of curve before welding it so it would at least be close to the right contour.
A bit of filler and that'll be invisible, hopefully.
Jan 20, 2016 | 04:17 AM
#27
Registered User
Joined: Jun 2010
Posts: 1,448
Likes: 100
From: Virginia
In Post #25 you said
"These are the original fenders right before I replaced them. I still have them if anyone wants to attempt a repair. I'm not sure if there's a market for these at all."
I've seen it said that you can use the lower rear part of the front fender to repair the lower rear fender. For example you would cut a piece of the front right fender to repair the left rear quarter area. I noticed you have already repaired some but it might be worth the experiment. I wish I had tried this years ago.
Your body work looks great. I wish I could weld.
Last edited by Nervo19; Jan 20, 2016 at 04:21 AM.
Jan 20, 2016 | 04:23 AM
#28
First thing I attacked was the big dent on the left rear quarter. It's been like that since I bought it and it always bugged me.
Before.
I managed to hammer some of the surrounding area out but the worst part was really kinked and actually had punctured the metal. No can do. So I cut it out.
And welded in a new piece. I gave it a bit of curve before welding it so it would at least be close to the right contour.
A bit of filler and that'll be invisible, hopefully.
Great Work this is going to look really sweet after, can't wait to see the finish product.
Jan 20, 2016 | 06:25 AM
#29
Thread Starter
Registered User
iTrader: (8)
Joined: May 2011
Posts: 1,517
Likes: 354
From: Southeast Virginia
I've seen it said that you can use the lower rear part of the front fender to repair the lower rear fender. For example you would cut a piece of the front right fender to repair the left rear quarter area. I noticed you have already repaired some but it might be worth the experiment. I wish I had tried this years ago.
Jan 21, 2016 | 04:01 AM
#32
Thread Starter
Registered User
iTrader: (8)
Joined: May 2011
Posts: 1,517
Likes: 354
From: Southeast Virginia
Alright, beware of what lies ahead. I'll openly admit that I have little to no idea what I'm doing when it comes to bodywork. Some of the professional guys may see this and cringe. Or maybe they'll pat me on the back for getting it right. Anyway, this truck gets parked in the garage and I have another truck for rainy days, so hopefully it won't rust again in the future.
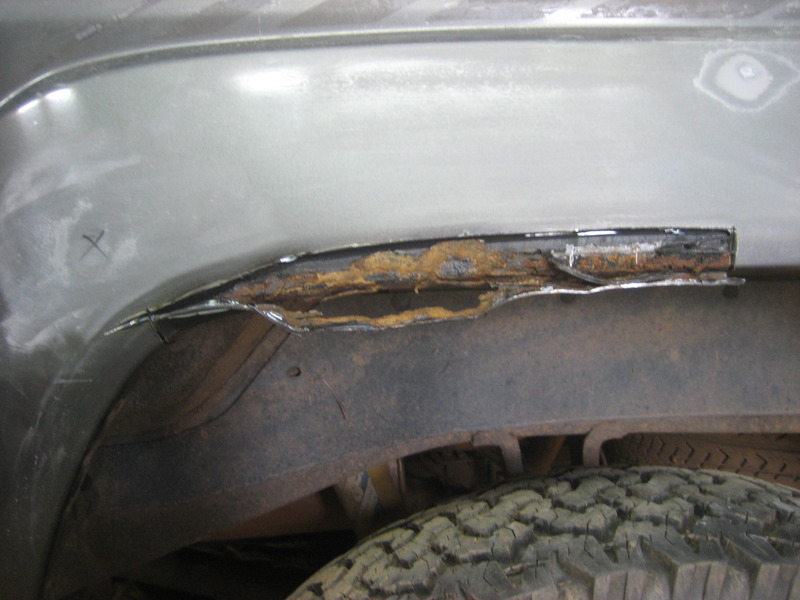
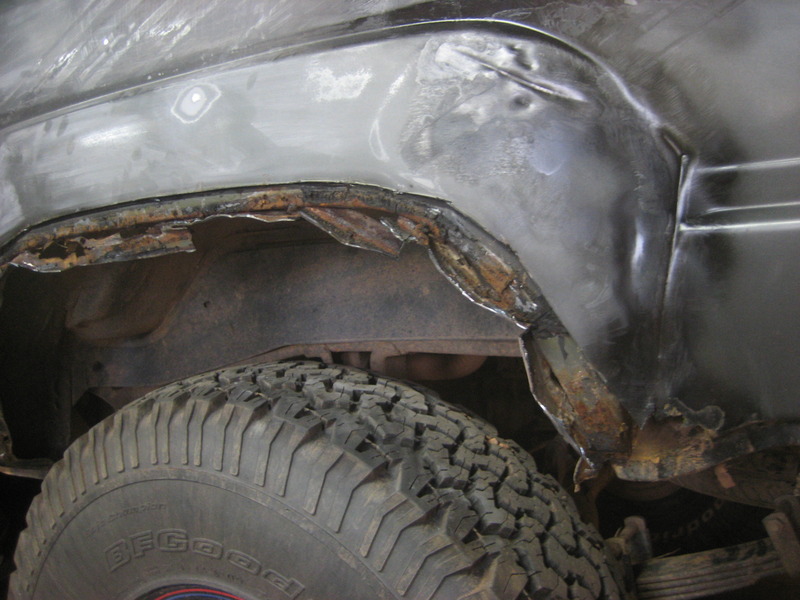
Started cutting and peeling back the wheel arches.
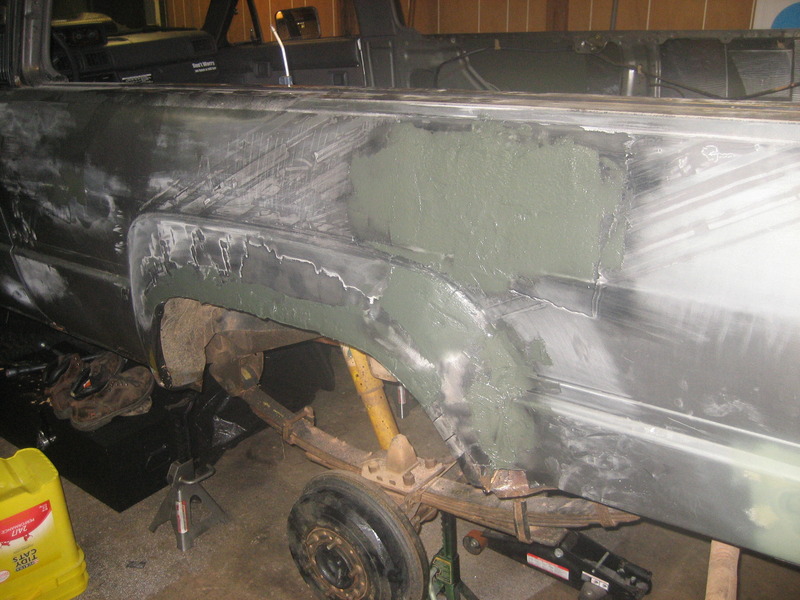
And welded in a bunch of little strips to build it back up.

And some glass reinforced filler to get it back to close. I'll use glazing putty after this to get the final shape.
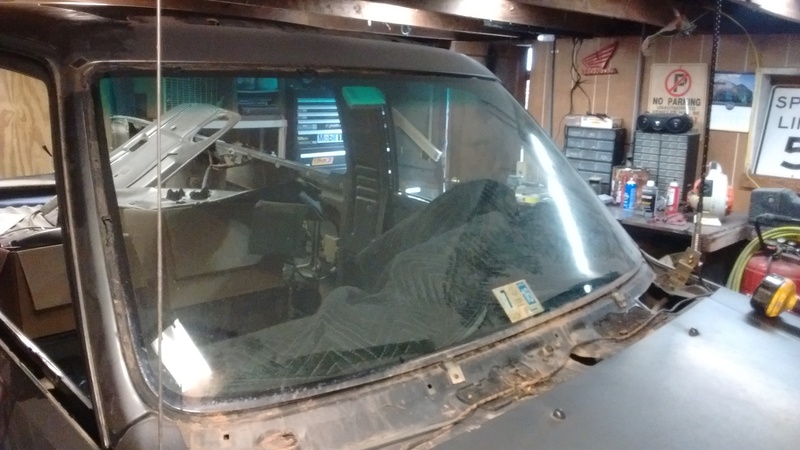
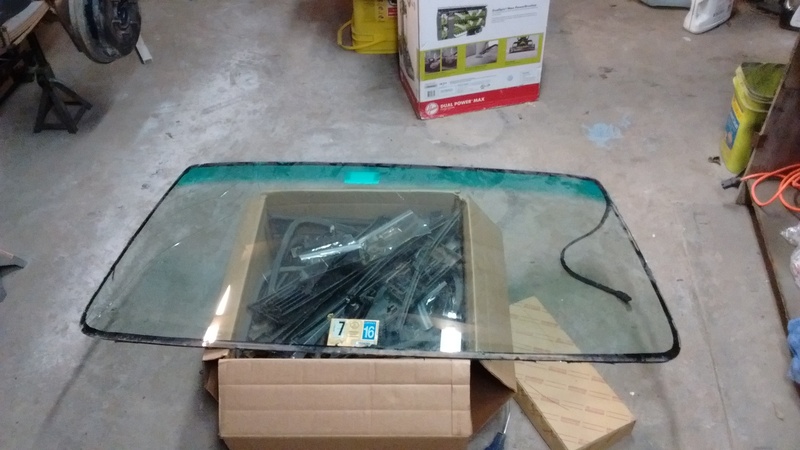
Pulled the windshield.
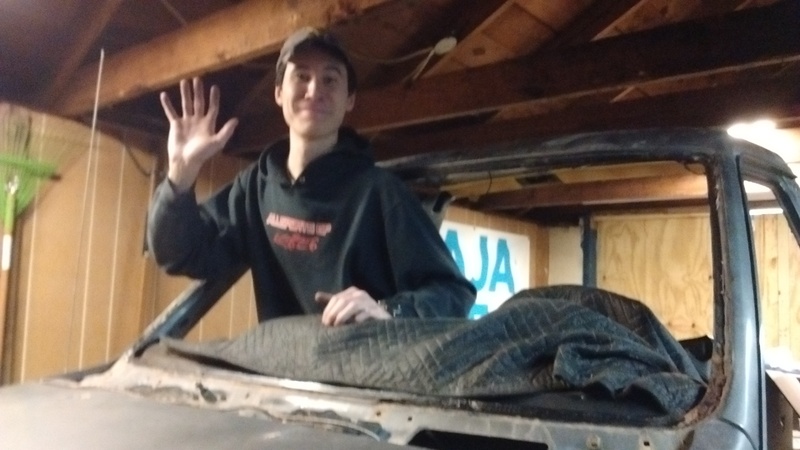
Hi Mom!
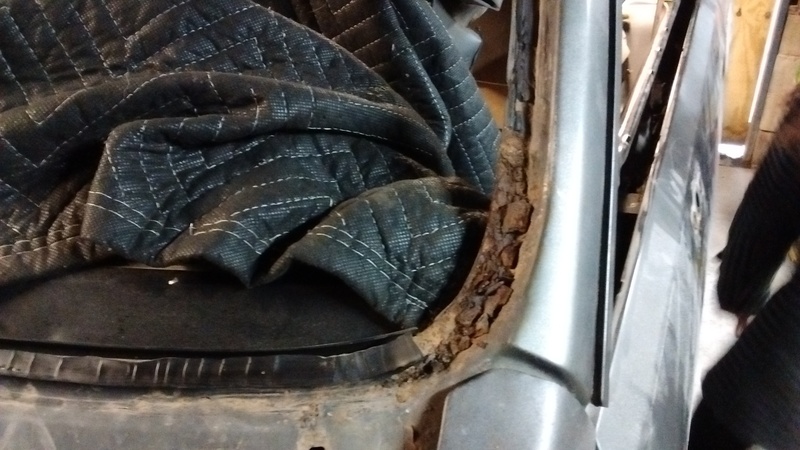
This is the worst of the rust around the windshield. The passenger side has the same rust but much less severe. There's also one pinhole at the top near the center.
Stripped. Maybe I'll just keep it like this? I took it around the block once just to say I did. No belts, seats, doors, or windshield made it interesting.

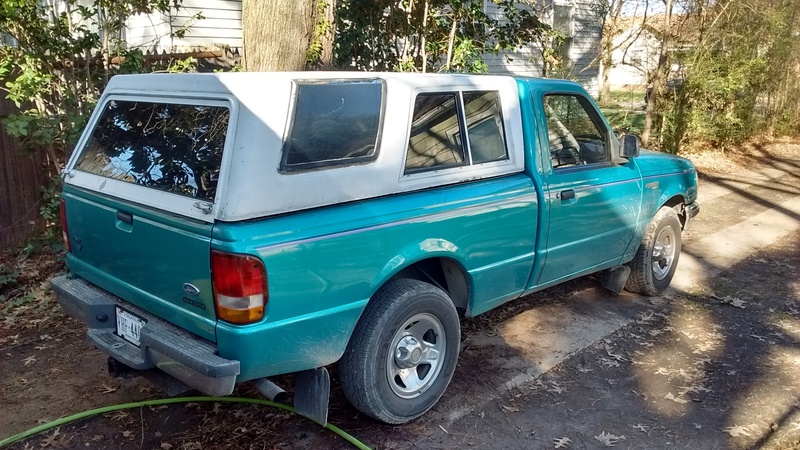
And my current DD, a 1993 Ford Ranger, 4 cylinder, 5 speed, 2 wheel drive. Basically a throwaway vehicle. I call it the Faux-Runner since I bought the 4Runner looking cap. I bought this truck so I could do more time consuming projects on the 4Runner. The 4Runner is my nice weather truck.
Started cutting and peeling back the wheel arches.
And welded in a bunch of little strips to build it back up.
And some glass reinforced filler to get it back to close. I'll use glazing putty after this to get the final shape.
Pulled the windshield.
Hi Mom!
This is the worst of the rust around the windshield. The passenger side has the same rust but much less severe. There's also one pinhole at the top near the center.
Stripped. Maybe I'll just keep it like this? I took it around the block once just to say I did. No belts, seats, doors, or windshield made it interesting.
And my current DD, a 1993 Ford Ranger, 4 cylinder, 5 speed, 2 wheel drive. Basically a throwaway vehicle. I call it the Faux-Runner since I bought the 4Runner looking cap. I bought this truck so I could do more time consuming projects on the 4Runner. The 4Runner is my nice weather truck.
Jan 21, 2016 | 04:05 AM
#33
Thread Starter
Registered User
iTrader: (8)
Joined: May 2011
Posts: 1,517
Likes: 354
From: Southeast Virginia
Thanks, Terry. I have done quite a bit but I don't think I'm anywhere near done. There's a lot of smaller details I haven't written about in this thread, and there's a whole lot more to do still.
Jan 22, 2016 | 05:21 AM
#34
Thread Starter
Registered User
iTrader: (8)
Joined: May 2011
Posts: 1,517
Likes: 354
From: Southeast Virginia
Worked on the driver's side windshield near the bottom.
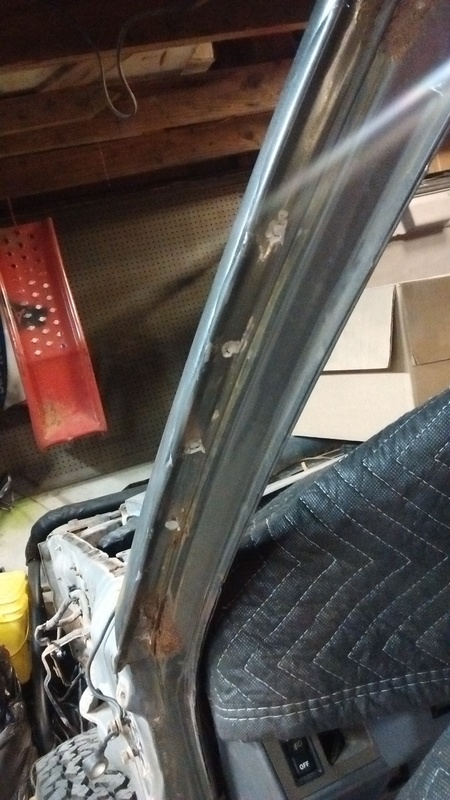
Started with this.

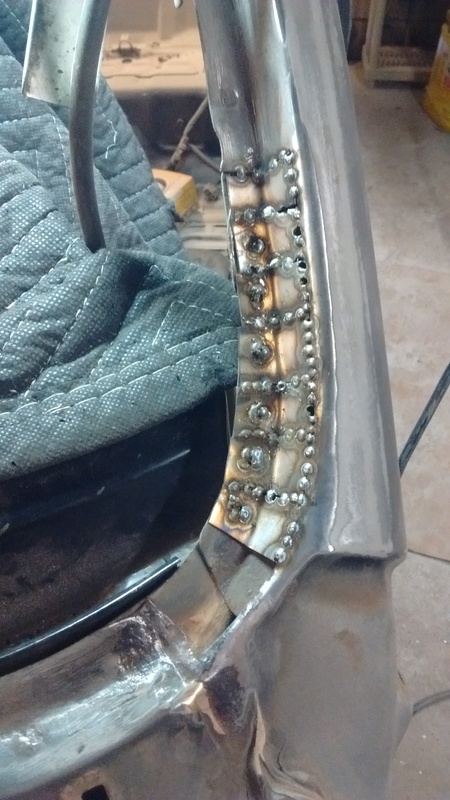
Cut out the swiss cheese and started building it back up.
Two more pieces to go.
I don't have a picture after grinding down the welds. Also need ideas on how to rustproof the inside after the filler is applied to the outside.
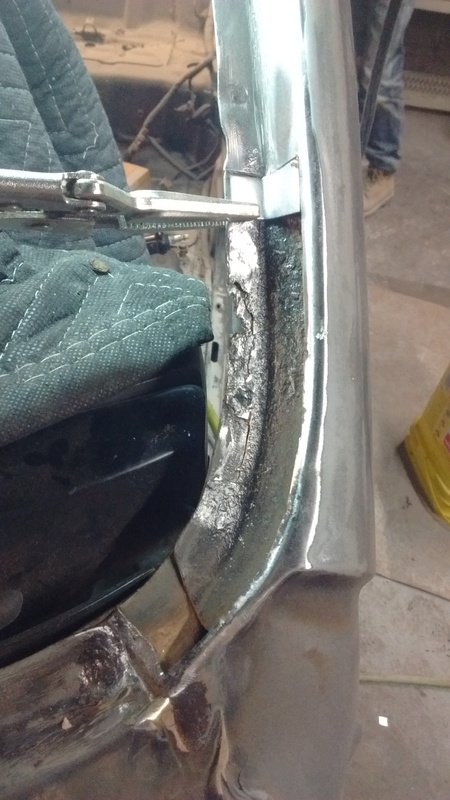
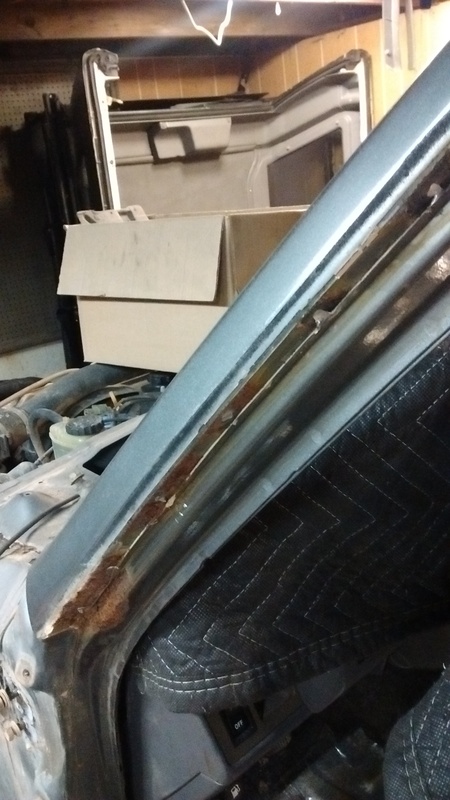
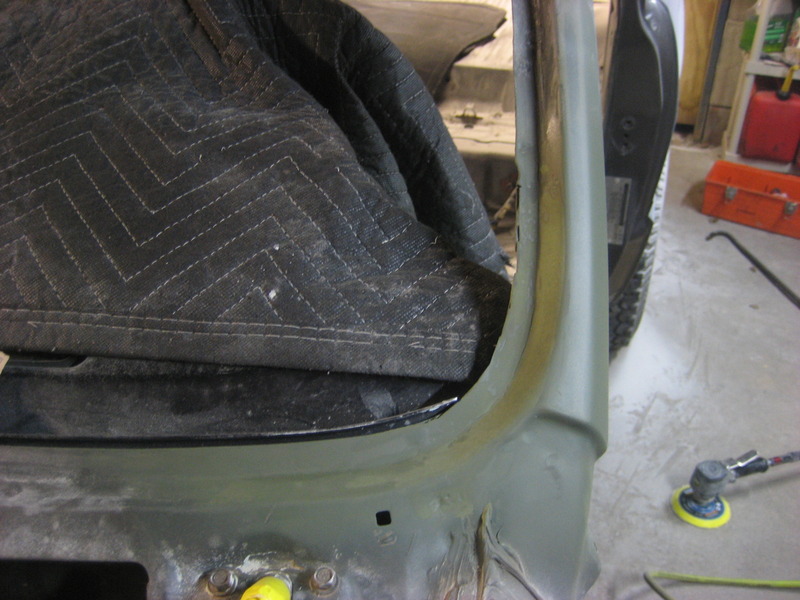
Removed the front sections of the rain gutter. The seam sealer cracks over time and lets water get between the rain gutter and the A-pillar. No water gets into the truck directly but it does sit there and rust away at the A-pillar. This is a rare case where it rusts from the outside in. Typically rust starts from inside and works its way out so by the time you see it it's already really bad. You can see where the rust has pitted the A-pillar pretty bad and just made a couple pinholes.
Grind down the spot welds.
And remove the rain gutter.
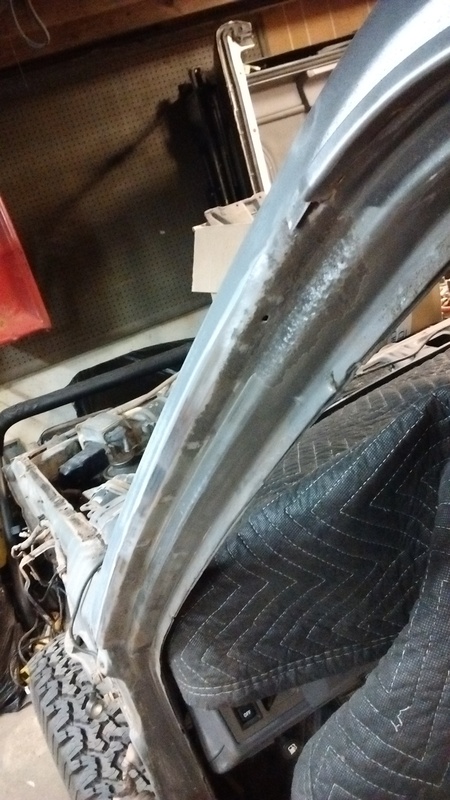
Seam sealer and rust wire wheeled away. Welds ground smooth. You can see where it just started poking through the metal.
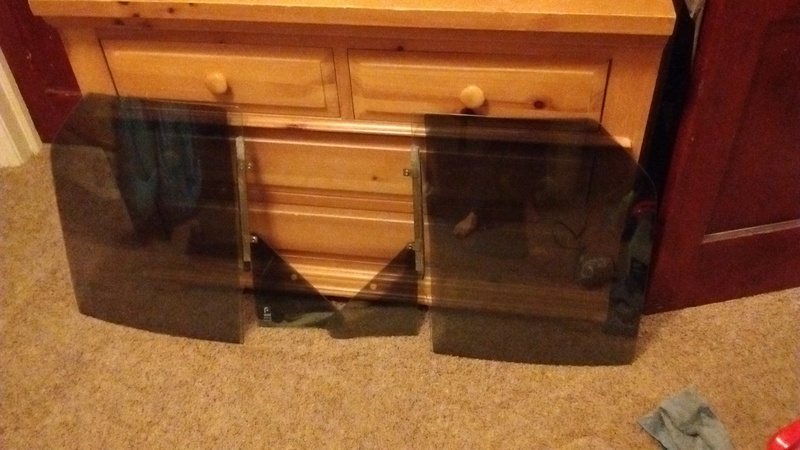
Also tinted my windows myself. Had a coupon for the parts store so figured I'd give it a try. I'd give myself a 95%. Not quite professional grade but certainly not like some cars you see with bubbles and spiderwebs like crazy. My issue is what looks like water spots because I used tap water and soap as the lube instead of distilled water and soap.
Started with this.
Cut out the swiss cheese and started building it back up.
Two more pieces to go.
I don't have a picture after grinding down the welds. Also need ideas on how to rustproof the inside after the filler is applied to the outside.
Removed the front sections of the rain gutter. The seam sealer cracks over time and lets water get between the rain gutter and the A-pillar. No water gets into the truck directly but it does sit there and rust away at the A-pillar. This is a rare case where it rusts from the outside in. Typically rust starts from inside and works its way out so by the time you see it it's already really bad. You can see where the rust has pitted the A-pillar pretty bad and just made a couple pinholes.
Grind down the spot welds.
And remove the rain gutter.
Seam sealer and rust wire wheeled away. Welds ground smooth. You can see where it just started poking through the metal.
Also tinted my windows myself. Had a coupon for the parts store so figured I'd give it a try. I'd give myself a 95%. Not quite professional grade but certainly not like some cars you see with bubbles and spiderwebs like crazy. My issue is what looks like water spots because I used tap water and soap as the lube instead of distilled water and soap.
Jan 22, 2016 | 05:49 AM
#35

Registered User
Joined: Jan 2015
Posts: 652
Likes: 0
From: Hendersonville NC
Couldn't you seal behind by drilling some small holes and shooting primer in then seals holes with filler prime and paint.
Possibly from inside the truck
Possibly from inside the truck
Last edited by 92ehatch; Jan 22, 2016 at 05:50 AM.
Jan 22, 2016 | 04:26 PM
#36


have a peek at my repair thread here .. might help you on the windshield
https://www.yotatech.com/forums/f209...ew-bed-242508/
.
https://www.yotatech.com/forums/f209...ew-bed-242508/
.
Jan 23, 2016 | 04:54 PM
#37
Thread Starter
Registered User
iTrader: (8)
Joined: May 2011
Posts: 1,517
Likes: 354
From: Southeast Virginia
have a peek at my repair thread here .. might help you on the windshield
https://www.yotatech.com/forums/f209...ew-bed-242508/
https://www.yotatech.com/forums/f209...ew-bed-242508/
Jan 23, 2016 | 04:58 PM
#38
Thread Starter
Registered User
iTrader: (8)
Joined: May 2011
Posts: 1,517
Likes: 354
From: Southeast Virginia
Ground the welds on the corner of the windshield frame and applied some filler. Here's after smoothing and priming it.

And the inside of the A-pillar smoothed and primed.
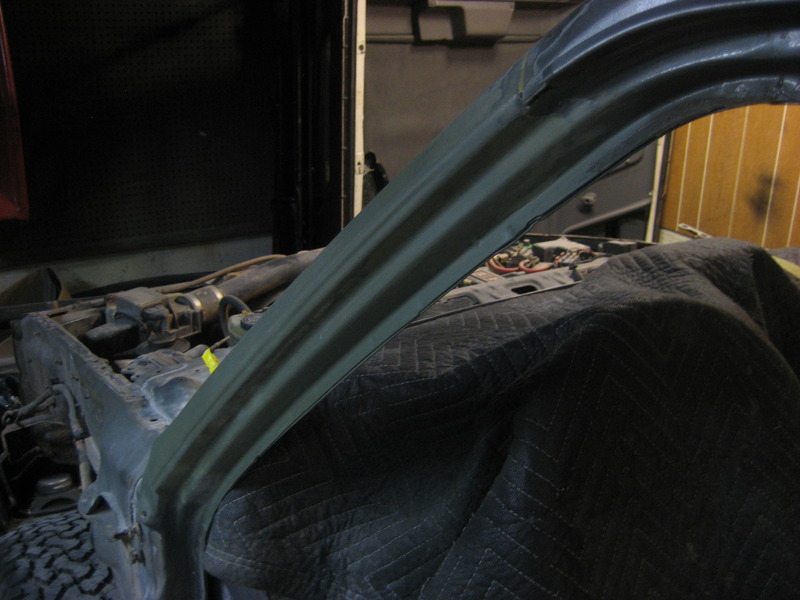
And the inside of the A-pillar smoothed and primed.
Jan 23, 2016 | 05:09 PM
#39
[QUOTE=arlindsay1992;52306102]Ground the welds on the corner of the windshield frame and applied some filler. Here's after smoothing and priming it.
Whoa!! Night and day difference
Whoa!! Night and day difference
Jan 25, 2016 | 05:13 AM
#40
Thread Starter
Registered User
iTrader: (8)
Joined: May 2011
Posts: 1,517
Likes: 354
From: Southeast Virginia
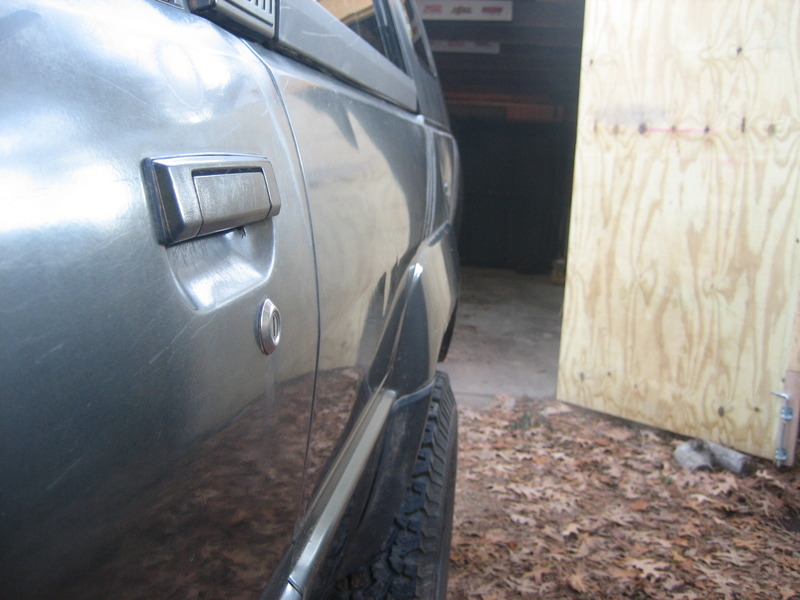
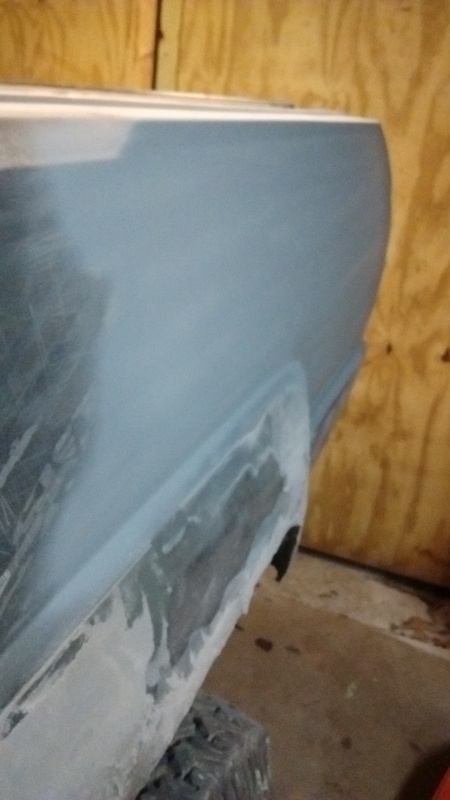
I broke down and decided to bring in a professional. My girlfriend's dad has been restoring cars his whole life. He's been a professional auto body technician for the past 40 years so he has a bit more experience than I do. He finished repairing the rear quarter where I welded in the square patch and also fixed a couple door dings just behind the driver's door. It's amazing how much work he gets done in so little time. I'm just glad he likes me. He drove down for the weekend to help and only requested food in return.
I still need to finish contouring the wheel arch. It's a bit tough for me since I'm a serious rookie. I managed to get most of the dent pushed out so the filler won't be very thick. What's hard for me is getting it smooth and trying to match the contour properly. At least I'm getting a lot of practice.
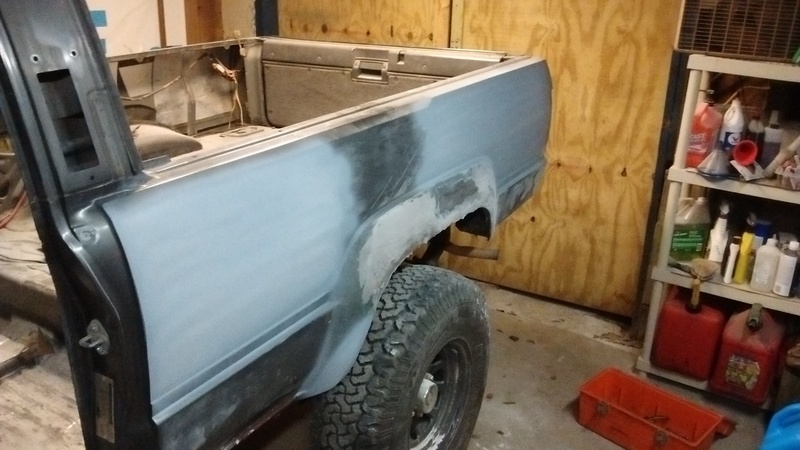
Can't see it in the picture but he was even able to maintain the creased body line that runs down the whole truck. Might not be a big deal for pros but I was kind of dreading it. I can fix a dent in a flat panel but trying to replicate that line had me worried.
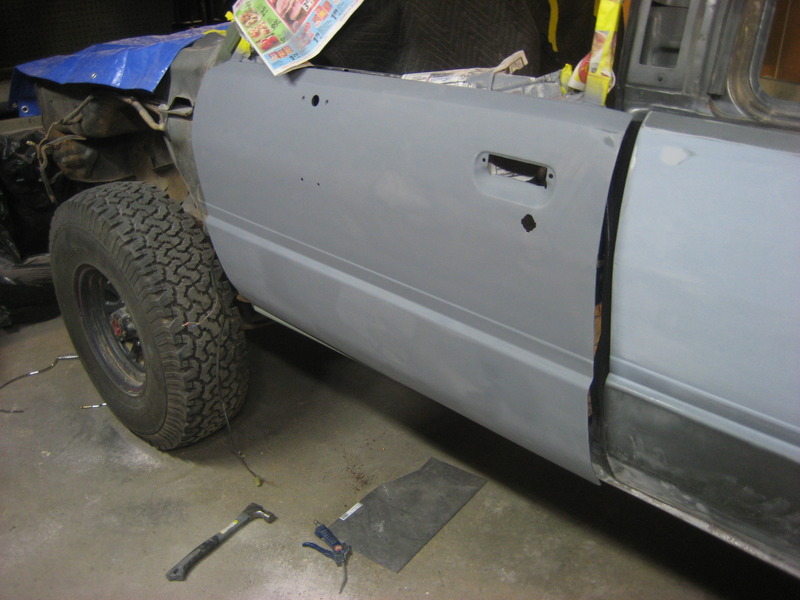
Did this myself. Fixed all the door dings on the driver's door. It's the first panel that is totally dent free and ready for paint!
I still need to finish contouring the wheel arch. It's a bit tough for me since I'm a serious rookie. I managed to get most of the dent pushed out so the filler won't be very thick. What's hard for me is getting it smooth and trying to match the contour properly. At least I'm getting a lot of practice.
Can't see it in the picture but he was even able to maintain the creased body line that runs down the whole truck. Might not be a big deal for pros but I was kind of dreading it. I can fix a dent in a flat panel but trying to replicate that line had me worried.
Did this myself. Fixed all the door dings on the driver's door. It's the first panel that is totally dent free and ready for paint!


