
DP9's 85 X-Cab Build. Project: Fat Man
 Aug 28, 2010 | 11:01 AM
#1
Thread Starter
Registered User
Joined: Sep 2009
Posts: 22
Likes: 0
From: NJ
DP9's 85 X-Cab Build. Project: Fat Man
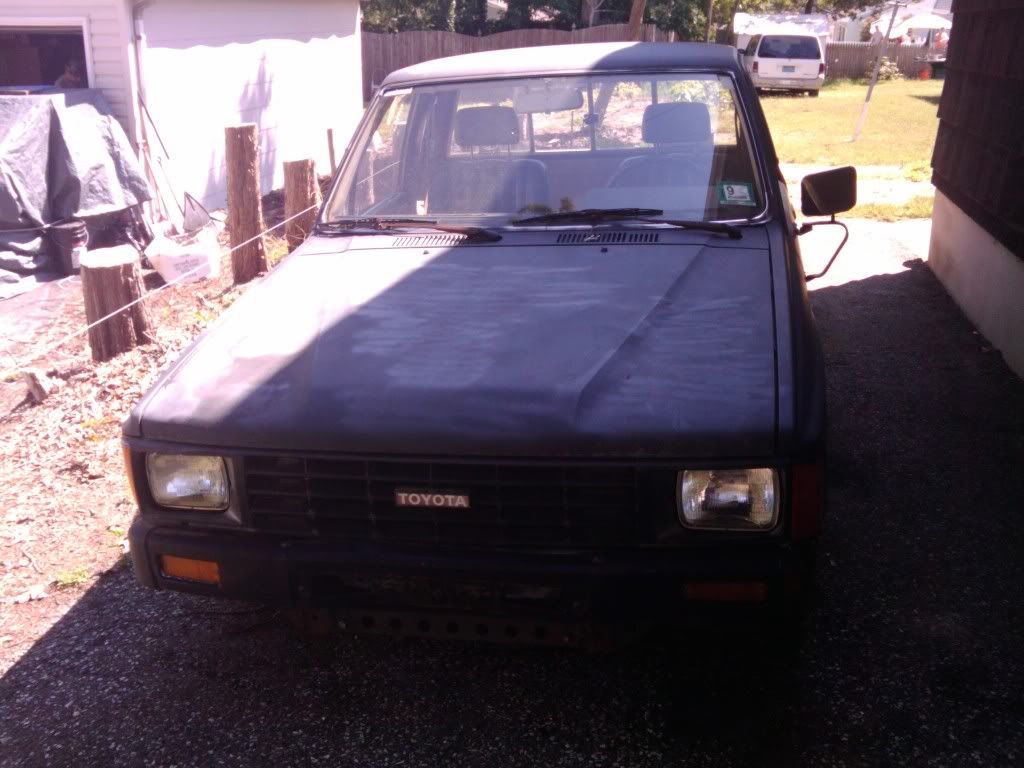
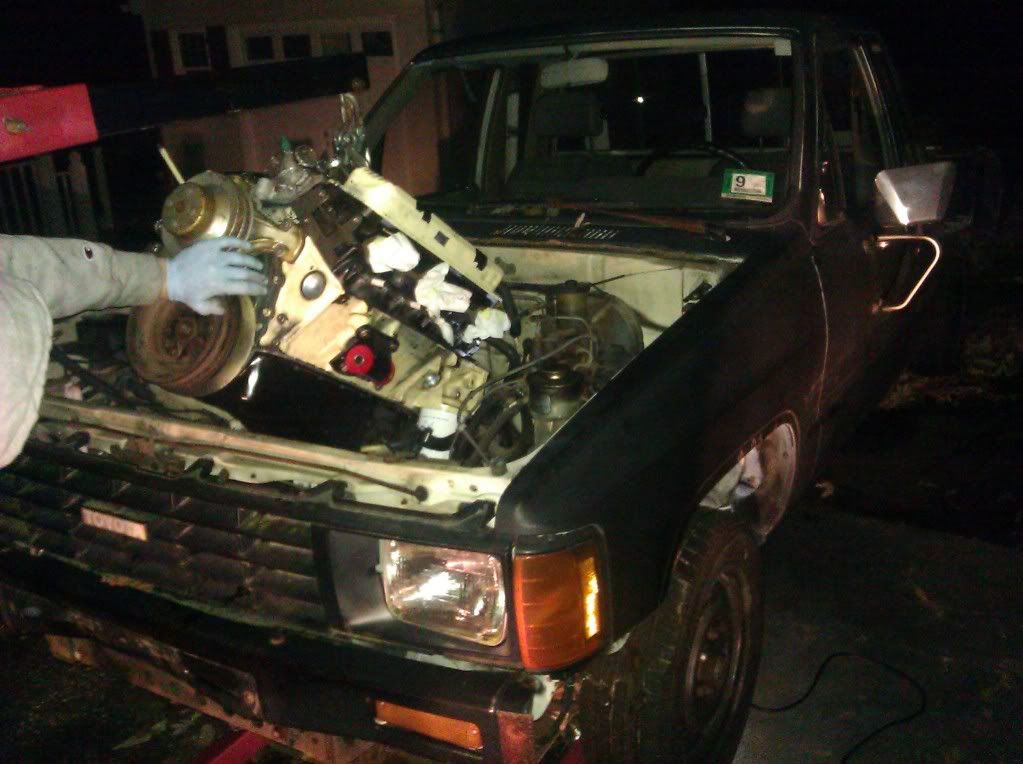
Hey guys, I recently picked up an 85 x-cab 2wd that im getting ready to do a chevy 350/th350 swap into. The truck originally came with a 22r, so Im sticking with a carb on the small block to make life a lil easier. Its just gonna be a fun street truck, not a drag race truck or anything. So thats what I'm doing and here's my starting point:
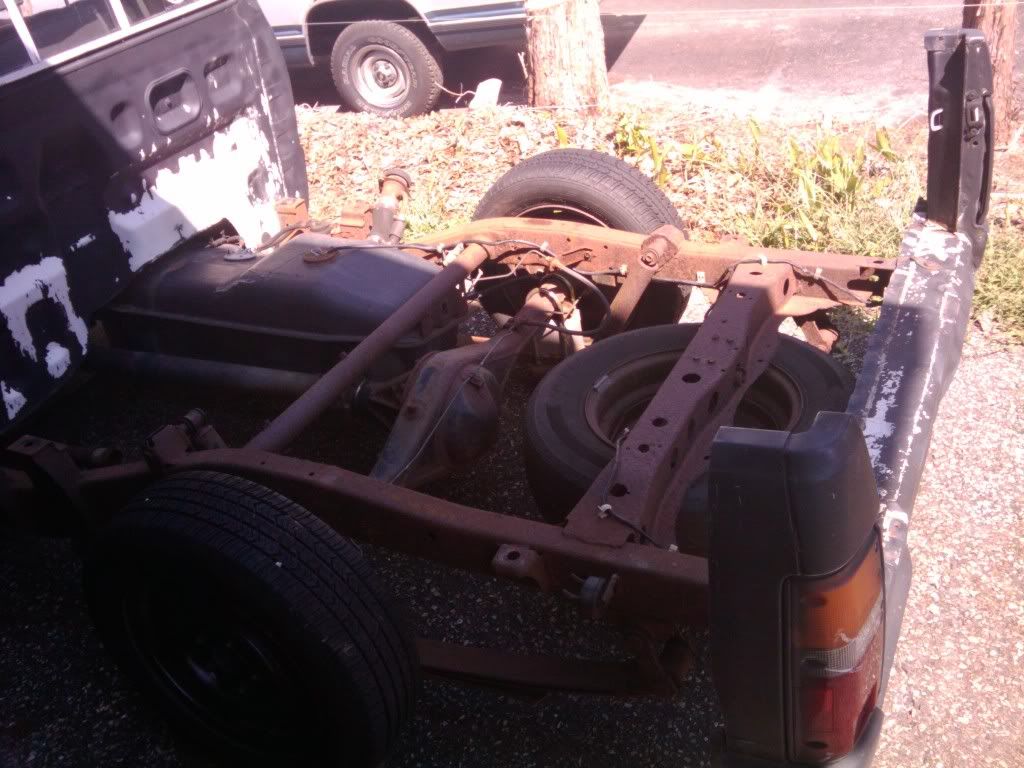
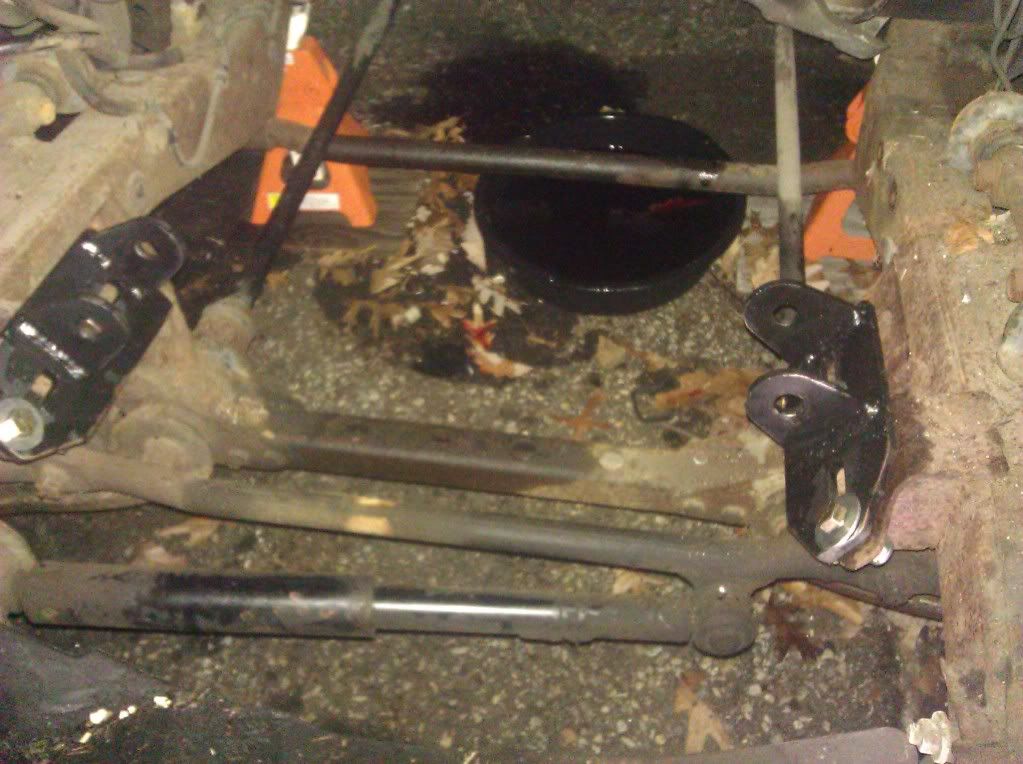
The previous owner turned the torsion bars all the way down and threw lowering blocks btwn the axle and the leaf springs. things practically on the ground, i cant get my jack under it. I have to get a new lower jack to even work on it.
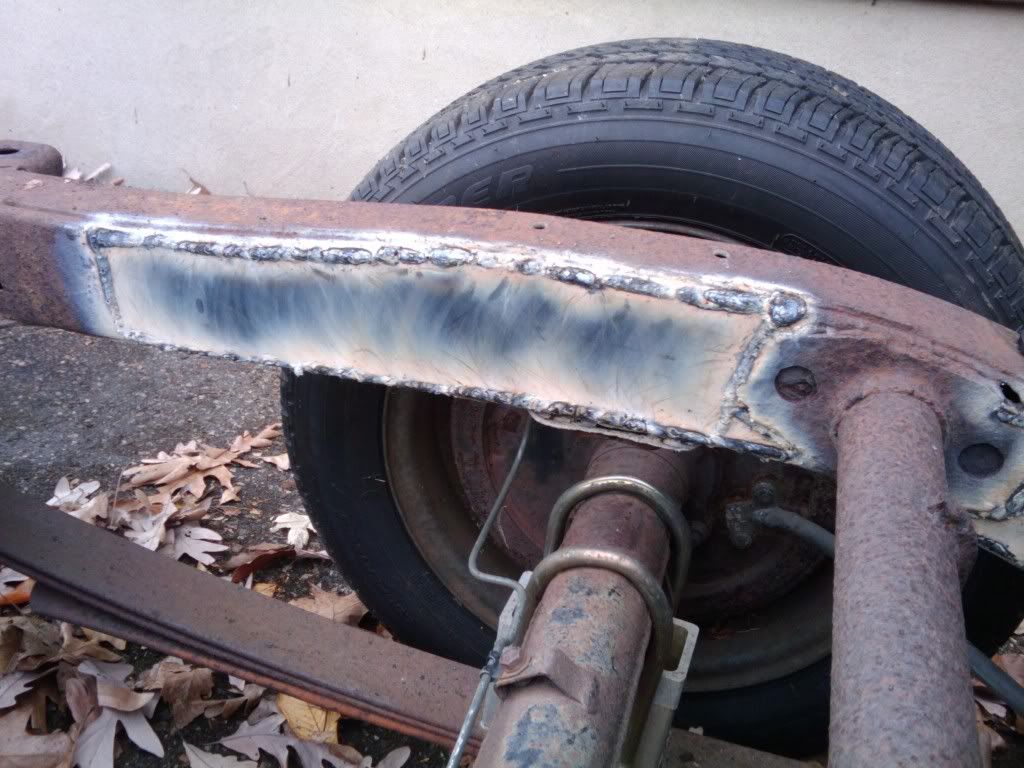
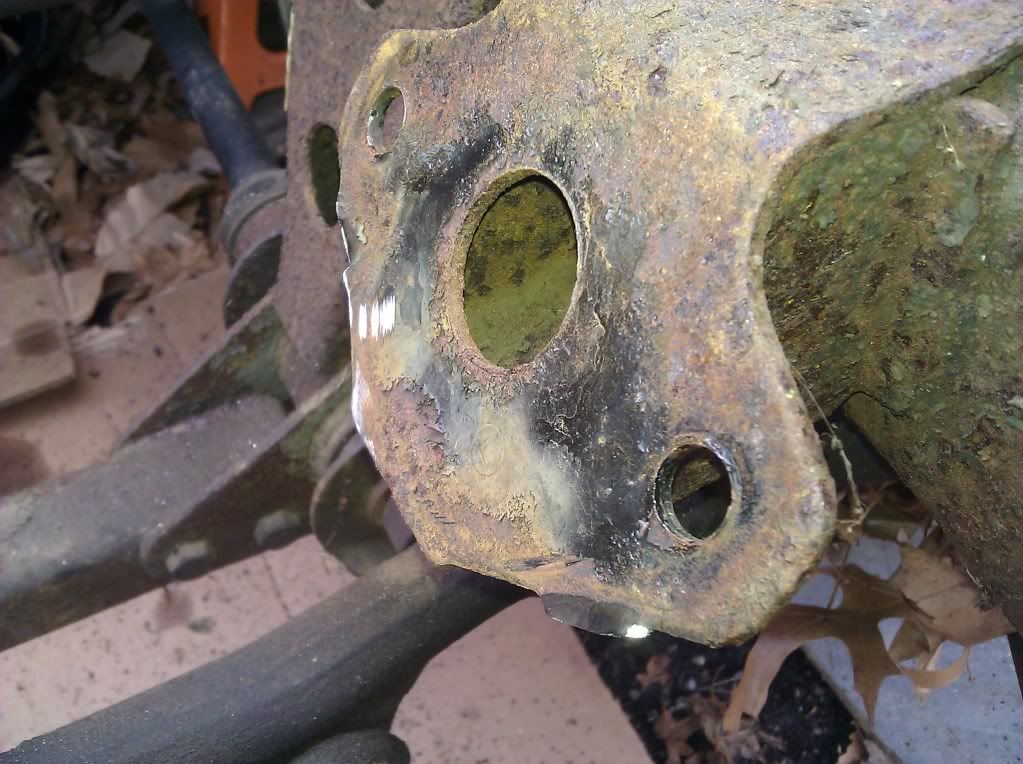
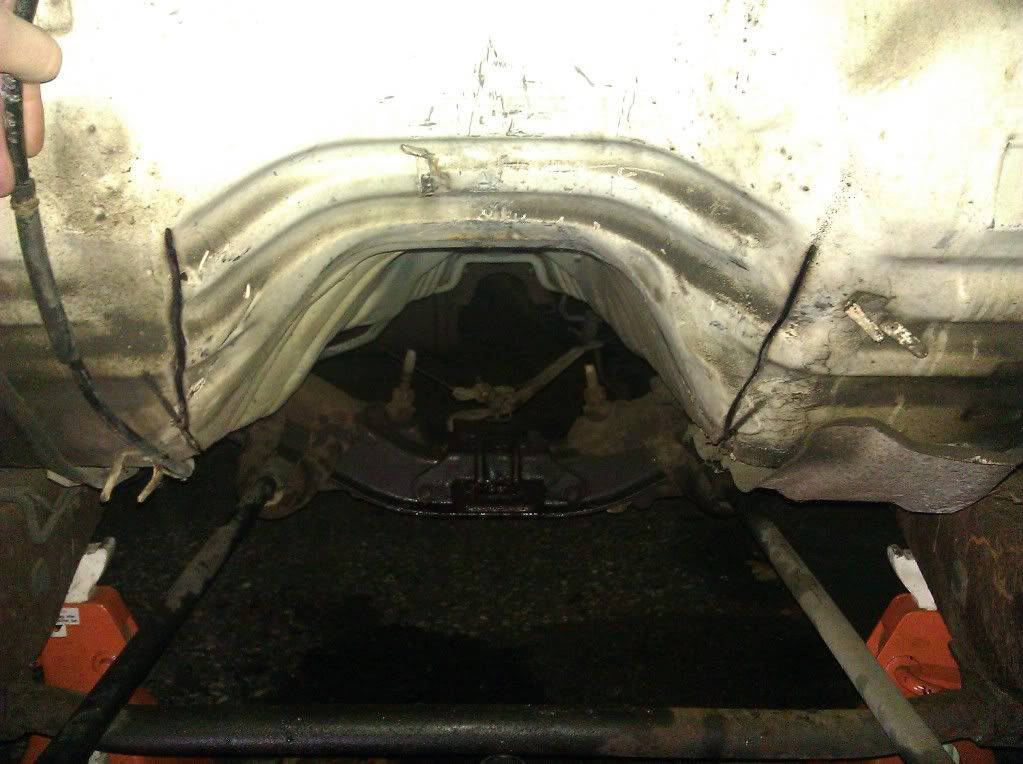
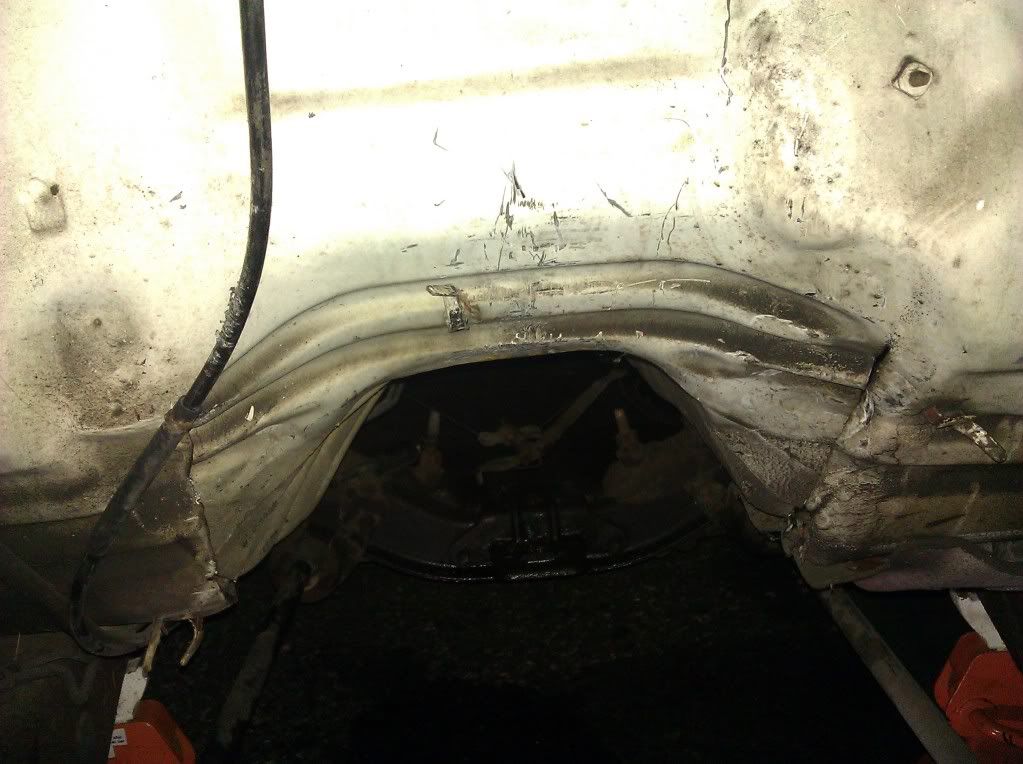
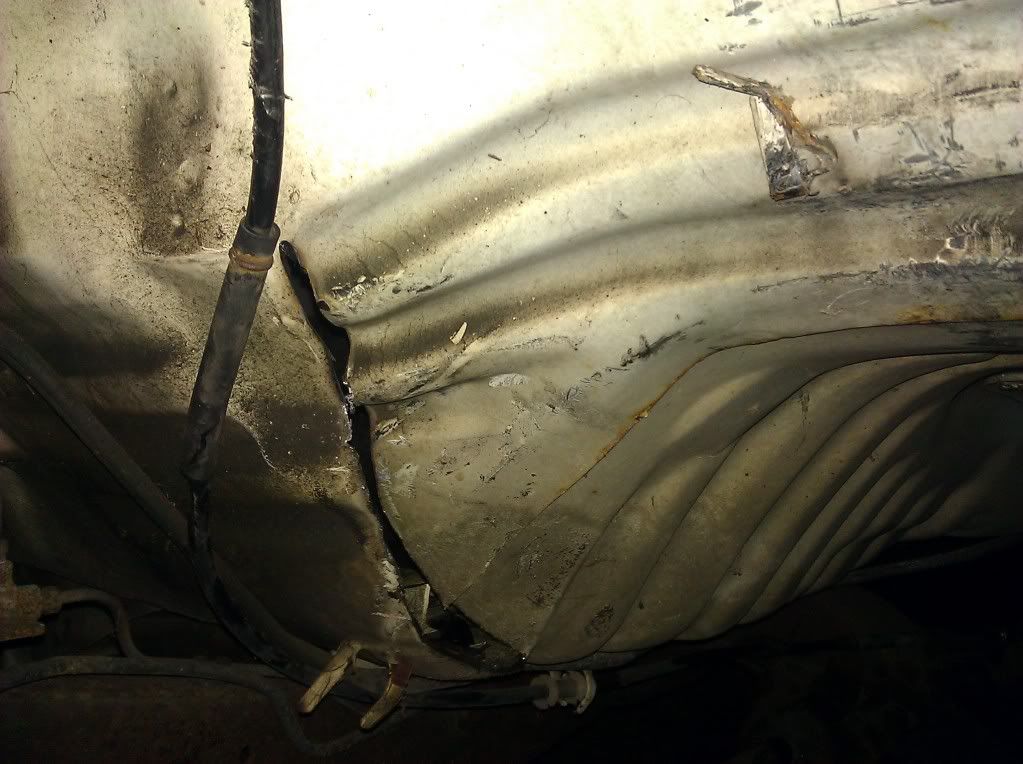
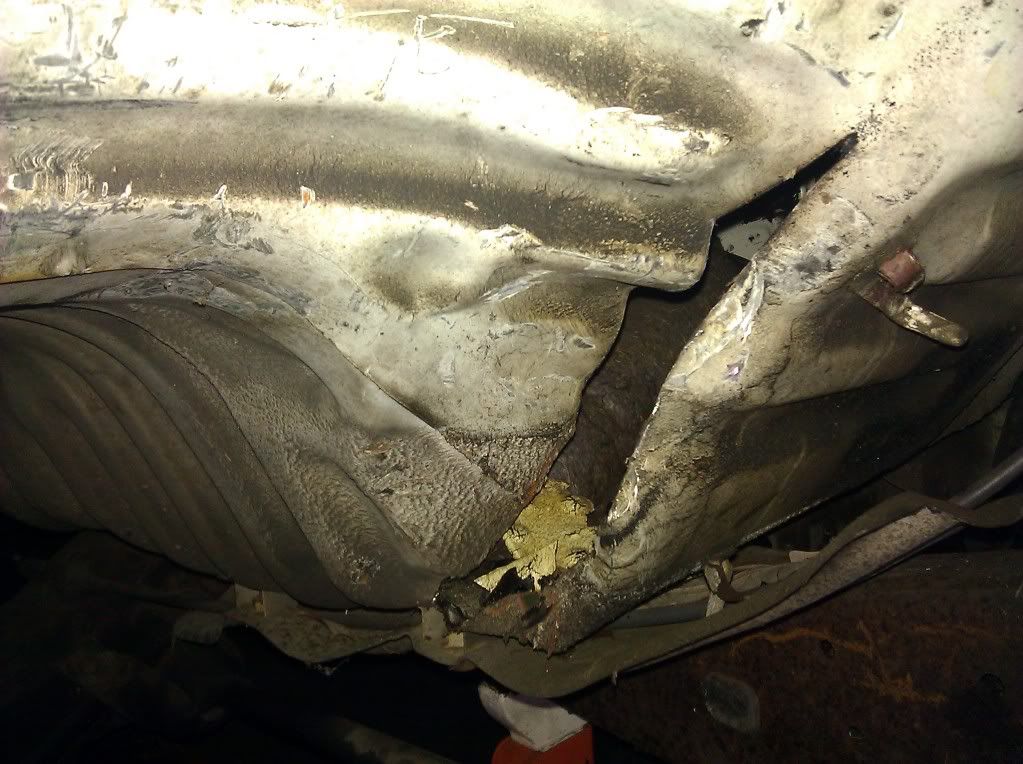
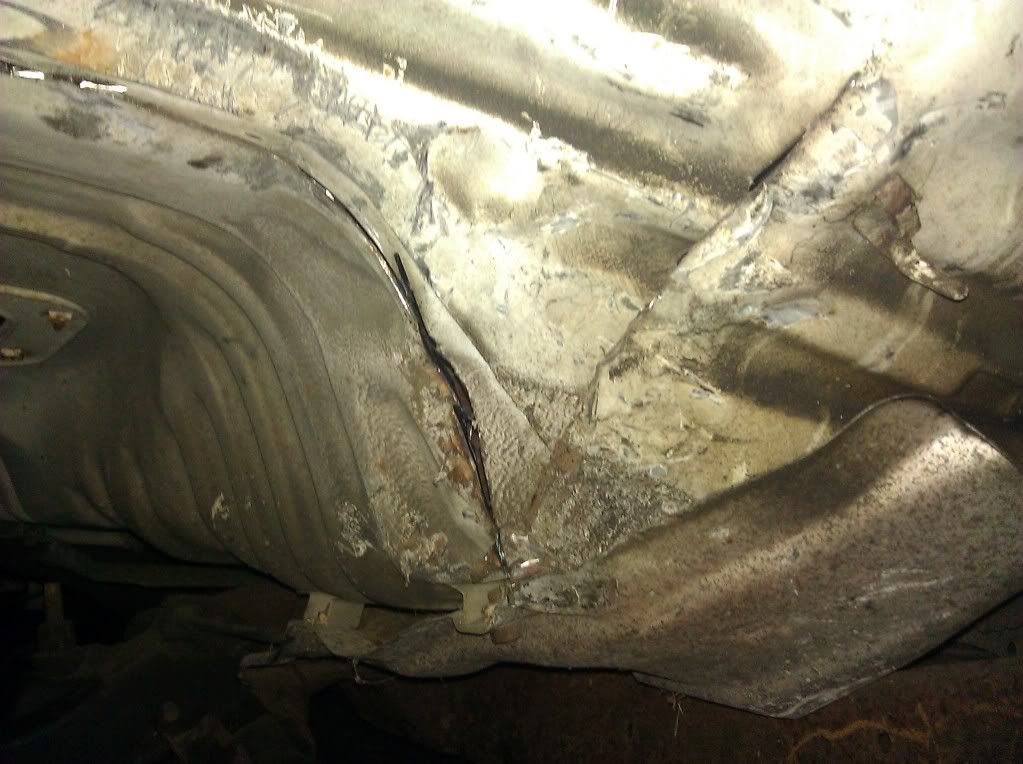
The bed apparently rusted through, so the kid just left the tail lights on so it was at least kinda legal. There is some frame rot at the front of the leaf spring mounts. My welder said its not horrible, and that he can patch it up.
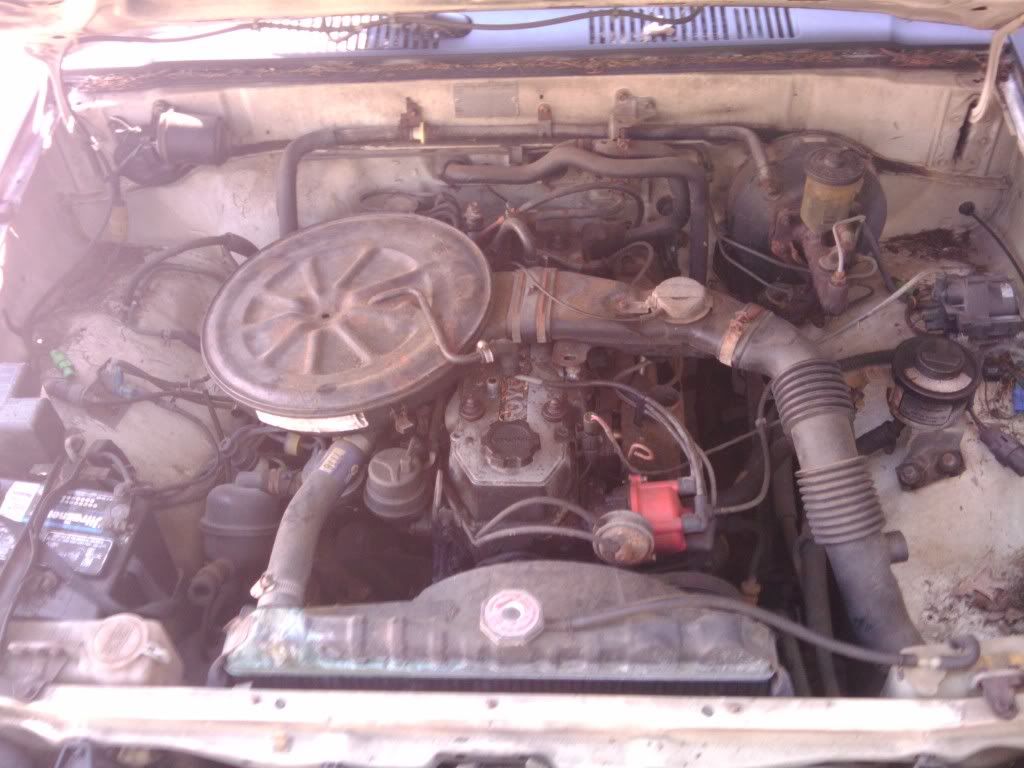
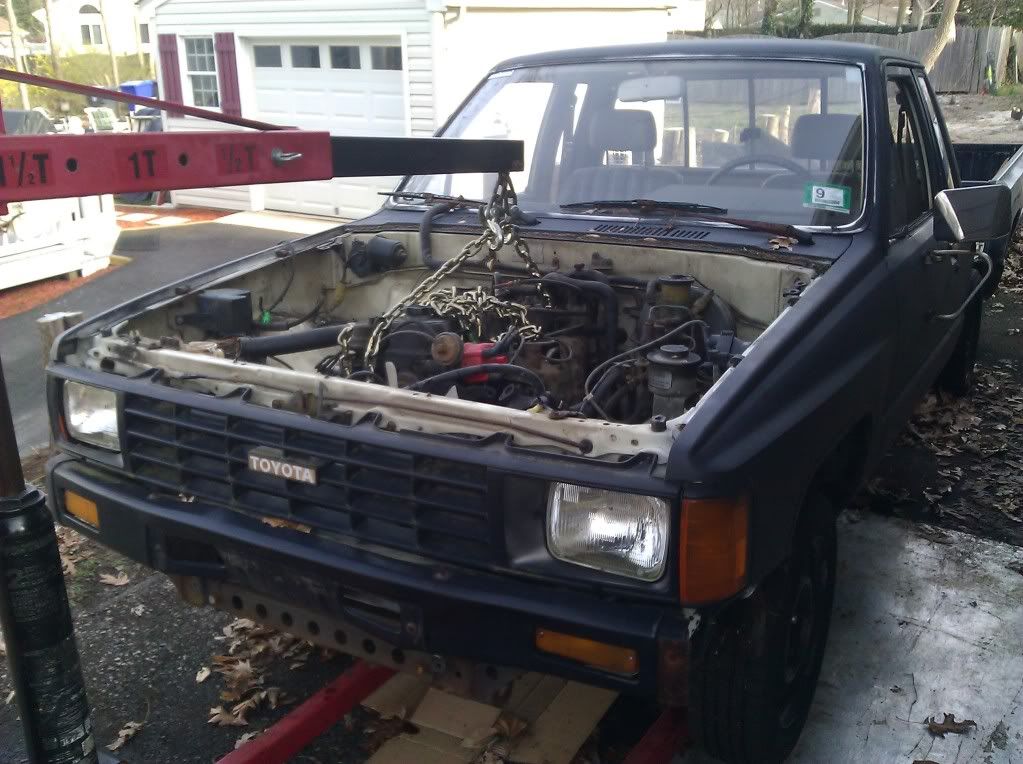
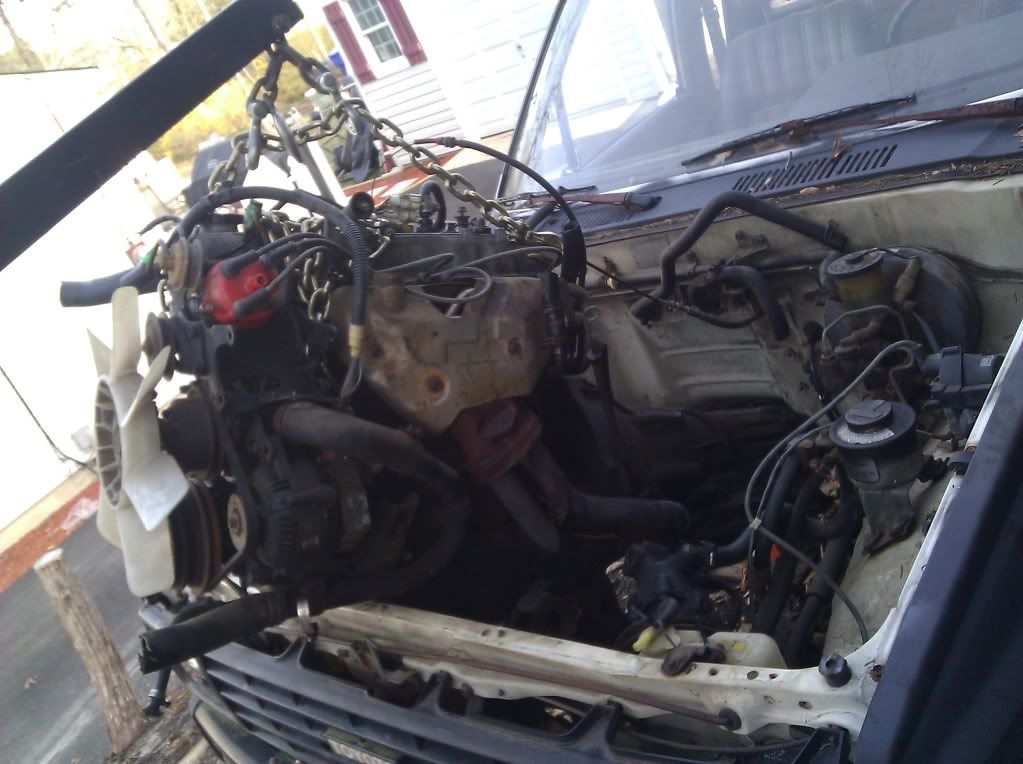
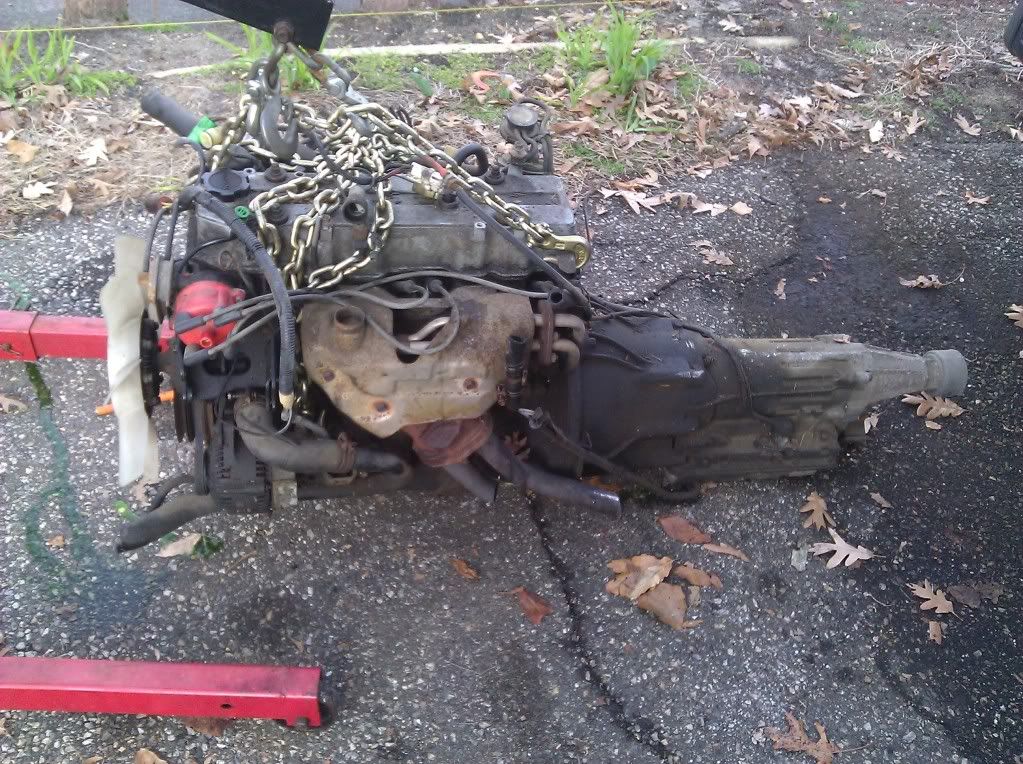
Here's the current motivation for the lil guy. stock 22r with a lil over 100k on it. I'm gonna throw it up in the classifieds section as soon as i have 15 posts. Its still all hooked up, so if someone wants to check the compression they can. ran fine, stock carb needs a rebuild b/c its been sitting. Trans is going with it too. the prev owner said it has some trouble getting into first when its cold out, but ive only driven it in the summer, and it was fine.
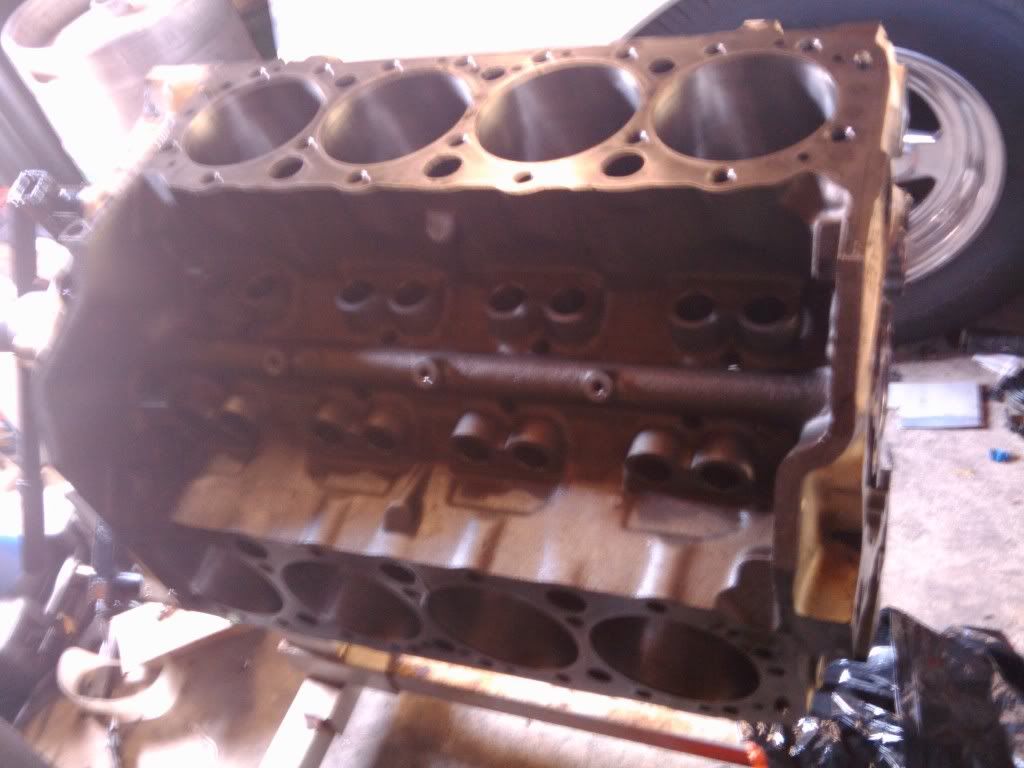
The motor is a late 90's vortec truck block that was actually used as a generator motor. there is absolutely no dif btwn the truck and generator motors from that time. they even have the same cam. I got it for free from a friend who's company was replacing their generator motor. they were going to throw this one out, so my buddy said he'd "take care of it." The rings were frozen in the pistons. they either rusted in there or the ring lands collapsed. I'm starting the motor rebuild first, so new rings and pistons are on their way from summit, as well as the transdapt swap mounts and p/s mount. reusing the crank and orig rods, went with stock type pistons but with flat tops, so I wont have to re-bal the rotating assembly. The motor is gonna come in at around 10.2:1 static compression. The block came with vortec 906 castings, but im going to use a set of vorted 062's that i have laying around b/c they have slightly better exhaust flow. when im all done, i expect the motor to put out somewhere around 350hp and 400+ ft.lbs.
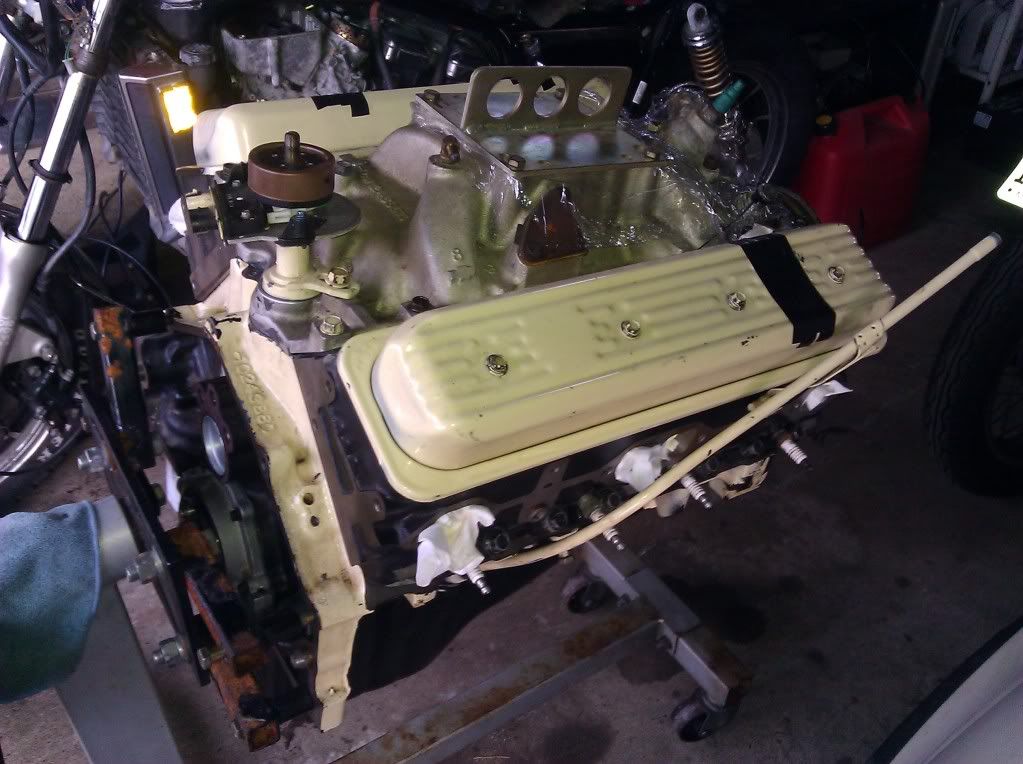
Fresh from a hone job at the machine shop. this is a bad pic, but im sure everyone knows what an sbc looks like.
The trans is a TCI streetfighter rated to 450 horse with a shift kit and a 2400 stall converter. a friend of mine "stress tested" it for about 8 months before selling it to me. said it chirped all 3 gears when it was bolted up to his stock '71 monte carlo's engine.

The previous owner turned the torsion bars all the way down and threw lowering blocks btwn the axle and the leaf springs. things practically on the ground, i cant get my jack under it. I have to get a new lower jack to even work on it.
The bed apparently rusted through, so the kid just left the tail lights on so it was at least kinda legal. There is some frame rot at the front of the leaf spring mounts. My welder said its not horrible, and that he can patch it up.
Here's the current motivation for the lil guy. stock 22r with a lil over 100k on it. I'm gonna throw it up in the classifieds section as soon as i have 15 posts. Its still all hooked up, so if someone wants to check the compression they can. ran fine, stock carb needs a rebuild b/c its been sitting. Trans is going with it too. the prev owner said it has some trouble getting into first when its cold out, but ive only driven it in the summer, and it was fine.
The motor is a late 90's vortec truck block that was actually used as a generator motor. there is absolutely no dif btwn the truck and generator motors from that time. they even have the same cam. I got it for free from a friend who's company was replacing their generator motor. they were going to throw this one out, so my buddy said he'd "take care of it." The rings were frozen in the pistons. they either rusted in there or the ring lands collapsed. I'm starting the motor rebuild first, so new rings and pistons are on their way from summit, as well as the transdapt swap mounts and p/s mount. reusing the crank and orig rods, went with stock type pistons but with flat tops, so I wont have to re-bal the rotating assembly. The motor is gonna come in at around 10.2:1 static compression. The block came with vortec 906 castings, but im going to use a set of vorted 062's that i have laying around b/c they have slightly better exhaust flow. when im all done, i expect the motor to put out somewhere around 350hp and 400+ ft.lbs.
Fresh from a hone job at the machine shop. this is a bad pic, but im sure everyone knows what an sbc looks like.
The trans is a TCI streetfighter rated to 450 horse with a shift kit and a 2400 stall converter. a friend of mine "stress tested" it for about 8 months before selling it to me. said it chirped all 3 gears when it was bolted up to his stock '71 monte carlo's engine.
Last edited by dp9; Apr 15, 2011 at 08:40 PM.
Nov 23, 2010 | 02:16 PM
#2
Thread Starter
Registered User
Joined: Sep 2009
Posts: 22
Likes: 0
From: NJ
OK, been a little while since ive updated this (not that anyone's reading it). I ended up purchasing a custom camshaft from Lunati (not sure if i mentioned that) and assembled the short block. I did a bowl blend on the heads, and gasket matched the exhaust ports. The heads are chevy vortec 062 castings. Ive heard that its easy to screw up the swirl promoting design of the intake ports, so I didnt touch them. I picked up a set of manley nextec springs and had a 3 angle valve job done to them. no pics of this, but i thought i would mention it.
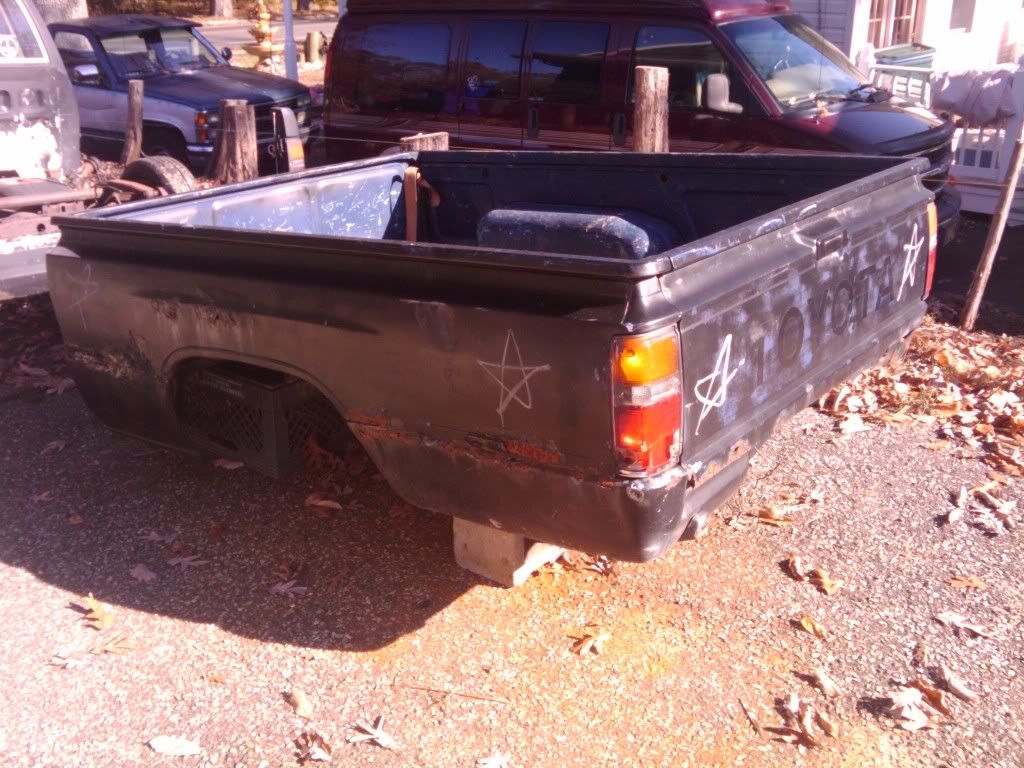
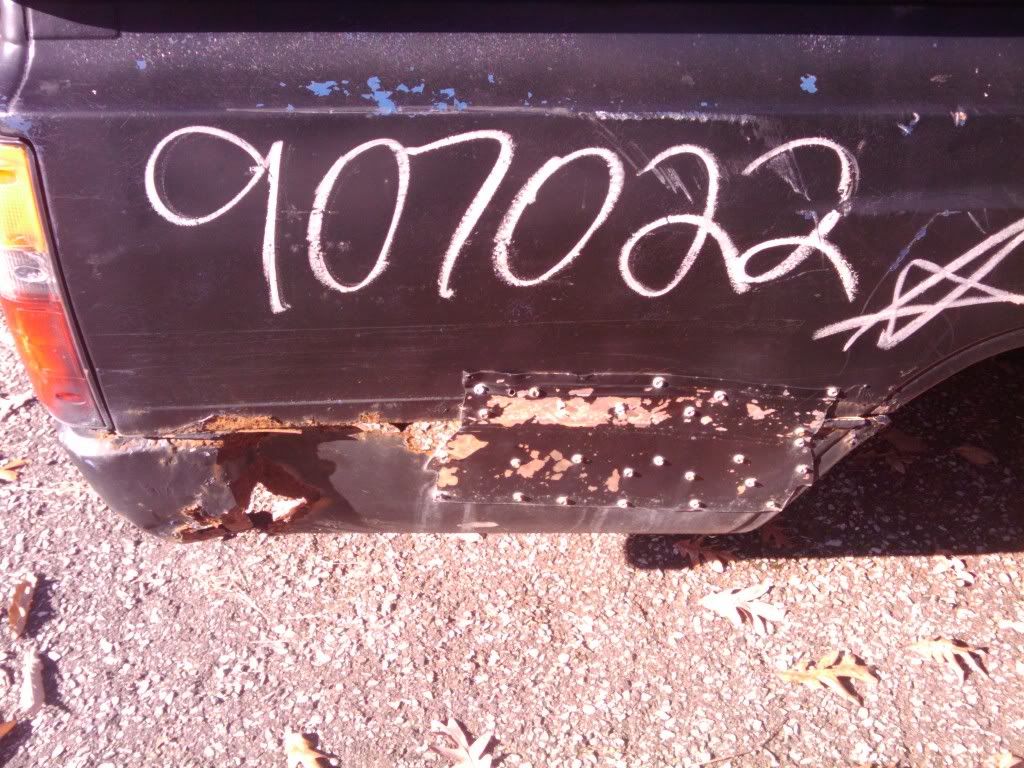
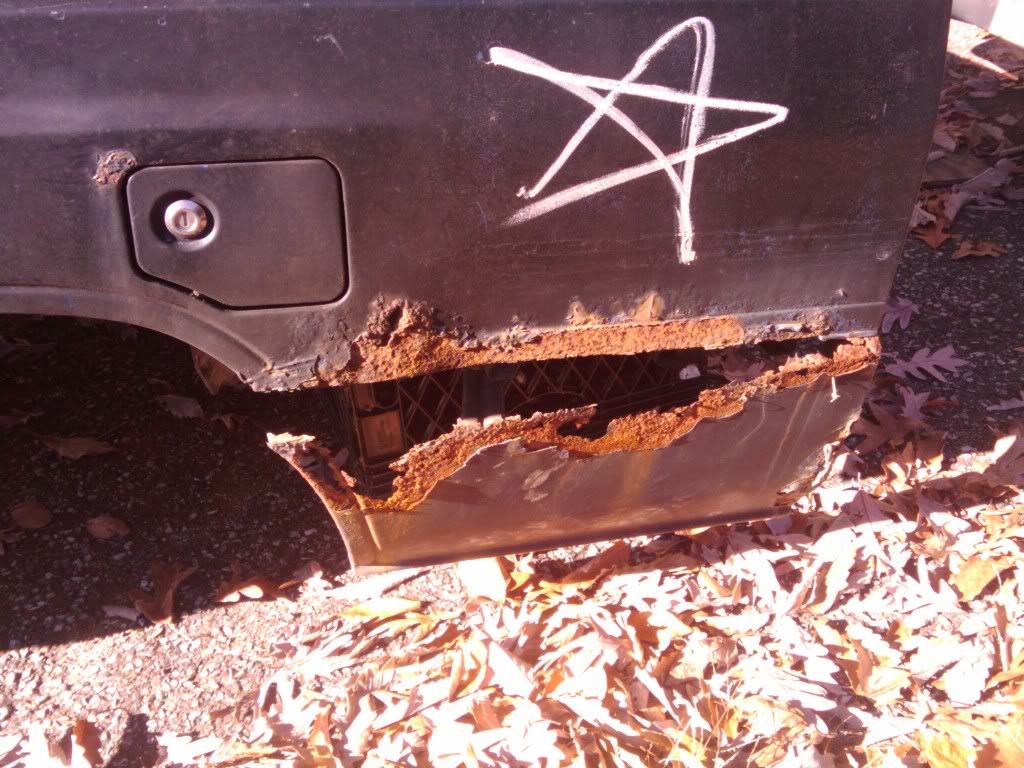
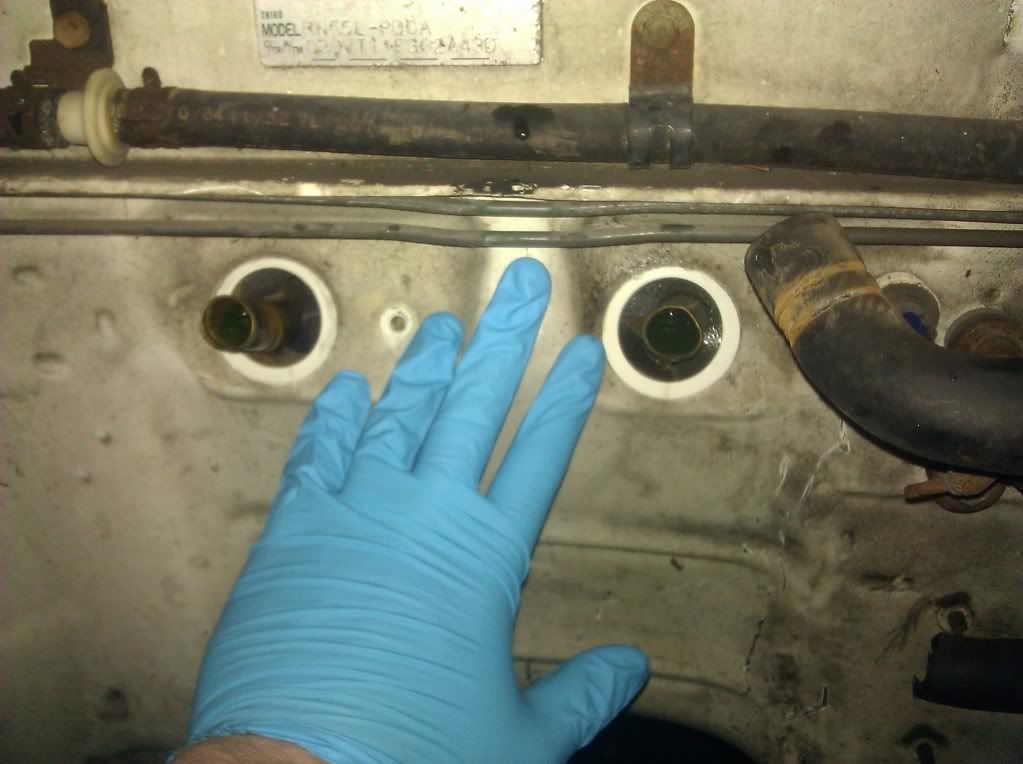
I picked up a jap/canadian style bed. its in pretty rough shape, so I've got some glass work ahead of me. all the patches are going to be fiberglass, and I'm going to use west system micro filler instead of bondo because its exponentially lighter and I already have it from a previous project.
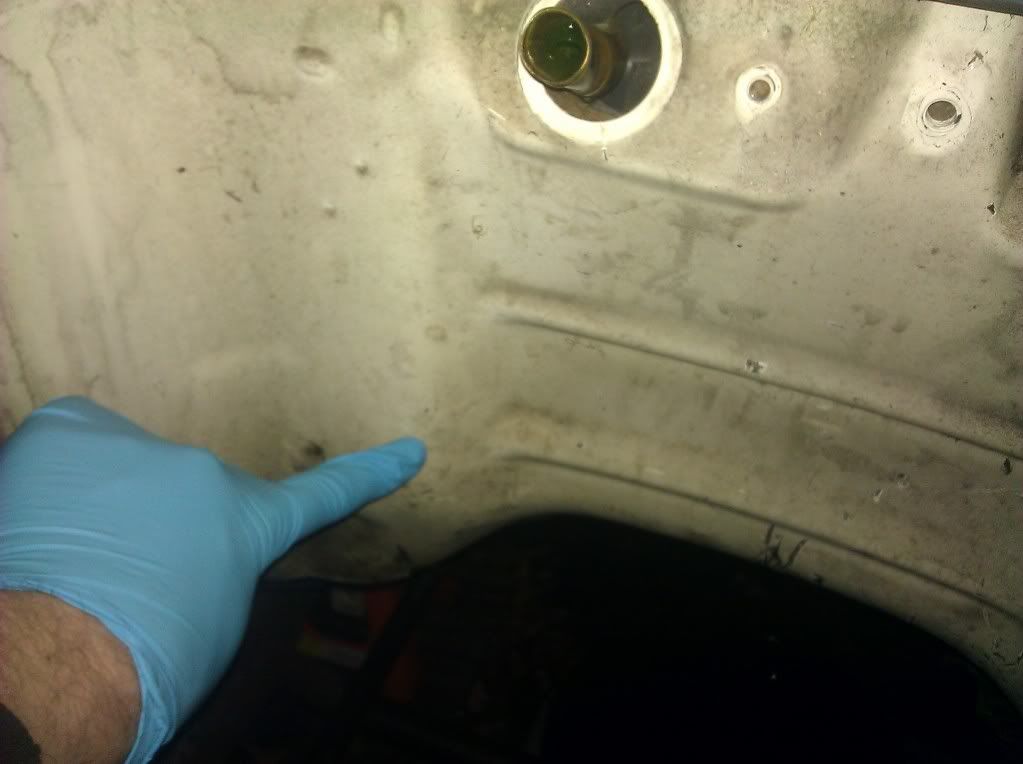
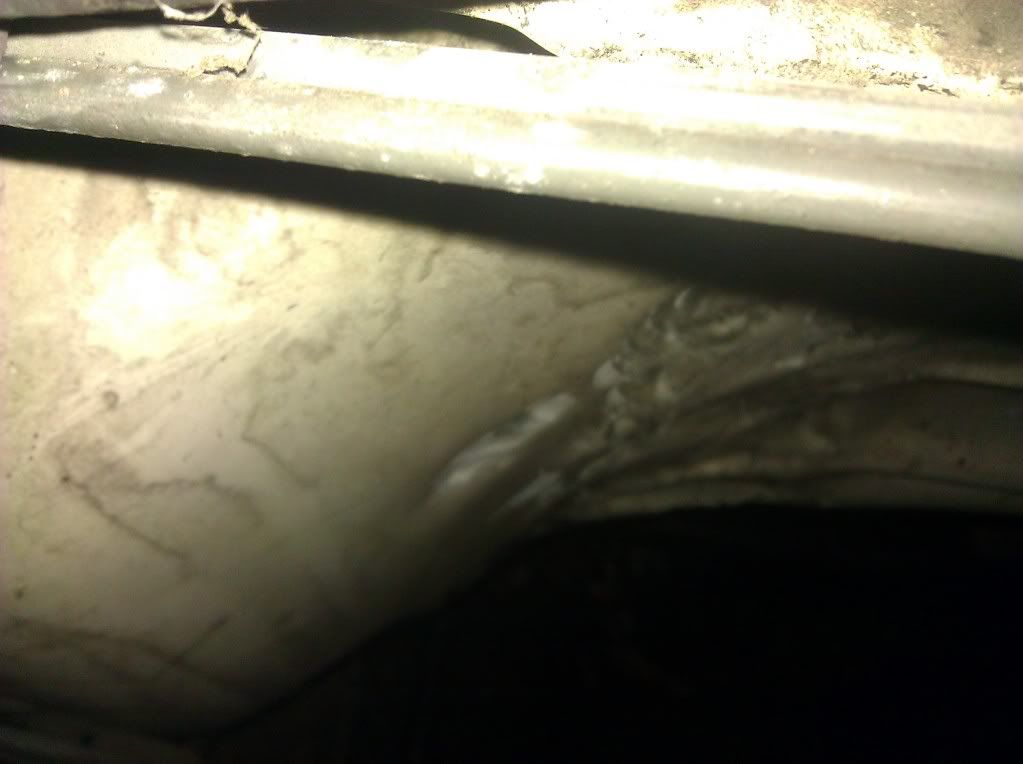
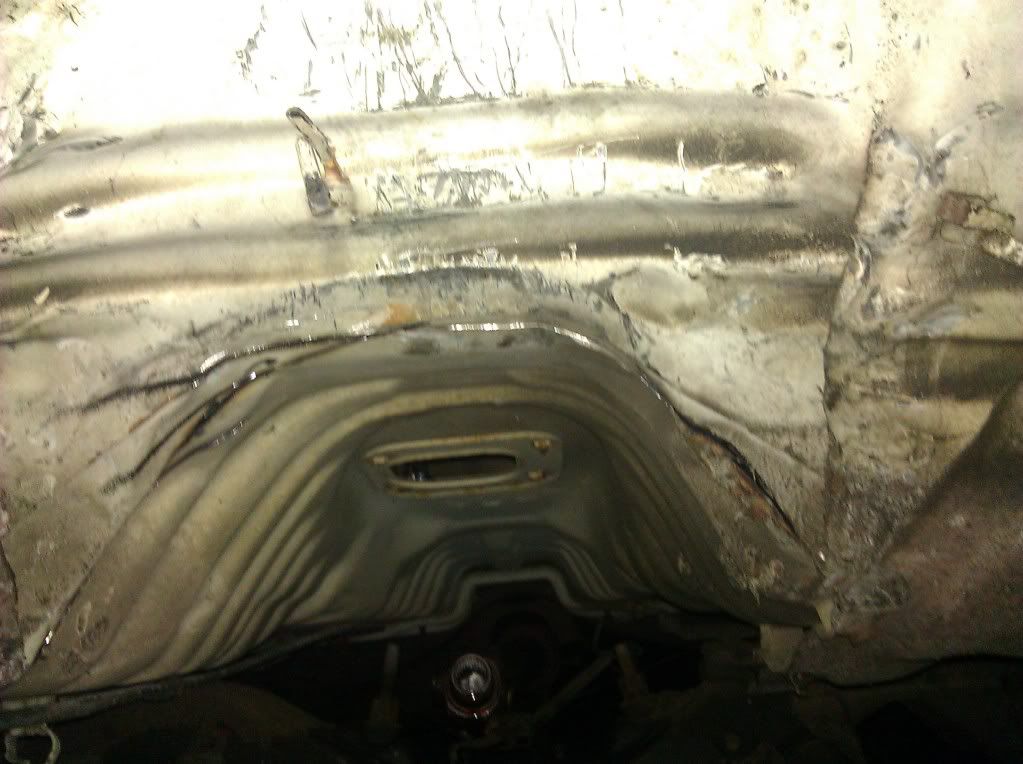
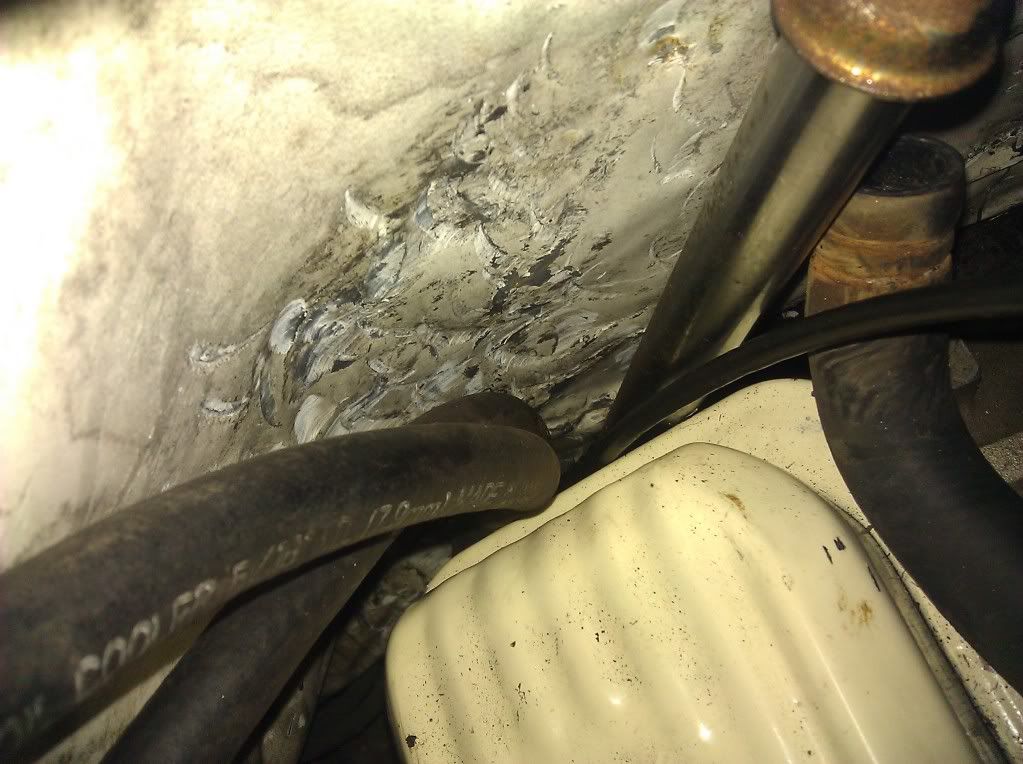
The frame had some rust holes, so I picked up some 3/16" steel and made up some patches.
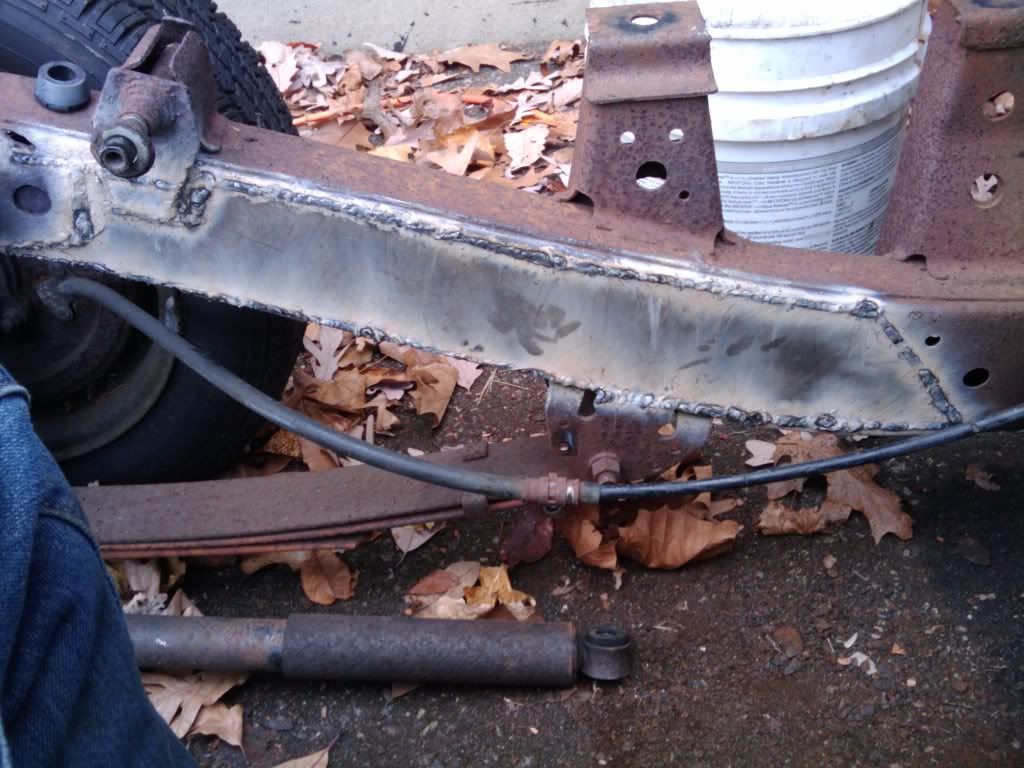
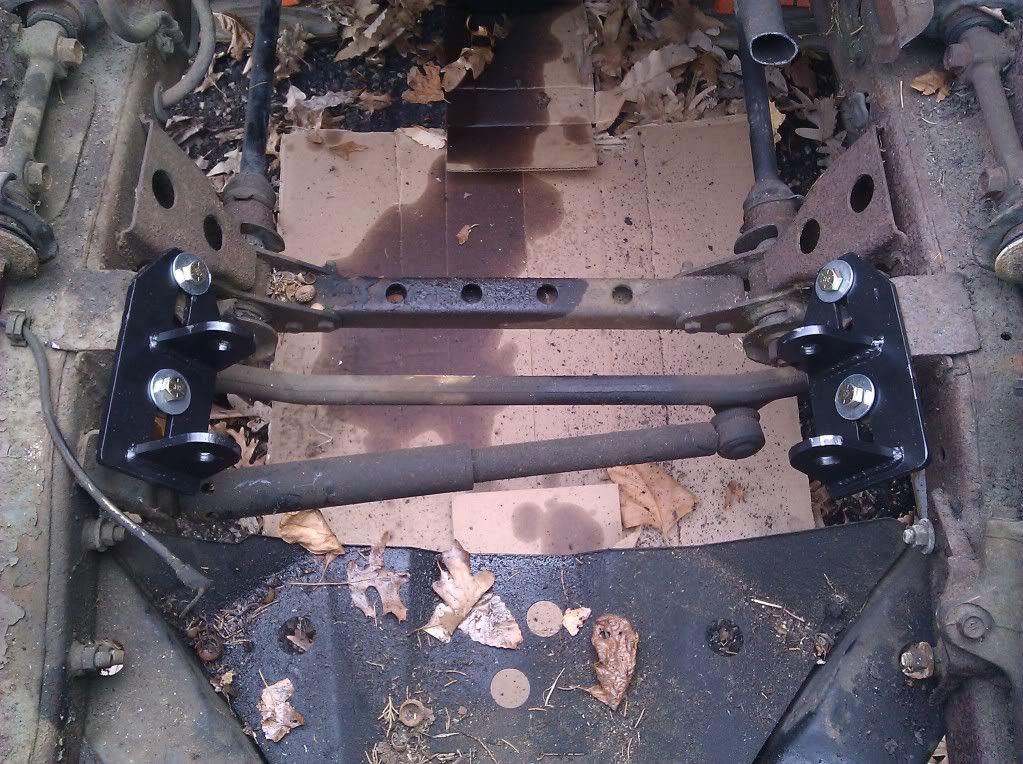
Next step is to patch up the bed. Hopefully it will be warm this weekend so I can get to that. I was thinking about getting fiberglass bead sides, but a grand is a little too much for me right now. I'm also going to take out the lowering blocks in the rear and put a set of slapper bars on it.
I picked up a jap/canadian style bed. its in pretty rough shape, so I've got some glass work ahead of me. all the patches are going to be fiberglass, and I'm going to use west system micro filler instead of bondo because its exponentially lighter and I already have it from a previous project.
The frame had some rust holes, so I picked up some 3/16" steel and made up some patches.
Next step is to patch up the bed. Hopefully it will be warm this weekend so I can get to that. I was thinking about getting fiberglass bead sides, but a grand is a little too much for me right now. I'm also going to take out the lowering blocks in the rear and put a set of slapper bars on it.
Last edited by dp9; Nov 23, 2010 at 02:17 PM.
 Feb 28, 2011 | 05:01 PM
#4
Thread Starter
Registered User
Joined: Sep 2009
Posts: 22
Likes: 0
From: NJ
man, i wish. The truck is out side, and my garage is unheated. It's just been too cold to work on it. Starting to warm up now tho, so I should start making progress this weekend or next.
I decided that the bedsides are beyond repair after i stripped off all the bondo and found out what they really looked like. I'm in the market for some if anyone has a set. if i cant find a used set in decent shape, any recommendations on a set of glass ones?
I also managed to get the short block built before it got too cold. now i just have to figure out where all the extra seals from my conversion gasket set go. I hate having leftover parts.

 Mar 7, 2011 | 05:17 PM
#6
Thread Starter
Registered User
Joined: Sep 2009
Posts: 22
Likes: 0
From: NJ
I've thought about that, and here's what I'm going to do: I'm going to install the motor and trans and drive the piss out of truck (like i do with all my vehicles). If the rear ends up as shrapnel on the asphalt, then I'll know it cant handle the torque, at which point I'll replace it with a chevy 10-bolt because theyre cheap and plentiful. I'm going to do the same test on that one too, but I'll replace it with a ford 9 inch if it fails.
Apr 9, 2011 | 03:10 PM
#7
Thread Starter
Registered User
Joined: Sep 2009
Posts: 22
Likes: 0
From: NJ
FINALLY!!! Some ˟˟˟˟˟ thats worth posting!!!
OK, I pulled the trans out of the car that was holding on to it so it can go into the truck, and finished building the motor(!) late last week.
Came home from work today, it was nice out, so I decided to make some progress.
Wasnt too hard. getting to the passenger side motor mount was a little difficult. Otherwise, nothing I havent done before.
Anyone want a 22R motor and auto trans from an 85 with 100k on it? ran well before I pulled it.
Tomorrow I plan to either ride my motorcycle all day since its going to be 80 degrees or something insanely warm like that, or mate up the small block and the th350 and see if i can wedge them in there. More than likely I'll have to cut some of the trans tunnel out to fit the trans (not doing a body lift). That means interior work getting the seats and carpeting out. I also have to swap over the gear selector from a car with a chevy trans because the linkage is on the opposite side. I'll try to make the next post pic heavy b/c i know thats the part you guys want to see.
Feels good to make progress.
Last edited by dp9; Apr 9, 2011 at 03:13 PM.
Trending Topics
Apr 10, 2011 | 05:58 PM
#8
Thread Starter
Registered User
Joined: Sep 2009
Posts: 22
Likes: 0
From: NJ
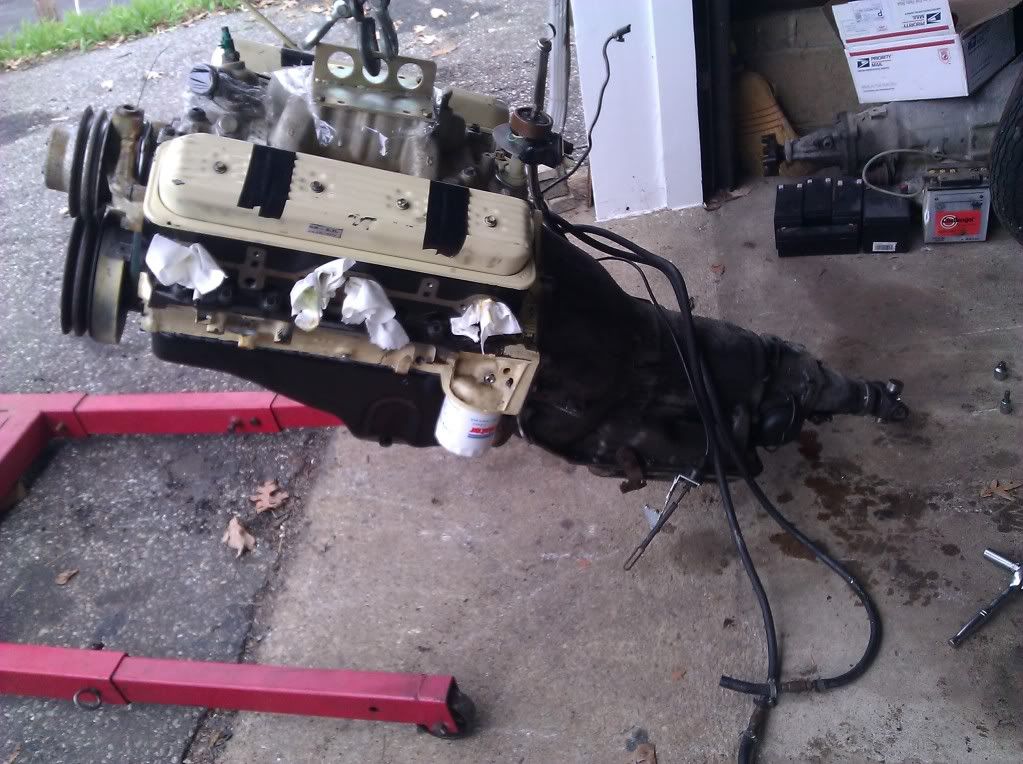
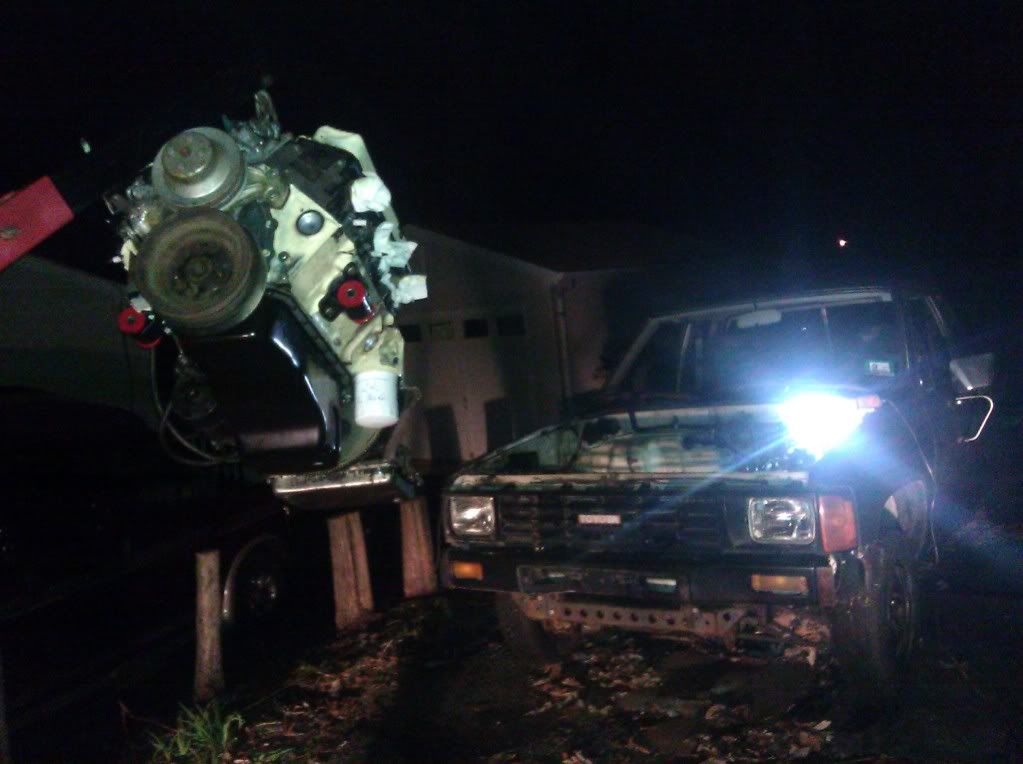
Ok, here is the, as promised, pic-heavy post.. not that anyone's going to read it. The motor and trans are in the truck! not bolted in or even resting in place, but suspended for the time being. First things first, attached the motor to the trans.
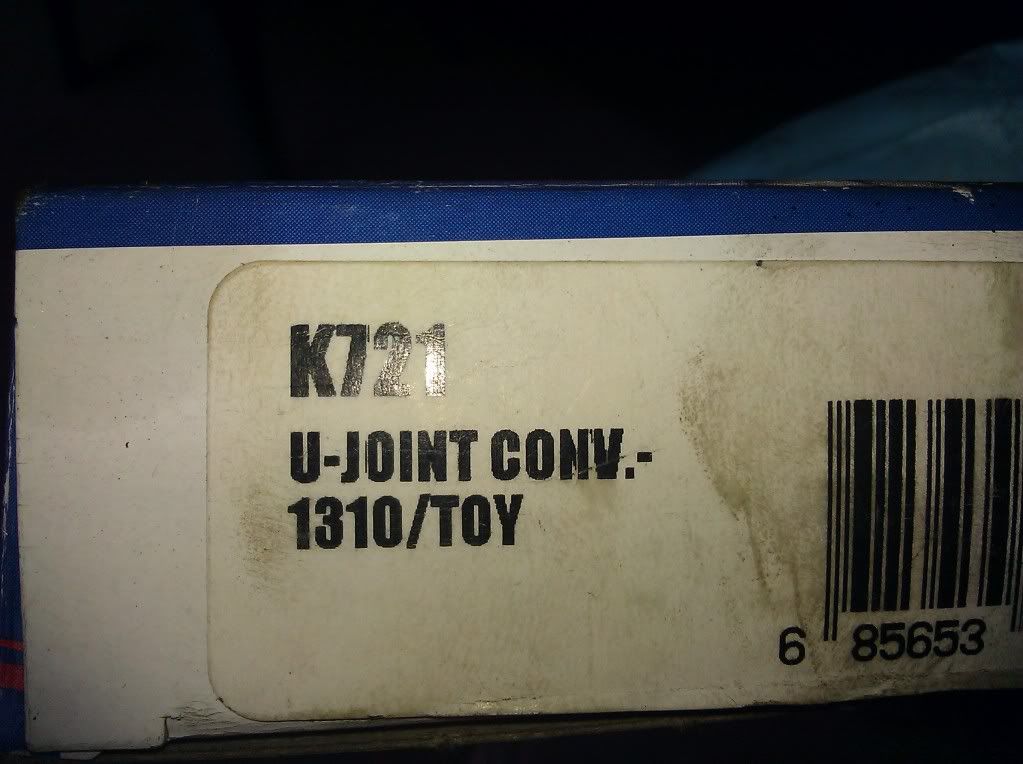
Then I figured I should have the drive shaft set up for god knows what reason, but thats what i did next. the rosetta stone was a 1310/toyota u-joint so i could use the stock slip yoke on the TH350 trans.
The old yoke and drive shaft. Gatta take the c-clips off the u-joint. THey came right off with a punch and a hammer. light taps, too.
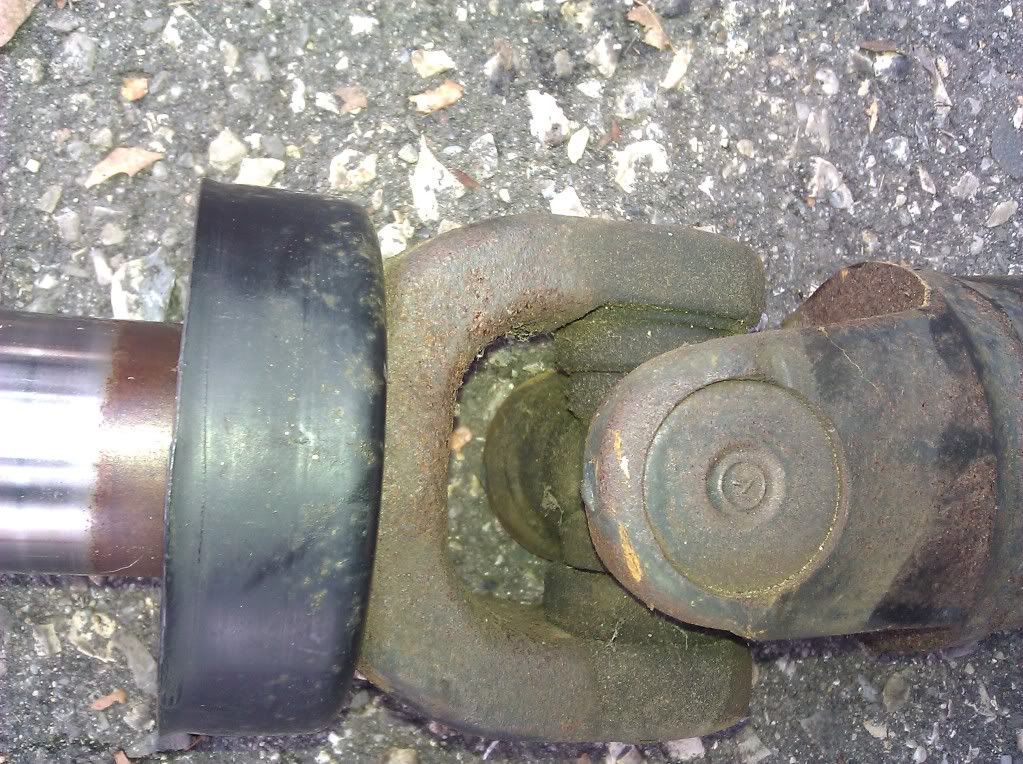
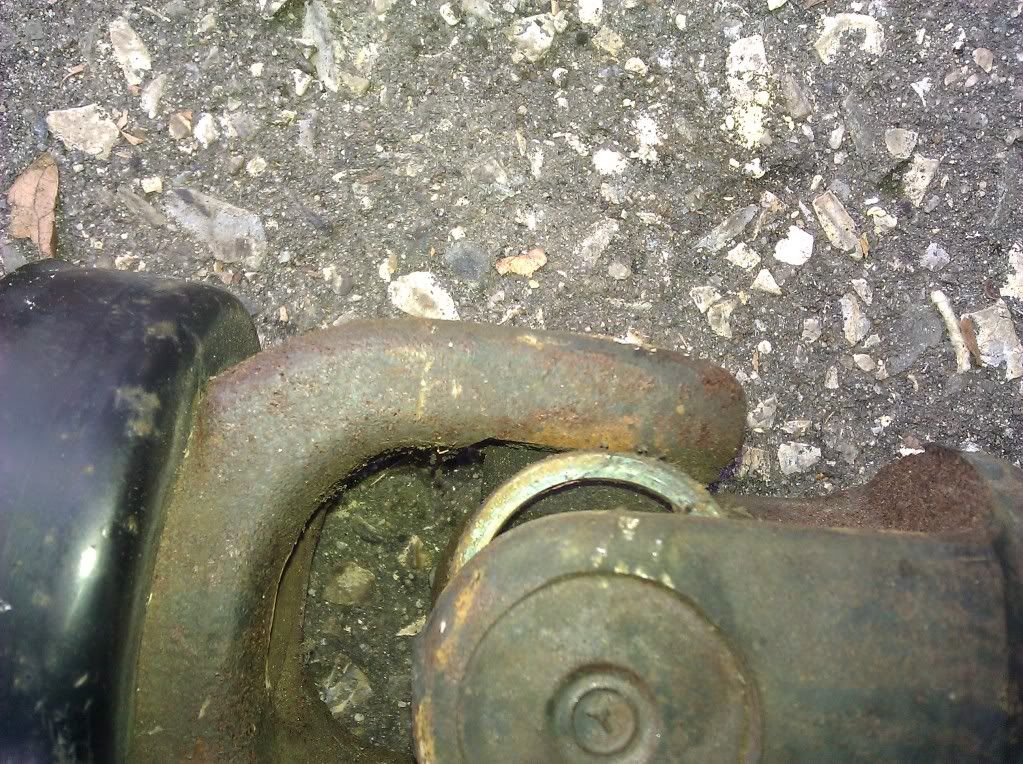
Then press the caps out with a vise.
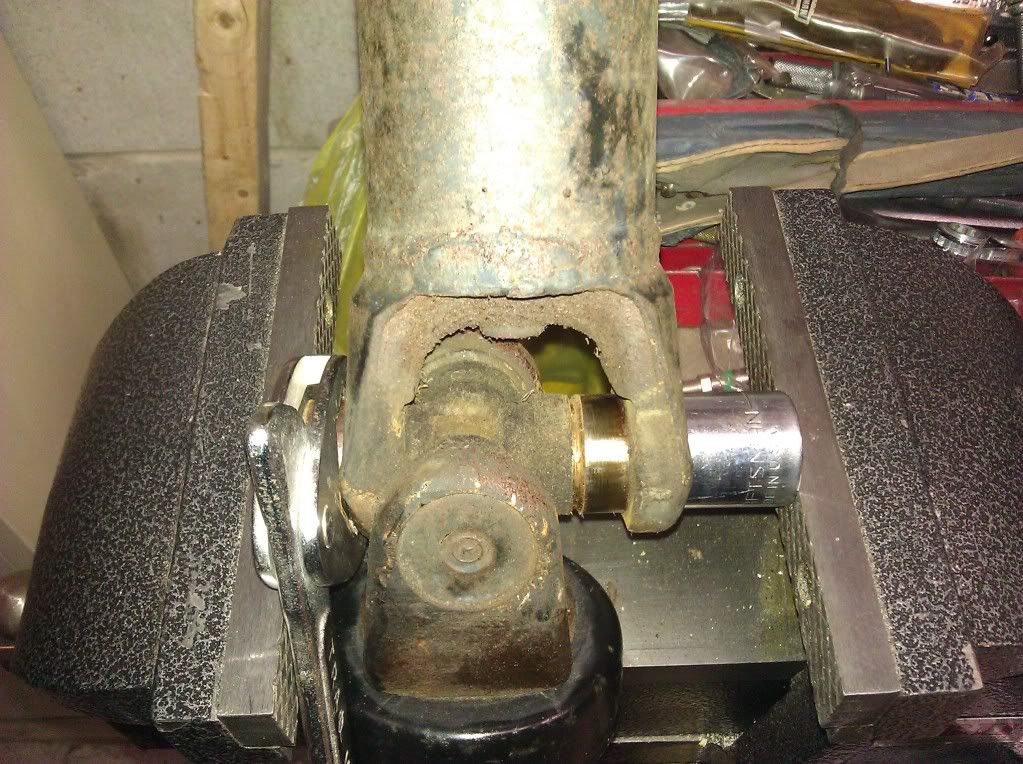
put the new one in. hint: put it on the drive shaft first.

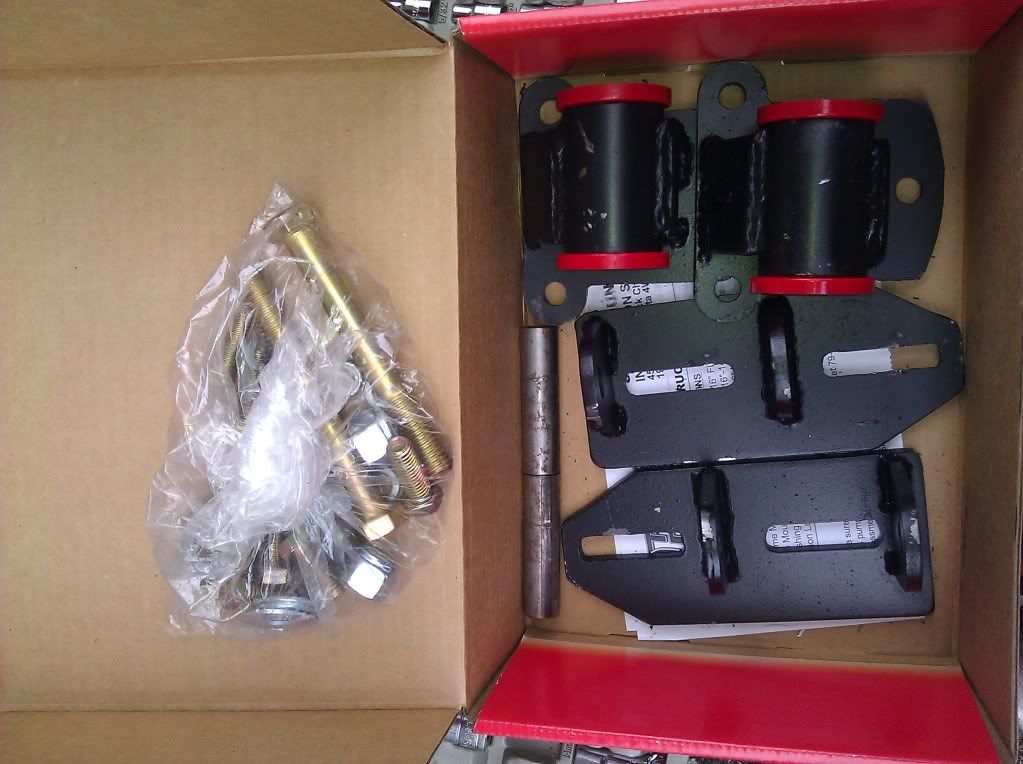
On to the install. Here's the Trans Dapt motor mount kit im using.
and here how it fits.
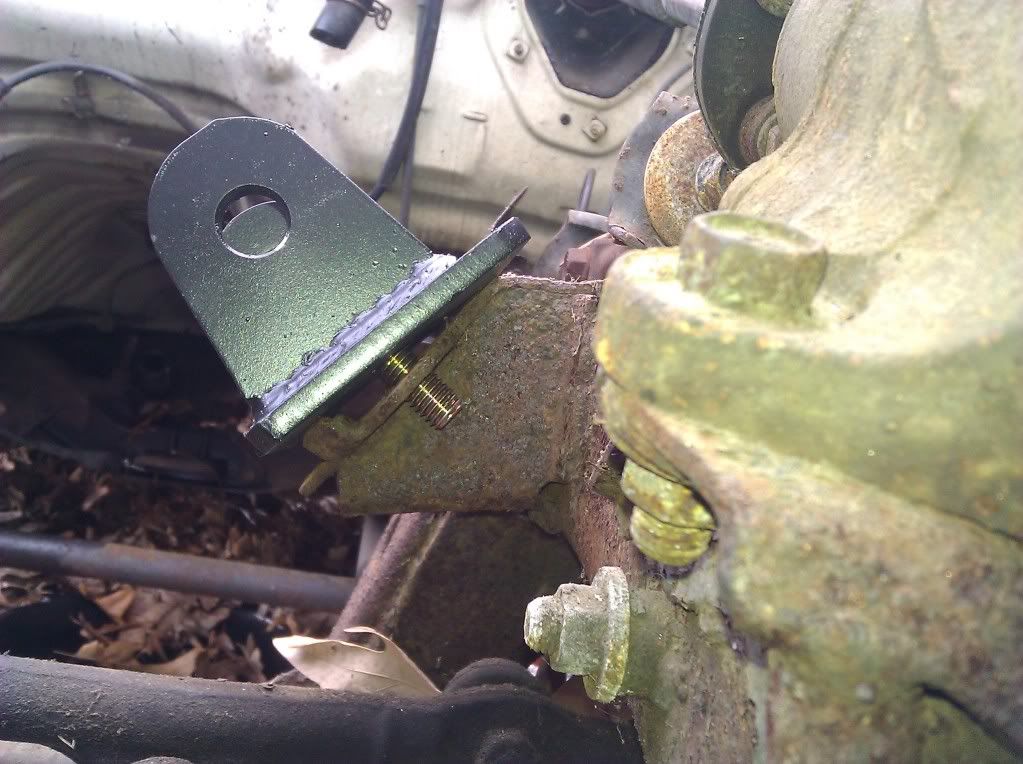
Ok, so I have to clearance those little tabs. No problem, I love using my angle grinder.
Now they fit right on.
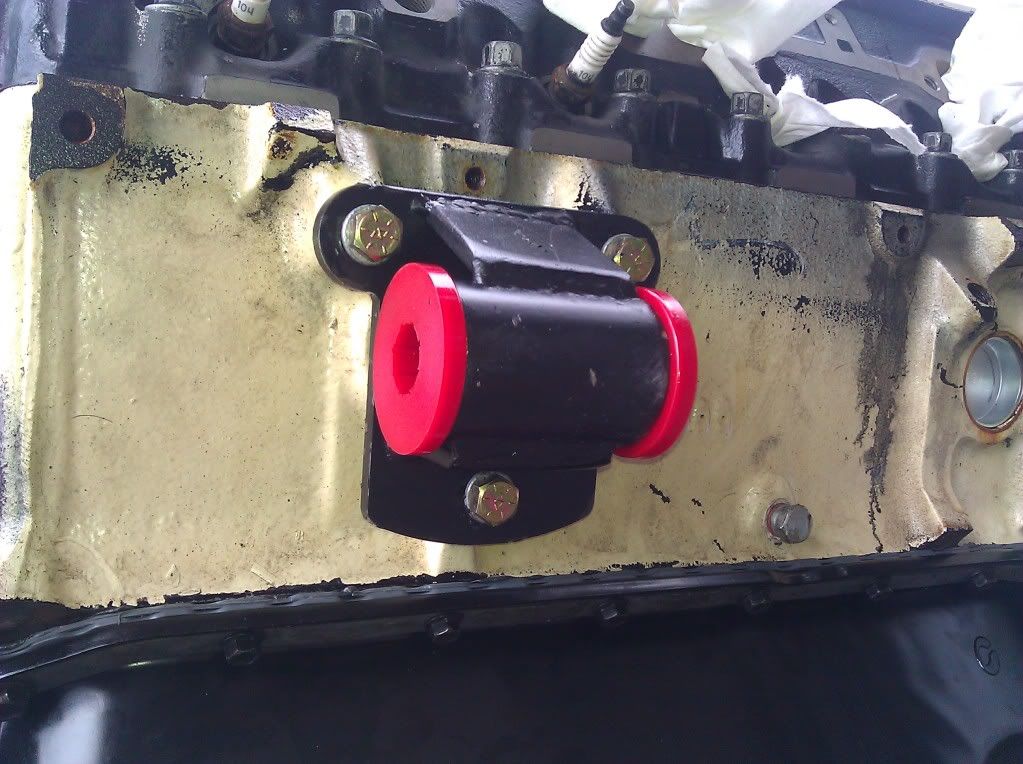
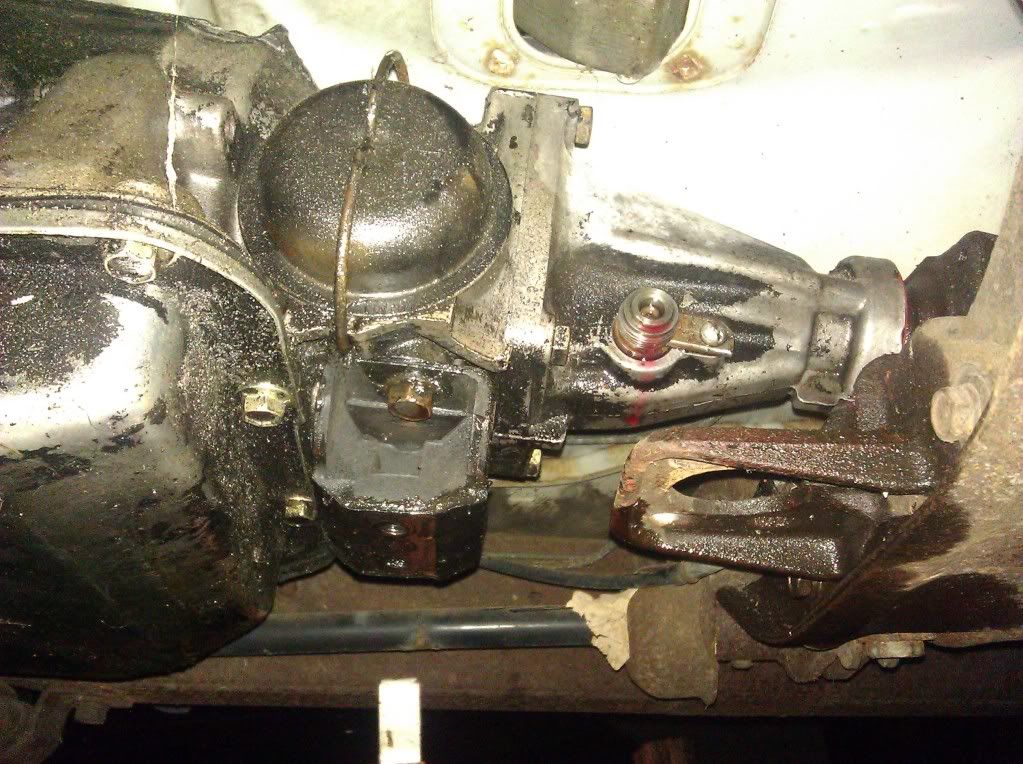
Here are the motor mounts. They have steel sleeves that slide (read: press) into the poly bushings. They arent installed in this shot. I put some olive oil on the bushings and hammered them in with a block of wood on the back side of the bushings. took the same amount of time as it wouldve taken to take the mounts off, go down to the basement and use the vise to press them in correctly.
All set to go in now.
so far, so good.
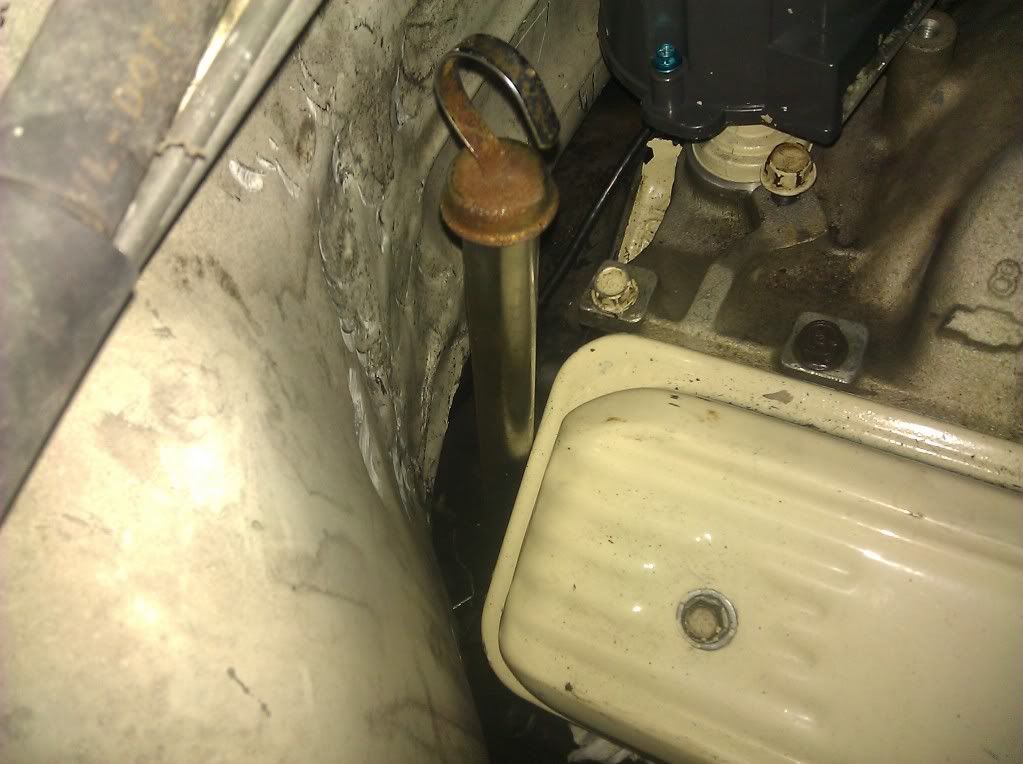
Aaaaaand its stuck. I expected that though. here's where it stopped. It contacts the parking brake pulley on the driver side, the trans dip stick on the passenger side, the oil pan and trans pan contact cross-members and the motor mounts still have to drop another inch. The trans-side trans mount doesnt reach the cross-member trans mount either.. Fun, fun.
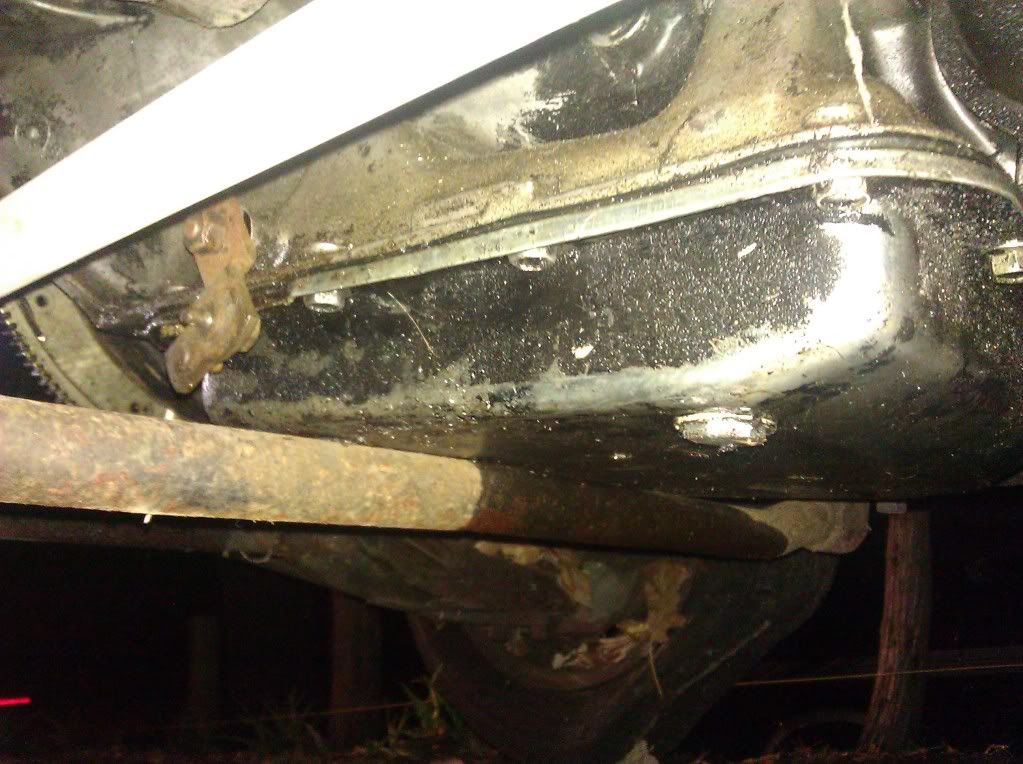
I lifted the trans pan with a jack and a block of wood, and now the oil pan and trans pan clear those cross-members, but just by a little. It looks like theyre going to clear on the bottom with the mounts and everything, its the trans tunnel thats going to be a problem.
My current thinking is that im going to clearance the trans tunnel at the corner where the bell housing meets the rest of the trans case (its all one piece, but you know where im talking about). Im going to install the drive shaft and see where the trans mounts end up when the yoke is deep enough in the trans. then I'll cut an adapter out of 3/16 plate steel and just drill some holes in it. anybody think that wont be thick enough? i have a sheet of it, which is why im thinking about using it. but if you guys dont think it will hold, ill get something thicker.
Then I figured I should have the drive shaft set up for god knows what reason, but thats what i did next. the rosetta stone was a 1310/toyota u-joint so i could use the stock slip yoke on the TH350 trans.
The old yoke and drive shaft. Gatta take the c-clips off the u-joint. THey came right off with a punch and a hammer. light taps, too.
Then press the caps out with a vise.
put the new one in. hint: put it on the drive shaft first.
On to the install. Here's the Trans Dapt motor mount kit im using.
and here how it fits.
Ok, so I have to clearance those little tabs. No problem, I love using my angle grinder.
Now they fit right on.
Here are the motor mounts. They have steel sleeves that slide (read: press) into the poly bushings. They arent installed in this shot. I put some olive oil on the bushings and hammered them in with a block of wood on the back side of the bushings. took the same amount of time as it wouldve taken to take the mounts off, go down to the basement and use the vise to press them in correctly.
All set to go in now.
so far, so good.
Aaaaaand its stuck. I expected that though. here's where it stopped. It contacts the parking brake pulley on the driver side, the trans dip stick on the passenger side, the oil pan and trans pan contact cross-members and the motor mounts still have to drop another inch. The trans-side trans mount doesnt reach the cross-member trans mount either.. Fun, fun.
I lifted the trans pan with a jack and a block of wood, and now the oil pan and trans pan clear those cross-members, but just by a little. It looks like theyre going to clear on the bottom with the mounts and everything, its the trans tunnel thats going to be a problem.
My current thinking is that im going to clearance the trans tunnel at the corner where the bell housing meets the rest of the trans case (its all one piece, but you know where im talking about). Im going to install the drive shaft and see where the trans mounts end up when the yoke is deep enough in the trans. then I'll cut an adapter out of 3/16 plate steel and just drill some holes in it. anybody think that wont be thick enough? i have a sheet of it, which is why im thinking about using it. but if you guys dont think it will hold, ill get something thicker.
Last edited by dp9; Apr 11, 2011 at 07:28 PM.
Apr 15, 2011 | 07:25 PM
#9
Thread Starter
Registered User
Joined: Sep 2009
Posts: 22
Likes: 0
From: NJ
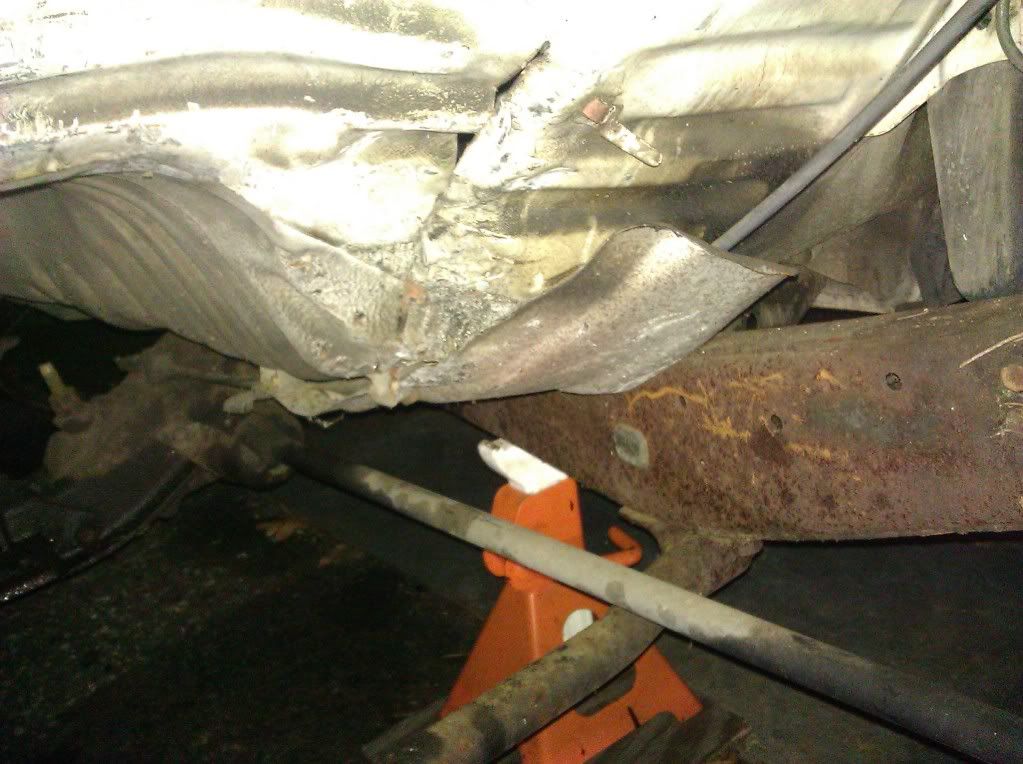
Today I clearanced the trans tunnel and started finagling the motor into place. Trans tunnel kinda went like this:
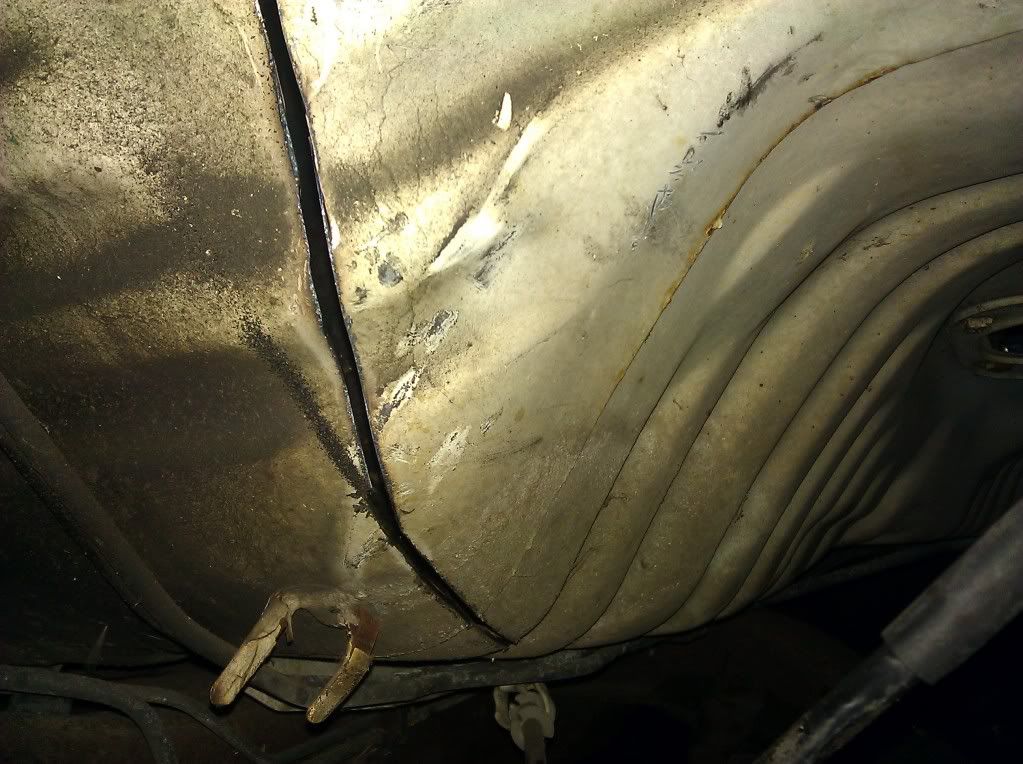
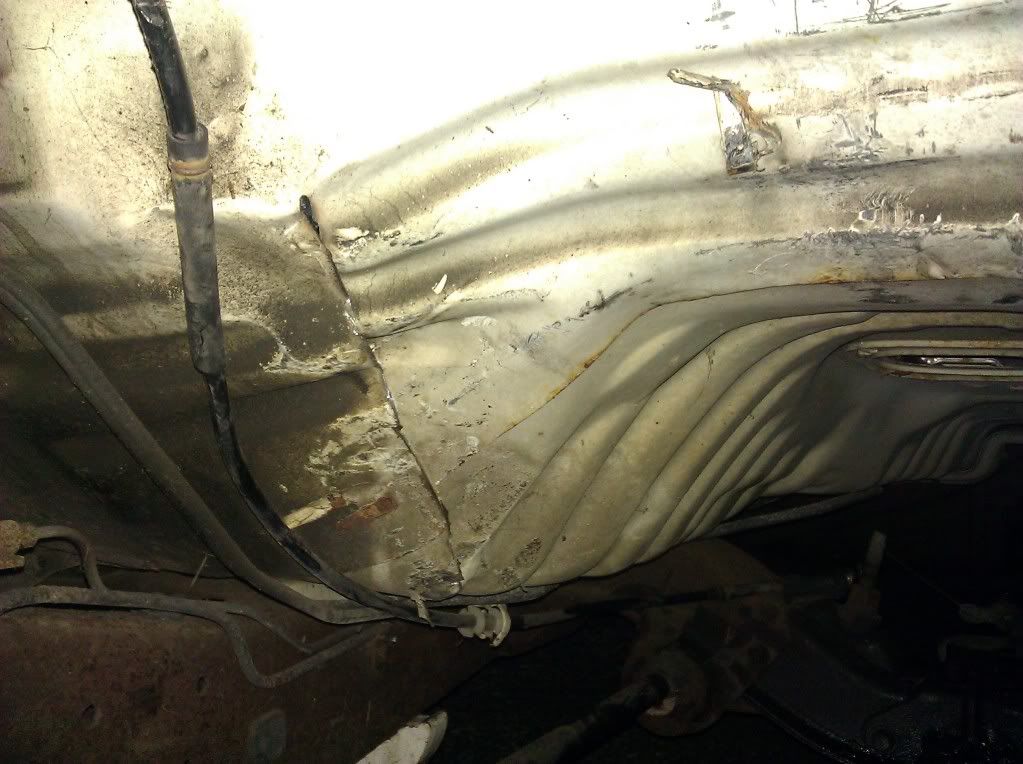
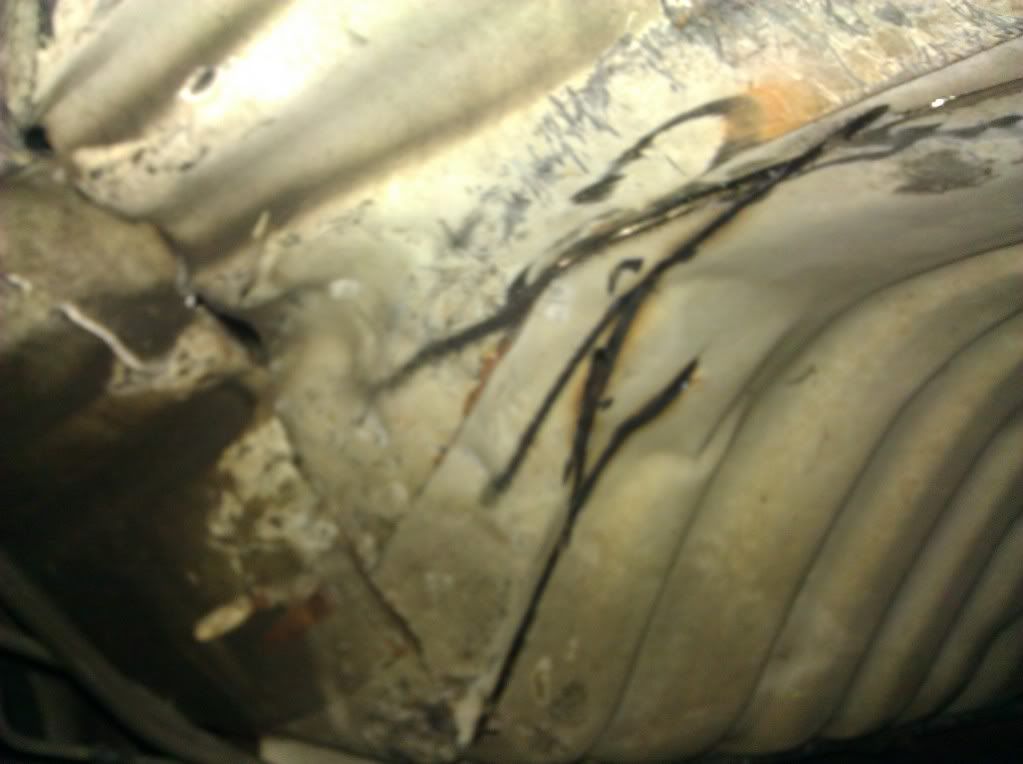
The trans contacted at the bottom of the tunnel so I wanted to move the bottom corner out and up a little to clear the bell housing on the trans. The trans dipstick was pinched btwn the bell housing and the tunnel, and there was still room above the trans. I started by pulling the matting in the cab back so that i didnt cut through it. Then I made two cuts like this.
Then I took my 10# sledge and moved the two sides of the cut inward. This is with just the inside sides massaged in.
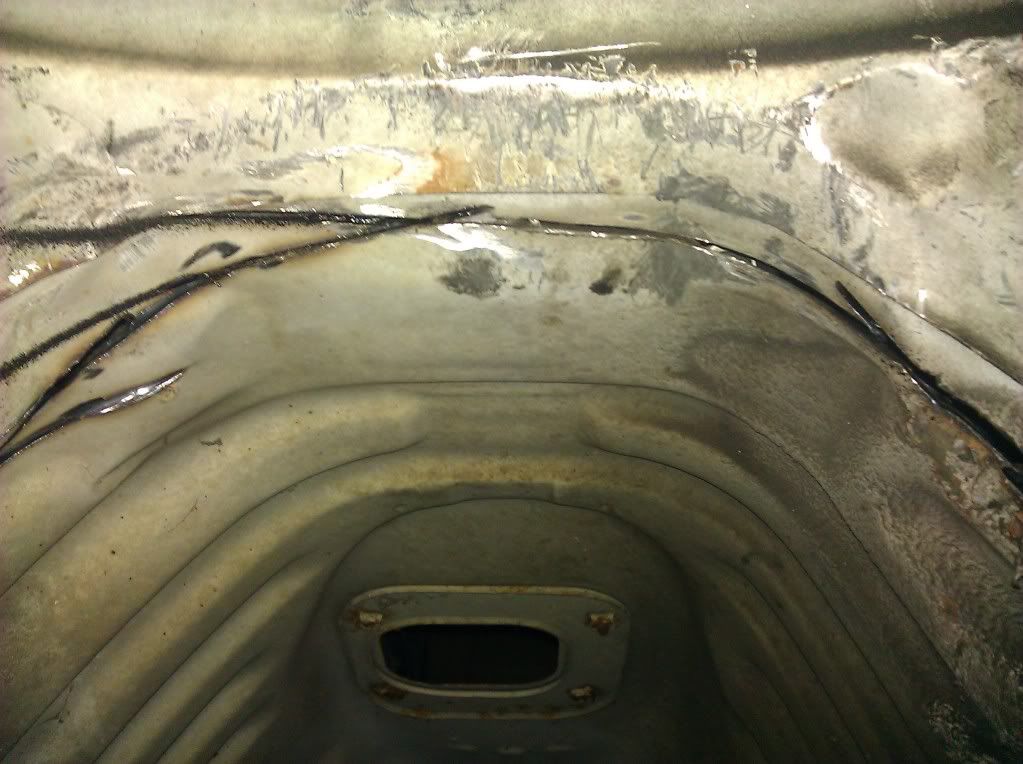
and here it is with everything clearanced.
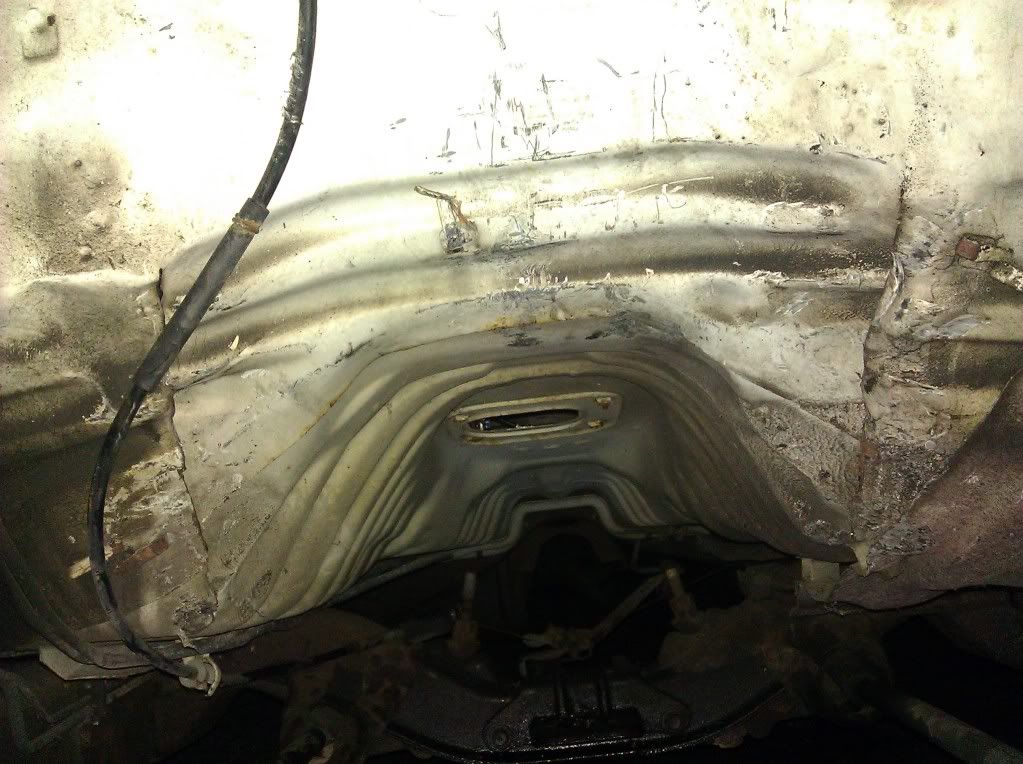
Inside after clearancing.
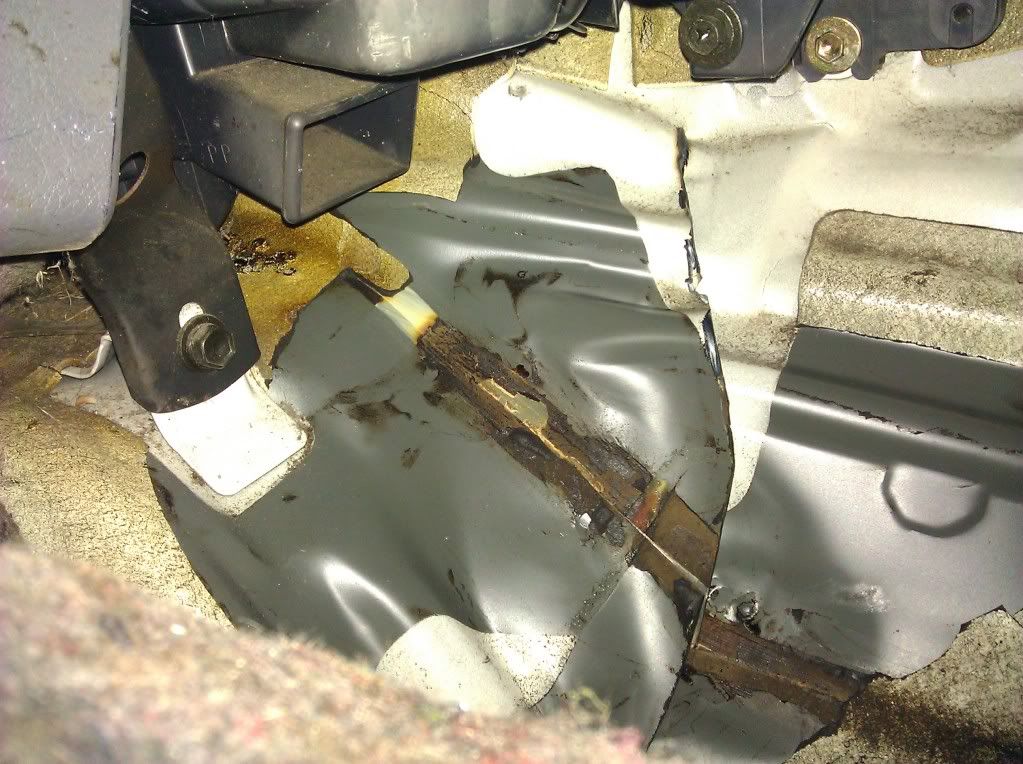
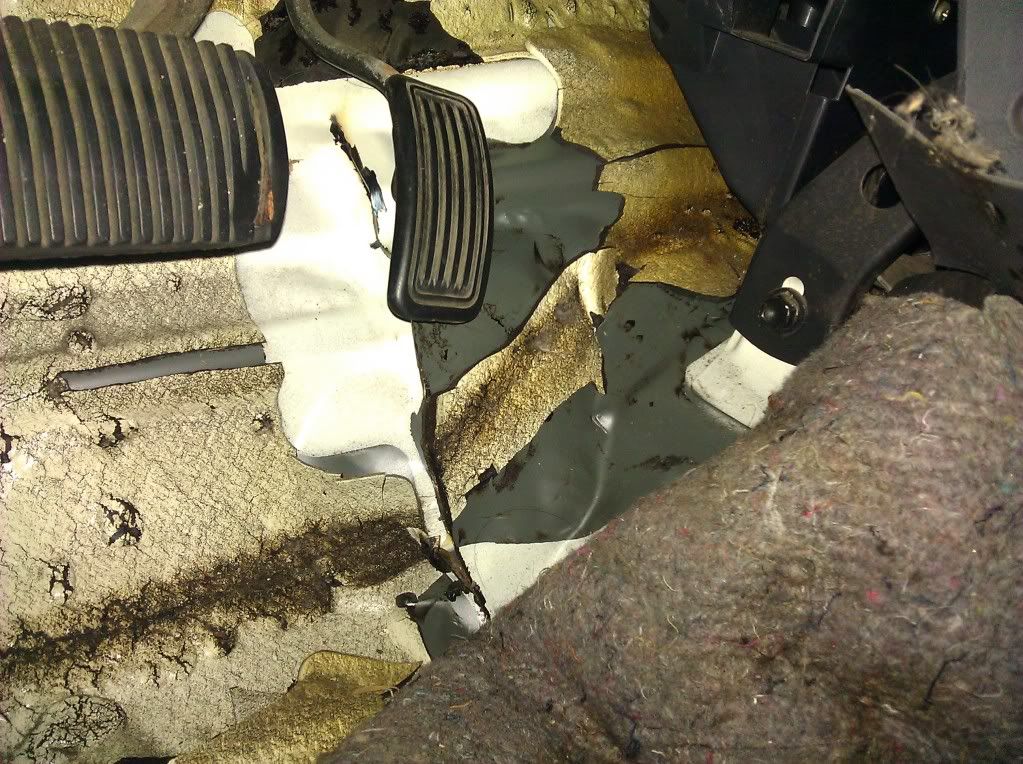
a friend of mine is going to lay a bead on the seams from the inside when he has a chance. I'll pull back the matting thats on there first, of course.
Next I put the motor back in, bolted the motor mounts in place and its all done!
LAUGH! aaaaaaahhhhh if only.
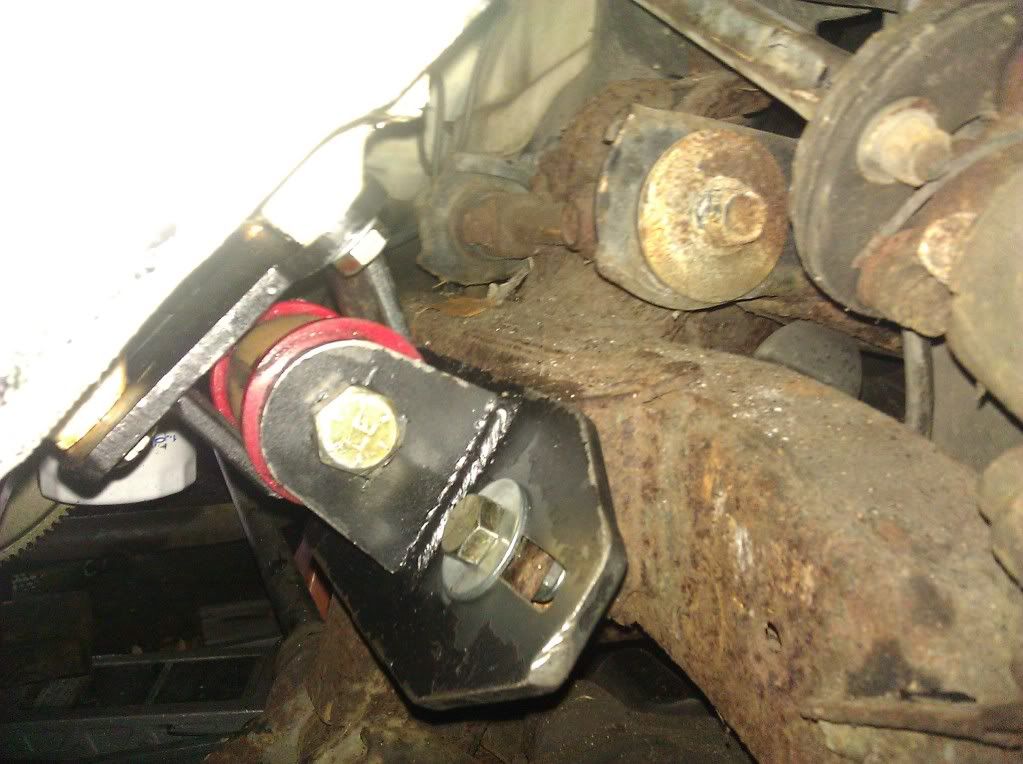
took forever to get the tail shaft and mounts lined up by myself using a jack under the trans pan, the hoist on the engine lift plate and a 5 foot pry-bar for motivation. like 3 hours. I kept blasting the corner of the poly bushings off, but i finally got one in.
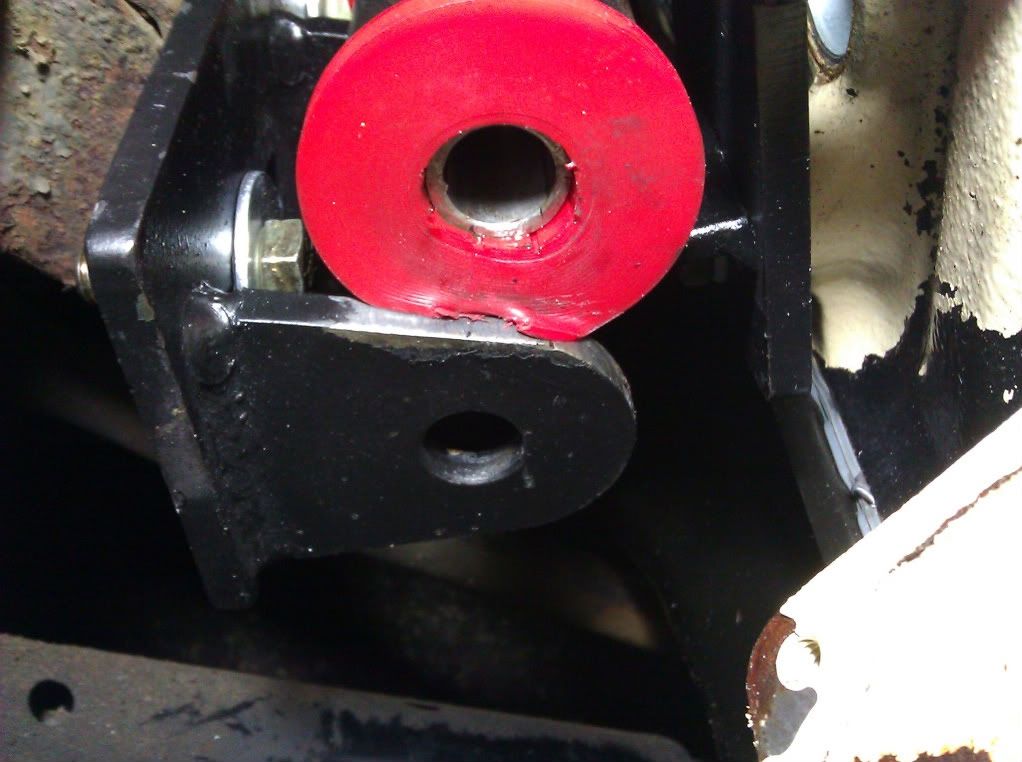
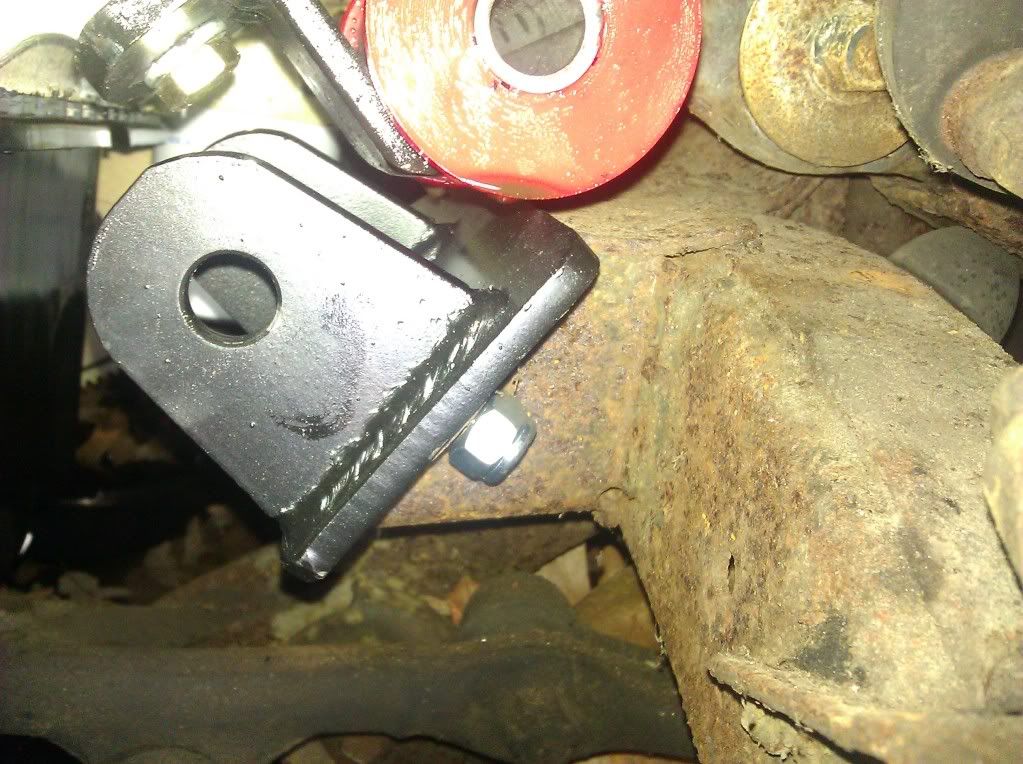
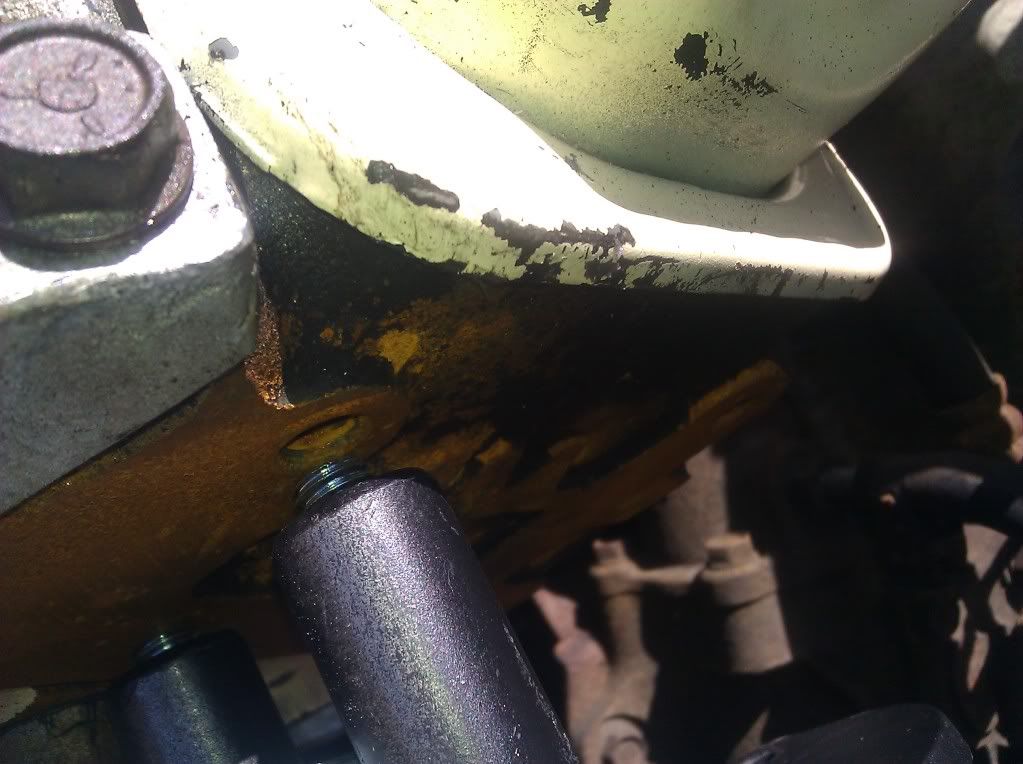
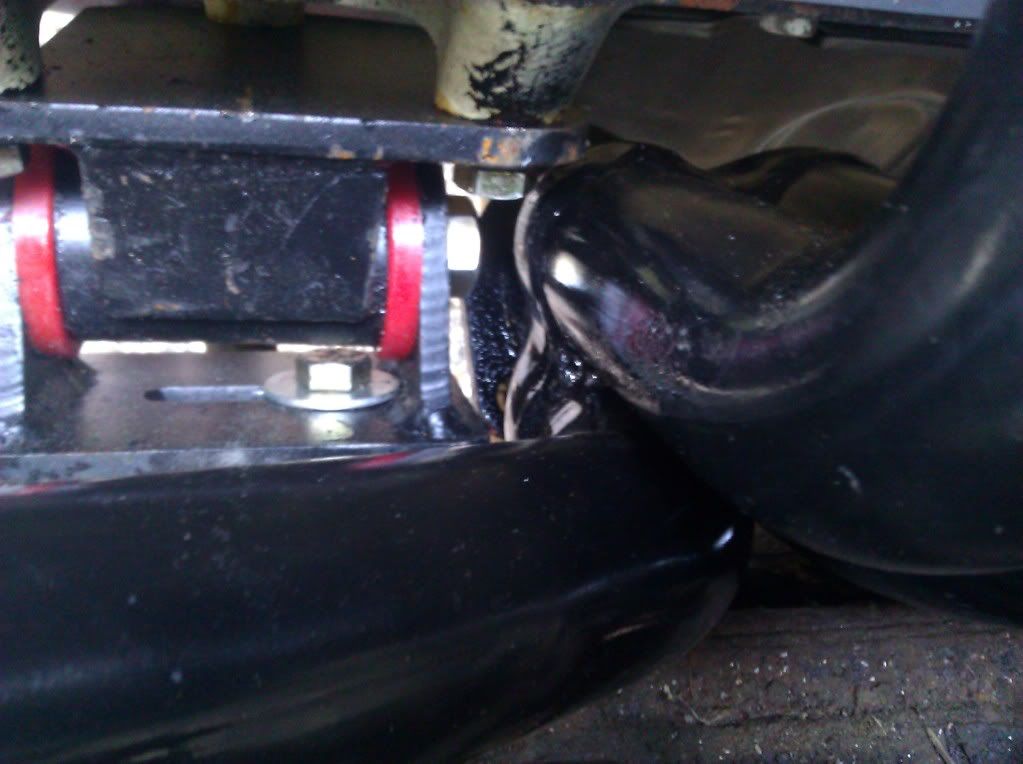
Then the other one wouldnt go in. couldnt line it up. re-read the instructions. yup, I put them in upside down. Look at the pic of the bushing getting blasted off. see how the tabs are flush with the bottom of the frame side mount? yeah, they should be flush with the top of the frame side mount.
I'm going to grab a sammich and then flip the mounts. see if i can get this part bolted up tonight.
I saw a universal trans mount kit for my truck by trans dapt. They just use a slotted 3/8" plate as the universal mount from the trans mount to the frame. So I'll pick up some 3/8" steel plate next time I'm out.
The trans contacted at the bottom of the tunnel so I wanted to move the bottom corner out and up a little to clear the bell housing on the trans. The trans dipstick was pinched btwn the bell housing and the tunnel, and there was still room above the trans. I started by pulling the matting in the cab back so that i didnt cut through it. Then I made two cuts like this.
Then I took my 10# sledge and moved the two sides of the cut inward. This is with just the inside sides massaged in.
and here it is with everything clearanced.
Inside after clearancing.
a friend of mine is going to lay a bead on the seams from the inside when he has a chance. I'll pull back the matting thats on there first, of course.
Next I put the motor back in, bolted the motor mounts in place and its all done!
LAUGH! aaaaaaahhhhh if only.
took forever to get the tail shaft and mounts lined up by myself using a jack under the trans pan, the hoist on the engine lift plate and a 5 foot pry-bar for motivation. like 3 hours. I kept blasting the corner of the poly bushings off, but i finally got one in.
Then the other one wouldnt go in. couldnt line it up. re-read the instructions. yup, I put them in upside down. Look at the pic of the bushing getting blasted off. see how the tabs are flush with the bottom of the frame side mount? yeah, they should be flush with the top of the frame side mount.
I'm going to grab a sammich and then flip the mounts. see if i can get this part bolted up tonight.
I saw a universal trans mount kit for my truck by trans dapt. They just use a slotted 3/8" plate as the universal mount from the trans mount to the frame. So I'll pick up some 3/8" steel plate next time I'm out.
Last edited by dp9; Apr 15, 2011 at 07:31 PM.
Apr 15, 2011 | 07:58 PM
#11
Thread Starter
Registered User
Joined: Sep 2009
Posts: 22
Likes: 0
From: NJ
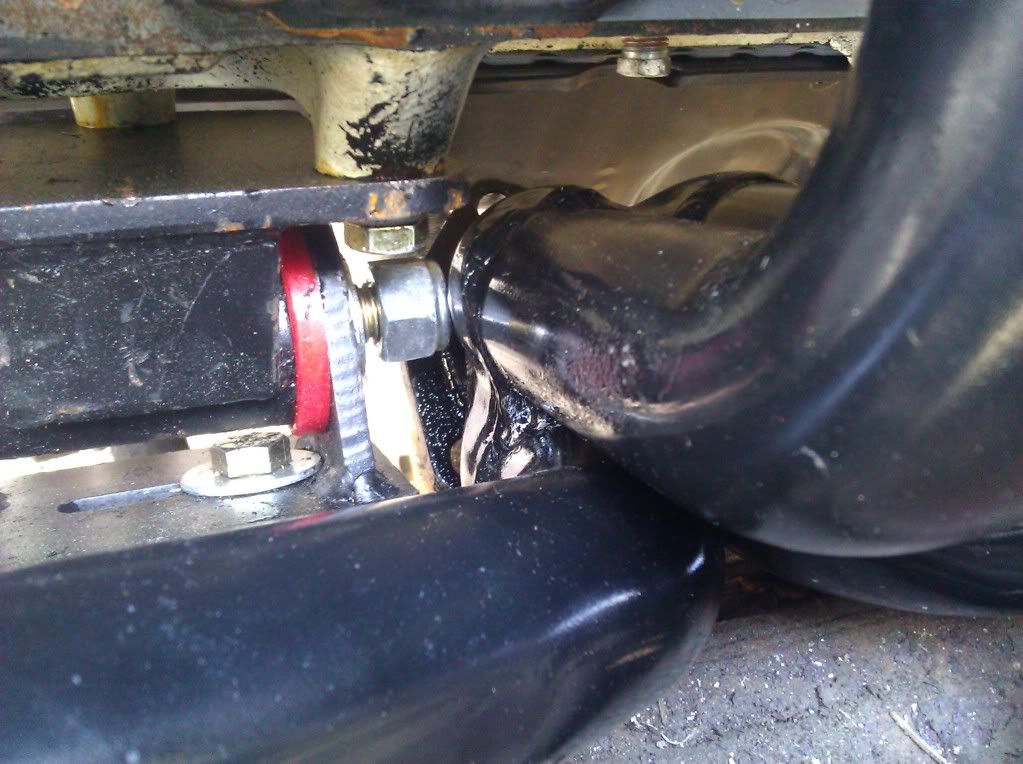
Ok, I rotated the pic of the bushing. the is a view of the passenger side from the front, and its right side up now. If the mount that attaches to the frame is flipped, the motor will sit slightly higher.
Apr 15, 2011 | 08:16 PM
#13
Thread Starter
Registered User
Joined: Sep 2009
Posts: 22
Likes: 0
From: NJ
Thanks, man.
yeah. a couple more cans of rattle can flat black. the new bed sides are going to have black gel coat on them, so thats going to stay that way. after i get some front bumper and corner parts I might start thinking about paint. The interior is a mess though, so thats going to get attention first.
yeah. a couple more cans of rattle can flat black. the new bed sides are going to have black gel coat on them, so thats going to stay that way. after i get some front bumper and corner parts I might start thinking about paint. The interior is a mess though, so thats going to get attention first.
Last edited by dp9; Apr 15, 2011 at 08:19 PM.
Apr 17, 2011 | 12:38 PM
#14
Thread Starter
Registered User
Joined: Sep 2009
Posts: 22
Likes: 0
From: NJ
Flipped the motor mounts today and the engine dropped in like it was f'n made for this truck.

well.. almost. Here's where the trans ended up. Its got to move back a couple of inches for the slip yoke to grab enough of the splines. Its barely in there.
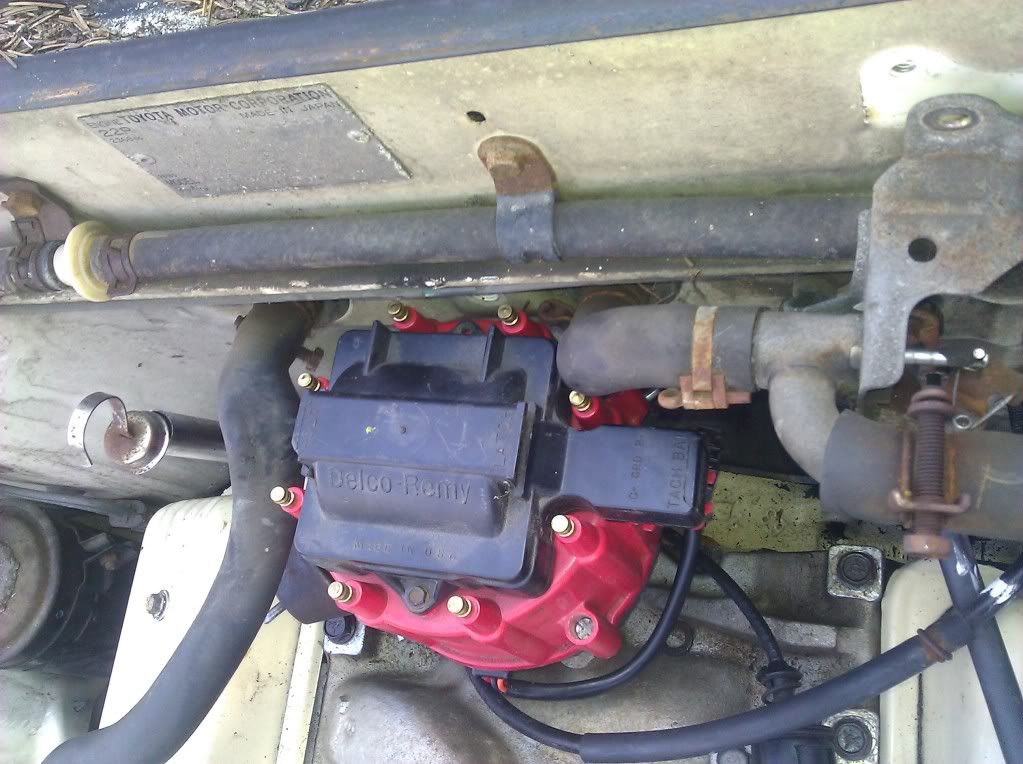
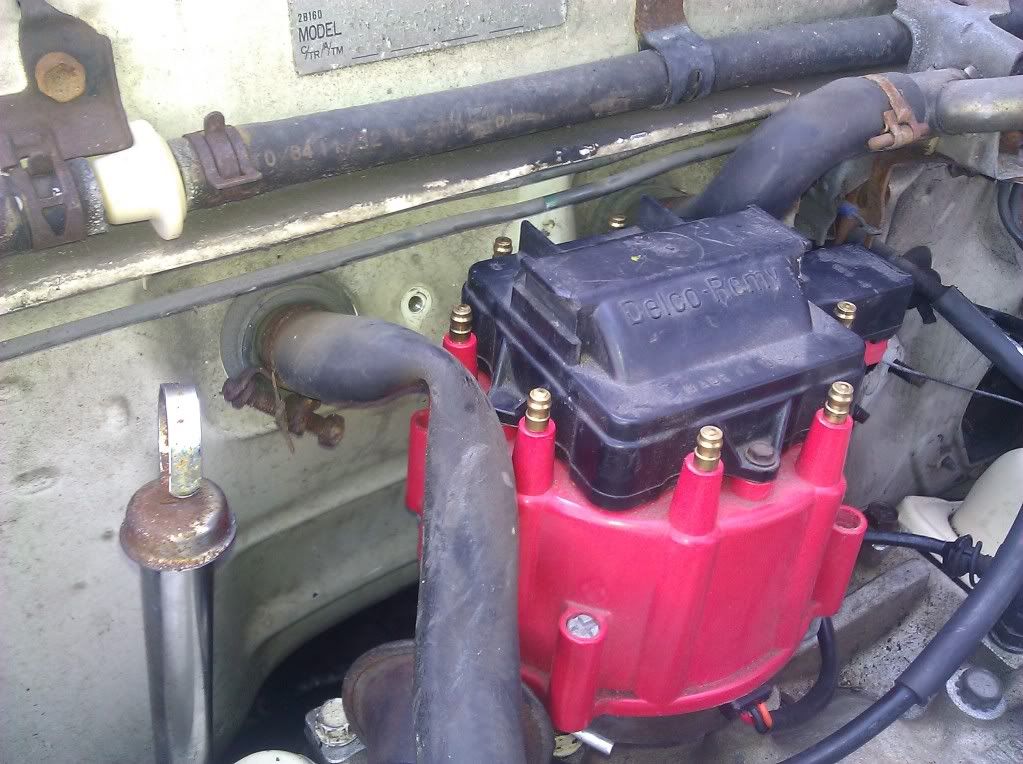
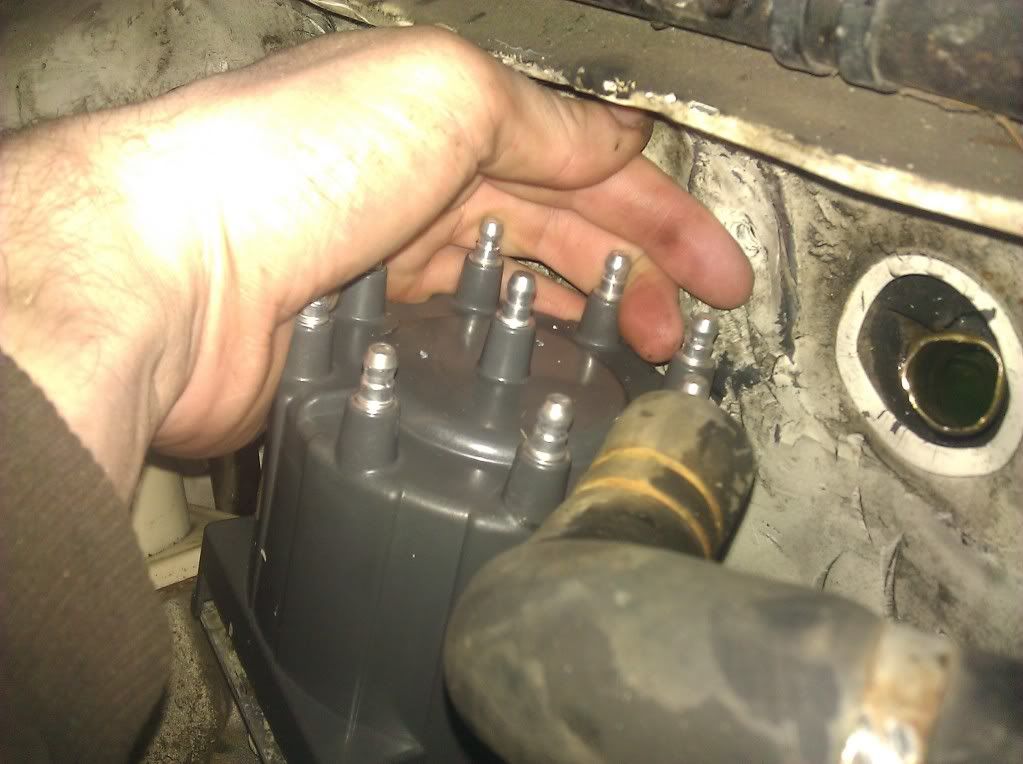
Tried fitting a large cap distributor on. It fits, for now, but it wont when I move the motor/trans back some more so I'm going to have to go with a small cap one and probably massage the firewall, too.
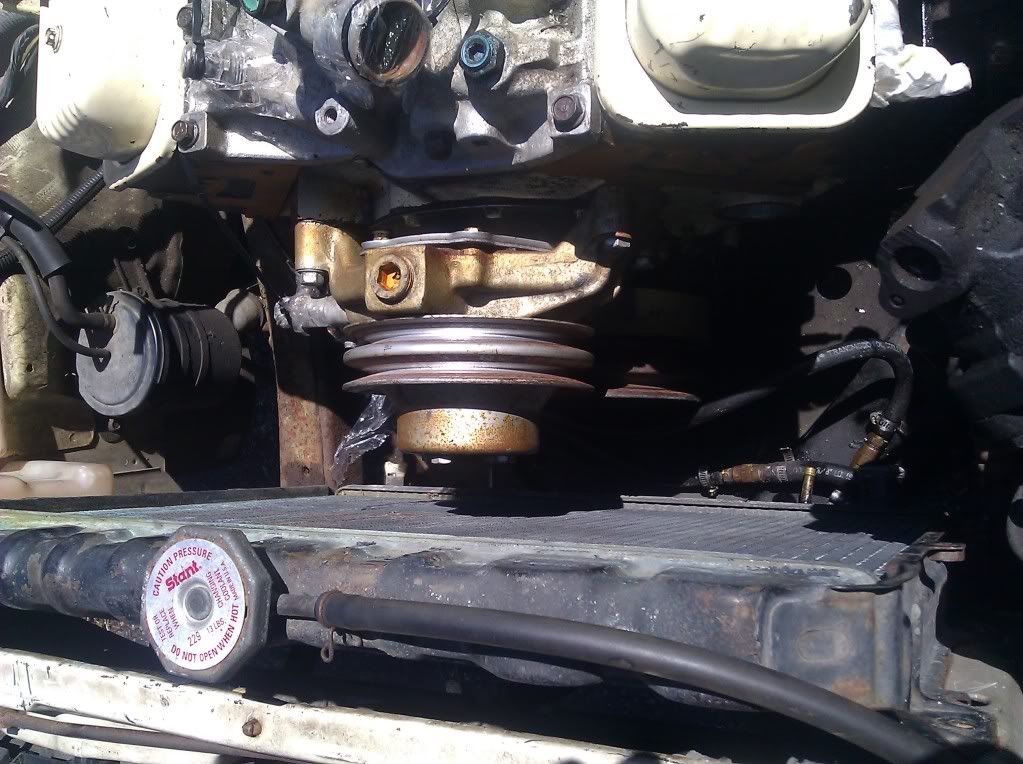
The rad fits though.
Found out that the trans dapt ps pump mount doesnt work for vortec heads beacuse the accessory holes are different.
well.. almost. Here's where the trans ended up. Its got to move back a couple of inches for the slip yoke to grab enough of the splines. Its barely in there.
Tried fitting a large cap distributor on. It fits, for now, but it wont when I move the motor/trans back some more so I'm going to have to go with a small cap one and probably massage the firewall, too.
The rad fits though.
Found out that the trans dapt ps pump mount doesnt work for vortec heads beacuse the accessory holes are different.
Apr 18, 2011 | 07:27 PM
#15
Thread Starter
Registered User
Joined: Sep 2009
Posts: 22
Likes: 0
From: NJ
I need to move the motor/trans back more to mate up the trans mounts and for the slip yoke to get some more tooth area on the output shaft. took the motor/trans out (again) and flipped the motor mounts and put them on opposite sides so that they have a lot of rearward movement (couldnt go far enough back when they were in the position the directions told me to put them in).
Driver side.
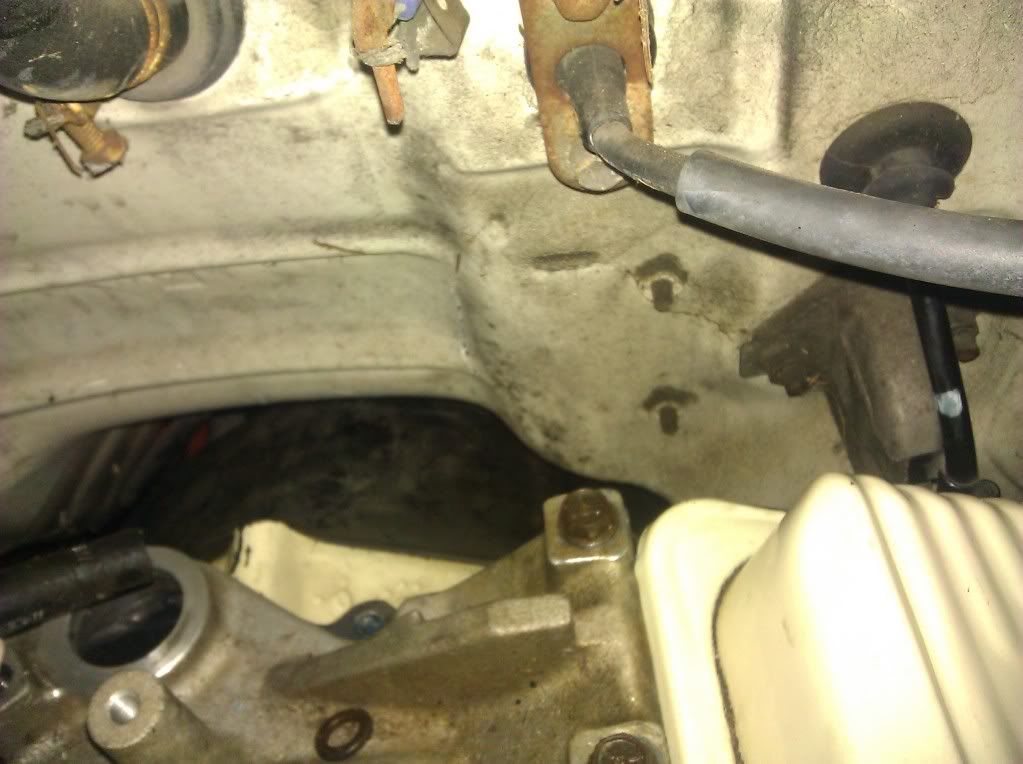
Then I clearanced some spots on the firewall.
Before:
After (from top):
Before:
After:
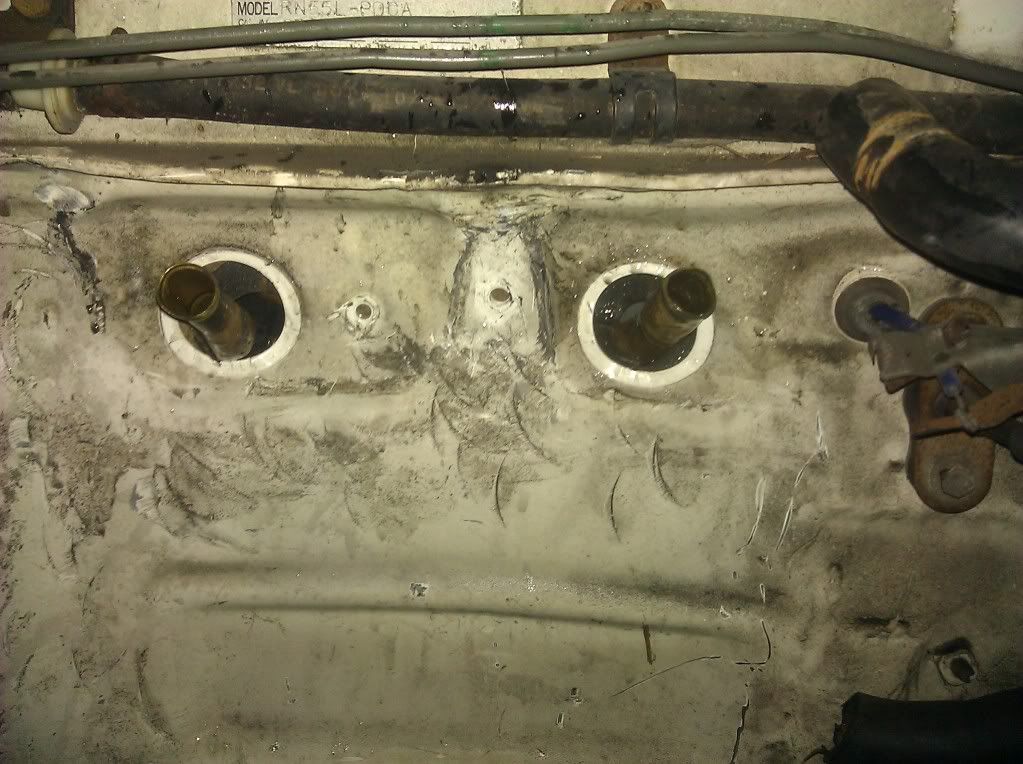
After (from top):

So the end result of this clearancing is that it wasnt quite enough. Well, it may be enough in the areas that I clearanced, but the trans is now hitting a different part of the tunnel ::sigh:: Its contacting, again, near the bottom of the bell housing. I want to just cut the whole tunnel out and throw in a universal drag race aluminum tunnel, but i think im just going to end up cutting and hammering until its in there. I'm stubborn that way and this thing is pissing me off.
so here's where everything is:
So close, and yet so far.
Looks better.
This is where the mounts are lining up. I took the frame side mounts out so that i could see exactly where the engine wanted to be. This spot is not achievable with the trans dapt mounts without modifying them. they *should* mount up an inch or so back when the trans mounts line up. I think theyre a little low in this position too. That will be cleared up when I clearance the trans tunnel some more.
Yup, definitely a little low. oil pan just barely clears. It should clear with a little more space after the motor moves back and up a little.

One thing kinda worked out: this side looks good. ok, ok, it "looks" like hell, but it clears.
Moved over to a small cap gm distributor. not sure about wiring, but I'm not overly concerned with that right now. gatta get it in there first. Not much room behind it. I'm probably going to have to re-clearance this part of the firewall. Heater core be damned.

Next I'm going to make another cut in the firewall and then hammer it in. the cut is going to go from bottom corner to bottom corner of the transition from the bottom of the bell housing to the gear box. That should just about do it.
Driver side.
Then I clearanced some spots on the firewall.
Before:
After (from top):
Before:
After:
After (from top):
So the end result of this clearancing is that it wasnt quite enough. Well, it may be enough in the areas that I clearanced, but the trans is now hitting a different part of the tunnel ::sigh:: Its contacting, again, near the bottom of the bell housing. I want to just cut the whole tunnel out and throw in a universal drag race aluminum tunnel, but i think im just going to end up cutting and hammering until its in there. I'm stubborn that way and this thing is pissing me off.
so here's where everything is:
So close, and yet so far.
Looks better.
This is where the mounts are lining up. I took the frame side mounts out so that i could see exactly where the engine wanted to be. This spot is not achievable with the trans dapt mounts without modifying them. they *should* mount up an inch or so back when the trans mounts line up. I think theyre a little low in this position too. That will be cleared up when I clearance the trans tunnel some more.
Yup, definitely a little low. oil pan just barely clears. It should clear with a little more space after the motor moves back and up a little.
One thing kinda worked out: this side looks good. ok, ok, it "looks" like hell, but it clears.
Moved over to a small cap gm distributor. not sure about wiring, but I'm not overly concerned with that right now. gatta get it in there first. Not much room behind it. I'm probably going to have to re-clearance this part of the firewall. Heater core be damned.
Next I'm going to make another cut in the firewall and then hammer it in. the cut is going to go from bottom corner to bottom corner of the transition from the bottom of the bell housing to the gear box. That should just about do it.
Last edited by dp9; Apr 18, 2011 at 07:35 PM.
Apr 20, 2011 | 08:24 PM
#16
Thread Starter
Registered User
Joined: Sep 2009
Posts: 22
Likes: 0
From: NJ
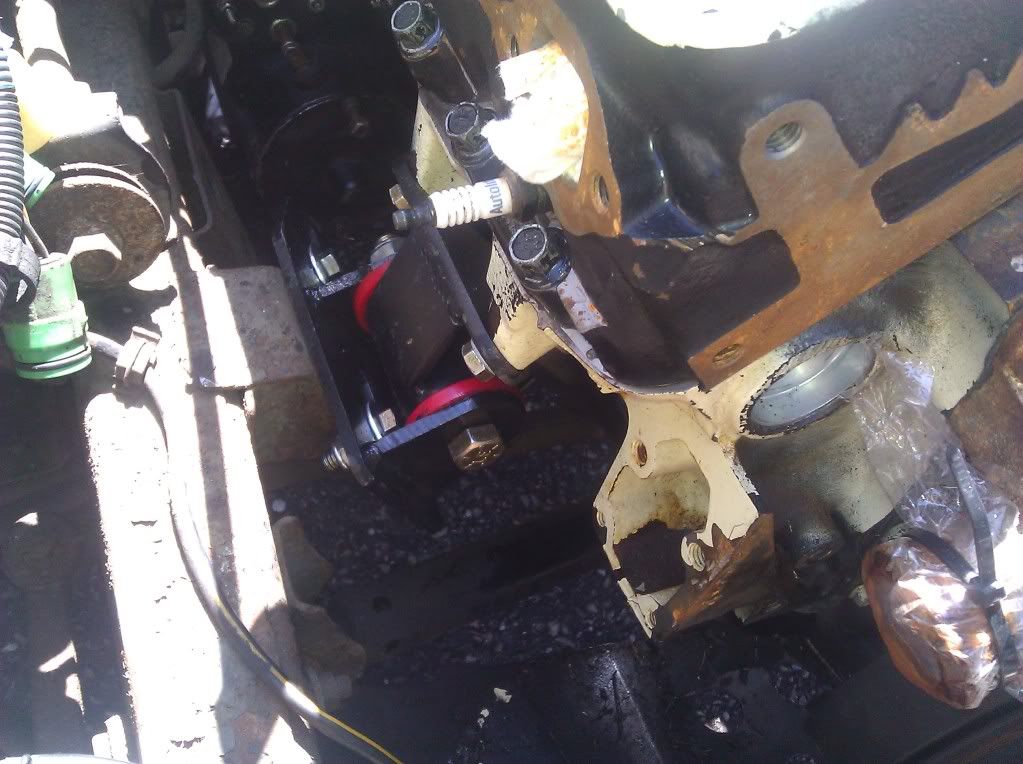
Man, this thing turned into such a f'ng hack job. On the bright side.. THE MOTOR IS MOUNTED!
I had to "re-clearance" a bunch of spots on the firewall, make a new cut in the trans tunnel (which i botched) then massage that. god it looks like ass. These are just the cuts. it looks so bad after i hammered it in that i didnt take pics.
The distributor had to move back like another inch, so that part of the fire wall had to be hammered in some more. again, not pretty, but it fits.

I had to do some more hammering for each of the valve covers as well.
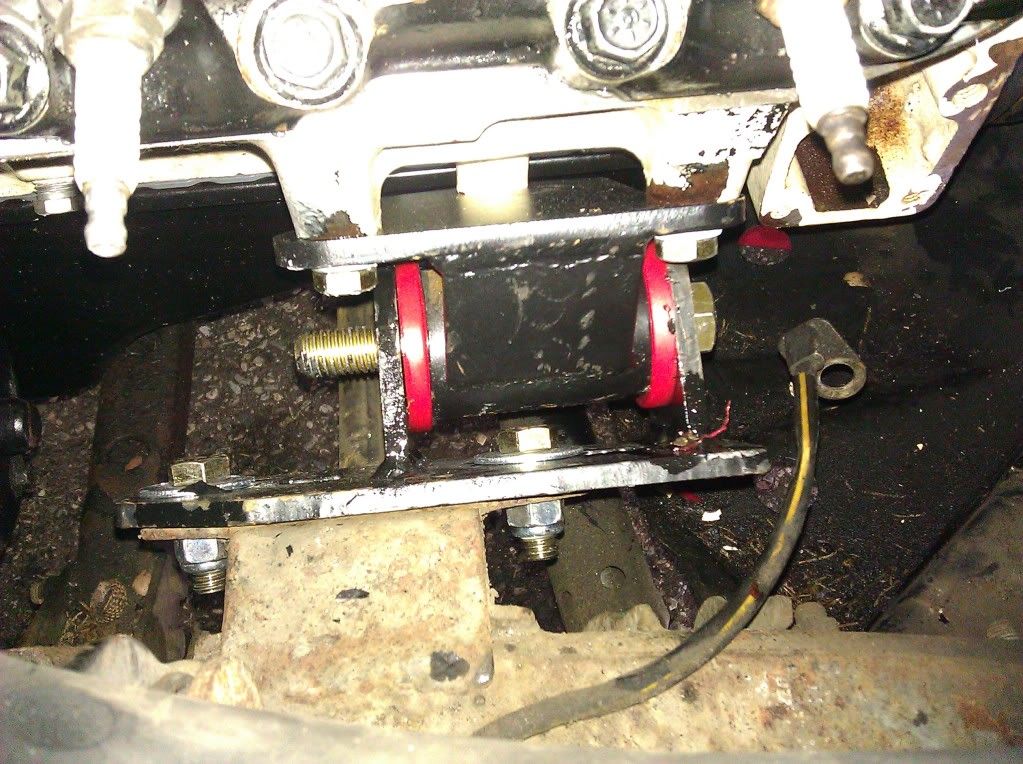
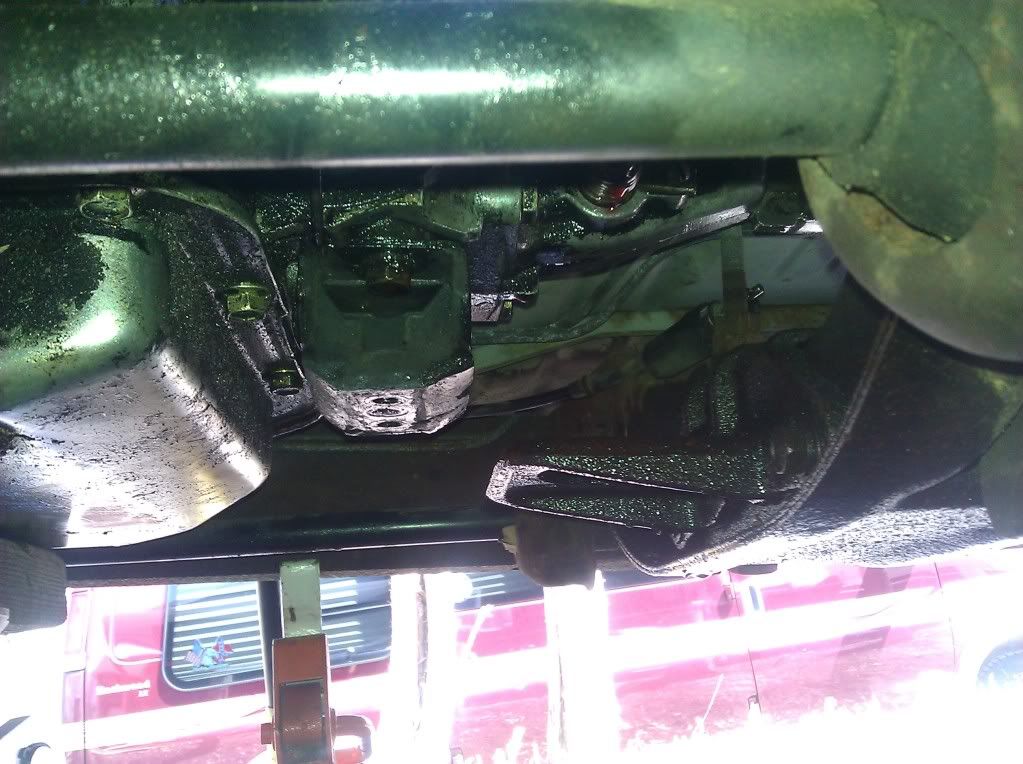
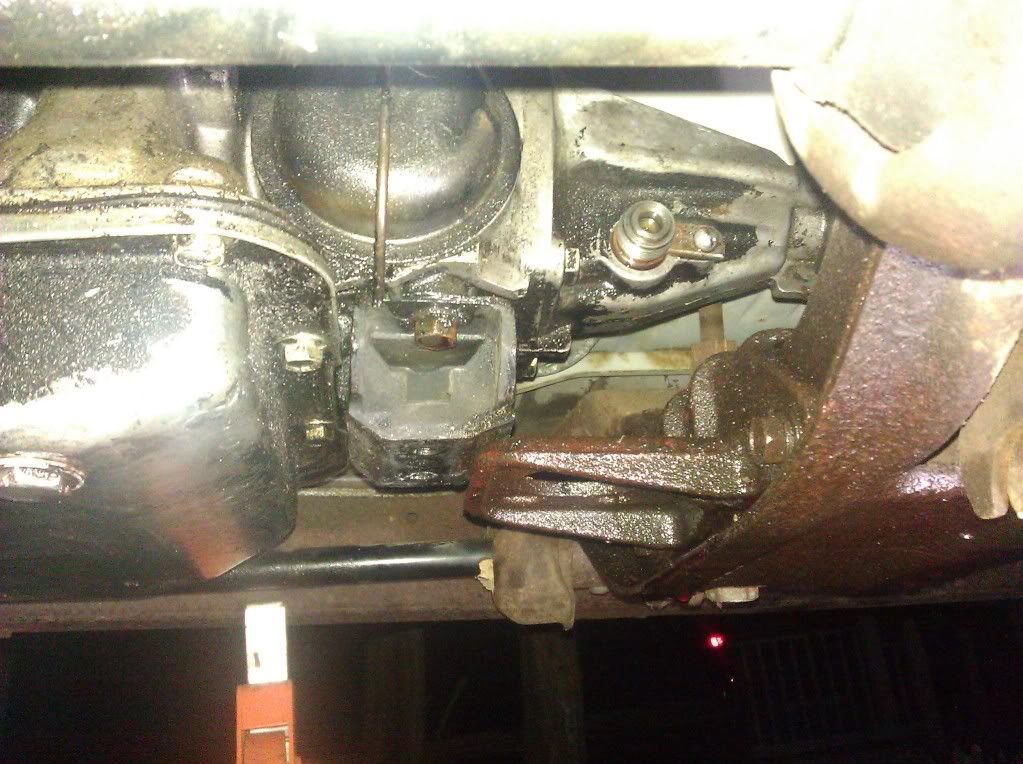
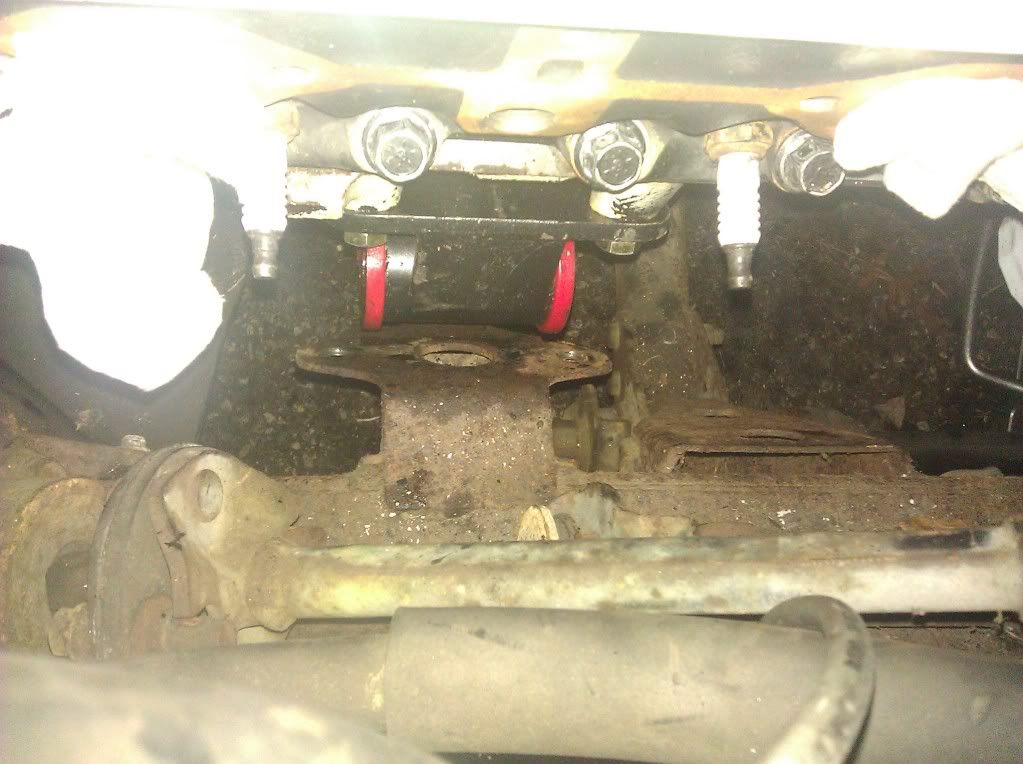
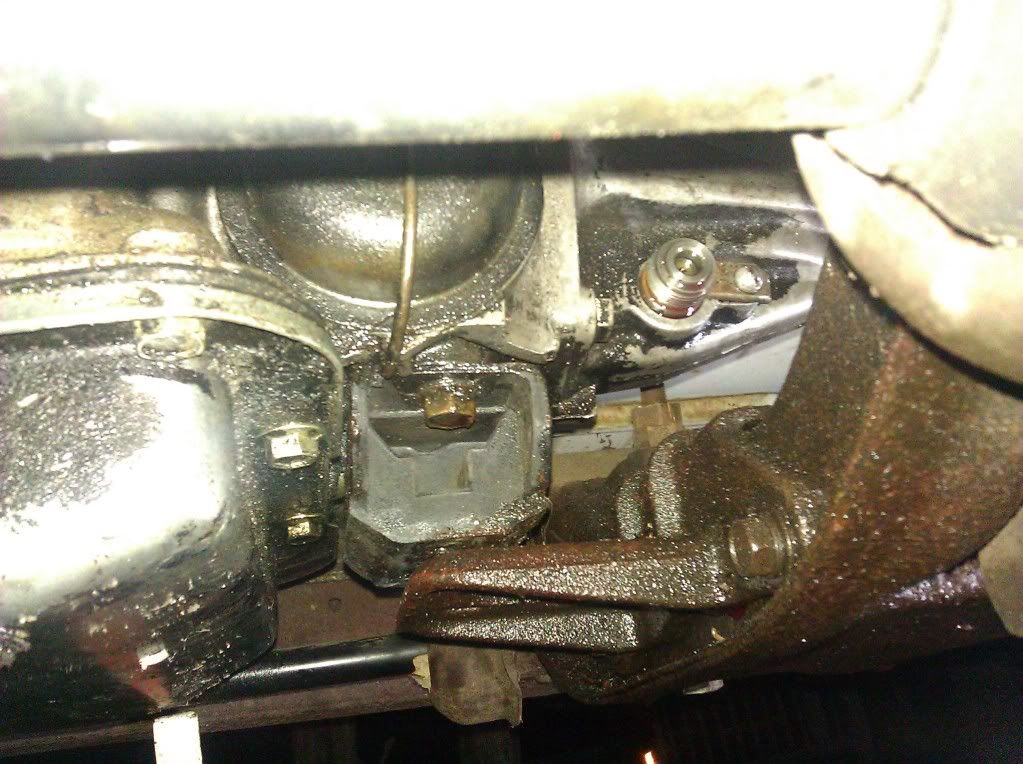
I did end up flipping and swapping sides with the mounts. This is where they ended up (driver side in pics).
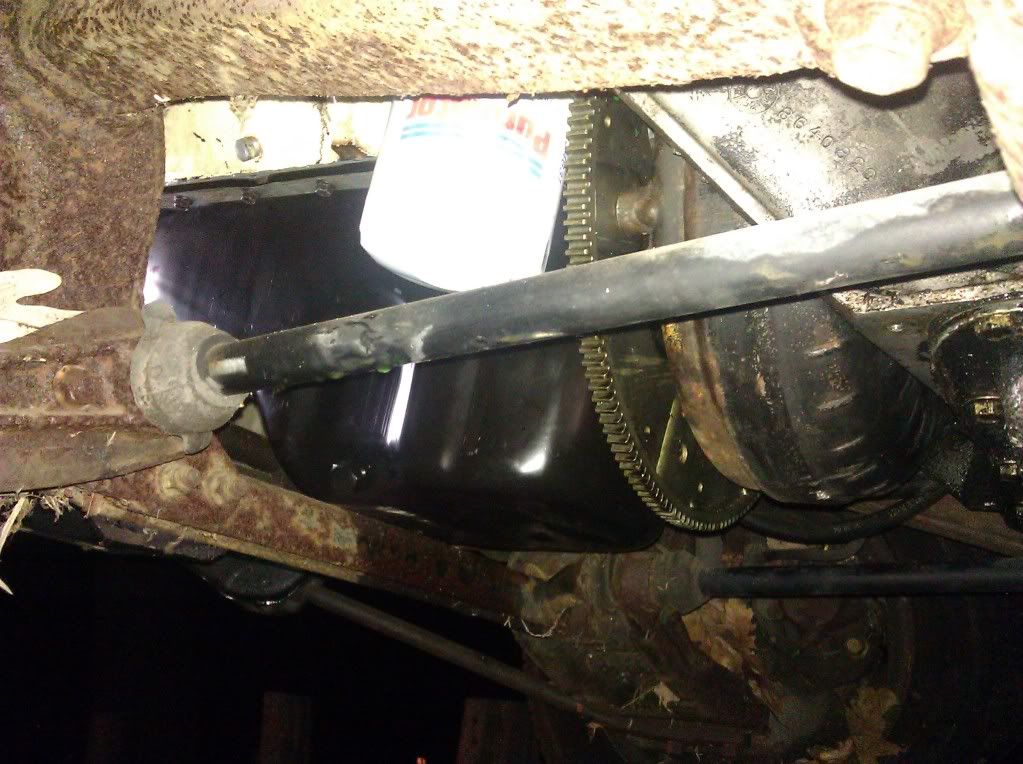
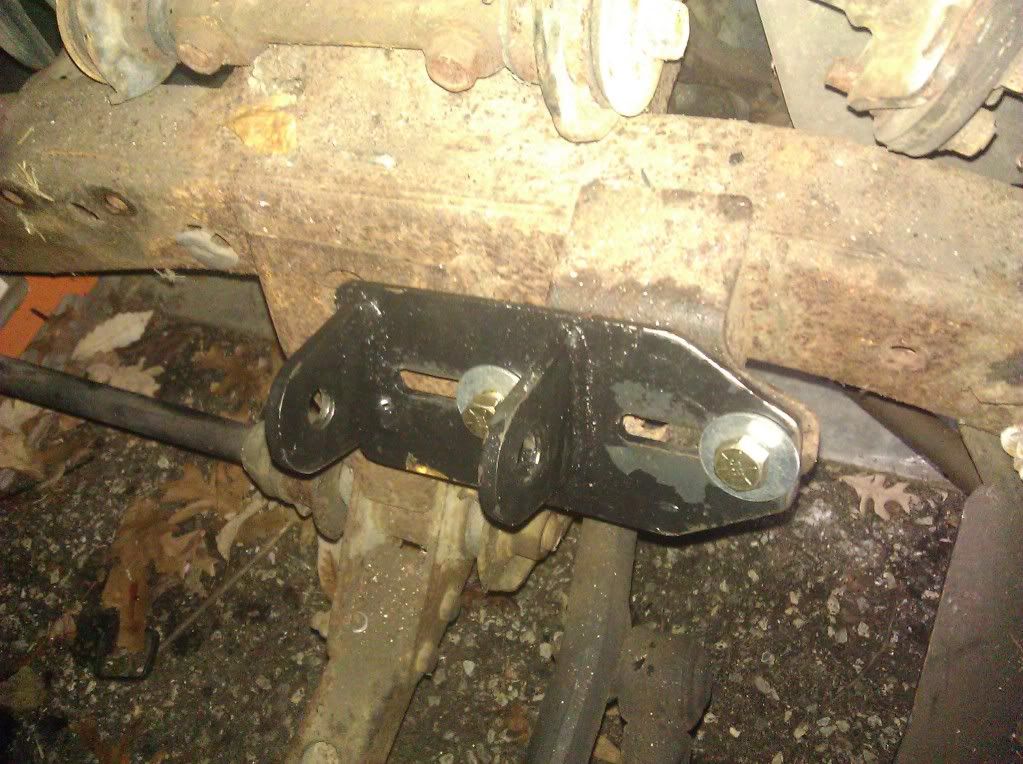
Why all this extra effort? to get the TH350 trans to this position. Now all I have to do is drill 2 holes in the stock frame mount and bolt it in.
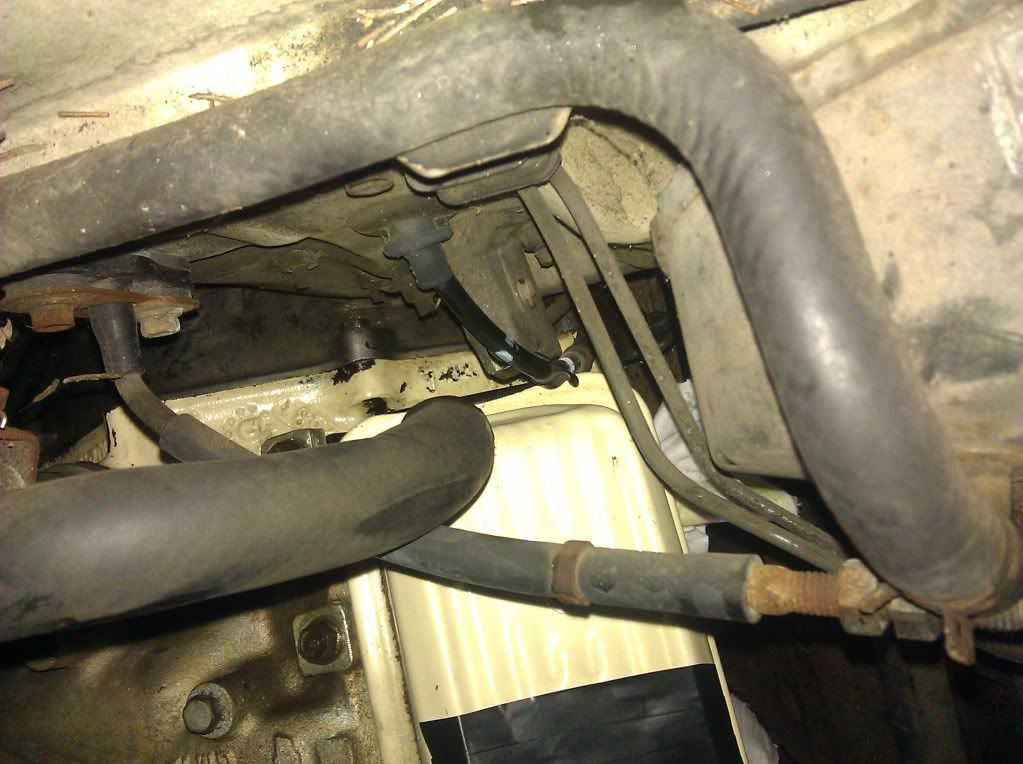
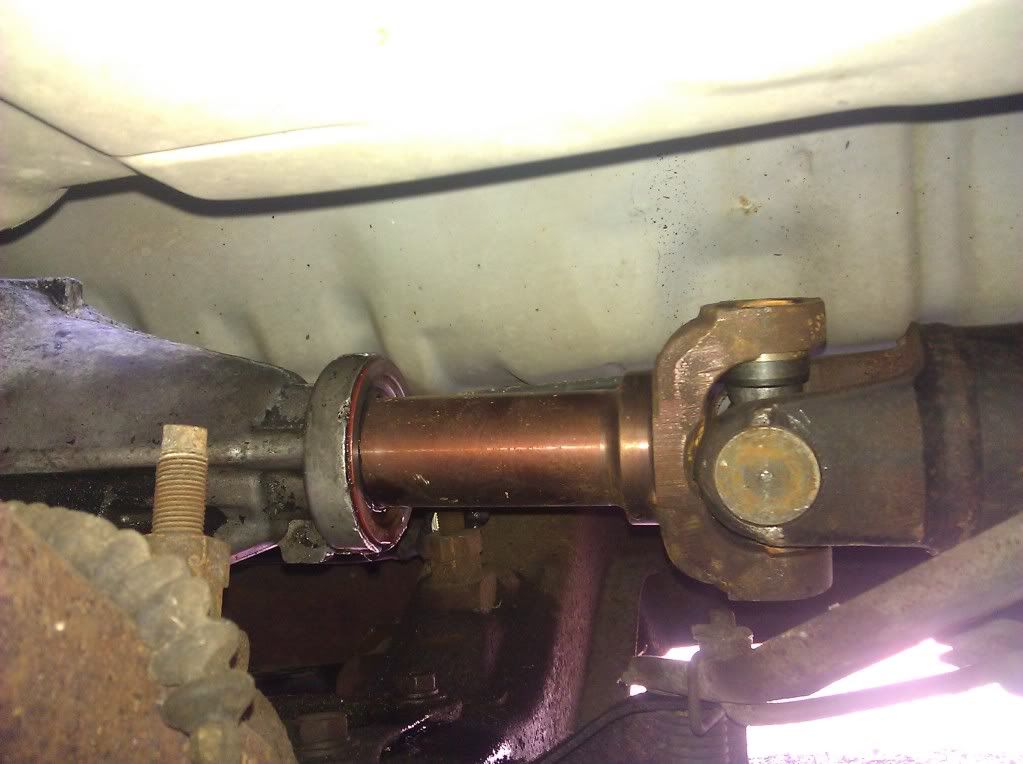
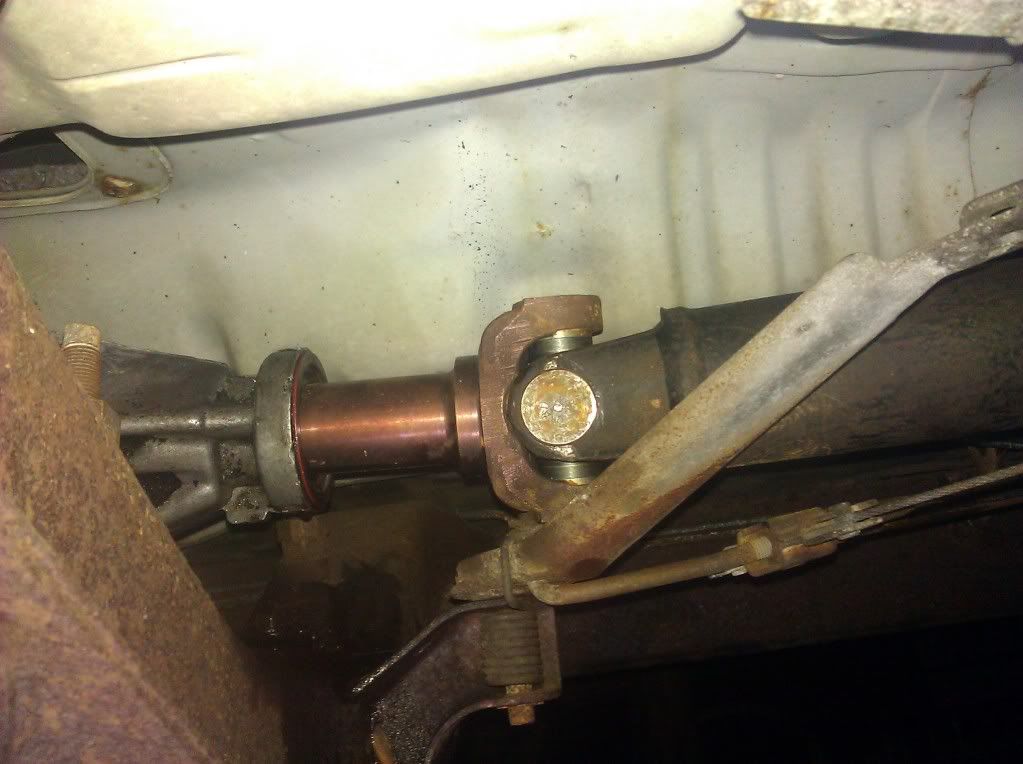
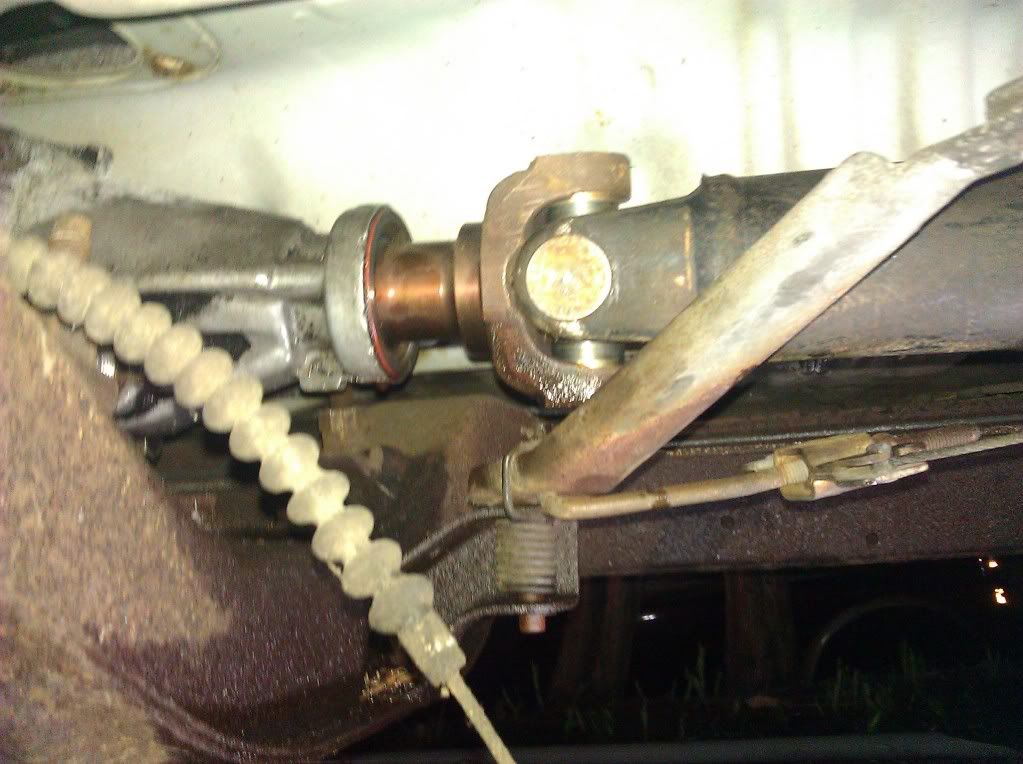
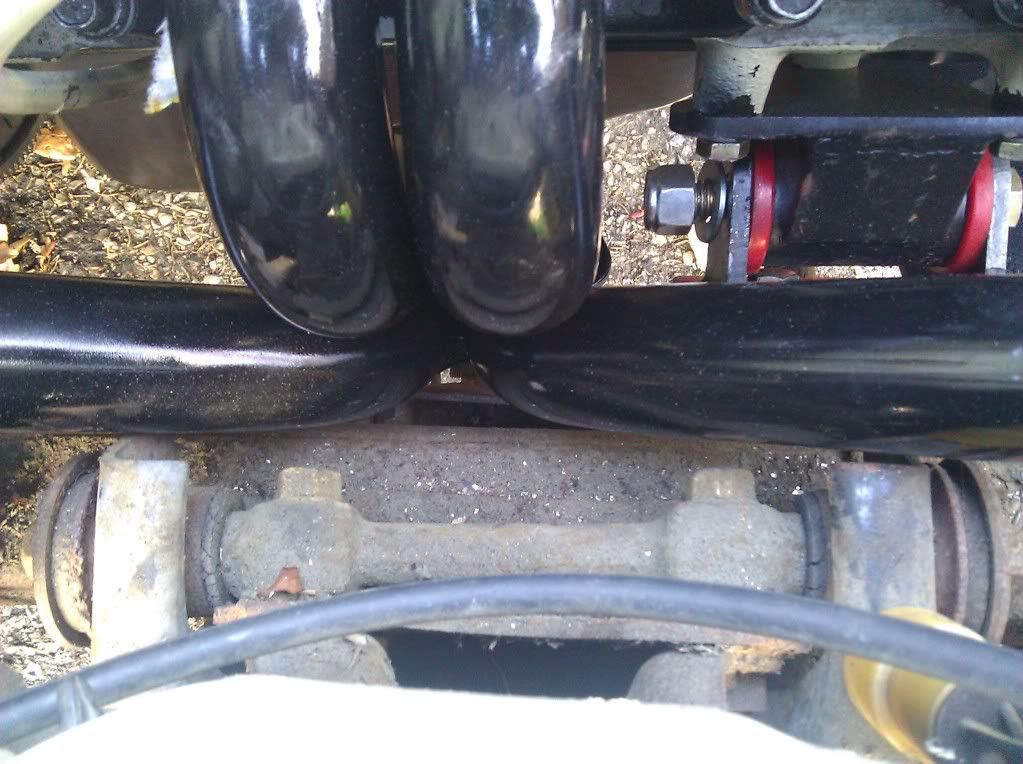
I shouldve spent the money on an 8" slip yoke instead of finding the cheapest one (6"). This is where it finally ended up. The only thing I'm very happy with. It contacts the parking brake cable assembly, so I'm going to take that out.
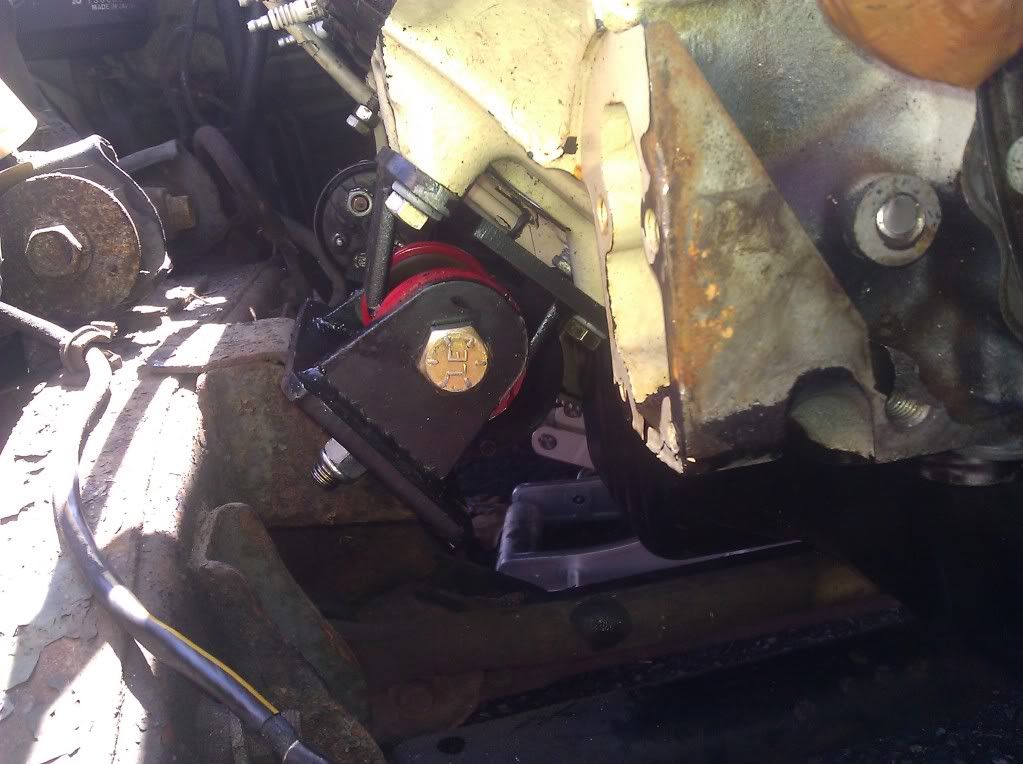
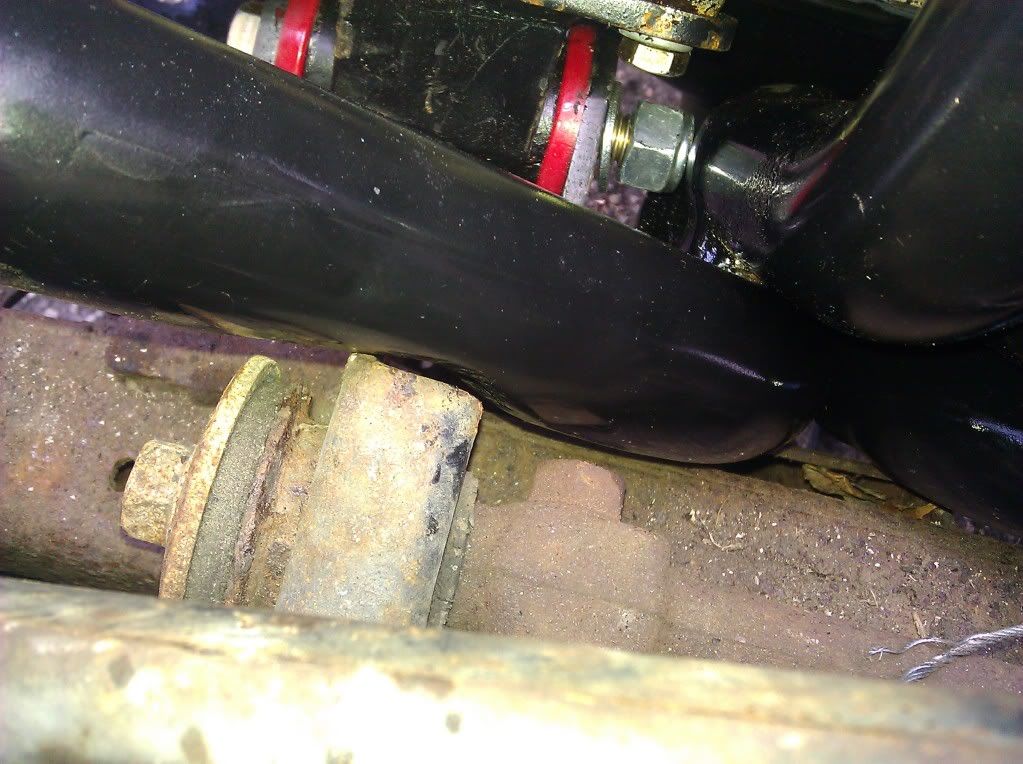
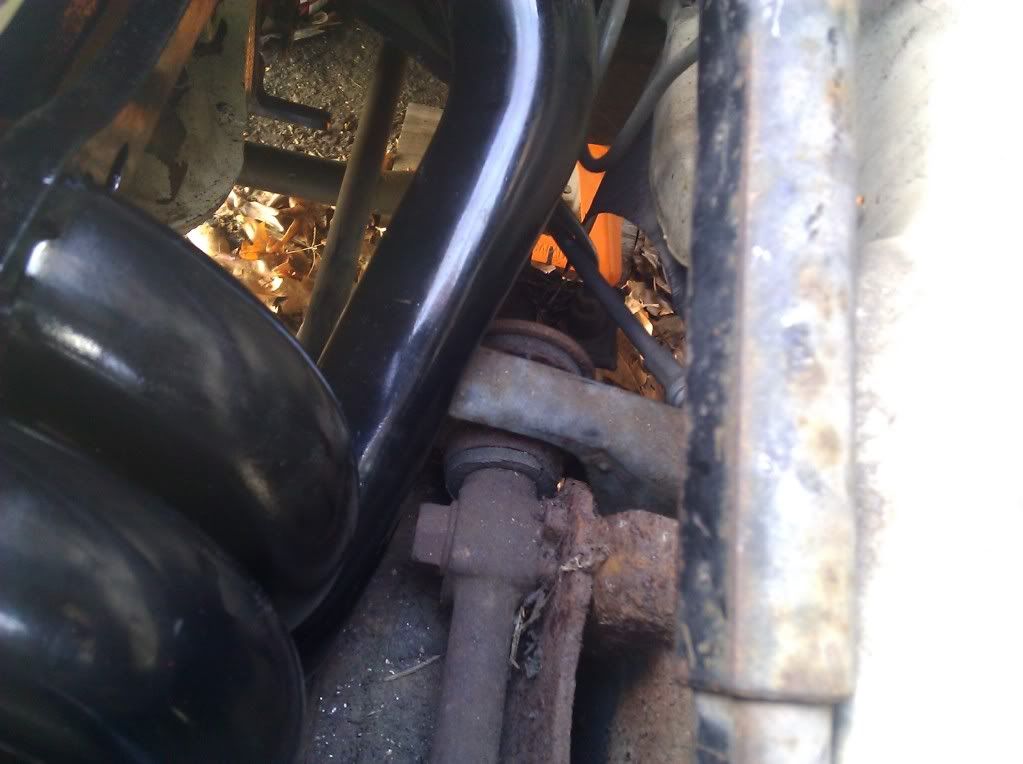
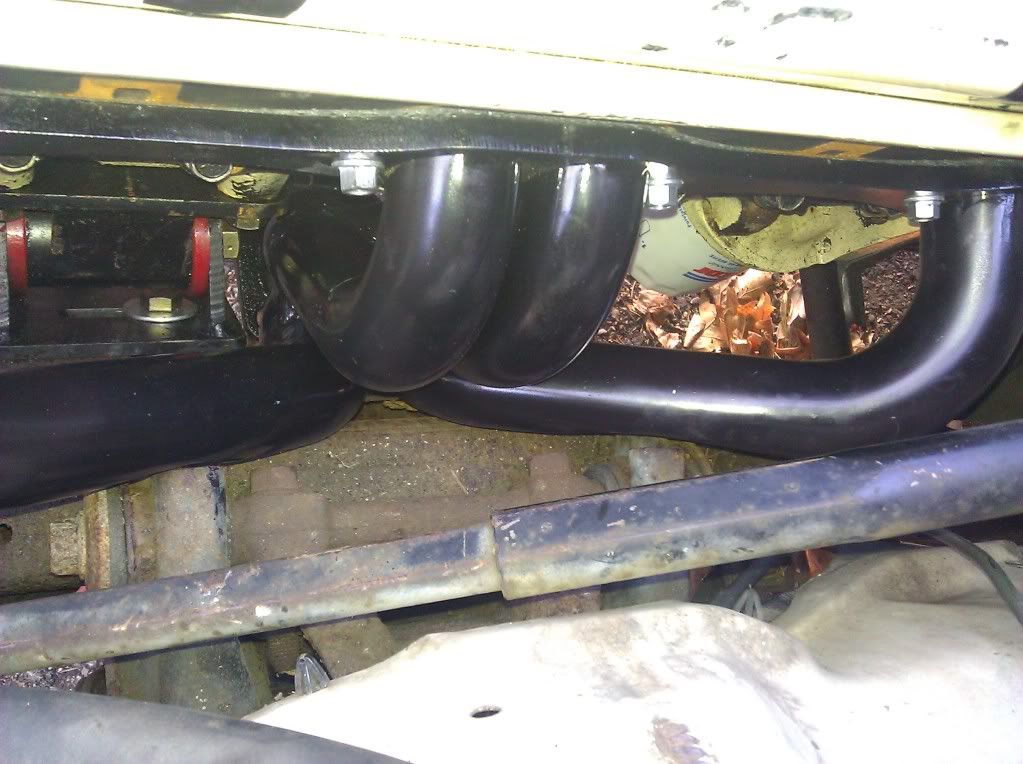
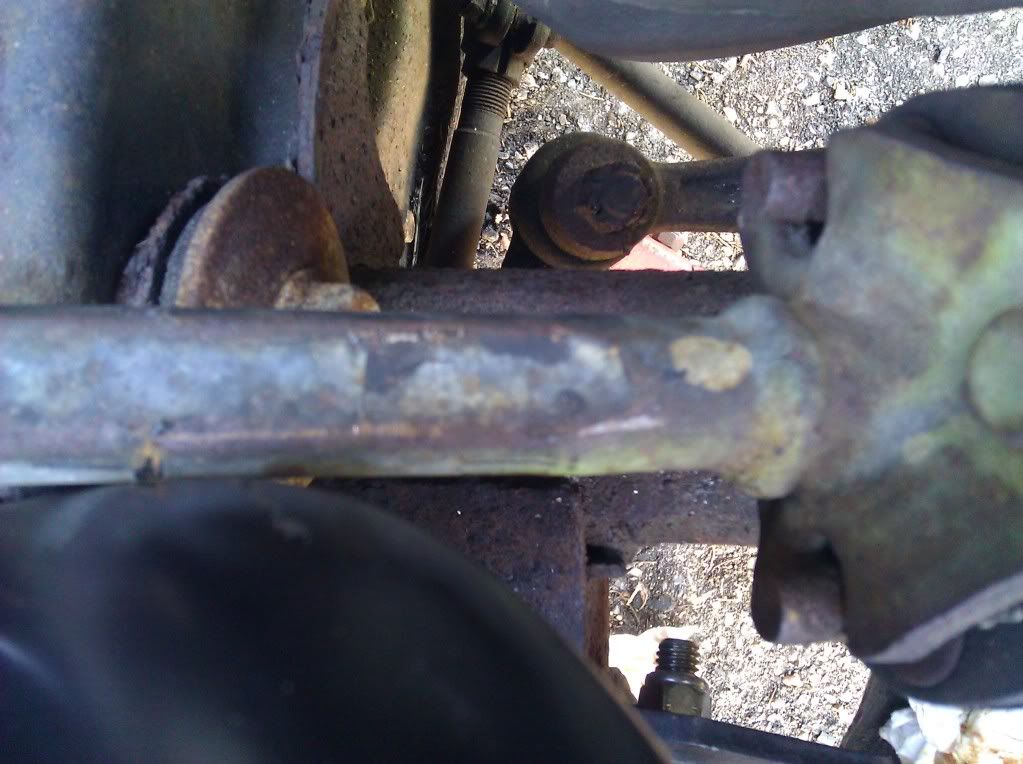
Tried to fit some universal-ish 3/4 length headers. They contacted the frame where I'm pointing in the pic, so I hammered on them a little, and then found out that the flanges contact the torsion bar. Looks like I'll have to use shorty headers.
Things left to do: Mount trans, install/wire-up the starter, figure out how to wire in the distributor, install the alternator, modify the ps pump bracket and install ps pump, install speedo cable, install electric fuel pump and relay kit, install rad (buy bigger one first) and fan, and a bunch of other ish.
I had to "re-clearance" a bunch of spots on the firewall, make a new cut in the trans tunnel (which i botched) then massage that. god it looks like ass. These are just the cuts. it looks so bad after i hammered it in that i didnt take pics.
The distributor had to move back like another inch, so that part of the fire wall had to be hammered in some more. again, not pretty, but it fits.
I had to do some more hammering for each of the valve covers as well.
I did end up flipping and swapping sides with the mounts. This is where they ended up (driver side in pics).
Why all this extra effort? to get the TH350 trans to this position. Now all I have to do is drill 2 holes in the stock frame mount and bolt it in.
I shouldve spent the money on an 8" slip yoke instead of finding the cheapest one (6"). This is where it finally ended up. The only thing I'm very happy with. It contacts the parking brake cable assembly, so I'm going to take that out.
Tried to fit some universal-ish 3/4 length headers. They contacted the frame where I'm pointing in the pic, so I hammered on them a little, and then found out that the flanges contact the torsion bar. Looks like I'll have to use shorty headers.
Things left to do: Mount trans, install/wire-up the starter, figure out how to wire in the distributor, install the alternator, modify the ps pump bracket and install ps pump, install speedo cable, install electric fuel pump and relay kit, install rad (buy bigger one first) and fan, and a bunch of other ish.
Last edited by dp9; Apr 30, 2011 at 03:24 PM.
Apr 30, 2011 | 03:21 PM
#17
Thread Starter
Registered User
Joined: Sep 2009
Posts: 22
Likes: 0
From: NJ
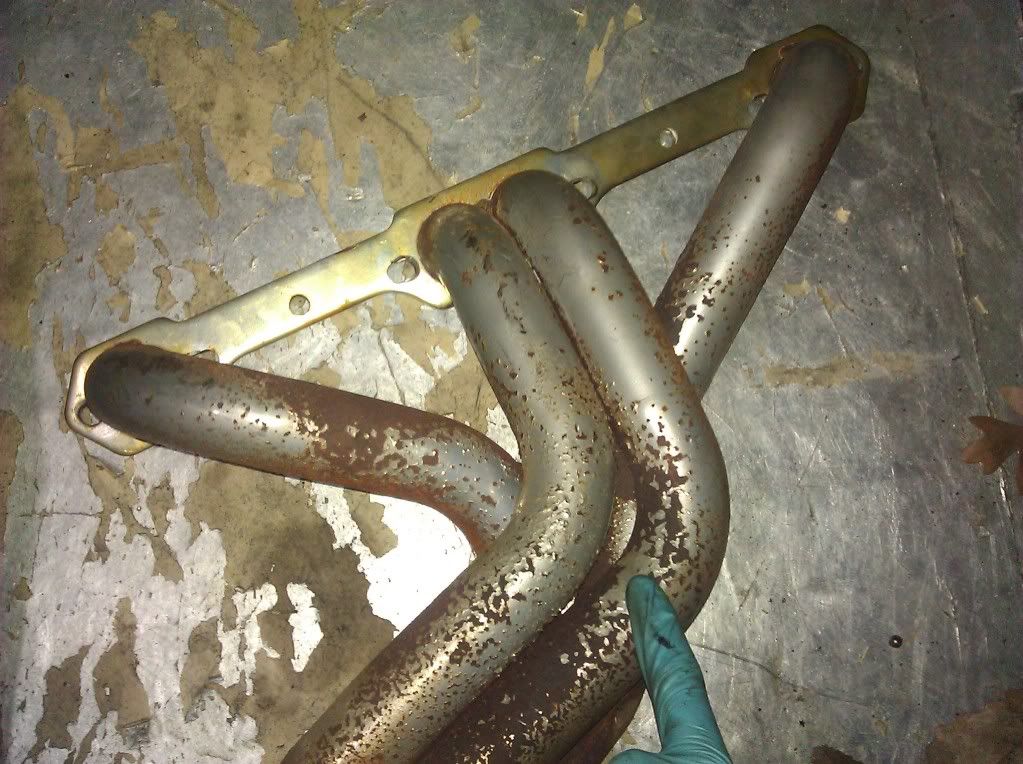
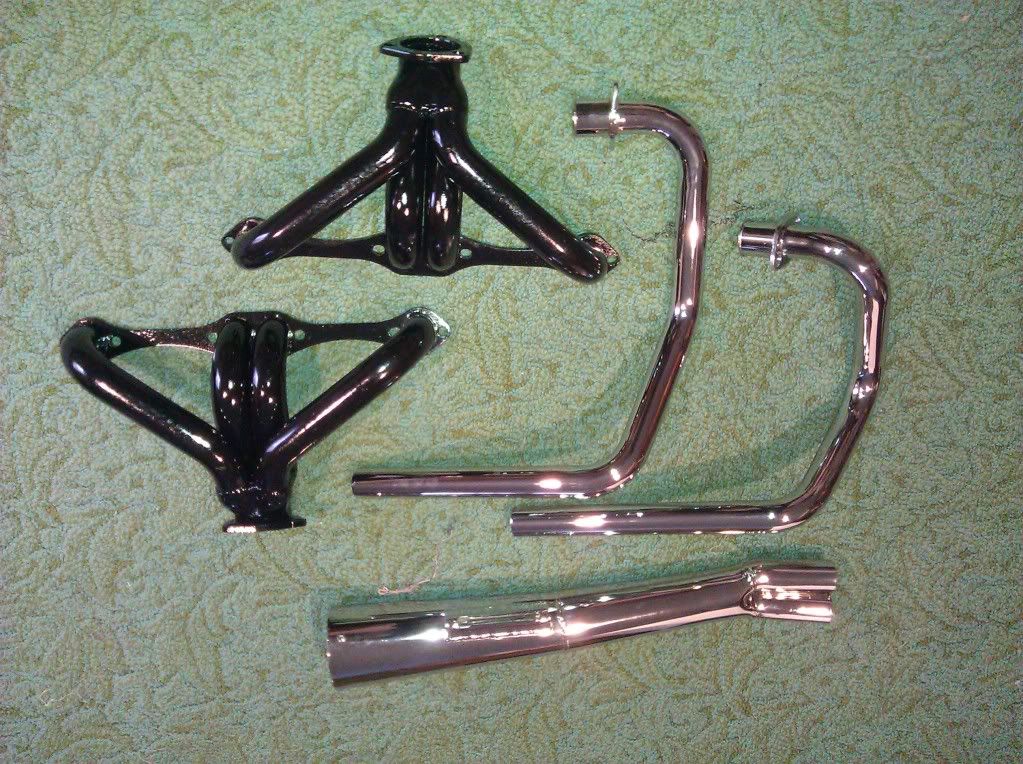
tackled the headers today. I'm a little upset that they dont have the same port shape as the headers i was going to use, mainly because i ported the heads to match the old ones. old ones were square-ish, these are straight up oval. ill lose some performance, but oh well. I'm not buying another set of headers, and im not going to try to change a square hole to a round one in the heads. The important thing is that I have something for the guys at the exhaust shop to weld the exhaust up to.
here's what they looked like out of the box (along with my motorcycle headers that came on the same day).
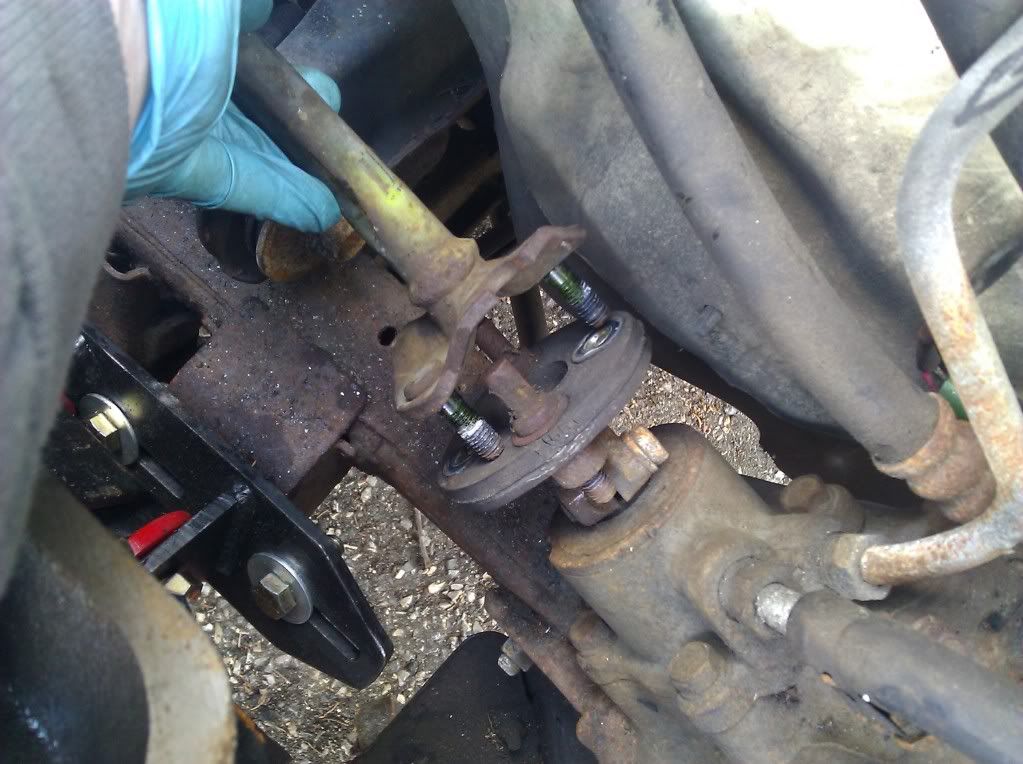
I started by trying to fit the driver side header in. It contacted the steering shaft or whatever its called. 2 nuts and that was pulled and moved out of the way.
Next test fit: it contacted the front pivot of the a-arm.
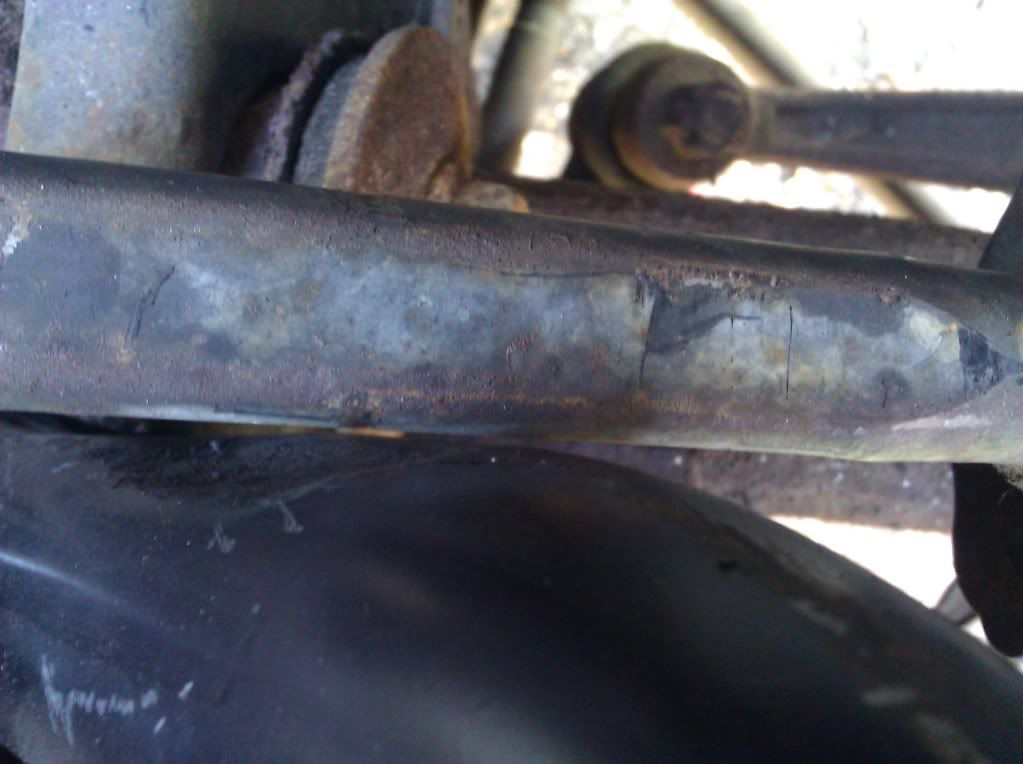
hammer in that front tube a little, and then a little more, and it clears.

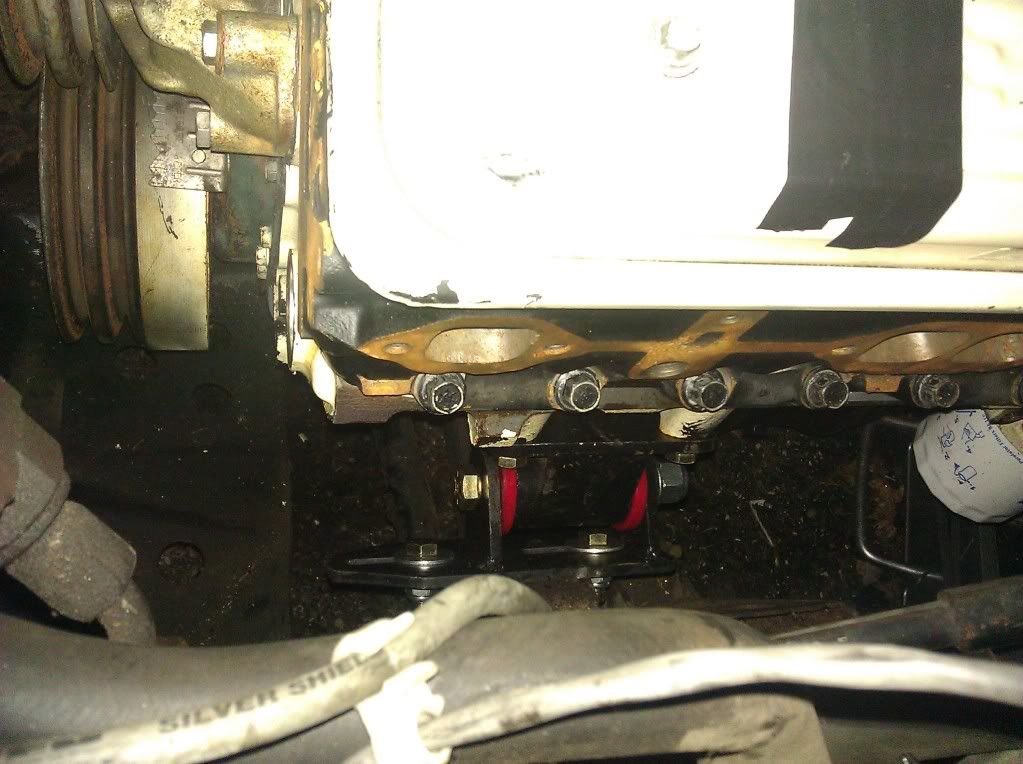
Next test fit: its contacting the rear pivot of the upper a-arm. hammer a flat spot in that tube and we're good.
Next test fit: contacting the motor mount bolt. eff me!
turn that bolt around and it clears the head end no problem.
Yes, everything clears!
except for the steering that i hadnt put back on yet.
yet another flat spot in that tube and it just barely clears. a miss is as good as a mile, right?
frustrating time with that one. now on to the passenger side. i cant wait.
First test fit: fits perfectly. doesnt contact a single thing.
The rear most header bolt was a pain in the balls to get in though. I still have to mount the starter too, but i dont think thats going to be a problem.
aaaand now I have headers.
here's what they looked like out of the box (along with my motorcycle headers that came on the same day).
I started by trying to fit the driver side header in. It contacted the steering shaft or whatever its called. 2 nuts and that was pulled and moved out of the way.
Next test fit: it contacted the front pivot of the a-arm.
hammer in that front tube a little, and then a little more, and it clears.
Next test fit: its contacting the rear pivot of the upper a-arm. hammer a flat spot in that tube and we're good.
Next test fit: contacting the motor mount bolt. eff me!
turn that bolt around and it clears the head end no problem.
Yes, everything clears!
except for the steering that i hadnt put back on yet.
yet another flat spot in that tube and it just barely clears. a miss is as good as a mile, right?
frustrating time with that one. now on to the passenger side. i cant wait.
First test fit: fits perfectly. doesnt contact a single thing.
The rear most header bolt was a pain in the balls to get in though. I still have to mount the starter too, but i dont think thats going to be a problem.
aaaand now I have headers.
Last edited by dp9; Apr 30, 2011 at 03:28 PM.

Thread
Thread Starter
Forum
Replies
Last Post
LittleUgly
86-95 Trucks & 4Runners (Build-Up Section)
15
Jan 2, 2020 01:30 PM
myotherrideisayoshi
86-95 Trucks & 4Runners
1
Sep 29, 2015 05:41 AM
Toys4parts
86-95 Trucks & 4Runners (Build-Up Section)
2
Sep 26, 2015 01:56 PM


