
85 Extra Cab Saved from Crusher


 Jun 18, 2015 | 09:04 AM
#762
Hi Terry, just checking in, haven't been on the forum as much lately, just been busy. Nice work on the front axel rebuild. Sorry to hear about the camshaft, hope your able to swap in another without to much trouble! It's stinks when you have setbacks like that, but I'm sure you'll have it up and running again in no time!
Jun 19, 2015 | 01:20 AM
#763
Thread Starter
Super Moderator
iTrader: (1)
Joined: Aug 2008
Posts: 11,787
Likes: 28
From: Anderson Missouri
Hello habanero... It is always good to hear from you. I am ready for this rain to move out of Missouri, hope you are staying dry. Once it does, it is going to get muggy around here. The Easy Off works great. I have tried industrial cleaners and high pressure washers and the oven cleaner works the best. Wish I would of known of it earlier.
Thanks Ed... It was a set back and still havent figured out what went wrong. I did get to drive it around quite a bit and had just gotten the new rotors broke in. I have some great brakes now. Also got the floor boards fixed so still making some progress. I have been getting tied up a little myself, doesnt take much to get in the way of things.
Thanks Ed... It was a set back and still havent figured out what went wrong. I did get to drive it around quite a bit and had just gotten the new rotors broke in. I have some great brakes now. Also got the floor boards fixed so still making some progress. I have been getting tied up a little myself, doesnt take much to get in the way of things.
Jun 19, 2015 | 01:33 AM
#764
Thread Starter
Super Moderator
iTrader: (1)
Joined: Aug 2008
Posts: 11,787
Likes: 28
From: Anderson Missouri
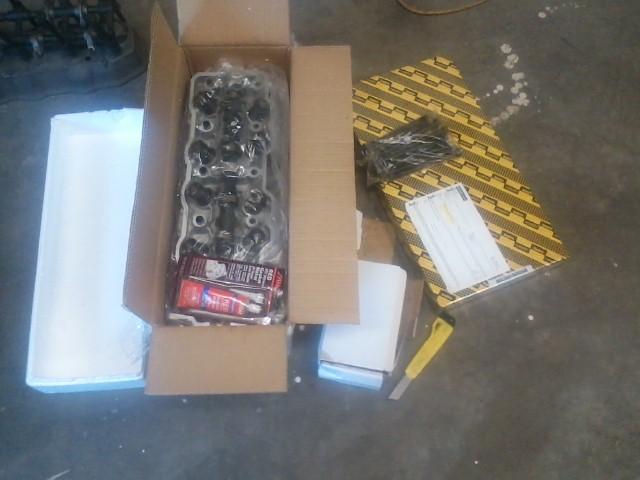
I will be getting a new head. I was hoping just to swap in a new cam but there is just more damage then I want to deal with. With what it would cost getting a machine shop to get this head back in shape, I will be better off getting a new head. I had sent this one to the shop before installing it and it was fine. Just one of those things I guess.
Still happy that I got the floor boards and axle done. Brakes work great. Earlier in the day an elderly lady pulled out in front of me and they did their job. It will stop quick and no more wobbling of the steering wheel. The rotors were warped and I got the truck to where it would pass inspection as they dont drive them. They have to pass test sitting at the inspection station. It is getting more safe and hopefully more relieable to drive each day.
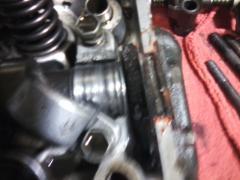
Got the head off and here is a few pics of the cam. Not sure why picture is so small.
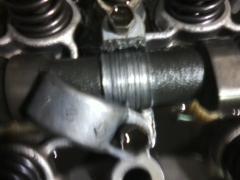
A second cam bearing. Truck never over heated. I wonder if the machine shop missed something or I could of missed something as well.
A friend of mine has used these ebay heads and suggested I go with this one. By the time I buy gaskets, machine shop expenes, head bolts, it would be about as cheap to go this route.
http://www.ebay.com/itm/85-95-2-4L-TOYOTA-PICKUP-COMPLETE-CYLINDER-HEAD-HEAD-GASKET-SET-w-BOLTS-22RE-/140689057901?fits=Year%3A1985%7CMake%3AToyota%7CModel%3APickup&hash=item20c1b8a86d&vxp=mtr
Still happy that I got the floor boards and axle done. Brakes work great. Earlier in the day an elderly lady pulled out in front of me and they did their job. It will stop quick and no more wobbling of the steering wheel. The rotors were warped and I got the truck to where it would pass inspection as they dont drive them. They have to pass test sitting at the inspection station. It is getting more safe and hopefully more relieable to drive each day.
Got the head off and here is a few pics of the cam. Not sure why picture is so small.

A second cam bearing. Truck never over heated. I wonder if the machine shop missed something or I could of missed something as well.

A friend of mine has used these ebay heads and suggested I go with this one. By the time I buy gaskets, machine shop expenes, head bolts, it would be about as cheap to go this route.
http://www.ebay.com/itm/85-95-2-4L-TOYOTA-PICKUP-COMPLETE-CYLINDER-HEAD-HEAD-GASKET-SET-w-BOLTS-22RE-/140689057901?fits=Year%3A1985%7CMake%3AToyota%7CModel%3APickup&hash=item20c1b8a86d&vxp=mtr

Last edited by Terrys87; Oct 15, 2015 at 04:13 AM.
Jun 25, 2015 | 07:13 AM
#765
Thread Starter
Super Moderator
iTrader: (1)
Joined: Aug 2008
Posts: 11,787
Likes: 28
From: Anderson Missouri
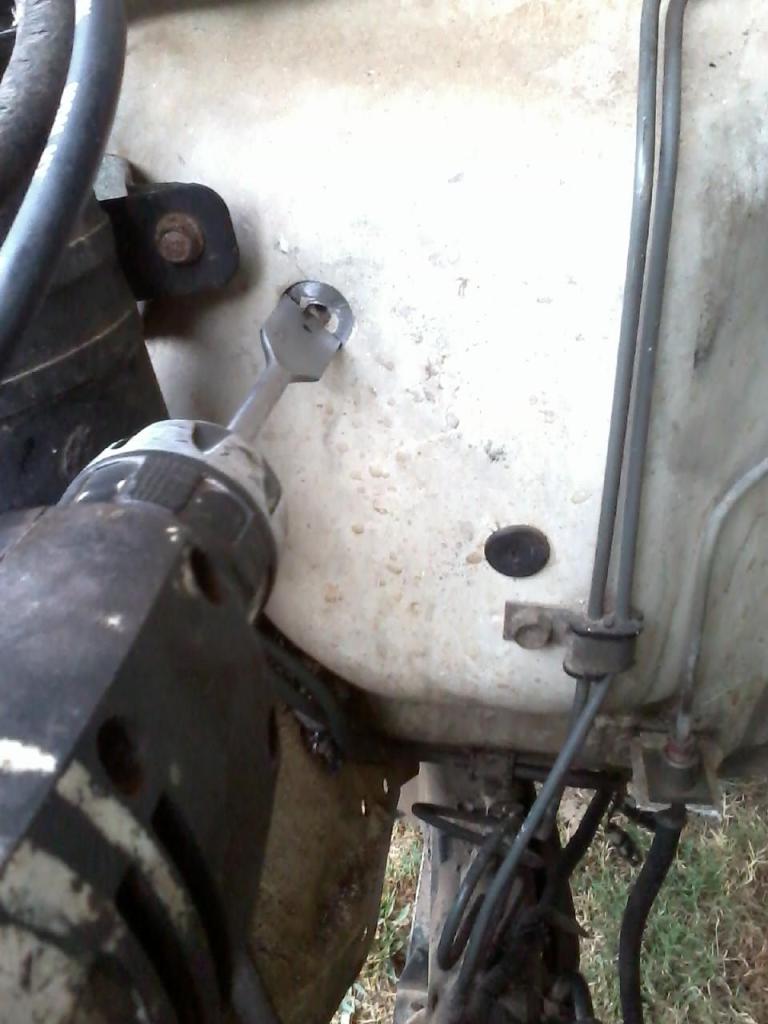
I drove it to a friends house to fix the floor boards and towed it home. After getting the head off and pulling the oil pan, I just dont feel comfortable putting it back together with out pulling the motor and seeing what caused the fault. I will be sticking in a new timing chain and oil pump when I do.
I do suspect oil starvation even though I havent found any evidence of it. I had the block cleaned before rebuilding it and it did have oil on top of the motor but just cant see what caused the cam to do what it did.
Cylinder wall still have the honing hash marks and look good. I want to see what the main bearings and rod bearings look like is the biggest reason for me going to pull the motor. It is hot and miserable here. I plan on taking a vaction in a few weeks and will do alot of work on several trucks then once I get back from the lake. I got to get air conditioning in the shop it is HOT!!!, even with insulation. Probably not going to be much going on til I get ac in the shop.
I have seen other rebuild one of these and it fail. Guess my turn come around. One reason I like to buy a rebuilt motor instead of building one, atleast I would of had a warranty. I used all good parts from Engbuilder. I dont suspect his parts being an issue but maybe something in one of the oil galleys or similar. Even still I have seen others fail that did a great job.
Towing it home, grrr...

Last edited by Terrys87; Jul 5, 2015 at 05:36 PM.
Jun 25, 2015 | 10:34 AM
#766
Registered User
Joined: Jul 2012
Posts: 2,365
Likes: 4
From: Idaho
sorry to hear whats happened terry
when i rebuild i tend to be really anal about blowing all passages clear repeatedly my block got boiled but i still got boiling stuff out of the oil passages i had all plugs out as well (alen head an the couple on the sides) then i sprayed carb cleaner down them an air again course mine had greenish brown oil an goopy from the blown head gasket
ive seen bolts break from age being torqued the temp changes metal fatuiqe is not unusual that valve company i worked for we got some old units back from a latex producer bolts all over them were cracked an popping as we tried to take them apart i finally convinced management to let us replace them all with new stainless an sell it to the owners as a good idea they did so but they wanted testing done of the bolts to see was it really needed we did 20 random bolts of various sizes over 3/4 failed the units had been in operation for over 20 years
Jun 25, 2015 | 05:25 PM
#767
Thread Starter
Super Moderator
iTrader: (1)
Joined: Aug 2008
Posts: 11,787
Likes: 28
From: Anderson Missouri
Hello Cyberhorn...I was really slow at building this motor and thought I did a great job of assembling it. You got me to wondering if maybe the camshaft bolt broke on it leading up to the failure. It is still in tight in the cam that I am unable to get it out. The cam is now on my friends Wall of Shame. He has a collection of parts that have failed. Bent rods, burnt pistons, and he has never seen a cam like mine did, and now my camshaft.
I have a nice torque wrench and went a little overboard on torquing the bolts. I did it 3 times just to make sure I did not miss any. I chase the bolt holes with brake cleaner and then blow it out with the air hose. It has me stumped. Thanks for the bolt failure idea.
Sometimes thing go like they should without even trying and other times no matter how hard you try it still goes wrong. I keep thinking it will pay off in the end. Front axle is done as good as you can do it with top parts, brakes new all the way around, Aisian clutch with all parts new, new windshield, new exhaust system. This motor had more machine shop work then I normally have done using the best parts I can get sure was a let down to see it fail. I will get it just going to take a little longer then I was hoping for.
Last edited by Terrys87; Jun 25, 2015 at 05:49 PM.
Jun 25, 2015 | 05:39 PM
#768
Thread Starter
Super Moderator
iTrader: (1)
Joined: Aug 2008
Posts: 11,787
Likes: 28
From: Anderson Missouri
My friend suggested the head with a complete kit with head, bolts, gaskets, and sealant. He does alot of repair on the side and has used this kit many times and has worked great for him. I looked at the head kit and looks to be a great kit. It is from Mizumo Auto off of ebay.
 Jun 25, 2015 | 06:08 PM
#769
Thread Starter
Super Moderator
iTrader: (1)
Joined: Aug 2008
Posts: 11,787
Likes: 28
From: Anderson Missouri
One thing I did not have to buy is springs for it. It has new springs all the way around it from Ranchero. From what my friend was telling me that is an automatic 3 inch lift. I have 31 inch tires on it now and have always liked the looks of 31s, but for about the same price I could go to 33s. Just really not sure about regearing. I have access to some 4.30 gears which would be a improvement over the 4.10s I have. Not sure if going down .20 make much difference in the gearing for 33s. I dont want a slug on the road. I know for 33s I really need 4.88s. Tires are still a ways off but the thought of 33s has crossed my mind.
Not sure how I want to sound deaden the floor. I have thought about putting some roll on bed liner on the floor and then cover that with some Peel and Seal. I want it quiet in there and when I get to hold the temperture to where I want it.
Little by little I will get this truck to where I want it but it sure seem like it is going to make me work for it.
Jun 26, 2015 | 01:18 AM
#770
Registered User
Joined: Jul 2012
Posts: 2,365
Likes: 4
From: Idaho
when putting bolts in a dry hole (clean) put a bit of oil on the threads before torquing them unless they need sealer on the threads of course never torque dry
we walked my head bolts down a bit at a time in steps due to the one healicoil in there an i fully admit im terrified of checking the torque when i go in to check the lifters adjustment an know i need to do it but i bought new bolts for the head with one broken several had marks of being stretched it was a easy reason to buy new for those
well your getting a new cam so wear on the lobes no longer an issue id have a local head shop do a 3 face grind on the valves for best performance an life an let them assemble that part also check the new head for being flat i have seen new not be 100% flat
Jul 6, 2015 | 08:30 AM
#771
Thread Starter
Super Moderator
iTrader: (1)
Joined: Aug 2008
Posts: 11,787
Likes: 28
From: Anderson Missouri
Thanks Cyberhorn... I have done numerous top end rebuilds and to see this one fail was a surprise to me having the cam bolt to snap. Good point on having the new head checked, thanks for that bit of info as I would of just assumed it was good. Never really thought about that. I have an exhaust helicoil that has let loose on me on my 86. Helicoils are great but not perfect. I dont blame you for being nervous on it. I think you will be alright.
Anytime I have the valve cover off, I retorque my head bolts. Instead of going to the max torque of 6? pounds, ( forget which it is at the top of my head) I go to about 60 pounds. It is a few pounds light but it is strong enough to let me know if any have loosened up.
Anytime I have the valve cover off, I retorque my head bolts. Instead of going to the max torque of 6? pounds, ( forget which it is at the top of my head) I go to about 60 pounds. It is a few pounds light but it is strong enough to let me know if any have loosened up.
Jul 6, 2015 | 08:41 AM
#772
Thread Starter
Super Moderator
iTrader: (1)
Joined: Aug 2008
Posts: 11,787
Likes: 28
From: Anderson Missouri
I am two trucks down. The 85 cam bolt has snapped causing several issues. The 88 keeps having the cherry manifold. After having it to Toyota and several other places, checking all sensors, replacing injectors... I am putting the 88s motor into my 85. For a couple of reasons. One is to see if the cherry manifold moves to the truck or stays with the 88. That will let me know where the problem could be. I have 3 runners and need a truck and two runners.
Second reason is to get the 88 back on the road. It is a much funner truck to drive. Dont know why as everything I have done to it I have done to the 86 runner. Besides I will be in the long run fixing the red 87 runner as it fully loaded. I am in no hurry to get the 87 going. I am more intrested in getting the pickup and Mistys runner up to where I want them.
One I get the motor in the pick up, I am sticking the motor out of my 86 into Mistys. It is going to be alot of work but hopefully I will get this cherry manifold figured out, get a pickup back on the road as I need it.
I am going on vacation in a few days. Half of it will be camping, fishing, and boating. The other half will be getting the trucks running. I will be painting Toms runner as well when I get back. Will be getting alot done when I get in the shop. I am so ready for a vacation. I have only missed 3 days in 5 years but have been covering for a few others that have been having medical issues.
Jul 6, 2015 | 08:47 AM
#773
Thread Starter
Super Moderator
iTrader: (1)
Joined: Aug 2008
Posts: 11,787
Likes: 28
From: Anderson Missouri
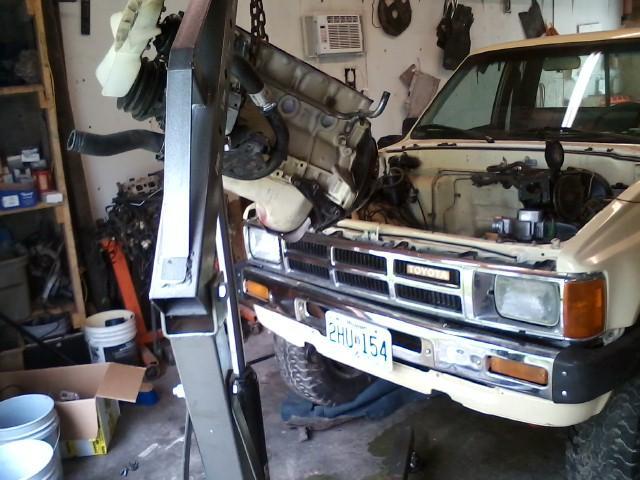
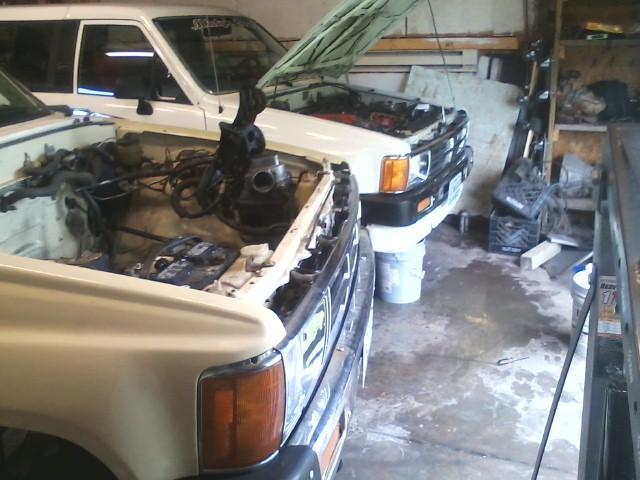
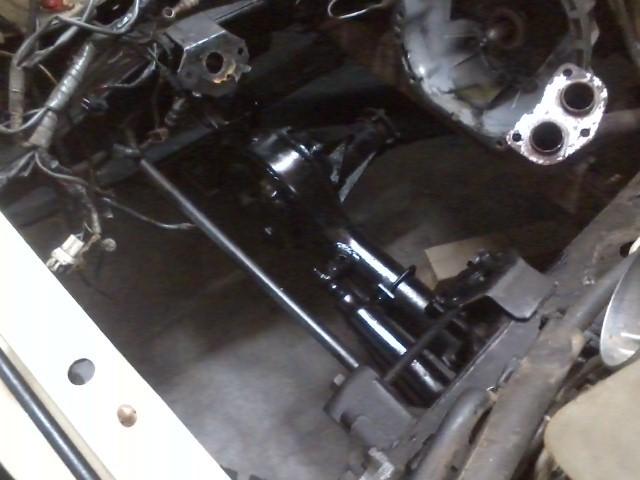
Got the motor out of the 85.
Seen a question on the homepage a while back. A member was asking about pulling a motor with out the head on. Some suggested using the head bolts. I dont like to put any more stress on the head bolt holes then necessary.
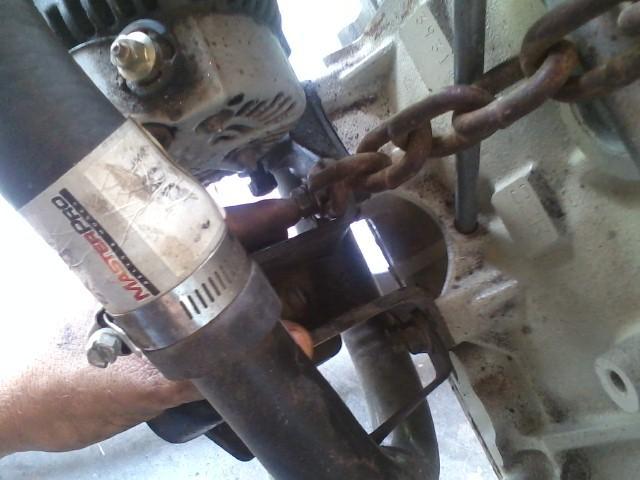
I suggest using the transmission bracket for the rear.
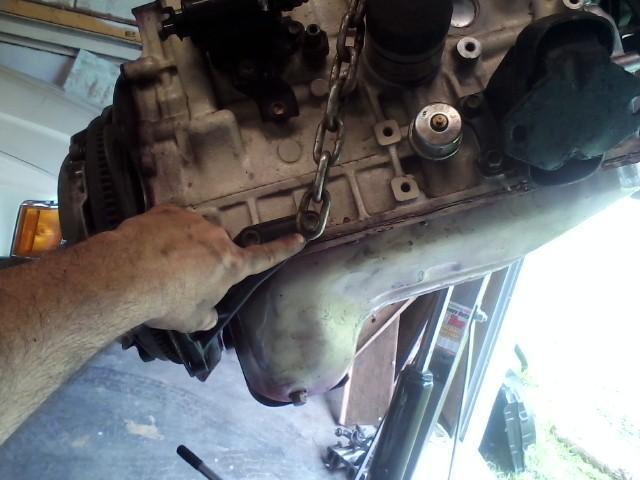
A motor mount bolt for the front.
Probably found why I am having a fuel issue. The 85 has both lines, Return and Vent lines in the same spot instead of having the Return line on the firewall like the newer trucks.

Getting started on pulling the motor out of the 88.

Seen a question on the homepage a while back. A member was asking about pulling a motor with out the head on. Some suggested using the head bolts. I dont like to put any more stress on the head bolt holes then necessary.
I suggest using the transmission bracket for the rear.

A motor mount bolt for the front.

Probably found why I am having a fuel issue. The 85 has both lines, Return and Vent lines in the same spot instead of having the Return line on the firewall like the newer trucks.

Getting started on pulling the motor out of the 88.

Last edited by Terrys87; Aug 24, 2015 at 02:09 PM.
Jul 9, 2015 | 06:54 AM
#774
Thread Starter
Super Moderator
iTrader: (1)
Joined: Aug 2008
Posts: 11,787
Likes: 28
From: Anderson Missouri
I got my axle rebuilt a while back and was going to paint it then. I finally got around to it and got it painted before sticking the 88s motor in.
I am swapping everything over with exception of injectors and the vsv valves which are year specific. It is in but still several things to hook up. Getting the transmission shaft in the pilot bering took a little longer then I expected.

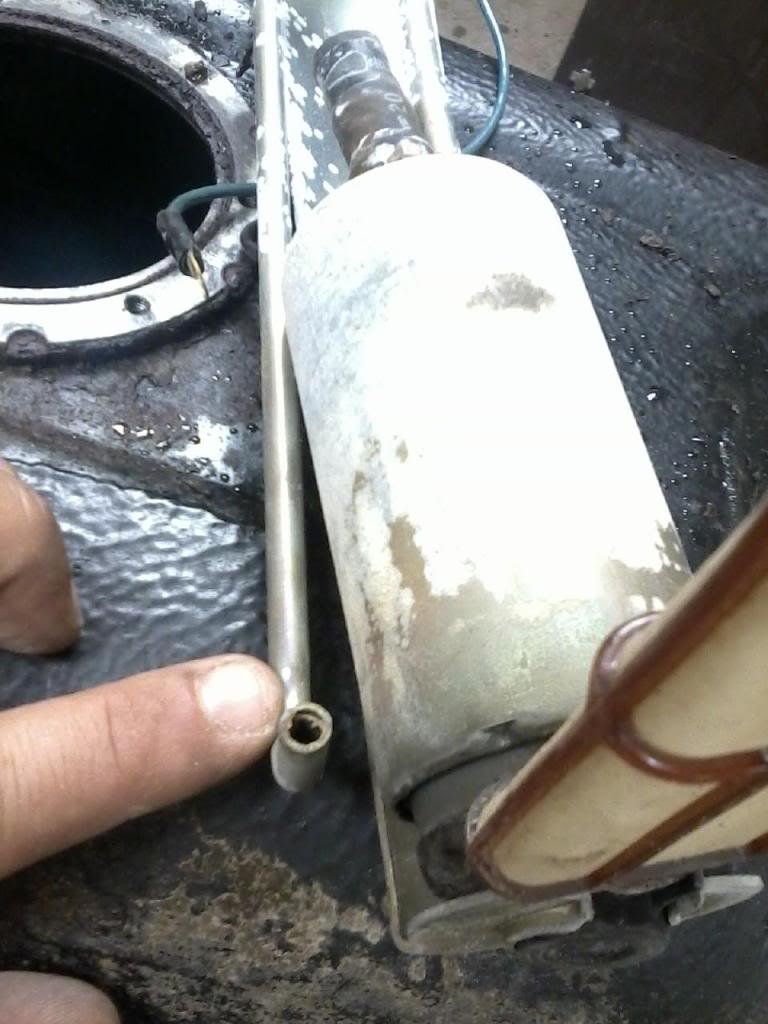
I mentioned earlier that I had a fuel smell issue. One thing I like about these threads is I can go back and see what I did at a certain time. When I did the fuel tank, I was unable to seperate the fuel pump assembly so was unable to clear the "J" line. Now I know it was the orange line with out tracing it out.
This picture is from page 5 of this build. Now I know where to check.

This "J" line likes to get clogged. Check all of them, but most likely this one will be clogged.

I am swapping everything over with exception of injectors and the vsv valves which are year specific. It is in but still several things to hook up. Getting the transmission shaft in the pilot bering took a little longer then I expected.

I mentioned earlier that I had a fuel smell issue. One thing I like about these threads is I can go back and see what I did at a certain time. When I did the fuel tank, I was unable to seperate the fuel pump assembly so was unable to clear the "J" line. Now I know it was the orange line with out tracing it out.
This picture is from page 5 of this build. Now I know where to check.

This "J" line likes to get clogged. Check all of them, but most likely this one will be clogged.
Last edited by Terrys87; Jul 9, 2015 at 08:28 AM.
Jul 9, 2015 | 03:37 PM
#775
Thread Starter
Super Moderator
iTrader: (1)
Joined: Aug 2008
Posts: 11,787
Likes: 28
From: Anderson Missouri
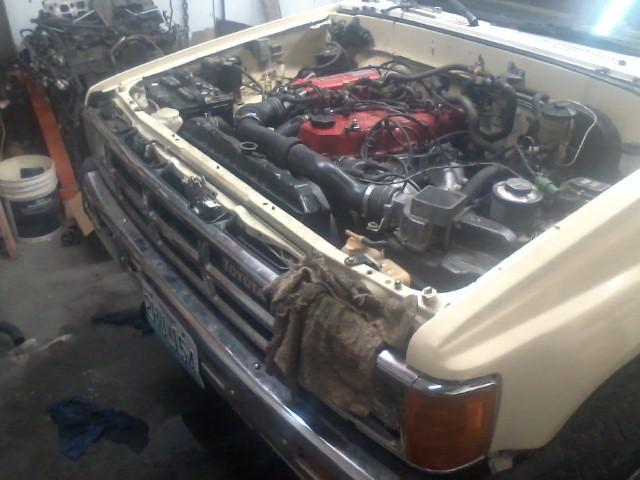
I got it in and got it running. We are getting a ton of rain so will wait til tomorrow to take it for a test drive. Secretly I am really hoping the problem just went away but am not holding my breath. If anything I did get the power steering pump leak fixed so guess that is a positve. I am going to leave the hood off so I can see it and also take it to the carwash and try and get everything cleaned back up.
 Jul 16, 2015 | 05:14 AM
#777
Thread Starter
Super Moderator
iTrader: (1)
Joined: Aug 2008
Posts: 11,787
Likes: 28
From: Anderson Missouri
Thanks Cory... This truck has been giving me a run for my money. I am so glad you mentioned the fuel pump could be an issue with the cherry manifold. I jumpered the Fp and +B on the runner and I am not happy with the results I got. It just seems weak after running the fuel out for a while. I did an initial test of the pump but not as long as I just did. It could be failing when run for a while.
Jul 16, 2015 | 05:16 AM
#778
Thread Starter
Super Moderator
iTrader: (1)
Joined: Aug 2008
Posts: 11,787
Likes: 28
From: Anderson Missouri
I got to take the 85 for a test run. Seems a little sluggish on take off but revs up great. Probably got some loose ends I need to wrap up. I did get the power steering leak fixed. I drove it around early this morning and tried to run it hard to see if it would cherry up and it hasnt so far. I still dont have confidence in the truck just yet. It is miserably hot here. I am having to get in the shop early before it gets to muggy.
Last edited by Terrys87; Jul 16, 2015 at 12:57 PM.
Aug 16, 2015 | 09:47 AM
#779
Thread Starter
Super Moderator
iTrader: (1)
Joined: Aug 2008
Posts: 11,787
Likes: 28
From: Anderson Missouri
I have worked on the rear cargo pockets in the past and was working on Toms rear pockets and think I have found a better way. Getting all of the tabs off and trying to get the string tightened up and getting the pockets to stay on is a pain.
This time I just trimmed off of one the tabs and used a small screw with a nut as a spacer.
Here you can see the sagging net.

Here is the knot that needs tightened.
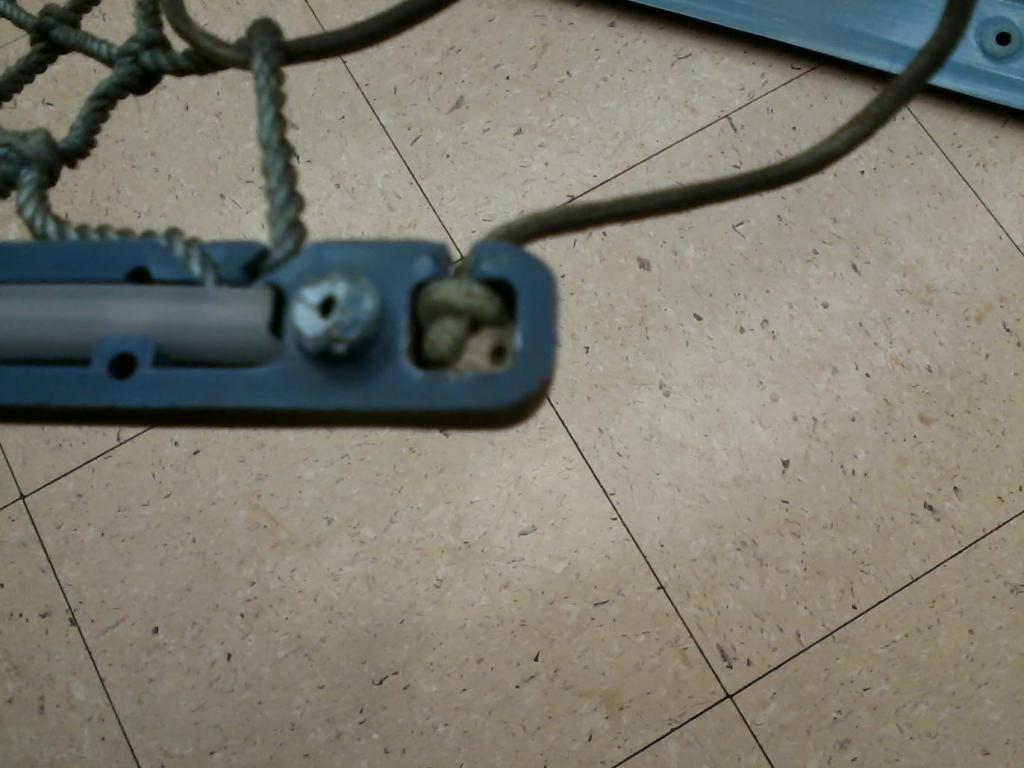
I cut the tab on the back so I could access the knot. Then tightend the string with another knot.

Then from the back side I used a nut as a spacer and a small screw. Instead of removing all the tabs which is a pain, I just did a top corner on each net. I shipped it back to Tom and he will finish it with some coloring that matches his truck.
 Oct 1, 2015 | 01:37 PM
#780
Thread Starter
Super Moderator
iTrader: (1)
Joined: Aug 2008
Posts: 11,787
Likes: 28
From: Anderson Missouri
Been tied up with work lately and Mistys runner is still having the cherry manifold and that has me tied up on her truck. I have fought the cherry manifold on her truck and will be taking it to a friends house and see if he can find anything that I may have missed. I have taken it to Toyota and they cant find anything either. I am going to going to convert her runner and my 85 to carb as I will be keeping these trucks for the long haul and think EFi is going to be problematic in the years to come so my 85 has been taking the back burner until I get some time and gather the parts and will be buying two Weber carbs for them soon.
In the mean time, I was able to spend some time with a friend and we checked out a salvage yard and it had a 99 runner with two tan front seats that are in great condition. to good of a deal to pass up. They did have two carbureted trucks but one was an automatic truck and the other one had butchered wiring so passed on those harnesses. I will convert them with the correct harness instead of making an EFI harness work. Converting an EFI harness to carb looks terrible.
When I get the correct harness and a Weber carb, I will strip the whole interior out, order some carpet and I think with these seats, I will have a great looking interior.
New seats that have some adjustments and having an 01 Runner these seats are going to be comfortable. They actually have more adjustments then my 01 runner. They are in great shape and will need some minor cleaning.


