
85 Extra Cab Saved from Crusher
 May 5, 2015 | 02:58 PM
#741
Thread Starter
Super Moderator
iTrader: (1)
Joined: Aug 2008
Posts: 11,787
Likes: 28
From: Anderson Missouri
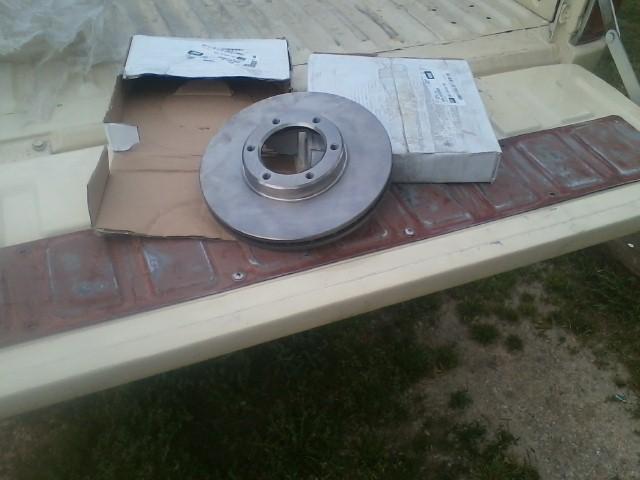
I got a new set of rotors. I am building up the parts to do a complete front axle rebuild. I got my rotors at Orielly and they are showing two sizes of rotors. If I recall the numbers correctly they are 257mm and 302mm. I forget which size I got now but can return them if they are incorrect. I will pull a tire off tomorrow and see if they are the same. Anybody know what size I should have?
New Rotors. I did get a center panel cover for the tailgate that I need to paint.
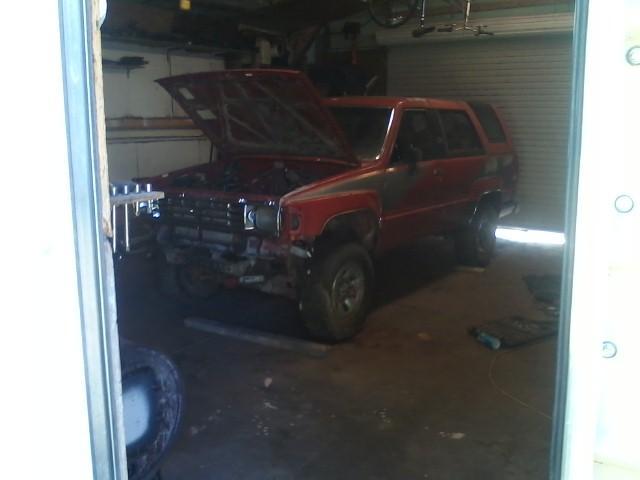
Pulled the red runner in the shop to pull the tank and transmission out of it for Toms Runner. My truck is wired as an 87 SR5 and this is an 87 SR5 and I will eventually fix it so I can have two fully loaded SR5s and use them to compare the features of each one. Both of my trucks will have about every option Toyota ever put on one. This runner looks bad but is in great shape. Just getting the tank ready to be pulled out I was pleasantly surprised at how great all the nuts and bolts just came out without breaking. I wont be in no big hurry to get this one on the road but it is getting moved up the list.
 May 5, 2015 | 04:11 PM
#742
Registered User
Joined: Jul 2012
Posts: 2,365
Likes: 4
From: Idaho
cant stand not having that side mirror i still look when changing lanes but i like it for quick reference
LOL wish my ol girl was so easy to take apart like that one terry
mines a bit stiff but zuk springs an now the poly bushings on the shackles am tempted to take the heat wrench to the zuk's to relax a coil just a bit but likely wont
LOL wish my ol girl was so easy to take apart like that one terry
mines a bit stiff but zuk springs an now the poly bushings on the shackles am tempted to take the heat wrench to the zuk's to relax a coil just a bit but likely wont
May 8, 2015 | 06:21 AM
#743
Thread Starter
Super Moderator
iTrader: (1)
Joined: Aug 2008
Posts: 11,787
Likes: 28
From: Anderson Missouri
Hello Cyberhorn... Misty coils are great. I got the same ones on mine and it still sits high in the back. Same brand and everything. I am going to look into some different springs when I do it the next time. There are several others out there that I think would work better then the Black Magics I have. Not having a passenger mirror is dangerous for me.
May 8, 2015 | 06:22 AM
#744
Thread Starter
Super Moderator
iTrader: (1)
Joined: Aug 2008
Posts: 11,787
Likes: 28
From: Anderson Missouri
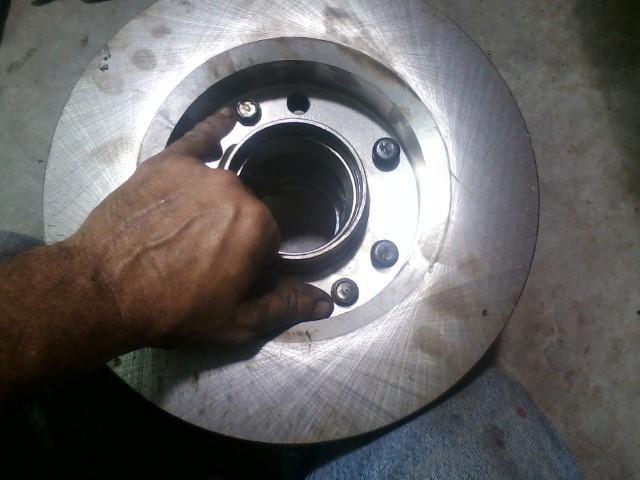
I finally got out and looked at my rotors. Mine uses the larger ones. May not look like it in the picture but it is about 1/2 an inch to short on each side. I will find out the measurements when I go and swap out for the other one.
I did find out the sizes. They come in 257mm and 302mm. 302mm is the correct size.
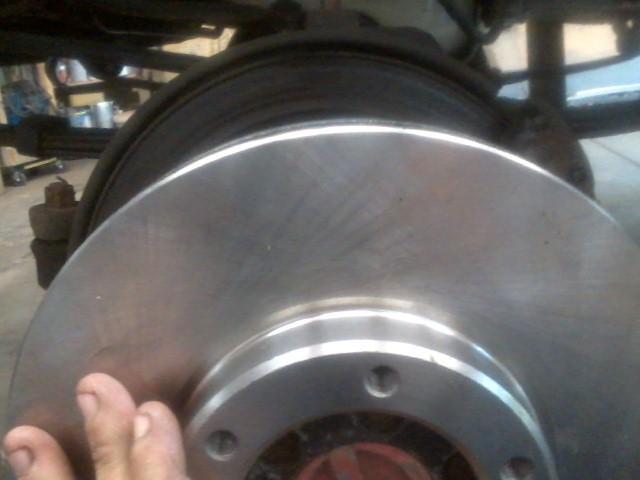
I did find out the sizes. They come in 257mm and 302mm. 302mm is the correct size.

Last edited by Terrys87; May 8, 2015 at 08:47 AM.
May 9, 2015 | 03:06 PM
#745
Registered User
Joined: Jul 2012
Posts: 205
Likes: 5
From: Estill Springs TN / Atl GA
I wonder when the rotor size change happens. I wonder if it's something that actually changed from 83 to 84 but the parts store computer just sees both SFA Toyota possibilities.
Hrmmm.
Hrmmm.
May 15, 2015 | 10:55 AM
#746
Thread Starter
Super Moderator
iTrader: (1)
Joined: Aug 2008
Posts: 11,787
Likes: 28
From: Anderson Missouri
Hello cabot..I know the axles are different lengths between solid axles and IFS. I too wonder if the smaller rotors are for the 79-83. I see axle information all the time but have not seen the rotor information. Has me wondering too.
May 15, 2015 | 10:59 AM
#747
Thread Starter
Super Moderator
iTrader: (1)
Joined: Aug 2008
Posts: 11,787
Likes: 28
From: Anderson Missouri
My axle rebuild kit should be in tomorrow. Not sure when I will get to it as a friend is going to help me do it as he is more familiar with it. Most axle leak and have a tought build up on them from oil and dirt. Earlier this week I tried Easy Off Oven cleaner to clean a tranny. Thought I would give it a try on the axle. Works great, I would use caution on where you use it at but it is better then any other cleaners I have tried.
I had used the high pressure carwash in the past to get it this clean and some scrubbing. This time I used Easy Off oven cleaner. Before.
Nice and clean now. A few spots I will get when we tear it down. Just waiting for parts and time to do it. The whole axle will be getting painted at that time.

I had used the high pressure carwash in the past to get it this clean and some scrubbing. This time I used Easy Off oven cleaner. Before.

Nice and clean now. A few spots I will get when we tear it down. Just waiting for parts and time to do it. The whole axle will be getting painted at that time.
 May 16, 2015 | 07:36 PM
#749
Thread Starter
Super Moderator
iTrader: (1)
Joined: Aug 2008
Posts: 11,787
Likes: 28
From: Anderson Missouri
Hello cabot... I wish I would of know of it earlier. I have spent hours cleaning with a drill and brush in the past and all of the different cleaners that I have tried that dont work well.
May 16, 2015 | 07:39 PM
#750
Thread Starter
Super Moderator
iTrader: (1)
Joined: Aug 2008
Posts: 11,787
Likes: 28
From: Anderson Missouri
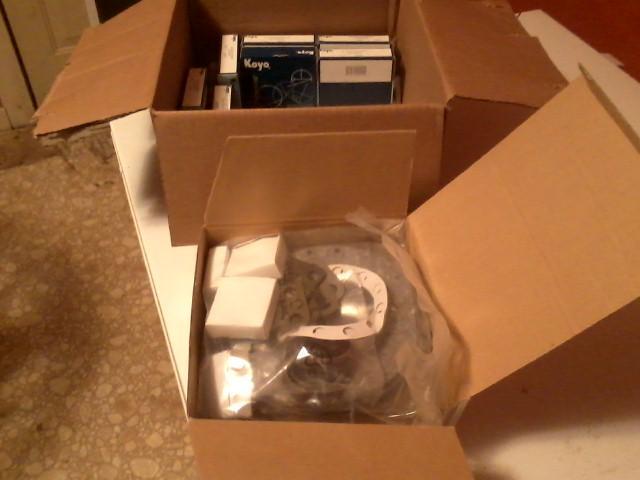
I got my front end kit in today. It is heavier then I thought it would be. This will do away with the felt seals that leak after a period of time It is all Koyo bearings. Hope to get them installed in the next week or so. Just got to get the time set up with a friend of mine and get our schedules set up. It is going to be nice to have new rotors and front end fixed. I have a warped rotor.
http://www.4crawler.com/4x4/CheapTri...eRebuild.shtml

http://www.4crawler.com/4x4/CheapTri...eRebuild.shtml
Last edited by Terrys87; May 28, 2015 at 04:04 AM.
May 23, 2015 | 12:55 PM
#751
Thread Starter
Super Moderator
iTrader: (1)
Joined: Aug 2008
Posts: 11,787
Likes: 28
From: Anderson Missouri
Been working some overtime and then it was just cool and rainey so when I did have a little time to work on the trucks, just really did not want to mess with them. Got everything I need to do the front axle, just waiting for my friend and time to work it self out.
I have been looking for a rim for my right rear tire. This is the Gold Mod Rim. Any suggestions on where to find it??? I have looked everywhere and cant seem to have any luck.
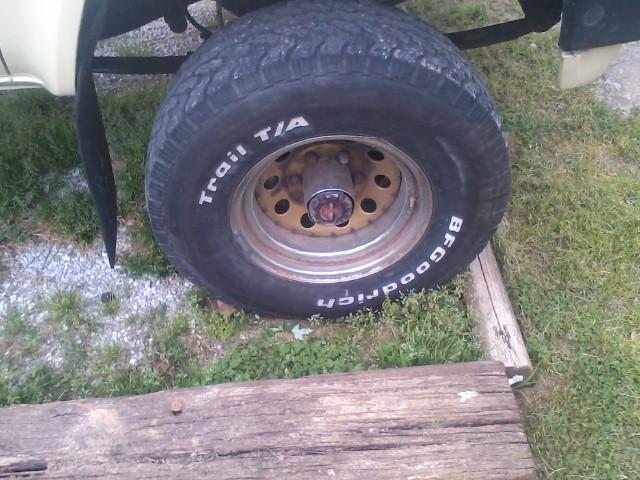
I have been looking for a rim for my right rear tire. This is the Gold Mod Rim. Any suggestions on where to find it??? I have looked everywhere and cant seem to have any luck.


 Jun 5, 2015 | 06:22 AM
#753
Thread Starter
Super Moderator
iTrader: (1)
Joined: Aug 2008
Posts: 11,787
Likes: 28
From: Anderson Missouri
Hello Mark, will be looking forward to meeting up with you. I have been tied up with work lately and havent gotten to do much work on my trucks as well. Got plenty of things to keep me busy but after getting home, I get a little break and then get to bed to start it over again. Should be getting back on a normal schedule here soon.
Last edited by Terrys87; Jun 5, 2015 at 06:29 AM.
Jun 5, 2015 | 06:28 AM
#754
Thread Starter
Super Moderator
iTrader: (1)
Joined: Aug 2008
Posts: 11,787
Likes: 28
From: Anderson Missouri
I have been spending some time trying to help my brother get his 2000 Ford Ranger running again. It is the truck from hades. I warned him when he bought it, it was junk. I bought a Ranger brand new, 12 miles on the odometer in 98 and it was the biggest pile of junk I ever owned. Some where around '94 the rangers took a turn for the worse.
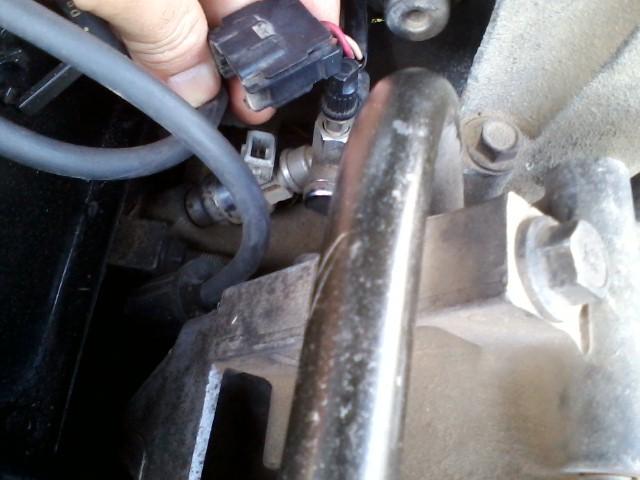
One thing I did notice while working on it, its injectors look the same as 85-87 injectors on our Toyotas. The top look to have the same style of connectors and is white. Next time I am at the bone yard I will pull an injector from a Ranger and compare to one of mine and do a resistance check on one. I will say that the connectors that Rangers use look to be a much better quality then what came on our trucks.
Talking to Alex at connectorsfast.com, he was telling me that Bosch is the one that created fuel injection so the 85-87 injectors may not be Toyota specific.
2000 Ranger Injector.
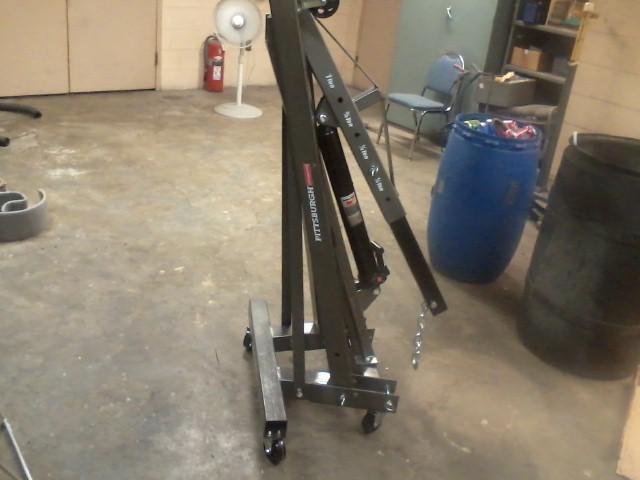
I did get a Cherry Picker yesterday. I had the old style that would not collapse. My nephew overloaded the old one so finally got another one. Great for changing lawn mower tires, sharpening blades, lifting several things that are not truck related. I wanted a fold up one for a while to conserve on floor space.

Last edited by Terrys87; Jun 8, 2015 at 07:47 PM.
 Jun 11, 2015 | 07:54 AM
#756
Thread Starter
Super Moderator
iTrader: (1)
Joined: Aug 2008
Posts: 11,787
Likes: 28
From: Anderson Missouri
Thanks N1YDP... I see you have an extra cab as well. I will be looking forward to seeing how your build comes along. I think these are some great looking trucks. I finally got to work on mine some yesterday and hope to have some pictures up later on. Just to do the complete front axle and still have a ton more to get done today. When I get the axle done today it will be a big step for me and one of the few major things I have left to do. All of the other things are small things and working out the bugs. Hope my thread helps you along on yours. A slow steady pace will get it.
Jun 12, 2015 | 02:37 AM
#757
Thread Starter
Super Moderator
iTrader: (1)
Joined: Aug 2008
Posts: 11,787
Likes: 28
From: Anderson Missouri
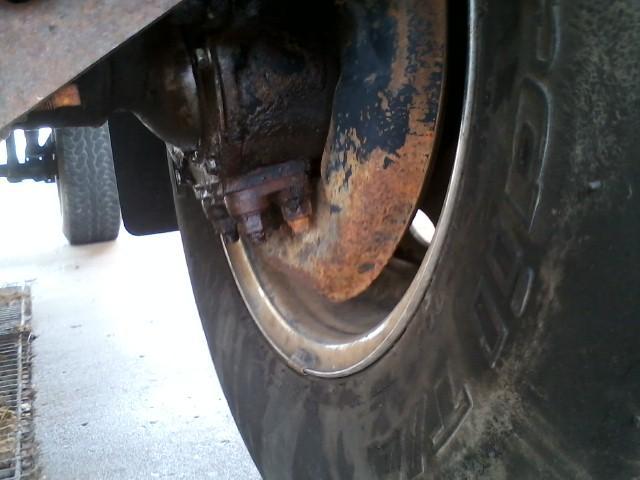
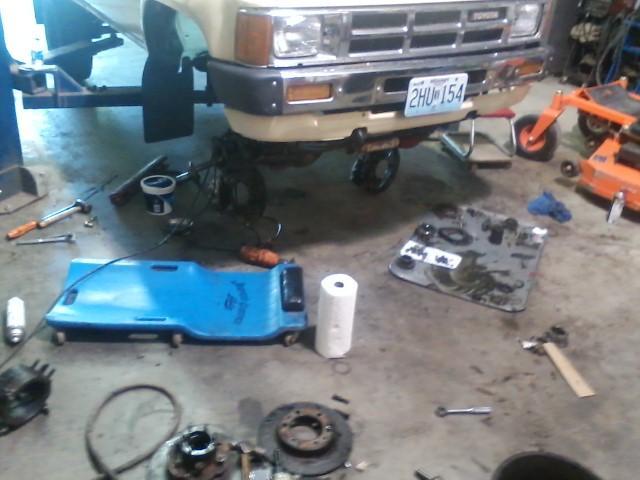
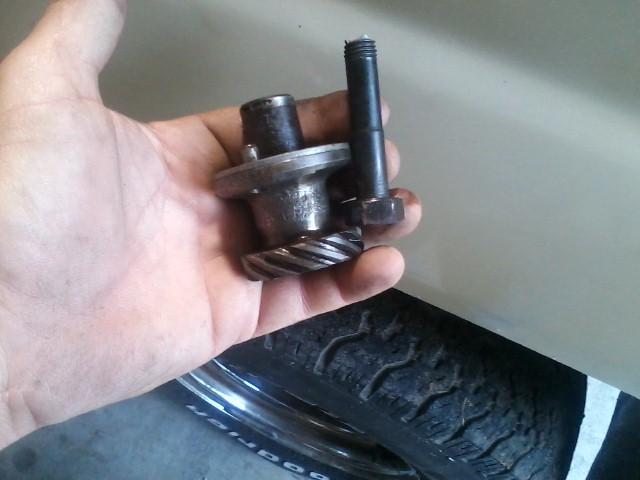
I need one wheel stud to finish my front end rebuild. This is the first one I have done and glad I had some help with it. A lot of cleaning is involved. I had a lot of surface rust on nuts and bolts, grime that I was unable to get to when it as assembled before tear down, just a bigger job than I really thought was involved but will feel confident in the next time I have to do it.
I was swapping out the hubs and my friend was surprised that I had two bolts that held the hub to the disk. Later on when I went to the part store to get a new wheel stud, the 85 stud is a different style. The 79-83 stud is the one I needed. One reason he may have been surprised at the bolts hold the rotor on. So I may have a 79-83 axle under neath it.
The two bolts I am talking about and the one wheel stud I need to finish the job.
This is where we are about halfway done. The next step after this is trying to get several pieces all bolted up at the same time. What we called the Chinese puzzle when we got to it.

A big mess at one time. Lifts are soooo nice. I soon found out I need a variety of seal drivers for driving in the races for the bearings.
I was swapping out the hubs and my friend was surprised that I had two bolts that held the hub to the disk. Later on when I went to the part store to get a new wheel stud, the 85 stud is a different style. The 79-83 stud is the one I needed. One reason he may have been surprised at the bolts hold the rotor on. So I may have a 79-83 axle under neath it.
The two bolts I am talking about and the one wheel stud I need to finish the job.

This is where we are about halfway done. The next step after this is trying to get several pieces all bolted up at the same time. What we called the Chinese puzzle when we got to it.

A big mess at one time. Lifts are soooo nice. I soon found out I need a variety of seal drivers for driving in the races for the bearings.

Last edited by Terrys87; Jun 12, 2015 at 02:57 AM.
Jun 12, 2015 | 02:40 AM
#758
Thread Starter
Super Moderator
iTrader: (1)
Joined: Aug 2008
Posts: 11,787
Likes: 28
From: Anderson Missouri
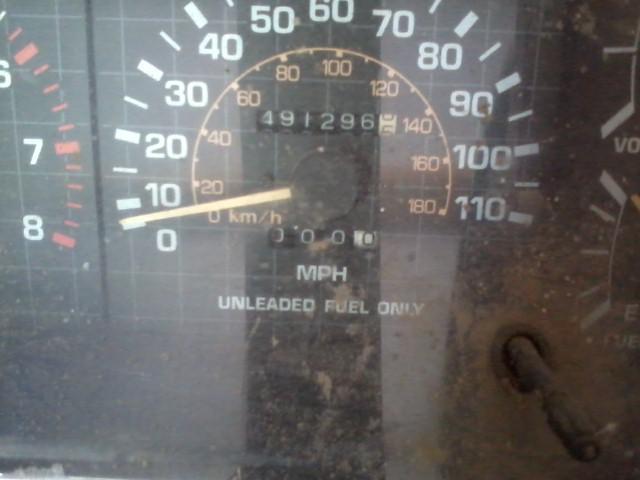
My friend works on trucks as well and this Cluster guage come out of an 86 truck identical to mine. The speedometer quit working and he put another one in it. Last time he worked on it, this truck has over 750,000 miles on it. Dont think it will make the million mark as rust is about to eat the truck up.
Few things next on the list.
Front Bumper
Rear Bumper
Tow Hitch
Stripes
AC
Finish Interior
Wheels
Tires

Few things next on the list.
Front Bumper
Rear Bumper
Tow Hitch
Stripes
AC
Finish Interior
Wheels
Tires
Last edited by Terrys87; Jun 12, 2015 at 06:13 AM.
Jun 18, 2015 | 02:08 AM
#759
Thread Starter
Super Moderator
iTrader: (1)
Joined: Aug 2008
Posts: 11,787
Likes: 28
From: Anderson Missouri
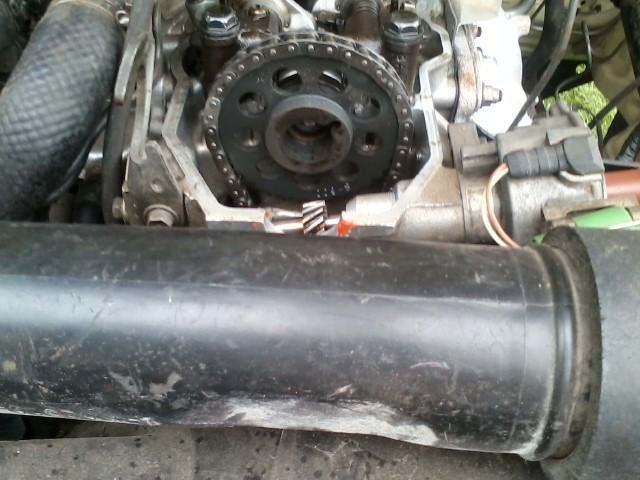
I had a strange thing to happen to me. I was going to a friends house to repair the floor boards in my truck. Got about a mile from his house and my truck just died. He towed me to his house and we started troubleshooting why it would not start. Fearing the worse that the motor had blown, we did a compression test. Only had 35 psi on number 1 cylinder and nothing on the rest of the cylinders. Rotor was turning with the cap off so go to thinking that may the camshaft just snapped in to.
Pulled the valve cover off and camshaft looked good. After more trouble shooting we found that the tab on the cam shaft that locks the camshaft sprocket had broken off and the bolt that holds the gear on snapped in two.
Where the notch is in the sprocket, the tab is broken off into it that is attached to the camshaft. Some how I specialize in the odd problems. I have done several head gaskets so dont know what caused this. I am hoping to just remove the head bolts and swap in a new camshaft. I am hoping that the head gasket will stay sealed. I got a 50/50 chance of it staying sealed. Seen some get away with not having to pull the head when changing out the camshaft. If you look closely, you can see the bolt broken off in the camshaft.
I did get my floorboards patched up. He has a better welder set up then I have and his makes welding fun. My welder takes the fun out of welding. Long term goal will be to get a better welding setup.

Another patch. I did a third one but did not get a picture of it.

Pulled the valve cover off and camshaft looked good. After more trouble shooting we found that the tab on the cam shaft that locks the camshaft sprocket had broken off and the bolt that holds the gear on snapped in two.

Where the notch is in the sprocket, the tab is broken off into it that is attached to the camshaft. Some how I specialize in the odd problems. I have done several head gaskets so dont know what caused this. I am hoping to just remove the head bolts and swap in a new camshaft. I am hoping that the head gasket will stay sealed. I got a 50/50 chance of it staying sealed. Seen some get away with not having to pull the head when changing out the camshaft. If you look closely, you can see the bolt broken off in the camshaft.

I did get my floorboards patched up. He has a better welder set up then I have and his makes welding fun. My welder takes the fun out of welding. Long term goal will be to get a better welding setup.

Another patch. I did a third one but did not get a picture of it.

Last edited by Terrys87; Jun 18, 2015 at 02:38 AM.
Jun 18, 2015 | 02:29 AM
#760
Thread Starter
Super Moderator
iTrader: (1)
Joined: Aug 2008
Posts: 11,787
Likes: 28
From: Anderson Missouri
I just laughed at the whole problem. Getting frustrated wont do much good and it could of been worse. I could of been out a motor. I have seen several that have rebuilt motors and they go bad on them. I am hoping this wont take long to repair. I prefer to do body work over mechanical. I had planned on trying to possibly paint Toms runner and might still get to by the week end if all goes well. Will have to see how things go.
Different things I have found on ebay that is catching my interest.
http://www.ebay.com/itm/85-95-2-4L-TOYOTA-PICKUP-COMPLETE-CYLINDER-HEAD-HEAD-GASKET-SET-w-BOLTS-22RE-/140689057901?fits=Year%3A1985%7CMake%3AToyota%7CModel%3APickup&hash=item20c1b8a86d&vxp=mtr
http://www.ebay.com/itm/KINGDOM-NEW-Radiator-Toyota-4Runner-Pickup-2-4-L4-/121588324838?fits=Year%3A1985%7CMake%3AToyota%7CModel%3APickup&hash=item1c4f3a99e6&vxp=mtr
http://www.ebay.com/itm/1985-Toyota-Pickup-L4-2-4L-Engine-120AMP-Alternator-/151269802079?fits=Year%3A1985%7CMake%3AToyota%7CModel%3APickup&hash=item233862005f&vxp=mtr
http://www.ebay.com/itm/New-Distributor-fits-Toyota-4Runner-Celica-Pickup-1985-1990-19100-35180-/181729384627?fits=Year%3A1985%7CMake%3AToyota%7CModel%3APickup&hash=item2a4fea58b3&vxp=mtr
Aisian
http://www.ebay.com/itm/OEm-Aisin-Transmission-Clutch-Master-Cylinder-for-Toyota-4Runner-Cressida-Pickup-/371346457292?fits=Year%3A1985%7CMake%3AToyota%7CModel%3APickup&hash=item5675f942cc&vxp=mtr
Last edited by Terrys87; Jun 19, 2015 at 05:49 AM.


