
Wulfdan's 82 Hilux SR5 Build Thread
 Apr 3, 2014 | 01:17 PM
#1

Thread Starter
Registered User
Joined: Apr 2014
Posts: 46
Likes: 0
From: Athens GA
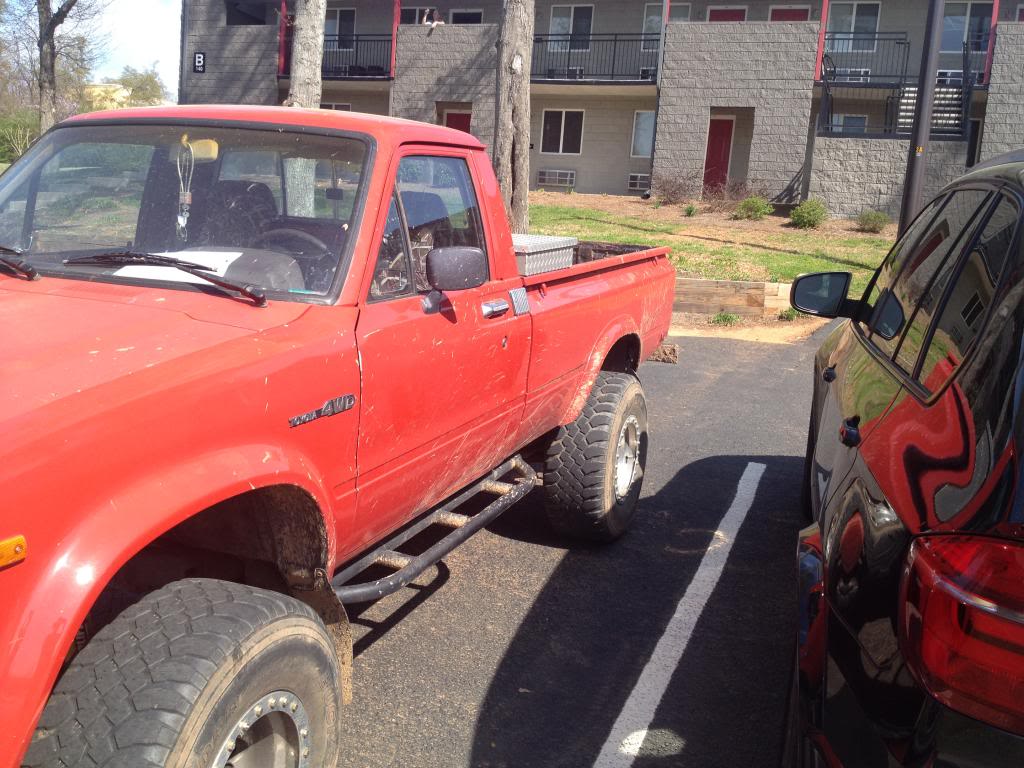
Here's my new yota
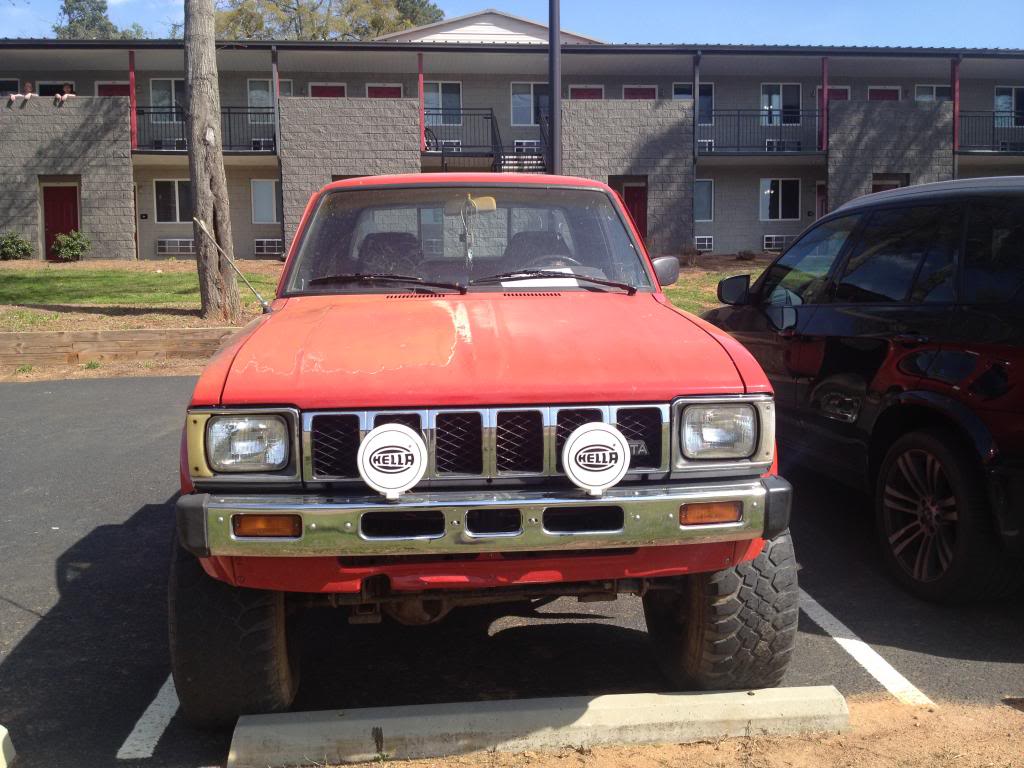
She's in fine condition for her years, very little rust!

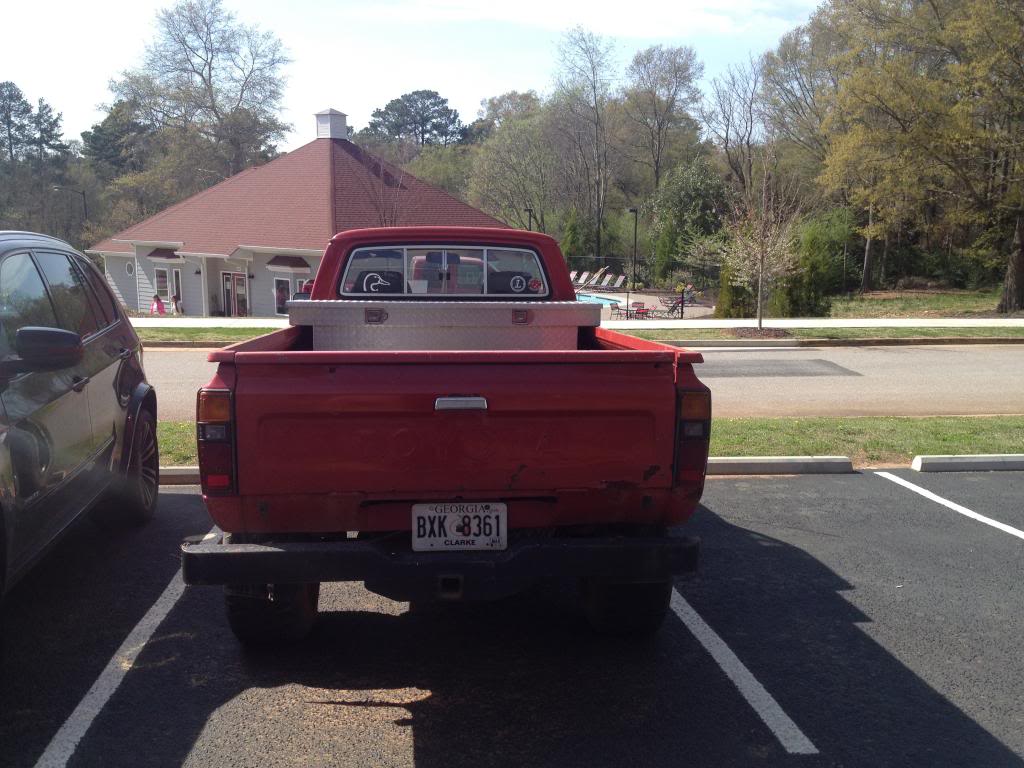
Here's the Bed

And the Tailgate
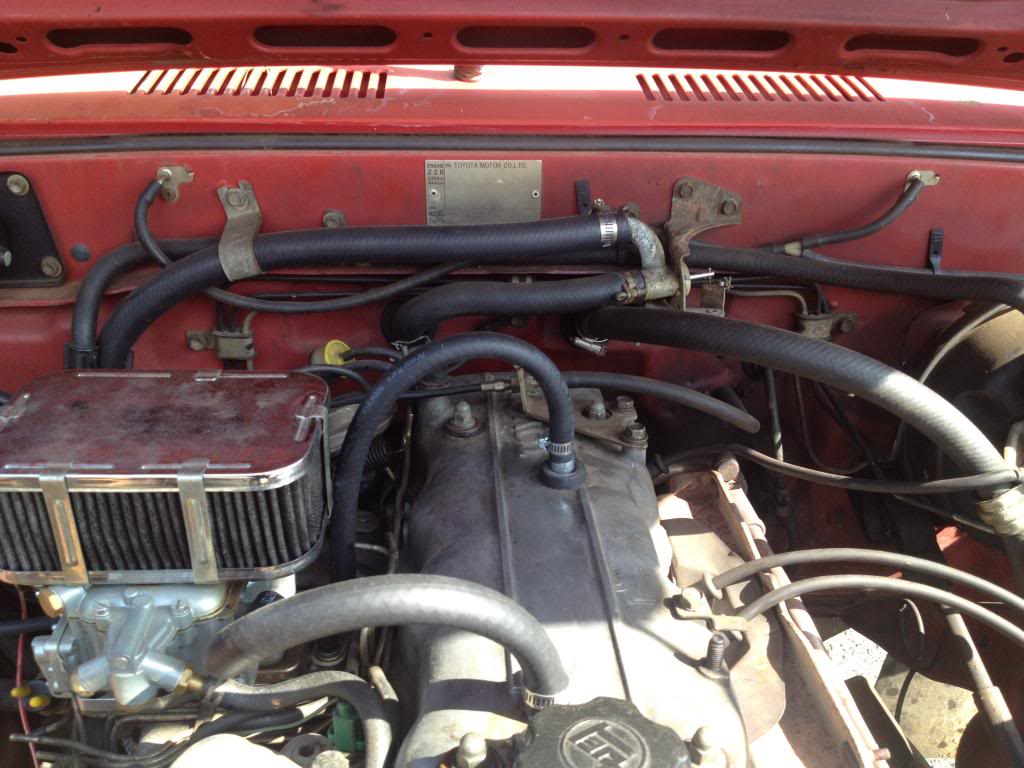
Engine Bay
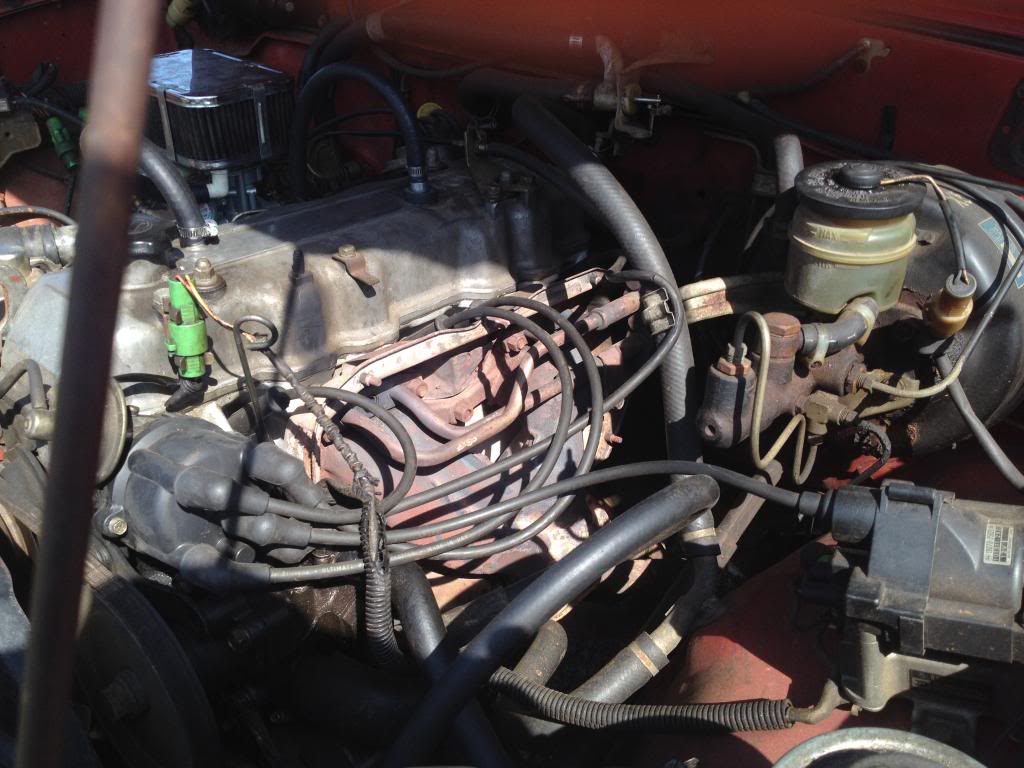
That pesky Exhaust manifold
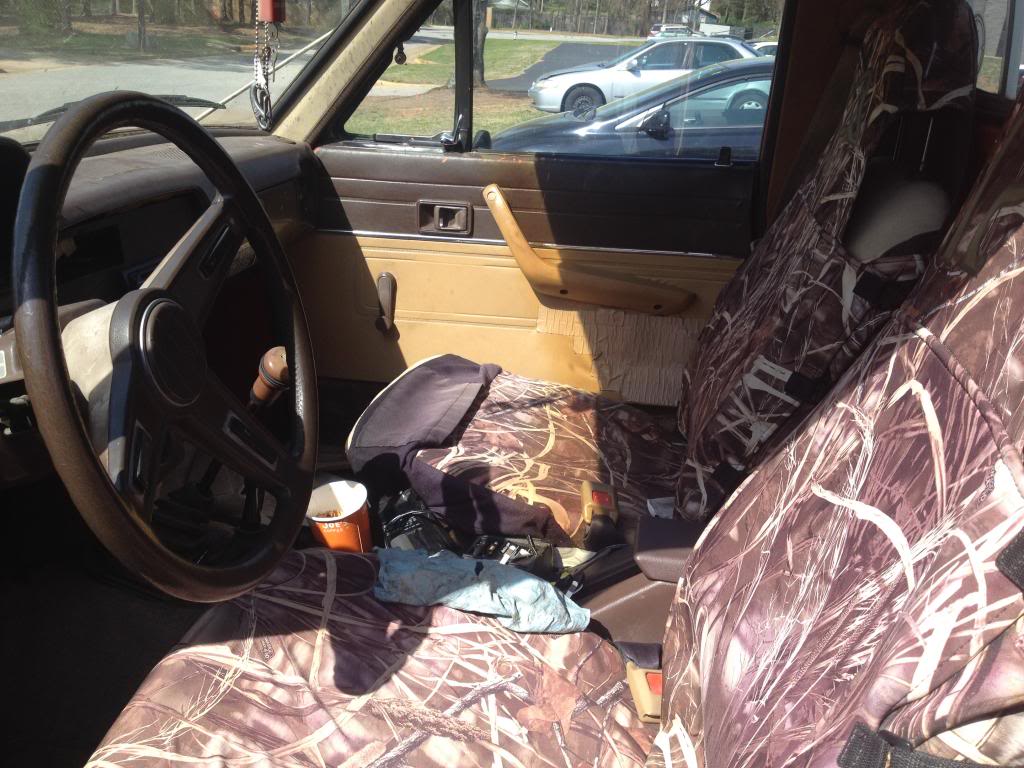
Cab Interior
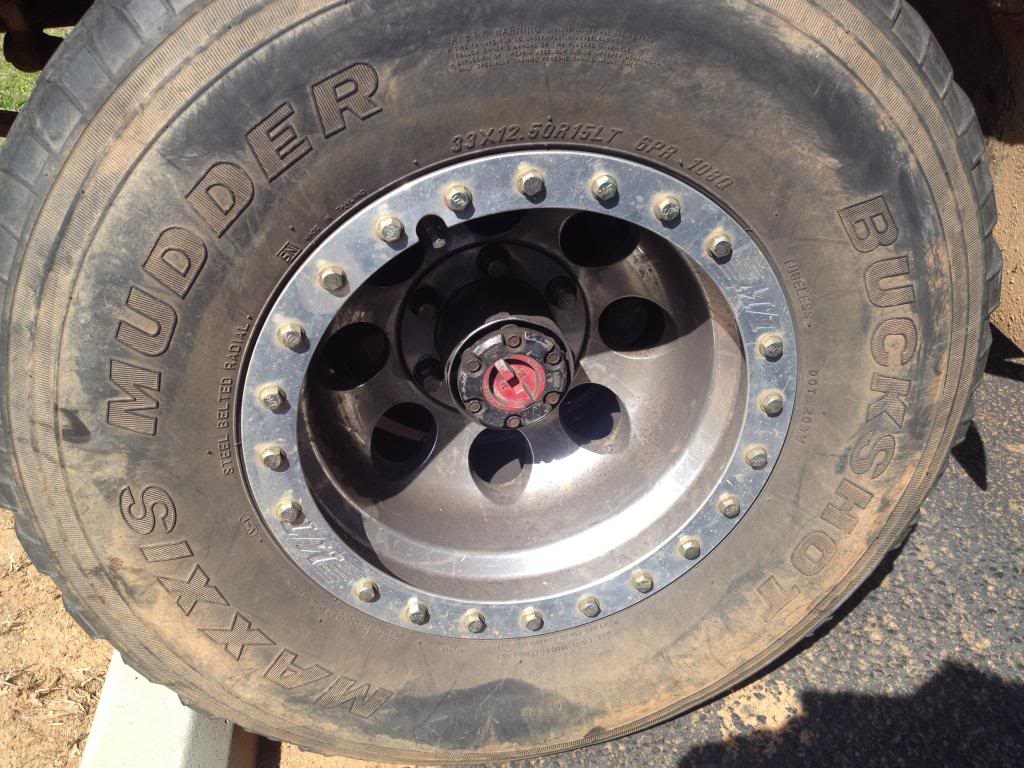
She came with 33x12.50s I'm going to do a 3 inch suspension lift and put 35x12.50s on her with 5.29 diff gears. Probably going to go with the BFG KM2.
Here's the driver's side. Those rock sliders are 1/4" steel tubing WELDED to the frame. No bolt ons.
This is my hobby truck, so i'm going to be building up the 22r motor, eventually going to make it a stroker. This means you will probably see me doing things to the 22r and you'll think (Why doesn't this guy just swap in a 3rz and play with that?)
Well there's a few reasons I'm doing it this way.
1. the carb'd 22r is dead simple and easy to work on.
2. it's a Hobby, something to do (instead of swapping a motor and that's it)
3. When the EMPs hit from the Apocalypse, the 22r probably won't care... swap in a magneto and hook up the water choke
4. I don't have a shop area to do a swap in, I'm saving for house so I can have a garage to work in.
5. This motor will dual fuel LPG without batting an eye because it's a carb motor, EFI with propane is much more complicated.
Adventures to date: Current Project is desmogging. Don't worry, I checked local laws, and I'm exempt from emissions because the vehicle is considered antique. I can also run propane legally.
The truck is in great shape, the first owner kept it in a barn and sold it to the guy I bought it from with 140k miles. He started driving it, and all the dryrotted seals gave up, so he had the motor rebuilt by Jasper. Unfortunately, the shop he used to pull/reinstall the motor cut all kinds of corners, which I've been fixing. (PO has a second newer truck so he didn't really work on this one).
The first thing I had to fix was the PCV system. The PCV valve had been hooked up to the breather port on the weber 32/36, and the breather port at the front of the motor was left wide open. (smelly, I actually got a headache when driving from the fumes.) Then they capped the PCV port on the manifold. A trip to Autozone for some new hose, hose clamps, and PCV valve was made.
The mix on the carb was set very lean, and the idle was set high to compensate so it would diesel when shut off. Fixed both of those, though I still need to rejet the carb so I can get the idle mix screw back down to 2 turns.
Yesterday I went to pull the exhaust manifold, once I got the heat shield off, Surprise! there were 3 bolts missing from the manifold (I'm finding a new engine shop if I have to pull the motor), plus the air injection is leaking, so I'm getting lean sputters periodically.
All that said, the motor has about 15k on the rebuild, and was purring nicely before I messed with the exhaust manifold... such is the way of the home mechanic
Looking forward to many hours bonding with my Truck. Thanks for making this site such a great resource! The PO thinks that I'm some sort of mechanical genus now because I've had this site to reference.
Long term goals.
1st - Get the motor running right
This will include:
-Desmog
- Find vacuum leaks around carb mount
- Clean carb and adjust per the many great threads around here
-Cutting out catalytic converter for now because it's plugged. Will be adding a high flow cat down the line when I have the money cause I don't like stinky rich engine exhaust.
- LCE Billet adapter so i can install a standard K&N air filter
- New plugs/wires, There's a bad cut in the #3 wire.
- New Distributor cap and button
Longer term engine upgrades
- Eventually I'm probably going to do a Top End job, rebuild the head, mill it flat, larger valves, add torque cam
- LCE headers
- possibly new ignition coil for platinum/iridium spark plugs, considering raising compression, need to read up on the pros/cons
- Stroker upgrade - probably do a larger flywheel at this time, new clutch, Bigger Carb.
- Dual Fuel Kit from GotPropane.com
2nd - Diff gears (5.29s)and lockers, Maybe electric locking hubs
3rd - 3" suspension lift (Currently has 2 inch body lift)
4th - New Tires 35x12.50s probably BFG KM2's
5th - Paint and bodywork
I'll add more later
She's in fine condition for her years, very little rust!
Here's the Bed
And the Tailgate
Engine Bay
That pesky Exhaust manifold
Cab Interior
She came with 33x12.50s I'm going to do a 3 inch suspension lift and put 35x12.50s on her with 5.29 diff gears. Probably going to go with the BFG KM2.
Here's the driver's side. Those rock sliders are 1/4" steel tubing WELDED to the frame. No bolt ons.
This is my hobby truck, so i'm going to be building up the 22r motor, eventually going to make it a stroker. This means you will probably see me doing things to the 22r and you'll think (Why doesn't this guy just swap in a 3rz and play with that?)
Well there's a few reasons I'm doing it this way.
1. the carb'd 22r is dead simple and easy to work on.
2. it's a Hobby, something to do (instead of swapping a motor and that's it)
3. When the EMPs hit from the Apocalypse, the 22r probably won't care... swap in a magneto and hook up the water choke
4. I don't have a shop area to do a swap in, I'm saving for house so I can have a garage to work in.
5. This motor will dual fuel LPG without batting an eye because it's a carb motor, EFI with propane is much more complicated.
Adventures to date: Current Project is desmogging. Don't worry, I checked local laws, and I'm exempt from emissions because the vehicle is considered antique. I can also run propane legally.
The truck is in great shape, the first owner kept it in a barn and sold it to the guy I bought it from with 140k miles. He started driving it, and all the dryrotted seals gave up, so he had the motor rebuilt by Jasper. Unfortunately, the shop he used to pull/reinstall the motor cut all kinds of corners, which I've been fixing. (PO has a second newer truck so he didn't really work on this one).
The first thing I had to fix was the PCV system. The PCV valve had been hooked up to the breather port on the weber 32/36, and the breather port at the front of the motor was left wide open. (smelly, I actually got a headache when driving from the fumes.) Then they capped the PCV port on the manifold. A trip to Autozone for some new hose, hose clamps, and PCV valve was made.
The mix on the carb was set very lean, and the idle was set high to compensate so it would diesel when shut off. Fixed both of those, though I still need to rejet the carb so I can get the idle mix screw back down to 2 turns.
Yesterday I went to pull the exhaust manifold, once I got the heat shield off, Surprise! there were 3 bolts missing from the manifold
(I'm finding a new engine shop if I have to pull the motor), plus the air injection is leaking, so I'm getting lean sputters periodically.All that said, the motor has about 15k on the rebuild, and was purring nicely before I messed with the exhaust manifold... such is the way of the home mechanic
Looking forward to many hours bonding with my Truck. Thanks for making this site such a great resource! The PO thinks that I'm some sort of mechanical genus now because I've had this site to reference.
Long term goals.
1st - Get the motor running right
This will include:
-Desmog
- Find vacuum leaks around carb mount
- Clean carb and adjust per the many great threads around here
-Cutting out catalytic converter for now because it's plugged. Will be adding a high flow cat down the line when I have the money cause I don't like stinky rich engine exhaust.
- LCE Billet adapter so i can install a standard K&N air filter
- New plugs/wires, There's a bad cut in the #3 wire.
- New Distributor cap and button
Longer term engine upgrades
- Eventually I'm probably going to do a Top End job, rebuild the head, mill it flat, larger valves, add torque cam
- LCE headers
- possibly new ignition coil for platinum/iridium spark plugs, considering raising compression, need to read up on the pros/cons
- Stroker upgrade - probably do a larger flywheel at this time, new clutch, Bigger Carb.
- Dual Fuel Kit from GotPropane.com
2nd - Diff gears (5.29s)and lockers, Maybe electric locking hubs
3rd - 3" suspension lift (Currently has 2 inch body lift)
4th - New Tires
35x12.50s probably BFG KM2's5th - Paint and bodywork
I'll add more later
Last edited by Wulfdan; Apr 3, 2014 at 06:53 PM. Reason: Added more mechanical info about truck
Apr 3, 2014 | 05:08 PM
#2

Registered User
Joined: Dec 2013
Posts: 20
Likes: 0
From: Orange County, CA
I like to think that I am building a DD that can handle the Apocalypse as well 
Great Truck! Looks like it will be easy to work on like mine... Not abused by PO.
Can't wait to see what comes next.
Great Truck! Looks like it will be easy to work on like mine... Not abused by PO.
Can't wait to see what comes next.
Apr 3, 2014 | 06:45 PM
#3
Thread Starter
Registered User
Joined: Apr 2014
Posts: 46
Likes: 0
From: Athens GA
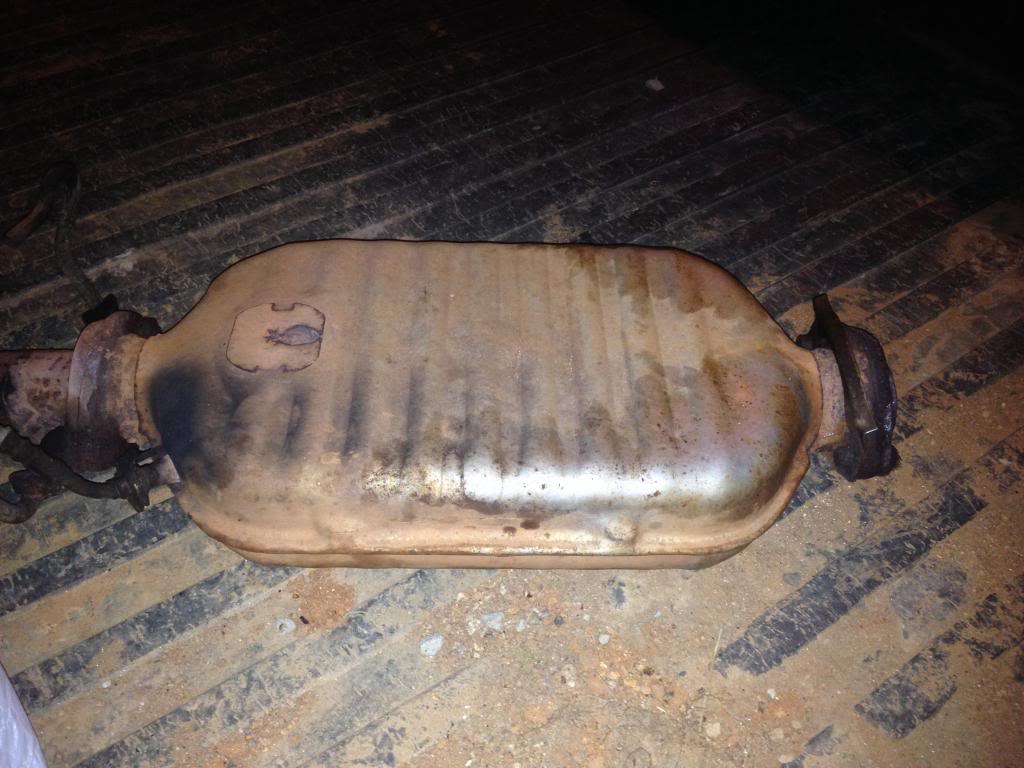
Cut the cat off tonight, man am I sore. Never doing that without a sawzall again.
no honeycomb in this one, there is no direct route through the cat for exhaust. It's about 15 lbs too.
I cut the manifold just before the flange because the bolts were rusted in, and I didn't have the angles to drill them out. Heading to parts store tomorrow for some flexi exhaust hose and a couple exhaust clamps so I can get rid of the drone. Putting my hand down behind the manifold with the engine idling I can feel stronger exhaust pulses, so I have good hopes. I just need to get some block plates for the egr and reed valve so I can replace the exhaust manifold gasket.
Time for beer
 Apr 4, 2014 | 06:12 AM
#5
Thread Starter
Registered User
Joined: Apr 2014
Posts: 46
Likes: 0
From: Athens GA
Thanks! I got really lucky. I've been looking at how some of the other 1st gen builds started out, and wow oh wow the rust. This truck has almost no rust considering that it's an 82. Even the undercarriage only has superficial rust, no rot. Going to take some pics today to add to top post!
+1 for barn-kept trucks
I'm having so much fun with this truck.
+1 for barn-kept trucks
I'm having so much fun with this truck.
Apr 5, 2014 | 06:03 AM
#7
Thread Starter
Registered User
Joined: Apr 2014
Posts: 46
Likes: 0
From: Athens GA
Ok, I pulled the exhaust manifold, put in a new gasket, said bye bye to the EGR tubes. The valve is still in place, but the vacuum is not hooked up so I think that defaults to closed? Anyway I'm working on fabbing up block off plates, I'm also considering a product called metal inferno, good up to 2000 degrees, to plug the holes. Does anyone have experience with this product?
Trending Topics
Apr 5, 2014 | 06:08 AM
#8

The machinist I sent my head to tapped the egr holes and inserted an allen nut, secured with jb weld. I also used jb weld in the exhaust port to block the egr from the inside to have a smooth runner, however I have note used it yet so I can't say how much it holds, for your metal inferno, good metal prep is essential.
Apr 5, 2014 | 06:21 AM
#9
Thread Starter
Registered User
Joined: Apr 2014
Posts: 46
Likes: 0
From: Athens GA
yeah I know the prep is critical. I thought about doing a tap, but I don't have a tap that size. I may take the metal inferno stuff back because there is so much rust and I really don't want to hand sand that all day long.
What size are those holes in the manifold? Do you remember? I may go down to home depot or lowes and get a tap and plugs, because I think that will make a more reliable seal.
What size are those holes in the manifold? Do you remember? I may go down to home depot or lowes and get a tap and plugs, because I think that will make a more reliable seal.
Apr 5, 2014 | 07:22 AM
#10
Thread Starter
Registered User
Joined: Apr 2014
Posts: 46
Likes: 0
From: Athens GA
ok, for those of you that need to plug those egr holes in the factory manifold, I measured the diameter with the only thing I had handy, My Metric wrench set
a 17mm open end just touches both edges, now I have to go find the tap.
I've also finished reconnecting the exhaust under the truck. I have the stock manifold, thru 2" ID flexi pipe (the stuff you can bend into whatever shape you need) then into 2" ID regular pipe, thru the 18" glasspack and out the back.
Last edited by Wulfdan; Apr 5, 2014 at 07:32 AM. Reason: added info about exhaust pipes
Apr 5, 2014 | 07:40 AM
#11
Registered User
Joined: May 2013
Posts: 400
Likes: 0
From: San Antonio, Tx.
man, I wish my 82 was that rust free. I dont have THAT much rust, but there are places that need to be completely cut out and replaced (partial floor board on DS, inner cab corner rust, and a fair amount of bed love), but it will come with time.
Apr 5, 2014 | 11:27 AM
#12
Thread Starter
Registered User
Joined: Apr 2014
Posts: 46
Likes: 0
From: Athens GA
Making slow progress with plugging the exhaust holes from the old EGR. I went off and got a 5/8" tap and now I'm charging my drill... always dead when needed
Anyway, I'm going to drill and tap those holes, then use some high temp threadlocker. Will post photo of finished product
Anyway, I'm going to drill and tap those holes, then use some high temp threadlocker. Will post photo of finished product
Apr 5, 2014 | 01:15 PM
#13
Thread Starter
Registered User
Joined: Apr 2014
Posts: 46
Likes: 0
From: Athens GA
Timing set 12 BDTC. My Vacuum Advance works when I test it by sucking on the hose, but when hooked up to manifold I get nada. I think I have some major leaks around the carb. The advance holds good vacuum without leaking down, so I have to conclude that it's not seeing enough vacuum to move.
Apr 5, 2014 | 02:59 PM
#14
Thread Starter
Registered User
Joined: Apr 2014
Posts: 46
Likes: 0
From: Athens GA
Ok guys... don't do what I just did. Drilled too far and made a small hole in the bottom of the valve train and now oil going straight into exhaust. it's fixable, JB weld, but just a heads up.
Apr 6, 2014 | 12:47 PM
#17
Thread Starter
Registered User
Joined: Apr 2014
Posts: 46
Likes: 0
From: Athens GA
I'm going to pull the carb and redo all the gaskets, then I'll check timing and vacuum advance again. If it's working I'll set to 5* at idle.
I have to fix the hole I made in the valvetrain first.

I am in MO most of this week for work, so no new pics for a little while.
Last edited by Wulfdan; Apr 6, 2014 at 12:48 PM.
Apr 13, 2014 | 03:45 AM
#18
Thread Starter
Registered User
Joined: Apr 2014
Posts: 46
Likes: 0
From: Athens GA
The DeSmogging is done. Truck is running great. Next item is fixing large vacuum leak at base of carb.
I've fixed the hole I made in the bottom of the valvetrain, and plugged all the EGR exhaust ports, remounted the exhaust manifold. Cut out the cat and hooked all the piping back up.
Truck can actually use 5th gear now
I've fixed the hole I made in the bottom of the valvetrain, and plugged all the EGR exhaust ports, remounted the exhaust manifold. Cut out the cat and hooked all the piping back up.
Truck can actually use 5th gear now
Apr 13, 2014 | 04:15 PM
#19
this will fix your leak
http://www.lceperformance.com/Spiral...-p/1033028.htm
http://www.lceperformance.com/Spiral...-p/1033028.htm
Apr 13, 2014 | 06:13 PM
#20
Registered User
Joined: Feb 2014
Posts: 351
Likes: 0
this will fix your leak http://www.lceperformance.com/Spiral...-p/1033028.htm


