When you click on links to various merchants on this site and make a purchase, this can result in this site earning a commission. Affiliate programs and affiliations include, but are not limited to, the eBay Partner Network.
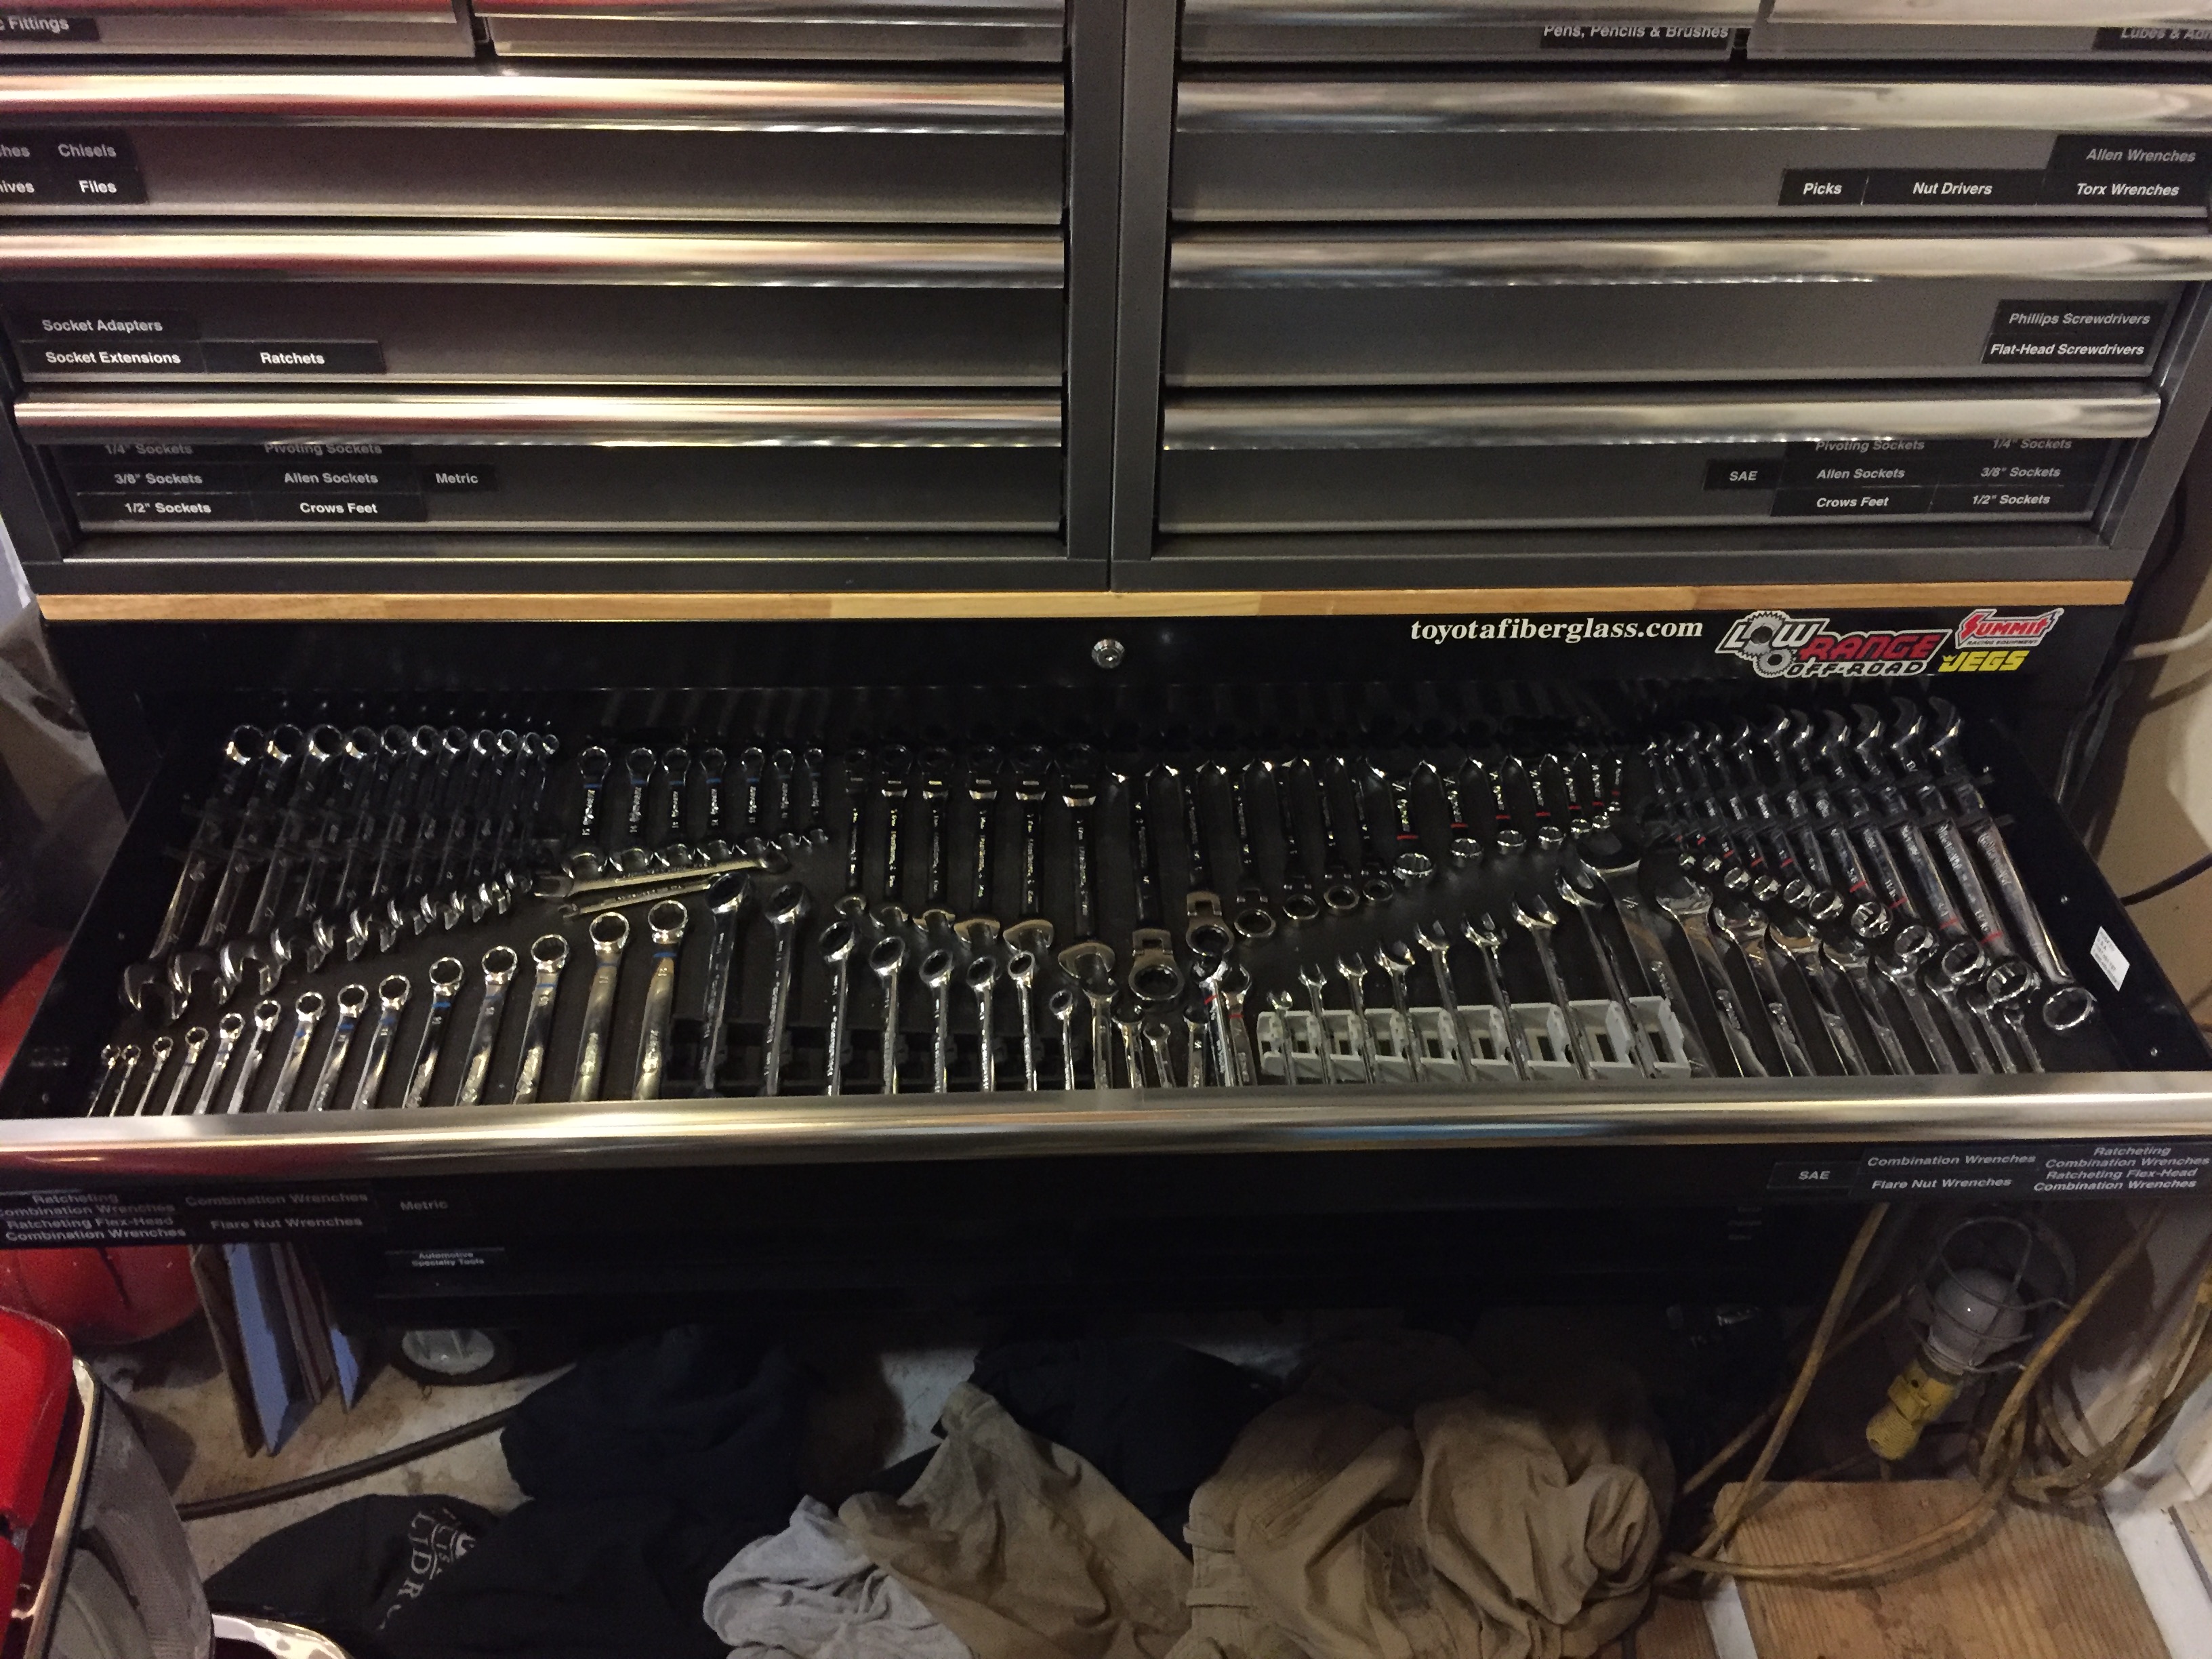
I didn't do anything to my truck today, but I did buy some new tools since working on my truck can be difficult without the right tools. Every since I "misplaced" my set of offset box wrenches, I have needed them more than ever so today I scored a set of metric and SAE offset box wrenches for $23 each and a set of metric and SAE ignition wrenches for $11 each!
The problem now is that I am running out of room in my tool chest so more tool storage may be next... I have a big ass 52" top/bottom tool chest and the damn thing is pretty much stuffed!! Some may say that I have a tool addiction, but I say that there is no greater pain than needing a tool and not having it! Nonetheless, my name is Dave and I have a tool addiction....
For those of you looking for tools out there, www.Craftsman.com has a ridiculous amount of tools on sale right now. They are way cheaper than in store sale prices too, but you can still pay online and pick-up in store. I'm the kind of guy that likes nice, quality tools and parts, but I will never pay full price so I love some good sales! I also scored killer deals on new ratchets, a torque wrench, torx sockets and breaker bars for my Pops for Christmas - more or less all for me since I often work on my truck in his shop and some of his tools are getting old and worn out...
First off Awesome thread. I've read this for the last three nights (at work) from start to finish. I just traded an 87 chevy on 37" Toyo's with a sb 350, original fuel inj., all power and A/C truck for a stock/original 83 toy SR5 w/ 160k miles and mint interior A/C truck with free cancer throughout. Which was an addition to the 85 toy 4x4 I've built from parts trucks the last 10 years.
I'm wondering if you ever found an attachment to treat the inside of the frame? If so what it was and what did you use to treat it? If i missed it i apologize but there was a lot of great info to absorb.
Also, want to add a vote for an electric fuel pump. I lost my first motor in my 85 to a mech fuel pump that failed and leaked gas slowly in to the block over ??? time washing out the main bearings and I've been anti mech ever since.
Beautiful truck. Thanks for all the extra time and effort it took you to log and post. I know I have learned a lot from your work...
Thanks Florida! I haven't actually treated the inside of my frame yet - been procrastinating a little on that. I'll probably do it in the coming spring. I already have Eastwood's internal frame coating and a gun to do it. Eastwood sells the gun which is basically a shutz gun with a long rigid nylon tube with a 360* brass spray tip on the end - Just slide the tube up and down the inside of the frame until you get the desired coating. A co-worker here just used the same coating and gun to do the inside of the frame on the Scout that he is restoring and said that it turned out great! I trust his opinion and expertise tremendously so if he said it works well then it does.
As for the mechanical fuel pump... Again, procrastination. Going to an electric fuel pump is on the list of things to do. When I did my wiring, I wired in an extra fuse block to the ignition switch so really it is only a matter of yanking the mechanical pump, running some wire to the fuse block, a little hose re-routing and mounting the electric fuel pump. I hate working on things during the winter, plus we have an infant and a 3 year old running around so I don't get many opportunities to work on my truck much any more. Hopefully soon though...
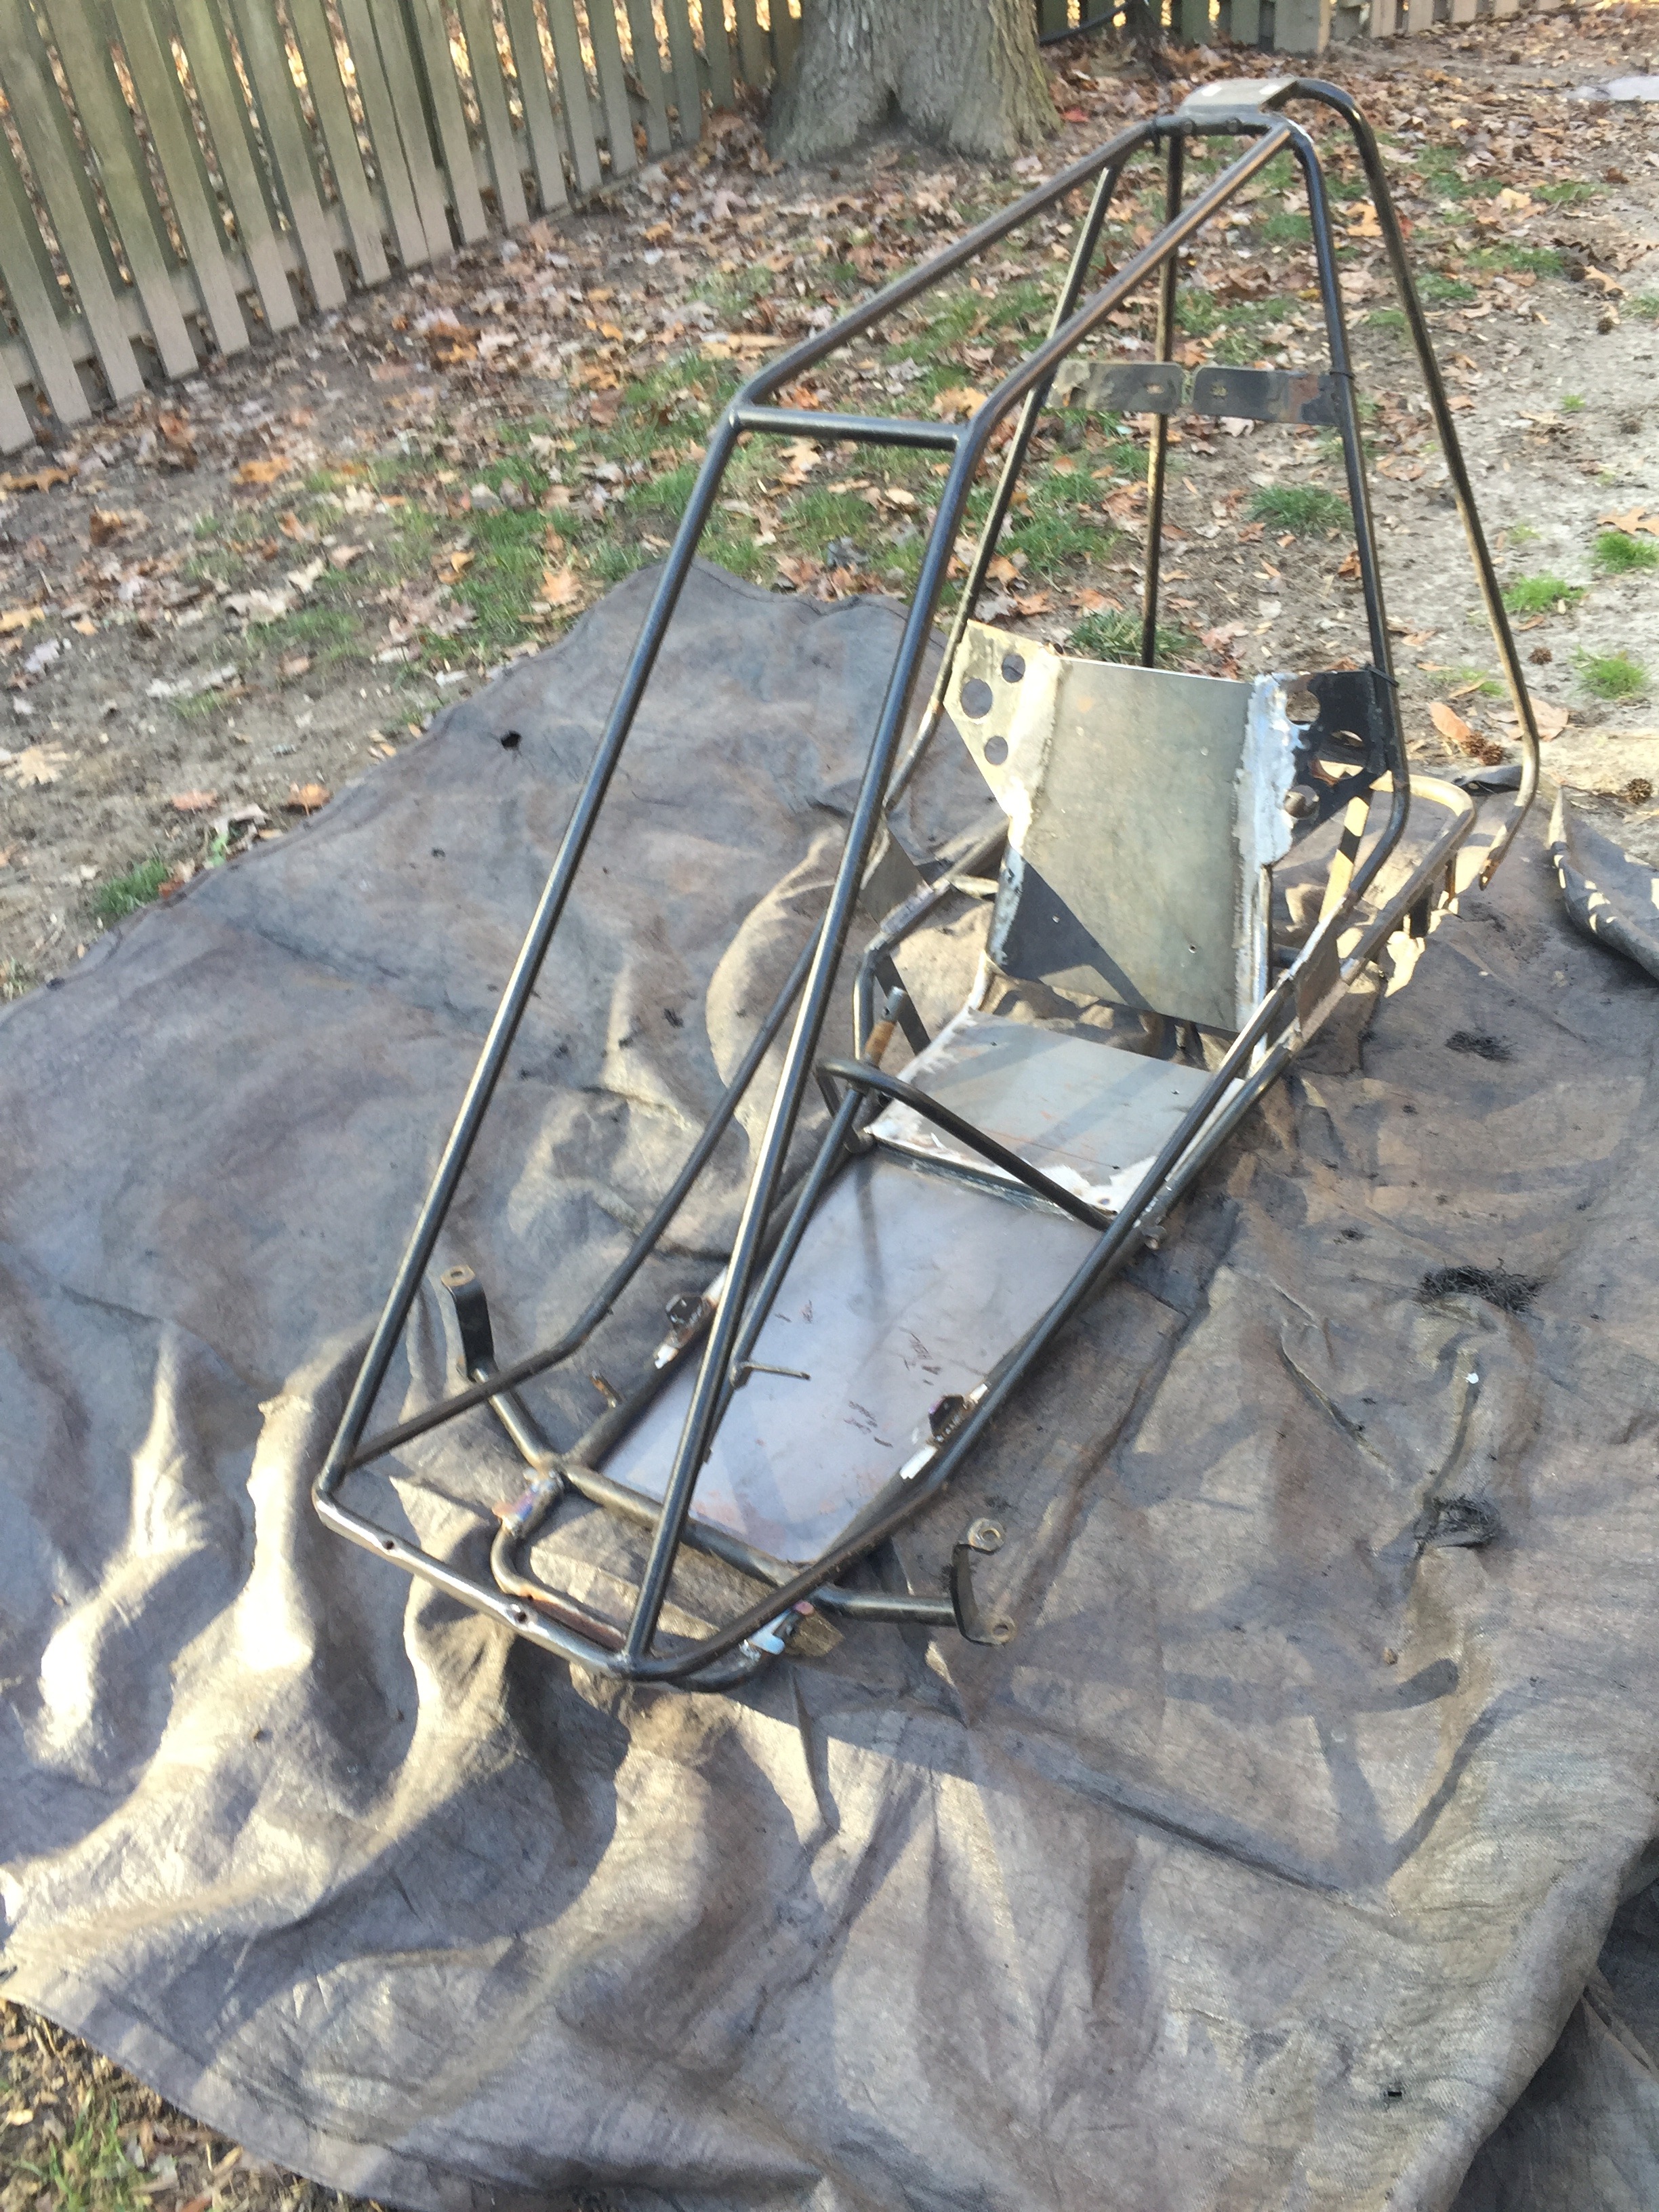
A little update on Camden's go-kart. I got all the metal work complete. Originally, a lot of the frame was bolted together. Well... bolts rust, break and come loose and while my 3 year old know how to drive fairly well, it still needs to be as safe as possible. So all the places where it was bolted together were replaced by welds. All the rotted sheet metal (floorpan, seat pan, seat back) were replaced with stiffer 14ga steel. I also added a few sections of sheet metal on the sides to make it a little more rigid. I welded on new bungs for the pedals to pivot on, fabbed some new spindles for the front wheels (the originals were shot) and fabbed up some new adjustable "short people" pedal linkages as mentioned before. Then it was time for some sand blasting to get all the old flaking powdercoating off:
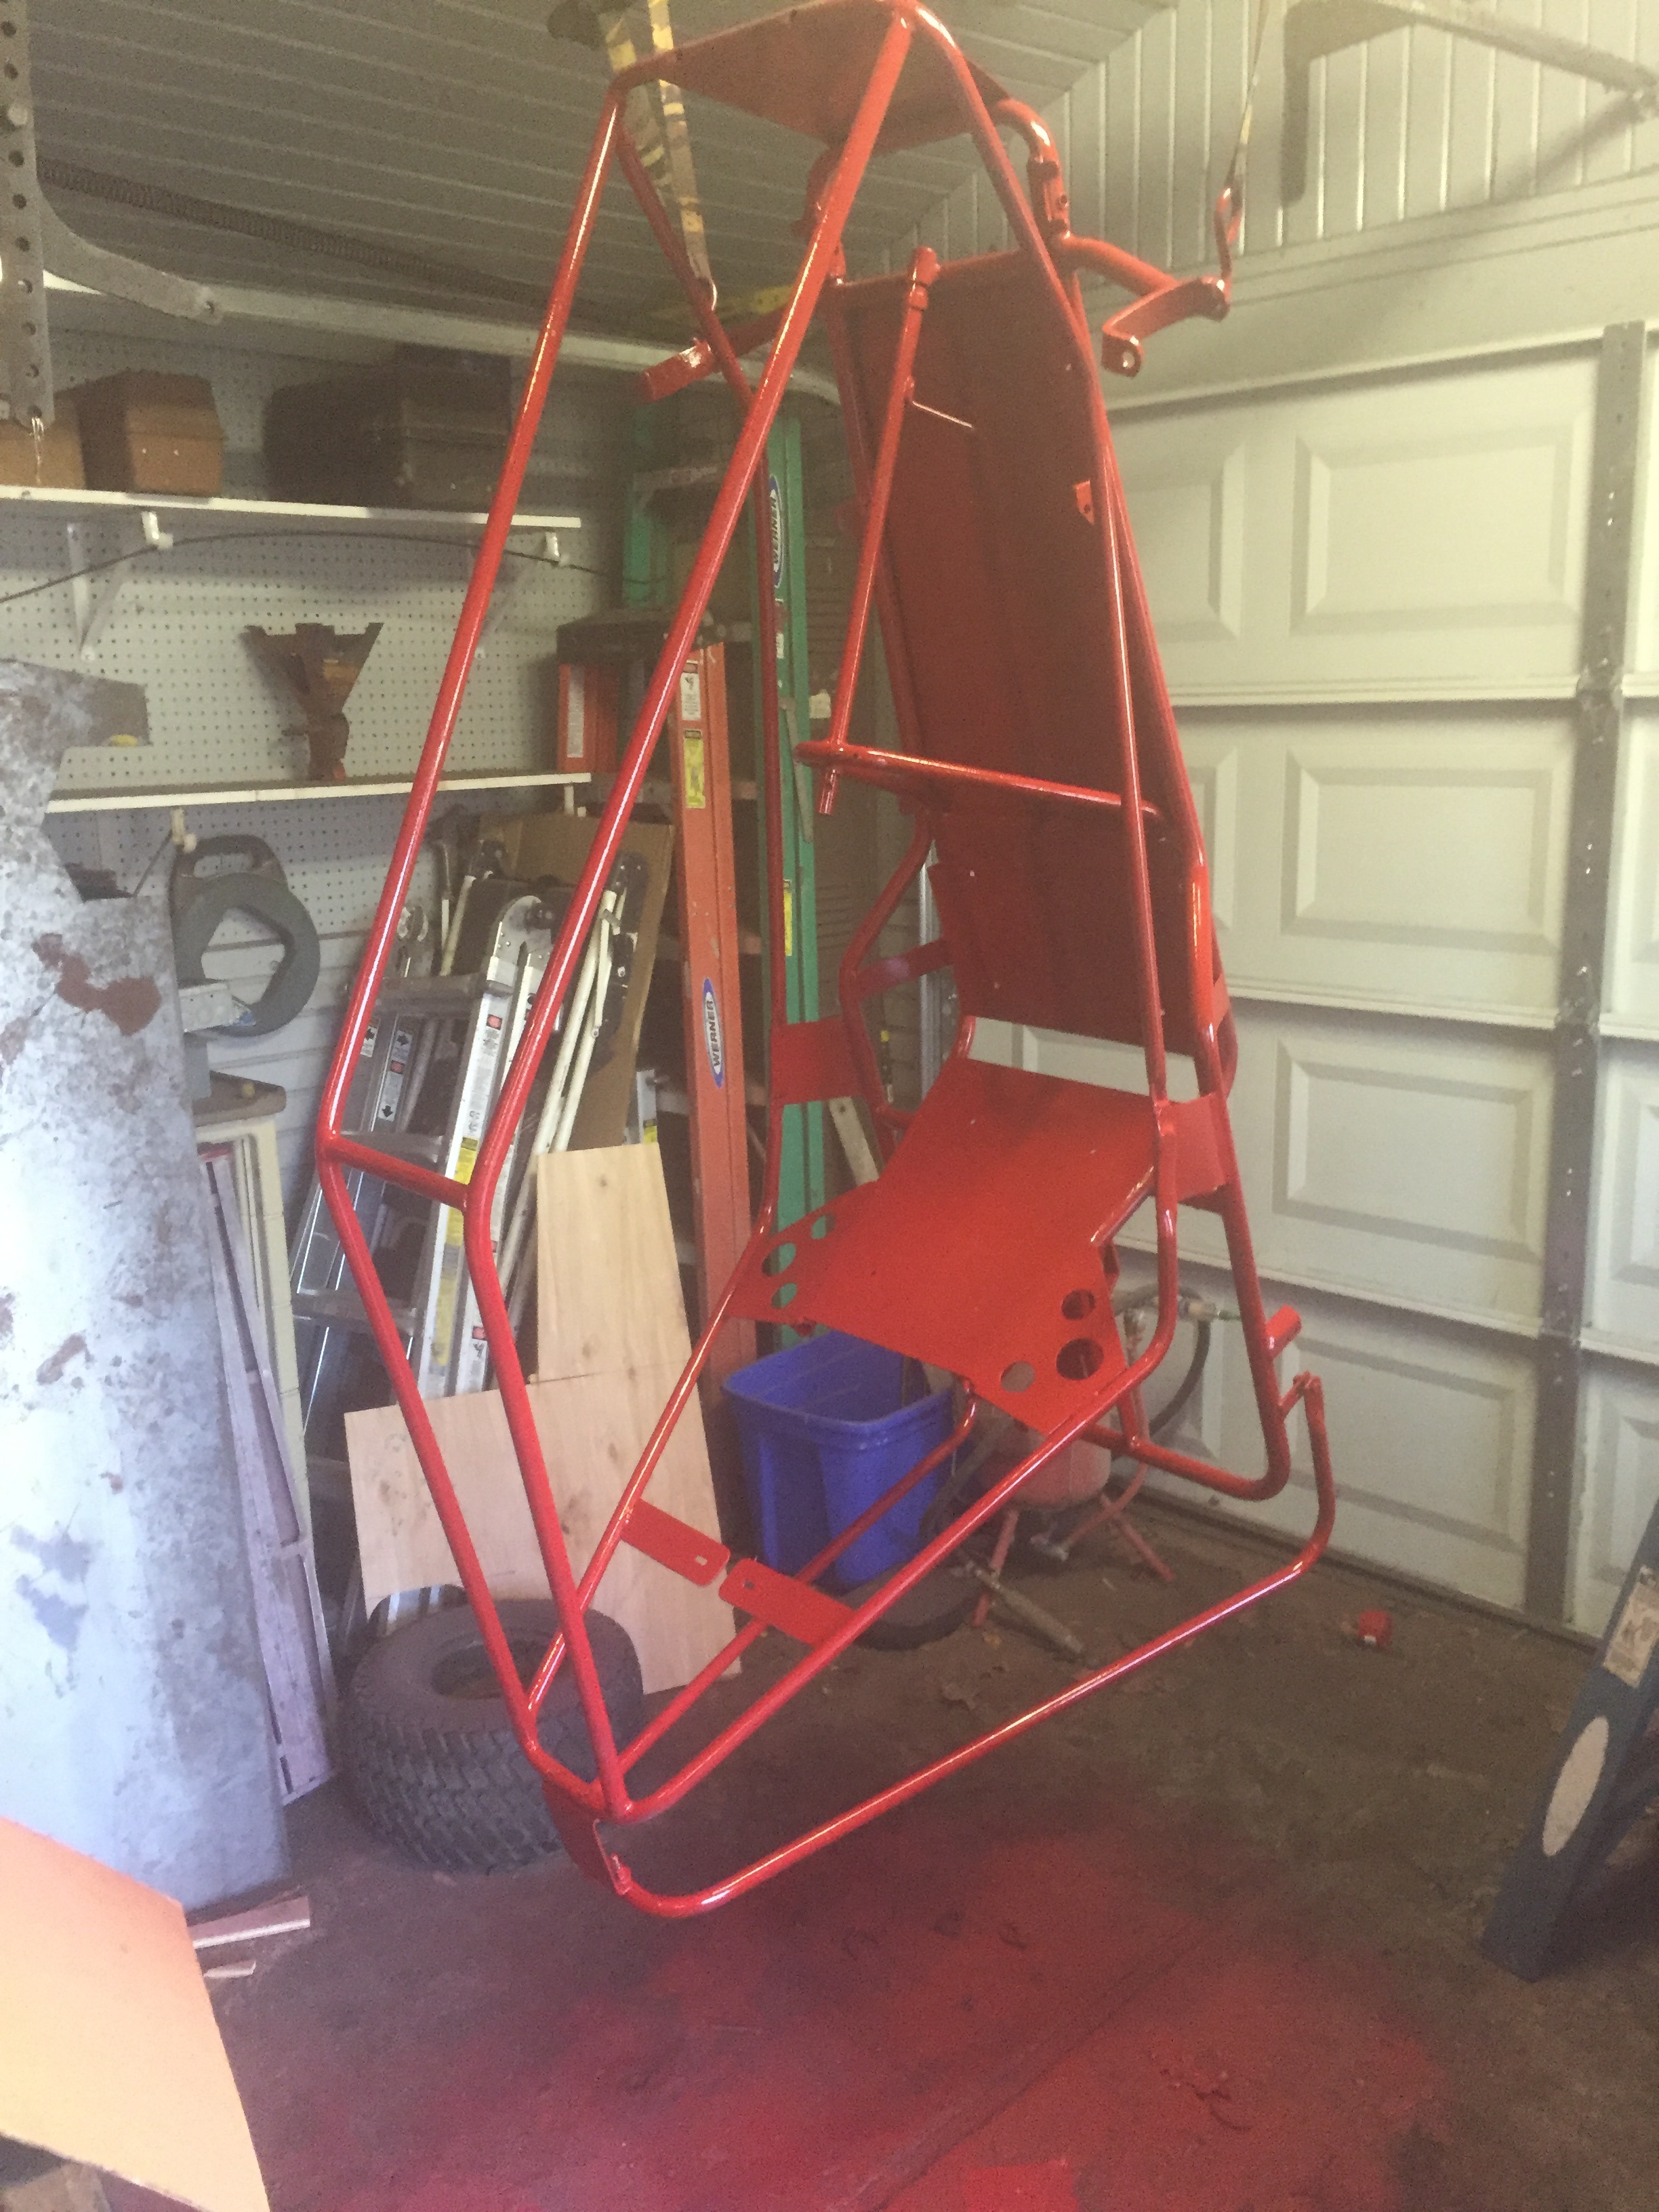
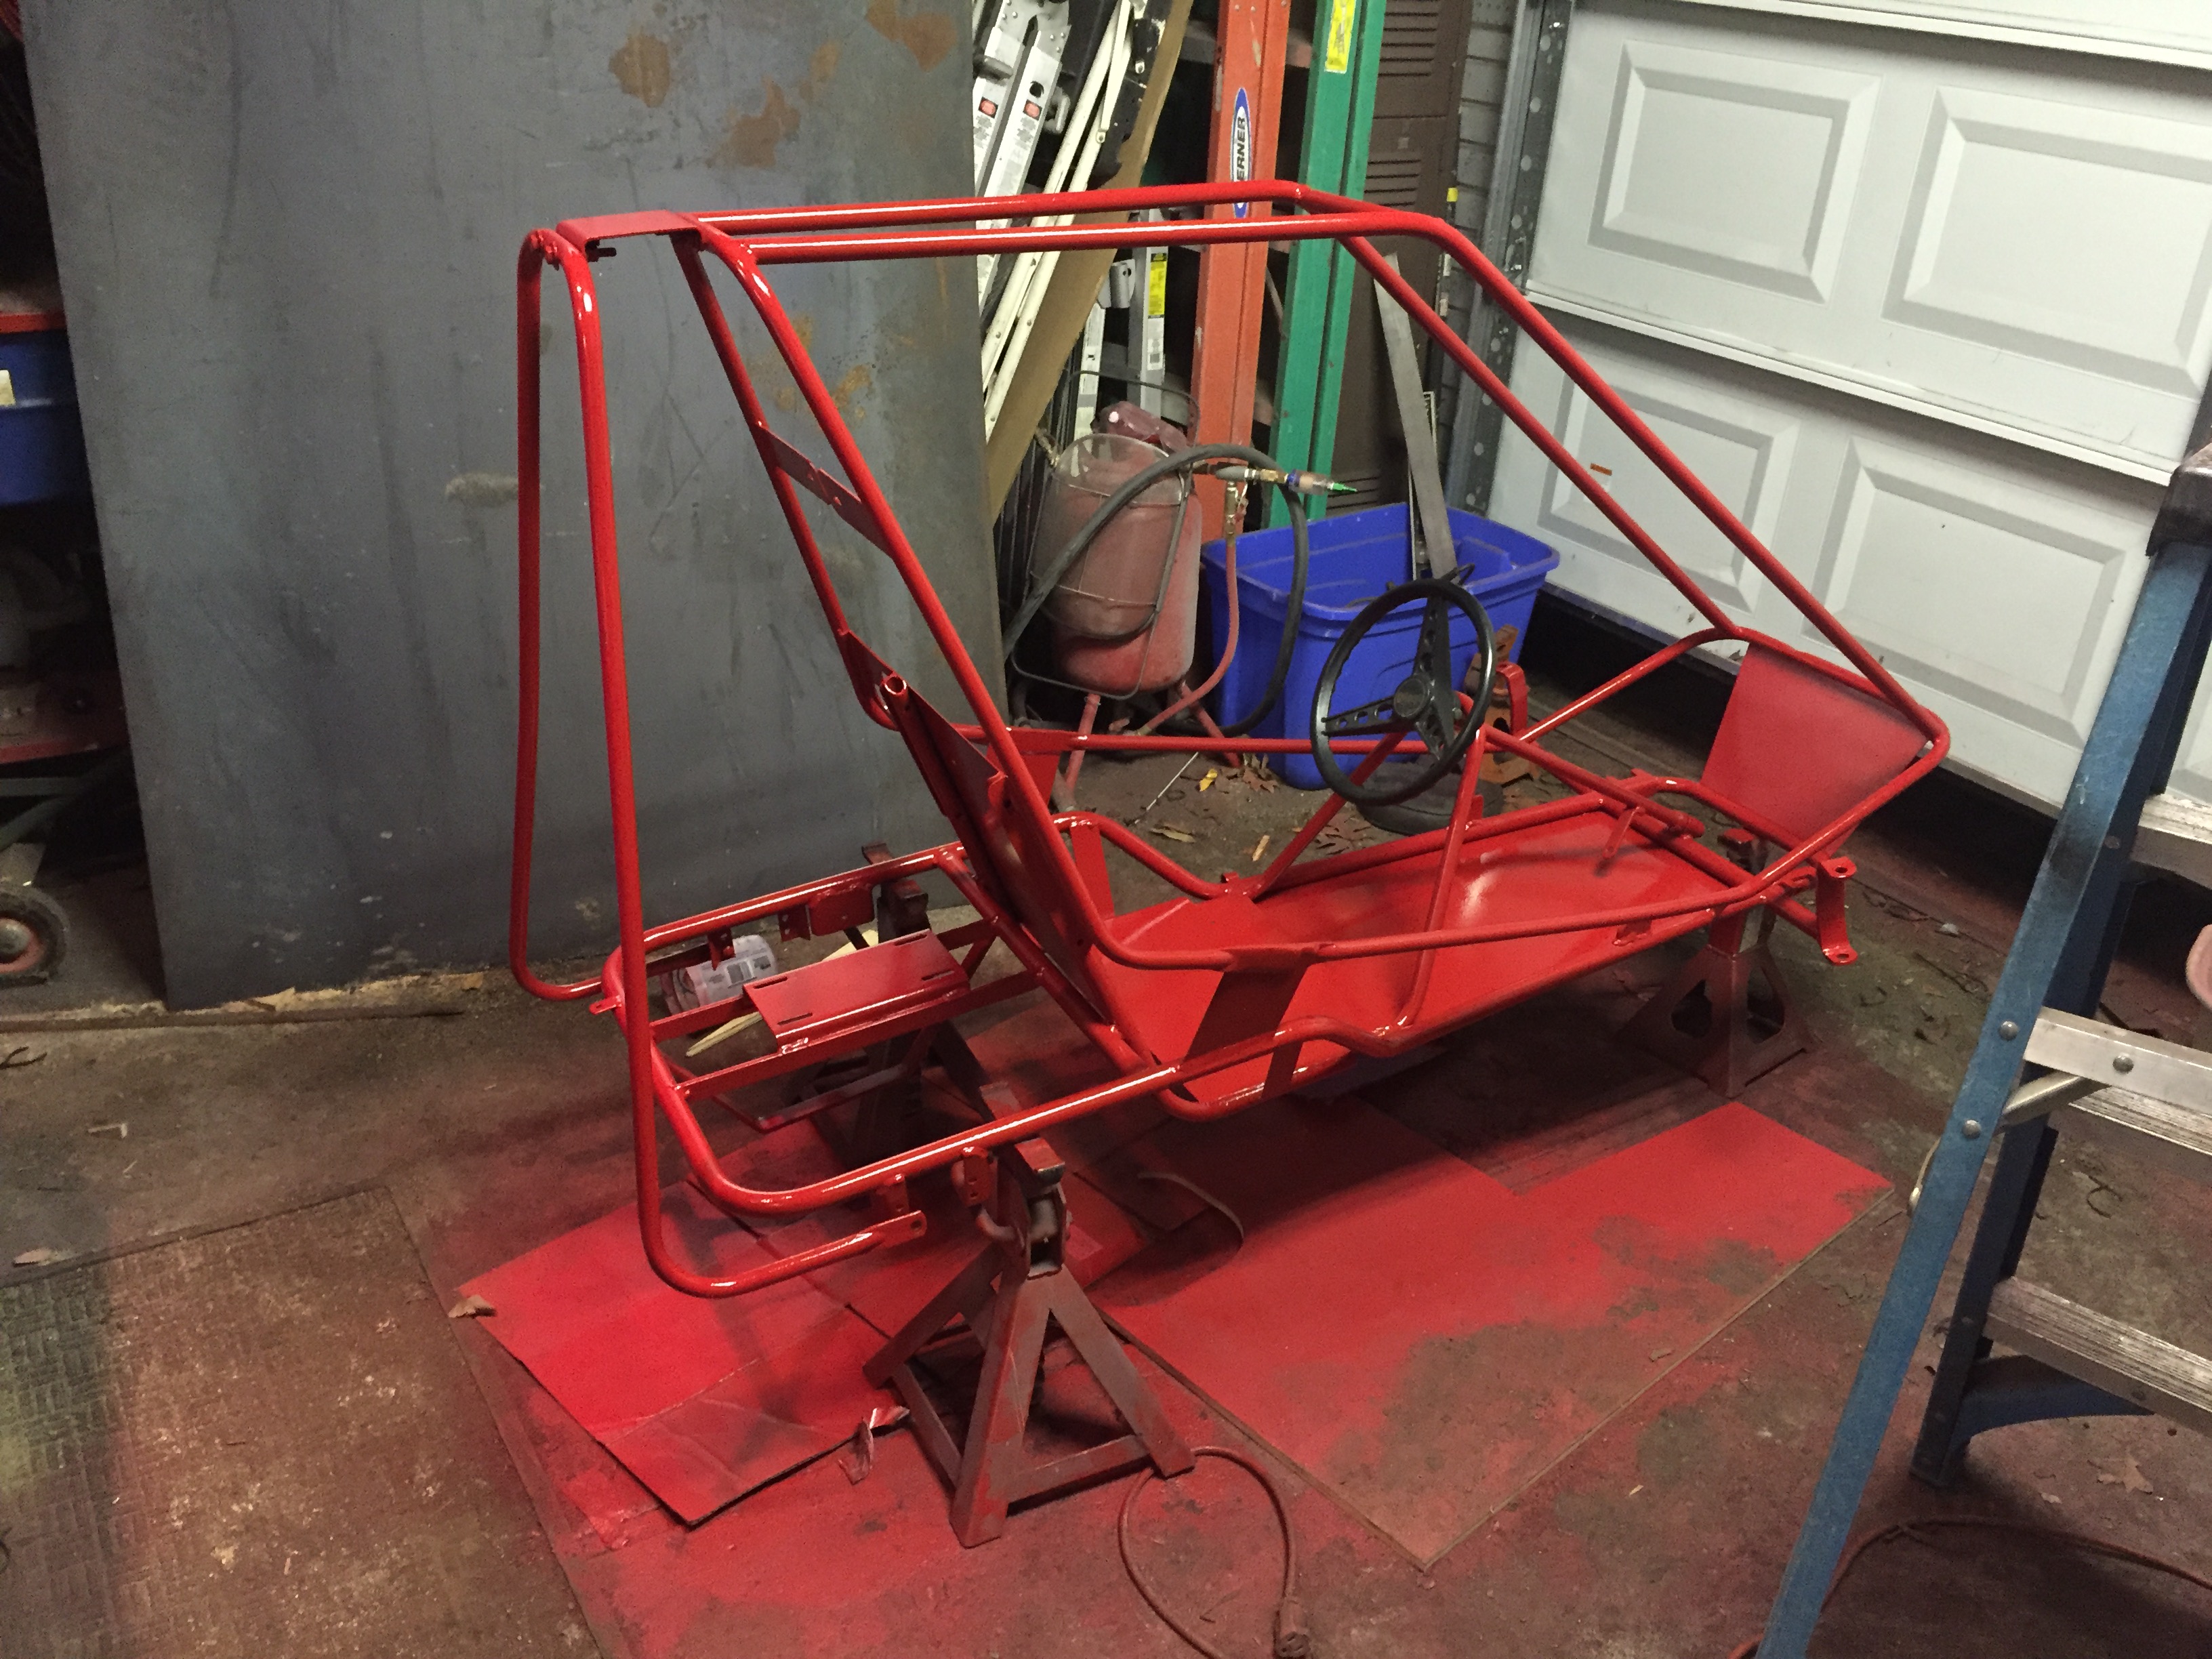
I had some leftover paint from when I painted my truck so it got a nice coat of epoxy primer and some single stage 2K urethane paint. Probably the most over-done paint job ever on a 3 year old's go-kart but he LOVES my truck so he is going to be super stoked when he sees that I painted his go-kart the same color!
The overspray was strong with this one... Painting tubing is NOT efficient at all!
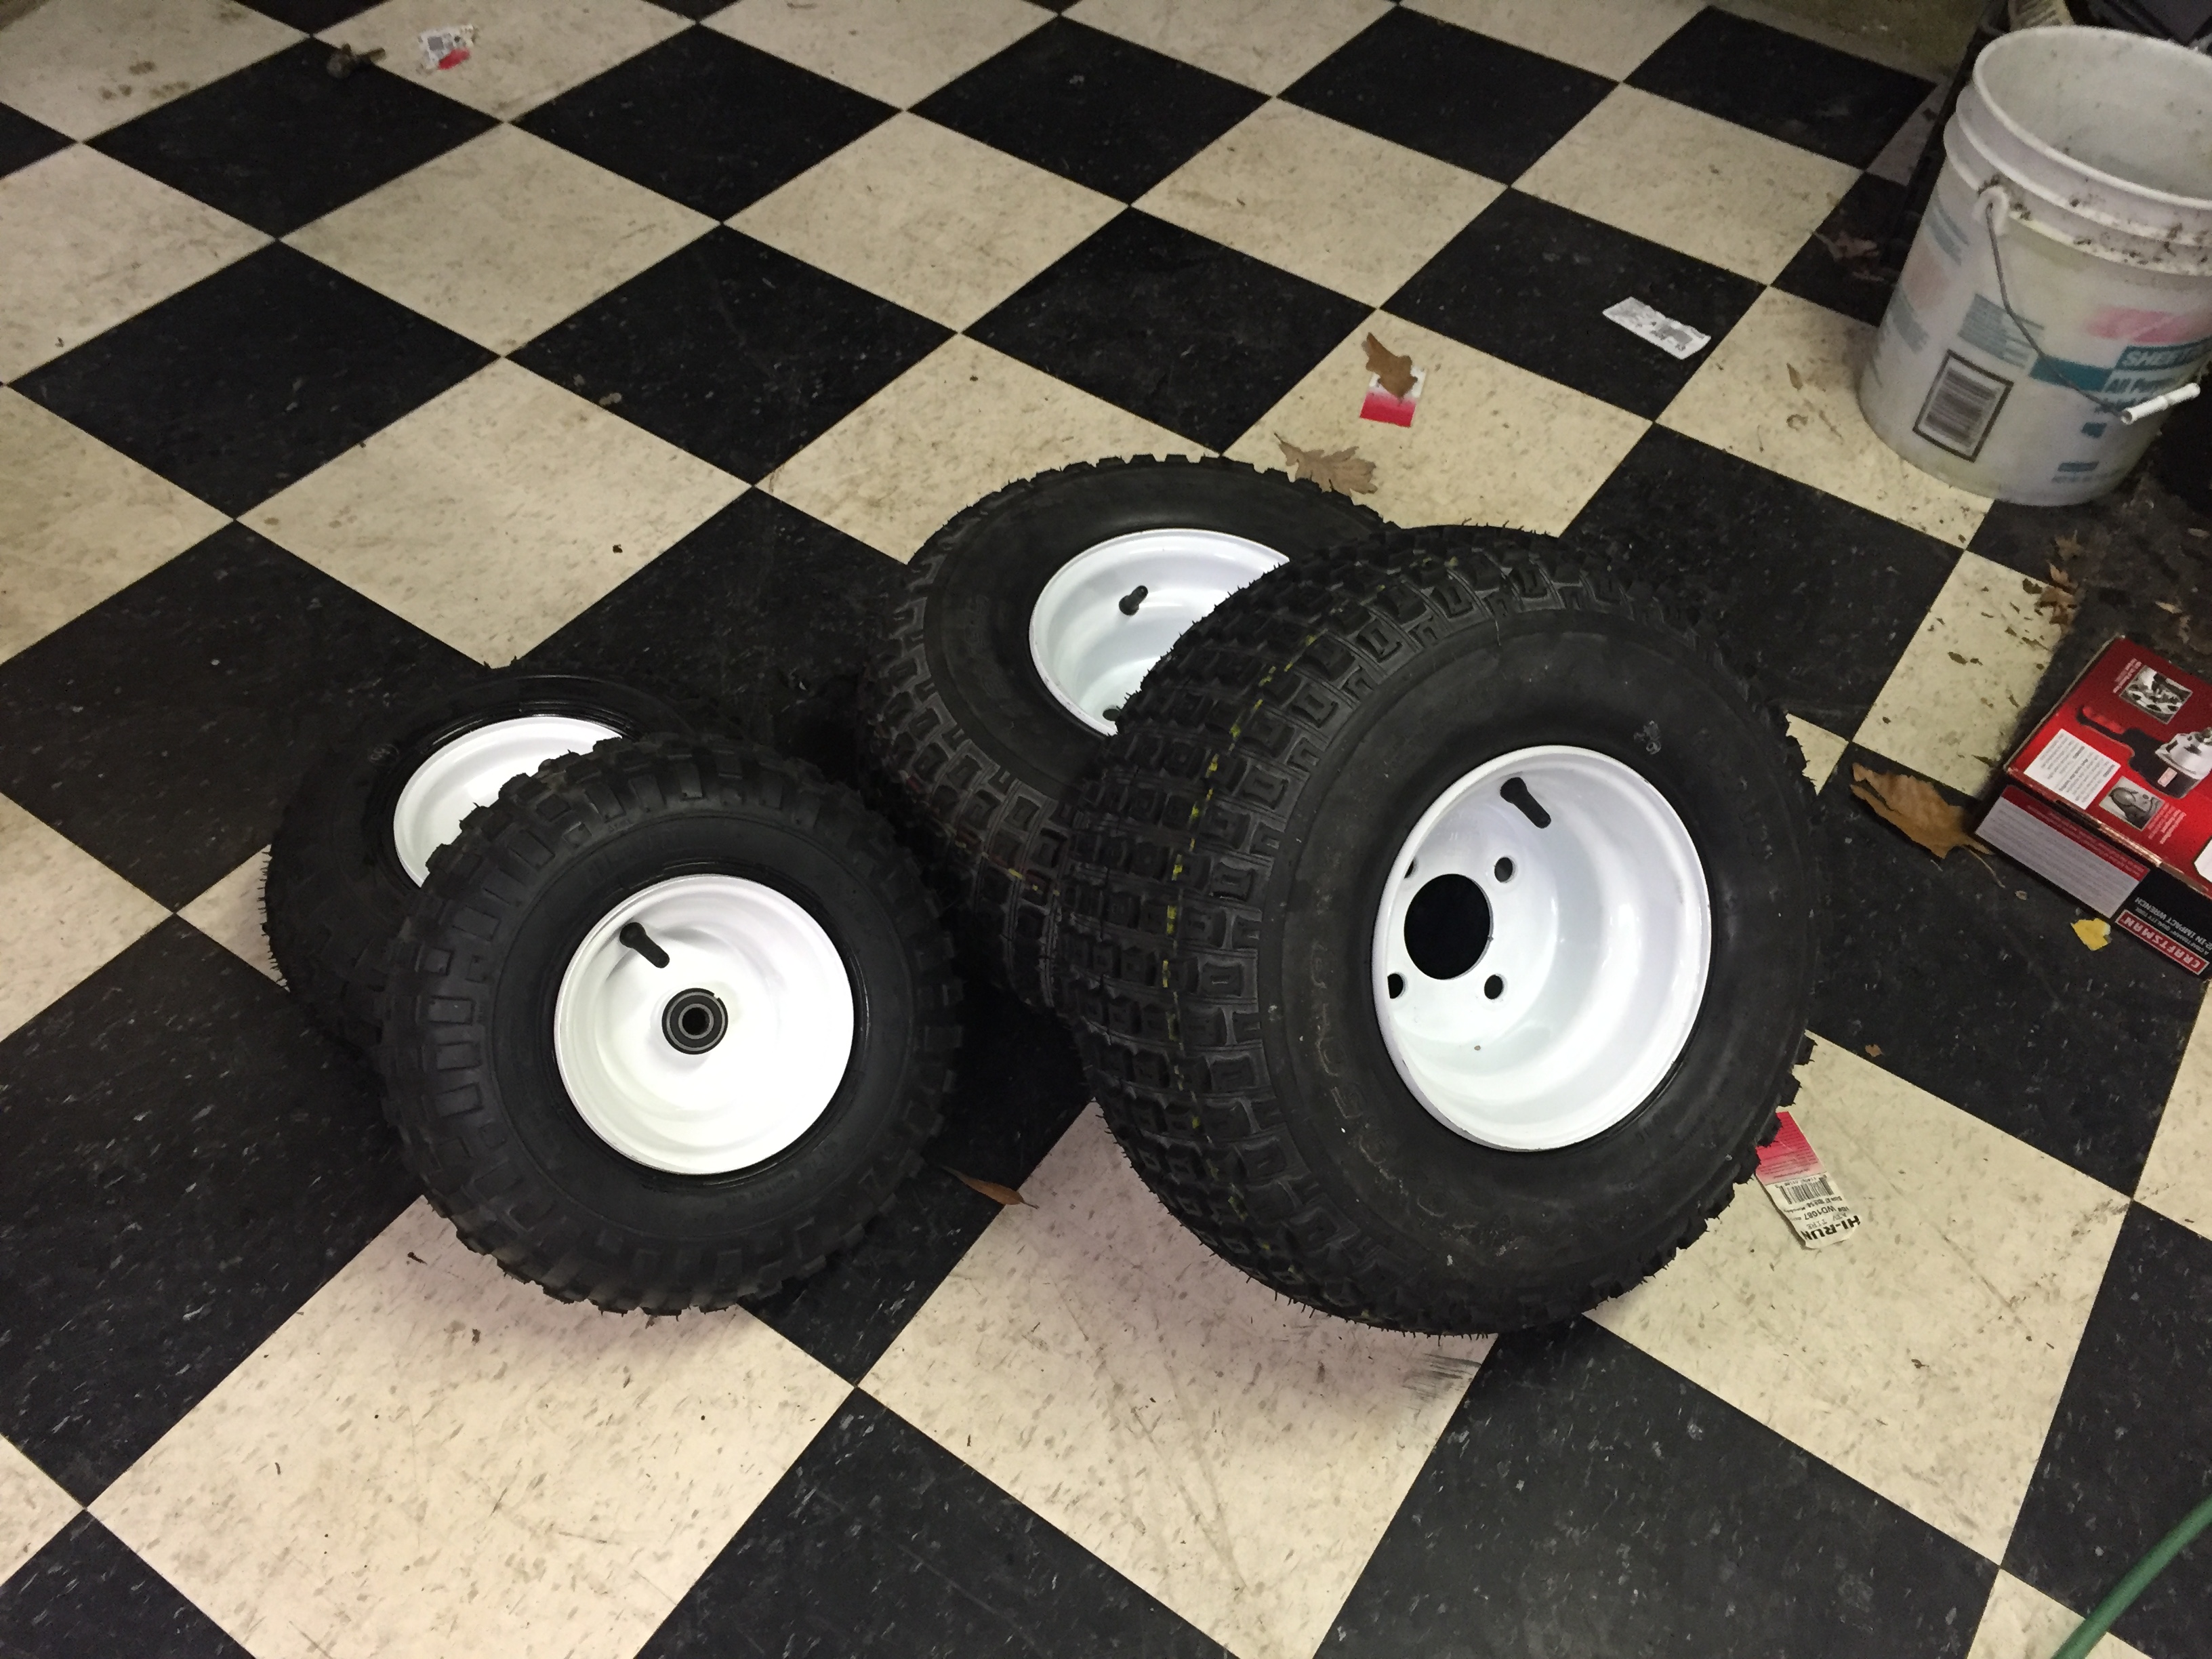
I got new wheels and tires for him too. The old wheels were pretty beat up and the tires were dry rotted. Plus the front wheels spun on bronze bushings (no bearings) so I upgraded him to sealed bearings. If you have never mounted go-kart or lawn mower tires, don't even try! These things were a major PITA to mount! I eventually got them mounted, but next time I'm taking them to a tire center!
I just have a few parts that I need to powedercoat then it's just a matter of getting everything assembled. Hopefully I can get the majority of it done tonight. He hasn't seen it in about a week and I want to give it to him on Christmas so hopefully I have no hiccups. With the amount of time and money I have dropped into this silly project, I probably could have bought two new ones, but what's the fun in that? Plus this one will go a lot faster!!!
Seen the eastwood kit a while back. Let me know how it goes. My truck sees a lot of mud/water.
I have a 5 year old daughter. She's made the request at times "dad can you not work on your truck this weekend". Make ya realize priorities quick. Just easy to get distracted when work needs to be done.
Fortunately/unfortunately winter don't mean much for us here. Few cold days and less bugs.
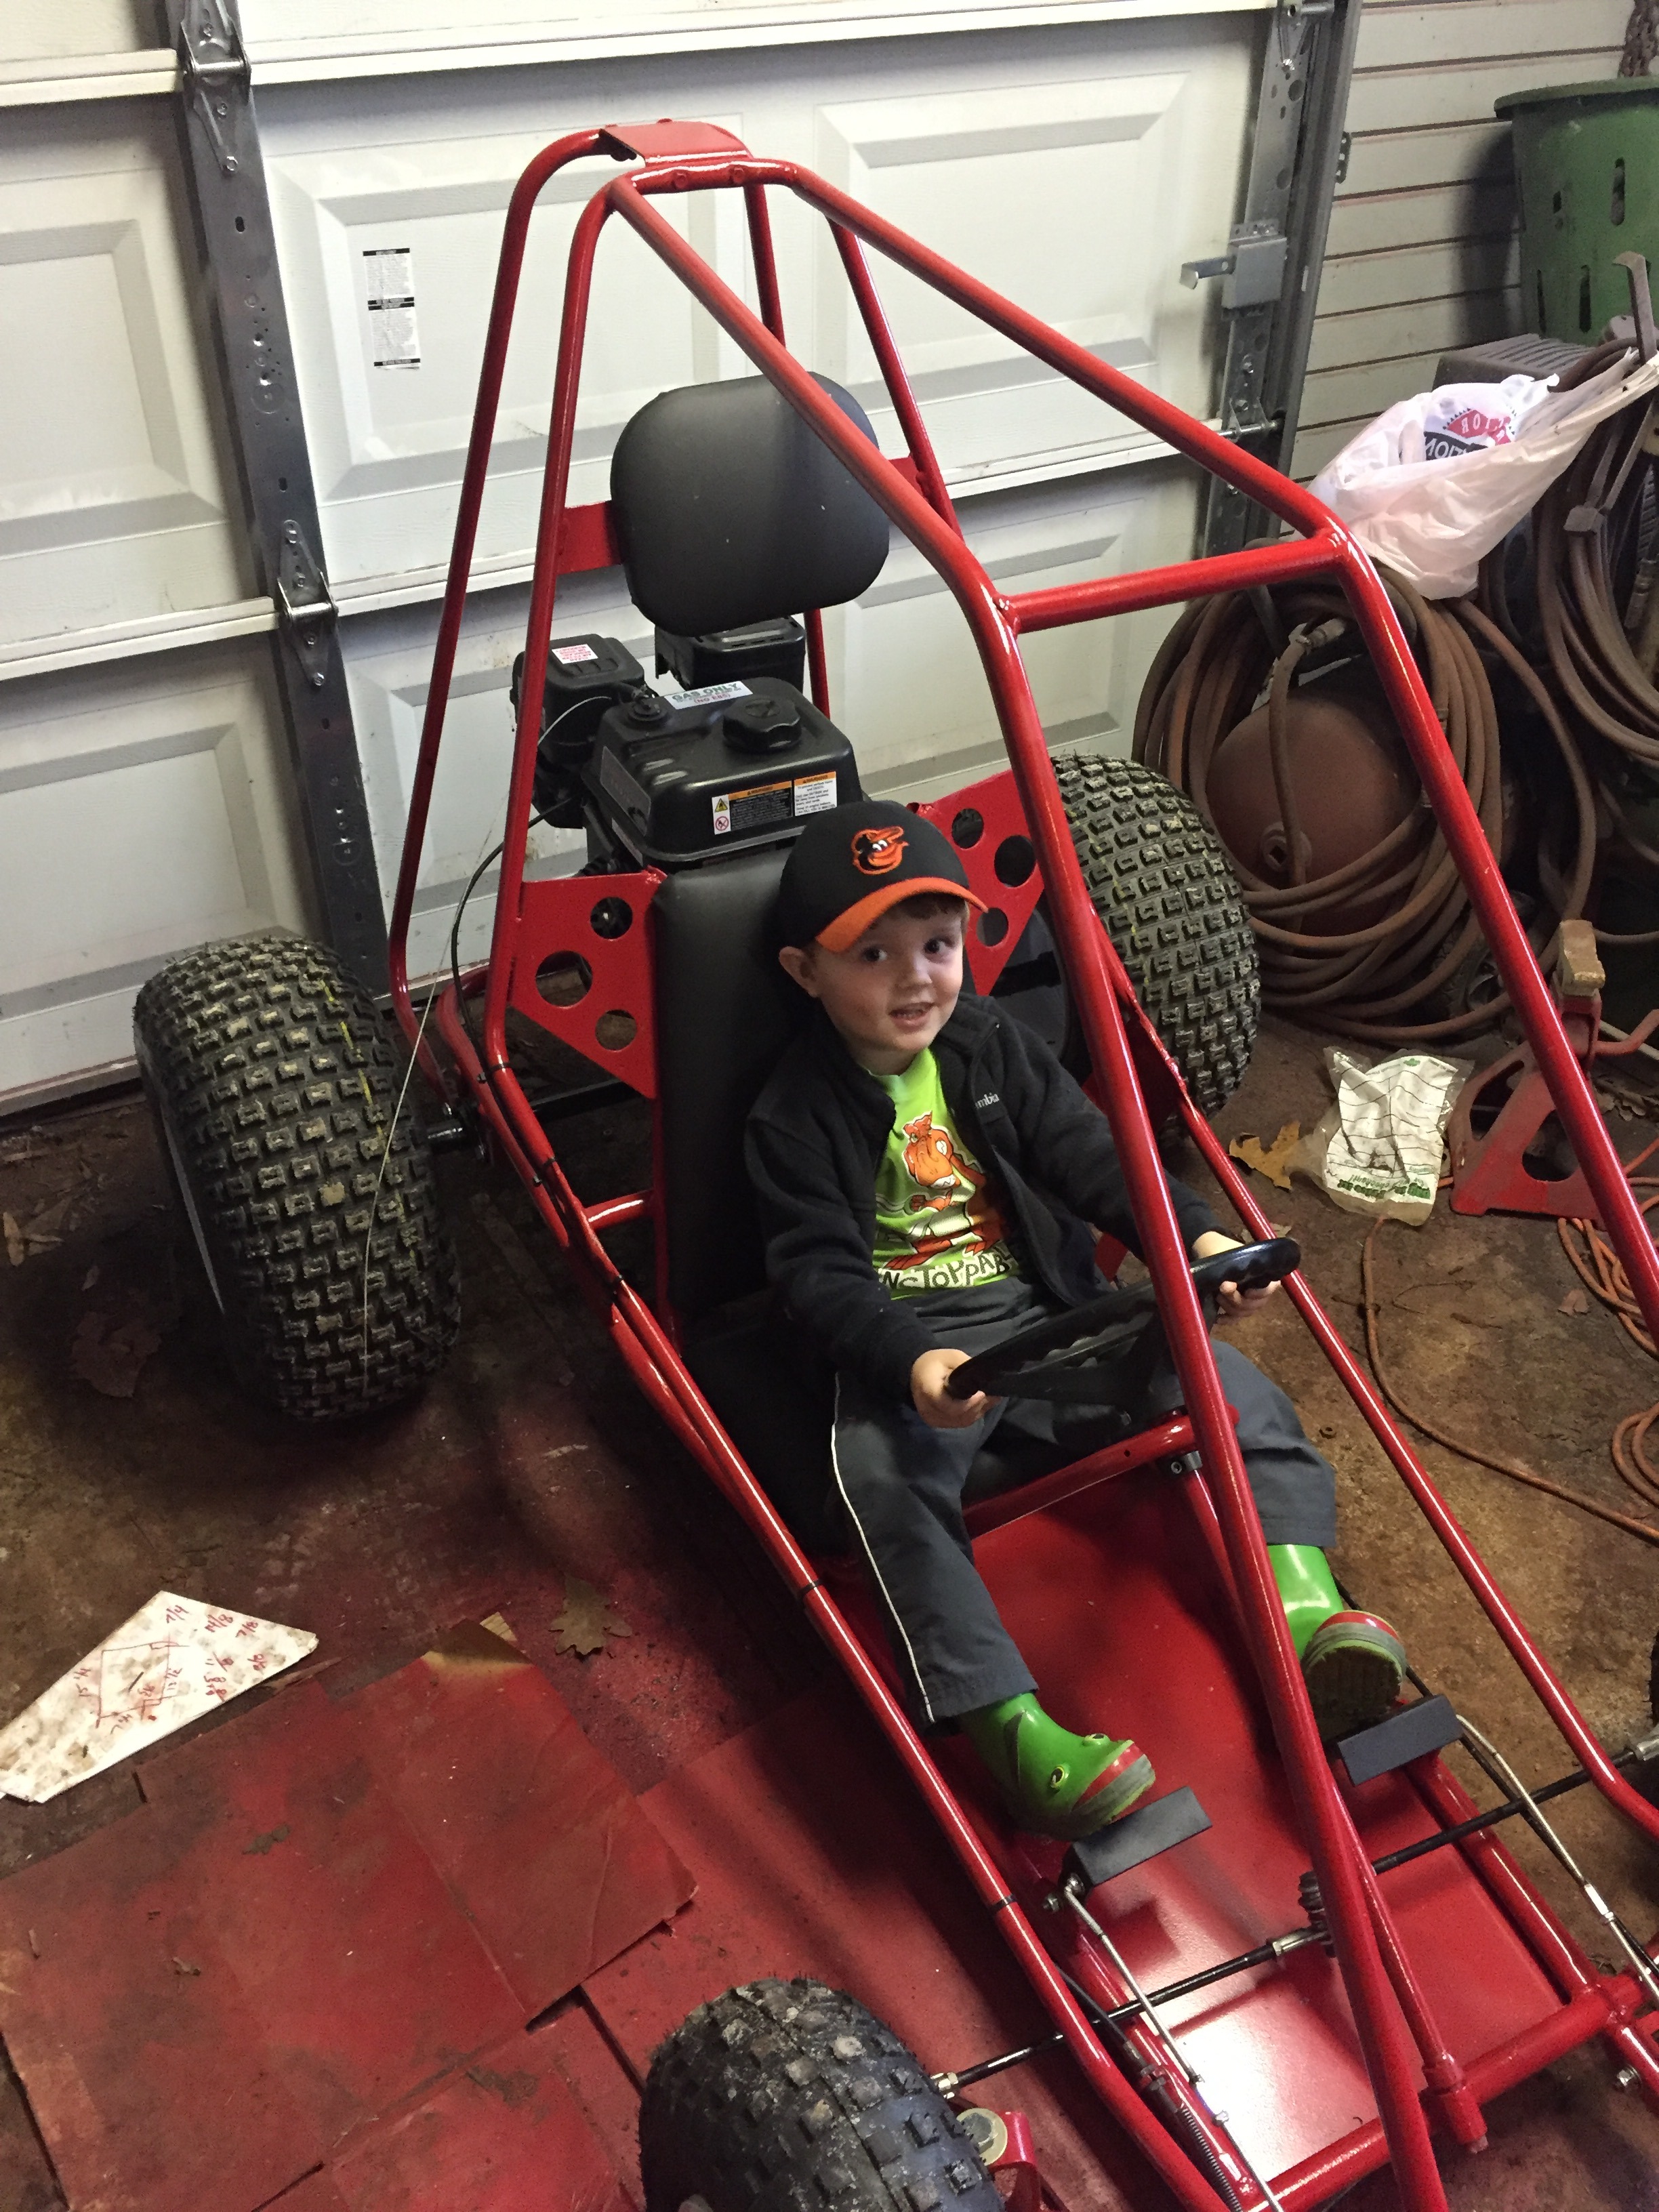
I got my son's go-kart finished up just in time for Christmas. I wish I got a picture of the look on his face when he first saw it - he LOVED IT! It was totally worth the time, money and effort!
I have the throttle tuned down pretty far for him, but this thing really hauls ass! So far he's been pretty responsible driving it and as you can see he drives really well for a 3.5 year old! It makes my heart smile seeing him enjoy it so much!
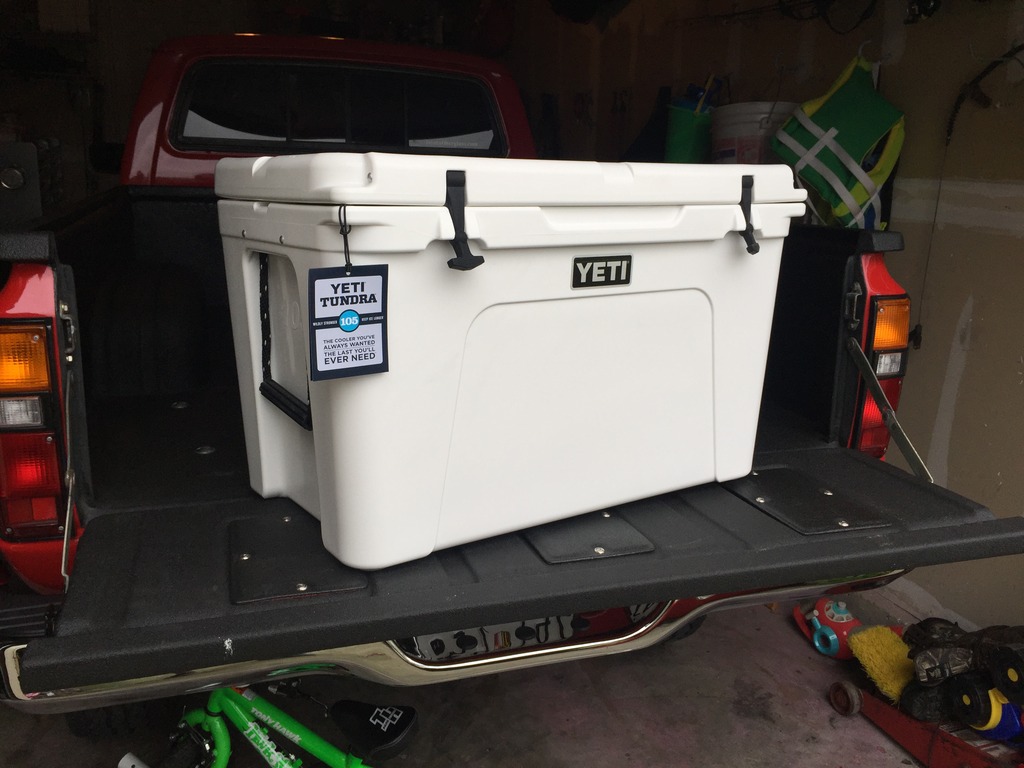
Christmas also treated me fairly well too. I've had a Yeti 35 cooler for a while now and I absolutely love it; however, I've wanted a larger one for a while now, but they are so expensive and I simply couldn't bring myself to drop the money on it. So Santa brought me a Yeti 105 for Christmas!!
If any of you haven't experienced the benefits of a Yeti cooler then you don't know what you are missing out on! They keep ice for DAYS! I was skeptical at first until I tossed a 10lb bag in my Yeti 35. I left it out on my rear deck for 5 days in the 80-90* July heat and I still had ice left 5 days later! They are very expensive coolers ($480 for the 105), but it pays for it self in ice savings. I bet this summer alone I spent well over $250 in bags of ice and probably even more during deer season this fall/winter.
My next task is to add some tie-down mounts to the bed of my pickup to strap down and lock my Yeti so it stays secure and won't get stolen.
On another note, every year between Christmas and New Years, a few friends and I always get together to go shooting - it has turned into an annual tradition. We are all pretty big gun enthusiasts so typically a very good time is had with a whole bunch of rare and unique firearms. My best friend that lives out in Hawaii for the winters was in town this weekend so we all got together yesterday. I bet we fired off at least 6,000 rounds among the 6 of us!
We are the type of Americans that make ISIS wet their pants!
(Don't worry, the guns were not loaded in these pictures and the pictures were taken using a timer so there wasn't a camera man looking down the barrels of 7 guns. We are very safe gun owners)
Last edited by kawazx636; Jan 8, 2016 at 06:11 PM.
I'm new to posting so I hope I'm doing this right. First, I'd like to say that I really appreciate the time you've taken to document and post this build. It's been an incredible resource for me while I rebuild my 81 pickup. I'm curious about the hex bolts you used to replace the tiny phillips screws that hold the fuel pick up and sending unit to the tank. Mine broke off and I was going to use self tapping screws to reinstall until I saw what you did. Those bolts you used look to be larger diameter than the screws. Did you drill out the holes and tap them? Thanks again.
I'm new to posting so I hope I'm doing this right. First, I'd like to say that I really appreciate the time you've taken to document and post this build. It's been an incredible resource for me while I rebuild my 81 pickup. I'm curious about the hex bolts you used to replace the tiny phillips screws that hold the fuel pick up and sending unit to the tank. Mine broke off and I was going to use self tapping screws to reinstall until I saw what you did. Those bolts you used look to be larger diameter than the screws. Did you drill out the holes and tap them? Thanks again.
Thanks for the compliments and I'm glad that this has been able to help you along the way. For the tank bolts, I just used a stainless hex version of what I took out - I believe that they were M4x1.00. The main reason why I went with hex bolts was so that could remove them and pull the sending unit and fuel pick-up without having to drop the tank or lift the bed. There is just enough room between the tank and the bed to squeeze the sender and pick-up out, but not enough to really get in there with a phillips screwdriver to remove the bolts - with hex bolts I can. I would not recommend using self tapping screws simply because if you ever have to take it out again then you run the risk of not being able to get another self tapping screw to bite when you put it back together. Plus metal shavings will fall into your tank. My advice would be to drill out the broken screws and re-tap the threads using the next size tap. Then go with the appropriate size hex bolts.
Hey Dave, I want to acknowledge your generosity, your patience, your helpfulness. I feel it speaks volumes to your character. Best wishes to you and yours.
Just got done looking through your build, and wow. Great work, the truck turned out great! What leaf springs did you go with? I'm starting on my 82, and not sure which leaf springs to go with. Like the amount of lift you achieved on your truck. Thanks
Hey Dave, I want to acknowledge your generosity, your patience, your helpfulness. I feel it speaks volumes to your character. Best wishes to you and yours.
Thanks! I'm glad it has helped you out!
Originally Posted by J.yota
Just got done looking through your build, and wow. Great work, the truck turned out great! What leaf springs did you go with? I'm starting on my 82, and not sure which leaf springs to go with. Like the amount of lift you achieved on your truck. Thanks
Jack
Thanks! I went with Old Man Emu medium duty springs. The say it is 2" of lift, but I think that it is closer to 3". My shackles are 1" so that yields roughly 1/2" of lift. And I'm running 31x10.5 tires so that gives me about 1.5" of additional ground clearance over stock tires. Combined, I have somewhere in the neighborhood of 5" of lift/ground clearance over stock. The height is rather adequate - an inch shorter would probably suit me better and look a little more appropriate, but I can't really complain. The ride is really good - there isn't a better riding stock length lift spring than Old Man Emu. I also have Bilstein 5125 shocks which also help the ride - if you go with cheap shocks you'll likely yield a very stiff ride.
Originally Posted by Big Little Bear
Not only is ISIS wetting their pants so are the Libtards in Montgomery County...lol ,,,It's good to see some real Americans...Sounds like a good time.
Yeah, my friends and I are very heavily armed so ISIS would not last long around us... And the libtards in Annapolis can kiss my ass! I wish that the Delmarva Peninsula would just create its own state (except for Wilmington and New Castle, DE - New Jersey can have them!) because most things that get pushed through Annapolis seldom benefit us over here on the Eastern Shore.
Originally Posted by thebeaverisdead
Thanks for the advice on the hex nuts. Happy New Year to you.
Ok, so raise your hand if you have ever been disappointed by the dome light situation in your first gen pickup... The fact that the dome light only comes on when you open the door drives me nuts! Or at least I assume that it is supposed to be like that and mine isn't actually messed up some how. It finally pushed me over the edge the other day when my son dropped a gumball in the floor and I had no light to help me located said gumball thus I had to listen to it roll around on the floor and eventually get trapped under the seat. Not that the dim dome light would have helped much, it was a matter of principle damnit! LOL Well now, stray gumballs and sub par lighting is a thing of the past in my truck! Last night I decided to do some wiring that I wish I had done when I had my truck in a thousand pieces while reworking the wiring harness. Doing this as an after though was a bit of a PITA, but it got done.
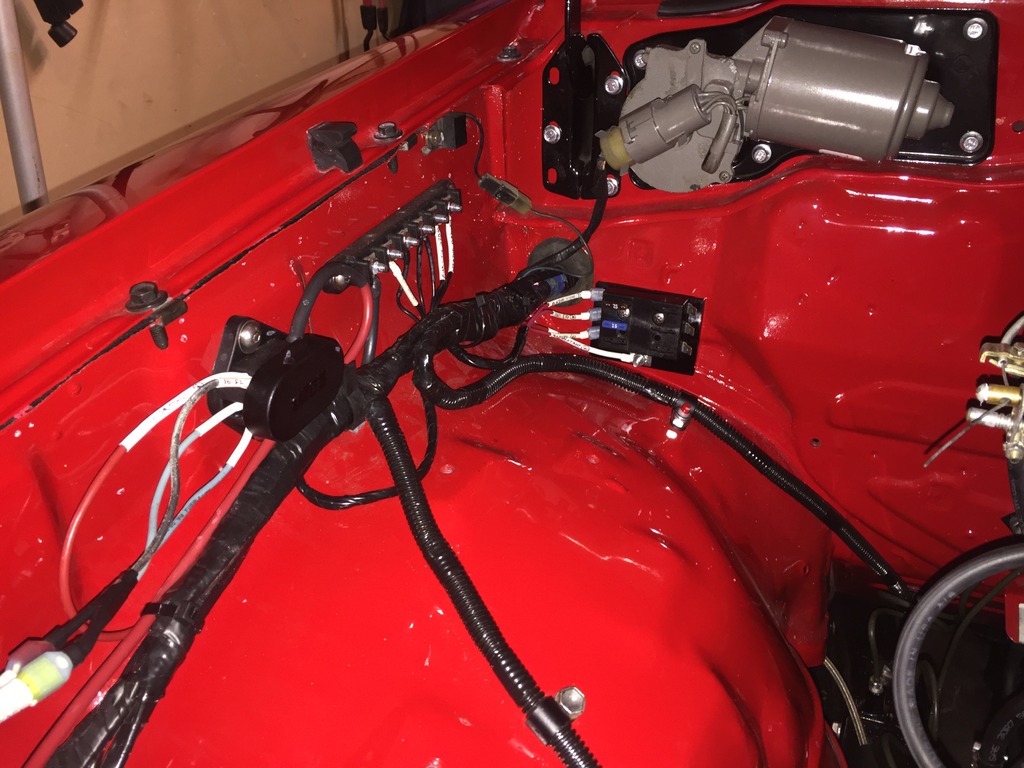
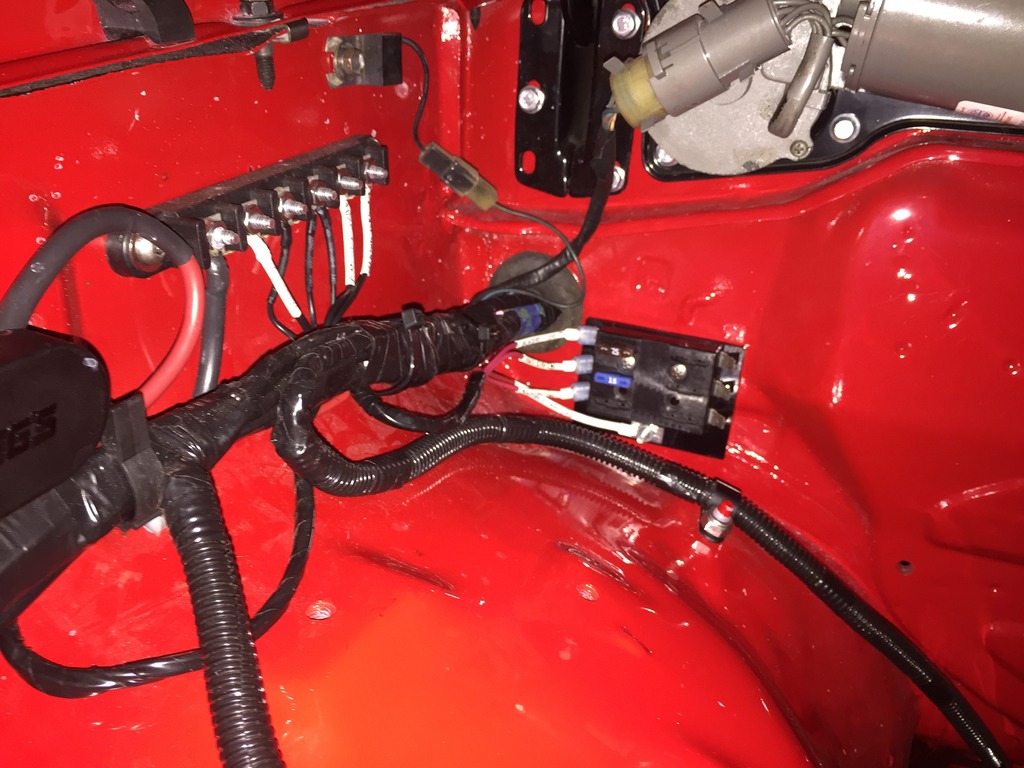
So step one... Wire a constant power fuse block. This isn't really part of my lighting solution, but I also wanted to add an accessory 12V outlet with constant power and I will soon be installing fog lights so I wanted to have a central fuse block for said accessories in lieu of a bunch of in-line fuses and a birds nest of wiring. I wired a ignition power source fuse block when I was doing the wiring during the restoration, but I'm not exactly sure why I didn't go ahead an wire in an extra one for constant power.
From left to right:
1 - Power (+) Distribution block - I originally ran this when I wired the truck so I just needed to add a 6ga wire lead to the new constant power fuse block.
2 - Ground (-) Bus Bar - again, this was originally installed when I did my wiring. It's just a central spot to secure the majority of my grounds (not a good idea to ground accessories here that would be sensitive to interference and ground noise)
3 - Constant power fuse block - This is the new guy. It's feed accessories like an auxiliary 12v cig outlet, fog light switch, low draw lighting, etc.
I wired up a new auxiliary 12V power outlet in the glove box. I basically wanted this so that I can charge/power more than one thing at a time and with the constant power I don't have to have the ignition key on to charge or power an accessory. Sits very discretely in the glove box.
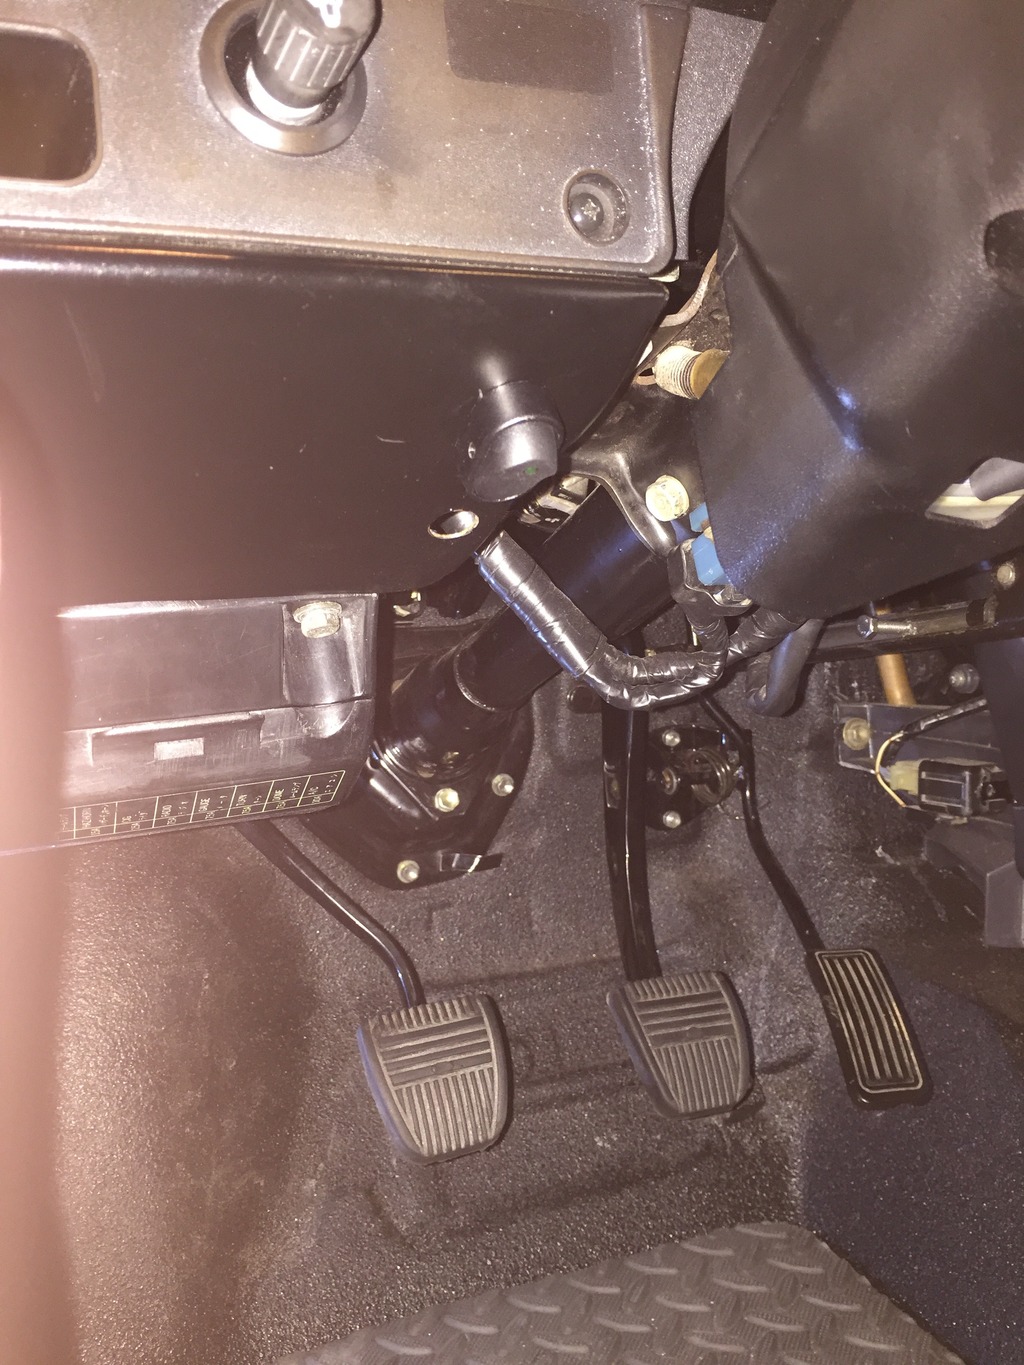
Now for the dome light dilemma... The dome light in these trucks is a ground interrupt system; Meaning that the dome light itself always has constant power going to it, but needs to be grounded in order to complete the circuit and turn on. Thus when you open the door, the door releases the interrupter switch in the jamb, the ground is completed and the light comes on. I needed to basically simulate this with a switch in order to get a dome light to come on with the doors closed. Sooooo... I spliced into the lead and the ground wires going to the dome light (I didn't technically need the lead but I wanted the fancy light on the rocker switch to work when I turned it on so I had to have 12V power to the switch). I ran the ground wire from the light to the "load" pole of the switch, then ran a ground wire from the "supply" pole of the switch to a ground bolt and then ran the 12V lead from the dome light wire to the "Ground" pole of the switch. In essence, I wired the switch backwards since a switch typically interrupts the positive side of a circuit and I needed to interrupt the ground or negative side of the circuit. So now I can either open the doors or flip a switch to turn on the dome light. TA-DA!!!
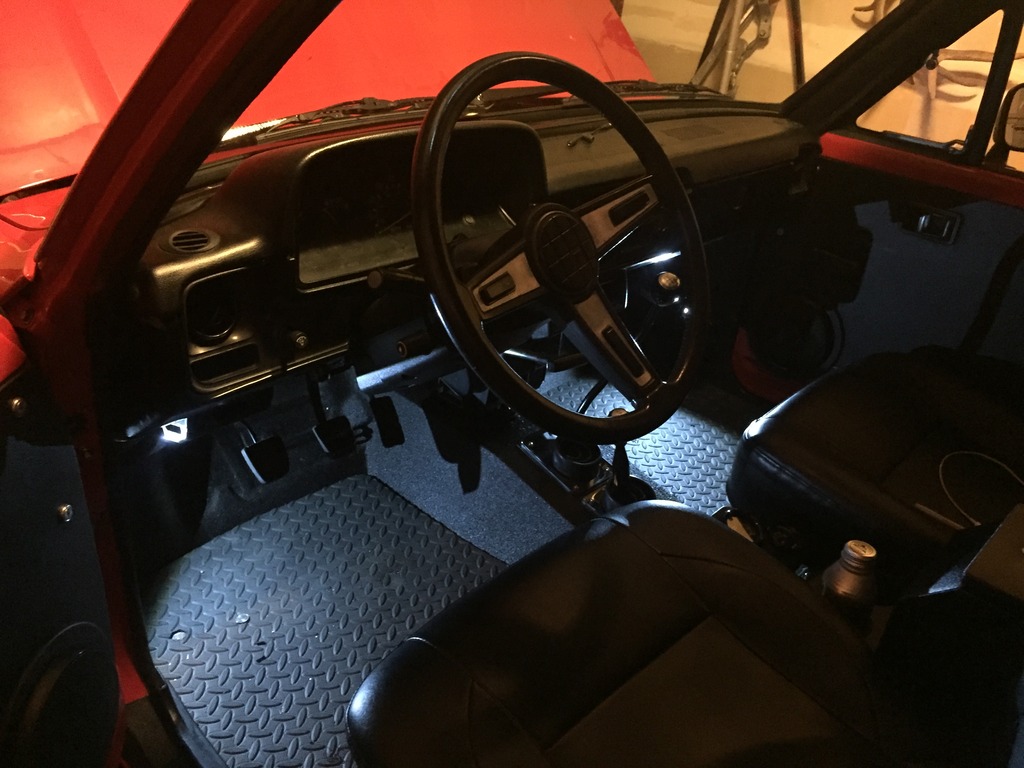
I also didn't want to hack into my dash in an obtrusive manner so I decided to mount the switch on the metal portion of the dash assembly just to the left of the steering column. Very discrete, yet convenient location for wiring and access to the switch. I also drilled a hole and ran the wiring to the switch that I intend to use for my fog lights that I will soon be installing, but somehow managed to lose that switch so it hasn't made its way in yet.
And of course, that wasn't enough... Even with the dome light at the convenient flip of a switch, it is still to dim to adequately illuminate the cab (still need to get an LED bulb for the dome light) so I decided to also add a couple of LED lights to the kick panels so that I can better illuminate the floors when that pesky gumball is on the loose again... They are spliced into the dome light circuit so they operate with the same switch and opening of the doors. I haven't actually mounted them where I want them to go yet, but they certainly will help out with any and all future fugitive gumball hunts! Lookout Robb, I'm catching up with you in the LED department - I officially have TWO now....
I'm very satisfied with the results and the headaches it will prevent. Now I get to move on to my Yeti cooler tie downs and theft prevention system!
Last edited by kawazx636; Dec 31, 2015 at 09:39 AM.
I almost forgot to post this video that I took while driving truck. Please disregard the whiny input shaft bearing when I shift - it needs to be replaced soon. She gets up and goes pretty well for a 33 year old four banger and I'm not even getting into her too hard either - I didn't check the tach, but I bet I hardly hit 3,000 RPM before shifting.
Oh, and my exhaust also doesn't sound that ricey at all either - the video makes it sound kind of like a Honda Civic with coffee can muffler. It stays relatively throaty through the RPM range.
Last edited by kawazx636; Jan 8, 2016 at 06:16 PM.
You know how I was telling you guys that my truck fires up on the first bump of the ignition damn near every time? Well...today I went to start my truck on a 39* day annnnd this happened....
She fired right up!! No choke and dead cold after not being cranked for at least two weeks and went straight to a loping low idle without feathering the gas!! I've had a lot of people not believe me when I tell them this so I decided to shoot a video for proof. Man I love this truck!!! Just goes to show that if built and tuned right, a carbureted vehicle can be reliable even in cold weather.
Sounds pretty solid Dave, mine sure doesn't sure doesn't sound like that when you blip the throttle on a cold start, impressive! Shows you have good compression and the carb finely tuned!
Last edited by gillesdetrail; Jan 9, 2016 at 04:26 PM.
Just curious, what kind of gas mileage are you getting with the Weber 38 compared to the 32/36. I have a very similar engine as yours modification-wise and am also suffering from a lack of sufficient air and fuel once into the secondaries. So I was thinking about the possibility of switching to a 38 since you've had so much success with it.

 Dec 14, 2015 | 10:15 AM