
Live4soccer7's 84runner 1UZ Swap
 Jun 17, 2013 | 01:13 PM
#22

Thread Starter
Registered User
Joined: Nov 2008
Posts: 1,319
Likes: 2
I've been hung up for the last couple weeks and at least the next week or two with other things (work and family related), so hopefully that will all settle down soon so I can get back to the 1UZ.
Jun 17, 2013 | 02:08 PM
#23
Registered User
iTrader: (2)
Joined: Oct 2009
Posts: 1,044
Likes: 6
From: Centeral Willamette Valley Oregon
The biggest advice I can give you is to pace yourself. You can't expect to tackle this in a couple of weeks, especially with family. I found that I had a list of steps that I needed to take. As I got an hour or two here and there I would work on one item on the list and mark it off when I was ready to move to the next. Having steps and small attainable goals helps with discouraging breaks when time isn't available.
Make sure you take good notes so you remember where you left off so next time you have a few minutes your don't fumble around trying to remember what step you were at.
I look forward to seeing your progress
Make sure you take good notes so you remember where you left off so next time you have a few minutes your don't fumble around trying to remember what step you were at.
I look forward to seeing your progress
Jun 17, 2013 | 02:23 PM
#24
Thread Starter
Registered User
Joined: Nov 2008
Posts: 1,319
Likes: 2
The biggest advice I can give you is to pace yourself. You can't expect to tackle this in a couple of weeks, especially with family. I found that I had a list of steps that I needed to take. As I got an hour or two here and there I would work on one item on the list and mark it off when I was ready to move to the next. Having steps and small attainable goals helps with discouraging breaks when time isn't available.
Make sure you take good notes so you remember where you left off so next time you have a few minutes your don't fumble around trying to remember what step you were at.
I look forward to seeing your progress
Make sure you take good notes so you remember where you left off so next time you have a few minutes your don't fumble around trying to remember what step you were at.
I look forward to seeing your progress
I should be good once this stuff gets ironed out. I'll get the remainder of the harness pulled from the donor (steering column and cluster as well).
In the free spare moments, I have been keeping an eye out for an R151F. I might get lucky and locate one so I don't have to use an adapter for the dual cases.
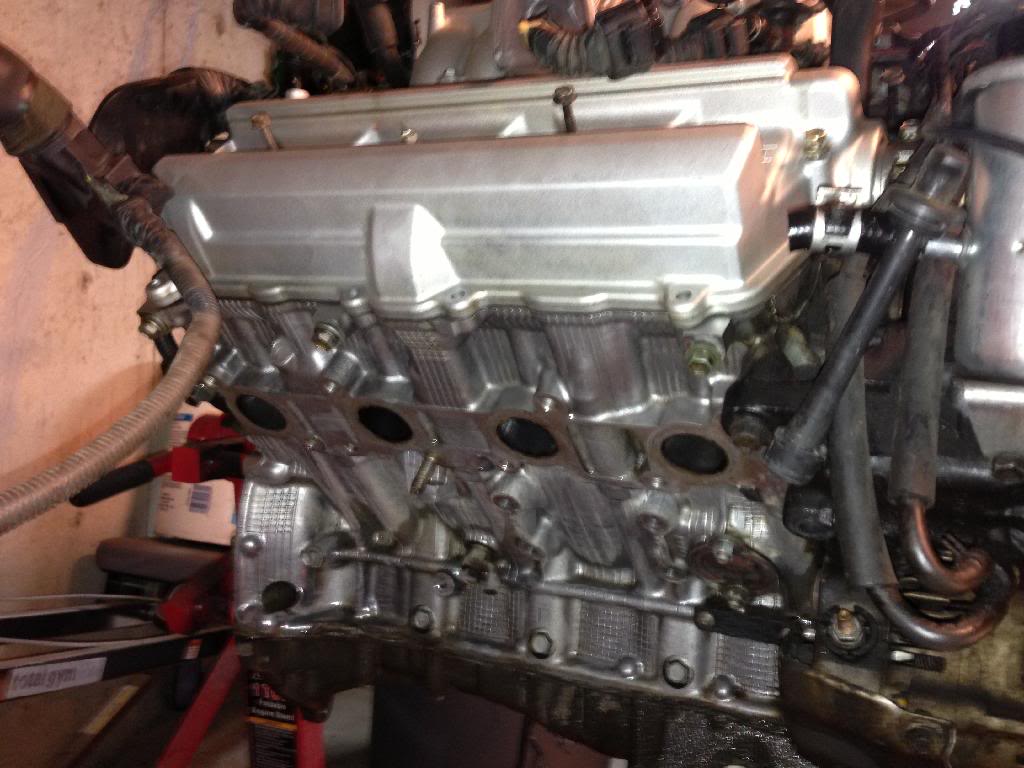
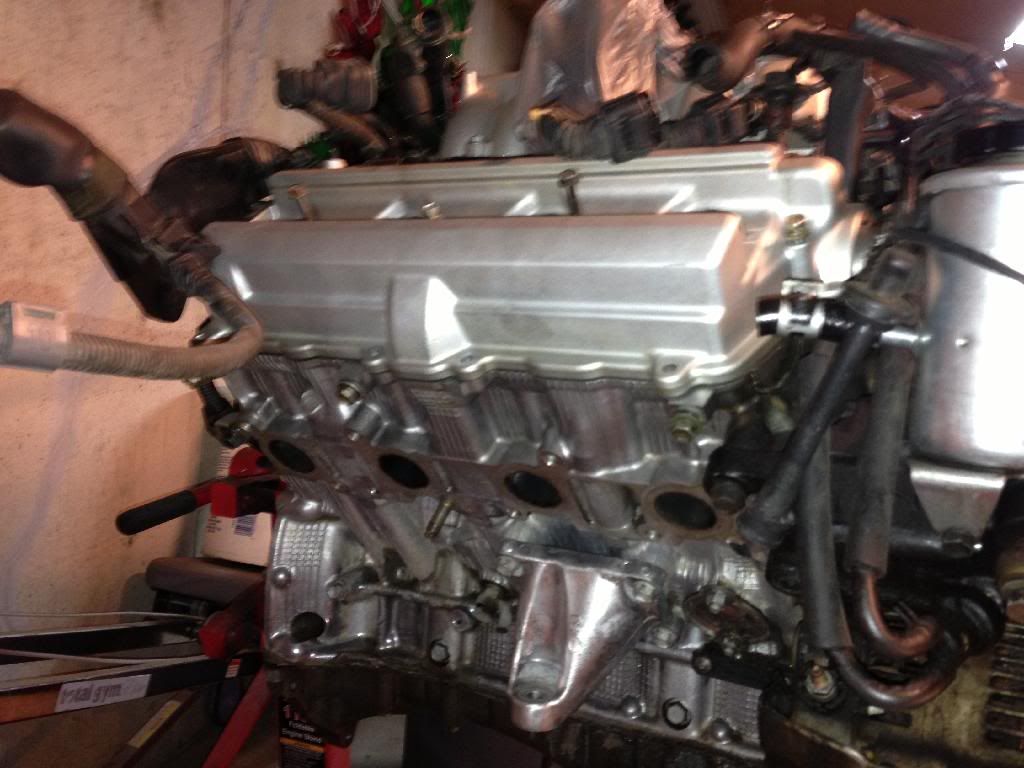
I probably have to change the timing belt on the 1UZ as well. The serpentine belt is somehow miraculously still in one "loop". It is cracked to hell and back on the underside.
 Jun 17, 2013 | 02:52 PM
#27
Registered User
iTrader: (2)
Joined: Oct 2009
Posts: 1,044
Likes: 6
From: Centeral Willamette Valley Oregon
You too. I have found one but the guy wanted $900 and it needed rebuilt.
Patience grasshopper, patience. We will find eventually.
Patience grasshopper, patience. We will find eventually.
Last edited by 85toyman; Jun 17, 2013 at 02:56 PM.
Jun 17, 2013 | 03:54 PM
#28
Thread Starter
Registered User
Joined: Nov 2008
Posts: 1,319
Likes: 2
That's complete BS. You might as well buy a rebuilt one from marlin. lol. I already have an R150F (3.0 version/shorter input). I figure when the time comes to bolt it all together then I'll use it if I haven't found the R151F.
 Jul 19, 2013 | 06:37 PM
#30

Registered User
Joined: Nov 2011
Posts: 72
Likes: 0
From: toledo, oh
any updates.. how is it going with the wiring harness?
i am at this point now but not to enthusiastic about tearing apart the whole body harness for a few wires here and there?
did your ecu have one plug that went into the body harness?
i am at this point now but not to enthusiastic about tearing apart the whole body harness for a few wires here and there?
did your ecu have one plug that went into the body harness?
Jul 21, 2013 | 09:15 AM
#31
Thread Starter
Registered User
Joined: Nov 2008
Posts: 1,319
Likes: 2
I haven't really dug into the harness yet. I've been quite busy researching and ordering parts. I put in a little more time into the recipient truck on friday. Here is the update:
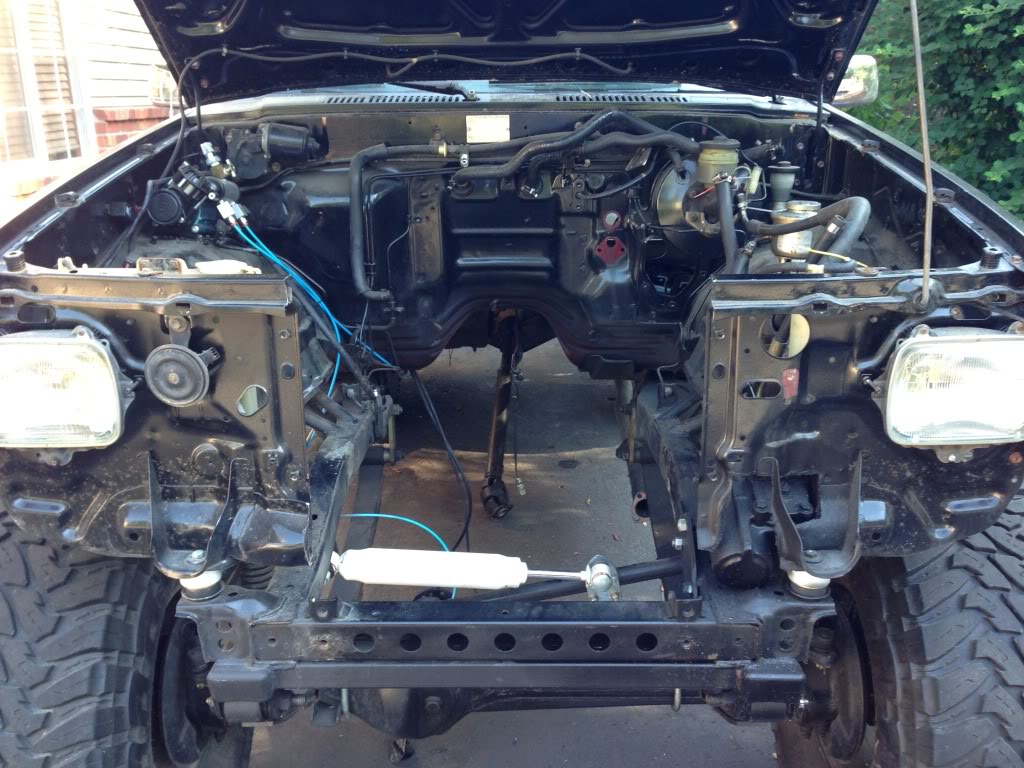
Here are some update pics. I put in about 7 hours or so on friday. I removed the entire wiring harness out of the engine bay for now.
Prepping the engine bay:
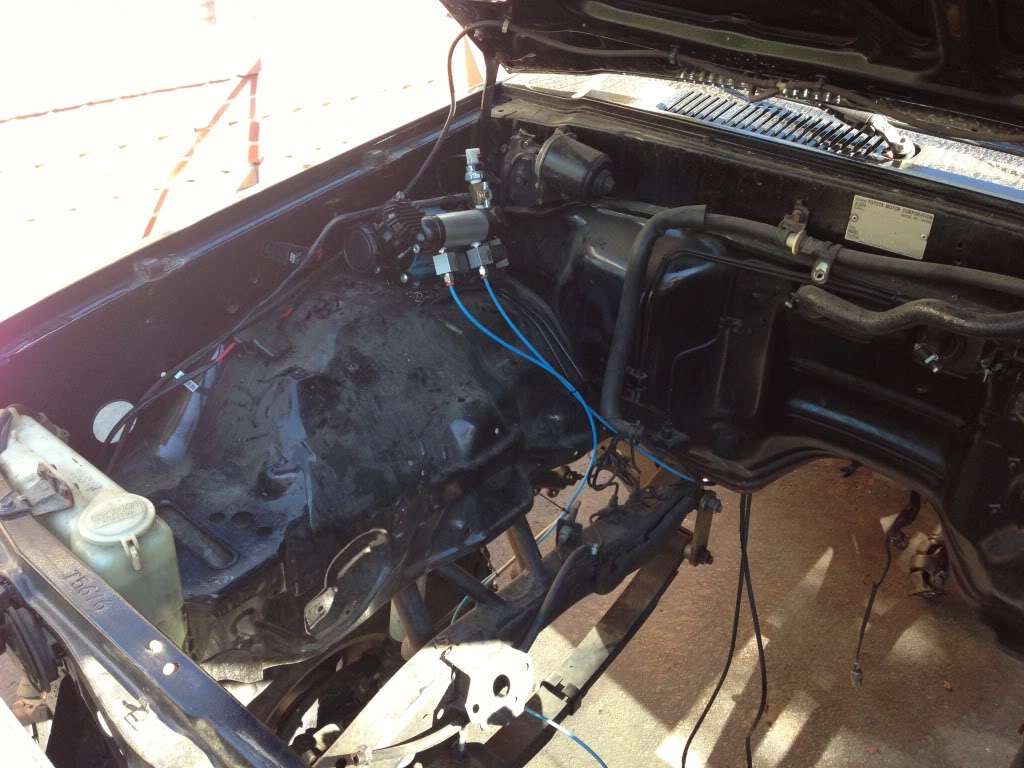
Just another shot:
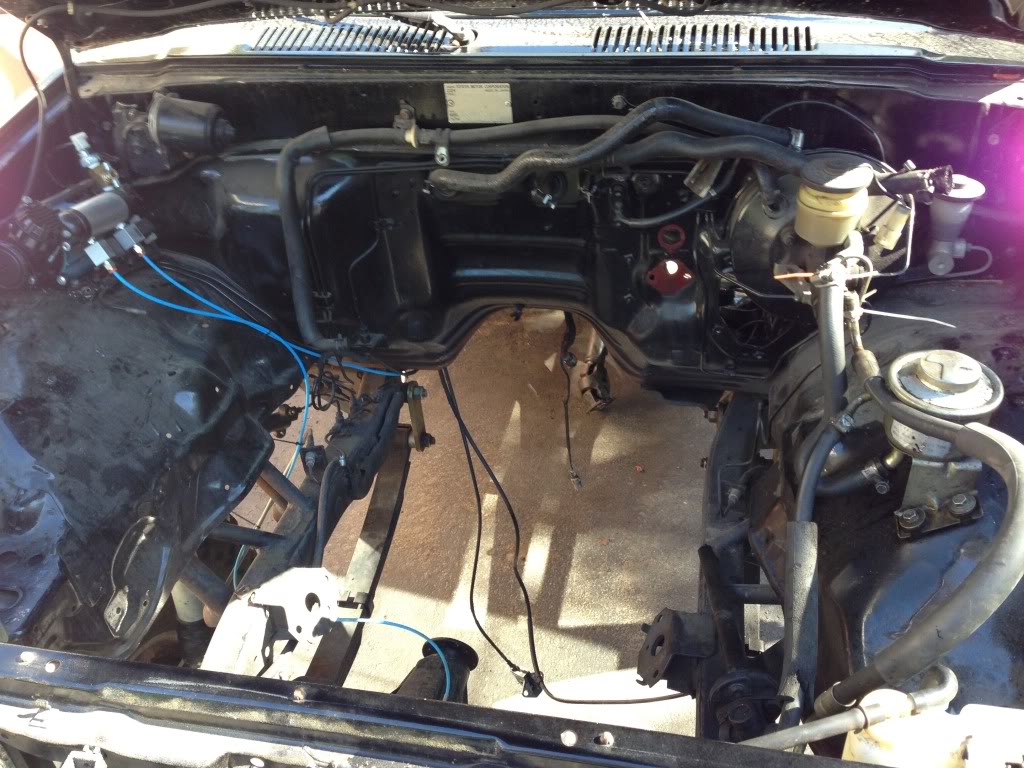
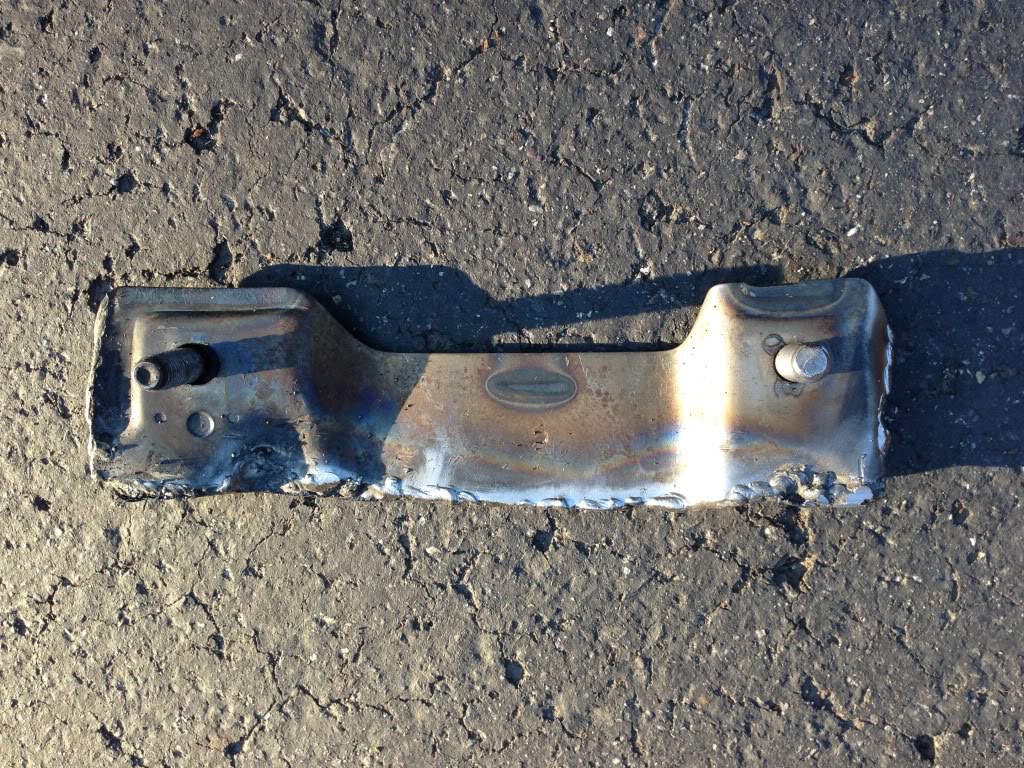
Old motor mounts gone:
I took the old interior dash brace/cross member from the Lexus and simply cut out the old steering column mounting points.
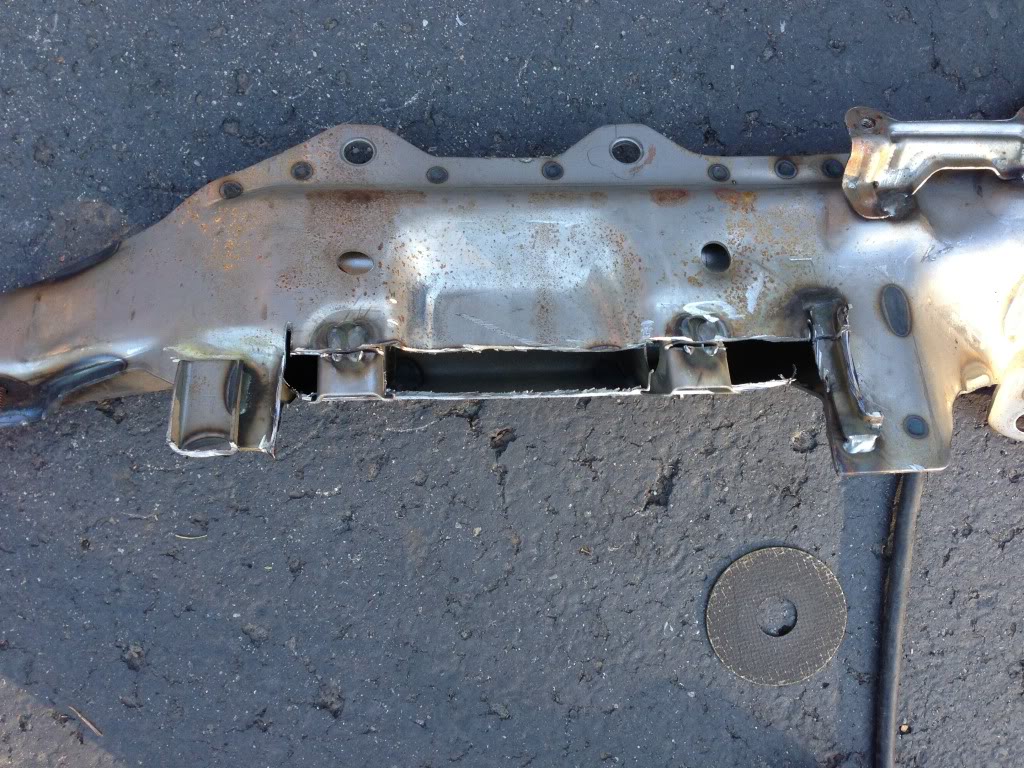
I then welded the back side of it shut quickly to make it easier to work with and give it more integrity.
I cut out the old mounting points in the 4runner so that these would sit nicely and have a good amount of contact surface with the dash support/cross member bar and then welder 'er up.
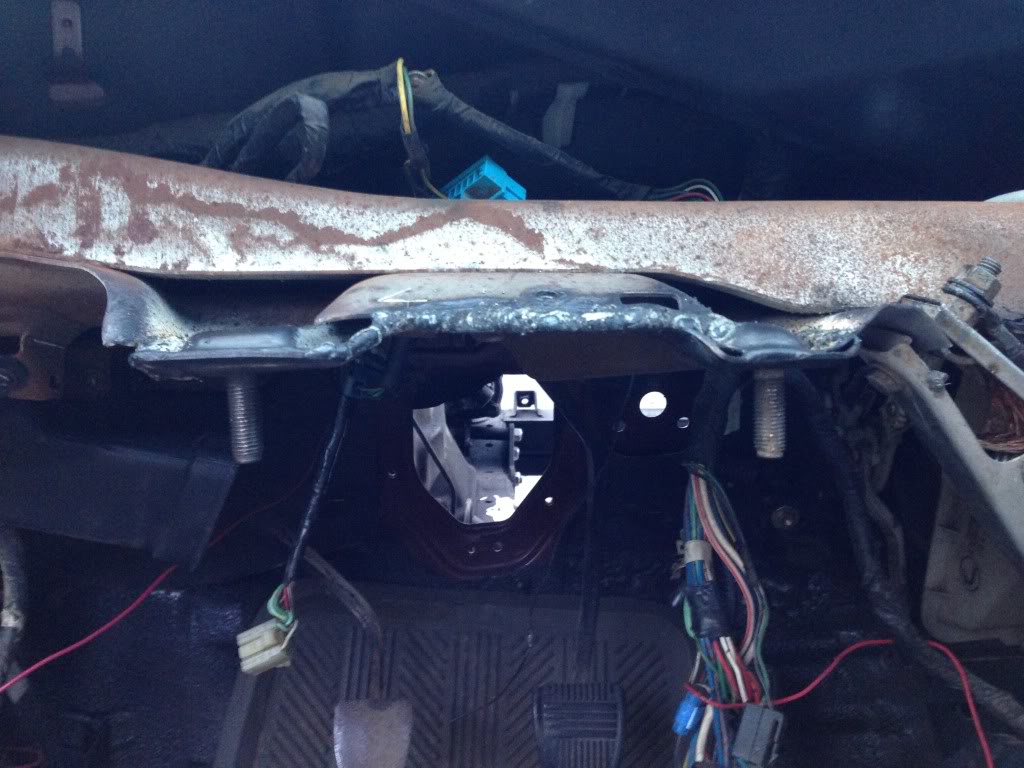
Kabooom. Steering column mounted.

I still need to work on the shaft adaption between the gear box and the new steering column, but I have to get some steel first.
Here are some update pics. I put in about 7 hours or so on friday. I removed the entire wiring harness out of the engine bay for now.
Prepping the engine bay:

Just another shot:

Old motor mounts gone:

I took the old interior dash brace/cross member from the Lexus and simply cut out the old steering column mounting points.

I then welded the back side of it shut quickly to make it easier to work with and give it more integrity.

I cut out the old mounting points in the 4runner so that these would sit nicely and have a good amount of contact surface with the dash support/cross member bar and then welder 'er up.

Kabooom. Steering column mounted.

I still need to work on the shaft adaption between the gear box and the new steering column, but I have to get some steel first.
Jul 22, 2013 | 04:16 AM
#33
Thread Starter
Registered User
Joined: Nov 2008
Posts: 1,319
Likes: 2
I'm not quite sure what you mean. I will simply be transplanting nearly the entire lexus wiring harness into the 4runner. Plug it into the lexus steering column, into the lexus cluster, lexus ecu, hook it all back up to the engine, apply grounds, use the lexus fuse boxes, add power and it'll pretty much start.
That leaves fuel delivery and a speed sensor to be figured out. Everything else is pretty much "plug and play". Of course, there will be lights and whatnot to be resolved with the lexus wiring harness, but I'll figure that out after the truck is able to drive again. Those should be easy and if push comes to shove, I will use the lexus light control modules as well and just plug those in.
That leaves fuel delivery and a speed sensor to be figured out. Everything else is pretty much "plug and play". Of course, there will be lights and whatnot to be resolved with the lexus wiring harness, but I'll figure that out after the truck is able to drive again. Those should be easy and if push comes to shove, I will use the lexus light control modules as well and just plug those in.
Jul 22, 2013 | 09:19 AM
#34
Registered User
Joined: Apr 2010
Posts: 68
Likes: 0
Its to many modules ,abs cruise ,body control module, and menu more you don't need you truck has all ready body control.module , wen you need arroun 25 wires out the ecu in info to your cluster, powers for relays and you ready to start you engine , but it's your swap check on RMA 's 1uzfe into 1st 4runner soon I'm going to make my 80 pick up tread.
Jul 22, 2013 | 09:29 AM
#35
Thread Starter
Registered User
Joined: Nov 2008
Posts: 1,319
Likes: 2
correct, new modules aren't necessary. That's why they likely won't get swapped in. It will all work out just fine. I'm not too concerned yet.
I have the entire donor car, so I have everything to do it if I decided I wanted to do it that way. I never had cruise to begin with, so I doubt I'll do it in the swap. Again, I can if I want, I have all the parts.
I have the entire donor car, so I have everything to do it if I decided I wanted to do it that way. I never had cruise to begin with, so I doubt I'll do it in the swap. Again, I can if I want, I have all the parts.
Sep 12, 2013 | 08:49 PM
#36

Registered User
Joined: Mar 2010
Posts: 20
Likes: 0
From: Issaquah, WA
I'm not quite sure what you mean. I will simply be transplanting nearly the entire lexus wiring harness into the 4runner. Plug it into the lexus steering column, into the lexus cluster, lexus ecu, hook it all back up to the engine, apply grounds, use the lexus fuse boxes, add power and it'll pretty much start.
That leaves fuel delivery and a speed sensor to be figured out. Everything else is pretty much "plug and play". Of course, there will be lights and whatnot to be resolved with the lexus wiring harness, but I'll figure that out after the truck is able to drive again. Those should be easy and if push comes to shove, I will use the lexus light control modules as well and just plug those in.
That leaves fuel delivery and a speed sensor to be figured out. Everything else is pretty much "plug and play". Of course, there will be lights and whatnot to be resolved with the lexus wiring harness, but I'll figure that out after the truck is able to drive again. Those should be easy and if push comes to shove, I will use the lexus light control modules as well and just plug those in.
There is only about 10 wires from the body connectors from the 1uz engine harness that need to go to the 3vz engine harness body connectors. Retain all the truck fuse blocks, cluster etc. So much less work.
Oct 11, 2013 | 08:49 AM
#38
Thread Starter
Registered User
Joined: Nov 2008
Posts: 1,319
Likes: 2
Just a quick update. Finished putting the tcases back together. 23 spline all the way through with upgraded TG rear ouput and marlin upgraded front output and 4.7 in the rear case. It is using the TG adapter (wish I would have went with marlin adapter, but I originally built the cases 1-2 yrs ago and didn't know better on that piece). I can't recall who makes the triple shifter, but the shift mechanism for the rear case kinda sucks. There has been slop in the unit from the stiff shifters. Seems like I will need to disassemble it and weld something up to fix this. Something that shouldn't have to be done when paying that kind of money for it.
Here is the front case getting buttoned up:
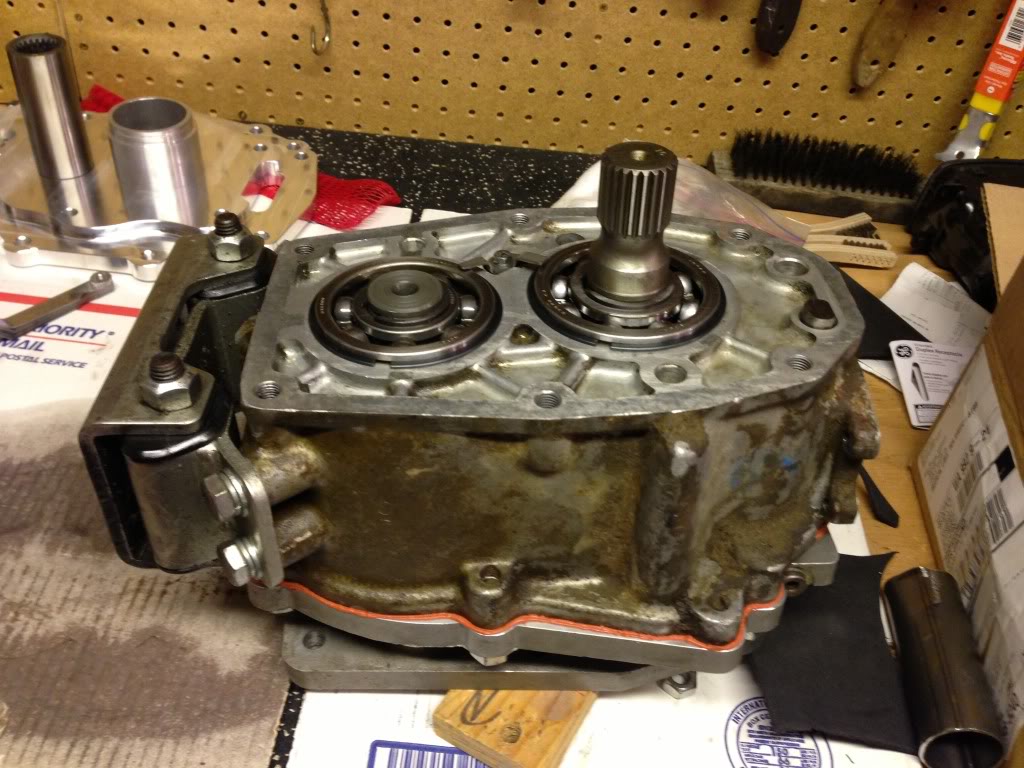
and all together. I know, I made a mess of the sealant. I used toyota orange. I can't recall the part #. It is for transfer and transmissions.
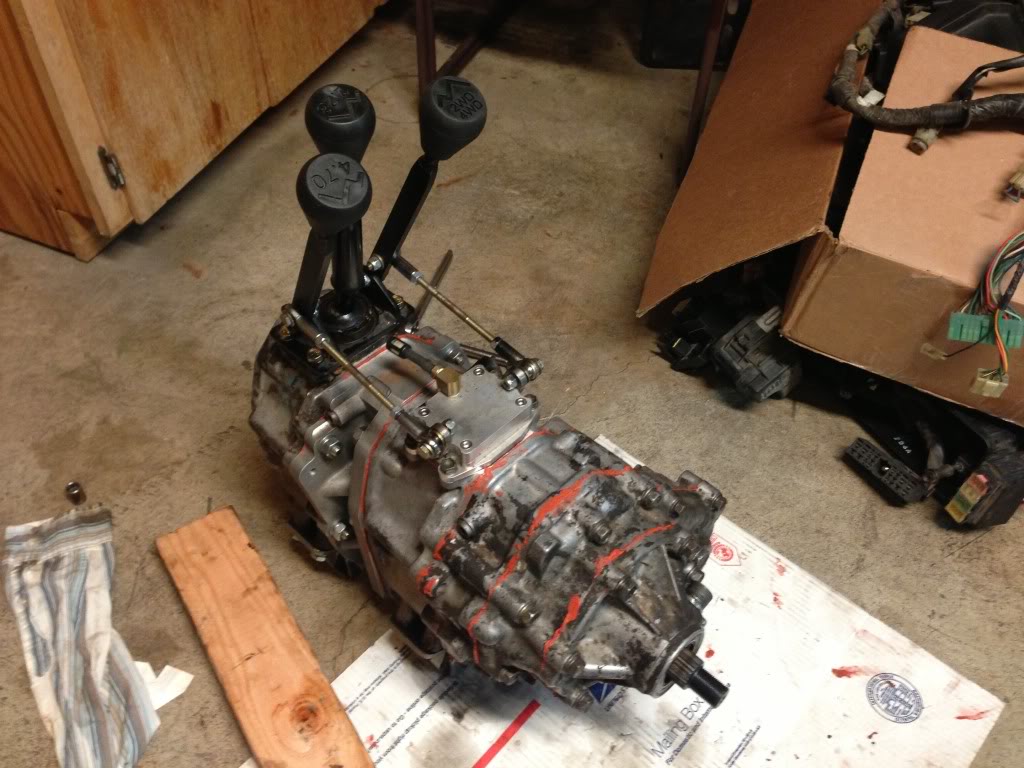
Next: on to cleaning up the R150F tranny, replacing the rear seal, checking that the input shaft length is all good with the flywheel, bell housing, etc... and then mating then the R150F (3.0 version) to the transfer cases and getting the bell all setup with the slave cylinder and associated parts.
Last edited by live4soccer7; Oct 11, 2013 at 09:13 AM.
Mar 28, 2014 | 10:45 AM
#39
Thread Starter
Registered User
Joined: Nov 2008
Posts: 1,319
Likes: 2
I hate to do it, but I have been keeping up on the pirate forums and don't have the time to do it on two different forums. If anyone want to follow then you should check out over here:
http://www.pirate4x4.com/forum/toyot...l#post24900506
I have received much more feedback over there with this particular thread, so I have chosen to stick with it for this topic. I may continue to do major update, but quite a bit has happened since the last update here. Don't worry, I'm still a huge YT fan!!!
Apr 4, 2014 | 09:59 AM
#40
Thread Starter
Registered User
Joined: Nov 2008
Posts: 1,319
Likes: 2
A little progress today. Probably got to work on it for about 4-5 hours. Nothing too exciting. I did get to clean up and put on the SC400 Motor mounts. I've almost got the non traction control throttle body ready to go on. I just have to snag some carb cleaner to get it cleaned up a bit. Wherever I bought the TB from, it was likely near salt water (quite a bit of corrosion). I also want to clean up the inside from buildup as well.
Next up is to get the valve covers sealed up, throttle body and associated hoses installed, and then on to the front of the engine for the timing belt and all that bs.
Next up is to get the valve covers sealed up, throttle body and associated hoses installed, and then on to the front of the engine for the timing belt and all that bs.


Last edited by dropzone; Apr 14, 2014 at 04:13 PM.


