
superchiem's Toyota RV 5vz Swap
 Jul 18, 2012 | 01:47 AM
#101
Its most likely something really simple pimple. If the rig was running before, what changed? Are all the fuses good? Ecu sends out switched ground independantly to all the injectors. Chances of the ecu failing are really really slim. There has to be something else going on around the ecu thats not allowing it to "run"
Jul 19, 2012 | 08:29 AM
#102
Thread Starter
Registered User
iTrader: (1)
Joined: Jan 2004
Posts: 212
Likes: 0
From: Anaheim, California
Its most likely something really simple pimple. If the rig was running before, what changed? Are all the fuses good? Ecu sends out switched ground independantly to all the injectors. Chances of the ecu failing are really really slim. There has to be something else going on around the ecu thats not allowing it to "run"
Thanks for helping out Vital I appreciate it.
Navy
Jul 19, 2012 | 09:56 PM
#103

Registered User
Joined: Jul 2012
Posts: 15
Likes: 0
this sounds really similar to my issue, I had pressure at the rail, and fluctuating voltage at the injectors but still no fuel. It wound up being the IGSW pin on the ECU needed to see 12v. I ran an add a circuit on a 7.5a to provide it, from the ignition fuse under the drivers kick (89 runner). I saw your post saying that you wired this and already have tested it at 12v. I also had to connect the AFM power, have you tested for that? it's the pin1 i believe on the harness, the pin closest to the firewall, should have 12v with ignition on. FC on the ecu also needed to be wired up to the COR for me, and I did it through one of the body harness connectors rather than directly splicing into the COR itself. there was a wire color change at that connector as well, which confused me for a minute until i put a meter to it to check continuity. These are the tricky parts that took me a few long days to figure out..
Jul 20, 2012 | 11:37 AM
#104
Thread Starter
Registered User
iTrader: (1)
Joined: Jan 2004
Posts: 212
Likes: 0
From: Anaheim, California
this sounds really similar to my issue, I had pressure at the rail, and fluctuating voltage at the injectors but still no fuel. It wound up being the IGSW pin on the ECU needed to see 12v. I ran an add a circuit on a 7.5a to provide it, from the ignition fuse under the drivers kick (89 runner). I saw your post saying that you wired this and already have tested it at 12v. I also had to connect the AFM power, have you tested for that? it's the pin1 i believe on the harness, the pin closest to the firewall, should have 12v with ignition on. FC on the ecu also needed to be wired up to the COR for me, and I did it through one of the body harness connectors rather than directly splicing into the COR itself. there was a wire color change at that connector as well, which confused me for a minute until i put a meter to it to check continuity. These are the tricky parts that took me a few long days to figure out..
I just swapped ecm's and still nothing. The only thing these injectors share is a ground. I might make my own ground through EO1 and see if this works.
Jul 20, 2012 | 04:57 PM
#105
Thread Starter
Registered User
iTrader: (1)
Joined: Jan 2004
Posts: 212
Likes: 0
From: Anaheim, California
I got my new DVOM and ohmed out the crankshaft, camshaft, and engine coolant temperature sensor.
The ECT sensor was 1.6 k ohms which is low. On the temperature scale in the haynes repair manual 1.6 k ohms would be at 100f degress. I unplugged the connector to see if it would start with out it, but it didn't. Going to have to wait till monday to go to toyota and pick up a new one.
Now another question. Does the igniter send an input to the ecm for the injectors. If so what wire?
Thank you,
Navy
Jul 20, 2012 | 09:09 PM
#106
If you had a bad sensor or circuit that would cause a no start, I would think the ecu would throw a code for it.
At this point I would go back and check all of your power sources to the ecu and injectors. Do you have working obd2?
At this point I would go back and check all of your power sources to the ecu and injectors. Do you have working obd2?
Jul 21, 2012 | 11:30 AM
#107
Thread Starter
Registered User
iTrader: (1)
Joined: Jan 2004
Posts: 212
Likes: 0
From: Anaheim, California
Ob2 is working with no codes.
I will redo all my test over with the new dvom.
Thank you,
Navy
Jul 21, 2012 | 11:39 AM
#108
WOW, you're RIGHT THERE! Just checking in, SC, .... amazing the stuff some swaps provide for in regards to 'fishing expo's'..... Good to see you doing a proper P.O.E. Vitale is one of the 'GURU's pertaining to this swap/this motor now.... Along with your digging for the gremlin and all the other 3.4'NAUTS, ... you'll have it in no time! WOOT!
Can't wait to see a Drive by Video with an RV doing a lil burn out! hehehe... Jk, but you know what I mean... Best wishes, man!
Vitale is one of the 'GURU's pertaining to this swap/this motor now.... Along with your digging for the gremlin and all the other 3.4'NAUTS, ... you'll have it in no time! WOOT! Can't wait to see a Drive by Video with an RV doing a lil burn out! hehehe... Jk, but you know what I mean... Best wishes, man!
Jul 21, 2012 | 04:27 PM
#109
Thread Starter
Registered User
iTrader: (1)
Joined: Jan 2004
Posts: 212
Likes: 0
From: Anaheim, California
WOW, you're RIGHT THERE! Just checking in, SC, .... amazing the stuff some swaps provide for in regards to 'fishing expo's'..... Good to see you doing a proper P.O.E. Vitale is one of the 'GURU's pertaining to this swap/this motor now.... Along with your digging for the gremlin and all the other 3.4'NAUTS, ... you'll have it in no time! WOOT!
Can't wait to see a Drive by Video with an RV doing a lil burn out! hehehe... Jk, but you know what I mean... Best wishes, man!
Vitale is one of the 'GURU's pertaining to this swap/this motor now.... Along with your digging for the gremlin and all the other 3.4'NAUTS, ... you'll have it in no time! WOOT! Can't wait to see a Drive by Video with an RV doing a lil burn out! hehehe... Jk, but you know what I mean... Best wishes, man!
Thank you for the wishes. I can't give up when I had it running once. Going to do one wire at a time until I find the problem.
Jul 21, 2012 | 09:35 PM
#110

I have a dumb suggestion...checked all your wires at the ECU. Make sure none of the pins walk out. Some pins may walk out when you connect it to the ECU. It may be just enough to not make the connection.
Jul 23, 2012 | 09:03 AM
#111
Thread Starter
Registered User
iTrader: (1)
Joined: Jan 2004
Posts: 212
Likes: 0
From: Anaheim, California
Thank you,
Navy
Jul 23, 2012 | 10:11 AM
#112
Hey man,..... sorry........... P.O.E. ; Process Of Elimination ..... you're on it... and you'll find that NASTY lil Electrical-Gremlin in no time!
Trying to remember where I heard something about a 3.4 with Trailer kit that got all corroded/plugged up with mud that ended up shorting out something and shutting off the injectors/and they STAYED shut for some reason... "Fuel Cut" can do that? Anyway, just mention that cuz it seems SO MANY things are involved... but as you head down a good P.O.E. list.. you'll find it that much faster.
..... you're on it... and you'll find that NASTY lil Electrical-Gremlin in no time! Trying to remember where I heard something about a 3.4 with Trailer kit that got all corroded/plugged up with mud that ended up shorting out something and shutting off the injectors/and they STAYED shut for some reason... "Fuel Cut" can do that? Anyway, just mention that cuz it seems SO MANY things are involved... but as you head down a good P.O.E. list.. you'll find it that much faster.
Jul 27, 2012 | 08:25 AM
#114
Thread Starter
Registered User
iTrader: (1)
Joined: Jan 2004
Posts: 212
Likes: 0
From: Anaheim, California
I'm going to try to find out whats wrong today. If not I got to get this thing over to toyota. I work at toyota right now so maybe they'll give me a discount or something.
Jul 27, 2012 | 12:53 PM
#115
Thread Starter
Registered User
iTrader: (1)
Joined: Jan 2004
Posts: 212
Likes: 0
From: Anaheim, California
She is running again  . Now I can move forward and start doing the evap stuff.
The problem was a ground wire that was missed pinned. I didn't even remember removing when soldiering the starter wire. The ground wire was EOM E14 pin 10.
I found this because I was going to finally hard wire my OB2 and see if I get any other readings. OB2 takes pin 13 and 14 in the E14 connector. The EOM wire was in pin 13. I removed and plugged in the right spot and she fired right up!
Its a humbling experience, but I wouldn't have done it without yotatech.
Stay tuned for gas tank welding and evap nonsense.
Thank you for all helping!
Navy
. Now I can move forward and start doing the evap stuff. The problem was a ground wire that was missed pinned. I didn't even remember removing when soldiering the starter wire. The ground wire was EOM E14 pin 10.
I found this because I was going to finally hard wire my OB2 and see if I get any other readings. OB2 takes pin 13 and 14 in the E14 connector. The EOM wire was in pin 13. I removed and plugged in the right spot and she fired right up!
Its a humbling experience, but I wouldn't have done it without yotatech.
Stay tuned for gas tank welding and evap nonsense.
Thank you for all helping!
Navy
Jul 30, 2012 | 06:56 PM
#116
Thread Starter
Registered User
iTrader: (1)
Joined: Jan 2004
Posts: 212
Likes: 0
From: Anaheim, California
Just finished soildering everything up today. The tank has evap stuff on it now. I didn't have a camera on me during the extravaganza, but I'll snap some of the aftermath tomorrow.
I can't wait to finish this project and never have another one.
Haha
Navy
I can't wait to finish this project and never have another one.
Haha
Navy

 Jul 31, 2012 | 10:31 AM
#119
Thread Starter
Registered User
iTrader: (1)
Joined: Jan 2004
Posts: 212
Likes: 0
From: Anaheim, California
Most of the things I did on this swap was a first time for me. I didn't get the exhaust done because I just didn't have the skills or tools to do so. Same was done with the tank.
I had a buddy help me with it because he knew what he was doing.
We first attached a piece of wood to the bottom of what we were going to drill out with the hole saw. (pictures are of the aftermath)
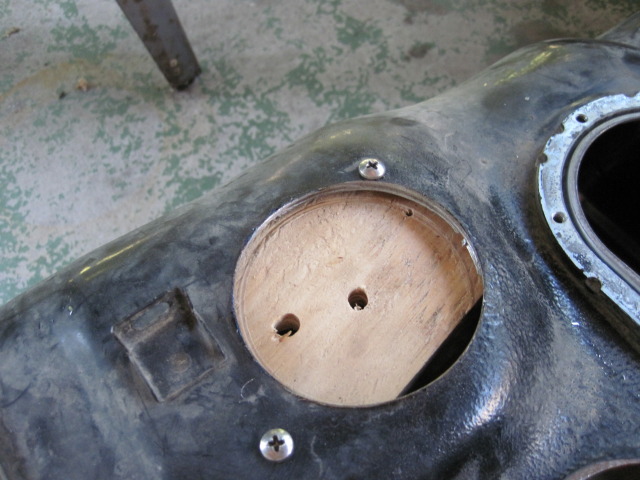
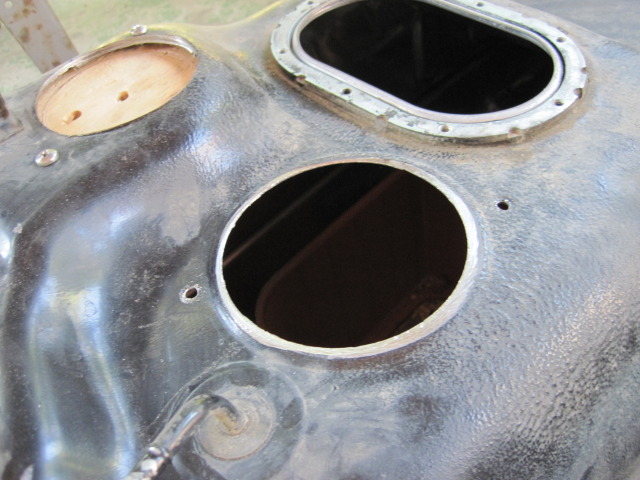
Clean the paint off of the tank and new piece you just cut out. Use a hammer to get the smallest gap possible. Apply flux and heat up with a propane torch. Feed the soldier as soon as it melts on the metal.

I still need to do some stuff for the pressure sensor part, but I'll have before and after pictures of that at least.
I had a buddy help me with it because he knew what he was doing.
We first attached a piece of wood to the bottom of what we were going to drill out with the hole saw. (pictures are of the aftermath)
Clean the paint off of the tank and new piece you just cut out. Use a hammer to get the smallest gap possible. Apply flux and heat up with a propane torch. Feed the soldier as soon as it melts on the metal.
I still need to do some stuff for the pressure sensor part, but I'll have before and after pictures of that at least.
Aug 1, 2012 | 12:26 PM
#120
Thread Starter
Registered User
iTrader: (1)
Joined: Jan 2004
Posts: 212
Likes: 0
From: Anaheim, California
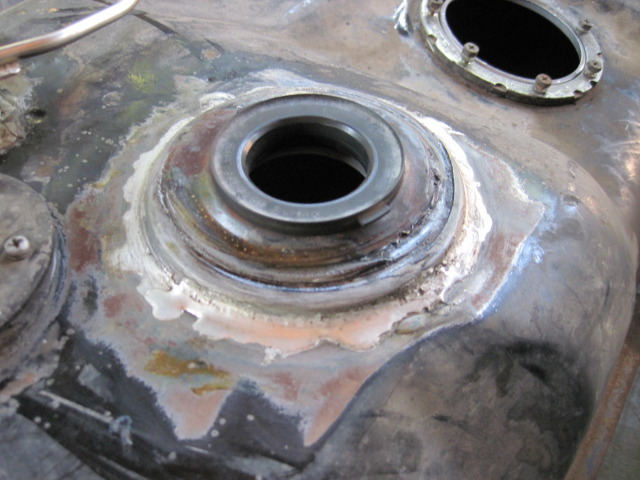
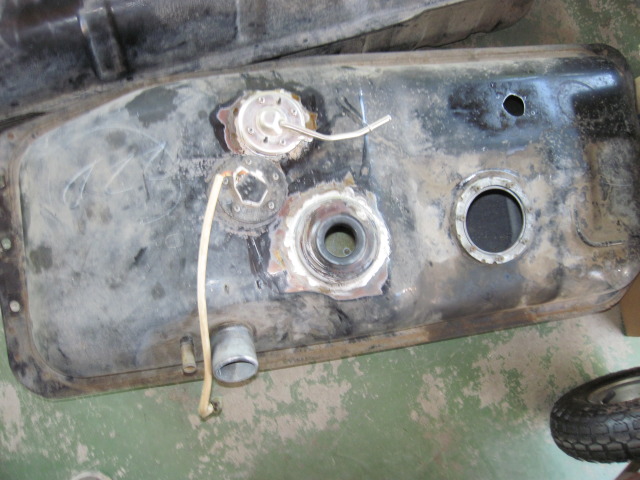
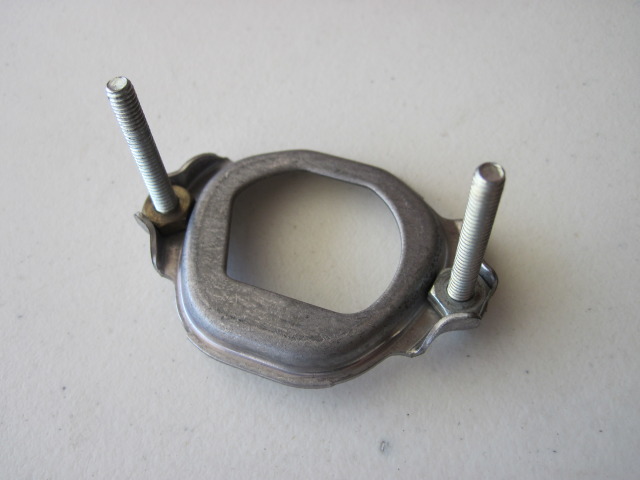
I cut the weird shape hole for the pressure sensor. It may not be perfect, but its a tight fit.
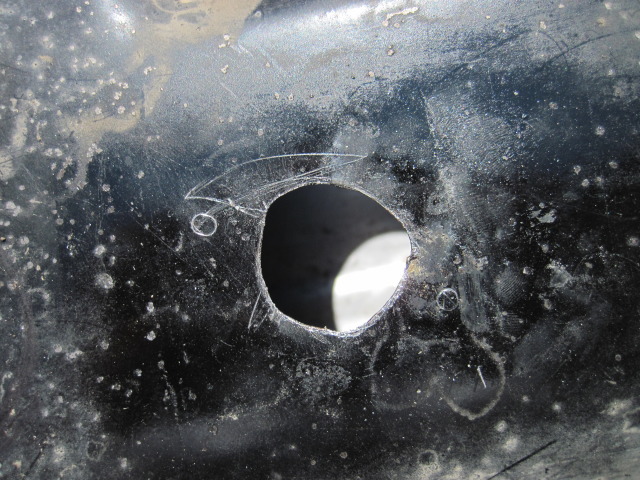
If you look at how the pressure sensor it is mounted to the 5vz fuel pump. You have to take the pump out to get to it. I didn't use the 5vz pump, but kept the old pump. So I had to have bolts come out to the tank so I can secure the pressure sensor.

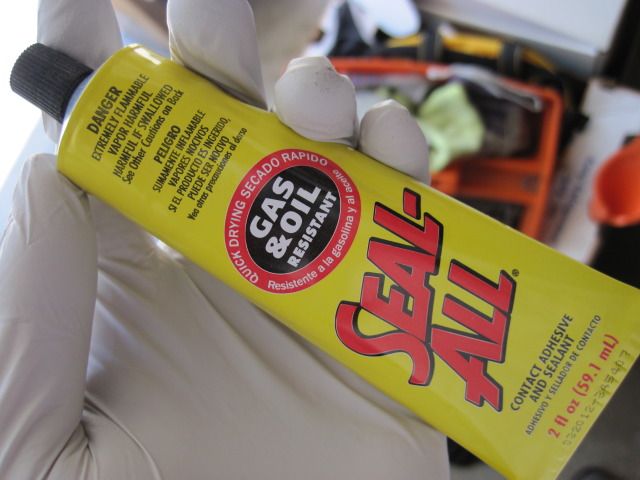
I sealed the tank around where we soldiered.
Prime:
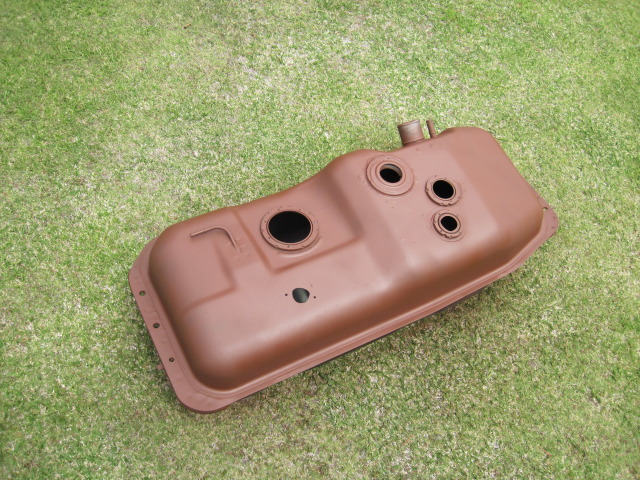
Then paint:
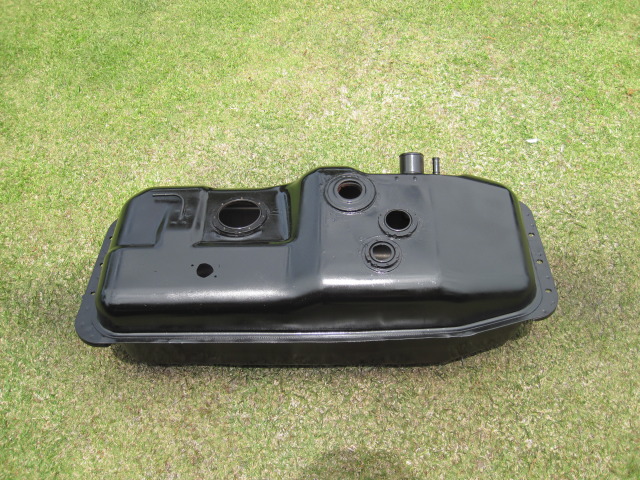
I'll throw one more coat today and rinse the tank out tomorrow and mount her up.
If you look at how the pressure sensor it is mounted to the 5vz fuel pump. You have to take the pump out to get to it. I didn't use the 5vz pump, but kept the old pump. So I had to have bolts come out to the tank so I can secure the pressure sensor.
I sealed the tank around where we soldiered.
Prime:
Then paint:
I'll throw one more coat today and rinse the tank out tomorrow and mount her up.
Last edited by superchiem; Aug 2, 2012 at 03:28 PM.


