
superchiem's Toyota RV 5vz Swap

 Aug 3, 2012 | 01:15 PM
#123
Thread Starter
Registered User
iTrader: (1)
Joined: Jan 2004
Posts: 212
Likes: 0
From: Anaheim, California
Thanks guys!
Got the tank ready to mount up. Had to plug a breather port that goes to the filler neck. We won't be using that anymore.

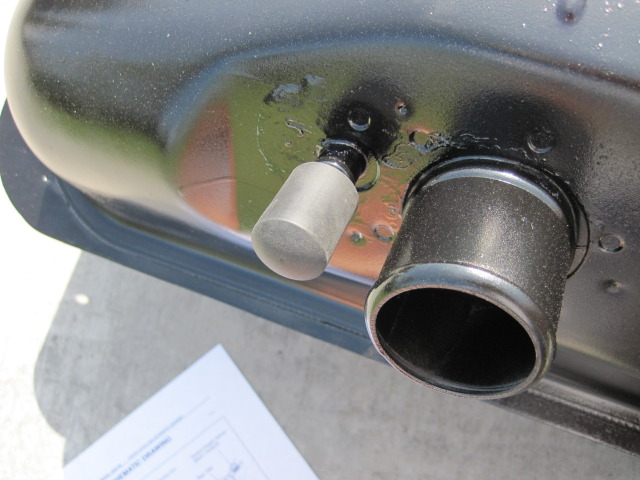

This goes to the smaller tube on the filler neck. We are still using the filler neck side. It will go to the charcoal canister.
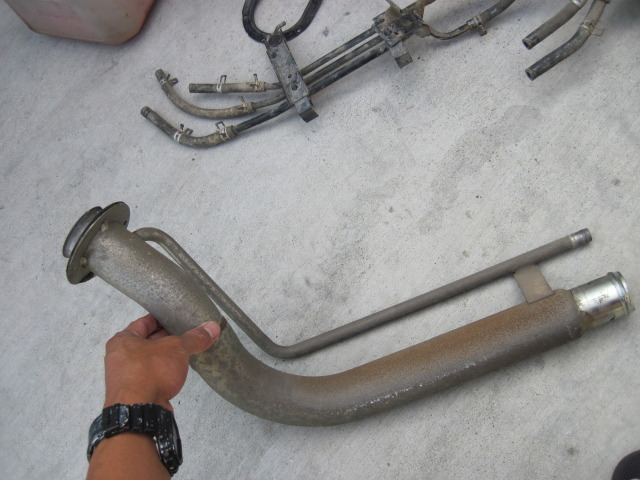
I needed to add 2 lines to the filler neck because thats how the 2002 4runner was set up.
Visualize:

And Attack!:
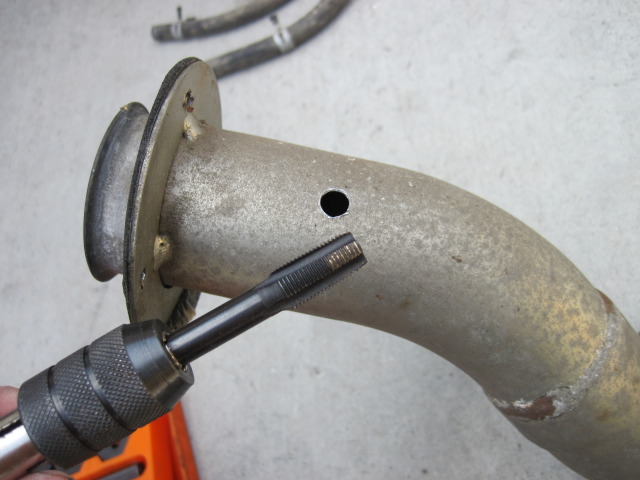
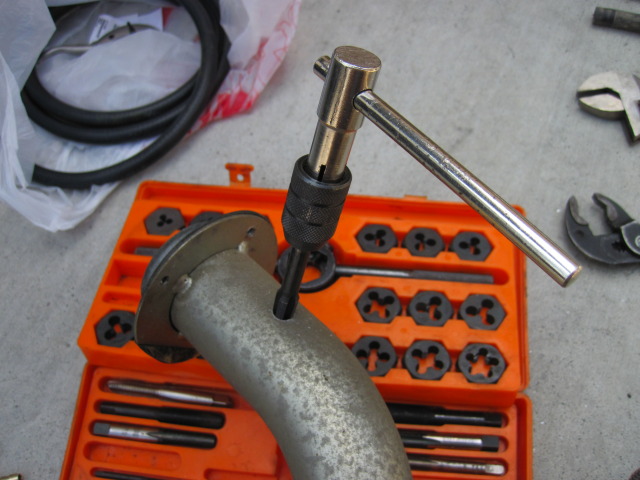

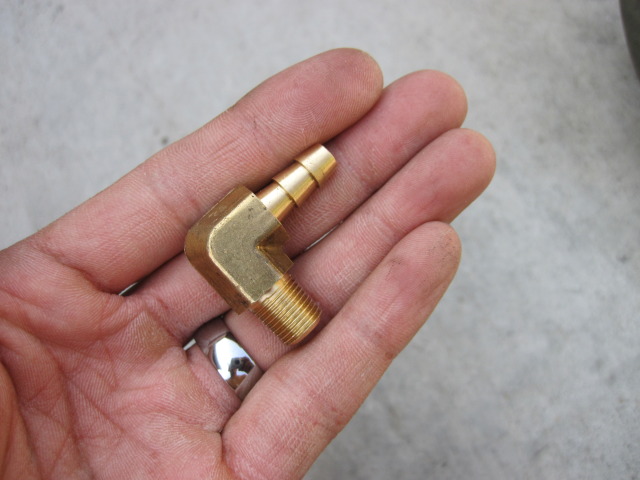
I used 1/8th npt to a 90 degree 1/4" barb. The fuel hoses used on the tank are mostly 1/4".
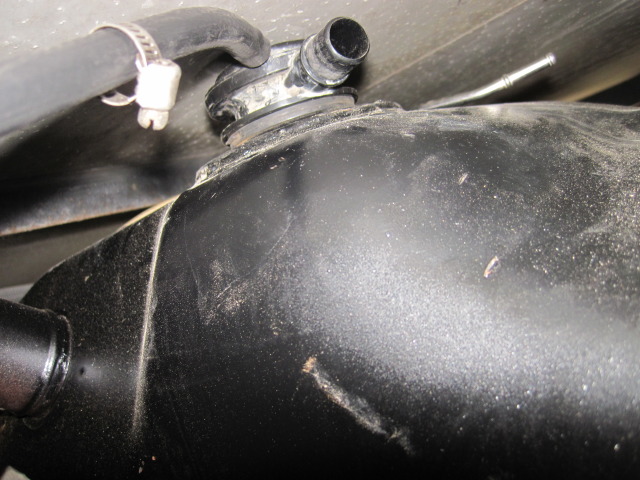
Here is the top of the tank.
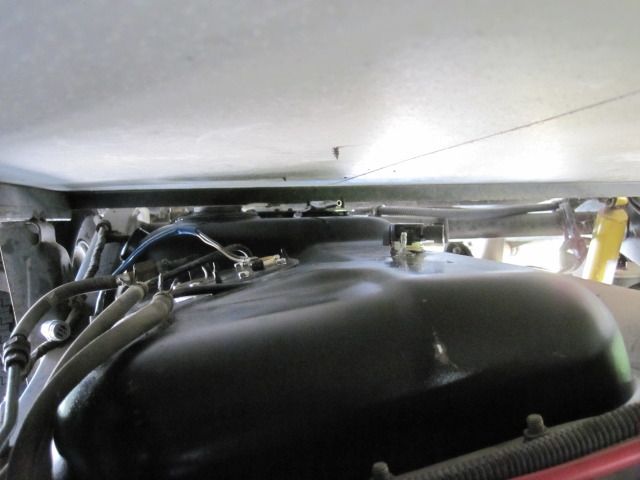
I forgot to mount the large black float. I had pulled to tank off and put the float in. I found out that it touches, but barely. I'm probably going to add a few washers or something to bring the tank down 1/8".
Got the tank ready to mount up. Had to plug a breather port that goes to the filler neck. We won't be using that anymore.
This goes to the smaller tube on the filler neck. We are still using the filler neck side. It will go to the charcoal canister.
I needed to add 2 lines to the filler neck because thats how the 2002 4runner was set up.
Visualize:
And Attack!:
I used 1/8th npt to a 90 degree 1/4" barb. The fuel hoses used on the tank are mostly 1/4".
Here is the top of the tank.
I forgot to mount the large black float. I had pulled to tank off and put the float in. I found out that it touches, but barely. I'm probably going to add a few washers or something to bring the tank down 1/8".
Aug 6, 2012 | 06:34 PM
#124
Thread Starter
Registered User
iTrader: (1)
Joined: Jan 2004
Posts: 212
Likes: 0
From: Anaheim, California
Ah another day with no work. Toyota sales are down I guess. So we have been slow.
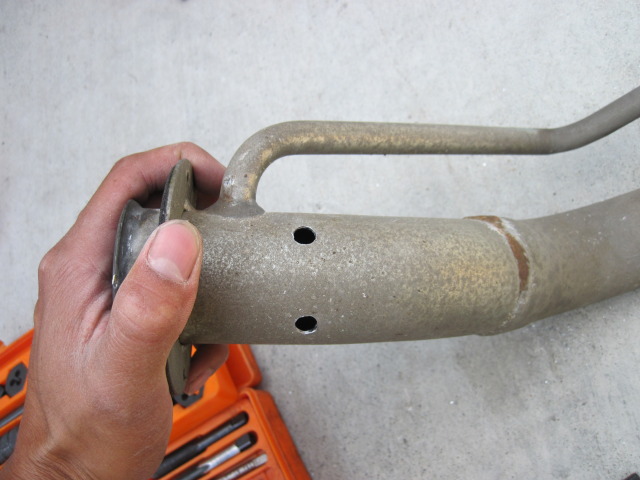
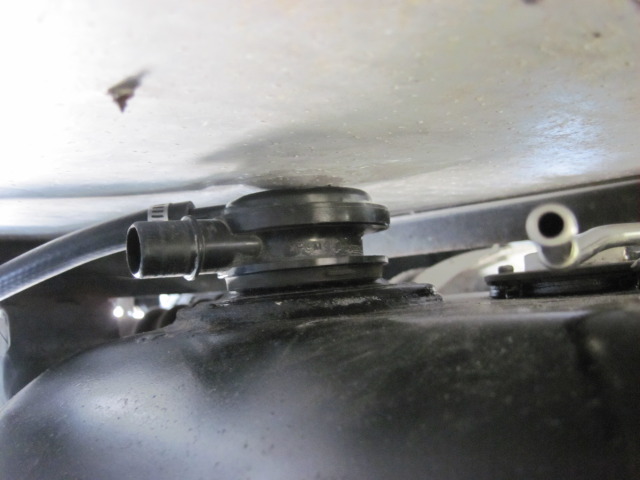
Anywho, added 1/4" line to the filler neck. A bit of advice when adding the 90 degree brass fittings. Make sure you put them anywhere above 3 and 9 o'clock. That way when you pour gas it doesn't get into those lines. I figure I should copy how the stock 2002 4runner filler neck was.
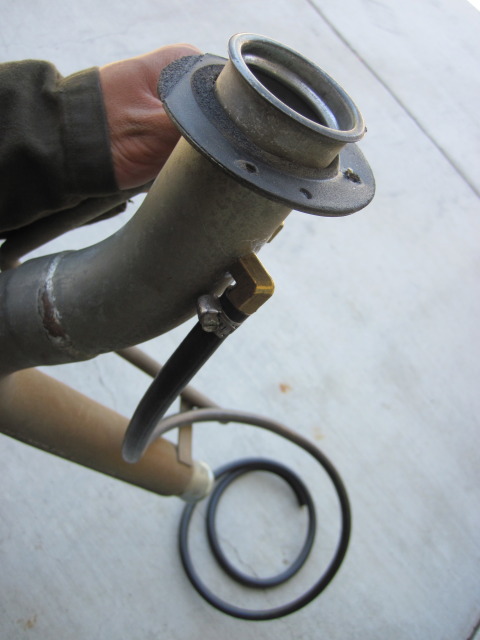
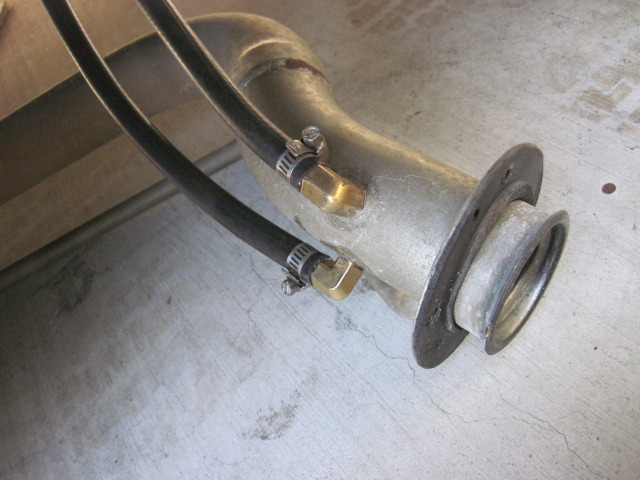
One goes to a return line on the tank.
The other to the large float thing.
You can see the float back there, with about 1 inch of gap. I had to loosen the tank to get my hands in there. The float actually sits up against the body of the rv. I have to make some spacers for that.
Anywho, added 1/4" line to the filler neck. A bit of advice when adding the 90 degree brass fittings. Make sure you put them anywhere above 3 and 9 o'clock. That way when you pour gas it doesn't get into those lines. I figure I should copy how the stock 2002 4runner filler neck was.
One goes to a return line on the tank.
The other to the large float thing.
You can see the float back there, with about 1 inch of gap. I had to loosen the tank to get my hands in there. The float actually sits up against the body of the rv. I have to make some spacers for that.
Aug 7, 2012 | 08:06 PM
#125
Thread Starter
Registered User
iTrader: (1)
Joined: Jan 2004
Posts: 212
Likes: 0
From: Anaheim, California
update!
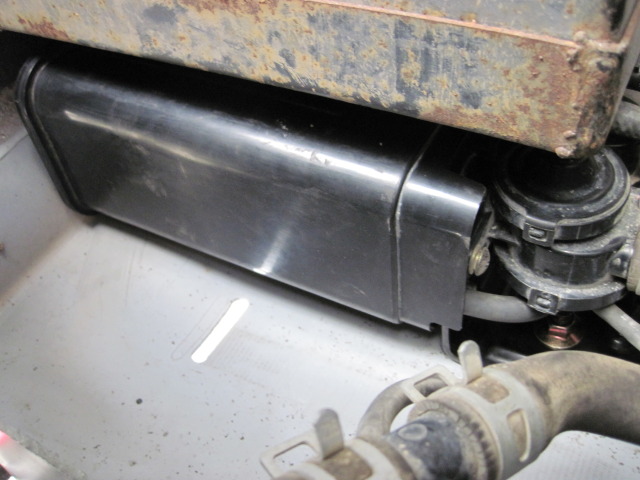
Made spacers out of some aluminum metal from True Value.

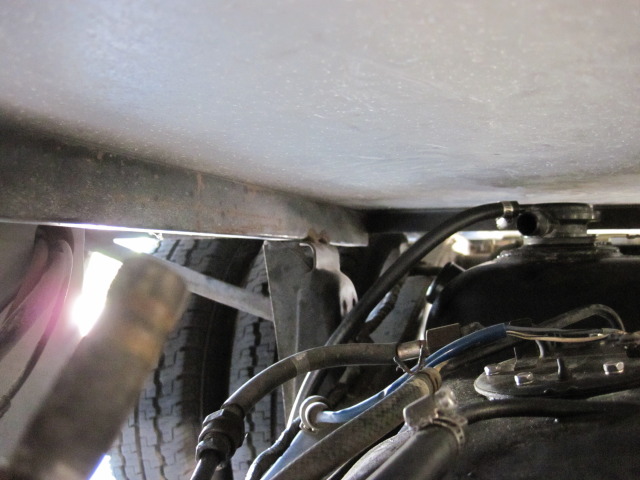
Here is the tank with the spacer. It may look like its touching, but theres about 1/4" gap.
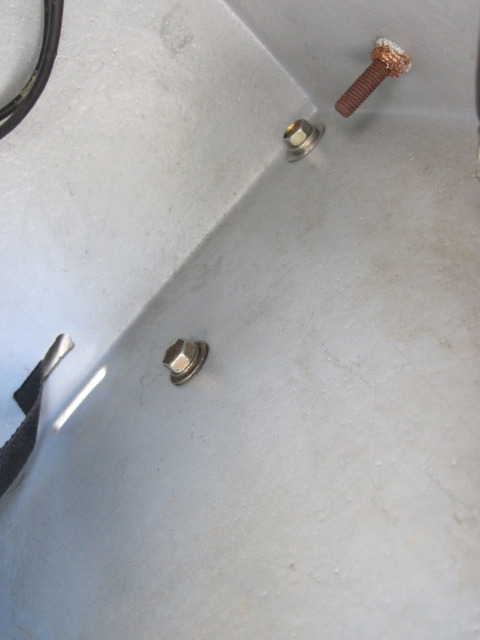
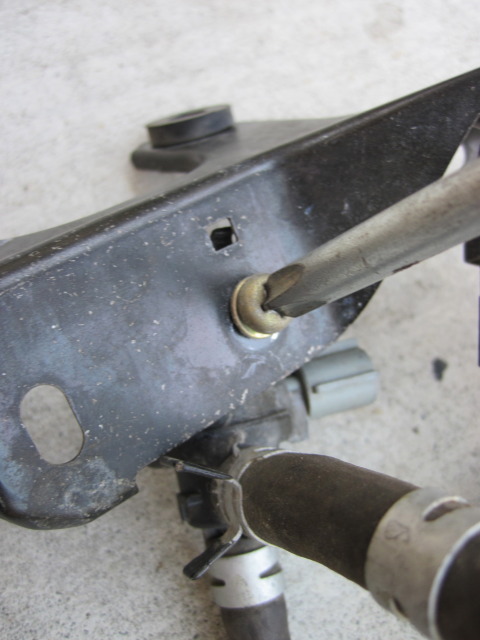
I drilled a hole in the charcoal canister bracket to mount it to the side of the coach battery box I have in the rv.

Make some marks:
Mounted:

In the battery box:
I had a celeberity guess today. SafetyDang helped me with the vsv stuff in the engine bay.
Step 1 take out old canister:

Step 2 bend bracket to mount to vsv stuff:
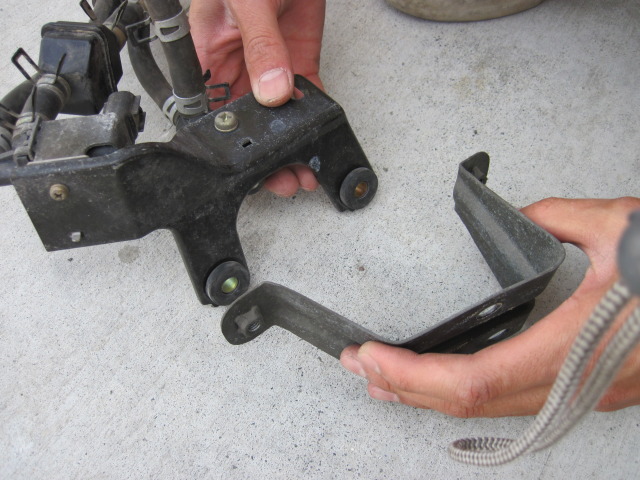
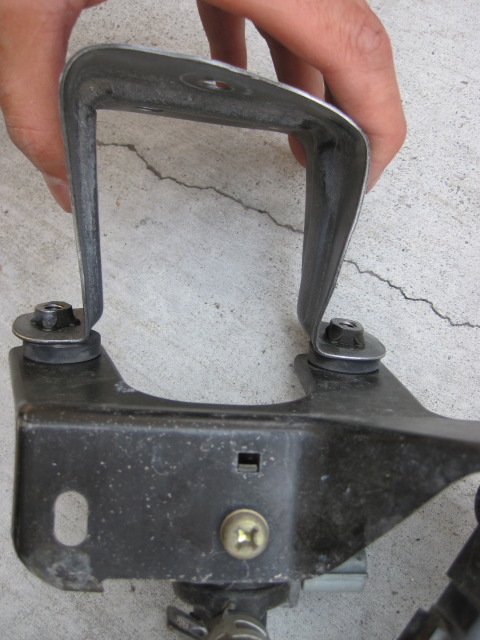
Step 3 flip vsv up side down:
Step 4 finish everything, but don't take a picture :lmao:
...
Made spacers out of some aluminum metal from True Value.
Here is the tank with the spacer. It may look like its touching, but theres about 1/4" gap.
I drilled a hole in the charcoal canister bracket to mount it to the side of the coach battery box I have in the rv.
Make some marks:
Mounted:
In the battery box:
I had a celeberity guess today. SafetyDang helped me with the vsv stuff in the engine bay.
Step 1 take out old canister:
Step 2 bend bracket to mount to vsv stuff:
Step 3 flip vsv up side down:
Step 4 finish everything, but don't take a picture :lmao:
...

 Aug 17, 2012 | 09:42 PM
#128
Thread Starter
Registered User
iTrader: (1)
Joined: Jan 2004
Posts: 212
Likes: 0
From: Anaheim, California
Still chugging along here. I hooked up my obd2 and had an "data link error" message. I looked at the connector and the EOM ground was actually in the red OBD2 wire spot. If I unplug that and put it in the correct pin for EOM, the truck doesn't start. I then plugged the red wire where the EOM ground was. Then plugged red OBD2 wire where the EOM ground was. Now the truck starts and my code reader is working again.
I guess toyota messed up on the pin out. Pin 10 and Pin 15 of E14 can be mistaken for each other if you hold the connector upside down.
I also got the dash shifter indicators to work, except for drive. It looks like that bulbs is out.
I guess toyota messed up on the pin out. Pin 10 and Pin 15 of E14 can be mistaken for each other if you hold the connector upside down.
I also got the dash shifter indicators to work, except for drive. It looks like that bulbs is out.
Aug 20, 2012 | 08:17 AM
#131
Thread Starter
Registered User
iTrader: (1)
Joined: Jan 2004
Posts: 212
Likes: 0
From: Anaheim, California
A bit frustrated the past 2 days. I thought I could bring the rv to work and work on it on my off day. First thing I do is pull into a parking spot and rip the back bumper off at work. Nothing happen to my work neighbors tow truck though thank goodness. He didn't even care about his truck and was bummed that I ripped my bumper off.
Anywho I tried to wire the tach yesterday with no luck. I took the tach apart and found that one of the shifting lights were out. I moved the bad D light to L. This is until I can get to toyota and order the part. I slap the tach back together and it sits at 3000 rpm with the key on. I figured I must have screwed up the tach alignment, since I took off the needle. I take the needle off of the tach plug it back in. With the key on I put the needle back on. This should 0 it out I think, but nope it doesn't work.
I'm going to order another sr5 cluster and try again. Today I'm going to get the speedo working with the Dakota Digital device I bought.
Lets see what happens!
 Aug 21, 2012 | 01:40 PM
#135

Hey, my tach did that too. put in the key and it sits at 3K.
All I did was pull it off and turn the key on and put it so it read zero.
Works fine now. Yes, I did the resistor mod as well.
btw, I'm in Torrance. Let me know if you need help.
All I did was pull it off and turn the key on and put it so it read zero.
Works fine now. Yes, I did the resistor mod as well.
btw, I'm in Torrance. Let me know if you need help.
Aug 21, 2012 | 05:03 PM
#136


resistors come off the line thousands at a time .. I recommend you check the resistance of the resistor FIRST , before you sauder it .
I found this out the hard way !!
last build I did , 8 out of 10 resistors were NOT correct
.
I found this out the hard way !!
last build I did , 8 out of 10 resistors were NOT correct
.
Aug 21, 2012 | 08:02 PM
#137
Thread Starter
Registered User
iTrader: (1)
Joined: Jan 2004
Posts: 212
Likes: 0
From: Anaheim, California
Going to look into it.
Well thats good to hear! Did you do add a 20k resistor? If I need a hand I'll surely pm you! Thank you!
Ic. I think I got around 41k, but I'll double check. Do I need to add a resistor if its around there that resistance?
I'm going to push hard to finish the smog/evap lines and get the check engine light to work tomorrow (I believe thats all I need for the smog referee). I hope he doesn't give me grief for no tach and speedo. I need to see the smog referee the first week of sept. My smog and registration ends on sept 10th.
I'm going to push hard to finish the smog/evap lines and get the check engine light to work tomorrow (I believe thats all I need for the smog referee). I hope he doesn't give me grief for no tach and speedo. I need to see the smog referee the first week of sept. My smog and registration ends on sept 10th.
Last edited by superchiem; Aug 21, 2012 at 08:03 PM.
Aug 23, 2012 | 08:24 PM
#138
Thread Starter
Registered User
iTrader: (1)
Joined: Jan 2004
Posts: 212
Likes: 0
From: Anaheim, California
She's getting close. Probably going to set up an appointment with the smog referee next week sometime. Just need a small hose and the check engine line to be finished.
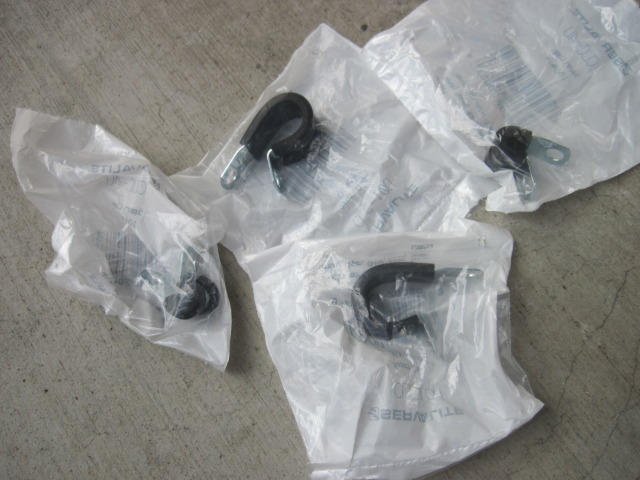
Got about 10ft of fuel line and some clamps. The parts guy looked at me like I was crazy. He didn't know it was for a RV. I ended up using 9 1/2.
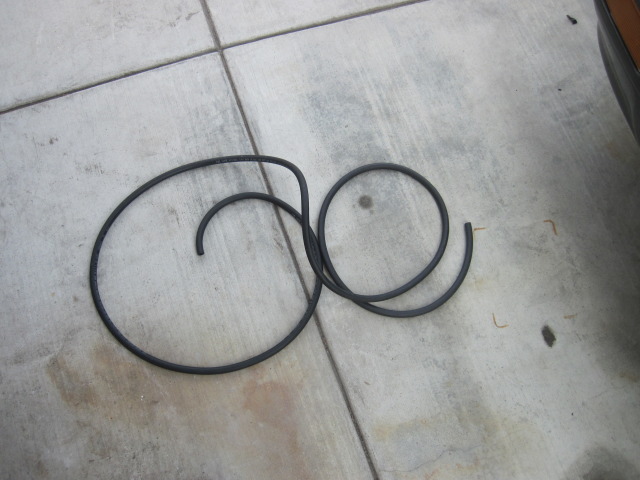
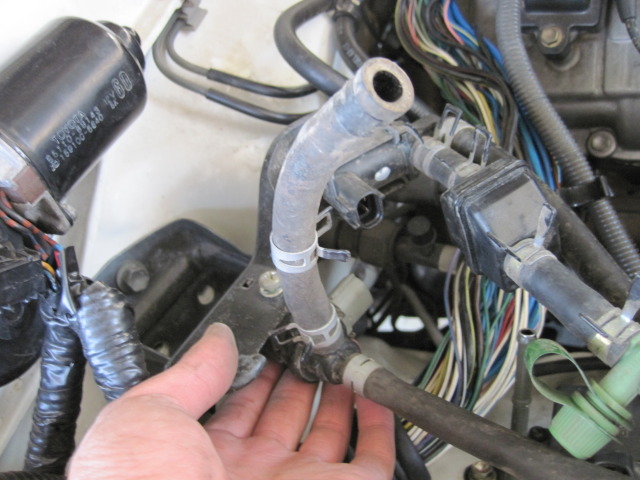
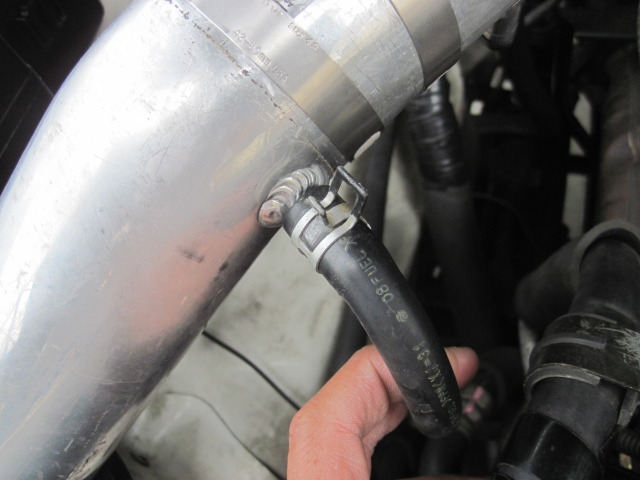
So it connects to here and then goes all the way to the charcoal canister.

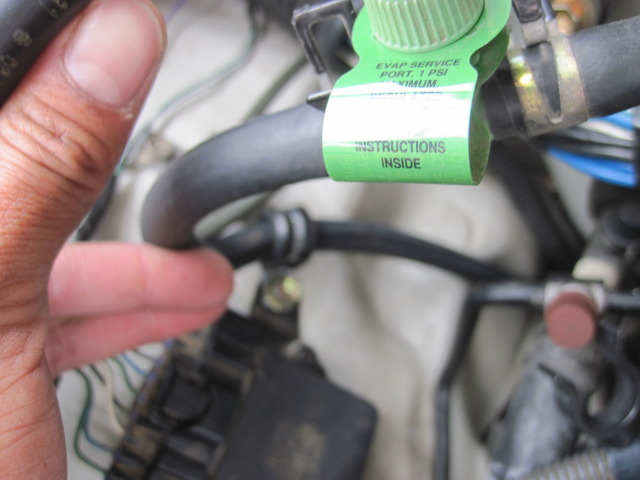
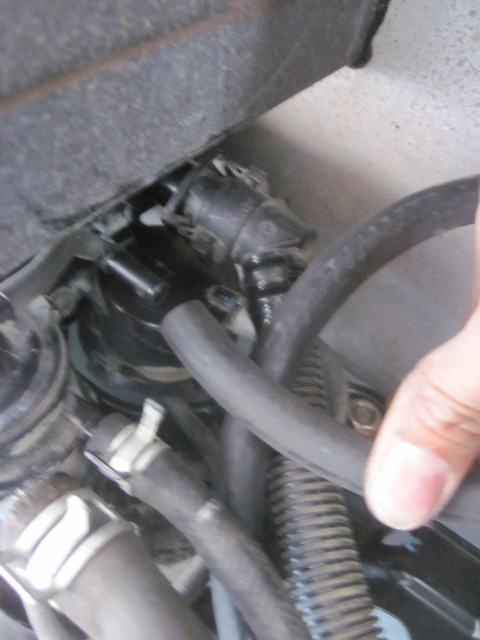
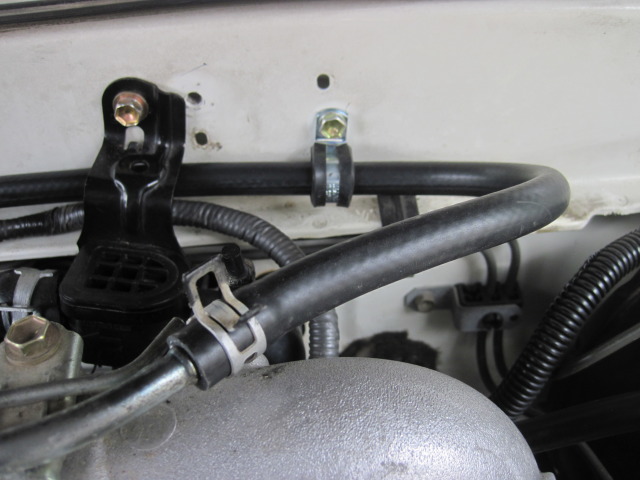
One of the tubes go from here:
To here"

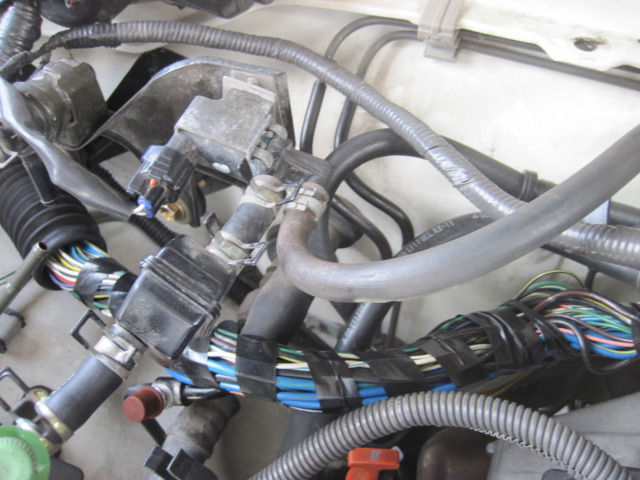
This tube goes to the intake.
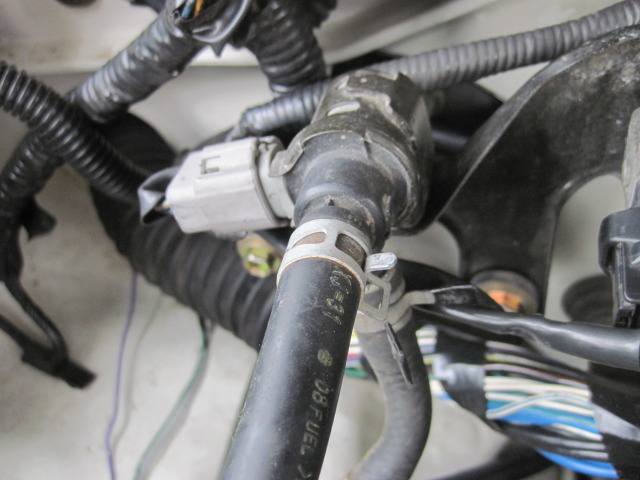
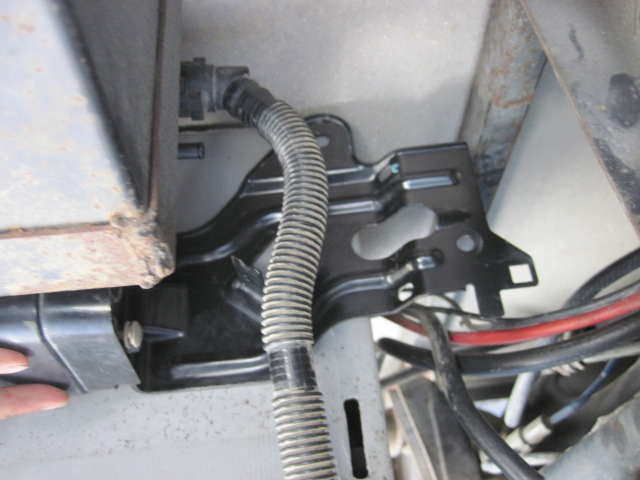
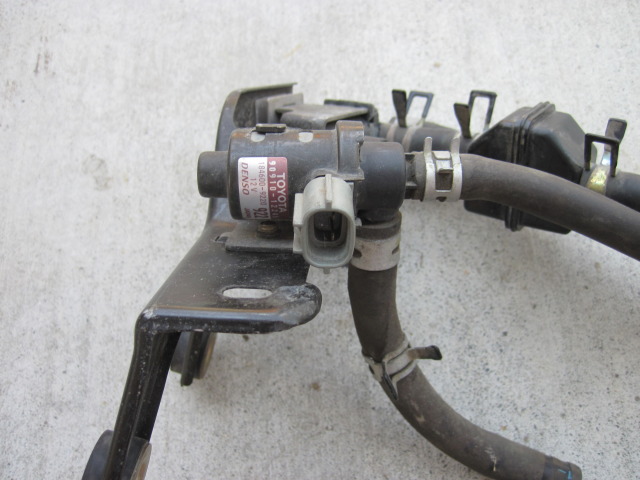
This is the plug for the vapor pressure sensor:
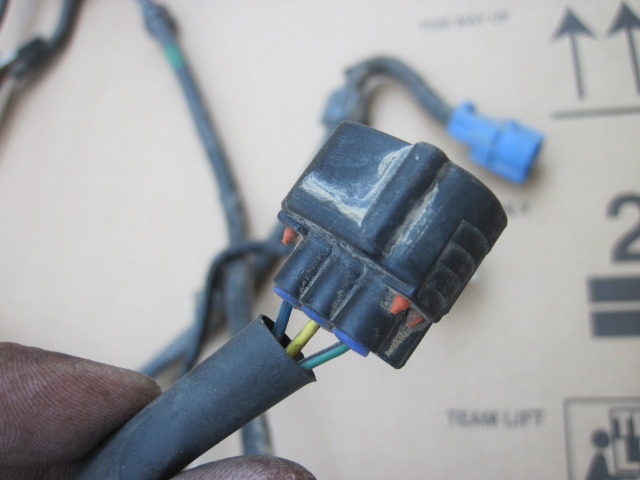
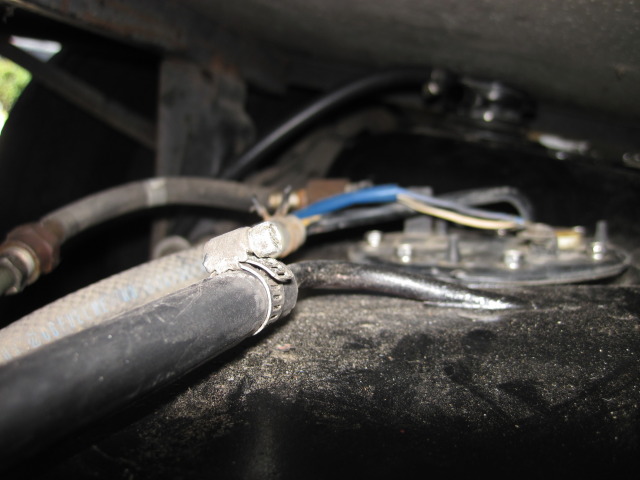
If you follow the loom you get to this connector:
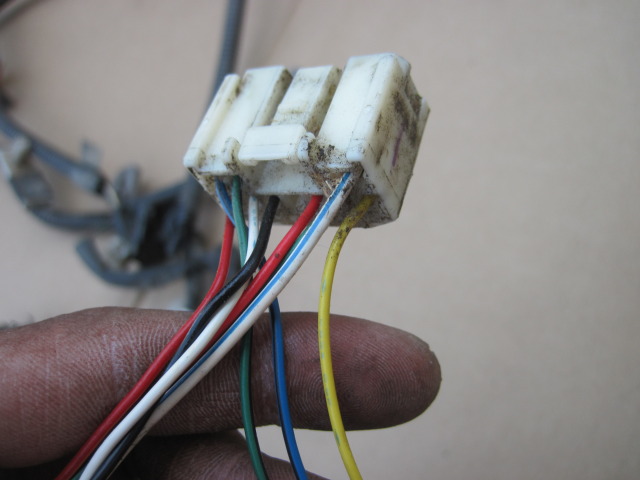
I just unpinned the other wires I didn't need.
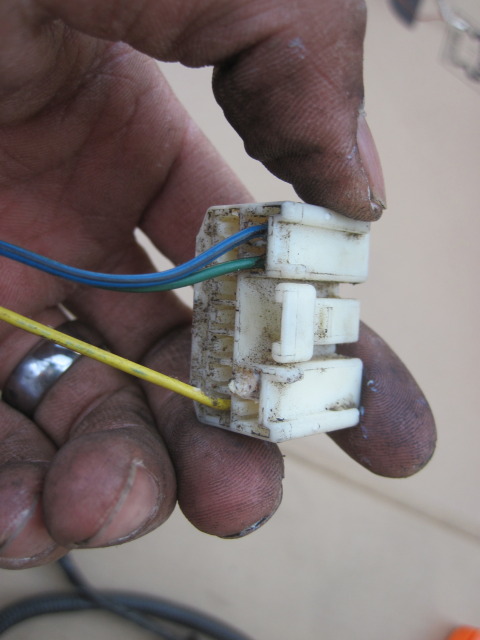
This plugs into another connector, which leads to the main connector you should still have on the engine harness. I just soldiered the three wires and wrapped it all up.
Got about 10ft of fuel line and some clamps. The parts guy looked at me like I was crazy. He didn't know it was for a RV. I ended up using 9 1/2.
So it connects to here and then goes all the way to the charcoal canister.
One of the tubes go from here:
To here"
This tube goes to the intake.
This is the plug for the vapor pressure sensor:
If you follow the loom you get to this connector:
I just unpinned the other wires I didn't need.
This plugs into another connector, which leads to the main connector you should still have on the engine harness. I just soldiered the three wires and wrapped it all up.
Aug 24, 2012 | 08:46 AM
#139
I hope you have a OBDII reader that shows all the test that the smog ref. looks at. Make sure the status for Evap Monitor status is "OK" or "Ready". "N/A" is an automatic fail.
I have 4 wired TPS which falls in the 1995 spec so I don't need to meet that req.
I have 4 wired TPS which falls in the 1995 spec so I don't need to meet that req.
Aug 24, 2012 | 04:50 PM
#140
Thread Starter
Registered User
iTrader: (1)
Joined: Jan 2004
Posts: 212
Likes: 0
From: Anaheim, California
http://www.amazon.com/Actron-CP9410-.../dp/B000YIW5VA
It says 3 ready or something like that. I think I should be good with the emissions stuff. Although when I hooked up the check engine light. I actually got a check engine light. Its p1135, which is the o2 sensor. I cleared it and it came right back. So looks like a trip to toyota for an o2 sensor. I scheduled a smog referee meeting this Thursday. I don't have a tach or speedo. I hope he doesn't fail me for that.
I didn't solder a 20kohm resistor to the tach, but I just turned the potentiometer on the tach and added 20kohms~ it now reads 61.9kohms. Still no tach movement.
Last edited by superchiem; Aug 28, 2012 at 03:08 PM. Reason: spelling


