
Quick Draw's 3.4 Swap for Doris
 Oct 30, 2010 | 05:46 PM
#22
Thread Starter
Registered User
Joined: Sep 2010
Posts: 59
Likes: 1
From: Bellvue, CO
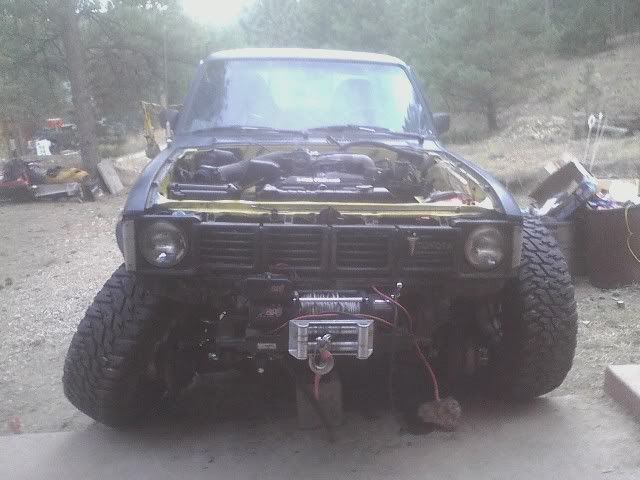
Well its tack welded in there. I'm not positive yet that that will be its final position, and I'm going to have to pull it part way back out again to tweak a few things. But the point is that its sitting in there. I "shoe-horned" it in with transmission and all...which wasn't easy. But I really hate laying on my back putting transmissions in...
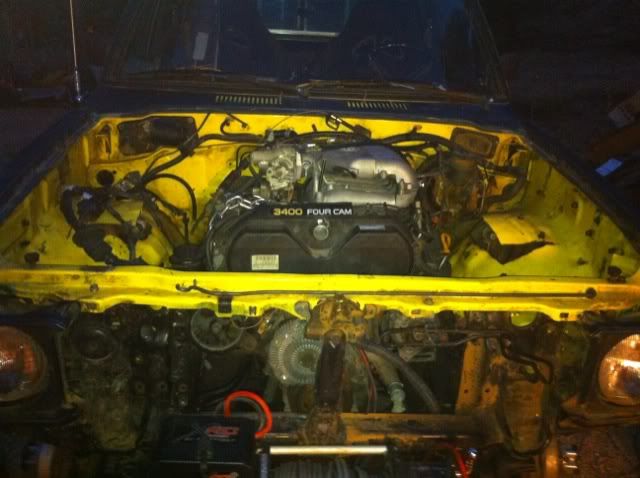
The hood almost fits... which means the engine probably needs to be a touch higher.
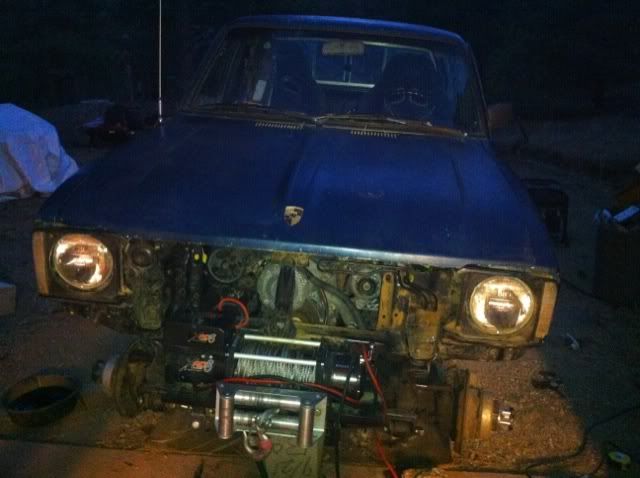
The hood almost fits... which means the engine probably needs to be a touch higher.
Last edited by Quick Draw; Oct 30, 2010 at 05:49 PM.
Oct 31, 2010 | 05:45 PM
#23
Thread Starter
Registered User
Joined: Sep 2010
Posts: 59
Likes: 1
From: Bellvue, CO
I got the motor mounts completed but not fully welded today. Then I also played around with how I'm going to shuffle things in my engine bay:
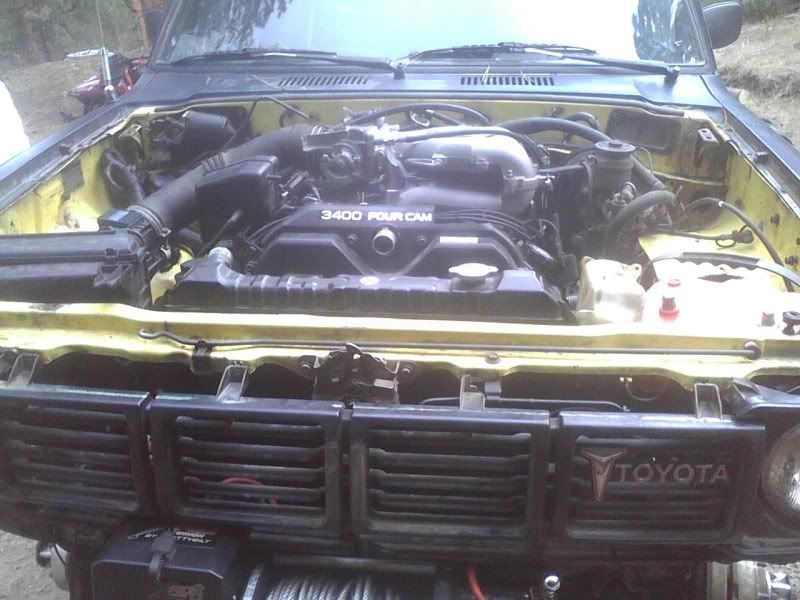
The engine will be more level when the rear is sitting on something more than a jackstand..
The engine will be more level when the rear is sitting on something more than a jackstand..
Nov 6, 2010 | 07:57 AM
#25
Thread Starter
Registered User
Joined: Sep 2010
Posts: 59
Likes: 1
From: Bellvue, CO
So I've been running around, shortening my parts needed list. I'm getting fairly close to having all the little things. Now I've got everything for the radiator (shroud, fan, hoses, etc). I have a throttle cable, a catalytic converter, a power steering line, a fuel line... My Marlin 23 spline input just showed up so that I can mate my gear drive adapter and dual cases to the auto tranny. I still need some O2 sensor bungs to finish up the exhaust. I'll need to shorten my driveshaft some more...and make a new square front driveshaft. This auto tranny added about 8" or so to my drivetrain length. With the duals on there, the rear output ends up pretty close to the driveshaft collar at the back of the cab. At this rate, it shouldn't take too long to get this engine all plumbed up.
After that I'll start on the wiring, and that should stall me for awhile. The entire truck still needs to be rewired since this swap started with my old harness going up in smoke. Fortunately, I am fairly decent with wiring and how some of the more complex circuits work. The cleanliness of my finished product could use some work, but I'm sure that I'll have plenty of practice with that!
After that I'll start on the wiring, and that should stall me for awhile. The entire truck still needs to be rewired since this swap started with my old harness going up in smoke. Fortunately, I am fairly decent with wiring and how some of the more complex circuits work. The cleanliness of my finished product could use some work, but I'm sure that I'll have plenty of practice with that!
Nov 10, 2010 | 01:40 PM
#26
Registered User
Joined: Aug 2007
Posts: 319
Likes: 0
 Nov 18, 2010 | 04:06 PM
#30
Thread Starter
Registered User
Joined: Sep 2010
Posts: 59
Likes: 1
From: Bellvue, CO
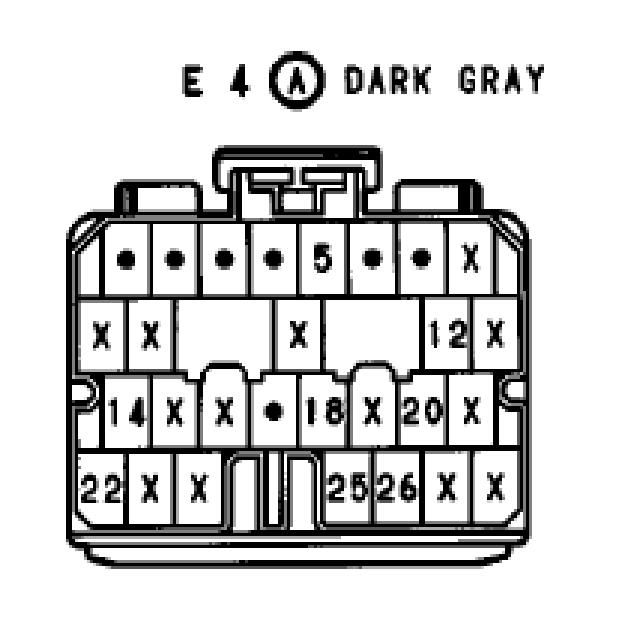
So in this plug diagram...can somebody tell me what the dots indicate? I've got all the numbers labeled out, but I'm not sure what to do with those... I can't find a key that tells me what that is anywhere. Are they grounds?
Nov 18, 2010 | 05:36 PM
#31
Registered User
Joined: Aug 2007
Posts: 319
Likes: 0
PM me your email address. thx
Last edited by DWEINBERG01; Nov 18, 2010 at 08:57 PM.
Nov 27, 2010 | 07:42 PM
#33

Registered User
Joined: Apr 2007
Posts: 1,580
Likes: 1
From: Park City, UT
I'll be watching this one, haven't seen much info on swapping Toy v6's into this generation. If I read right, you just moved the frame mounts back and used your Trail Gear mounts to the original 3.4 brackets on the block?
Nov 30, 2010 | 11:01 AM
#34
Thread Starter
Registered User
Joined: Sep 2010
Posts: 59
Likes: 1
From: Bellvue, CO
Yeah, that's pretty much exactly what I did. One detail that I neglected to put was that I had to cut apart the frame mounts when they were off the truck because they were too close together, causing the TG mounts to rotate down and make the engine sit too high. So the TG mounts really gave me no advantage. So when I had the frame mounts cut into 2 pieces (the plate with the holes and its bottom gusset part), I tacked in the mounting plates where I wanted them, set the height of the engine, then cut down the gussets to fit in there and tacked it in. Then, I had to remove the engine again so that I could get in there to actually get some good welds on it. Then I was able to finally set the engine back in and bolt it in.
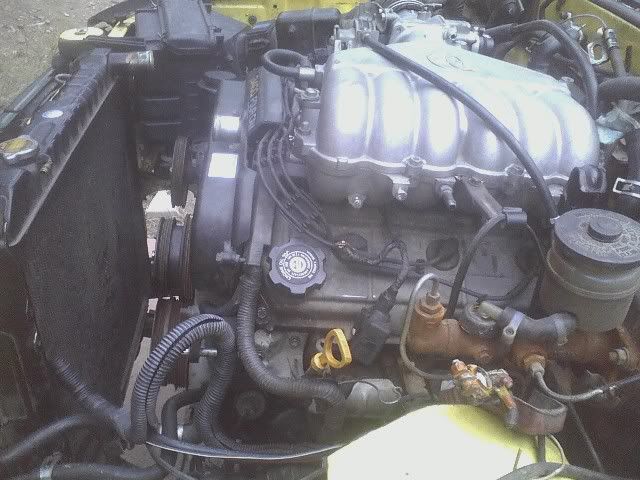
It would seem that my engine bay is a little tighter than a lot of trucks. I made my x-over really tight to the engine and trans, and moved the engine back quite a ways. Still, there is no way I could run a stock fan. I absolutely have to have the electric fan, and its still tight. Also, the very widest part of the x-over is touching the frame a little, which I'm not very happy about. I'm going to have to see if I can get a grinder in there or something. It would have been fine if I got it about 1/4" closer to the transmission, but unfortunately I couldn't have known. The next little issue is that this drivetrain is LONG... Over 6' long in fact. My rear output is about 1' away from the rear driveshaft collar. So I'm going to have to remake my front shaft, and have my rear professionally cut down and balanced. Also, my alternator just barely clears the steering shaft by about a centimeter. So the dimensions of the drivetrain in this little truck are a challenge, but its looking like its going to work.
The next challenge is to make 1980 electrics work with 1996 modern computer controlled stuff...
Dec 9, 2010 | 10:38 AM
#35
Thread Starter
Registered User
Joined: Sep 2010
Posts: 59
Likes: 1
From: Bellvue, CO
Well... it sounds like my first drive when I get this done is straight to the emissions center. Just my luck my county just started doing emissions this month. And my registration is up this month unless I get it emissions tested. I don't think I'll have it ready by the end of the month, though... So that means another $25 for the inspection, my regular $65 for the registration...and some more for a late fee, because they won't even take my money until the emissions is done!
Anyway, I'm thinking about buying one of these:
http://www.amazon.com/ElmScan-Compac...=pd_sim_auto_5
Thoughts? Opinions?
Anyway, I'm thinking about buying one of these:
http://www.amazon.com/ElmScan-Compac...=pd_sim_auto_5
Thoughts? Opinions?
Dec 9, 2010 | 11:16 AM
#36

Registered User

Joined: Jun 2008
Posts: 28
Likes: 0
From: Oklahoma
Can't help you with emissions other than to say good luck and I hope it all works out for you!
I am interested to see how you like the new found power I have an 82 that this swap might be in its future. My 1994 4Runner is a completely different vehicle and I can only imagine how much fun yours is going to be.
I have a stand alone OBD II scanner and while I think they have there place this is what lives in the 4Runner to keep track of everything:
Scanguage II
http://www.amazon.com/ScanGauge-Comp...1925408&sr=8-1
My 2 cents,
and
Get some pics up!
Dec 9, 2010 | 08:56 PM
#39
Thread Starter
Registered User
Joined: Sep 2010
Posts: 59
Likes: 1
From: Bellvue, CO
That's the plan, Molly. Doris should look pretty funny with 33s on blingin' Ivan Stewart wheels...
So now I'm on the hunt for an EVAP VSV. I didn't realize until doing some reading today that I don't have one! Since it is attached to the body harness and not the engine harness, it was not included like I thought it was. If you have one, let me know!
Question:
Are all Toyota EVAP VSVs created equal? Or do I absolutely have to get one from a '96 T100?


