
87 SAS started!
 Oct 27, 2013 | 05:33 PM
#1

Thread Starter
Registered User
Joined: Oct 2013
Posts: 30
Likes: 0
87 SAS started!
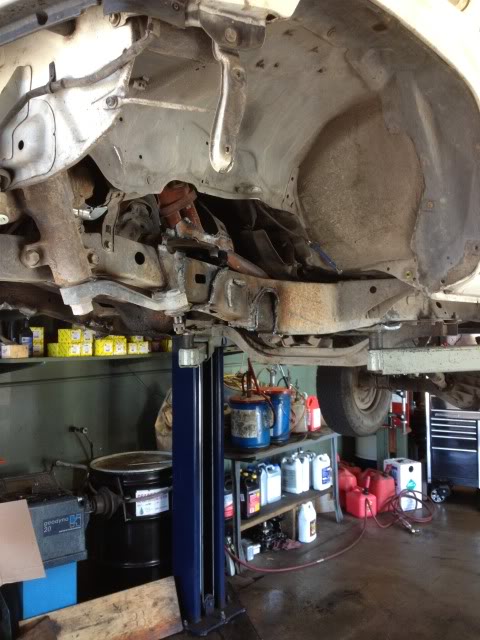
I've been collecting parts for nearly a year and today finally took the plunge and started the sas on my 87 regular cab.
The axle was completely rebuilt from center out with the trail gear knuckle rebuild kit, backing plate eliminators, and rock rings. I also had to replace one of the spindles, and had to hammer apart the short side axle shaft to out a new outer on. I have a new set of calipers, new rotors and new pads ready to go as well.

Today my dad was nice enough to give me the rear lift at his shop to do the work. We removed all of the ifs parts and brackets today, next Sunday the leaf spring mounts, springs and axle will go in.

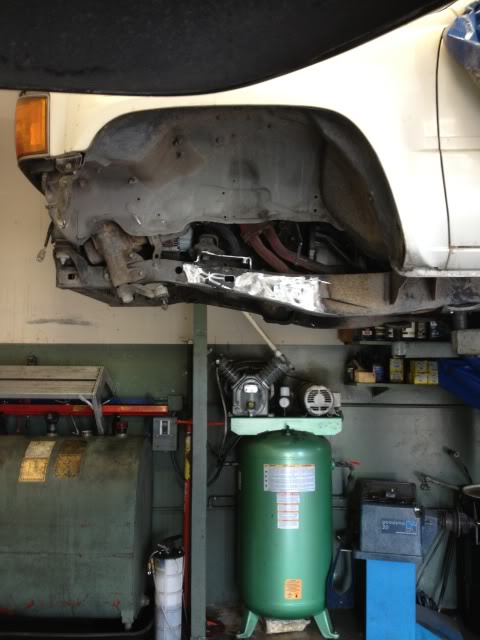
I still need to make reinforcement plates for the motor mounts but that'll be easy
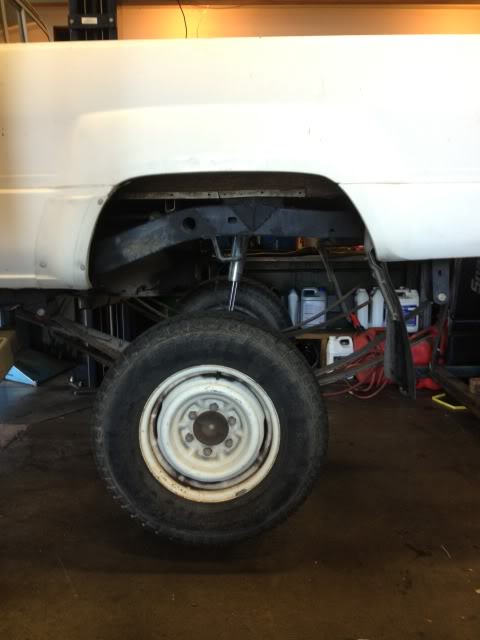
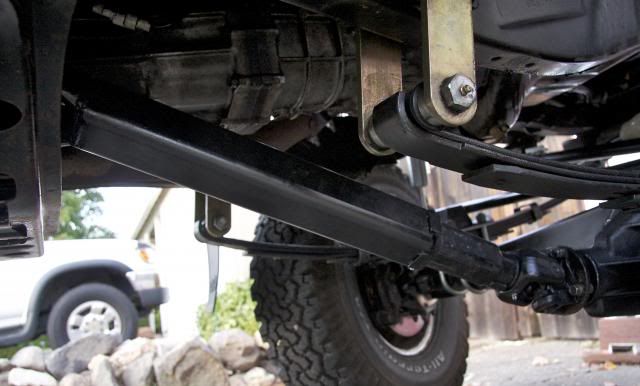
This is also a shot of my rear at full droop with f150 springs with one leaf pulled. I need to get shorter shackles or longer shocks as the shocks are limiting down travel right now.
The axle was completely rebuilt from center out with the trail gear knuckle rebuild kit, backing plate eliminators, and rock rings. I also had to replace one of the spindles, and had to hammer apart the short side axle shaft to out a new outer on. I have a new set of calipers, new rotors and new pads ready to go as well.
Today my dad was nice enough to give me the rear lift at his shop to do the work. We removed all of the ifs parts and brackets today, next Sunday the leaf spring mounts, springs and axle will go in.
I still need to make reinforcement plates for the motor mounts but that'll be easy
This is also a shot of my rear at full droop with f150 springs with one leaf pulled. I need to get shorter shackles or longer shocks as the shocks are limiting down travel right now.
 Oct 29, 2013 | 12:17 PM
#5

Registered User


Joined: Jun 2011
Posts: 1,699
Likes: 75
you are going to move the steering box? you'll want to box(reinforce) the frame under the steering box... the bigger the tire you are going to run, the further forward it'll have to go... you'll probably want to move the front axle forward to get tire clearance.
think about a bracket or something to mount bump stops up front, while you are doing the welding.
think about a bracket or something to mount bump stops up front, while you are doing the welding.


Trending Topics
Nov 2, 2013 | 08:00 PM
#8
Thread Starter
Registered User
Joined: Oct 2013
Posts: 30
Likes: 0
I'm spoiled. My parents have owned a shop as long as I've been driving and into cars and trucks. I can't imagine working without the lift. I have HUGE amounts of respect for the guys that do these in their driveway.
Nov 3, 2013 | 05:07 PM
#11
Thread Starter
Registered User
Joined: Oct 2013
Posts: 30
Likes: 0
I got a bit more done today. The truck is now sitting on all fours. I had to mix and match different leafs to get the ride height I was looking for but I'm happy with it now. The big test will be when I flex it out, but I suspect it should be pretty good especially as the front springs break in.
The first time I set it on the ground it was sitting really front end high.
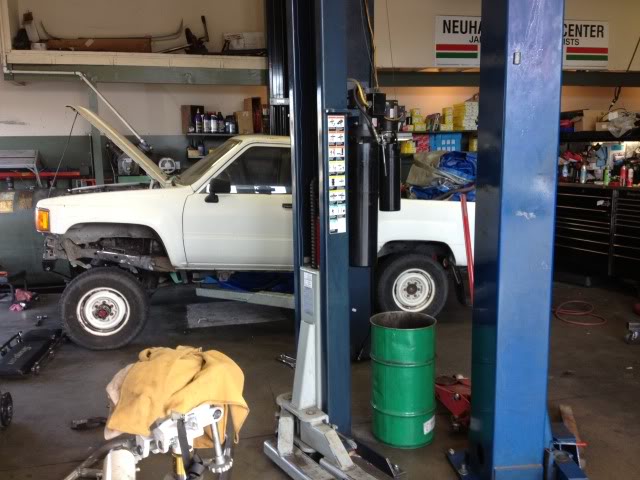
After swapping some springs around I am much happier with how it's sitting.

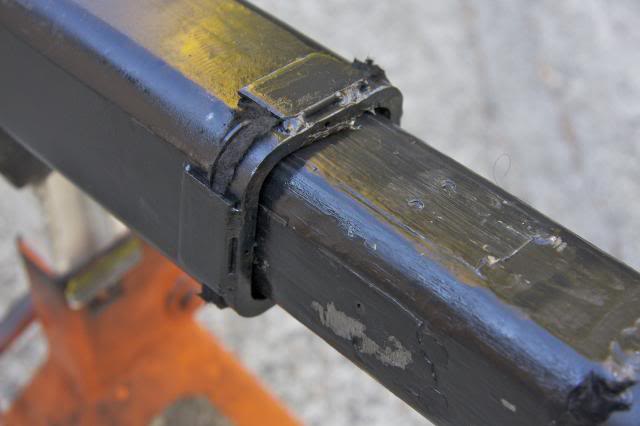
I finished welding the spring and shackle hangers and made a gusset for the crossmember/front spring hanger. This will also be a tie in point for my front bumper.

And everything together.

This is my first time dealing with a solid axle and leaf springs. I'm just kinda learning as I go. So far I have about 12 hours into it and I suspect another 8 to finish it up. Shock hoops should be here tomorrow, and my new calipers and pads arrived Friday so I don't think there is much left before I can drive it minus the front drive shaft.
The first time I set it on the ground it was sitting really front end high.
After swapping some springs around I am much happier with how it's sitting.
I finished welding the spring and shackle hangers and made a gusset for the crossmember/front spring hanger. This will also be a tie in point for my front bumper.
And everything together.
This is my first time dealing with a solid axle and leaf springs. I'm just kinda learning as I go. So far I have about 12 hours into it and I suspect another 8 to finish it up. Shock hoops should be here tomorrow, and my new calipers and pads arrived Friday so I don't think there is much left before I can drive it minus the front drive shaft.
Nov 3, 2013 | 05:36 PM
#13
Thread Starter
Registered User
Joined: Oct 2013
Posts: 30
Likes: 0
I already fixed it. I pulled the bottom two leafs from the front springs and put the second one in the rear spring packs. Leveled it out nicely. Front sits a little higher than the back right now, but the front springs will settle a little.
Last edited by little_twin; Nov 4, 2013 at 04:13 AM.


 Nov 7, 2013 | 10:06 AM
#17
Thread Starter
Registered User
Joined: Oct 2013
Posts: 30
Likes: 0
Thanks for all of the compliments. I feel like it's coming along well and really hasn't been as difficult as I anticipated. I am hoping to get it out and drive it around a bit this weekend. I need to decide which route I am going to go with the front drive shaft. This is a weekend toy/trail rig for me so I am leaning towards square tube but I'll check with a few of my dads contacts and see what I can come up with. Any opinions are more than appreciated.

 [/IMG]
Nov 7, 2013 | 01:16 PM
[/IMG]
Nov 7, 2013 | 01:16 PM
#19
Registered User
Joined: Apr 2009
Posts: 5,592
Likes: 24
From: Dixon, Ca
Nov 7, 2013 | 01:30 PM
#20
Thread Starter
Registered User
Joined: Oct 2013
Posts: 30
Likes: 0


