

 Mar 30, 2016, 09:40 AM
Last edit by: IB Advertising
See related guides and technical advice from our community experts:
- Toyota 4Runner, Tacoma, and Tundra How to Repair and Repalce Parking Brake<br>Step by step instrucstions for do-it-yourself repairs.

Front parking Brake Cable Replacement on a '93 Pickup
Jan 14, 2009 | 05:18 PM
#1
Thread Starter
Registered User
Joined: Jan 2007
Posts: 564
Likes: 3
From: Kingston, WA
Front parking Brake Cable Replacement on a '93 Pickup
I'm done now
There isn't a huge need for this, but I found more questions than answers and a lot of bad information when I searched. So I figured I would write a how-to while I replaced mine
  For information purposes, this is being done on a '93 V6 4x4 Extended cab. It's probably very similar for any of the '86-'95 pickups and 4runners.
So here it is:
Required tools:
1. Wrenches, ratchet, extensions and sockets: 10mm and 12mm
2. A good set of pliers (I just used my Gerber)
3. Needle nose vice grips (just makes the job easier)
4. Phillips head screwdriver
5. Possibly a hammer
6. Mt. Dew
I highly recommend that you don't do this when the engine is warm! You will be working around the exhaust manifolds and they get very hot and stay hot and will burn you!
Step 1: Verify the part number.
This is not the correct part number for a 1993 Extended cab:
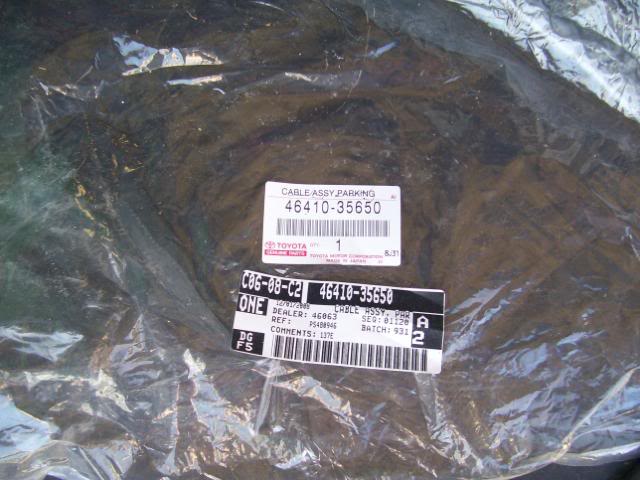
It was the dealer's mistake so they had to send out another one. Hopefully it wont take forever. So I'll finish the write up while I wait.
Step 2: Safely secure the vehicle.
Put blocks behind the wheels and leave the truck in gear/park or put vehicle on jack stands. What ever you do, be safe and ensure that the vehicle wont roll. I've been driving without an e-brake for about two weeks now, so I've been driving around with a wheel chock on the passenger seat anyways.
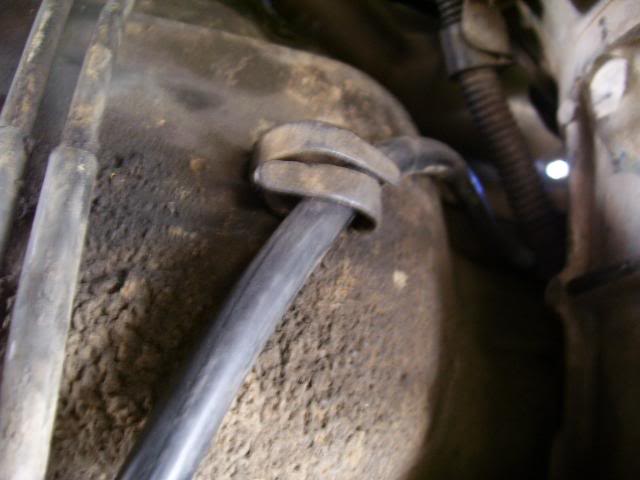
Step 3: Starting at the rear.
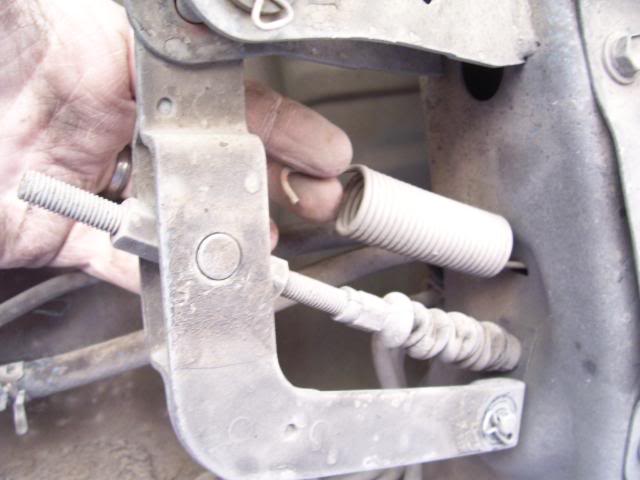
If your cable is already snapped like mine this might not be necessary. Remove the spring from the lever that the rear of the cable attaches to. This is located on the right side of the vehicle in front of the gas tank. I just left it hanging there by the other end.
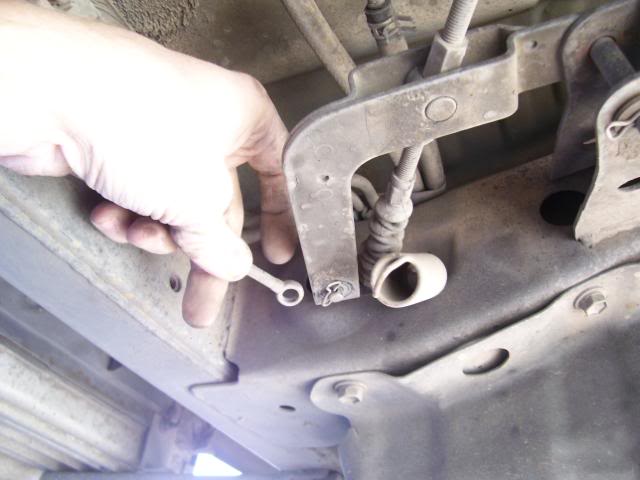
Step 4: Clamps and Brackets
Remove the pin and disconnect the cable:
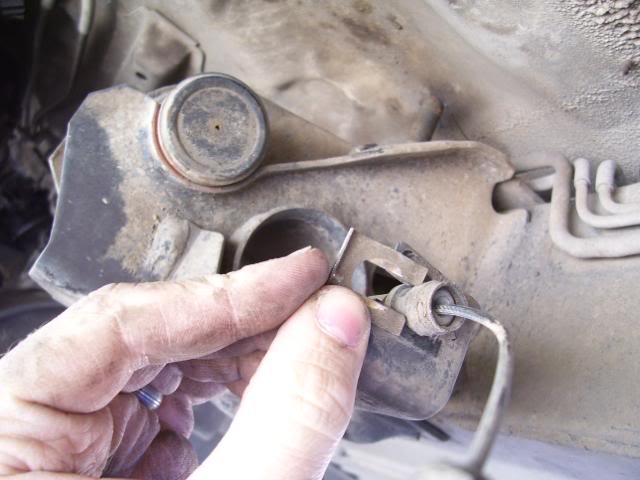
Remove the square retaining clip on the rear of the cable:
Open up all the clips like this one:
There are two that are above the transmission, they aren't that hard to get to, you just can't see them. There are also two clamps that are held on with 10mm nuts and studs coming through the floorboard.
Step 5: The other end.
Once all of the clips are out, you can move into the cab. Remove the lower dash panel. It's held in by a couple phillips head screws and a 10mm bolt on the left hand side. You might have to pull the black plastic cover that surrounds the ignition. Next remove the square clip on the bottom of the bracket:
This will let you pull the cable out after you push the grommet through the floor. The cable should now be free if yours was snapped up by the pulley.
If you want to remove the whole handle, this is how:
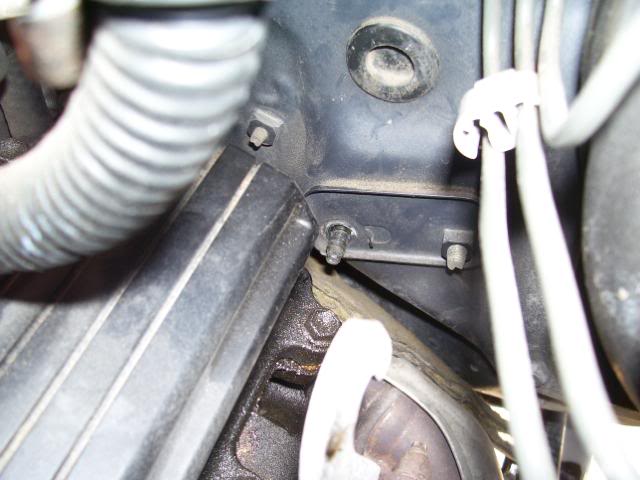
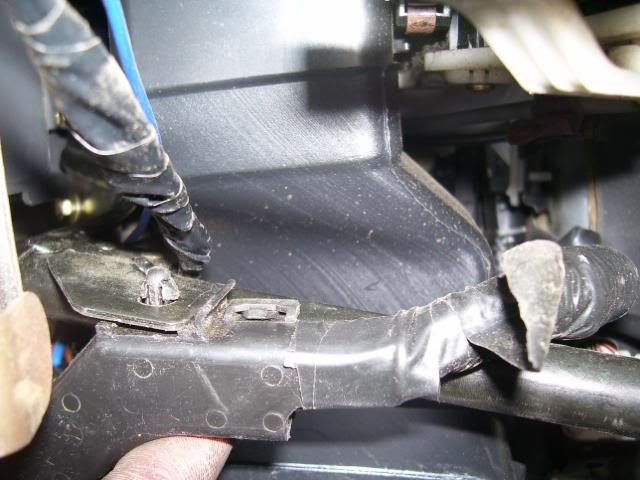
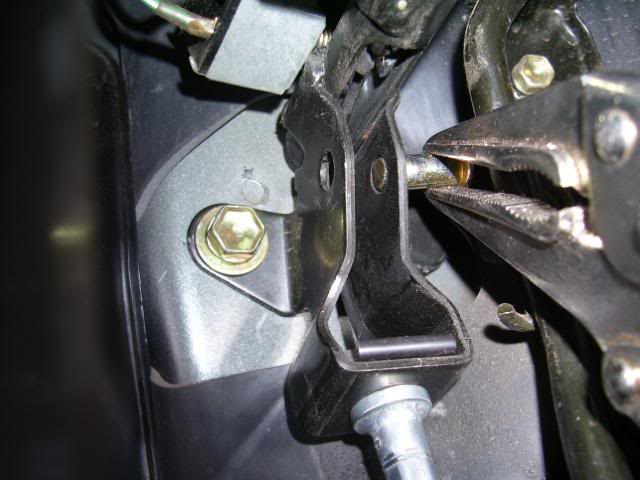
This is optional. I chose to remove the brake handle all together. I did this to get a better idea about how the cable is connected, as this is where everybody has had problems. To remove the handle, you need to remove the 12mm bolt shown in the picture above, and the nut on the firewall. Here is a view looking down at the stud with the nut removed. It is right next to the driver side valve cover:
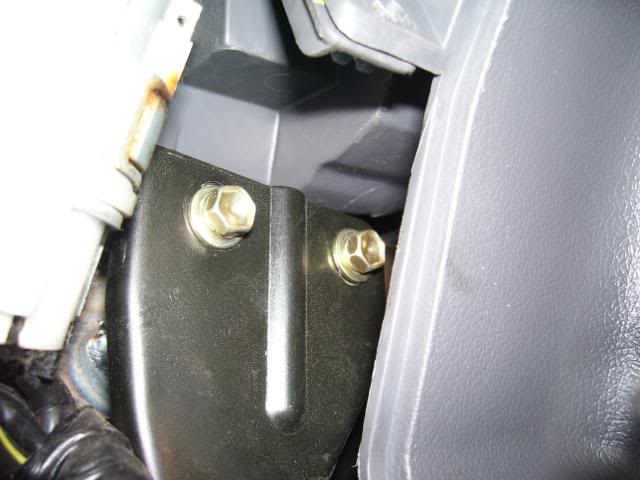
Next remove these two bolts at the back of the bracket, just below and to the left of the stereo:
Then remove this plastic cover that is on a wiring loom: (this view is looking up)
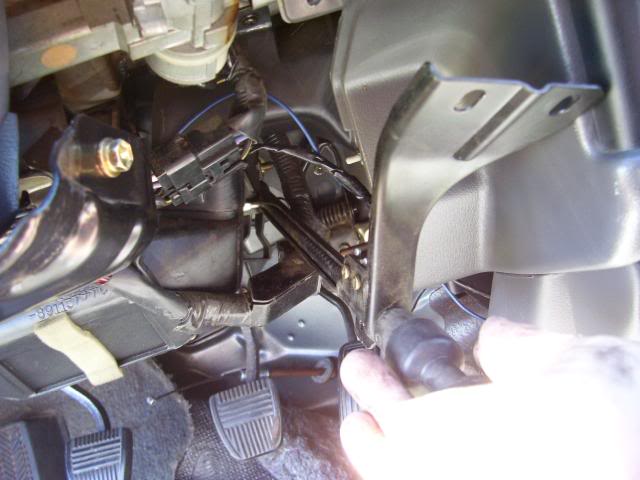
Then disconnect the switch for the brake light (it's back by the pulley). With everything disconnected, you can pull the assembly straight back and out like so:
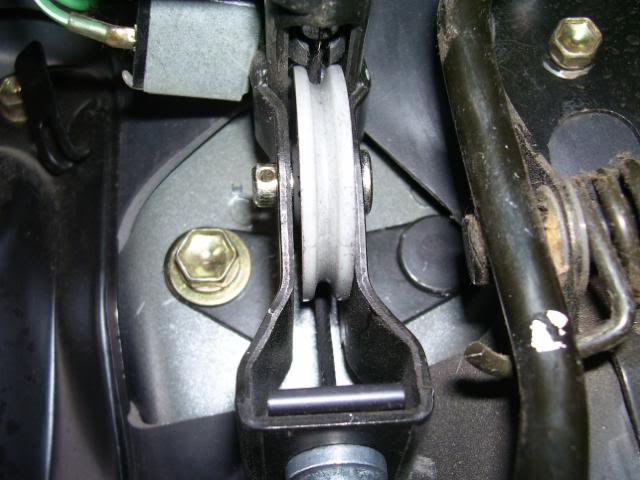
Step 6: Disconnecting the cable from the handle.
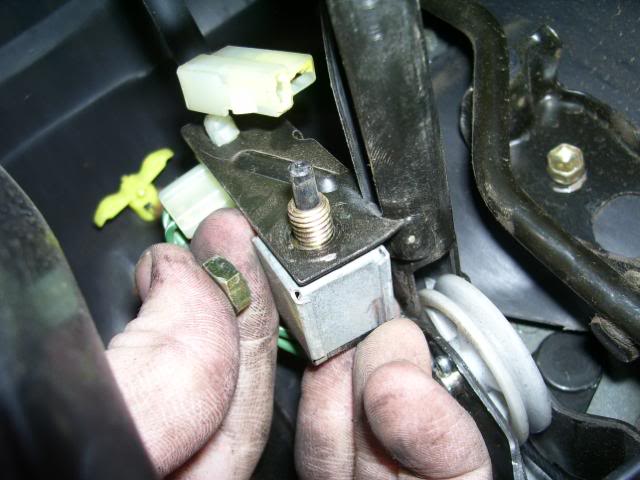
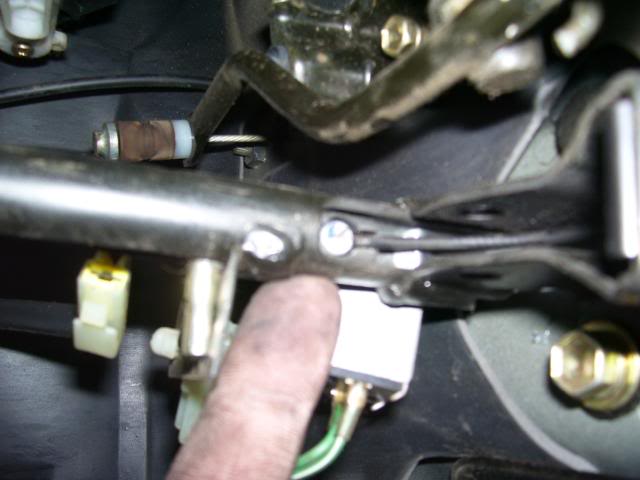
Even if you didn't pull the handle, you can still do this inside the cab. Either way, you have to remove the pulley (it's held in with a pin that has a cotter pin on one end) and the switch:
Now that the switch and pulley are out of the way, you can push the handle all the way in to get the cable end out. This is done without removing the pressed in prong that strikes the brake light switch. There have been a few posts about trying to get this out. Even if you do remove it, it doesn't help any.
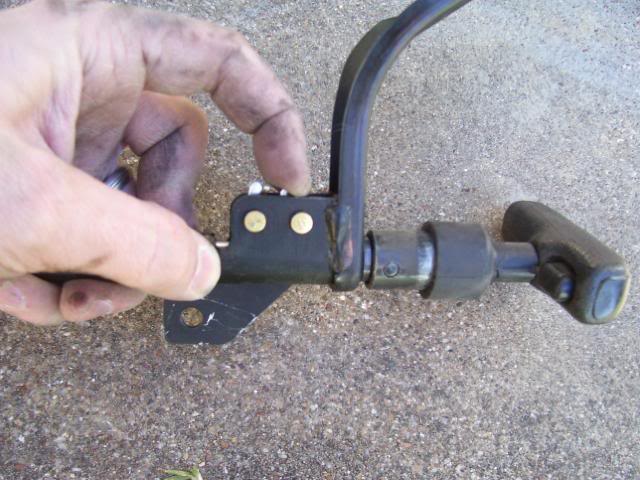
You simply locate the two gold rivets that are near the rear of the bracket for the handle. On top of them there are two little tongs that are sticking up. When you push forward on the rear one, it releases the catch that will allow the handle to move all the way forward. Here is the handle before pressing forward on the catch:
And after:
Here you can now see where the cable end rests on the handle:
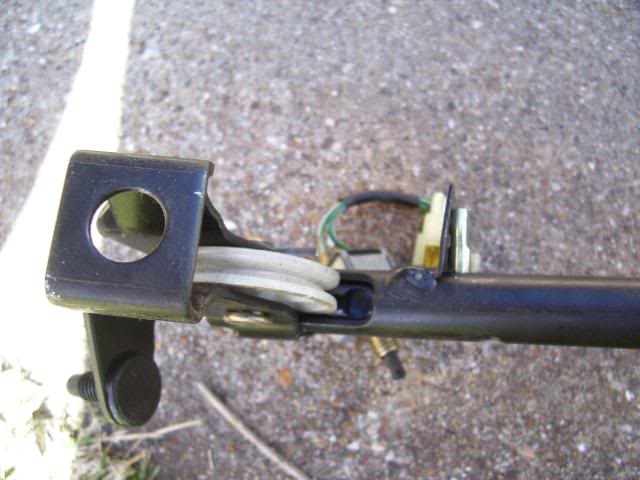
Here is another shot after it is in the truck with the new cable installed. Notice that the little tang that sticks out is all the way up against the bracket for the light switch:
Reinstallation: This is fairly straight forward, as it's just the opposite of the removal. I do have a few tricks though.
I chose to route the cable from the back to the front and into the cab. Then once it's in the cab, connect it to the bracket and install the square clip and the cable end into the bracket.
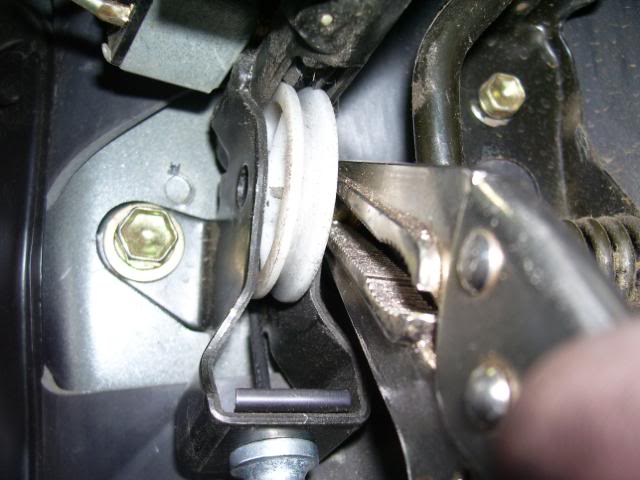
For the pulley, I just used my needle nose vice grips to hold the pin and then with the other hand put the pulley into position like so:
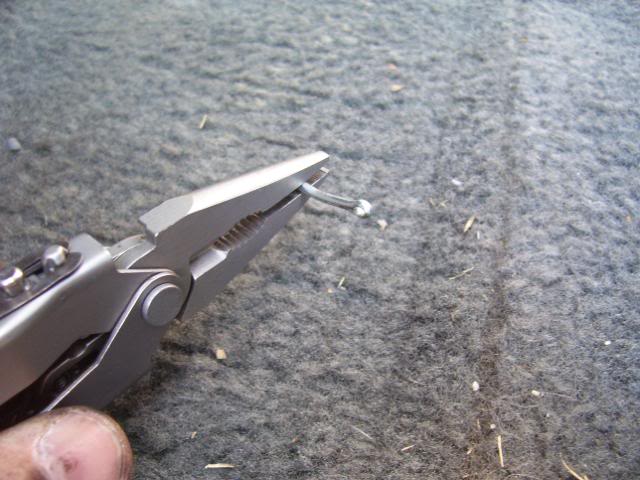
If the cotter pin is hard to install because the ends aren't together there is an easy fix for that. Just firmly grab the two ends with your pliers like so:
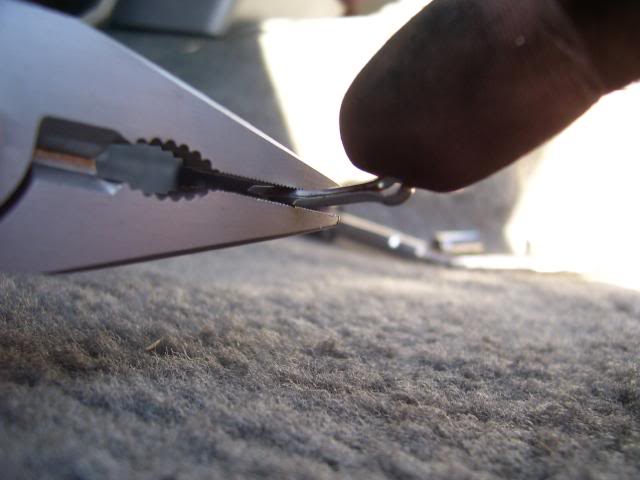
Then push down:
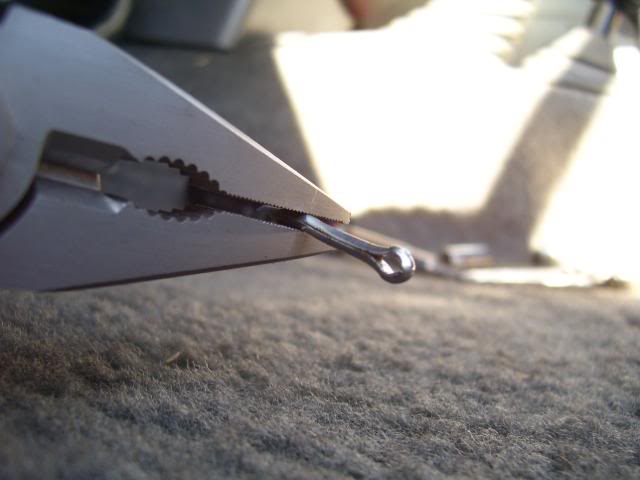
And then pull back up:
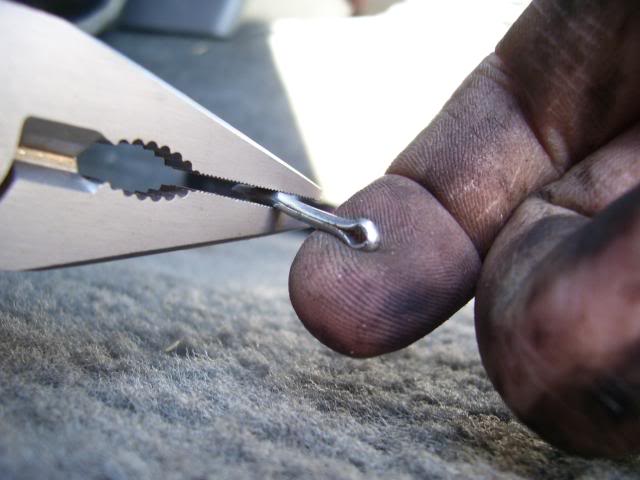
And now they are together enough to easily go back into the hole on the pin!
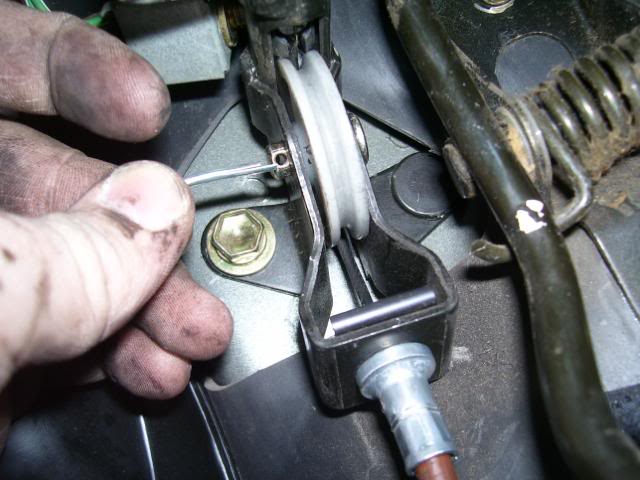
Once the pulley and cable are in, reinstall the brake light switch, and plug it back in. Install all the bolts for the handle (if you had it out). Don't forget the nut that is on the front of the firewall! Then you can put the rest of the stuff underneath back together and just work your way back. The spring should be the last step.
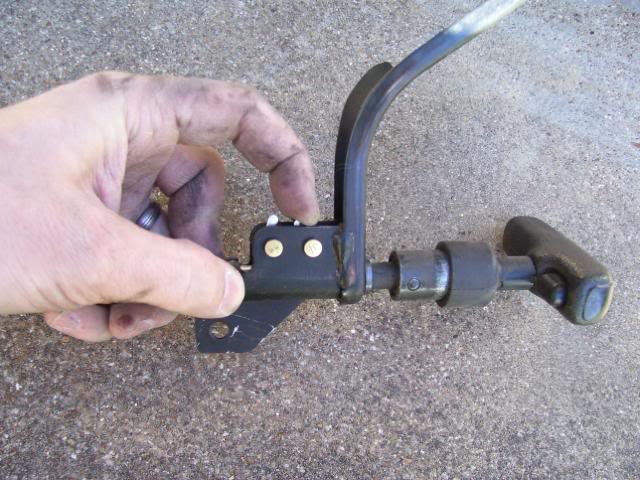
Depending on how stretched out your old cable was, you may need to make adjustments. These can be done on the bracket back by the fuel tank. Here you can see where the other cable attaches to the bracket and where to adjust it:
Hope all this helps!
There isn't a huge need for this, but I found more questions than answers and a lot of bad information when I searched.
So I figured I would write a how-to while I replaced mine For information purposes, this is being done on a '93 V6 4x4 Extended cab. It's probably very similar for any of the '86-'95 pickups and 4runners.So here it is:
Required tools:
1. Wrenches, ratchet, extensions and sockets: 10mm and 12mm
2. A good set of pliers (I just used my Gerber)
3. Needle nose vice grips (just makes the job easier)
4. Phillips head screwdriver
5. Possibly a hammer
6. Mt. Dew
I highly recommend that you don't do this when the engine is warm! You will be working around the exhaust manifolds and they get very hot and stay hot and will burn you!
Step 1: Verify the part number.
This is not the correct part number for a 1993 Extended cab:
It was the dealer's mistake so they had to send out another one. Hopefully it wont take forever. So I'll finish the write up while I wait.
Step 2: Safely secure the vehicle.
Put blocks behind the wheels and leave the truck in gear/park or put vehicle on jack stands. What ever you do, be safe and ensure that the vehicle wont roll. I've been driving without an e-brake for about two weeks now, so I've been driving around with a wheel chock on the passenger seat anyways.
Step 3: Starting at the rear.
If your cable is already snapped like mine this might not be necessary. Remove the spring from the lever that the rear of the cable attaches to. This is located on the right side of the vehicle in front of the gas tank. I just left it hanging there by the other end.
Step 4: Clamps and Brackets
Remove the pin and disconnect the cable:
Remove the square retaining clip on the rear of the cable:
Open up all the clips like this one:
There are two that are above the transmission, they aren't that hard to get to, you just can't see them. There are also two clamps that are held on with 10mm nuts and studs coming through the floorboard.
Step 5: The other end.
Once all of the clips are out, you can move into the cab. Remove the lower dash panel. It's held in by a couple phillips head screws and a 10mm bolt on the left hand side. You might have to pull the black plastic cover that surrounds the ignition. Next remove the square clip on the bottom of the bracket:
This will let you pull the cable out after you push the grommet through the floor. The cable should now be free if yours was snapped up by the pulley.
If you want to remove the whole handle, this is how:
This is optional. I chose to remove the brake handle all together. I did this to get a better idea about how the cable is connected, as this is where everybody has had problems. To remove the handle, you need to remove the 12mm bolt shown in the picture above, and the nut on the firewall. Here is a view looking down at the stud with the nut removed. It is right next to the driver side valve cover:
Next remove these two bolts at the back of the bracket, just below and to the left of the stereo:
Then remove this plastic cover that is on a wiring loom: (this view is looking up)
Then disconnect the switch for the brake light (it's back by the pulley). With everything disconnected, you can pull the assembly straight back and out like so:
Step 6: Disconnecting the cable from the handle.
Even if you didn't pull the handle, you can still do this inside the cab. Either way, you have to remove the pulley (it's held in with a pin that has a cotter pin on one end) and the switch:
Now that the switch and pulley are out of the way, you can push the handle all the way in to get the cable end out. This is done without removing the pressed in prong that strikes the brake light switch. There have been a few posts about trying to get this out. Even if you do remove it, it doesn't help any.
You simply locate the two gold rivets that are near the rear of the bracket for the handle. On top of them there are two little tongs that are sticking up. When you push forward on the rear one, it releases the catch that will allow the handle to move all the way forward. Here is the handle before pressing forward on the catch:
And after:
Here you can now see where the cable end rests on the handle:
Here is another shot after it is in the truck with the new cable installed. Notice that the little tang that sticks out is all the way up against the bracket for the light switch:
Reinstallation: This is fairly straight forward, as it's just the opposite of the removal. I do have a few tricks though.
I chose to route the cable from the back to the front and into the cab. Then once it's in the cab, connect it to the bracket and install the square clip and the cable end into the bracket.
For the pulley, I just used my needle nose vice grips to hold the pin and then with the other hand put the pulley into position like so:
If the cotter pin is hard to install because the ends aren't together there is an easy fix for that. Just firmly grab the two ends with your pliers like so:
Then push down:
And then pull back up:
And now they are together enough to easily go back into the hole on the pin!
Once the pulley and cable are in, reinstall the brake light switch, and plug it back in. Install all the bolts for the handle (if you had it out). Don't forget the nut that is on the front of the firewall! Then you can put the rest of the stuff underneath back together and just work your way back. The spring should be the last step.
Depending on how stretched out your old cable was, you may need to make adjustments. These can be done on the bracket back by the fuel tank. Here you can see where the other cable attaches to the bracket and where to adjust it:
Hope all this helps!
Last edited by b.miller123; Jan 17, 2009 at 06:31 PM.

Thread
Thread Starter
Forum
Replies
Last Post
Aleeex_u
86-95 Trucks & 4Runners
10
Jun 5, 2016 06:52 PM
voiddweller
86-95 Trucks & 4Runners (Build-Up Section)
19
May 2, 2016 09:10 PM


