Toyota 4Runner, Tacoma, and Tundra: How to Repair and Replace Parking Brake Cables
A common problem suffered by various Toyota truck models is a damaged or broken parking brake cable. At first glance, the parking brake may seem like a complex setup, but the use of multiple cables allows for easy component replacement to restore the function of the parking brakes.
This article applies to the Toyota 4Runner (1995-2002), Tacoma (1995-2004), and Tundra (2000-2006).
The parking brake setup on the 4Runner, Tacoma, and Tundra uses multiple cables to actuate the parking brakes. In most cases, a single broken cable can prevent the parking brakes from functioning properly; however, a repair does not usually require replacing all cables. By properly inspecting the parking brake system to determine which cable(s) is faulty, you can prevent removing unnecessary components to complete the repair. More often than not, the front parking brake cable attached to the parking brake handle/pedal assembly is prone to damage because of the tight radius bend it must make, as well as the large amount of force it must cope with. A frayed or bound-up cable can cause the lever assembly to stick and require replacement to restore parking brake functionality. This article will provide an overview for parking brake cable replacement on various Toyota 4Runner, Tacoma, and Tundra models.
Materials Needed
Needle nose pliers
Metric wrench and socket sets
Screwdriver
3/8" ratchet and extension
Interior trim panel tool
Step 1 – Handle/pedal cable (front cable)
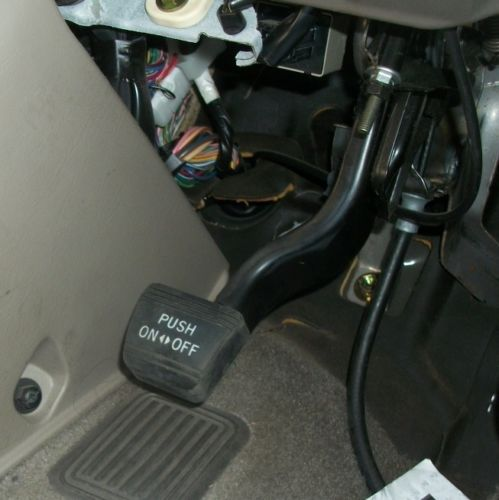
The most common area where a parking brake cable can become damaged or fail is at the handle/lever assembly located just below the dash on the driver's side footwell. A quick peek under the dash can often tell you if a frayed or broken cable is the cause of a non-functional parking brake.
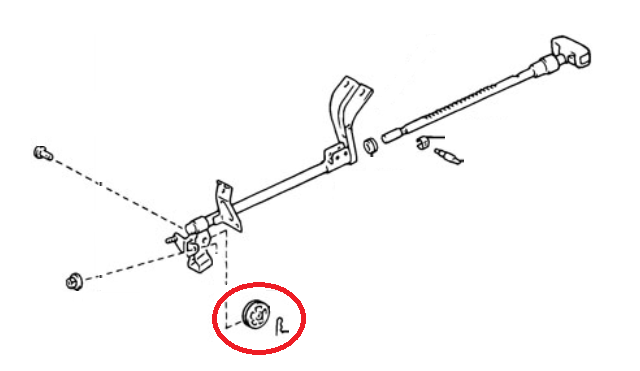
Remove the pulley axle retaining pin with a pair of needle nose pliers and set the pulley as well as axle aside.
Figure 1. Pulley and axle retaining clip.
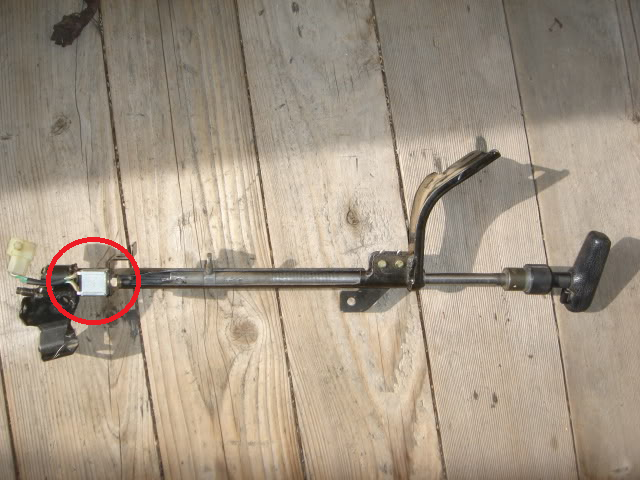
Remove the parking brake switch from the handle assembly by removing the nut with a 12mm wrench.
Figure 2. Parking brake switch.
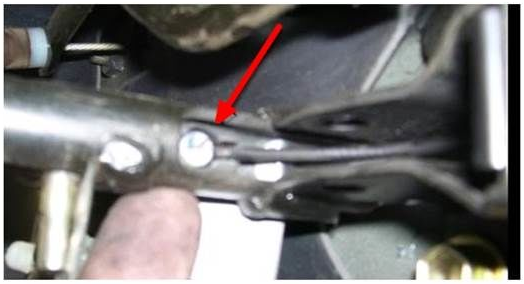
Reach underneath the dash near the top of the ratcheting mechanism, and depress the (2) tabs to allow the handle shaft to slide in the additional distance needed to remove the end of the cable.
Figure 3. Handle shaft release tabs.
With the cable removed, route it through the interior and floorboard/center console before disconnecting the cable from the intermediate lever.
Figure 4. Removing cable end from lever shaft.
Foot Pedal
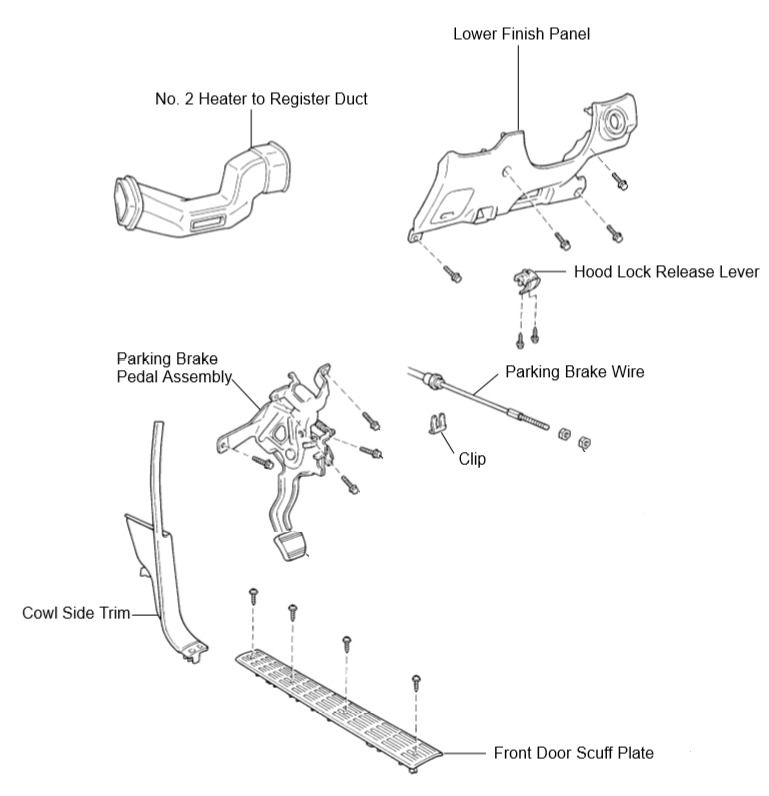
To gain access to the parking brake pedal assembly, removal of the lower dash finish panel, cowling trim, scuff plate, and heater duct may be necessary.
Figure 5. Typical parking brake pedal assembly.
Disconnect the parking brake switch electrical connector.
Remove the lock nut and adjusting nut from the parking brake cable (wire).
Remove the fastening clip and brake cable (wire) from pedal assembly, and route cable through interior before disconnecting the cable end from the intermediate lever.
If necessary, the parking brake lever assembly can be removed from the footwell by removing the four mounting bolts.
Figure 6. Pedal assembly exploded view.
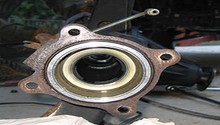
Step 2 – Rear cable
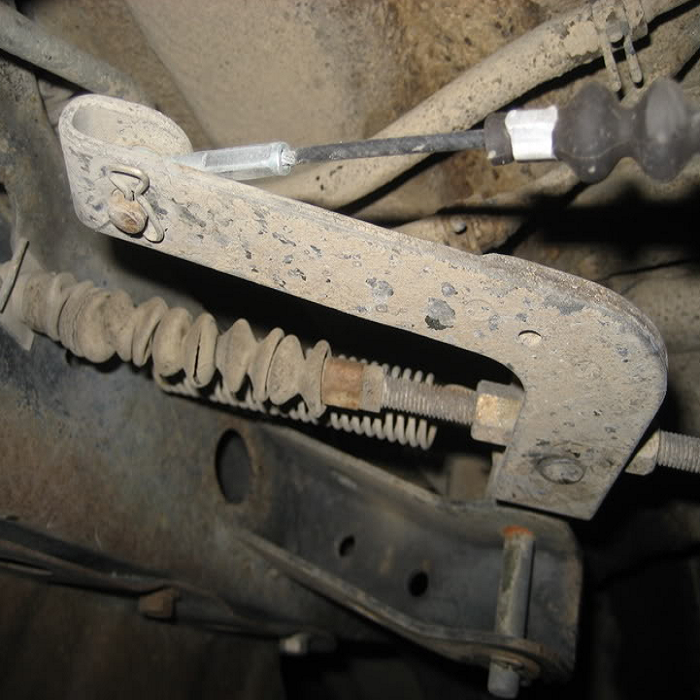
The front and rear cables are connected via an intermediate lever located under the vehicle. From the intermediate lever, the rear cable routes to the rear axle where its ends attach to the drums internal parking brake levers/bell crank arms at the rear brakes. Removal of the rear cable simply involves disconnecting the cable end from the intermediate lever and routing the cable through the chassis before disconnecting the cable end at rear brake or brake cable equalizer on the rear axle.
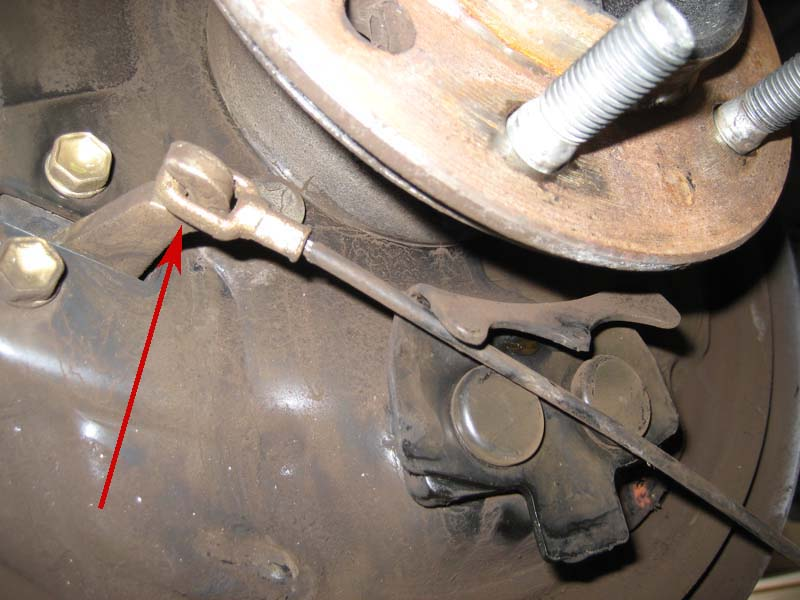
Figure 7. Front and rear cables attached to intermediate lever.
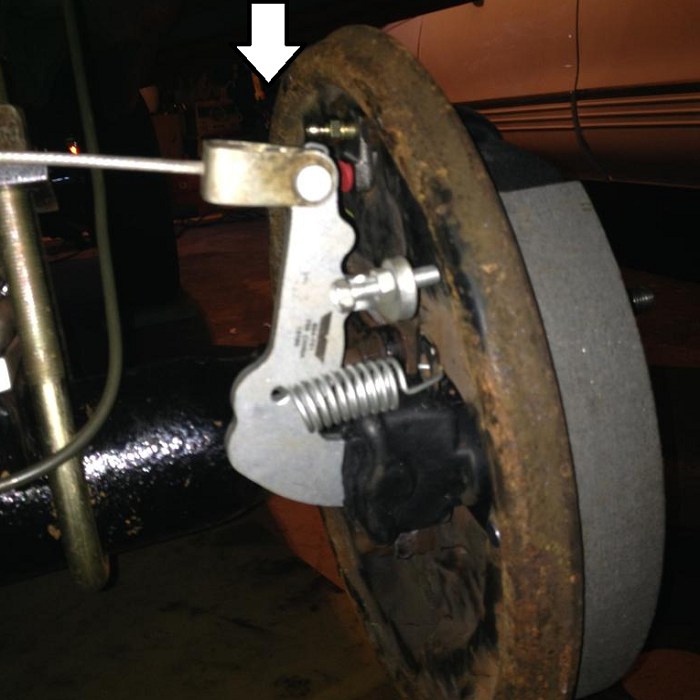
Figure 8. Cable end at bell crank.
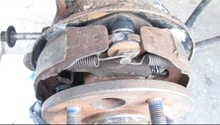
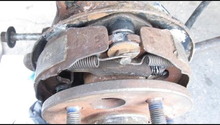
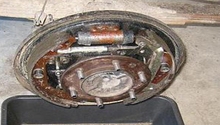
Step 3 – Drum/bell crank cables
The final two cables in the parking brake system are located inside of the rear brake drums. The cables attach to the bell crank arms that pulls the parking brake levers, and subsequently forces the brake shoes into the drum linings to keep the axle from spinning. In order to replace the cables, the rear brake drums and shoes need to be removed. Additional information on replacing the rear brake shoes and parking brake cables can be found at How to Repair and Replace Parking Brake.
Toyota 4Runner and Tacoma Repairing and Replacing Parking Brake
How to Repair and Replace Parking Brake
Keep your parking brake functional and your truck stationary with new brake shoes.
This article applies to ...
Toyota Tundra Repairing and Replacing Parking Brake
How to Repair and Replace Parking Brake
speedkar99
Don't under-estimate the importance and safety of a good, well-adjusted parking brake.
This article applies to ...
Toyota 4Runner Brakes Diagnostics Guide
Brakes Diagnostics Guide
Have your brakes gone bad?
This article applies to the Toyota 4Runner (1996-2002).
The braking system in your Toyota truck is a hydraulic one. ...
Toyota 4Runner Rear Axle Seals Replacement
How to Replace Rear Axle Seals
Are you noticing oily residue on the inside of your wheels?
This article applies to the Toyota 4Runner (1996-2002).
Every component on ...
How to Change Rear Axle Seals and Differential Fluid
Is your diff acting up?
This article applies to the Toyota Tacoma (1996-2015).
The seals in your Toyota Tacoma's axles play a vital role in your truck's ...
Toyota 4Runner How to Jump Start Battery
How to Jump Start Battery
Get your car back on the road!
This article applies to the Toyota 4Runner (1996-2002).
The Toyota 4Runner's battery is not designed to live ...