Toyota 4Runner 1996-2002: How to Replace Rear Axle Seals
It's possible you have a blown axle seal, and you'll want to address this soon before the problem gets worse.
This article applies to the Toyota 4Runner (1996-2002).
Every component on every vehicle requires servicing or replacement at some point in its life cycle. Seals are a big part of how components work with one another. When seals go bad, they could render the component itself useless. When seals go bad, they are usually very easy to spot; as you will notice oil or seeping oil in or around where the component is located. Take axle seals, for example, when they have gone bad, the inner side of the wheel will be covered in oil. If the right precautions are not taken to address the faulty seal, the problem can transpose all the way to the wheel bearings and even the brake shoe on the drum itself. This is all relevant to mileage and use, however, so keep this in mind. Read on for more information on how to replace axle seals on your 3rd generation Toyota 4runner.

Materials Needed
- Jack and jack stands
- Tire iron or impact wrench
- Crow bar
- Drain pan
- Pliers
- Ratchet wrench with various sockets
- Mallet or hammer
- Pick/awl or skinny screwdriver
- Power bleeder
- Bearing press
- WD-40 or PB Blaster (optional)
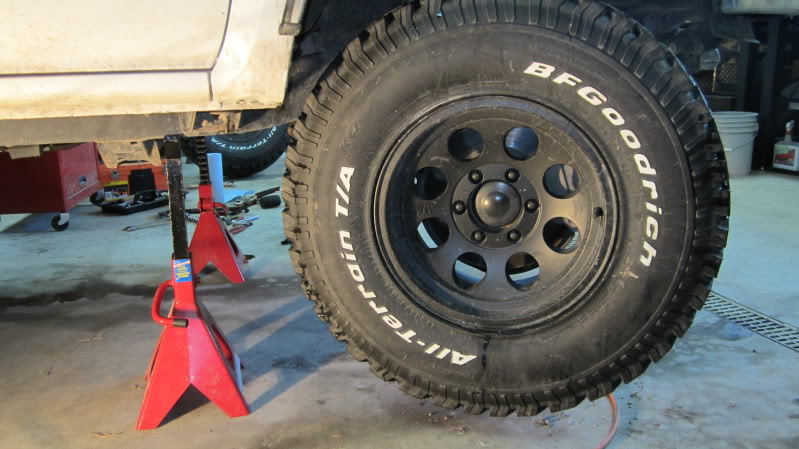
Step 1 – Raise and support vehicle
To service the axle seals, you will need to raise and support the vehicle to gain access.
- Loosen the lug nuts with a tire iron.
- Use jack points to raise the vehicle.
- Secure the vehicle on jack stands at jack points on the chassis.
- Chock the wheels.
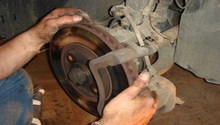
Step 2 – Remove tire and brake drum
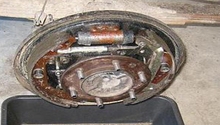
The seal to be replaced will be accessed behind the brake drum. Both the tire and the brake drum will need to be removed.
- Remove lug nuts and remove tire.
- Remove brake drum using special service tool and 14mm wrench.
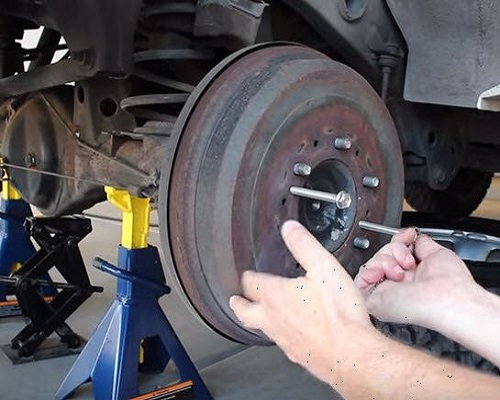
Figure 2. Run a bolt through the access hole to back the drum off. 
Figure 3. Inside of drum accessed.
Pro Tip
If the brake drum is stubborn upon removal, spray some WD-40 or PB Blaster and let it soak. After some time, strike the back side of the drum with a mallet in a circular pattern and it should come off more easily. Screw with washer special service tool 90099-04306-83 can be used to remove the drum as well.
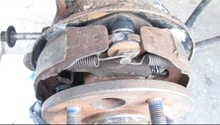
Step 3 – Remove axle
To service the seal appropriately, the axle will need to be removed.
- Locate the parking brake cable, power brake line and four nuts securing the plate to the axle housing.
- Detach the parking brake cable, which is secured by a pin.
- Unscrew fitting from power brake line using 10mm wrench.
- Remove the four nuts with a 14mm socket wrench.
- Pull the axle out.
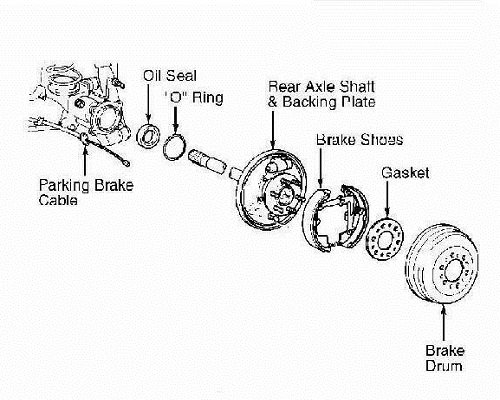
Figure 4. Axle assembly. 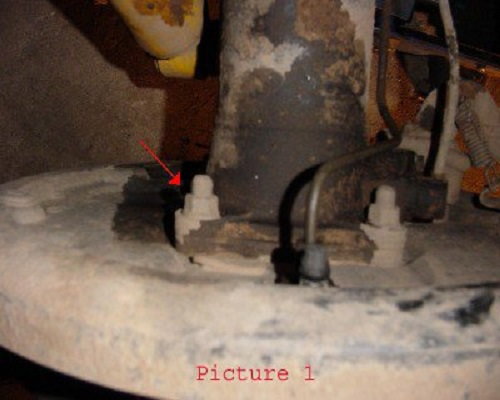
Figure 5. Mounting bolts.
Pro Tip
You will need to plug the exposed brake line with a rubber cap, stopper or a screw that fits the opening. The axle may need some coercing by gently tapping with a hammer to free it from the backing plate.
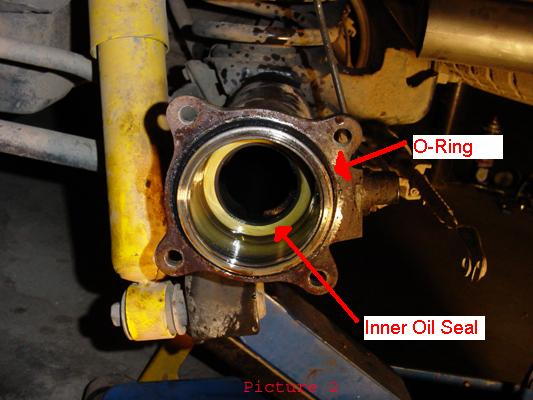
Step 4 – Remove the old seal
With the axle removed, the old seal will be exposed. You will need to remove it before it can be replaced.
- Use special service tool, pick, or awl to remove the old seal.
- Use pliers to handle the seal and pull without damaging anything else.
- Use brake cleaner or degreaser to clean all components thoroughly.
Pro Tip
Be very careful not to damage anything as you remove the seal. This is crucial to ensuring the new seal has an all around good seal. This is a good time to inspect the wheel bearings and O-rings. It is the best time to replace these components as well, since they are accessible at the same time.
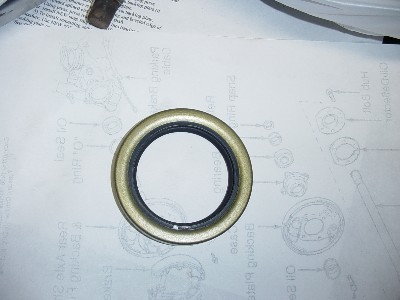
Step 5 – Install new seal
Once the old seal is out and all the excess oil as well as debris has been cleaned off, it's time to install the new seal.
- Apply bearing grease to the inner axle housing.
- Insert seal and push toward center.
- Use a large socket or something of the same diameter of the seal to "tap" the seal into place.
- Coat outer portion of the new seal with new oil.
- Bleed the brake line you originally capped off on the side with the help of a friend.
Pro Tip
A bearing press tool will make this part of the job much more smoother and accurate. If the seal is too far away from the retainer, you will risk having the leak reappear. A power bleeder will also make the job of bleeding the brake line faster and more accurate in removing air from the lines.
Step 6 – Reinstall components
Now that the new seal is installed and the brake line is bled on that side, it's time to button her up.
- Reinstall axle and secure with four nuts.
- Reattach brake line and secure with 10mm nut.
- Reinstall brake drum and secure to hub.
- Reinstall tire.
- Lower vehicle to ground.
Pro Tip
Before lowering the vehicle down, service the opposite side of the axle if necessary.
Featured Video: Toyota 4Runner Rear Drum Replacement
Related Discussions
- Replacing Rear Axle Seals - YotaTech.com
- Rear Axle Seal Discussion and Tips - YotaTech.com
- Rear Axle Seal Repair - YotaTech.com
- Axle Seals Leaking - YotaTech.com