


 Mar 23, 2016, 02:55 PM
Last edit by: IB Advertising
See related guides and technical advice from our community experts:
- Toyota 4Runner, Tacoma, and Tundra Paint Modifications<br>Overview of popular modifications to help you customize your Toyota.

Show us your best cheap mods!
Aug 25, 2010 | 09:11 AM
#421
Registered User
iTrader: (2)
Joined: Dec 2009
Posts: 2,159
Likes: 7
From: Pleasanton, CA - SF Bay Area
Check out my sig for links (pics!) of my seat swap, and the amber dash bulbs (which I just did and love!).
I also scored a second towhook at the boneyard last weekend for $2.75
I also scored a second towhook at the boneyard last weekend for $2.75
Aug 25, 2010 | 02:47 PM
#422
Registered User
Joined: Sep 2007
Posts: 919
Likes: 0
From: Longmont, CO
no pictures, but here goes...
scored a free K&n intake off a '02 4runner, modified to fit my T100. fit the heat shield in and used 1/8 in steel plates and the trim that comes with k&n's to seal the corner off. then, i rotated the tube that goes into the fender 180* to face forward. now, when racing, i pull the passenger side corner light. free intake!
got a electric fan off a C5 z06 corvette, wired it in with an autozone thermostatic controller. $22.
Got a rancho steering stabilizer off a 3/4 ton dodge. mounted it with one of the bolts for the idler arm, using a shock mount of a late model silverado.
inside, i put the dome light from my old '90 regular cab in and wired it to the stock dome light. now i have two! lol
other than that, extended the breathers, and various little things i cant think of right now...
Aug 25, 2010 | 03:24 PM
#423
Registered User
Joined: Aug 2009
Posts: 13,574
Likes: 72
From: Wilkes-Barre, PA, USA
probably not a good idea since snow and ice like to accumulate there. the motor would either suffocate or hydro-lock from drawing in the water. Not to mention what would happen if it simply rained?
 Aug 25, 2010 | 03:33 PM
#424
Registered User
Joined: Jun 2010
Posts: 494
Likes: 3
From: Oak Harbor, WA
BigBluePile made a snorkel up through the valance, looks good and would eliminate that problem. Here's his build thread: https://www.yotatech.com/forums/f88/...norkel-194369/
Aug 28, 2010 | 08:27 PM
#429
Contributing Member
Joined: Feb 2010
Posts: 260
Likes: 0
From: Pagosa Springs, CO
in the last month, done a few mods, but I don't want to post them twice, so here is the link.
https://www.yotatech.com/forums/f116...ra-cab-219057/
https://www.yotatech.com/forums/f116...ra-cab-219057/


 Aug 28, 2010 | 09:55 PM
#433
Registered User
Joined: Jul 2009
Posts: 285
Likes: 0
From: beaverton, oregon
the reason it looks funny is because that smittybuilt bumper isnt a brush guard, it is supposed to REPLACE your original bumper!! haha, i dont even know how you would attach that with the other bumper on there???
Aug 29, 2010 | 07:53 AM
#434
Registered User
Joined: Aug 2010
Posts: 56
Likes: 0
From: Washington
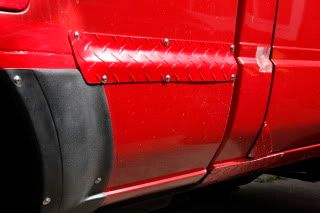
Looks good. I used Mighty Putty to patch my rusty holes. I cut out loose fragments and sanded down to bare metal. This left me with a clean hole which I filled with MP, primed and painted. I forgot to get a before, but here's the after (there used to be a 2-inch wide rusty hole here):

Sep 4, 2010 | 02:16 PM
#436
Found some cheap LED lights at walmarchet yesterday while looking for some fishing gear; they were $23 in the automotive electrical section, had a few different kinds but decided on this one as they are thin and have more LEDs (12 total per light)
They're clear and probably won't be super bright but they should help, have to wait until dark to test them out. I measured the power at the back up lights and it was only 9.95 VDC so losing some of their effectiveness right from the start but didn't feel like running a hot wire all the way from the battery so I just tapped directly into the existing backup bulbs. the LEDs don't draw very much power anyway, and they're cheap crap!
Fabbed some brackets from some steel 'strap' material I had laying around and pop-rivited the mount to it; it wraps around my tow bar which should also provide decent protection for the lights.
The kit comes with all the wires and even a switch and a fused link as they are intended for 'driving' lights.
Anyway, enough rambling, here are some pics
 Sep 4, 2010 | 05:35 PM
#440
Registered User
Joined: May 2008
Posts: 179
Likes: 0
From: Australia
I got given an 80Litre fridge/freezer.. Got some MDF Board and vinyl and glue for about $40..
Well I took the back seat out of my 4 door pick up...

Made up a basic stand for the fridge, later on I mounted a toolbox to the board also.

And the ratchet strap holding the fridge in place.

It didn't pass for roadworthy with the back seat removed, so I had to take this setup out
Well I took the back seat out of my 4 door pick up...
Made up a basic stand for the fridge, later on I mounted a toolbox to the board also.
And the ratchet strap holding the fridge in place.
It didn't pass for roadworthy with the back seat removed, so I had to take this setup out


