

roof rack for 89 1st gen 4runner

 Jul 8, 2013 | 08:06 PM
#2
Registered User
Joined: Apr 2012
Posts: 2,817
Likes: 2
From: Los Angeles CA
They never came with our 4runners. But you can always mod your hard top to be able to carry one like i did. Give me a few minutes and i'll look through my thread to see the process i did from when i did mine.
Jul 8, 2013 | 08:37 PM
#3
Registered User
Joined: Apr 2012
Posts: 2,817
Likes: 2
From: Los Angeles CA
Alright man this is just a copy and paste of all the stuff i did for my install.
Keep in mind i didnt have any headliner material when i did this so you might have to install yours on top of the headliner. Unless you cover everything up with new headliner like i did. Anyway here's all the info for my roof rack build. Hope it's of some help to you.
---------------------------------------------------------------------------------------------------------
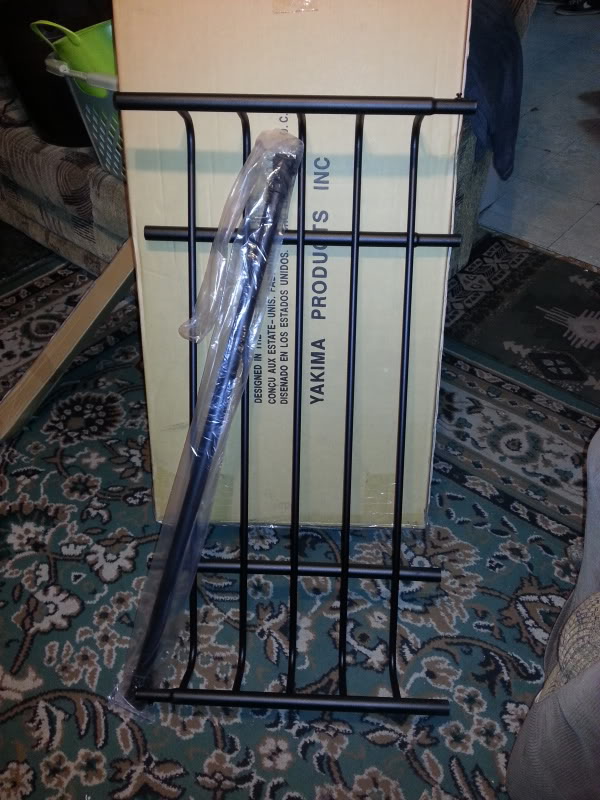
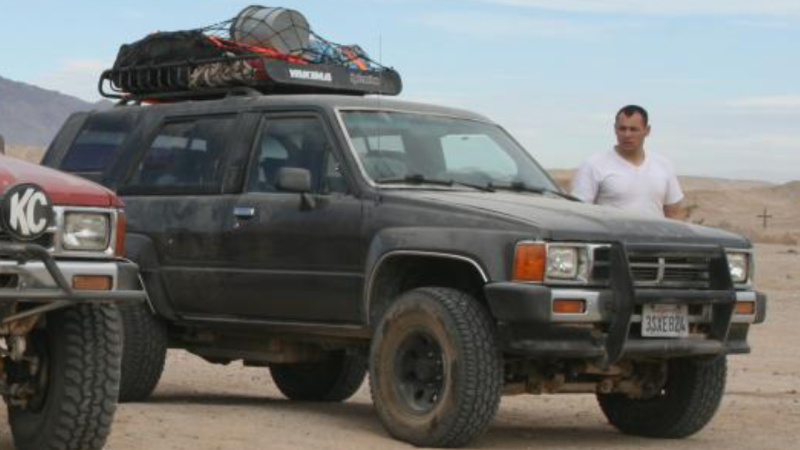
Alright guys here are the pictures/video of my new roof rack and rails.
It's like i said. I got the Yakima basket, the things to hold it onto the crossbars, 2 locks, and a Yakima net all for $180
I went straight to the junk yard after buying it and got myself this stock rack off an older version tahoo. i really dont remember the year. this rack only cost me about $24. I think i scored with both these deals.
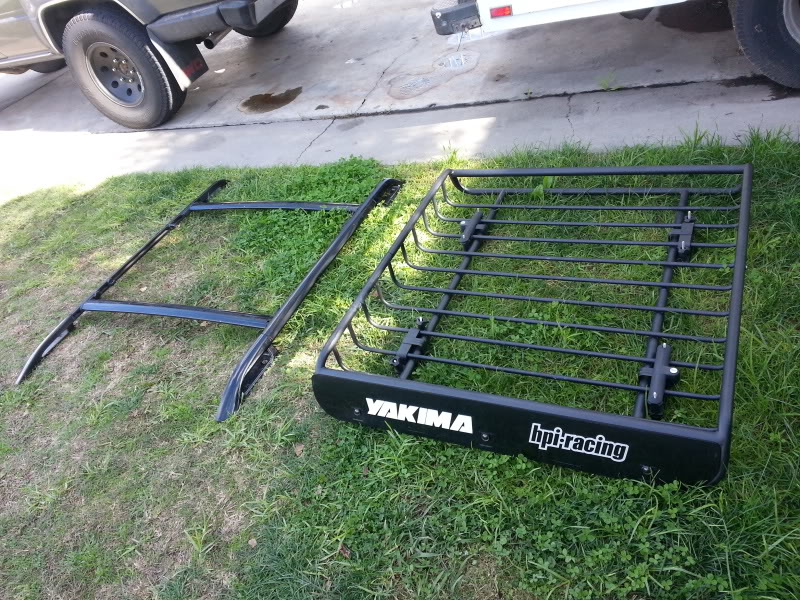
I Went ahead and ordered the extender for the basket today too.
http://www.ebay.com/itm/Yakima-LoadWarrior-Extension-Cargo-Basket-Roof-Rack-/390522875641?pt=Motors_Car_Truck_Parts_Accessories&hash=item5aecfa2ef9&vxp=mtr
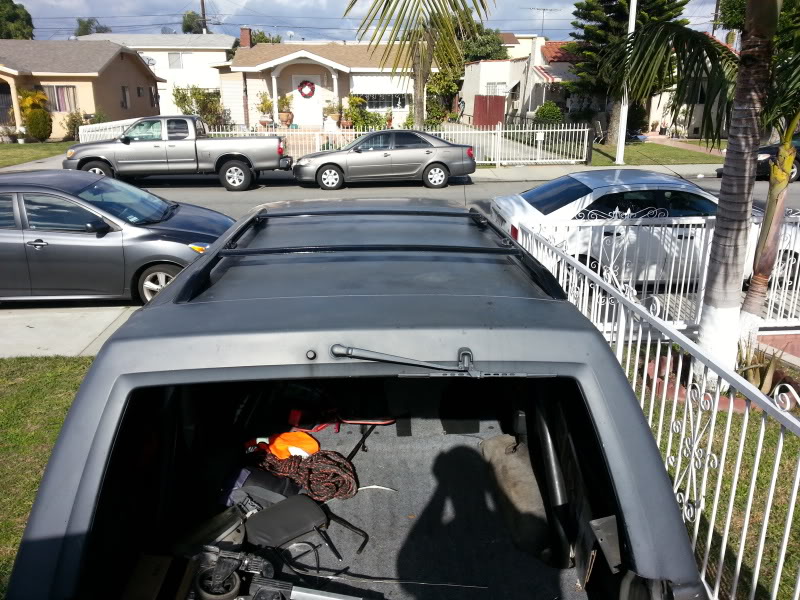
Here's a little problem i encountered. The roof rack width is too long. I'm going to have to cut it down about 4". because the way it sits now it just ends up on top of the glass. which you can clearly see in this picture
I get more into detail in this video. So I'll spare you the pix.
-------------------------------------------------------
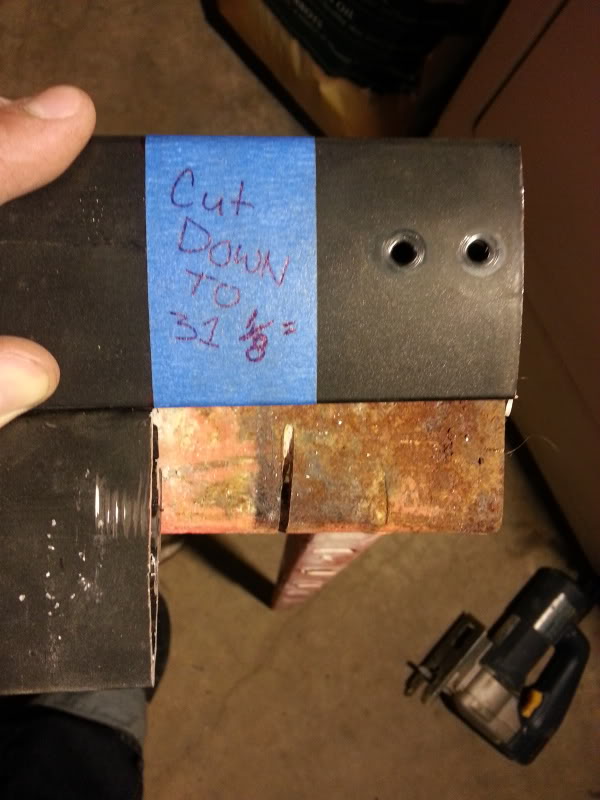
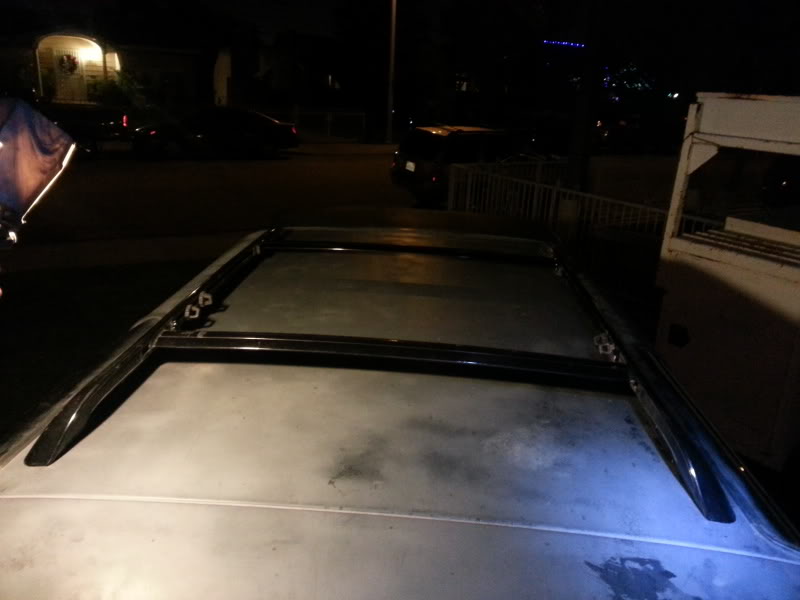
Alright, As for my roof rack, this is what went down. I took a couple of measurements found that i needed to cut down my cross bars to 30 & 1/8". Once mounted onto the side rails end up having about 0.5" space on each side before reaching the windows.

Once cut i had to make some new holes because obviously the ones it had were just cut off lol
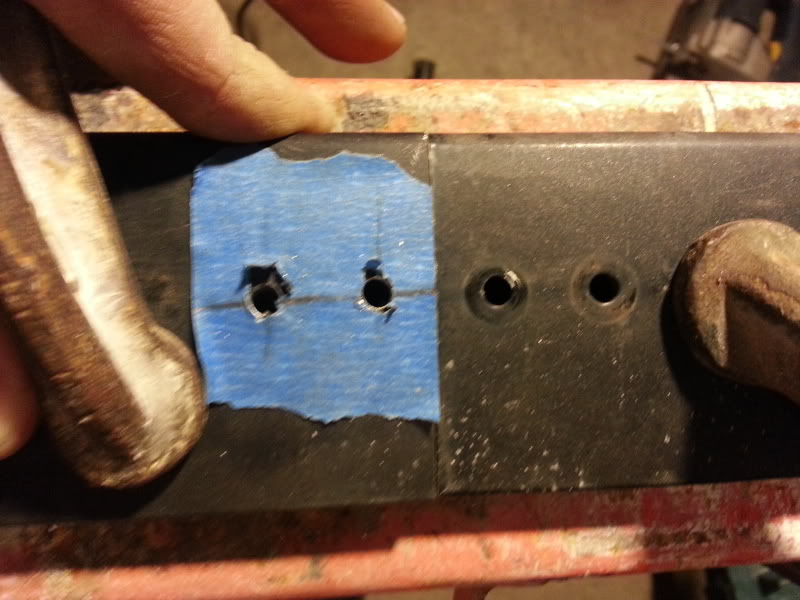
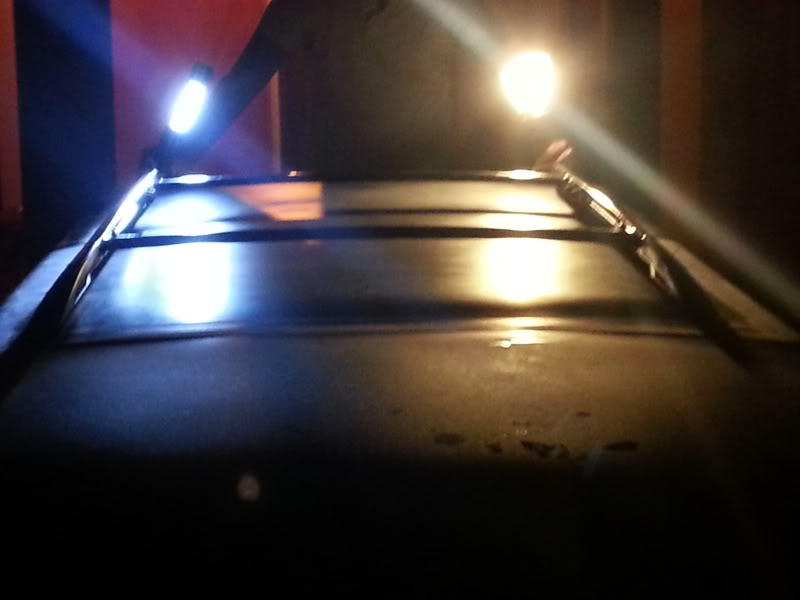
Darn. I thought i had the measurments dead on. lol It's ok i just made the hole a bit more oval shape and it worked fine. You can see in my picture below where i marked with permanent marker. I was at least able to get the 2nd cross bar right.
Sorry for the crappy quality. My phone takes great pix but apparently night time is its kryptonite. Anyway here are the pix of the way it looks on my roof now. Perfect fit. I'll try to upload some more pix tomorrow when there's daylight.
Had to get my brother to hold up some flash lights so i could get a semi view-able picture for you guys.
------------------------------------------------------------------------------------------
After i was done playing with the rack i pulled the Yakima Load Warrior to try to open up the locks. And i was having a really hard time. I literally spent about 20 minutes trying to get them open. So I'm assuming the locks might have been seized. So i put some WD-40 in it. and it still didnt work. I sent the guy i bought it off of a text and he said it should be working because he had just taken it off his truck before i came. he doesnt understand why it wouldnt work. and he said i know thats the right key because i down own any other Yakima products. Told me to use some oil or lube of some sort and that should work. He also found it weird because he was able to take it off his truck in about 1-2 minutes when i told him i was on my way. Said he's willing to try to open it for me if i got back to his house on one of his days off. But that guy lives like 30 miles away. I'd much rather attempt to get it open on my own lol. So i told him its ok. and eventually just ended up telling me, "Sorry for the hassle man but in case you do decide to drive back up here i will give you a Safari utility strap net for your truck for free! i never used it and its still new. ill just give it to you for all the trouble and and beside its just sitting in my garage.
I'm kinda thinking about it lol might be cool to get one of those utility strap nets.
I just dont wanna waste 1/3 of a tank just so he can tell me, "look dummy, this here is what you gotta do. Ya see you put the key into this doo-bally-doo and twist this way...(2 seconds later)..... voila. There ya go!
----------------------------------------------------------------------
sweet i finally got my 18" Yakima Load Warrior extension via FEDEX delivery.
----------------------------------------------------------------------
I got a ton accomplished today. We had mid 50's weather. (WOOOO hot for terry and William haha) jk
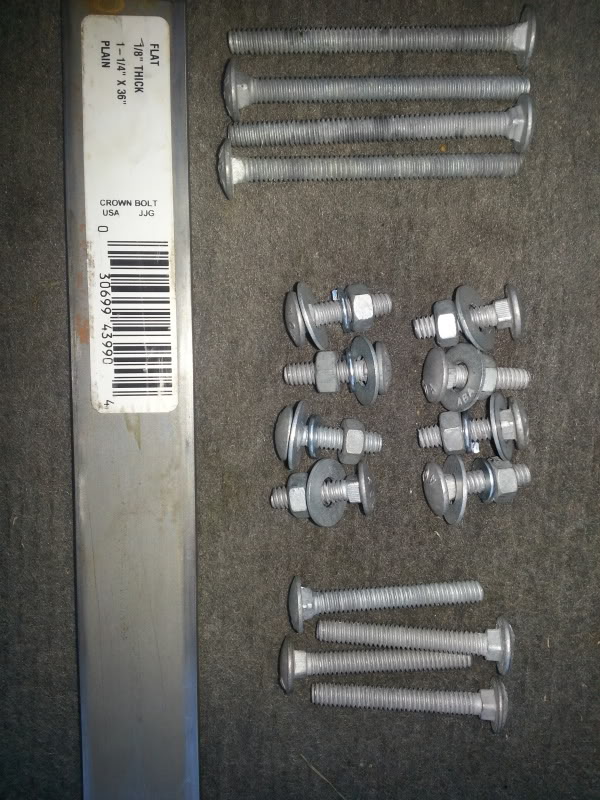
So i went to home Depot and grabbed a couple materials for the roof rack install. I bought some black silicone, different length bolts, nuts washers/lock-washers, flat metal plate, adhesive spray, and some charcoal grey carpeting.
Here's some of the hardware i got: [I didn't use the small bolts. they were too short.]
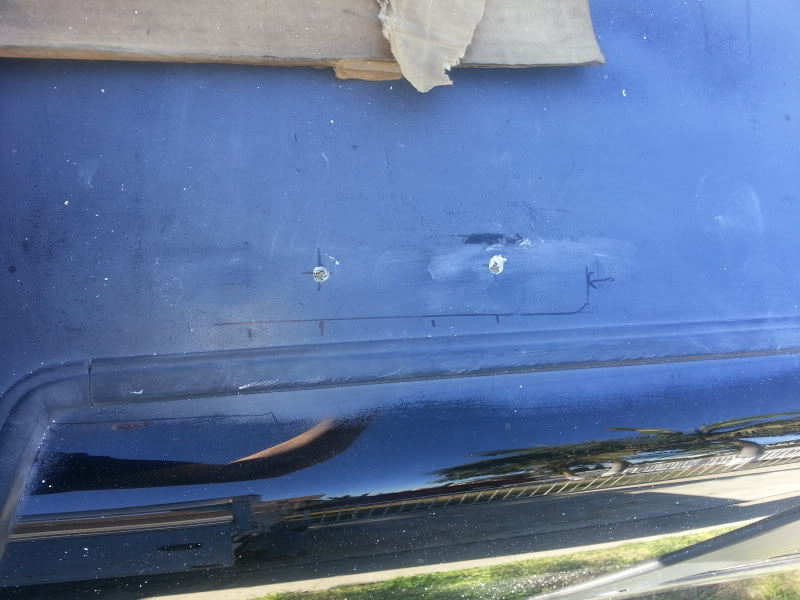
My dad works construction and makes lots of precise measured cuts/holes for his profession so rather then taking a chance and screwing up my roof rack i asked him to help me out and make the holes for me. I'd rather him get it right the first time then me take a chance of making my top look like Swiss cheese lol
Here is one of the pix.
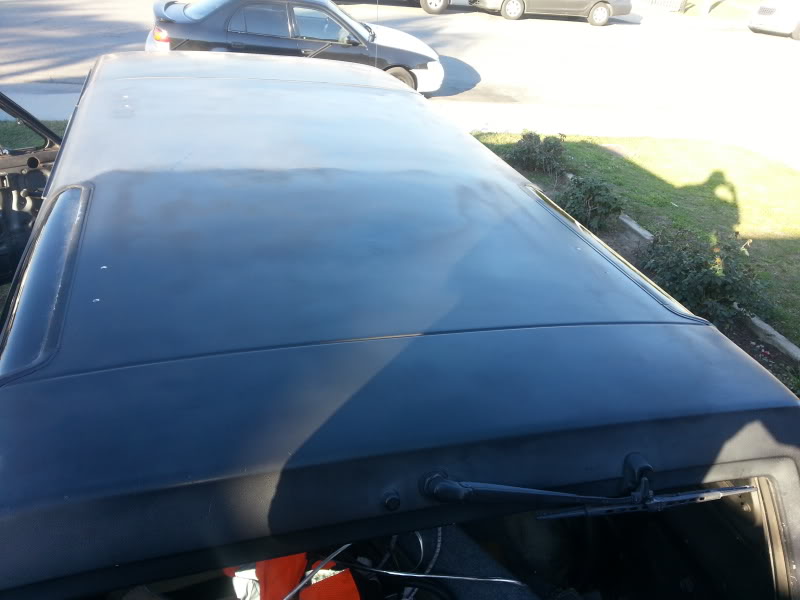
I washed my truck 2ce to make sure it was clean. I have been wanting to wax my truck for the longest but laziness always takes over and i never get more then 1-2 coats of wax on which is nothing..... So because i had planned to install my roof rack today i bit my tongue and washed the truck haha. After the wash i began waxing the hard top(only) I know Mark and Ray seen the picture i sent but let me tell you guys, I NEVER KNEW HOW BAD OF CONDITION THE PAINT ON THE HARD TOP WAS TILL I WAXED IT. I was out waxing for a good 3 hours (no kidding) i put coats of wax on the hard top. And just out of curiosity i wanted to see the before and after condition of the top so i waxed the back half of my truck first. CHECK IT OUT! This picture taken when i was on the 8th coat of wax.
I wish i would have taken more pictures of the whole process but once again i found myself fighting against time to get as much done before the sun went down so i just kept at it and only took like 5 pix
I put silicone on both sides of this rubber under piece to the rack just to ensure that it is waterproofed.
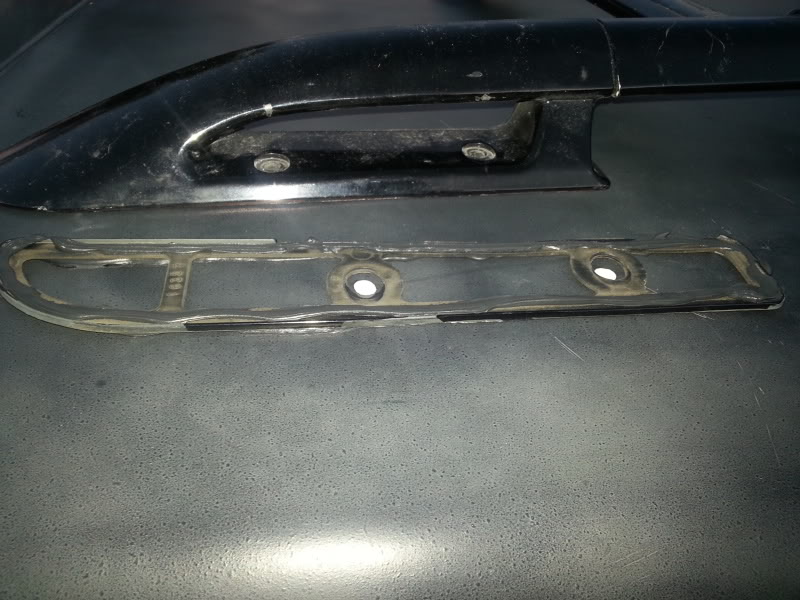
I used the rounded topped (carriage bolts) for my roof rack install. I chose these to keep people from trying to unscrew them from the outside and taking off with the rack and Yakima basket. By doing this the only way to remove the rack would be from the inside.
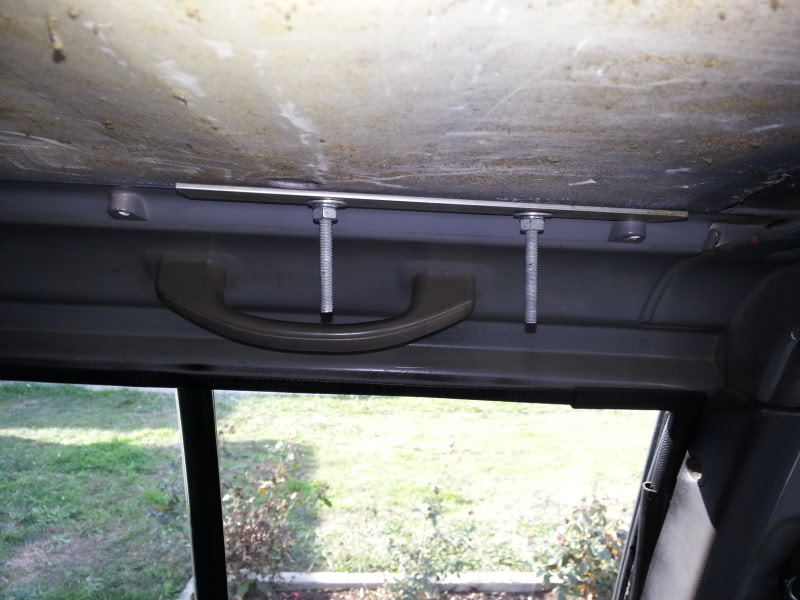
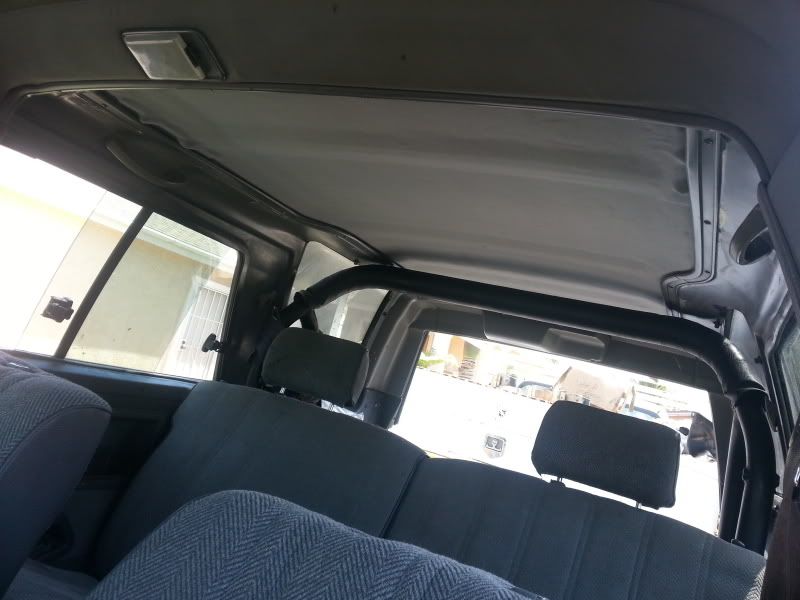
Interior view (Rear Driver side):
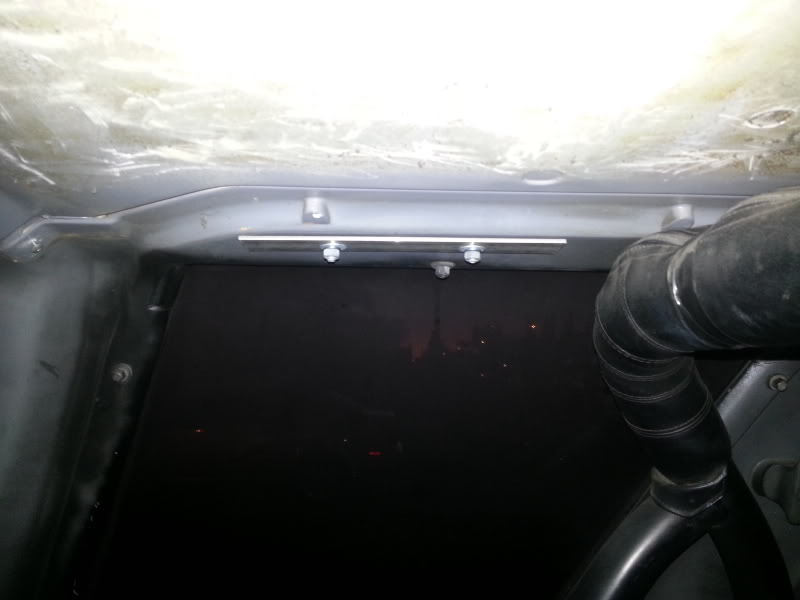
Ray This previous one here is just for you. I know i sent you a text earlier today confirming that the thick piece on the sides of the hard top is NOT solid.
It is 2 layers. We noticed that when we drilled. once we got through the outer layer the drill went through a short drop then hit the bottom layer. Its not bad. but if i were you i would try to keep it on the 1 layer part (flat center). Just something to think about. You cant tighten the screws extremely tight because you might break the interior layer into that middle gap between the 2 layers. I still got the rack on pretty damn tight without breaking it. but just thought id tell you anyway. It's something to think about. Goes for you too Mark.
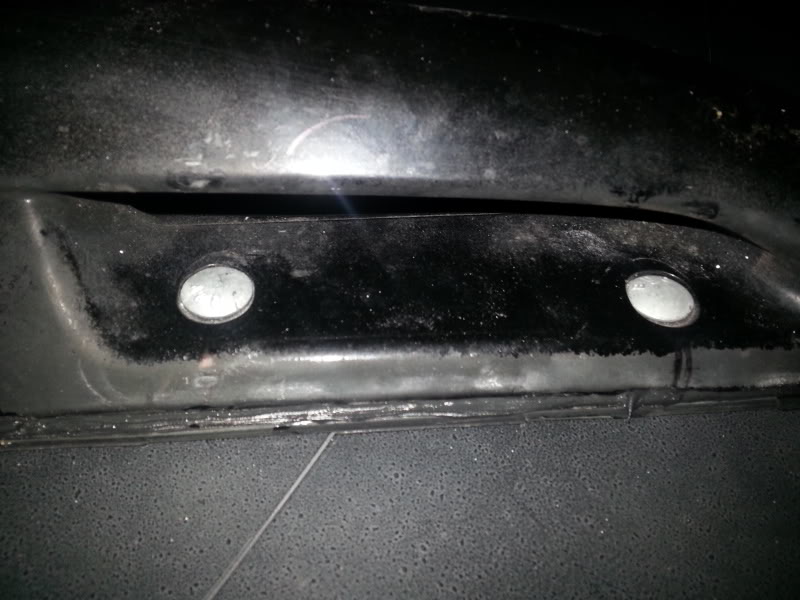
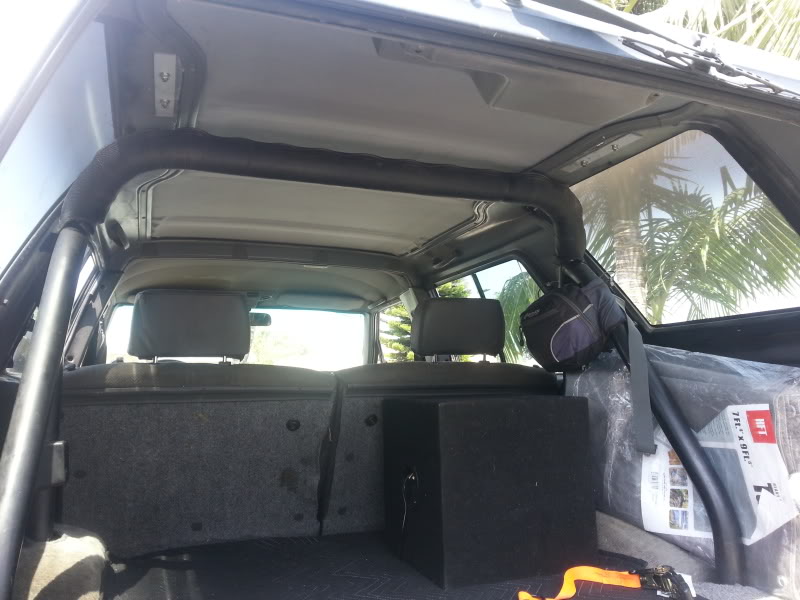
Here is the front driver side:
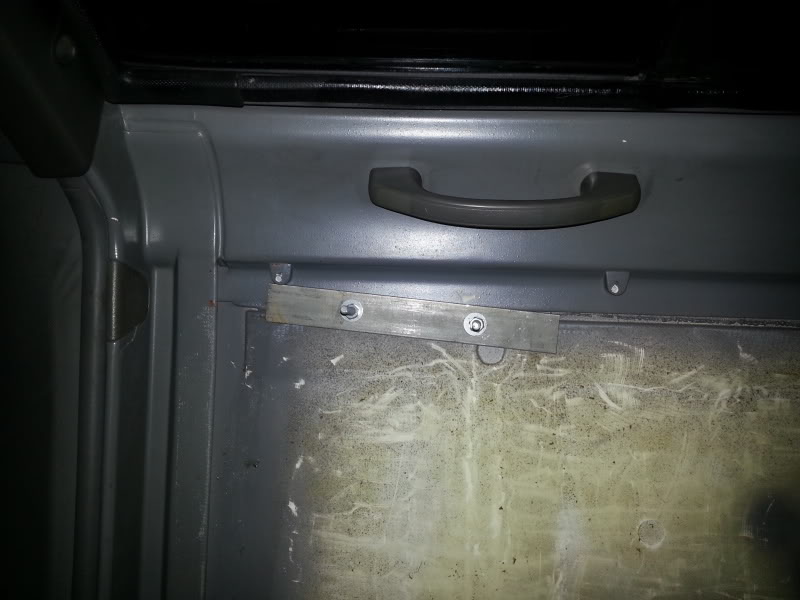
I plan to put some headliner on the roof of this to cover up these nuts and bolts in the front side of the truck. The ones on the far back side will end up being exposed because the headliner doesn't reach the part where i mounted it.
Once we got the rack all mounted up it was time to clean up. I used some acetone to clean up the silicone on my hands. I haven't touched the fresh silicone with it just yet. I'm letting it dry before i mess with it.
---------------------------------------------------------------------
Note: I ended up taking off the galvanized steel bolts and buying stainless steel carriage bolts and also priming those plates.
---------------------------------------------------------------------
Today i while looking through my dad's pile of junk i found a buffer. WOOT
So went to AutoZone and bought some new cloths for the buffer, rubbing compound, and some wax. I figured id buy some quality stuff sinc that crap i used yesterday was one of those "Wax as you dry" kind of wax liquid in a spray bottle.
I buffed the hell out of my entire truck. Including the hard top. I was shocked. Just doing that alone really bought out some of the shine haha. After the buff i gave the whole truck 1 coat of wax. I wanted to give it at least 3 or 4. but i was running late and had to get to band practice already. So i only got away with one coat. Either way it made a huge difference. My trcuk looked freekin beautiful. SO Shiney! And rebuffing and waxing the hardtop with the new product i bought really brought out the shine even more then it was yesterday. I can only imagine how great it would look if i gave it a few more waxes.
Here are the pix after the wax job.

Also went ahead and used the grinder to cut the long bolts down.
Before:

--------------------------------------------------------------------------------
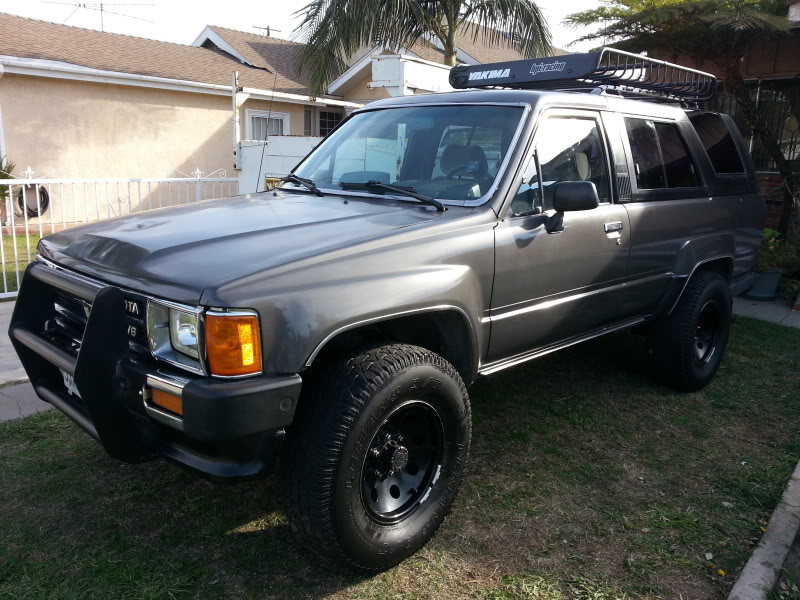
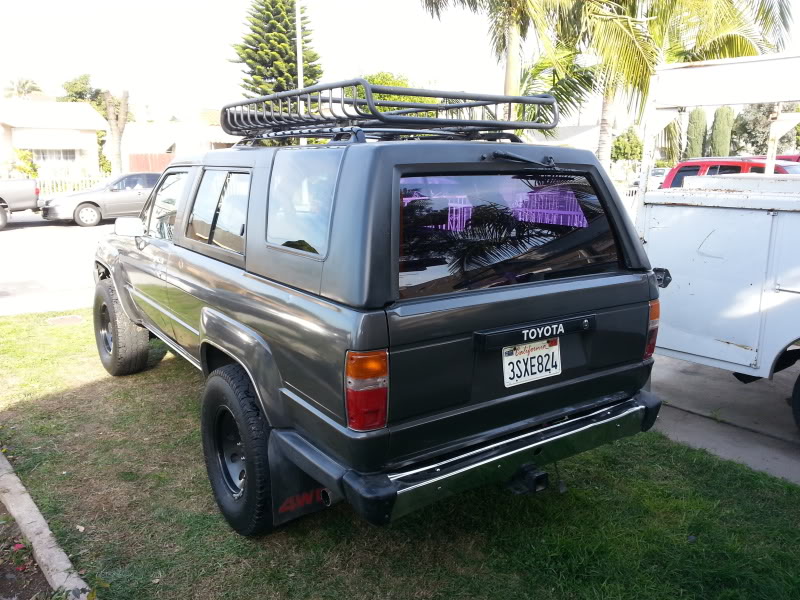
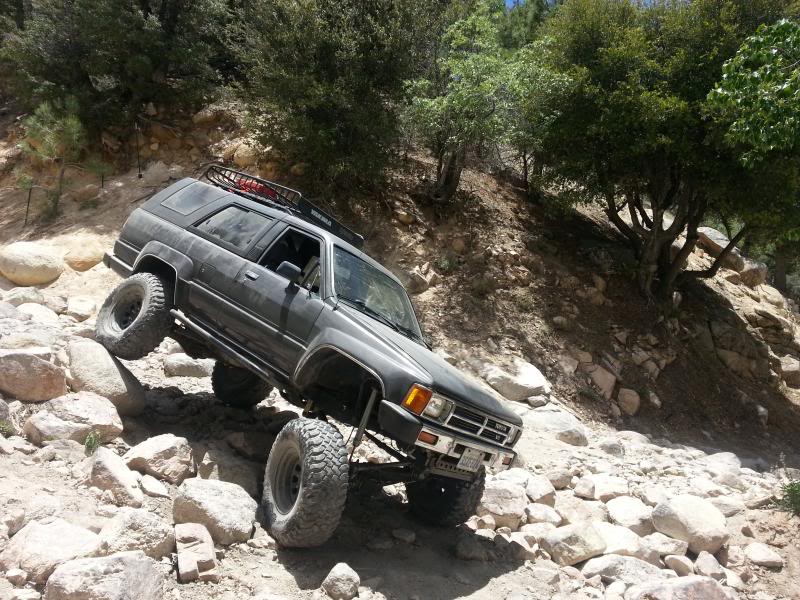
This is with a stock truck on 31" tires
This thing held at least 150lb on this trip.
-------------------------------------------------------------------------------
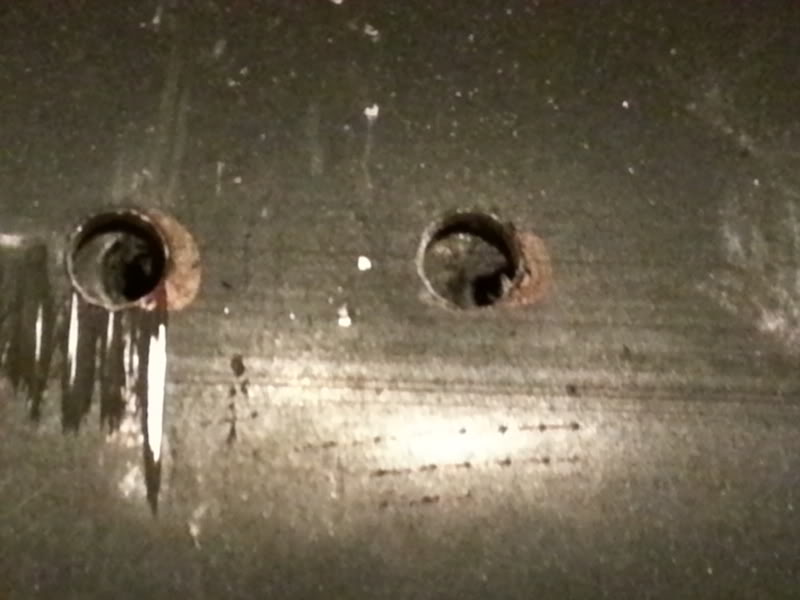
Sorry i didnt take pix of the today's progress with steps but I removed the roof rack and drilled out the holes bigger through my roof to install some plastic spacer washers so I can tighten the bolts that go through my roof as much as I want with out destroying the fiberglass hard top. Thanks Mark for that idea. It really works.
Anyways I used some new headliner material from Pepboys. And used some 3M 80 Adhesive Spray bought from Home Depot. I love the way it came out. It is pretty clean looking. With the exception of the little bumps where the bolts and nuts tie down into through the roof. But other then that. Yea it came out pretty clean.
-------------------------------------------------------------------------------------
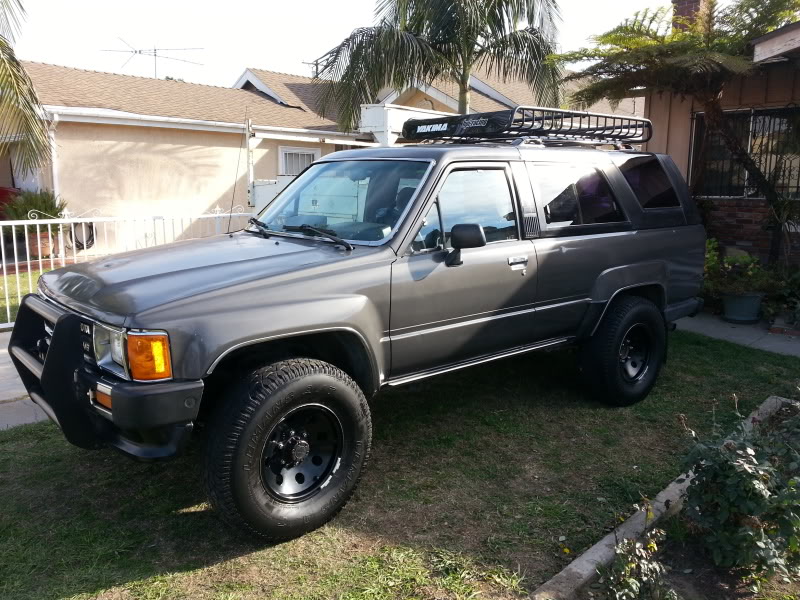
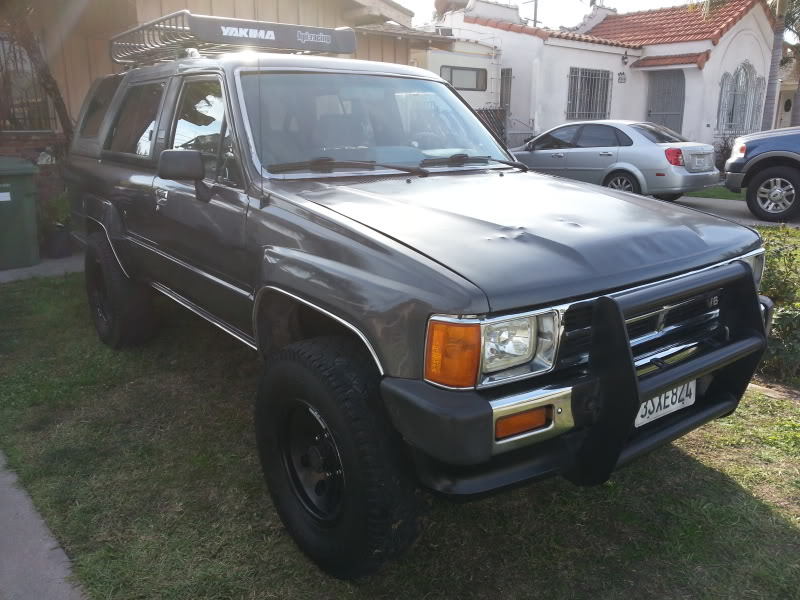
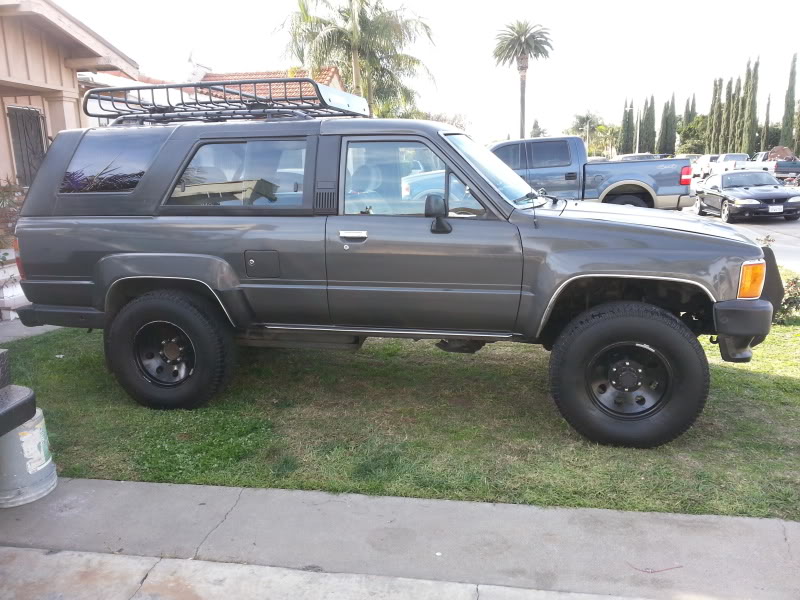
And this is what my rig looks like now.
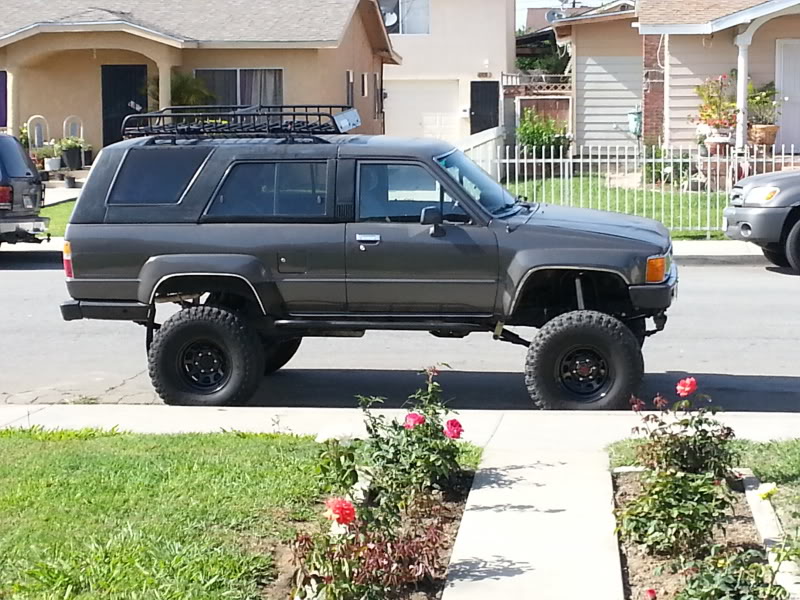
Side view. (mom&dad)
-------------------------------------------------------------------------------- I really hope this information helped you. I didnt have very much to look into or research into. and the few people that did have info didnt have enough pictures and details into 'how' they did it. Sorry for such a massive post but im just putting myself in your shoes. This kind of a post would have been exactly what i needed when i was researching how to do it on mine.
Good luck man you'll get it done. And done be intimidated. it was really easy to do. Just triple check your roof rack before you drill make sure it is centered from all views because once you drill, you cant take it back.
Keep in mind i didnt have any headliner material when i did this so you might have to install yours on top of the headliner. Unless you cover everything up with new headliner like i did. Anyway here's all the info for my roof rack build. Hope it's of some help to you.
---------------------------------------------------------------------------------------------------------
Alright guys here are the pictures/video of my new roof rack and rails.
It's like i said. I got the Yakima basket, the things to hold it onto the crossbars, 2 locks, and a Yakima net all for $180
I went straight to the junk yard after buying it and got myself this stock rack off an older version tahoo. i really dont remember the year. this rack only cost me about $24. I think i scored with both these deals.
I Went ahead and ordered the extender for the basket today too.
http://www.ebay.com/itm/Yakima-LoadWarrior-Extension-Cargo-Basket-Roof-Rack-/390522875641?pt=Motors_Car_Truck_Parts_Accessories&hash=item5aecfa2ef9&vxp=mtr
Here's a little problem i encountered. The roof rack width is too long. I'm going to have to cut it down about 4". because the way it sits now it just ends up on top of the glass. which you can clearly see in this picture
I get more into detail in this video. So I'll spare you the pix.
-------------------------------------------------------
Alright, As for my roof rack, this is what went down. I took a couple of measurements found that i needed to cut down my cross bars to 30 & 1/8". Once mounted onto the side rails end up having about 0.5" space on each side before reaching the windows.
Once cut i had to make some new holes because obviously the ones it had were just cut off lol
Darn. I thought i had the measurments dead on. lol It's ok i just made the hole a bit more oval shape and it worked fine. You can see in my picture below where i marked with permanent marker. I was at least able to get the 2nd cross bar right.
Sorry for the crappy quality. My phone takes great pix but apparently night time is its kryptonite. Anyway here are the pix of the way it looks on my roof now. Perfect fit. I'll try to upload some more pix tomorrow when there's daylight.
Had to get my brother to hold up some flash lights so i could get a semi view-able picture for you guys.
------------------------------------------------------------------------------------------
After i was done playing with the rack i pulled the Yakima Load Warrior to try to open up the locks. And i was having a really hard time. I literally spent about 20 minutes trying to get them open. So I'm assuming the locks might have been seized. So i put some WD-40 in it. and it still didnt work. I sent the guy i bought it off of a text and he said it should be working because he had just taken it off his truck before i came. he doesnt understand why it wouldnt work. and he said i know thats the right key because i down own any other Yakima products. Told me to use some oil or lube of some sort and that should work. He also found it weird because he was able to take it off his truck in about 1-2 minutes when i told him i was on my way. Said he's willing to try to open it for me if i got back to his house on one of his days off. But that guy lives like 30 miles away. I'd much rather attempt to get it open on my own lol. So i told him its ok. and eventually just ended up telling me, "Sorry for the hassle man but in case you do decide to drive back up here i will give you a Safari utility strap net for your truck for free! i never used it and its still new. ill just give it to you for all the trouble and and beside its just sitting in my garage.
I'm kinda thinking about it lol might be cool to get one of those utility strap nets.
I just dont wanna waste 1/3 of a tank just so he can tell me, "look dummy, this here is what you gotta do. Ya see you put the key into this doo-bally-doo and twist this way...(2 seconds later)..... voila. There ya go!
----------------------------------------------------------------------
sweet i finally got my 18" Yakima Load Warrior extension via FEDEX delivery.
----------------------------------------------------------------------
I got a ton accomplished today. We had mid 50's weather. (WOOOO hot for terry and William haha) jk
So i went to home Depot and grabbed a couple materials for the roof rack install. I bought some black silicone, different length bolts, nuts washers/lock-washers, flat metal plate, adhesive spray, and some charcoal grey carpeting.
Here's some of the hardware i got: [I didn't use the small bolts. they were too short.]
My dad works construction and makes lots of precise measured cuts/holes for his profession so rather then taking a chance and screwing up my roof rack i asked him to help me out and make the holes for me. I'd rather him get it right the first time then me take a chance of making my top look like Swiss cheese lol
Here is one of the pix.
I washed my truck 2ce to make sure it was clean. I have been wanting to wax my truck for the longest but laziness always takes over and i never get more then 1-2 coats of wax on which is nothing..... So because i had planned to install my roof rack today i bit my tongue and washed the truck haha. After the wash i began waxing the hard top(only) I know Mark and Ray seen the picture i sent but let me tell you guys, I NEVER KNEW HOW BAD OF CONDITION THE PAINT ON THE HARD TOP WAS TILL I WAXED IT. I was out waxing for a good 3 hours (no kidding) i put coats of wax on the hard top. And just out of curiosity i wanted to see the before and after condition of the top so i waxed the back half of my truck first. CHECK IT OUT!
This picture taken when i was on the 8th coat of wax.I wish i would have taken more pictures of the whole process but once again i found myself fighting against time to get as much done before the sun went down so i just kept at it and only took like 5 pix
I put silicone on both sides of this rubber under piece to the rack just to ensure that it is waterproofed.
I used the rounded topped (carriage bolts) for my roof rack install. I chose these to keep people from trying to unscrew them from the outside and taking off with the rack and Yakima basket. By doing this the only way to remove the rack would be from the inside.
Interior view (Rear Driver side):
Ray This previous one here is just for you. I know i sent you a text earlier today confirming that the thick piece on the sides of the hard top is NOT solid.
It is 2 layers. We noticed that when we drilled. once we got through the outer layer the drill went through a short drop then hit the bottom layer. Its not bad. but if i were you i would try to keep it on the 1 layer part (flat center). Just something to think about. You cant tighten the screws extremely tight because you might break the interior layer into that middle gap between the 2 layers. I still got the rack on pretty damn tight without breaking it. but just thought id tell you anyway. It's something to think about. Goes for you too Mark.
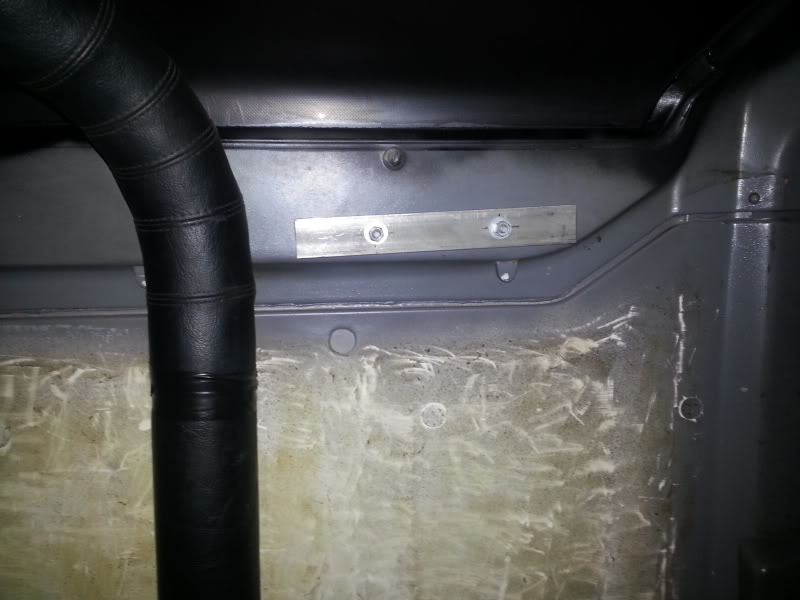
Here is the front driver side:
I plan to put some headliner on the roof of this to cover up these nuts and bolts in the front side of the truck. The ones on the far back side will end up being exposed because the headliner doesn't reach the part where i mounted it.
Once we got the rack all mounted up it was time to clean up. I used some acetone to clean up the silicone on my hands. I haven't touched the fresh silicone with it just yet. I'm letting it dry before i mess with it.
---------------------------------------------------------------------
Note: I ended up taking off the galvanized steel bolts and buying stainless steel carriage bolts and also priming those plates.
---------------------------------------------------------------------
Today i while looking through my dad's pile of junk i found a buffer. WOOT
So went to AutoZone and bought some new cloths for the buffer, rubbing compound, and some wax. I figured id buy some quality stuff sinc that crap i used yesterday was one of those "Wax as you dry" kind of wax liquid in a spray bottle.
I buffed the hell out of my entire truck. Including the hard top. I was shocked. Just doing that alone really bought out some of the shine haha. After the buff i gave the whole truck 1 coat of wax. I wanted to give it at least 3 or 4. but i was running late and had to get to band practice already. So i only got away with one coat. Either way it made a huge difference. My trcuk looked freekin beautiful. SO Shiney! And rebuffing and waxing the hardtop with the new product i bought really brought out the shine even more then it was yesterday. I can only imagine how great it would look if i gave it a few more waxes.
Here are the pix after the wax job.
Also went ahead and used the grinder to cut the long bolts down.
Before:
--------------------------------------------------------------------------------
This is with a stock truck on 31" tires
This thing held at least 150lb on this trip.
-------------------------------------------------------------------------------
Sorry i didnt take pix of the today's progress with steps but I removed the roof rack and drilled out the holes bigger through my roof to install some plastic spacer washers so I can tighten the bolts that go through my roof as much as I want with out destroying the fiberglass hard top. Thanks Mark for that idea. It really works.
Anyways I used some new headliner material from Pepboys. And used some 3M 80 Adhesive Spray bought from Home Depot. I love the way it came out. It is pretty clean looking. With the exception of the little bumps where the bolts and nuts tie down into through the roof. But other then that. Yea it came out pretty clean.
-------------------------------------------------------------------------------------
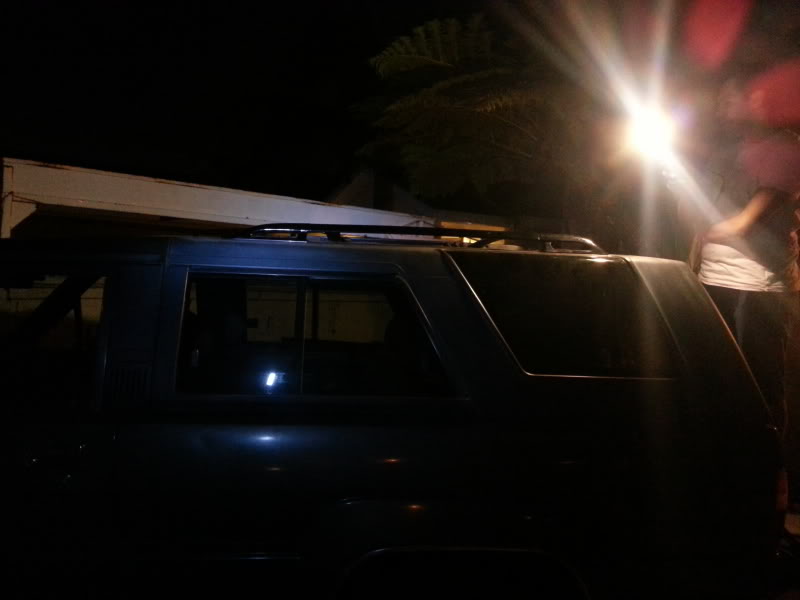
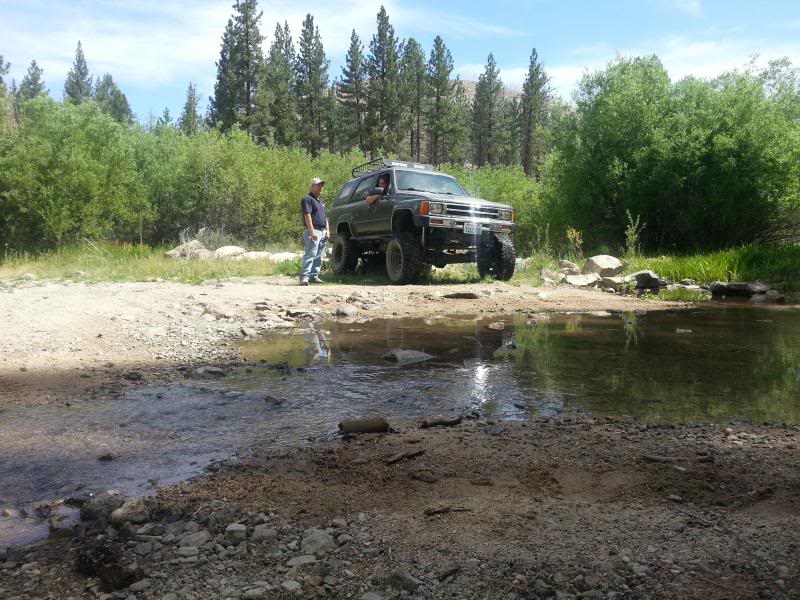
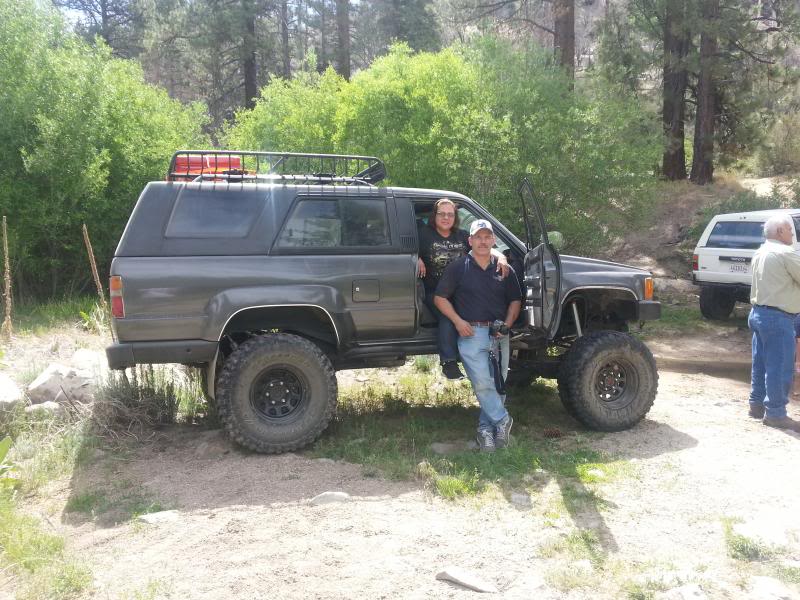
And this is what my rig looks like now.


Side view. (mom&dad)

-------------------------------------------------------------------------------- I really hope this information helped you. I didnt have very much to look into or research into. and the few people that did have info didnt have enough pictures and details into 'how' they did it. Sorry for such a massive post but im just putting myself in your shoes. This kind of a post would have been exactly what i needed when i was researching how to do it on mine.
Good luck man
you'll get it done. And done be intimidated. it was really easy to do. Just triple check your roof rack before you drill make sure it is centered from all views because once you drill, you cant take it back.
Sep 9, 2019 | 08:45 AM
#4

Registered User
Joined: Sep 2019
Posts: 1
Likes: 0
Is it necessary to have that Rack installed before the Basket to sit on? I would rather just get a basket and mount it straight to the hard top. I'm just curious, does it server a purpose, friction, more weight, stronger structure, etc?
Sep 12, 2019 | 07:58 PM
#5

Originally Posted by Jonathan Wolworth
Is it necessary to have that Rack installed before the Basket to sit on? I would rather just get a basket and mount it straight to the hard top. I'm just curious, does it server a purpose, friction, more weight, stronger structure, etc?
Sep 12, 2019 | 09:21 PM
#6
Registered User


Joined: Mar 2012
Posts: 7,130
Likes: 683
However, A raised-rail like on Redeth's and mine allows other attachments like cross-bars for kayak/surfboards/bike racks.
If you only need a basket, OK to install directly on the cap. Best to distribute the weight to several mounting points. A T-Track rail combined with T-nuts would make it easy to install/ remove the basket. Chefyota's write-up is here (https://www.yotatech.com/forums/f199...l#post52047616)
However, you may be able to find T-track from a second or third gen-4Runner.
Sep 13, 2019 | 07:41 AM
#7
Registered User
Joined: Jan 2017
Posts: 1,271
Likes: 335

Thread
Thread Starter
Forum
Replies
Last Post


