When you click on links to various merchants on this site and make a purchase, this can result in this site earning a commission. Affiliate programs and affiliations include, but are not limited to, the eBay Partner Network.
Broken chain guides: should I change timing cover / remove oil pan?
Hey all, new here with my "new" 86 22re 4runner! From what I can tell it's mostly all stock including unique decal job but 250k miles ridden with issues. I'll post about it a little bit at a time
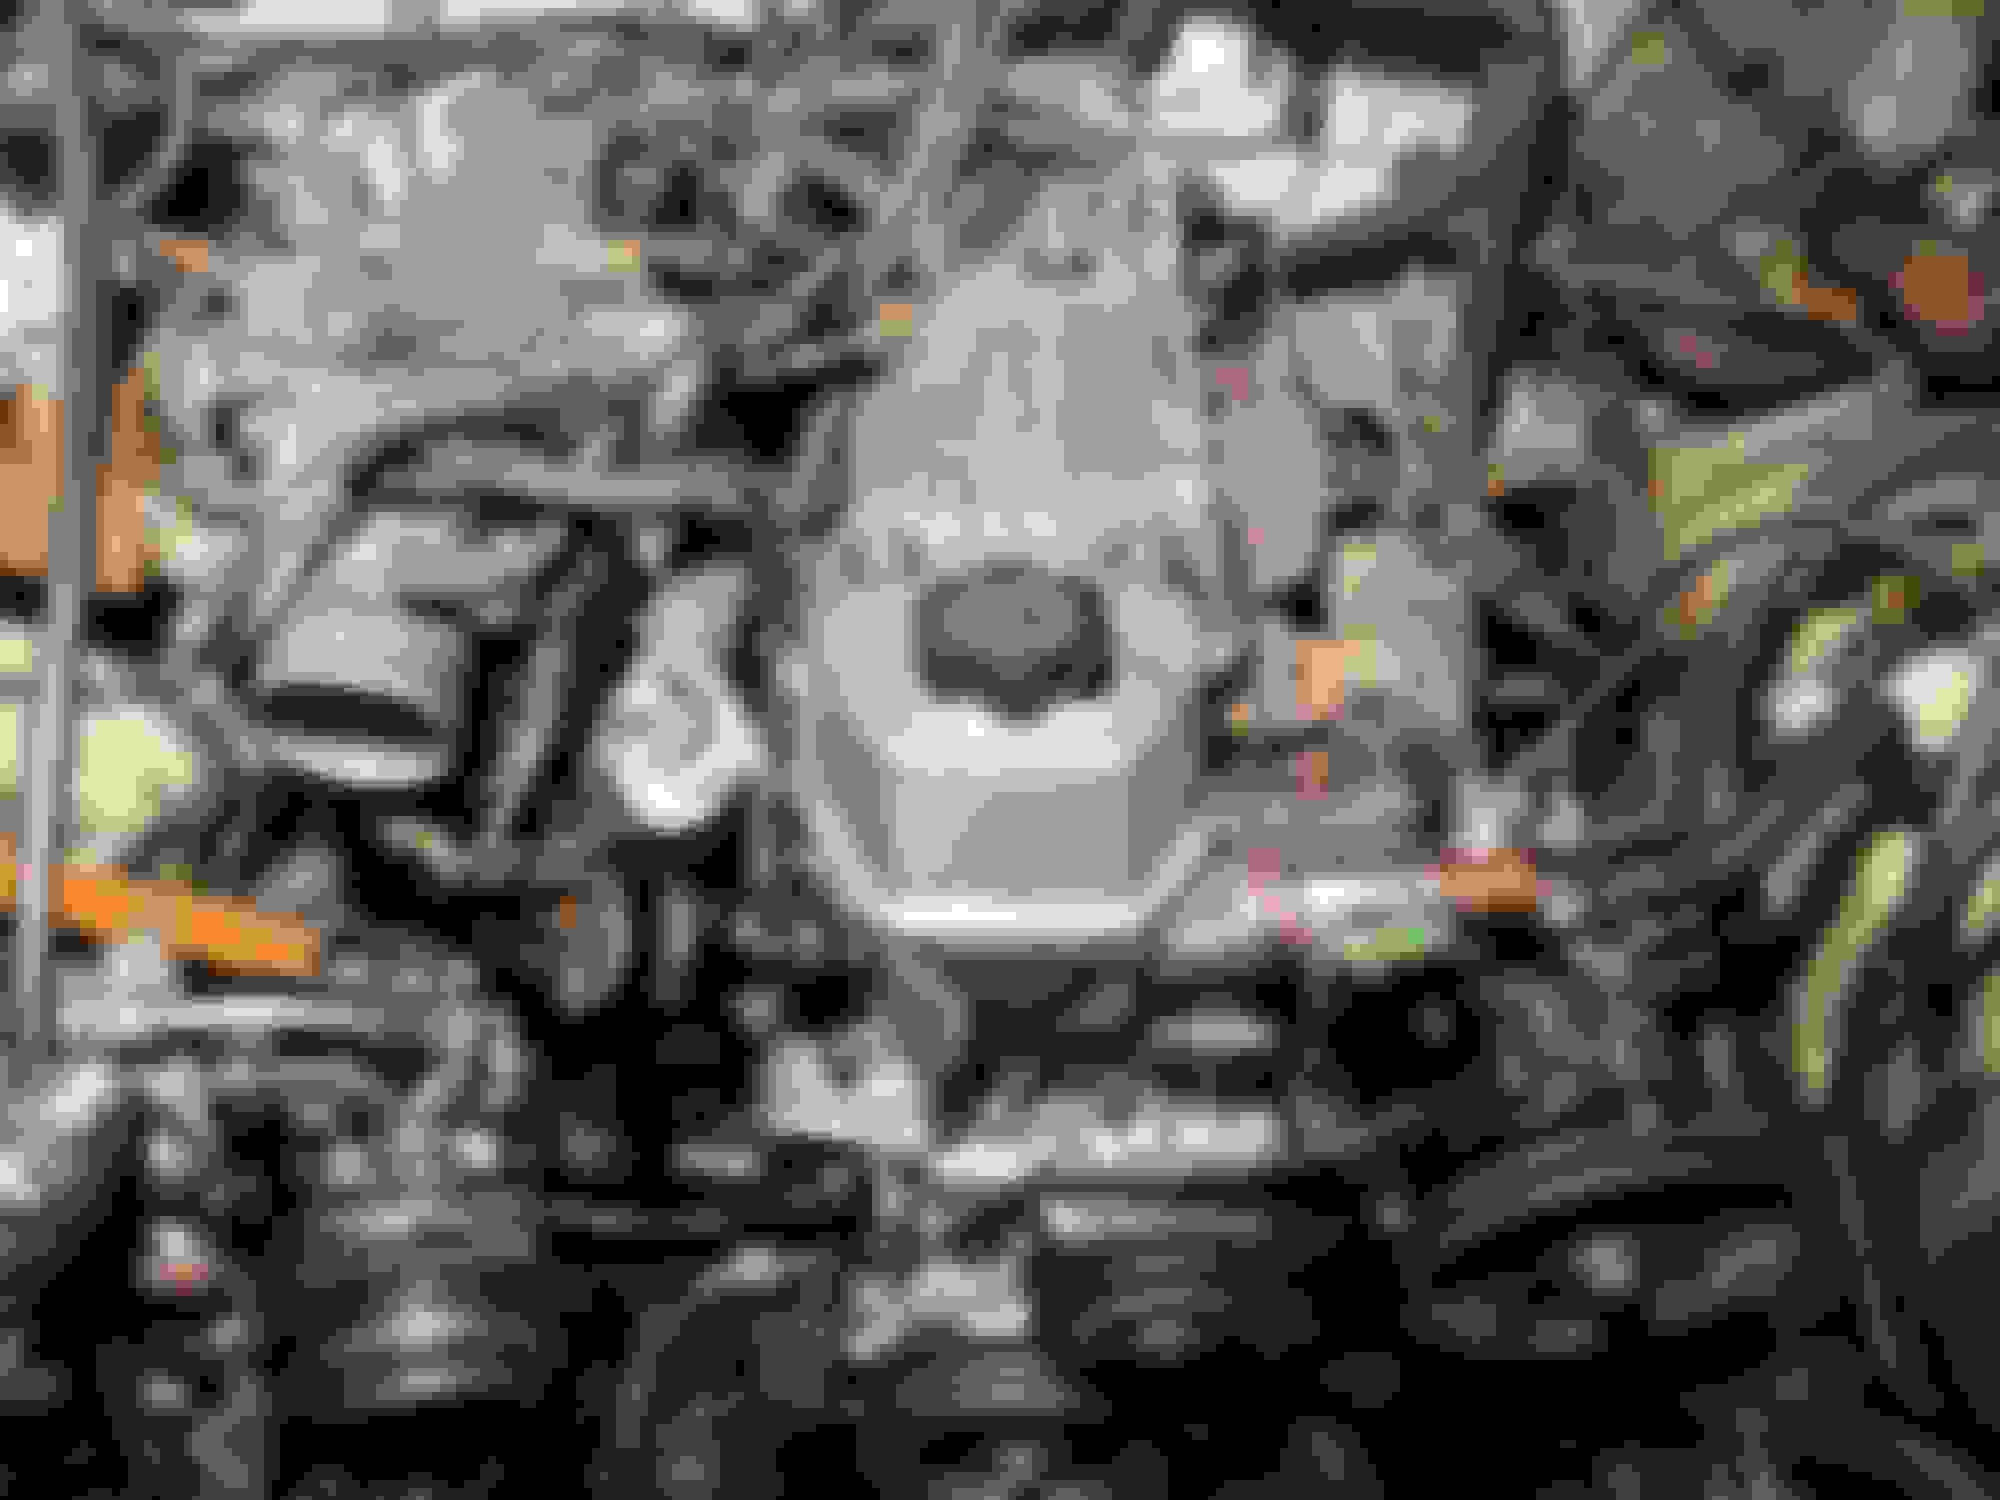
Anyways... chain guides have been busted (for i don't know how long) as you can see in images. I retrieved a piece of the plastic guides -- looks like a piece from the passenger side. But the drivers is totally gone and chain has chewed into cover wall and I know there's coolant under there...
...so first question. Should I change the timing cover? Does it risk a high probability of failure? I called a place called yota-1 they said the thickness of that wall is about 1/4 inch. from the pictures it doesn't look close to that yet.. but that IS a thin wall... these yota-1 guys (where i already ordered chain w/ metal guides) also have a japanese replacement cover for $50 + shipping, but couldn't find much info about them. are they known in the yota community? i'm inclined to get the cover
second question, as for the bits of plastic guide sitting in the oil sump. it's a 4x4 so removing the pan sounds like another PITA to add on top of a long weekend replacing the chain. i've read plenty about this, but my question is this... can't i just fish out some pieces without removing the sump? just from reaching in there after removing the timing cover? i don't seem too worried about the pieces causing too many problems, but if i find something easy to grab i'll fish it out.
passenger side drivers side
Last edited by frikinyankee; Jan 30, 2019 at 09:31 AM.
Removing the pan on an '85 is easy compared to IFS trucks, jack up the front of the frame real high to let the axle hang down. Since you're pulling the timing cover, it's smart to give the pan a new bead of fipg all the way around to minimize the chance of leaks (cleaning tip: gasoline breaks down old rtv). Now you can also check the oil pickup screen and make sure it's not clogged.
Be really gentle with the top part of the timing cover when you pull it so it doesn't rip the front of your head gasket. On that note, remember to remove the top-most timing cover bolt hidden in a pool of oil right under the cam gear.
I've had good experience ordering parts from yota-1 but they aren't as well-known as others. If you get a new cover, there's a chance you could run into problems, cause if your block ever got rebuilt or a head gasket it might've been decked. If you don't know for sure it's on it's original build, and aren't pulling the head to check deck flatness, I'd reuse your cover if it checks out. The aisin covers are higher quality than aftermarket ones too, for example the teflon-like coating on the water pump passage.
Good luck, let us know how it goes.
Last edited by gsp4life; Jan 30, 2019 at 09:26 AM.
Reason: Added text
Removing the pan on an '85 is easy compared to IFS trucks, jack up the front of the frame real high to let the axle hang down. Since you're pulling the timing cover, it's smart to give the pan a new bead of fipg all the way around to minimize the chance of leaks (cleaning tip: gasoline breaks down old rtv). Now you can also check the oil pickup screen and make sure it's not clogged.
Be really gentle with the top part of the timing cover when you pull it so it doesn't rip the front of your head gasket. On that note, remember to remove the top-most timing cover bolt hidden in a pool of oil right under the cam gear.
I've had good experience ordering parts from yota-1 but they aren't as well-known as others.
Good luck, let us know how it goes.
My bad, i said 85 but i meant 86! It's an IFS truck
Thanks for the other tips.
As for Yota1 I talked to them on the phone and they're super nice. Also local. And they sell aisin parts for less than i could find at other places.
Also another question... since this has an automatic tanny. For the crank shaft pulley removal, I'm planning on the bump start method. Can i start it in neutral? Or should I just start it in park? But for then keeping the crank / cam locked for removing the chain, how can i get it in gear? Just putting it in L or 2, will that do the trick even with the car off / not rolling?
Edit: Replies above were posted before I could see them. Carry on!
It is hard to tell how far down the chain ground into the timing cover from the picture. It is only a high risk of failure if the chain has eaten pretty close to the water jacket. It could be reusable, or not....
See this post on a timing cover that failed after the chain ate through it. The grooves look deeper than yours, at least to me: https://www.yotatech.com/forums/f116...l#post51454998
If you want the piece of mind, you can go ahead and replace it. If you do, just note that if the block surface has ever been machined during a previous rebuild, the cover may not be flat with that surface, and it needs to be for a proper seal.
As for the oil pan, I say remove it and clean it out if you have the means. Most of the pieces fall back into an area that would be very difficult to remove without removing the oil pan.
See here: https://www.yotatech.com/forums/f116...l#post51455028
The broken pieces *probably* won't do much staying in the pan, but if this was my engine, I would drop the pan and clean it out.
I have never used Yota-1, so I have no feedback to give you.
Last edited by old87yota; Jan 30, 2019 at 09:36 AM.
Reason: New replies above.
My '85 is also a manual so not sure the correct way to remove a crank bolt on yours. Bump starter method should still work (in neutral) but I'll let others with real-world experience take over from here.
Edit: Replies above were posted before I could see them. Carry on!
It is hard to tell how far down the chain ground into the timing cover from the picture. It is only a high risk of failure if the chain has eaten pretty close to the water jacket. It could be reusable, or not....
See this post on a timing cover that failed after the chain ate through it. The grooves look deeper than yours, at least to me: https://www.yotatech.com/forums/f116...l#post51454998
If you want the piece of mind, you can go ahead and replace it. If you do, just note that if the block surface has ever been machined during a previous rebuild, the cover may not be flat with that surface, and it needs to be for a proper seal.
As for the oil pan, I say remove it and clean it out if you have the means. Most of the pieces fall back into an area that would be very difficult to remove without removing the oil pan.
See here: https://www.yotatech.com/forums/f116...l#post51455028
The broken pieces *probably* won't do much staying in the pan, but if this was my engine, I would drop the pan and clean it out.
I have never used Yota-1, so I have no feedback to give you.
thanks for the reply!
Regarding the timing wall thickness, i'm gonna stay safe. looking at that picture isn't making me feel better! it really seems like a thin wall. I bought a new timing cover from Yota1. the people over at yota1 also mentioned, like you do, that it may not fit if the engine was rebuilt... i have no knowledge about prior rebuilds.. lets say it DOES need to be filed down. i imagine this needs to be done professionally by a machine shop?
As for the oil pan, I might just wait it out for another time. we'll see how busy the rest of the job keeps me this weekend
New questions... I've read a LOT about removing the crank pulley nut, but a lot less about putting it back on. I feel I can get it off no problem. But to put it back on will be more difficult (remember I have an auto trans). I once did it on a 3vze and we used a radiator fan holder. that should work here too, no? it's like a Y shaped metal rod (we used this one from oreilly's) that bolts onto the pulley and that you can get stuck somewhere or have someone hold while you torque the bolt. it seems like there are 4 bolts on the pulley. Can't i take off two of the bolts and bolt on this tool? it should hold the sucker
Oh yeah and one more thing. Is there any way I can hold the engine still while i replace the chain / etc? In a manual you just put it in gear. Does that work with the L or 2 setting on the automatic? How else can I keep the shafts steady while i assemble everything back together?
Last edited by frikinyankee; Jan 30, 2019 at 05:02 PM.
old87yota has more knowledge and experience than me, so even when our advice overlaps listen to him first ;-)
With that being said:
The top of the timing cover acts as a continuation of the block's deck surface, and a good seal is needed there so it's machined not filed. Unfortunately it's a precision job best left to a machine shop. If you're not bringing in the block with the cover (I'll assume you're not) they'd need a very very precise measurement of the block's height to give you a good result. Like to the hundredth of an inch. Honestly I think your best bet is finding the PO and asking if the engine is original or at least never been rebuilt.
That tool in the photo probably isn't strong enough for this job. People have made versions of it before with angle iron and plate steel and I think it's the best method. I've used a big chain wrench over a heavy towel in the past with success but it'd be easy to slip and destroy the pulley's belt surface. I've also put a wooden block between the rotating assembly and crankcase wall, but only works if the oil pan's off. If you don't weld, you can drill and bolt your new crank-holding tool together. It really gets made of just one length of angle iron, one small peice of plate and a few high-grade bolts to connect it to the pulley.
The cam and crank won't move much if at all on their own (the bearings hold pretty tight) and the keyways at the front of the shafts indicate where they need to be as you replace the chain and tensioner. Do yourself a favor and stick with OSK brand tensioner, the rest aren't as good. Don't overtorque it's bolts cause it can cause sticking.
old87yota has more knowledge and experience than me......
I wouldn't be so sure about that.....
Toyota shows a Special Service Tool (SST) that holds the crankshaft pulley in place when removing and reinstalling the crankshaft pulley bolt (about 1/3 of the way down on the attached .pdf file).
I think you should be able to substitute the Special Service Tool with a universal pulley holder or you can do what gsp4life suggested and make your own. I am not sure if the fan clutch tool is strong enough, but it is the same idea.
Great thank you all for the tips! I think i'll rent the fan holder tool just in case (it's free) and see if it works at all or if i have to fabricate something that won't be too much of an issue apart from setting me back some time.
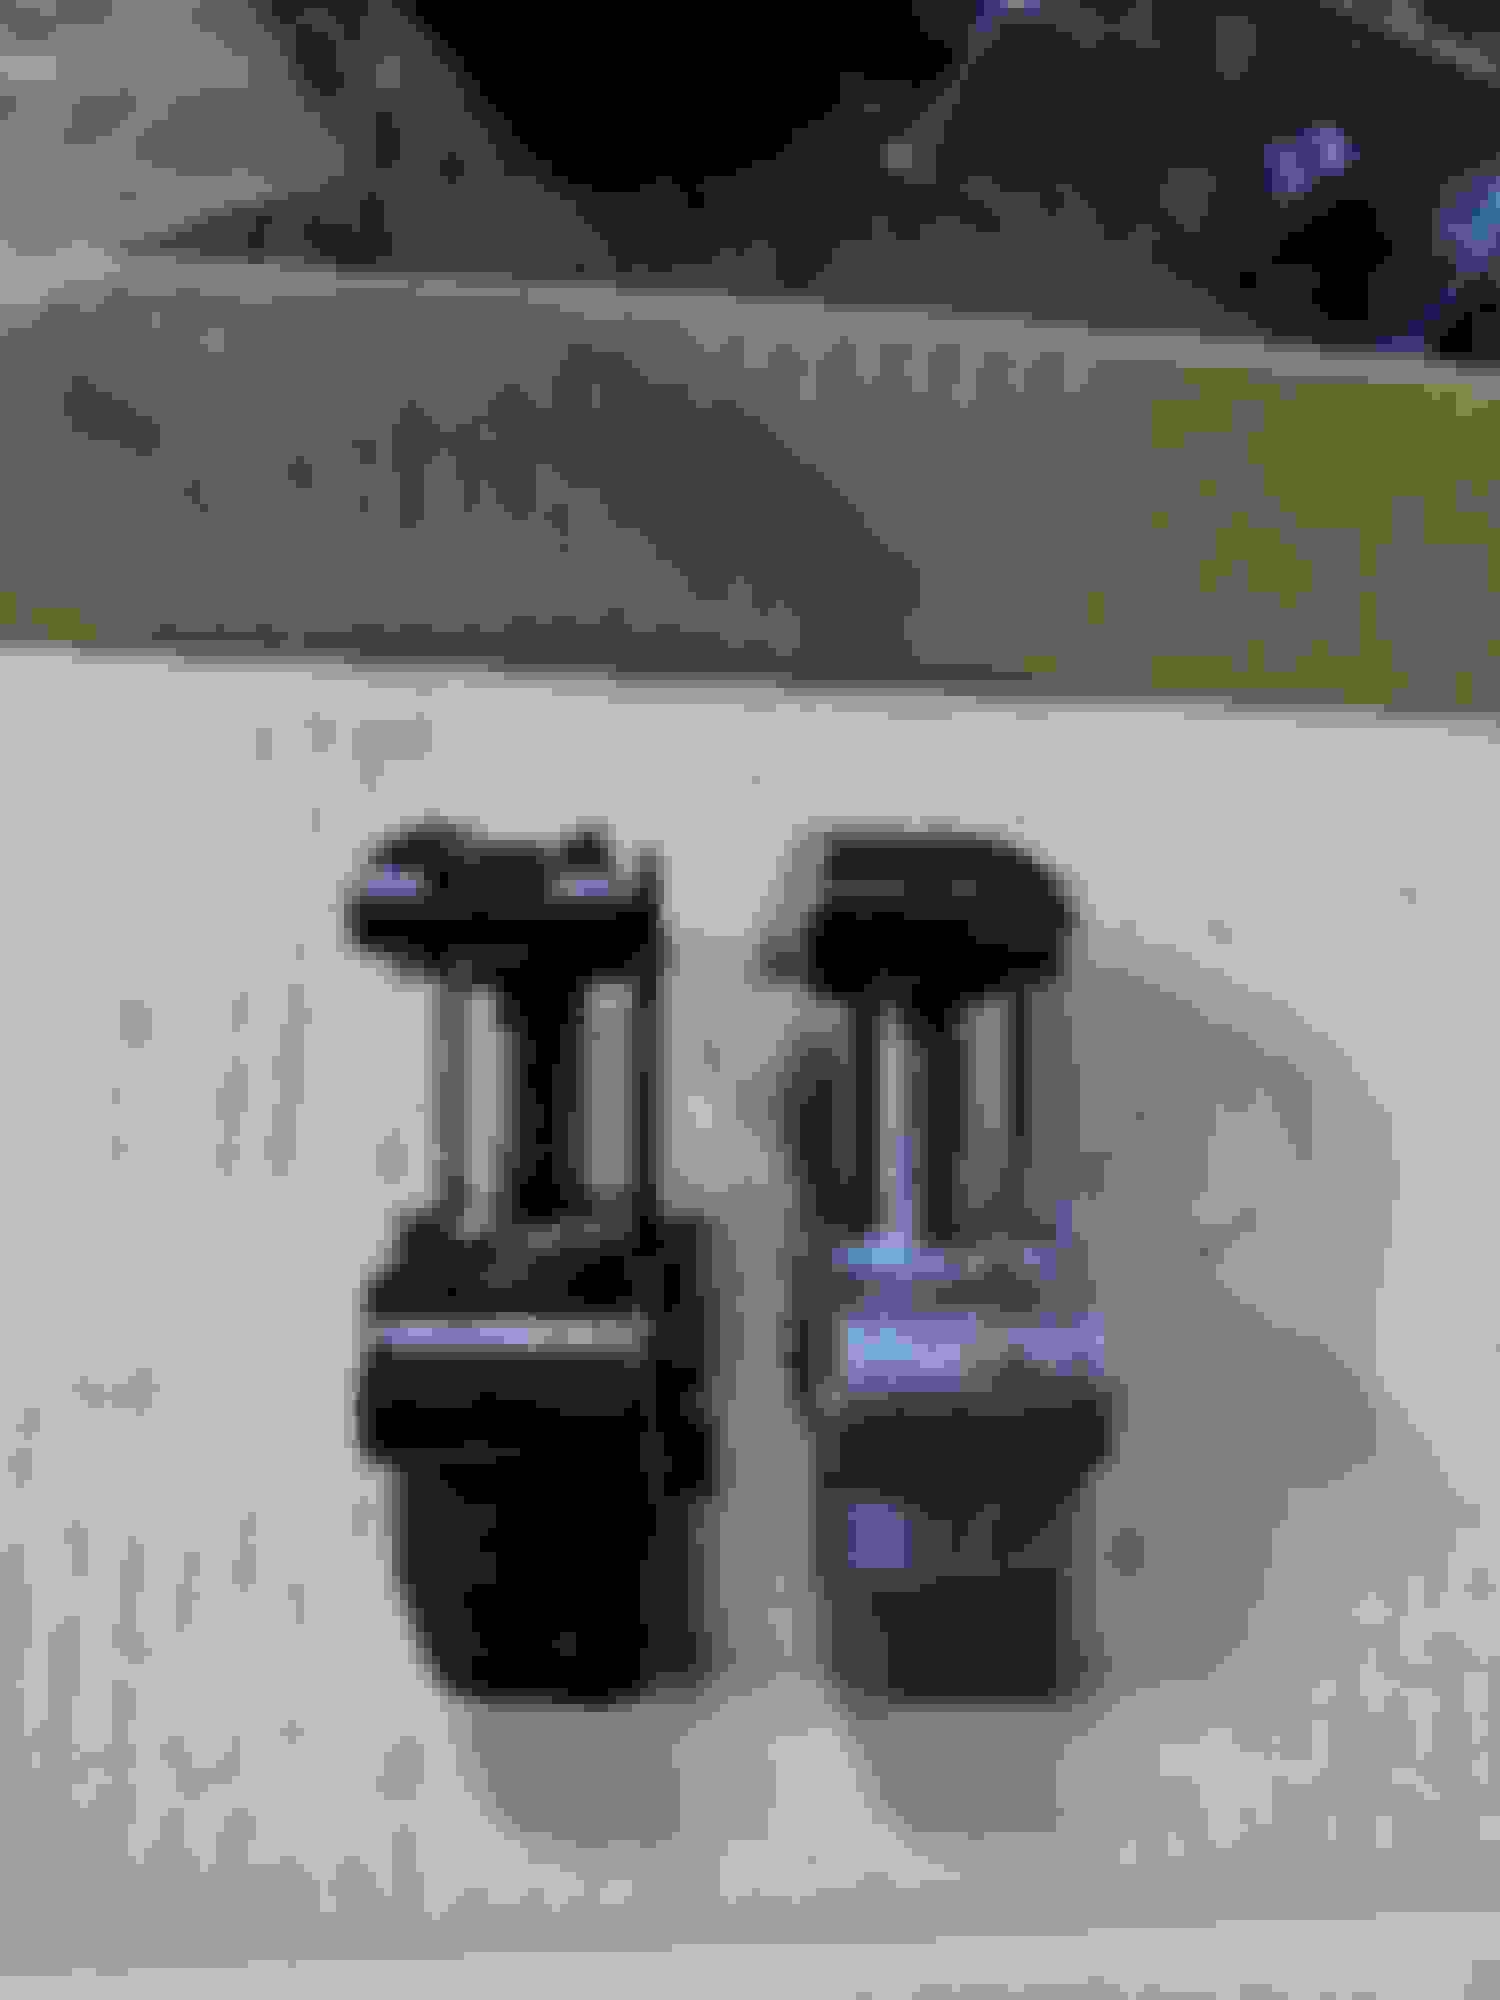
On another note, the OSK timing chain set came in, and the drivers side guide is metal while the passenger side is plastic. I was expecting them both to be metal. What's up with that?
Pry bar jammed into a ring gear tooth on the flywheel will lock it down. Some engines all you need to do is to remove the starter dust cover to gain access.
You can also do the rope trick. Nylon rope down a spark plug hole. Never done it that way personally.
Great thank you all for the tips! I think i'll rent the fan holder tool just in case (it's free) and see if it works at all or if i have to fabricate something that won't be too much of an issue apart from setting me back some time.
On another note, the OSK timing chain set came in, and the drivers side guide is metal while the passenger side is plastic. I was expecting them both to be metal. What's up with that?
The drivers side is the only one that takes abuse. Last 3 sets I have done are 1 metal & 1 plastic. Totally good imho.
Hey all here's an update, operation was a success!
All in all, first time doing a timing chain job - but i did do a 3vze belt once. similar in ways but obviously without the oil / sealing
THIS write up is thorough and perfect, it's everywhere online but it doesn't hurt to link it again for future noobs
I'm in LA. and of course the weekend i decided to do it it was raining. i parked in the alley out front of the friend's garage so i could use some of his tools / space, but still under the elements and had to get in and out as fast as possible, took me two full days and two half days. i didn't run into any problems but wanted to do the job right, examine anything i took off, clean everything, and make sure everything was torqued right and sealed well on my way out. definitely learned a lot. and i'm exhausted! crawling under the car in pouring rain sure was an experience.
i ended up putting in new aisin fuel and water pumps, but NOT putting the new cover. i couldn't get in touch with the old owner and at 250k miles I didn't want to put money that it hand't been rebuilt. would there have been any sure way to know? anyways the old cover had a couple millimeters eaten off, but hadn't been eaten all the way through. with the metal guide in place the chain won't be wearing it out any further i don't see why it wouldn't hold structurally
i also did pull the oil pan. it was sort of a pain in the ass but i wanted to be thorough. shattered guides were found and tossed.
I've attached some pics of the process because who doesn't like pictures, right?
Now that I can drive it without the risk of damaging the engine i can move onto the next issues! but that's for other posts i guess
Excellent job. Feels good doesn't it? Also builds up the courage, timing chain is a pretty intensive job, lots of stuff to undo to get in there and you went a step further and dropped the oil pan.


 Jan 29, 2019 | 08:33 PM