When you click on links to various merchants on this site and make a purchase, this can result in this site earning a commission. Affiliate programs and affiliations include, but are not limited to, the eBay Partner Network.
I have a 95 3VZE 3.0. Took for smog and failed due to high emissions at 15 mph. Passed at 25 mph, visual and functionality. Changed fuel filter, plugs, wires, cap, rotor, air filter. Also ran a tank of gas with crc guaranteed to pass fuel additive. Went back to smog and failed functional check because the timing went from 10 on the first test to 32 on this test and NO PPM shot up past gross polluter status but HC PPM and CO dropped way down. I don't see how what I did could throw the timing off. Can any one help?
1000 warm is too high, and may well raise the ignition timing above base.
Use the idle air screw to bring the revs down around 800 hot.
I adjusted the idle to 800 while hot. My timing light wouldn't work so I went for a drive. It started running great with lots of power. I drove to work this morning, home for lunch back to work. Still ran great. On the way home it was running like timing was off so i got a new light on the way home. Checked timing and it was way to the right but moving around then started moving all over the place. The tcp sensor seems off because the idle would stop high at one light and low at another, but at average it would stay where I set it. I hear the computer should adjust the timing. Should i adjust the distributor?
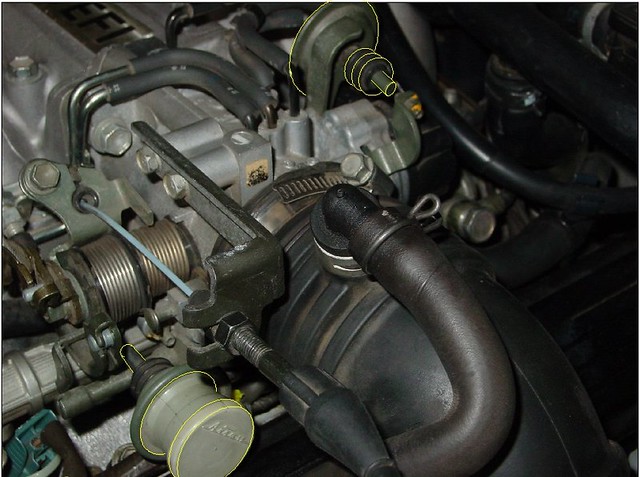
That was a dumb question. I unplugged TPS (not tcp) and everything went right back to normal. Started running great immediately and timing went right back to 10. So, now I have another question. When I adjust the new TPS, the manual calls for a SST special tool to be placed between the lever and stop screw on the throttle. Do I really need that tool or non-conductive feeler guage? Can I just use a regular metal feeler guage? I'm not the best mechanic, but I don't see that stop screw being conductive.
This is the same manual I have. Section 2 part (c) says insert SST between throttle stop screw and stop lever. I don't have much knowledge on this type of stuff, so I looked up SST and I found it's a non conductive guage. I tried to find out whether I needed it or not. I couldn't find anything on my type of vehicle. I'm not sure if the reason for using this tool is because it's non conductive or just because trying to get a normal feeler guage in that spot is a major pain in the a$$. I found a long, thin feeler guage that will fit in there in my toolbox. This TPS part is ridiculous. I want to do it right the first time so I don't have to deal with it anymore.
You are correct; the setting procedure is repeated on page EG2-241, without reference to an SST, only a thickness gauge. (This page https://lexus.service-solutions.com/...spx?id=26&g=12 says the SST part number is just a "wire gauge," no reference to non-conducting)
But I don't want you to overthink this! You are only checking the IDL terminal in two positions: closed, and open. But rather than argue "is it really closed," Toyota tells you that 0.5mm or less is closed, 0.8mm is open. Similarly, you are only looking for two results: conducting, and non-conducting. Again, Toyota tells you that anything less than 2.3k ohms is "close enough" to conducting.
The hardest part on the 3VZE is that the connector is pointing away from you, and it is difficult to get your probes on the right pins. I suggest using one of those tiny straws used as stir-sticks to hold your piece of wire against a single pin.
Finally something makes some sense. All it is, is a wire guage. Thank you, that is very helpful. It's pretty hilarious that the answer to my question was only a couple pages below what I was reading. My manual is missing table of contents/index pages, so I have been having a hard time navigating. You would happen to have that on your version would ya?
I have mini alligator clips that I attached to the probes. I tried them out on the TPS that I removed. Clamp right on there perfectly. Whole set assorted of clips and clamps $3 at Harbor Freight.
One more thing I'm not understanding. Apply vaccum to throttle opener. I don't understand the process. What kind of vaccum and where exactly do I connect it?
Thank you, sir. You have been a huge help. I'm finding that I'm naturally mechanically inclined. I just have little experience or education on these things. Grew up with a bunch of women. Tips like this go a long way. Thanks again.

 Nov 30, 2016 | 11:35 AM