
New '90 4Runner project, CA truck in the northeast
 Sep 22, 2014 | 05:03 PM
#1
Thread Starter
Registered User
Joined: May 2009
Posts: 578
Likes: 11
From: Southern NH
New '90 4Runner project, CA truck in the northeast
Edit: As the problems with the rig become more evident, it occurs to me that I should note the circumstances surrounding the purchase, so future readers don't think I'm a total chode who buys whatever comes my way. I looked at a few 3rd gens but the frame rust issues were very common, and asking prices were what I deemed unreasonable. Working in southern CT I saw an ad over the Sound in LI for this truck. CA, no rust, an engine I knew how to work on... It was 1.5 hours by ferry or 5 hours through Manhattan by land - got the owner to meet me in the ferry lot on LI side. Drove to the CT side ferry after work with moments to spare and discovered that we would have literally minutes to buy the truck and load it on the return ferry or I'd have to drive an illegal vehicle through Manhattan for 5 hours.
Talked to the crew and they let us cut the cars and jump the gap while the ferry was still parking, ran to the parking lot, heard it run, checked for rust, "new head gasket, exhaust leak is making it throw a code..." Whatever, it was clean. Offered him $2k, $500 less than asking which he accepted. My buddy ran to buy the tickets while he signed the title, and we were off - last truck on the ferry before they slammed the gate. Sooo yeah, maybe a bad idea, but at the time it seemed right. I will turn this baby around though. Now, back to the thread...
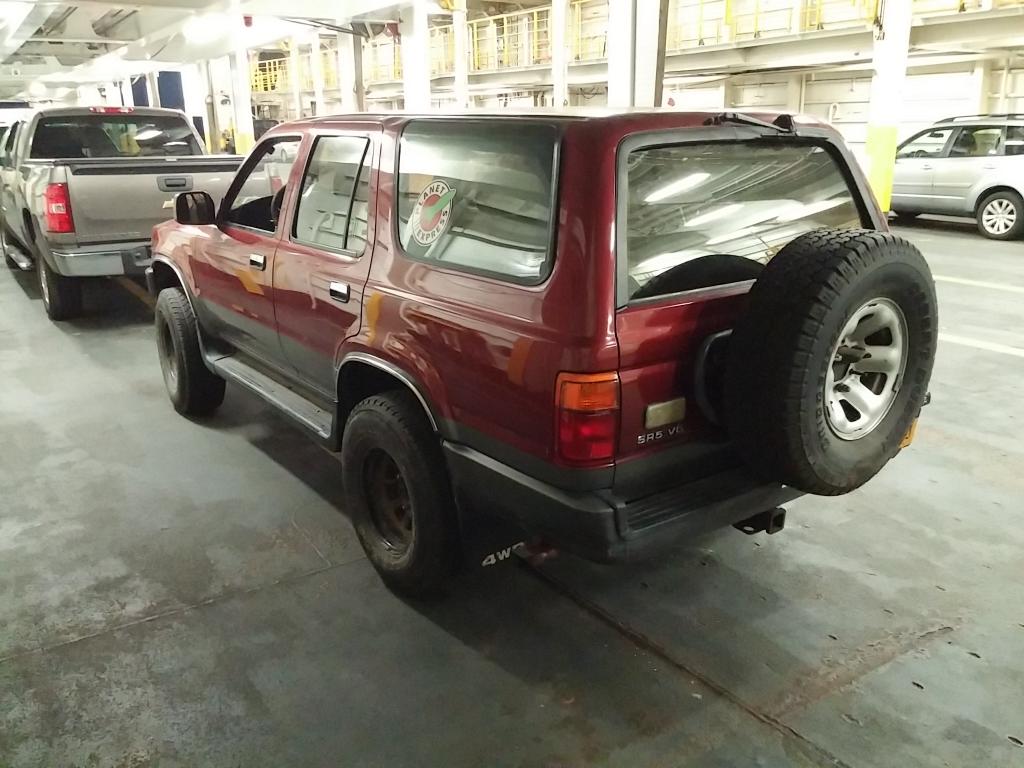
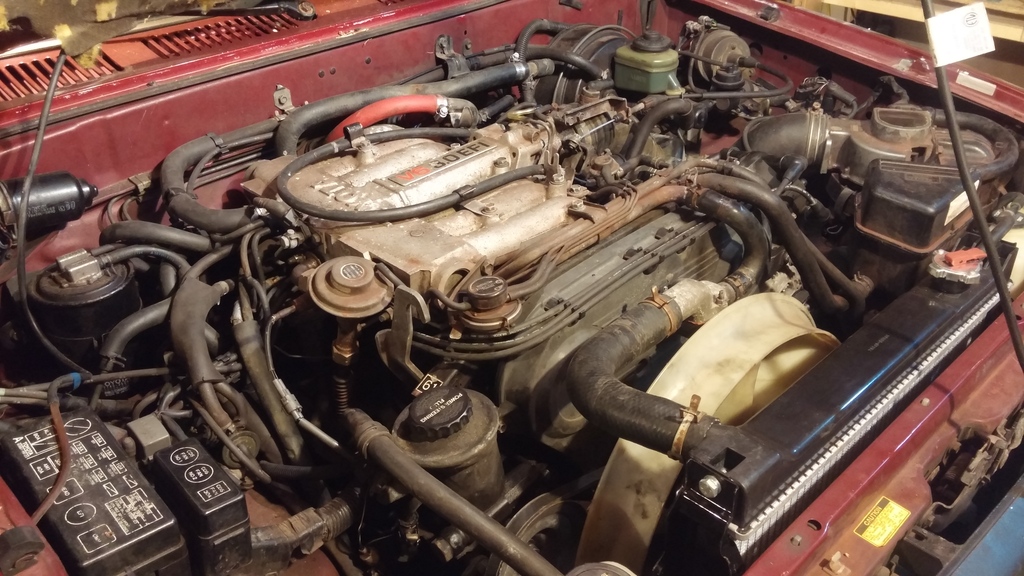
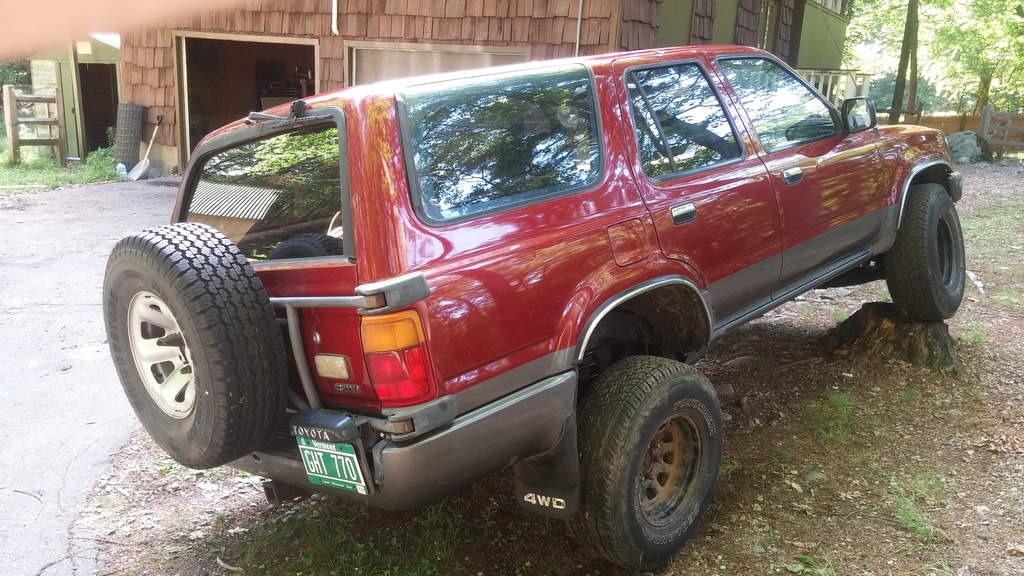
3.0, 5 speed, power everything, although some power options are down, I think because of a loose ground. Believe that's a stock spare tire swing out - I've never seen one before. Body is mint, aside from some scratches which should buff out and the geeky "Planet Express" sticker. No rust on the bumper even. Compression from 150-163 PSI cold.
Runs like crap right now, throwing codes for ECT and lean mix. Huge split near throttle intake mostly taped over for the drive home was the likely culprit for lean code. PO had someone do the head gasket 500 miles ago but truck overheated on the drive home. With the heat cranked and the temp gauge near the redline I was barely getting any heat in the cabin, suspect a corroded heater core has plugged some passages in the radiator which got steaming hot, hopefully not the head. Going to take the radiator/heater core out of my other rotted out, smashed up '90 and swap it in, as well as the exhaust, rear springs, and a few other knick knacks. Little oil undercoat and I should have a good winter ride for years to come, fingers crossed!
Talked to the crew and they let us cut the cars and jump the gap while the ferry was still parking, ran to the parking lot, heard it run, checked for rust, "new head gasket, exhaust leak is making it throw a code..." Whatever, it was clean. Offered him $2k, $500 less than asking which he accepted. My buddy ran to buy the tickets while he signed the title, and we were off - last truck on the ferry before they slammed the gate. Sooo yeah, maybe a bad idea, but at the time it seemed right. I will turn this baby around though. Now, back to the thread...

3.0, 5 speed, power everything, although some power options are down, I think because of a loose ground. Believe that's a stock spare tire swing out - I've never seen one before. Body is mint, aside from some scratches which should buff out and the geeky "Planet Express" sticker. No rust on the bumper even. Compression from 150-163 PSI cold.
Runs like crap right now, throwing codes for ECT and lean mix. Huge split near throttle intake mostly taped over for the drive home was the likely culprit for lean code. PO had someone do the head gasket 500 miles ago but truck overheated on the drive home. With the heat cranked and the temp gauge near the redline I was barely getting any heat in the cabin, suspect a corroded heater core has plugged some passages in the radiator which got steaming hot, hopefully not the head. Going to take the radiator/heater core out of my other rotted out, smashed up '90 and swap it in, as well as the exhaust, rear springs, and a few other knick knacks. Little oil undercoat and I should have a good winter ride for years to come, fingers crossed!
Last edited by jbtvt; Jun 10, 2015 at 04:35 PM.
Sep 22, 2014 | 05:36 PM
#2

You didn't leave the planet express sticker!?
I believe the rear tire carrier was an option. Sometimes I wish mine had it but it doesn't.
What's the future plans? Just get it running good?
I believe the rear tire carrier was an option. Sometimes I wish mine had it but it doesn't.
What's the future plans? Just get it running good?
Sep 22, 2014 | 05:50 PM
#3
Thread Starter
Registered User
Joined: May 2009
Posts: 578
Likes: 11
From: Southern NH
haha, yeah the sticker is still on there but not for long. If, I mean once, I get it running well it'll be my winter ride and occasional summer trips where I need to haul things. Already have an '85 for wheeling.
The oil pressure readout on the stock gauge is on the low side also but I have a tester gauge coming, hopefully I don't need to tear into the bottom end for the pump.
The oil pressure readout on the stock gauge is on the low side also but I have a tester gauge coming, hopefully I don't need to tear into the bottom end for the pump.
Sep 22, 2014 | 06:25 PM
#4
Registered User
Joined: Oct 2007
Posts: 2,747
Likes: 3
From: NC
Cool truck. Good find. 
Externaly mounted spare tire is standard equipment on a 1990 model 4runner.
Sounds like a good project.
Poor heat in the cabin coupled with overheating could indicate a faulty/failed coolant pump.
Coolant pump impeller damaged.
Definatly a flow problem.
Good luck with build.
Externaly mounted spare tire is standard equipment on a 1990 model 4runner.
Sounds like a good project.
Poor heat in the cabin coupled with overheating could indicate a faulty/failed coolant pump.
Coolant pump impeller damaged.
Definatly a flow problem.
Good luck with build.

 Oct 8, 2014 | 02:33 PM
#7
Thread Starter
Registered User
Joined: May 2009
Posts: 578
Likes: 11
From: Southern NH
I'm hoping a little bar and chain oil will keep it safe. I do feel a little bad bringing these mint rides up to the salt belt, oh well.
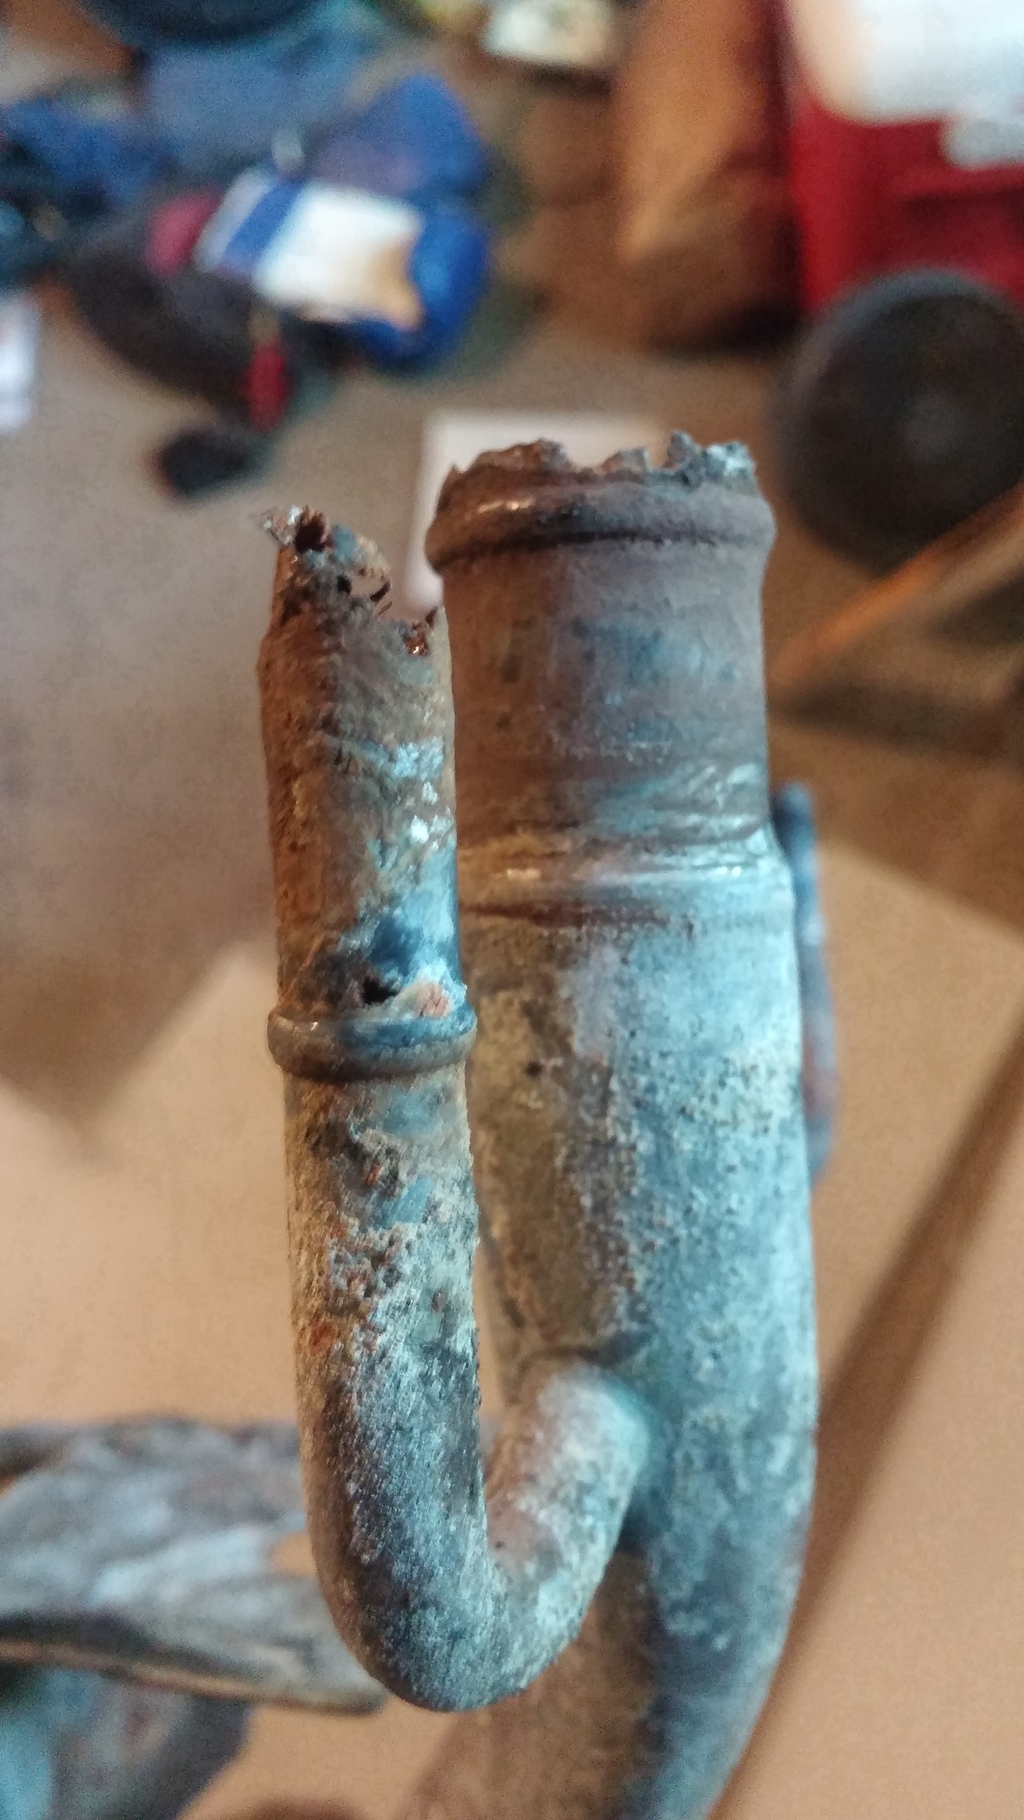
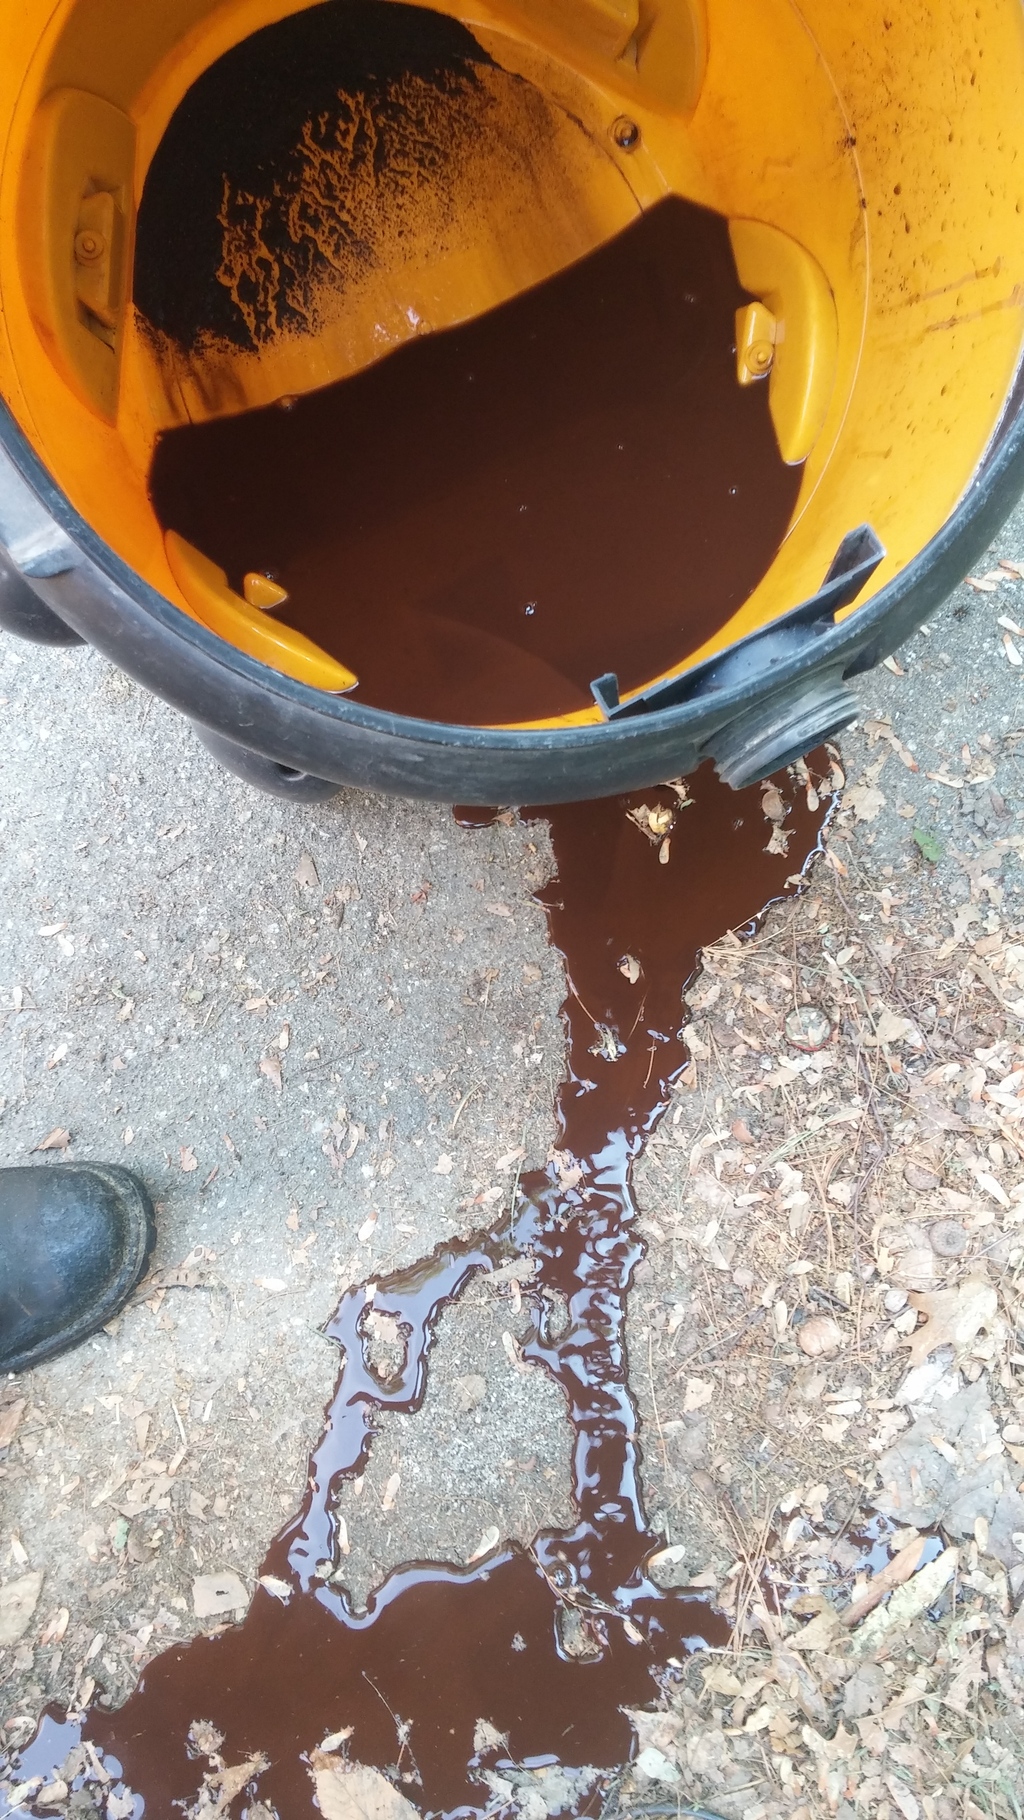
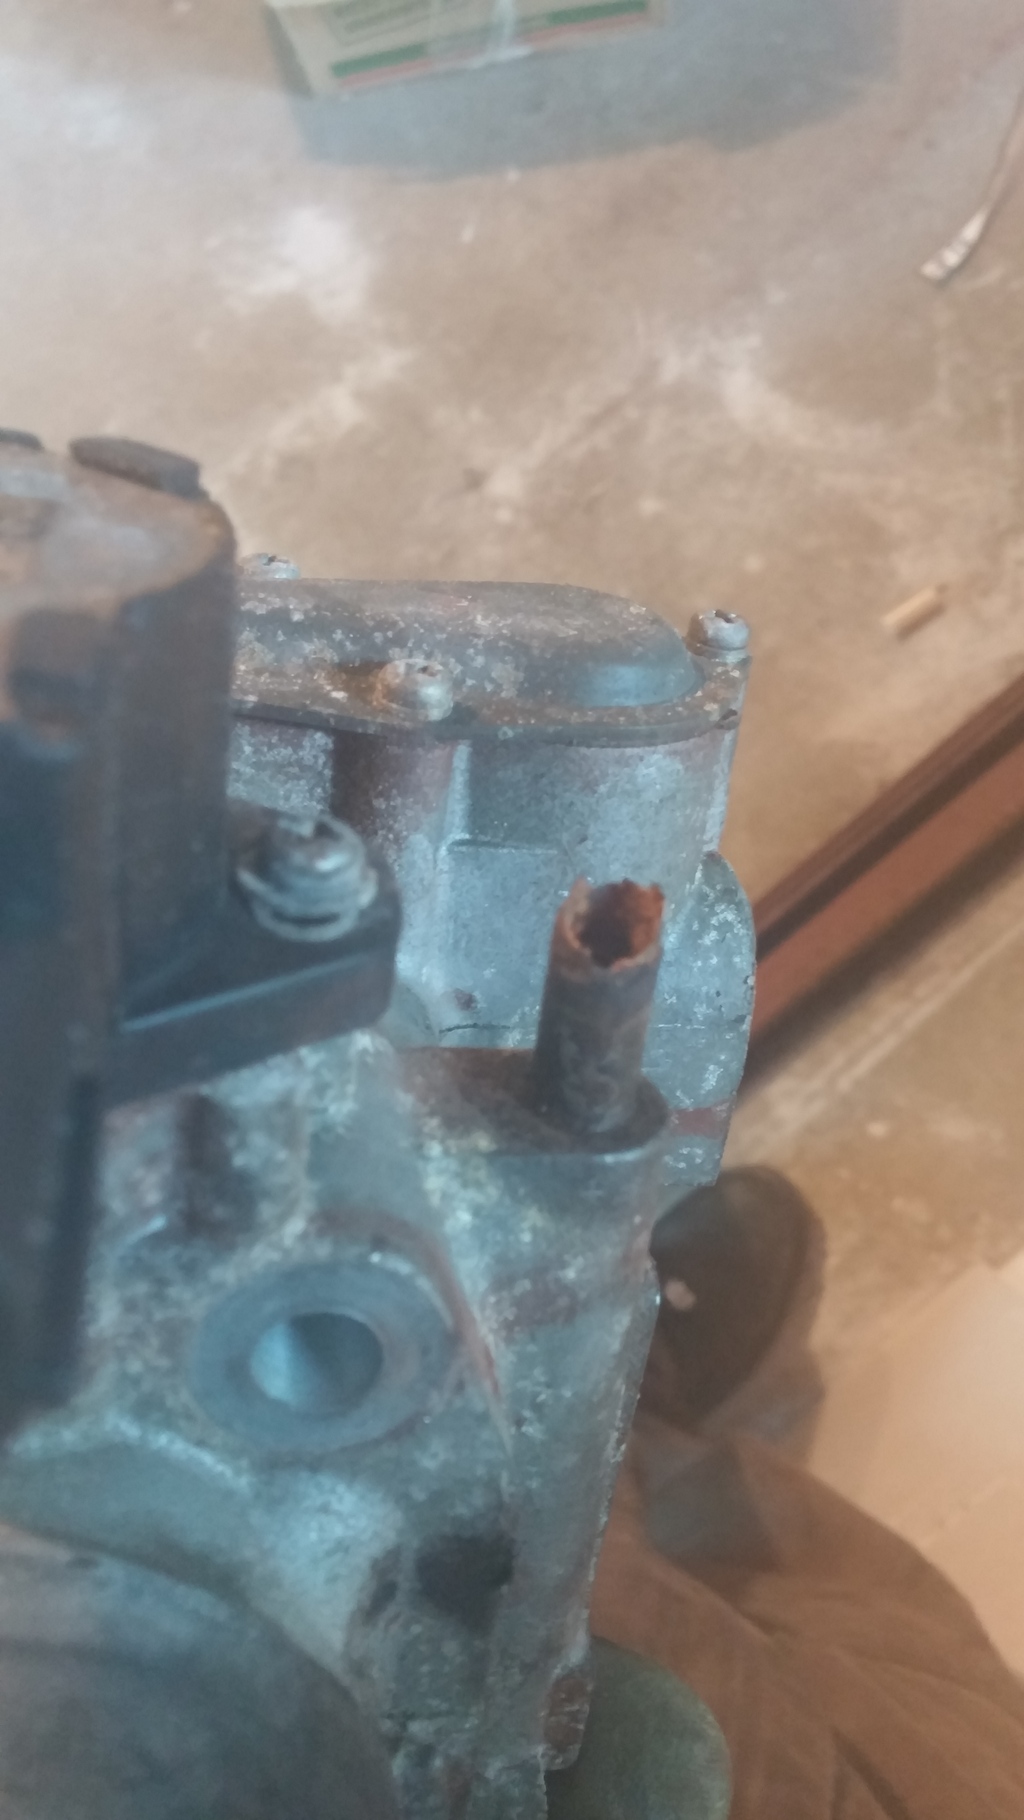
Finally having some time to work on it, the heater core looked fine from the outside but some thick rusty sludge came out when I dumped it and the inside of the tubes are very scaly like so -
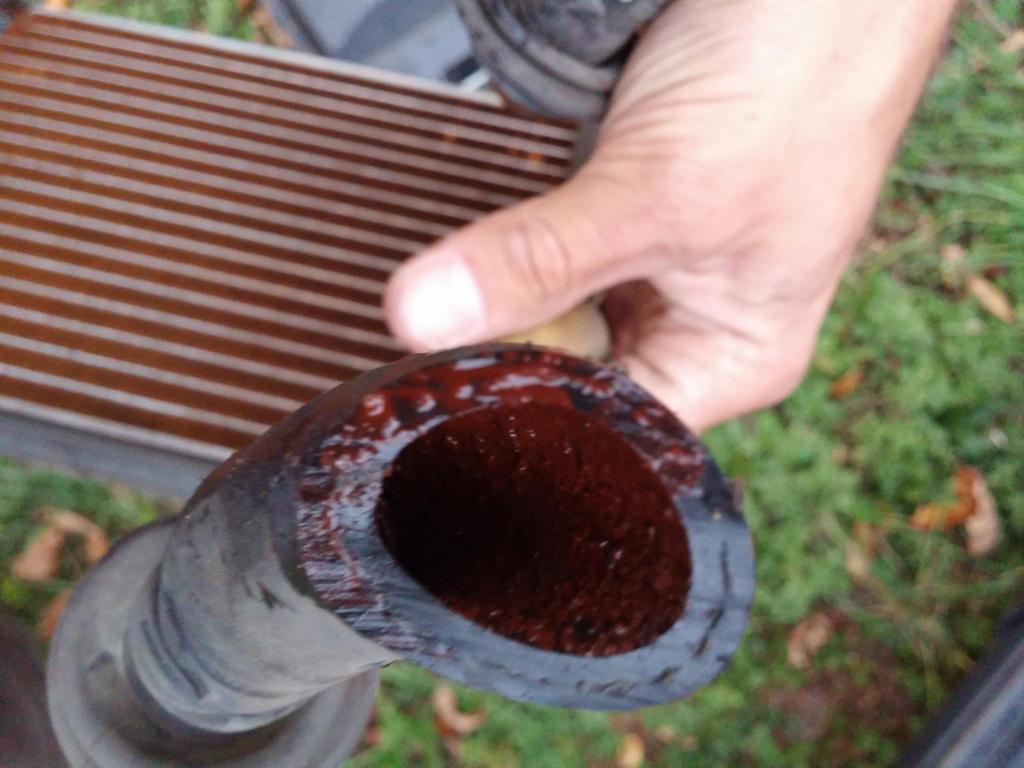
I'm going to replace all the tubing I can and then run some EDTA flush through it, about 8 times I think, no wonder the system was clogged. Given this experience I'll be running red antifreeze. Core out of the other '90 is mint, as long as I can get a new hose to seal around where I bent the pipe trying to get the hose unstuck before finally just cutting it off (the hose) -

Last edited by jbtvt; Jun 10, 2015 at 04:37 PM.
Trending Topics
May 11, 2015 | 05:27 PM
#8
Thread Starter
Registered User
Joined: May 2009
Posts: 578
Likes: 11
From: Southern NH
New house has a garage, I can finally make progress on so many things! Got the exhaust and coolant system all straightened out, new PS pump, vacuum leaks fixed and more. New radiator, heater core, fittings and hoses, two flushes. New exhaust from cat back and an amalgam of parts to make a decent front half. This is what came off the truck, minor leak...
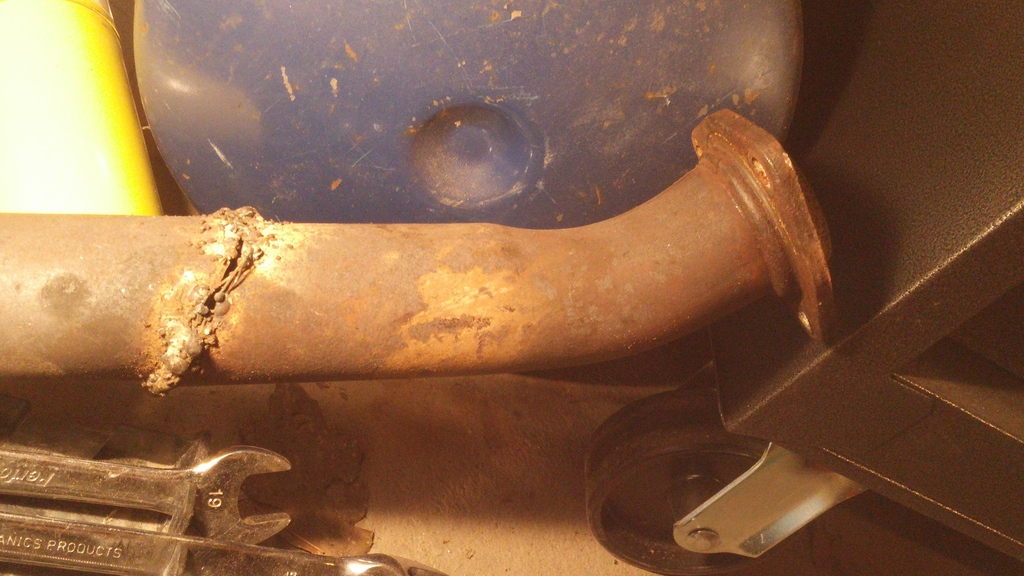
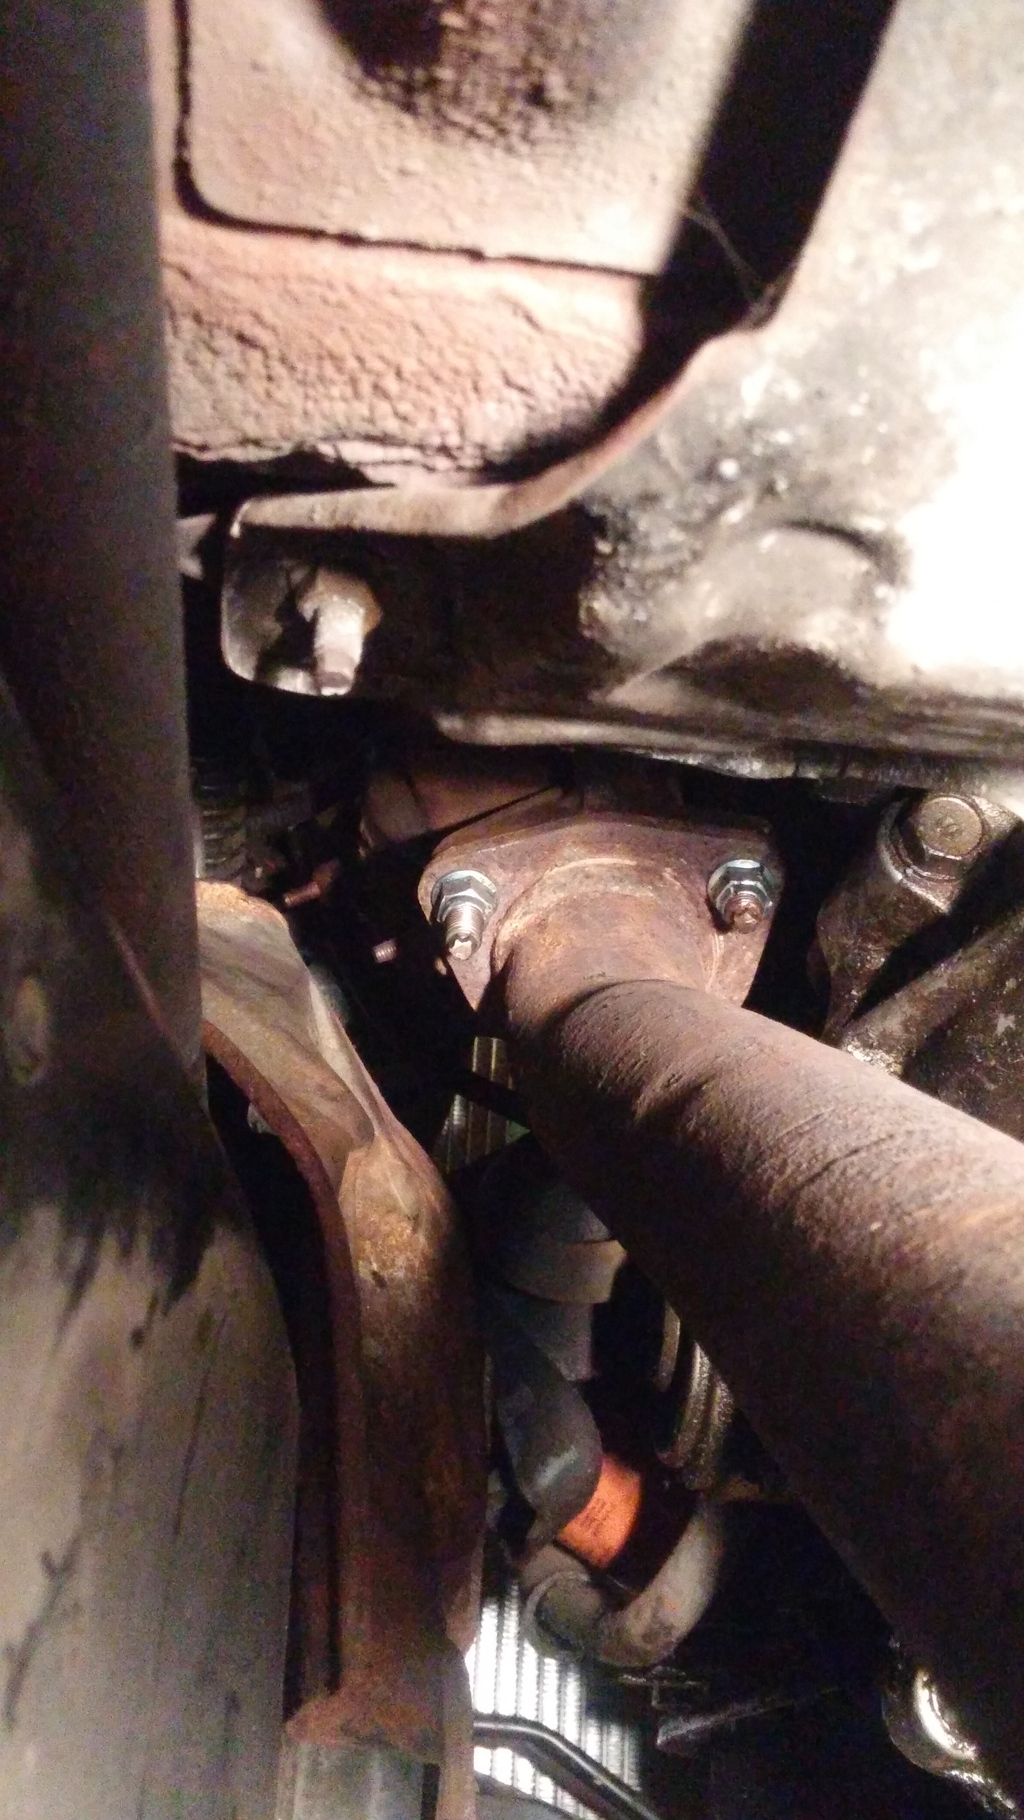
Both intermediate pipes were rotten so custom welded flange pipe
Patched a small hole by the 02 which I hope isn't a sign of things to come
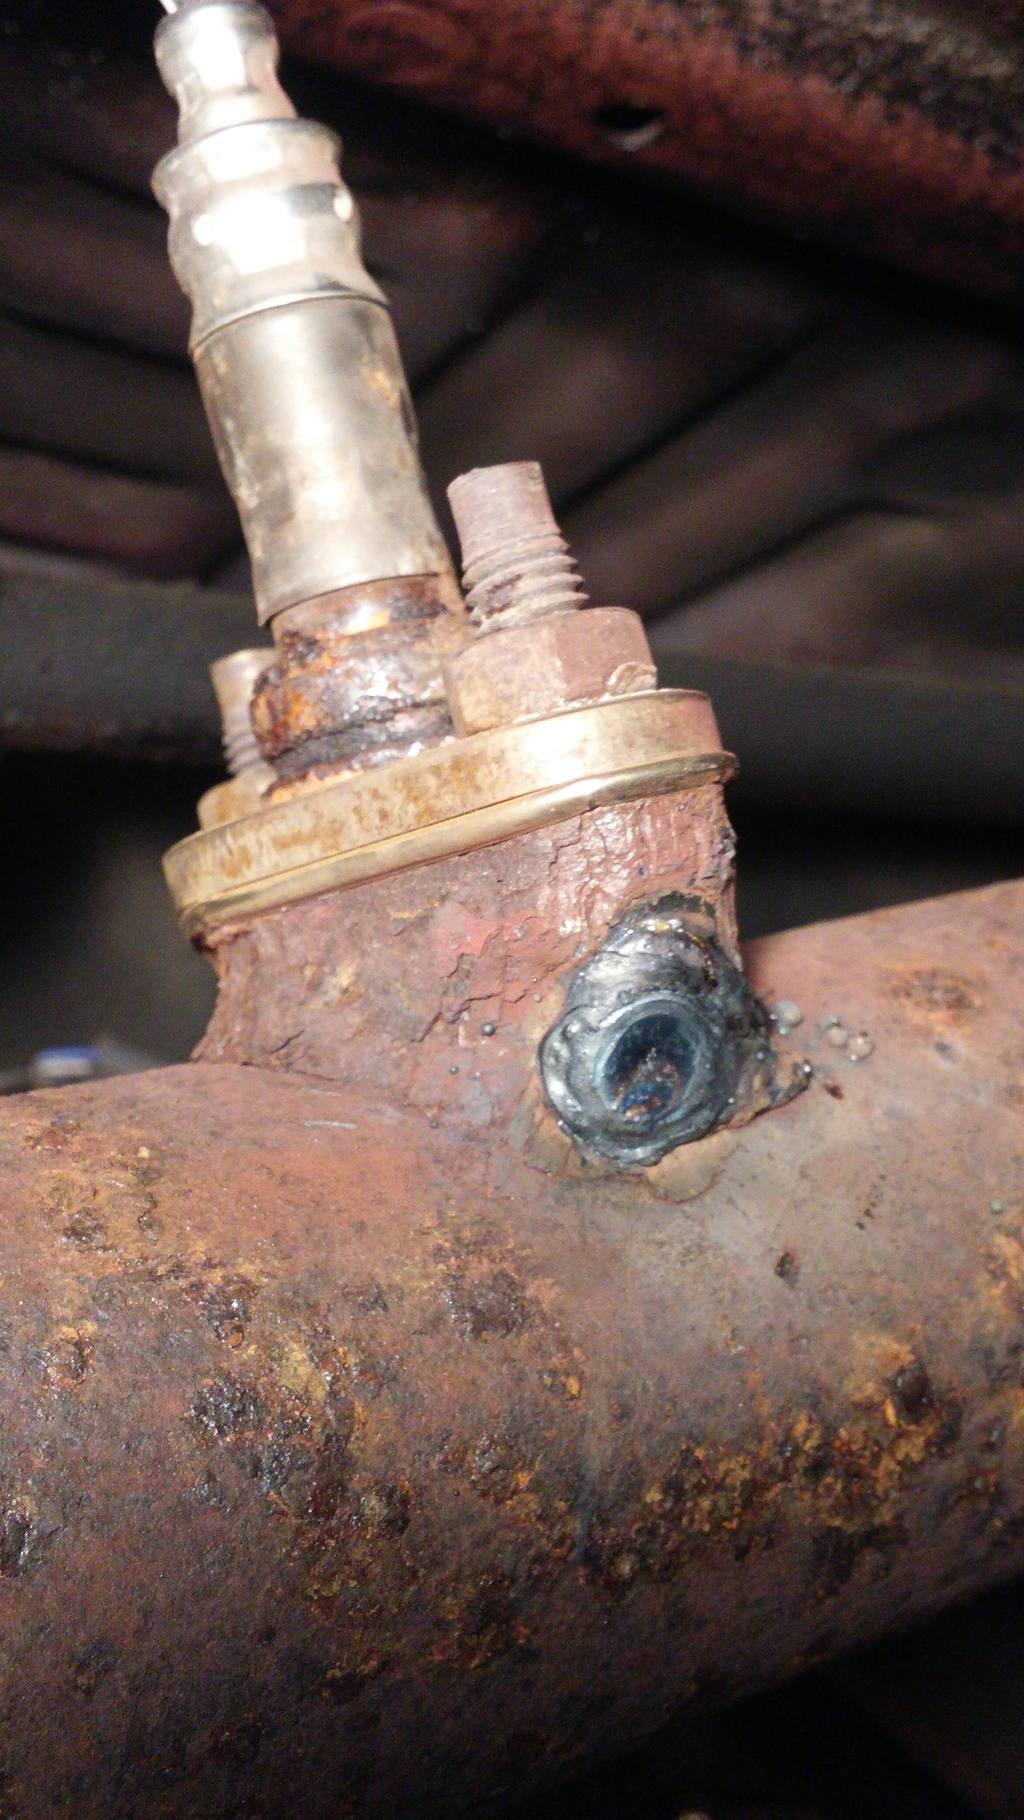
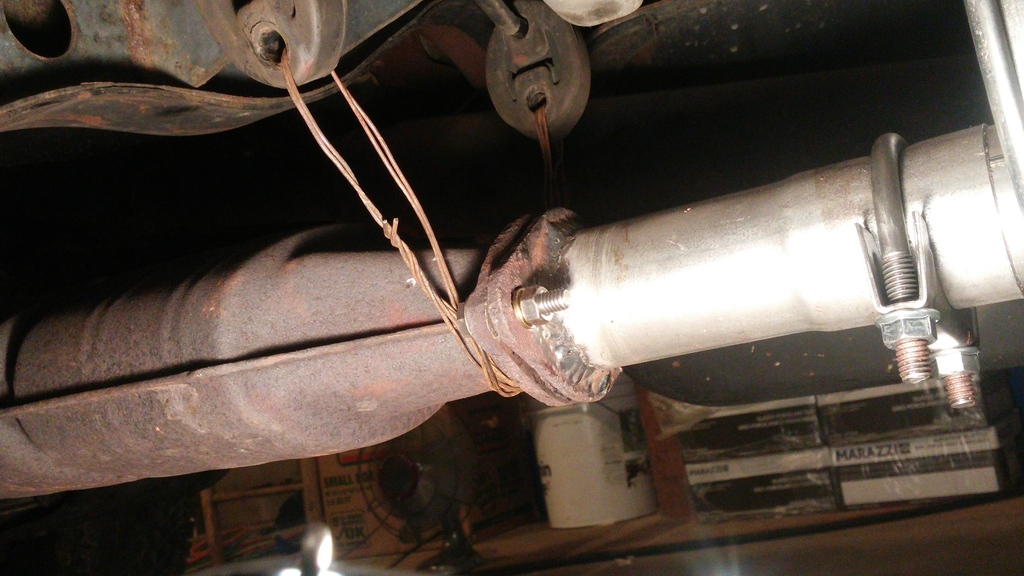
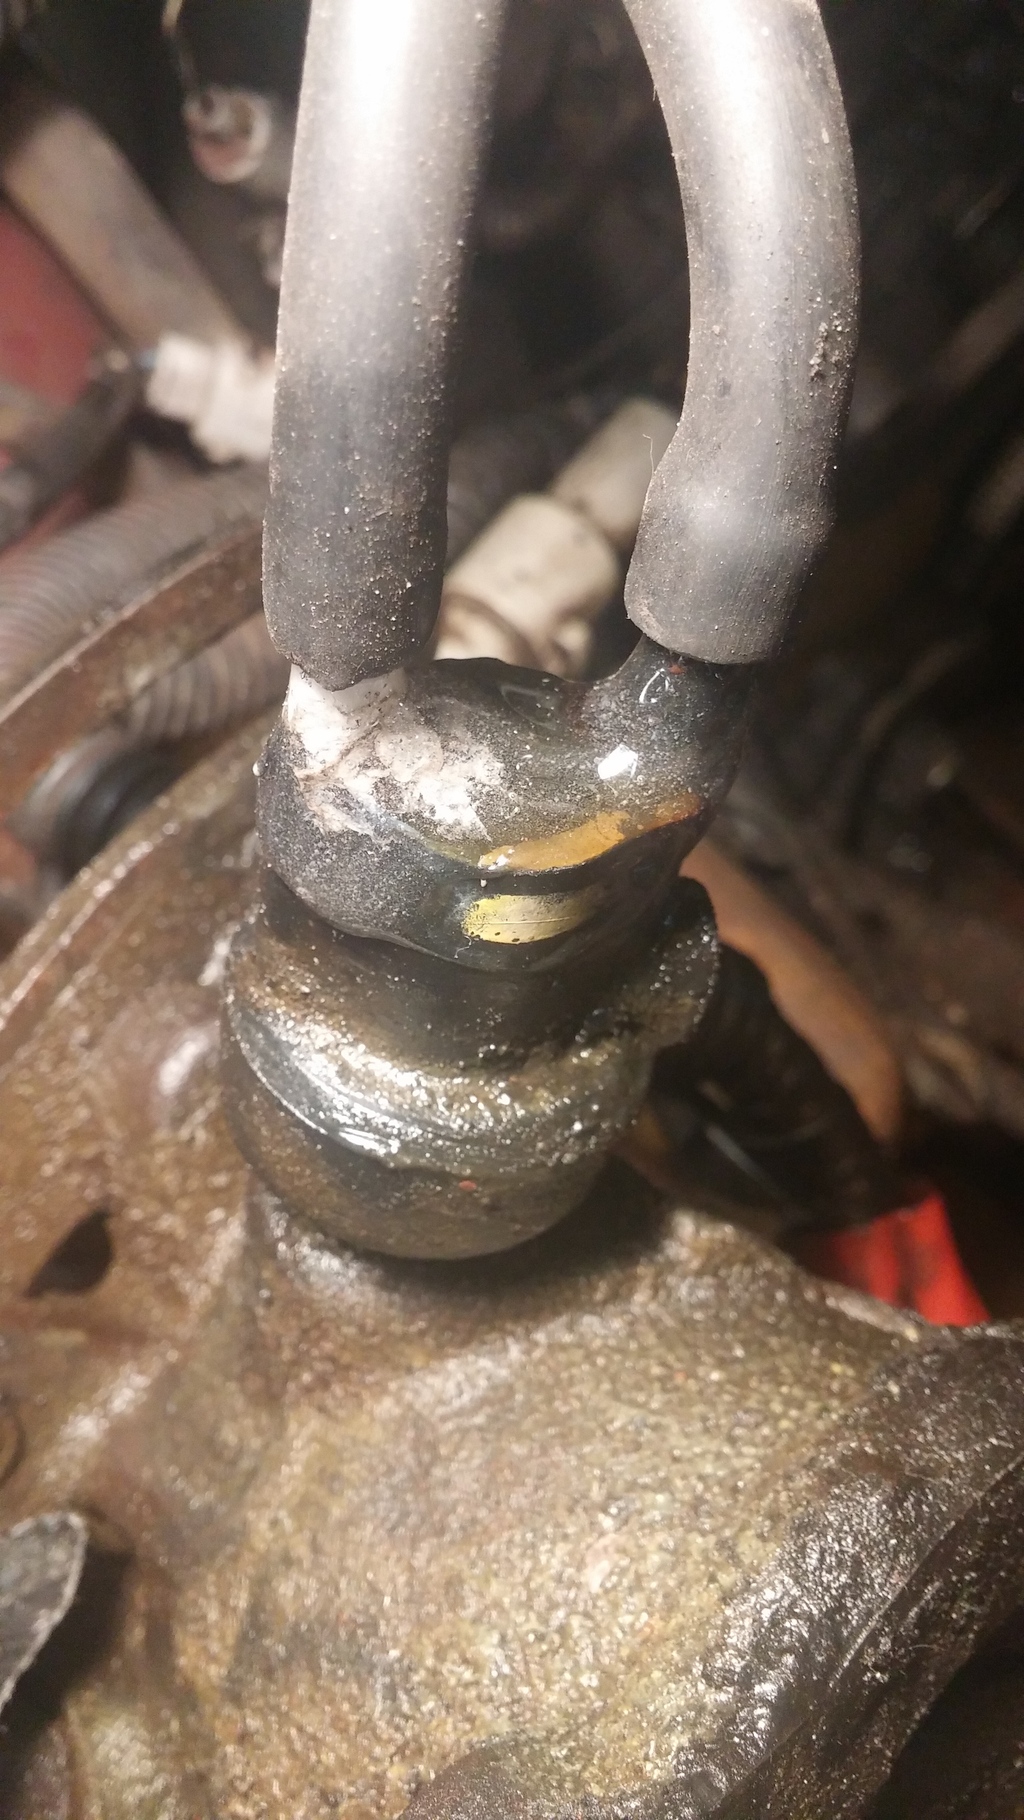
Front pipe in place, one of these nuts was seized and stripped, explains the weld job. And I once thought they were a beotch when they were in decent shape!
I should have shelled out for OEM heater core hoses, or at least some pre-formed part store ones cut to fit. This thick wall rubber tube crimped a bit when I bent it so I'm probably losing flow. We'll see how it handles the winter.
Now to find the cause of the persistent codes 25 and 26 which I hoped would go away after fixing the 83 vacuum leaks the PO neglected, as well as a code 52. That showed up today after burping the coolant and soaking everything under there, hope it goes away after things dry out but if not the capacitor fix someone recently mentioned in the thread on topic will be my first try.
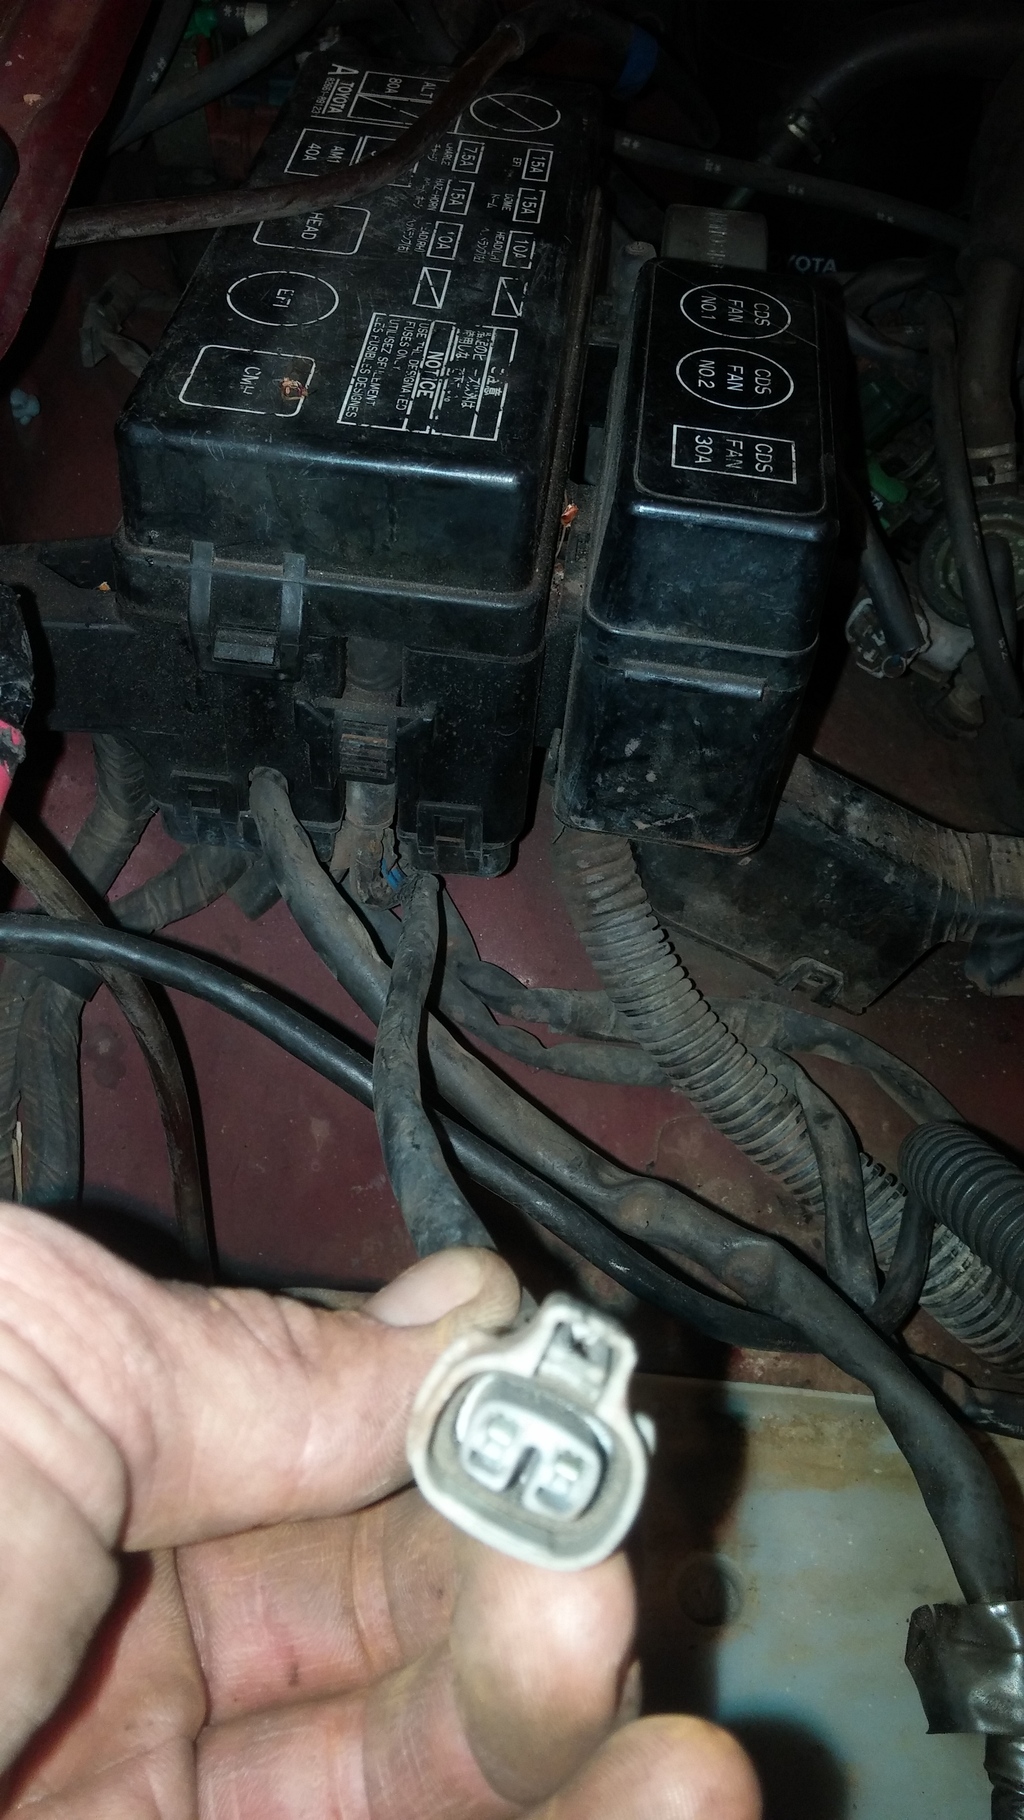
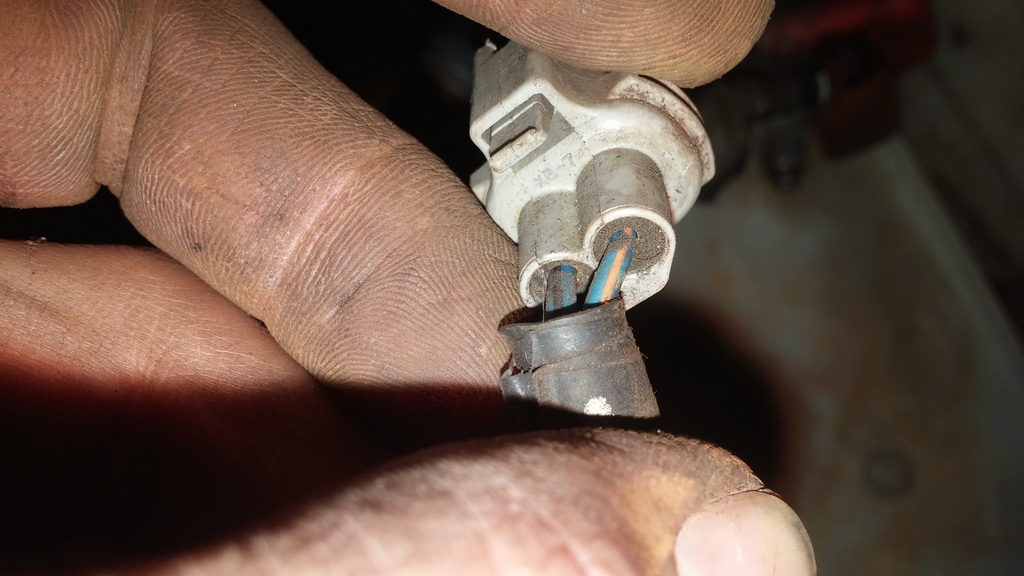
Question: Anyone know where this plug goes? Wire colors are blue/black and blue/red. It comes out from under the fuse box.


Both intermediate pipes were rotten so custom welded flange pipe

Patched a small hole by the 02 which I hope isn't a sign of things to come

Front pipe in place, one of these nuts was seized and stripped, explains the weld job. And I once thought they were a beotch when they were in decent shape!

I should have shelled out for OEM heater core hoses, or at least some pre-formed part store ones cut to fit. This thick wall rubber tube crimped a bit when I bent it so I'm probably losing flow. We'll see how it handles the winter.

Now to find the cause of the persistent codes 25 and 26 which I hoped would go away after fixing the 83 vacuum leaks the PO neglected, as well as a
code 52. That showed up today after burping the coolant and soaking everything under there, hope it goes away after things dry out but if not the capacitor fix someone recently mentioned in the thread on topic will be my first try.Question: Anyone know where this plug goes? Wire colors are blue/black and blue/red. It comes out from under the fuse box.


 Jun 10, 2015 | 05:07 PM
#11
Thread Starter
Registered User
Joined: May 2009
Posts: 578
Likes: 11
From: Southern NH
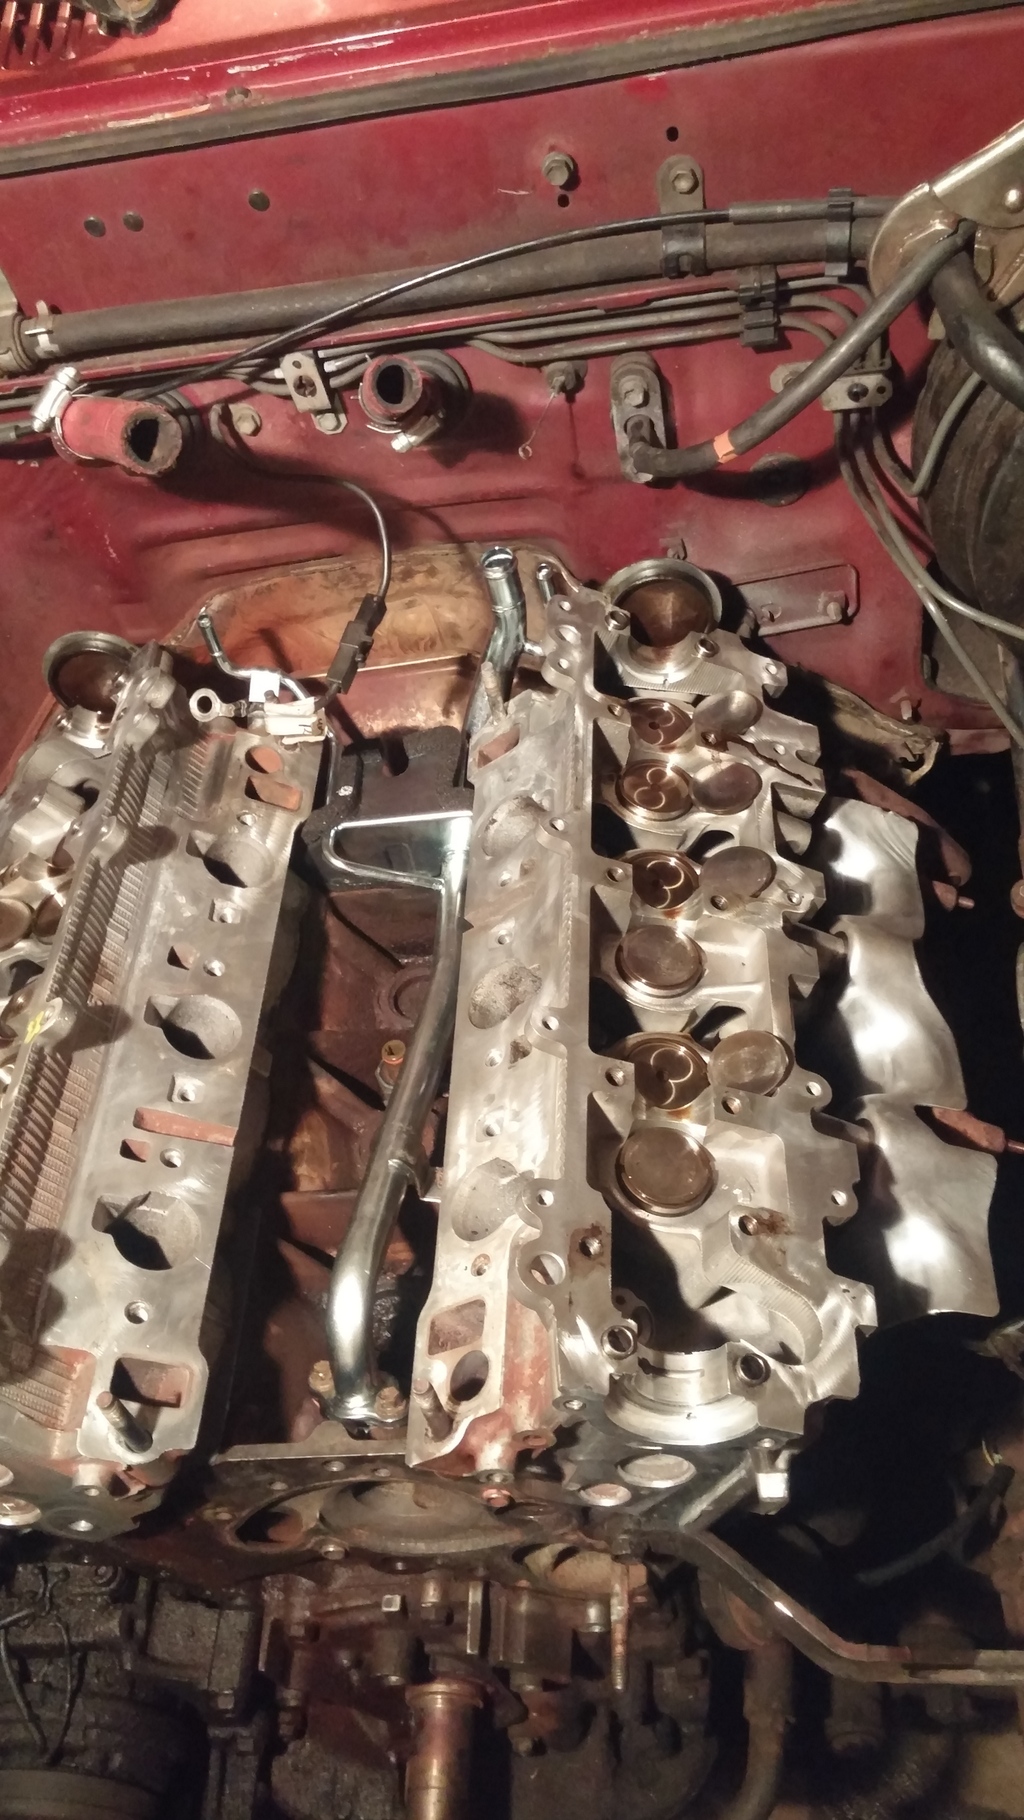
After endless flushing and cooling component replacements failed to solve my overheating I tore it down and found the PO's buddy put the HGs on backwards. https://www.yotatech.com/forums/f116...illing-288950/
Just as well I got in there because the coolant bypass was on its last legs too
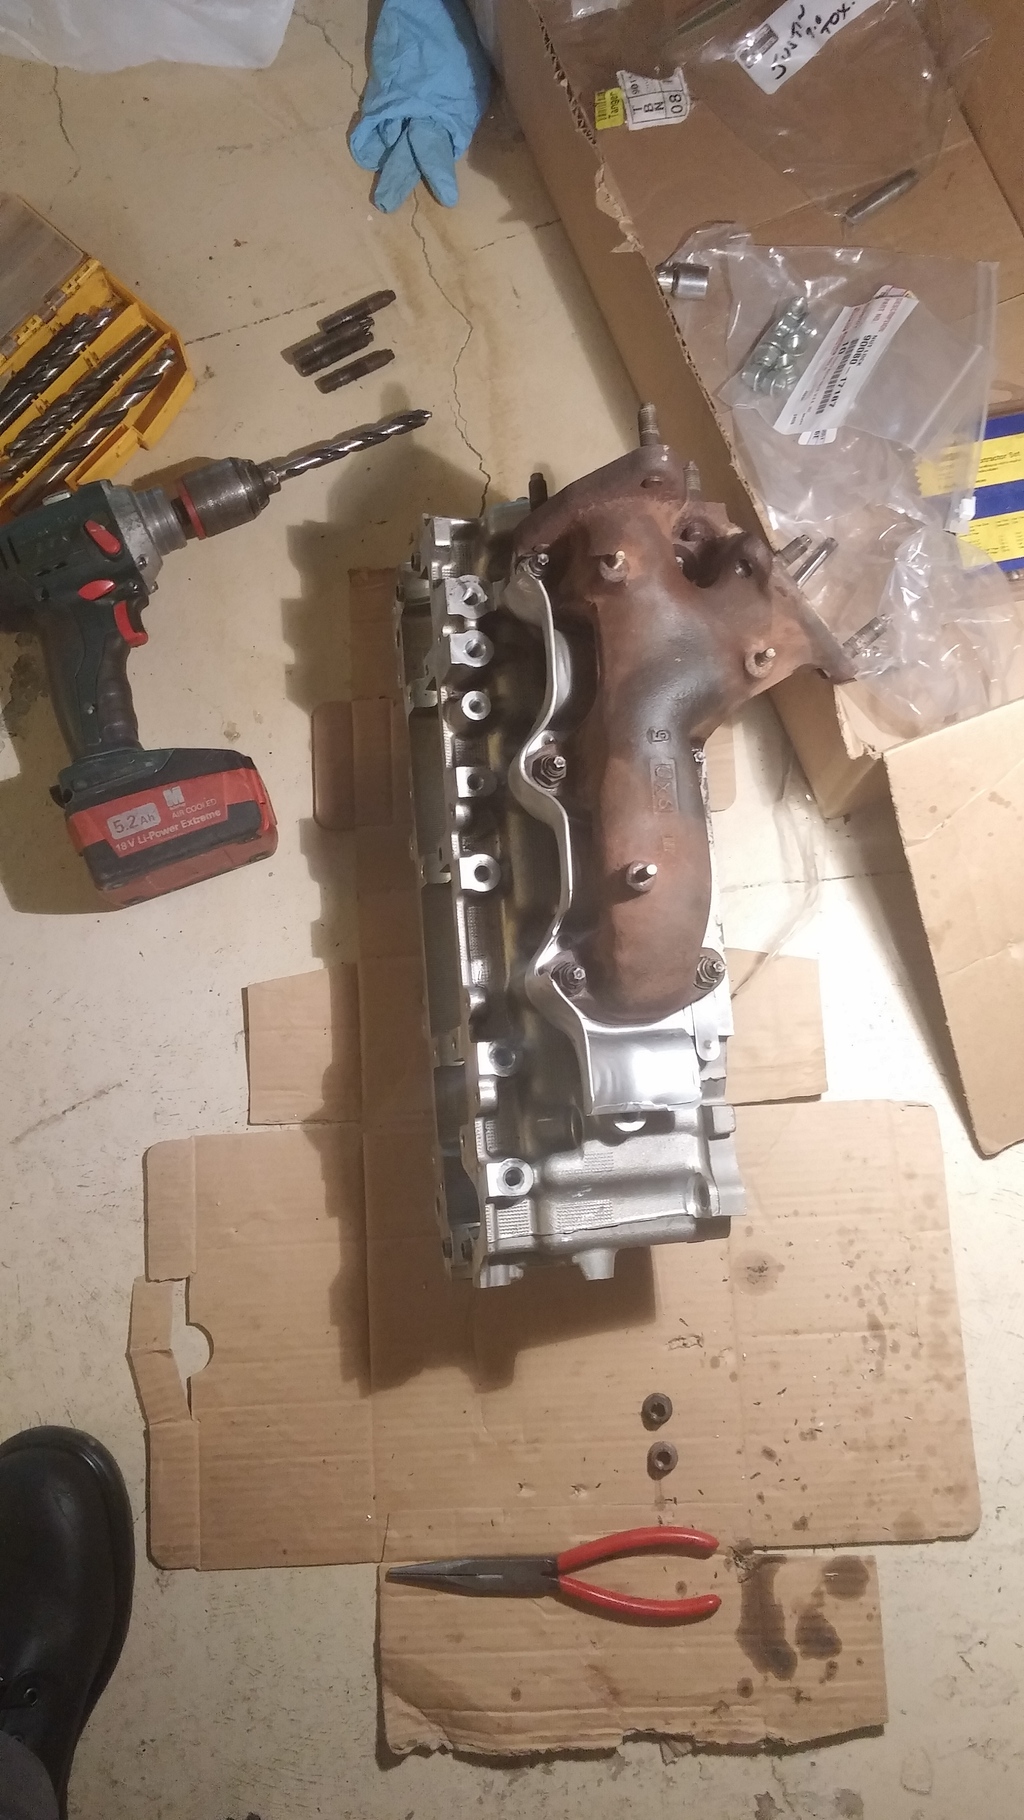
Forgot to transfer my order of ex manifold studs from a parts site with diagrams to the parts site that had everything I needed. Sucks that Toyotapartsdeal got rid of theirs... I had a few new ones but reused the others, got one of them up to maybe 25 ft/lbs with a torque wrench set to 29 and it snapped. Tried to drill/EZ-out it without removing the manifold and uncompressing the new gasket and hit the head. So now I have one stud which is threaded mostly into the aluminum and a sliver of bolt, torqued to 18 ft/lb. We'll see how that goes, seems to be plenty of material there though and I didn't have to buy a helicoil...
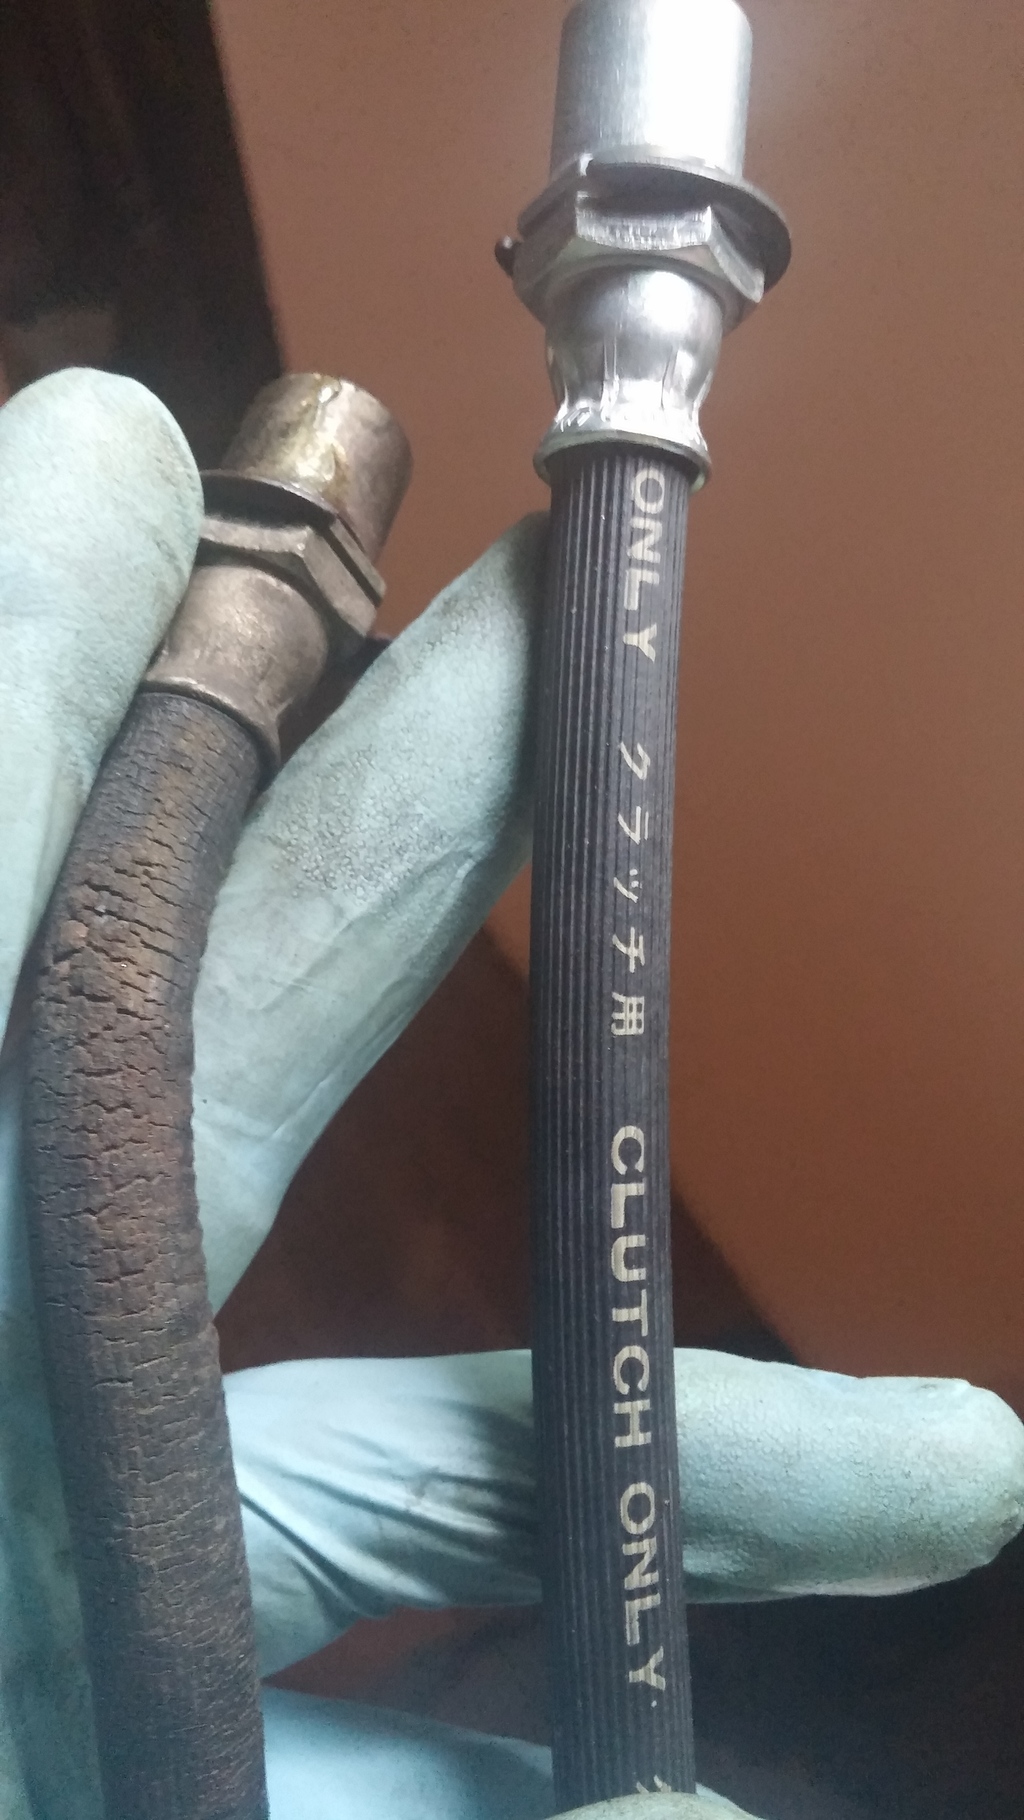
Clutch flex hose was also rotted, replaced that
Made a little sumpin sumpin to clean the crud out of my water jacket. Filled with water, section of Harbor Freight transfer pump hose ($5, can't even buy hose that cheap!) taped to a Shop Vac, long 1/8" drill bit in the hole next to it to stir up the crud. Wash, rinse, repeat: 5 times
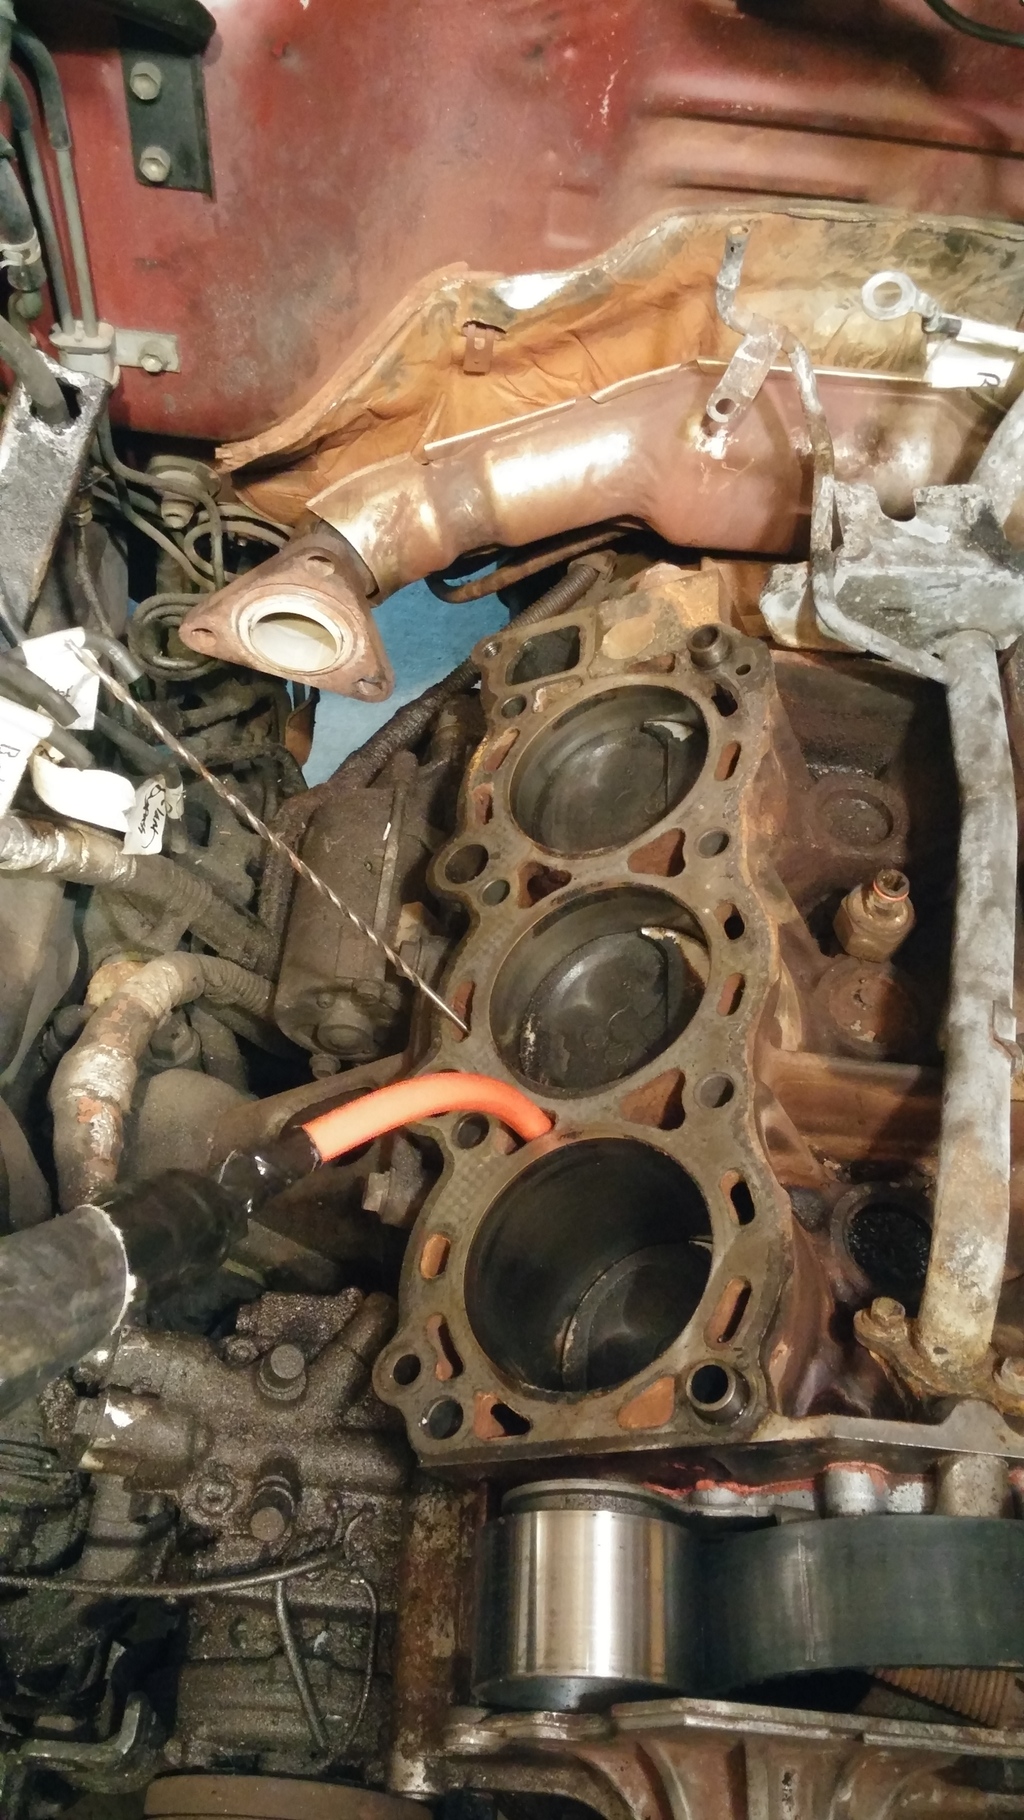
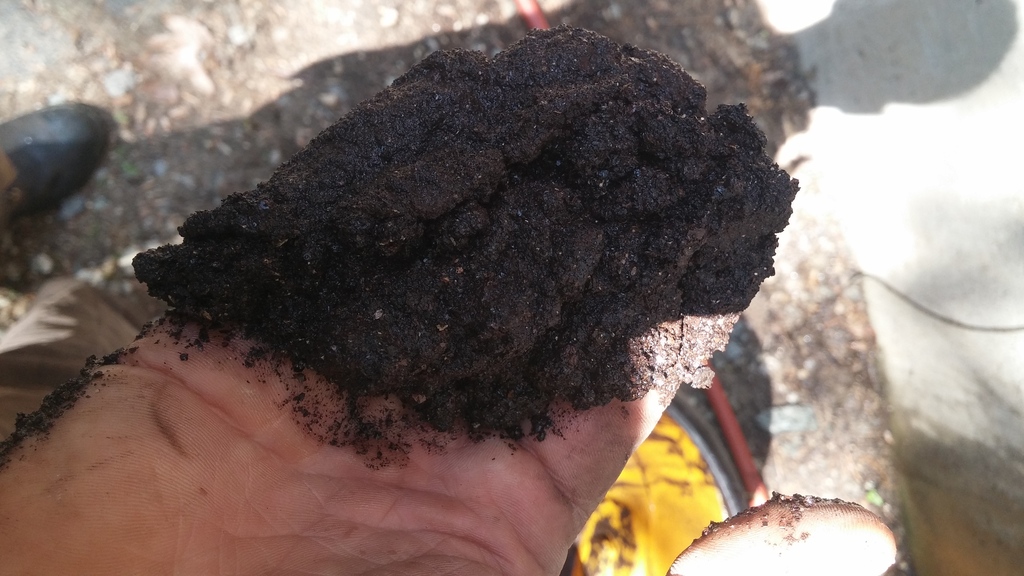
Yeah, that was in my block. Nice eh?
Ishino gasket kit in, used EngineQuest bolts off Ebay (10.9 grade)

Also replacing all Timing components except the belt which is a Toyota one in good shape. Others were cheap junk, just like the HG set that came out - OAW water pump, GMB bearing (mixed reviews to be fair, but not OEM). Actually, I ordered a Beck Arnley tensioner and was surprised to receive the same GMB that was in it! I returned it and ordered an NSK.
Cams in, checked clearances, and removed. I need 6 new exhaust shims and an intake on #6, a week out from Toyota and $10.50 each. Should've bought a complete head with cams off Ebay. Or a 3.4... Got a call into the machine shop to see if he can cut my current shims down for me. I have ground them before and it works well, but it is a PITA.
Just as well I got in there because the coolant bypass was on its last legs too

Forgot to transfer my order of ex manifold studs from a parts site with diagrams to the parts site that had everything I needed. Sucks that Toyotapartsdeal got rid of theirs... I had a few new ones but reused the others, got one of them up to maybe 25 ft/lbs with a torque wrench set to 29 and it snapped. Tried to drill/EZ-out it without removing the manifold and uncompressing the new gasket and hit the head. So now I have one stud which is threaded mostly into the aluminum and a sliver of bolt, torqued to 18 ft/lb. We'll see how that goes, seems to be plenty of material there though and I didn't have to buy a helicoil...

Clutch flex hose was also rotted, replaced that

Made a little sumpin sumpin to clean the crud out of my water jacket. Filled with water, section of Harbor Freight transfer pump hose ($5, can't even buy hose that cheap!) taped to a Shop Vac, long 1/8" drill bit in the hole next to it to stir up the crud. Wash, rinse, repeat: 5 times


Yeah, that was in my block. Nice eh?
Ishino gasket kit in, used EngineQuest bolts off Ebay (10.9 grade)

Also replacing all Timing components except the belt which is a Toyota one in good shape. Others were cheap junk, just like the HG set that came out - OAW water pump, GMB bearing (mixed reviews to be fair, but not OEM). Actually, I ordered a Beck Arnley tensioner and was surprised to receive the same GMB that was in it! I returned it and ordered an NSK.
Cams in, checked clearances, and removed. I need 6 new exhaust shims and an intake on #6, a week out from Toyota and $10.50 each. Should've bought a complete head with cams off Ebay. Or a 3.4... Got a call into the machine shop to see if he can cut my current shims down for me. I have ground them before and it works well, but it is a PITA.
 Jun 11, 2015 | 07:21 AM
#12
Registered User
Joined: Jul 2014
Posts: 360
Likes: 0
From: Dallas, TX
[/QUOTE]
Question: Anyone know where this plug goes? Wire colors are blue/black and blue/red. It comes out from under the fuse box.

 [/QUOTE]
Nice yota you have there, I have the same model w/the back tire. Looks like is coming along great.
To answer your question, that looks like the plug for the little cable that plugs into your EGR valve. Posted some pics below:
https://images.search.yahoo.com/imag...hspart=mozilla
https://images.search.yahoo.com/imag...hspart=mozilla
Also if you have the finds, I would recommend buying a stock replacement kit for your exhaust system, (new pipe, hangers, ect) & and a new cat.
Question: Anyone know where this plug goes? Wire colors are blue/black and blue/red. It comes out from under the fuse box.
[/QUOTE]Nice yota you have there, I have the same model w/the back tire. Looks like is coming along great.
To answer your question, that looks like the plug for the little cable that plugs into your EGR valve. Posted some pics below:
https://images.search.yahoo.com/imag...hspart=mozilla
https://images.search.yahoo.com/imag...hspart=mozilla
Also if you have the finds, I would recommend buying a stock replacement kit for your exhaust system, (new pipe, hangers, ect) & and a new cat.
Jun 15, 2015 | 08:49 PM
#13
Thread Starter
Registered User
Joined: May 2009
Posts: 578
Likes: 11
From: Southern NH
Nice yota you have there, I have the same model w/the back tire. Looks like is coming along great.
To answer your question, that looks like the plug for the little cable that plugs into your EGR valve. Posted some pics below:
Also if you have the finds, I would recommend buying a stock replacement kit for your exhaust system, (new pipe, hangers, ect) & and a new cat.
To answer your question, that looks like the plug for the little cable that plugs into your EGR valve. Posted some pics below:
Also if you have the finds, I would recommend buying a stock replacement kit for your exhaust system, (new pipe, hangers, ect) & and a new cat.
Got the engine mostly back together this afternoon. Started with making a multi-use cam/crank bolt tool based on the Bugs1961 design - https://www.yotatech.com/forums/f116...l-tool-186081/ In the past I've just hit them with the impact, but decided to do it right.

I used some 1.5" by about 30" long, 1/4" angle I had salvaged a while back from a job we demo'd. 3/8" holes, long grade 8, 3/8" bolts (stainless first try but they bent) for the cams, and some of the longer camshaft bolts I had around threaded right into the crank and worked well. With the thicker steel I can drill more holes if I need smaller adjustemnt for anything on the Lexus, etc, but seems to be pretty multi-purpose.


Using the Scope103 method of finding 181 ft/lbs with my 150 ft/lb wrench - https://www.yotatech.com/forums/f116...h-3vze-137934/. Was going to make one of these extensions - http://www.freeinfostuff.com/torquee...eextension.htm but didn't have the time to invest. Maybe when I'm doing the crank on my next 3.4.

Annealing some crush washers for reuse, credit "Oops" over at Pirate for pointing this out -http://www.pirate4x4.com/forum/toyota-truck-4runner/201013-22re-fuel-damper.html. I haven't bought new crush washers in years, and although I may jinx myself now by saying this, I haven't had a single leak. Takes seconds with MAPP gas, a little longer with propane but still doable. I sand with a medium grit sponge after, or paper works too.
 Jun 19, 2015 | 07:30 PM
#15
Thread Starter
Registered User
Joined: May 2009
Posts: 578
Likes: 11
From: Southern NH
Other than what you see here, not much of anything. Last owner didn't believe in "maintenance". Although the fuel filter I changed out wasn't original, maybe the guy before him didn't suck.
Fired it up today after some nailbiting. Got everything back together last night late and turned the key, cranking, no fire. Smelled of gas under the hood...did I jinx myself braggin of annealing washers... no just a busted return line. snipped that off, still no love. This AM checked for timing out by 180* via the leak down tester, that wasn't it, taped a plug to my plenum to check for spark through the hood crack, there was none. About to pull off the distributor and I realized taht I had the igniter out hooked up to the #2 plug! Phew.
I repaired the vacuum switch on the PS pump which I broke on removal - heat weld for connection and then loaded with some cheapo epoxy from Harbor Freight. It held even while I forced my too-small vacuum lines on.
Swapped throttle bodies and under plenum piping, the plenum itself was in good shape.
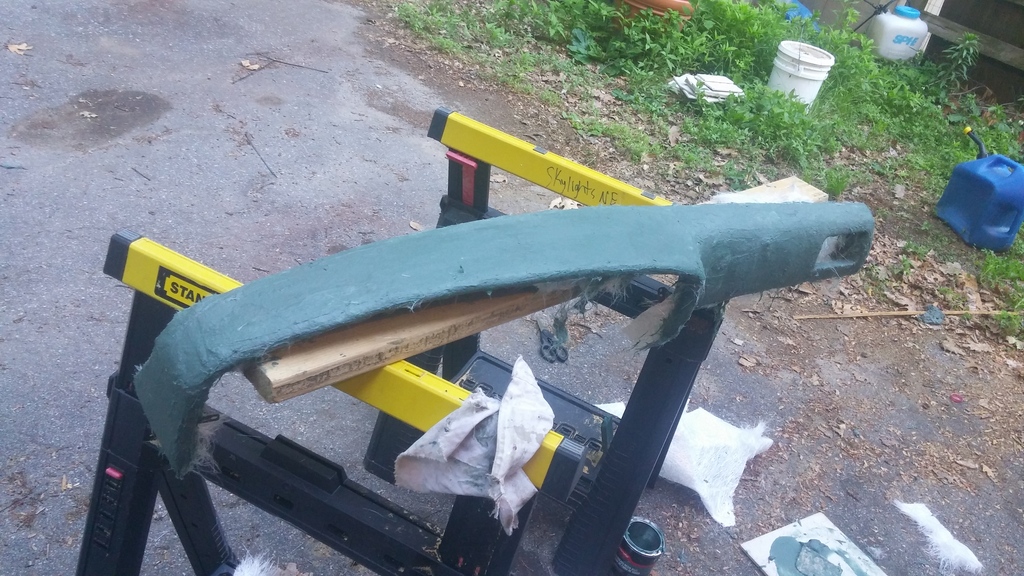
Redoing the dash since I still had it half apart to repair the cracks, credit Corax for the inspiration - https://www.yotatech.com/forums/f123...repair-230891/ The 2nd gens are half plastic, even easier. Cut out any high spots and scuff with 60 grit-
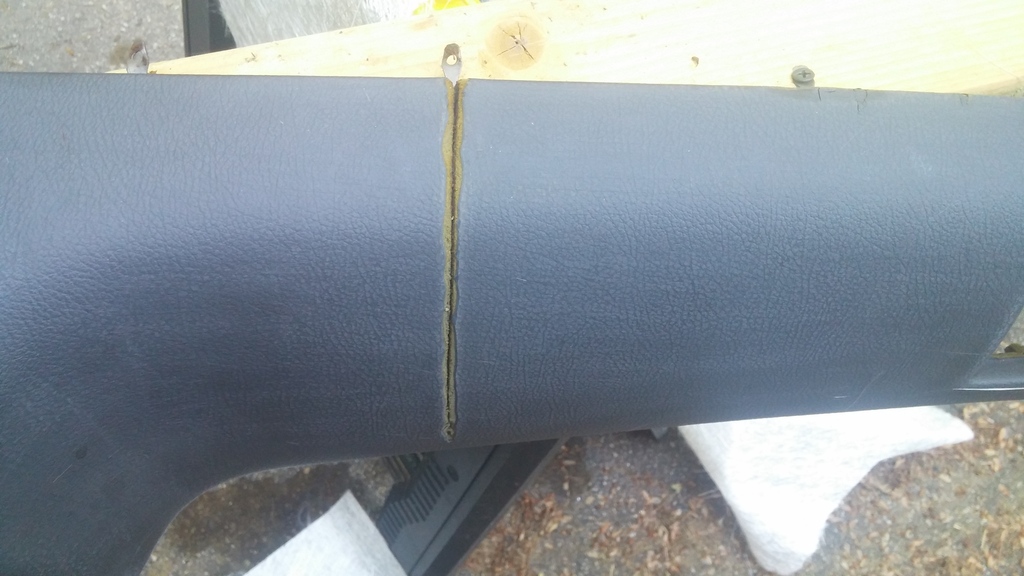
Lay out my matting (not cloth, matting is easier to position for contours)
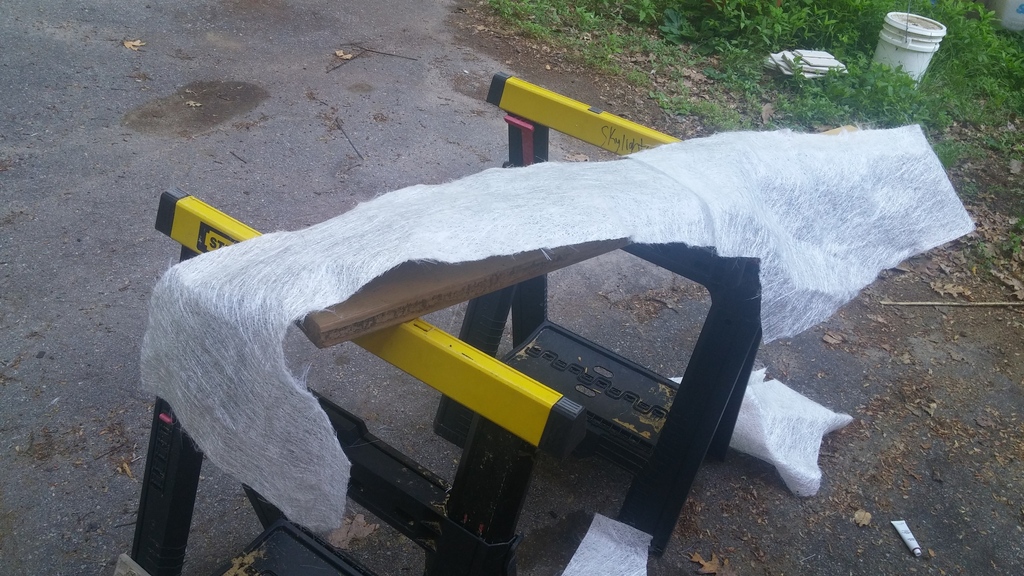
Used the gel fiberglass resin which was actually a little too thick, 50/50 would probably be best but it worked...I think. Find out tomorrow after paint. I will Herculiner to cover my rough job because I don't want to take the time to skim coat, sand, and all that.
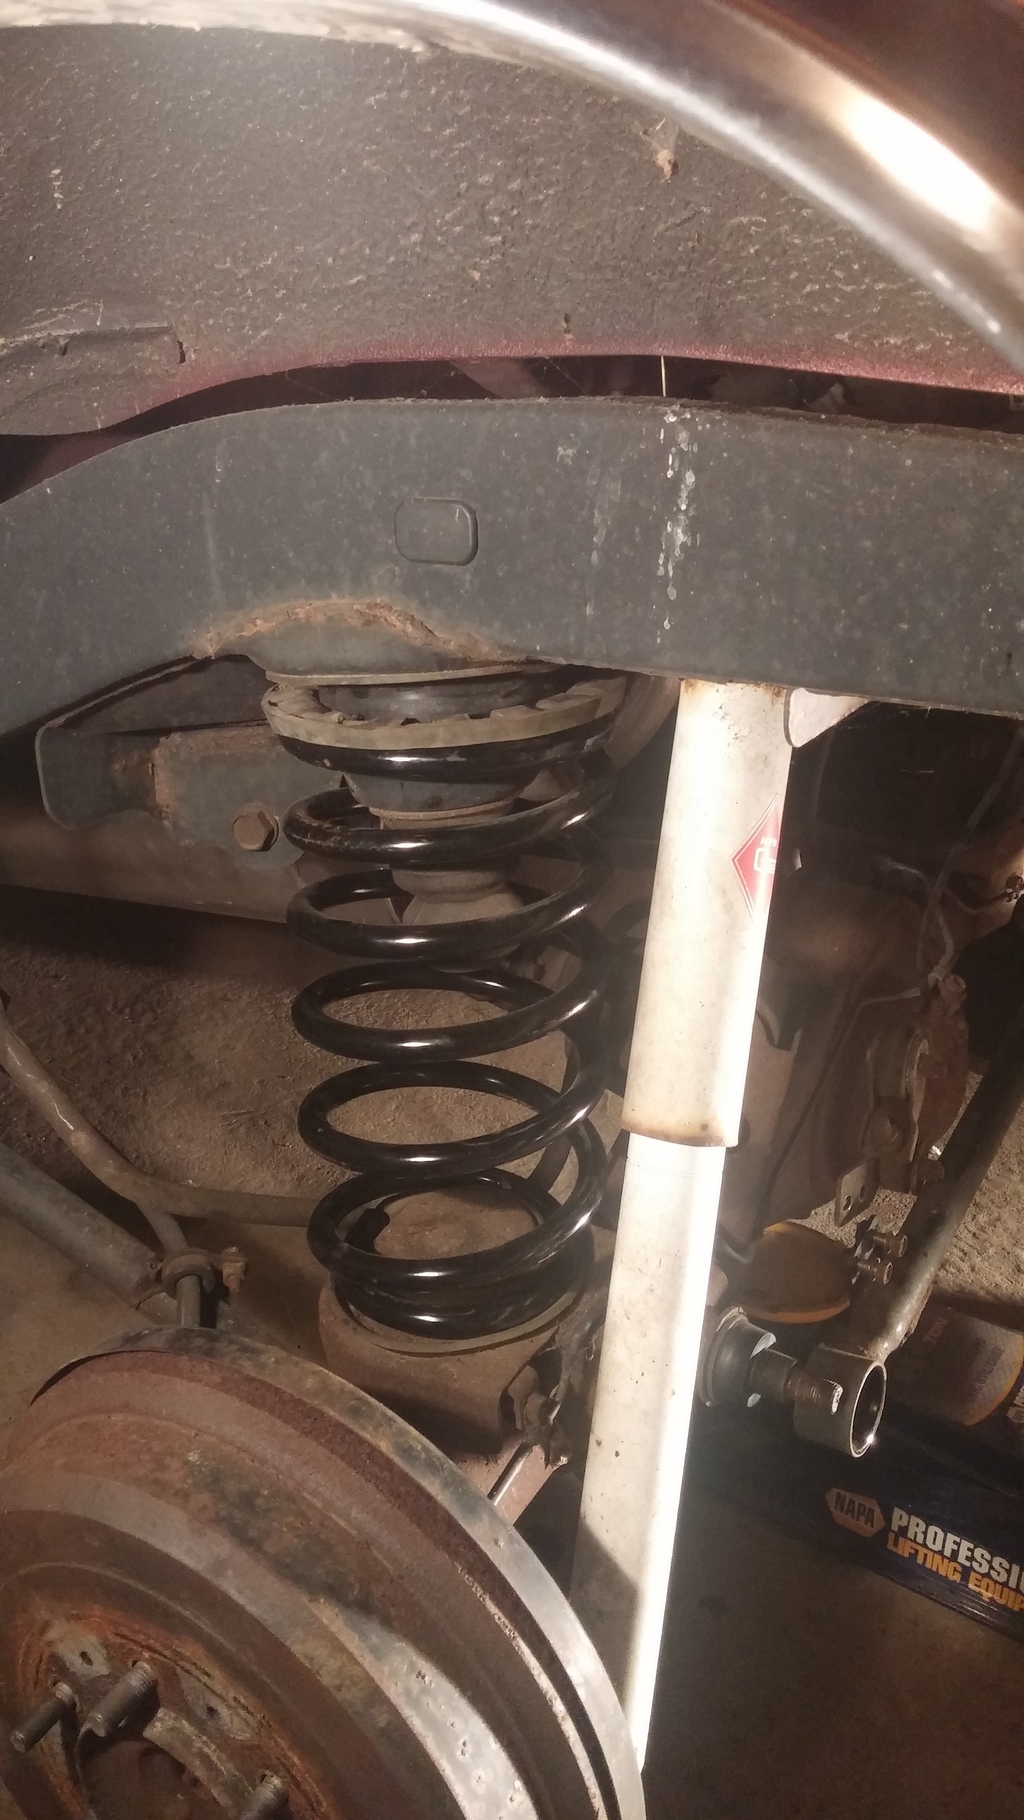
Got some new AC Delco variable rate springs on. Pretty sure these are made by Raybestos, which I've used before. Good quality, they can take a load.
Toyota OEM plugs that I received are Yazaki, they are head and shoulders above the parts store brand which disintegrated in my hand as I unplugged 4 of them.
Fired it up today after some nailbiting. Got everything back together last night late and turned the key, cranking, no fire. Smelled of gas under the hood...did I jinx myself braggin of annealing washers... no just a busted return line. snipped that off, still no love. This AM checked for timing out by 180* via the leak down tester, that wasn't it, taped a plug to my plenum to check for spark through the hood crack, there was none. About to pull off the distributor and I realized taht I had the igniter out hooked up to the #2 plug! Phew.
I repaired the vacuum switch on the PS pump which I broke on removal - heat weld for connection and then loaded with some cheapo epoxy from Harbor Freight. It held even while I forced my too-small vacuum lines on.

Swapped throttle bodies and under plenum piping, the plenum itself was in good shape.

Redoing the dash since I still had it half apart to repair the cracks, credit Corax for the inspiration - https://www.yotatech.com/forums/f123...repair-230891/ The 2nd gens are half plastic, even easier. Cut out any high spots and scuff with 60 grit-

Lay out my matting (not cloth, matting is easier to position for contours)

Used the gel fiberglass resin which was actually a little too thick, 50/50 would probably be best but it worked...I think. Find out tomorrow after paint. I will Herculiner to cover my rough job because I don't want to take the time to skim coat, sand, and all that.

Got some new AC Delco variable rate springs on. Pretty sure these are made by Raybestos, which I've used before. Good quality, they can take a load.

Toyota OEM plugs that I received are Yazaki, they are head and shoulders above the parts store brand which disintegrated in my hand as I unplugged 4 of them.
Jun 20, 2015 | 04:12 PM
#17
Thread Starter
Registered User
Joined: May 2009
Posts: 578
Likes: 11
From: Southern NH
Vacuum bled the brakes today. Teflon on the bleeders really is key for that. Works great one-man, good purchase since I don't know many people around the new area yet.
Pulled it out of the garage, flushed with water and refilled with EDTA and water. Sitting pretty on the new springs

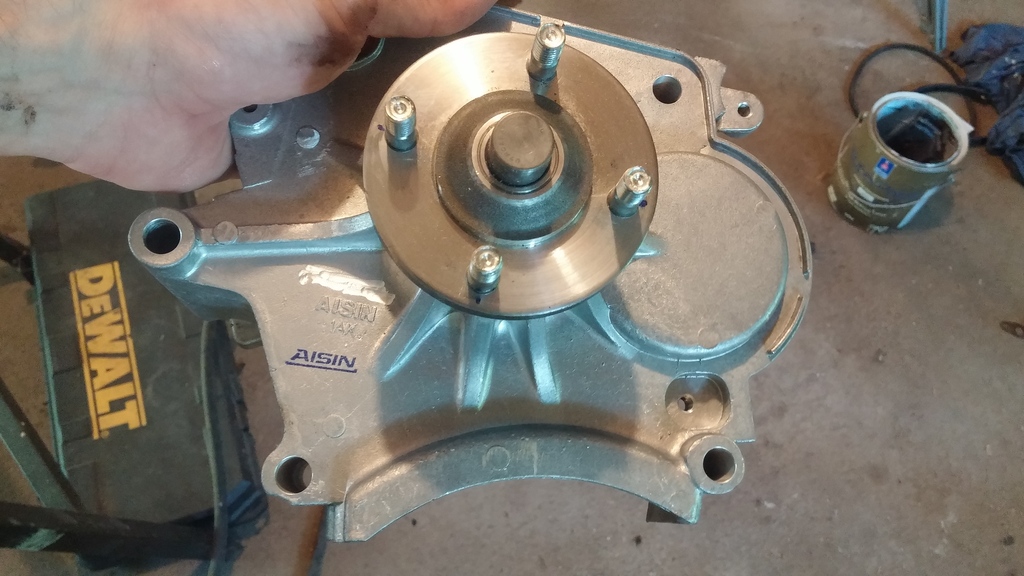
Had a howl from the engine. There was a little noise last fall I hoped was just the cheap idler bearings but no such luck. It subsided a little after I loosened the PS belt but still there. Stethoscope narrowed it down to the fan bracket bearing. Reading the stories about Dorman I shelled out for a new Aisin - on the way. Also when timing it I noticed the signal cutting out. Resistance between N-G was out of spec, replaced the distributor with a spare and runs better.
Spot-glassed the dash today, then a quick power sand with some 60 grit and went around the vent with a hand me down Dremel. Dusted and Herculiner applied (in the shed for the coming rain)

If there is one lesson I'm getting out of this truck it's that maintenance trumps mileage in almost all regards. There's only so much neglect even a Toyota can handle.
Jun 25, 2015 | 07:36 PM
#18
Thread Starter
Registered User
Joined: May 2009
Posts: 578
Likes: 11
From: Southern NH
Dash is together but I didn't get any pics. It looks...custom. Not bad, but not TFG quality. Whatever.
The fan bracket that I replaced was Dorman. Maybe the original Aisin failed from heat, maybe it was replaced throwing parts at a noise, but on a rig with 125k I doubt the Dorman was there very long. Yet another reminder - don't use Dorman fan brackets, or bearings in general!
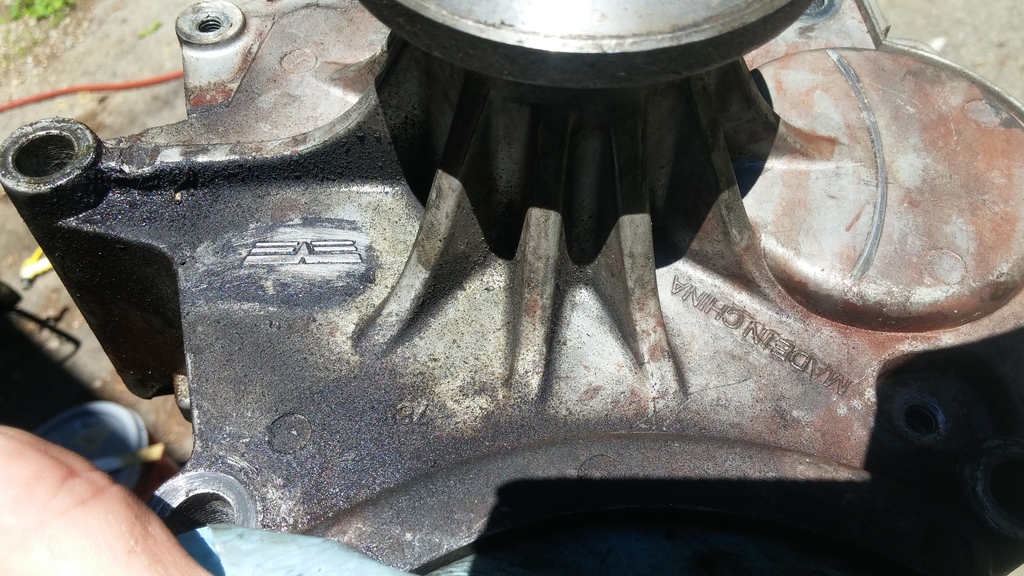
New Aisin one had a Toyota logo that was ground off
I noticed for the first time recently that the ECU terminals are labeled on the inside! Great because all the FSMs out there are for 91-95 3.0 which are completely different ECUs. So for any future searchers like me earlier looking for 88-90 ECU pinout here you go, two angles so that you can see all the labels (might need to zoom)

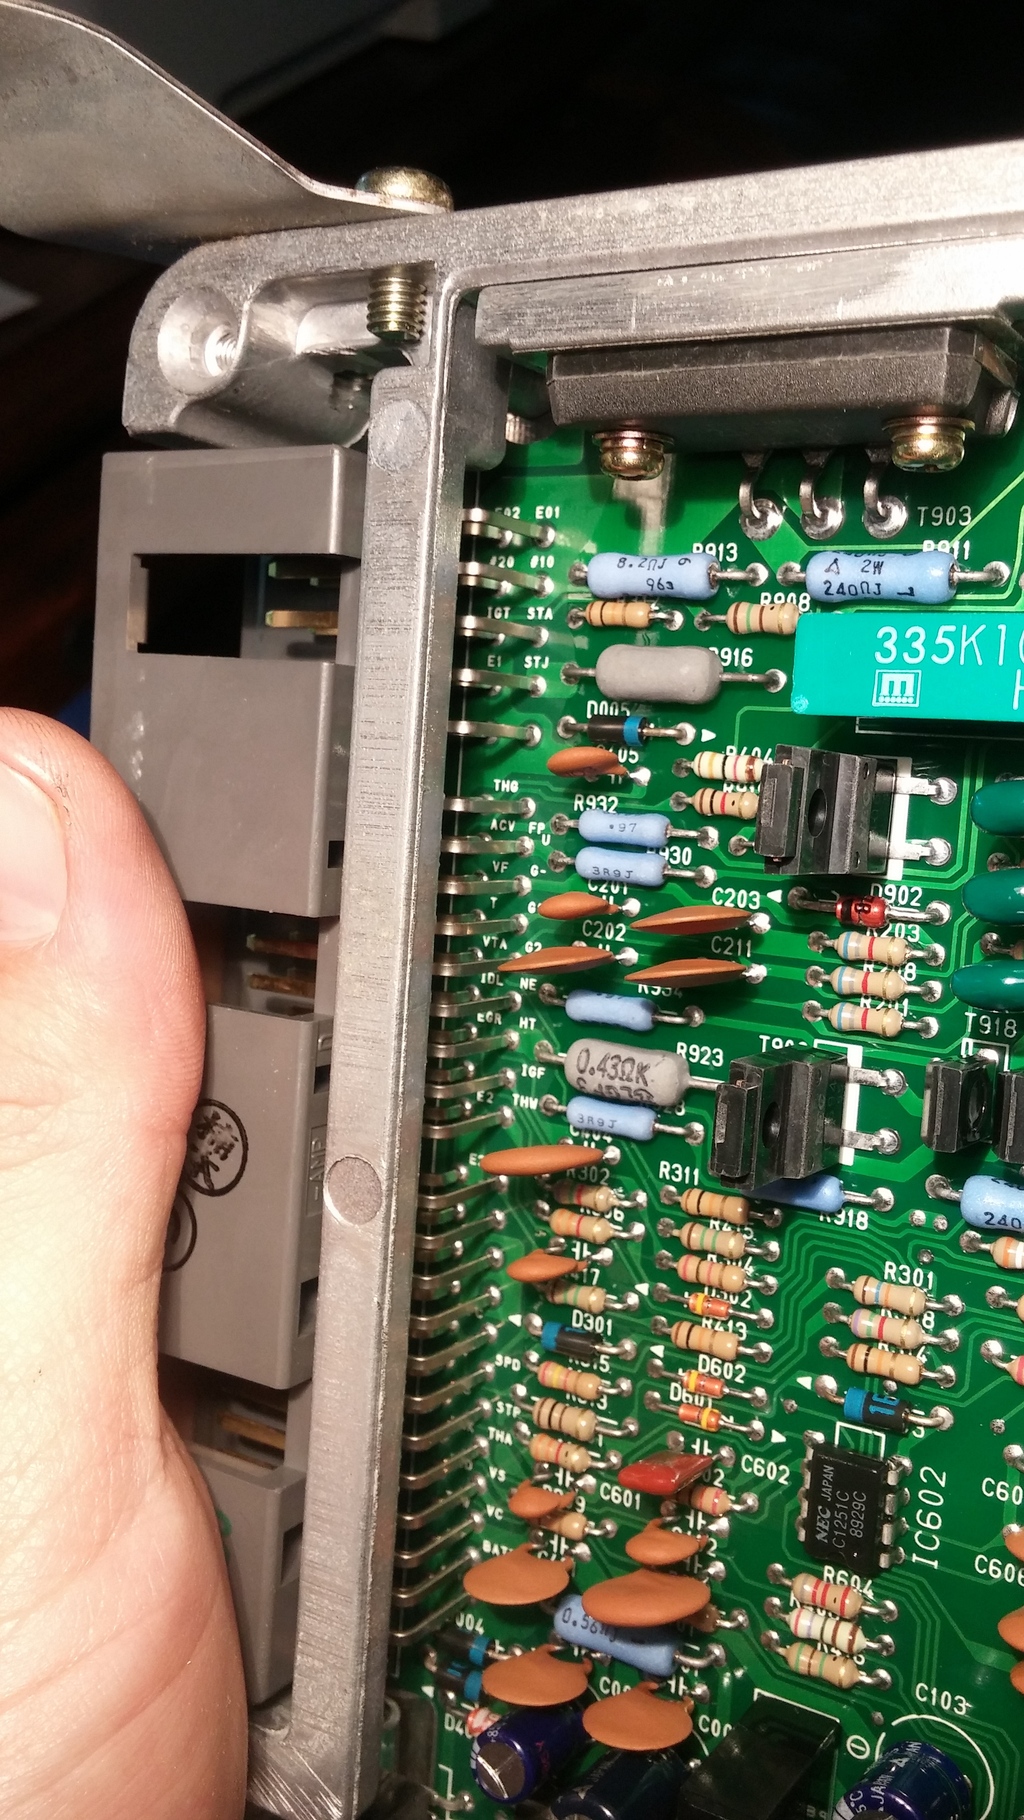
The CA and Federal model 3.0 ECUs are interchangeable, will try to edit and link the part numbers later.

The truck is looking pretty but still running like crap. Trying to figure out if the apparent spark miss on my timing light is an actual ignition miss or just a faulty lamp. Continuity on all ignition wires appears as it should be, ECU resistance and voltages check out. I'm feeling slightly stumped and more than slightly frustrated.

Oh, shameless plug - for an easy way to get the shifter retainer out of the way use a 19mm wrench, after you watch this excellent instructional video
[YOUTUBE]
[/YOUTUBE]
The fan bracket that I replaced was Dorman. Maybe the original Aisin failed from heat, maybe it was replaced throwing parts at a noise, but on a rig with 125k I doubt the Dorman was there very long. Yet another reminder - don't use Dorman fan brackets, or bearings in general!

New Aisin one had a Toyota logo that was ground off

I noticed for the first time recently that the ECU terminals are labeled on the inside! Great because all the FSMs out there are for 91-95 3.0 which are completely different ECUs. So for any future searchers like me earlier looking for 88-90 ECU pinout here you go, two angles so that you can see all the labels (might need to zoom)


The CA and Federal model 3.0 ECUs are interchangeable, will try to edit and link the part numbers later.


The truck is looking pretty but still running like crap. Trying to figure out if the apparent spark miss on my timing light is an actual ignition miss or just a faulty lamp. Continuity on all ignition wires appears as it should be, ECU resistance and voltages check out. I'm feeling slightly stumped and more than slightly frustrated.
Oh, shameless plug - for an easy way to get the shifter retainer out of the way use a 19mm wrench, after you watch this excellent instructional video
[YOUTUBE]
Last edited by jbtvt; Jun 25, 2015 at 07:50 PM.
Jul 1, 2015 | 11:22 AM
#19
Thread Starter
Registered User
Joined: May 2009
Posts: 578
Likes: 11
From: Southern NH
End of the line for this one. Fixed my other timing light and getting the same erratic spark pattern. Ran the tap tests, continuity tests, voltage test, ground test, changed distributors twice, ignitor and coil set once, computer once - nothing fixes spark. Removed ECT sensor the other day and it snapped off, now plugging in a new one I noticed the female end is cracked and will not maintain continuity - constant code 22. No vacuum at fuel regulator and code 71 comes and goes so it's possible the PO mixed vacuum lines and they need to be sorted ( I have been OCD with labeling as they came off), or more likely knowingthis POS it needs more new parts. Vibration when it's lugging under load indicates new engine mounts needed...not gonna happen.
This stopped being fun weeks ago - everything on the truck that is touched breaks and leads to 3 other projects, and it's time I stopped throwing good money after bad. And time, time, time. I don't even want to button up the interior trim and clean it to attempt a sale, wasted enough of my life already. An expensive lesson indeed.
The last vehicle I will ever buy without a thorough inspection regardless of what a "deal" it seems like, and most DEFINITELY the last 3.0 I will ever own. Going to look at a 98 today, this one is going to the crusher.
Jul 1, 2015 | 02:41 PM
#20
Registered User
iTrader: (1)
Joined: Apr 2009
Posts: 13,381
Likes: 100
From: I live in New Tripoli Pa out in the woods
Calm Down We all get these !!!!!
It will make a nice start to a 3.4 Swap .
How much $$$$ to keep it from the Crusher ??
I went to Michigan for a truck only to have Sandy drop 3 huge trees on it.
Your much closer!!
It will make a nice start to a 3.4 Swap .
How much $$$$ to keep it from the Crusher ??
I went to Michigan for a truck only to have Sandy drop 3 huge trees on it.
Your much closer!!


