
Morph
 Jul 27, 2009 | 09:36 AM
#1
Thread Starter
Contributing Member
Joined: Apr 2004
Posts: 5,464
Likes: 6
From: Arvada, Colorado
Morph
Been working on this for the last 8 months, and its finally driving around again. Figured I'd post up for fun.
Its been copied and pasted from elsewhere, so bear with the commentary.
Its been copied and pasted from elsewhere, so bear with the commentary.
Jul 27, 2009 | 09:36 AM
#2
Thread Starter
Contributing Member
Joined: Apr 2004
Posts: 5,464
Likes: 6
From: Arvada, Colorado
To begin:
The end of an era. Both pieces of equipment served me well, but it was time to retire. The ARB was an amazing bumper, and I loved it. But, it was a little too big for what I wanted.
The sliders were a metal shop final project, and were not built, or welded, as well as they needed to be. Amazingly, they held up quite well, but its time for something better.


Neither one will be replaced for a number of months. Lots of other stuff to do first.
Next installment: Drivetrain lift preparation.
The end of an era. Both pieces of equipment served me well, but it was time to retire. The ARB was an amazing bumper, and I loved it. But, it was a little too big for what I wanted.
The sliders were a metal shop final project, and were not built, or welded, as well as they needed to be. Amazingly, they held up quite well, but its time for something better.
Neither one will be replaced for a number of months. Lots of other stuff to do first.
Next installment: Drivetrain lift preparation.
Jul 27, 2009 | 09:37 AM
#3
Thread Starter
Contributing Member
Joined: Apr 2004
Posts: 5,464
Likes: 6
From: Arvada, Colorado
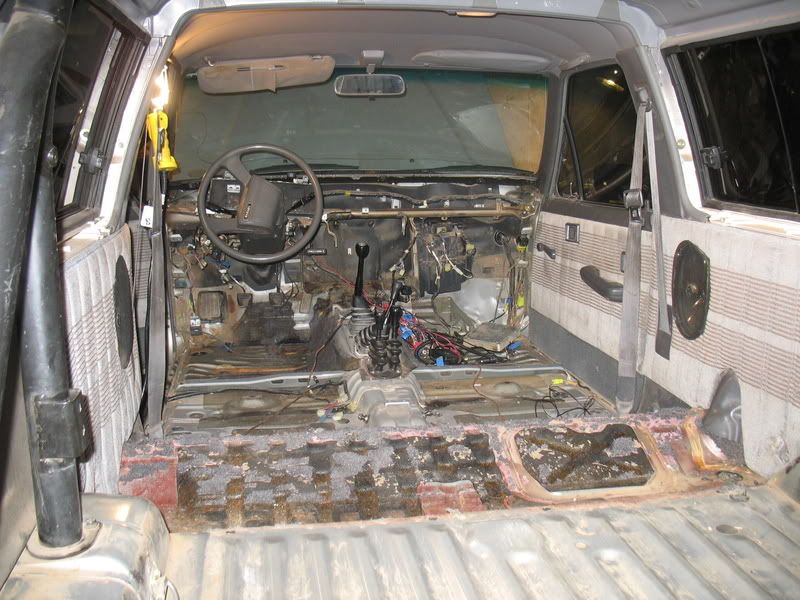
Progress: Got most of the dash out. Holy crap, dash boards suck. I like how simple an FJ-40 dash is. Couple of bolts and out it comes. Ugh.
Should be able to finish the dash in another day or so.
Xmember center:

Should be able to finish the dash in another day or so.
Xmember center:
 Jul 27, 2009 | 09:37 AM
#5
Thread Starter
Contributing Member
Joined: Apr 2004
Posts: 5,464
Likes: 6
From: Arvada, Colorado
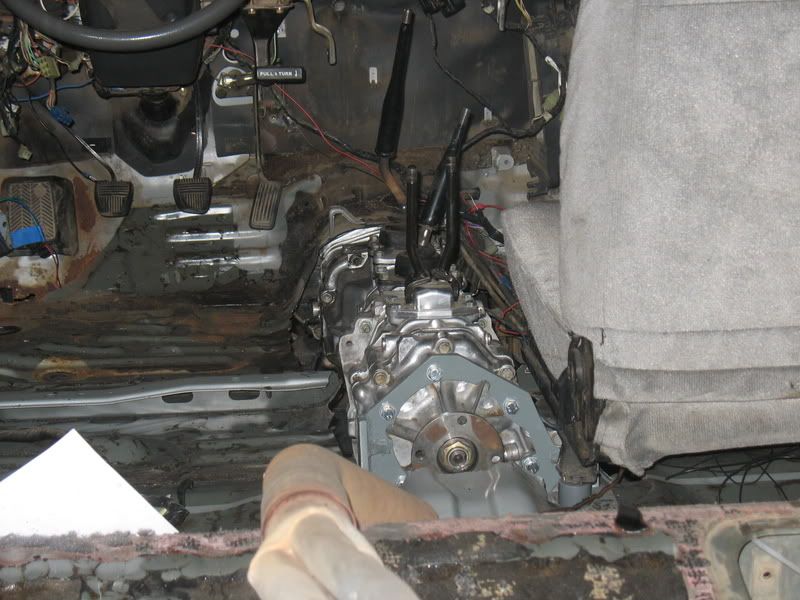
I've been working at the carpet. It isn't going well. Even with the heat gun, it is an outrageous process. I am flabbergasted by this crap. I simply cannot believe that the carpet UNDER THE REAR SEAT needed to be glued down like it was. Good lord.
First tranny cut was tenative. It gets bigger.
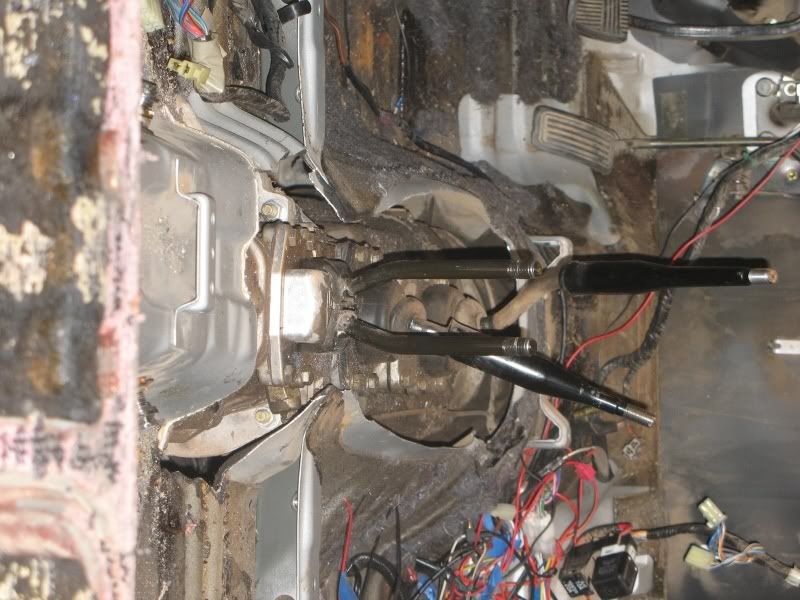
First tranny cut was tenative. It gets bigger.


Trending Topics
Jul 27, 2009 | 09:38 AM
#8
Thread Starter
Contributing Member
Joined: Apr 2004
Posts: 5,464
Likes: 6
From: Arvada, Colorado
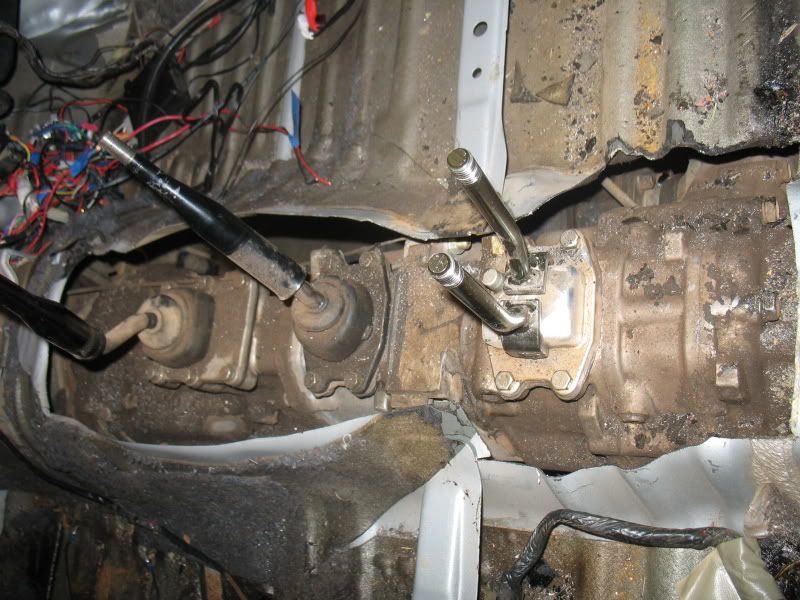
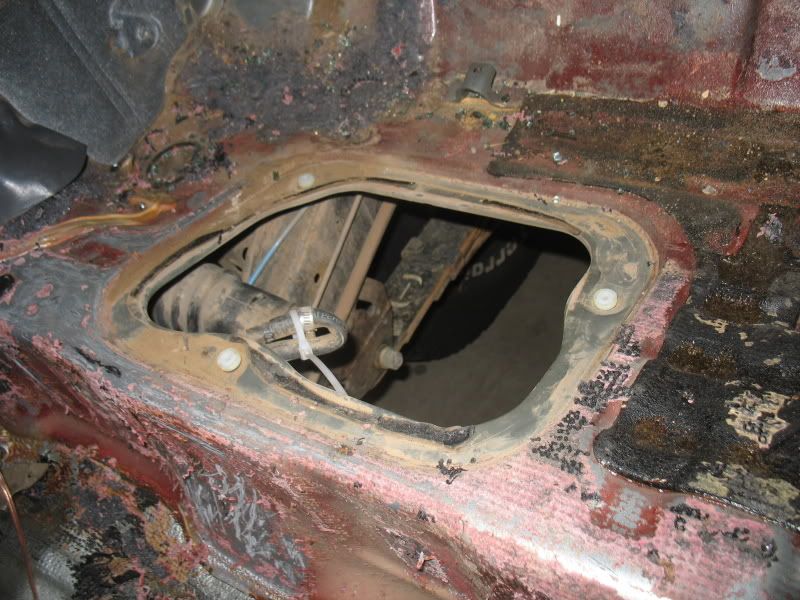
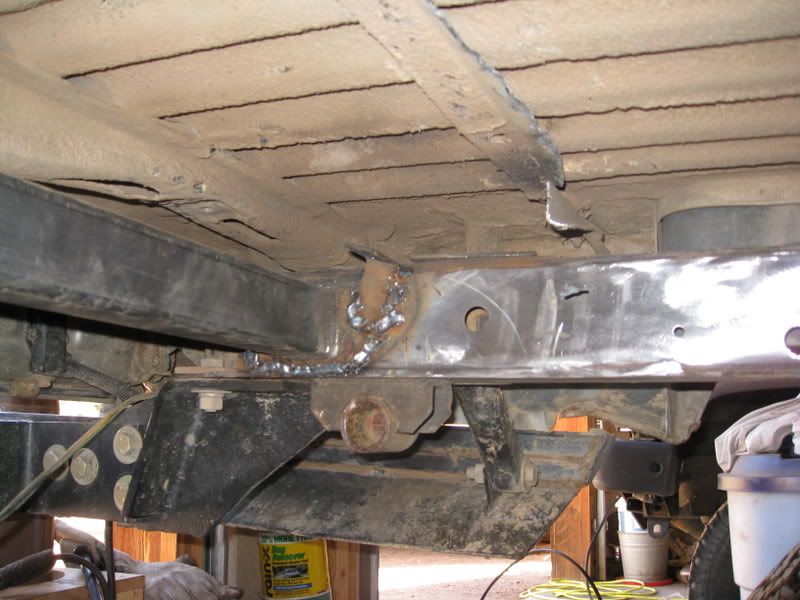
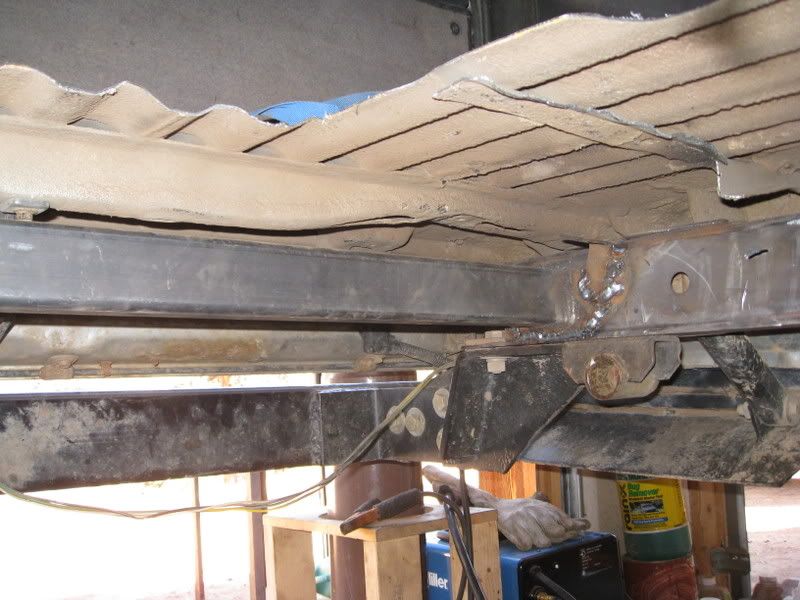
Another lovely thing: They started double paneling the floor once you get back a little way. Yeah, not fun.
Anyway pics:
Inside:
Closer to flat:

Like, bummer dude:

That horsecollar thing is going to suck a bit.

Anyway pics:
Inside:
Closer to flat:
Like, bummer dude:
That horsecollar thing is going to suck a bit.
Jul 27, 2009 | 09:38 AM
#9
Thread Starter
Contributing Member
Joined: Apr 2004
Posts: 5,464
Likes: 6
From: Arvada, Colorado
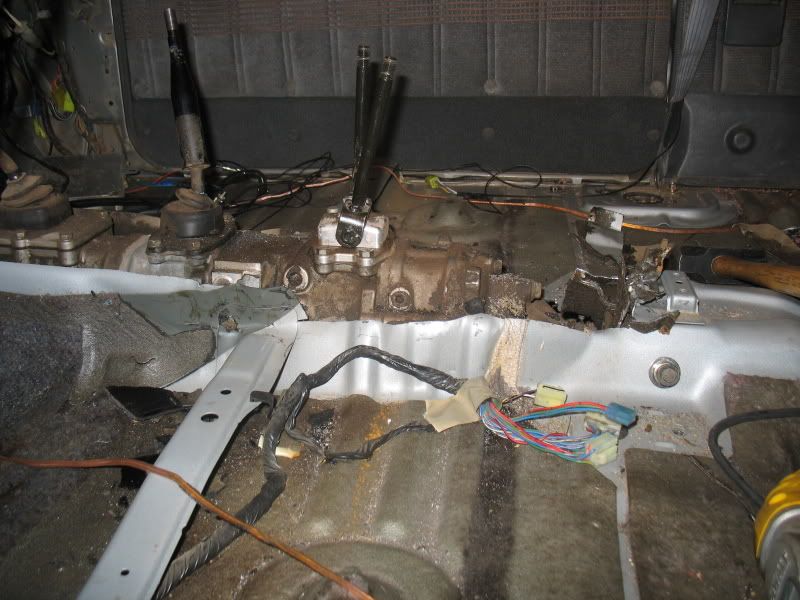
From there, I finished cutting out the floor, but didn't have pics because it was cold.
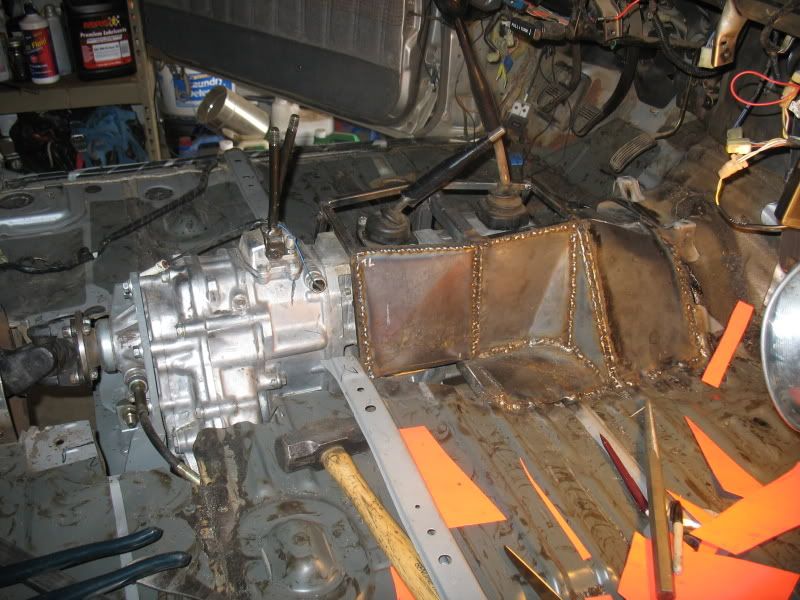
Got the tranny dropped and cleaned closer to a silver color.
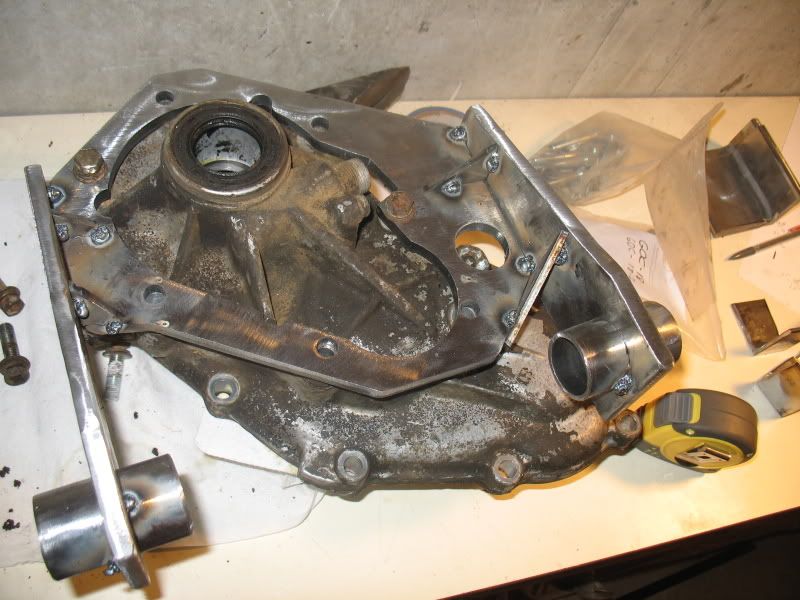
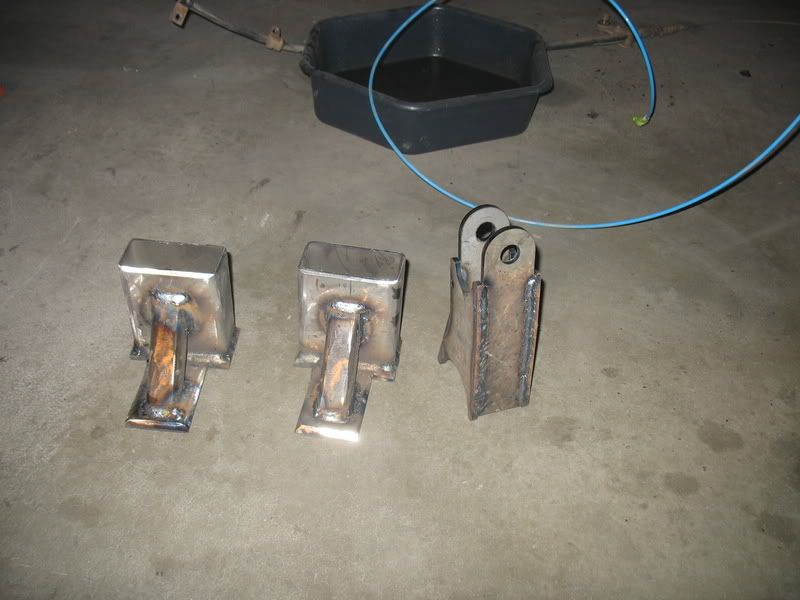
Fabbed up my crossmember:
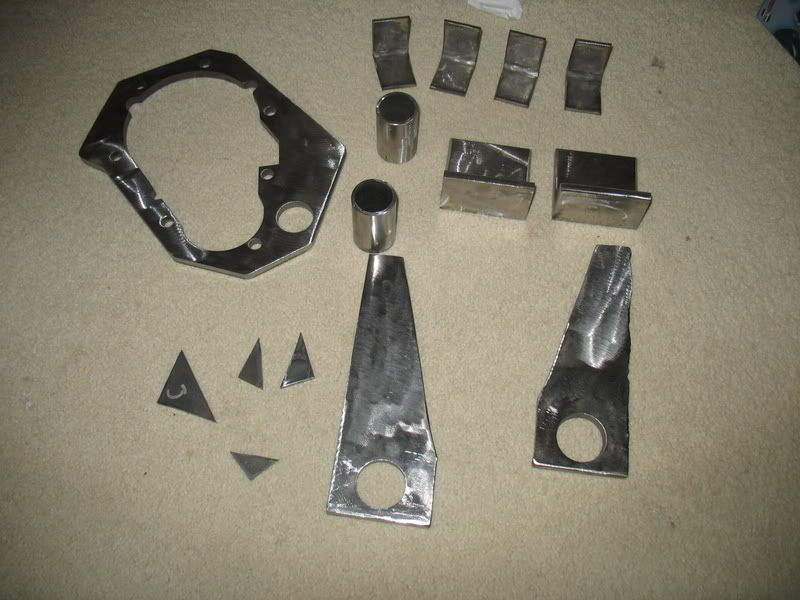
Plasma is awesome. Two bottom brackets are 3/8", two L brackets are also 3/8", round tubes are .120 wall DOM, and the 4 smaller L brackets are 3/16", and the gussets are all 3/16".

All tacked up:
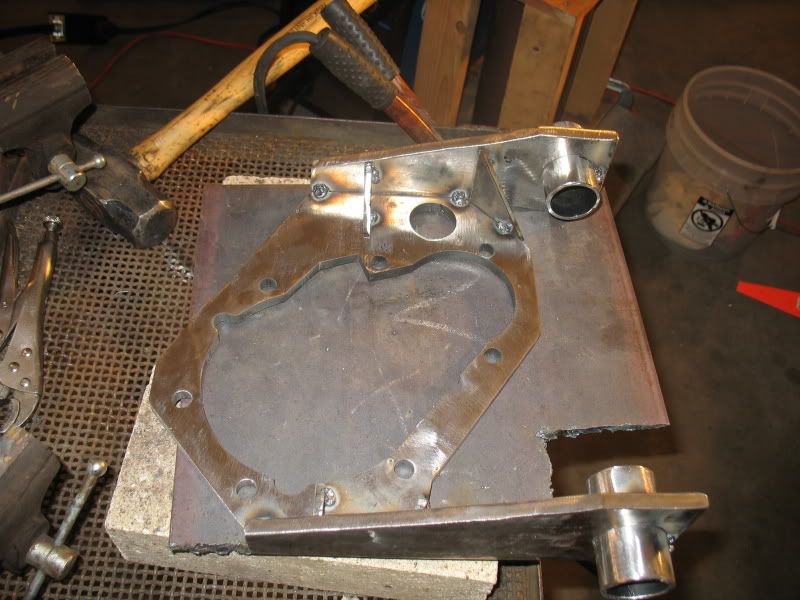
Tacked and put onto my spare case, to check for fitment:
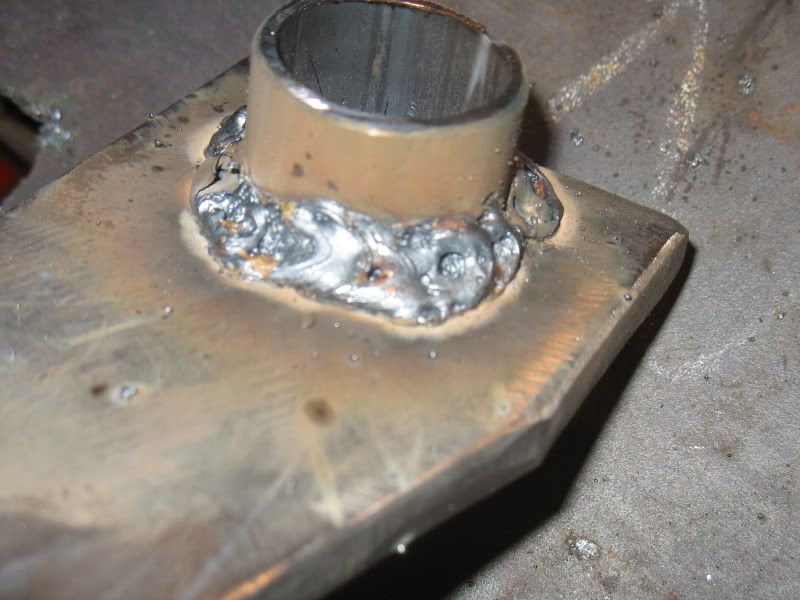
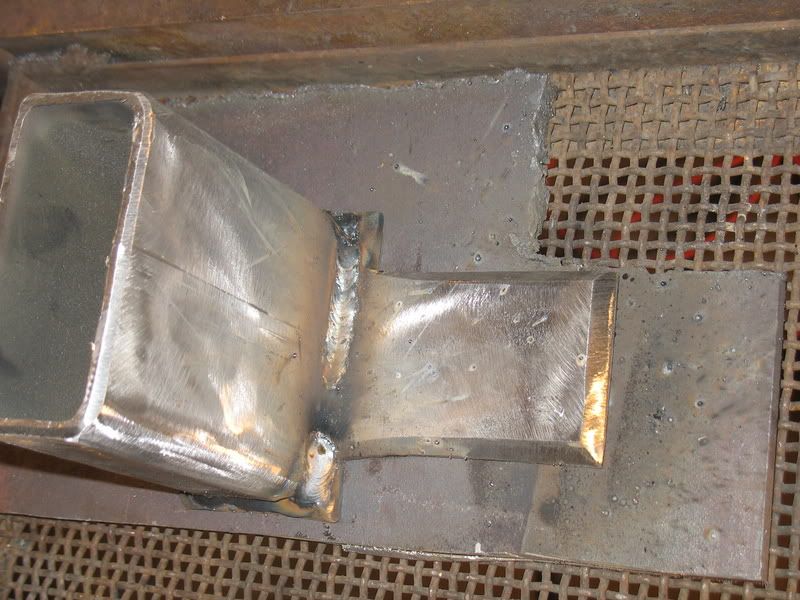
You know whats good? Remembering to turn on your shielding gas.
No gas:
Gas:
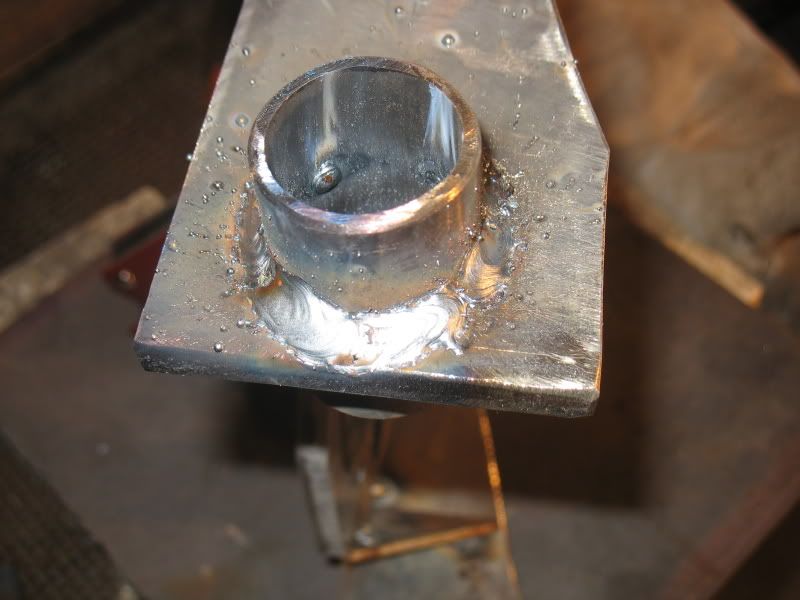
Welded:
Got the tranny dropped and cleaned closer to a silver color.
Fabbed up my crossmember:
Plasma is awesome. Two bottom brackets are 3/8", two L brackets are also 3/8", round tubes are .120 wall DOM, and the 4 smaller L brackets are 3/16", and the gussets are all 3/16".
All tacked up:
Tacked and put onto my spare case, to check for fitment:
You know whats good? Remembering to turn on your shielding gas.
No gas:
Gas:
Welded:
Jul 27, 2009 | 09:39 AM
#10
Thread Starter
Contributing Member
Joined: Apr 2004
Posts: 5,464
Likes: 6
From: Arvada, Colorado
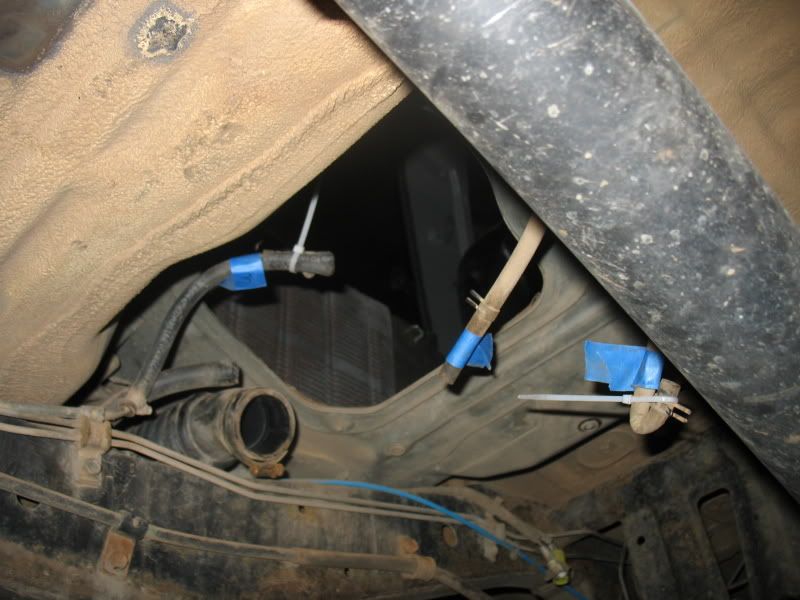
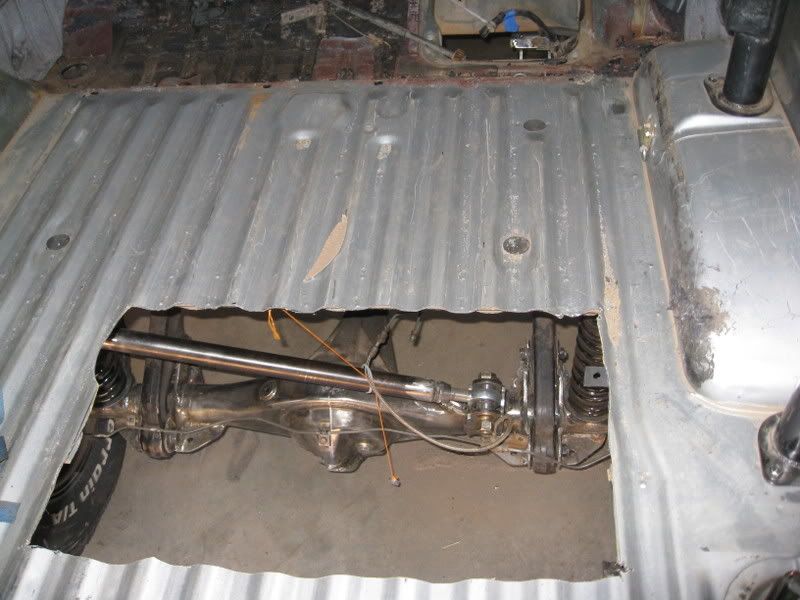
After cutting out my floor, I decided to get my rear suspension set up, so that, when building my tunnel, I wouldn't have any issues with the driveshaft in the rear.
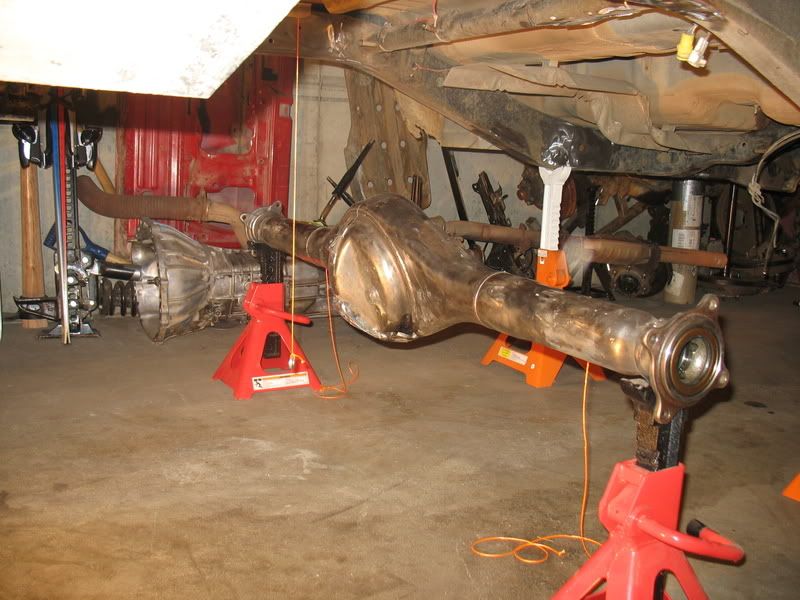
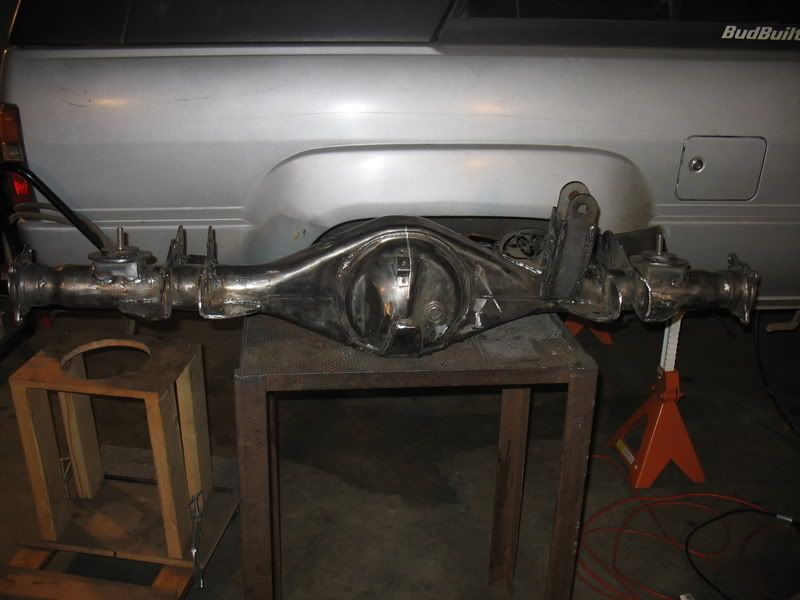
So, last week, I pulled out my extra rear housing, from an 87 runner, and cleaned it. Then, I gutted it, pulling the axles, diff, brakelines, an diff studs.
On Saturday, I forgot my camera, but I drove to my buddy kevin's house, and plasma'd off the bracketry. Plasma is awesome. Burned everything off, and then had just a couple passes with a grinder to clean up. Super fun.
When that was done, it looked like this:

In Saturday's mail, my shaving kit arrived. Awesome!

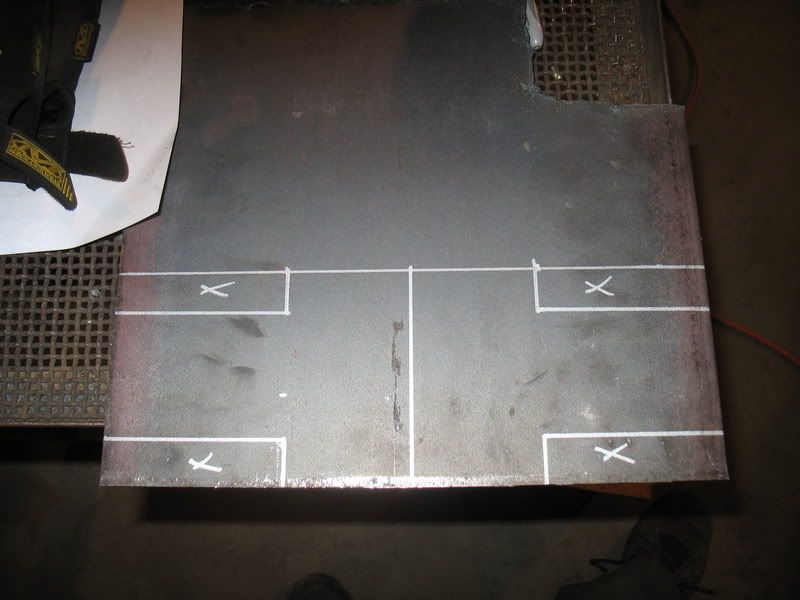
The steel is all 3/8" plate.
So, I got to work.
Inked in:

Cut.
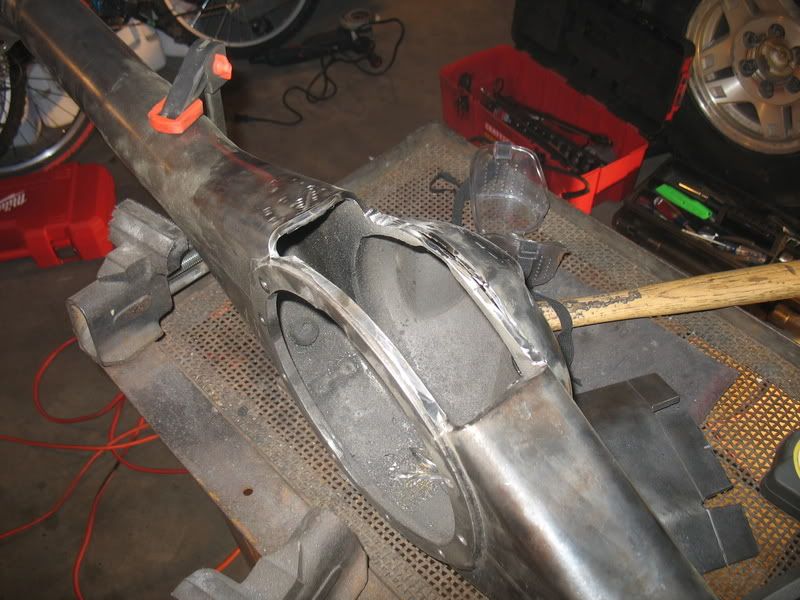
The cutting sucked. I cut too much in an error of judgement, as I thought the plate would sit differently. Not a huge deal, but just added extra welding, which translated to extra time while I let the housing cool between welds. One of those, kick-yourself-in-the-pants moments.
Set in place, ready to weld:
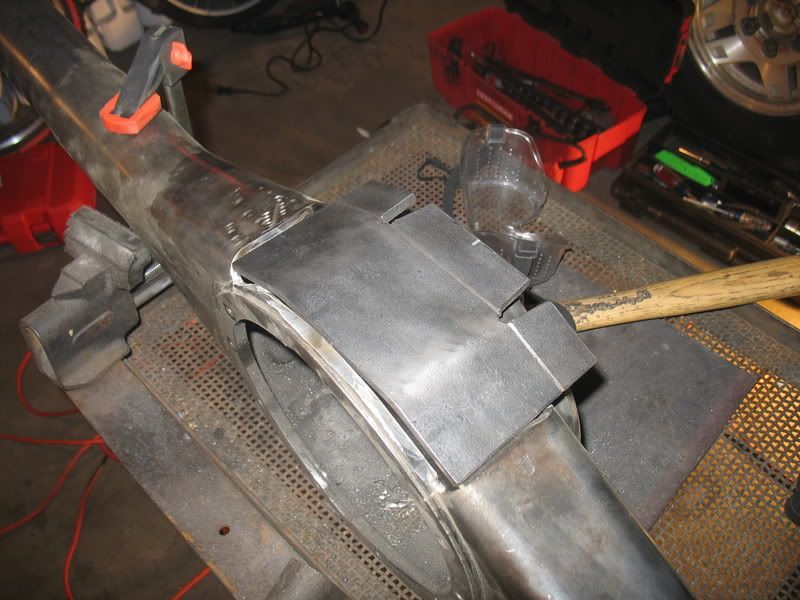
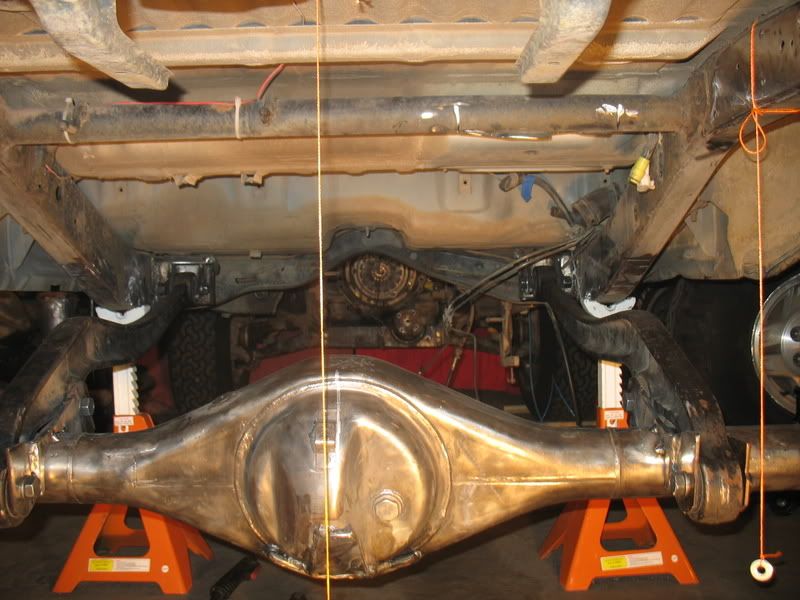
Finished product. I'm calling it my baby's bottom, as it is smooth like one.
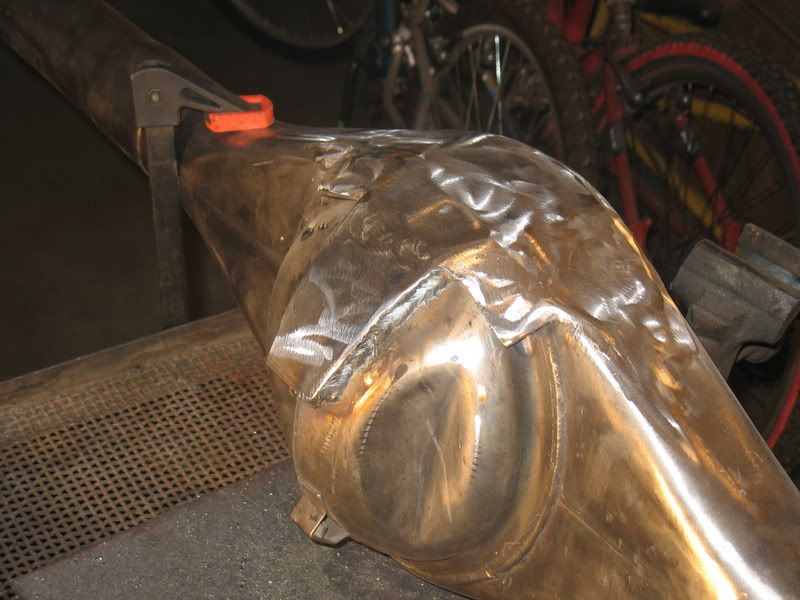
My axle housing base is now smooth, and armored to 3/8". It also should give me about an inch of clearance. I will be measuring to see if its actually that much.
Currently its sitting in the garage with some old engine oil in it, to see if it leaks. Hopefully not.
Cheers.
So, last week, I pulled out my extra rear housing, from an 87 runner, and cleaned it. Then, I gutted it, pulling the axles, diff, brakelines, an diff studs.
On Saturday, I forgot my camera, but I drove to my buddy kevin's house, and plasma'd off the bracketry. Plasma is awesome. Burned everything off, and then had just a couple passes with a grinder to clean up. Super fun.
When that was done, it looked like this:
In Saturday's mail, my shaving kit arrived. Awesome!
The steel is all 3/8" plate.
So, I got to work.
Inked in:
Cut.
The cutting sucked. I cut too much in an error of judgement, as I thought the plate would sit differently. Not a huge deal, but just added extra welding, which translated to extra time while I let the housing cool between welds. One of those, kick-yourself-in-the-pants moments.
Set in place, ready to weld:
Finished product. I'm calling it my baby's bottom, as it is smooth like one.
My axle housing base is now smooth, and armored to 3/8". It also should give me about an inch of clearance. I will be measuring to see if its actually that much.
Currently its sitting in the garage with some old engine oil in it, to see if it leaks. Hopefully not.
Cheers.
Jul 27, 2009 | 09:39 AM
#11
Thread Starter
Contributing Member
Joined: Apr 2004
Posts: 5,464
Likes: 6
From: Arvada, Colorado
Updates:
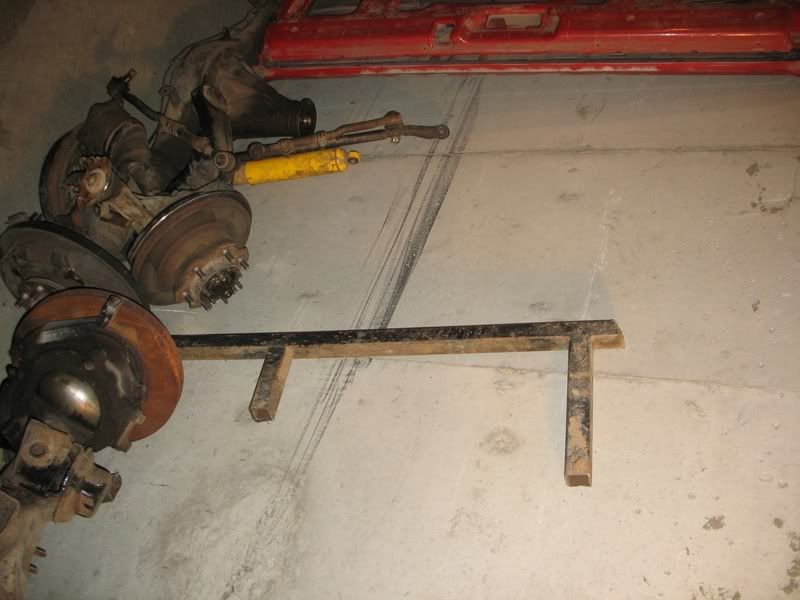
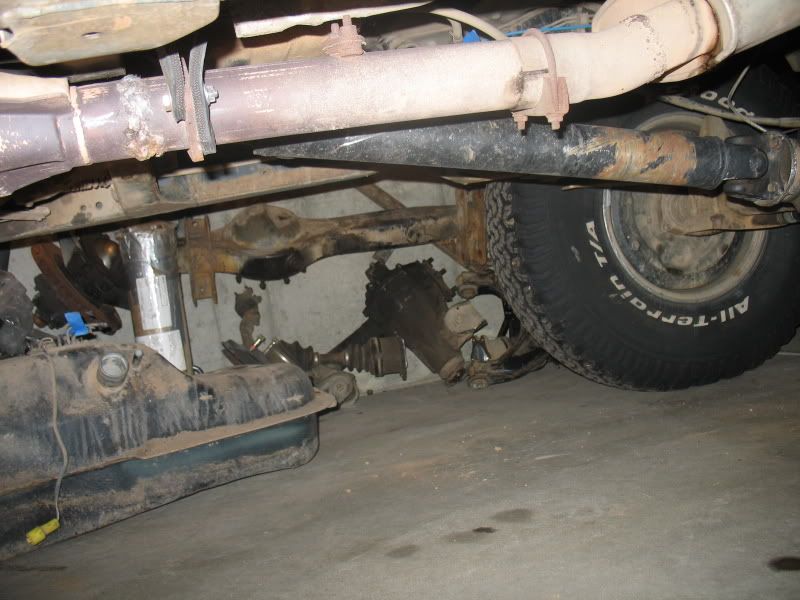
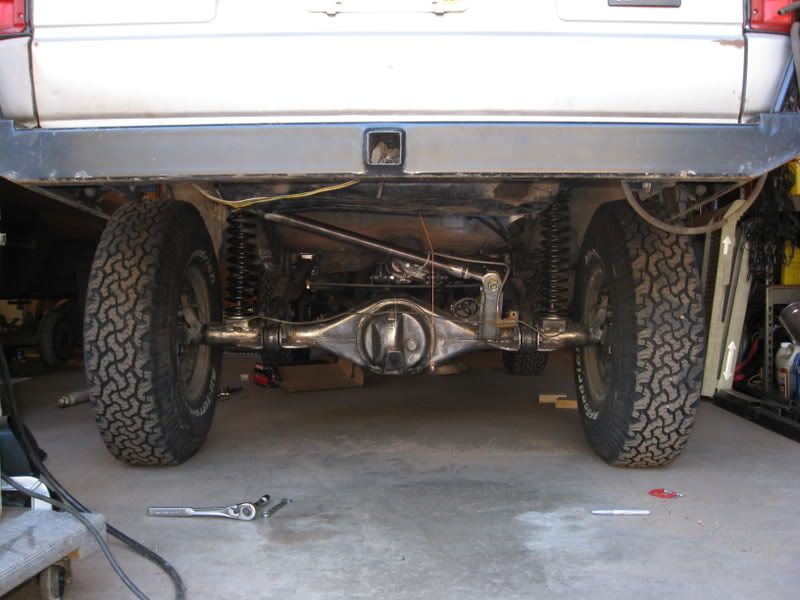
Got the rear suspension out, and the new stuff in:
After finishing the rear axle up, I cleanup up a bit, did a lot of organizing, and turned the truck around. Also, due to the extreme generosity of a friend, I picked up a 14" abrasive chop saw for a six pack of beer.
So, I took off my rear axle, and cleaned my frame:
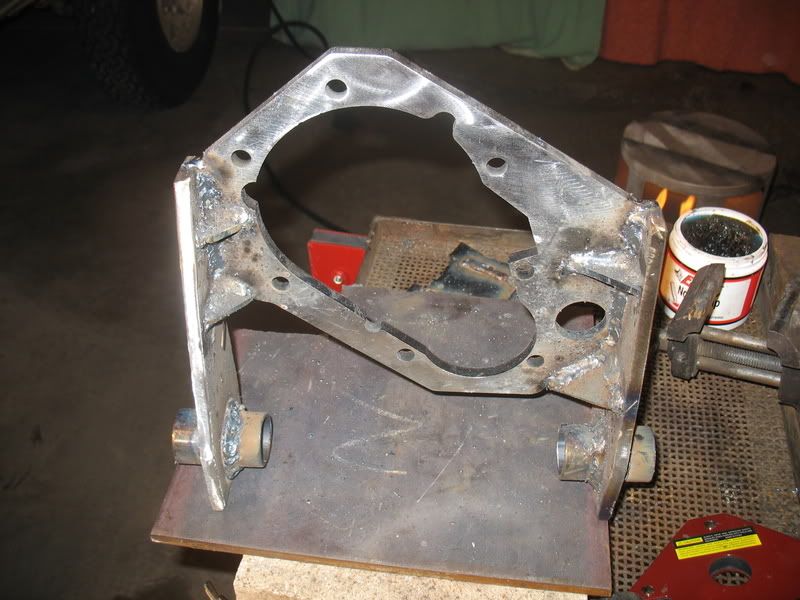
I also began fabbing my frame side bracketry.
Here are my frame plates:

And the back "plates" (rectangular tubes) that will be where the tabs weld to, along with the plates and some square tubular gussets:

And the last of my bling arrived via the UPS man:

18" 300 lb/inch coils
Got the rear suspension out, and the new stuff in:
After finishing the rear axle up, I cleanup up a bit, did a lot of organizing, and turned the truck around. Also, due to the extreme generosity of a friend, I picked up a 14" abrasive chop saw for a six pack of beer.
So, I took off my rear axle, and cleaned my frame:
I also began fabbing my frame side bracketry.
Here are my frame plates:
And the back "plates" (rectangular tubes) that will be where the tabs weld to, along with the plates and some square tubular gussets:
And the last of my bling arrived via the UPS man:
18" 300 lb/inch coils
 Jul 27, 2009 | 09:40 AM
#13
Thread Starter
Contributing Member
Joined: Apr 2004
Posts: 5,464
Likes: 6
From: Arvada, Colorado
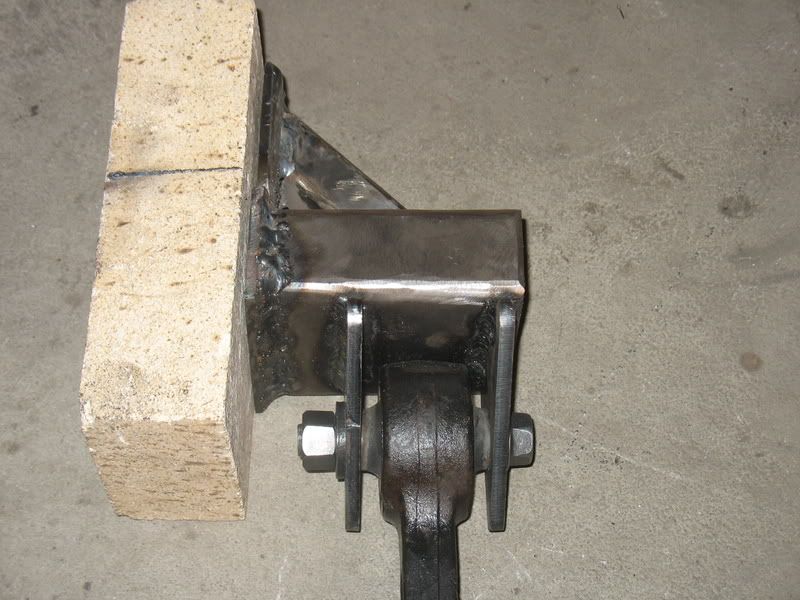
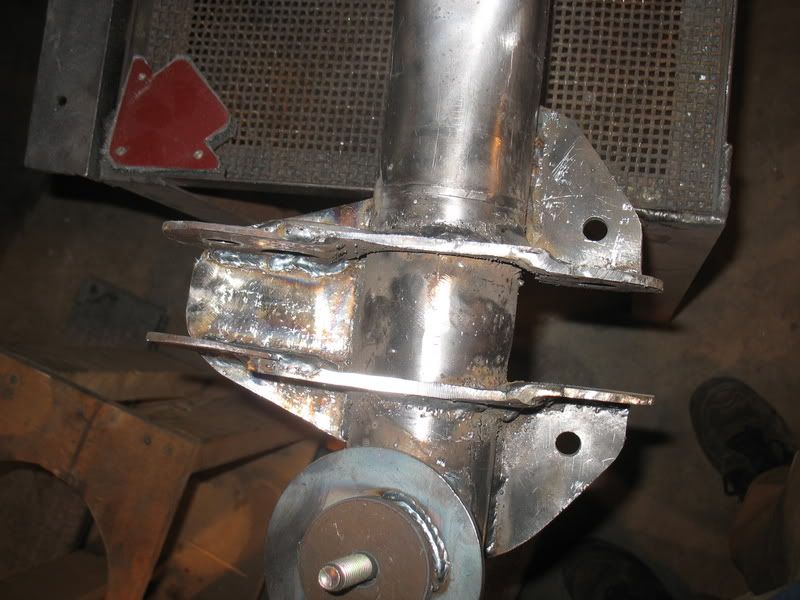
I drilled out the holes at work on a drill press.
This was slow. A lot of stacking/creative leaning, to get things to line up properly, and actually sit without falling:
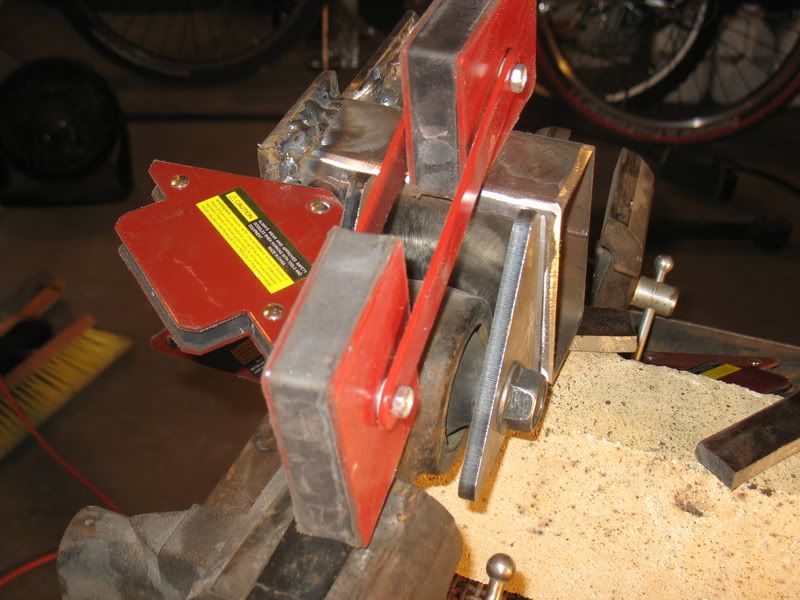
Even still, I'm going to have to pound this bracket a little once its welded to the frame. Both tabs are leaning about 1/32 or so inboard. Not good. But, easy to fix. However, it means that gussets will have to be done on the truck.
Imagine that the firebrick is actually the frame rail, and that you are looking down on the set up from above (ie through the truck, xray vision style). You can see how the bracket mounts, and how the arm comes off of it.
This was slow. A lot of stacking/creative leaning, to get things to line up properly, and actually sit without falling:
Even still, I'm going to have to pound this bracket a little once its welded to the frame. Both tabs are leaning about 1/32 or so inboard. Not good. But, easy to fix. However, it means that gussets will have to be done on the truck.
Imagine that the firebrick is actually the frame rail, and that you are looking down on the set up from above (ie through the truck, xray vision style). You can see how the bracket mounts, and how the arm comes off of it.
Jul 27, 2009 | 09:40 AM
#14
Thread Starter
Contributing Member
Joined: Apr 2004
Posts: 5,464
Likes: 6
From: Arvada, Colorado
A good weekend.
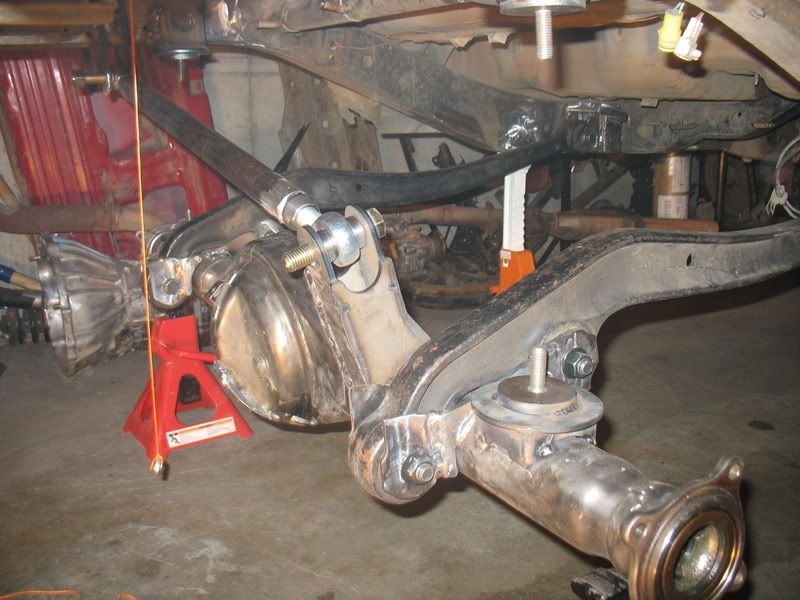
I realized I hadn't exactly explained my suspension before, so here goes:
This is a total experiment. I'm going to see how it works. It may work well, and be really cool, or it may suck huge, and have to get changed next winter.
The good part is, if it does need to be changed, I can convert to either a true 3 link, and jeep 3 link, or a different radius arm set up. I'll be out about 65 bucks if that happens.
The idea came from staring at an 80 series land cruiser and listening to the owner complain about his front radius arms being rock magnets.
After staring for a few minutes, I thought to my self, "wow, those do hang down far. But, if you flipped them on top of the axle, they'd have a TON of clearance." And, so, I kept turning it over in my head, and finally picked up a set of used arms from Slee Offroad for 50 bucks.
I stuck them up under my truck, and was happy to see that not only did they give me virtually nothing hanging below the axle (the rear mount hangs down 1/2", and is smooth), but, when tucked above the bottom of the frame, they were higher up than my leaf spring. Much better clearance all around.
Anyway, obviously I see the issues with this, and there are a few, as well as the fact that it would be much easier to link it, and call it good. However, I like different. I figure I'll see where this goes, and go back to the norm if it doesn't work out.
Back to the pictures
On Saturday, with the help of a buddy, I got things measured, and remeasured, and remeasured, ad nauseam. However, things turned out straight, so thats good.
Setting the pinion angle

Axle strapped down so it wouldn't move.

Tacked in the radius arms. Looking good so far.
That's as far as we got. Troy came over today, and helped me get the rest going.
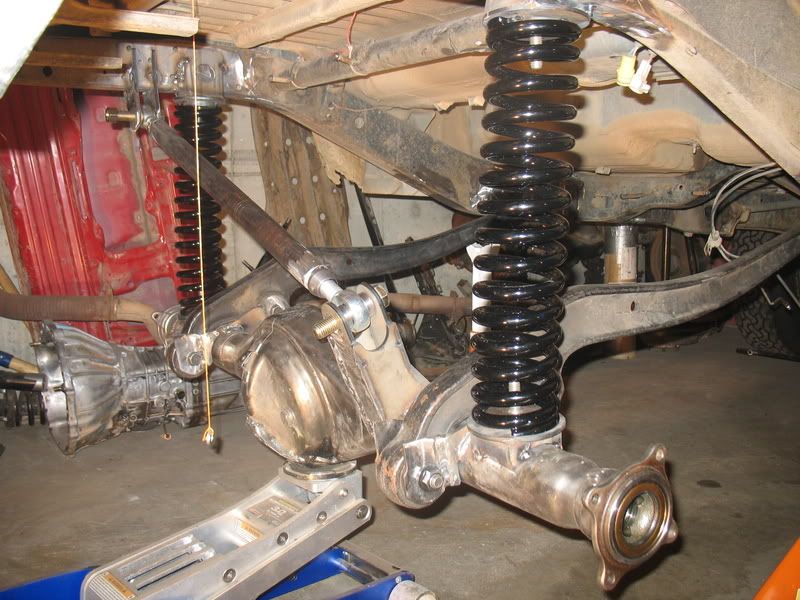
Panhard in:
Spring buckets in:
Small snag, due to a dumb mistake. I calculated a loaded truck rear axle weight to be 1200 lbs. I wasn't far off. However, I miscalculated. If the truck has a 1200 lb weight on the axle, then each spring has 600 lbs. Bummer. So, I got 18" 300lb/inch springs, thinking they'd compress around 4". Wrong. Loaded, they'll get about 2. So, sending these back, and getting a set of 16". That should be about perfect.
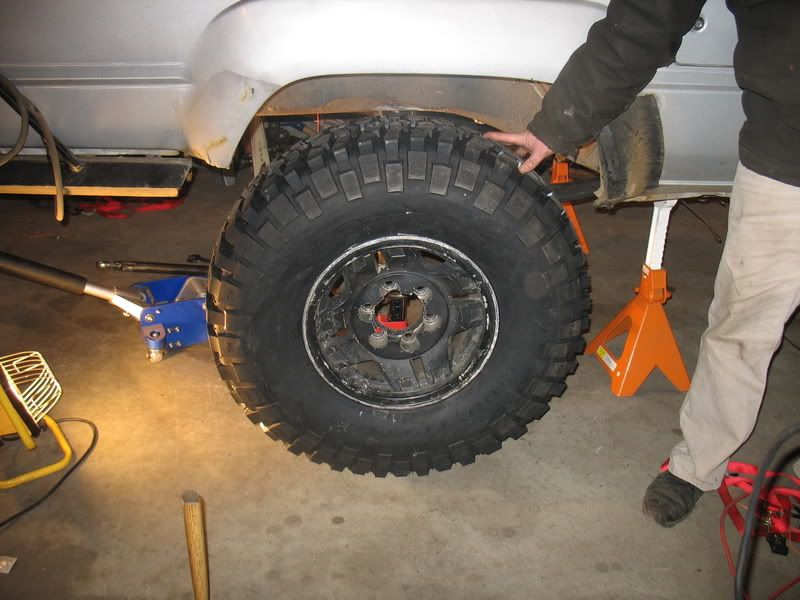
Before Troy left, we hauled out his spare, which is the tire and rim set up I hope to run. I like it!
I booger welded in the frame brackets tonight. I don't know what it is, but I can't for the life of me make pretty welds upside down. Practice makes perfect I'm sure, and I've gotten all the tips and tricks. I just suck at it. Oh well.
I realized I hadn't exactly explained my suspension before, so here goes:
This is a total experiment. I'm going to see how it works. It may work well, and be really cool, or it may suck huge, and have to get changed next winter.
The good part is, if it does need to be changed, I can convert to either a true 3 link, and jeep 3 link, or a different radius arm set up. I'll be out about 65 bucks if that happens.
The idea came from staring at an 80 series land cruiser and listening to the owner complain about his front radius arms being rock magnets.
After staring for a few minutes, I thought to my self, "wow, those do hang down far. But, if you flipped them on top of the axle, they'd have a TON of clearance." And, so, I kept turning it over in my head, and finally picked up a set of used arms from Slee Offroad for 50 bucks.
I stuck them up under my truck, and was happy to see that not only did they give me virtually nothing hanging below the axle (the rear mount hangs down 1/2", and is smooth), but, when tucked above the bottom of the frame, they were higher up than my leaf spring. Much better clearance all around.
Anyway, obviously I see the issues with this, and there are a few, as well as the fact that it would be much easier to link it, and call it good. However, I like different. I figure I'll see where this goes, and go back to the norm if it doesn't work out.
Back to the pictures
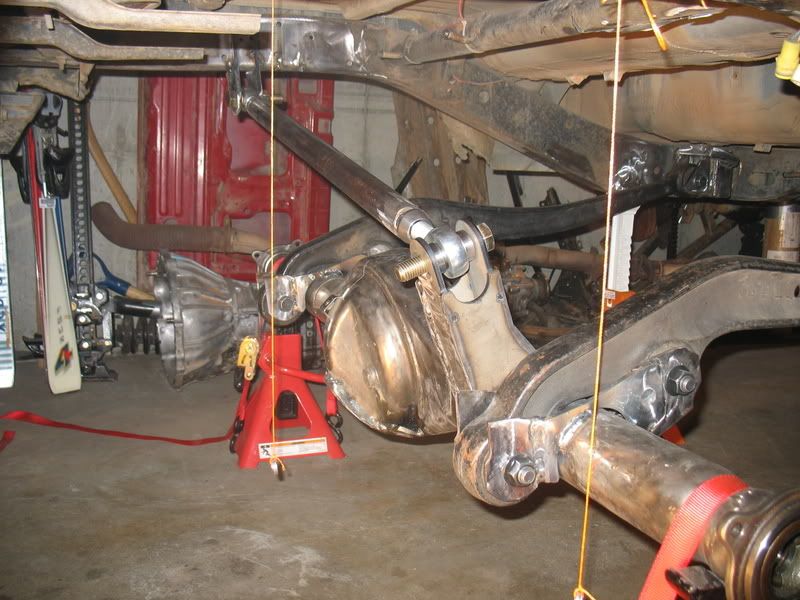
On Saturday, with the help of a buddy, I got things measured, and remeasured, and remeasured, ad nauseam. However, things turned out straight, so thats good.
Setting the pinion angle
Axle strapped down so it wouldn't move.
Tacked in the radius arms. Looking good so far.
That's as far as we got. Troy came over today, and helped me get the rest going.
Panhard in:
Spring buckets in:
Small snag, due to a dumb mistake. I calculated a loaded truck rear axle weight to be 1200 lbs. I wasn't far off. However, I miscalculated. If the truck has a 1200 lb weight on the axle, then each spring has 600 lbs. Bummer. So, I got 18" 300lb/inch springs, thinking they'd compress around 4". Wrong. Loaded, they'll get about 2. So, sending these back, and getting a set of 16". That should be about perfect.
Before Troy left, we hauled out his spare, which is the tire and rim set up I hope to run. I like it!
I booger welded in the frame brackets tonight. I don't know what it is, but I can't for the life of me make pretty welds upside down. Practice makes perfect I'm sure, and I've gotten all the tips and tricks. I just suck at it. Oh well.
Jul 27, 2009 | 09:41 AM
#15
Thread Starter
Contributing Member
Joined: Apr 2004
Posts: 5,464
Likes: 6
From: Arvada, Colorado
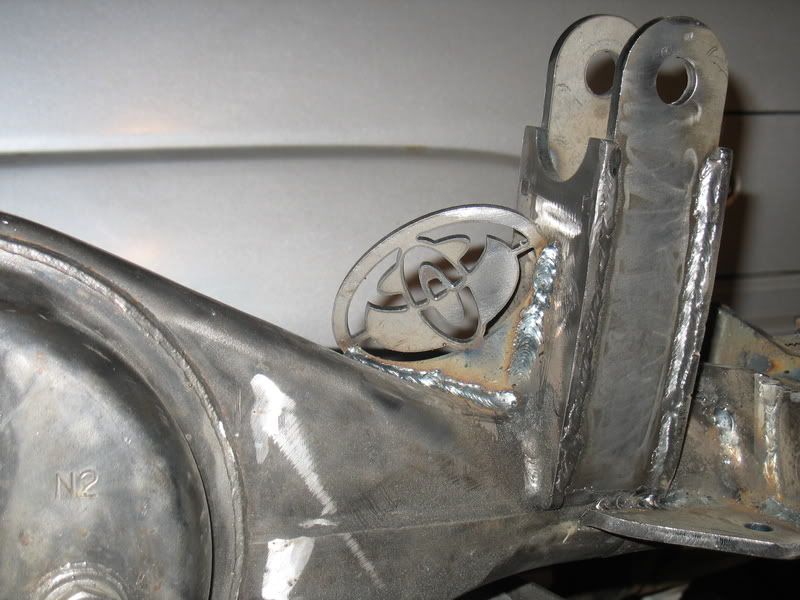
Slow progress. Lots of grinding, welding, etc...
Axle is done, and ready to go back under the truck.
Here is a shot of one of the radius arm brackets gusseted in:
And my favorite part, a little bling:
Axle is done, and ready to go back under the truck.
Here is a shot of one of the radius arm brackets gusseted in:
And my favorite part, a little bling:
Jul 27, 2009 | 09:41 AM
#16
Thread Starter
Contributing Member
Joined: Apr 2004
Posts: 5,464
Likes: 6
From: Arvada, Colorado
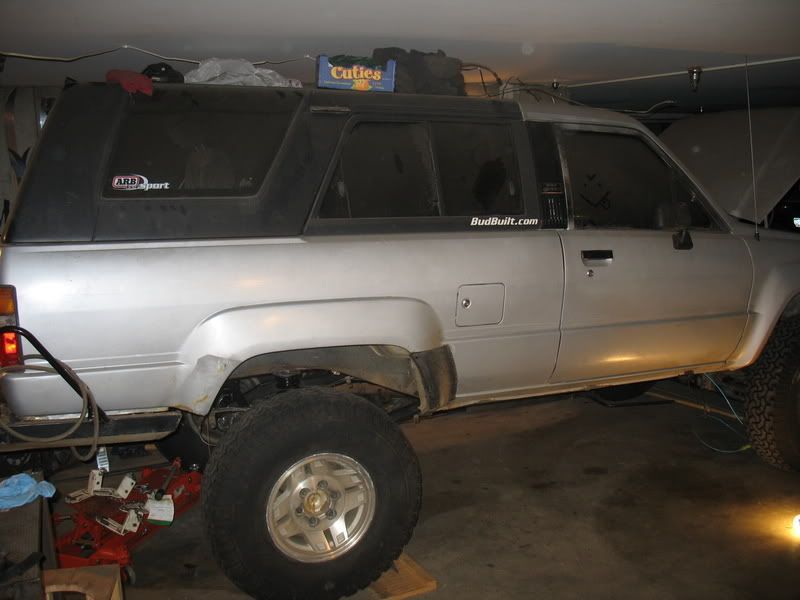
More progress. Got a lot done:
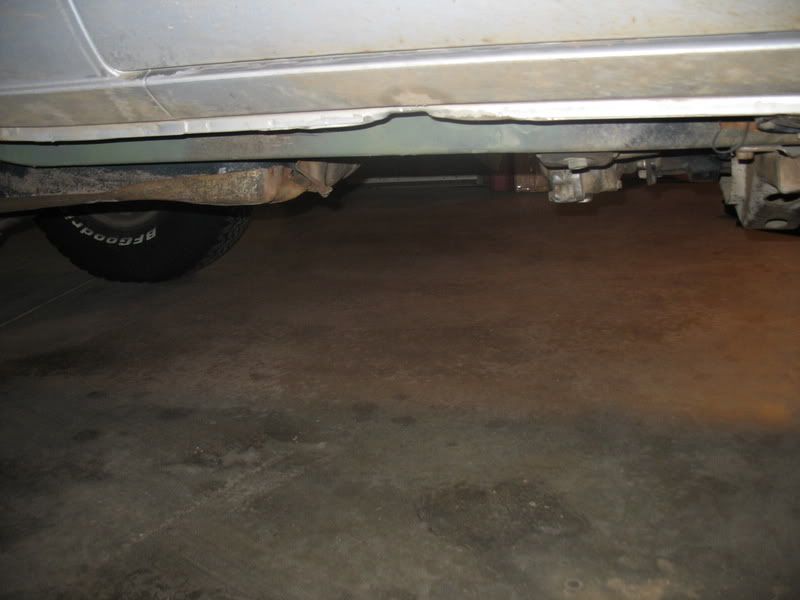
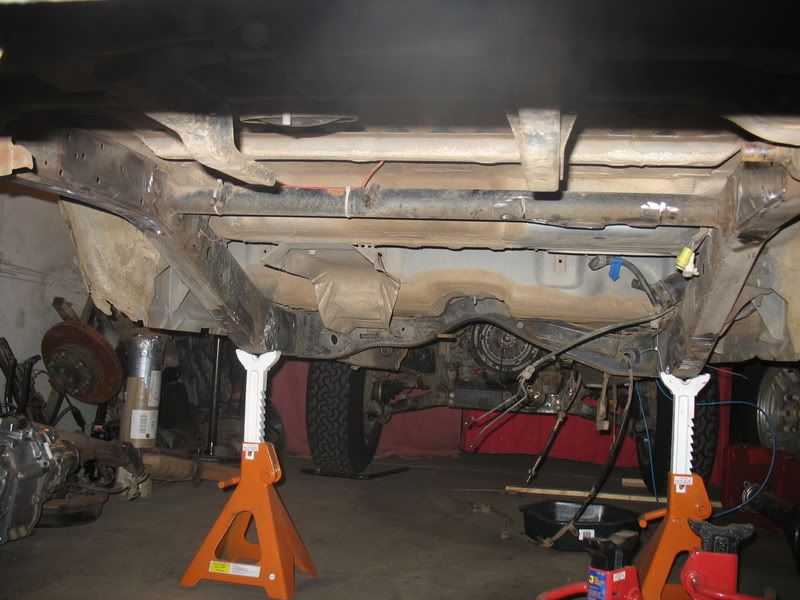
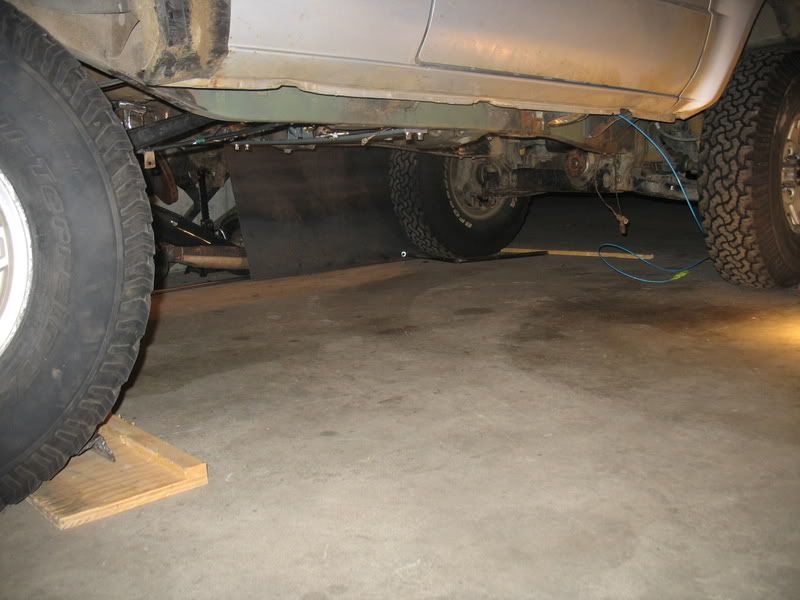
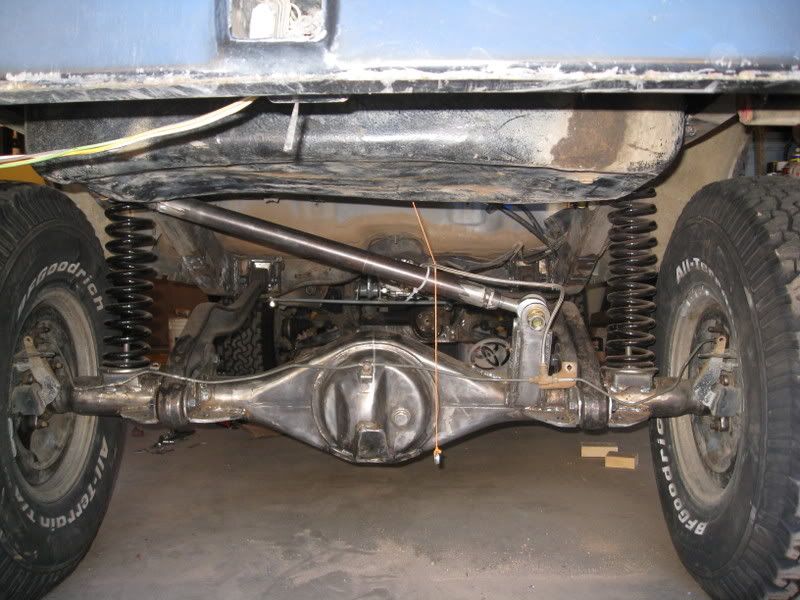
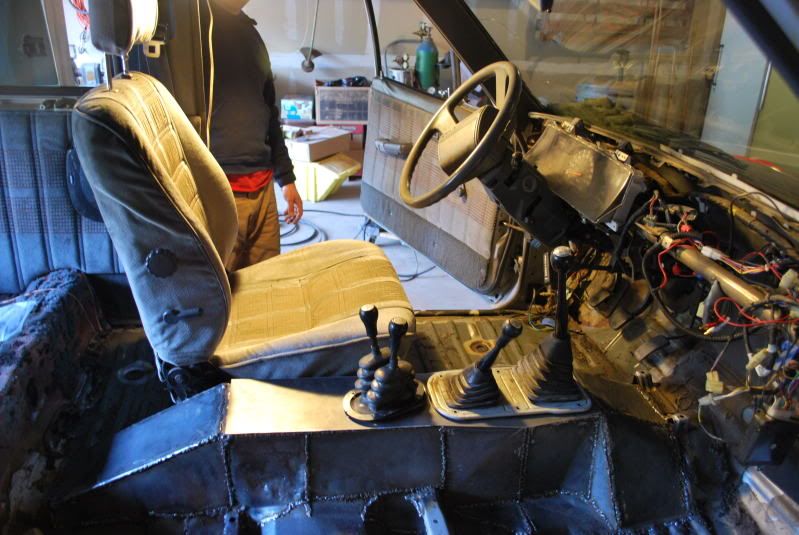
First off, here is a shot of the truck with no weight in it, besides the transmission. It'll have about 300 more lbs in the back, which, when added, makes the rear sit at a perfect height. Which is stellar!
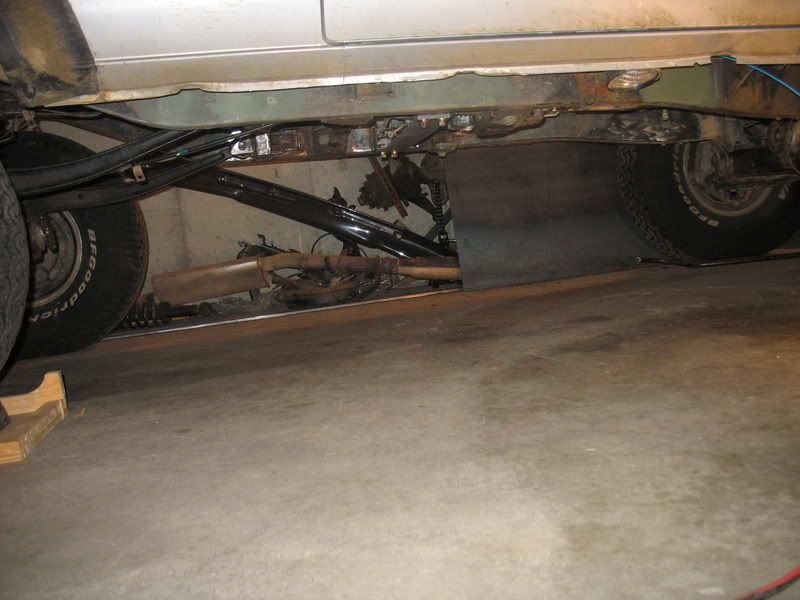
Here is the flat Belly:
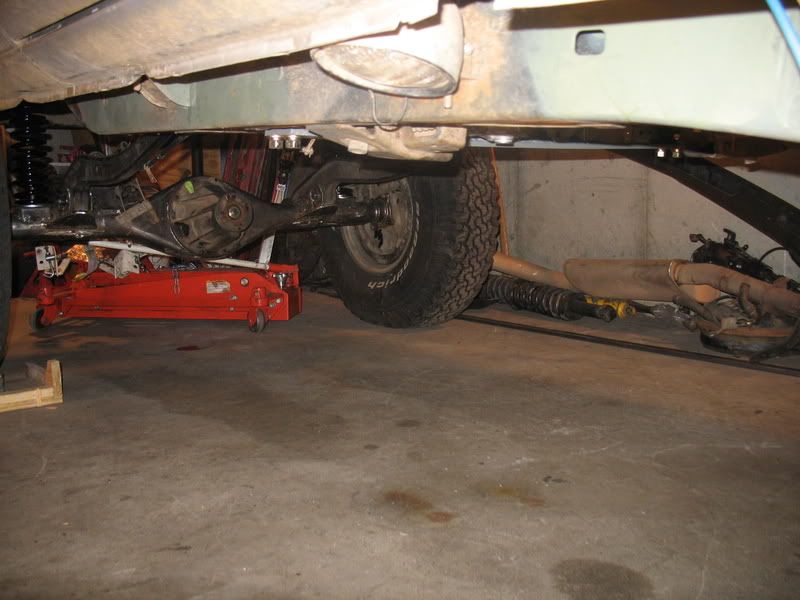
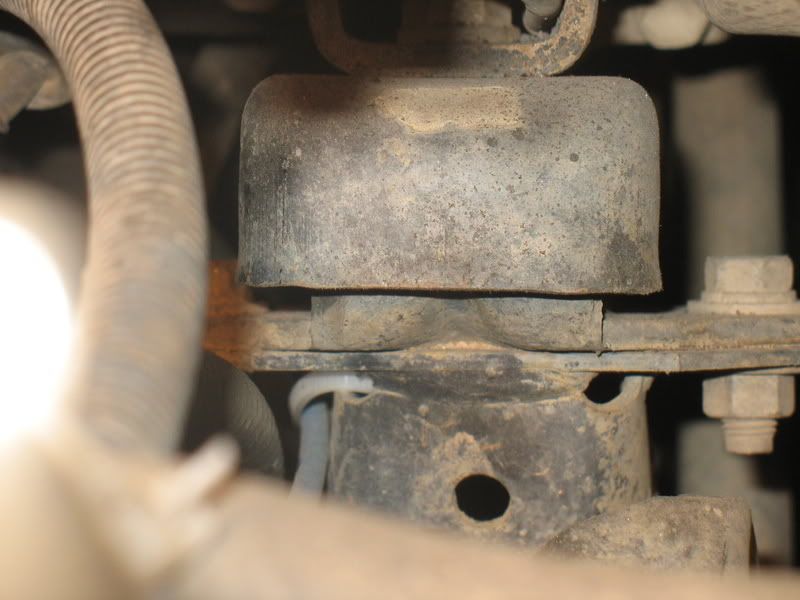
And, a shot of the motor mount, so you can see why I didn't feel that lifting the motor was needed:
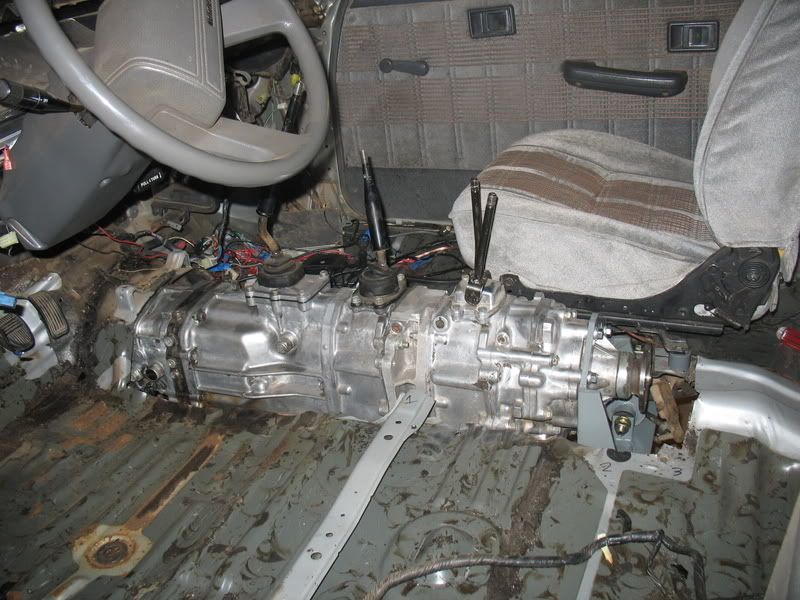
And a quick interior shot showing how it fits inside. The Pass seat fits! It will be close but, I can make it work...
First off, here is a shot of the truck with no weight in it, besides the transmission. It'll have about 300 more lbs in the back, which, when added, makes the rear sit at a perfect height. Which is stellar!
Here is the flat Belly:
And, a shot of the motor mount, so you can see why I didn't feel that lifting the motor was needed:
And a quick interior shot showing how it fits inside. The Pass seat fits! It will be close but, I can make it work...
Jul 27, 2009 | 09:42 AM
#17
Thread Starter
Contributing Member
Joined: Apr 2004
Posts: 5,464
Likes: 6
From: Arvada, Colorado
Got more work done.
Truck now moves under its own power.
Got the old crossmember torched out, and the new one put in:
Hole cut for the tank:
Tank in:
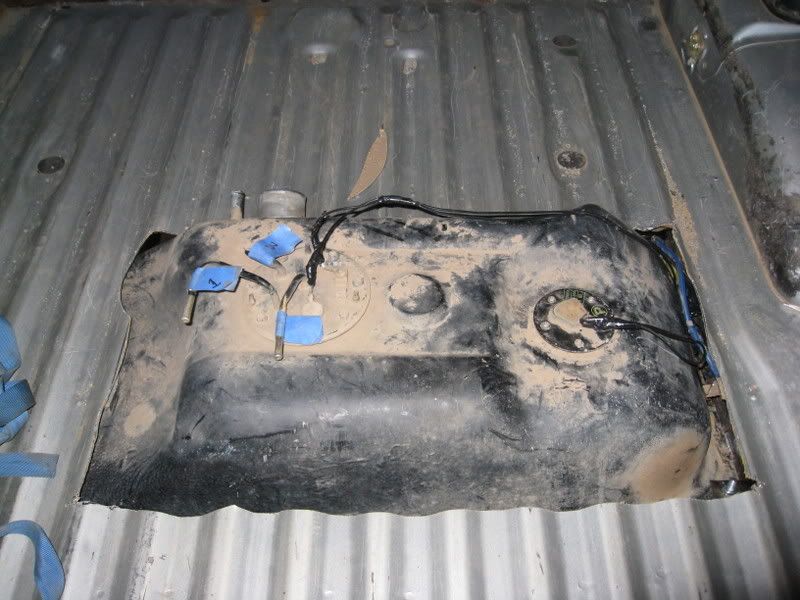
This was cool. Lots of clearance under the tank. I didn't think it would sit up that high. Very cool
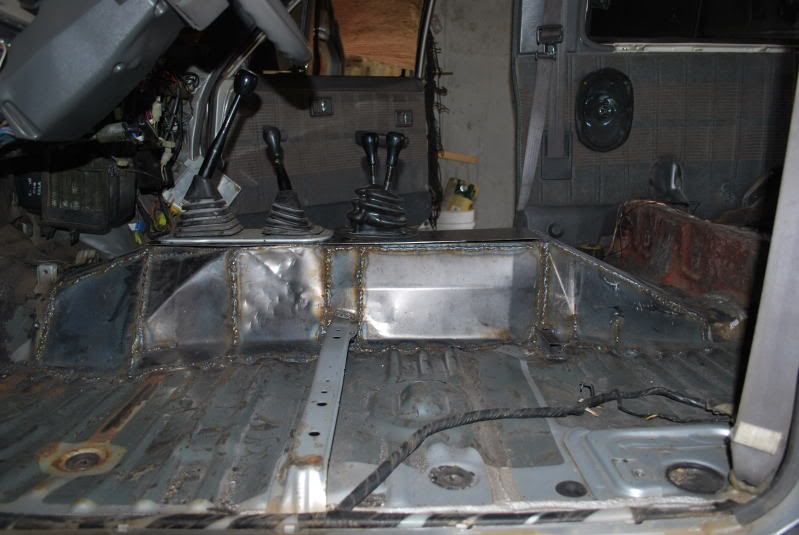
Lastly, got the horseshoe crossmember dealt with.

Started on the tranny tunnel. One cross piece is all, as it took a little adjustment to change from welding 1/4" to sheet metal. Burned a few holes before I got it dialed in. I will likely go to oxy/acetylene for the rest. Its much easier to keep from burning through with that.
Truck now moves under its own power.
Got the old crossmember torched out, and the new one put in:
Hole cut for the tank:
Tank in:
This was cool. Lots of clearance under the tank. I didn't think it would sit up that high. Very cool
Lastly, got the horseshoe crossmember dealt with.
Started on the tranny tunnel. One cross piece is all, as it took a little adjustment to change from welding 1/4" to sheet metal. Burned a few holes before I got it dialed in. I will likely go to oxy/acetylene for the rest. Its much easier to keep from burning through with that.
Jul 27, 2009 | 09:42 AM
#18
Thread Starter
Contributing Member
Joined: Apr 2004
Posts: 5,464
Likes: 6
From: Arvada, Colorado
This weekend I got my ARB reinstalled, plumbed, and working. Put in new diff studs, new seals, and got my breather nozzle put back in.
Also got the passenger side of the tranny tunnel done. I gave up on adjusting wire speed and found a setting that worked, and then ran a million tack welds. Doesn't look great, but its strong. Dr Frankenstein anyone?
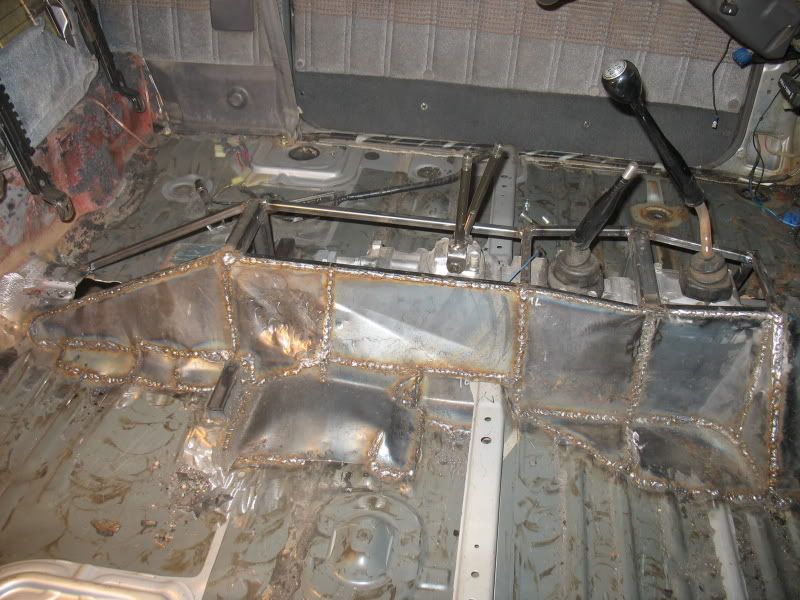
I was very happy with it. Even with just one side done, the floor has stiffened up almost to the point where it doesn't move. I can BARELY flex the driver side. Once I'm done with this, I will be covering everything with body/seam sealer so it looks a little better.
Also got the passenger side of the tranny tunnel done. I gave up on adjusting wire speed and found a setting that worked, and then ran a million tack welds. Doesn't look great, but its strong. Dr Frankenstein anyone?
I was very happy with it. Even with just one side done, the floor has stiffened up almost to the point where it doesn't move. I can BARELY flex the driver side. Once I'm done with this, I will be covering everything with body/seam sealer so it looks a little better.
Jul 27, 2009 | 09:42 AM
#19
Thread Starter
Contributing Member
Joined: Apr 2004
Posts: 5,464
Likes: 6
From: Arvada, Colorado
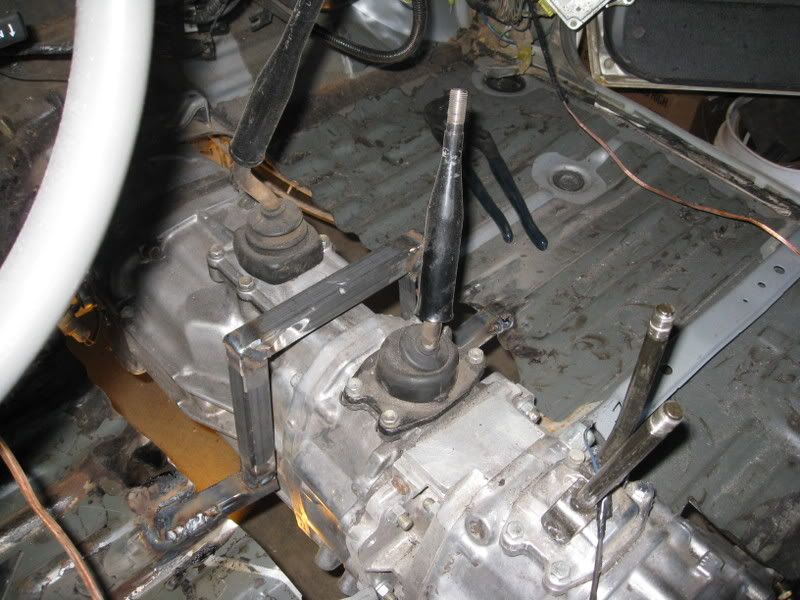
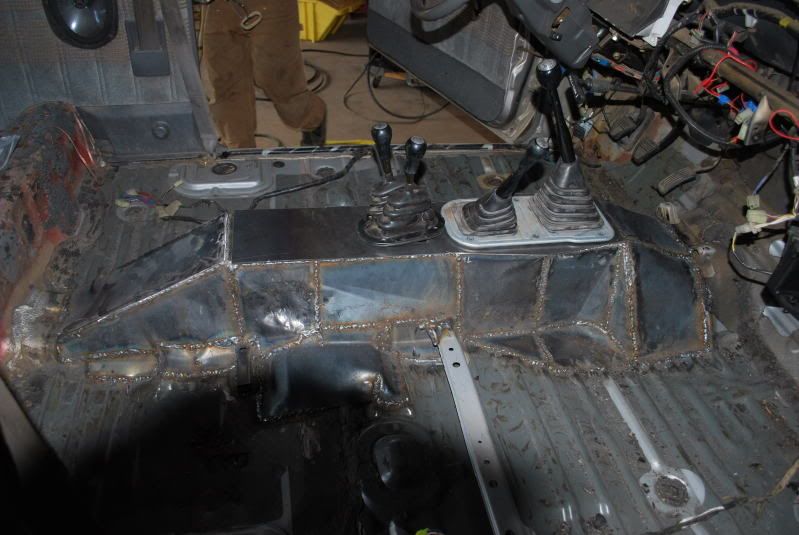
Got the tunnel done save the screws to hold the top plate on. Have to buy those and the weather strip first.
Seats fit in the factory locations, but raised 1" in the rear via 4crawler spacers and a support I welded in.
Also, the shift boots were just set on there for the pics. They too need to be bolted down.
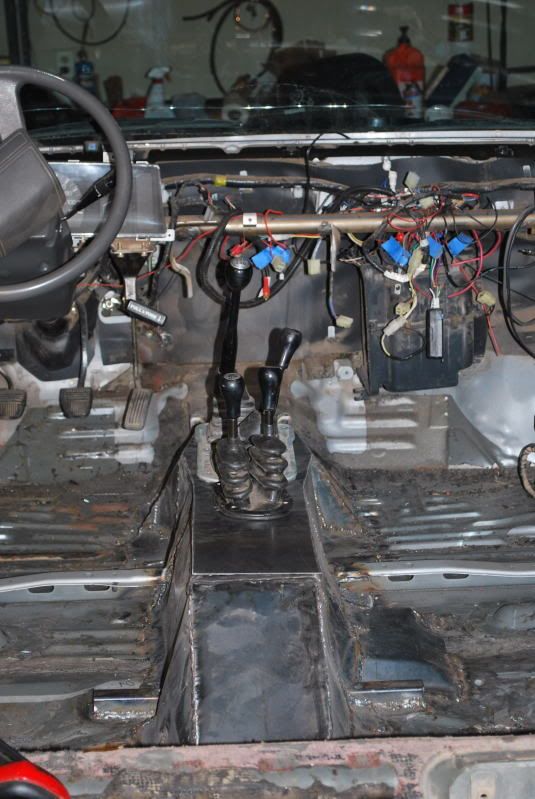
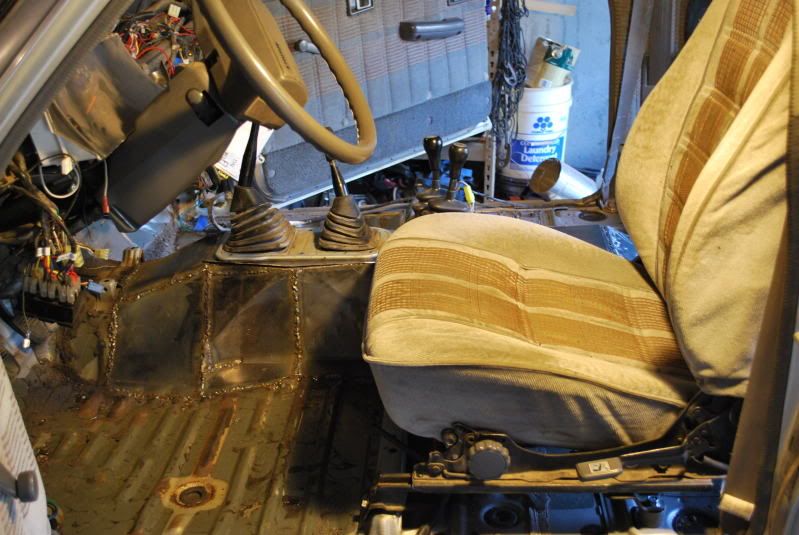
Seats fit in the factory locations, but raised 1" in the rear via 4crawler spacers and a support I welded in.
Also, the shift boots were just set on there for the pics. They too need to be bolted down.
Jul 27, 2009 | 09:43 AM
#20
Thread Starter
Contributing Member
Joined: Apr 2004
Posts: 5,464
Likes: 6
From: Arvada, Colorado
A somewhat big update:
After the last update, I was somewhat burned out, so I didn't do too much for about 2 weeks. I did get everything Seam Sealed, primed, and undercoated.
From there I did the interior. I will get some pictures of that just as soon as I get the radio back in. I put down window flashing, which I found that 1 18 dollar roll covered my passenger area with two layers everywhere except the tranny tunnel. I didn't do two layers on the tranny tunnel because of clearance issues with the seats.
I then redid a TON of wiring, which had been somewhat of a cluster before this. All wires are now soldered, and loomed, and attached to the factory harness.
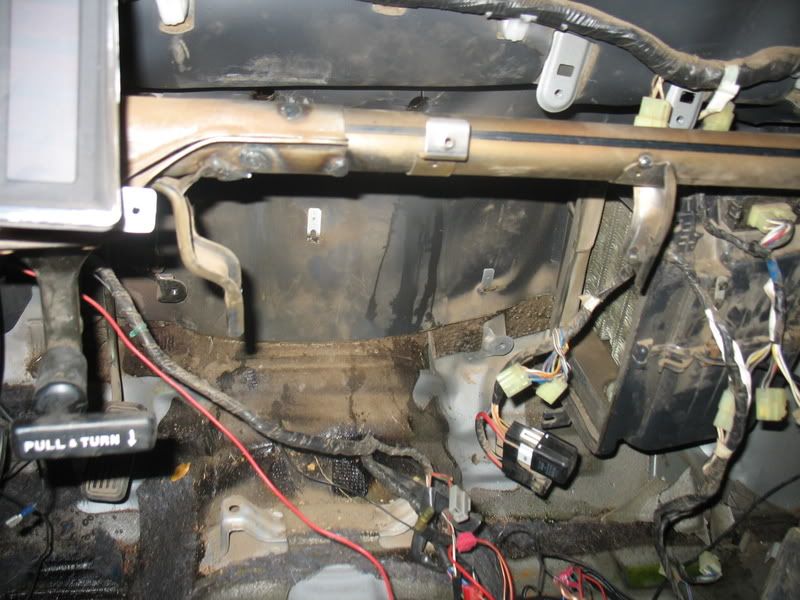
After that, I cleaned about 100 lbs of dust out of my heat/cooling tubing, and reassembled my dash completely with the exception of the radio (a bit more wiring to do for the CB and Sirius).
After the last update, I was somewhat burned out, so I didn't do too much for about 2 weeks. I did get everything Seam Sealed, primed, and undercoated.
From there I did the interior. I will get some pictures of that just as soon as I get the radio back in. I put down window flashing, which I found that 1 18 dollar roll covered my passenger area with two layers everywhere except the tranny tunnel. I didn't do two layers on the tranny tunnel because of clearance issues with the seats.
I then redid a TON of wiring, which had been somewhat of a cluster before this. All wires are now soldered, and loomed, and attached to the factory harness.
After that, I cleaned about 100 lbs of dust out of my heat/cooling tubing, and reassembled my dash completely with the exception of the radio (a bit more wiring to do for the CB and Sirius).


