

 Feb 10, 2016, 09:29 AM
Last edit by: IB Advertising
See related guides and technical advice from our community experts:
Browse all: Steering & Suspension Guides
- Toyota 4Runner 1984-1995 How to Replace Ball Joints
Step by step instructions for do-it-yourself repairs
Browse all: Steering & Suspension Guides

CV, Ball joint, TRE, replacement write up with PICTURES!!
Oct 31, 2008 | 09:40 PM
#1
Thread Starter
Registered User

Joined: May 2008
Posts: 3,277
Likes: 23
From: way way nor cal
CV, Ball joint, TRE, replacement write up with PICTURES!!
I started in on this IFS repair this morning. This is the first time I have done one and I thought I would do a complete write up from start to finish for anyone who has not done one. Although I was very careful to follow the FSM manual and help from a few other Yotatecher's, I may have missed a few little tricks to make things easier as well as not getting some of the terminology correct. For that I apologize. I HOPE I didn't miss anything else.
I ordered the TRE's and ball joints from ebay. The seller is arm_can.
The CV's I ordered from Kragen. I live in a remote area where there is no Pep Boy's, Autozone, Parts Plus etc. I bought new CV's. The remans were $89.00 with a limited lifetime warranty and the new CV's (Cardone) were $99.00 with a lifetime warranty. I can live with the $20 difference. (I am doing both sides)
I did not do the Idler arm and pitman arm. I did those a month ago. They are pretty new and didn't need to be replaced. The FSM and a few mechanics I know recommend doing the Idler arm and Pitman arm while doing the CV's, TRE's. BJ's etc.
Comments and criticism are greatly appreciated!
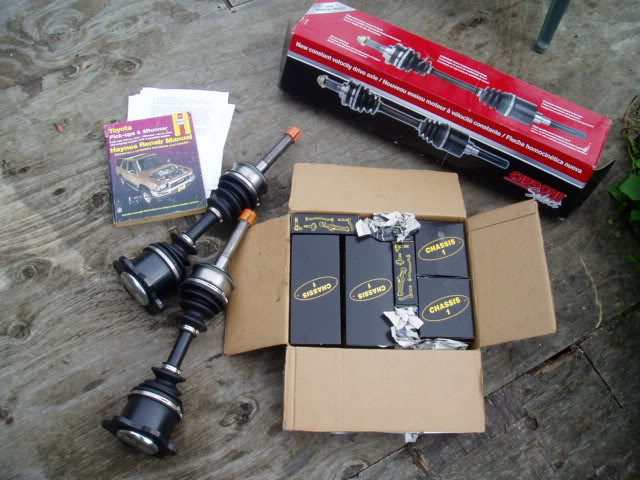
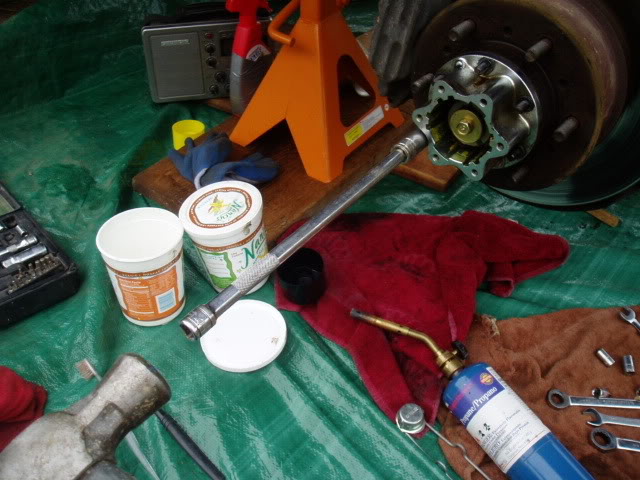
The goods - New CV's, tie rod ends, upper and lower ball joints and adjuster sleeves. Total cost- $406.00.
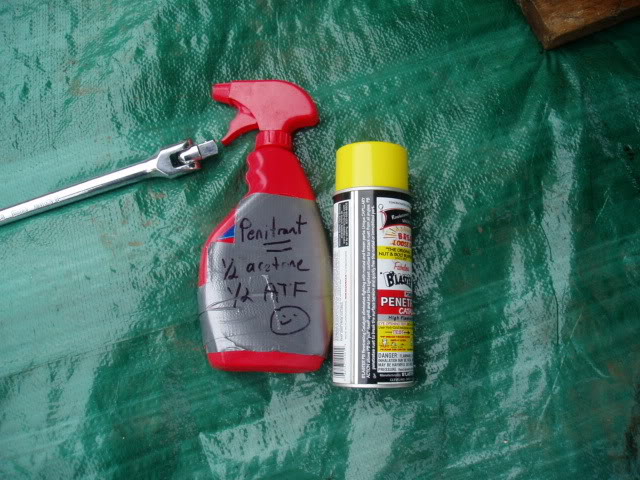
I sprayed everything down with PB blaster as well as a mixture of Acetone and ATF-
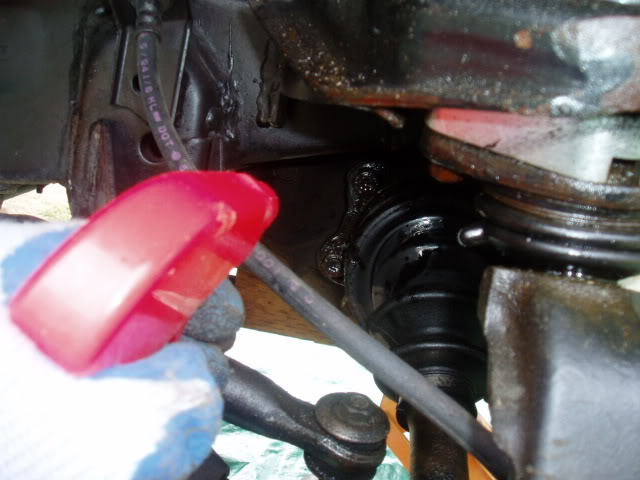
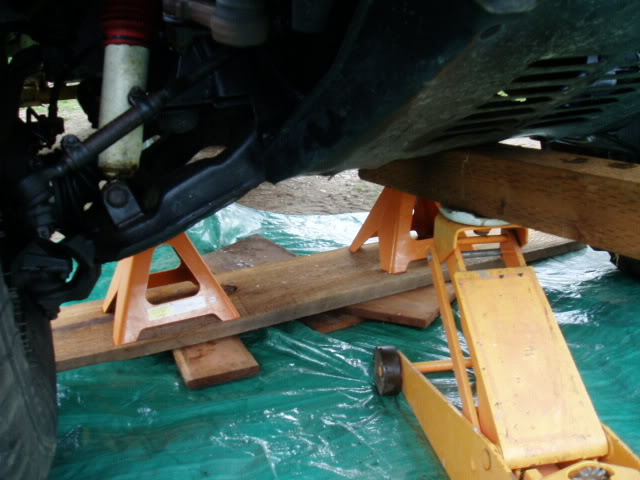
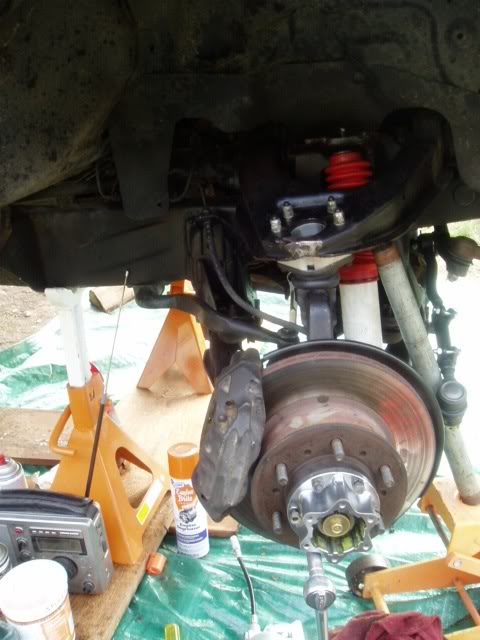
I sprayed all the bolts 3 days prior to starting in and then sprayed them down a couple of hours before I started. Next, redneck jackstand on my un level driveway and the tires coming off..
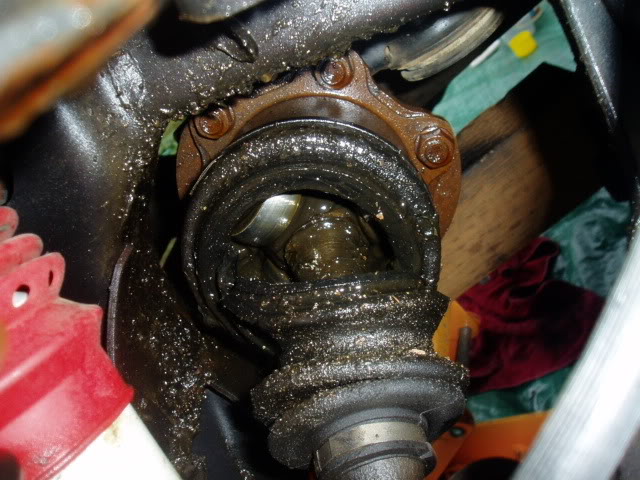
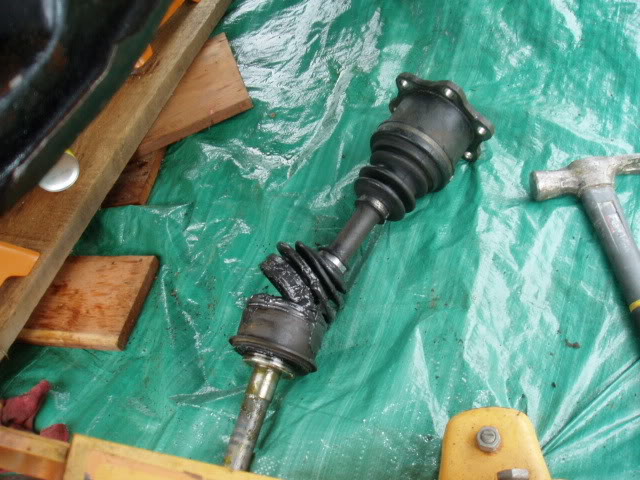
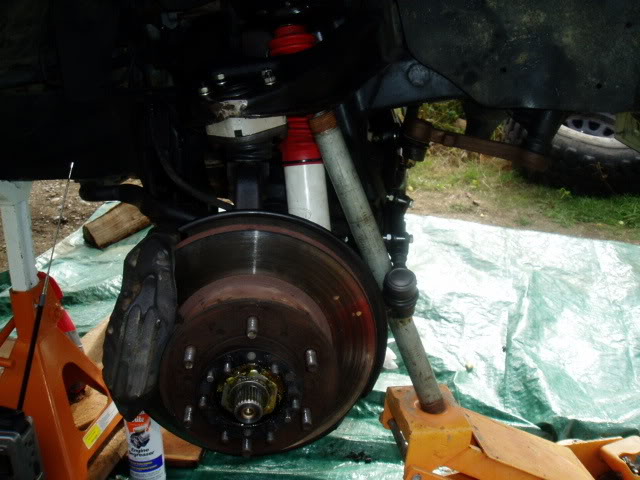
After the tires are off here is a good look at the damaged CV-
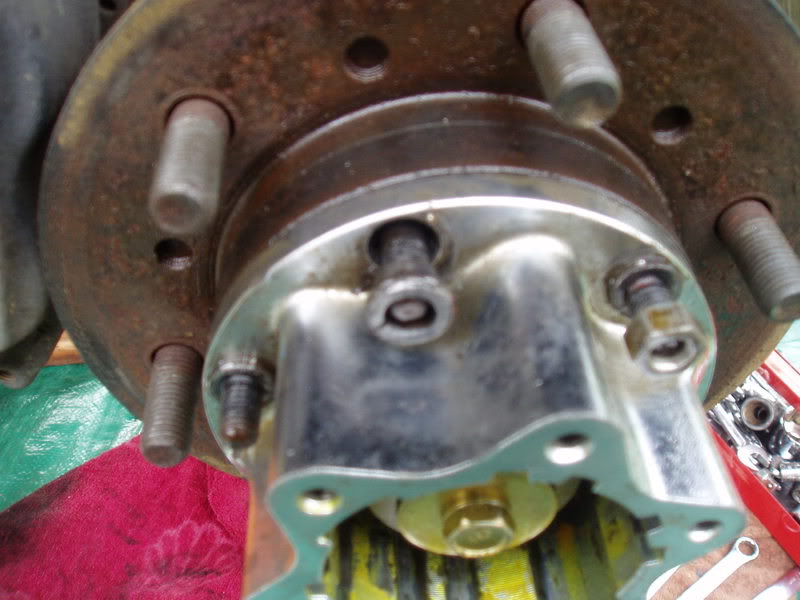
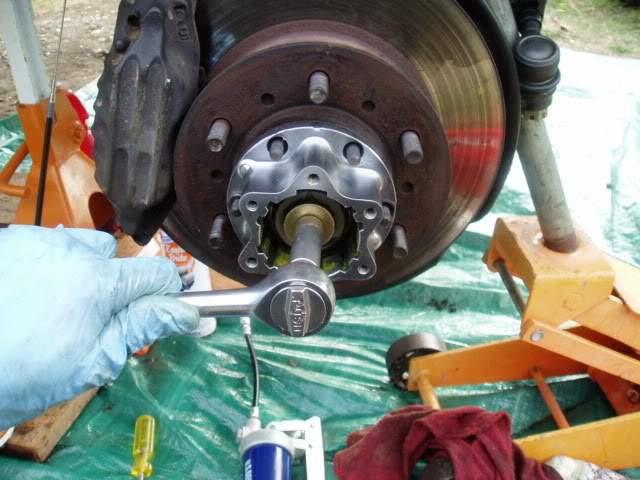
Now I start in on the Hub-
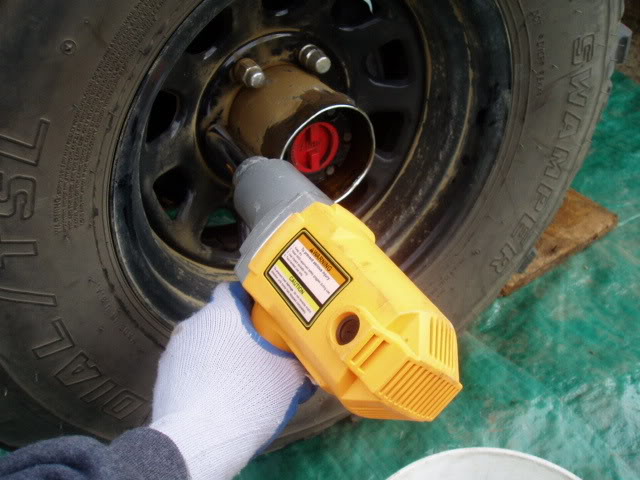
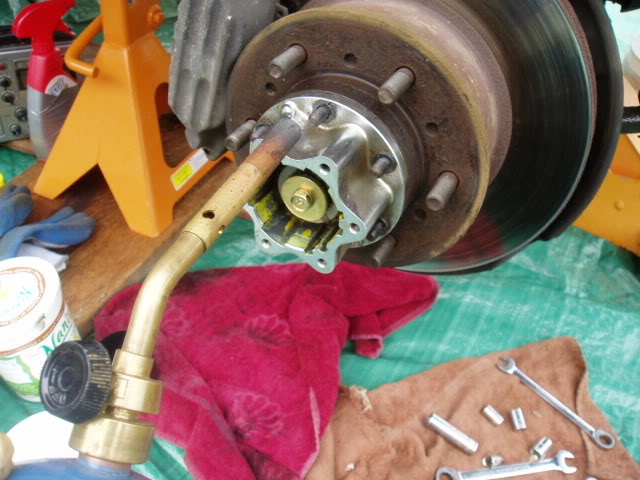
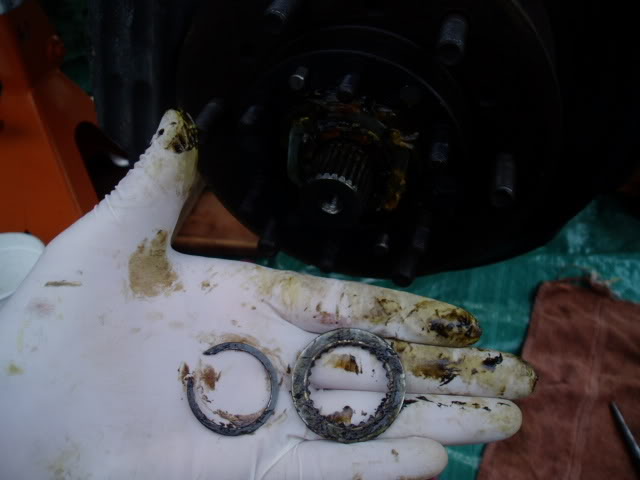
With the hub off I heat up EACH of the cone shaped washers with a propane torch. The FSM recommended using a tapered punch. I didn't have one so I used a torch and a 15 mm deep socket. I put the 15mm socket over the washer and hit it with a hammer about 30 times until it came loose. The only real trouble I had with this job was these washers. I finally managed to get them off using this method.
Off!! damn!
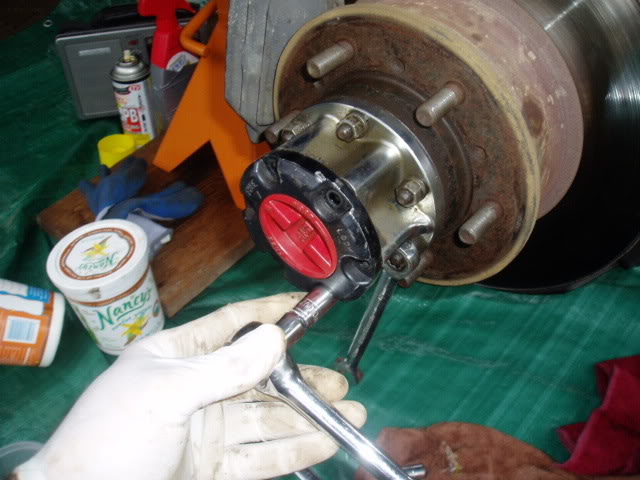
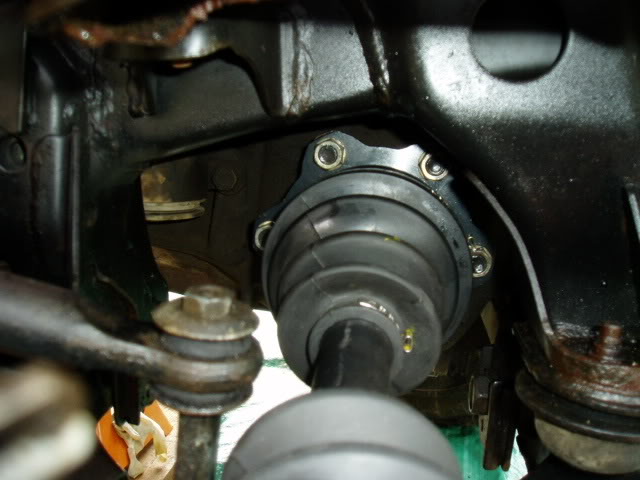
Next the bolts from the CV to the differential. The 17mm open ended wrench on the outside of the differential I used to stop the CV from turning. I had to do it this way because the only helper I had was my cat and his paw wouldn't reach the break pedal. I did this to freeze the differential from turning so I could break free the bolt.
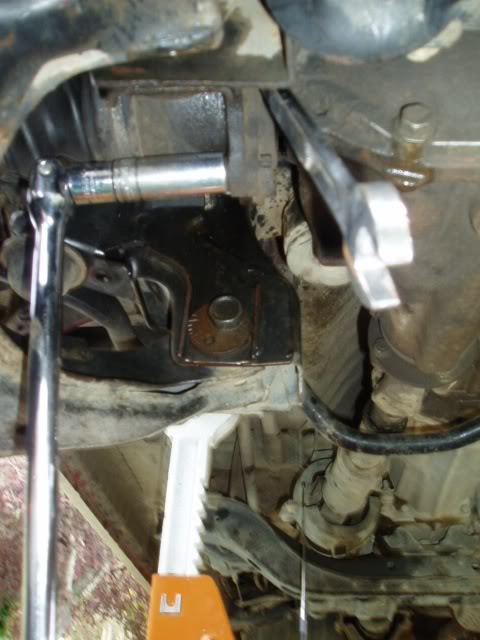
after using this method on all 6 bolts the CV was free from the differential.
Back to work-
at this point I removed the CV nut washer and then I remove the snap ring and washer allowin for the CV to slide out

With these off the CV is ready to come out. I had to take off shock to get it to squeeze by the shock lower mount and the stabilizer bar. I also cut the metal band and peeled back the rubber boot to make it slide by.

after this I put my drivers side tire back on to stabilize the truck so it wouldn't fall on me then I put my 2 ton jack under the Lower Control Arm and jacked it up to get the CV to line up enough so it would come out-
This method worked perfectly and the old CV is out!
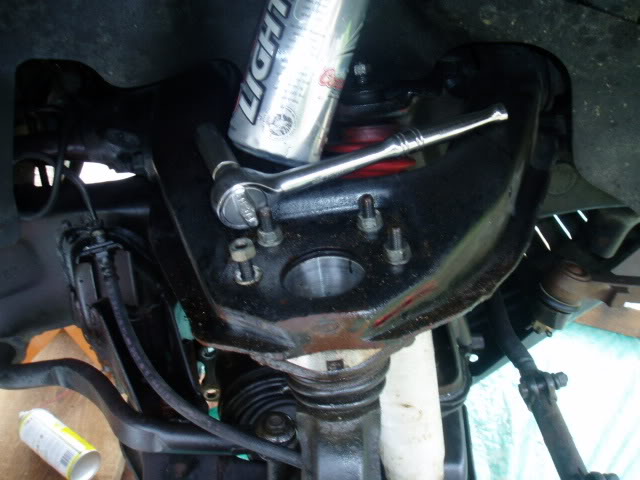
Next I removed the bolts and nuts from the upper ball joint and aftermarket ball joint spacer
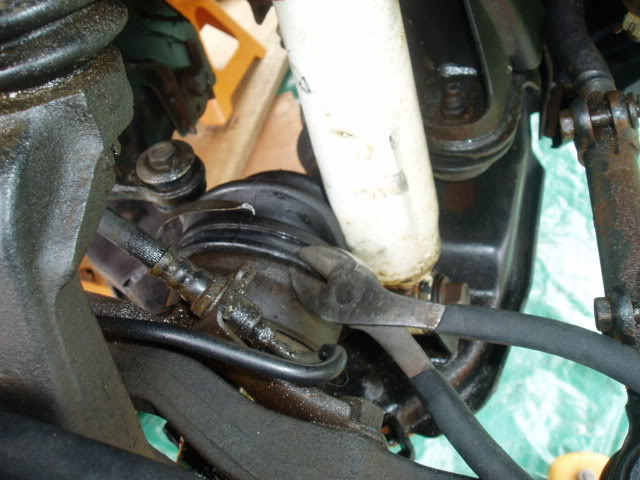
At this point I had to take off the brake caliper and knuckle arm
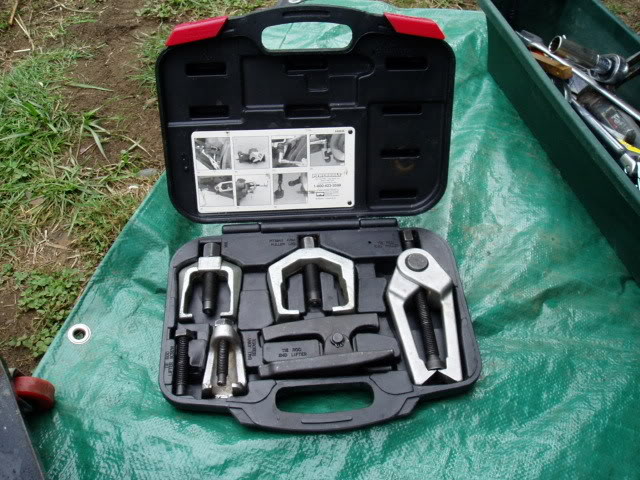
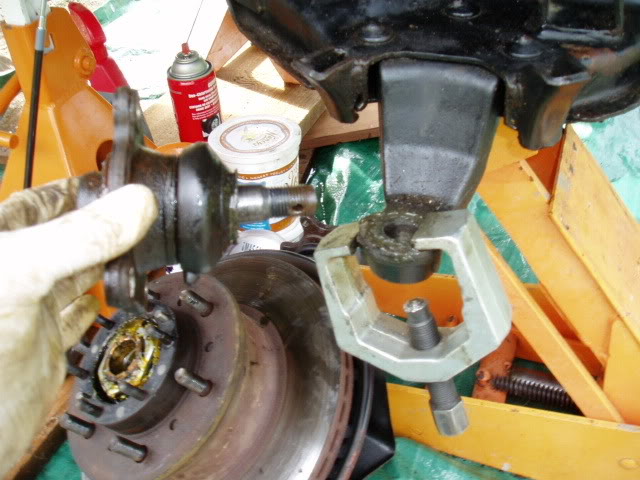
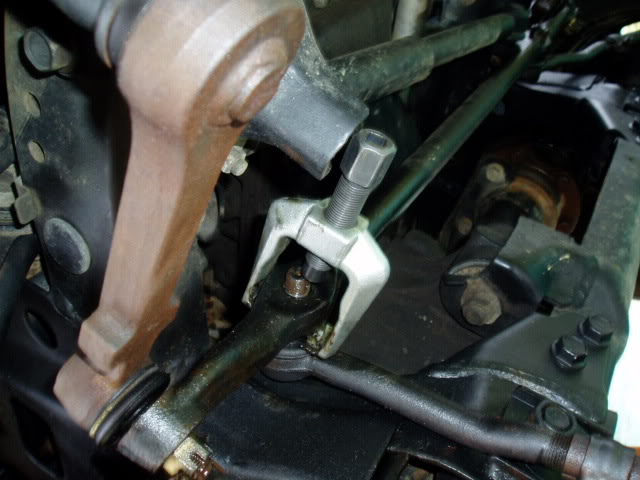
and secure the caliper up and out of the way (with fencewire). I had to do this because the break line will not allow enough room for the ball joint puller to do its thing. Once everything was out of the way I put the ball joint puller on the upper ball joint and set it free. I rented the "front end kit" ball joint puller, idler arm puller etc. from Kragen- $85.00 deposit, $6 a day.
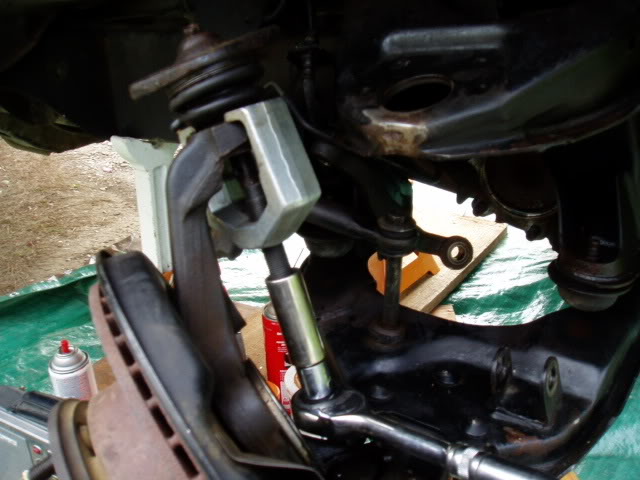
using the same method with the ball joint puller I set the lower ball joint free.
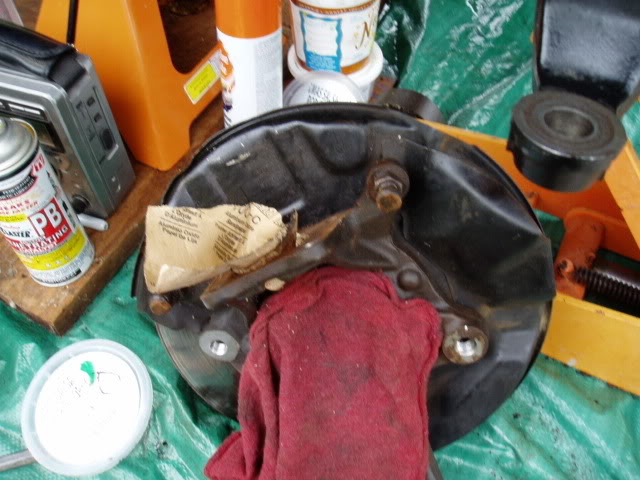
Now I tapped on the lower ball joint to separate the axel hub and disc from the lower ball joint. This takes a chisel in the little slot with a few light taps-
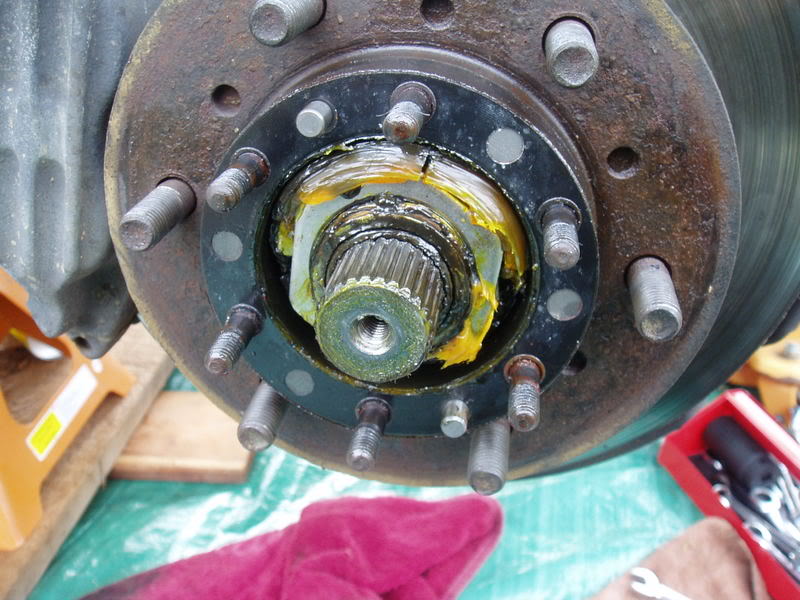
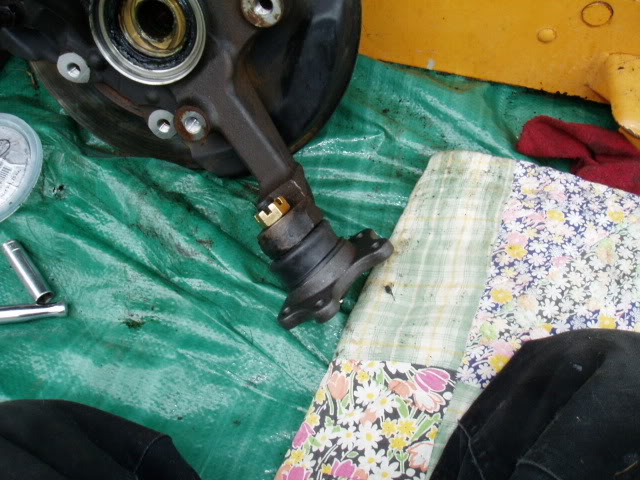
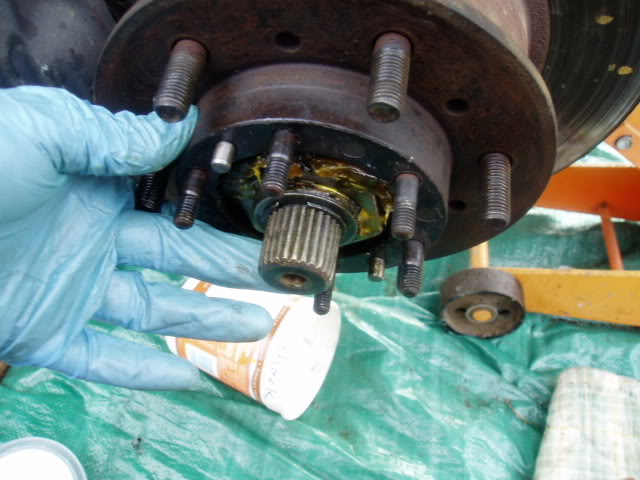
Now that the axel hub and disk is separate I clean everything and prepare for the NEW upper and lower ball joints to go on (notice I cover the axel CV hub so I don't get any dirt or grit in there)
Lower ball joint locktited as well as the upper ball joint. Both are ready to go on.
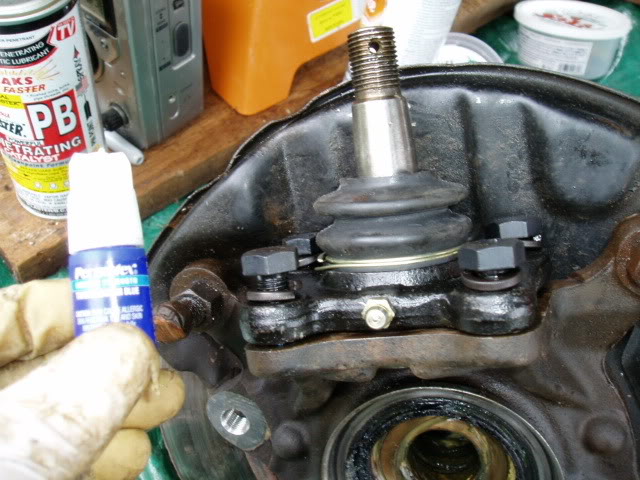
The upper ball joint and aftermarket spacer were kinda tricky. I used a pipe and my floor jack to raise the upper suspension arm enough to get the upper ball joint and aftermarket spacer to slide by and fit. THIS WAS VERY SKETCHY! I would not recommend this technique! If the pipe slipped off the jack or the upper suspension arm while my hand was adjusting the ball joint spacer it would totally crush my hand. I didn't know how else to do this. It worked but it was dangerous.
After both the upper and lower ball joints are on and torqued to spec. I put the CV on. The CV went in without any problem. Once the CV was in I put back on the snap ring and washer-

Next I put the shock back on- Then the Hub!
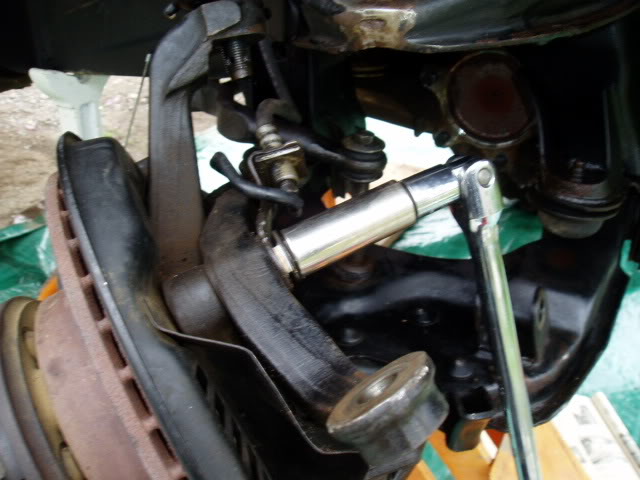
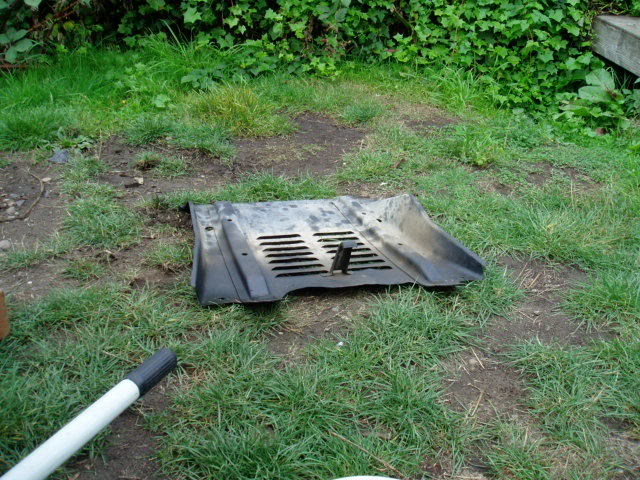
Time for the tie rod ends!!! I used the TRE puller and pulled the two tie rod ends ( I had to remove the front rock guard in order to get enough clearance for the wrench)
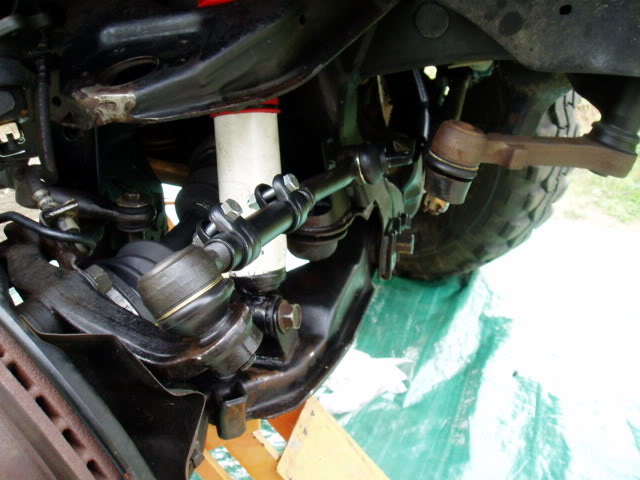
I then assembled the new tie rod end and used the old tie rod end as a reference for how much thread should be showing. Once this was done I installed the new tie rod end-
Almost done!!
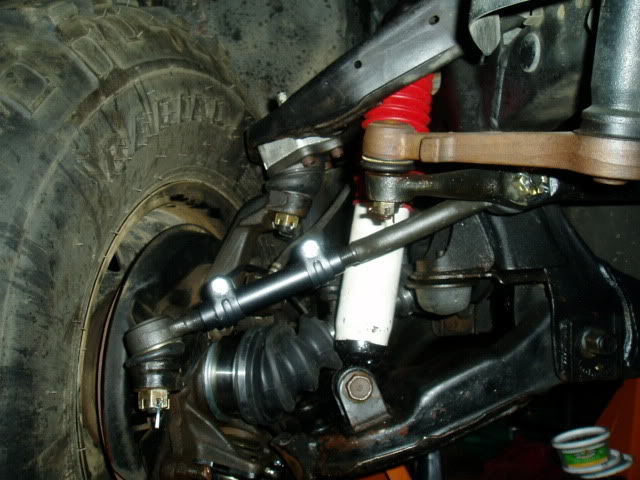
I greased all the joints and inspected everything to make sure I didn't miss anything.
Everything in and tire back on-
Total time involved for one side- 6 hrs. Most could do it in far less time. I am kinda slow
The only thing at this point is to do the exact same thing to the other side and take the rig into town to get an alignment.

I ordered the TRE's and ball joints from ebay. The seller is arm_can.
The CV's I ordered from Kragen. I live in a remote area where there is no Pep Boy's, Autozone, Parts Plus etc. I bought new CV's. The remans were $89.00 with a limited lifetime warranty and the new CV's (Cardone) were $99.00 with a lifetime warranty. I can live with the $20 difference. (I am doing both sides)
I did not do the Idler arm and pitman arm. I did those a month ago. They are pretty new and didn't need to be replaced. The FSM and a few mechanics I know recommend doing the Idler arm and Pitman arm while doing the CV's, TRE's. BJ's etc.
Comments and criticism are greatly appreciated!
The goods - New CV's, tie rod ends, upper and lower ball joints and adjuster sleeves. Total cost- $406.00.
I sprayed everything down with PB blaster as well as a mixture of Acetone and ATF-
I sprayed all the bolts 3 days prior to starting in and then sprayed them down a couple of hours before I started. Next, redneck jackstand on my un level driveway and the tires coming off..
After the tires are off here is a good look at the damaged CV-
Now I start in on the Hub-
With the hub off I heat up EACH of the cone shaped washers with a propane torch. The FSM recommended using a tapered punch. I didn't have one so I used a torch and a 15 mm deep socket. I put the 15mm socket over the washer and hit it with a hammer about 30 times until it came loose. The only real trouble I had with this job was these washers. I finally managed to get them off using this method.
Off!! damn!
Next the bolts from the CV to the differential. The 17mm open ended wrench on the outside of the differential I used to stop the CV from turning. I had to do it this way because the only helper I had was my cat and his paw wouldn't reach the break pedal. I did this to freeze the differential from turning so I could break free the bolt.
after using this method on all 6 bolts the CV was free from the differential.
Back to work-
at this point I removed the CV nut washer and then I remove the snap ring and washer allowin for the CV to slide out
With these off the CV is ready to come out. I had to take off shock to get it to squeeze by the shock lower mount and the stabilizer bar. I also cut the metal band and peeled back the rubber boot to make it slide by.
after this I put my drivers side tire back on to stabilize the truck so it wouldn't fall on me then I put my 2 ton jack under the Lower Control Arm and jacked it up to get the CV to line up enough so it would come out-
This method worked perfectly and the old CV is out!
Next I removed the bolts and nuts from the upper ball joint and aftermarket ball joint spacer
At this point I had to take off the brake caliper and knuckle arm
and secure the caliper up and out of the way (with fencewire). I had to do this because the break line will not allow enough room for the ball joint puller to do its thing. Once everything was out of the way I put the ball joint puller on the upper ball joint and set it free. I rented the "front end kit" ball joint puller, idler arm puller etc. from Kragen- $85.00 deposit, $6 a day.
using the same method with the ball joint puller I set the lower ball joint free.
Now I tapped on the lower ball joint to separate the axel hub and disc from the lower ball joint. This takes a chisel in the little slot with a few light taps-
Now that the axel hub and disk is separate I clean everything and prepare for the NEW upper and lower ball joints to go on (notice I cover the axel CV hub so I don't get any dirt or grit in there)
Lower ball joint locktited as well as the upper ball joint. Both are ready to go on.
The upper ball joint and aftermarket spacer were kinda tricky. I used a pipe and my floor jack to raise the upper suspension arm enough to get the upper ball joint and aftermarket spacer to slide by and fit. THIS WAS VERY SKETCHY! I would not recommend this technique! If the pipe slipped off the jack or the upper suspension arm while my hand was adjusting the ball joint spacer it would totally crush my hand. I didn't know how else to do this. It worked but it was dangerous.
After both the upper and lower ball joints are on and torqued to spec. I put the CV on. The CV went in without any problem. Once the CV was in I put back on the snap ring and washer-
Next I put the shock back on- Then the Hub!
Time for the tie rod ends!!! I used the TRE puller and pulled the two tie rod ends ( I had to remove the front rock guard in order to get enough clearance for the wrench)
I then assembled the new tie rod end and used the old tie rod end as a reference for how much thread should be showing. Once this was done I installed the new tie rod end-
Almost done!!
I greased all the joints and inspected everything to make sure I didn't miss anything.
Everything in and tire back on-
Total time involved for one side- 6 hrs. Most could do it in far less time. I am kinda slow
The only thing at this point is to do the exact same thing to the other side and take the rig into town to get an alignment.
Last edited by toyospearo; Jan 24, 2019 at 03:36 PM.
Nov 1, 2008 | 05:31 AM
#4
Registered User
Joined: Nov 2007
Posts: 383
Likes: 0
From: north ridgeville ohio
great job! one thing.. oops two things. first turn the bolts around on the cv to diff there is a right up about it ! makes the next time sooo much nicer
2) do the alignment yourself. i just did mine trust me on this if you can do what you just did you can do the alignment! sdori has an awsome write up on it i did mine and ive never had a car drive so well !
2) do the alignment yourself. i just did mine trust me on this if you can do what you just did you can do the alignment! sdori has an awsome write up on it i did mine and ive never had a car drive so well !
Nov 1, 2008 | 09:55 AM
#5
Contributing Member
Joined: Feb 2008
Posts: 12,248
Likes: 33
From: Lake City, Fl

Very good write up! I as well am going to reffer back to this; book-marked!
Nice work man!


 no really, awesome write up. very informative and thorough.
Trending Topics
Nov 1, 2008 | 09:30 PM
#8
Registered User
Joined: Mar 2008
Posts: 69
Likes: 0
From: Saratoga, California
hey toyo,
on the hubs, did you try tapping the outer edge with a small hammer to get the cone washers out?
OH! and i just found something out. if you have BJ spacers and you're having a hard time getting the upper ball joint on or off the seat, try undoing the anti-sway bar. I just spent 20 frigging minutes figuring that one out.
Last edited by coolthew; Nov 1, 2008 at 09:36 PM.
Nov 1, 2008 | 09:52 PM
#9
Thread Starter
Registered User
Joined: May 2008
Posts: 3,277
Likes: 23
From: way way nor cal
hey toyo,
on the hubs, did you try tapping the outer edge with a small hammer to get the cone washers out?
OH! and i just found something out. if you have BJ spacers and you're having a hard time getting the upper ball joint on or off the seat, try undoing the anti-sway bar. I just spent 20 frigging minutes figuring that one out.
on the hubs, did you try tapping the outer edge with a small hammer to get the cone washers out?
OH! and i just found something out. if you have BJ spacers and you're having a hard time getting the upper ball joint on or off the seat, try undoing the anti-sway bar. I just spent 20 frigging minutes figuring that one out.
If I have to take them off again for whatever reason I will do that. Those little washer are a PITA! Also, that pipe method I used on the spacers I don't think I would do that again. That was kinda stupid.
D
Last edited by toyospearo; Nov 2, 2008 at 09:20 AM.
Nov 1, 2008 | 11:04 PM
#11
Thread Starter
Registered User
Joined: May 2008
Posts: 3,277
Likes: 23
From: way way nor cal
Your write up https://www.yotatech.com/forums/f116...v-boot-156096/ helped me quite a bit!
thanks for that
D
Nov 2, 2008 | 02:46 PM
#13
Thread Starter
Registered User
Joined: May 2008
Posts: 3,277
Likes: 23
From: way way nor cal
Oh, and I did end up doing the other side in the rain. I built a make shift redneck tent out of a tarp that worked for a while until the wind blew it over the hillside.
Last edited by toyospearo; Nov 2, 2008 at 02:48 PM.
Jan 9, 2009 | 04:21 PM
#15
Registered User
Joined: Oct 2007
Posts: 5,377
Likes: 5
toyospearo: I did a driveway alignment writeup (https://www.yotatech.com/forums/f116...ite-up-163432/). It would be a good idea to give adjust the toe-in precisely as even driving to an alignment shop with too much toe will result in a substantial amount of tire wear. Luckily this isn't too hard to do (especially with new parts!). Perhaps you could include this link in your write up.
Mar 17, 2009 | 11:12 AM
#17
Registered User
Joined: Jan 2008
Posts: 11,338
Likes: 120
From: Austin, Texas
Oh, toyo..What I noticed, And refrence for anyone else, To get that upper arm in a good spot and have the ability to put the spacer in, This is the best method, Courtesy SDORI.

Thats the droop stop on the upper a arm, when you first jack the truck up that should go in...
Just sayin..

Thats the droop stop on the upper a arm, when you first jack the truck up that should go in...
Just sayin..
Mar 17, 2009 | 02:21 PM
#19
Contributing Member
Joined: Feb 2008
Posts: 12,248
Likes: 33
From: Lake City, Fl
haha, look at my old post and me saying how I was going to be doing this soon too 
ah memories...
although on a side note, I didn't have to remove my caliper brackets to get my upper ball-joints out
ah memories...
although on a side note, I didn't have to remove my caliper brackets to get my upper ball-joints out
Last edited by iamsuperbleeder; Mar 17, 2009 at 02:22 PM.


