
cv axel not coming off
 Mar 17, 2009 | 09:13 AM
#1
Thread Starter
Registered User
Joined: Nov 2005
Posts: 8
Likes: 0
From: Denver, CO
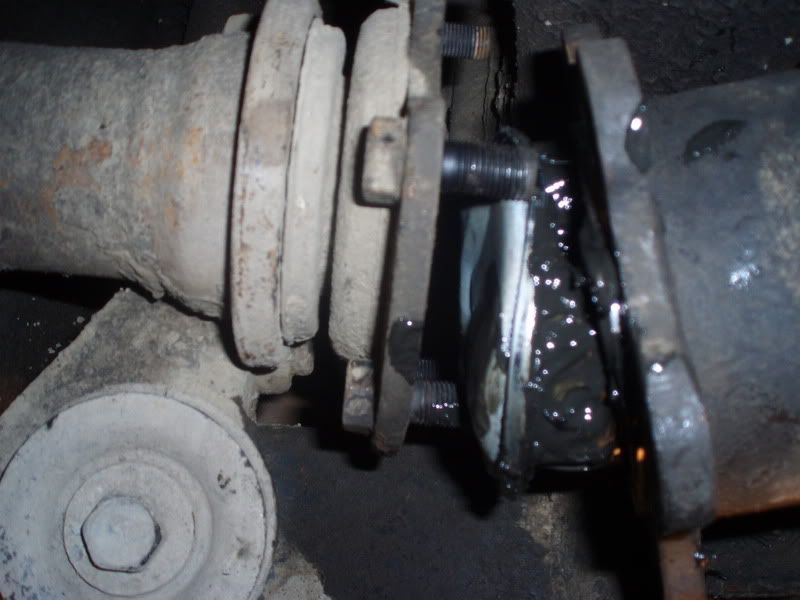
`94 4Runner. I'm having troubles removing the cv form the 6 drive axel bolts. Only need another .5 cm and it's free. Any tricks? 
Freewheel hub body is off. ?Does the Large hub nut need to removed as well as other stuff? Suspension linkage removel? Pry bar and buddy?
Freewheel hub body is off. ?Does the Large hub nut need to removed as well as other stuff? Suspension linkage removel? Pry bar and buddy?
Mar 17, 2009 | 09:55 AM
#2
Registered User
Joined: Jan 2008
Posts: 11,338
Likes: 120
From: Austin, Texas
I suppose you may have missed the snap ring..?
http://personal.utulsa.edu/~nathan-b...18frontdri.pdf

http://personal.utulsa.edu/~nathan-b...18frontdri.pdf
Mar 17, 2009 | 10:50 AM
#3
Registered User
Joined: Oct 2007
Posts: 5,377
Likes: 5
Here you go:
From https://www.yotatech.com/newreply.ph...ly&p=50938697:
From https://www.yotatech.com/newreply.ph...ly&p=50938697:
Well my inner CV boot was spitting grease and it was getting worse after every time I locked the hubs. I replaced the boots with Beck-Arnley replacement boots. Toyota boots were hideously expensive. The whole job took about 4 hrs with breaks rain, and a tire rotation etc.
Removing the CV axle
Replacing the CV boot
Assembly is reverse removal.
Link for more IFS maintenance. This writeup also has pictures of the stuff I am describing.
Removing the CV axle
- Park truck on flat level ground, set parking brake well and chock the wheels either side of the axle your working on.
- Unbolt the CV- diff flange. I had already removed the studs when the diff was on my driveway pre-install.
- Remove tire and the hub. To do this, remove the front hub cover (dial in centre) undo the brass- coloured bolt/washer in the centre of the axle. Cone washers are removed by beating on the hub directly above the cone washer. Its a pain.
- I disconnected my swaybar as I have quick disconnects, but not sure if its necessary to be honest, but its easier to unbolt the opposite side now, then later.
- Remove the C-clip and splined washer beneath the hub
- Now, go around to the back of the truck and jack up the wheel diagonally opposed to the CV you're working on
- Go back to the front and place jack under the lower ball joint. You're trying to compress the suspension so that the outer CV doesn't catch on the lower A-arm.
- Undo the bolt connecting the shock to the LCA (lower control arm)
- CV should slide out. Watch that the swaybar endlink doesn't tear the outer CV boot.
Replacing the CV boot
- Break the clamps (metal bands) holding the boot to the axle
- Slit the boot and remove, with as much of the grease as possible. DO NOT pull the tripod out of the socket yet.
- Wipe out the old grease with paper towel, took me about a quarter of a roll. DO NOT use parts cleaner, the residue is incompatible with the grease and boot. Just get as much as possible with paper towels.
- Match mark the tripod joint to the inner CV socket, so that each of the three lobes goes back into its original place. This is a bearing actually, so this stuff does matter.
- Pull the tripod joint out of the socket after matchmarking.
- Clean off the end of the tripod joint well enough to match mark the splined shaft to the tripod itself.
- Remove the C-clip and pull the tripod joint off the splined shaft.
- Slide the small clamp, then CV boot over the axle, so that the boots sits on in the grove on the shaft. This is obvious when do it. Slip the clamp over the end of the boots and pull tight with pliers, maybe 5lbs pull. Fold the tag end over close the fingers. Should be obvious when doing it.
- Coat the socket and bearing surfaces of the tripod joint with the grease provided with the boots. Eat the rest of the foul grease in one swallow. The package says you should worry if TWO mouthfuls are swallowed, thus one mouthful should be fine. It actually says this.
- Put ever the axle back together making sure to line up the match marks. Clamp the outer boot in place AFTER letting some of the air out of the joint. I just guessed on this part by looking at it. Basically, there shouldn't be too much air in the boot.
Assembly is reverse removal.
Link for more IFS maintenance. This writeup also has pictures of the stuff I am describing.
Mar 17, 2009 | 10:59 AM
#4
Registered User

Joined: May 2008
Posts: 3,277
Likes: 23
From: way way nor cal
Mar 17, 2009 | 11:24 AM
#5
Registered User
Joined: Mar 2005
Posts: 1,756
Likes: 7
From: New Brunswick, Canada
If the problem is you can't get the differential end of the CV axle to clear those six studs, you can do one of two things.
Either pound out two of the six studs (they are just pressed in there), or remove the four lower balljoint bolts so that you can swing the bottom end of the spindle outwards (use blue loctite on these bolts when you put them back on). Either of these two methods will give you the clearance that you need to get the CV out.
Either pound out two of the six studs (they are just pressed in there), or remove the four lower balljoint bolts so that you can swing the bottom end of the spindle outwards (use blue loctite on these bolts when you put them back on). Either of these two methods will give you the clearance that you need to get the CV out.
 it's trashed anyhow, right? or are you just replacing boots...
Trending Topics
Mar 17, 2009 | 03:19 PM
#10
Registered User
Joined: Mar 2005
Posts: 1,756
Likes: 7
From: New Brunswick, Canada
Mar 18, 2009 | 08:20 AM
#13

Registered User
Joined: Sep 2007
Posts: 8,381
Likes: 873
From: San Francisco East Bay
To remove the 1/2 axle (carrying the CV joint) you must make sure that the front springs are compressed as though the truck were sitting on the ground. If the front suspension is just "hanging" (with a jack stand on the frame, for instance), you will never get it out -- the angles are wrong.
I have no trouble with just sitting the hub on a jack stand, but the point of putting a jack on the opposite corner (and lifting a little) is to get just a wee more compression on the front spring. So you might want to try that if my method alone doesn't quite do it.
You will hear from others on this site who have removed ball joints, shocks and even pounded the studs out of the differential flange. You don't need to do any of that.
Mar 18, 2009 | 09:09 AM
#14
Registered User
Joined: Jun 2007
Posts: 65
Likes: 3
From: Lugoff-Elgin SC
When I was installing my front locker, my truck was on a lift and had to remove the front diff. When installing it, had to fight vs both CVs to get them to line up right and slide in, just about the opposite of that, it took 3 guys to finally get that back in there. Lots of wiggling and shimmying around.
Mar 18, 2009 | 10:56 AM
#15
Registered User
Joined: Mar 2005
Posts: 1,756
Likes: 7
From: New Brunswick, Canada
To remove the 1/2 axle (carrying the CV joint) you must make sure that the front springs are compressed as though the truck were sitting on the ground. If the front suspension is just "hanging" (with a jack stand on the frame, for instance), you will never get it out -- the angles are wrong.
I have no trouble with just sitting the hub on a jack stand, but the point of putting a jack on the opposite corner (and lifting a little) is to get just a wee more compression on the front spring. So you might want to try that if my method alone doesn't quite do it.
You will hear from others on this site who have removed ball joints, shocks and even pounded the studs out of the differential flange. You don't need to do any of that.
I have no trouble with just sitting the hub on a jack stand, but the point of putting a jack on the opposite corner (and lifting a little) is to get just a wee more compression on the front spring. So you might want to try that if my method alone doesn't quite do it.
You will hear from others on this site who have removed ball joints, shocks and even pounded the studs out of the differential flange. You don't need to do any of that.

Thread
Thread Starter
Forum
Replies
Last Post
jasonty
Pre 84 Trucks (Build-Up Section)
41
Dec 23, 2018 01:00 PM
itzmywife's
95.5-2004 Tacomas & 96-2002 4Runners
2
Jul 25, 2015 04:55 PM
ripp96
95.5-2004 Tacomas & 96-2002 4Runners
0
Jul 25, 2015 02:32 PM
Odin
86-95 Trucks & 4Runners
8
Jul 15, 2015 09:28 PM


